

Page 1

• LED EZ COOKER •
•МУЛЬТИВАРКА LED EZ COOKER •
INSTRUCTION MANUAL WITH COOKING
RECIPES
ИНСТРУКЦИЯ ПО ЭКСПЛУАТАЦИИ С
РЕЦЕПТАМИ
VES ELECTRIC SPAIN
MODEL SK-A12/14
МОДЕЛЬ SK-A12/14
Page 2

Page 3

ENGLISH ENGLISH
3
2
LED EZ COOKER MODEL: SK-A12/14
Dear customer!
We highly appreciate you choosing VES Electric home appliances.
From our side we guarantee excellent quality, perfect functioning
and safety of your appliance upon keeping to all the rules of
home exploitation. Before using the appliance, please, read carefully attached instruction.
GENERAL PRECAUTIONS
• the appliance is for home use only. Do not
use for industrial
purpose.
• read all the instruction manual before the first operating and save it
• before the first operating make sure that the voltage in your wall
outlet is the same as on the appliance’s rating label marked.
• fire may occur if the appliance is covered or touching flammable
materials such as curtains, draperies etc. Do not cover the
appliance!
• before use connect the power cord to the appliance first, then plug
into the wall outlet.
• use only the enclosed power cord.
• keep the power cord and plug always clean and dry.
• if the supply cord is damaged, it must be replaced by the authorized
service centre.
• to unplug the appliance do not pull the power cord.
• during cooking the appliance becomes very hot. Do not touch the
hot surfaces.
• before cleaning let the appliance cool down to avoid burning.
• to avoid the electrical shock and appliance damage, do not insert
any object into the openings of the appliance.
• WARNING: do not use this appliance near water. Do not use this
appliance near bathtubs, showers, basins or other vessels containing
water.
• never immerse the appliance, cord and plug into water.
• if the appliance fell down into water, unplug it immediately and do
not hurry to take it out.
• never use the appliance with wet hands.
• never use the appliance on a damp floor.
• before using an extension cord, make sure it is suitable for such a
load, otherwise it may overheat and cause a risk of fire.
• never use the appliance with the damaged wall outlet.
• any examination, repair or adjustment must be done in an authorized
Service Center. Do not repair the appliance by yourself! If the
opening of the appliance is detected, the appliance's guarantee
will be canceled.
• never use the appliance near or on the hot surfaces.
• never let the cord hang over the edge of the table or touch any
hot surfaces.
• always unplug the appliance when
not in use/before cleaning.
• do not let children play or use the appliance.
• give a high attention when the appliance is being used near
the children.
• use the appliance only for it’s direct purpose.
• never expose the appliance to fall down or to be kicked.
dna srenaelc deniatnoc-l
ohocla ,lacimehc ,evisarba yna esu ton od •
hard brushes for cleaning the appliance.
• while using the appliance, please, observe the safety precautions
• incorrect operation and improper handing can lead to malfunctions
of the appliance and injuries to the user.
• if the appliance has been used with infringement of guide’s
instructions, the appliance’s guarantee would be canceled and
consumer would repair the appliance at his/her expense.
• this appliance is not intended for use by person (including children)
with reduced physical, sensory or mental capabilities, or lack of
experience and knowledge, unless they have been given supervision
or instruction concerning use of appliance by a person responsible
for their safety.
INFORMATION ABOUT THE INNER POT
• use the inner pot only with LED EZ cooker, do not use with other
appliances.
• the inner pot has a special carbon coating. Take care of the coating
and never wash the inner pot in alkaline solution to avoid damage
Page 4

ENGLISH ENGLISH
4 5
• do not wash the inner pot in dishwashing machine
• never use hard brushes, scrubs to clean the inner pot to avoid
damage of the coating
• do not wash the inner pot immediately after cooking. Let it cool
down, then wash in warm soapy water and wipe dry
• to avoid burning take the hot inner pot out with kitchen gloves only
or let the inner pot cool down before taking it out
• do not beat up, mix or wash food in the inner pot to avoid damage
of the coating
• the inner pot coating will gradually rub away, it is necessary to
use it gently
• do not drop down or beat the inner pot
• do not clean the inner pot with force
• do not put the inner pot on open fire
• do not put other objects (except food) into the inner pot
• do not use the appliance with other pots not enclosed in the set
• do not use the appliance without inner pot or with empty pot, as
this can damage the appliance, except the preheating procedure. See
ÂÛÏÅ×ÊÀ (baking) section
• before cooking make sure the inner pot is in full contact with the
heating plate, by turning round
• wash the inner pot after each use
• do not fill the inner pot higher than top level mark
• before baking oil the inner pot
• before baking level the dough on the bottom of the inner pot, so
that it could cover all the bottom and touch the walls
INFORMATION ABOUT THE HEATING PLATE
• do not insert any objects between the inner pot and heating plate
to avoid electric shock and damage of the appliance
• the heating plate and outside of the inner pot should always be dry
and clean to avoid damage of the appliance
• do not wash or pour water on the heating plate. Clean it w
ith wet
soft cloth/sponge and wipe dry with the soft cloth
• the heating plate is very hot when the appliance is on. Do not
touch it!
• never use hard brushes, scrubs to clean the heating plate to avoid
damage of the heating plate
INFORMATION ABOUT THE LID
• during cooking close the lid tightly, except ЖАРКА (frying)
function
• take care of the face and hands while opening the lid. Do not bend
over the appliance, while opening the lid
• do not tear off the silicon ring from the lid, as it is part of the lid
• do not immerse the lid into water
• for cleaning use the wet soft cloth/sponge only
INFORMATION ABOUT STEAM VALVE AND WATER COLLECTOR
• take care of the face and hands from steam escaping from the
valve
• after each use take out the steam valve from the lid, untwist it and
wash under the running water and wipe dry
• place the water collector on the appliance and keep it there while
cooking. Periodically pour out water from the water collector. Be
careful as water can be hot!
INFORMATION ABOUT THE STEAMER
• do not use the steamer on open fire
• do not use the steamer without inner pot
• do not use steamer with other appliances
• do not use the appliance with the steamer not enclosed in the
set
• before cooking oil the inside of the steamer, so the food will not
stick to the bottom
• to avoid burning take the hot steamer out with kitchen gloves or
let it cool down
INFORMATION ABOUT ACCESSORIES
The item has the following accessories in the set: inner pot, steamer,
scoop, spoon, measuring cup and detachable power cord.
• use only the enclosed accessories
• for food tasting or serving use only the enclosed spoon or scoop.
Do not use metal cutlery, as they may damage the coating
• do not leave the accessories in the inner pot during cooking
Page 5

ENGLISH ENGLISH
Wipe the housing of the appliance with wet soft
cloth. Wash the inner pot, spoon and scoop with soft cloth or sponge
in warm soapy water and wipe dry.
DESCRIPTION
1. lid
2. silicon ring
3. detachable steam valve
4. water collector
5. LED colorful control panel
with intermittent indication lights
6. stainless steel body
7. s coop/s p oon ho lder
8. inner pot
LED DISPLAY DESCRIPTION
6
7
WHILE CARRYING HOLD THE APPLIANCE BODY WITH TWO
HANDS TIGHTLY. BE CAREFUL WHEN THE APPLIANCE IS HOT OR
CONTAINS FOOD. WE RECOMMEND TO MOVE THE APPLIANCE
EMPTY ONLY. WHILE MOVING DON'T HOLD BY THE LID OR
TOUCH THE OPEN LID BUTTON TO AVOID BURNS.
FEATURES OF LED EZ COOKER
Cooking in LED EZ cooker is extremely simple and does not
require special skills and knowledge as microchip sets the time and
temperature in accordance with the chosen function. And result –
excellent taste, useful substances are as much as possible kept in
groats at a minimum of time spent by you. 3D system controls cooking
temperature in all points and supports an optimal temperature mode.
The device allows to save a lot of time by Time booking function.
You can place food at night, set the programme and have freshly
cooked breakfast in the morning. The choice of dishes for LED EZ
cooker is huge and nearly each recipe can be adapted to it. In the
small device with big inner pot can be cooked the whole dinner for
big family. LED EZ cooker can cook dietary and baby food and it is
capable to cook even tough meat.
Our LED EZ cooker replaces such items as:
• electric stove
• frying pan
• steam cooker
• pilau cooker
• porridge cooker
• electric pot
• deep fryer
• yoghurt maker
• dough rising appliance
and helps to save a lot of time and money.
BEFORE USE
Remove the appliance from the package. Do not leave the packing
(plastic bags, polystyrene etc.) within the reach of children since they
could be dangerous. Keep the package for appliance storage.
p
p
g
1
2
3
4
5
6
8
steamer
measuring cup (capacity
about 160ml), scoop,
spoon
cooking time/
minutes / hours
booking minutes
booking hours
7
ITEM CARRYING RULES
Page 6

ENGLISH ENGLISH
8 9
FUNCTIONS:
ÑÓÏ (soup)
Programmed time - 90 minutes
ТУШЕНИЕ (stewing)
Programmed time - 90 minutes
ÕÎËÎÄÅÖ (jellied meat)
Programmed time - 3 hours
ÏËÎÂ (pilau)
Programmed time - 45 minutes.
ÌÎËÎ×ÍÀß ÊÀØÀ (milk porridge)
Programmed time - 20 minutes
Also this program is suitable for porridges.
ÂÛÏÅ×ÊÀ (baking)
Programmed time - 50 minutes.
Also this program is suitable for frying.
ÏÀÐ (steam)
Programmed time - 40 minutes
ÉÎÃÓÐÒ (yoghurt)
Programmed time - 9 hours
Also this program is suitable for rise of east dough.
• TIME BOOKING - 16 hours
• SETTING OF COOKING TIME - 9 hours
• KEEP WARM function - 12 hours (except yoghurt function).
OPERATION
ÑÓÏ (soup)
1. Put all ingredients into the inner pot.
2. Pour necessary quantity of water for cooking soup into the inner
pot.
Note: do not fill the inner pot higher than top level mark.
3. Make sure that the outside of the inner pot and heating plate are
clean and dry. Place the inner pot into the appliance. Turn it round
for full contact with the heating plate.
4. Close the lid tightly.
5. Plug in the appliance to the wall outlet.
6. Panel will show ÑÓÏ function and cooking time 90 minutes.
7. To set the desired cooking time, please refer to the Cooking time
section.
8. Press СТАРТ key. Indicator light 1 will blink until the function
finishes. Upon finishing of cooking process, the appliance will turn to
Keep warm mode automatically.
9. Press ÎТМЕНА key to cancel the Keep warm function (if
needed).
ТУШЕНИЕ (stewing)
1. Pour some oil in the inner pot. Use the ÂÛÏÅ×ÊÀ (baking) for
10-15 minutes to fry some vegetables for a better taste of a stew.
2. Put meat and other ingredients with some water inside the inner
pot. Usually the amount of water is from 200 ml up to 400 ml.
Note: do not put food in the inner pot higher than top level mark.
3. Make sure that the outside of the inner pot and heating plate are
clean and dry. Place the inner pot into the appliance. Turn it round
for full contact with the heating plate.
4. Close the lid tightly.
5. Plug in the appliance to the wall outlet.
6. Press Ô
УНКЦИИ key to choose ТУШЕНИЕ function. The display
will show cooking time 90 minutes. Cooking time of stewing depends
on the volume and kind of food.
7. To set the desired cooking time, please refer to the Cooking time
section.
8. Press СТАРТ key. Indicator light 2 will blink until the function
finishes. Upon finishing of cooking process, the appliance will turn to
Keep warm mode automatically.
9. If you want to cancel the Keep warm mode, press ÎТМЕНА
key.
ÕÎËÎÄÅÖ (jellied meat)
1. Put all ingredients into the inner pot.
2. Pour necessary quantity of water for cooking into the inner pot.
3. Make sure that the outside of the inner pot and heating plate are
clean and dry. Place the inner pot into the appliance. Turn it round
Page 7

ENGLISH ENGLISH
10 11
for full contact with the heating plate.
4. Close the lid tightly.
5. Plug in the appliance to the wall outlet.
6. Press ФУНКЦИИ key to choose ХÎËÎÄÅÖ function. The display
will show cooking time 3 hours.
7. To set the desired cooking time, please refer to the Cooking time
section.
8. Press СТАРТ key. The indicator light 3 will blink until the function
finishes. Upon finishing of cooking process, the appliance will turn to
Keep warm mode automatically.
9. Press ÎТМЕНА key to cancel the Keep warm function (if
needed).
Note: do not fill the inner pot higher than top level mark.
ÏËÎÂ (pilau)
With program ÏËÎÂ you can cook a tasty pilau in a short time. To
do this you will need the following ingredients:
carrots (about 200g) - 3 pcs.
medium onion - 2 pcs.
garlic - 1 / 2 head
chicken breast - 400g
season
ing for pilau (if no - add cumin and black pepper), salt - to
taste
vegetable oil - 80ml.
4 measuring cups of rice (Jasmine or Indian Long Grain)
Note: Use the type of rice that is cooked quickly.
4 measuring cups of water (water should cover the rice to a height
of a phalanx of about 2.5 cm).
1. Make sure that the outer part of the pot and the heating plate is
2. Connect the device to the network.
3. Press ФУНКЦИИ key to choose ÏËÎÂ function. The display will
show cooking time 45 minutes.
4. To set the desired cooking time, please, refer to the Cooking time
section.
5. Pour oil into the pot.
6. Add the pre-peeled and chopped onions, carrots, garlic cloves,
chicken and seasoning.
7. Press the СТАРТ key.
8. Cook with the lid open 25 minutes. Mix the food every time.
9. Add pre-washed rice and cover with water. Close the lid
10. Cook until the completion of the program.
Indicator light 4 will flash until the completion of the program. At
ot sehctiws yllacitamotua ecived eht ,ss
ecorp gnikooc eht fo dne eht
Keep Warm mode. We suggest to cancel the keep warm as it can
overdry the food.
Note: The section gives an approximate pilau recipe. Results may
vary depending on the products used, size of pieces, in which they
have been cut, the amount of cooked food, the culinary and personal
tastes.
ÌÎËÎ×ÍÀß ÊÀØÀ (milk porridge)
This function is suitable of all kind of porridges: cooked with
milk or water. Use the recipes from cooking book.
1. Place the ingredients into the inner pot, pour necessary quantity
of water or milk.
Note: do not put food and water higher than top level mark inside
the inner pot.
2. Make sure that t
he outside of the inner pot and heating plate are
clean and dry. Place the inner pot into the appliance. Turn it round
for full contact with the heating plate.
3. Close the lid tightly.
4. Plug in the appliance to the wall outlet.
5. Press ФУНКЦИИ key to choose МÎËÎ×ÍÀß ÊÀØÀ function. The
display will show cooking time 20 minutes.
6. To set the desired cooking time, please refer to the Cooking time
section.
7. Press СТАРТ key. Number 5 will blink until the function finishes.
Upon finishing of cooking process, the appliance will turn to Keep
warm mode automatically.
8. Press ÎТМЕНА key to cancel the Keep warm mode (if needed).
ÂÛÏÅ×ÊÀ (baking)
In the LED EZ cooker you can bake pies, cakes and tarts (but not
the buns)
1. Prepare the dough, following recommendations of the recipe chosen
by you (you can follow our recipe book).
2. Oil the inner pot well.
3. Make sure that the outside of the inner pot and heating plate are
clean and dry. Place the inner pot into the appliance. Turn it round
Page 8

ENGLISH ENGLISH
12
for full contact with the heating plate.
4. Close the lid tightly.
5. Plug in the appliance to the wall outlet.
6. Press the ФУНКЦИИ key to choose ВЫÏÅ×ÊÀ function. Set 10
minutes.
7. Press СТАРТ key to heat up the inner pot. Number 6 will blink until
the function finishes. Upon finishing of cooking process, the appliance
will turn to Keep warm mode automatically.
8. Press ÎТМЕНА key to cancel Keep warm mode.
9. Choose ÂÛÏÅ×ÊÀ function again. The display will show 50
minutes.
10. To set the desired cooking time, please refer to the Cooking time
section.
11. Put dough inside the inner pot and level it. So that it could cover
all the bottom and touch the walls.
Note: do not put dough in the inner pot higher than top level mark.
12. Close the lid tightly. We recommend not to open the lid during
baking.
Note: baking time depends on the volume and kind of baked goods.
You can set cooking time when trying your own recipes or following
our recipe book.
13. Press СТАРТ key. Number 6 will blink until the function finishes.
Upon finishing of cooking process, the appliance will turn to Keep
warm mode automatically.
Note: it is recommended to switch off Keep warm function to
avoid baked goods burn slightly or overdry. Press ÎТМЕНА key (if
needed).
14. Unplug the appliance. Take out the inner pot using the kitchen
gloves and turn it upside down.
Note: usually the upper part of the baked goods is not brown in
comparison with the bottom. This is not the defect of the item but
its construction feature. With our 3D system the baked goods are
baked through very well, even not brown on up. If you wish to have
up brown, oil the inner pot and place the baked goods upside down,
choose ÂÛÏÅ×ÊÀ function for 10 minutes or more.
This function can be used for frying - set the cooking time from
15 to 25 minutes for frying food. ATTENTION! DO NOT CLOSE
THE LID WHEN FRYING.
ÏÀÐ (steaming)
1. Pour water until the bottom level mark inside of the inner pot.
2. Place steamer in the inner pot.
3. Place food in the steamer.
Note: before placing the food oil the steamer, so the food will not
stick to the bottom.
4. Make sure that the outside of the inner pot and heating plate are
clean and dry. Place the inner pot into the appliance. Turn it round
for full contact with the heating plate.
5. Close the lid.
6. Plug in the appliance to the wall outlet.
7. Press ФУНКЦИИ key to choose ÏÀÐ function. The display will show
cooking time 40 minutes.
8. To set the desired cooking time, please refer to the Cooking time
section.
9. Press СТАРТ key. Number 7 will blink until the function finishes.
Upon finishing of cooking process, the appliance will turn to Keep
warm mode automatically.
10. Press ÎТМЕНА key to cancel the Keep warm mode (if needed).
ÉÎÃÓÐÒ (yoghurt)
1. Ingredients: Fresh milk - 1 L, 150 ml of yoghurt, 3 table spoons of
sugar (use more to get more yoghurt).
Mix the milk with sugar and yoghurt well.
Place the mixture in the inner pot.
Note: do not fill the inner pot higher than top level mark.
2. Make sure that the outside of the inner pot and heating plate are
clean and dry. Place the inner pot into the appliance. Turn it round
for full contact with the heating plate.
3. Close the lid tightly.
4. Plug in the appliance to the wall outlet.
5. Press ФУНКЦИИ key to choose ЙÎÃÓÐÒ function. The display will
show "9h" - meaning 9 hours.
6. Press СТАРТ key. Number 8 will blink until the function finishes.
Upon finishing of cooking process, the appliance will turn off
automatically.
THIS FUNCTION CAN BE USED FOR RISING OF EAST DOUGH.
PLACE THE READY DOUGH IN THE INNER POT, CHOOSE
ÉÎÃÓÐÒ FUNCTION, SET THE COOKING TIME FOR 3h (3 hours)
AND PRESS START.
IF NEEDED ADJUST THE TIME. CHECK THE DOUGH FOR
READINESS.
13
Page 9

ENGLISH ENGLISH
15
KEEP WARM (ПОДОГРЕВ)
Upon finishing of cooking process, the appliance will turn to Keep
warm mode automatically.
The display will show "bb".
To cancel this function, press ОТМЕНА key.
Note: do not use Keep warm mode to warm up the food.
TIME BOOKING (ОТСРОЧКА ПРИГОТОВЛЕНИЯ)
Time booking is countdown timer on the left side of display.
1. Place the inner pot with food into the appliance.
2. Close the lid tightly.
3. Plug in the appliance to the wall outlet.
4. Choose the function you need.
5. Press ОТСРОЧКА/ЧАСЫ several times to set hours.
6. Press ОТСРОЧКА/МИНУТЫ several times to set minutes.
7. Press СТАРТ key. The "watch" light will be on.
The numbers on the display will show how long you should wait before
the appliance starts cooking.
COOKING TIME (ВРЕМЯ ГОТОВКИ)
Cooking time is countdown timer on the right side of display.
1. Place the inner pot with food into the appliance.
2. Close the lid tightly.
3. Plug in the appliance to the wall outlet.
4. Choose the function you need.
5. Press ВРЕМЯ ГОТОВКИ several times to set cooking time.
6. Press СТАРТ key.
COOKING TIME AND TIME BOOKING
1. Place the inner pot with food into the appliance.
2. Close the lid tightly.
3. Plug in the appliance to the wall outlet.
4. Choose the function you need by pressing ФУНКЦИИ key.
5. Press ВРЕМЯ ГОТОВКИ several times to set the cooking time.
6. Press ОТСРОЧКА/ЧАСЫ several times to set hours.
7. Press ОТСРОЧКА/МИНУТЫ several times to set minutes.
8. Press СТАРТ.
FOOD WARMING
If you need to warm up the food, use ÑÓÏ function for 20-30 minutes.
If it is bread, use ВЫПЕЧКА function, but change the cooking time.
NOTE: You can not defrost the food in LED EZ cooker. For this purpose,
please use convection ovens of VES Electric AX 747D/730/745/999,
VES 777/787/747/767/797.
CLEANING
• Unplug the appliance and take away the power cord.
• Wait until the appliance cools down.
Steam valve
Take out the steam valve from the lid, untwist it. Wash under the
running water, wipe dry. Assemble and place back.
Body, lid, steam valve hole.
Clean with the wet soft cloth/sponge and wipe dry.
Do not immerse the body/lid into the water!
Inner pot
Never use force to clean the inner pot. Wait until the pot cools down,
pour warm water inside the inner pot (in case of hard dirt) and leave
it for some time, then carefully wash it with soft cloth/sponge in warm
soapy water. Do not wash in the dishwashing machine.
Water collector
Clean after each use of the appliance.
Accessories (spoon, scoop, steamer)
Clean with the soft cloth/sponge in soapy water, rinse and wipe dry.
STORAGE
Store the appliance in a cool dry place, far from children.
SAVE THIS INSTRUCTION
14
Page 10

РУССКИЙ РУССКИЙ
16 17
МУЛЬТИВАРКА МÎÄÅËÜ: SK-A12/14
Уважаемый покупатель!
Áëàгодарим Вас за выбор бытовой техники от компании VES
Electric. Мы гарантируем высокое качество, безупречное
функционирование и безопасность приобретенного Вами
прибора при соблюдении всех правил его эксплуатации. Пåðåä
началом использования прибора, пожалуйста, полностью
прочитайòе данную инструкцию.
ÌÅÐÛ ПРЕДОСТОРОЖНОСТИ
• прибор предназна÷ен только для домашнего использования. Не
использовать в промышленных целях.
• прочитайте всю инструêöèю перед первым подключением прибора
и сохраните ее.
• перед первым подключением к сети убедитесь, ÷òî величина и
тип напряжения в ней, соответствуют указанным на приборе.
• имеется риск возгорания, если прибор накрыт полотенцем и
т.п., или соприкасается с легковоспламеняющимися материалами,
например с занавесками. Íе накрывайте прибор!
• перед использованием вставьте шнур питания в разъем прибора,
затем подсоедините его к сети.
• используйте прилагаемый в комплекте шнур питания. Не
используйте его с другими устройствами.
• следите за тем, ÷тобы шнур и вилка шнура всегда были чистыми
и сухими.
• â ñëó÷ае повреждения шнура питания, он должен быть
заменен спеöиализированным сервисным öентром, во избежание
опасности.
• ÷тобы отсоединить прибор от сети, не тяните за шнур питания
• во время использования прибора он сильно нагревается. Во
избежание ожогов не прикасайтесь к горя÷èì ÷астям прибора.
• во избежание ожога, перед чисткой дайте прибору остыть.
• во избежание электри÷еского шока не вставляйте посторонние
предметы в выходные отверстия прибора.
ВНИМАНИЕ: Не используйте прибор вблизи воды. Не используйте
прибор вблизи ванн, душевых, бассейнов и т.д.
•
никогда не погружайте прибор, шнур питания в воду.
ÏРАВИЛА ÏÎËÜÇÎÂÀÍИЯ КАСТРЮЛЕЙ
• используйте кастрюлю только с мультиваркой LED EZ cooker, не
• если прибор упал в воду, оòсоедините его от сети, через
некоторое время извлеките из воды и отнесите в ближайший
сервисный центр.
• никогда не эксплуатируйте прибор мокрыми руками.
• никогда не эксплуатируйте прибор на влажной поверхности/полу.
• перед использованием удлиíителя убедитесь, что он рассчитан
на такую нагрузку, так как удлинитель может перегреться и
вызвать опасность пожара.
• никогда не эксплуатируйте прибор с поврежденной розеткой.
• проверка, ремонт и регулировка должны осуществляться в
специализированном сервиснîм центре. Не ремонтируйте прибор
самостоятельно! В случае обнаружения сервисным центром
вскрытия прибора, гарантия с прибора снимается.
• никогда не эксплуатируйте прибор вблизи или на горячих
поверхностях.
• никогда не позволяйте шнуру питания перегибаться под острым
углом и касаться горячих поверхностей.
• всегда отключайте прибор от сети, если он не эксплуатируется
и перед чисткой.
• не позволяйте детям играть или пользоваться прибором.
• особое внимание уделяйте, если прибор эксплуатируется
вблизи детей.
• эксплуатируйте прибор тольêо по его прямому назначению.
• никогда не подвергайте прибор ударам или другому
механическому воздействию.
• никогда не используйте для чистки прибора едкие или
абразивные чистящие средства, а также жесткие или
металлические губки/щетки.
• в процессе работы с прибором, пожалуйста, соблюдайте
технику безопасности.
• при эксплуатации прибора с нарушениями руководства по
эксплуатации, описанными в данной инструкции, прибор
снимается с гарантии и ремонт производится за счет владельца.
• этот прибор не предназначен для использования людьми
(включая детей) с пониженнûми физическими, чувственными или
психическими возможностями, с недостатком опыта или знаний
по его эксплуатации, если они не находятся под контролем или
не проинструктированны лицом, ответственным за их
безопасность. Дети должны находиться под контролем для
недопущения игры с прибором или упаковкой.
Page 11

РУССКИЙ РУССКИЙ
18 19
используйте ее с каким-либо другим прибором
• перед использованием убедитесь, ÷то кастрюля плотно
соприкасается с нагревательной пластиной, повернув ее по
÷асовой стрелке
• кастрюля имеет специальное угольное покрытие. Во избежание
повреждения кастрюли, не мойте ее в щело÷ном растворе
• мойте кастрюлю после каждого использования
• не мойте кастрюлю в посудомое÷ной машине
• не используйте жесткие, острые предметы, а также едкие или
абразивные чистящие средства для чистки кастрюли, во избежание
повреждения покрытия
• не мойте кастрюлю сразу после использования. Дайте кастрюле
немного остыть, затем вымойте в мыльной воде, сполосните и
протрите насухо
• во избежание ожогов извлекайте кастрюлю из прибора, надев
кухонные рукавиöы или дайте кастрюле остыть перед тем, как
извле÷ь ее из прибора
• не взбивайте и не мойте продукты в кастрюле, во избежание
повреждения ее покрытия
• покрытие кастрюли будет постепенно стираться, необходимо
использовать ее бережно
• не роняйте и не ударяйте по кастрюле
• не применяйте силу, о÷ищая кастрюлю
• не ставьте кастрюлю на открытый огонь
• не оставляйте посторонние предметы (кроме еды) в кастрюле
• не используйте прибор с кастрюлей, не входящий в комплект
• íå âêëþ÷айте прибор без кастрюли или с пустой кастрюлей, так
как это может привести к полом
ке прибора, кроме прогревания
(см. раздел ВЫПЕЧКА)
• не заполняйте кастрюлю выше верхней отметки
• перед выпе÷кой смазывайте кастрюлю маслом
• перед выпе÷кой разравнивайте тесто на дне кастрюли, чòîáû
дно было полностью покрыто и тесто касалось стенок кастрюли
ÏРАВИЛА ÏÎËÜÇÎВАНИЯ НАГРЕВАТЕЛЬНÎÉ ÏЛАСТИНОÉ
• не вставляйте никакие предметы между
кастрюлей и нагревательной
пластиной. Это может стать при÷иной электри÷еского шока или
поломки прибора
• нагревательный элемент прибора и внешняя сторона
кастрюли всегда должны быть ÷истыми и сухими во избежание
поломки прибора
• не мойте и не мо÷èте нагревательную пластину. Ïротирайте ее
влажной тканью/губкой, затем вытирайте насухо
• нагревательная пластина о÷ень сильно нагревается во время
работы прибора. Не дотрагивайтесь до нее!
ÏРАВИЛА ÏÎËÜÇÎВАНИЯ КРЫШКÎÉ
• во время готовки плотно закрывайте крышку, кроме функöèè
ЖАРКА
• берегите лиöо и руки от ожогов при открытии крышки. Не
наклоняйтесь над прибором во избежание ожогов
• не снимайте силиконовое кольцо с крышки прибора, так как оно
является ÷астью крышки
• не погружайте крышку прибора в воду
• äëÿ ÷истки крышки прибора используйте только влажную мягкую
ткань/губку
ПРАВИЛА ПОЛЬЗОВАНИЯ ПАРОВЫМ КЛАПАНОМ И
ВЛАГОСБОРНИКОМ
• во время использования прибора берегите лиöо и руки от пара,
выходящего из парового клапана
• после каждого использования прибора снимайте клапан с
крышки, раскрутите его, промойте под проточной водой и вытрите
насухо. Заново соберите и установите на место
•
убедитесь в том, ÷то влагосборник находится в приборе.
Ïериоди÷ески сливайте воду из влагосборника. Áудьте осторожны,
вода во влагосборнике может быть о÷åíü ãîðÿ÷åé
ÏРАВИЛА ÏÎËÜÇÎВАНИЯ СТИМЕРÎÌ
• не используйте стимер на открытом огне
• не используйте стимер без кастрюли
• не используйте стимер с другими приборами
• не используйте прибор со стимером, не входящим в комплект
• перед готовкой на пару смажьте стимер маслом, тогда пища не
будет прилипать к стимеру
• во избежание ожогов, извлекайте стимер из прибора, используя
Page 12

РУССКИЙ РУССКИЙ
20 21
кухонные рукавиöы или дайте прибору остыть
ÏРАВИЛА ÏÎËÜÇÎВАНИЯ АКСЕССУАРАМИ
В комплект прибора входят следующие аксессуары: половник,
ложка и мерный стакан÷èê.
• используйте только аксессуары входящие в комплект
• для пробы, смешивания и изъятия пищи используйте только
прилагаемые в комплекте ложку и половник. Не используйте
металли÷еские кухонные приборы, так как они могут повредить
покрытие кастрюли
• не оставляйте аксессуары в кастрюле во время использования
прибора
ÏРАВИЛА ÏÅÐÅÍÎÑÊÈ ÏÐÈÁÎÐÀ
ÏÐÈ ÏÅÐÅÍÎÑÊÅ ÏÐÈÁÎÐÀ ÎÁХВАТИТЕ ЕГÎ ÄВУМЯ РУКАМИ.
ÍÅ ÁЕРИТЕСЬ ЗА КРЫШКУ. НЕ ÏРИКАСАЙТЕСЬ К КНÎÏÊÅ,
ÎТКРЫВАЮÙЕЙ КРЫШКУ. ÁÓÄÜÒÅ ÎÑÒÎÐÎÆÍÛ, ÅÑËÈ ÏÐÈÁÎÐ
ÃÎРЯЧИЙ ИЛИ ЗАГРУЖЕН ÏÐÎÄУКТАМИ. РЕКОМЕНДУЕМ
ÏÅÐÅÍÎÑÈÒÜ ÏÐÈÁÎÐ ÏУСТЫМ И ÏÎËÍÎÑÒÜÞ ÎСТЫВШИМ.
Мультиварка LED EZ cooker заменяет такие приборы как:
• электрическая духовка/пл
èòà
• сковорода
• пароварка
• плововарка
• кашеварка
• электри÷еская кастрюля
• фритюрниöà
• йогуртниöà
• прибор для подъема дрожжевого теста
и помогает сэкономить время и деньги.
ÎÑÎÁÅÍÍÎÑÒÈ
Ïриготовление еды в мультиварке предельно просто и не
требует особых навыков и знаний. Расч¸т необходимого
времени приготовления, управление температурой бер¸т на себя
микропроöессор в соответствии с выбранной Вами программо
é.
А результат – превосходный вкус, максимально сохраненные в
продуктах полезные вещества при минимуме затра÷енного Вами
времени. Система 3D контролирует температуру приготовления во
всех то÷ках и поддерживает оптимальный температурный режим. С
помощью функöèè "Отсрочка времени" прибор позволяет сэкономить
Ваше время. Вы можете загрузить пищу вечером, запустить
нужную программу и на утро полу÷ить свежепригот
овленный
завтрак. Выбор блюд для мультиварки огромен, адаптировать
к ней можно по÷ти любой реöепт. В небольшом по габаритам
приборе, благодаря объ¸мной кастрюле, можно приготовить обед
на большую семью.
В мультиварке можно готовить диети÷еское и детское питание, а
так же она способна справиться с любым, даже самым жестким
мясом.
ÏÅÐÅÄ ИСПОЛЬЗÎВАНИЕМ
Извлеките прибор из упаковки. Не оставляйте упаково÷íûå
материалы (пластиковые пакеты, полистирол и т.д.) в доступных
для детей местах во избежание опасных ситуаöèé.
Корпус прибора протрите влажной тканью. Кастрюлю, стимер,
ложку и половник вымойте в теплой мыльной воде, сполосните и
протрите насухо.
Page 13

РУССКИЙ РУССКИЙ
22 23
ОПИСАНИЕ
1. крышка
2. силиконовое кольцо
3. съемный паровой клапан
4. влагосборник
5. цветная LED панель
управления с мигающим
световым индикатором
6. корпус из нержавеющей
стали
7. держатель для ложки
и половника
8. кастрюля
ОПИСАНИЕ LED ПАНЕЛИ
• ФУНКЦИИ
СУП
Запрограммированное время приготовления- 90 минут.
ТУШЕНИЕ
Запрограммированное время приготовления - 90 минут.
ХОЛОДЕЦ
Запрограммированное время приготовления - 3 часа.
ÏËÎÂ
Запрограммированное время приготовления - 45 минут.
МОЛОЧНАЯ КАША
Запрограммированное время приготовления - 20 минут.
Данная программа также подходит для
приготовления каш на воде.
ВЫПЕЧКА
Запрограммированное время приготовления - 50 минут.
Данная программа также подходит для жарки.
ÏÀÐ
Запрограммированное время приготовления - 40 минут.
ЙОГУРТ
Запрограммированное время приготовления - 9 часов
Данная программа также подходит для подъема дрожжевого
теста.
• ОТСРОЧКА ВРЕМЕНИ ПРИГОТОВЛЕНИЯ до 16 часов.
• ВРЕМЯ ГОТОВКИ от 5 минут до 9 часов.
• ПОДОГРЕВ до 12 часов, кроме функции ЙОГУРТ, которая
выключается автоматически по истечении времени.
ЭКСПЛУАТАЦИЯ
ÑÓÏ
1. Положите в кастрюлю все необходимые ингредиенты.
2. Налейте в кастрюлю количество воды, необходимое для
приготовления супа.
Примечание: следите, чтобы все ингредиенты и жидкость
находились ниже верхней отметки, указанной внутри кастрюли.
3. Убедитесь в том, что внешняя часть кастрюли и нагревательная
пластина сухие. Вставьте кастрюлю в прибор. Убедитесь в том,
стимер
мерный стаканчик,
(примерно 160 мл)
ложка, половник
1
2
3
5
6
7
8
отсрочка/часы
отсрочка/минуты
время готовки/
минуты
4
Page 14

РУССКИЙ РУССКИЙ
÷то кастрюля плотно соприкасается с нагревательной пластиной.
4. Ïлотно закройте крышку.
5. Ïодсоедините прибор к сети.
6. На дисплее высветится функöèÿ ÑÓÏ и время приготовления
90 мин.
7. Чтобы установить желаемое время приготовления, пожалуйста,
ознакомьтесь с разделом ВРЕМЯ ГОТОВКИ.
8. Нажмите на кнопку СТАРТ. Световой индикатор "1" будет мигать
до завершения программы. Затем, прибор автомати÷ески перейдет
в режим Подогрев.
9. Í
ажмите на кнопку ОТМЕНА, чтобы отменить режим Подогрев
(по желанию).
ТУШЕНИЕ
1. Налейте в кастрюлю немного растительного масла.
Выберите функöèþ ÂÛÏЕЧКА на 10-15 минут. Îбжарьте овощи,
÷то придаст вкус блюду.
2. Ïоложите мясо и остальные ингредиенты в кастрюлю. Налейте
немного воды. Коли÷ество воды варьируется от 200 до 400 мл.
Ïðèìå÷ание: не закладывайте продукты выше верхней отметки,
указанной на внутренней стороне
кастрюли.
3. Убедитесь в том, ÷то внешняя ÷асть кастрюли и нагревательная
пластина сухие. Вставьте кастрюлю в прибор. Убедитесь в том, ÷òî
кастрюля плотно соприкасается с нагревательной пластиной.
4. Ïлотно закройте крышку.
5. Ïодсоедините прибор к сети.
6. Нажимая на кнопку ФУНКЦИИ несколько раз, выберите
программу ТУШЕНИЕ. На дисплее появится факти÷еское время
приготовления 90 минут. Время тушения зависит от типа и
коли÷ества продуктов.
7. Чтобы установить желаемое время приготовления, пожалуйста,
ознакомьтесь с разделом ВРЕМЯ ГОТОВКИ.
8. Нажмите на кнопку СТАРТ. Световой индикатор "2" будет мигать
до завершения программы. Затем, прибор автомати÷ески перейдет
в режим Подогрев.
9. Äля отмены режима Ïодогрев нажмите кнопку ОТМЕНА.
ÕÎËÎÄÅÖ
1. Ïоложите в кастрюлю все необходимые ингредиенты.
2. Налейте в кастрюлю коли÷ество воды, необходимое для
приготовления супа.
Ïðèìå÷ание: следите, ÷тобы все ингредиенты и жидкость
находились ниже верхней отметки, указанной внутри кастрюли.
3. Убедитесь в том, ÷то внешняя ÷асть кастрюли и нагревательная
пластина сухие. Вставьте кастрюлю в прибор. Убедитесь в том, ÷òî
кастрюля плотно соприкасается с нагревательной пластиной.
4. Ïлотно закройте крышку.
5. Ïодсоедините прибор к сети.
6. На дисплее высветится функöèÿ ÕÎËÎÄЕЦ и время приготовления
3h, ÷òî îçíà÷àåò 3 ÷
àñà.
7. Чтобы установить желаемое время приготовления, пожалуйста,
ознакомьтесь с разделом ВРЕМЯ ГОТОВКИ.
8. Нажмите на кнопку СТАРТ. Световой индикатор "3" будет мигать
до завершения программы. Затем, прибор автомати÷ески перейдет
в режим Подогрев.
9. Нажмите на кнопку ОТМЕНА, чтобы отменить режим Подогрев
(по желанию).
ÏËÎÂ
С помощью программы ÏËÎВ Вы можете приготовить вкуснейший
плов за короткое время. Äля этого Вам понадобят
ся следующие
ингредиенты:
морковь (примерно 200г) - 3шт.
луковицы среднего размера - 2 шт.
÷еснок - 1/2 головки
куриная грудка - 400г
приправа для плова (если нет - добавьте зиру, молотый черный
ïåðåö), соль - по вкусу
масло растительное - 80мл.
4 мерных стакана риса (жасминовый или индийский
длиннозерный)
Ï
ðèìå÷àíèå: используйте тот сорт риса, который варится
быстро.
4 мерных стакана воды (вода должна покрывать рис на высоту
одной фаланги пальöа, примерно 2,5 см).
24 25
Page 15

РУССКИЙ РУССКИЙ
1. Убедитесь в том, ÷то внешняя ÷асть кастрюли и нагревательная
пластина сухие. Ïоместите кастрюлю в прибор. Убедитесь в том,
÷то кастрюля плотно соприкасается с нагревательной пластиной.
2. Ïодсоедините прибор к сети. Нажимая на кнопку ФУНКЦИИ
несколько раз, выберите функöèþ ÏËÎВ. На дисплее появится
факти÷еское время приготовления 45 минут.
3. Чтобы установить желаемое время приготовления, пожалуйста,
ознакомьтесь с разделом ВРЕМЯ ГОТОВКИ.
4. Налейте в кастрюлю масло.
5. Добавьте предварительно о÷ищенные и порезанные лук, морковь,
çóá÷èêè ÷еснока, куриные грудки и приправу.
6. Нажмите на кнопку СТАРТ.
7. Готовьте с открытой крышкой 25 минут, постоянно помешивая.
8. Äобавьте предварительно промытый рис и залейте водой.
Закройте крышку.
9. Готовьте до завершения программы.
Индикатор 4 будет мигать до завершения програ
ììû. По окончании
ïðîöесса приготовления, прибор автомати÷ески перейдет в режим
Ïодогрев. Äля отмены режима Ïодогрев, нажмите на кнопку
ÎТМЕНА (по желанию).
Ïðèìå÷ание: в разделе приведен приблизительный рецепт плова.
Результаты могут существенно варьироваться в зависимости
от используемых продуктов, размера кусо÷ков, на которые они
порезаны, объема приготавливаемых продуктов и индивидуальных
кулинарных и в
кусовых пристрастий.
ÌÎËÎ×ÍÀß ÊÀØÀ
Äанная функöия подходит для приготовления как каш на молоке,
так и на воде. Используйте реöåïòû â êîíöе инструкöèè.
1. Ïоместите в кастрюлю ингредиенты, налейте необходимое
коли÷ество молока или воды.
Ïðèìå÷ание: следите за тем, ÷тобы все ингредиенты и жидкость
находились ниже верхней отметки, указанной внутри кастрюли.
2.
Убедитесь в том, что внешняя часть кастрюли и нагревательный
элемент сухие. Вставьте кастрюлю в прибор. Убедитесь в том, ÷òî
кастрюля плотно соприкасается с нагревательной пластиной.
3. Ïлотно закройте крышку.
4. Ïодсоедините прибор к сети.
5. Нажимая на кнопку ФУНКЦИИ несколько раз, выберите
функöèþ ÌÎËÎЧНАЯ КАША. На дисплее появится факти÷еское
время приготовления 20 минут.
6. Чтобы установить желаемое время приготовления, пожалуйста,
ознакомьтесь с разделом ВРЕМЯ ГОТОВКИ.
7. Нажмите на кнопку СТАРТ. Световой индикатор "5" будет мигать
до завершения программы. Затем, прибор автомати÷ески перейдет
в режим Подогрев.
8. Нажмите на кнопку ОТМЕНА, чтобы отменить режим Подогрев
(по желанию).
ÂÛÏÅ×ÊÀ
В мультиварке LED EZ cooker Вы можете выпекать пироги, торты,
кексы (нельзя пе÷ü áóëî÷êè).
Äанная программа подходит для жарки. Жарьте с открытой
крышкой.
1. Ïриготовьте тесто для выпе÷ки, следуя рекомендаöиям
выбранного Вами реöепта (Вы можете воспользоваться нашей
книгой рецептов).
2. Îбильно смажьте кастрюлю маслом или маргарином.
3. Убедитесь в том, ÷то внешняя ÷асть кастрюли и нагревательная
пластина ÷истые и сухие. Ïоместите кастрюлю в мультиварку.
Убедитесь в том, ÷то кастрюля плотно соприкасается с
нагревательной пластиной.
4. Ïлотно закройте крышку.
5. Ïодсоедините прибор к се
òè.
6. Нажмите на кнопку ФУНКЦИИ один раз. Световой индикатор
остановится на функöèè ÂÛ
ÏЕЧКА. Установите время 10 минут.
7. Нажмите на СТАРТ, прогрейте кастрюлю. Световой индикатор
"6" будет мигать до завершения программы. Ïî îêîí÷ании режима,
прибор автомати÷ески перейдет в режим Подогрев.
8. Нажмите на кнопку ОТМЕНА, чтобы отменить режим
Ïодогрев.
9. Выберите функöèþ ÂÛÏЕЧКА еще раз. На дисплее появится
фак
òè÷еское время приготовления 50 минут.
10. Äля установки желаемого времени приготовления, пожалуйста,
ознакомьтесь с разделом ВРЕМЯ ГОТОВКИ.
11. Ïоместите тесто в кастрюлю, разровняйте его так, чтобы
26 27
Page 16

РУССКИЙ РУССКИЙ
дно кастрюли было полностью покрыто и тесто касалось стенок.
Ïðèìå÷ание: не закладывайте тесто выше верхней отметки,
указанной на внутренней стороне кастрюли.
12. Ïлотно закройте крышку. Не рекомендуется открывать
крышку во время выпе÷êè.
Ïðèìå÷àíèå: время приготовления зависит от объема и вида
âûïå÷ки. Вы можете установить желаемое время приготовления
или следовать рекомендаöиям в нашей книге рецептов.
13. Нажмите на кнопку СТАРТ. Световой индикатор "6" будет
мигать до завершения программы. Ïî îêîí÷ании режима, прибор
автомати÷ески перейдет в режим Подогрев.
Ïðèìå÷ание: рекомендуется сразу по окон÷ании приготовления
выклю÷ить режим Ïодогрев, ÷òîáû âûïå÷ка не подгорела и не
высохла. Нажмите на кнопку ÎТМЕНА (по желанию).
14. Îтсоедините прибор от сети. Надев кухонные рукавиöы,
извлеките кастрюлю из корпуса. Зате
м, переверните ее вверх
äíîì.
Ïðèìå÷àíèå: îáûчно изделие сверху не подрумянивается. Это
является конструктивной особенностью прибора, а не дефектом.
С системой 3D изделие полностью пропекается, даже если не
подрумянивается сверху. Если Вы желаете полу÷ить румяный верх,
смажьте кастрюлю маслом и переверните изделие вверх дном.
Выберите функöèþ ÂÛÏЕЧКА на 10 минут или больше.
ÏÀÐ
1. Налейте в кастрюлю воды до нижн
ей отметки, указанной на
внутренней ÷асти кастрюли.
2. Установите стимер в кастрюлю.
3. Заложите продукты в стимер.
Ïðèìå÷àíèå: перед закладкой продуктов в стимер, смажьте его
маслом, так продукты не будут прилипать к стимеру.
4. Убедитесь в том, ÷
то внешняя ÷асть кастрюли и нагревательная
пластина сухие. Вставьте кастрюлю в прибор. Убедитесь в том, ÷òî
кастрюля плотно соприкасается с нагревательной пластиной.
5. Ïлотно закройте крышку.
6. Ïодсоедините прибор к сети.
7. Нажимая на кнопку ФУНКЦИИ несколько раз, выберите функöèþ
ÏАР. На дисплее появится факти÷еское время приготовления 40
минут.
8. Чтобы установить желаемое время приготовления, пожалуйста,
ознакомьтесь с разделом ВРЕМЯ ГОТОВКИ.
9. Нажмите на кнопку СТАРТ. Световой индикатор "7" будет мигать
до завершения программы. Затем, прибор автомати÷ески перейдет
в режим Подогрев.
10. Нажмите на кнопку ОТМЕНА, чтобы отменить режим Подогрев
(по желанию).
ÉÎÃÓÐÒ
1. Ингредиенты: Молоко - 1 л, йогурт - 150 мл, сахар - 3 ст.л.
Смешайте все ингредиенты и поместите в к àñò
ðþëþ.
Ïðèìå÷ание: не закладывайте продукты выше верхней отметки,
указанной на внутренней стороне кастрюли.
2. Убедитесь в том, ÷то внешняя ÷асть кастрюли и нагревательная
пластина сухие. Вставьте кастрюлю в прибор. Убедитесь в том, ÷òî
кастрюля плотно соприкасается с нагревательной пластиной.
3. Ïлотно закройте крышку.
4. Ïодсоедините прибор к сети.
5. Нажмите на кнопку ФУНКЦИИ несколько раз, выбрав функöèþ
ÉÎГУРТ. На дисплее появится факти÷еское время приготовления
9h, ÷òî îçíà÷àåò 9 ÷àñîâ.
6. Нажмите несколько раз на кнопку ВРЕМЯ ГОТОВКИ, у вивонатс
желаемое время приготовления.
7. Нажмите на кнопку СТАРТ. Световой ин
дикатор "8" будет мигать
до завершения программы. Затем, прибор автомати÷ески перейдет
в режим Подогрев.
8. Нажмите на кнопку ОТМЕНА, чтобы отменить режим Подогрев
(по желанию).
Äанная программа подходит для подъема дрожжевого теста.
Äля этого поместите тесто в кастрюлю, выберите функöèþ è
установите время готовки-3 h (3 ÷аса). Нажмите на старт.
Ïри необходимости регулируйте время самостоятельно.
ÎÒÑÐÎ×ÊÀ ÂÐÅÌ
ÅÍÈ ÏÐÈÃÎÒÎВЛЕНИЯ
Òàé ì å ð îòñ ð î ÷ки времени - это таймер обратного отс÷ета. Цифры
28 29
Page 17

РУССКИЙ РУССКИЙ
на дисплее расположены слева.
1. Ïоместите кастрюлю с уложенными в нее ингредиентами в
мультиварку.
2. Ïлотно закройте крышку.
3. Ïодсоедините прибор к сети.
4. Выберите нужную Вам функöèþ.
5. Нажмите несколько раз на кнопку ОТСРОЧКА/ЧАСЫ.
Установите ÷àñû.
6. Нажмите несколько раз на кнопку ОТСРОЧКА/МИНУТЫ.
Установите минуты.
7. Нажмите на кнопку СÒÀÐТ. На дисплее загорится индикатор
"÷асы". Цифры на дисплее будут показывать сколько времени
осталось до на÷ала работы мультиварки.
ВРЕМЯ ГОТОВКИ
Òаймер времени готовки -
это таймер обратного отс÷ета. Цифры
на дисплее расположены справа.
1. Ïоместите кастрюлю с уложенными в нее ингредиентами в
мультиварку.
2. Ïлотно закройте крышку.
3. Ïодсоедините прибор к сети.
4.
Выберите нужную Вам функöèþ.
5. Нажмите несколько раз на кнопку ВРЕМЯ ГОТОВКИ, установив
время приготовления (минуты / ÷àñû).
6. Нажмите на кнопку СÒÀÐÒ.
ВРЕМЯ ГÎÒÎÂÊÈ È ОТСРОЧКА ПРИГОТОВЛЕНИЯ
1. Ïоместите кастрюлю с уложенными в нее ингредиентами в
мультиварку.
2. Ïлотно закройте крышку.
3. Ïодсоедините прибор к сети.
4. Нажмите на кнопку ФУНКЦИИ и выберите нужную программу.
5. Нажмите несколько раз на кнопку ВРЕМЯ ГОТОВКИ, установив
желаемое время приготовления.
7. Нажмите несколько раз на кнопку ОТСРОЧКА/ЧАСЫ.
Установите ÷àñû.
8.
Нажмите несколько раз на кнопку ОТСРОЧКА/МИНУТЫ.
Установите минуты.
9. Нажмите на кнопку СÒÀÐÒ.
Ïодогрев пищи
Если нужно подогреть пищу, можно использовать функöèþ ÑÓÏ
20-30 мин. Если это хлеб, используйте функöèþ ÂÛÏЕЧКА, но
измените время приготовления.
Ïðèìå÷ание: в мультиварке LED EZ cooker нельзя размораживать
продукты. Äëÿ ýòèõ öелей используйте аэрогрили от VES Electric
AX 747D/730/745/999, VES777/787/747/767/797.
Î×ÈÑÒÊÀ
• Îтсоедините прибор от сети и уберите шнур.
• Äайте прибору остыть.
Ïаровой клапан
Извлеките паровой клапан из крышки прибора, раскрутите его.
Ïромойте под прото÷ной водой, протрите насухо. Соберите
паровой клапан и вставьте в крышку.
Корпус, крышка, отверстие для клапана
Î÷истите влажной губкой/мягкой тканью и протрите насухо.
Не мойте корпус прибора/крышку в воде!
Кастрюля
Не применяйте силу для очистки кастрюли. В случае сильного
загрязнения кастрюли, подождите пока кастрюля остынет, налейте
в нее воду, оставьте на некоторое время, затем аккуратно вымойте
губкой. Не мойте в посудомое÷ной машине.
Внимание! гарантия на кастрюлю отсутствует.
Влагосборник
Мойте влагосборник после каждого использования прибора.
Аксессуары
Вымойте стимер, ложку, половник и мерный стаканчик в теплой
мыльной воде, затем сполосните и протрите насухо.
ХРАНЕНИЕ
Храните прибор в прохладном сухом месте, вдали от детей.
30 31
СОХРАНИТЕ ДАННУЮ ИНСТРУКЦИЮ
Page 18

РУССКИЙ РУССКИЙ
КНИГА РЕЦЕПТОВ
РЕЦЕПТЫ ПО ПРИГОТОВЛЕНИЮ РАЗЛИЧНЫХ БЛЮД ОТ
ШЕФ-ПОВАРА КОМПАНИИ "VES electric"
Вы можете готовить по собственному рецепту.
Все рецепты, приведенные в этой книге, носят
рекомендательный характер.
КУХНЯ НА ПАРУ
ТОМАТНАЯ ПАСТА С МИНДАЛЕМ
Ингредиенты:
помидор - 2шт.
несколько капель уксуса
оливковое масло - 6 ст.л.
чеснок - 2 зубца
очищенный и поджаренный миндаль - 50г
соль
Способ приготовления:
Налейте 1 литр воды в кастрюлю.
Вымойте помидоры и сделайте небольшой надрез на кожице у их
основания.
Положите помидоры и очищенный чеснок в стимер.
Включите функцию ПАР
на 20 минут. По истечении времени, нажав
на кнопку ОТМЕНА, извлеките содержимое из стимера и дайте ему
остыть.
Очистите от кожуры помидоры и порежьте их кусочками.
Добавьте оливковое масло, уксус, перемешайте.
Добавьте миндаль (в виде кусочков или цельных орехов).
Для того, чтобы паста стала более твердой, после того, как она
остынет, ее
можно поместить в холодильник. Получившуюся пасту
можно намазывать на хлеб или использовать в качестве приправы
к мясу.
ОВОЩИ НА ПАРУ
Ингредиенты:
оливковое масло
морковь средняя - 2 шт.
картофель мелкий - 4 шт.
кабачок мелкий - 1 шт
цветная капуста - 4-6 .соцветий
брокколи - 4 соцветия
зеленые побеги спаржи - 8шт.
репа средняя - 1 шт.
соль по вкусу
Способ приготовления:
Вымойте тщательно все овощи
.
Почистите морковь, картофель и репку.
В кастрюлю мультиварки налейте воды.
Разложите все овощи в стимере, не допуская их перемешивания друг
с другом и поместите стимер в кастрюлю.
Посыпьте блюдо несколькими щепотками соли.
Выберите функцию ПАР.
По мере готовности каждого из ингредиентов, снимайте его со
стимера.
После окончания процесса приготовления блюда,
положите все
овощи снова в стимер, чтобы подогреть их, и подавайте его в
тарелках в разных сочетаниях. По желанию вы можете полить
блюдо тонким слоем оливкового масла.
МИДИИ/ АЛЬМЕХИ НА ПАРУ С СОКОМ ЛАЙМА
Ингредиенты:
оливковое масло - 3 ст.л.
белое вино - 50 мл
чеснок - 2 зубца
лайм - 1 шт.
мидии/альмехи
(мелкие морские моллюски) -1кг
вода - 200 мл
Способ приготовления:
Слегка поджарьте очищенный и измельченный чеснок на функции
ВЫПЕЧКА на оливковом масле. Затем нажмите ОТМЕНА.
Добавьте вина, сок лайма с мякотью.
32 33
Page 19

РУССКИЙ РУССКИЙ
Затем добавьте 200 мл воды.
Выберите функцию ПАР на 20 минут и кипятите получившуюся
смесь. По истечении времени поместите вымытые и вычищенные
мидии/ альмехи в стимер, а стимер - в кастрюлю. Выберите
функцию ПАР на 30 минут.
Го т о в о е блюдо посыпьте измельченной петрушкой, приправив
соками из жаркого.
Примечание: данным способом можно готовить любые
морепродукты.
ПАШТЕТ ИЗ
БАКЛАЖАНОВ
Ингредиенты:
баклажаны - 2 шт.
1/2 лимона
чеснок - 2 зубца
соль и черный перец по вкусу
оливковое масло - 200 мл
вода - 1 л
Способ приготовления:
В кастрюлю мультиварки налейте воду, установите стимер.
Вымойте баклажаны, и, не очищая их, положите в стимер.
Уст ано вите для их приготовления программу ПАР.
По истечении программы дайте баклажанам остыть, разрежьте их
пополам и выскребите
всю мякоть.
Измельчите мякоть в чопере вместе с чесноком (для размягчения
последнего, его можно в течение нескольких минут отварить на
пару).
Положите получившееся пюре в большую миску, добавьте соль по
вкусу и понемногу добавляйте масла, сначала по капле, а затем
тонкой струйкой. Массу необходимо помешивать. Когда масса
достигнет требуемого состояния,
приправьте ее перцем и налейте
лимонного сока.
Подается холодным с гренками.
КРЕМОВЫЕ И ОБЫЧНЫЕ СУПЫ
БОРЩ УКРАИНСКИЙ
Ингредиенты:
мясо (свинина либо говядина) - 200-300 г
свекла - 3 шт. (среднего размера)
капуста - 150 г
картофель - 3 клубня (среднего размера)
морковь -1 шт. (большая)
корень петрушки -1 шт.
лук репчатый - 1 шт.
перец сладкий - 1 шт.
чеснок - 2 зубца
томатная паста - 2 ст.л.
шпик - 20 г
растительное
масло - 4 ст.л
сахарный песок - 1 ст. л.
3% уксус - 1 ст.л.
вода для тушения - 160 мл
вода для бульона - 1,5 л
соль
черный перец
зелень - 10 г
Способ приготовления:
Предварительно подготовьте продукты для борща:
Мясо порезать на кубики 2*2 см, морковь, свеклу и перец нарезать
соломкой, лук и корень петрушки мелко порубить, капусту тонко
нашинковать. Картофель нарезать дольками
или брусочками
В кастрюлю налить масло, выставить функцию ВЫПЕЧКА и жарить
лук и корень петрушки 5 минут, затем добавить морковь, перец и
свеклу. Жарить 5 минут. Добавить мясо и жарить 10 минут. Нажать
на ОТМЕНА. Выбрать программу ТУШЕНИЕ на 50 минут. Добавить
томатную пасту, 160 мл воды, уксус и сахар, помешать, закрыть
крышку и тушить. По
окончании времени добавить капусту,
картофель, воду (1,5л), соль, перец. Выбрать программу СУП на 50
минут.
Шпик ,чеснок и зелень растереть вместе . По окончании программы
добавить в суп, выбрать программу СУП еще на 10 минут.
ХАРЧО
Ингредиенты:
баранина - 500 г
рис - 2 ст.л.
лук репчатый - 2 шт.
томатная паста - 2 ст.л.
слива - 4 шт.
вода - 1,5 л
зелень, соль, молотый
черн. перец, лавровый лист (2 шт.)
приправа «Хмели-сунели» - 1 ч.л.
растительное масло - 4 ст.л.
Способ приготовления:
34 35
Page 20

РУССКИЙ РУССКИЙ
Мясо порезать на кубики 2*2 см. Лук мелко нашинковать.
В кастрюлю налить масло, выставить функцию ВЫПЕЧКА и жарить
лук до золотистого цвета. Добавить томатную пасту, Хмели-сунели,
молотый перец и жарить 5-7 минут. Отключить прибор.
Выложить зажарку в отдельную посуду. Кастрюлю не полоскать.
Налить воды и положить мясо. Выбрать программу СУП на 60
минут
. По окончании программы добавить промытый рис, соль,
лавровый лист, перец. Выбрать программу СУП на 30 минут, варить
до готовности мяса и риса. Попробовать. В суп опустить зажарку и
сливы и варить еще 15 -20 минут на программе СУП.
При подаче посыпать мелко нарезанной зеленью.
КЮФТА-БОЗБАШ
(суп с мясными шариками)
Ингредиенты:
баранина - 350 г
(тазобедренная или лопаточная части)
курдючный жир - 70 г
лук репчатый - 1 шт.
рис - 1/2 мерного стакана
алыча - 1 мерный стакан
картофель - 5 клубней (среднего размера)
горох - 3/4 мерного стакана (рекомендуем использовать Нут турецкий горох)
вода - 1 л
шафран, сушеная мята (или базилик), соль
бульонный кубик - 1 шт.
соль, черный молотый перец
Способ приготовления:
Баранину пропустить через мясорубку (используйте мясорубки VES
electric ).
Лук мелко
порубить. Кур дю чн ый жир нарезать мелкими кусочками.
Картофель нарезать кубиками.
Рис предварительно промыть. Го р о х предварительно промыть,
замочить на ночь, утром воду слить.
В фарш, приготовленный из мякоти баранины с добавлением
репчатого лука и жира, положить рис, соль, перец и разделать по
два шарика на порцию.
Каждый шарик начинить по 2 -3 алычи. В
воде сварить горох (на
программе СУП). Затем добавить мясные шарики, картофель и
репчатый лук, соль по вкусу. Варить на программе СУП 40 минут.
За 10 -15 минут до окончания программы добавить перец и шафран.
При подаче суп посыпать сушеной мятой.
Если нет мяты, можно использовать сушеный базилик.
СОЛЯНКА ДОМАШНЯЯ
Ингредиенты:
суповой набор - 800 г
картофель - 3 клубня
(среднего размера)
огурцы соленые - 2 шт.
лук репчатый - 2 шт. (среднего размера)
томатная паста - 3 ст.л.
сливочное масло - 1 ст.л.
вода - 1,5 л
сметана - 4 ст.л.
соль
Способ приготовления:
Мясо промыть.
Лук мелко нашинковать, картофель нарезать ломтиками или
кубиками.
Огурцы порезать соломкой.
В кастрюлю налить воды и сварить суповой набор на программе
СУП. По
окончании программы добавить картофель и варить на
программе СУП 40 минут, затем добавить остальные продукты и
варить еще 30 минут.
СУП-ПЮРЕ ИЗ КАРТОФЕЛЯ
Ингредиенты:
картофель - 7 клубней (среднего размера)
мука пшеничная - 2 ст.л.
сливочное масло - 2 ст.л.
сметана - 4 ст.л. (нежирная)
молоко - 250 мл
вода - 1,5 л
зелень укропа
пучок петрушки
Способ приготовления:
Картофель промыть и очистить.
В кастрюлю налить воды, посолить и отварить картофель на
программе ПАР 40 минут до готовности.
Затем картофель необходимо протереть с отваром.
Приготовление белого соуса:
Сливочное масло растопить в кастрюле на функции СУП, добавить
муки и постоянно мешать, аккуратно тонкой струйкой добавляя
подогретое молоко и постоянно помешивая.
36 37
Page 21

РУССКИЙ РУССКИЙ
Довести соус до кипения , посолить и поперчить.
Выложить в отдельную посуду.
Протертый картофель смешать с белым соусом и довести до
кипения на функции ПАР 15 минут.
Го т о в ы й суп заправить сметаной. Подавать, предварительно
посыпав зеленью.
РИСОВЫЙ СУП С КАБАЧКАМИ ПРОТЕРТЫЙ
Ингредиенты:
рис - 2 мерных стакана (жасминовый)
кабачки - 300 г
слив.масло - 1 ст.л.
молоко - 250 мл
яйцо - 1
шт.
вода - 1,5 л
сахарный песок - 1 ч.л.
соль
бульон - 1л
Способ приготовления:
Рис отварить до готовности на программе МОЛОЧНАЯ КАША и
протереть. Кабачки почистить и отварить 5-10 минут на программе
ПАР, а затем протереть и соединить с рисом. Добавить отвар от
кабачков, перемешать и довести до кипения на функции ПАР в
течении 10-15 минут.
Выложить в отдельную посуду и остудить до
50-60 градусов.
Приготовление льезона:
Яйцо смешать с молоком и влить в кастрюлю. Устан овить программу
СУП, варить с открытой крышкой до первого пара, постоянно
помешивая. Не кипятить!
Вылить в отдельную посуду.
В кастрюлю вылить суп и льезон и варить на программе СУП с
открытой крышкой,
не доводя до кипения.
ЛУКОВЫЙ СУП
Ингредиенты:
оливковое масло - 4 ст.л.
хлеб белый - 100 г
мясной бульон - 1.5 л
сыр тертый - 150 г
репчатый лук - 1 кг
молотый черный перец - 15 г
мука - 1 ст.л.
соль по вкусу
сливочное масло - 80 г
Способ приготовления:
Нарежьте лук кольцами.
Положите в кастрюлю все ингредиенты.
Выберите программу ПАР, установите 30 минут.
Добавьте соль и перец
по вкусу.
Для украшения блюда можно поджарить несколько кусочков хлеба.
Для этого налейте 2 ст.л. оливкового масла в кастрюлю и поджарьте
хлеб.
СВЕКОЛЬНЫЙ КРЕМ-СУП С ЦЫПЛЕНКОМ И ОВОЩАМИ
Ингредиенты:
свекла - 100 г
цветная капуста - 300 г
морковь - 150 г
кабачок - 300 г
филе цыпленка, разрезанного на кусочки - 200 г
соль по вкусу
белое вино - 100 мл
растительное масло - 2 ст.
л.
горячая вода - 500 мл
Способ приготовления:
Порежьте овощи на маленькие кусочки.
Положите все ингредиенты в кастрюлю.
Выберите программу СУП.
По окончании приготовления пропустите образовавшуюся массу
через блендер. Блюдо готово.
СУП ИЗ ШПИНАТА
Ингредиенты:
шпинат - 1 пучок
овощной бульон - 1л
сливки - 200 мл
мускатный орех
сливочное масло - 50 г
репчатый лук (средних размеров) - 1 шт.
мука - 1 ст.л.
черный
перец и соль по вкусу
Способ приготовления:
Вымойте шпинат и лук. Почистите и нарежьте.
38 39
Page 22

РУССКИЙ РУССКИЙ
Ɋɚɫɬɨɩɢɬɟ ɫɥɢɜɨɱɧɨɟ ɦɚɫɥɨ ɜɤɚɫɬɪɸɥɟ ɧɚ ɮɭɧɤɰɢɢ ȼɕɉȿɑɄȺ.
Ʉɨɝɞɚ ɨɧɨ ɪɚɫɬɨɩɢɬɫɹ,ɩɨɥɨɠɢɬɟ ɥɭɤ, ɨɛɠɚɪɶɬɟ 5 ɦɢɧ, ɡɚɬɟɦ,
ɞɨɛɚɜɶɬɟ ɲɩɢɧɚɬ ɜɦɟɫɬɟ ɫ ɨɫɬɚɥɶɧɵɦɢ ɢɧɝɪɟɞɢɟɧɬɚɦɢ.
Ɂɚɩɭɫɬɢɬɟ ɩɪɨɝɪɚɦɦɭ ɋɍɉ ɍɫ ɬɚɧ ɨɜɢɬɟ ɜɪɟɦɹ 30 ɦɢɧɭɬ.
ɉɨ ɨɤɨɧɱɚɧɢɢ ɮɭɧɤɰɢɢ ɩɪɨɩɭɫɬɢɬɟ ɩɨɥɭɱɢɜɲɭɸɫɹ ɦɚɫɫɭ ɱɟɪɟɡ
ɛɥɟɧɞɟɪ.
Ɉɬɞɟɥɶɧɨ ɪɚɫɬɜɨɪɢɬɟ ɦɭɤɭ ɜ ɫɥɢɜɤɚɯ ɢ ɞɨɛɚɜɶɬɟ ɜ ɦɚɫɫɭ.
ȼɚɪɢɬɟ ɜ ɬɟɱɟɧɢɟ ɟɳɟ 15 ɦɢɧɭɬ ɧɚ ɮɭɧɤɰɢɢ
ɉȺɊ ɢɩɨɫɥɟ ɷɬɨɝɨ
ɞɨɛɚɜɶɬɟ ɦɭɫɤɚɬɧɵɣ ɨɪɟɯ, ɩɟ
ɪɟɰ ɢ ɫɨɥɶ ɩɨ ɜɤɭɫɭ.
ɄɊȿɆ-ɋɍɉ ɂɁ ɒɉɂɇȺɌȺ (ɫɩɨɫɨɛ 2)
ɂɧɝɪɟɞɢɟɧɬɵ:
ɲɩɢɧɚɬ - 800 ɝ
ɦɨɥɨɤɨ - 4 ɦɟɪɧɵɯ ɫɬɚɤɚɧɚ
ɫɥɢɜɨɱɧɨɟ ɦɚɫɥɨ - 50 ɝ
ɦɭɤɚ - 1/2 ɦɟɪɧɨɝɨ ɫɬɚɤɚɧɚ
ɱɟɪɧɵɣ ɩɟɪɟɰ
ɦɭɫɤɚɬɧɵɣ ɨɪɟɯ
ɫɨɥɶ
ɋɩɨɫɨɛ ɩɪɢɝɨɬɨɜɥɟɧɢɹ:
ɉɨɥɨɠɢɬɟ ɜɫɟ ɢɧɝɪɟɞɢɟɧɬɵ (ɤɪɨɦɟ ɲɩɢɧɚɬɚ) ɜɤɚɫɬɪɸɥɸ,
ɩɟɪɟɦɟɲɚɣɬɟ ɢɯ ɞɥɹ ɩɪɟɞɨɬɜɪɚɳɟɧɢɹ ɨɛɪɚɡɨɜɚɧɢɹ ɤɨɦɨɱɤɨɜ
Ⱦɨɛɚɜɶɬɟ ɪɭɛɥɟɧɵɣ ɲɩɢɧɚɬ ɢ ɡɚɩɭɫɬɢɬɟ ɩɪɨɝɪɚɦɦɭ ɉȺɊ ɧɚ
20 ɦɢɧɭɬ.
ɉɨ ɨɤɨɧɱɚɧɢɢ ɩɪɨɝɪɚɦɦɵ ɩɪɨɩɭɫɬɢɬɟ ɦɚɫɫɭ ɱɟɪɟɡ ɛɥɟɧɞɟɪ
ɋɈɅəɇɄȺ ɋ ɌɍɇɐɈɆ
ɂɧɝɪɟɞɢɟɧɬɵ:
ɤɚɛɚɱɨɤ ɫɪɟɞɧɢɯ ɪɚɡɦɟɪɨɜ - 3 ɲɬ.
ɡɟɥɟɧɵɣ ɢɥɢ ɤɪɚɫɧɵɣ ɩɟɪɟɰ - 3 ɲɬ.
ɥɭɤ ɪɟɩɱɚɬɵɣ - 1 ɲɬ.
ɩɨɦɢɞɨɪɵ - 200 ɝ
ɬɭɧɟɰ - 3 ɛɚɧɤɢ (ɩɨ 80 ɝ ɤɚɠɞɚɹ)
ɨɥɢɜɤɨɜɨɟ ɦɚɫɥɨ, ɫɨɥɶ
ɋɩɨɫɨɛ ɩɪɢɝɨɬɨɜɥɟɧɢɹ:
ɉɨɱɢɫɬɢɬɟɤɚɛɚɱɤɢ, ɩɟɪɟɰ, ɥɭɤ ɢɩɨɪɟɠɶɬɟ ɢɯ ɚɤɤɭɪɚɬɧɵɦɢ
ɤɪɭɠɨɱɤɚɦɢ.
ɂɡɦɟɥɶɱɢɬɟ ɬɭɧɰɚ ɜɢɥɤɨɣ. ɉɨɥɨɠɢɬɟ ɜɫɟ ɢɧɝɪɟɞɢɟɧɬɵ ɜɤɚɫɬɪɸɥɸ.
ȼɤɥɸɱɢɬɟ ɩɪɨɝɪɚɦɦɭ ȼɕɉȿɑɄȺ
ɧɚ 25 ɦɢɧɭɬ. Ȼɥɸɞɨ ɧɟɨɛɯɨɞɢɦɨ
ɩɨɦɟɲɢɜɚɬɶ. Ƚɨ ɬ ɨ ɜ ɨ ɟ ɛɥɸɞɨ ɩɨɫɵɩɶɬɟ ɡɟɥɟɧɶɸ.
ɄɊȿɆɈȼɕɃ ɋɍɉ ɂɁ ɐɕɉɅȿɇɄȺ
ɂɧɝɪɟɞɢɟɧɬɵ:
ɝɪɭɞɤɚ ɰɵɩɥɟɧɤɚ - 1 ɲɬ.
ɦɨɪɤɨɜɶ ɫɪɟɞɧɢɯ ɪɚɡɦɟɪɨɜ - 1 ɲɬ.
ɥɭɤ-ɩɨɪɟɣ - 1 ɲɬ.
ɫɨɥɶ
ɦɭɤɚ - 1 ɱ.ɥ.
ɜɨɞɚ - 1 ɥ
ɋɩɨɫɨɛ ɩɪɢɝɨɬɨɜɥɟɧɢɹ:
ɇɚɥɟɣɬɟ ɜɨɞɭ ɜɤɚɫɬɪɸɥɸ ɢɩɨɦɟɫɬɢɬɟ ɬɭɞɚ ɤɭɪɢɧɭɸ ɝɪɭɞɤɭ ɢ
ɧɚɪɟɡɚɧɧɵɟ ɤɭɫɨɱɤɚɦɢ ɨɜɨɳɢ.
ɍɫɬ ɚɧɨ ɜɢɬɟ ɩɪɨɝɪɚɦɦɭ Ɍɍɒȿɇɂȿ ɧɚ 60 ɦɢɧɭɬ.
ɉɨ ɨɤɨɧɱɚɧɢɢ ɮɭɧɤɰɢɢ ɫɥɟɣɬɟ ɛɭɥɶɨɧ
ɱɟɪɟɡ ɫɢɬɨ ɜ ɞɪɭɝɭɸ ɟɦɤɨɫɬɶ,
ɚ ɤɭɪɢɰɭ ɫ ɨɜɨɳɚɦɢ ɨɬɥɨɠɢɬɟ ɞɥɹ ɨɫɬɵɜɚɧɢɹ.
ɉɨɪɟɠɶɬɟ ɤɭɪɢɧɭɸ ɝɪɭɞɤɭ ɧɚ ɤɭɫɨɱɤɢ.
ȼɵɦɨɣɬɟɤɚɫɬɪɸɥɸ ɦɭɥɶɬɢɜɚɪɤɢ, ɩɪɨɬɪɢɬɟ ɧɚɫɭɯɨ. ɇɚɥɟɣɬɟ ɜ ɧɟɟ
ɪɚɫɬɢɬɟɥɶɧɨɟ ɦɚɫɥɨ ɢɩɨɞɠɚɪɶɬɟ ɦɭɤɭ ɧɚ ɮɭɧɤɰɢɢ ȼɕɉȿɑɄȺ,
ɞɨɛɚɜɶɬɟ ɧɟɫɤɨɥɶɤɨ ɥɨɠɟɤ ɛɭɥɶɨɧɚ, ɩɟɪɟɦɟɲɢɜɚɹ ɞɥɹ ɪɚɫɬɜɨɪɟɧɢɹ
ɦɭɤɢ.
ɉɟɪɟɥɟɣɬɟ ɛɭɥɶɨɧ ɜ ɤɚɫɬɪɸɥɸ ɦɭɥɶɬɢɜɚɪɤɢ, ɞɨɛɚɜɶɬɟ ɩɨɪɟɡɚɧɧɭɸ
ɤɭɪɢɧɭɸ ɝɪɭɞɤɭ, ɞɨɜɟɞɢɬɟ ɞɨ ɤɢɩɟɧɢɹ ɧɚ
ɮɭɧɤɰɢɢ ɉȺɊ.
ɉɨɞɚɜɚɣɬɟ ɝɨɪɹɱɢɦ.
ɈȼɈɓɇɈɃ ɋɍɉ ɂɁ ȼȿȽȿɌȺɊɂȺɇɋɄɈȽɈ ɌɍɊȿɐɄɈȽɈ ȽɈɊɈɏȺ
ɂɧɝɪɟɞɢɟɧɬɵ:
ɬɭɪɟɰɤɢɣ ɝɨɪɨɯ (ɧɭɬ) - 2 ɦɟɪɧɵɯ
ɫɬɚɤɚɧɚ
ɬɵɤɜɚ, ɨɱɢɳɟɧɧɚɹ ɨɬ ɫɟɦɟɱɟɤ ɢ
ɤɨɠɭɪɵ- 20 0 ɝ
ɤɚɛɚɱɨɤ - 1 ɲɬ. (ɫɪɟɞɧɟɝɨ ɪɚɡɦɟɪɚ)
ɩɨɦɢɞɨɪ - 2 ɲɬ. (ɫɪɟɞɧɟɝɨ ɪɚɡɦɟɪɚ)
ɥɭɤ ɪɟɩɱɚɬɵɣ - 1 ɲɬ. (ɫɪɟɞɧɟɝɨ
ɪɚɡɦɟɪɚ)
ɤɪɚɫɧɵɣ ɫɥɚɞɤɢɣ ɩɟɪɟɰ - 1 ɲɬ.
ɡɟɥɟɧɵɣ ɩɟɪɟɰ - 1 ɲɬ.
ɱɟɪɧɵɣ ɩɟɪɟɰ ɝɨɪɨɲɤɨɦ
ɨɥɢɜɤɨɜɨɟ ɦɚɫɥɨ
ɫɨɥɶ
ɋɩɨɫɨɛ ɩɪɢɝɨɬɨɜɥɟɧɢɹ:
Ɂɚɦɨɱɢɬɟ ɝɨɪɨɯ
ɧɚ ɧɨɱɶ, ɭɬɪɨɦ ɜɨɞɭ ɫɥɟɣɬɟ.
ɉɨɥɨɠɢɬɟ ɧɭɬ ɜɤɚɫɬɪɸɥɸ. Ⱦɨɛɚɜɶɬɟ 0,5 ɥ ɜɨɞɵ. ȼɵɛɟɪɢɬɟ
ɩɪɨɝɪɚɦɦɭ ɋɍɉ ɧɚ 40 ɦɢɧɭɬ.
40 41
Page 23

РУССКИЙ РУССКИЙ
ɉɨɪɟɠɶɬɟ ɨɜɨɳɢ ɤɭɛɢɤɚɦɢ.
ɉɨ ɨɤɨɧɱɚɧɢɢ ɩɪɨɝɪɚɦɦɵ ɞɨɛɚɜɶɬɟ ɨɜɨɳɢ ɢ 1ɥ ɜɨɞɵ. ȼɵɛɟɪɢɬɟ
ɩɪɨɝɪɚɦɦɭ ɋɍɉ ɧɚ 40 ɦɢɧɭɬ.
ȼɌɈɊɕȿ ȻɅɘȾȺ
ɄȺɊɌɈɎȿɅɖ ɋɈ ɋɅȺȾɄɂɆ ɉȿɊɐȿɆ
ɂɧɝɪɟɞɢɟɧɬɵ:
ɤɚɪɬɨɮɟɥɶ - 1 ɤɝ
ɱɟɫɧɨɤ - 3 ɡɭɛɰɚ
ɪɚɫɬɢɬɟɥɶɧɨɟ ɦɚɫɥɨ - 1/2 ɦɟɪɧɨɝɨ ɫɬɚɤɚɧɚ
ɫɥɚɞɤɢɣ ɩɟɪɟɰ - 3 ɲɬ.
ɫɨɥɶ ɩɨ ɜɤɭɫɭ
ɋɩɨɫɨɛ ɩɪɢɝɨɬɨɜɥɟɧɢɹ:
ɇɚɥɟɣɬɟ ɪɚɫɬɢɬɟɥɶɧɨɟ ɦɚɫɥɨ ɜɤɚɫɬɪɸɥɸ ɦɭɥɶɬɢɜɚɪɤɢ.
ɉɨɥɨɠɢɬɟ ɜ ɧɟɟ ɢɡɦɟɥɶɱɟɧɧɵɣ ɱɟɫɧɨɤ, ɩɟɪɟɰ,ɩɨɪɟɡɚɧɧɵɣ
ɩɨɥɨɫɤɚɦɢ, ɢ ɤɚɪɬɨɮɟɥɶ,
ɧɚɪɟɡɚɧɧɵɣ
ɤɪɭɠɨɱɤɚɦɢ.
ɉɨɫɨɥɢɬɟ ɩɨ ɜɤɭɫɭ.
ȼɤɥɸɱɢɬɟ ɩɪɨɝɪɚɦɦɭ ȼɕɉȿɑɄȺ (ɧɚ 25 ɦɢɧɭɬ). ɉɨɦɟɲɢɜɚɣɬɟ ɟɞɭ.
ɎȺɋɈɅɖ ɋ ɆəɋɈɆ
ɂɧɝɪɟɞɢɟɧɬɵ:
ɨɥɢɜɤɨɜɨɟ ɦɚɫɥɨ - 2 ɫɬ.ɥ.
ɬɟɥɹɬɢɧɚ, ɧɚɪɟɡɚɧɧɚɹ ɤɭɛɢɤɚɦɢ - 250 ɝ
ɦɨɪɤɨɜɶ, ɧɚɪɟɡɚɧɧɚɹ ɬɨɥɫɬɵɦɢ ɥɨɦɬɢɤɚɦɢ - 4 ɲɬ.
ɤɨɱɚɧ ɰɜɟɬɧɨɣɤɚɩɭɫɬɵ, ɪɚɡɞɟɥɟɧɧɵɣ ɧɚ ɜɟɬɨɱɤɢ
ɤɚɩɭɫɬɚ-ɛɪɨɤɤɨɥɢ - 300 ɝ
ɤɚɪɬɨɮɟɥɶ, ɧɚɪɟɡɚɧɧɵɣ ɤɭɛɢɤɚɦɢ - 2 ɲɬ.
ɡɟɥɟɧɚɹ ɮɚɫɨɥɶ - 200 ɝ
ɬɵɤɜɚ (ɨɱɢɳɟɧɧɚɹ ɨɬ ɫɟɦɟɱɟɤ ɢ ɤɨɠɭɪɵ, ɧɚɪɟɡɚɧɧɚɹ ɤɭɛɢɤɚɦɢ) - 200 ɝ
ɨɜɨɳɧɨɣ
ɛɭɥɶɨɧ - 2 ɦɟɪɧɵɯ ɫɬɚɤɚɧɚ
ɜɟɬɨɱɤɚ ɬɢɦɶɹɧɚ
ɢɡɦɟɥɶɱɟɧɧɚɹ ɩɟɬɪɭɲɤɚ - 1 ɩɭɱɨɤ
ɋɩɨɫɨɛ ɩɪɢɝɨɬɨɜɥɟɧɢɹ:
ɇɚɥɟɣɬɟ ɜɤɚɫɬɪɸɥɸ ɦɚɫɥɨ,ɩɨɥɨɠɢɬɟ ɬɭɞɚ ɦɹɫɨ, ɦɨɪɤɨɜɶ, ɰɜɟɬɧɭɸ
ɤɚɩɭɫɬɭ, ɛɪɨɤɤɨɥɢ, ɡɟɥɟɧɭɸ ɮɚɫɨɥɶ, ɬɵɤɜɭ ɢ ɩɟɬɪɭɲɤɭ.
ɍɫɬ ɚɧɨ ɜɢɬɟ ɩɪɨɝɪɚɦɦɭ Ɍɍɒȿɇɂȿ.
ɑɟɪɟɡ 30 ɦɢɧɭɬ ɨɬɤɪɨɣɬɟ ɤɪɵɲɤɭ ɦɭɥɶɬɢɜɚɪɤɢ ɢ ɞɨɛɚɜɶɬɟ
ɤɚɪɬɨɮɟɥɶ, ɛɭɥɶɨɧ, ɬɢɦɶɹɧ, ɫɨɥɶ ɢ ɩɟɪɟɰ. ɉɨɞɨɠɞɢɬɟɡɚɜɟɪɲɟɧɢɹ
ɩɪɨɝɪɚɦɦɵ.
ɉɅɈȼ ɉɈ-ȿȽɂɉȿɌɋɄɂ
ɂɧɝɪɟɞɢɟɧɬɵ:
ɪɢɫ ɞɥɢɧɧɨɡɟɪɧɵɣ ɢɧɞɢɣɫɤɢɣ - 150 ɝ
ɥɚɜɪɨɜɵɣ ɥɢɫɬ - 1 ɲɬ.
ɜɚɪɟɧɚɹ
ɱɟɱɟɜɢɰɚ - 1 ɦɟɪɧɵɣ ɫɬɚɤɚɧ
ɬɦɢɧ ɜ ɜɢɞɟ ɩɨɪɨɲɤɚ - ɳɟɩɨɬɤɚ
ɥɭɤ ɪɟɩɱɚɬɵɣ,ɩɨɪɟɡɚɧɧɵɣ ɤɨɥɶɰɚɦɢ - 2 ɲɬ.
ɱɟɫɧɨɤ - 1 ɡɭɛɟɰ
ɫɨɥɶ ɢ ɩɟɪɟɰɩɨ ɜɤɭɫɭ
ɨɥɢɜɤɨɜɨɟ ɦɚɫɥɨ - 5 ɫɬ.ɥ.
ɜɨɞɚ - 3,5 ɦɟɪɧɵɯ ɫɬɚɤɚɧɚ
ɋɩɨɫɨɛ ɩɪɢɝɨɬɨɜɥɟɧɢɹ:
ɉɨɠɚɪɶɬɟ ɥɭɤ, ɢɫɩɨɥɶɡɭɹ ɮɭɧɤɰɢɸ ȼɕɉȿɑɄȺ.
Ⱦɨɛɚɜɶɬɟ ɢɡɦɟɥɶɱɟɧɧɵɣ ɱɟɫɧɨɤ, ɤɨɝɞɚ ɥɭɤ ɩɪɢɨɛɪɟɬɟɬ ɡɨɥɨɬɢɫɬɵɣ
ɨɬɬɟɧɨɤ.
Ⱦɨɛɚɜɶɬɟ ɜɨɞɭ ɢ ɫɩɟɰɢɢ.
Ⱦɨɛɚɜɶɬɟ ɪɢɫ ɢ ɜɚɪɟɧɭɸ ɱɟɱɟɜɢɰɭ.
ɍɫɬ ɚɧɨ ɜɢɬɟ ɩɪɨɝɪɚɦɦɭ ɉɅɈȼ (
ɧɚ 20 ɦɢɧɭɬ).
Ɋɂɋ ɋ ɋɕɊɈɆ
ɂɧɝɪɟɞɢɟɧɬɵ:
ɫɵɪ ɫ ɩɥɟɫɟɧɶɸ - 50 ɝ
ɥɢɫɬɶɹ ɫɚɥɚɬɚ - 4 ɲɬ.
ɪɢɫ - 200ɝ
ɨɥɢɜɤɨɜɨɟ ɦɚɫɥɨ - 8 ɱ.ɥ.
ɤɪɭɩɧɵɣ ɝɨɪɨɯ ɧɭɬ- 400 ɝ
ɭɤɫɭɫ - 3 ɱ.ɥ.
ɫɥɢɜɨɱɧɨɟ ɦɚɫɥɨ - 50 ɝ
ɦɨɥɨɤɨ - 8 ɫɬ.ɥ.
ɫɨɥɶ ɢ ɱɟɪɧɵɣ ɩɟɪɟɰɩɨ ɜɤɭɫɭ
ɋɩɨɫɨɛ ɩɪɢɝɨɬɨɜɥɟɧɢɹ:
ɇɭɬɡɚɦɨɱɢɬɟ ɧɚ ɧɨɱɶ. ɉɟɪɟɞ ɝɨɬɨɜɤɨɣ ɜɨɞɭ ɫɥɟɣɬɟ ɢ ɩɪɨɦɨɣɬɟ ɩɨɞ
ɩɪɨɬɨɱɧɨɣ ɜɨɞɨɣ.
ɋɜɚɪɢɬɟ ɪɢɫ ɜɛɨɥɶɲɨɦ
ɤɨɥɢɱɟɫɬɜɟ ɩɨɞɫɨɥɟɧɧɨɣ ɜɨɞɵ. ɂɫɩɨɥɶɡɭɣɬɟ
ɮɭɧɤɰɢɸ ɄɊɍɉɕ.
ȼɨɞɭ ɫɥɟɣɬɟ. ɉɪɨɦɨɣɬɟ ɪɢɫ ɜ ɯɨɥɨɞɧɨɣ ɜɨɞɟ.
ɋɜɚɪɢɬɟ ɝɨɪɨɯ, ɢɫɩɨɥɶɡɭɹ ɩɪɨɝɪɚɦɦɭ ɋɍɉ ɢ ɩɟɪɟɦɟɲɚɣɬɟ ɟɝɨ ɫ
ɪɢɫɨɦ. ȼɵɦɨɣɬɟ ɥɢɫɬɶɹ ɫɚɥɚɬɚ, ɧɚɪɟɠɶɬɟ ɤɭɫɨɱɤɚɦɢ ɢ ɞɨɛɚɜɶɬɟ ɜ
ɪɢɫ ɫ ɝɨɪɨɯɨɦ.
4342
Page 24

РУССКИЙ РУССКИЙ
Заправьте соусом из сыра с плесенью.
Соус: взбейте сыр с плесенью со сливочным маслом вилкой или
миксером и смешайте его с молоком. По окончании процесса
добавьте немного масла, затем уксус и, в конце, посолите и
поперчите.
РИС С ВИНОМ «КАВА»
Ингредиенты:
рис длиннозерный - 4 мерных стакана
твердый сыр - 100 г
растительное масло - 1/2 мерного
стакана
репчатый лук средних размеров - 1 шт.
сливки - 1 мерный стакан
соль по вкусу
вино - 1/2 л
мясной бульон - 1/2 л
Способ приготовления:
Почистите луковицу, измельчите ее и, используя функцию
ВЫПЕЧКА, обжарьте ее в масле до золотистого оттенка.
Добавьте рис и пожарьте его (10 -15 минут).
После того, как он пожарится, добавьте вино. Запустите программу
ПЛОВ (крышку не закрывайте);
при ее выполнении количество вина
уменьшится.
Через 15-20 минут добавьте мясной бульон. Закройте крышку.
За 2 минуты до окончания приготовления блюда добавьте тертый
сыр и сливки. Блюдо подается сразу же после приготовления.
РИС С КАРРИ
Ингредиенты:
рис длиннозерный - 1 мерный стакан
кедровые орехи - 100 г
вода - 2 мерных стакана
чеснок - 1 зубец
карри - 1 ч.л.
оливковое масло - 50 мл
лавровый лист - 1 шт.
мясной бульон - 1 кубик
соль по вкусу
Способ приготовления:
Положите все ингредиенты в кастрюлю.
Выберите функцию ПЛОВ на 25 минут.
РИС С ОВОЩАМИ
Ингредиенты
рис длиннозерный - 1 мерный стакан
чеснок - 2 зубца
овощи по вкусу, любой набор - 1/2 кг
оливковое масло - 50 мл
лавровый лист - 2 шт.
вода - 2 мерных стакана
овощной бульон - 1 кубик
соль по вкусу.
Способ приготовления
:
Положите все ингредиенты в кастрюлю.
Выберите функцию ПЛОВ на 25 минут.
РИС С ЯЙЦАМИ
Ингредиенты:
помидор средних размеров - 1шт.
морковь средних размеров - 1 шт.
репчатый лук средних размеров - 1шт.
сладкий перец - 1шт.
рис - 300 г
овощной бульон (можно заменить
водой) - 600 мл
яйцо - 4 шт.
соль по вкусу
уксус - 1 ч.л.
Способ приготовления:
Загрузите измельченный помидор, луковицу,
сладкий перец и
морковь в кастрюлю.
Добавьте рис и овощной бульон.
Выберите функцию ПЛОВ 30 минут.
В процессе приготовления через 20 минут добавьте уксус.
Добавьте соль по вкусу.
После того, как рис будет готов, переложите его в тарелку и
украсьте яичницей (глазунья).
4544
Page 25

РУССКИЙ РУССКИЙ
РИС С КАЛЬМАРАМИ
Ингредиенты:
красный перец - 40 г
помидоры - 100 г
чеснок - 2 зубца
кольца кальмара - 150 г
рис белый круглозерный - 150 г
рыбный бульон - 300 мл
растительное масло - 3 ст.л.
лук репчатый - 1 шт.
артишоки - 100 г
Способ приготовления:
Репчатый лук мелко нарезать. Перец нарезать дольками, чеснок
измельчить, помидоры порезать на 4 части.
Налейте масло в кастрюлю.
Поместите туда красный перец, помидоры, чеснок
, лук и артишоки.
Выберите функцию ВЫПЕЧКА. Жарьте 10-15 минут.
После этого добавьте кольца кальмара, рис, рыбный бульон.
Включите функцию ПАР на 20 минут.
РИС ПО-ГРЕЧЕСКИ
Ингредиенты:
рис - 2 мерных стакана
мясной бульон - 4 мерных стакана
помидоры - 50 г
черные маслины - 50 г
растительное масло - 50 мл
соль
лук репчатый среднего размера - 1 шт
Способ приготовления:
Налейте масло в кастрюлю.
Добавьте порезанный
кольцами лук.
Выберите функцию ВЫПЕЧКА. Поджарьте лук до золотистого
оттенка.
Добавьте помидоры, рис, перемешайте все и добавьте бульон.
Включите программу ПЛОВ (на 20-25 минут).
В конце добавьте черные маслины и оставьте блюдо на 2 минуты.
После этого можете подавать на стол.
РИС С ШАМПИНЬОНАМИ ПО-ПРОВАНСАЛЬСКИ
Ингредиенты:
рис белый длиннозерный - 1/2 кг
шампиньоны - 1/2 кг
растительное
масло - 50 мл
чеснок - 2 зубца
измельченный лук репчатый - 1 шт.
соль, перец
лимонный сок одного лимона
измельченная петрушка - 2 ст.л.
вода - 1 л
Способ приготовления:
Поместите шампиньоны в емкость с водой и лимонным соком на
полчаса для вымачивания, после чего слейте воду и нарежьте
грибы дольками.
Измельчите чеснок и луковицу. Поместите в кастрюлю, выставьте
программу ВЫПЕЧКА
и жарьте до золотистого цвета.
Добавьте масло, петрушку, рис и шампиньоны и жарьте еще 10
минут.
Добавьте воду.
Посолите и поперчите.
Включите программу ПЛОВ (на 20-25 минут).
РИС ПО-МИЛАНСКИ
Ингредиенты:
круглозерный рис для ризотто 2 мерных стакана
вода - 4 мерных стакана
помидор - 1 шт.
лук репчатый -1 шт.
белое вино - 1/2 стакана
сыр «Пармезан» - 50 г
соль
растительное масло - 50 мл
горошек - 1 банка
Способ приготовления:
Почистите луковицу и нарежьте ее маленькими квадратиками.
В кастрюлю налейте масло, установите программу ВЫПЕЧКА.
Поджарьте лук до золотистого цвета.
Добавьте в кастрюлю очищенный от кожуры и нарезанный на кубики
помидор. Жарьте 5-7 минут.
4746
Page 26

РУССКИЙ РУССКИЙ
Ⱦɨɛɚɜɶɬɟ ɪɢɫ, ɝɨɪɨɲɟɤ, ɫɨɥɶ ɢ ɛɟɥɨɟ ɜɢɧɨ.
Ɂɚɥɟɣɬɟ ɜɫɟ ɢɧɝɪɟɞɢɟɧɬɵ ɜɨɞɨɣ ɢ ɡɚɩɭɫɬɢɬɟ ɩɪɨɝɪɚɦɦɭ ɉɅɈȼ (ɧɚ
20-25 ɦɢɧɭɬ).
ɉɟɪɟɞ ɬɟɦ, ɤɚɤɩɨɞɚɜɚɬɶ ɤɭɲɚɧɶɟ,ɩɨɫɵɩɶɬɟ ɪɢɫ ɫɵɪɨɦ ɢ ɫɥɟɝɤɚ
ɪɚɡɦɟɲɚɣɬɟ ɟɝɨ. ɉɨɞɚɟɬɫɹ ɝɨɪɹɱɢɦ.
ɈȼɈɓɂ ɋ ɌɍɇɐɈɆ
ɂɧɝɪɟɞɢɟɧɬɵ:
ɡɚɦɨɪɨɠɟɧɧɵɟ ɨɜɨɳɢ - 1 ɤɝ
ɜɨɞɚ - 50 ɦɥ
ɬɭɧɟɰ ɜ ɦɚɪɢɧɚɞɟ - 3 ɛɚɧɤɢ
ɫɨɥɶ
ɪɚɫɬɢɬɟɥɶɧɨɟ ɦɚɫɥɨ - 2 ɫɬ.ɥ.
ɋɩɨɫɨɛ ɩɪɢɝɨɬɨɜɥɟɧɢɹ:
Ɋɚɡɦɨɪɨɡɶɬɟ ɨɜɨɳɢ.
ɉɨɦɟɫɬɢɬɟ ɜɫɟ
ɢɧɝɪɟɞɢɟɧɬɵ ɜɤɚɫɬɪɸɥɸ.
ȼɤɥɸɱɢɬɟ ɩɪɨɝɪɚɦɦɭ Ɍɍ
ɒȿɇɂȿ 40 ɦɢɧɭɬ.
ɄɊȺɋɇɕɃ ɉȿɊȿɐ ɎȺɊɒɂɊɈȼȺɇɇɕɃ
ɂɧɝɪɟɞɢɟɧɬɵ:
ɤɪɚɫɧɵɣ ɩɟɪɟɰ - 4 ɲɬ.
ɛɟɥɨɟ ɜɢɧɨ - 1 ɦɟɪɧɵɣ ɫɬɚɤɚɧ
ɦɹɫɧɨɣ ɮɚɪɲ - 500 ɝ
ɜɟɬɱɢɧɚ ɢɥɢ ɛɟɤɨɧ - 100 ɝ
ɪɚɫɬɢɬɟɥɶɧɨɟ ɦɚɫɥɨ - 4 ɫɬ.ɥ.
ɛɟɥɵɣ ɩɟɪɟɰɩɨ ɜɤɭɫɭ
ɫɨɥɶ
ɋɩɨɫɨɛ ɩɪɢɝɨɬɨɜɥɟɧɢɹ:
ȼɵɦɨɣɬɟ ɩɟɪɰɵ, ɭɞɚɥɢɬɟ ɯɜɨɫɬɢɤɢ, ɫɟɪɞɰɟɜɢɧɭ ɢ ɫɟɦɟɧɚ
Ɏɚɪɲ ɩɨɫɨɥɢɬɟ,ɩɨɩɟɪɱɢɬɟ ɢ ɫɦɟɲɚɣɬɟ ɟɝɨ ɫ ɜɟɬɱɢɧɨɣ.
Ɂɚɩɨɥɧɢɬɟ ɩɟɪɰɵ ɩɨɥɭɱɢɜɲɟɣɫɹ ɫɦɟɫɶɸ
ɢɩɨɦɟɫɬɢɬɟ ɢɯ ɜɤɚɫɬɪɸɥɸ
ɨɬɤɪɵɬɨɣ ɱɚɫɬɶɸ ɜɜɟɪɯ.
ɉɨɥɟɣɬɟ ɩɟɪɰɵ ɪɚɫɬɢɬɟɥɶɧɵɦ ɦɚɫɥɨɦ ɢ ɛɟɥɵɦ ɜɢɧɨɦ.
ȼɤɥɸɱɢɬɟ ɩɪɨɝɪɚɦɦɭ ȼɕɉȿɑɄȺ (4 0 ɦɢɧɭɬ).
ɄȺɊɌɈɎȿɅɖ ɋ ɄɈɅȻȺɋɈɃ
ɂɧɝɪɟɞɢɟɧɬɵ:
ɤɚɪɬɨɮɟɥɶ - 800 ɝ
ɫɜɢɧɚɹ ɤɨɩɱɟɧɚɹ ɤɨɥɛɚɫɚ - 200 ɝ
ɲɩɢɤ - 50 ɝ
ɥɭɤ ɪɟɩɱɚɬɵɣ - 200 ɝ
ɩɟɪɟɰ - 1 ɱ.ɥ.
ɱɟɫɧɨɤ - 2 ɡɭɛɰɚ
ɩɨɪɨɲɨɤ ɩɚɩɪɢɤɢ - 2 ɱ.ɥ.
ɫɨɥɶ
ɜɨɞɚ - 3 ɦɟɪɧɵɯ ɫɬɚɤɚɧɚ
ɋɩɨɫɨɛ ɩɪɢɝɨɬɨɜɥɟɧɢɹ:
ɇɚɪɟɡɚɬɶɤɚɪɬɨɮɟɥɶ ɤɭɛɢɤɚɦɢ, ɤɨɥɛɚɫɭ - ɬɨɥɫɬɵɦɢɥɨɦɬɢɤɚɦɢ.
ɉɨɦɟɫɬɢɬɟ ɜɫɟ ɢɧɝɪɟɞɢɟɧɬɵ ɜɤɚɫɬɪɸɥɸ
Ɂɚɩɭɫɬɢɬɟ
ɩɪɨɝɪɚɦɦɭ Ɍɍɒȿɇɂȿ.
ȺɊɌɂɒɈɄɂ ɋɈ ɋȼɂɇɂɇɈɃ
ɂɧɝɪɟɞɢɟɧɬɵ:
ɚɪɬɢɲɨɤɢ -16 ɲɬ.
ɥɢɦɨɧ - 1 ɲɬ.
ɱɟɫɧɨɤ - 4 ɡɭɛɰɚ
ɦɹɬɚ - 2 ɥɢɫɬɚ
ɲɚɮɪɚɧ - 1 ɱ.ɥ.
ɮɢɥɟ ɫɜɢɧɢɧɵ - 300 ɝ
ɫɨɥɶ
ɪɚɫɬɢɬɟɥɶɧɨɟ ɦɚɫɥɨ
ɜɢɧɨ - 100 ɦɥ
ɦɭɤɚ - 1 ɫɬ.ɥ.
ɜɨɞɚ - 1 ɥ (ɞɥɹ ɚɪɬɢɲɨɤɨɜ)
ɦɹɫɧɨɣ ɛɭɥɶɨɧ - 25 0 ɦɥ
ɫɚɯɚɪ - 1 ɱ.ɥ.
ɋɩɨɫɨɛ ɩɪɢɝɨɬɨɜɥɟɧɢɹ:
ɉɨɱɢɫɬɢɬɟ ɚɪɬɢɲɨɤɢ, ɨɬɜɚɪɢɬɟ ɢɯ ɜ ɩɨɞɫɨɥɟɧɧɨɣ ɜɨɞɟ ɫ
ɢɡɦɟɥɶɱɟɧɧɵɦ ɥɢɦɨɧɨɦ ɢ ɫɚɯɚɪɨɦ, ɢɫɩɨɥɶɡɭɹ ɩɪɨɝɪɚɦɦɭ ɉȺɊ 15
ɦɢɧɭɬ. ȼɵɥɨɠɢɬɟ ɜ ɨɬɞɟɥɶɧɭɸ ɩɨɫɭɞɭ.
Ɂɚɩɭɫɬɢɬɟ ɩɪɨɝɪɚɦɦɭ ȼɕɉȿɑɄȺ, ɨɛɠɚɪɶɬɟ ɧɚɪɟɡɚɧɧɵɣɩɨɥɨɫɤɚɦɢ
ɱɟɫɧɨɤ ɢ ɮɢɥɟ.
Ⱦɨɛɚɜɶɬɟ ɲɚɮɪɚɧ ɢ ɦɭɤɭ, ɩɟɪɟɦɟɲɚɣɬɟ ɢ ɬɭɲɢɬɟ, ɢɫɩɨɥɶɡɭɹ
ɩɪɨɝɪɚɦɦɭ Ɍɍɒȿɇɂȿ. ɑɟɪɟɡ 20 ɦɢɧɭɬɡɚɥɟɣɬɟ ɜɢɧɨɦ ɢ ɦɹɫɧɵɦ
ɛɭɥɶɨɧɨɦ.
Ⱦɨɛɚɜɶɬɟ ɧɚɪɟɡɚɧɧɵɟ ɤɭɛɢɤɚɦɢ ɚɪɬɢɲɨɤɢ ɢ ɥɢɫɬɶɹ ɦɹɬɵ. Ⱦɨɠ ɞɢɬɟɫɶ
ɡɚɜɟɪɲɟɧɢɹ ɩɪɨɝɪɚɦɦɵ Ɍɍɒȿɇɂȿ.
48 49
Page 27

РУССКИЙ РУССКИЙ
ɆɈɊɋɄɈɃ ɋɍȾȺɄ ɋ ɒȺɆɉɂɇɖɈɇȺɆɂ
ɂɧɝɪɟɞɢɟɧɬɵ:
ɦɨɪɫɤɨɣ ɫɭɞɚɤ - 600 ɝ
ɫɨɤ 2 ɥɢɦɨɧɨɜ
ɥɭɤ ɪɟɩɱɚɬɵɣ - 1 ɲɬ. (ɫɪɟɞɧɟɝɨ ɪɚɡɦɟɪɚ)
ɱɟɫɧɨɤ - 2 ɡɭɛɰɚ
ɫɵɪ (ɬɜɟɪɞɵɣ) - 50 ɝ
ɲɚɦɩɢɧɶɨɧɵ ɫɜɟɠɢɟ - 100 ɝ
ɫɨɥɶ ɢ ɩɟɪɟɰ
ɋɩɨɫɨɛ ɩɪɢɝɨɬɨɜɥɟɧɢɹ:
Ɉɱɢɫɬɢɬɶ ɫɭɞɚɤɚ ɨɬ ɱɟɲɭɢ ɢɩɨɪɟɡɚɬɶ ɧɚ ɤɭɫɤɢ. ɉɨɫɨɥɢɬɶ. Ʌɭɤ ɢ
ɱɟɫɧɨɤ ɦɟɥɤɨ ɩɨɪɭɛɢɬɶ. ȼɤɚɫɬɪɸɥɸ ɧɚɥɢɬɶ ɦɚɫɥɨ ɢ ɨɛɠɚɪɢɬɶ ɥɭɤ ɢ
ɱɟɫɧɨɤ ɧɚ ɩɪɨɝɪɚɦɦɟ ȼɕɉȿɑɄȺ 5 ɦɢɧɭɬ.
ɉɨɥɨɠɢɬɶ ɪɵɛɭ,
ɝɪɢɛɵ,ɩɨɥɢɬɶ ɫɨɤɨɦ ɥɢɦɨɧɚ
ɍɫɬ ɚɧɨ ɜɢɬ
ɶ ɩɪɨɝɪɚɦɦɭ ɉȺɊ ɧɚ 15 ɦɢɧɭɬ.
Ƚɨ ɬ ɨ ɜ ɨ ɟ ɛɥɸɞɨ ɨɛɫɵɩɚɬɶ ɬɟɪɬɵɦ ɬɜɟɪɞɵɦ ɫɵɪɨɦ.
ɅɈɋɈɋɖ ɋ ɋɕɊɈɆ
ɂɧɝɪɟɞɢɟɧɬɵ:
ɥɨɫɨɫɶ - 500 ɝ
ɩɨɦɢɞɨɪɵ - 2 ɲɬ. (ɫɪɟɞɧɢɣ ɪɚɡɦɟɪ)
ɦɨɥɨɬɵɣ ɱɟɪɧɵɣ ɩɟɪɟɰ - ɳɟɩɨɬɤɚ
ɪɚɫɬɢɬɟɥɶɧɨɟ ɦɚɫɥɨ - 4 ɫɬ.ɥ.
ɫɨɥɶ
ɫɵɪ - 5 ɥɨɦɬɢɤɨɜ
ɦɚɣɨɪɚɧ
ɋɩɨɫɨɛ ɩɪɢɝɨɬɨɜɥɟɧɢɹ:
Ʌɨɫɨɫɶ ɩɪɨɦɵɬɶ, ɨɛɫɭɲɢɬɶ ɩɨɥɨɬɟɧɰɟɦ ɢɩɨɪɟɡɚɬɶ ɥɨɦɬɢɤɚɦɢ.
ɉɨɦɢɞɨɪ ɩɨɪɟɡɚɬɶ ɤɪɭɠɨɱɤɚɦɢ.
ɉɨɥɨɠɢɬɟ ɜɤɚɫɬɪɸɥɸ ɧɚɪɟɡɚɧɧɵɣ ɤɪɭɠɨɱɤɚɦɢɩɨɦɢɞɨɪ. ɉɨɫɨɥɢɬɟ ɢ
ɩɨɥɟɣɬɟ ɪɚɫɬɢɬɟɥɶɧɵɦ ɦɚɫɥɨɦ.
ɉɨɜɟɪɯ ɧɟɝɨ ɩɨɥɨɠɢɬɟ ɥɨɫɨɫɶ, ɫɵɪ ɢ ɧɟɦɧɨɝɨ ɦɚɣɨɪɚɧɚ
Ɂɚɩɭɫɬɢɬɟ ɩɪɨɝɪɚɦɦɭ ɋɍɉ ɧɚ 30- 40 ɦɢɧɭɬ.
ɎɈɊȿɅɖ ɋ ɅɂɆɈɇɈɆ
ɂɧɝɪɟɞɢɟɧɬɵ:
ɮɨɪɟɥɶ (ɰɟɥɚɹ) - 4 ɲɬ.
ɱɟɪɧɵɣ ɩɟɪɟɰ
ɫɨɥɶ
ɪɚɫɬɢɬɟɥɶɧɨɟ ɦɚɫɥɨ - 4 ɫɬ.ɥ.
ɥɢɦɨɧ - 3 ɲɬ.
ɩɟɬɪɭɲɤɚ - 1 ɩɭɱɨɤ
ɋɩɨɫɨɛ ɩɪɢɝɨɬɨɜɥɟɧɢɹ:
2 ɥɢɦɨɧɚ ɩɨɪɟɡɚɬɶ ɧɚ ɤɪɭɠɨɱɤɢ. ɂɡ ɬɪɟɬɶɟɝɨ ɥɢɦɨɧɚ ɜɵɞɚɜɢɬɶ ɫɨɤ.
ɉɨɱɢɫɬɢɬɶ ɮɨɪɟɥɶ, ɫɞɟɥɚɬɶ ɩɪɨɞɨɥɶɧɵɣ ɪɚɡɪɟɡ ɜɤɚɠ ɞɨɣ ɪɵɛɟ,
ɩɨɥɨɠɢɬɶ
ɜɧɭɬɪɶ ɫɨɥɶ, ɩɟɪɟɰ ɢ 1/2 ɩɭɱɤɚ ɩɪɟɞɜɚɪɢɬɟɥɶɧɨ
ɢɡɦɟɥɶɱɟɧɧɨɣ ɩɟɬɪɭɲɤɢ.
ɋɞɟɥɚɬɶ ɞɢɚɝɨɧɚɥɶɧɵɟ ɧɚɞɪɟɡɵ, ɜɤɚɠɞɵɣ ɜɨɬɤɧɭɬɶ ɩɨ ɞɨɥɶɤɟ
ɥɢɦɨɧɚ
Ⱦɨɛɚɜɢɬɶ ɪɚɫɬɢɬɟɥɶɧɨɟ ɦɚɫɥɨ ɜɤɚɫɬɪɸɥɸ,ɩɨɥɨɠɢɬɶ ɬɭɞɚ ɮɨɪɟɥɶ ɢ
ɩɨɥɢɬɶ ɥɢɦɨɧɧɵɦ ɫɨɤɨɦ.
Ɂɚɩɭɫɬɢɬɶ ɩɪɨɝɪɚɦɦɭ ȼɕɉȿɑɄȺ (40 ɦɢɧɭɬ).
ɎȺɋɈɅɖ ɋ ɄɊȺɋɇɕɆ ȼɂɇɈɆ
ɂɧɝɪɟɞɢɟɧɬɵ:
ɤɪɚɫɧɚɹ ɮɚɫɨɥɶ - 400 ɝ
ɫɜɢɧɢɧɚ (ɮɢɥɟ) - 250 ɝ
ɤɪɚɫɧɨɟ ɜɢɧɨ - 200 ɦɥ
ɪɟɩɱɚɬɵɣ ɥɭɤ - 1 ɲɬ.
(ɫɪɟɞɧɟɝɨ ɪɚɡɦɟɪɚ)
ɱɟɫɧɨɤ - 2 ɡɭɛɰɚ
1 ɥɚɜɪɨɜɵɣ ɥɢɫɬ
ɜɨɞɚ
- 1 ɥ
ɨɥɢɜɤɨɜɨɟ ɦɚɫɥɨ - 3 ɫɬ.ɥ.
ɫɨɥɶ
ɋɩɨɫɨɛ ɩɪɢɝɨɬɨɜɥɟɧɢɹ:
Ɂɚɦɨɱɢɬɶ ɮɚɫɨɥɶ ɧɚ ɧɨɱɶ. ɋɥɢɬɶ ɜɨɞɭ ɩɟɪɟɞ ɝɨɬɨɜɤɨɣ.
Ʌɭɤ, ɱɟɫɧɨɤ ɨɱɢɫɬɢɬɶ ɢ ɧɚɲɢɧɤɨɜɚɬɶ. Ɇɹɫɨ ɧɚɪɟɡɚɬɶ ɤɭɫɨɱɤɚɦɢ
ɪɚɡɦɟɪɨɦ ɫɛɨɥɶɲɨɣ ɩɚɥɟɰ.
ȼɤɚɫɬɪɸɥɸ ɧɚɥɢɬɶ ɜɨɞɵ, ɞɨɛɚɜɢɬɶ ɜɢɧɨ,ɩɨɥɨɠɢɬɶ ɜɫɟ
ɢɧɝɪɟɞɢɟɧɬɵ.
ȼɤɥɸɱɢɬɶ ɩɪɨɝɪɚɦɦɭ Ɍɍɒȿɇɂȿ.
50 51
Page 28

РУССКИЙ РУССКИЙ
МАКАРОНЫ С БЕКОНОМ
Ингредиенты:
макароны - 250 г
вода - 300 мл
помидоры - 200 г
белое вино - 50 мл
репчатый лук - 150 г
бекон - 150 г
оливковое масло - 7 ст.л.
соль
Способ приготовления:
Помидоры порезать на дольки и пожарить в 4 ст.л. оливкового
масла. Бекон порезать на кусочки
Положить все ингредиенты в кастрюлю и установить программу
СУП на 30-40 минут.
ТУРЕЦКИЙ ГОРОХ (НУТ) ПО-
КАТАЛОНСКИ
Ингредиенты:
свиная колбаса - 150 г
репчатый лук - 1 шт. (среднего размера)
турецкий горох (нут) - 500 г
яйца - 4 шт.
шпик - 50 г
молотый черный перец - щепотка
кедровые орехи - 50 г
помидоры- 4 шт. (среднего размера)
соль
вода
Способ приготовления:
Замочить горох на ночь (12-14 часов). Слить воду перед готовкой и
промыть в холодной воде.
Яйца отварить вкрутую, остудить. Лук очистить и измельчить
. Шпик
измельчить. Помидоры обдать кипятком, снять кожицу и нарезать
кусочками.
В кастрюлю положить шпик и установить программу ВЫПЕЧК А.
Дать салу подтаять и обжарить на нем лук до золотистого цвета,
добавить помидоры, кедровые орешки и колбасу. Добавить НУТ.
Поперчить, посолить. Залить водой так, чтобы вода покрывала
продукты на 5 см. Уст ано вить программу
ТУШЕНИЕ.
Блюдо подается с вареными яйцами, предварительно порезанными
на дольки.
ГОВЯДИНА МАРИНОВАННАЯ «ОСОБАЯ»
Ингредиенты:
говядина - 1 кг
картофель - 8 клубней
масло растительное - 4 ст.л.
бульон - 375 мл
3% уксус - 120 мл
вода - 500 мл
лимон -1 шт.
лавровый лист - 4 шт.
соль
черный перец - 8 горошин
Способ приготовления:
Приготовить маринад: смешать уксус, воду, соль, лавровые листья,
черный перец и вскипятить.
Замариновать говядину
в маринаторе VES electric (модели VMR-
10/11/12).
Го т о в ы й продукт нарезать полосками 2,5 см и обжарить на
растительном масле на программе ВЫПЕЧКА.
Затем обжаренное мясо уложить в кастрюлю, туда же положить
очищенный картофель, 3 кружочка лимона без зерен и без кожи и
влить бульон. Ту ш и т ь на программе ТУШЕНИЕ 60 минут.
РУЛЕТИКИ, ФАРШИРОВАННЫЕ ГРИБАМИ
Ингредиенты:
говядина - 1 кг
лук репчатый - 1 шт.
грибы (отварные или соленые) - 150 г
шпик- 50 г
масло растительное - 3 ст.л.
вода - 375 мл (можно грибной отвар)
мука пшеничная - 1 ст.л.
сметана - 2 ст.л.
томатный соус, зелень петрушки, соль, черный молотый перец
Способ приготовления:
Лук и грибы мелко нарезать, зелень нашинковать.
Го в я д и н у промыть и подсушить на полотенце.
Го в я д и н у разрезать на куски и отбить,
каждый кусочек посолить и
поперчить.
52 53
Page 29

РУССКИЙ РУССКИЙ
ȼ ɫɟɪɟɞɢɧɭɤɚɠɞɨɝɨ ɤɭɫɨɱɤɚ ɩɨɥɨɠɢɬɶ ɫɦɟɫɶ ɢɡ ɥɭɤɚ ɝɪɢɛɨɜ ɢ
ɡɟɥɟɧɢ, ɡɚɜɟɪɧɭɬɶ ɜ ɪɭɥɟɬ ɢ ɨɛɜɹɡɚɬɶ ɧɢɬɤɨɣ.
ȼɤɚɫɬɪɸɥɸ ɧɚɥɢɬɶ ɦɚɫɥɚ ɢ ɜɵɛɪɚɬɶ ɩɪɨɝɪɚɦɦɭ ȼɕɉȿɑɄȺ.
Ɉɛɠɚɪɢɬɶ ɪɭɥɟɬɢɤɢ ɫ ɨɛɟɢɯ ɫɬɨɪɨɧ,ɩɨɞɥɢɬɶ ɜɨɞɭ ɢɥɢ ɨɬɜɚɪ,
ɜɵɛɪɚɬɶ ɩɪɨɝɪɚɦɦɭ Ɍɍɒȿɇɂȿ 60 ɦɢɧɭɬ.
Ƚɨ ɬ ɨ ɜ ɵ ɟ ɪɭɥɟɬɢɤɢ ɜɵɧɭɬɶ, ɧɢɬɤɢ ɭɞɚɥɢɬɶ. ȼ ɨɬɜɚɪ, ɝɞɟ ɬɭɲɢɥɢɫɶ
ɪɭɥɟɬɵ, ɞɨɛɚɜɢɬɶ ɦɭɤɭ ɢ ɬɨɦɚɬɧɵɣ ɫɨɭɫ. ȿɫɥɢ
ɨɫɬɚɥɢɫɶ ɝɪɢɛɵ,
ɥɭɤ ɢ ɡɟɥɟɧɶ,ɢɯ ɬɨɠɟ ɧɟɨɛɯɨɞɢɦɨ ɩɨɥɨɠɢɬɶ ɜ ɫɨɭɫ ɢ ɩɪɨɤɢɩɹ
ɬɢɬɶ
ɧɚ ɩɪɨɝɪɚɦɦɟ ɉȺɊ 15 ɦɢɧɭɬ, ɜ ɤɨɧɰɟɡɚ 2 ɦɢɧɭɬɵ ɞɨ ɨɤɨɧɱɚɧɢɹ
ɞɨɛɚɜɢɬɶ ɫɦɟɬɚɧɭ.
Ɋɭɥɟɬɢɤɢɩɨɥɢɬɶ ɫɨɭɫɨɦ ɢɩɨɞɚɜɚɬɶ ɫ ɠɚɪɟɧɵɦ ɢɥɢ ɨɬɜɚɪɧɵɦ
ɤɚɪɬɨɮɟɥɟɦ, ɬɭɲɟɧɵɦɢ ɨɜɨɳɚɦɢ.
ɑɈɊȻȺ (ɪɭɦɵɧɫɤɨɟ ɛɥɸɞɨ)
ɂɧɝɪɟɞɢɟɧɬɵ:
ɫɜɢɧɢɧɚ - 500 ɝ
ɹɣɰɨ - 2 ɲɬ.
ɪɢɫ - 3 ɫɬ.ɥ.
ɤɚɩɭɫɬɚ (ɤɜɚɲɟɧɚɹ ɢɥɢ ɤɢɫɥɚɹ) - 250 ɝ
ɨɜɨɳɢ - 750 ɝ
ɩɨɦɢɞɨɪɵ
- 2 ɲɬ (ɫɪɟɞɧɟɝɨ ɪɚɡɦɟɪɚ)
ɡɟɥɟɧɶ ɩɟɬɪɭɲɤɢ
ɫɨɥɶ
ɜɨɞɚ - 250 ɦɥ
Ɉɜɨɳɢ ɦɨɪɤɨɜɶ - 1 ɲɬ., ɤɨɪɟɧɶ ɩɟɬɪɭɲɤɢ - 1 ɲɬ., ɤɨɥɶɪɚɛɢ,
ɤɚɪɬɨɮɟɥɶ - 2 ɤɥɭɛɧɹ, ɥɭɤ ɪɟɩɱɚɬɵɣ - 1 ɲɬ., ɫɬɪɭɱɤɨɜɵɣ ɩɟɪɟɰ
(ɦɨɠɧɨɡɚɦɟɧɢɬɶ ɫɥɚɞɤɢɦ ɢɥɢ ɛɨɥɝɚɪɫɤɢɦ ɩɟɪɰɟɦ) -2 ɲɬ., ɬɵɤɜɚ -
150 ɝ, ɰɜɟɬɧɚɹ ɤɚɩɭɫɬɚ
ɋɩɨɫɨɛ ɩɪɢɝɨɬɨɜɥɟɧɢɹ:
Ɉɜɨɳɢ ɨɱɢɫɬɢɬɶ ɢ ɦɟɥɤɨ ɧɚɪɟɡɚɬɶ. Ɇɹɫɨ ɧɚɪɟɡɚɬɶ ɤɭɛɢɤɚɦɢ 2*2 ɫɦ
ȼɤɚɫɬɪɸɥɸ ɜɵɥɨɠɢɬɶ ɦɹɫɨ, ɨɜɨɳɢ, ɤɢɫɥɭɸɤɚɩɭɫɬɭ,ɩɨɫɨɥɢɬɶ,
ɜɥɢɬɶ 250 ɦɥ ɜɨɞɵ
ɢ ɬɭɲɢɬɶ ɧɚ ɩɪɨɝɪɚɦɦɟ Ɍɍɒȿɇɂȿ 45 ɦɢɧɭɬ.
ȼ ɤɨɧɰɟ ɬɭɲɟɧɢɹ ɞɨɛɚɜɢɬɶ ɩɨɦɢɞɨɪɵ (ɩɨɪɟɡɚɧɧɵɟ ɤɭɫɨɱɤɚɦɢ) ɢ
ɩɨɞɤɢɫɥɢɬɶɤɚɩɭɫɬɧɵɦ ɫɨɤɨɦ. Ɍɭɲɢɬɶ ɟɳɟ 20 ɦɢɧɭɬ, ɞɨ ɝɨɬɨɜɧɨɫɬɢ.
ɋȼɂɇɂɇȺ ɋ ɊɂɋɈɆ ɂ ɉɈɆɂȾɈɊȺɆɂ
ɂɧɝɪɟɞɢɟɧɬɵ:
ɫɜɢɧɢɧɚ - 500 ɝ
ɪɢɫ - 250 ɝ (ɛɟɥɵɣ ɞɥɢɧɧɨɡɟɪɧɵɣ)
ɫɥɢɜɨɱɧɨɟ ɦɚɫɥɨ - 50 ɝ
ɥɭɤ ɪɟɩɱɚɬɵɣ - 250 ɝ
ɫɥɚɞɤɢɣ ɩɟɪɟɰ - 1 ɲɬ.
ɩɨɦɢɞɨɪɵ - 500 ɝ
ɛɭɥɶɨɧ - 250 ɦɥ
ɫɨɥɶ, ɱɟɪɧɵɣ ɦɨɥɨɬɵɣ ɩɟɪɟɰ
ɋɩɨɫɨɛ ɩɪɢɝɨɬɨɜɥɟɧɢɹ:
ɋɜɢɧɢɧɭ ɧɚɪɟɡɚɬɶ ɤɭɛɢɤɚɦɢ
2*2 ɫɦ. ɉɨɦɢɞɨɪɵ ɨɛɞɚɬɶ ɤɢɩɹɬɤɨɦ ɢ
ɨɱɢɫɬɢɬɶ ɨɬ ɤɨɠɢɰɵ, ɭɞɚ ɥɢɬɶ ɫɟɪɞɰɟɜɢɧɭ ɢ ɪɚɡɪɟɡɚɬɶ ɧɚ ɱɟɬɵɪɟ
ɱɚɫɬɢ. ȼ ɫɥɚɞɤɨɦ ɩɟɪɰɟ ɭɞɚɥɢɬɶ ɫɟɪɞɰɟɜɢɧɭ ɢ ɫɟɦɟɧɚ ɢɩɨɪɟɡɚɬɶ
ɤɭɛɢɤɚɦɢ. Ʌɭɤ ɨɱɢɫɬɢɬɶ ɢɩɨɪɟɡɚɬɶ ɤɪɭɩɧɵɦɢɥɨɦɬɢɤɚɦɢ.
ȼɤɚɫɬɪɸɥɸ ɩɨɥɨɠɢɬɶ ɫɥɢɜɨɱɧɨɟ ɦɚɫɥɨ ɢ ɭɫɬɚɧɨɜɢɬɶ ɩɪɨɝɪɚɦɦɭ
ȼɕɉȿɑɄȺ. ȼ ɦɚɫɥɟ ɨɛɠɚɪɢɬɶ ɫɜɢɧɢɧɭ, ɞɨ ɨɛɪɚɡɨɜɚɧɢɹ
ɤɨɪɢɱɧɟɜɚɬɨɣ ɤɨɪɨɱɤɢ, ɡɚɬɟɦ ɞɨɛɚɜɢɬɶ ɥɭɤ ɢ ɫɥɚɞɤɢɣ ɩɟɪɟɰ ɢ
ɨɛɠɚɪɢɬɶ 8-10 ɦɢɧɭɬ.
ɉɨɫɨɥɢɬɶ ɢ ɩɨɩɟɪɱɢɬɶ ɩɨ ɜɤɭɫɭ, ɜɥɢɬɶ ɛɭɥɶɨɧ,
ɞɨɛɚɜɢɬɶ ɩɨɦɢɞɨɪɵ ɢ ɩɪɨɦɵɬɵɣ ɪɢɫ. ɍɫ ɬɚɧɨɜ ɢɬɶ ɩɪɨɝɪɚɦɦɭ ɋɍɉ ɧɚ
40 ɦɢɧɭɬ
ɁȺɉȿɑȿɇɇɕɃ ɐɕɉɅȿɇɈɄ
ɂɧɝɪɟɞɢɟɧɬɵ:
ɰɵɩɥɟɧɨɤ - 1 ɲɬ.
ɤɚɪɬɨɮɟɥɶ - 4 ɤɥɭɛɧɹ
ɪɟɩɱɚɬɵɣ ɥɭɤ - 3 ɲɬ. (ɫɪɟɞɧɟɝɨ ɪɚɡɦɟɪɚ)
ɛɭɥɶɨɧ - 2 ɤɭɛɢɤɚ
ɫɢɞɪ - 1/2 ɥ
ɛɪɟɧɞɢ - 1 ɦɟɪɧɵɣ ɫɬɚɤɚɧ
ɜɨɞɚ - 400 ɦɥ
ɋɩɨɫɨɛ ɩɪɢɝɨɬɨɜɥɟɧɢɹ:
ɐɵɩɥɟɧɤɚ ɩɨɦɵɬɶ ɢ ɪɚɡɪɟɡɚɬɶ ɧɚ ɤɭɫɤɢ. Ʉɚɪɬɨɮɟɥɶ ɩɨɱɢɫɬɢɬɶ ɢ
ɩɨɪɟɡɚɬɶ ɬɨɥɫɬɵɦɢɥɨɦɬɢɤɚɦɢ. Ʌɭɤɩɨɱɢɫɬɢɬɶ ɢɩɨɪɟɡɚɬɶ ɤɨɥɶɰɚɦɢ.
Ȼɭɥɶɨɧɧɵɟ ɤɭɛɢɤɢ ɪɚɡɜɟɫɬɢ ɜɨɞɨɣ.
ɉɨɦɟɫɬɢɬɶ ɜɤɚɫɬɪɸɥɸɤɚɪɬɨɮɟɥɶ,ɩɨɜɟɪɯɤɚɪɬɨɮɟɥɹ - ɥɭɤ,ɩɨɜɟɪɯ
ɥɭɤɚ - ɰɵɩɥɟɧɤɚ
Ɂɚɥɢɬɶ ɛɭɥɶɨɧɨɦ, ɞɨɛɚɜɢɬɶ ɫɢɞɪ, ɛɪɟɧɞɢ ɢɡɚɩɭɫɬɢɬɶ ɩɪɨɝɪɚɦɦɭ
ȼɕɉȿɑɄȺ.
5554
Page 30

РУССКИЙ РУССКИЙ
РАГ У ИЗ ТЕЛЯТИНЫ С ШАМПИНЬОНАМИ
Ингредиенты:
телятина - 1 кг (используйте
говяжью вырезку)
гвоздика - 3 соцветия
(не измельчать)
сладкий перец - 1 шт.
репчатый лук - 1 шт.
(среднего размера)
чеснок - 2 зубца
шампиньоны - 400 г
томатный соус - 3-4 ст.л.
зеленый горошек - 1 банка (260 г)
кориандр (семена) - 1/2 ч.л.
растительное масло - 6 ст.л.
соль
Способ приготовления:
Лук и чеснок почистить и мелко
нарезать. Шампиньоны порезать на
4 части. Мясо порезать на кусочки 3*3 см.
В кастрюлю налить масло и пожарить лук и чеснок на программе
ВЫПЕЧКА 5 минут.
Добавить мясо и пожарить 10 минут, затем добавить остальные
ингредиенты (воду с горошка не сливать, а добавить в блюдо) и
запустить программу СУП на 40 минут.
СЛОЕНОЕ ФИЛЕ
Ингредиенты:
свинина (филе) - 1кг
лук репчатый
вяленая ветчина - 200 г
шпик - 70 г
красное вино - 1 мерный стакан
Растительное масло - 6 ст.л.
соль
Способ приготовления:
Порезать мясо кусочками с большой палец. Лук почистить и
порезать ломтиками. Ветчину нарезать кусочками, шпик - мелкими
кубиками.
В кастрюлю налить масло.
Ингредиенты закладываются в кастрюлю следующим образом:
первый слой - мясо, второй слой - лук
, третий слой - ветчина и
немного шпика.
Следующие слои следуют в том же порядке. Каждый слой
необходимо немного солить.
После размещения ингредиенты полить вином.
Уст ано вить программу ВЫПЕЧКА.
ЖАРКОЕ ИЗ ЦЫПЛЕНКА
Ингредиенты:
цыпленок - 1 шт.
свинина или бекон - 100 г
растительное масло - 6 ст.л.
чеснок - 3 зубца
помидоры - 250 г
сладкий перец - 2 шт.
красное вино - 1 мерный cтакан
Способ приготовления
:
Цыпленка разделать на части. Бекон порезать кубиками. Чеснок
почистить и измельчить. Помидоры порезать на 8 частей. Перец
очистить от сердцевины и семян, нарезать полосками.
Загрузить все ингредиенты в кастрюлю и установить программу
ТУШЕНИЕ.
КРОЛИК В КРАСНОМ ВИНЕ
Ингредиенты:
мясо кролика - 1 кг
ветчина - 200 г
репчатый лук - 200 г
коньяк - 150 мл
растительное масло - 100 мл
красное вино - 750 мл
лук
- 2 шт.
мука - 2 ч.л.
тимьян
чеснок - 2 зубца
черный перец-горошек - 8 шт.
соль
Способ приготовления:
Порезать кролика на куски. Замариновать мясо в маринаторе VES
Electric VMR-10/11/12 в коньяке с несколькими веточками тимьяна и
луком, порезанным большими кружочками.
В кастрюле на функции ВЫПЕЧКА обжарить в масле нарезанную
5756
Page 31

РУССКИЙ РУССКИЙ
ломтиками ветчину и две нарезанные кольцами луковицы до
золотистого цвета.
Затем добавить две чайных ложки муки и отменить программу
ВЫПЕЧКА.
Положить куски крольчатины и добавить вино и коньяк.
Посолить, приправить тимьяном и черным перцем. Уста нов ить
программу ТУШЕНИЕ.
КРЫЛЫШКИ ЦЫПЛЕНКА
Ингредиенты:
крылышки цыпленка - 8 шт.
лук репчатый - 2 шт. (среднего размера)
чеснок - 3 зубчика
помидоры - 1-2 шт
.
мука - 1 ст.л.
соль
мясной бульон - 100 мл (можно
использовать кубик)
растительное масло - 80-100 мл
Способ приготовления:
Крылышки промыть, обсушить, посолить. Лук и чеснок почистить
и измельчить. Помидоры обдать кипятком, снять кожицу и мелко
порезать. Бульонный кубик развести водой.
Поджарить крылышки, используя программу ВЫПЕЧКА. Когда они
поджарятся, положить их на поднос.
В масле, в
котором были поджарены крылышки, поджарить чеснок,
лук, небольшое количество помидоров и муку.
Когда все поджарится, добавить небольшое количество бульона и
довести до кипения. Полученным соусом полить крылышки.
ФИЛЕ СВИНИНЫ С АПЕЛЬСИНОМ
Ингредиенты:
филе свинины - 1 кг
соль
апельсиновый сок - 2 мерных стакана
вода - 1 мерный стакан
измельченный лук репчатый - 1 шт.
растительное масло - 1/2 мерного стакана
молотый черный
перец
Способ приготовления:
Поместить все в кастрюлю и включить программу ВЫПЕЧКА.
Когда блюдо будет готово, порезать его на ломтики и подавать
с очищенным и порезанным на кусочки апельсином.
ЦЫПЛЕНОК С ПИВОМ
Ингредиенты:
цыпленок - 1 шт.
лук репчатый - 2 шт.
темное пиво - 1 банка (330 мл)
коньяк - 1 мерный стакан
оливковое масло - 3 ст.л.
соль и перец
(черный молотый)
Способ приготовления:
Цыпленка порезать на кусочки, затем приправить солью и перцем.
Оставить на 30 минут. Лук очистить и порезать большими дольками.
Налить масло в кастрюлю и обжарить лук 5-7 минут на ВЫПЕЧКЕ.
Положить цыпленка, налить пиво и коньяк и запустить программу
ТУШЕНИЕ 80 минут.
ГРУДКА С ВИСКИ
Ингредиенты:
цыпленок - 4 грудки
виски - 1/2 мерного
стакана
шампиньоны свежие - 300 г
чеснок - 1 зубец
молоко - 200 мл
растительное масло - 80 мл
соль
перец
Способ приготовления:
Гру д к и посолить и поперчить. Чеснок почистить и измельчить.
Шампиньоны очистить и порезать полосками.
Гру д к и поджарить в масле, используя программу ВЫПЕЧК А и
извлечь в отдельную посуду. В том же самом масле потушить
измельченный чеснок с шампиньонами, используя программу
ТУШЕНИЕ (15 минут
).
По окончании тушения спрыснуть блюдо виски и добавить молока.
Положить в кастрюлю грудки, отменить программу ТУШЕНИЕ и
запустить программу ПАР (10 минут).
5958
Page 32
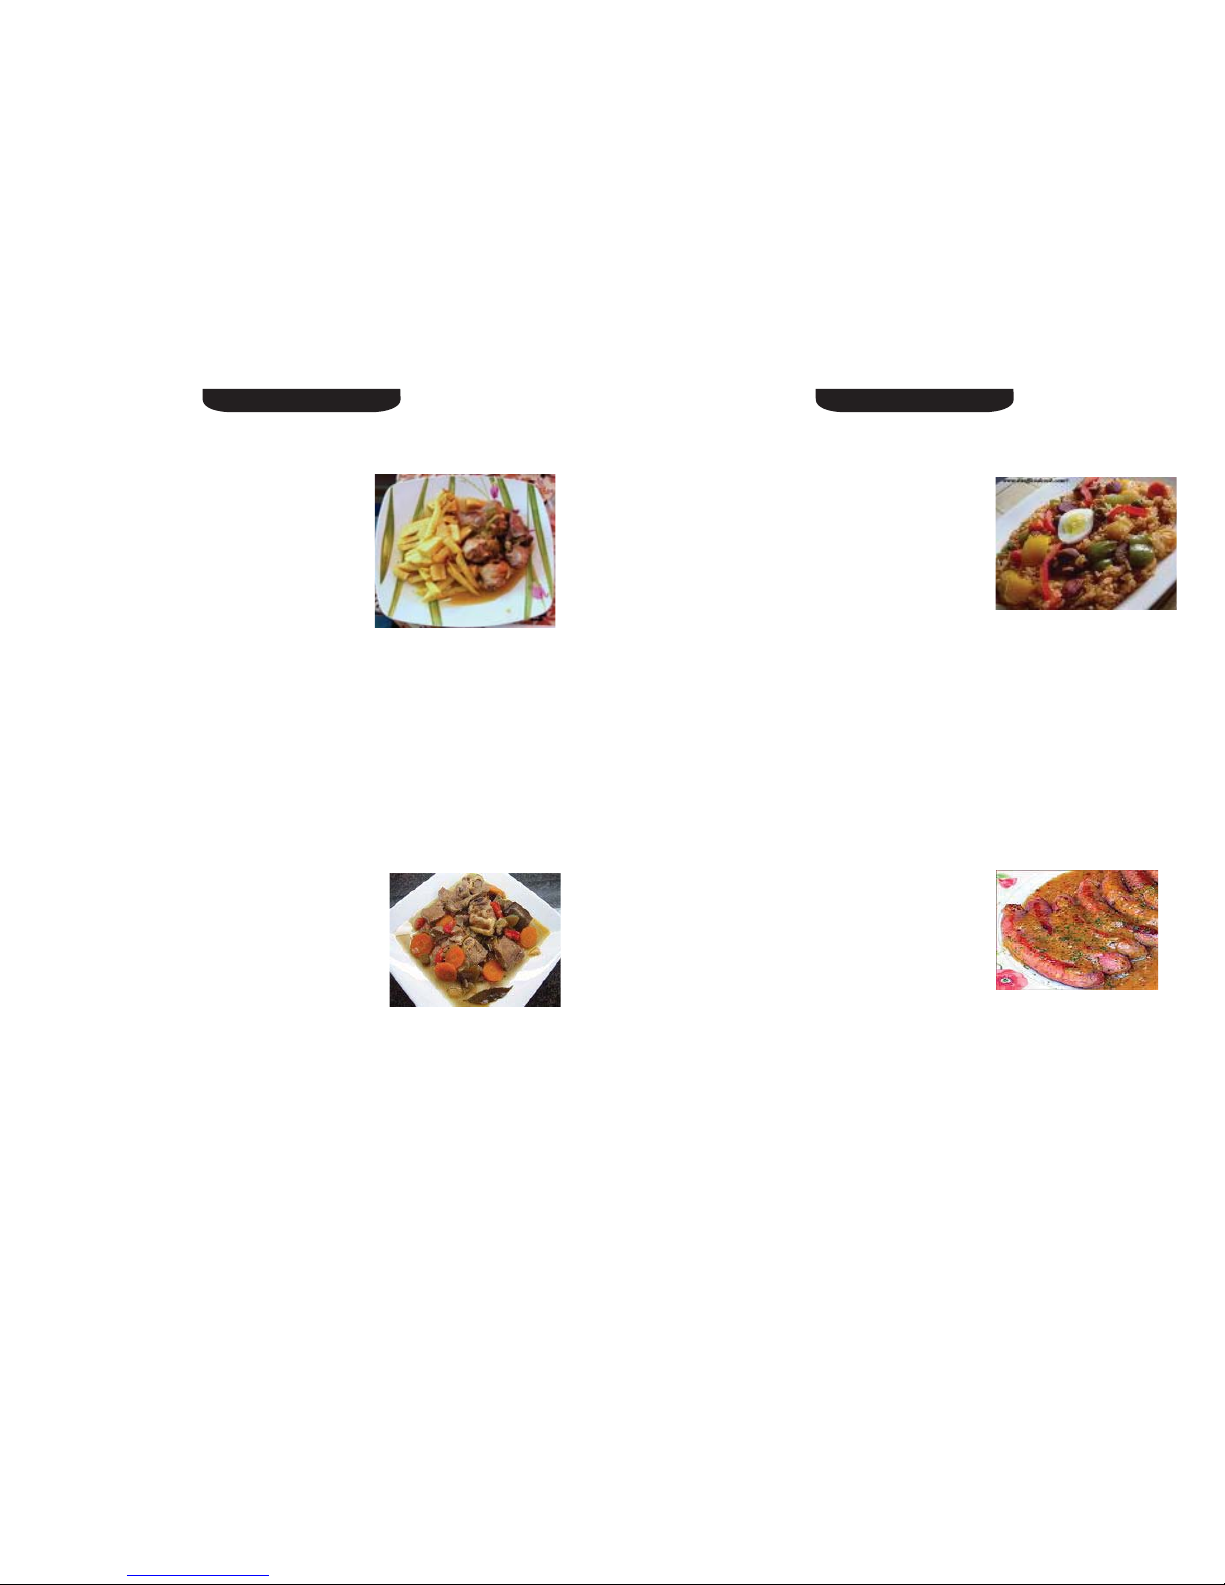
РУССКИЙ РУССКИЙ
КРОЛИК ПО-ВОСТОЧНОМУ С МИНДАЛЕМ
Ингредиенты:
растительное масло - 50 мл
чищеный миндаль - 4 ст.л.
куриный бульон - 120 мл
лук репчатый - 1 шт.
мелко измельченный кориандр
- 2 чайные ложки
молотый тмин по вкусу
мед - 2 ст.л.
ножки кролика - 4 шт.
сельдерей - 2 веточки
соль и перец по вкусу
лук- 3 шт. (среднего размера)
помидор - 2 шт.
белый виноград (без косточек) -300 г
морковь - 3 шт (небольшого
размера)
Способ приготовления:
Все овощи почистить и порезать кубиками.
В кастрюлю налить масло и обжарить кролика с луком, тмином и
миндалем на программе ПЛОВ 15 минут. По окончании положить
остальные ингредиенты (кроме винограда) и запустить программу
ТУШЕНИЕ (30 минут). За 5 минут до окончания программы
добавить виноград.
КОТЕЛОК С МЯСОМ
Ингредиенты:
баранина - 1 кг (нарезанная
кусками)
растительное масло
лук репчатый - 1 шт. (измельченный)
морковь - 2 шт. (нарезанная кружочками)
лук-порей - 1 шт. (измельченный)
мука - 1 ст.л.
томатное пюре - 1/2 мерного стакана
чеснок - 1 зубец (измельченный)
измельченная петрушка
горошек - 250 г
картофель - 250 г
соль
Способ приготовления:
Положить все ингредиенты в кастрюлю и включить программу
ТУШЕНИЕ.
ТУШЕНАЯ ГОВЯДИНА С РИСОМ
Ингредиенты:
говядина, порезанная кусками - 450 г
мука - 2
ст.л.
лук репчатый - 1 шт.
(нарезанный кольцами)
соль
помидоры - 400 г (измельченные)
черный перец
жасминовый рис - 225 г
чеснок - 1 шт. (измельченный)
растительное масло - 4-5 ст.л.
молотый красный перец - 1 ч.л.
карри - 1 ч.л.
вода - 3 мерных стакана
Способ приготовления:
Мясо посолить, поперчить и обвалять в муке.
Положить все ингредиенты и один мерный стакан воды в кастрюлю
,
за исключением риса и карри.
Включить программу ТУШЕНИЕ (30 минут).
По окончании приготовления добавить рис, 2 мерных стакана воды
и карри.
Запустить программу ПЛОВ (20 минут).
СОСИСКИ С ВИНОМ
Ингредиенты:
сосиски/ свиные колбаски - 8-10 шт.
лук репчатый - 1 шт. (среднего размера)
растительное масло - 3-4 ст.л.
красное вино -120 мл
Способ приготовления:
Нарезать луковицу полосками и обжарить в
растительном масле 5-7
минут, используя программу ВЫПЕЧКА.
Положить в кастрюлю сосиски и поджарить 5 минут, добавить вино
и жарить 15 минут.
ПЛОВ
Ингредиенты:
растительное масло - 1/2 мерного стакана (можно 1 мерный стакан
60 61
Page 33

РУССКИЙ РУССКИЙ
ɞɥɹ ɛɨɥɟɟ ɠɢɪɧɨɝɨ ɩɥɨɜɚ)
ɪɟɩɱɚɬɵɣ ɥɭɤ - 300 ɝ
ɦɨɪɤɨɜɶ - 450 ɝ
ɦɹɫɨ (ɥɸɛɨɟ) - 600 ɝ
ɠɚɫɦɢɧɨɜɵɣ ɪɢɫ - 4 ɦɟɪɧɵɯ ɫɬɚɤɚɧɚ
ɜɨɞɚ - 4 ɦɟɪɧɵɯ ɫɬɚɤɚɧɚ
ɱɟɫɧɨɤ - 1 ɝɨɥɨɜɤɚ
ɩɪɢɩɪɚɜɵ
ɫɨɥɶ ɩɨ ɜɤɭɫɭ
ɋɩɨɫɨɛ ɩɪɢɝɨɬɨɜɥɟɧɢɹ:
ɉɨɪɟɡɚɬɶ ɥɭɤ ɤɚɤ ɞɥɹ ɫɭɩɚ, ɦɨɪɤɨɜɶ ɩɨɪɟɡɚɬɶ ɫɨɥɨɦɤɨɣ, ɦɹɫɨ
ɩɨɪɟɡɚɬɶ ɤɭɛɢɤɚɦɢ 3*3 ɫɦ. Ɋɢɫ ɢ ɝɨɥɨɜɤɭ ɱɟɫɧɨɤɚ ɩɪɨɦɵɬɶ.
ȼɤɚɫɬɪɸɥɸ ɧɚɥɢɬɶ ɦɚɫɥɨ ɢ ɭɫɬɚɧɨɜɢɬɶ ɩɪɨɝɪɚɦɦɭ ɉɅɈȼ. ɉɨɥɨɠɢɬɶ
ɥɭɤ, ɦɨɪɤɨɜɶ, ɦɹɫɨ ɢ
ɫɩɟɰɢɢ ɢ ɨɛɠɚɪɢɬɶ 2
5 ɦɢɧɭɬ ɩɪɢ ɨɬɤɪɵɬɨɣ
ɤɪɵɲɤɟ,ɩɨɦɟɲɢɜɚɹ. Ɂɚɬɟɦ ɜ ɦɚɫɫɭ ɞɨɛɚɜɢɬɶ ɝɨɥɨɜɤɭ ɱɟɫɧɨɤɚ, ɪɢɫ,
ɜɨɞɭ. ɉɨɫɨɥɢɬɶ ɢɩɨɩɟɪɱɢɬɶ, ɡɚɤɪɵɬɶ ɤɪɵɲɤɭ ɢ ɝɨɬɨɜɢɬɶ 20 ɦɢɧɭɬ.
ɄȺɊɂ ɋ ɄɍɊɂɐȿɃ
ɂɧɝɪɟɞɢɟɧɬɵ:
ɤɭɪɢɧɨɟ ɮɢɥɟ - 300 ɝ
ɫɨɭɫɤɚɪɪɢ - 5 ɫɬ.ɥ.
ɩɨɦɢɞɨɪɵ ɱɟɪɪɢ - 1/2 ɤɝ
ɪɟɩɱɚɬɵɣ ɥɭɤ - 1 ɲɬ.
ɪɭɛɥɟɧɧɚɹ ɡɟɥɟɧɶ
ɋɩɨɫɨɛ ɩɪɢɝɨɬɨɜɥɟɧɢɹ:
ɉɨɪɟɡɚɬɶ ɤɭɪɢɰɭ ɧɚ ɤɭɫɨɱɤɢ, ɩɨɦɢɞɨɪɵ ɱɟɪɪɢ ɪɚɡɪɟɡɚɬɶ ɩɨɩɨɥɚɦ.
ɇɚɲɢɧɤɨɜɚɬɶ
ɪɟɩɱɚɬɵɣ ɥɭɤ.
ȼɫɟ ɢɧɝɪɟɞɢɟɧɬɵ ɩɨɦɟɫɬɢɬɶ ɜɤɚɫɬɪɸɥɸ ɢ ɠɚɪɢɬɶ ɧ
ɚ ɮɭɧɤɰɢɢ ȼɕɉȿɑɄȺ ɧɚ
25 ɦɢɧɭɬ.
ɄɍɊɂɐȺ ɌɍɒȿɇȺə ɋ ɉȿɊɅɈȼɄɈɃ
ɂɧɝɪɟɞɢɟɧɬɵ:
ɤɭɪɢɰɚ - 300 ɝ,ɩɨɪɟɡɚɧɧɚɹ ɤɭɫɨɱɤɚɦɢ
ɫɨɥɶ
ɱɟɫɧɨɤ - 1 ɡɭɛɟɰ
ɪɟɩɱɚɬɵɣ ɥɭɤ - 1 ɲɬ.
ɩɟɪɥɨɜɤɚ - 260 ɝ
ɜɨɞɚ - 800 ɦɥ
ɋɩɨɫɨɛ ɩɪɢɝɨɬɨɜɥɟɧɢɹ:
ɉɪɟɞɜɚɪɢɬɟɥɶɧɨɡɚɦɨɱɢɬɟ ɩɟɪɥɨɜɭɸ ɤɪɭɩɭ ɧɚ 8 ɱɚɫɨɜ ȼɨɞɭ ɩɟɪɟɞ
ɝɨɬɨɜɤɨɣ ɫɥɢɬɶ.
ɉɨɦɟɫɬɢɬɟ ɤɭɪɢɰɭ ɢ ɥɭɤ ɜɤɚɫɬɪɸɥɸ ɢ ɠɚɪɶɬɟ ɧɚ ɮɭɧɤɰɢɢ ȼɕɉȿɑɄȺ
15 ɦɢɧɭɬ
.
Ⱦɨɛɚɜɶɬɟ ɩɟɪɥɨɜɭɸ ɤɪɭɩɭ , ɡɚɥɟɣɬɟ ɜɨɞɨɣ. ȼɤɥɸɱɢɬɟ ɮɭɧɤɰɢɸ
ɆɈɅɈɑɇȺə ɄȺɒȺ ɧɚ 40 ɦɢɧ.
ɄɈɌɅȿɌɕ
ɂɧɝɪɟɞɢɟɧɬɵ:
ɦɹɫɧɨɣ ɮɚɪɲ - 700 ɝɪ
ɛɚɬɨɧ, ɜɵɦɨɱɟɧɧɵɣ 3-5 ɦɢɧ.
ɜ ɦɨɥɨɤɟ ɢɥɢ ɜɨɞɟ (ɦɹɤɢɲ)
ɤɚɪɬɨɮɟɥɶ (ɬɟɪɬɵɣ) - 1 ɲɬ.
ɥɭɤ (ɧɚɲɢɧɤɨɜɚɧɧɵɣ)
ɠɟɥɬɨɤ 1 ɹɣɰɚ
ɦɚɫɥɨ - 120 ɦɥ
ɫɨɥɶ
ɩɟɪɟɰ
ɋɩɨɫɨɛ ɩɪɢɝɨɬɨɜɥɟɧɢɹ:
ɋɦɟɲɚɣɬɟ ɮɚɪɲ, ɛɚɬɨɧ, ɤɚɪɬɨɮɟɥɶ, ɥɭɤ, ɹɣɰɨ.
Ⱦɨɛɚɜɶɬɟ ɦɚɫɫɭ ɜ ɮɚɪɲ, ɩɟɪɟɦɟɲɚɣɬɟ ɢ ɫɮɨɪɦɢɪɭɣɬɟ ɤɨɬɥɟɬɤɢ.
ȼɧɭɬɪɶɤɚɠɞɨɣ ɤɨɬɥɟɬɵɩɨ
ɠɟɥɚɧɢɸ ɦɨɠɧɨ ɞɨɛɚɜɢɬɶ ɤɭɫɨɱɟɤ ɫɵɪɚ
ɇɚɥɟɣɬɟ ɦɚɫɥɨ ɜɤɚɫɬɪɸɥɸ ɢ ɭɫɬɚɧɨɜɢɬɟ ɮɭɧɤɰɢɸ ȼɕɉȿɑɄ Ⱥ.
ɉɪɨɝɪɟɣɬɟ ɦɚɫɥɨ 10 ɦɢɧ.
Ɉɛɜɚɥɹɣɬɟ ɤɨɬɥɟɬɵ ɜ ɩɚɧɢɪɨɜɨɱɧɵɯ ɫɭɯɚɪɹɯ ɢ ɜɵɥɨɠɢɬɟ ɜ
ɤɚɫɬɪɸɥɸ.
ɀɚɪɶɬɟ ɞɨ ɨɛɪɚɡɨɜɚɧɢɹ ɤɨɪɨɱɤɢ.
62 63
Page 34

РУССКИЙ РУССКИЙ
ɂɧɝɪɟɞɢɟɧɬɵ:
ɦɹɫɧɨɣ ɮɚɪɲ (1/2 - ɫɜɢɧɢɧɚ,
1/2 - ɝɨɜɹɞɢɧɚ) - 500 ɝ
ɦɭɤɚ - 2 ɫɬ.ɥ.
ɤɟɬɱɭɩ ɢɥɢ ɥɸɛɨɣ ɬɨɦɚɬɧɵɣ
ɫɨɭɫ - 3 ɫɬ.ɥ.
ɫɨɥɶ (ɩɨ ɜɤɭɫɭ)
ɩɪɢɩɪɚɜɚ ɤ ɦɹɫɭ - 1/2 ɱ.ɥ.
ɪɚɫɬɢɬɟɥɶɧɨɟ ɦɚɫɥɨ - 120 ɦɥ
ɋɩɨɫɨɛ ɩɪɢɝɨɬɨɜɥɟɧɢɹ:
ɋɦɟɲɚɣɬɟ ɜɫɟ ɢɧɝɪɟɞɢɟɧɬɵ. ɋɞɟɥɚɣɬɟ ɢɡ ɝɨɬɨɜɨɝɨ ɮɚɪɲɚ ɤɨɬɥɟɬɵ ɜ
ɮɨɪɦɟ ɤɨɥɛɚɫɨɤ.
ɇɚɥɟɣɬɟ ɦɚɫɥɨ ɜ ɤɚɫɬɪɸɥɸ ɢ ɭɫɬɚɧɨɜɢɬɟ ɮɭɧɤɰɢɸ ȼɕɉȿɑɄȺ.
ɉɪɨɝɪɟɣɬɟ ɦɚɫɥɨ 10 ɦɢɧ.
ɀɚɪɶɬɟ
ɞɨ ɨɛɪɚɡɨɜɚɧɢɹ ɡɨɥɨɬɢɫɬɨɣ ɤɨɪ
ɨɱɤɢ.
ɒɍɊɉȺ (ɭɡɛɟɤɫɤɚɹ)
ɂɧɝɪɟɞɢɟɧɬɵ:
ɛɚɪɚɧɢɧɚ (ɥɨɩɚɬɤɚ) — 4 0 0-5 0 0 ɝ.
ɤɚɪɬɨɮɟɥɶ - 3 ɤɥɭɛɧɹ (ɫɪɟɞɧɟɝɨ ɪɚɡɦɟɪɚ)
ɦɨɪɤɨɜɶ - 1 ɲɬ. (ɛɨɥɶɲɚɹ)
ɩɟɪɟɰ ɫɥɚɞɤɢɣ - 1 ɲɬ. (ɫɪɟɞɧɟɝɨ ɪɚɡɦɟɪɚ)
ɩɨɦɢɞɨɪɵ — 1 ɲɬ. (ɫɪɟɞɧɟɝɨ ɪɚɡɦɟɪɚ)
ɩɟɬɪɭɲɤɚ (ɫɭɲɟɧɚɹ) -1 ɱ.ɥ.
ɭɤɪɨɩ (ɫɭɲɟɧɵɣ) - 1 ɱ.ɥ.
ɥɭɤ ɪɟɩɱɚɬɵɣ — 1 ɲɬ.
ɜɨɞɚ — 1,7 ɥ.
ɫɨɥɶ
ɱɟɪɧɵɣ ɩɟɪɟɰ (ɦɨɥɨɬɵɣ)
ɉɪɢɦɟɱɚɧɢɟ: ɫɭɲɟɧɭɸ ɡɟɥɟɧɶ ɦɨɠɧɨ ɡɚɦɟɧɢɬɶ ɫɜɟɠɟɣ
ɋɩɨɫɨɛ ɩɪɢɝɨɬɨɜɥɟɧɢɹ
:
Ɇɹɫɨ ɩɪɨɦɵɬɶ. Ɇɨɪɤ
ɨɜɶ, ɥɭɤ, ɩɟɪɟɰ ɢ ɤɚɪɬɨɮɟɥɶ ɨɱɢɫɬɢɬɶ. ȼɫɟ
ɨɜɨɳɢ ɪɚɡɪɟɡɚɬɶ ɧɚ 8 ɱɚɫɬɟɣ.
ȼ ɤɚɫɬɪɸɥɸ ɧɚɥɢɬɶ ɜɨɞɵ, ɩɨɥɨɠɢɬɶ ɦɹɫɨ ɢ ɜɵɫɬɚɜɢɬɶ ɩɪɨɝɪɚɦɦɭ
ɋɍɉ ȼɚɪɢɬɶ 50 ɦɢɧɭɬ, ɡɚɬɟɦ ɡɚɥɨɠɢɬɶ ɨɫɬɚɥɶɧɵɟ ɢɧɝɪɟɞɢɟɧɬɵ ɢ
ɝɨɬɨɜɢɬɶ ɞɨ ɨɤɨɧɱɚɧɢɹ ɩɪɨɝɪɚɦɦɵ.
ȻȺɊȺɇɂɇȺ ɌɍɒȿɇȺə ɋ ɈȼɈɓȺɆɂ
ɂɧɝɪɟɞɢɟɧɬɵ:
ɛɚɪɚɧɢɧɚ (ɦɹɤɨɬɶ)— 400 ɝ
ɥɭɤ ɪɟɩɱɚɬɵɣ — 2 ɲɬ. (ɫɪɟɞɧɟɝɨ ɪɚɡɦɟɪɚ)
ɩɨɦɢɞɨɪɵ— 2 ɲɬ. (ɫɪɟɞɧɟɝɨ ɪɚɡɦɟɪɚ)
ɦɨɪɤɨɜɶ — 2
ɲɬ. (ɫɪɟɞɧɟɝɨ ɪɚɡɦɟɪɚ)
ɤɚɪɬɨɮɟɥɶ — 8 ɤɥɭɛɧɟɣ (ɫɪɟɞɧɟɝɨ ɪɚɡɦɟɪɚ)
ɱɟɫɧɨɤ - 6 ɡɭɛɱɢɤɨɜ
ɜɨɞɚ — 600 ɦɥ
ɪɚɫɬɢɬɟɥɶɧɨɟ ɦɚɫɥɨ — 7-8 ɫɬ.ɥ.
ɡɟɥɟɧɶ, ɫɨɥɶ, ɱɟɪɧɵɣ ɩɟɪɟɰ (ɦɨɥɨɬɵɣ)
ɫɜɟɠɚɹ ɡɟɥɟɧɶ — 10 ɝ
ɋɩɨɫɨɛ ɩɪɢɝɨɬɨɜɥɟɧɢɹ:
Ɇɹɫɨ ɩɪɨɦɵɬɶ ɢ ɩɨɪɟɡɚɬɶ ɧɚ ɤɭɛɢɤɢ 2*2 ɫɦ. Ʌɭɤ ɢ ɱɟɫɧɨɤ ɦɟɥɤɨ
ɧɚɲɢɧɤɨɜɚɬɶ. Ɇɨɪɤɨɜɶ ɩɨɪɟɡɚɬɶ ɫɨɥɨɦɤɨɣ. ɉɨɦɢɞɨɪɵ ɢ ɤɚɪɬɨɮɟɥɶ
ɩɨɪɟɡɚɬɶ ɞɨɥɶɤɚɦɢ.
ȼ ɤɚɫɬɪɸɥɸ ɧɚɥɢɬɶ ɦɚɫɥɨ, ɜɵɫɬɚɜɢɬɶ ɮɭɧɤɰɢɸ ȼɕɉȿɑɄ Ⱥ ɢ
ɠɚɪɢɬɶ
ɥɭɤ ɢ ɱɟɫɧɨɤ ɞɨ ɡɨɥɨɬɢɫɬɨɝɨ ɰɜɟɬɚ — ɩɪɢɦɟɪɧɨ 7 ɦɢɧɭɬ. Ⱦɨɛɚɜɢɬɶ
ɦɹɫɨ ɢ ɠɚɪɢɬɶ ɞɨ ɨɤɨɧɱɚɧɢɹ ɩɪɨɝɪɚɦɦɵ. ɉɨɫɨɥɢɬɶ ɢ ɩɨɩɟɪɱɢɬɶ.
Ⱦɨɛɚɜɢɬɶ ɜɫɟ ɨɜɨɳɢ, ɡɚɥɢɬɶ ɜɨɞɨɣ, ɩɨɫɨɥɢɬɶ, ɜɵɫɬɚɜɢɬɶ ɩɪɨɝɪɚɦɦɭ
Ɍɍɒȿɇɂȿ.
ɉɪɢ ɩɨɞɚɱɟ ɩɨɫɵɩɚɬɶ ɦɟɥɤɨ ɧɚɪɟɡɚɧɧɨɣ ɡɟɥɟɧɶɸ.
ɁȺɄɍɋɄȺ ɂɁ ɉȿɑȿɇɂ
ɂɧɝɪɟɞɢɟɧɬɵ:
ɩɟɱɟɧɶ - 1 ɤɝ
ɝɨɪɱɢɰɚ - 1 ɫɬ. ɥ.
ɥɭɤ ɪɟɩɱɚɬɵɣ - 4 ɲɬ.
ɹɣɰɨ - 3 ɲɬ.
ɩɚɧɢɪɨɜɨɱɧɵɟ ɫɭɯɚɪɢ - 5 ɫɬ. ɥ.
ɲɚɦɩɢɧɶɨɧɵ - 200
ɝ
64 65
ɅɘɅə-ɄȿȻȺȻ (8-10ɒɌ)
Page 35

РУССКИЙ РУССКИЙ
ɬɺɪɬɵɣ ɫɵɪ - 100 ɝ
ɫɨɥɶ
ɩɟɪɟɰ
ɪɚɫɬɢɬɟɥɶɧɨɟ ɦɚɫɥɨ - 2-3 ɫɬ.ɥ.
ɋɩɨɫɨɛ ɩɪɢɝɨɬɨɜɥɟɧɢɹ:
ɉɪɨɩɭɫɬɢɬɟ ɱɟɪɟɡ ɦɹɫɨɪɭɛɤɭ ɩɟɱɟɧɶ ɢ ɥɭɤ. ɒɚɦɩɢɧɶɨɧɵ ɧɚɪɟɠɶɬɟ ɧɚ
ɤɭɫɨɱɤɢ.
ɋɦɟɲɚɣɬɟ ɜɫɟ ɩɪɨɞɭɤɬɵ ɤɪɨɦɟ ɫɵɪɚ, ɨɫɬɚɜɢɜ ɟɝɨ ɧɚ ɩɨɫɵɩɤɭ.
ȼɵɥɨɠɢɬɟ ɜɤɚɫɬɪɸɥɸ, ɩɪɟɞɜɚɪɢɬɟɥɶɧɨ ɧɚɥɢɜ ɬɭɞɚ ɧɟɦɧɨɝɨ
ɪɚɫɬɢɬɟɥɶɧɨɝɨ ɦɚɫɥɚ.
ȼɟɪɯ ɩɨɫɵɩɶɬɟ ɫɵɪɨɦ. ɍɫɬ ɚɧɨ ɜɢɬɟ ɩɪɨɝɪɚɦɦɭ ȼɕɉȿɑɄȺ.
ȼɵɥɨɠɢɬɟ ɧɚ ɬɚɪɟɥɤɭ ɢ ɩɨɫɬɚɜɶɬɟ ɜ ɯɨɥɨɞɢɥɶɧɢɤ ɧɚ ɧɟɫɤɨɥɶɤɨ ɱɚɫɨɜ.
ɀɍɅɖȿɇ
ɂɧɝɪ
ɟɞɢɟɧɬɵ:
ɮɢɥɟ ɤɭɪɢɰɵ - 200 ɝ
ɲɚɦɩɢɧɶɨɧɵ - 100 ɝ
ɦɭɤɚ - 2 ɫɬ. ɥ.
ɦɨɥɨɤɨ- 250 ɦɥ
ɬɟɪɬɵɣ ɫɵɪ - 2-3 ɫɬ.ɥ.
"Ɇɚɝɝɢ ɧɚ ɜɬɨɪɨɟ" ɞɥɹ ɠɭɥɶɟɧɚ ɢɡ
ɤɭɪɢɰɵ ɢ ɝɪɢɛɨɜ
ɦɚɫɥɨ - 2-3 ɫɬ.ɥ.
ɋɩɨɫɨɛ ɩɪɢɝɨɬɨɜɥɟɧɢɹ:
Ɇɟɥɤɨ ɩɨɪɟɠɶɬɟ ɮɢɥɟ ɢ ɝɪɢɛɵ . Ɉɛɠɚɪɶɬɟ ɮɢɥɟ 5-7 ɦɢɧɭɬ ɧɚ
ɮɭɧɤɰɢɢ ɀȺɊɄȺ. Ⱦɨɛɚɜɶɬɟ ɝɪɢɛɵ, ɜɵɫɬɚɜɶɬɟ ɉȺɊ ɧɚ 20-25
ɦɢɧɭɬ, ɱɬɨɛɵ ɜɵɩɚɪɢɬɶ ɠɢɞɤɨɫɬɶ. Ɂɚɬɟɦ ɞɨɛɚɜɶɬɟ
ɧɟɦɧɨɝɨ ɦɭɤɢ ɢ
ɨɛɠɚɪɶɬɟ ɧɚ ȼɕɉȿɑɄȿ 5-10 ɦɢɧɭɬ. Ⱦɨɛɚɜɶɬɟ ɫɦɟɬɚɧɭ, ɫɨɥɶ, ɩɟɪɟɰ
ɱɟɪ
ɧɵɣ ɦɨɥɨɬɵɣ ɢ ɧɚ ɮɭɧɤɰɢɢ ɉȺɊ ɩɪɨɜɚɪɢɬɟ ɞɨɡɚɝɭɫɬɟɧɢɹ ɫɨɭɫɚ
10-15 ɦɢɧɭɬ. ɉɨ ɨɤɨɧɱɚɧɢɢ ɩɪɨɝɪɚɦɦɵɩɨɫɵɩɶɬɟɡɚɪɚɧɟɟ ɧɚɬɟɪɬɵɦ
ɫɵɪɨɦ. ȼɵɛɟɪɢɬɟ ɮɭɧɤɰɢɸ ȼɕɉȿɑɄ Ⱥ ɧɚ 10 -15 ɦɢɧɭɬ, ɱɬɨɛɵ ɫɵɪ
ɩɨɥɧɨɫɬɶɸ ɪɚɫɩɥɚɜɢɥɫɹ.
ȼɕɉȿɑɄȺ
ɒɈɄɈɅȺȾɇɕɃ ɄȿɄɋ ɋ ȼɂɒɇȿɃ
ɂɧɝɪɟɞɢɟɧɬɵ:
ɫɥɢɜɨɱɧɨɟ ɦɚɫɥɨ - 200 ɝ
ɫɦɟɬɚɧɚ - 200 ɦɥ
ɫɚɯɚɪ - 250 ɝ
ɦɭɤɚ - 350 ɝ
ɪɚɡɪɵɯɥɢɬɟɥɶ - 1 ɩɚɤɟɬɢɤ (10 ɝ)
ɹɣɰɨ - 4 ɲɬ.
ɜɢɲɧɹ ɛɟɡ ɤɨɫɬɨɱɟɤ, ɛɟɡ ɠɢɞɤɨɫɬɢ
- 1 ɛɚɧɤɚ (800 ɝ)
ɲɨɤɨɥɚɞ - 100 ɝ
ɫɚɯɚɪɧɚɹ ɩɭɞɪɚ ɞɥɹɩɨɫɵɩɤɢ
ɋɩɨɫɨɛ ɩɪɢɝɨɬɨɜɥɟɧɢɹ:
ȼɡɛɟɣɬɟ ɦɚɫɥɨ ɫ ɫɚɯɚɪɨɦ ɞɨ ɩɵɲɧɨɣ ɦɚɫɫɵ.
Ⱦɨɛɚɜɶɬɟ ɩɨ ɨɞɧɨɦɭ ɹɣɰɭ. ɉɨɫɥɟɤɚɠɞɨɝɨ ɞɨɛɚɜɥɟɧɢɹ ɹɣɰɚ ɜɡɛɟɣɬɟ
ɦɢɤɫɟɪɨɦ ɧɚɛɨɥɶɲɨɣ ɫɤɨɪɨɫɬɢ ɞɨ ɩɨɥɧɨɝɨ ɩɟɪɟɦɟɲɢɜɚɧɢɹ.
ɍɦɟɧɶɲɢɬɟ ɫɤɨɪɨɫɬɶ, ɞɨɛɚɜɶɬɟ ɫɦɟɬɚɧɭ.
Ɇɭɤɭ ɩɪɨɫɟɣɬɟ ɫ ɜɚɧɢɥɶɸ. ɇɚɫɵɩɶɬɟ ɢ ɡɚɦɟɫɢɬɟ ɬɟɫɬɨ ɤɨɧɫɢɫɬɟɧɰɢɢ
ɝɭɫɬɨɣ ɫɦɟɬɚɧɵ. Ⱦɨɛɚɜɶɬɟ ɲɨɤɨɥɚɞ ɢ
ɜɢɲɧɸ, ɩɟɪɟɦɟɲɚɣɬɟ.
Ʉɚɫɬɪɸɥɸ ɦɭɥɶɬɢɜɚɪɤɢ ɯɨɪɨɲɨ ɫɦɚɡɚɠɶɬɟ ɫɥɢɜɨɱɧɵɦ ɦɚɫɥɨɦ,
ɩɨɦɟɫ
ɬɢɬɟ ɜ ɦɭɥɶɬɢɜɚɪɤɭ. Ɋɚɡɨɝɪɟɣɬɟ, ɢɫɩɨɥɶɡɭɹ ɩɪɨɝɪɚɦɦɭ
ȼɕɉȿɑɄȺ 10 ɦɢɧ. ɉɨɫɥɟ ɩɪɨɝɪɟɜɚ ɧɚɠɦɢɬɟ ɧɚ ɤɧɨɩɤɭ ɈɌɆȿɇȺ.
ɉɟɪɟɥɨɠɢɬɟ ɬɟɫɬɨ ɜɤɚɫɬɪɸɥɸ.
ȼɤɥɸɱɢɬɟ ɮɭɧɤɰɢɸ ȼɕɉȿɑɄȺ, ɭɫɬɚɧɨɜɢɜ 65ɦɢɧ.
66 67
Page 36

РУССКИЙ РУССКИЙ
ɌɈɊɌ ɆȺɄɈȼɈ-ɄɈɄɈɋɈȼɕɃ
ɂɧɝɪɟɞɢɟɧɬɵ:
ɫɥɢɜɨɱɧɨɟ ɦɚɫɥɨ - 150 ɝ
ɫɚɯɚɪ - 1/2 ɫɬɚɤɚɧɚ
ɤɨɤɨɫɨɜɚɹ ɫɬɪɭɠɤɚ - 1 ɫɬɚɤɚɧ
ɦɨɥɨɬɵɣ ɦɚɤ - 100-150 ɝ
ɹɣɰɨ - 3 ɲɬ.
ɦɭɤɚ - 1 ɫɬɚɤɚɧ (250 ɦɥ)
ɪɚɡɪɵɯɥɢɬɟɥɶ - 1 ɩɚɤɟɬɢɤ
ɫɦɟɬɚɧɚ - 200 ɝ
ɋɩɨɫɨɛ ɩɪɢɝɨɬɨɜɥɟɧɢɹ:
ȼɡɛɟɣɬɟ ɦɚɤ, ɤɨɤɨɫɨɜɭɸ ɫɬɪɭɠɤɭ, ɫɚɯɚɪ, ɹɣɰɚ
Ⱦɨɛɚɜɶɬɟ ɪɚɫɬɨɩɥɟɧɧɨɟ ɫɥɢɜɨɱɧɨɟ ɦɚɫɥɨ. ȼɡɛɟɣɬɟ.
Ⱦɨɛɚɜɶɬɟ ɫɦɟɬɚɧɭ. ȼɡɛɟɣɬɟ.
Ⱦɨɛɚɜɶɬɟ ɩɪɨɫɟɹɧɧɭɸ ɦɭɤɭ ɫ ɪɚɡɪɵɯɥɢɬɟɥɟɦ. ȼɡɛɟɣɬɟ.
Ʉɚɫɬɪɸɥɸ ɯɨɪɨɲɨ ɫɦɚ
ɡɚɠɶɬɟ ɫɥɢɜɨɱɧɵɦ ɦɚɫɥɨɦ,ɩɨɦɟɫɬɢɬɟ ɜ
ɦɭɥɶɬɢɜɚɪɤɭ. Ɋɚɡɨɝɪɟɣɬɟ
, ɢɫɩɨɥɶɡɭɹ ɩɪɨɝɪɚɦɦɭ ȼɕɉȿɑɄȺ 10 ɦɢɧ.
ɉɨɫɥɟ ɩɪɨɝɪɟɜɚ ɧɚɠɦɢɬɟ ɧɚ ɤɧɨɩɤɭ ɈɌɆȿɇȺ.
ȼɵɥɨɠɢɬɟ ɬɟɫɬɨ ɜɤɚɫɬɪɸɥɸ.
ȼɤɥɸɱɢɬɟ ɮɭɧɤɰɢɸ ȼɕɉȿɑɄȺ, ɭɫɬɚɧɨɜɢɜ 65 ɦɢɧ.
Ƚɨ ɬ ɨ ɜ ɵ ɣ ɤɨɪɠ ɨɫɬɭɞɢɬɶ, ɪɚɡɪɟɡɚɬɶ ɧɚ 3 ɤɨɪɠɚ ɢ ɩɪɨɦɚɡɚɬɶ
ɜɡɛɢɬɨɣ ɫɦɟɬɚɧɨɣ ɫ ɫɚɯɚɪɧɨɣ ɩɭɞɪɨɣ, ɫɨɟɞɢɧɢɬɶ, ɡɚɥɢɬɶ ɩɨɜɟɪɯ
ɲɨɤɨɥɚɞɧɨɣ ɝɥɚɡɭɪɶɸ.
Ɇɨɠɧɨ ɫɞɟɥɚɬɶ ɤɪɟɦ ɢɡ ɜɚɪɟɧɧɨɣ ɫɝɭɳɟɧɤɢ ɫɨ ɫɦɟɬɚɧɨɣ ɢɥɢ
ɫɥɢɜɨɱɧɵɦ ɦɚɫɥɨɦ.
Ⱦɥɹ ɝɥɚɡɭɪɢ
ɫɚɯɚɪ - 4 ɫɬ.ɥ.
ɦɨɥɨɤɨ - 4 ɫɬ.ɥ.
ɤɚɤɚɨ - 2 ɫɬ.ɥ. (ɫ ɝɨɪɤɨɣ)
ȼɫɟ ɩɨɥɨɠɢɬɟ ɜɤɚɫɬɪɸɥɸ ɦɭɥɶɬɢɜɚɪɤɢ.
ȼɤɥɸɱɢɬɟ ɮɭɧɤɰɢɸ ɋɍɉ ɜɫɟ ɜɪɟɦɹ ɦɟɲɚɹ,ɩɨɤɚ ɧɟ ɫɬɚɧɟɬ
ɨɞɧɨɪɨɞɧɨɣ ɦɚɫɫɨɣ.
Ɉɬɤɥɸɱɢɬɟ ɮɭɧɤɰɢɸ ɋɍɉ ɢ ɞɨɛɚɜɶɬɟ 50 ɝɪ ɫɥɢɜɨɱɧɨɝɨ ɦɚɫɥɚ,
ɪɚɡɦɟɲɚɣɬɟ ɞɨ ɨɞɧɨɪɨɞɧɨɫɬɢ, ɫɥɟɝɤɚ ɨɫɬɭɞɢɬɟ ɢ ɡɚɥɟɣɬɟ ɬɨɪɬ.
ɄȿɄɋ ɂɁ ɆȺɇɇɈɃ ɄɊɍɉɕ
ɂɧɝɪɟɞɢɟɧɬɵ:
ɦɚɧɤɚ - 1 ɫɬɚɤɚɧ (250 ɦɥ)
ɫɦɟɬɚɧɚ ɢɥɢ ɤɟɮɢɪ - 1 ɫɬɚɤɚɧ (25 0 ɦɥ
)
ɦɚɫɥɨ ɫɥɢɜɨɱɧɨɟ ɪɚɫɬɨɩɥɟɧɧɨɟ
(ɢɥɢ ɦɚɪɝɚɪɢɧ) - 150 ɝ
ɹɣɰɨ - 3 ɲɬ.
ɫɚɯɚɪ - 1 ɫɬ.
ɫɨɞɚ,ɩɨɝɚɲ.ɭɤɫɭɫɨɦ - 1 ɱ.ɥ.
ɦɭɤɚ - 4 ɫɬ.ɥ.
ɹɛɥɨɤɢ ɢɥɢ ɫɭɯɨɮɪɭɤɬɵ (ɩɨ ɠɟɥɚɧɢɸ)
ɋɩɨɫɨɛ ɩɪɢɝɨɬɨɜɥɟɧɢɹ:
Ɂɚɥɟɣɬɟ ɦɚɧɤɭ ɫɦɟɬɚɧɨɣ ɢɥɢ ɤɟɮɢɪɨɦ ɢɞɚɣɬɟ ɩɨɫɬɨɹɬɶ 1 ɱɚɫ (ɱɬɨɛɵ
ɦɚɧɤɚ ɧɚɛɭɯɥɚ).
Ⱦɨɛɚɜɶɬɟ ɪɚɫɬɨɩɥɟɧɧɨɟ ɦɚɫɥɨ ɢɥɢ ɦɚɪɝɚɪɢɧ, ɹɣɰɨ, ɫɚɯɚɪ, ɝɚɲɟɧɭɸ
ɭɤɫɭɫɨɦ ɫɨɞɭ, ɦɭɤɭ. ȼɫɺ ɬɳɚɬɟɥɶɧɨ ɩɟɪɟɦɟɲɚɣɬɟ ɦɢɤɫɟɪɨɦ.
Ɇɨɠɧɨ
ɜɦɟɲɚɬɶ ɨɱɢɳɟɧɧɵɟ ɢɩɨɪɟɡɚɧɧɵɟ ɤɭɫɨɱɤɚɦɢ ɹɛɥɨɤɢ ɢɥɢ
ɫɭɯɨɮɪɭɤɬɵ.
Ʉɚɫɬɪɸɥɸ ɦɭ
ɥɶɬɢɜɚɪɤɢ ɯɨɪɨɲɨ ɫɦɚɠɶɬɟ ɫɥɢɜɨɱɧɵɦ ɦɚɫɥɨɦ,
ɩɨɦɟɫɬɢɬɟ ɜ ɦɭɥɶɬɢɜɚɪɤɭ. Ɋɚɡɨɝɪɟɣɬɟ, ɢɫɩɨɥɶɡɭɹ ɩɪɨɝɪɚɦɦɭ
ȼɕɉȿɑɄȺ 10 ɦɢɧ. ɉɨɫɥɟ ɩɪɨɝɪɟɜɚ ɧɚɠɦɢɬɟ ɧɚ ɤɧɨɩɤɭ ɈɌɆȿɇȺ.
ɍɫɬ ɚɧɨ ɜɢɬɟ ɩɪɨɝɪɚɦɦɭ ȼɕɉȿɑɄȺ ɧɚ 65 ɦɢɧ. ɉɨɦɟɫɬɢɬɟ ɬɟɫɬɨ ɜ
ɤɚɫɬɪɸɥɸ.
Ƚɨ ɬ ɨ ɜ ɨ ɟ ɛɥɸɞɨ ɩɨɫɵɩɶɬɟ ɫɚɯɚɪɧɨɣ ɩɭɞɪɨɣ.
68 69
Page 37

РУССКИЙ РУССКИЙ
КАШИ НА МОЛОКЕ
РИС
Варится на функции МОЛОЧНАЯ КАША -25-30 минут
1 мерный стакан крупы / 4 мерных стакана молока
выход продукта — 2 порции
2 мерных стакана крупы / 6 мерных стаканов молока
выход продукта — 3-4 порций
3 мерных стакана крупы / 8 мерных стаканов молока
выход продукта — 5-6 порций
ГРЕЧКА
Варится на функции МОЛОЧНАЯ КАША -25-30 минут
1 мерный стакан крупы / 4 мерных стакана молока
выход продукта — 2 порции
2 мерных
стакана крупы / 6 мерных стаканов молока
выход продукта — 3-4 порций
3 мерных стакана крупы / 8 мерных стаканов молока
выход продукта — 5-6 порций
ПШЕНО
Варится на функции МОЛОЧНАЯ КАША -30-40 минут
1 мерный стакан крупы / 4 мерных стакана молока
выход продукта — 2 порции
2 мерных стакана крупы / 6 мерных стаканов молока
выход продукта — 3-4 порций
3 мерных стакана крупы / 8 мерных стаканов молока
выход продукта — 5-6 порций
КАШИ НА МОЛОКЕ И
ВОДЕ
ГРЕЧКА
Ингредиенты:
гречка - 100 г (предварительно промойте крупу)
молоко - 400 мл
вода - 100 мл
сливочное масло - 1 ст.л.
сахар - 1 ст. л.
соль - 1 ч.л.
Способ приготовления:
Все ингредиенты (кроме сливочного масла) поместите в кастрюлю.
Включите функцию МОЛОЧНАЯ КАША на 35 мин.
За 2 минуты до окончания программы добавьте сливочное масло.
ПШЕНО
Ингредиенты:
пшено - 130 г (предварительно промойте крупу)
молоко - 300 мл
вода - 450 мл
сливочное масло - 1 ст.л.
сахар - 2 ст.л.
Способ приготовления:
Все ингредиенты (кроме сливочного масла) поместите в кастрюлю.
Включите функцию МОЛОЧНАЯ КАША на 35 мин.
За 2 минуты до окончания программы добавьте сливочное масло.
ПЕРЛОВКА
Ингредиенты:
перловая крупа - 250 г (предварительно промойте крупу)
молоко - 600 мл
вода -150 мл
сливочное масло - 1 ст.л.
70 71
Page 38

РУССКИЙ РУССКИЙ
соль по вкусу
Способ приготовления:
Замочите перловую крупу в холодной воде на 6 часов. Слейте воду.
Все ингредиенты (кроме сливочного масла) поместите в кастрюлю.
Включите функцию МОЛОЧНАЯ КАША на 45 мин.
За 2 минуты до окончания программы добавьте сливочное масло.
КРУПЫ
РИС ЯНТАРНЫЙ / БЕЛЫЙ КРУГЛОЗЕРНЫЙ КУБАНЬ / БЕЛЫЙ
ДЛИННОЗЕРНЫЙ ОРИЕНТ
Пропорции : 1 мерный стакан / 2 мерных стакана воды
Го т о в и т ь
на программе МОЛОЧНАЯ КАША 20 минут
РИС ИНДИЙСКИЙ ПРОПАРЕННЫЙ ДЛИННОЗЕРНЫЙ
Пропорции : 1 мерный стакан / 3,5 мерных стакана воды
Го т о в и т ь на программе МОЛОЧНАЯ КАША 30 минут
ГРЕЧКА
Пропорции : 1 мерный стакан / 2 мерных стакана воды
Го т о в и т ь на программе МОЛОЧНАЯ КАША 20 минут
ВНИМАНИЕ! Следует учесть, что при окончании работы прибор
переходит в функцию «подогрев».
Не держите каши на функции «подогрев» во избежание
пересушивания продукта.
72 73
 Loading...