

Page 1
Application Note – Creating and Installing Voice Prompt Files
Xcelerator IP 07011
This Application Note addresses the process for creating and installing voice prompt files for
Xcelerator IP. This process covers the changing of the main system greetings for Xcelerator
IP. Please reference Appendix A at the end of this Application Note for a complete listing of
voice prompts and their content.
All audio files on Xcelerator IP are saved and run as Dialogic .vox format files. Any files that
are changed in Xcelerator IP must be saved first as a .vox formatted file before you attempt
to upload the file to the ftp server within the system. The files will not play properly if they are
not in the .vox format.
There are two steps for converting and installing voice prompt files for Xcelerator IP. The first
step is to identify and convert the file you will be using. The second step will be loading the
file to the ftp server on Xcelerator IP.
Converting your audio file to the Message on Hold file
To convert files to .vox, you will need a conversion tool that allows you to convert mp3, wav,
or other audio file formats to the Dialogic .vox format.
We have used a program called Goldwave (http://www.goldwave.com) with Xcelerator IP
testing. There are other programs available for your consideration; however, for the purposes
of this Application Note, we will use Goldwave as the conversion tool.
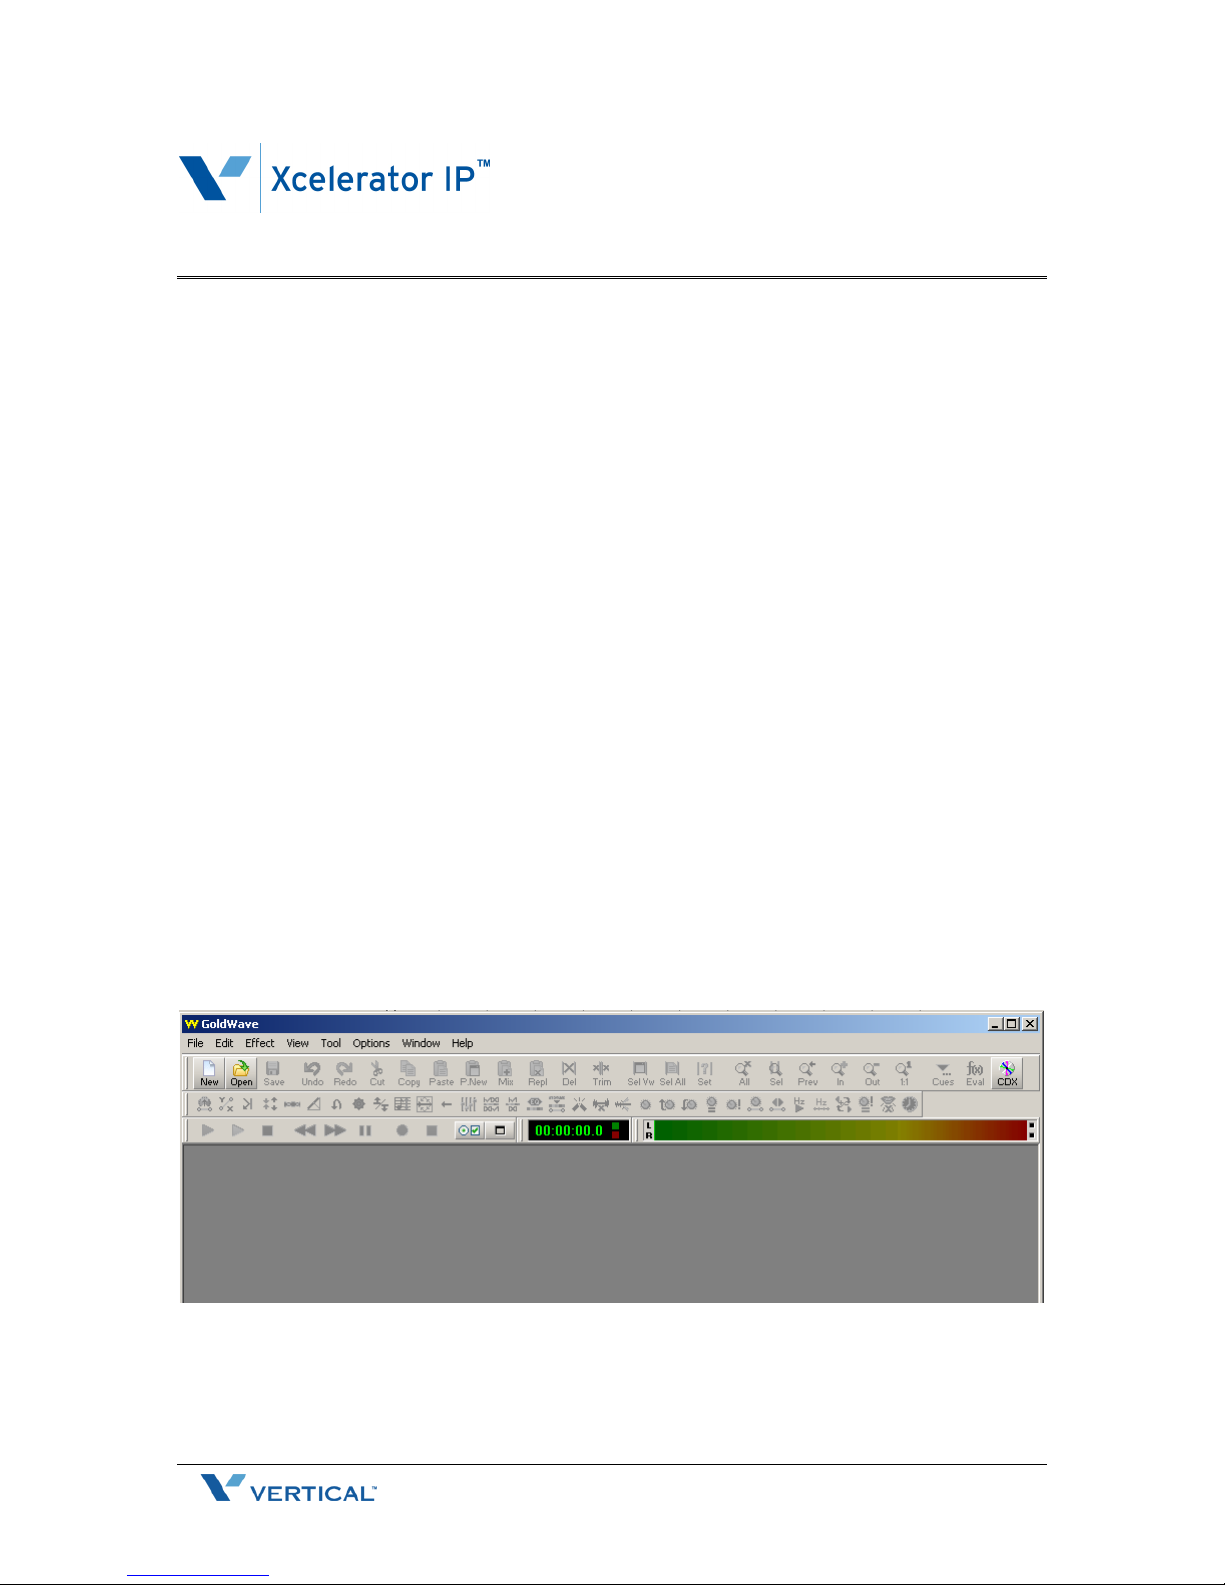
Step 1: Launch the Goldwave application. This is the main screen from where you will load
and convert your voice prompt file.
1 of 18 Aug 2007
Page 2
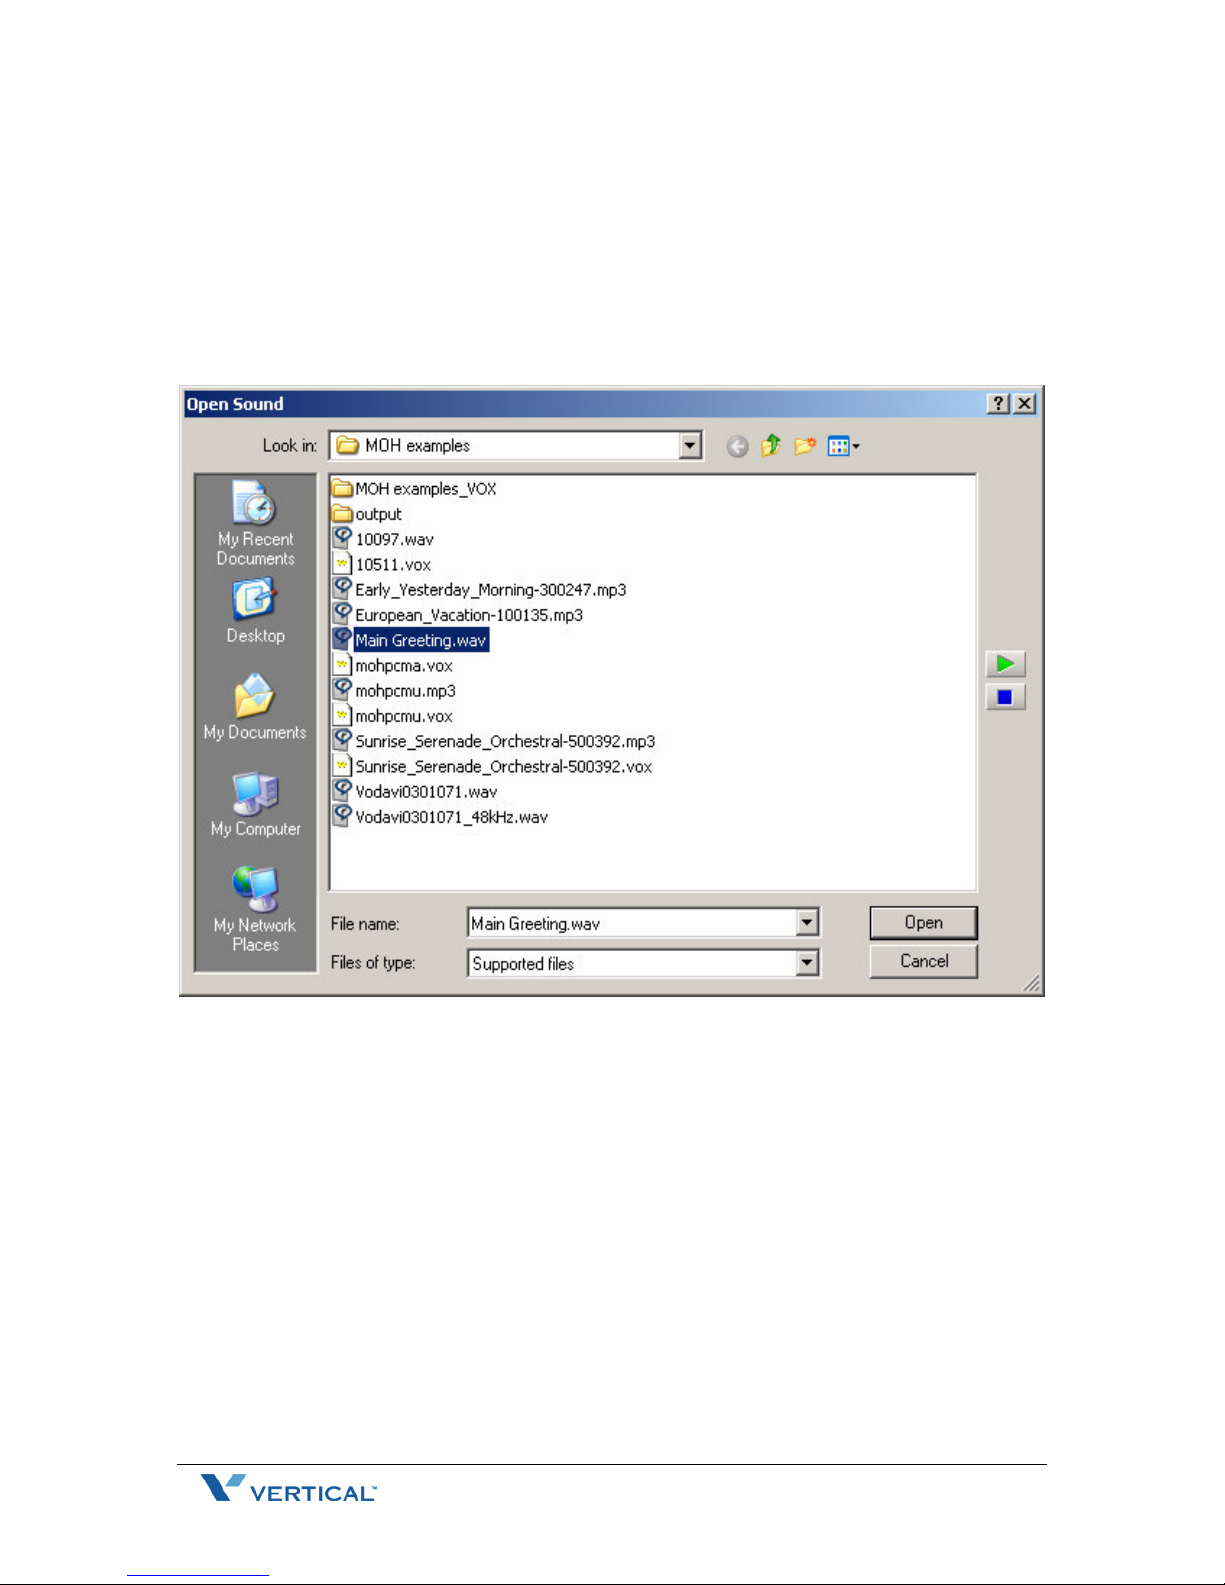
Step 2: Click on File > Open
Navigate to the file on your hard drive or network drive where you have stored the file that
will be used for the voice prompt file for Xcelerator IP. This will be a file that you have
recorded with a new customized prompt for system greetings or in a foreign language for
localization purposes.
2 of 18 Aug 2007
Page 3
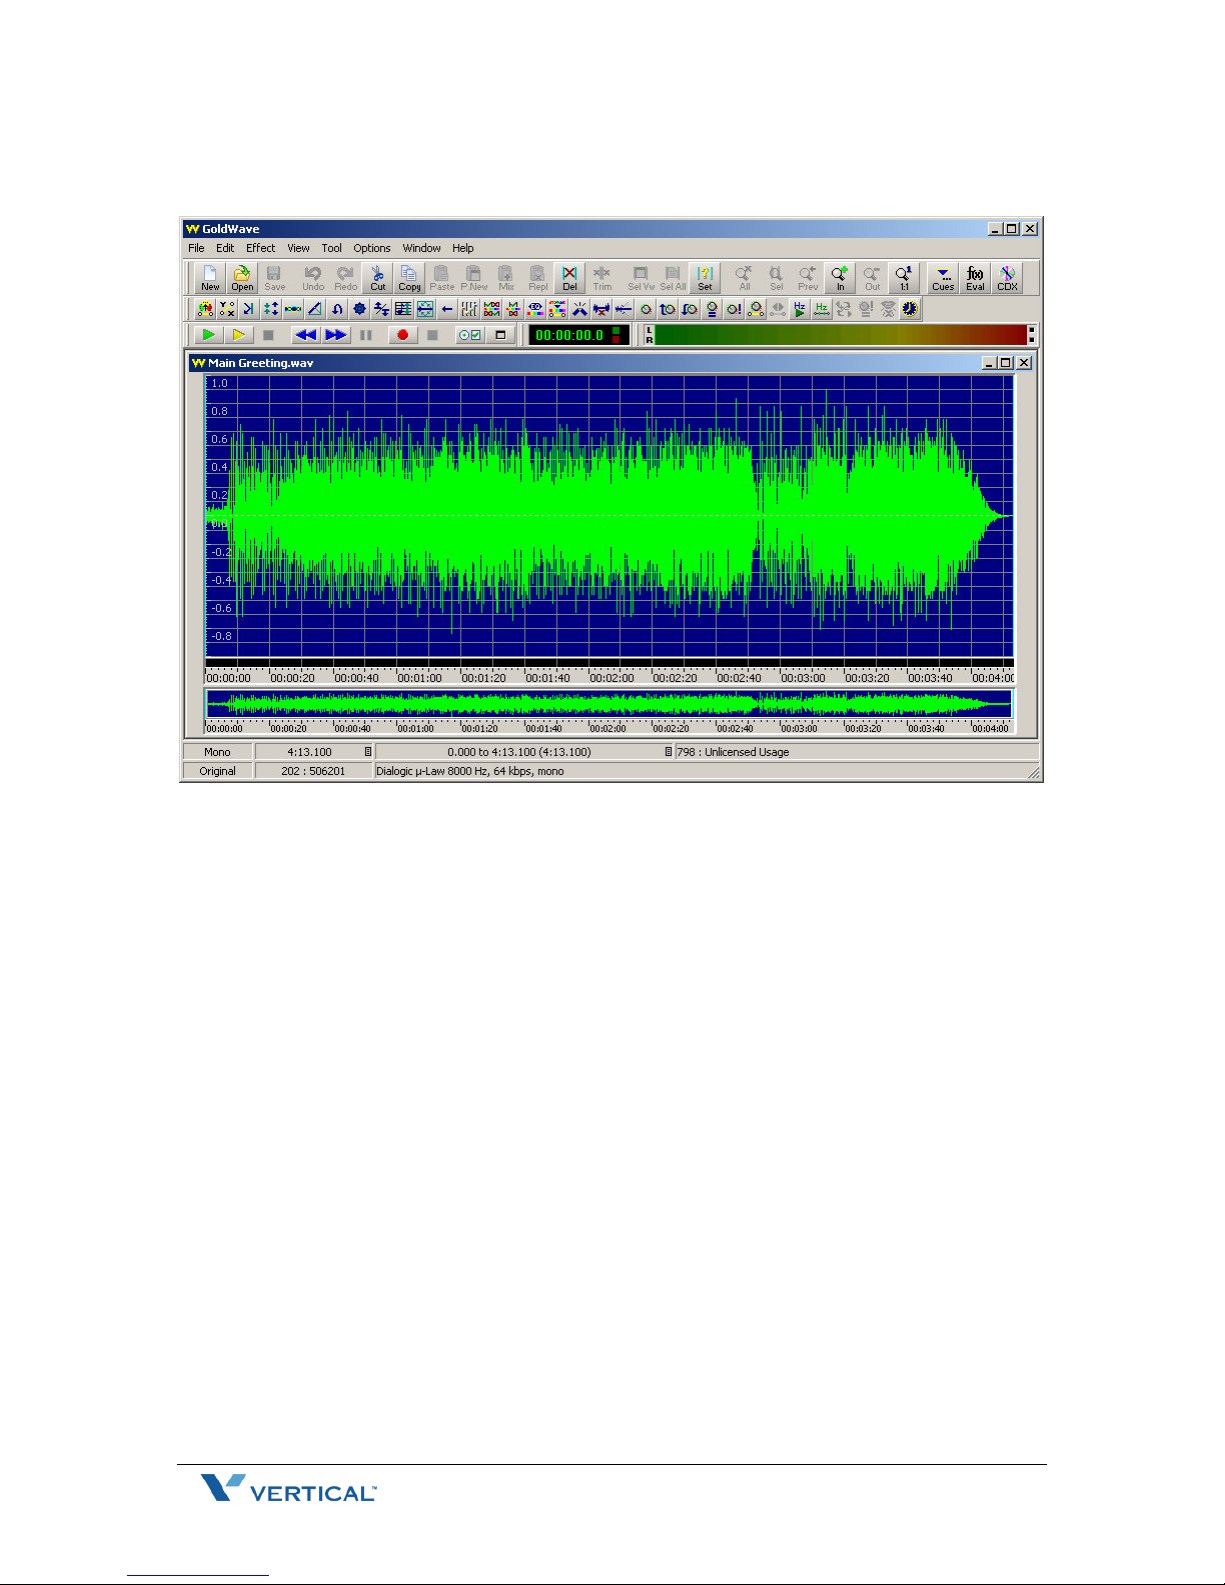
Step 3: Highlight the file you wish to use as the voice prompt, then Click OPEN. A screen
showing the audio channel of the chosen file will be displayed.
3 of 18 Aug 2007
Page 4
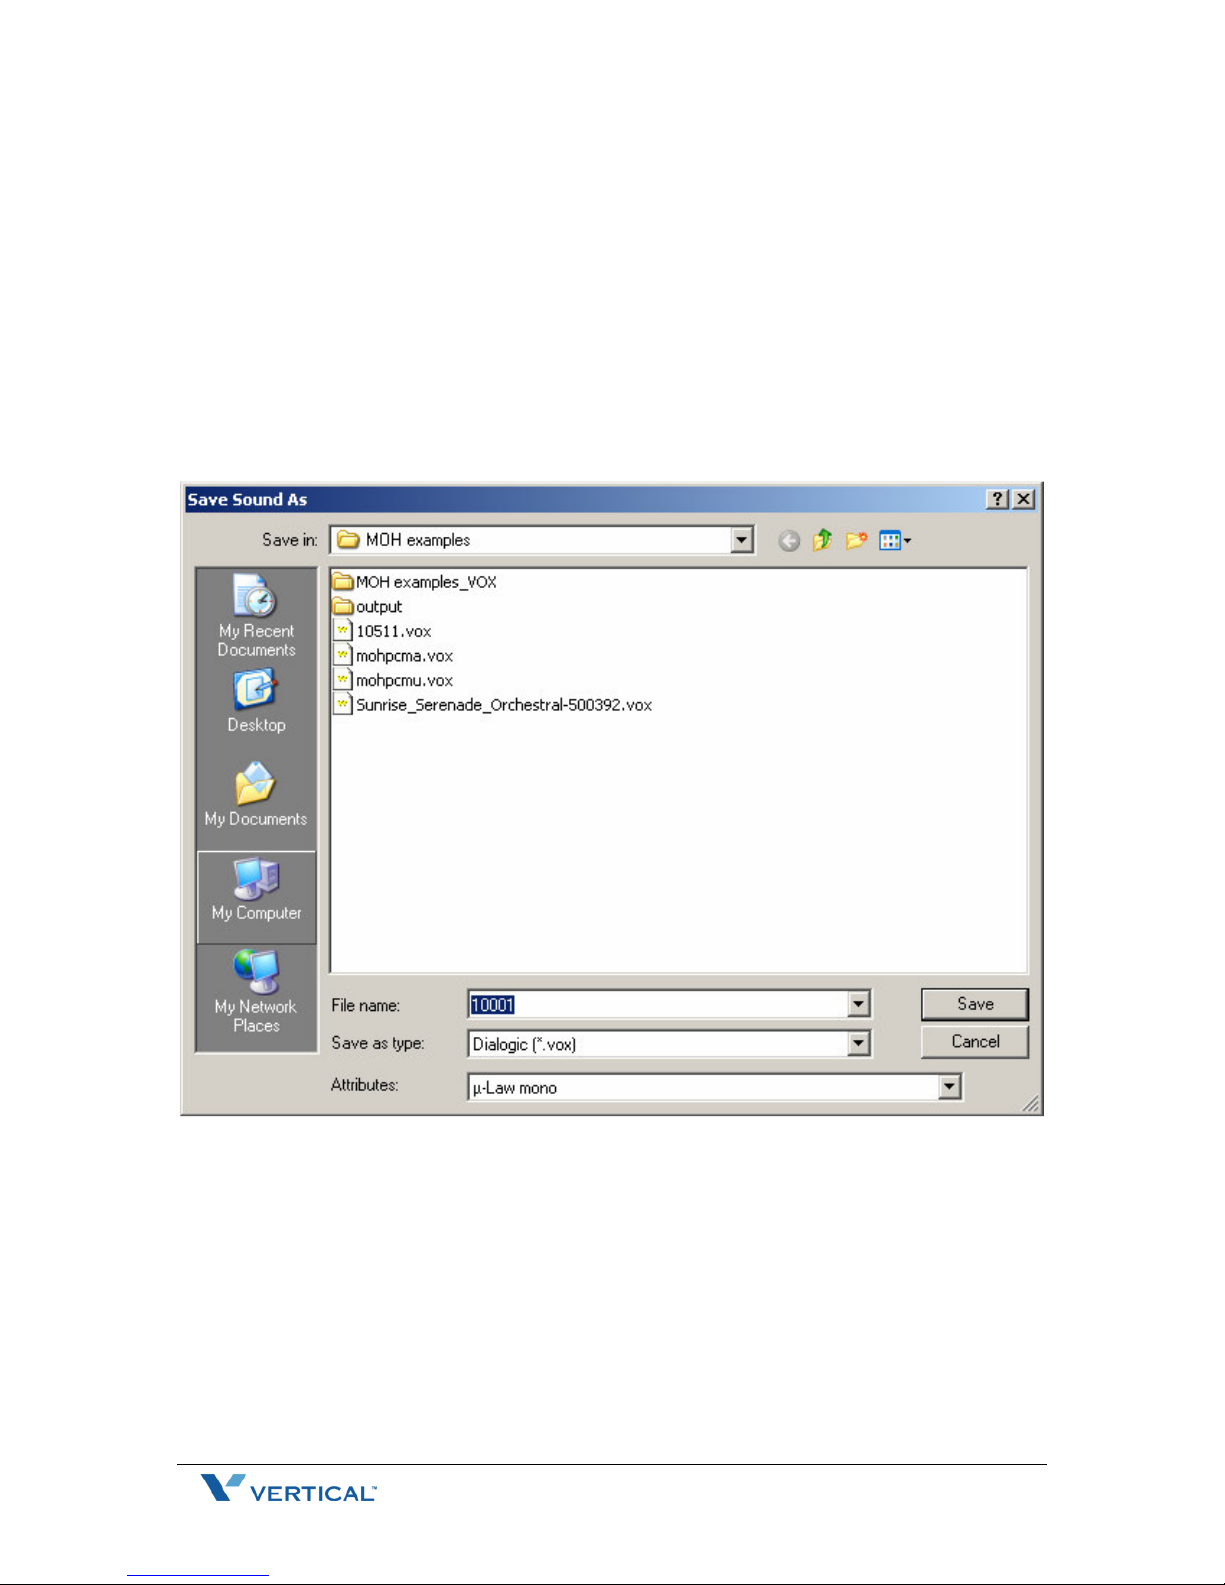
Step 4: Save the target Message on Hold file in the following format:
File Name: Must be the same as the file name you are converting. Please
refer to the attached prompt files in Appendix A at the end of
this document, or in the Xclerator IP Admin Guide.
File Type: Must be Dialogic (*.vox)
Attributes: µ-law
8KHz sampling rate
64Kbps channel
Mono audio format
Note: Saving the file with settings other than those shown will result in failure of the
recording to play properly.
4 of 18 Aug 2007
Page 5

Step 5: Once the file has been saved, you will see the below screen showing the loaded file
(name 10001.vox in upper left corner) and a graphical representation of the audio playback.
Make note of the bottom of the screen to verify that the file has been saved in the proper
format. You can listen to the saved file by pressing the green arrow on the lower toolbar.
Step 6: Save the file to your hard drive or network location and close the Goldwave
application. You have now successfully formatted the voice prompt file.
In the next section, we will cover installation of the voice prompt file.
5 of 18 Aug 2007
Page 6
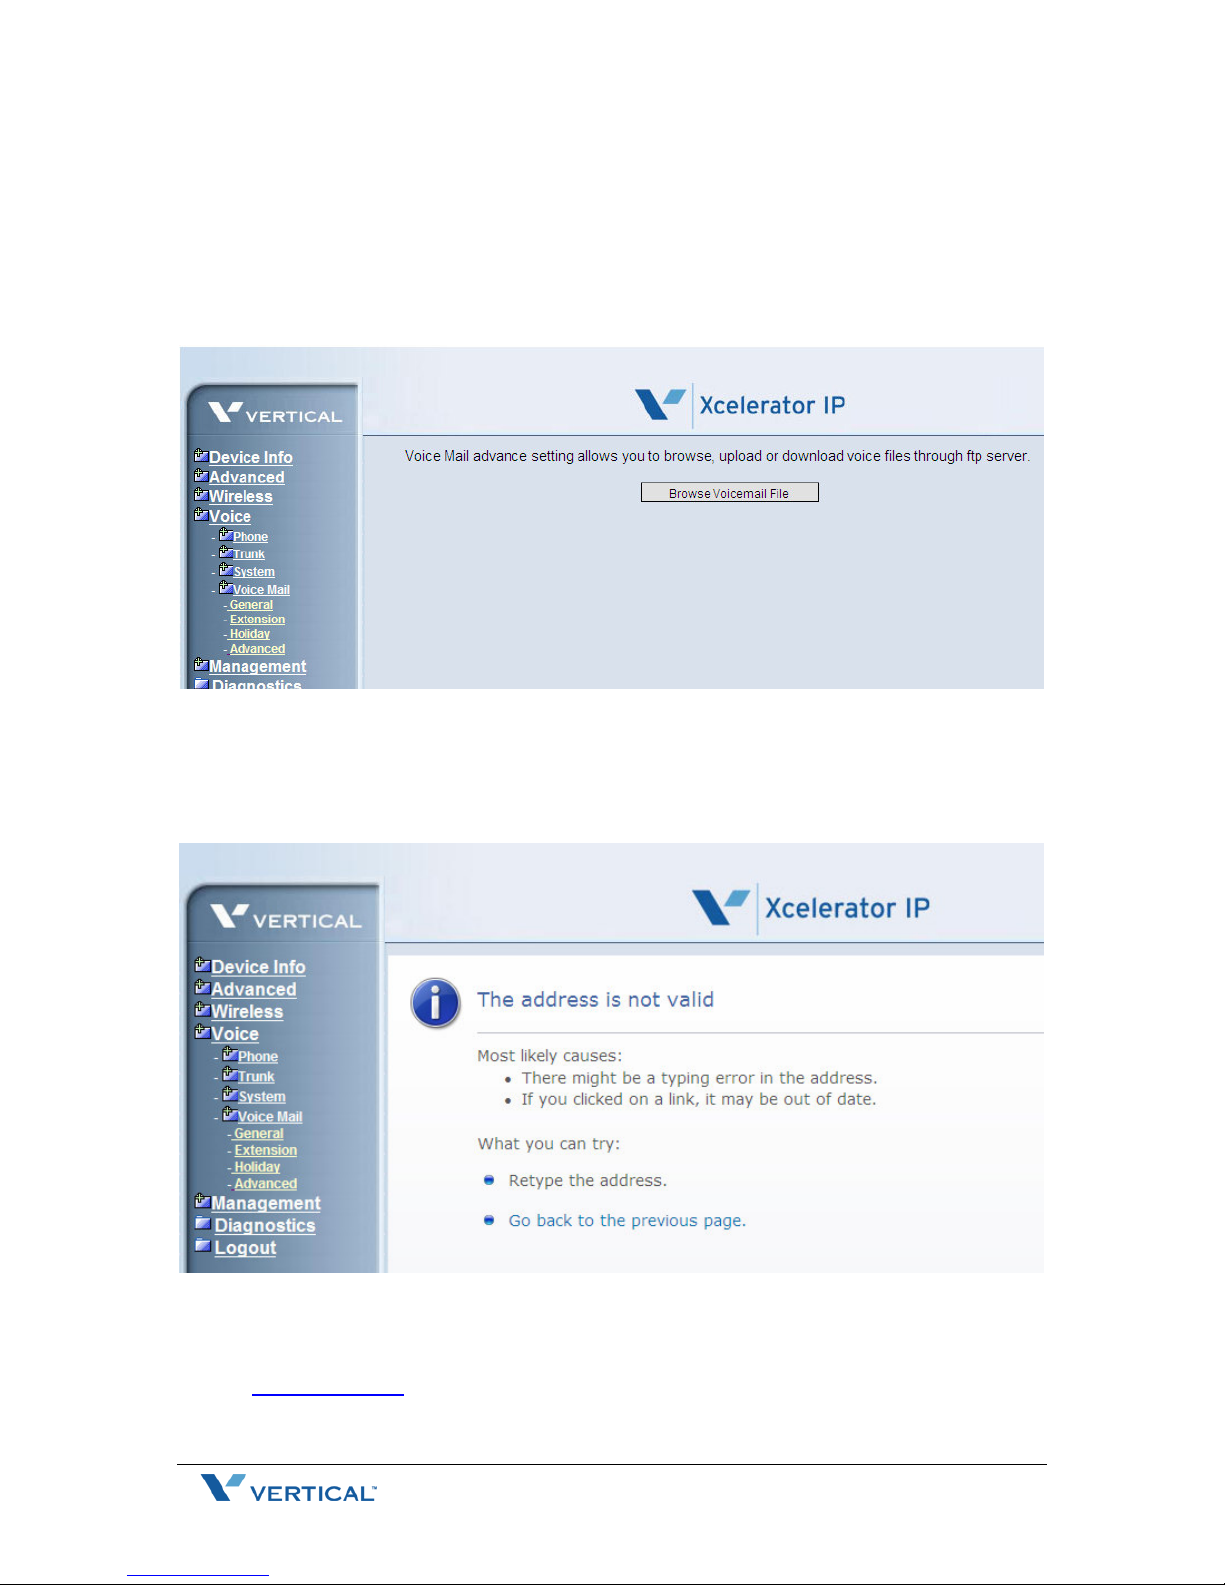
Installing the Voice Prompt file to Xcelerator IP
Step 1: Open the Advanced Application screen of Xcelerator IP and go to the Section
Voice>Advanced
Click on Browse Voicemail File
Step 2: If you are using IE 7.0 or higher, you will see the following screen appear when you
click on Browse Voicemail File. If you are using IE 6.0 you can skip this step and continue to
Step 3.
To access the ftp server of Xcelerator IP, type the following information into the address bar
of your Internet Explorer screen:
ftp://192.168.1.1 if in default mode, or enter the ftp address of your system using the
same format but with the appropriate system IP address entered.
6 of 18 Aug 2007
Page 7

You will be prompted to log onto the FTP server using the User Name and Password for your
Xcelerator IP administrator account.
Once logged on, you will see the following screen. Follow the directions on the screen and
click Page > Open FTP Site in Windows Explorer.
7 of 18 Aug 2007
Page 8

You will now see the following screen with standard Windows icons. If you are using a
version of Internet Explorer that is below version 7.0, you will see this screen when you click
on the Browse Voicemail File button on the Advanced Voice screen.
Step 3: Open the file entitled Vm
Step 4: Open the file entitled Vox
8 of 18 Aug 2007
Page 9

You will now see a list of all .vox files stored on Xcelerator IP. Do not change any of these
files without first verifying the file you wish to change and verifying the file name. Each of
these files is a prompt on the system. Changing the file name will cause the system prompts
to play improperly or not at all.
For a detailed description of each of these files, please reference Appendix A of this
Application Note or Xcelerator IP Admin document Section A System Prompts and
Recordings. Here you will find a list of the prompt files by name with a written description of
the prompt included in the file. These files can be used for localization or adding a second
language to Xcelerator IP.
Step 5: Locate the file entitled “10001.vox”
9 of 18 Aug 2007
Page 10

Step 6: Delete the file from the prompts list
10 of 18 Aug 2007
Page 11

Step 7: Open the file on your hard drive or network drive where you saved the file
“10001.vox” you created earlier using your conversion tool. Highlight and copy the file.
11 of 18 Aug 2007
Page 12

Step 8: Paste the new 10001.vox file to the VOX folder on Xcelerator IP and close all the
files and return to the Admin screen.
You have now successfully updated the voice prompt file for your Xcelerator IP.
Although not required, best practices recommend you reboot Xcelerator IP at the conclusion
of this process.
If you have any questions, please contact Vertical Customer Support for assistance.
12 of 18 Aug 2007
Page 13

APPENDIX A – Xcelerator IP System Preset Voice Prompts
Note: Prompts 10001 through 10004 are the four main Xcelerator IP system greeting
prompts
File # Contents
10001 If you know your party’s extension, you may dial it at anytime or press zero for the
operator
10002 Our office is currently closed. If you know your party’s extension you may dial it at
any time or press zero to leave a message in our general mailbox
10003 Our office is currently closed for lunch. If you know your party’s extension you may
dial it at any time or press zero to leave a message in our general mailbox
10004 Our office is currently closed for the holiday. If you know your party’s extension you
may dial it at any time or press zero to leave a message in our general mailbox
10051 Please dial your number now. When you are finished, press pound
10097 This mailbox is full. No further messages can be accepted at this time. Good bye.
10102 The number you dialed is invalid. Please hold while your call is transferred to the
operator
10103 The number you dialed is invalid
10104 Please check your number and dial again
10106 The extension you dialed is invalid. Please dial again
10107 The extension you dialed is invalid. Please check the number and dial again.
10201 Please hold while your call is being transferred.
10205 The extension you dialed is currently busy, press star (*) to wait
10206 The extension you dialed is not answering, press star (*) to try another extension
13 of 18 Aug 2007
Page 14

10207 To leave a message, press pound (#)
10210 Press zero to reach an operator
10212 The extension you dialed is busy. Press 1 to hold
10221 The extension you dialed is unavailable. Please dial another extension or press zero
to reach the operator
10301 Please leave a message after the tone. Press pound when you have finished
recording.
10302 Your message has been recorded
10303 To send your message, press one
To listen to your message, press 2
To re-record your message, press 3
To cancel recording, press 4
To delete your message, press #
10304 Your message has been recorded
10305 You have retrieved all messages
10306 Thank you for calling. Your call will now be disconnected
10501 Please enter your mailbox number
10502 The mailbox number you dialed is invalid. Please try again
10503 The mailbox you dialed is not in service. Please try again.
10504 Please enter your password.
10505 The password you entered is incorrect. Please try again
10506 You have exceeded the maximum attempts to access this mailbox. You will now be
disconnected.
10507 To listen to your messages, press 1
To change your password, press 2
To record your personal greeting, press 3
To have your calls forwarded directly to your mailbox, press 4
14 of 18 Aug 2007
Page 15

10510 No message has been recorded
10511 You have
10512 Voice messages
10514 To listen to voice messages, press 1
To delete all messages, press 2
When finished, press pound
10516 To replay the message, press 1
To delete this message, press 2
To skip to the next message, press 3
To forward this message to another mailbox, press 4
When finished press #
10517 You have retrieved all messages
10521 Your message has been forwarded
10522 Your message did not forward
10523 Deleting messages , please wait
10524 All messages have been deleted
10526 Please enter your new four digit mailbox password
10527 You have entered _________
10528 To confirm, press 1
To re-enter, press 2
10529 Your password has been changed
10530 Your password has NOT been changed
10531 To listen to the current greeting, press 1
To record a new greeting, press 2
To delete the current greeting, press 3
When finished, press #
10532 You have not recorded a personal greeting
15 of 18 Aug 2007
Page 16

10533 At the tone, please record your greeting. When finished, press #
10534 Recording finished
10537 Your greeting has been deleted
10538 Your greeting has NOT been deleted
10547 Mailbox setup is complete
10549 Your message has been deleted
10550 Your message has NOT been deleted
10561 Do you wish to user your extension as your mailbox number?
Press one for “yes”
Press two for “no”
When finished, press #
10580 The mailbox you are trying to access is currently in use
10601 Start recording at the tone. When finished, press #
19001 Please enter the administrator password
19011 Recording the first language greeting, press 1
Recording the second language greeting, press 2
When you have finished, press #
19012 To record standard greeting, press 1
To record after hours greeting, press 2
To record out to lunch greeting, press 3
To record holiday greeting, press 4
When finished, press #
19013 To play, press 1
To record, press 2
When finished, press pound
19015 There is no greeting recorded
19073 The extension number you dialed is invalid
16 of 18 Aug 2007
Page 17

19200 Please enter a five digit code to name this voice file. When finished, press #
19201 The code you entered is ________
91000 Language 1, press 1.
Language 2, press 2.
10870 Zero
10871 One
10872 Two
10873 Three
10874 Four
10875 Five
10876 Six
10877 Seven
10878 Eight
10879 Nine
10880 Ten
10881 Eleven
10882 Twelve
10883 Thirteen
10884 Fourteen
10885 Fifteen
10886 Sixteen
10887 Seventeen
10888 Eighteen
10889 Nineteen
17 of 18 Aug 2007
Page 18

10890 Twenty
10891 Thirty
10892 Forty
10893 Fifty
10894 Sixty
10895 Seventy
10896 Eighty
10897 Ninety
18 of 18 Aug 2007
 Loading...