

Page 1
Application Note – Networking Xcelerator IP Systems
Xcelerator IP 07009
This Application Note addresses the procedure for networking Xcelerator IP systems together.
Xcelerator IP Networking
This document describes the networking of two Xcelerator IP systems.
Site “A” Phoenix WAN IP 192.168.0.154 will be the Master with extension 100-125
Site “B” Scottsdale WAN IP 192.168.0.129 will be the Slave with extension 150-175
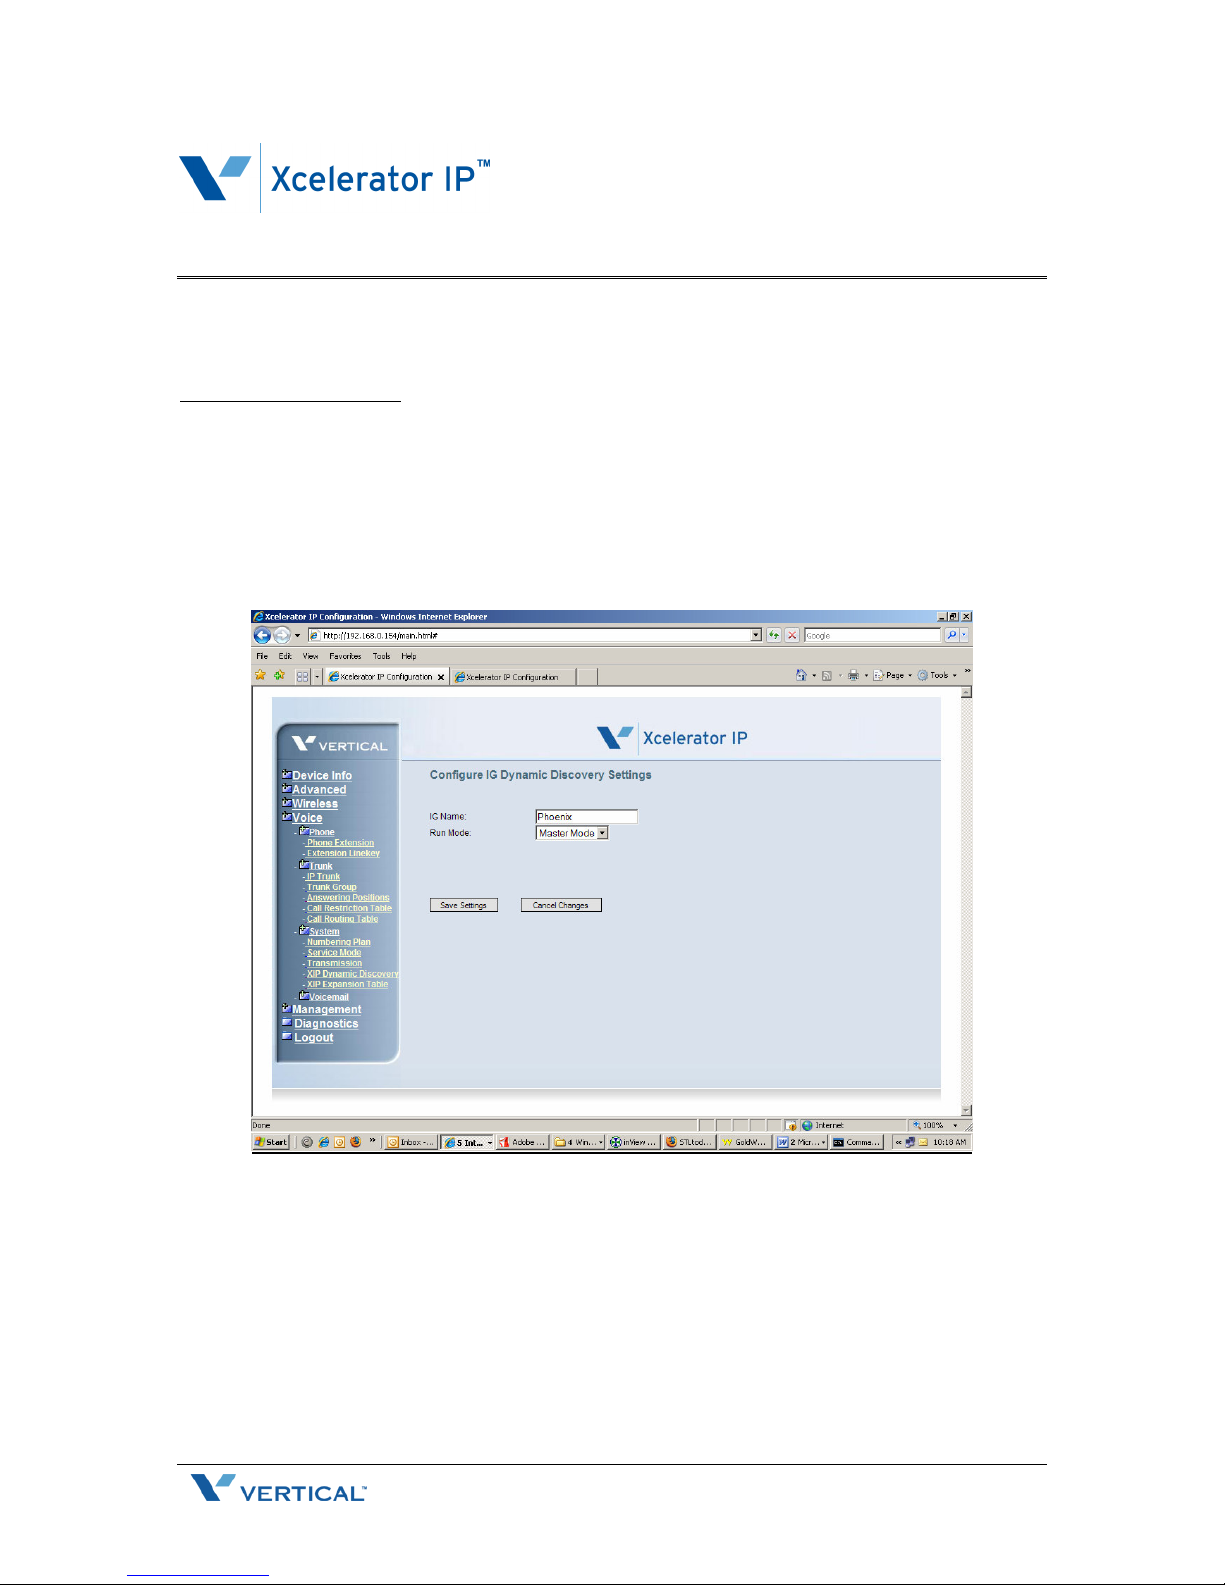
Login to the Phoenix Xcelerator IP, click on System and then XIP Dynamic Discovery.
You will see the following screen:
At this time, configure the Master Xcelerator IP. In the IG Name box put the location name of the
Master Xcelerator IP (Phoenix). For the Run Mode select Master Mode then click Save Settings
When complete, browse to the Slave Xcelerator IP (Scottsdale) system and login. Click on Voice
then System and then click on XIP Dynamic Discovery. You will see the following screen:
1 July 2007
Page 2
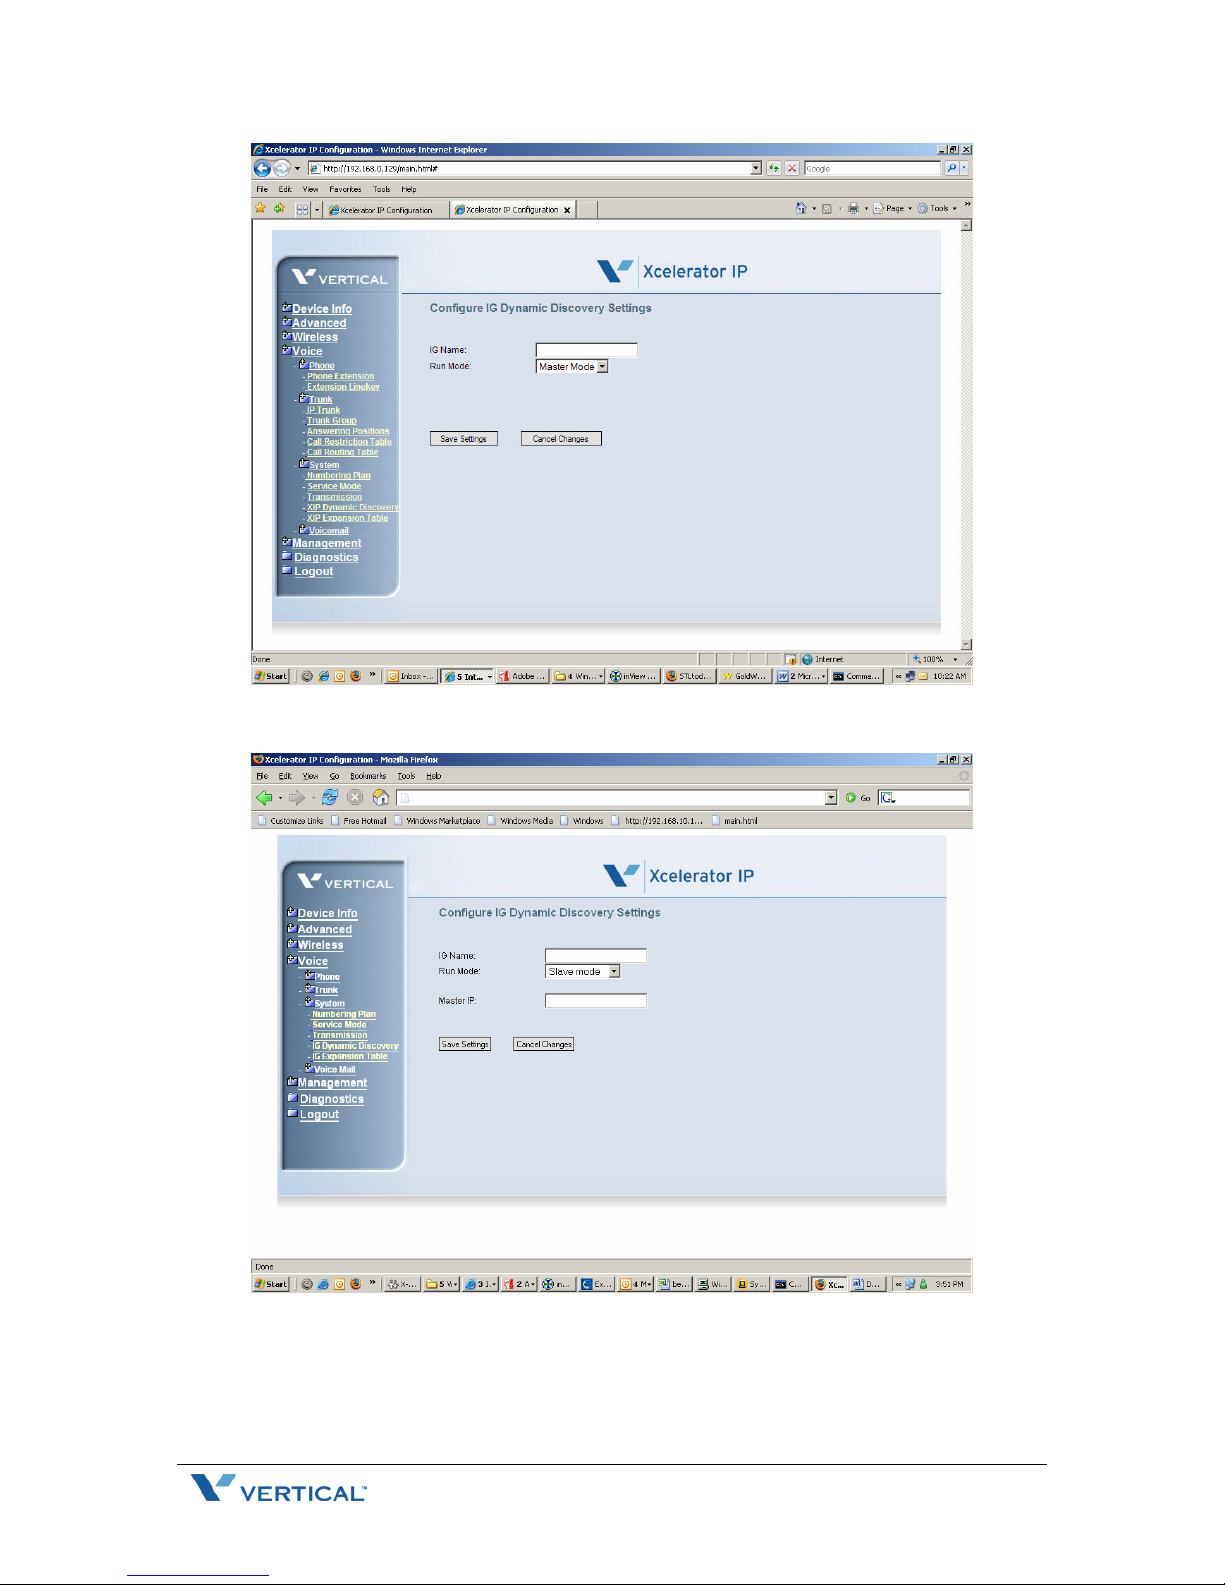
Change Run Mode setting to Slave Mode. The following screen will be displayed:
You will enter the name of the local Xcelerator IP in the IG Name box, in this case it is Scottsdale,
and then fill in the Master IP address (which will be the WAN IP address of the Phoenix
Xcelerator IP). The following screen depicts this operation:
2 July 2007
Page 3

Click Save Settings. You need to give the Xcelerator IP a little time to make the link from Master
to Slave Xcelerator IP.
Click on the XIP Expansion Table. You will see the following screen:
3 July 2007
Page 4

From this screen you can see that the link has been established between the Slave (Scottsdale)
and the Master (Phoenix). However, the connection is not complete at this time. Open the
Phoenix link and click Edit. You will see the following screen:
The only thing that needs to be changed on this screen is the Validity setting. Toggle the setting
to Yes and click on Save Settings. This procedure needs to be done for both the Phoenix and
Scottsdale links. You will also need to go to the Phoenix Xcelerator IP and repeat this process for
both links that are displayed in the XIP Expansion Table in Phoenix.
Routing Calls Between Xcelerator IP Systems
There are 3 types of calls that can be routed across the network:
1. Station to Station
2. Incoming (PSTN/SIP) calls that are answered at an extension. can be transferred across
the network to an extension on a remote IG
3. Outbound calls can be routed across the network to gain access to a trunk on a remote
Xcelerator IP. Note: THIS IS NOT CENTRALIZED TRUNKING. This process allows a
caller at site A to access a trunk at site B and place a local call from site B.
First we will look at calls that are initiated by an extension in Phoenix and calling an extension in
Scottsdale. If you recall we have extension 100-125 programmed in Phoenix, and 150 to 175
programmed at the Scottsdale office. We will start by routing station calls from Phoenix to
Scottsdale.
Browse to the Phoenix Xcelerator IP and login. In the column on the left side the screen click on
Voice, then click on Trunk, then click on Call Routing Table.
4 July 2007
Page 5

On the first line, you will see that the From is 0 and the To is 9. This is the default setting,
indicating all calls that start with 0-9 with a min of 1 digit and a max of 99 will be sent out CO
group 1 (which by default are the PSTN lines). If you add any lines to the Routing Table you will
need to move the data in route table No. 1 to the last line that is configured. To get the Station
calls to route correctly across the network reference the screen shot below:
5 July 2007
Page 6

You can see that the data that was in route table no. 1 was moved to route table no. 2. and then
the extensions that reside in Scottsdale(150-175) where input on route table no. 1.
Route table no. 1 data is as follows:
• From: 150
• To: 175
• Min: 3 (number of digits expected)
• Max: 3 (number of digits expected)
• Delete: 0 (number of digits to delete on leading edge)
• Insert: N/A (number of digits to insert on the leading edge)
• Destination: IG Expansion, with Scottsdale as the network link to use to establish the call.
The same entries need to be configured at the Scottsdale Xcelerator IP. Below is a screen shot of
what the Scottsdale Xcelerator IP Call Routing Table should look like.
With this configuration station calls between these 2 sites will route correctly. This configuration
will also allow incoming calls on either site to be transferred to an extension at the remote site.
OUTBOUND CALL ROUTING
In this section we will look at routing an outbound call across the network to access trunks on a
remote Xcelerator IP. The area code for phoenix is 602, and the area code for Scottsdale is 480.
In Phoenix if a user wanted to make a call to the 480 area code and wanted to use the trunks out
of Scottsdale the configuration would look like this in Phoenix:
6 July 2007
Page 7

The same configuration applies to a user at the Scottsdale office wanting to make a call to the
602 area code and use the trunks out of Phoenix, the configuration in Scottsdale would look like
this:
This concludes the Call Routing Section of the Xcelerator IP.
If you have any questions, please contact Vertical Customer Support.
7 July 2007
 Loading...