

Vertical Vertical Wave - - (donated by Ray from - Vertical) Vertical Wave - ViewPoint User Guide 3.0
Page 1

Wave IP 3.0
Release 3.0
April 2012
Wave ViewPoint
User Guide
Page 2

© 2012 by Vertical Communications, Inc. All rights reserved.
Release 3.0
April 2012
Vertical Communications and the V ertical Comm unications logo and com binations thereof and
Vertical ViewPoint and W av e Contact Center are trademarks of Vertical Communications, Inc.
All other brand and product names are u sed for identification only an d are the property of their
respective holders.
LIMIT OF LIABILITY/DISCLAIMER OF WARRANTY
Vertical Communications, Inc. makes no representation or warranties with respect to the
accuracy or completeness of the content of this publication and specifically disclaims any
implied warranty of merchantability or fitness for any particular purpose, and shall not be liable
for any loss of profit or any other commercial damage, including but not limited to, special,
incidental, or consequential.
COPYRIGHT STATEMENT
This publication contains proprietary and confidential information of Vertical Communications,
Inc. The contents of this document may not be disclosed, copied or translated by third parties,
in any form, or by any means known, or not now known or conceived, without prior explicit
written permission from Vertical Communications, Inc.
Vertical Communications, Inc. reserves the right to revise this publication and to make changes
in content without notice.
Wave ViewPoint User Guide
Page 3

Revision History
Release 3.0
April 2012
Release Date Documentation Changes Page No.
3.0 4/12 GENERAL RELEASE
The ViewPoint Mobile App allows you to make and take calls and access
some ViewPoin t features from sup ported mobile devic es, such as the iPh one,
iPad, iPod Touch.
2.5 10/11 GENERAL RELEASE
ViewPoint can now be installed on the Wave Server for administrative
purposes only.
Added section “Performing automatic updates” describing how ViewPoint
will automatically update on your PC when a new version is available.
Added section “Automatically displaying account code information for
contacts.”
Added section “Adding bookmarks to a voice message”. If a voice message
contains bookm ark s, the bookmarks are now included when the voice
message is forwarded to a gateway user (a user on another W ave s ystem
in a WaveNet network).
Added new routing lis t action opti on: When calling a V iewPoint Grou p, you
can now specify tha t G roup members who are on the phone will not be
called.
2.0 SP1 03/11 SERVICE PACK RELEASE
Added section “Installing ViewPoint”, including an important note to never
install ViewPoint on the Wave Server.
The Vie wPoint Incoming Call Ale rt wind ow can n ow dis play up to 3 Call
Monitor fields in addition to caller name and number.
Added note on how to set different incoming call alert options for Call
Monitors that have been shared with you.
Added appendix “Troubleshooting ViewPoint Problems”. D-1
14-1
---
2-2
5-7
7-9
9-18
2-2
5-18
12-14
Wave ViewPoint User Guide
Page 4

Revision History
Release 3.0
April 2012
Release Date Documentation Changes Page No.
2.0 09/10 GENERAL RELEASE
Added section “What’s new in this version” that describes how to view a list
of new ViewPoint features.
Y ou can no w choose th e ViewPoint sof tphone as your primary or secondary
phone when you log on. See section “U sing V iewPoint wi th a diff erent phone
or Wave Server“.
You can now share folders with other users. Your Wave system
administrator set s up sharing, as wel l as the access pe rmissions th at control,
whether the other users view the contents of the shared folders or view and
act on the contents (for example, take another user’s call via a shared Call
Monitor.
You can now modify personal status p references to reflect your c han gin g
availability and location, or to customize how your calls will be handled.
Wave IMpul se supports simple, secure, use r-to-user insta nt messaging
in ViewPoint.
The new All tab in th e Call Monitor disp lays all cal ls to and fr om your phone ,
all queue calls for any queue that you are currently logged into, and all calls
from other users’ Call Monitors that have been shared with you.
Added note that to superv ise a call, at lea st one party in the call must be from
the local Wave system.
A Wave mobi le extension allows your remote phone to b e treated as a W ave
station so that you can use ViewPoint to manage your voice messages and
greetings, place outbound calls, answer and manage calls displayed in the
Call Monitor, and so forth.
Wave Mail allows you to synchronize your voice messages and contacts
between Wave and your e-mail program.
Added note to table in section “Viewing call details” clarifying the “Blind
transfer” and “Supervised transfer” resul t s.
In the Call Transfer report, filtering calls by all users or by a ViewPoint
Group is now supported, in addition to the previous options (ind ividual us er
or queue). Also, the new Inb ound Calls column on th e Data t ab allow s you
to compare the number of calls received by vs. transferred to each target
during the reporting period.
1-1
2-10
2-35
3-1
4-4
5-3
6-13
6-17
7-27
8-3
13-16
Page 5

Revision History
Release 3.0
April 2012
Release Date Documentation Changes Page No.
1.5 SP3 09/09 SERVICE PACK RELEASE
T wo additional V iewPoint repo rt s are now avail able on all s ystems wit h no
licensing requirements. See sections “Call Transfer report” and “User Call
Trends report.”
1.5 SP2 05/09 SERVICE PACK RELEASE
Added important note on not using the ViewPoint Call Monitor to manage
calls to a virtual extension.
Added steps to display ViewPoint Group tabs in the Contacts folder.10-3
Added a new chapter “Running Contact Center Reports” that describes
call activity and phone usage reports available from the ViewPoint Tools
menu.
1.5 11/08 GENERAL RELEASE
Added the Call Monitor “Report a Problem” feature. C-2
Updated Appendix B with current command line arguments.B-1
Removed re ferences to Exchange synchro nization. -Added a note that Call Waiting is not always supported. 12-6
Added “Flag a call” button in Call Monitor.5-17
Added Extensions t abs section. 4-3
Revised screenshot in Groups chapter. 10-18
Revisions to Archive Recording Browser section. A-1
Added screenshot and description of Call Monitor Parties pane. 6-9
Changed “workgroup” to “group” throughout. -Added “Personal Status” chapter.3-1
Revised voicemail notification scheduling. 7-19
1.0 SP2 1/08 SERVICE PACK RELEASE
Added “Customizing” chapter.12-1
Added “Routing Lists” section.9-5
Added “Call Rules” chapter.11-1
Added Revision History table. this page
13-16, 13-23
5-7
13-1
Wave ViewPoint User Guide
Page 6

Revision History
Release 3.0
April 2012
Release Date Documentation Changes Page No.
1.0 10/07 GENERAL RELEASE
Initial Release. ---
Wave ViewPoint User Guide
Page 7

Contents
Release 3.0
April 2012
Contents
Chapter 1 Introducing Vertical Wave
About Vertical Wave ViewPoint - - - - - - - - - - - - - - - - - - - - - 1-1
What’s new in this version - - - - - - - - - - - - - - - - - - - - - - - - - - - 1-1
Installing ViewPoint - - - - - - - - - - - - - - - - - - - - - - - - - - - - - - - 1-1
Accessing Wave - - - - - - - - - - - - - - - - - - - - - - - - - - - - - - - 1-2
Using ViewPoint - - - - - - - - - - - - - - - - - - - - - - - - - - - - - - - - - - 1-2
Using the Wave TAPI Service Provider and Contact Manager
Assistant - - - - - - - - - - - - - - - - - - - - - - - - - - - - - - - - - - - - - 1-2
Using your phone - - - - - - - - - - - - - - - - - - - - - - - - - - - - - - - - - 1-3
Feature comp a ris o n ta bl e - - - - - - - - - - - - - - - - - - - - - - - - - 1-3
Getting technical support - - - - - - - - - - - - - - - - - - - - - - - - - 1-4
Wave documenta tion - - - - - - - - - - - - - - - - - - - - - - - - - - - - 1-4
Related reading - - - - - - - - - - - - - - - - - - - - - - - - - - - - - - - - - - 1-4
Accessing Help - - - - - - - - - - - - - - - - - - - - - - - - - - - - - - - - - - 1-5
Chapter 2 Using ViewPoint
About ViewPoint - - - - - - - - - - - - - - - - - - - - - - - - - - - - - - - 2-1
Installing ViewPoint - - - - - - - - - - - - - - - - - - - - - - - - - - - - - - - 2-2
Using ViewPoint remotely - - - - - - - - - - - - - - - - - - - - - - - - - - - 2-5
Using ViewPoint with a remote phone - - - - - - - - - - - - - - - - - - 2-5
Using the ViewPoint Softphone - - - - - - - - - - - - - - - - - - - - - - - 2-6
Logging on to ViewPoint - - - - - - - - - - - - - - - - - - - - - - - - - - 2-7
Using ViewPoint with a different phone, Wave Server, or language -
2-10
Using ViewPoint with another station ID - - - - - - - - - - - - - - - - 2-14
Using ViewPoint in languages other than English - - - - - - - - - 2-15
Changing your station, Wave Server name, or user name after
logging on - - - - - - - - - - - - - - - - - - - - - - - - - - - - - - - - - - - 2-17
Wave ViewPoint User Guide
Page 8

TOC-2
Release 3.0
April 2012
Contents
Changing your password - - - - - - - - - - - - - - - - - - - - - - - - - - 2-17
Logging on with command-line switches - - - - - - - - - - - - - - - - 2-18
Exiting ViewPoint - - - - - - - - - - - - - - - - - - - - - - - - - - - - - - 2-18
Elements of the ViewPoint window - - - - - - - - - - - - - - - - - 2-19
The Menu Bar - - - - - - - - - - - - - - - - - - - - - - - - - - - - - - - - - - 2-19
The Toolbar - - - - - - - - - - - - - - - - - - - - - - - - - - - - - - - - - - - - 2-20
The Navigation Pane - - - - - - - - - - - - - - - - - - - - - - - - - - - - - 2-20
The Status Bar - - - - - - - - - - - - - - - - - - - - - - - - - - - - - - - - - - 2-21
Working in ViewPo in t folders - - - - - - - - - - - - - - - - - - - - - 2-22
Working with multiple Viewpoint folders at the same time - - - - 2-25
Adjusting the Phonebook Pane layout in the Call Monitor - - - - 2-26
Deleting voice messages and other items - - - - - - - - - - - - - - - 2-27
Copying and pasting items - - - - - - - - - - - - - - - - - - - - - - - - - 2-27
Dragging and dropping items - - - - - - - - - - - - - - - - - - - - - - - 2-28
Printing items in folders - - - - - - - - - - - - - - - - - - - - - - - - - - - 2-31
Organizin g ite ms in folders - - - - - - - - - - - - - - - - - - - - - - - 2-31
Public folders - - - - - - - - - - - - - - - - - - - - - - - - - - - - - - - - - - - 2-31
Customizing columns - - - - - - - - - - - - - - - - - - - - - - - - - - - - - 2-31
Viewing public folders - - - - - - - - - - - - - - - - - - - - - - - - - - - - - 2-33
Managing the Deleted folder - - - - - - - - - - - - - - - - - - - - - - - - 2-33
Sharing folders - - - - - - - - - - - - - - - - - - - - - - - - - - - - - - - 2-35
Using the audio controls - - - - - - - - - - - - - - - - - - - - - - - - - 2-36
Importing and exporting Wave items - - - - - - - - - - - - - - - - 2-37
Importing and exporting contacts - - - - - - - - - - - - - - - - - - - - - 2-38
Exporting ViewPoint recordings - - - - - - - - - - - - - - - - - - - - - - 2-41
Chapter 3 Using Personal Statuses
About personal statuses - - - - - - - - - - - - - - - - - - - - - - - - - - 3-1
Available personal statuses - - - - - - - - - - - - - - - - - - - - - - - - - - 3-4
Selecting a personal status - - - - - - - - - - - - - - - - - - - - - - - - 3-7
Selecting a personal status in Viewpoint - - - - - - - - - - - - - - - - - 3-7
Selecting a personal status using your phone - - - - - - - - - - - - - 3-7
Modifying a personal status - - - - - - - - - - - - - - - - - - - - - - - 3-8
Using personal status defaults - - - - - - - - - - - - - - - - - - - - 3-10
Specifying a default personal status greeting and routing list - 3-10
Wave ViewPoint User Guide
Page 9

Setting personal status defaults - - - - - - - - - - - - - - - - - - - - - - 3-10
Release 3.0
April 2012
Changing the personal status of another user - - - - - - - - - - 3-11
Chapter 4 Using the Extensions List
Viewing Wave exte n s io n s - - - - - - - - - - - - - - - - - - - - - - - - - 4-1
Searching the Extensions list - - - - - - - - - - - - - - - - - - - - - - - - 4-2
Extensions list tabs - - - - - - - - - - - - - - - - - - - - - - - - - - - - - - - 4-3
Extensions list columns - - - - - - - - - - - - - - - - - - - - - - - - - - - - 4-3
Placing call s to an ex te n s io n - - - - - - - - - - - - - - - - - - - - - - - 4-4
Using Wave IMpulse for instan t messaging - - - - - - - - - - - - 4-4
Sending an instant message to another user - - - - - - - - - - - - - 4-4
Receiving an instant message from another user - - - - - - - - - - 4-6
Inviting users to an instant messaging conference - - - - - - - - - - 4-6
Chapter 5 Receiving and Handling Calls in ViewPoint
Using the Call Mon itor folder - - - - - - - - - - - - - - - - - - - - - - - 5 -1
Call Monitor folder tabs - - - - - - - - - - - - - - - - - - - - - - - - - - - - - 5-3
Call Monitor folder panes - - - - - - - - - - - - - - - - - - - - - - - - - - - 5-5
Call Monitor folder columns - - - - - - - - - - - - - - - - - - - - - - - - - - 5-5
Displaying the Call Monitor folder automatically - - - - - - - - - 5-6
Selecting and acting on a call in the Call Monitor - - - - - - - - 5-7
Call ownership - - - - - - - - - - - - - - - - - - - - - - - - - - - - - - - - - - - 5-7
Double-clicking calls - - - - - - - - - - - - - - - - - - - - - - - - - - - - - - 5-8
Commands while a call is ringing - - - - - - - - - - - - - - - - - - - 5-8
Taking the call - - - - - - - - - - - - - - - - - - - - - - - - - - - - - - - - - - 5-8
Sending the call to voicemail - - - - - - - - - - - - - - - - - - - - - - - - - 5-9
Commands while you’re on a call - - - - - - - - - - - - - - - - - - - 5-9
Putting a call on hold - - - - - - - - - - - - - - - - - - - - - - - - - - - - - 5-10
Transferring a call - - - - - - - - - - - - - - - - - - - - - - - - - - - - - - - 5-11
Adding notes to a call - - - - - - - - - - - - - - - - - - - - - - - - - - - - - 5-13
Sending an email message about a call - - - - - - - - - - - - - - - - 5-13
Recording a call - - - - - - - - - - - - - - - - - - - - - - - - - - - - - - - - - 5-13
Associating a call with a contact - - - - - - - - - - - - - - - - - - - - - 5-15
Parking a call - - - - - - - - - - - - - - - - - - - - - - - - - - - - - - - - - - - 5-15
Unparking a call - - - - - - - - - - - - - - - - - - - - - - - - - - - - - - - - - 5-16
TOC-3
Contents
Wave ViewPoint User Guide
Page 10

Sending a call to voicemail - - - - - - - - - - - - - - - - - - - - - - - - - 5-16
Release 3.0
April 2012
Playing a caller's name over your speakers - - - - - - - - - - - - - 5-16
Disconnecting a call while staying on the phone - - - - - - - - - - 5-16
Flagging a problem call to report later - - - - - - - - - - - - - - - - - 5-17
Incoming call indicators - - - - - - - - - - - - - - - - - - - - - - - - - 5-18
Sharing your Call Monitor folder - - - - - - - - - - - - - - - - - - - 5-19
Viewing shared calls - - - - - - - - - - - - - - - - - - - - - - - - - - - - - - 5-20
Chapter 6 Placing Calls in ViewPoint
Placing a call - - - - - - - - - - - - - - - - - - - - - - - - - - - - - - - - - - 6-1
Placing calls using the Dial bar - - - - - - - - - - - - - - - - - - - - - - - 6-2
Using the Place Call To dialog - - - - - - - - - - - - - - - - - - - - - - - - 6-3
Quick-dialing from ViewPoint folders - - - - - - - - - - - - - - - - - - - 6-6
Placing calls using drag-and-drop - - - - - - - - - - - - - - - - - - - - - 6-7
Placing calls using other contact managers - - - - - - - - - - - - - - 6-8
Checking a number - - - - - - - - - - - - - - - - - - - - - - - - - - - - - 6-8
Redialing numbers and returning calls - - - - - - - - - - - - - - - - 6-9
Creating con fe r e n ce ca l l s - - - - - - - - - - - - - - - - - - - - - - - - - 6-9
Adding parties to a conference - - - - - - - - - - - - - - - - - - - - - - 6-10
Conferencing multiple active calls together - - - - - - - - - - - - - - 6-11
Ending a conference call - - - - - - - - - - - - - - - - - - - - - - - - - - - 6-12
Supervising other users’ calls - - - - - - - - - - - - - - - - - - - - - 6-12
Using the ViewPoint Softphone - - - - - - - - - - - - - - - - - - - - 6-14
About the ViewPoint Softphone Dial Pad - - - - - - - - - - - - - - - 6-15
Placing calls using the ViewPoint Softphone - - - - - - - - - - - - - 6-16
Answering and handling calls using the ViewPoint Software - - 6-16
Using a remote phone - - - - - - - - - - - - - - - - - - - - - - - - - - 6-17
Using a remote phone with ViewPoint - - - - - - - - - - - - - - - - - 6-17
Using a remote phone without ViewPoint - - - - - - - - - - - - - - - 6-18
TOC-4
Contents
Chapter 7 Managing Voice Messages in ViewPoint
About managing voice messages in ViewPoint - - - - - - - - - - 7-1
The Messages folder - - - - - - - - - - - - - - - - - - - - - - - - - - - - - - 7-2
Archiving voice messages and call recordings - - - - - - - - - - - - 7-3
Managing thousands of voice messages or call recordings - - - 7-4
Wave ViewPoint User Guide
Page 11

TOC-5
Release 3.0
April 2012
Contents
Listening to your voice messages and call recordings - - - - - 7-4
Listening to a voice message as it is being left - - - - - - - - - - - - 7-4
Handling your voice messages - - - - - - - - - - - - - - - - - - - - - 7-4
Forwarding a voice message - - - - - - - - - - - - - - - - - - - - - - - - - 7-5
Replying to a voice message - - - - - - - - - - - - - - - - - - - - - - - - - 7-6
Calling back the person who left a voice message - - - - - - - - - - 7-6
E-mailing a voice message - - - - - - - - - - - - - - - - - - - - - - - - - - 7-7
Opening the contact record from a voice message - - - - - - - - - 7-7
Deleting voice messages - - - - - - - - - - - - - - - - - - - - - - - - - - - 7-7
Associating a voice message from “Unknown” with a contact - - 7-8
Marking a voice message unheard - - - - - - - - - - - - - - - - - - - - 7-8
Marking a voice message Urgent or Private - - - - - - - - - - - - - - 7-8
Adding notes to a voice message - - - - - - - - - - - - - - - - - - - - - 7-9
Adding bookmarks to a voice message - - - - - - - - - - - - - - - - - 7-9
Managing call recordings - - - - - - - - - - - - - - - - - - - - - - - - 7-10
Managing your voicemail maximums - - - - - - - - - - - - - - - - 7-10
Setting a maximum length for your voice messages - - - - - - - 7-10
Sending a message directly to a user’s voicemail - - - - - - - 7-12
Knowing when you have new voice messages - - - - - - - - - 7-13
Number displayed in the Navigatio n Pane - - - - - - - - - - - - - - 7-13
Stutter dial tone - - - - - - - - - - - - - - - - - - - - - - - - - - - - - - - - - 7-13
Message waiting light - - - - - - - - - - - - - - - - - - - - - - - - - - - - - 7-13
Sound played - - - - - - - - - - - - - - - - - - - - - - - - - - - - - - - - - - 7-13
E-mail, pager, and call notifications - - - - - - - - - - - - - - - - - - - 7-14
Scheduling notifications - - - - - - - - - - - - - - - - - - - - - - - - - - - 7-19
Managing voicemail greetings - - - - - - - - - - - - - - - - - - - - - 7-23
The Greetings folder - - - - - - - - - - - - - - - - - - - - - - - - - - - - - - 7-24
Greeting hierarchy - - - - - - - - - - - - - - - - - - - - - - - - - - - - - - - 7-25
Recording a new greeting - - - - - - - - - - - - - - - - - - - - - - - - - - 7-26
E-mailing a greeting - - - - - - - - - - - - - - - - - - - - - - - - - - - - - - 7-27
Synchronizing Wave voice messages and contacts with your
e-mail program - - - - - - - - - - - - - - - - - - - - - - - - - - - - - - 7-27
Configuring your Wave Mail mailbox in ViewPoint - - - - - - - - - 7-31
Wave ViewPoint User Guide
Page 12

Chapter 8 Using the Call Log Folder
Release 3.0
April 2012
The Call Log folder - - - - - - - - - - - - - - - - - - - - - - - - - - - - - 8-1
Call Log folder filters - - - - - - - - - - - - - - - - - - - - - - - - - - - - - - - 8-2
Call Log folder columns - - - - - - - - - - - - - - - - - - - - - - - - - - - - 8-3
Viewing call details - - - - - - - - - - - - - - - - - - - - - - - - - - - - - - - - 8-3
Taking notes on a Call Log entry - - - - - - - - - - - - - - - - - - - - 8-6
Sending an email message about a Call Log entry - - - - - - - 8-6
Associating a call from “Unknown” with a contact - - - - - - - - 8-7
Returning a call in the Call Log - - - - - - - - - - - - - - - - - - - - - 8-7
Entering an account code for a Call Log entry - - - - - - - - - - 8-8
Opening the contact record from a contact’s call - - - - - - - - - 8-8
Sharing the Ca ll L og - - - - - - - - - - - - - - - - - - - - - - - - - - - - 8-8
Reporting on the Call Log - - - - - - - - - - - - - - - - - - - - - - - - - 8-9
Chapter 9 Call Forwarding and Routing Lists
About call forwarding and routing li sts - - - - - - - - - - - - - - - - 9-1
Forwarding calls - - - - - - - - - - - - - - - - - - - - - - - - - - - - - - - 9-2
Turning forwarding on and off via the FWD button - - - - - - - - - - 9-5
Call forwarding and voicemail - - - - - - - - - - - - - - - - - - - - - - - - 9-5
Using routing lists - - - - - - - - - - - - - - - - - - - - - - - - - - - - - - 9-5
The Routing Lists folder - - - - - - - - - - - - - - - - - - - - - - - - - - - - 9-7
Using the Routing List Wizard vs. the Routing List Editor - - - - - 9-9
Creating a routing list using the Routing List Wizard - - - - - - - 9-10
Creating a routing list using the Routing List Editor - - - - - - - - 9-11
Handling calls differently if you do not answer or are busy - - - 9-15
Routing calls to groups - - - - - - - - - - - - - - - - - - - - - - - - - - - - 9-18
Using greetings with routing list final actions - - - - - - - - - - - - - 9-20
TOC-6
Contents
Chapter 10 Managing Contacts and Groups
About contact management and Wave - - - - - - - - - - - - - - 10-1
The Contacts folder - - - - - - - - - - - - - - - - - - - - - - - - - - - - 10-2
Searching the Contacts folder - - - - - - - - - - - - - - - - - - - - - - - 10-2
Private and public contacts - - - - - - - - - - - - - - - - - - - - - - - - - 10-2
Wave ViewPoint User Guide
Page 13

TOC-7
Release 3.0
April 2012
Contents
Viewing shared contacts - - - - - - - - - - - - - - - - - - - - - - - - - - - 10-3
Contacts folder tabs - - - - - - - - - - - - - - - - - - - - - - - - - - - - - - 10-3
Changing double-click behavior - - - - - - - - - - - - - - - - - - - - - - 10-4
Managing contacts - - - - - - - - - - - - - - - - - - - - - - - - - - - - - 10-5
Entering a new contact - - - - - - - - - - - - - - - - - - - - - - - - - - - - 10-5
Placing calls to your contacts - - - - - - - - - - - - - - - - - - - - - - - 10-8
Teaching Wave to recognize your contacts - - - - - - - - - - - 10-8
Identifying contacts by name - - - - - - - - - - - - - - - - - - - - - - - - 10-9
Associating a call or Caller ID number with a contact - - - - - - 10-11
Understanding name and number on Caller ID - - - - - - - - - - 10-14
Using contact PINs for guaranteed recognition - - - - - - - - - - 10-14
Opening contacts from within other folders - - - - - - - - - - - 10-15
Synchronizing your Wave contacts with your e-mail program - - -
10-15
Using contacts maintained in another contact manager - - 10-15
Using the Wave Contact Manager Assistant - - - - - - - - - - - - 10-16
Importing contacts from other contact managers into Wave - 10-16
Using ViewPo in t Groups - - - - - - - - - - - - - - - - - - - - - - - - 10-17
Personal and public Groups - - - - - - - - - - - - - - - - - - - - - - - 10-18
The Groups folder - - - - - - - - - - - - - - - - - - - - - - - - - - - - - - 10-18
Creating a Group - - - - - - - - - - - - - - - - - - - - - - - - - - - - - - - 10-19
Chapter 11 Using Call Rules
About call rules - - - - - - - - - - - - - - - - - - - - - - - - - - - - - - - 11-1
Call rules overview - - - - - - - - - - - - - - - - - - - - - - - - - - - - - - - 11-1
Distinguishing which incoming calls activate the call rule - - - - 11-2
Examples of how you can use call rules - - - - - - - - - - - - - - - - 11-3
The Call Rules dialog - - - - - - - - - - - - - - - - - - - - - - - - - - - 11-3
Enabling and disabling a call rule - - - - - - - - - - - - - - - - - - - - - 11-4
Organizing the priority of call rul es - - - - - - - - - - - - - - - - - - - - 11-4
Creating a new ca ll ru le- - - - - - - - - - - - - - - - - - - - - - - - - - 11-4
Specifying people that trigger a call rule - - - - - - - - - - - - - - - - 11-6
Specifying dates and times to trigger a call rule - - - - - - - - - - - 11-7
Quickly creating call rules for contacts or groups - - - - - - 11-10
Call rule priority - - - - - - - - - - - - - - - - - - - - - - - - - - - - - - 11-10
Wave ViewPoint User Guide
Page 14

How Wave resolves call rule conflicts - - - - - - - - - - - - - - - - - 11-11
Release 3.0
April 2012
Chapter 12 Customizing ViewPoint
About customizing ViewPoint - - - - - - - - - - - - - - - - - - - - - 12-1
Guide to the Options dialog - - - - - - - - - - - - - - - - - - - - - - - - - 12-1
Customizing phone behavior - - - - - - - - - - - - - - - - - - - - - - 12-3
Recording your voice title - - - - - - - - - - - - - - - - - - - - - - - - - - 12-4
Changing the language of phone command prompts - - - - - - - 12-5
Customizing or turning off call waiting - - - - - - - - - - - - - - - - - 12-6
Changing your personal operator - - - - - - - - - - - - - - - - - - - - - 12-7
Customizing your listing in the dial-by-name directory - - - - - - 12-8
Customizing how long your phone rin gs - - - - - - - - - - - - - - - - 12-9
Configuring the ViewPoint Softp hone - - - - - - - - - - - - - - - 12-10
Customizing incoming call behavior - - - - - - - - - - - - - - - - 12-13
Customizing voice message behavior - - - - - - - - - - - - - - 12-15
Setting voice messages playback order - - - - - - - - - - - - - - - 12-15
Playing a sound when a new message arrives - - - - - - - - - - 12-16
Customizing ViewPoint for operators - - - - - - - - - - - - - - - 12-17
Customizing the ViewPoint display - - - - - - - - - - - - - - - - 12-17
Changing ViewPoint’s language - - - - - - - - - - - - - - - - - - - - 12-18
Defining double-click behavior in the Contacts folder - - - - - - 12-19
Customizing columns - - - - - - - - - - - - - - - - - - - - - - - - - - - - 12-20
Other custom ization options - - - - - - - - - - - - - - - - - - - - - 12-21
TOC-8
Contents
Chapter 13 Running Contact Center Reports
About the Contact Center Reporter - - - - - - - - - - - - - - - - - 13-1
Running a report - - - - - - - - - - - - - - - - - - - - - - - - - - - - - - 13-3
Using the Contact Center Reporter toolbar in Excel - - - - - - - - 13-4
Shared and local reports - - - - - - - - - - - - - - - - - - - - - - - - - - - 13-5
Reporting on outbound Contact Center calls - - - - - - - - - - - - - 13-5
Backups of original repor ts - - - - - - - - - - - - - - - - - - - - - - - - - 13-6
Do not modify Contact Center report templates! - - - - - - - - - - 13-6
Setting Reporter options - - - - - - - - - - - - - - - - - - - - - - - - - 13-6
Setting general Reporter options - - - - - - - - - - - - - - - - - - - - - 13-6
Wave ViewPoint User Guide
Page 15

TOC-9
Release 3.0
April 2012
Contents
Setting individual report options - - - - - - - - - - - - - - - - - - - - - - 13-8
Using Excel tabs to view report results - - - - - - - - - - - - - - - 13-9
Totals on the Data tab - - - - - - - - - - - - - - - - - - - - - - - - - - - - 13-9
Using the Report Options tab in Excel - - - - - - - - - - - - - - - - - 13-9
Printing and scheduling reports with the Report Runner - 13-10
Using the Report Runner - - - - - - - - - - - - - - - - - - - - - - - - - 13-11
Running the Report Runner without a command line statement - - -
13-12
Available reports overview - - - - - - - - - - - - - - - - - - - - - - 13-13
Call Log report - - - - - - - - - - - - - - - - - - - - - - - - - - - - - - - 13-14
Filtering Call Log data by column - - - - - - - - - - - - - - - - - - - - 13-15
Call Transfer report - - - - - - - - - - - - - - - - - - - - - - - - - - - 13-16
Reading the Call Transfer report - - - - - - - - - - - - - - - - - - - - 13-16
Grouped Service Level report - - - - - - - - - - - - - - - - - - - - 13-17
Reading the Grouped Service Level report - - - - - - - - - - - - - 13-17
Outbound Call Comparison report - - - - - - - - - - - - - - - - - 13-18
Reading the Outbound Call Comparison report - - - - - - - - - - 13-18
Outbound Calls by Phone Number report - - - - - - - - - - - - 13-19
Reading the Outbound Call by Phone Number report - - - - - 13-19
Outbound Long Distance Summary report - - - - - - - - - - - 13-20
Before running the Outbound Long Distance Summary report 13-20
Reading the Outbound Long Distance Summary report - - - - 13-21
Unanswered Calls During Business Hours report - - - - - - 13-22
Reading the Unanswered Calls During Business Hours report 13-22
User Call Trends report - - - - - - - - - - - - - - - - - - - - - - - - 13-23
Reading this report - - - - - - - - - - - - - - - - - - - - - - - - - - - - - - 13-23
Chapter 14 Using the ViewPoint Mobile App
Appendix A Using the Wave Archived Recording Browser
About the Wave Archived Recording Browser - - - - - - - - - - A-1
Running the Archived Recording Browser - - - - - - - - - - - - - A-2
Searching fo r re c o rd ings - - - - - - - - - - - - - - - - - - - - - - - - - A-3
Starting a new search - - - - - - - - - - - - - - - - - - - - - - - - - - - - - - A-3
Wave ViewPoint User Guide
Page 16

Saving your current search - - - - - - - - - - - - - - - - - - - - - - - - - - A-9
Release 3.0
April 2012
Loading a saved search - - - - - - - - - - - - - - - - - - - - - - - - - - - - A-9
Managing individual recordings - - - - - - - - - - - - - - - - - - - - A-10
Acting on archived call recordings - - - - - - - - - - - - - - - - - - A-11
Checking the archive for missing audio files - - - - - - - - - - - A-13
Purging arch iv e d re co rdings - - - - - - - - - - - - - - - - - - - - - - A-14
Appendix B Logging On with Command-Line Switches
About ViewPoint command-line switches - - - - - - - - - - - - - - B-1
ViewPoint command-line switch reference - - - - - - - - - - - - - B-1
Associating ViewPoint with a specific phone - - - - - - - - - - - - - - B-3
Appendix C Reporting Problems
About the Problem Report Wizard - - - - - - - - - - - - - - - - - - - C-1
Reporting a problem that involves a specific call - - - - - - - - - C-2
Reporting a problem that does not involve a specific call - - - C-3
TOC-10
Contents
Appendix D Troubleshooting V iewPoint Problems
Index
Wave ViewPoint User Guide
Page 17

Chapter 1
Release 3.0
April 2012
Introducing Vertical Wave
CHAPTER CONTENTS
About Vertical Wave ViewPoint. . . . . . . . . . . . . . . . . . . . . . . . . . . . . . . . . . . . . .1-1
Accessing Wave . . . . . . . . . . . . . . . . . . . . . . . . . . . . . . . . . . . . . . . . . . . . . . . . . 1-2
Feature comparison table . . . . . . . . . . . . . . . . . . . . . . . . . . . . . . . . . . . . . . . . . .1-3
Getting technical support. . . . . . . . . . . . . . . . . . . . . . . . . . . . . . . . . . . . . . . . . . . 1-4
Wave documentation. . . . . . . . . . . . . . . . . . . . . . . . . . . . . . . . . . . . . . . . . . . . . .1-4
About Vertical Wave ViewPoint
Vertical’s award-winning Wave ViewPoint integrates your phone and Windows PC to make
your phone a much more powerful tool, dramatically expanding the ways in which you can
place, receive, and manage your phone calls.
What’s new in this version
To learn about the new ViewPoint features in this version, in ViewPoint click Help > Contents
and Index
, and then choose Release Not es > What ’ s new in thi s versi on from the Contents pane.
Installing Vi ewPoint
If you need to install or upgrade your version of ViewPoint, contact your Wave administrator,
or see Chapter 9 in the Wave Server Installation Guide.
Wave ViewPoint User Guide
Page 18

Accessing Wave 1-2
Release 3.0
April 2012
Chapter 1 : Introducing Vertical Wave
Accessing Wave
You can access Wave in any of the following ways. Each method is described below.
• Wave ViewPoint
• Wave TAPI Service Provider and Contact Manager Assistant
• Your phon e
Using ViewPoint
This manual describes how to use ViewPoint, Wave’s easy-to-use Windows interface. With
ViewPo int you can point and click to play voice mes sages and place calls, access contacts and
users, and more. To jump right into using Wave ViewPoint, skip to Chapter 2.
Using the Wave TAPI Service Provider and Contact Manager Assistant
If you make extensive use of contact management applications or customer relationship
management software that are TAPI-compatible, such as Microsoft Outlook, GoldMine,
GoldMine FrontOffice 2000, or Act!, you can install the Wave TAPI Service Provider and place
Wave calls to contacts directly from those applications. You do not need to have Wave
ViewPoint installed on your computer to use the TAPI Service Provider.
The TA PI Service Provider links your contact management applications to your Wave phone,
just as Wave ViewPoint is linked to your phone. After the TAPI Service Provider is installed,
you can use your contact manager application’s Place Call feature to call its contacts using your
Wave phone. Ask your Wave system administrator to install the Wave TAPI Service Provider,
and then follow the instructions in your contact manager application for placing calls.
You can also install the Wave Contact Manager Assistant (CMA) and receive screen-pops for
calls that show the name, the Caller ID, and the time of day of the call. Y ou do not need to have
Wave ViewPoint installed on your computer to use the CMA.
Note: With Act!, you can receive screen-pops without installing the CMA.
For more information, see the Wave TAPI Service Provider Help and the Wave Contact
Manager Assistant Help.
Wave ViewPoint User Guide
Page 19

Feature comparison table 1-3
Release 3.0
April 2012
Chapter 1 : Introducing Vertical Wave
Using your phone
Voice prompts guide you to enter Wave phone commands via your phone’ s keypad. Depend ing
on your phone type (SIP, digital, or anal og), you can also use ph one feature but tons or soft keys
to access W ave features. For more information, see the Wave Phone User Guide, or the Wave
Phone Quick Reference Guide specific to your phone type.
Feature comparison table
The following table shows the major features that are available in Wave, via ViewPoint, the
phone menu prompts, or the Cont act Manager A ssistan t (CMA). If your Wave system does not
include some of these features, your Wave system administrator may have made them
unavailable to you.
Feature ViewPoint Phone CMA
Managing voice messages Yes Yes No
Placing, receiving, and handling calls Yes Yes Some
Managing participants in conference calls Yes No No
Managing contacts Yes No Yes
Screen-pops for incoming calls Yes n/a Yes
Managing Groups Yes No No
Viewing the Extensions list Yes No No
Viewing the Call Log Yes No No
Recording greetings Yes Yes No
Forwarding calls Yes Yes No
Managing routing lists Yes No No
Managing call rules Yes No No
Wave ViewPoint User Guide
Page 20

Getting technical support 1-4
Release 3.0
April 2012
Chapter 1 : Introducing Vertical Wave
Feature ViewPoint Phone CMA
Changing the active greeting Yes Yes No
Changing the active routing list Yes No No
Getting technical support
Contact your W ave sys tem administrator for t echnical support. For i nformation on how to repo rt
problems, see Appendix C.
You can get help through Wave documentation as described in the next section.
Wave documentation
Related reading
The following documents are included with Vertical W av e in Acrobat format, an d can be found
on the Vertical Wave Documentation CD.
For information about this version of Vertical W ave, including new features, known issues, and
other late-breaking information, see the Release Notes included on the Documentation CD.
Manuals
• Wave Phone User Guide. Describes how to use digital phones, SIP phones, and analog
phones with Wave.
Quick Reference Guides
• Wave Analog Phone Quick Reference Guide. Provides instructions for using analog
phones with Vertical Wave.
• Wave Digital Phone Quick Reference Guide. Provides instructions for using Vertical
Edge digital phones.
Wave ViewPoint User Guide
Page 21

Wave documentation 1-5
Release 3.0
April 2012
Chapter 1 : Introducing Vertical Wave
• Wave SIP Phone Quick Reference Guide. Provides instructions for using Vertical Wave
SIP phones.
• Wave Voice Mail Quick Reference Guide. Provides instructions for using Vertical Wave
voicemail features.
Accessing Help
From any Wave dialog, you can press F1 or click Help to get context-sensitive Help describing
the window and its individual fields.
Wave ViewPoint User Guide
Page 22

Release 3.0
April 2012
Page 23

Chapter 2
Release 3.0
April 2012
Using ViewPoint
CHAPTER CONTENTS
About ViewPoint . . . . . . . . . . . . . . . . . . . . . . . . . . . . . . . . . . . . . . . . . . . . . . . . .2-1
Logging on to ViewPoint . . . . . . . . . . . . . . . . . . . . . . . . . . . . . . . . . . . . . . . . . . .2-7
Exiting ViewPoint. . . . . . . . . . . . . . . . . . . . . . . . . . . . . . . . . . . . . . . . . . . . . . . .2-18
Elements of the ViewPoint window . . . . . . . . . . . . . . . . . . . . . . . . . . . . . . . . . .2-19
Working in ViewPoint folders. . . . . . . . . . . . . . . . . . . . . . . . . . . . . . . . . . . . . . .2-22
Organizing items in folders . . . . . . . . . . . . . . . . . . . . . . . . . . . . . . . . . . . . . . . .2-31
Sharing folders . . . . . . . . . . . . . . . . . . . . . . . . . . . . . . . . . . . . . . . . . . . . . . . . .2-35
Using the audio controls . . . . . . . . . . . . . . . . . . . . . . . . . . . . . . . . . . . . . . . . . . 2-36
Importing and exporting Wave items. . . . . . . . . . . . . . . . . . . . . . . . . . . . . . . . . 2-37
About ViewPoint
ViewPo int provides a central place to manage your calls, voicemail, contacts and W ave accoun t
in an easy-to-use, graphical Windows interface. In ViewPoint you can quickly and easily drag
and drop to transfer or conference calls, point and click to hear voice messages or call people
back, set up call rules and “follow me” call forwarding to handle important callers, monitor
Contact Center queues, and more.
Another option for iOS devices (iPhone, iPad, and iPod Touch) is to use the V iewPoint Mobile
App to make and take calls and access some ViewPoint features. For details, see Chapter 14.
Even without ViewPoint, you can still access many Wave functions by using the phone
commands. For details, see the Wave Phone User Guide.
Wave ViewPoint User Guide
Page 24

About ViewPoint 2-2
Release 3.0
April 2012
Chapter 2: Using ViewPoint
Installing Vi ewPoint
See your Wave system administrator about installing ViewPoint on your computer.
Important: Viewpoint may be installed directly onto the Wave Server for administrative
purposes only.
For more information about ViewPoint requirements, see Chapter 9 in the Wave Server
Installat ion Guide.
Performing automatic updates
When a new version of ViewPoint is available, you will see the following message when you
log on:
You have 2 options:
•Click
Start Now to start the auto-update. (By default, the Launch ViewPoint when
upgrade is complete
checkbox is selected to start the new version of ViewPoint
automatically when the update is complete.) One of the following happens:
• If you are logged on using a Windows administrator account. When the User
Access Control dialog opens, click
Wave ViewPoint User Guide
Yes to continue.
Page 25

About ViewPoint 2-3
Release 3.0
April 2012
Chapter 2: Using ViewPoint
• If you are not logged on using a Windows administrator account. You are
prompted to grant the installer program administrative rights by entering the valid
user name and password of a Windows administrator account:
•Click
Remind Me Later if you are busy and do not want to be interrupted. If you choose
this option, the auto-update message will not be presented again for 24 hours.
Wave ViewPoint User Guide
Page 26

About ViewPoint 2-4
Release 3.0
April 2012
Chapter 2: Using ViewPoint
Note: By default, the V iewPoint auto-update process is enabled for all ViewPoint users. You
can disable auto-update in ViewPoint by choosing
Disable auto-updates checkbox on the ViewPoint tab.
Tools > Options and then de-selecting the
Wave ViewPoint User Guide
Page 27

About ViewPoint 2-5
Release 3.0
April 2012
Chapter 2: Using ViewPoint
Using ViewPoint remotely
If your office’s network is set up so you can log on remotely via a Virtual Private Network
(VPN) connection, you can use ViewPoint from another location as if you were on the network
at your office. Contact your net work adm in ist rato r to see if you have VPN su ppo rt and ho w to
start VPN from your remote computer.
Important: ViewPoint will not run without a network connection to your W ave Server. Be sure
you have an active VPN connection to your office before launching ViewPoint.
Using ViewPoint with a remote phone
A remote phone is any phone that is external to the Wave system, for example a cell phone,
home phone, or legacy PBX phone. You can use a remote phone with or without ViewPoint.
Y ou speci fy a remote phone number wh en you log on to V iewPoint . See “Using V iewPo int with
a different phone, Wave Server, or language” on page 2-10.
When you use a remote phone with ViewPoint, you can use ViewPoint to manage your voice
messages and greetings, place outbound calls, answer calls displayed in the Call Monitor, and
so forth. Also, depending on how your W ave system administrator configured your acco unt, you
may be able to use ViewPoint to visually manage calls that are forwarded to your remote
number or routed to your remote number as a result of an action in your routing list.
For more information, see “Using a remote phone” on page 6-17.
Wave ViewPoint User Guide
Page 28

About ViewPoint 2-6
Release 3.0
April 2012
Chapter 2: Using ViewPoint
Using the ViewPoint Softphone
The Vi ewP oi nt So ft pho ne i s so ftw are i ncluded with ViewPoint that appears as a new Dial Pad
tab at the bottom of the Call Monitor.,
You can use the controls on this tab to switch between your headset vs. PC microphone and
speakers, adjust call volume, and so forth. You use the number keys on this tab to send DTMF
tones while you are on a call, for example in response to prompts from an IVR appl ication. (The
number keys are disabled unless you are on a call.)
Important: In this version, you cannot place a call using the number keys on the ViewPoint
Softphone Dial Pad tab. Use any of the standard V iewPoint methods to place a call, as described
in “Placing calls using the ViewPoint Softphone” on page 6-16.
If you have been configured to do so by your Wave administrator, you can use the ViewPoint
Softphone in either of the following ways:
• As yo ur pr imary phone , if you do not have a phys ical phone . You can use the V i ewPoint
Softphone as your primary phone from the local LAN or when you run ViewPoint while
logged in via VPN from a remote location.
• As your secondary phone, when you are away from your physical phone, for example
when you are on the road.
You specify the ViewPoint Softphone when you log on to View Point. See “Using ViewPoint
with a different phone, Wave Server, or language” on page 2-10.
Wave ViewPoint User Guide
Page 29

Logging on to ViewPoint 2-7
Release 3.0
April 2012
Chapter 2: Using ViewPoint
You must have audio playback and capture devices (microphone, speakers, headset, or other
USB audio devices) on y our PC or lap top in order to l ogon using the ViewPoint Softphone. The
default device settings w ork in most cas es. To change the default settings, see “Configuring the
ViewPoint Softphone” on page 12-10.
For instructions on how to place, answer, and handle calls using the ViewPoint Softphone, see
“Using the ViewPoint Softphone” on page 6-14.
Logging on to ViewPoint
To use ViewPoint, you must log on using a valid Wave user account. Ask your Wave
administrator for the information you need to use to log on.
Note: Each running ViewPoint program requires a license. If you see a message stating that
you have exceeded your ViewPoint licenses, you cannot log on. See your Wave system
administrator for help if such a message appears.
To log on to ViewPoint
1. Choose Start > Programs > Vertical Wave ViewPoint > Wave ViewPoint. The ViewPoint
Log On dialog opens.
2. Enter your user name in the
User Name field if it is not already displayed. If you do not
know your user name, ask your Wave system administrator.
3. Enter your numeric passwo rd i n t he
Password field. Use the same password that you use
to log into your Wave voicemail account using the phone.
4. If you want to skip the process of logging on to the Wave ViewPoint in future sessions,
Automatically log on as this user.
check
Wave ViewPoint User Guide
Page 30

Logging on to ViewPoint 2-8
Release 3.0
April 2012
Chapter 2: Using ViewPoint
5. If you check Automatically log on as this user, anyone at your computer can open your
ViewPoint program and listen to your voice messages, because ViewPoint will open
without requiring a password.
6. If you need to change login options, for example to use ViewPoint at a different location
than your normal location, click
Options >> to display additional se ttings. See “Using
ViewPoint with a different phone, Wave Server, or language” on page 2-10 for more
information about each option.
7. Click
OK to launch ViewPoint.
Wave ViewPoint User Guide
Page 31
Logging on to ViewPoint 2-9
Release 3.0
April 2012
Chapter 2: Using ViewPoint
Disabling automatic logon
The automatic logon feature allows you to skip the process of logging on to ViewPoint in future
sessions. If you previousl y selected the
Automatically log on as this user option and now want
to turn it off, do the following:
1. In ViewPoint, choose
Tools > Options. The Options dialog opens.
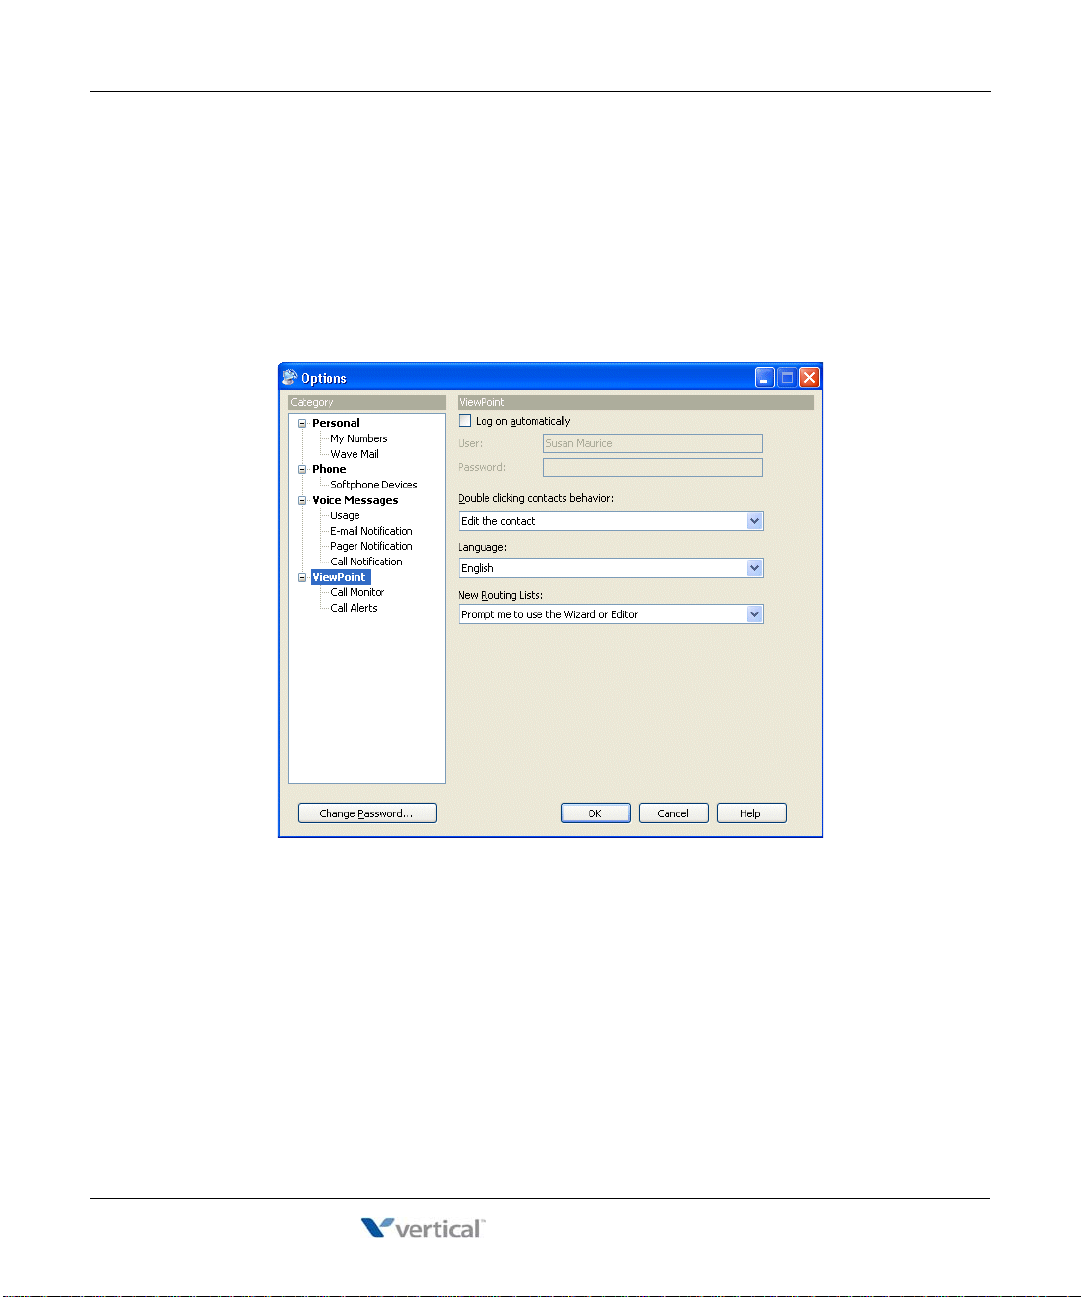
2. On the ViewPoint tab, deselect the
3. Click
OK.
Log on automatically checkbox.
Wave ViewPoint User Guide
Page 32

Logging on to ViewPoint 2-10
Release 3.0
April 2012
Chapter 2: Using ViewPoint
Using ViewPoint with a different phone, Wave Server, or language
There may be times when you nee d to modify th e options y ou normally us e when you lo g on to
ViewPoint. To change logon options, click
This section describes how to do the following:
Change the Wave phone associated with ViewPoint. ViewPoint works best in
•
conjunction with a phone. ViewPoint can be associated with only one phone at a time.
This phone will ring whenever you use a ViewPoin t comm and that requires ringing your
phone, for example, playing a voice message over the phone, using the
command, or making a call recording. You can change the associated phone when you
want to use a different phone w ith ViewPoint (for example, your PC has been m oved to a
different office, you are visiting at another company location, and so forth.)
Options >> in the ViewPoint Logon dialog.
Place Call
Note: You can also change the associated phone after logg ing o n by se lecting
a different station
.
File > Use
• Use the ViewPoint Softphone in as your primary or secondary phone. See “Using the
ViewPoint Softphone” on page2-6 for an overview of the ViewPoint Softphone.
•
Use a phone that is external to the Wave system to log on to ViewPoint, for example if
you are using a remote phone or mobile extension.
• Change the language used for the ViewPoint user interface.
•
Change the Wave Server that you connect to. ViewPoint connects to a specific Wave
Server server. If multiple Wave Servers are available on your network, you can change
the one to which ViewPoint is connected. You must also change the Wave Server name if
the network name of its computer has changed.
Use ViewPoint without an associated phone. Note that if you do so, ViewPoint
•
commands that require a phone (for example, managing calls or making call recordings)
will not be available to you.
Wave ViewPoint User Guide
Page 33

Logging on to ViewPoint 2-11
Release 3.0
April 2012
Chapter 2: Using ViewPoint
To change ViewPoint login options
1. Start ViewPoint as described in the previous section. If your system logs you on
automatically , you can chang e the optio ns after ViewPoint starts by choosing
different station
. The expanded ViewPoint Log On dialog opens:
File > Use a
2. In the
Use this phone with ViewPoint section, specify the phone with which ViewPoint is
associated in one of the following ways:
Default station ID. Select this option to use one of the following as your ViewPoint
•
phone. (You can select this option for a Wave phone in the office or a mobile
extension.)
Default station ID of your physical phone. This is typically your own phone at
•
your own location.
Your primary softphone. If you do not have a physical phone, you can use the
•
ViewPo int Sof tphon e to place and take calls, using your PC’s microphone and
speakers, headset, or other USB audio devices. See “Using the ViewPoint
Softphone” on page 2-6 for an overview of the ViewPoint Softphone.
Note: A physical phone or a p rimary softph one is config ured for you by your Wave
administrator when you are added to the system.
Wave ViewPoint User Guide
Page 34

Logging on to ViewPoint 2-12
Release 3.0
April 2012
Chapter 2: Using ViewPoint
• St ation ID. To log on to V iewPoin t usi ng a different Wave phone, fo r example if you
are a guest at another location or temporarily using a different office, select this
option and enter that phone’s station ID. To obtain a Wave phone’s station ID, pick
up the phone and press
*00. (You can select this option for a Wave phone in the
office or a mobile extension.)
Remote number. Select this option to log on to ViewPoint using a phone that is
•
external to the Wave system, for example if your Wave system administrator has
configured you to use a mobile extension. Enter the phone number of that phone, for
example 6175551212. Click to op en th e Check Remot e Number dialog to view
or make corrections to the actual dial string that will be used based on the remote
number that you enter here (see “Specifying options for a remote number” on
page 2-13 for details).
Integrated Secondary Softphone. Select this option to log on to ViewPoint using the
•
ViewPoint Softphone as a secondary phone when you are away from your regular
physical phone. See “Using the ViewPoint Softphone” on page 2-6 for an overview
of the ViewPoint Softphone.
Forward my calls to softphone. Optionally, select this checkbox to
•
automatically forward your calls to your softphone. (Selecting this checkbox
at logon saves you the step of manually changing your default call fo rwardi n g
number after logging on.)
None. Select this option to use ViewPoint without an associated phone. ViewPoint
•
commands that require a phone (for example, managing calls or making call
recordings) will not be available to you.
3. Select the
Language for the ViewPoint user interface from the drop-down list. (For
another way to change the ViewPoint display language, see “Using ViewPoint in
languages other than English” on page 2-15.)
4. In the
Server field, enter the network name of the Wave Server that ViewPoint will
connect to when you log on. If you have more than one Wave Server on your network,
you can choose which one to connect to. Click
Browse to browse the network and select
a Wave Server.
5. Click
OK.
Wave ViewPoint User Guide
Page 35

Logging on to ViewPoint 2-13
Release 3.0
April 2012
Chapter 2: Using ViewPoint
Specifying options for a remote number
If you selected
Remote number in the ViewPoint Login dialog, you can click to open the
Check Remote Number dialog to specify how Wave will actually dial the remote number that
you entered.
The number as it will be dialed after dialing rules are applied is displayed in the middle of the
dialog. Thi s displayed dial string may be modified as you make changes as described be low.
1. In the
Call Using section, select one of the following options:
Default Phone number access code. Select this option to dial this number using the
•
Default Phone number access code set up by your Wave system administrator.
This access code. Select this option to use a different access code. Ask your Wave
•
system administrator if other access codes are available for your use.
2. Select the correct
Country/Region from the drop-down list.
3. Verify that the remote
4. If the
Use country code and area cod e di al i ng rules checkbox is selected, Wave applies
Number you entered via the ViewPoint Logon dialog is correct.
the country code and area code dialing rules set up by your Wave system administrator.
For example, the area code will not be included for a local call. If this checkbox is not
selected, Wave dials the
5. Click
OK.
Number exactly as you entered it.
Wave ViewPoint User Guide
Page 36

Logging on to ViewPoint 2-14
Release 3.0
April 2012
Chapter 2: Using ViewPoint
Using ViewPoint with another station ID
Most Wave users have a default station ID, which represents the phone your Wave system
administrator assigned to you (if you roam between phones your station ID may be 0). When
you log on to ViewPoint specifying an associated phone other than your default station, the
Select Your ViewPoint Phone dialog opens, enabling you to clarify which phone you want to
use with ViewPoint.
To use ViewPoint with another station
1. In the Select Your ViewPoint Phone dialog, choose one of the following options:
Use station n as a visitor. This option appears only if you specified another user’s
•
station as your associated phone—for exampl e, you are logging on at ano ther user’ s
desk. The phone remains set for its normal user, but ViewPo int is set for you. Calls
you place and receive using the phone use the normal user’s account (for example,
the dialing permissions) and appear in the normal user’s Call Log.
Example: However, calls you place and receive using ViewPoint commands use
your account. Choose this option if you do not intend to use the phone extensively
during this ViewPoint session.
Use <this phone > to place an d ans w er cal l s... . The phone (station or remote
•
number) is set for you. Calls you place and receive using the phone use your
account settings. Choose this option if you will be using the phone as your own
during this ViewPoint session.
Example: If you choose this option, you can also select
station / number
to receive calls to your own extension here. For more information
Forward my calls to this
about call forwarding, see “Forwarding calls” on page 9-2.
Wave ViewPoint User Guide
Page 37

Logging on to ViewPoint 2-15
Release 3.0
April 2012
Chapter 2: Using ViewPoint
• Use my default station. Y o ur defau lt station remains ViewPoint’s associated phone.
Whenever you use a ViewPoint command that requires the phone—for example, to
play a voice message—ViewPoint uses your default s tation. Cho ose this option only
if your default station is nearby.
I am not near a Wave phone. You log on with station ID 0, meaning that ViewPoint
•
is not associated with a phone. ViewPoint commands that require a phone—for
example, placing a call—are unavailable.
Note: When you run ViewPoint without an associated phone, the Call Monitor
folder title bar displays “No associated phone” as a reminder.
2. Click
OK. ViewPoint opens with the phone selection you made.
Using ViewPoint in languages other than English
You can display the ViewPoint interface in various languages. ViewPoint will automatically
adjust to the proper language when your Windows language (as set in the Windows Control
Panel) matches one of the supported languages.
Wave ViewPoint User Guide
Page 38

Logging on to ViewPoint 2-16
Release 3.0
April 2012
Chapter 2: Using ViewPoint
To change the ViewPoint display language
1. In ViewPoint, choose Tools > Options. The Options dialog opens.
2. Click the ViewPoint tab.
3. Choose the
4. Click
Language for the ViewPoint user interface from the drop-down list.
OK. Yo ur change takes effect the next time that you start ViewPoint.
Y o u can also specify the langu age to use when you log on to ViewPoint. See “Using V iewPoint
with a different phone, Wave Server, or language” on page 2-10.
Wave ViewPoint User Guide
Page 39

Logging on to ViewPoint 2-17
Release 3.0
April 2012
Chapter 2: Using ViewPoint
Changing your station, Wave Server name, or user name after logging on
You can log on as a different user, or with a different associated phone, without exiting and
restarting the V iewPoint program. This feature makes it easy to log on to another user’ s account
from your ViewPoint, or to switch ViewPoint’s associated phone. (To log on to another user’s
account, you must know the other user’s password.)
T o log on as a different user , choo se
On dialog opens. See “Logging on to ViewPoint” on page 2-7.
To change ViewPoint’s associated phone, choose
Vi ewPoint Log On dialog opens with your n ame and password al ready ente red and the Opti ons
showing.
Changing your password
To change your password via ViewPoint
1. Choose Tools > Opt ions. The Options dialog opens.
2. Click
Change Password. (The Change Password button is located at the bottom of each
tab in the Options dialog.) The Change Password dialog opens.
File > Log on as a different user. The W ave ViewPoint Log
File > Use a different station. The Wave
Wave ViewPoint User Guide
Page 40

Exiting ViewPoint 2-18
Release 3.0
April 2012
Chapter 2: Using ViewPoint
3. Use the following fields to change your password:
Old password. Enter your current password.
•
New password. Enter your new password.
•
Verify new password. Enter your new password to confirm it.
•
4. Click
Logging on with command-line switches
You can add switches to the Windows shortcut command line that starts ViewPoint. The
command line switches enable you to run multiple copies of ViewPoint at once connected to
different pho nes or Wave servers, log on using a particul ar station , and perf orm oth er tasks. See
Appendix B for more information.
Exiting ViewPoint
To exit ViewPoint, choose File > Exit.
OK to close the Change Password dialog, and then click OK to close the Options
dialog.
Wave ViewPoint User Guide
Page 41

Elements of the ViewPoint window 2-19
Release 3.0
April 2012
Chapter 2: Using ViewPoint
Elements of the ViewPoint window
The following graphic shows a typical window in V iewPoint, in this case the Inbox that contains
your voice messages.
The ViewPoint window contains the following elements:
• The menu bar
• The toolbar
• The navigation pane
• The status bar
• The ViewPoint folder that is currently displayed (see “Working in ViewPoint folders” on
page 2-22)
The Menu Bar
The menu bar, at the top of ViewPoint, provides access to Wave commands. Click each menu
to see the commands that menu contains. Menu command s are referenced in this manual in the
format
File > New > Contact. You can drag the menu bar from its left edge to detach it.
Wave ViewPoint User Guide
Page 42

Elements of the ViewPoint window 2-20
Release 3.0
April 2012
Chapter 2: Using ViewPoint
The Toolbar
The toolbar, directly under the menu bar in each folder, provides single-click access to
frequently used Wave commands. Toolbar buttons can change depending on which folder
you’re in. The following illustration shows the toolbar for the Messages folder.
In any folder, clicking the left-most toolbar button creates a new item for that folder. For
example, in the Call Monitor, clicking the left-most button lets you place a new call:
You can also click the small arrow to the right of that button for a menu that lets you create any
new ViewPoint item. The arrow is available in every folder.
The Navigation Pane
Use the navigation pane, on the left side of the ViewPoint window, to switch between
ViewPoint’s folders. Click a folder icon in the navigation pan e to open that fold er in th e
ViewPoint main window.
Wave ViewPoint User Guide
Page 43
Elements of the ViewPoint window 2-21
Release 3.0
April 2012
Chapter 2: Using ViewPoint
Each folder in the navigation pane gives you access to other related folders, as follows:
•
Messages. Displays the Inbox folder. Folders: All other Messages folders, including
local folders and any folders that other users have shared with you.
the Call Monitor.
Folders: Extensions and (if you are an agent in Contact Center queue)
Call Monitor. Displays
Queue Monitor.
•
Contacts. Displays the Contacts folder . Folders: The Public\Contacts folder.
•
Call Log. Displays the Call Log.
•
Configuration. Displays the Greetings folder. Folders: Greetings, Personal Statuses,
Routing Lists, Groups, Public\Groups.
Customizing the Navigation Pane
T o add or remove buttons from the navigation pane, click the small arrow icon in the lower right
corner of the pane, then choose
Add or Remove Buttons from the menu that ap pears . C heck or
uncheck button options on the submenu to include or hide them in the pane.
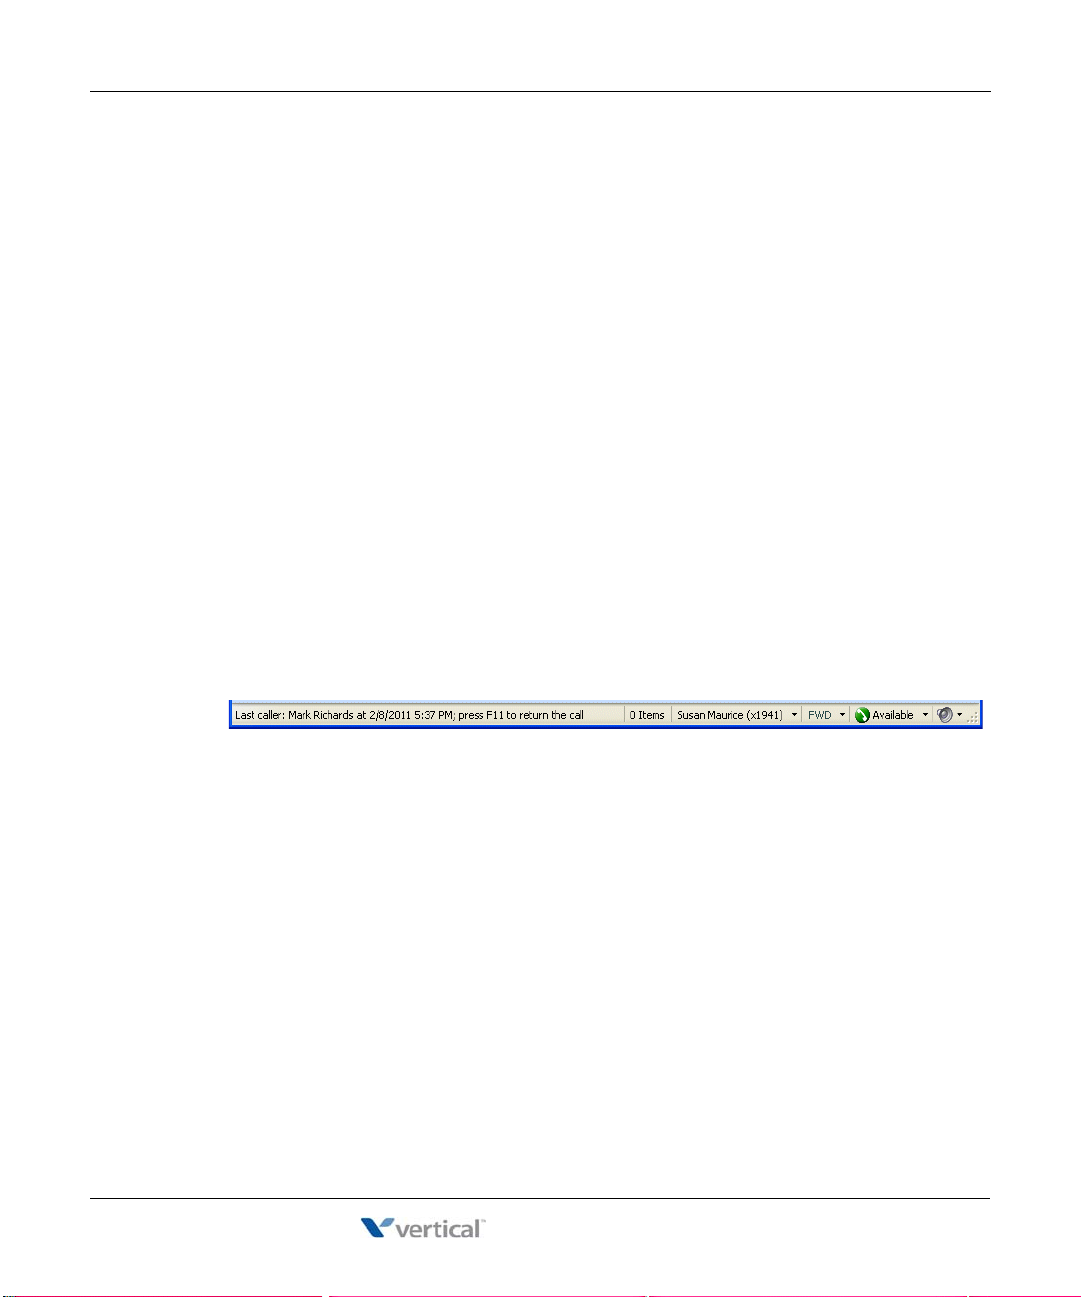
The Status Bar
The status bar is located at the bottom of ViewPoint window.
The status bar gives you quick access to the following information:
•
Last caller. Lists the name (if available) and Caller ID of your last incoming call. You can
press F11 to place a call to that number.
•
Number of items. Number of items in the current folder. For example, if you have 18
contacts, the Contacts folder status bar displays “18 Items.” In any Messages folder, the
status bar also indicates the number of Unheard messages.
Name and extension. The name and extension of the user logged on to ViewPoint on this
•
computer.
Note: If you are a Contact Center agent, clicking this spot on the status bar displays a
dropdown list so you can specify if you are making personal or queue calls.
Wave ViewPoint User Guide
Page 44
Working in ViewPoint folders 2-22
Release 3.0
April 2012
Chapter 2: Using ViewPoint
• Phone. If you s ee a Phone p ane showi ng the name of anothe r user, it indicates that user is
logged in to your station. While that user is logged in, calls you place using the phone
will be subject to that user’s dialing restrictions, and logged as coming from that user. To
restore the station to yourself, pick up the phone and dial *00.
Persona l S t at us. The current p ersonal status o f the user logged on to V iewPoint. Click the
•
personal status button to choose a different p ersonal status. See Chapter 3 for information
on personal statuses.
Audio out put. You can click these buttons to switch ViewPoint's audio output between
•
your computer speakers and your phone. Audio output includes playing your voice
messages. Click the arr ow to the ri ght of the button t o s witch yo ur aud io out put. If you do
not have a sound device, the speaker option may be disabled.
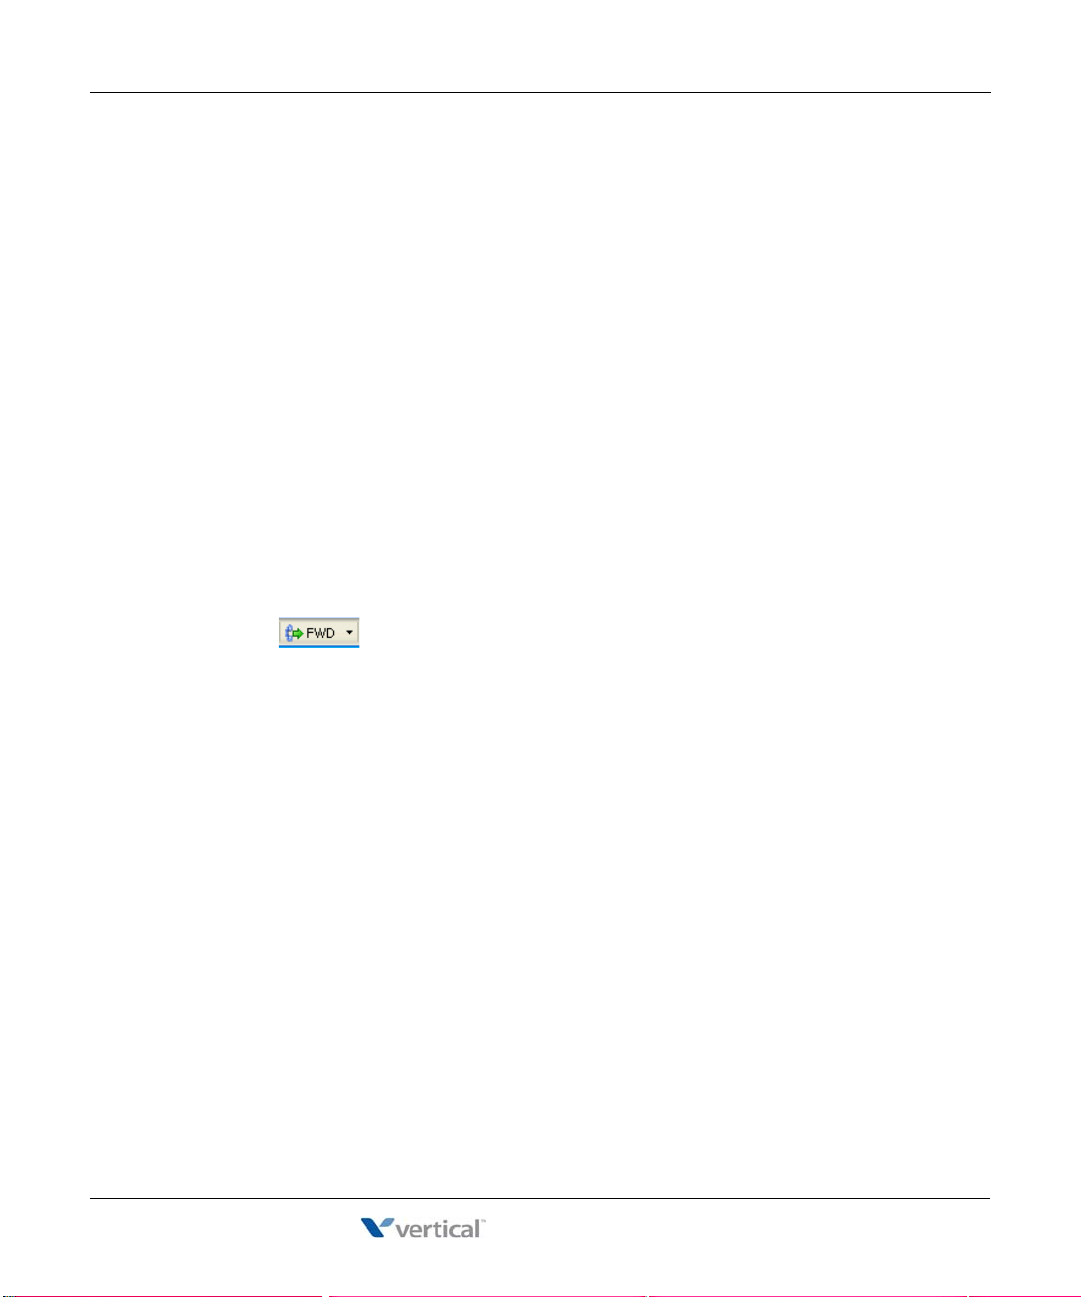
Call forwarding. If the FWD button is bold and has a phone icon to the left, it means you
•
are currently forwarding your calls. Hover your mouse over the button to display the
forwarding number. You can also click the arrow to quickly select one of your personal
numbers (which you can set via
Tools > Options > My Numbers) as the forwarding
number. Double-click the button to open the Call Forwarding dialog, in which you can
change or turn off call forwarding. See “Forwarding calls” on page 9-2.
Working in ViewPoint folders
W ave ViewPoint contains several folders, which appear in the main part of ViewPoint window
and give you access to specific Wave functions.
Note: Some folders may not be available to you. Your Wave system administrator controls
which folders your ViewPoint program displays.
To open a folder, do one of the following:
• Click its icon in the Navigation pane. See “The Navigation Pane” on page2-20
• Choose
View > Go To, then select the folder to display.
Wave ViewPoint User Guide
Page 45

Working in ViewPoint folders 2-23
Release 3.0
April 2012
Chapter 2: Using ViewPoint
For an overview of each folder, see the following table.
Navigation
Pane
Folder Description
Messages
Hear and manage your voice messages. To call back a
message, right-click it and choose
Selecting the Messages folder gives you access to your
Inbox, Saved, and Deleted folders.
Call Monitor
Place calls and handle incoming calls (transfer calls, create
conference calls, monitor a voice message as it is being left,
record a call).
Selecting the Call Monitor folder also gives you access to
the Extensions folder , your Contact s folders, and (if you are
a member of one or more Contact Center queues) the
Queue Monitor.
Call Monitor \ Extensions
View all Wave extensions, their personal st atuses, and who
is on the phone now.
Call Monitor \ Queue Monitor
Contact Center agents only. View and manage agents, and
view real-time queue statistics.
Place Call.
Contacts
Manage an online phone book of your own phone contact s.
Selecting the Contacts folder also gives you access to the
Public\Contacts folder (public contacts are available to all
Wave users).
Call Log
View a record of all your incoming or outgoing phone calls.
To return a call, right-click it and choose
Wave ViewPoint User Guide
Place Call.
Page 46

Working in ViewPoint folders 2-24
Release 3.0
April 2012
Chapter 2: Using ViewPoint
Navigation
Pane
Folder Description
Configuration
Selecting the Configuration folder gives you access to the
Greetings, Personal Statuses, Routing Lists, Groups, and
Public\Groups folders.
Configuration \ Greetings
Record your voice-mail greetings and change the active
greeting.
Configuration \ Personal Statuses
Manage personal statuses that communicate your location
and availability to your coworkers and control how your
incoming calls are handled.
Configuration \ Routing Lists
Set up “follow me” call forwarding (calls ring a series of
numbers to find you), and direct calls to Groups or other
extensions.
Configuration \ Groups
Define Groups of users and contacts. You can then send
voice messages to the Group, and more. (Only y ou can see
the personal Groups that you create—they do not appear in
other users’ ViewPoints.)
Configuration \ Public\Groups
Send voice messages to the members of a public Group
and more. (Public Groups, which are accessible to all Wave
users who have permission to see them, can only be
created by your Wave system administrator or a ViewPoint
user with permission to do so.)
Wave ViewPoint User Guide
Page 47

Working in ViewPoint folders 2-25
Release 3.0
April 2012
Chapter 2: Using ViewPoint
Working with multiple Viewpoint folders at the same time
You can have several folders open at once by opening each folder in its own window. To open
a folder in its own window, right-click a folder in the Folders list and choose
Window
on the shortcut menu.
Open in New
Wave ViewPoint User Guide
Page 48

Working in ViewPoint folders 2-26
Release 3.0
April 2012
Chapter 2: Using ViewPoint
Adjusting the Phonebook Pane layout in the Call Monitor
The Phonebook pane—shown by default in the Call Monitor—includes the Extensions list and
the Contacts folder . You can perform drag-and-drop call handling operations between the pane
and the Call Monitor. See “Dragging and dropping items” on page 2-28. With the Extensions
list, you can see whether a user is on the phone before placing a call to that user.
With the Phonebook pane open, click the appropriate tab to display the Extensions list or
Contacts folder.
T o move the Phon ebook Pa ne within the Call Mon itor fo lder, choose
View > PhoneBook Pane,
and then select a location from the sub-menu.
To remove the Phonebook P ane from the Call Monitor folder, choose
Pane > Off
.
Wave ViewPoint User Guide
View > Phonebook
Page 49

Working in ViewPoint folders 2-27
Release 3.0
April 2012
Chapter 2: Using ViewPoint
Deleting voice messages and other items
T o d elete a voice m essage from your Inbox, select it and then press Delete. The voice message
moves to your Deleted folder. It will be permanently deleted from the Deleted folder according
to the settings defined in
To permanently delete a voice message from your Inbox
1. Select the voice message. To select more than one voice message, press Ctrl and
then select them.
2. Press Shift+Delete. A confirmation dialog opens.
3. Do one of the following:
Tools > Options.
•Click
Yes if you want the selected voice message to be permanently removed from
your computer.
•Click
To delete other items
No to keep the voice message in your Inbox.
1. In the folder in which the item appears, select the item. To select more than one item,
press Ctrl and click each item that you want to delete.
2. Right-click the selected item and choose
dialog opens.
3. When you delete an item that is not a voice message, such as a greeting, the item is
permanently and irretrievably removed from your computer. You cannot recover it after
you delete it.
4. Click
OK to permanently delete the item.
Copying and pasting items
Copying a row in any folder places a copy of the item in that row o n the clipbo ard as tex t. Th is
information can be pasted into other applications, such as a text program.
Choose
paste the items. Use this method to paste Call Log entries and voice message information into
the Problem Report Wizard (See “About the Problem Report Wizard” on page C-1.).
Edit > Copy to place a copy of selected items on your clipboard. Choose Edit > Paste to
Delete on the shortcut menu. A confirmation
Wave ViewPoint User Guide
Page 50

Working in ViewPoint folders 2-28
Release 3.0
April 2012
Chapter 2: Using ViewPoint
Dragging and dropping items
You can drag and drop one item onto another item to perform actions such as making a call,
transferring a call, and adding a call to a conference. You can also move an item to a folder.
For example, if you drag an active call in your Call Monitor onto a user in the Extensions tab of
the Phonebook pane, the call transfers to that user. Conversely, you can drag a user from the
Phonebook pane to the Call Monitor to call that user.
The following table lists the drag-and-drop actions you can perform within Wave ViewPoint.
The From column shows the items you can click and drag. The T o column shows the destination
items. The remaining columns show the actions that result when you drag and drop an item or
use the Shift and Ctrl keys in conjunction with dragging and dropping.
Note: Whenever you can drag an item to the Call Monitor to place a call, you can also drag it
to the Dial toolbar field.
DRAG AND DROP ITEMS
From To Drag SHIFT + Drag CTRL + Drag
Call Call No action Opens the
Conference
dialog
Extension,
Contact, Call
Log, Voice
Performs a
blind transfer
Opens the
Transfer
dialog
Message
Note: Alt + Drag of a call to an extension transfers
the call directly to that extension’s voicemail.
Call Log Call Conferences
the Call Log
party with the
Opens the
Conference
dialog
call
Empty Call
Monitor
Places a call to
the Call Log
party
Wave ViewPoint User Guide
Opens the
Place Call To
dialog
Conferences
the calls
together
Performs a
consultation
transfer
Page 51

Working in ViewPoint folders 2-29
Release 3.0
April 2012
Chapter 2: Using ViewPoint
DRAG AND DROP ITEMS
(continued)
From To Drag SHIFT + Drag CTRL + Drag
Contact Call Conferences
the contact’s
default
Opens the
Conference
dialog
number with
the call
Empty Call
Monitor
Places a call to
the default
phone number
Folder Moves the
contact to the
folder
Folder Folder Moves the
folder to
another folder
Contact Moves the
folder to the
Contacts
Opens the
Place Call To
dialog
Opens the
Move Item
dialog
Opens the
Move Folder
dialog
Opens the
Move Folder
dialog
Copies the
folder
folder
Voice Message Moves the
folder to the
Messages
folder
Wave ViewPoint User Guide
Opens the
Move Folder
dialog
Page 52

Working in ViewPoint folders 2-30
Release 3.0
April 2012
Chapter 2: Using ViewPoint
DRAG AND DROP ITEMS
(continued)
From To Drag SHIFT + Drag CTRL + Drag
Voice Message Call Conferences
the message
sender with
Opens the
Conference
dialog
the call
Empty Call
Monitor
Places a call to
the message
Caller ID
Folder Moves the
message to
the folder
Extension Call Conferences
the call
Opens the
Place Call To
dialog
Opens the
Move Item
dialog ox
Opens the
Conference
Copies the
message
dialog
Empty Call
Monitor
Places the call Opens the
Place Call To
dialog
Text
(for example, a
phone number
you copied
from a web
page)
Call Monitor Places a call to
the number
that was
dropped
Wave ViewPoint User Guide
Opens the
Place Call To
dialog
Page 53

Organizing items in folders 2-31
Release 3.0
April 2012
Chapter 2: Using ViewPoint
Printing items in folders
To print the contents of a folder, choose File > Print. When you print a folder that contains
several columns, you may need to change the orientation of the page to “landscape” so that all
columns that appear in the folder are printed.
Organizing items in folde rs
The Messages folder contains one folder already created, the Saved folder. When you listen to
a voice message on the phone and save it, the message is moved into the Saved folder.
Public folders
Most items you create or see in ViewPoint are stored in private folders so they are not shown
when a different user logs into ViewPoint. However, ViewPoint also supports public Contacts
and Groups folders that contain items that can seen by all ViewPoint users and edited by those
with the proper permission. See “Viewing public folders” on page 2-33.
Customizing columns
Y ou can choose to show or hide columns in a folder . You can also customize columns in a folder
by moving, resizing, and resorting them. The changes you make to columns in a folder are saved
when you exit ViewPoint.
Showing, hiding, and reordering columns
For each folder in ViewPoint, you can choose the columns that you want to see in the folder.
Note that by default, some folders do not show all of the available columns.
Wave ViewPoint User Guide
Page 54

Organizing items in folders 2-32
Release 3.0
April 2012
Chapter 2: Using ViewPoint
To show, hide, or reorder columns in a ViewPoint folder
1. Choose View > Show Columns (or right-click the column header). The Show Columns
dialog opens.
2. Do any of the following:
• To move columns into or out of the folder, select them and click
Add or Remove.
You can also drag and drop.
• To reorder the columns in the folder, select the column in the
Up and Down arrows to move the column up or down in the list.
3. Click
list, and click the
OK to save your changes.
Show these columns
Note: You can also reorder columns from within the folder by dragging the column headers.
Dragging a column off the screen until an X displays removes that column.
Moving columns
To move a column, do either of the following:
• In the folder, click the column header and then drag and drop it to a new location.
• Use the Show Columns dialog to reorder the columns in a folder, as described above.
Resizing columns
To change a column’s width, in the folder click and drag the right-hand side of the col umn
header.
Wave ViewPoint User Guide
Page 55

Organizing items in folders 2-33
Release 3.0
April 2012
Chapter 2: Using ViewPoint
Sorting the contents of a column
Click a column header to sort the items in a folder by the information in that column. Click the
column header again to sort in the reverse order.
The column in the folder that contains an arrow in its header is the column by which the display
is currently sorted. The direction of the arrow indicates the sort order.
Viewing public folders
Public folders contain items that all Wave users can view and use. For example, any user can
view a public contact’s information or place a call to that contact.
Example: Your company defines its departments as public Groups. All users in the company
can view the members of those Groups.
Note: Items in public folders are not generally available for editing or deleting. You must have
special permission to edit a public item.
Managing the Deleted folder
The Deleted folder contains voice messages that you have deleted from the Voice Mail folder.
Items in the Deleted folder continue to be stored in the limited space that has been allocated to
you for your voice files. To regain space for more voice messages or other voice files, empty
your Deleted folder.
To view the contents of the Deleted folder, click it in the Folder List.
Wave ViewPoint User Guide
Page 56

Organizing items in folders 2-34
Release 3.0
April 2012
Chapter 2: Using ViewPoint
Emptying th e D el e ted folder
You can delete an item from the Deleted folder just as you wo uld from any folder. When items
are deleted from the Deleted folder, they are deleted permanently.
To empty the Deleted folder, choose
Tools > Empty Deleted Folder.
To empty the Deleted folder automatically
1. Choose Tools > Opt ions. The Options dialog opens.
2. Click the Voice Messages \ Usage tab.
Wave ViewPoint User Guide
Page 57

Sharing folders 2-35
Release 3.0
April 2012
Chapter 2: Using ViewPoint
3. Choose one of the following options:
Remove all items when exiting. Deletes all messages in the Deleted folder
•
automatically each time you exit ViewP oint.
Periodically remove old items. Select this checkbox to remove old items
•
automatically from the Deleted folder.
Age: ___ days. Enter the number of days an item will remain in the Deleted
•
folder before Wav e automa tically deletes it.
4. Click
5. Click
Sharing folders
Your Wave system administrator can share other users' folders with you, for example a voice
message Inbox shared by all members of a project team. Shared folders appear in your
ViewPoint navigation pane, and you can view the folder contents and optionally (d epending on
your access permission level as assigned by your administrator) edit items in the folder. For
example, if another user's Inbox is shared to you and you have fu ll access per mission, you can
listen to voice messages in that folder, reply to a message, delete it, and so forth.
The following folders can be shared:
•
•
Remove All Items Now to immediately delete all messages in your Deleted folder
when you click
OK.
Call Log. When shared, you can access the other user's call history.
Message. When shared, you can access the contents of the other user's Inbox, Shared,
OK to close the Options dialog.
and/or Deleted folders. Note the following:
• Voice messages marked Private do not appear in a shared folder.
• If you have f ull access perm issi on to an other user’s shared Message folder, you can
delete voice messages from that folder. If that other user has also shared his or her
Deleted folder, the deleted message is moved to that Deleted folder. If that other
user has not shared his or her Deleted folder, the deleted message is permanently
removed.
Call Monitor. W hen shared, you can acce ss the other user's current call activity. Note
•
that Contact Center queue calls are not displayed in a shared Call Monitor. See
“Sharing your Call Monitor folder” on page 5-19 for m ore informati on.
Contacts. When shared, you can access and use the other user's contacts.
•
Wave ViewPoint User Guide
Page 58

Using the a udio controls 2-36
Release 3.0
April 2012
Chapter 2: Using ViewPoint
Using the audio controls
Wave’s audio controls make it easy to create recordings and listen to recordings and voice
messages. These audio controls appear throughout ViewPoint.
Creating recordings and playing voice messages
You create recordings by speaking into your phone.
RecordWhen you are ready to record, pick up your phone, and
then click the button. A beep signals that recording has
begun.
Stop When you are finished recording, you can either hang up
or click the button.
Play Click the button to listen to the recording or voice
message. Click it again to pause playback.
To move forward and backward within the recording or voice message,
drag the slider bar:
You can play audio either over your computer speakers or your phone. Choose
to switch audio output from one to the other. You can also use the button in the status
Output
Tools > Audio
bar. When playing audio over the phon e, if your ph one is on hook, it will ring to co nnect you to
the audio being played.
Note: When sending au dio to your phon e, ViewPoint displays a message identifying the
station ID being rung.
Wave ViewPoint User Guide
Page 59

Importing and exporting Wave items 2-37
Release 3.0
April 2012
Chapter 2: Using ViewPoint
Using voice message bookmarks
You can set bookmarks in voice messages by dragging the arrows that appear under the slider
bar. When you play a message you have bookmarked, only the portion of the file between the
bookmarks plays. This capability can be useful when you want to mark the location of an
important phone number in a voice message.
Importing and exporting voice files
To import or export a voice file, use the buttons on the recording control.
Import You can import a voice file in WAV format to use for any
ViewPoint recording (greetings, voice titles, and so on).
Wave can import WAV files with a frequency of 8Khz,
11.025 Khz, 22.05 Khz, or 44.1 Khz.
Export Y ou can export any of your V iewPoint recordings, including
voice messages and recorded conversations, to a WAV or
MP3 file on your hard disk.
Importing and exporting Wave items
See the following topics for more about importing and exporting Wave items:
• Contacts. See “Importing and exporting contacts” on page 2-38.
• ViewPoint recordings (voice messages and call recordings). See page “Exporting
ViewPoint recordings” on page 2-41.
• Archived call recordings. See “Acting on archived call recordings” on page A-11.
Wave ViewPoint User Guide
Page 60

Importing and exporting Wave items 2-38
Release 3.0
April 2012
Chapter 2: Using ViewPoint
Importing and exporting contacts
You can import contacts into Wave:
• From a CSV file gen erated via Wave
• From a CSV file generated from another contact manager such as Microsoft Outlook
You can export contacts from Wave to a CSV file that you can import into another Wave
Vi ewPoint, Outlook, Gold Mine, FrontOffi ce 2000, Act!, or other c ontact management so ftware.
To import contacts from a CSV file
1. Choose File > Import and Export. The Import and Export Wizard opens.
2. Select
Import Contacts, and then click Next.
Wave ViewPoint User Guide
Page 61

Importing and exporting Wave items 2-39
Release 3.0
April 2012
Chapter 2: Using ViewPoint
3. In File to Import, click Browse and select the CSV file that you want to import.
4. In
Destination folder, select the Wave Contact folder into which you want to import the
contacts in the CSV file.
5. Under
Options, select one of the following:
Replace duplicates with items imported. If Wave finds a duplicate contact in the
•
CSV file, the contact from the file will replace the existing Wave contact.
Allow duplicates to be created. If Wave finds a duplicate contact in the CSV file, it
•
will import all contacts, even those that are duplicates of Wave contacts.
Do not import duplicate items. If Wave finds duplicate contacts in the CSV file, it
•
will not import them.
6. Select
Use phone numbers as caller identification for these contacts to add the imported
contacts’ phone numbers to Wave’s list of Caller ID numbers so that contacts can be
identified when they call. For more information, see “Teaching Wave to recognize your
contacts” on page 10-8.
7. If you are importing a CSV file that was created by Wave or Outlook, go to step 10.
8. If you are importing contacts from another application and have not previously mapped
the fields, click
Map Custom Fields. The Map Custom Fields dialog opens using the
default map, showing the first contact record to be imported, and how the existing fields
will be mapped to Wave fields.
Wave ViewPoint User Guide
Page 62

9. If you have saved a different map and want to use it, click Load Map and select it.
Release 3.0
April 2012
Otherwise, map the fields manually as follows:
• Check
First record contains field names at the bottom of the dialog if the CSV file’s
first record consists of the names of fields. Then drag fields or values from the left
pane (the CSV file) to the fields in the right pane (Wave contacts) in which you
want the values to appear. Drag unwanted field mapping from the right pane to the
left pane to clear them.
•Click
Previous or Next to view other records in the CSV file to see how they
will map.
•Click
•Click
•Click
Clear Map to remove all mapping from the right pane.
Default M a p to restore the default mapping.
Save Map to save the current mapping to a new file (this can be useful if you
regularly import contacts from several different sources). If you do not click
, the default map is saved when you click OK.
Map
When you are finished mapping fields, click
OK. Any changes to the default or custom
map are saved for future importing.
10. Click
Next in the Import and Export Wizard, and then click Finish. The contacts in the
CSV file are imported.
Note: When text is imported from a CSV file, a comma in the text breaks the text between
fields unless the text is within quotation marks.
To export contacts to a CSV file
1. Choose File > Import and Export. The Import and Export Wizard opens.
Save
Page 63

Importing and exporting Wave items 2-41
Release 3.0
April 2012
Chapter 2: Using ViewPoint
2. Under Choose an action to perform, select Export Contacts, and then click Next.
3. In
4. In
5. Click
Save exported file as, browse to the folder in which you want to save the CSV file.
Source folder, choose the Contacts file that you want to export, and then click Next.
Finish. The CSV file is exported.
Exporting ViewPoint recordings
You can export voice messages and call recordings in WAV or MP3 format.
1. In the ViewPoint Messages folder, select the voice message or call recording.
2. Click the
3. Specify the target location.
4. Select WAV or MP3 from the
5. Click
Note: If a call recording has already been archived, you must use the Archived Recording
Browser to export it. See Appendix A.
Export audio button.
Save.
Save as type drop-down list.
Wave ViewPoint User Guide
Page 64

Release 3.0
April 2012
Page 65

Chapter 3
Release 3.0
April 2012
Using Personal Statuses
CHAPTER CONTENTS
About personal statuses. . . . . . . . . . . . . . . . . . . . . . . . . . . . . . . . . . . . . . . . . . . . . . . . .3-1
Selecting a personal status . . . . . . . . . . . . . . . . . . . . . . . . . . . . . . . . . . . . . . . . . . . . . .3-7
Modifying a personal status . . . . . . . . . . . . . . . . . . . . . . . . . . . . . . . . . . . . . . . . . . . . . .3-8
Using personal status defaults. . . . . . . . . . . . . . . . . . . . . . . . . . . . . . . . . . . . . . . . . . .3-10
Changing the personal status of another user. . . . . . . . . . . . . . . . . . . . . . . . . . . . . . .3-11
About personal statuses
Y o ur personal status appears with your name in other V iewPoint users’ Extensions lists, letting
your colleagues know where you are and what you are doing. For exam ple, setting your personal
status to On Vacation alerts other users not to call you on a critical issue.
Also, you can also use personal status as a quick way to change your call handling. For example,
the Do Not Disturb st atus s ends y our incomi ng calls directly to v oicemail withou t ring ing y our
phone.
Note: To change your own or another person’s personal status, you must have permission to
do so. If you cannot change your own or another user’s personal status according to the
instructions in this chapter, see your Wave system administrator.
Wave ViewPoint User Guide
Page 66

About personal statuses 3-2
Release 3.0
April 2012
Chapter 3: Using Personal Statuses
T o view the available personal statuses, click Configuration in the navigation bar , and then click
Personal Statuses:
Double-click a personal status to view its properties.
Wave ViewPoint User Guide
Page 67

About personal statuses 3-3
Release 3.0
April 2012
Chapter 3: Using Personal Statuses
A personal status consists of the following:
•
A personal status icon and a name, such as A vailable. These appear next to y our name in
the Extensions list, so that other Wave users can see at a glance whether you are in the
office and available or not. Likewise, by looking at the Extensions list you can see the
personal status of other users.
A collection of preferences that determines how your incomi ng ca lls a re ha ndled . Each
•
personal status consists of the following call handling preferences:
Where I Am. Identifies the phone to which your incoming calls will be sent when the
•
personal status is active. The default Where I Am location is your phone, or your
forwarding number if your calls are forwarded.
Taking calls. Specifies whether calls ring through to your phone or not when the
•
personal status is active.
Queue calls. For Contact Center agents only, specifies whether queue calls are sent
•
to your phone when the personal status is active. For more about using personal
statuses as a Contact Center agent, see Chapter 5 in the Wave Contact Center
Administrator Guide .
Routing List. Specifies the routing list that Wave uses to process calls when the
•
personal status is active.
Greeting. Specifies the recording that Wave plays to callers when they reach your
•
voicemail (or any other final action of your routing list) when the personal status is
active.
Depending on the personal status, you can modify some of these preferences. See
“Modifying a personal status” on page 3-8.
Wave ViewPoint User Guide
Page 68

About personal statuses 3-4
Release 3.0
April 2012
Chapter 3: Using Personal Statuses
Available personal statuses
Five personal statuses are available to all users. Three additional personal statuses are available
only to Contact Center agents.
Personal statuses (for all users)
The following five personal statuses are available for all users.
Icon Status Description
Available Lets people know that you are available to take calls. All calls
ring through to you according to your current call forwarding,
routing list, and other settings.
If you are an agent in a Contact Center queue, you can use this
status to make yourself available for both queue and non-queue
calls. For additional Contact Center agent personal statuses,
see the next table.
Do Not
Disturb
Lets people know that you are not taking calls. No calls ring
your phone.
Calls are sent straight to the “unanswered” final
action of your routing list (usually your voicemail).
Note: You can create a call rule that overrides the Do Not
Disturb personal status by allowing calls from specific people to
ring your phone. See Chapter 11.
In a Meeting These three personal statuses let people know where you are
when you are away from your desk. Like Do Not Disturb, these
personal statuses send your calls directly to the “unanswered”
final action of your routing list (usually your voicemail) without
Out of the
Office
ringing your phone. You can change that default behavior with
these statuses.
On Vacation
Wave ViewPoint User Guide
Page 69
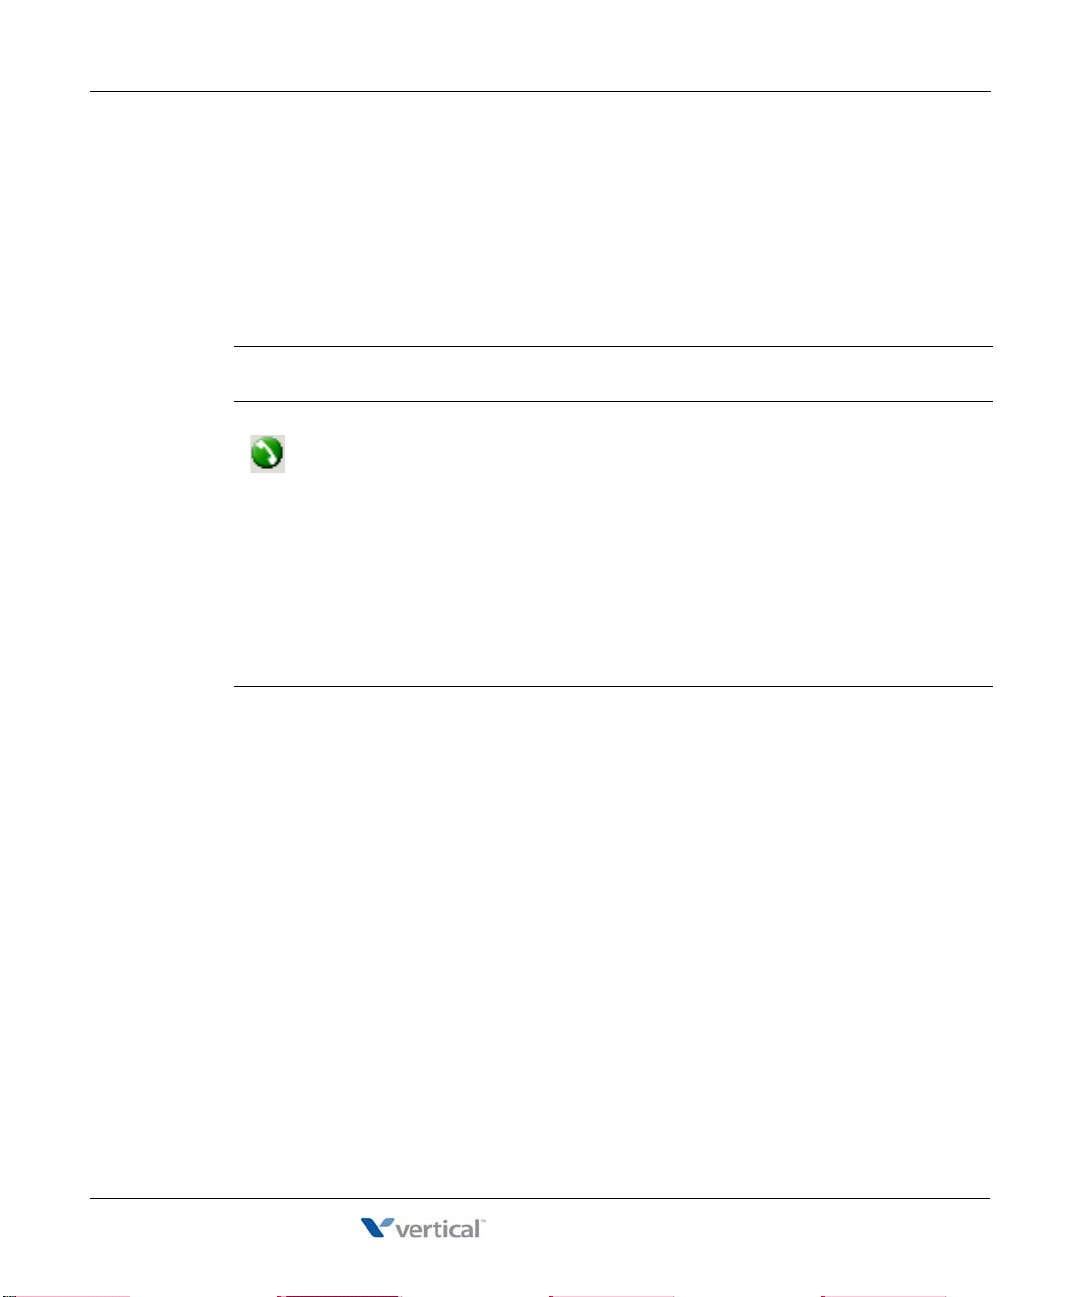
About personal statuses 3-5
Release 3.0
April 2012
Chapter 3: Using Personal Statuses
Personal statuses (for Contact Center queue agents)
In addition to the personal statuses described above, the personal statuses shown in the
following table are available if you are an agent in one or more Contact Center queues. For
information about working as an agent in a Contact Center queue, see the Wave Contact Center
Administrator Guide .
Icon Status Description
Available
(Queue Only)
This status or the Available stat us makes you available to take
calls. When you select this status, the queue begins sending
calls to you.
With this status, only queue calls ring your phone.
Non-queue calls are sent directly to your voicemail. To have all
your calls ring your phone, make yourself available by
selecting the Available status (see the previous table).
You can also select this status by picking up the phone and
pressing *51.
Wave ViewPoint User Guide
Page 70

About personal statuses 3-6
Release 3.0
April 2012
Chapter 3: Using Personal Statuses
Icon Status Description
Available
(Non-Queue)
This status makes you unavailable at the end of your shift.
When you select this status, the queue stops sending calls to
you.
With this status, non-queue calls still ring your phone. To
prevent all calls from ringing your phone, make yourself
unavailable by selecting Do Not Disturb.
You can also select this status by picking up the phone and
pressing *52.
On Break This status puts you on a break during your shift. While this
status is selected, the queue does not send calls to you.
When you take a break, be sure to use the On Break status
rather than Available (Non-Queue), which ends your shift.
Using On Break when you take a break will ensure the integrity
of Contact Center statistics.
You can also select this status by picking up the phone and
pressing *53.
Wave ViewPoint User Guide
Page 71

Selecting a personal status 3-7
Release 3.0
April 2012
Chapter 3: Using Personal Statuses
If you are an agent in a Contact Center queue, note the following:
• You can make yourself available for queue calls by selecting either Available or
Available (Queue Only).
• You can make yourself unavailable for queue calls by selecting any status other than
Available (Non-Queue), Available (Queue Only), or On Break.
Selecting a personal status
You can select a personal status using ViewPoint or the phone.
Selecting a personal status in Viewpoint
Use any of the following methods to select a personal status in ViewPoint:
• Click the Personal Status button on the status bar, and then select a personal status.
• Choose
Tools > Personal Sta tu s and then select a personal status.
• In the Personal Statuses folder, select a personal status and then choose
.
Active
Selecting a personal status using your phone
You can select a personal status on the phone in the following ways:
• Log on and press
the phone and pressing
• For Con tact Center agent statuses, pick up your phone and press
these quick commands to begin and end your shift and to go on break. See “Starting and
ending your shift, and taking breaks” in Chapter 5 in the Wave Contact Center
Administrator Guide .
6 1. You can select the Available personal status quickly by picking up
*50.
Wave ViewPoint User Guide
Actions > Set as
*51 through *53. Use
Page 72

Modifying a personal status 3-8
Release 3.0
April 2012
Chapter 3: Using Personal Statuses
Modifying a personal status
You can modify personal statuses to reflect your changing availabilit y and location. For
example, if you are often away from your desk attending meetings, you can modify the In a
Meeting personal status to send your callers directly to voicemail.
Not all preferences are modifiable:
Where I Am. Cannot be modified for any personal status. The defa ult Where I Am location
•
is your phone or your call forwarding number if your calls are being forwarded.
•
Taking Calls. Can be modified for In A Meeting, Out Of The Office, or On Vacation.
•
Greeting. Cannot be modified for any personal status. Your default greeting is always
used.
•
Routing List. Can be modified for all pe rsonal status es.
If you are an agent in a Contact Center queue:
Queue call s. Canno t be modified f or any person al status. Queue Calls is always set to Yes
•
for Available (Queue Only) and Available (Non-Queue), and to No for all other statuses.
To modify a personal status
1. In the Personal Statuses folder, double-click the personal status. The Personal Status
dialog box opens.
2. Specify how you want your calls handled while this personal status is selected using the
following drop-down lists. For most call handling preferences, you can select either a
specific item or Default. Selecting Default uses the item that is your current personal
status default, which is shown in parentheses. “Setting personal status defaults” on page
3-10 for more information.
Wave ViewPoint User Guide
Page 73

Modifying a personal status 3-9
Release 3.0
April 2012
Chapter 3: Using Personal Statuses
• Where I am. Modifying this preference for a personal status is not supported in this
version. This preference identifies the phone to which your incoming calls will be
sent when this personal status is active. The default Where I Am location is your
phone, or your forwarding number if your calls are forwarded.
Taking calls. Specifies whether you want calls to ring through to your phone or not
•
when this personal status is active.
Yes (use my routing list). Incoming calls follow your active routing list, which
•
usually includes ringing your phone.
No (use only my final action). Incoming calls are sent directly to the final
•
action on your active routing list, which by default is your voicemail.
Note: You can modify this setting only for the personal status es In a Meetin g, Out
of the Office, and On Vacation.
Queue calls. Modifying this preference for a personal status is not supported in this
•
version. This preference is displayed only if you are an agent in a Contact Center
queue. Specifies whether queue calls are sent to your phone when this personal
status is active.
Yes. Marks you as available to take queue calls, and while this personal status
•
is active you can receive calls from all queues for which you are signed in.
No. Marks you as not available to take queue calls.
•
•
•
3. Click
Note:
Queue calls is always set to Yes for Available (Queue Only) and Available
(Non-Queue), and to No for all other statuses.
Routing List. Select the routing list that your calls will follow when this personal
status is active. T o create a new routing list, click , or press ALT+click to edit the
selected routing list. For more about routing lists, see “Using routing lists” on
page 9-5.
Greeting. Modifying this preference for a personal status is not supported in this
version. For more about greetings, see “Managing voicemail greetings” on
page 7-23.
OK to save your changes.
Wave ViewPoint User Guide
Page 74

Using personal status defaults 3-10
Release 3.0
April 2012
Chapter 3: Using Personal Statuses
Using personal status defaults
Specifying a default personal status greeting and routing list
When you select a personal status with a greeting or routing list preference, it makes that
greeting or routing list active. Wh en you are done using that pe rsonal status, you pro bably want
your active greeting and routing list to revert to what they were before they were made active
by the personal status.
Personal status defaults are a way of accomplishing this. Personal status defaults specify the
greeting and the routing list that become active when you select a personal status that has no
greeting or routing list preference.
You can specify only one default personal stat us gr eet ing and one default routing li st at a time.
When you select a personal status with no greeting preference, the personal status default
greeting becomes active. When you select a pers onal status with no routing list preference, the
personal status default preference becomes active.
Example: You set your “Everyday” greeting to be your personal status default, because this
is the greeting you normally use. Several times during the day you change your active
greeting by selecting the personal status In a Meeting, which applies your custom “Be Back
Soon” greeting. When you return fr om the meeting and s elect the p ers onal status Available (or
any other personal status) your personal status defaults are restored, so your “Everyday”
greeting becomes active again.
You can change the greeting and the routing list that are your personal status defaults at any
time. See “Setting personal status defaults” on page 9-13.
Setting personal status defaults
• To set your personal status default greeting, edit the greeting and select the Default
personal status greeting
details.
Note: When you make a greeting active using the telephone commands, that greeting
also becomes your personal status default greeting.
• To set your default routing list, edit the routing list and select the
the defau lt for incoming calls
List Editor” on page 9-11 for details.
checkbox. See “Recording a new greeting” on page 7-26 for
Use this routing list as
checkbox. See “Creating a routing list using the Routing
Wave ViewPoint User Guide
Page 75

Changing the personal status of another user 3-11
Release 3.0
April 2012
Chapter 3: Using Personal Statuses
To set a personal status preference back to the default setting
Perform these steps to set a personal status preference back to the default setting
1. Edit the personal status. See “Modifying a personal status” on page 3-8.
2. For the
Routing List preference, select Default from the drop-down list. The Default entry
displays the name of the current default item in parentheses, for example “Default
(Standard)”.
3. Click
OK.
Changing the personal status of another user
You can change the personal status of another Wave user if you know that user’s password (or
you can do it without entering a pass word if you hav e the appropriate permi ssion). This feature
is useful when a user wants to change his or her personal status but does not want to or canno t
log on to W ave. For example, an administrative assistan t can change the person al status for the
boss, or the user who is acting as the Operator user can change the Operator’s personal status
without logging on as the Operator user.
To change another user’s personal status in ViewPoint
1. In the Extensions list, right-click the user.
2. Choose
3. If you do not have the appropriate permission, you will be prompted for that user's
password:
Apply Personal Status and click a personal status.
Enter the user’s password and click
Wave ViewPoint User Guide
OK.
Page 76

Release 3.0
April 2012
Page 77

Chapter 4
Release 3.0
April 2012
Using the Extensions List
CHAPTER CONTENTS
Viewing Wave extensions . . . . . . . . . . . . . . . . . . . . . . . . . . . . . . . . . . . . . . . . . .4-1
Placing calls to an extension. . . . . . . . . . . . . . . . . . . . . . . . . . . . . . . . . . . . . . . .4-4
Using Wave IMpulse for instant messaging . . . . . . . . . . . . . . . . . . . . . . . . . . . .4-4
Viewing Wave extensions
You can see all Wave extensions, along with information about the current status of each
extension, in the Extensions list. You can use the Extensions list to quickly place calls to other
Wave extensions or to change another user’s personal status if you have permission to do so.
You can display the Extensions list in the Call Monitor for quick access, including
drag-and-drop calling. See “Adjusting the Phonebook Pane layout in the Call Monitor” on
page 2-26.
A glance at the Extensions list can tell you:
• A user’s extension number
• Whether a user is currently on a call
• A user’s current personal status
• Whether a user has call forwarding turned on, and the location to which the calls are
forwarded
• The extensions of your office’s auto attendants and Contact Center queues.
Wave ViewPoint User Guide
Page 78

Viewing Wave extensions 4-2
Release 3.0
April 2012
Chapter 4: Using the Extensions List
The Extensions list automatically updates in real time.
Note: From the Extensions li st you can change another user’ s personal status if you kn ow that
user’s password, or have the proper permission. For instructions, see “Changing the personal
status of another user” on page 3-11.
Searching the Extensions list
To find someone quickly, you can type their first or last name (fully or partially) in the Search
field. The Extensions lis t displays all it ems whose first or l ast name begins w ith the entered text .
Wave ViewPoint User Guide
Page 79

Viewing Wave extensions 4-3
Release 3.0
April 2012
Chapter 4: Using the Extensions List
Extensions list tabs
The Extensions list can optionally contain tabs that display related groups of extensions. Tabs
are located at the bottom of the Extensions list. Click each tab to view its contents.
•
All tab. This tab displays all Wave extensions. Note that your Wave system may be
configured to not show this tab.
•
Group tabs. The Extensions list can optionally display a tab for each public ViewPoint
Group of which you are a member, and a tab for any personal V iewPoin t Group s that yo u
created. Click a Group tab to see the extensions within that Group. See “Using ViewPoint
Groups” on page 10-17.
• Queue tabs. If you are an agent in a Contact Center queue, the Extensions list contains a
tab for each queue. Click the tab to see the agents who are members of that queue, as well
as all of the current calls for the queu e. An asterisk (*) on the queue tab indicates that you
are signed out for that queue. For details about participating in a queue, see Chapter 5 in
the Wave Contact Center Administrator Guide.
Showing, hiding, and reordering Extensions list tabs
To show or hide individual tabs, as well as choose their order, do the following:
1. In the Extensions list, choose
the the Extensions list and then choose
2. Select a tab name and click
list. Use the up and down arrow buttons to arrange the order of tabs in the list.
3. Click
OK. The specified tabs are displayed at the bottom of the Extensions list.
Extensions list columns
Some Extensions list columns are hidden by default. Press F1 for Help to see a complete list of
columns with explanations. To show or hide columns, see “Customizing columns” on
page 2-31.
View > Show Tabs. (You can also right-click anywhere in
Show Tabs.)
Add or Remove to set up the Show these tabs in this order
Wave ViewPoint User Guide
Page 80

Placing calls to an extension 4-4
Release 3.0
April 2012
Chapter 4: Using the Extensions List
Placing calls to an extension
T o place a call to an ex tensio n, d ouble-click th e exten sion. If your phone is on hoo k, it rings to
connect you to the call being placed.
Using Wave IMpul se for instant messaging
Wave IMpulse supports simple, secure, user-to-user instant messaging in ViewPoint. With
instant messaging you can initiate a real-time typed conversation between yourself and another
user.
You can:
• Send and receive instant messages with other users.
• Send and receiv e instant messages with us ers in Wave organizations other than the one to
which you belong.
• Initiate an instant messaging conference.
Each of these features requires that you have the appropriate Wave permissions assigned by
your Wave administrator. Ask your Wave administrator if you are configured to use these
features. Also, before your instant message can be delivered to another user, that user must be
running ViewPoint and must also have the appropriate Wave permissions assigned.
Sending an instant message to another user
T o send an instant message to anot her user , right-click t he user in the Extensions view and then
Send Instant Message.
click
If that user is not currently online, the following message is displayed:
“Joe Wang seems to be offline. Message you send will be delivered when Joe Wang
comes online.”
Wave ViewPoint User Guide
Page 81

Using Wave IMpulse for instant messaging 4-5
Release 3.0
April 2012
Chapter 4: Using the Extensions List
Y ou can recognize whether users are on line or not by the Presence icon next to their name in the
Extensions view. In the following example, Ana Chen and Audrey Escobar are online
Type your instant message in the window that opens:
Send to send your instant message. If that user is running ViewPoint and has the
Click
appropriate Wave permissions assigned when you click
Send, the message window pops open
in the receiving user’s ViewPoint, allowing him or her to respond.
Wave ViewPoint User Guide
Page 82

Using Wave IMpulse for instant messaging 4-6
Release 3.0
April 2012
Chapter 4: Using the Extensions List
As your conversation p rog ress es , al l of the messages and repli es ar e di s played at the top of the
window:
If you send or receive a message and there is no new interaction from the other party within a
minute, the date and time of the last message is displayed in the window, for example “Sent at
5:14 PM on Thursday."
Receiving an instant message fro m another user
When you receive an instant message from another user , the instant message window displaying
the message pops up if it is not already open. Similarly, when you log onto ViewPoint, the
message window pops open displaying any instant messages you received while you were not
logged on.
Inviting users to an instant messaging conference
Y ou can create an instant messaging conf erence before you start s ending mes sages, or add other
users as you go along.
Wave ViewPoint User Guide
Page 83

Using Wave IMpulse for instant messaging 4-7
Release 3.0
April 2012
Chapter 4: Using the Extensions List
To create an instant messaging conference
1. Right-click the name of one of the participants in the Extensions view and then click
Send Instant Message.
2. In the window that opens, click the arrow button located to the right of the
and then click
Invite to Conference.
Send button,
3. The Invite to Conference dialog opens listing the users who are currently available.
Wave ViewPoint User Guide
Page 84

Using Wave IMpulse for instant messaging 4-8
Release 3.0
April 2012
Chapter 4: Using the Extensions List
4. Select the names of the conference participants to invite and then click OK.
The invitees are automatically added to the conference.
Participating in a conference
Any of the conference participants can send messages that will be displayed in each user’s
ViewPoint.
Any participant can invite additional participants to join the conference by following the steps
listed above.
To exit a conference, click the Close button at the top of the window.
Note: In this version, selecting or deselecting one or more participant names in the left pane
has no effect. In a future ver sion, yo u will be able to u se th is area to remo ve a par ticip ant fro m
the conference, send a private message to a participant, and so forth.
Wave ViewPoint User Guide
Page 85

Chapter 5
Release 3.0
April 2012
Receiving and Handling Calls in ViewPoint
CHAPTER CONTENTS
Using the Call Monitor folder. . . . . . . . . . . . . . . . . . . . . . . . . . . . . . . . . . . . . . . .5-1
Displaying the Call Monitor folder automatically . . . . . . . . . . . . . . . . . . . . . . . . .5-6
Selecting and acting on a call in the Call Monitor . . . . . . . . . . . . . . . . . . . . . . . . 5-7
Commands while a call is ringing . . . . . . . . . . . . . . . . . . . . . . . . . . . . . . . . . . . .5-8
Commands while you’re on a call . . . . . . . . . . . . . . . . . . . . . . . . . . . . . . . . . . . .5-9
Incoming call indicators. . . . . . . . . . . . . . . . . . . . . . . . . . . . . . . . . . . . . . . . . . .5-18
Sharing your Call Monitor folder . . . . . . . . . . . . . . . . . . . . . . . . . . . . . . . . . . . . 5-19
Using the Call Monitor folder
In the W ave ViewPoint, the Call Monitor folder is the visual counterpart to your phone. The Call
Monitor lets you see all your incoming calls and any outgoing calls at once, often with the
callers identified by name. You must h a ve a phone associated with ViewPoint in order to use
most Call Monitor features.
Note: Calls made or answered via an Outside Line feat ure butt on o n a pho ne do not appear in
the ViewPoint Call Monitor.
Wave ViewPoint User Guide
Page 86
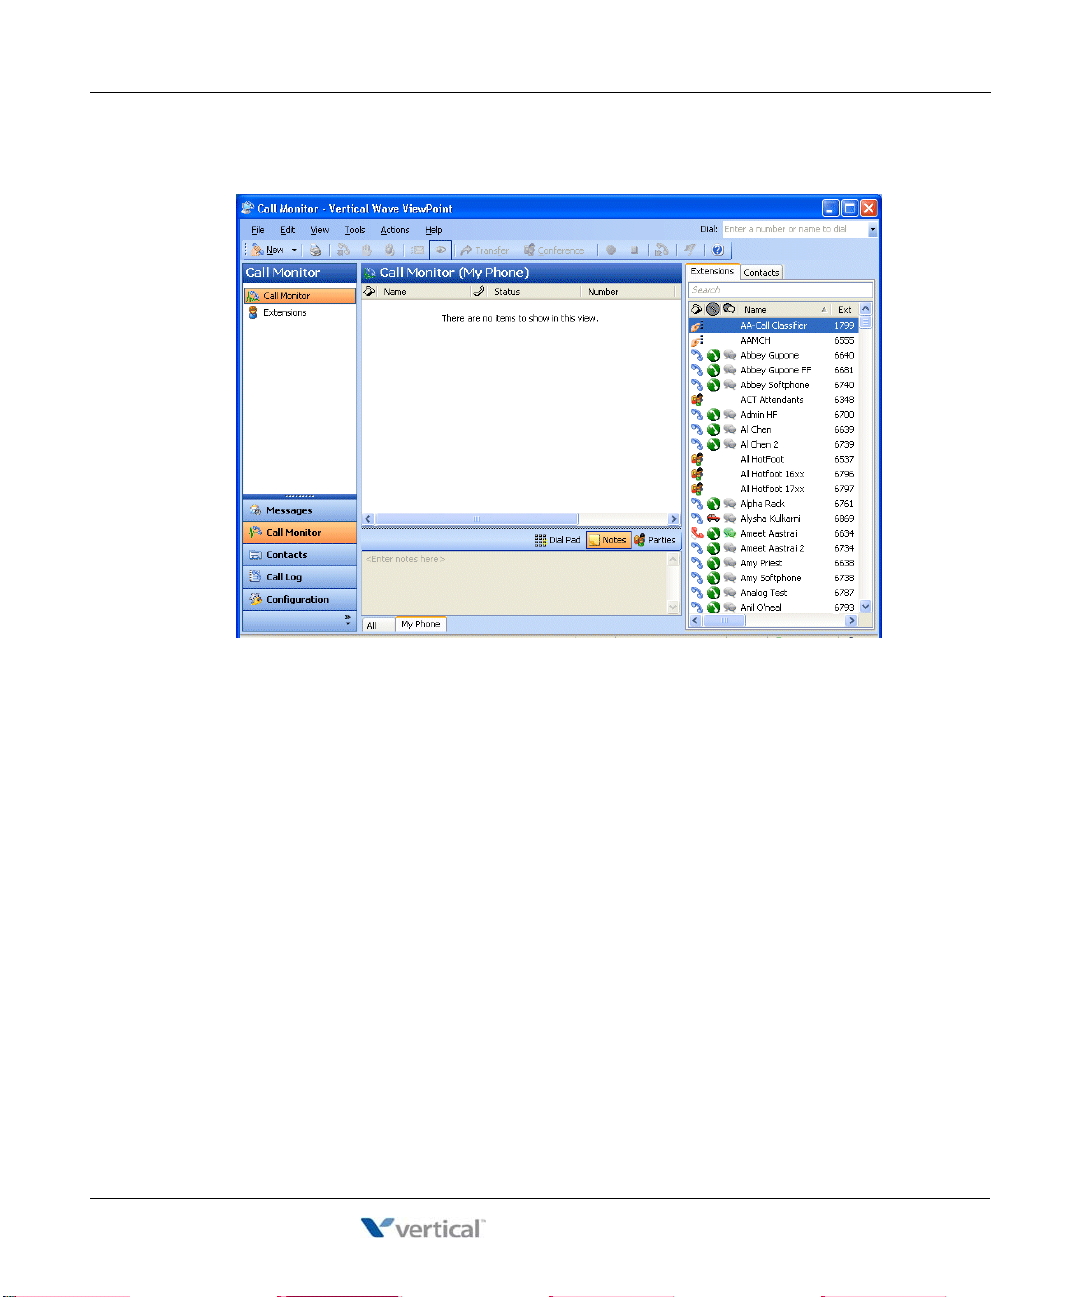
Using the Call Monitor folder 5-2
Release 3.0
April 2012
Chapter 5: Receiving and Handling Calls in ViewPoint
The following graphic illustrates the ViewPoint Call Monitor.
In the Call Monitor folder you can:
• See who is calling you and take the call or send it to voicemail
• Click calls to transfer them, put them on hold, send them to voicemail, or perform other
actions
• Move among multiple calls on hold with a click of the mouse
• Record calls
• Conference calls (including creating or starting a conference)
Each row in the Call Monitor folder is an item that contains information about one call, or one
party in a call. Conference calls appear in a special Conference pane that shows the parties other
than yourself.
For an explanation of Call Monitor folder columns, press
F1 for online Help. For information
about changing the Call Monitor folder columns that are displayed, see “Customizing columns”
on page 12-20.
Wave ViewPoint User Guide
Page 87

Using the Call Monitor folder 5-3
Release 3.0
April 2012
Chapter 5: Receiving and Handling Calls in ViewPoint
Call Monitor folder tabs
For most people, the Call Monitor folder contains two tabs, called My Phone and All. Y ou can
optionally display other tabs that group related calls. Click each tab to view the related call
activity at your phone.
My Phone tab. This tab always appears in your Call Monitor folder and displays all calls
•
to or from your phone. This includes calls that are forwarded to your extension (in this
case, the called party who forwarded the call is identified in the Owner column), and calls
to your DID number if you have one.
Parked tab. The Parked tab shows all current parked calls.
•
•
Queue tab. If you are an agent in a Contact Center queue, all the current calls for the
queue appear on a separate tab labeled with the queue name. An asterisk (*) on the queue
tab indicates that you are signed out for that queue. For details about participating in a
queue, see Chapter 5 in the Wave Contact Center Administrator Guide.
All tab. The All tab shows all of the following that apply to you:
•
• All calls to and from your phone.
• If you are an agent in a Co ntact Center queue: All qu eue calls for any qu eue that you
are currently signed into. (If you are not signed into a queue, that queue’s calls do
not appear in your All tab, but they do appear on that queue’s Queue tab.)
• All calls from any other users’ Call Monitors that have been shared with you.
Calls on the All tab are grouped und er head ers t hat corr espond to the names of your oth er Cal l
Monitor tabs, as in the following example.
Note that a call may appear multiple times in the All tab, for example, under both the My Phone
header and the Parked head er . You can select any appeara nce of a call to perform command s on
it.
Wave ViewPoint User Guide
Page 88

Using the Call Monitor folder 5-4
Release 3.0
April 2012
Chapter 5: Receiving and Handling Calls in ViewPoint
Showing, hiding, and reordering Call Monitor tabs
To show or hide individual Call Monitor tabs, as well as choose their order, do the following:
1. Choose
View > Show Tabs. (You can also right-click the Call Monitor column headers or
tabs.)
2. Click
All to select all tabs, or select a tab name and click Add or Remove to show or hide
it. Use the up and down arrow buttons to arrange the order in which the tabs are
displayed.
3. Click
OK.
Using the My Phone tab to handle calls
The My Phone tab appears if you have other tabs showing. After you answer a call, the Call
Monitor automatically switches to the My Phone tab. It is the only tab from which you can
perform call-handling commands on a call. If you select an active call in another tab, the
call-handling commands are unavailable.
Wave ViewPoint User Guide
Page 89

Using the Call Monitor folder 5-5
Release 3.0
April 2012
Chapter 5: Receiving and Handling Calls in ViewPoint
Call Monitor folder panes
The Call Monitor folder contains the following panes that you can hide or show:
•
Phonebook Pane. Shows the Extensions list and th e Cont acts folder and enables
drag-and-drop call handling. See “Adjusting the Phonebook Pane layout in the Call
Monitor” on page 2-26 and “Dragging and dropping items” on page 2-28.
Notes Pane. Enables you to type and add call notes. See “Adding notes to a call” on
•
page 5-13.
•
Parties pane. Shows the parties in a conference call other than yourself.
•
ViewPoint Softphone Dial Pad. Available if you are using the ViewPoint as your primary
or secondary phone. See “Using the ViewPoint Softphone” on page 2-6 for an overview
of the ViewPoint Softphone.
Call Monitor folder columns
The Call Monitor folder contains several columns that show detailed information about a call,
such as Trunk Name and Target Station. Some of the columns are hidden by default. For an
explanation of the columns, press
instructions on hiding and showing columns, see “Customizing columns” on page 12-20.
F1 in the Call Monitor folder for its online Help. For
Viewing a custom data column in the Call Monitor
If your Wave system is configured to display custom data (for example, a caller’s account
number) in the Call Monitor, the custom data appears in one or more columns. Y ou can view the
available columns in the Show Columns dialog. You can hide and show custom data columns
the same way you can hide and show normal columns (see “Customizing columns” on
page 2-31.) Contact your Wave system administrator to see if any custom data columns are
available in your Call Monitor folder.
Wave ViewPoint User Guide
Page 90

Displaying the Call Monitor folder automatically 5-6
Release 3.0
April 2012
Chapter 5: Receiving and Handling Calls in ViewPoint
Displaying the Call Monitor folde r automatically
W ave can open the Call Monitor folder automatically when you place or return calla form some
ViewPoint folders. When the Call Monitor folder opens automatically, it appears in front of all
other open windows on your computer.
To display the Call Monitor folder automatically
1. Choose Tools > Opt ions. The Options dialog opens.
2. Click the ViewPoint \ Call Monitor tab.
3. Under
checkboxes:
•
•
Display Call Monitor in the following situations, select one or bot h of the foll owing
Placing new calls from Contacts or Extensions. The Call Monitor folder opens each
time you place a call from the Contacts or Extensions folder.
Returning calls from Voice Messages or Call Log. the Call Monitor folder opens
each time you return a call from a voice message or Call Log entry.
Wave ViewPoint User Guide
Page 91

Selecting and acting on a call in the Call Monitor 5-7
Release 3.0
April 2012
Chapter 5: Receiving and Handling Calls in ViewPoint
4. To display the Call Monitor folder automatically on incoming calls, click the V iewPoint \
Call Alerts tab and check
Display the Call Monitor.
5. Click
OK.
Selecting and acting on a call in the Call Monitor
Click a call in the Call Monitor folder to select it. After it is selected, you can choose commands
to apply to that call.
To use a command on a call in the Call Monitor folder, do one of the following actions:
• Right-cl ick the call and choose a comman d on the sho rtcut menu . This opti on is often t he
fastest way of choosing a command, but it may be difficult to do so during times when
phone traffic is heavy . This is due to the fact that calls change position in the Call Monitor
folder as new calls arrive and transferred calls leave the Call Monitor folder.
• Click a button on the toolbar.
• Choose a command from the
•Press
Enter. This puts the selected call on hold, or retrieves it if it is already on hold.
Important: Do not use the ViewPoint Call Monitor to select and act on a call to a virtual
extension—use the phone commands (as described in the Wave Phone User Guide) to control
these calls. A virtual extension number can be assign ed to a u ser who d oes no t need a phy sical
phone, for example because the user works on the road using a cell phone. Ask your system
administrator if there are any virtual extensions assigned on your system.
Actions menu.
Automatically displaying account code information for contacts
On an incoming call from a ViewPoint contact, Wave automatically displays the contact’s
account code information (if any) along with the call in the ViewPoint Call Monitor. If you do
not observe this behavior , ask your W ave admi nistrator if this feature has been disabled on yo ur
system.
Call ownership
In the Call Monitor you can perform call-handling commands only on calls that you own. You
own a call if you are the one who answered it. If you select a call that you do not own, the
call-handling commands are unavailable.
Wave ViewPoint User Guide
Page 92

Commands while a call is ringing 5-8
Release 3.0
April 2012
Chapter 5: Receiving and Handling Calls in ViewPoint
Examples of calls that you can see, but that you do not own, include calls in a Queue tab that
are being handled by another agent, or calls in a shared Call Monitor tab that are being h andled
by the sharing user.
To determine who owns a call, look at the name in the Owner column.
Double-clicking calls
Double-clicking in the Call Monitor folder has the following effects:
• Double-clicking an active call puts it on hold.
• Double-clicking any other type of call takes the call (connects you to the caller). This
includes incoming calls, calls on hold, parked calls, and calls to which you are listening
while the caller leaves a message.
Commands while a call is ringing
While calls are ringing at your phone, the Call Monitor folder displays “Incoming Call.” If
W ave can identify the caller , the item in the Call Monitor folder also displays the caller’s phone
number and name, which enables you to screen your calls. (See “Teaching Wave to recognize
your contacts” on page 10-8.) While calls are ringing, you can perform the following actions:
• Take the call
• Send the call to voicemail
• “Grab and hold” the call (put the call on hold without talking to the caller first)
Taking the call
If you are already on another call, select the in coming call and choose Actions > T ake Call. Y our
current call is put on hold. You can easily move among multiple calls by choosing
again.
When you use
speakers by choosing
Take Call
Take Call in the Call Monitor folder, you can play the caller’s name over your
Actions > Announce Caller.
Wave ViewPoint User Guide
Page 93

Commands while you’re on a call 5-9
Release 3.0
April 2012
Chapter 5: Receiving and Handling Calls in ViewPoint
Sending the call to voicemail
Select the call, and then choose Actions > Take Message. The call is sent to your voicemail.
Note: Contact center agents cannot perform this command on an incoming queue call.
Screening a voice message as it is being left
Y o u can listen to a voice message as the caller is leaving it and pick up the call if needed. T o do
so:
1. Select the call while it is ringing or while the caller is leaving a message.
2. Choose
Actions > Screen Message.
3. Pick up your phone and listen to the message as it is being left. This is a one-way
connection. The caller cannot hear you.
4. T o interrupt the message and take the call, choose
to the caller.
You can also listen to a voice message as it is being left via the phone.
Commands while you’re on a call
Once you are on an active call, you can perform actions on that call, including the following:
• Putting a call on hold. See page 5-10.
• Transferring a call. See page 5-11.
• Adding notes to a call. See page 5-13.
• Sending an email message about a call. See page 5-13.
• Recording a call. See page 5-13.
• Including the call as part of a conference call. See page 5-12 for steps to transfer a call
and then conference all parties together. (Conferencing is described in more detail in
Chapter 6.)
Actions > Take Call. You are connected
• Associating a call with a contact. See page 5-15.
Wave ViewPoint User Guide
Page 94

Commands while you’re on a call 5-10
Release 3.0
April 2012
Chapter 5: Receiving and Handling Calls in ViewPoint
• Parking a call. See page 5-15.
• Sending a call to voicemail. See page 5-16.
• Playing a caller's name over your speakers. See page 5-16.
• Disconnecting a call while staying on the phone. See page 5-16.
• Entering an account code for a call. See page 5-17.
• Flagging a problem call to report later. See page 5-17.
Instructions for each of these commands appear in the following sections.
Note: To perform a Call Monitor command on a call, you must first select the call.
Putting a call on hold
T o put a call on hold, select the call, and then choose Act ions > Hold . Alternatively , double-click
the call or select the call and press Enter.
T o retrieve the call from hold, select the call and either choose
the call, or press
Enter.
You can put as many calls on hold at one time as you want. The
Actions > T ake Call, doubl e-click
Duration column in the Call
Monitor folder shows how long each call has been waiting on hold.
Note:
• Use ViewPoint instead of the Hold button on your phone to put calls on hold. When on
hold from ViewPoint, callers hear your system’s hold music, but they hear only silence if
you use your phone’s Hold button.
• If you’re using a digital feature phone with multiple line appearances, you do not hear
dial tone after putting a call on hold. To get dial tone, select an unoccupied line.
Ringback for calls on hold
By default, if you hang up with one or more calls on hold, Wave’s ringback feature rings your
phone to remind you . Wh en t h e call rings back, the call’s status in the Call Monitor changes to
Ringing (On Hold). Talk to your Wave system administrator about configuring ringback
behavior.
Wave ViewPoint User Guide
Page 95

Commands while you’re on a call 5-11
Release 3.0
April 2012
Chapter 5: Receiving and Handling Calls in ViewPoint
Transferring a call
The Call Monitor folder allows you to easily transfer a call to any party, either another Wave
user or someone at an exter nal phone numb er . You can look up users and contacts by name, and
you can see in advance if an extension is busy. You can also trans fer a call to an auto attendant
or to a user’s voicemail.
Drag-and-drop transferring
With the Phonebook pane showing in the Call Monitor folder, you can drag a call from the Call
Monitor to an extension to transfer the call to that extension, or to a contact’s name to transfer
the call to the contact’ s default number. For more information about drag-and-drop command s,
see “Dragging and dropping items” on pag e 2-28. T o show the Phonebook pane, see “Adjusting
the Phonebook Pane layout in the Call Monitor” on page 2-26.
Blind, supervised, and direct-to-voicemail transfers
You can transfer a call in one of the following ways:
Blind tra nsf er, sometimes called an unattended transfer. You transfer the call without first
•
speaking to the recipient. When the recipient answers the phone, the call is connected.
• Blind transfers occur automatically when transferring a ringing call, and when
transferring to voicemail or an auto attendant.
•
Supervised transfer, sometimes called an attended or consultation transfer. You speak to
the transfer recipient first, while the caller is placed on hold. You can then complete the
transfer, or conference the three of you together, or cancel the transfer and return to the
caller.
Direct to voicemail. You transfer the call directly to an extension’s voicemail.
•
To transfer a call
1. Select the call that you want to transfer.
2. Choose
Actions > Transfer. The Transfer To dialog opens.
3. Select the person or enter the number to which to you want to transfer the call. See
“Placing a call” on page 6-1 for instructions.
Note: You may be prohibited from transferring an external caller to an external numb er.
See your Wave system administrator for more information.
Wave ViewPoint User Guide
Page 96

Commands while you’re on a call 5-12
Release 3.0
April 2012
Chapter 5: Receiving and Handling Calls in ViewPoint
4. In the Transfer field at the bottom of the dialog, click either Blind, Supervised, or to
Voicemail
. See the beginning of this section for more information about the different
types of transfers.
5. Click
OK. If you selected Blind or to Voicemail, the transfer is completed and the call
disappears from your Call Monitor.
Note: If you selected
Supervised, you are connected to the recipient’ s extension, and the
caller is put on hold. The incomplete transfer displays as a linked three-party call in the
Call Monitor.
6. Speak to the recipient and announce the caller. A dialog opens and asks you if you want
to complete the transfer or cancel it.
7. Choose one of the following options:
Complete. The transfer is completed and the call disappears fr om your Call Monit or .
•
You can also complete the transfer by hanging up the phone.
Conference. The caller, the recipient, and you are all connected in a conference call.
•
Cancel. The transfer process ends and you are reconnected to the caller, so you can
•
transfer him or her to voicemail or another destination.
Transfer tips for operators
By using Groups and showing the Extensions tab of the Phonebook pane in the Call Monitor
folder, you can easily find and choose the recipient of a call that you want to transfer. Define
Groups to represent the depart ments o f your of fice. When transferring a call you can then view
only the members of a Group, for example, the Marketing Group. You can see at a glance the
names of members of the Marketing departmen t and who is available to take a call. See “Using
ViewPoint Groups” on page 10-17 and “Adjusting the Phonebook Pane layout in the Call
Monitor” on page 2-26.
Wave ViewPoint User Guide
Page 97

Commands while you’re on a call 5-13
Release 3.0
April 2012
Chapter 5: Receiving and Handling Calls in ViewPoint
Y ou can also transfer calls more easily by resizing the Trans fer To di alog, by showing and hiding
columns, and by sorting calls by column. See “Customizing ViewPoint for operators” on
page 12-17.
Adding notes to a call
While a call is visible in your Call Monitor folder, you can type notes about the call in the Notes
Pane. If the Notes Pane is not showing, click
Notes in the bottom pane.
If the call is transferred to someone else, notes that you created about the call are sent with the
call (for example, you can add a note such as “Customer wants to track in voice #123987” b efore
transferring the call to your shipping department). When the call is complete, you can view or
edit the notes for the call in the Call Log folder (see Chapter 8, “Using the Call Log Folder” ).
If the call is recorded or transferred to voicemail, you will see the notes associated with the
recording.
Sending an email message about a call
From an active call, you can create an email message that’s automatically preformatted with
details about the call (from name and number, date and time, and so forth). This can be useful
for receptionists who sometimes need to take a verbal messages from the caller.
T o create an email from a call, select the call and choose
message opens preformatted with call details. You can add optional notes or message
information before sending the email.
Recording a call
If your Wave system administrator has given you the requi red perm ission, y ou can record your
Wave conversations, including conference calls. By default, recordings appear in your
Voicemail Inbox folder, although the system may be configured to send them to another
extension’s Inbox.
Actions > Send To. A new email
Wave ViewPoint User Guide
Page 98

Commands while you’re on a call 5-14
Release 3.0
April 2012
Chapter 5: Receiving and Handling Calls in ViewPoint
The maximum length of a single recording is equal to the total number of minutes available in
your voice mailbox. By default this is 20 minutes, but your Wave administrator may have set a
different limit.
Note: You cannot receive more voice messages when your voice mailbox is full. You should
check your available mailbox space after recording any conversation to be sure that you have
space for new voice messages. See “Managing your voicemail maximums” on page 7-10 for
more information.
Privacy issues with call recording
Some countries, states, or other locations require that you announce to callers that their calls
may be or are being recorded. Be sure that you understand how to comply with call recording
privacy requirements.
To record a call
1. During an active call, choose Actions > Start Recording. Wave starts to record the call.
You may hear a regular beep while recording, depending on your system configuration.
2. To stop recording before the call is finished, choose
Actions > Stop Recording.
To play a call you just recorded
1. Go to your Voicemail \ Inbox folder, or open another mailbox if your system is set up
differently.
2. Select the recording.
3. Choose
Actions > Play.
Using the phone commands
You can start and stop recording your calls u sing the
*16 phone command. You can also use the
phone commands to listen to recordings in your Inbox. For more information, see the Wa ve
Phone User Guide.
Wave ViewPoint User Guide
Page 99

Commands while you’re on a call 5-15
Release 3.0
April 2012
Chapter 5: Receiving and Handling Calls in ViewPoint
Associating a call with a contact
Unidentified calls appear in the Call Monitor folder as being from “Unknown.” You can
associate a particular unidentified call with one of your contacts, so that the Call Monitor and
Call Log folders display a name with the call. You can also permanently associate the call’s
Caller ID phone number or text with the contact, so that Wave automatically identifies the
contact on all subsequent calls from that phone.
T o associate a call with a contact, choose
ID number with a contact” on page 10-11.
Parking a call
Parking a call puts a call on hold and lets any Wave user retrieve it from any Wave phone or
ViewPoint program in your office. To display parked calls in the Call Monitor, choose
Show Tabs
To park a call
1. In the Call Monitor, select the call you want to park.
2. Choose
on <orbit number>.
Ringback for parked calls
By default, if you hang up with one or more calls on hold, Wave’s ringback feature rings your
phone to remind you . Wh en t h e call rings back, the call’s status in the Call Monitor changes to
Ringing (Parked). Talk to your Wave system administrator about configu ring ringback behavior .
Actions > Associate. See “Associating a call or Caller
View >
from the Call Monitor, and check Show all parked c alls.
Actions > Park. The Status column in the Call Monitor folder displays “Parked
Wave ViewPoint User Guide
Page 100

Commands while you’re on a call 5-16
Release 3.0
April 2012
Chapter 5: Receiving and Handling Calls in ViewPoint
Unparking a call
You can retrieve a parked call from any Wave phone or from any PC running ViewPoint.
To answer a parked call from any ViewPoint program
1. Click Tools > U npark. The Unpark dialog opens.
2. Select the call that you want to unpark and answer and click
You can also answer a parked call by picking up a Wave phone, pressing
the parking slot number.
Sending a call to voicemail
To send an active call to voicemail, choose Actions > Take Message.
Playing a caller's name over your speakers
You can play a recording of a caller’s name over your speakers at any time during a call by
choosing
Actions > Announce Caller. If you hear nothing, there is no voice title recorded for the
caller.
Disconnecting a call while staying on the phone
You can disconnect a call without hanging up the phone. Select the call, and then choose
Actions > Disconnect. This command is useful if:
• You want to disconnect a sing le party in a co nference call . Hanging u p your phone w ould
disconnect you from the whole conference.
OK.
*53, and then entering
• You are going to immediately dial another call. If you hang up and pick up your analog
phone too quickly, Wave can read that as a Flash command, which would put the call on
hold instead of disconnecting it.
Wave ViewPoint User Guide
 Loading...