

I
MANUALE ISTRUZIONI
GB
INSTRUCTION MANUAL
F
MODE D'EMPLOI
D
BEDIENUNGSSANLEITUNGEN
NL
BEDIENINGSHANDLEIDING
E
MANUAL DE INSTRUCCIONES
MANUAL DE INSTRUÇÕES
P
ЕГЧЕЙСЙДЙП ПДЗГЙЩН
GR
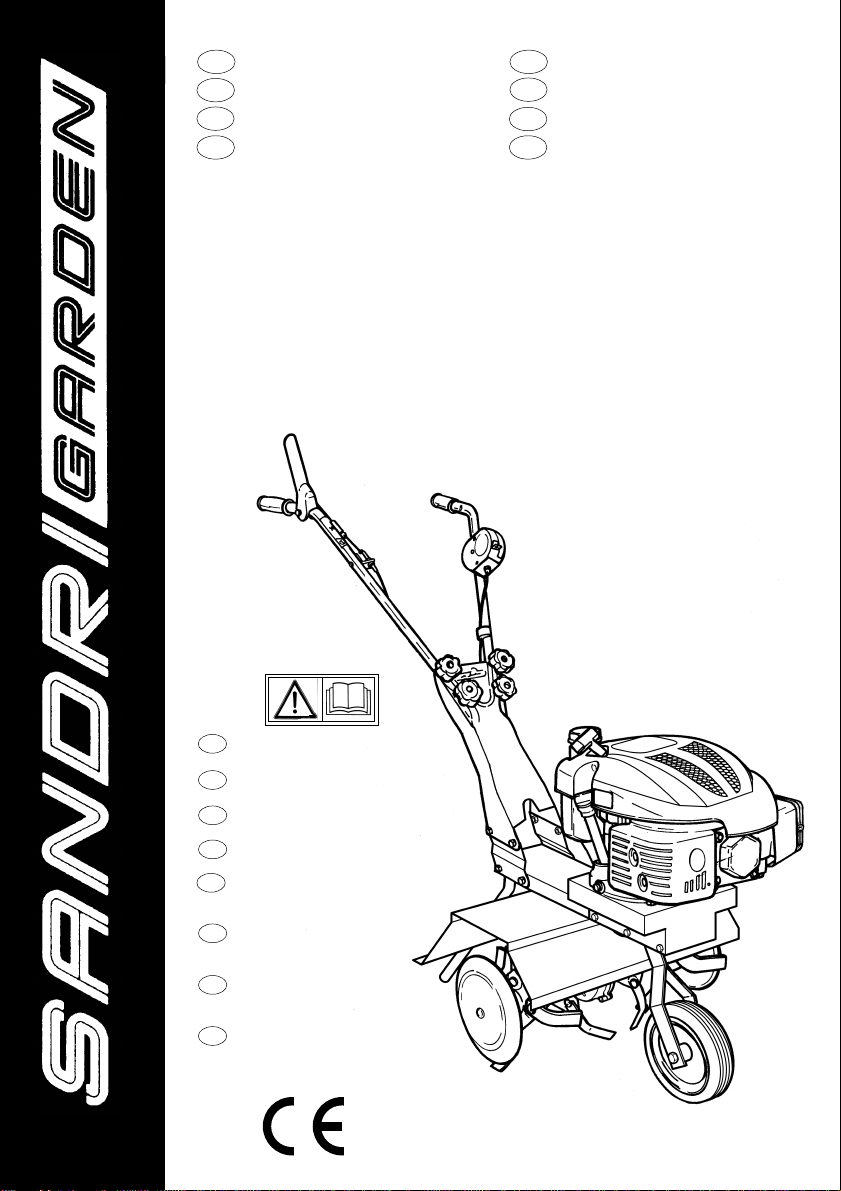
MOTOZAPPA - MOTOR HOE
MOTOBINEUSE - MOTORHACKE
HAKFREES - MOTOAZADA
MOTOENXADA - МПФПУКБРФЙКП
TL 60
Leggere attentamente le presenti
I
istruzioni prima del primo impiego.
Read this operators manual careful
GB
before the first use.
Lire avec attention ces instructions
F
avant la première utilisation
Vor der Anwendung die vorliegenden
D
Anweisungen aufmerksam lesen.
Lees aandachtig deze instructies
NL
door alvorens het apparaat voor het
eerst in gebruik te nemen.
Leer con cuidado estas
E
instrucciones antes de la primera
utilización.
Leia com atenção estas instruções
P
antes de utilizar pela primeira vez
o aparelho.
Рсйн чсзуймпрпйЮуефе фп
GR
мзчЬнзмб гйб рсюфз цпсЬ,
дйбвЬуфе рспуекфйкЬ бхфЭт фйт
пдзгЯет.
TL 40
N
6050470/028
1

(I)
ATTESTAZIONE DI CONFORMITÀ ALLE NORME CEE PER LE MACCHINE CON MOTORI < 3 KW
La sottoscritta SANDRIGARDEN srl, via Manzoni 22, 36027 ROSÀ (VI) ITALIA, dichiara che i seguenti prodotti: MOTOZAPP A TL 60 - TL 40/N sono
conformi alle direttive, 98/37/CE, 89/336/CE, 2000/14 CE, Art. 12 ANNEX VI, N°1232, CESMA s.c. a r .l. V ia Gorizia 49, 42100 Reggio Emilia
ITALIA e sono state sviluppate conformemente alle norme EN 709.
# Livello di potenza sonora misurata - Lwa = 91,6 dB(A)
# Livello di potenza sonora garantita - Lwa = 93 dB(A)
(ENG)
DECLARATION OF CONFORMITY TO EU STANDARDS RELATING TO MACHINES FITTED WITH MOTORS < 3 KW
SANDRIGARDEN srl, located in via Manzoni 22, 36027 ROSÀ (VI) ITALY, declares that the following products: TL 60 - TL 40/N MOTOR HOE
comply with directives 98/37/EC, 89/336/EC, 2000/14 EC, Art. 12 ANNEX VI, No. 1232, CESMA s.c. a r .l. Via Gorizia 49, 42100 Reggio Emilia
ITALY and that they have been designed in compliance with EN 709 standards.
# Measured sound power level - Lwa = 91.6 dB(A)
# Assured sound power level - Lwa = 93 dB(A)
(F)
ATTESTATION DE CONFORMITÉ AUX NORMES CEE POUR LES MACHINES AVEC MOTEURS < 3 KW
La société soussignée SANDRIGARDEN srl, via Manzoni 22, 36027 ROSÀ (VI) ITALIE, déclare que les produits suivants : MOTOBINEUSE
TL 60 - TL 40/N sont conformes aux directives 98/37/CE, 89/336/CE, 2000/14 CE, Art. 12 ANNEXE VI, N° 1232, CESMA s.c. a r.l. Via Gorizia
49, 42100 Reggio Emilia ITALIE et qu’ils ont été développés conformément à la norme EN 709.
# Niveau de puissance acoustique mesuré - Lwa = 91,6 dB(A)
# Niveau de puissance acoustique garanti - Lwa = 93 dB(A)
(D)
CE-KONFORMITÄTSERKLÄRUNG FÜR MASCHINEN MIT MOTOREN < 3 KW
Hiermit bestätigt die Firma SANDRIGARDEN srl, Via Manzoni 22, 36027 ROSÀ (VI) ITALIEN, dass die Bauart des Geräts: MOTORHACKE TL
60 - TL 40/N folgenden Richtlinien entspricht: 98/37/EG, 89/336/EG, 2000/14/EG, Art. 12 ANHANG VI, Nr . 1232, CESMA s.c. a r.l. Via Gorizia
49, 42100 Reggio Emilia ITALIEN und die Entwicklung des Produkts gemäß den Normen EN 709 erfolgte.
# Gemessener Schallpegel - Lwa = 91,6 dB(A)
# Garantierter Schallpegel - Lwa = 93 dB(A)
(NL)
VERKLARING VAN OVEREENSTEMMING MET DE EEG-NORMEN VOOR MACHINES MET MOTOREN < 3 KW
Ondergetekende SANDRIGARDEN srl, via Manzoni 22, 36027 ROSÀ (VI) ITALIË, verklaart dat de volgende producten: HAKFREES TL 60 - TL 40/N
in overeenstemming zijn met de Richtlijnen 98/37/EG, 89/336/EEG, 2000/14 EG, Art. 12 BIJLAGE VI, N°1232, CESMA s.c. a r .l. Via Gorizia 49,
42100 Reggio Emilia ITALIË en dat zij ontwikkeld zijn in overeenstemming met de normen EN 709
# Gemeten geluidsvermogenniveau - Lwa = 91,6 dB(A)
# Gegarandeerd geluidsvermogenniveau - Lwa = 93 dB(A)
(E)
CERTIFICADO DE CONFORMIDAD CON LAS NORMAS CEE PARA LAS MÁQUINAS CON MOTORES < 3 KW
La abajo firmante SANDRIGARDEN srl, via Manzoni 22, 36027 ROSÀ (VICENZA) ITALIA, declara que los siguientes productos: MOTOAZADA
TL 60 - TL 40/N son conformes a las directivas 98/37/CE, 89/336/CE, 2000/14 CE, Art. 12 ANEXO VI, N°1232, CESMA s.c. a r.l. Via Gorizia
49, 42100 Reggio Emilia ITALIA y se han desarrollado de acuerdo con las normas EN 709.
# Nivel de potencia sonora medida - Lwa = 91,6 dB(A)
# Nivel de potencia sonora garantizada - Lwa = 93 dB(A)
(P)
ATESTAÇÃO DE CONFORMIDADE DAS NORMAS CEE PARA AS MÁQUINAS COM MOTORES < 3 KW
A abaixo-assinada SANDRIGARDEN srl, via Manzoni 22, 36027 ROSÀ (VI) ITÁLIA, declara que os seguintes produtos: MOTOENXADA TL 60
- TL 40/N são conforme as directivas, 98/37/CE, 89/336/CE, 2000/14 CE, Art. 12 ANNEX VI, N°1232, CESMA s.c. a r.l. Via Gorizia 49, 42100
Reggio Emilia ITÁLIA e foram desenvolvidas em conformidade com as normas EN 709.
# Nível de potência sonora medida - Lwa = 91,6 dB(A)
# Nível de potência sonora garantida - Lwa = 93 dB(A)
(GR)
ВЕВБЙЩУЗ УХММПСЦЩУЗУ МЕ ФПХУ КБНПНЙУМПХУ ФЗУ ЕПК
РЕСЙ МЗЧБНЗМБФЩН МЕ КЙНЗФЗСЕУ < 3 КW
З хрпгсЬцпхуб ефбйсЯб SANDRIGARDEN srl, via Manzoni 22,
36027 ROSА (VI) ITALIA, дзлюней ьфй фб бкьлпхиб рспъьнфб:
ПФПУКБРФЙКП TL 60 - TL 40/N ухммпсцюнпнфбй ме фйт ПдзгЯет,
98/37/ÅÊ, 89/336/ÅÊ, 2000/14 ÅÊ, áñè. 12 ANNEX VI, N°1232,
CESMA s.c. a r.l. Via Gorizia 49, 42100 Reggio Emilia ITALIA êáé
кбфбукехЬуфзкбн уэмцщнб ме фпхт кбнпнйумпэт EN 709.
# ЕрЯредп мефсзмЭнзт йучэпт - Lwa = 91,6 dB(A)
# ЕрЯредп брь ЙУЧХУ sonora garantita - Lwa = 93 dB(A)
Rosà (VI) 19 - 04 - 2007
SANDRI GARDEN srl
Direttore Generale
Alberto Cattaneo
2

(I)
ATTESTAZIONE DI CONFORMITÀ ALLE NORME CEE PER LE MACCHINE CON MOTORI > 3 KW
La sottoscritta SANDRIGARDEN srl, via Manzoni 22, 36027 ROSÀ (VI) ITALIA, dichiara che i seguenti prodotti: MOTOZAPPA TL 60 - TL 40/N
sono conformi alle direttive, 98/37/CE, 89/336/CE e sono state sviluppate conformemente alle norme EN 709.
(ENG)
DECLARATION OF CONFORMITY TO EU STANDARDS RELATING TO MACHINES FITTED WITH MOTORS > 3 KW
SANDRIGARDEN srl, located in via Manzoni 22, 36027 ROSÀ (VI) ITALY, declares that the following products: MOT OR HOE TL 60 - TL 40/N
comply with directives 98/37/EC, 89/336/EC, and that they have been designed in compliance with EN 709 standards.
(F)
ATTESTATION DE CONFORMITÉ AUX NORMES CEE POUR LES MACHINES AVEC MOTEURS > 3 KW
La société soussignée SANDRIGARDEN srl, via Manzoni 22, 36027 ROSÀ (VI) ITALIE, déclare que les produits suivants : MOTOBINEUSE
TL 60 - TL 40/N sont conformes aux directives 98/37/CE, 89/336/CE et qu’ils ont été développés conformément à la norme EN 709.
(D)
CE-KONFORMITÄTSERKLÄRUNG FÜR MASCHINEN MIT MOTOREN > 3 KW
Hiermit bestätigt die Firma SANDRIGARDEN srl, Via Manzoni 22, 36027 ROSÀ (VI) ITALIEN, dass die Bauart des Geräts: MOTORHACKE
TL 60 - TL 40/N folgenden Richtlinien entspricht: 98/37/EG, 89/336/EG und die Entwicklung des Produkts gemäß den Normen EN 709 erfolgte.
(NL)
VERKLARING VAN OVEREENSTEMMING MET DE EEG-NORMEN VOOR MACHINES MET MOTOREN > 3 KW
Ondergetekende SANDRIGARDEN srl, via Manzoni 22, 36027 ROSÀ (VI) ITALIË, verklaart dat de volgende producten: HAKFREES TL 60 TL 40/N in overeenstemming zijn met de Richtlijnen 98/37/EG, 89/336/EEG en dat zij ontwikkeld zijn in overeenstemming met de normen EN 709
(E)
CERTIFICADO DE CONFORMIDAD CON LAS NORMAS CEE PARA LAS MÁQUINAS CON MOTORES > 3 KW
LA abajo firmante SANDRIGARDEN srl, via Manzoni 22, 36027 ROSÀ (VICENZA) ITALIA, declara que los siguientes productos: MOTOAZADA
TL 60 - TL 40/N son conformes A las directivas 98/37/CE y 89/336/CE y se han desarrollado de acuerdo con las normas EN 709.
(P)
ATESTAÇÃO DE CONFORMIDADE DAS NORMAS CEE PARA AS MÁQUINAS COM MOTORES > 3 KW
A abaixo-assinada SANDRIGARDEN srl, via Manzoni 22, 36027 ROSÀ (VI) ITÁLIA, declara que os seguintes produtos: MOTOENXADA TL 60
- TL 40/N são conforme as directivas, 98/37/CE, 89/336/CE e foram desenvolvidas em conformidade com as normas EN 709.
(GR)
ВЕВБЙЩУЗ УХММПСЦЩУЗУ УФПХУ КБНПНЙУМПХУ ЕПК
РЕСЙ МЗЧБНЗМБФЩН МЕ КЙНЗФЗСЕУ > 3 KW
З хрпгсЬцпхуб ефбйсЯб SANDRIGARDEN srl, via Manzoni
22, 36027 ROSА (VI) ITALIA, дзлюней ьфй фб бкьлпхиб
рспъьнфб: МПФПУКБРФЙКП TL 60 - TL 40/N
ухммпсцюнпнфбй ме фйт пдзгЯет, 98/37/ÅÊ, 89/336/ÅÊ кбй
Эчпхн кбфбукехбуфеЯ уэмцщнб ме фпхт кбнпнйумпэт EN 709.
Rosà (VI) 19 - 04 - 2007
SANDRI GARDEN srl
Direttore Generale
Alberto Cattaneo
3
SEGNALETICA DI SICUREZZA - WARNING SYMBOLS - SYMBOLES DE SECURIE
WARNZEICHEN - WAARSCHUWINGSYMBOLEN - SEÑALIZACIÓN DE
SEGURIDAD - SINAIS DE SEGURANÇA - УЗМБФБ БУЦБЛЕЙБУ
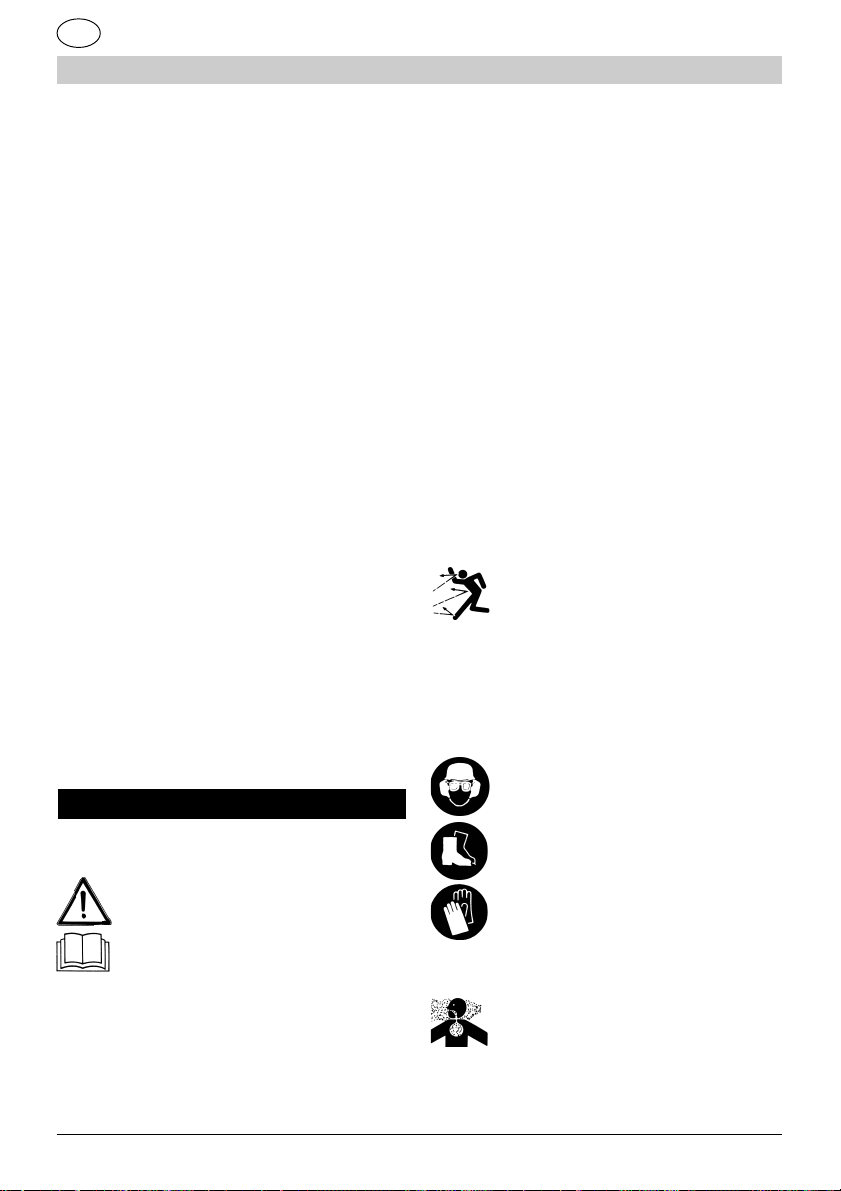
I
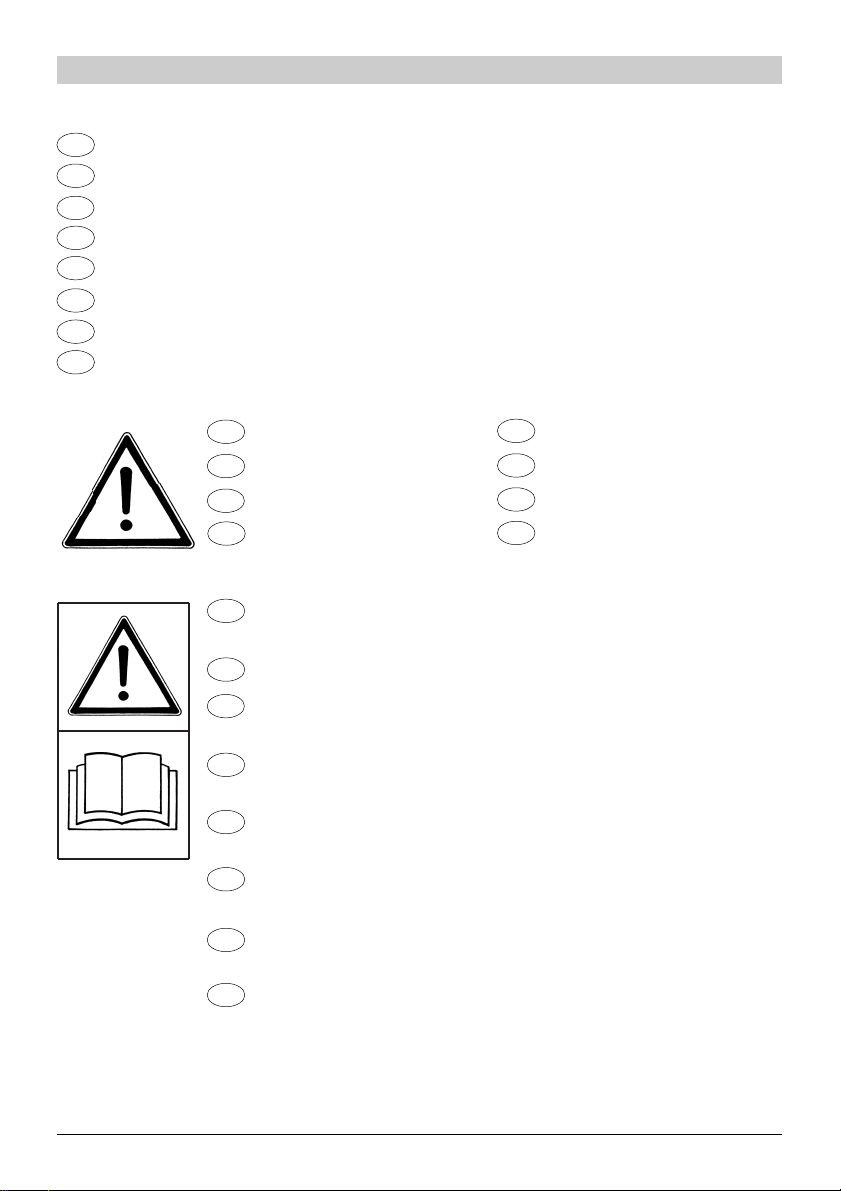
SIGNIFICATO DEI SIMBOLI
GB
DEFINITIONS OF SYMBOLS
F
SIGNIFICATION DES SYMBOLES
D
ERKLÄRUNG DER WARNSYMBOLE
NL
BETEKENIS VAN DE WAARSCHUWINGSSYMBOLEN
E
DEFINICIOND DE LOS SIMBOLOS
P
SIGNIFICADO DOS SÍMBOLOS
GR
УЗМБУЙБ УХМВПЛЩН
I
AVVERTENZE!
GB
WARNINGS!
F
AVVERTISSEMENT!
D
WARNUNG!
Chiunque utilizzi la motozappa deve prima leggere attentamente il manua
I
le di istruzioni e manutenzione e familiarizzarsi completamente con i comandi per un uso corretto della motozappa.
Read the operating and service instruction manual carefully. Be thoroughly
GB
familiar with the controls and the proper use of the motor hoe.
Lire soigneusement les instructions du manuel d’entretien et d’utilisation
F
avant d’utiliser la motobineuse et se familiariser complètement avec le
fonctionnement des commandes pour une utilisation correcte de la motobineuse.
Jeder Benutzer der Motorhacke muss zunächst aufmerksam die Betriebs-
D
und Wartungsanleitung lesen und sich für einen korrekten Gebrauch mit
allen Bedienungsteilen vertraut machen.
Alle personen die de hakfrees gebruiken dienen eerst de
NL
bedieningshandleiding zorgvuldig door te lezen om volledig vertrouwd te
raken met de instructies voor een correct gebruik van de hakfrees.
Cualquier persona, antes de utilizar la motoazada, tiene que leer
E
atentamente el presente manual de instrucciones y mantenimiento y
familiarizarse bien con los mandos para un empleo correcto de la motoazada.
Qualquer pessoa que utilize a motoenxada, deve primeiramente, ler com
P
atenção o manual de instruções e manutenção e familiarizarse completa-
mente com os comandos para um uso correcto uso da motoenxada.
ПРПЙПУ ЧСЗУЙМПРПЙЕЙ ФП МПФПУКБРФЙКП РСЕРЕЙ РСПЗГПХМЕНЩУ
GR
НБ ДЙБВБУЕЙ РСПУЕКФЙКБ ФП ЕГЧЕЙСЙДЙП ПДЗГЙЩН КБЙ УХНФЗСЗУЗУ КБЙ НБ
ЕОПЙКЕЙЩИЕЙ МЕ ФБ ЧЕЙСЙУФЗСЙБ ГЙБ ФЗ УЩУФЗ ЧСЗУЗ ФПХ МПФПУКБРФЙКПХ.
NL
WAARSCHUWINGEN!
E
ADVERTENCIAS!
P
ADVERTENCIAS!
GR
РСПЕЙДПРПЙЗУЕЙУ!
4
SEGNALETICA DI SICUREZZA - WARNING SYMBOLS - SYMBOLES DE SECURIE
WARNZEICHEN - WAARSCHUWINGSYMBOLEN - SEÑALIZACIÓN DE
SEGURIDAD - SINAIS DE SEGURANÇA - УЗМБФБ БУЦБЛЕЙБУ
I
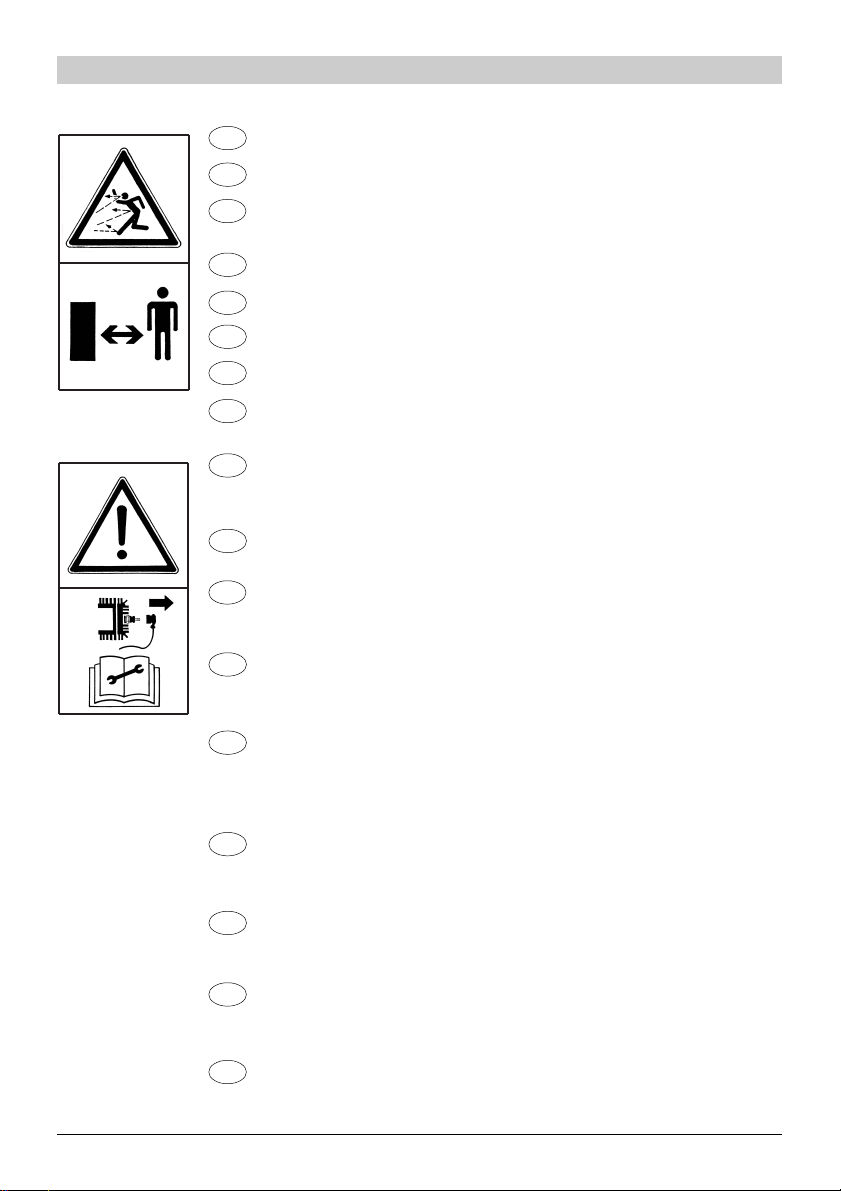
PERICOLO - Non mettere in moto e non utilizzare la motozappa in prossimità di persone, specialmente bambini o animali.
GB
DANGER - Never use the motor hoe while people, especially children, or
pets are nearby.
F
DANGER - Ne pas mettre en marche et ne pas utiliser la motobineuse
quand des personnes, surtout des enfants ou des animaux, se trouvent
à proximité.
D
GEFAHR - Setzen Sie die Motorhacke nicht in Betrieb, wenn sich in der
Nähe Personen, insbesondere Kinder, oder Tiere aufhalten.
GEVAAR - De hakfrees niet starten of gebruiken in de nabijheid van
NL
personen, en met name van kinderen en dieren.
E
PELIGRO - PELIGRO - No poner en marcha ni utilizar la motoazada si hay
personas, especialmente niños, o animales en los alrededores.
P
PERIGO - Não ligar e nem utilizar a motoenxada em proximidade de
pessoas, especialmente crianças ou animais.
КЙНДХНПУ - Мзн иЭфефе уе кЯнзуз кбй мз чсзуймпрпйеЯфе фп члппкпрфйкь
GR
кпнфЬ уе Ьфпмб кбй ейдйкьфесб уе рбйдйЬ Ю жюб.
I
PERICOLO - Prima di effettuare la pulizia, la manutenzione o l’ispezione,
accertarsi che le frese e tutte le altre parti in movimento si siano fermate
completamente. Scollegare il cavo della candela ed allontanarlo dalla candela stessa, in modo da evitare una messa in moto accidentale.
GB
DANGER - When cleaning, repairing, or inspecting, make certain the blades
and all moving parts have stopped. Disconnect the spark plug cap, and
keep the cap away from the plug to prevent accidental starting.
F
DANGER - Veiller à ce que les fraises ainsi que toutes les pièces en
mouvement soient arrêtées avant de nettoyer, réparer ou inspecter la
motobineuse. Déconnecter le fil de la bougie et le maintenir à l’écart pour
éviter une mise en marche accidentelle.
D
GEFAHR - Stellen Sie vor Reinigungs-, Wartungs- oder Inspektionsarbeiten
sicher, dass die Fräsen und alle anderen Bewegungsorgane vollständig
zum Stillstand gekommen sind. Ziehen Sie das Zündkabel ab und entfernen
Sie es von der Zündkerze, um ein versehentliches Anlassen zu vermeiden.
GEVAAR - Alvorens de machine schoon te maken of onderhoud of
NL
reparaties uit te voeren, moet u controleren of de frezen en alle andere
bewegende delen volledig tot stilstand zijn gekomen. Koppel de bougiekabel
af en houd deze weg van de bougie, om zo een ongewenste inschakeling
van de machine te voorkomen.
PELIGRO - PELIGRO - Antes de efectuar la limpieza, el mantenimiento o
E
la inspección, hay que asegurarse de que la fresas y todas las otras
piezas en movimiento estén completamente paradas. Desconectar el cable
de la bujía y alejarlo de la misma para evitar que el motor se pueda poner
en marcha de manera accidental.
PERIGO - Antes de efectuar a limpeza, a manutenção ou a inspecção,
P
certifiquese de que a lâmina e todas as outras partes em movimento
estejam completamente paradas. Desligar o cabo da vela e afastá-lo da
mesma, de modo a evitar uma ligação acidental.
КЙНДХНПУ - Рсйн кЬнефе кбибсйумь, ухнфЮсзуз Ю Элегчп, вевбйщиеЯфе ьфй з цсЭжб
GR
кбй ьлб фб Ьллб кйнпэменб фмЮмбфб Эчпхн уфбмбфЮуей енфелют. БрпухндЭуфе фп
кблюдйп брь фп мрпхжЯ кбйфпрпиефЮуфе фп мбксйЬ брь фп Ядйп фп мрпхжЯ, юуфе нб
брпцехчиеЯ фхчбЯб еккЯнзуз.
HINWEIS - WEITERE HINWEISE ZUR BEDIENUNS UND SERVICE DES
D
MOTORS FINDEN SIE IN DEA BEIGELEGTEN BEDIENUNGSANLEITÙNG DES
MOTORS.
5

SEGNALETICA DI SICUREZZA - WARNING SYMBOLS - SYMBOLES DE SECURIE
WARNZEICHEN - WAARSCHUWINGSYMBOLEN - SEÑALIZACIÓN DE
SEGURIDAD - SINAIS DE SEGURANÇA - УЗМБФБ БУЦБЛЕЙБУ
PERICOLO - Frese taglienti in rotazione! Non avvicinarsi per nessun
I
motivo con i piedi o con altre parti del corpo alla fresa in rotazione.
DANGER - Rotating cutting blades! Keep feet and other parts of the body
GB
away from the rotating cutters.
DANGER - Fraises coupantes en rotation! Ne s’approcher sous aucun pretexte de la
F
fraise en rotation avec les pieds ou d’autres parties du corps.
Gefahr - Scharfe DREHENDE Fräsen! nähern sie sich auf keinen fall der DREHENDEN
D
Fräse mit den füssen oder anderen körperteIlen.
GEVAAR - de SCHERPE frezen draaien! Kom om geen enkele reden met uw voeten
NL
of andere lichaamsdelen in de buurt van de draaiende frezen.
PELIGRO - ¡Fresas CORTANTES en rotacion! En ningún caso acercarse
E
con los pies o con otras partes del cuerpo a la fresa en rotacion.
PERIGO - Lâminas EM rotaÇÃo! Não aproxime-se por nenhum motivo com
P
os pés ou com outras partes do corpo à lâmina em rotação.
КЙНДХНПУ - Ресйуфсецьменет кпцфесЭт цсЭжет! Мзн рлзуйЬжефе гйб кбнЭнб
GR
льгп ме фб рьдйб Ю ме Ьллб мЭсз фпх уюмбфпт уфзн ресйуфсецьменз цсЭжб.
PARTI MACCHINA - MACHINE PARTS - PIECES DE LA MACHINE
MASCHINENTEILE - MACHINEDELEN - PARTES MÁQUINA
PARTES DA MÁQUINA - ФМЗМБФБ МЗЧБНЗМБФПУ
Fig. 1
TL 60
TL 40/N
A
B
N
O
S
C
D
F
Q
P
M
E
G H
I
L
R
6
ILLUSTRAZIONI DI FUNZIONAMENTO E MANUTENZIONE - ILLUSTRATION OF OPERATION &
MAINTENANCE - ILLUSTRATIONS DE MARCHE ET DE MAINTENANCE - BETRIES-UND
WARTUNGSANLEITUNGEN - AFBEELDINGEN VAN DE WERKING EN HET ONDERHOUD
ILUSTRACIONES DE FUNCIONAMIENTO Y MANTENIMIENTO - ILUSTRAÇÕES DE
FUNCIONAMENTO E MANUTENÇÃO - ЕЙКOНЕУ ЛЕЙФПХСГIБУ КБЙ УХНФHСЗУЗУ
Fig. 2
B
6
Fig. 3
A
C
2
5
8
1
2
10
11
9
7
3
2
4
Fig. 4
2
1
1
7

Fig. 5
Fig. 6
12
3
4
8
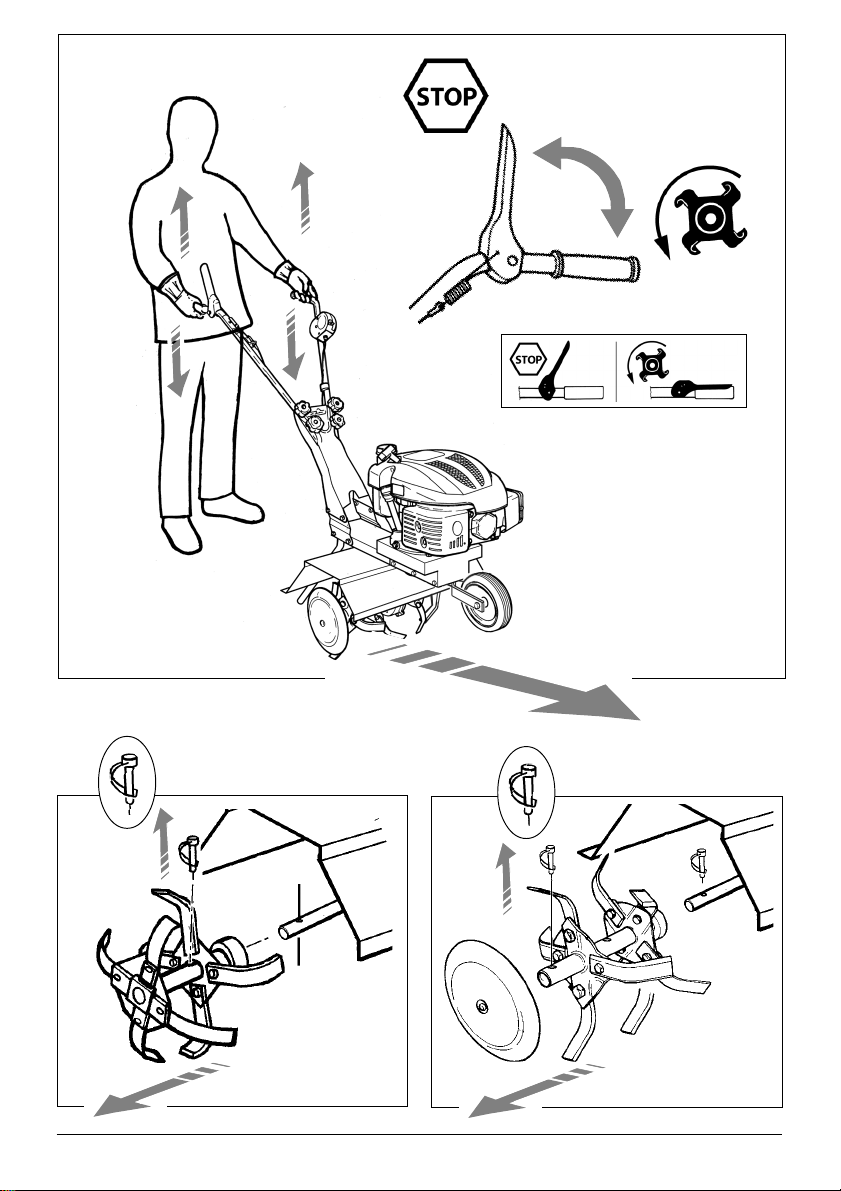
Fig. 7
1
2
1
TL 40/N
TL 40/N
2
Fig. 8
1
2
TL 60
TL 60
Fig. 9
9

I
MANUALE ISTRUZIONI MOTOZAPP A
1. CONGRATULAZIONI
Gentile cliente, vogliamo congratularci con Lei per
aver scelto un nostro prodotto per il giardino.
La Vostra MOTOZAPPA è stata costruita, tenendo
conto delle norme di sicurezza vigenti a tutela del
consumatore.
In questo manuale sono descritte ed illustrate le
varie operazioni di montaggio, di uso ed interventi
di manutenzione, necessari per mantenere in perfetta efficienza la Vostra MOTOZAPPA.
PER FACILIT ARE LA LETTURA
Le illustrazioni corrispondenti al montaggio e alla
descrizione della macchina si trovano all'inizio del
presente fascicolo.
Per rendere più comprensibile l'utilizzo della macchina consultare queste pagine durante la lettura
delle istruzioni di montaggio e di utilizzo.
Nel caso la Vostra MOTOZAPPA necessitasse di
assistenza o riparazione, Vi preghiamo di rivolgervi al nostro rivenditore, o ad un centro assistenza
autorizzato.
2. PRECAUZIONI FONDAMENTALI
DI SICUREZZA
NORME GENERALI
AVVERTENZE:
A1 - La MOTOZAPPA deve sempre
essere usata secondo le istruzioni del
costruttore comprese nel presente manuale.
A2 - L'utilizzo della MOTOZAPP A richie-
de il rispetto delle norme di sicurezza.
A3 - Chiunque utilizzi la MOTOZAPPA
deve prima leggere attentamente il manuale di istruzioni e manutenzione e
familiarizzare completamente con i comandi per un uso corretto dell'apparecchio.
A3.1 - Conservare il presente manuale per consultazioni future.
A4 - Non permettere l'uso della
MOTOZAPP A ai bambini e persone che
non siano completamente a conoscenza delle presenti istruzioni.
Specifiche norme nazionali potrebbero
limitare l'età dell'utilizzatore.
PERICOLO:
A5 - Fare attenzione al materiale pro-
iettato dalle frese.
A6 - Non mettere in moto e non utilizzare la motozappa in prossimità di persone, animali o cose.
A7 - L'operatore è responsabile in caso
di incidenti o pericoli occorsi ad altre
persone od alle loro cose.
PREPARAZIONE:
B1 - Ispezionare accuratamente l'area
in cui si intende usare la motozappa e
rimuovere qualsiasi oggetto che potrebbe essere lanciato o compromettere il
funzionamento della macchina.
B2 - Impiegare la MOTOZAPPA solamente per fresare terreni liberi da ostacoli.
Non impiegare l'apparecchio per scopi
diversi.
B3 - Durante l'utilizzo indossare abiti
aderenti e non sciolti. Indossare SEM-
PRE scarpe di sicurezza e pantaloni
lunghi. Non operare MAI a piedi
scalzi o con sandali aperti.
10
MANUALE ISTRUZIONI MOTOZAPP A
I
B4 - Indossare guanti robusti.
B5 - Chi utilizza la motozappa deve
essere in buona forma. NON UTILIZZARE la MOTOZAPP A in condizioni di
stanchezza, di malessere o sotto l'effetto dell'alcol e di altre droghe.
B6 - ATTENZIONE! I gas di scarico
sono velenosi ed asfissianti. Se inspirati possono quindi essere anche mortali. Non fare funzionare il motore in luogo chiuso o scarsamente ventilato.
B7 - ATTENZIONE! La benzina è
altamente infiammabile.
PERICOLO DI USTIONI ED INCENDIO.
In caso di incendio utilizzare un
estintore, se possibile; in alternativa
buttare terra sulle fiamme; se non si
riesce a spegnere le fiamme immediatamente allontanarsi dalla macchina almeno 20 metri, fino allo spegnimento naturale.
7.1 - Conservare la benzina in contenitori specificamente previsti per
questo uso.
7.2 - Fare il rifornimento di benzina solo
all’aperto; non fumare durante il rifornimento.
7.3 - Fare il rifornimento di benzina
prima di mettere in moto il motore. Non
togliere mai il tappo del serbatoio e non
fare il rifornimento di benzina mentre il
motore e in moto o a motore caldo.
7.4 In caso di benzina traboccata non
tentare di mettere in moto il motore ma
spostare la macchina lontano dal luogo
della benzina versata; evitare ogni causa di scintilla o fuoco, fino alla completa
scomparsa dei vapori di benzina.
7.5 - Richiudere il serbatoio della benzina ed i contenitori serrando con sicurezza i loro tappi.
B8 - Sostituire il silenziatore se difetloso
o danneggiato.
B9 - Prima dell’uso controllare sempre visivamente che le frese, i pioli
di bloccaggio frese ed i taglienti non
siano usurati o danneggiati. Sostituire le lame danneggiate o usurate per
lotti completi per mantenere il
bilanciamento.
FUNZIONAMENTO
C1 - Non fare funzionare il motore in
luogo chiuso o limitato dove può accumularsi il pericoloso gas monossido di
carbonio contenuto nei gas di scarico.
C2 - Operare solamente su terreni illuminati dalla luce diurna o da una adeguata illuminazione artificiale.
C3 - T enere l'apparecchio sempre con
ambedue le mani.
Assumere una posizione stabile e sicura sulle gambe.
C4 - Evitare, per quanto possibile, di
utilizzare la motozappa su terreni fangosi, su terreni pietrosi e terreni particolarmente duri (ghiacciati).
C5 - Sui pendii appoggiare con sicurezza i piedi sul terreno.
C6 - Camminare non correre mai con
la macchina.
C7 - Su terreni in pendenza avanzare
trasversalmente, senza mai procedere
verso I’alto o verso il basso.
C8 - Esercitare la massima precauzione nel cambiare direzione su terreni in
pendenza.
C9 - Evitare di operare su terreni con
una pendenza eccessiva.
C10 - Usare estrema precauzione nell’invertire la marcia e nel tirare la
motozappa all’indietro.
C11 - Arrestare il motore (e quindi le
frese) quando la motozappa deve attraversare un terreno diverso dal ter-
11

I
MANUALE ISTRUZIONI MOTOZAPP A
reno da lavorare e quando viene
trasportata verso e dall’area di lavoro.
C12 - Non modificare le regolazioni
del motore ne manomettere per
mandare su di giri il motore.
C13 - Nella messa in moto del motore usare attenzione seguendo le
istruzioni e tenendo i piedi ben lontani dalle frese.
C14 - Non porre le mani o i piedi in
prossimità o al di sotto delle parti rotanti.
C15 - Non sollevare mai e non trasportare mai la macchina mentre il motore in moto.
C16 - Arrestare il motore e
scollegare il cavo della cendela:
C17 - Prima di effettuare la pulizia, la
manutenzione o I’ispezione, accertarsi che le frese e tutte le altre parti in
movimento si siano fermate completamente. Scollegare il cavo della candela ed allontanarlo dalla candela stessa, in modo da evitare una messa in
moto accidentale.
C18 - Quando si colpisce un oggetto
estraneo, arrestare il motore,
scollegare il cavo della candela, ispezionare accuratamente le frese alla ricerca di eventuali danni. Fare riparare i danni evidenziati prima di mettere
in moto il motore; rivolgersi ad un centro assistenza specializzato.
C19 - Qualora la macchina presentasse vibrazioni anormale, arrestare il
motore e ricercare immediatamente la
causa delle vibrazioni. Di norma, le
vibrazioni segnalano la presenza di
un problema.
C20 - Arrestare il motore:
20.1 Ogni volta che si abbandona la
motozappa.
20.2 Prima di ogni rifornimento di
benzina.
20.3 Prima di regolare I’altezza del
vomere (attendere fino a che le frese
si siano arrestate).
C21 - Prima di sollevare o abbassare la ruota.
C22 - Prima di pulire o togliere materiale dalle frese.
C23 - Portare I’acceleratore al minimo durante lo spegnimento del
motore e chiudere il rubinetto della
benzina (se provvisto) dopo I’arresto
del motore.
C24 - Usare la macchina con temperature maggiori di 5°C, così che il
terreno sia completamente sgelato;
evitare l'utilizzo con terreni troppo
secchi e compatti, perchè risulterebbero particolarmente duri.
MANUTENZIONE E DEPOSITO
D1 - Mantenere ben serrati tutti i
dadi e le viti, in modo che la macchina sia in buone condizioni di funzionamento.
D2 - Non riporre mai la motozappa in
luogo chiuso lasciando benzina nel serbatoio, dato che i vapori di benzina possono raggiungere una fiamma libera o
una fonte di scintille.
D3 - Attendere che il motore si raffreddi
prima di riporre la macchina in uno spazio chiuso.
D4 - Al fine di ridurre il rischio di incendio tenere il motore, il silenziatore, puliti
da erba, foglie o eccesso di grasso.
D5 - Per ragioni di sicurezza sostituire
le parti usurate o danneggiate. Usare
solamente pezzi di ricambio originali.
Pezzi di ricambio prodotti da altri fabbri-
12
MANUALE ISTRUZIONI MOTOZAPP A
I
canti potrebbero adattarsi male e
causare danni e pericoli.
D6 - Nel caso si debba svuotare il
serbatoio effettuare I’operazione all’aperto.
D7 - Verificare o fare verificare ad
un centro assistenza ad intervalli regolari, il serraggio delle frese e delle viti di supporto del motore.
D8 - Le frese della motozappa sono
taglienti e possono provocare tagli all’epidermide. É necessario adottare le
opportune precauzioni quando si lavora in prossimità o sulle frese.
3. DESCRIZIONI PARTI MACCHINA
DESCRIZIONE (Fig.1)
A) Leva di comando rotazione frese.
B) Registro cavo comando frese
C) Leva acceleratore.
D) Pomoli bloccaggio semimanubri
E) Maniglia della fune di avviamento
F) Tappo serbatoio carburante
G) Tappo rabbocco olio motore
H) Avviatore
I) Cappuccio della candela
L) Silenziatore
M) Motore a scoppio
N) Riparo frese
O) Barra profondità lavoro
P) Frese
Q) Riduttore
R) Ruota per trasporto
S) Dischi frese (solo TL 60)
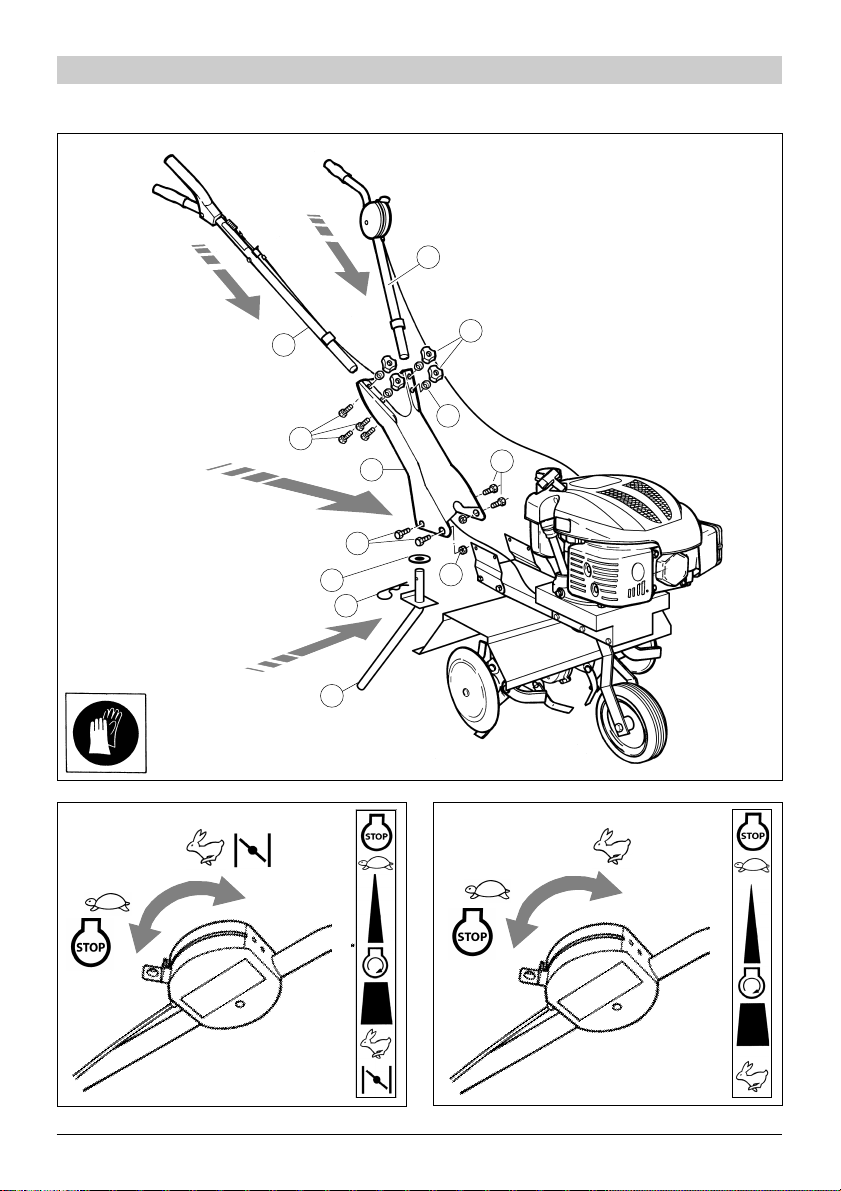
4. MONTAGGIO (FIG.2)
A) PIASTRA SEMIMANUBRI
Montare la piastra fissaggio semimanubri (1)
sulla scocca della motozappa, utilizzando le 4
viti (2) e bloccare il tutto con i dadi (4).
B) SEMIMANUBRI
Inserire nella piastra portamanici i due
semimanubri (5-6) e fissarli con le viti (8) e i
pomoli (7), facendo attenzione ad interporre il
piattello (3).
C) BARRA PER REGOLAZIONE
PROFONDITA' DI LAVORO
Fissare la barra (9) nella sede della scocca, interporre la rondella (10) e fissare il tutto con la
copiglia (11)
5. MESSA IN MOTO
ATTENZIONE !!
Questo motore viene spedito privo di olio.
NON METTERE IN MOTO prima di
aver riempito il serbatoio dell'olio.
NON SUPERARE IL LIVELLO MASSIMO.
ATTENZIONE !!
Prima di mettere in moto consultare l'allegato manuale del produttore del motore.
1) Preparare il carburante e fare rifor-
nimento solo all'aperto.
2) Conservare il carburante in un contenitore previsto per questo uso e con
tappo ben serrato.
13
I
MANUALE ISTRUZIONI MOTOZAPP A
6. AVVIAMENTO E ARRESTO
ATTENZIONE! Osservare scrupolosa-
mente gli avvertimenti contenuti nel
precedente Cap. 2 PRECAUZIONI FONDAMENTALI DI SICUREZZA.
ISTRUZIONI PER MOTORI CON COMANDO
ARIA SULLA LEVA ACCELERATORE (Fig.3)
La leva controlla la velocità del motore. Per
I’avviamento a freddo la leva deve essere portata sulla posizione (2).
Un motore caldo può essere messo in moto
sulla posizione MASSIMO .
Le migliori prestazioni della motozappa si ottengono sulla posizione MASSIMO .
.
ISTRUZIONI PER MOTORI CON POMPETTA
(BULBO) CARBURANTE (Fig.4)
La leva controlla la velocità del motore. Per I’avviamento a freddo portare la leva sulla posizione
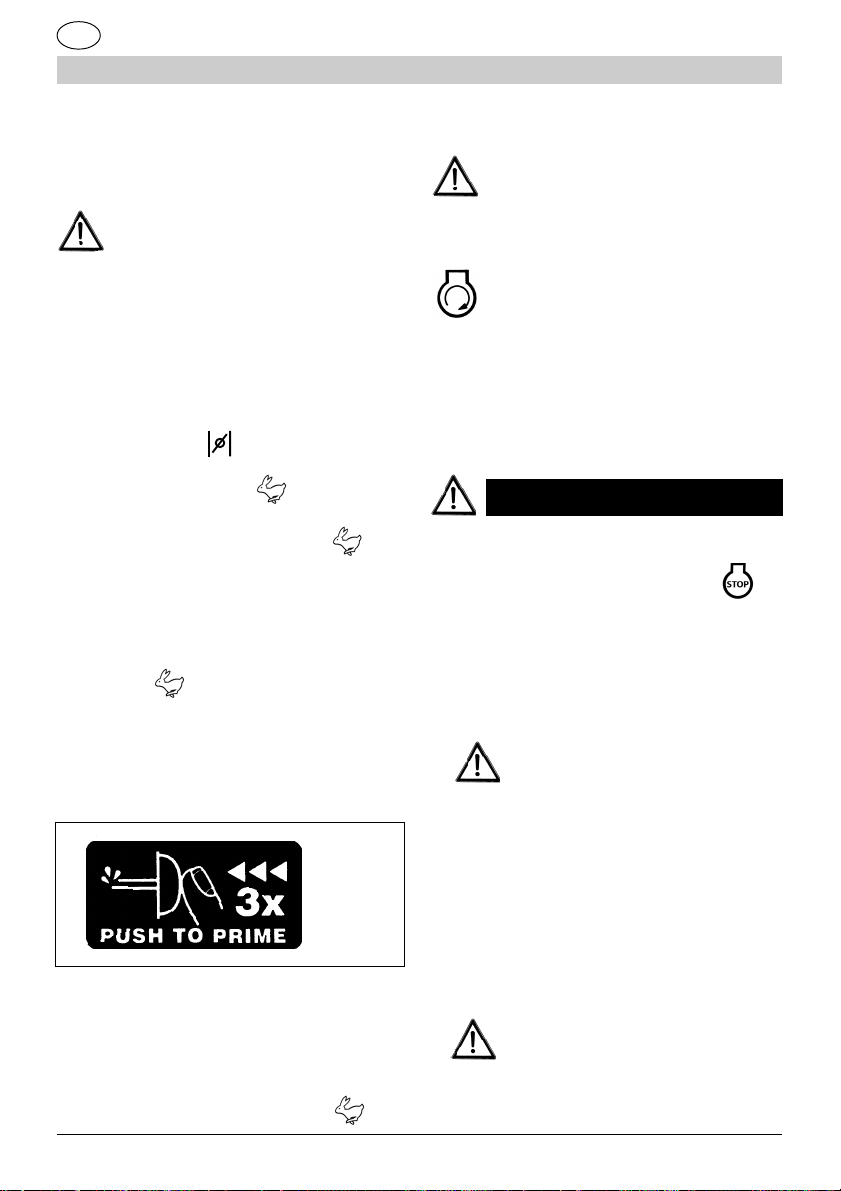
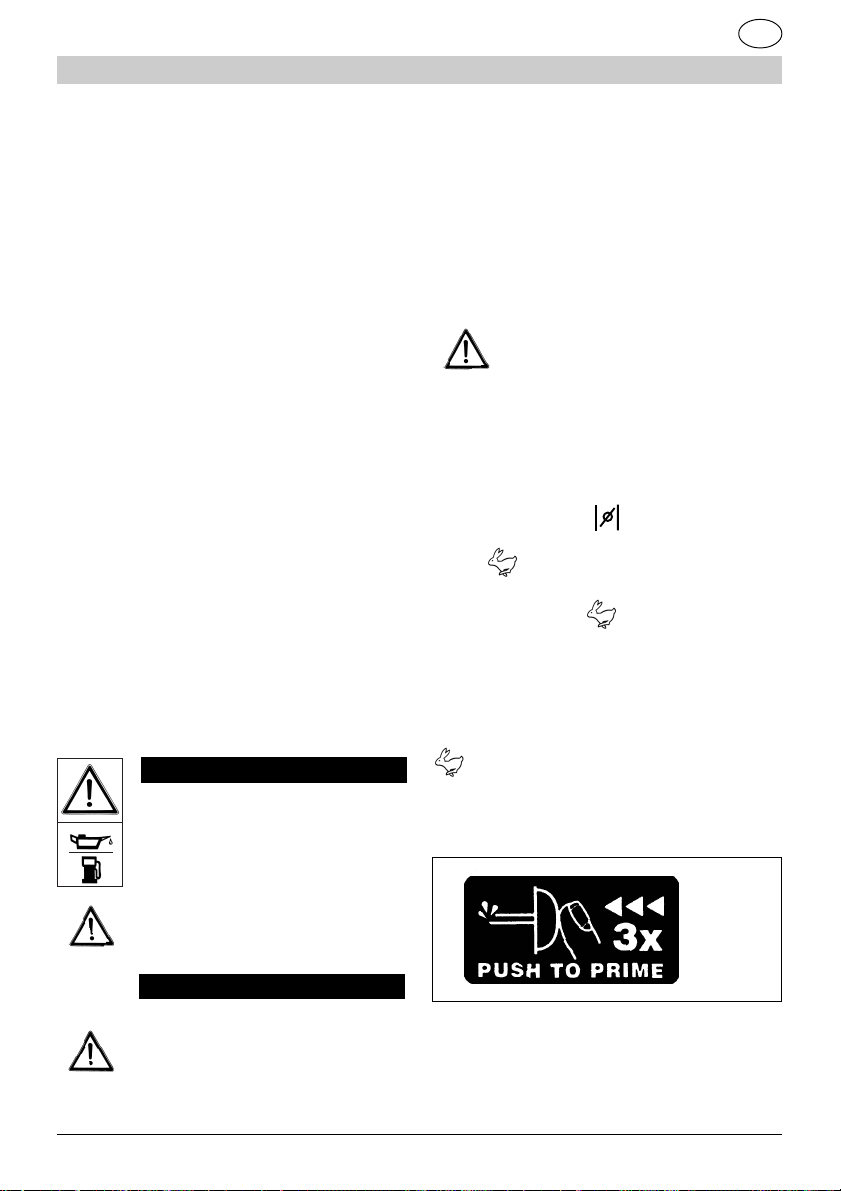
MASSIMO (2). Quindi premere energicamente per il bulbo della pompetta "primer"
(fig.11) prima di avviare il motore. (Inoltre, se il
motore si arresta per mancanza di carburante,
rabboccare il serbatoio di carburante e premere la pompetta di alimentazione 3 volte).
NOTA: Più ampie spiegazioni riguar-
danti I’utilizzo e la manutenzione del
motore sono riportate sul manuale del
costruttore del motore, allegato a parte.
Impugnare la stegola destra con la
mano sinistra, senza premere la leva di
comando frese, disporsi lateralmente all a zappa col corpo assumendo una posizione stabile
e lontana dal gruppo frese.
Impugnare la fune di avviamento (fig.5) e tirarla fino alla messa in moto. Lasciare funzionare
il motore per alcuni secondi.
ARRESTO MOTORE
1) Per arrestare il motore, portare la leva del-
l'acceleratore (fig. 3-4) nella posizione (1).
7. UTILIZZO
COME UTILIZZARE LA MOTOZAPPA
1) Portarsi in prossimità del terreno da lavora-
re.
Controllare che eventuali corpi
estranei, non siano rimasti sul
terreno da fresare.
Fig. 11
NOTA: In genere, non e necessario azionare la
pompetta quando si avvia un motore già caldo.
Tuttavia, in condizioni climatiche fredde, e possibile che si debba ripetere I’operazione iniziale.
Le migliori prestazioni della motozappa si ottengono sulla posizione MASSIMO .
14
2) Posizionare la ruota di trasporto nella posizione "ALTA" (vedi fig.6 - 1-2-3-4).
3) Avviare il motore. Vedi Cap.6.
4) Per avviare la rotazione delle frese, premere
la leva di comando frese (fig.7) e portarla nella
posizione (2). Al rilascio della leva le frese si
arrestano.
ATTENZIONE!! Non appena le
frese cominciano a ruotare, le
motozappa tende ad avanzare sul
terreno.
MANUALE ISTRUZIONI MOTOZAPP A
I
ATTENZIONE!! Nel caso le frese
entrino in rotazione con la leva
rilasciata, non utilizzare la macchina e rivolgersi ad un centro
di assistenza autorizzato.
5) Per regolare la velocità di avanzamento del-
la fresa, e quindi la profondità di lavoro delle
frese, l'operatore deve:
- MASSIMA PROFONDITÀ DI LAVORO
Premere sui semimanubri per fare affondare il
vomere sul terreno in modo da rallentare l'avanzamento della fresa (fig.7), ed aumentarne la
profondità di lavoro.
- MINIMA PROFONDITÀ DI LAVORO
Allegerire la pressione sui semimanubri per fare
affiorare il barra dal terreno in modo da aumentare l'avanzamento della fresa (fig.7), e diminuire la profondità di lavoro.
8. MANUTENZIONE
ATTENZIONE!! Spegnere il motore e staccare la candela prima di
eseguire qualunque manutenzione.
ATTENZIONE!! Attendere che il
motore si sia completamente raffreddato.
ATTENZIONE!! Calzare i guanti di
sicurezza per ogni intervento di
montaggio e manutenzione sulle
frese.
MOTORE
Vedi manuale costruttore allegato.
VERIFICA VITI E PARTI ROTANTI
Prima di ogni utilizzo controllare che non ci siano viti o parti allentate e che non ci siano cricche o notevoli usure sulle lame delle frese.
Sostituire le parti danneggiate prima dell'utilizzo.
SOSTITUZIONE FRESE (Fig.9)
Allentare la molla ed estrarre il perno di
bloccaggio (1). Estrarre la fresa sfilandola dall'albero (2). Inserire la nuova fresa, facendo attenzione a fare corrispondere i fori di fissaggio
all'albero e bloccare il tutto con perno e molla.
REGISTRO CAVO COMANDO FRESE REGOLAZIONE (fig.1 part.B)
L'operazione di regolazione e controllo deve essere eseguita da un
centro di assistenza autorizzato.
Una errata regolazione può costituire pericolo!
PULIZIA TRASPORTO E RIMESSAGGIO
# In caso di interruzione di utilizzo superiore a 2
mesi, vuotare il serbatoio del carburante.
# Non pulire con liquidi aggressivi.
# Conservare l'apparecchio in luogo asciutto e
sicuro non accessibile ai bambini.
# In occasione del trasporto vuotare il serbatoio
carburante.
9. SMALTIMENTO
Al termine della vita lavorativa della Vostra Zappa, rivolgersi ad un centro assistenza qualificato per informazioni relative a messa fuori servizio, smantellamento e smaltimento.
15
I
MANUALE ISTRUZIONI MOTOZAPP A
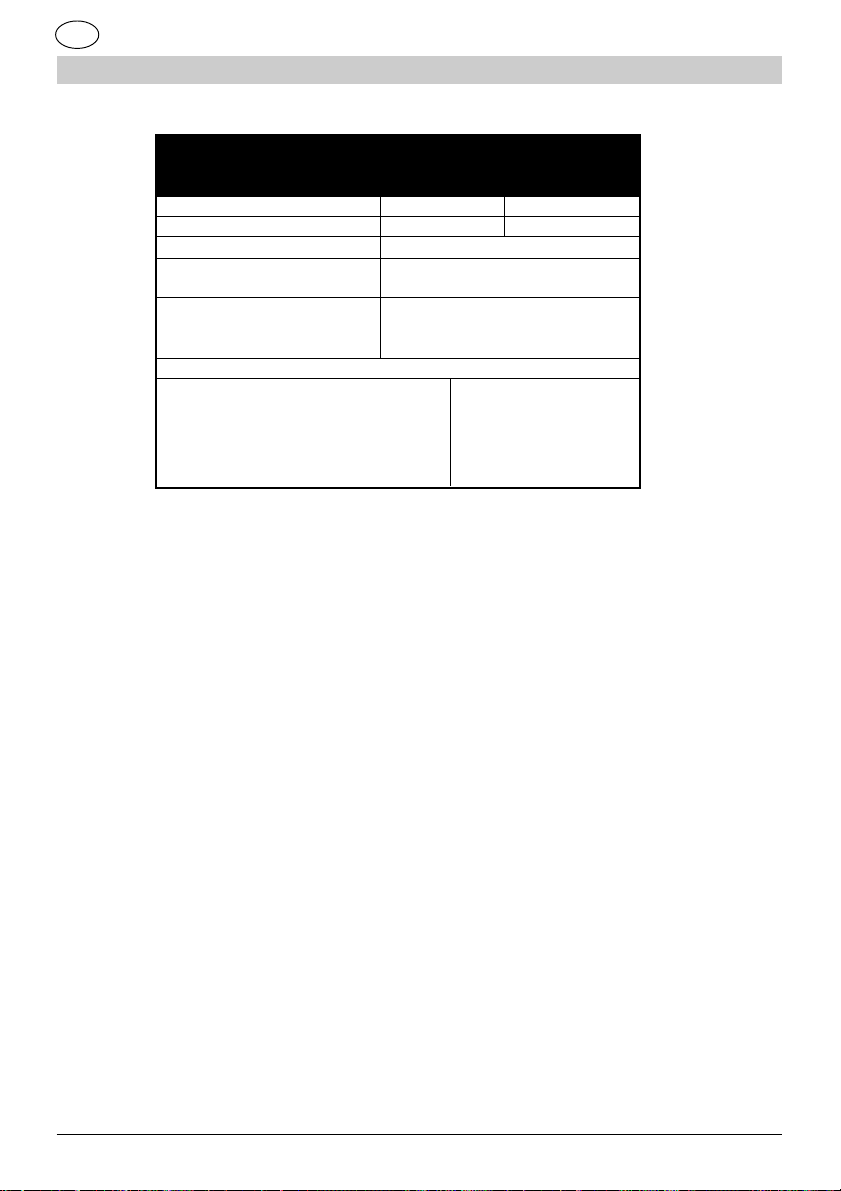
DATI TECNICI MOTOZAPPA
TL 40/N TL 60
Massa (senza carburante) 36 Kg 39 Kg
Larghezza di fresatura 38 cm 56 cm
Regime massimo rotazione frese 80 1/min
Vibrazioni al manubrio EN 1033: 1995
UNI EN 709: 1998 5,9 m/s
Livello di pressione acustica
EN 1553: 2001 LAcq 80,2 dB (A) - Lmax 98,7 dB ( C )
UNI EN 709: 1998 @ 3.000 rpm
Potenza
BRIGGS & STRA TTON - XC 35 - 450 SERIES 2,5 kW @ 3 .60 0 r pm
BRIGGS & STRATTON - XLS 50 - 625 SERIES 3,5 kW @ 3.600 rpm
HONDA - GVC 135 2,6 kW @ 3.600 rpm
SANDRIGARDEN 3,5 - 350 2,2 kW @ 3.600 rpm
SANDRIGARDEN 5,5 - 550 OHV 3,3 kW @ 3.600 rpm
2
@ 3.000 rpm
note _________________________________
_________________________________________________
____________________________________________________
_________________________________________________
___________________________________________________
___________________________________________________
_________________________________________________
____________________________________________________
_________________________________________________
___________________________________________________
___________________________________________________
_________________________________________________
____________________________________________________
_________________________________________________
___________________________________________________
16

MANUALE ISTRUZIONI MOTOZAPP A
I
note ______________________________
_________________________________________________
____________________________________________________
_________________________________________________
___________________________________________________
___________________________________________________
_________________________________________________
____________________________________________________
_________________________________________________
___________________________________________________
___________________________________________________
_________________________________________________
____________________________________________________
_________________________________________________
___________________________________________________
note ________________________________
_________________________________________________
____________________________________________________
_________________________________________________
___________________________________________________
___________________________________________________
_________________________________________________
____________________________________________________
_________________________________________________
___________________________________________________
___________________________________________________
_________________________________________________
____________________________________________________
_________________________________________________
___________________________________________________
___________________________________________________
_________________________________________________
____________________________________________________
_________________________________________________
___________________________________________________
___________________________________________________
_________________________________________________
____________________________________________________
_________________________________________________
___________________________________________________
___________________________________________________
_________________________________________________
____________________________________________________
_________________________________________________
___________________________________________________
___________________________________________________
_________________________________________________
____________________________________________________
_________________________________________________
___________________________________________________
17
GB
MOTOR HOE OPERA TING MANUAL
1. CONGRA TULATIONS
Dear Customer, We should like to congratulate you
for having preferred our garden product.
Your MOTOR HOE has been manufactured taking
into account all applicable consumer safety standards.
This manual describes and illustrates the various
assembly, use and maintenance operations needed
to keep your MOTOR HOE in perfect running condition.
TO MAKE READING EASIER
The illustrations referring to assembly and machine
description are at the beginning of this file.
T o make using the machine more understandable,
refer to these pages while reading the assembly
and operating instructions.
If your MOTOR HOE needs assistance or repairs,
please contact your dealer or an authorised aftersales centre.
2. BASIC SAFETY PRECAUTIONS
GENERAL RULES
IMPORTANT:
A1 - The MOTOR HOE must always
be used according to the manufacturer’s instructions provided in this manual.
A2 - When using the MOTOR HOE,
always following the safety regulations.
A3 - Anyone using the MOTOR HOE
must first of all carefully read the instruction and maintenance manual and become acquainted with the machine controls to ensure correct use.
A3.1 - Keep this manual handy for future reference.
A4 - Do not allow children or people
not acquainted with these instructions to
use the MOTOR HOE.
Specific national laws could restrict user
age.
HAZARD:
A5 - Mind any material thrown up by
the cutters.
A6 - Do not start and use the MOTOR
HOE near people, animals or things.
A7 - The operator is responsible in case
of accidents or hazards affecting persons or things.
PREPARATION:
B1 - Carefully inspect the area where
the MOTOR HOE is to be used and
remove any object that could be thrown
up or affect machine operation.
B2 - Only use the MOTOR HOE to hoe
land that is free of obstacles.
Do not use the machine for any other
use.
B3 - During use wear tight fitting and
not loose clothing. ALWAYS wear
safety shoes and long trousers.
NEVER work barefoot or in open sandals.
B4 - Wear sturdy gloves.
B5 - Anyone using the MOTOR HOE
must be fit. DO NOT USE THE MOTOR
HOE when you are tired, feeling bad
or under the effect of drink or drugs.
B6 - CAUTION! The exhaust gases
are poisonous and asphyxiating. If
breathed in they can kill. Do not run the
motor in a closed or badly ventilated
environment.
18

MOTOR HOE OPERA TING MANUAL
GB
OPERATION
B7 - CAUTION! Petrol is highly in-
flammable.
DANGER OF BURNS AND FIRE.
In case of fire, if possible, use a fire
extinguisher; alternatively, throw
earth on the flames; if the fire does
not go out immediately, move at least
20 metres away from the machine
and wait for the fire to go out naturally.
7.1 - Keep the petrol in special containers intended for such use.
7.2 - Only refuel outdoors; do not
smoke when filling up with petrol.
7.3 - Refuel before starting the motor.
Never take the cap off the tank and
never refuel while the motor is running
or hot.
7.4 In case of an overflow of petrol, do
not try starting the motor but move the
machine away from the spilt petrol; avoid
causing sparks or fire, until all the petrol
vapours have disappeared.
7.5 - Close the petrol tank and the containers and firmly tighten the caps.
B8 - Replace the silencer when faulty
or damaged.
B9 - Before using always make a sight
check to ensure the cutters, the cutter
etention pins and the cutting edges are
not worn or damaged. Change any
damaged or worn blades in complete
lots to maintain balance.
C1 - Do not run the motor in a closed or
restricted environment where the carbon monoxide in the exhaust gases
could build up.
C2 - Only work in daylight or where
there is good artificial lighting.
C3 - Always hold the machine with both
hands.
Assume a stable and safe position.
C4 - As much as possible, avoid using
the MOTOR HOE on muddy soils,
stony soils and very hard (frozen) soils.
C5 - Rest your feet firmly on the ground
on gradients.
C6 - Always walk and never run with
the machine.
C7 - On slopes, move crossways, without ever proceeding upwards or downwards.
C8 - Take every precaution when
changing direction on slopes.
C9 - Avoid working on very steep gradients.
C10 - Be very careful when changing
direction and pulling the MOTOR HOE
back.
C11 - Stop the motor (and consequently
the cutters) when the MOTOR HOE has
to cross ground different from that which
has to be hoed and when this is transported to and from the work area.
C12 - Do not change the motor settings or tamper with the motor to increase
rpm.
C13 - When starting up the motor, be
careful to follow all instructions and keep
your feet well away from the cutters.
C14 - Keep hands and feet well away
from rotating parts.
C15 - Never lift or transport the machine while the motor is running.
C16 - Stop the motor and disconnect the cable from the plug:
C17 - Before cleaning, servicing or
inspecting, make sure the cutters and
all other moving parts are completely
stopped. Disconnect the cable from the
plug and move this away from the plug
19
GB
MOTOR HOE OPERA TING MANUAL
itself to prevent accidentally starting
the machine.
C18 - If the machine hits a foreign
object while working, stop the motor,
disconnect the plug cable, carefully
inspect the cutters and determine
any damage. Repair any damage
before starting the motor. Contact a
specialised after-sales centre.
C19 - In the event of the machine
producing abnormal vibrations, stop
the motor and immediately seek the
cause. Vibrations normally indicate
a problem.
C20 - Stop the motor:
20.1 Every time you leave the MO-
TOR HOE.
20.2 Before filling up with petrol.
20.3 Before adjusting the height of the
ploughshare (wait until the cutters have
stopped).
C21 - Before lifting or lowering the
wheel.
C22 - Before cleaning or removing
material from the cutters.
C23 - Move the throttle to minimum
when switching off the motor and close
the petrol cock (if fitted) after stopping
the motor.
C24 - Use the machine in
temperatures higher than 5 °C, to
ensure that the ground is fully
defrosted; avoid using the machine
on grounds which are too dry and
compact, as they will be very hard.
MAINTENANCE AND DEPOSIT
D1 - Make sure all the nuts and
screws are tight so the machine is
always in good operating condition.
D2 - Never place the MOTOR HOE in
closed premises with petrol still in the
tank. Petrol vapours could reach an
open flame or sparks.
D3 - Wait for the motor to cool down
before storing the machine in closed
premises.
D4 - To reduce fire risks, keep the
motor and silencer free of grass,
leaves or excess grease.
D5 - For safety reasons, replace
worn or damaged parts. Only use
original spares. Spares made by
other manufacturers could adapt
badly and cause damage and danger.
D6 - If the tank has to be emptied, do
the job in the open.
D7 - Periodically check, or have
checked by an after-sales centre, the
tightness of the cutters and motor support screws.
D8 - The MOTOR HOE cutters are
sharp and can cut the skin. T ake every
precaution when working near or on
the cutters.
3. DESCRIPTION OF MACHINE
P ARTS
DESCRIPTION (Fig.1)
A) Cutter rotation control lever.
B) Cutter control cable adjuster
C) Throttle lever.
D) Handlebar lock knobs
E) Starting cable handle
F) Fuel tank cap
G) Engine oil topping-up cap
H) Starter
I) Plug cap
L) Silencer
M) Combustion engine
20
MOTOR HOE OPERA TING MANUAL
GB
N) Cutter guard
O) Work depth ploughshare
P) Cutters
Q) Reduction unit
R) Transport wheel
S) Tine disks (only TL 60)
4. ASSEMBLY (FIG.2)
A) - HANDLEBAR PLATE
Fit the handlebar retention plate (1) on the MOTOR HOE chassis using the 4 screws (2) and
secure by means of the nuts (4).
B) HANDLEBARS
Fit the two handlebars (5-6) in the handle holding plate and secure using the screws (8) and
the knobs (7), being careful to place the plate
(3) in between.
C) WORKING DEPTH ADJUSTMENT BAR
Fit the bar (9) inside the body, place the washer
(10) in between and fix it with the cotter pin (11)
5. STARTING
IMPORT ANT !!
The engine is shipped without oil.
DO NOT START until the sump has
been filled with oil.
1) Always prepare fuel and refuel out
of doors.
2) Keep the fuel in a container specially
intended for this purpose and keep the
container cap well tightened.
6. STARTING AND STOPPING
IMPORTANT! Carefully keep to the in
structions provided in Chap. 2 FUN-
DAMENTAL SAFETY PRECAUTIONS.
INSTRUCTIONS FOR MOTORS WITH AIR
CONTROL ON THROTTLE LEVER (Fig.3)
The lever controls motor speed. For cold starting
the lever must be on (2).
A warm motor can be started in MAXIMUM po-
sition .
Best MOTOR HOE performance is obtained in
MAXIMUM position .
INSTRUCTIONS FOR MOTORS WITH FUEL
PUMP (BULB) (Fig.4)
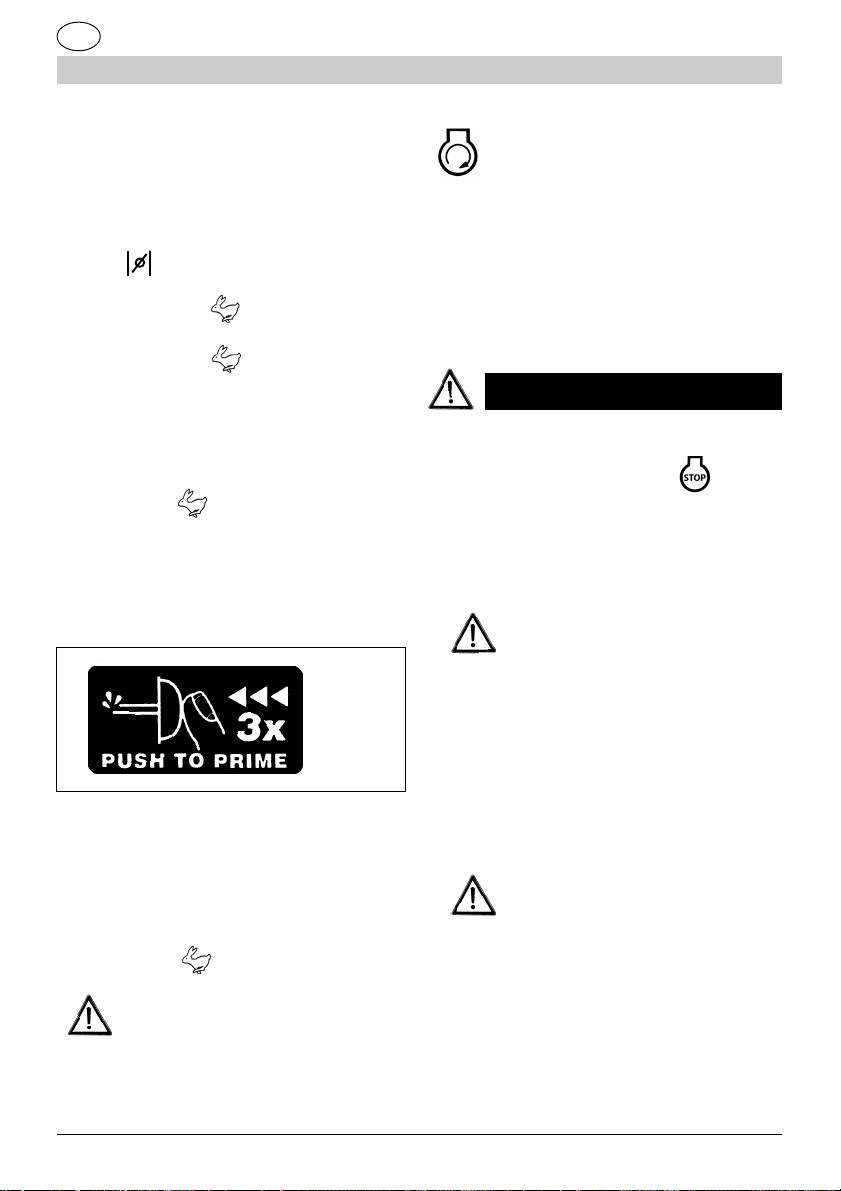
The lever controls motor speed. For cold starting the lever must be in MAXIMUM (2) position
. Next, pump the bulb of the “primer” pump
(fig.11) before starting the motor. (If the motor
stops due to lack of fuel, top up the tank and
press the supply pump 3 times).
Fig. 11
DO NOT FILL OVER MAXIMUM
LEVEL.
IMPORTANT !!
Before starting, refer to the attached motor manufacturer’s
manual.
NOTE: Generally speaking, the pump will not
be required if the motor is already warm on starting. Nevertheless, in cold climatic conditions,
the initial operation may have to be repeated.
21
GB
MOTOR HOE OPERA TING MANUAL
Best MOTOR HOE performance is obtained in
MAXIMUM position. .
NOTE: More detailed explanations concerning
motor use and maintenance are shown in the
motor manufacturer’s manual, attached separately.
Hold the right handlebar with the left
hand, without pressing the tine unit;
move to the side of the cultivator and take on
a stable position, away from the tine unit.
Hold the starting cable (fig.5) and pull it until
the machine starts up.
Leave the motor to run for a few seconds.
MOTOR STOP
1) To stop the motor, move the throttle lever (fig.
3-4) to position (1).
7. USE
HOW TO USE THE MOTOR HOE
1) Move the machine close to the area of land to be
hoed.
Make sure there are no foreign
bodies on the land to be hoed.
2) Set the transport wheel to the “HIGH” position
(see figure 6 - 1-2-3-4).
3) Start the motor. See chap.6.
4) T o start cutter rotation, press the cutter control
lever (fig.7) and move this to position (2). When the
lever is released, the cutter will stop.
IMPORTANT!! As soon as the cutter starts turning, the MOTOR HOE
will tend to move forward over
the ground.
WARNING!! Should the tines start
to rotate with the lever released,
do not use the machine and
contact an approved service
centre.
5) To adjust cutter speed, and consequently cut-
ter working depth, the operator should:
- MAXIMUM WORKING DEPTH
Press the handlebars so the ploughshare digs
into the soil, thereby reducing cutter speed (fig.
7) and increasing the working depth.
- MINIMUM WORKING DEPTH
Reduce the pressure on the handlebars so the
ploughshare lifts up from the ground, the cutter
speed (fig.7) increases and the working depth
is reduced.
8. MAINTENANCE
IMPORTANT!! Switch off the motor
and disconnect the plug before
performing any maintenance jobs.
IMPORTANT!! W ait for the motor to
completely cool down.
IMPORTANT!! Wear safety gloves
when fitting and servicing the
cutters.
MOTOR
See attached manufacturer’s manual.
CHECKING THE SCREWS AND ROTATING
PARTS
Before using, check there are no loose screws or
parts and that there are no cracks or extensive
wear on the cutter blades.
Replace any damaged parts before using.
22

MOTOR HOE OPERA TING MANUAL
GB
REPLACING THE CUTTERS (Fig.9)
Loosen the spring and take out the lock pin
(1). Remove the cutter from the shaft (2).
Fit the new cutter, making sure the shaft fastening holes coincide and lock the entire
assembly with pin and spring.
CUTTER CONTROL CABLE ADJUSTMENT (Fig.1 part.B)
The adjustment and control operation must be done by an authorised after-sales centre.
Bad adjustment could prove
hazardous!
MOTOR HOE TECHNICAL DATA
Mass (without fuel ) 36 Kg 39 Kg
Cutting width 38 cm 56 cm
Maximun cutter rotation speed 80 1/min
Vibrations on handle EN 1033: 1995
UNI EN 709: 1998 5,9 m/s
Sound power level
EN 1553: 2001 LAcq 80,2 dB (A) - Lmax 98,7 d B (C )
UNI EN 709: 1998 @ 3.000 rpm
Power:
BRIGGS & STRA TTON - XC 35 - 450 SERIES 2,5 kW @ 3.60 0 r pm
BRIGGS & STRATTON - XLS 50 - 625 SERIES 3,5 kW @ 3.600 rpm
HONDA - GVC 135 2,6 kW @ 3.600 rpm
SANDRIGARDEN 3,5 - 350 2,2 kW @ 3. 600 r pm
SANDRIGARDEN 5,5 - 550 OHV 3,3 kW @ 3.600 rpm
CLEANING TRANSPORT AND STORAGE
# In the event of the machine not being used for
over 2 months, empty the fuel tank.
# Do not clean with aggressive liquids.
# Keep the machine in a dry and safe place that
is not accessible to children.
# Before transporting, empty the fuel tank.
9. DISPOSAL
When the cultivator reaches the end of its working
life, take it to an authorised service centre to ask
information on decommissioning, dismantling
and disposal.
TL 40/N TL 60
2
@ 3.000 rpm
23

F
MANUEL D'INSTRUCTION DE LA MOTOBINEUSE
1. FELICITATIONS
Cher Client, Nous souhaitons vous féliciter pour
avoir choisi l’un de nos produits pour le jardin.
Votre MOTOBINEUSE a été construite en tenant
compte des normes de sécurité en vigueur pour la
protection du consommateur.
Ce manuel décrit et illustre les différentes opérations de montage, d’utilisation et d’intervention d’entretien nécessaires pour maintenir votre
MOTOBINEUSE en parfait état de marche.
POUR FACILITER LA LECTURE
Les illustrations correspondant au montage et à la
description de la machine se trouvent au début de
ce livret.
Pour faciliter la compréhension de l’utilisation de la
machine, consulter ces pages pendant la lecture
des instructions de montage et d’utilisation.
Si votre MOTOBINEUSE a besoin d’être entretenue ou réparée, veuillez vous adresser à notre
revendeur ou à un centre d’assistance agréé.
2. PRECAUTIONS FONDAMENTALES DE SECURITE
CONSIGNES GENERALES
AVERTISSEMENTS :
A1 - La MOTOBINEUSE doit toujours
être utilisée conformément aux instructions du constructeur se trouvant dans
le présent manuel.
A2 - L’utilisation de la MOTOBINEUSE
requiert le respect des normes de sécurité.
A3 - Lire attentivement les instructions
du manuel d’entretien et d’utilisation
avant d’utiliser la MOTOBINEUSE et
se familiariser complètement avec les
commandes pour une utilisation correcte
de l’appareil.
A3.1 - Conserver le présent manuel
pour toute consultation future.
A4 - Ne pas permettre aux enfants et à
des personnes ne connaissant pas
entièrement ces instructions d’utiliser la
MOTOBINEUSE.
Des normes nationales spéciales sont
susceptibles d’imposer des limites d’âge
à l’utilisateur.
DANGER :
A5 - Faire attention aux particules pro-
jetées par les fraises.
A6 - Ne pas mettre en marche ni utiliser
la motobineuse à proximité de personnes, d’animaux ou de choses.
A7 - L’opérateur est responsable en
cas d’accidents ou de dangers survenant à des personnes ou à leurs objets
personnels.
PREPARA TION :
B1 - Inspecter soigneusement la zone
où la motobineuse sera utilisée et éliminer tout objet qui pourrait être lancé ou
nuire au bon fonctionnement de la machine.
B2 - N’utiliser la MOTOBINEUSE que
pour biner des terrains ne présentant
pas d’obstacles.
Ne pas utiliser l’appareil pour des usages différents.
B3 - Pendant l’utilisation de l’appareil,
porter des vêtements moulants et non
amples. Porter TOUJOURS des
chaussures de sécurité et des pantalons longs. Ne JAMAIS travailler
pieds nus ou avec des sandales
ouvertes.
24

MANUEL D'INSTRUCTION DE LA MOTOBINEUSE
F
B4 - Porter des gants robustes.
B5 - L’utilisateur de la motobineuse
doit être en bonne forme physique.
NE PAS UTILISER la
MOTOBINEUSE en état de fatigue,
de malaise ou sous l’effet de l’alcool
et d’autres drogues.
B6 - ATTENTION ! Les gaz d’échappement sont toxiques et asphyxiants.
Ils peuvent donc être mortels en cas
d’inhalation. Ne pas faire marcher le
moteur dans un lieu fermé ou peu aéré.
B7 - A TTENTION ! L’essence est hautement inflammable.
DANGER DE BRULURES ET D’INCENDIE.
En cas d’incendie, utiliser un
extincteur, si possible ; ou bien jeter
de la terre sur les flammes ; si vous
n’arrivez pas à éteindre les flammes
immédiatement, éloignez-vous de la
machine d’au moins 20 mètres, jusqu’à l’extinction naturelle.
7.1 - Conserver l’essence dans des
bidons spécialement prévus pour cet
usage.
7.2 - Remplir le réservoir d’essence
seulement en plein air ; ne pas fumer
pendant cette opération.
7.3 - Remplir le réservoir d’essence
avant de mettre le moteur en marche.
Ne jamais enlever le bouchon du réservoir et ne pas le remplir d’essence
lorsque le moteur est en marche ou
chaud.
7.4 Si de l’essence a débordé, ne pas
tenter de mettre le moteur en marche :
déplacer la machine loin du lieu où l’essence s’est déversée. éviter toute
cause d’étincelle ou d’incendie jusqu’à
ce que les vapeurs d’essence se soient
complètement évaporées.
7.5 - Refermer le réservoir d’essence
et les bidons en vissant à fond leurs
bouchons.
B8 - Remplacer le silencieux en cas
de défaut ou de détérioration.
B9 - Avant l’utilisation de l’appareil, toujours contrôler visuellement que les fraises, les pieux de blocage des fraises et
les tranchants ne sont pas usés ou détériorés. Remplacer les lames détériorées ou usées par lots complets
pour maintenir l’équilibrage.
FONCTIONNEMENT
C1 - Ne pas faire marcher le mo-
teur dans un lieu fermé ou restreint
où peut s’accumuler un gaz dangereux, le monoxyde de carbone, se
trouvant dans les gaz d’échappement.
C2 - Travailler uniquement sur des
terrains éclairés par la lumière du jour
ou par un éclairage artificiel adéquat.
C3 - T oujours tenir l’appareil avec les
deux mains.
Maintenir une position stable et sûre
sur les jambes.
C4 - Dans la mesure du possible, éviter d’utiliser la motobineuse sur des terrains boueux, des terrains avec des
pierres, et des terrains particulièrement
durs (gelés).
C5 - Sur les pentes, poser fermement
les pieds sur le terrain.
C6 - Avec la machine, marcher et ne
jamais courir.
C7 - Sur des terrains en pente, avancer en diagonale sans jamais aller vers
le haut ou le bas.
C8 - Prendre toutes les précautions
possibles lors de changements de direction sur des terrains en pente.
C9 - Eviter de travailler sur des terrains avec une pente excessive.
C10 - Faire extrêmement attention lors
de l’inversion de marche et en tirant la
motobineuse en arrière.
C11 - Arrêter le moteur (et donc les
25

F
MANUEL D'INSTRUCTION DE LA MOTOBINEUSE
fraises) lorsque la motobineuse doit
traverser un terrain différent du terrain à travailler et lorsqu’elle est
transportée vers/en dehors de la
zone de travail.
C12 - Ne pas modifier le réglage
du moteur et ne pas effectuer de
manipulations visant à augmenter le
régime du moteur.
C13 - Lors de la mise en marche
du moteur, faire attention et suivre
les instructions en tenant les pieds à
l’écart des fraises.
C14 - Ne pas mettre les mains ou
les pieds à proximité ou sous les
pièces en rotation.
C15 - Ne jamais soulever ni transporter la machine pendant que le moteur
est en marche.
C16 - Arrêter le moteur et débrancher le câble de la bougie :
C17 - Avant toute opération de net-
toyage, d’entretien ou d’inspection,
veiller à ce que les fraises et toutes les
autres pièces en mouvement soient
complètement à l’arrêt. Débrancher le
câble de la bougie et l’éloigner de la
bougie afin d’éviter une mise en marche accidentelle.
C18 - Lorsqu’un corps étranger est
heurté, arrêter le moteur, débrancher
le fil de la bougie, contrôler attentivement les fraises à la recherche d’éventuels dégâts. Faire réparer les dégâts
constatés avant de mettre le moteur en
marche ; s’adresser à un centre d’assistance spécialisé.
C19 - Si La machine présente des
vibrations anormales, arrêter le moteur
et rechercher immédiatement la cause
des vibrations. En règle générale, les
vibrations signalent la présence d’un
problème.
C20 - Arrêter le moteur :
20.1 Chaque fois que la
motobineuse est abandonnée.
20.2 Avant chaque ravitaillement
d’essence.
20.3 Avant de régler la hauteur du
soc (attendre jusqu’à ce que les fraises se soient arrêtées).
C21 - Avant de soulever ou de baisser la roue.
C22 - Avant de nettoyer les fraises
ou d’éliminer de la saleté.
C23 - Porter I’accélérateur au minimum pendant l’arrêt du moteur et
fermer le robinet d’essence (si présent) après l’arrêt du moteur.
C24 - Utiliser la machine à une
température supérieure à 5 °C, de
sorte que le sol soit complètement
dégelé ; éviter l’utilisation sur des sols
trop secs et compacts, car ils
seraient particulièrement durs.
ENTRETIEN ET STOCKAGE
D1 - Maintenir bien serrés tous les
écrous et toutes les vis de façon à ce
que la machine soit en bon état de marche.
D2 - Ne jamais laisser la motobineuse
dans un endroit fermé en laissant de
l’essence dans le réservoir, car les vapeurs d’essence peuvent atteindre une
flamme libre ou une source d’étincelles.
D3 - Attendre que le moteur se refroidisse avant d’entreposer la machine
dans un espace fermé.
D4 - Pour réduire le risque d’incendie,
veiller à ce que le moteur et le silencieux soient exempts d’herbes, de
feuilles ou d’excès de graisse.
D5 - Pour des raisons de sécurité, remplacer les pièces usées ou endommagées. N’utiliser que des pièces de rechange originales. Les pièces détachées d’autres marques pourraient mal
26

MANUEL D'INSTRUCTION DE LA MOTOBINEUSE
F
s’adapter et être à l’origine de dommages et de dangers.
D6 - Vidanger le réservoir en plein
air.
D7 - Vérifier ou faire vérifier à intervalles réguliers le serrage des fraises et des vis de support du moteur
par un centre d’assistance.
D8 - Les fraises de la motobineuse
sont tranchantes et peuvent donc
couper. Il faut prendre toutes les précautions nécessaires lors du travail
à proximité ou sur les fraises.
3. DESCRIPTION DES P ARTIES DE
LA MACHINE
DESCRIPTION (Fig.1)
A) Levier de commande de la rotation des fraises
B) Réglage du câble de commande des fraises
C) Levier de l’accélérateur
D) Boutons de blocage des demi-guidons
E) Manette du câble de démarrage
F) Bouchon du réservoir de carburant
G) Bouchon de remplissage de l’huile moteur
H) Démarreur
I) Capuchon de la bougie
L) Silencieux
M) Moteur à explosion
N) Carter de protection des fraises
O) Soc profondeur de travail
P) Fraises
Q) Réducteur
R) Roue pour transport
S) Disques fraises (uniquement TL 60)
B) DEMI-GUIDONS
Introduire la plaque de support des manches des
deux demi-guidons (5-6) et les fixer avec les vis
(8) et les boutons (7) en veillant à intercaler le plateau (3).
C) BARRE POUR RÉGLER LA PROFONDEUR
DE TRAVAIL
Fixer la barre (9) dans le logement de la coque,
interposer la rondelle (10) et fixer le tout avec la
goupille (11)
5. MISE EN MARCHE
ATTENTION !
Ce moteur est expédié sans
huile.
NE PAS METTRE EN MARCHE
avant d’avoir rempli le réservoir
d’huile.
NE PAS DEPASSER LE NIVEAU
MAXIMUM.
ATTENTION !
Avant de mettre en marche, consulter le manuel ci-joint du constructeur du moteur.
1) Préparer le carburant et ravitailler
seulement en plein air.
2) Conserver le carburant dans un bidon prévu à cet effet et fermé avec un
bouchon bien serré.
4. MONTAGE (FIG.2)
A) - PLAQUE DES DEMI-GUIDONS
Monter la plaque de fixation des demi-guidons
(1) sur la coque de la motobineuse à l’aide des
4 vis (2) et bloquer le tout avec les écrous (4).
6. DEMARRAGE ET ARRET
ATTENTION! Observer scrupuleuse
ment les avertissements figurant
au chapitre 2 PRECAUTIONS FONDAMENTALES DE SECURITE.
27
F
MANUEL D'INSTRUCTION DE LA MOTOBINEUSE
INSTRUCTIONS POUR LES MOTEURS AVEC
COMMANDE A AIR SUR LE LEVIER DE L’ACCELERATEUR (Fig.3)
Le levier contrôle la vitesse du moteur. Pour le
démarrage à froid, le levier doit être mis en
position (2).
Un moteur chaud peut être mis en marche en
position MAXIMUM .
La motobineuse a les meilleures prestations en
position MAXIMUM .
INSTRUCTIONS POUR LES MOTEURS AVEC
PETITE POMPE (BULBE) CARBURANT (Fig.4)
Le levier contrôle la vitesse du moteur. Pour le
démarrage à froid, le levier doit être mis en position MAXIMUM (2). Appuyer ensuite énergi-
quement sur le bulbe de la petite pompe «primer»
(fig.11) avant de démarrer le moteur. (Par ailleurs,
si le moteur s’arrête suite à une pénurie de carburant, remplir le réservoir de carburant et appuyer
3 fois sur la petite pompe d’alimentation).
Fig. 11
REMARQUE : En général, il n’est pas nécessaire
d’actionner la petite pompe lorsqu’on démarre un
moteur déjà chaud.
Dans des conditions climatiques froides, il est néanmoins possible de devoir répéter l’opération initiale.
La motobineuse a les meilleures prestations en position MAXIMUM .
REMARQUE : De plus amples expli-
cations sur l’utilisation et l’entretien du
moteur sont données dans le manuel du constructeur du moteur fourni séparément.
Saisir le mancheron droit avec la main
gauche, sans appuyer sur le levier de
commande des fraises ; se mettre sur le côté
de la motobineuse en adoptant une position
stable et loin du groupe fraises.
Saisir la poignée du lanceur (fig. 5) et tirer la
corde jusqu’à la mise en marche.
Laisser tourner le moteur pendant quelques secondes.
ARRET DU MOTEUR
1) Pour arrêter le moteur, mettre le levier de
l’accélérateur (fig. 3-4) en position (1).
7. UTILISATION
COMMENT UTILISER LA MOTOBINEUSE
1) Se mettre à proximité du terrain à travailler.
Contrôler que le terrain à biner
ne soit pas parsemé d’éventuels
corps étrangers.
2) Mettre la roue de transport dans la position
« HAUTE » (voir fig. 6 - 1-2-3-4).
3) Démarrer le moteur. Voir le chapitre 6.
4) Pour que les fraises commencent à tourner,
appuyer sur le levier de commande des fraises
(fig.7) et le mettre e position (2). Au relâchement
du levier, les fraises s’arrêtent.
ATTENTION ! Dès que les fraises
commencent à tourner, la
motobineuse tend à avancer sur
le terrain.
ATTENTION!! Au cas où les
fraises entreraient en rotation
avec le levier relâché, ne pas
utiliser la machine et s’adresser
à un centre d’assistance
autorisé.
28

MANUEL D'INSTRUCTION DE LA MOTOBINEUSE
F
5) Pour régler la vitesse d’avance de la fraise et
donc la profondeur des fraises, l’opérateur doit
:
- PROFONDEUR MAXIMUM DE TRAVAIL
Appuyer sur les demi-guidons pour enfoncer le
soc dans le terrain de façon à ralentir l’avance
de la fraise (fig.7) et augmenter sa profondeur
de travail.
- PROFONDEUR MINIMUM DE TRAVAIL
Alléger la pression sur les demi-guidons pour
que le soc effleure le terrain de façon à ralentir
l’avance de la fraise (fig.7) et diminuer sa profondeur de travail.
8. ENTRETIEN
ATTENTION ! Eteindre le moteur
et détacher la bougie avant
d’exécuter toute opération d’entretien.
ATTENTION ! Attendre que le moteur se soit complètement refroidi.
ATTENTION ! Mettre des gants de
sécurité pour toute intervention de
montage et d’entretien sur les fraises.
MOTEUR
Voir le manuel du constructeur joint.
CONTROLE DES VIS ET DES PARTIES EN
MOUVEMENT
Avant toute utilisation, contrôler qu’il n’y a pas
de vis ou de pièces desserrées et qu’il n’y a
pas de criques ou d’importants signes d’usure
sur les lames des fraises. Remplacer les pièces détériorées avant toute utilisation.
REMPLACEMENT DES FRAISES (Fig.9)
Desserrer le ressort et sortir le goujon de blocage (1). Extraire la fraise en la faisant sortir de
l’arbre (2). Introduire la nouvelle fraise en veillant
à faire correspondre les trous de fixation à l’arbre et bloquer le tout avec le goujon et le ressort.
REGLAGE DU CABLE DE COMMANDE DES
FRAISES - REGLAGE (Fig.1 repère B)
L’opération de réglage et de contrôle
doit être exécuté par un centre d’assistance agréé.
Un réglage erroné peut constituer un danger !
NETTOYAGE, TRANSPORT ET REMISAGE
# En cas d’inactivité prolongée supérieure à 2
mois, vidanger le réservoir de carburant.
# Ne pas nettoyer avec des liquides agressifs.
# Conserver l’appareil dans un lieux sec et sûr,
hors de la portée des enfants.
# Lors du transport, vidanger le réservoir de carburant.
9. ÉLIMINATION
À la fin de la durée de vie de votre motobineuse,
s’adresser à un centre d’assistance qualifié pour
les informations relatives à la mise hors service,
au démantèlement et à l’élimination.
29

F
MANUEL D'INSTRUCTION DE LA MOTOBINEUSE
DONNEES TECHNIQUES DE LA MOTOBINEUSE
TL 40/N TL 60
Masse (sans carburant) 36 Kg 39 Kg
Largeur de binage 38 cm 56 cm
Regime maximum de rotation des fraises 80 1/min
Vibrations au guidon EN 1033: 1995
UNI EN 709: 1998 5,9 m/s
Niveau de pression acoustique
EN 1553: 2001 LAcq 80,2 dB (A) - Lmax 98,7 dB (C)
UNI EN 709: 1998 @ 3.000 rpm
Puissance
BRIGGS & STRA TTON - XC 35 - 450 SERIES
BRIGGS & STRATTON - XLS 50 - 625 SERIES 3,5 kW @ 3.600 rpm
HONDA - GVC 135 2,6 kW @ 3.600 rpm
SANDRIGARDEN 3,5 - 350 2,2 kW @ 3.600 rpm
SANDRIGARDEN 5,5 - 550 OHV 3,3 kW @ 3.600 rpm
2
@ 3.000 rpm
2,5 kW @ 3 .60 0 r pm
note _________________________________
_________________________________________________
____________________________________________________
_________________________________________________
___________________________________________________
___________________________________________________
_________________________________________________
____________________________________________________
_________________________________________________
___________________________________________________
___________________________________________________
_________________________________________________
____________________________________________________
_________________________________________________
___________________________________________________
30

MANUEL D'INSTRUCTION DE LA MOTOBINEUSE
F
note ______________________________
_________________________________________________
____________________________________________________
_________________________________________________
___________________________________________________
___________________________________________________
_________________________________________________
____________________________________________________
_________________________________________________
___________________________________________________
___________________________________________________
_________________________________________________
____________________________________________________
_________________________________________________
___________________________________________________
note ________________________________
_________________________________________________
____________________________________________________
_________________________________________________
___________________________________________________
___________________________________________________
_________________________________________________
____________________________________________________
_________________________________________________
___________________________________________________
___________________________________________________
_________________________________________________
____________________________________________________
_________________________________________________
___________________________________________________
___________________________________________________
_________________________________________________
____________________________________________________
_________________________________________________
___________________________________________________
___________________________________________________
_________________________________________________
____________________________________________________
_________________________________________________
___________________________________________________
___________________________________________________
_________________________________________________
____________________________________________________
_________________________________________________
___________________________________________________
___________________________________________________
_________________________________________________
____________________________________________________
_________________________________________________
___________________________________________________
31

D
BEDIENUNGSANWEISUNGEN ZUM MOTORHACKE
1. HERZLICHEN GLÜCKWUNSCH
Sehr geehrter Kunde, wir beglückwünschen Sie
zum Kauf eines unserer Gartenbauprodukte.
Ihre MOTORHACKE wurde unter Berücksichtigung
der geltenden Sicherheitsnormen zum Schutz des
Verbrauchers konzipiert und gebaut.
In dieser Betriebsanleitung sind alle für den einwandfreien Betrieb Ihrer MOTORHACKE erforder-
lichen Arbeiten für Montage, Gebrauch und Wartung beschrieben und illustriert.
ZUM BESSEREN VERSTÄNDNIS
Die Abbildungen zur Montage und Beschreibung
der Maschine befinden sich am Anfang dieses
Handbuchs.
Für ein besseres Verständnis des Maschinengebrauchs konsultieren Sie bitte diese Seiten beim
Lesen der Montage-und Bedienungsanleitungen.
Sollte Ihre MOTORHACKE eine Reparatur oder
Serviceleistung benötigen, wenden Sie sich bitte
an Ihren Händler oder eine autorisierte
Kundendienststelle.
2. GRUNDLEGENDE
SICHERHEITSMASSNAHMEN
ALLGEMEINE VORSCHRIFTEN
HINWEISE:
A1 - Beachten Sie beim Gebrauch der
MOTORHACKE stets die in dieser Be-
triebsanleitung aufgeführten Anweisungen des Herstellers.
A2 - Der Gebrauch der MOTORHACKE setzt die Einhaltung der
Sicherheitsvorschriften voraus.
A3 - Wer die MOTORHACKE verwenden will, muss zuerst die Bedienungsund Wartungsanleitungen aufmerksam
lesen und sich für einen korrekten Gebrauch des Geräts genaustens mit den
Steuerungen vertraut machen.
A3.1 - Bewahren Sie die Betriebsanleitung für spätere Konsultationen sorgfältig auf.
A4 - Verhindern Sie den Gebrauch der
MOTORHACKE durch Kinder und
Personen, die mit den hier aufgeführten Anweisungen nicht vertraut sind.
Beachten Sie mögliche Altersbegrenzungen für den Bediener durch
landesspezifische Normen.
GEFAHR:
A5 - Achten Sie auf von den Fräsen
weggeschleudertes Material.
A6 - Verwenden Sie die Motorhacke
nicht in der Nähe von Personen, Tieren oder Gegenständen.
A7 - Der Bediener haftet für selbst verschuldete Personen- oder Sachbeschädigungen.
VORBEREITUNG:
B1 - Überprüfen Sie sorgfältig den Be-
reich, in dem die Motorhacke verwendet werden soll, und entfernen Sie sämtliche Gegenstände, die weggeschleudert oder den einwandfreien Betrieb der
Maschine beeinträchtigen könnten.
B2 - Verwenden Sie die MOTORHACKE ausschließlich zum Auflockern
von Böden, die frei von Hindernissen
sind.
Der Gebrauch des Geräts für andere
Zwecke ist untersagt.
B3 - Tragen Sie beim Gebrauch eng
am Körper anliegende Kleidung.
Tragen Sie STETS Sicherheitsschuhe und lange Hosen. Arbeiten
32

BEDIENUNGSANWEISUNGEN ZUM MOTORHACKE
D
Sie NIE barfuß oder mit offenen Sandalen.
B4 - Tragen Sie feste Schutzhandschuhe.
B5 - Der Benutzer der Motorhacke
muss in guter körperlicher Verfassung
sein. VERWENDEN SIE DIE
MOTORHACKE nicht bei Müdigkeit,
Unwohlsein oder unter der Einwirkung
von Alkohol bzw. anderen Rauschmitteln.
B6 - ACHTUNG! Die Abgase sind giftig und können zu Erstickungen bis hin
zum T od führen. Starten Sie den Motor
nicht in geschlossenen oder unzureichend belüfteten Räumen.
B7 - ACHTUNG! Das Benzin ist hochgradig entzündlich.
VERBRENNUNGS- UND BRANDGEFAHR.
Verwenden Sie im Brandfall einen
Feuerlöscher, soweit möglich.
Andernfalls werfen Sie Erde auf die
Flammen. Sollten Sie das Feuer
nicht sofort löschen können,
entfernen Sie sich mindestens 20
Meter vom Gerät, bis es auf
natürliche Weise ausgeht.
7.1 - Bewahren Sie Benzin nur in dafür vorgesehenen Behältern auf.
7.2 - Füllen Sie Benzin nur im Freien
ein und rauchen Sie nicht dabei.
7.3 - Füllen Sie das Benzin vor dem
Starten des Motors ein. Öffnen Sie bei
laufendem oder heißem Motor niemals
den Tankverschluss oder füllen Sie
Benzin ein.
7.4 Versuchen Sie bei übergelaufenem
Benzin nicht, den Motor zu starten, sondern entfernen Sie die Maschine aus
dem benzinverschmutzten Bereich.
Vermeiden Sie jede Art von Funkenoder Flammenbildung, bis die Benzindämpfe sich vollständig verflüchtigt
haben.
7.5 - Verschließen Sie Benzintank
und -behälter besonders sorgfältig.
B8 - T auschen Sie den Schalldämpfer
bei Beschädigung aus.
B9 - Unterziehen Sie den Fräsvorsatz,
seine Verriegelungsbolzen und die
Schneiden einer Sichtkontrolle auf
Abnutzung oder Beschädigung. Tauschen Sie beschädigte oder abgenutzte Messer immer nur im ganzen Satz aus, um Unwuchten zu vermeiden.
BETRIEB
C1 - Lassen Sie den Motor nicht in
geschlossenen oder begrenzten Räumen laufen, in denen sich das in den
Abgasen vorhandene gefährliche Kohlenmonoxyd sammeln kann.
C2 - Arbeiten Sie nur bei Tageslicht
oder ausreichender Beleuchtung.
C3 - Halten Sie das Gerät stets mit beiden Händen.
Achten Sie auf einen stabilen, sicheren
Stand.
C4 - Vermeiden Sie, soweit möglich,
den Gebrauch der Motorhacke auf
schlammigen, steinigen oder übermäßig harten (gefrorenen) Böden.
C5 - Achten Sie an Hängen auf eine
sichere Fußstellung.
C6 - Führen Sie die Maschine nur im
Schritttempo.
C7 - Arbeiten Sie an Hängen immer in
der Querrichtung, niemals auf- oder
abwärts.
C8 - Seien Sie bei Richtungsänderungen am Hang besonders vorsichtig.
C9 - Arbeiten Sie nicht an übermäßig
steilen Hängen.
C10 - Gehen Sie bei Richtungsänderungen oder beim Rückwärtsziehen der Motorhacke besonders
vorsichtig vor.
33

D
BEDIENUNGSANWEISUNGEN ZUM MOTORHACKE
C11 - Schalten Sie den Motor (und
damit den Fräsvorsatz) aus, wenn
die Motorhacke über ein nicht zu bearbeitendes Gelände geführt bzw. zu
oder aus dem Arbeitsbereich gebracht wird.
C12 - Verändern Sie weder die
Motoreinstellungen, noch versuchen
Sie, die Motordrehzahl irgendwie zu
erhöhen.
C13 - Starten Sie den Motor mit Vorsicht. Beachten Sie dabei die Anweisungen und halten Sie mit den Füßen
ausreichend Abstand zum Fräsvorsatz.
C14 - Halten Sie Hände und Füße von
den drehenden T eilen entfernt.
C15 - Heben oder transportieren Sie
die Maschine niemals bei laufendem
Motor.
C16 - Stellen Sie den Motor aus
und ziehen Sie das Zündkabel ab:
C17 - Vergewissern Sie sich vor
Reinigungs-, Wartungs- oder
Inspektionsarbeiten, dass die Fräsen
und allen anderen beweglichen Teile
vollständig zum Stillstand gekommen
sind. Ziehen Sie das Zündkabel ab und
entfernen Sie es von der Zündkerze,
um ein unbeabsichtigtes Einschalten zu
vermeiden.
C18 - Stößt die Maschine auf einen
Fremdkörper, stoppen Sie den Motor ,
ziehen Sie das Zündkabel ab und überprüfen Sie die Fräsen sorgfältig auf
mögliche Beschädigungen. Lassen Sie
festgestellte Schäden von einer autorisierten Kundendienststelle reparieren,
bevor Sie den Motor wieder in Gang
setzen.
C19 - Sollte die Maschine anomale
Vibrationen aufweisen, stoppen Sie sofort den Motor und stellen Sie die Ursache fest. Starkes Vibrieren weist in der
Regel auf eine Betriebsstörung hin.
C20 - Stellen Sie den Motor ab,
20.1 sobald Sie sich von der Motor-
hacke entfernen;
20.2 bevor Sie Benzin nachfüllen;
20.3 bevor Sie die Pflughöhe verstel-
len (warten Sie bis zum vollständigen Stillstand der Fräsen).
C21 - bevor Sie das Rad anheben
oder absenken;
C22 - bevor Sie die Fräsen reinigen
oder von Material befreien.
C23 - Stellen Sie zum Ausschalten
des Motors die Geschwindigkeit auf
den niedrigsten Wert ein und schließen Sie den Benzinhahn (soweit vorhanden) nach dem Motorstillstand.
C24 - Verwenden Sie das Gerät bei
Temperaturen über 5 °C, so dass
der Boden völlig frostfrei ist.
Vermeiden Sie den Gebrauch auf zu
trockenem und kompaktem Boden,
da sich dieser als besonders hart
erweisen könnte.
WARTUNG UND LAGERUNG
D1 - Sorgen Sie dafür, dass alle
Schrauben und Muttern fest angezogen sind und die Maschine in gutem
Zustand ist.
D2 - Stellen Sie die Motorhacke nie mit
Benzin im T ank in geschlossenen Räumen ab, in denen die Benzindämpfe mit
offenem Feuer oder Funken in Berührung kommen könnten.
D3 - Lassen Sie den Motor abkühlen,
bevor Sie die Maschine in geschlossenen Räumen abstellen.
D4 - Halten Sie zur Vermeidung von
Brandgefahr Motor und Schalldämpfer
frei von Gras, Blättern und überschüssigem Fett.
D5 - T auschen Sie aus Sicherheitsgründen abgenutzte oder beschädigte T eile
unverzüglich aus. Verwenden Sie nur
Original-Ersatzteile. Ersatzteile ande-
34

BEDIENUNGSANWEISUNGEN ZUM MOTORHACKE
D
rer Hersteller könnten nicht genau
passen und Schäden bzw. Gefahren
verursachen.
D6 - Falls der Kraftstofftank geleert
werden muss, sollte dies im Freien
geschehen.
D7 - Der feste Sitz des Fräsvorsatzes
und der Motorträgerschrauben sollte
in regelmäßigen Abständen überprüft werden. Wenden Sie sich hierfür gegebenenfalls an Ihren Kundendienst.
D8 - Die Fräsen der Motorhacke
sind sehr scharf und können zu
Hautverletzungen führen. Bei Arbeiten an und nahe den Fräsen sind
entsprechende Sicherheitsvorkehrungen zu treffen.
3. BESCHREIBUNG DER
MASCHINENTEILE
BESCHREIBUNG (Abb. 1)
A) Steuerhebel Fräsenrotation
B) Regler Fräsen-Steuerkabel
C) Gashebel
D) Arretierknöpfe Führungsholmgriffe
E) Griff Anlassseil
F) Benzintankverschluss
G) Motoröl-Einfüllstopfen
H) Starter
I) Zündkerzen-Stecker
L) Schalldämpfer
M) Explosionsmotor
N) Fräsenschutz
O) Pflug Arbeitstiefe
P) Fräsen
Q) Untersetzungsgetriebe
R) Transportrad
S) Fräsenscheiben (nur TL 60)
4. MONTAGE (Abb. 2)
A) - PLATTE FÜHRUNGSHOLMGRIFFE
Montieren Sie die Platte zur Befestigung der
Führungsholmgriffe (1) mit Hilfe der vier Schrauben (2) an der Karosse der Motorhacke und
verriegeln Sie sie mit den Muttern (4).
B) FÜHRUNGSHOLMGRIFFE
Setzen Sie die beiden Führungsholmgriffe (5-
6) in die Griffplatte ein und befestigen Sie sie mit
den Schrauben (8) und Knöpfen (7). Vergessen Sie nicht, den Teller (3) zwischenzulegen.
C) STANGE ZUR EINSTELLUNG DER
ARBEITSTIEFE
Befestigen Sie die Stange (9) im Sitz der
Karosse, legen Sie die Scheibe (10) zwischen
und verriegeln Sie alles mit dem Splint (11).
5. INBETRIEBNAHME
ACHTUNG!!
Der Motor wird ohne Öl geliefert.
STARTEN SIE DEN MOTOR ERST
nach Füllen des Öltanks.
ÜBERSCHREITEN SIE NICHT DEN
MAX. FÜLLSTAND.
ACHTUNG!!
Lesen Sie vor der Inbetriebnahme
das beiliegende Handbuch des
Motorenherstellers.
1) Bereiten Sie den Kraftstoff vor. Fül-
len Sie ihn nur im Freien ein.
2) Bewahren Sie den Kraftstoff in einem dafür vorgesehenen fest verschlossenen Behälter auf.
35

D
BEDIENUNGSANWEISUNGEN ZUM MOTORHACKE
6. START UND STOPP
ACHTUNG! Beachten Sie genau die
Hinweise des vorherigen
Kap. 2 GRUNDLEGENDE
SICHERHEITSMASSNAHMEN.
ANWEISUNGEN FÜR MOTOREN MIT LUFT-
STEUERUNG AM GASHEBEL (Abb. 3)
Der Hebel steuert die Motorgeschwindigkeit. Bei
Kaltstarts muss der Hebel in die Position (2) gebracht werden .
Ein warmer Motor kann in der Position MAX
gestartet werden.
Die besten Leistungen erzielt die Motorhacke
in der Position MAX .
ANWEISUNGEN FÜR MOTOREN MIT BENZINPUMPE (Abb. 4)
Der Hebel steuert die Motorgeschwindigkeit. Bei
Kaltstarts muss der Hebel in die Position MAX
(2) gebracht werden. Danach drücken
Sie energisch den Kolben der „Primer“-Pumpe
(Abb. 11) hinunter, bevor Sie den Motor anlassen. (Bleibt der Motor wegen Kraftstoffmangels
stehen, füllen Sie den Kraftstofftank auf und betätigen Sie 3 mal die Förderpumpe).
Abb. 11
HINWEIS: Weiterführende Erklärun
gen für Gebrauch und Wartung des
Motors finden Sie im mitgelieferten Handbuch
des Motorenherstellers.
Ergreifen Sie den rechten Holm mit der
linken Hand, ohne den Hebel der
Fräsensteuerung zu betätigen. Stellen Sie sich
seitlich zur Motorhacke in einer stabilen und von
den Fräsmessern entfernten Position auf.
Ergreifen Sie das Anlassseil (Abb.5) und ziehen
Sie daran, bis der Motor anspringt.
Lassen Sie den Motor einige Sekunden laufen.
STOPPEN DES MOTORS
1) Bringen Sie zum Stoppen des Motors den
Gashebel (Abb. 3-4) in die Position (1).
7. GEBRAUCH
ANWENDUNG DER MOTORHACKE
1) Bringen Sie die Motorhacke in die Nähe des
zu bearbeitenden Geländes.
Überprüfen Sie den Boden auf
mögliche Fremdkörper.
HINWEIS: Im Allgemeinen ist ein Betätigen der
Pumpe beim Anlassen eines bereits warmen
Motors nicht nötig. Bei kalten Wetterbedingungen kann es jedoch vorkommen, dass
der Startvorgang wiederholt werden muss. Die
besten Leistungen erzielt die Motorhacke in der
Position MAX .
36
2) Bringen Sie das Transportrad in die „HOHE“
Position (siehe Abb. 6 - 1-2-3-4).
3) Starten Sie den Motor. Siehe Kap. 6.
4) Für den Start der Fräsen bringen Sie den
zugehörigen Steuerhebel (Abb. 7) in die Position (2). Beim Loslassen des Hebels bleiben die
Fräsen stehen.
ACHTUNG!! Sobald sich die Fräsen zu drehen beginnen, neigt die
Motorhacke zur Vorwärtsbewegung.

BEDIENUNGSANWEISUNGEN ZUM MOTORHACKE
D
ACHTUNG!! Sollten sich die
Fräsen bei losgelassenem Hebel
zu drehen beginnen, benutzen
Sie die Maschine nicht und
wenden Sie sich an ein
autorisiertes
Kundendienstzentrum.
5) Zur Einstellung der Fräsgeschwindigkeit und
damit der Arbeitstiefe der Fräsen gehen Sie wie
folgt vor:
- MAXIMALE ARBEITSTIEFE
Drücken Sie auf die Führungsholmgriffe, um
den Pflug in den Boden abzusenken und dadurch die Vorwärtsbewegung des Fräsvorsatzes
(Abb. 7) abzubremsen bzw. die Arbeitstiefe zu
erhöhen.
- MINIMALE ARBEITSTIEFE
Verringern Sie den Druck auf die Führungsholmgriffe, um den Pflug aus dem Boden austreten
zu lassen und dadurch die Vorwärtsbewegung
des Fräsvorsatzes (Abb. 7) zu erhöhen bzw. die
Arbeitstiefe zu reduzieren.
8. WARTUNG
KONTROLLE DER SCHRAUBEN UND DREHENDEN TEILE
Vergewissern Sie sich vor jedem Gebrauch,
dass keine Schrauben oder sonstigen Teile lokker und keine Risse oder Abnutzungserscheinungen auf den Fräsmessern sichtbar
sind.
Tauschen Sie beschädigte Teile vor dem Gebrauch aus.
AUSTAUSCH DER FRÄSEN (Abb. 9)
Lösen Sie die Feder und entfernen Sie den
Verriegelungsbolzen (1). Ziehen Sie die Fräse
von der Welle (2) ab. Setzen Sie die neue Fräse ein. Achten Sie dabei darauf, dass die
Befestigungsbohrungen mit der Welle übereinstimmen und verriegeln Sie alles mit Bolzen und
Feder.
REGLER FRÄSEN-STEUERKABEL - EINSTELLUNG (Abb.1 Pos.B)
Die Einstellung und Kontrolle muss
von einer autorisierten
Kundendienststelle vorgenommen
werden.
Eine falsche Einstellung kann
Gefahr verursachen!
ACHTUNG!! Stellen Sie vor jedem
Wartungseingriff den Motor aus
und ziehen Sie die Kerze ab.
ACHTUNG!! Lassen Sie den Motor vollständig abkühlen.
ACHTUNG!! Tragen Sie bei jedem
Montage- und Wartungseingriff
am Fräsvorsatz Schutzhandschuhe.
MOTOR
Siehe beiliegendes Handbuch des Herstellers.
REINIGUNG, TRANSPORT UND LAGERUNG
# Wird das Gerät länger als 2 Monate nicht be-
nutzt, leeren Sie den Kraftstofftank.
# Verwenden Sie keine aggressiven Reinigungsmittel.
# Bewahren Sie das Gerät an einem trockenen,
sicheren und für Kinder unzugänglichen Ort auf.
# Zu Transportzwecken entleeren Sie den
Kraftstofftank.
37

D
BEDIENUNGSANWEISUNGEN ZUM MOTORHACKE
9. ENTSORGUNG
Am Ende der Lebensdauer Ihrer Motorhacke
wenden Sie sich bitte an ein qualifiziertes
Kundendienstzentrum, das Ihnen Informationen
zur Außerbetriebnahme, Verschrottung und
Entsorgung geben kann.
TECHNISCHE DATEN DER MOTORHACKE
TL 40/N TL 60
Massa (ohnek Kraftstoff) 36 Kg 39 Kg
Fräsbreite 38 cm 56 cm
Höchstdrehzahl Fräsenrotation 80 1/min
Vibrationen am holm EN 1033: 1995
UNI EN 709: 1998 5,9 m/s
Schalleistungspegel
EN 1553: 2001 LAcq 80,2 dB (A) - Lmax 98,7 dB (C)
UNI EN 709: 1998 @ 3.000 rpm
Leistung:
BRIGGS & STRA TTON - XC 35 - 450 SERIES
BRIGGS & STRATTON - XLS 50 - 625 SERIES 3,5 kW @ 3.600 rpm
HONDA - GVC 135 2,6 kW @ 3.600 rpm
SANDRIGARDEN 3,5 - 350 2,2 kW @ 3.600 rpm
SANDRIGARDEN 5,5 - 550 OHV 3,3 kW @ 3.600 rpm
2
@ 3.000 rpm
2,5 kW @ 3 .60 0 r pm
38

BEDIENUNGSANWEISUNGEN ZUM MOTORHACKE
D
note ______________________________
_________________________________________________
____________________________________________________
_________________________________________________
___________________________________________________
___________________________________________________
_________________________________________________
____________________________________________________
_________________________________________________
___________________________________________________
___________________________________________________
_________________________________________________
____________________________________________________
_________________________________________________
___________________________________________________
note ________________________________
_________________________________________________
____________________________________________________
_________________________________________________
___________________________________________________
___________________________________________________
_________________________________________________
____________________________________________________
_________________________________________________
___________________________________________________
___________________________________________________
_________________________________________________
____________________________________________________
_________________________________________________
___________________________________________________
___________________________________________________
_________________________________________________
____________________________________________________
_________________________________________________
___________________________________________________
___________________________________________________
_________________________________________________
____________________________________________________
_________________________________________________
___________________________________________________
___________________________________________________
_________________________________________________
____________________________________________________
_________________________________________________
___________________________________________________
___________________________________________________
_________________________________________________
____________________________________________________
_________________________________________________
___________________________________________________
39

NL
GEBRUIKSAANWIJZING VAN DE HAKFREES
1. GEFELICITEERD
Beste klant, wij feliciteren u met uw keuze van één
van onze producten voor de tuin.
De HAKFREES is gebouwd volgens de geldende
veiligheidsnormen ter bescherming van de consument.
In dit instructieboekje worden de verschillende handelingen voor montage, installatie en gebruik beschreven en geïllustreerd, evenals de onderhoudswerkzaamheden die nodig zijn om uw HAKFREES
in perfecte staat van werking te houden.
VOOR EEN BETER BEGRIP
Afbeeldingen voor de montage zijn te zien aan het
begin van dit boekje.
Laat deze pagina’s tijdens het lezen van de
montageaanwijzingen open liggen.
Voor eventuele service of reparatie van uw
HAKFREES dient u zich tot uw winkelier of tot een
erkend servicecentrum te wenden.
2. FUNDAMENTELE VEILIGHEIDSMAATREGELEN
ALGEMENE NORMEN
WAARSCHUWINGEN:
A1 - Neem bij het gebruik van de
HAKFREES de veiligheidsnormen in
acht.
A2 - Neem bij het gebruik van de
HAKFREES de veiligheidsnormen in
acht.
A3 - Lees eerst de handleiding voor gebruik en onderhoud aandachtig om geheel vertrouwd te raken met de bedieningselementen, dit ten behoeve van een correct gebruik van het apparaat.
A3.1 - Bewaar deze handleiding voor
toekomstige raadpleging.
A4 - Sta het gebruik van de
HAKFREES niet toe aan kinderen en
personen, die niet geheel op de hoogte
zijn van deze instructies.
De leeftijd van de gebruiker kan door
specifieke normen landelijk gereglementeerd zijn.
GEVAAR:
A5 - Wees bedacht op materiaal dat uit
de frezen wegschiet.
A6 - Stel de hakfrees niet in werking en
gebruik deze niet in de nabijheid van
mensen, dieren of voorwerpen.
A7 - De gebruiker is aansprakelijk bij
ongelukken, gevaar voor anderen, of
schade aan bezittingen van anderen.
VOORBEREIDING:
B1 - Inspecteer het gebied waar men
de hakfrees wil gebruiken nauwkeurig
en verwijder alle voorwerpen die door
de machine weg kunnen schieten of de
goede werking van de machine op het
spel kunnen zetten.
B2 - Gebruik de HAKFREES alleen
om terreinen waar geen obstakels zijn
te frezen.
Gebruik het apparaat niet voor andere
doeleinden.
B3 - Draag tijdens het gebruik nauwsluitende, niet loshangende kleding.
Draag ALTIJD veiligheidsschoenen
en een lange broek. Gebruik de machine NOOIT als u op blote voeten loopt
of open sandalen draagt.
B4 - Draag stevige handschoenen.
B5 - Maak alleen gebruik van de
HAKFREES als u in goede conditie bent.
GEBRUIK de HAKFREES NIET wan-
neer u vermoeid bent, zich niet lekker
voelt of onder invloed bent van alcohol
40

GEBRUIKSAANWIJZING V AN DE HAKFREES
NL
of andere verdovende middelen.
B6 - ATTENTIE! De uitlaatgassen
zijn giftig en verstikkend. Bij inademing kunnen ze zelfs dodelijk zijn.
Laat de motor niet draaien in een
gesloten en schaars geventileerde
ruimte.
B7 - ATTENTIE! Benzine is uiterst
ontvlambaar.
GEVAAR VOOR BRANDWONDEN EN
BRAND.
Gebruik bij brand indien mogelijk
een brandblusapparaat; gooi
anders aarde op het vuur; als het
niet lukt om het vuur onmiddellijk te
doven moet u op minimaal 20 meter
afstand van de machine gaan staan
totdat het vuur op natuurlijke wijze
dooft.
7.1 - Bewaar de benzine in tanks
die hier speciaal voor bedoeld zijn.
7.2 - Het bijvullen van benzine dient
uitsluitend in de open lucht plaats te vinden; rook niet tijdens het bijvullen.
7.3 - Vul benzine bij voordat u de motor start. Haal bij een draaiende of nog
warme motor nooit de dop van de tank
en vul nooit benzine bij.
7.4 - Probeer als er benzine is overgestroomd de motor niet te starten,
maar breng de machine ver van de
plaats waar de benzine is gemorst; zorg
ervoor dat er zich, zolang de benzine
niet volledig verdampt is, op geen enkele wijze vonken of vlammen kunnen
worden.
7.5 - Doe de doppen weer op de benzinetank en op de bewaartank en draai
deze stevig vast.
B8 - Vervang de geluiddemper indien
deze gebreken of beschadigingen vertoont.
B9 - Alvorens de machine te gebruiken dient men altijd op het oog te controleren of de frezen, de borgpennen
van de frezen en de snijvlakken niet
versleten of beschadigd zijn. Vervang
de versleten of beschadigde frezen altijd samen met alle onderdelen om de
uitbalancering te behouden.
WERKING
C1 - Laat de motor nooit draaien in een
afgesloten of kleine ruimte, waar het gevaarlijke koolmonoxide dat zich in het
uitlaatgas bevindt zich kan verzamelen.
C2 - Werk alleen bij voldoende daglicht of bij voldoende kunstverlichting.
C3 - Houd het apparaat altijd met beide
handen vast.
Neem een stabiele en zekere houding
aan.
C4 - Vermijd het zoveel mogelijk om de
hakfrees op modderige, steenachtige
en bijzonder harde (bevroren) terreinen te gebruiken.
C5 - Zet op een hellend terrein altijd
uw voeten stevig neer.
C6 - Loop rustig en ren nooit met de
machine.
C7 - Beweeg op hellende terrein in de
richting dwars ten opzichte van de helling en nooit naar boven of naar beneden.
C8 - Wees uiterst voorzichtig op het
moment dat u van richting moet veranderen op hellende terreinen.
C9 - Vermijd het werken op terreinen
met een te scherpe helling.
C10 - Wees uiterst voorzichtig bij het
omkeren van de versnelling en bij het
achteruit trekken van de hakfrees.
C11 - Zet de motor (en dus de frezen)
stil wanneer de hakfrees een terrein
moet oversteken dat anders is dan het
terrein dat bewerkt moet worden of
wanneer de hakfrees van en naar het
werkterrein moet worden getransporteerd.
C12 - Verander niets aan de afstelling
van de motor en probeer niet om het
41

NL
GEBRUIKSAANWIJZING VAN DE HAKFREES
toerental van de motor te verhogen.
C13 - Let bij het starten van de motor
altijd goed op en volg de instructies
op. Houd uw voeten ver uit de buurt
van de frezen.
C14 - Plaats de handen en voeten
niet in de nabijheid van of onder roterende delen.
C15 - Til de machine nooit op en
transporteer de machine nooit met
een draaiende motor.
C16 - Stop de motor en maag de
bougiekabel los:
C17 - Alvorens de machine schoon te
maken of onderhoud of reparaties uit te
voeren moet u controleren of de frezen
en alle andere bewegende delen volledig tot stilstand zijn gekomen. Koppel
de bougiekabel af en houd deze weg
van de bougie om zo een ongewenste
inschakeling van de machine te voorkomen.
C18 - Als u tegen een vreemd voorwerp aanstoot moet u de motor uitschakelen, de bougiekabel loskoppelen en
de frezen nauwkeurig inspecteren om
eventuele schade op te sporen. Laat
eventuele schade repareren alvorens
de motor weer aan te zetten; wend u tot
een gespecialiseerd servicecentrum.
C19 - Indien de machine abnormale
trillingen vertoont, moet u de motor uitschakelen en de oorzaak van de trillingen proberen te achterhalen. Normaal
gesproken duidend de trillingen op een
probleem.
C20 - Stop de motor:
20.1 Iedere keer als u de hakfrees on-
beheerd achterlaat.
20.2 Voordat u benzine bijvult.
20.3 Voordat u de hoogte van de ploeg-
schaar afstelt (wacht de volledige stilstand van de frezen af).
C21 - Voordat u het wiel omhoog of
omlaag zet.
C22 - Voordat u de frezen schoonmaakt of materiaal ervan verwijdert
C23 - Zet bij het uitzetten van de
motor de versnelling op het minimum en sluit na het stoppen van de
motor de benzinekraan (indien aanwezig).
C24 - Gebruik de machine bij
hogere temperaturen dan 5°C, zodat
de grond volledig ontdooid is;
gebruik de machine niet op te droge
en aangedrukte grond, omdat dit te
hard is.
ONDERHOUD EN OPBERGEN
D1 - Zorg ervoor dat alle schroeven
en moeren goed aangedraaid zijn, om
een goede werking van de machine te
waarborgen.
D2 - Berg de hakfrees nooit in een
gesloten ruimte op terwijl er nog benzine in de tank zit, aangezien de benzinedampen in aanraking kunnen komen
met open vuur of vonken.
D3 - Wacht tot de motor is afgekoeld
alvorens de machine in een gesloten
ruimte op te bergen.
D4 - T eneinde het brandgevaar te verminderen moet u de motor en de geluiddemper altijd schoon houden door
gras, bladeren of overtollig vet te verwijderen.
D5 - Om veiligheidsredenen dient u
versleten of beschadigde onderdelen
altijd onmiddellijk te vervangen. Gebruik
uitsluitend originele vervangingsonderdelen. Vervangingsonderdelen
die zijn geproduceerd door andere
fabrikanten zouden slecht kunnen
passen en gevaarlijke situaties of
schade op kunnen leveren.
D6 - Indien u de benzinetank moet
legen, moet u dit in de open lucht
doen.
42

GEBRUIKSAANWIJZING V AN DE HAKFREES
NL
D7 - Controleer de bevestiging van
de frezen en de steunbouten van de
motor regelmatig of laat dit controleren bij een servicecentrum.
D8 - De frezen van de hakfrees zijn
scherp en kan sneden in de huid veroorzaken. Het is noodzakelijk om de
nodige voorzorgsmaatregelen te
nemen wanneer u dichtbij of op de
frezen werkt.
3. BESCHRIJVING MACHINEDELEN
BESCHRIJVING (afb. 1)
A) Bedieningshendel rotatie frezen
B) Verstelling bedieningskabel frezen
C) Gashendel
D) Bevestigingsknoppen stuurhelften
E) Handgreep van de startkabel
F) Dop brandstoftank
G) Vuldop motorolie
H) Starter
I) Bougiekapje
L) Geluiddemper
M) Verbrandingsmotor
N) Beschermkap frezen
O) Ploegschaar werkdiepte
P) Frezen
Q) Reductieaandrijving
R) Transportwiel
S) Freesschijven (alleen TL 60)
4. MONTAGE (afb. 2)
A) - PLAAT VAN DE STUURHELFTEN
Monteer de bevestigingsplaat van de stuurhelften (1) op het frame van de hakfrees en maak
daarbij gebruik van de 4 schroeven (2) en borg
alles met de moeren (4).
B) STUURHELFTEN
Steek de twee stuurhelften (5-6) in de plaat voor
de handgrepen en zet ze met de schroeven (8)
en de knoppen (7) vast, waarbij u erop moet
letten dat u het plaatje (3) er tussen doet.
C) STANG VOOR DE REGELING VAN DE
WERKDIEPTE
Bevestig de stang (9) op de daarvoor bestemde
plaats aan het frame, doe het ringetje (10)
ertussen en zet alles met de splitpen (11) vast.
5. STARTEN
ATTENTIE!!
Deze motor wordt zonder olie verzonden.
START DE MOT OR NIET voordat de
olietank gevuld is.
OVERSCHRIJD HET MAXIMUM NIVEAU NIET .
ATTENTIE!!
Alvorens de motor te starten moet
u het bijgevoegde handboek van
de fabrikant van de motor raadplegen.
1) Maak de brandstof klaar en giet het
alleen in de open lucht in de tank.
2) Bewaar de brandstof in een voor
dat doel bestemde houder, die goed
afgesloten moet worden met een
dop.
43

NL
GEBRUIKSAANWIJZING VAN DE HAKFREES
6. STARTEN EN STILSTAND
ATTENTIE! Houd u strikt aan de waar
schuwingen die opgenomen zijn in
Hoofdstuk 2: FUNDAMENTELE VEILIGHEIDSMAATREGELEN.
INSTRUCTIES VOOR MOTOREN MET
CHOKE CONTROL OP DE GASHENDEL (afb.
3)
De gashendel bepaalt het motortoerental. Om
een koude motor te starten moet de hendel in
stand (2) gezet worden.
Een warme motor kan in de MAXIMUM
stand gestart worden.
Op de MAXIMUM stand worden de beste
prestaties van de hakfrees verkregen.
INSTRUCTIES VOOR MOTOREN MET
PRIMERPOMP (afb. 4)
De gashendel bepaalt het motortoerental. Om een
koude motor te starten moet de hendel op de
MAXIMUM stand (2) gezet worden. Duw
daarna voordat u de motor start stevig op de
primerpomp (afb. 11). (Doe hetzelfde indien de
motor gestopt is doordat de brandstof op was; vul
brandstof bij en druk de primerpomp 3 keer in).
OPMERKING: Meer diepgaande toe
lichting met betrekking tot het gebruik
en het onderhoud van de motor vindt u in het
handboek van de fabrikant van de motor, dat
apart is bijgevoegd.
Pak de rechterhandgreep met uw lin
kerhand beet, zonder de bedieningshendel van de frezen in te drukken; ga met uw
lichaam naast de hakfrees staan, neem een
stabiele houding aan en blijf uit de buurt van
het freesblok. Pak de startkabel (afb. 5) beet
en trek eraan totdat de motor aanslaat.
Laat de motor enkele seconden draaien.
STILSTAND MOTOR
1) Om de motor tot stilstand te brengen zet u de
gashendel (afb. 3-4) in stand (1) .
7. GEBRUIK
HOE DE HAKFREES TE GEBRUKEN
1) Ga in de buurt van het te bewerken terrein
staan.
Controleer of er geen eventuele
vreemde voorwerpen op het te
frezen terrein achtergebleven
zijn.
Afb. 11
OPMERKING: Dit zogenaamde “primen” is
meestal niet nodig wanneer de motor nog warm
is. Tijdens koud weer of bij een koude motor
kan het echter noodzakelijk zijn.
Op de MAXIMUM stand worden de beste
prestaties van de hakfrees verkregen.
44
2) Zet het transportwiel in de stand “OP” (zie
afb. 6 - 1-2-3-4).
3) Start de motor. Zie Hoofdstuk 6.
4) Om de rotatie van de frezen te starten moet u
de bedieningshendel van de frezen (afb. 7) indrukken en in stand (2) zetten. Als de hendel
losgelaten wordt komen de frezen tot stilstand.
ATTENTIE!! Zodra de frezen beginnen te draaien heeft de
hakfrees de neiging om vooruit
te bewegen op het terrein.

GEBRUIKSAANWIJZING V AN DE HAKFREES
NL
ATTENTIE!! Als de frezen gaan
draaien terwijl de hendel
losgelaten is gebruik de machine
dan niet en wend u zich tot een
erkend servicecentrum.
5) Om de voorwaartse snelheid van de frees
en dus de werkdiepte van de frezen te regelen
moet de gebruiker het volgende doen:
- MAXIMUM WERKDIEPTE
Duw op de stuurhelften zodat de ploegschaar in
het terrein zakt zodat de frees langzamer vooruit beweegt (afb. 7) en de werkdiepte groter
wordt.
- MINIMUM WERKDIEPTE
Duw minder hard op de stuurhelften zodat de
ploegschaar weer uit het terrein komt waardoor
de frees sneller vooruit beweegt (afb. 7) en de
werkdiepte verminderd wordt.
8. ONDERHOUD
ATTENTIE!! Zet de motor af en koppel de bougie los voordat u onderhoud uitvoert.
ATTENTIE!! Wacht tot de motor volledig is afgekoeld.
ATTENTIE!! Trek voor alle montageen onderhoudswerkzaamheden aan
de frezen stevige handschoenen aan.
MOTOR
Zie bijgevoegd handboek van de fabrikant.
CONTROLE SCHROEVEN EN DRAAIENDE
DELEN
Vóór ieder gebruik dient u te controleren of er
geen schroeven of onderdelen loszitten en of
de bladen van de frezen geen barsten of aanzienlijke slijtage vertonen.
Vervang de beschadigde delen voordat u het
apparaat opnieuw gebruikt.
VERVANGEN FREZEN (afb. 9)
Maak de veer los en trek de borgpen (1) eruit.
Haal de frees eruit door hem van de as (2) af te
trekken. Doe de nieuwe frees erop en let er daarbij op dat de bevestigingsgaten goed ten opzichte van de as zitten en zet daarna alles vast
met de pen en de veer.
VERSTELLING BEDIENINGSKABEL FREZEN
- AFSTELLING (afb.1 det.B)
Het afstellen en de controle moeten
bij een bevoegd servicecentrum
gedaan worden.
Een verkeerde afstelling kan gevaarlijk zijn!
REINIGING, TRANSPORT EN OPSLAG
# Gebruikt u het apparaat langer dan 2 maan-
den niet, dan dient u de brandstoftank te legen.
# Reinig het apparaat niet met agressieve vloeistoffen.
# Bewaar het apparaat op een droge en veilige
plek die niet toegankelijk is voor kinderen.
# In geval van transport dient u de brandstoftank te legen.
9. WEGGOOIEN
Wend u zich aan het einde van de levensduur
van uw hakfrees tot een officiële servicedienst
voor informatie over de buitendienststelling, het
afdanken en weggooien ervan.
45

NL
GEBRUIKSAANWIJZING VAN DE HAKFREES
TECHNISCHE GEGEVENS VAN DE HAKFREES
TL 40/N TL 60
Masa (zonder brandstof) 36 Kg 39 Kg
Freesbreedte 38 cm 56 cm
Max toerental van de frezen 80 1/min
Trilling v an de steel EN 1033: 1995
UNI EN 709: 1998 5,9 m/s
Niveau akoestische druk
EN 1553: 2001 LAcq 80,2 dB (A) - Lmax 98,7 dB (C)
UNI EN 709: 1998 @ 3.000 rpm
Vermogen:
BRIGGS & STRA TTON - XC 35 - 450 SERIES
BRIGGS & STRATTON - XLS 50 - 625 SERIES 3,5 kW @ 3.600 rpm
HONDA - GVC 135 2,6 kW @ 3.600 rpm
SANDRIGARDEN 3,5 - 350 2,2 kW @ 3.600 rpm
SANDRIGARDEN 5,5 - 550 OHV 3,3 kW @ 3.600 rpm
2
@ 3.000 rpm
2,5 kW @ 3.600 rpm
note _________________________________
_________________________________________________
____________________________________________________
_________________________________________________
___________________________________________________
___________________________________________________
_________________________________________________
____________________________________________________
_________________________________________________
___________________________________________________
___________________________________________________
_________________________________________________
____________________________________________________
_________________________________________________
___________________________________________________
46

GEBRUIKSAANWIJZING V AN DE HAKFREES
NL
note ______________________________
_________________________________________________
____________________________________________________
_________________________________________________
___________________________________________________
___________________________________________________
_________________________________________________
____________________________________________________
_________________________________________________
___________________________________________________
___________________________________________________
_________________________________________________
____________________________________________________
_________________________________________________
___________________________________________________
note ________________________________
_________________________________________________
____________________________________________________
_________________________________________________
___________________________________________________
___________________________________________________
_________________________________________________
____________________________________________________
_________________________________________________
___________________________________________________
___________________________________________________
_________________________________________________
____________________________________________________
_________________________________________________
___________________________________________________
___________________________________________________
_________________________________________________
____________________________________________________
_________________________________________________
___________________________________________________
___________________________________________________
_________________________________________________
____________________________________________________
_________________________________________________
___________________________________________________
___________________________________________________
_________________________________________________
____________________________________________________
_________________________________________________
___________________________________________________
___________________________________________________
_________________________________________________
____________________________________________________
_________________________________________________
___________________________________________________
47

E
MANUAL DE INSTRUCCIONES DE LA DESBROZADORA
1. CONGRA TULACIONES
Estimado cliente, deseamos congratularnos con Ud.
por haber elegido un producto nuestro para el jardín.
La MOTOAZADA ha sido fabricado teniendo en
cuenta las normas de seguridad vigentes para la
tutela del consumidor.
En este manual se describen y representan las
diferentes operaciones de instalación, de uso y las
intervenciones de mantenimiento necesarias para
mantener en perfecta eficiencia su MOTOAZADA.
PARA F ACILIT AR LA LECTURA
Las figuras correspondientes al montaje y la descripción de la máquina se hallan al inicio del presente manual.
Para hacer más comprensible el uso de la máquina
consultar estas páginas durante la lectura de las
instrucciones de montaje y de utilización.
En caso de que su MOTOAZADA necesite asistencia o reparación, le rogamos que se dirija a nuestro
vendedor o a un centro de asistencia autorizado.
2. PRECAUCIONES FUNDAMENT ALES DE SEGURIDAD
NORMAS GENERALES
ADVERTENCIAS:
A1 - La MOTOAZADA se tiene que
utilizar según las instrucciones del fabricante contenidas en el presente
manual.
A2 - La utilización de la MOTOAZADA
requiere el respeto de las normas de
seguridad.
A3 - Antes de utilizar el MOTOAZADA
se debe leer con cuidado el manual de
instrucciones y mantenimiento y familiarizarse perfectamente con los mandos para poder emplear el aparato de
forma correcta.
A3.1 - Guardar este manual para
poderlo utilizar en el futuro.
A4 - Impedir la utilización de la
MOTOAZADA por parte de los niños y
las personas que no conozcan completamente estas instrucciones .
Normas nacionales específicas podrían
limitar la edad del usuario.
PELIGRO:
A5 - Prestar atención al material pro-
yectado por las fresas.
A6 – No poner en marcha y no utilizar
la motoazada cerca de personas, animales o cosas.
A7 - El operador es responsable en
caso de accidentes o peligros ocasionados a otras personas o a sus cosas.
PREPARACIÓN:
B1 - Inspeccionar esmeradamente el
área en la que se quiere utilizar la
motoazada y quitar cualquier objeto que
podría ser lanzado o perjudicar el funcionamiento de la máquina.
B2 - Utilizar la MOTOAZADA solamente
para cortar terrenos libres de obstáculos.
No emplear el aparato para otros motivos.
B3 - Durante la utilización, llevar prendas de vestir ceñidas y no desatadas. Llevar SIEMPRE zapatos de
seguridad y pantalones largos. NUN-
CA operar con los pies descalzos o
con sandalias abiertas.
B4 - Llevar guantes resistentes.
B5 - Las personas que utilizan la
motoazada deben estar en buena forma. NO UTILIZAR la MOTOAZADA
48

MANUAL DE INSTRUCCIONES DE LA DESBROZADORA
E
en condiciones de cansancio, de
malestar o bajo los efectos del alcohol y de otras drogas.
B6 - ¡ATENCIÓN! Los gases de escape son venenosos y asfixiantes. Por lo
tanto, de inhalarlos pueden ser incluso
mortales. No dejar funcionar el motor
en un lugar cerrado o con una ventilación insuficiente.
B7 - ¡ATENCIÓN! La gasolina es
altamente inflamable.
PELIGROS DE QUEMADURAS E INCENDIO.
En caso de incendio, utilice si es
posible un extintor; en alternativa
eche tierra sobre las llamas; si no
se consigue apagar las llamas
inmediatamente aléjese de la
máquina al menos 20 metros hasta
que se apague de manera natural.
7.1 - Conservar la gasolina en contenedores especialmente previstos
para este uso.
7.2 - Efectuar el abastecimiento de gasolina sólo al aire libre; no fumar durante el abastecimiento.
7.3 - Efectuar el abastecimiento de gasolina antes de poner en marcha el
motor. No quitar nunca el tapón del
depósito y no efectuar el abastecimiento de gasolina mientras el motor está
en marcha o con el motor caliente.
7.4 - Si se ha derramado gasolina, no
intentar poner en marcha el motor sino
desplazar la máquina lejos del lugar
donde se ha derramado la gasolina;
no utilizar nada que pueda provocar
chispas o fuego, hasta que no hayan
desaparecido por completo los vapores de gasolina.
7.5 - Cerrar el depósito de gasolina y
los contenedores apretando de modo
firme sus tapones.
B8 - Sustituir el silenciador si está defectuoso o dañado.
B9 - Antes de utilizar la motoazada,
controlar siempre visualmente que las
fresas, los tornillos de apriete fresas y
los cortantes no estén desgastados o
dañados. Sustituir las cuchillas dañadas o desgastadas en lotes completos
para mantener el equilibrio.
FUNCIONAMIENTO
C1 - No hacer funcionar nunca el
motor en lugares cerrados o limitados donde pueda acumularse el
peligroso gas monóxido de carbono presente en los gases de descarga.
C2 - Trabajar solamente en terrenos
iluminados por la luz diurna o con una
adecuada iluminación artificial.
C3 - T ener el aparato siempre con las
dos manos.
Tomar una posición estable y segura
sobre las piernas.
C4 - Evitar, dentro de lo posible, utilizar la motoazada en terrenos fangosos, con piedras y terrenos particularmente duros (helados).
C5 - En terrenos con pendientes, apoyar firmemente los pies en el terreno.
C6 - Caminar no correr nunca con la
máquina.
C7 - En terrenos con pendientes avanzar transversalmente, sin proceder
nunca hacia arriba o hacia abajo.
C8 - T omar las máximas precauciones
al invertir la marcha en terrenos con
pendiente.
C9 - Evitar trabajar en terrenos con
una pendiente excesiva.
C10 - T omar las máximas precauciones al invertir la marcha y al tirar la
motoazada hacia atrás.
C11 - Detener el motor (y por lo tanto,
las fresas) cuando la motoazada tiene
que atravesar un terreno que no sea
49

E
MANUAL DE INSTRUCCIONES DE LA DESBROZADORA
un prado y cuando se transporte
hacia el área de trabajo.
C12 - No modificar las regulaciones del motor ni hacer operaciones
indebidas para aumentar las revoluciones del motor.
C13 - Prestar mucha atención durante la puesta en marcha del motor siguiendo las instrucciones y
manteniendo los pies alejados de
las fresas.
C14 - No poner nunca las manos ni los
pies cerca o debajo de las partes giratorias.
C15 - No levantar ni transportar nunca la máquina mientras el motor está
en marcha.
C16 - Detener el motor y desconectar el cable de la bujía:
C17 - Antes de efectuar la limpieza, el
mantenimiento o la inspección, hay que
asegurarse de que las fresas y todas
las otras partes en movimiento estén
completamente paradas. Desconectar
el cable de la bujía y alejarlo de la bujía
misma, para evitar que el motor se pueda poner en marcha de manera accidental.
C18 - Cuando se choque contra un
objeto extraño, hay que detener inmediatamente el motor, desconectar el
cable de la bujía, inspeccionar con esmero las fresas para descubrir si se
han producido averías. Si así fuera,
antes de poner en marcha el motor hay
que reparar todos los daños; dirigirse
a un centro de asistencia especializado.
C19 - Siempre que la máquina vibre
de manera anormal, hay que detener
el motor y buscar enseguida la causa
de las vibraciones. Normalmente, las
vibraciones indican la presencia de un
problema.
C20 - Detener el motor:
20.1 Cada vez que se deja sin vigi-
lancia la motoazada.
20.2 Antes de abastecer con gasolina.
20.3 Antes de regular la altura de la
reja (esperar hasta que las fresas se
hayan parado).
C21 - Antes de levantar o bajar la
rueda.
C22 - Antes de limpiar o quitar material de las fresas.
C23 - Poner eI acelerador al mínimo durante el apagamiento del
motor y cerrar la llave de paso de la
gasolina (si se ha previsto) después
de haber apagado el motor.
C24 - Utilice la máquina con
temperaturas superiores a los 5 °C,
de manera que el terreno esté completamente deshelado; evite el uso
en terrenos demasiado secos o
compactos, porque resultarían
demasiado duros.
MANTENIMIENTO Y APARCAMIENTO
D1 - Mantener bien apretadas todas
las tuercas y tornillos de manera que la
máquina trabaje en buenas condiciones.
D2 - Nunca guardar la motoazada en
lugar cerrado dejando gasolina en el
depósito ya que los vapores de la gasolina pueden alcanzar una llama libre
o una fuente de chispas.
D3 - Esperar que el motor se haya
enfriado antes de guardar la máquina
en un lugar cerrado.
D4 - Para reducir el peligro de incendios, mantener el motor y el silenciador, limpios sin césped, hojas o exceso
de grasa.
D5 - Cambiar, por razones de seguridad, las piezas desgastadas o daña-
50

MANUAL DE INSTRUCCIONES DE LA DESBROZADORA
E
das. Usar solamente piezas de recambio originales. Piezas de recambio de otros fabricantes podrían
adaptarse mal y provocar daños o
situaciones de peligro.
D6 - es necesario vaciar el depósito, hacerlo al aire libre.
D7 - Controlar, o hacer controlar por
un centro de asistencia a intervalos
regulares, el apriete de las fresas y
de los tornillos de soporte del motor.
D8 - Las fresas de la motoazada
son muy afiladas y puede provocar,
fácilmente, cortes a la piel. Cuando
se trabaje cerca de las fresas o en
ellas, hay que adoptar las debidas
precauciones.
3. DESCRIPCIONES PIEZAS DE LA
MÁQUINA
DESCRIPCIÓN (Fig.1)
A) Palanca de mando rotación fresas.
B) Regulación cable mando fresas
C) Palanca acelerador.
D) Pomos bloqueo semimanillares
E) Asa del cable de puesta en marcha
F) Tapón depósito carburante
G) Tapón llenado aceite motor
H) Arrancador
I) Capuchón de la bujía
L) Silenciador
M) Motor de explosión
N) Cárter protección fresas
O) Reja profundidad trabajo
P) Fresas
Q) Reductor
R) Rueda para transporte
S) Discos fresas (sólo TL 60)
4. MONTAJE (FIG.2)
A) - PLACA SEMIMANILLARES
Montar la placa fijación semimanillares (1) en
el bastidor de la motoazada, utilizando los 4 tornillos (2) y bloquear todo con las tuercas (4).
B) SEMIMANILLARES
Introducir en la placa portamangos los dos
semimanillares (5-6) y fijarlos con los tornillos
(8) y los pomos (7), con atención a interponer
el platillos (3).
C) BARRA PARA LA REGULACIÓN DE LA
PROFUNDIDAD DE TRABAJO
Fijar la barra (9) en el alojamiento del chasis,
intercalar la arandela (10) y fijar todo con el
pasador (11).
5. PUESTA EN MARCHA
¡ATENCIÓN !!
Este motor se suministra sin aceite.
NO PONERLO EN MARCHA antes
de haber llenado el depósito del
aceite.
NO SUPERAR EL NIVEL MÁXIMO.
¡ATENCIÓN !!
Antes de poner en marcha consultar el manual adjunto del productor del motor.
1) Preparar el carburante y abastecer
sólo al aire libre.
2) Conservar el carburante en un contenedor previsto para este uso y con
tapón bien apretado.
51

E
MANUAL DE INSTRUCCIONES DE LA DESBROZADORA
6. PUESTA EN MARCHA Y PARADA
¡ATENCIÓN! Observar con cuidado
las advertencias contenidas en el
Cap. 2 PRECAUCIONES FUNDAMENTALES
DE SEGURIDAD anterior.
INSTRUCCIONES PARA MOTORES CON
MANDO AIRE EN LA PALANCA ACELERADOR (Fig.3)
La palanca controla la velocidad del motor. Para
la puesta en marcha en frío la palanca tiene
que estar en la posición (2).
Un motor caliente se puede poner en marcha
en la posición MÁXIMO .
Las mejores prestaciones de la motoazada se
obtienen en la posición MÁXIMO .
INSTRUCCIONES P ARA MOTORES CON BOMBA (BULBO) CARBURANTE (Fig.4)
La palanca controla la velocidad del motor. Para
la puesta en marcha en frío la palanca tiene que
estar en la posición MÁXIMO (2). Luego
presionar enérgicamente el bulbo del bulbo «primer» (fig.11) antes de poner en marcha el motor. (Además, si el motor se para por falta de
carburante, llenar el depósito de carburante y presionar la bomba de alimentación 3 veces).
Fig. 11
es posible que se tenga que repetir la operación inicial.
Las mejores prestaciones de la motoazada se
obtienen en la posición MÁXIMO .
NOTA: Las más amplias explicacio
nes relativas al uso y al mantenimiento del motor se hallan en el manual del fabricante del motor, adjunto a parte.
Empuñe el manillar derecho con la
mano izquierda sin presionar la palanca de mando de las fresas; llevarse la azada lateralmente al cuerpo asumiendo una posición estable y lejos del grupo de fresas.
Empuñar el cable de arranque (fig.5) y tirar de
él hasta que se ponga en movimiento.
Dejar funcionar el motor durante algunos segundos.
PARADA MOTOR
1) Para parar el motor, situar la palanca del acelerador (fig. 3-4) en la posición (1) .
7. UTILIZACIÓN
CÓMO UTILIZAR LA MOTOAZADA
1) Ir en el terreno por trabajar.
Controlar que en el terreno por
cortar no hayan eventuales cuerpos extraños.
NOTA: En general, no es necesario accionar
la bomba cuando se pone en marcha un motor ya caliente.
Sin embrago, en condiciones climáticas frías
52
2) Posicionar la rueda de transporte en la
posición “ALTA” (véase las fig. 6 - 1-2-3-4).
3) Poner en marcha el motor. Ver Cap.6.
4) Para iniciar la rotación de las fresas, presio-
nar la palanca de mando fresas (fig.7) y situarla en la posición (2). Al soltar la palanca las fresas se paran.

MANUAL DE INSTRUCCIONES DE LA DESBROZADORA
E
¡ATENCIÓN!! En cuanto las fresas empiezan a girar, la
motoazada tiende a avanzar en
el terreno.
¡ATENCIÓN! No utilizar la
máquina en el caso de que las
fresas empiecen a girar con la
palanca suelta, y dirigirse a un
centro de asistencia autorizado.
5) Para regular la velocidad de avance de la
fresa, y consecuentemente la profundidad de
trabajo de las fresas, el operador tiene que:
- MÁXIMA PROFUNDIDAD DE TRABAJO
Presionar en los semimanillares para hundir la
reja en el terreno al fin de ralentizar el avance
de la fresa (fig.7), y aumentar la profundidad
de trabajo.
- MÍNIMA PROFUNDIDAD DE TRABAJO
Reducir la presión en los semimanillares para
hacer aflorar la reja del terreno al fin de aumentar
el avance de la fresa (fig.7), y disminuir la profundidad de trabajo.
8. MANTENIMIENTO
¡ATENCIÓN!! Apagar el motor y
desconectar la bujía antes de
efectuar cualquier operación de
mantenimiento.
¡ATENCIÓN!! Esperar que el motor esté completamente enfriado.
¡ATENCIÓN!! Llevar los seguridad para cada intervención de
montaje y mantenimiento en las
fresas.
MOTOR
Ver manual fabricante adjunto.
VERIFICACIÓN TORNILLOS Y PARTES GIRATORIAS
Antes de cada utilización controlar que no hayan tornillos o partes aflojadas y que no hayan
hendiduras o desgastes notables en las cuchillas de las fresas.
Sustituir las partes dañadas antes del uso.
SUSTITUCIÓN FRESAS (Fig.9)
Aflojar el resorte y extraer el perno de bloqueo
(1). Extraer la fresa quitándola del eje (2). Introducir la nueva fresa, con atención a que los
agujeros de fijación del eje correspondan y bloquear todo con perno y resorte.
REGULACIÓN CABLE MANDO FRESAS - REGULACIÓN (Fig.1 part.B)
La operación de regulación y control tiene que ser efectuada por un
centro de asistencia autorizado.
¡Una regulación equivocada puede representar un peligro!
LIMPIEZA TRANSPORTE Y COLOCACIÓN EN
CASO DE INACTIVIDAD
# En caso de interrupción de la utilización su-
perior a 2 meses, vaciar el depósito del combustible.
# No limpiar con líquidos agresivos.
# Guardar el aparato en un lugar seco y segu-
ro, inaccesible a los niños.
# Antes de efectuar el transporte, vaciar el depósito de combustible.
9. ELIMINACIÓN
Al final de la vida de trabajo de su motoazada,
diríjase a un centro de asistencia calificado para
informaciones relativas a la puesta fuera de
servicio, desguace y eliminación.
53

E
MANUAL DE INSTRUCCIONES DE LA DESBROZADORA
DATOS TÉCNICOS MOTOAZADA
TL 40/N TL 60
Masa (sin carburante) 36 Kg 39 Kg
Anchura de fresado 38 cm 56 cm
Régimen máximo rotación fresas 80 1/min
Vibraciones EN 1033: 1995
UNI EN 709: 1998 3,9 m/s
Nivel de potencia acústica
EN 1553: 2001 LAcq 80,2 dB (A) - Lmax 98,7 dB (C)
UNI EN 709: 1998 @ 3.000 rpm
Potencia:
BRIGGS & STRA TTON - XC 35 - 450 SERIES
BRIGGS & STRATTON - XLS 50 - 625 SERIES 3,5 kW @ 3.600 rpm
HONDA - GVC 135 2,6 kW @ 3.600 rpm
SANDRIGARDEN 3,5 - 350 2,2 kW @ 3.600 rpm
SANDRIGARDEN 5,5 - 550 OHV 3,3 kW @ 3.600 rpm
2
@ 3.000 rpm
2,5 kW @ 3 .60 0 r pm
note _________________________________
_________________________________________________
____________________________________________________
_________________________________________________
___________________________________________________
___________________________________________________
_________________________________________________
____________________________________________________
_________________________________________________
___________________________________________________
___________________________________________________
_________________________________________________
____________________________________________________
_________________________________________________
___________________________________________________
54

MANUAL DE INSTRUCCIONES DE LA DESBROZADORA
E
note ______________________________
_________________________________________________
____________________________________________________
_________________________________________________
___________________________________________________
___________________________________________________
_________________________________________________
____________________________________________________
_________________________________________________
___________________________________________________
___________________________________________________
_________________________________________________
____________________________________________________
_________________________________________________
___________________________________________________
note ________________________________
_________________________________________________
____________________________________________________
_________________________________________________
___________________________________________________
___________________________________________________
_________________________________________________
____________________________________________________
_________________________________________________
___________________________________________________
___________________________________________________
_________________________________________________
____________________________________________________
_________________________________________________
___________________________________________________
___________________________________________________
_________________________________________________
____________________________________________________
_________________________________________________
___________________________________________________
___________________________________________________
_________________________________________________
____________________________________________________
_________________________________________________
___________________________________________________
___________________________________________________
_________________________________________________
____________________________________________________
_________________________________________________
___________________________________________________
___________________________________________________
_________________________________________________
____________________________________________________
_________________________________________________
___________________________________________________
55

P
MANUAL DE INSTRUÇÕES DA MOTOENXADA
1. P ARABÉNS
Prezado cliente, parabéns por ter escolhido um
nosso produto para o seu jardim.
A sua MOTOENXADA foi construída no respeito
das normas de segurança em vigor e em defesa
do consumidor.
Neste manual são descritas e ilustradas as várias
operações de montagem, de uso e as operações
de manutenção, necessárias para manter em perfeita eficiência a Sua MOTOENXADA.
PA RA F ACILIT AR A LEITURA
As ilustrações correspondentes à montagem e a
descrição da máquina encontram-se no início do
presente fascículo.
Para tornar mais compreensível o uso da máquina,
consultar estas páginas durante a leitura das
instruções de montagem e de uso.
Caso a Sua MOTOENXADA necessite de assistência ou reparação, rogamos que se dirija ao nosso revendedor, ou a um centro de assistência autorizado.
2. PRECAUÇÕES FUNDAMENTAIS
DE SEGURANÇA
NORMAS GERAIS
ADVERTÊNCIAS:
A1 - A MOTOENXADA deve sempre
ser utilizada segundo as instruções do
fabricante compreendidas no presente
manual.
A2 - O emprego da MOTOENXADA
exige o respeito das normas de segurança.
A3 – Qualquer pessoa que utilize a
MOTOENXADA deve primeiro ler com
atenção o manual de instruções e
manutenção e familiarizar-se completamente com os comandos para um uso
correcto do aparelho.
A3.1 - Conserve este manual para
consultas futuras.
A4 - Não permita o uso da
MOTOENXADA as crianças e a pes-
soas que não conheçam completamente
estas instruções.
Específicas normas nacionais poderiam limitar a idade do utilizador.
PERIGO:
A5 – T enha cuidado com o material ar-
remessado pelos dispositivos de corte.
A6 - Não ponha em funcionamento e
não utilize a motoenxada na proximidade de pessoas, animais ou coisas.
A7 – O operador é responsável em
caso de acidentes ou perigos causados a outras pessoas ou às coisas delas.
PREPARAÇÃO:
B1 - Inspeccione cuidadosamente a
área na qual se deseja utilizar a
motoenxada e remover qualquer objecto que poderia ser lançado ou comprometer o funcionamento da máquina.
B2 - Utilize a MOTOENXADA somente
para trabalhar em terrenos livres de
obstáculos.
Não usar o aparelho para escopos
diversos.
B3 - Durante o emprego vista roupa
aderente ao corpo e não largas. Use
SEMPRE sapatos de segurança e
calças compridas. NUNCA operar
com os pés descalços ou com sandálias abertas.
56

MANUAL DE INSTRUÇÕES DA MOTOENXADA
P
B4 - Utilize luvas grossas.
B5 - Quem utilizar a motoenxada
deve estar em boa forma. NÃO
UTILIZAR a MOTOENXADA em
condições de cansaço, de mal-estar ou sob o efeito do álcool e de
outras drogas.
B6 - A TENÇÃO! os gases de escape
são venenosos e asfixiantes. Se inspirados, podem ser mortais. Não ponha
em funcionamento o motor num local
fechado ou com pouca ventilação.
B7 - ATENÇÃO! A gasolina é altamente inflamável.
PERIGO DE QUEIMADURAS E INCÊNDIO.
Em caso de incêndio, utilize um
extintor, se for possível; em alternativa jogue terra sobre as chamas;
caso não se conseguir apagar as
chamas imediatamente, afaste-se
da máquina há pelo menos 20
metros de distância, até ao
apagamento natural.
7.1 - Conservar a gasolina em recipientes especificamente previstos
para este uso.
7.2 - Fazer o abastecimento de gasolina somente ao ar livre; não fume durante o abastecimento.
7.3 - Fazer o abastecimento de gasolina antes de ligar o motor. Nunca retirar
a tampa do reservatório e não fazer o
abastecimento de gasolina enquanto o
motor estiver ligado ou com o motor
quente.
7.4 Caso transborde gasolina, não tente ligar o motor mas deslocar a máquina longe do lugar da gasolina derramada; evitar a causa de faíscas ou fofo,
até o desaparecimento completo dos
vapores de gasolina.
7.5 - Feche o reservatório da gasolina
e os recipientes apertando com segurança as suas tampas.
B8 - Substituir o silenciador, se estiver defeituoso ou danificado.
B9 - Antes do uso controlar sempre
visualmente que as lâminas, os pinos
de bloqueio das lâminas e as lâminas
de cortar não estejam desgastadas ou
danificadas. Substituir as lâminas
danificadas ou desgastadas com lotes
completos para manter o
balanceamento.
FUNCIONAMENTO
C1 - Não ligar o motor em lugar fecha-
do ou limitado onde pode acumular-se
o perigoso gás monóxido de carbono
contido nos gases de escape.
C2 - Operar somente em terrenos iluminados pela luz diurna ou por uma
adequada iluminação artificial.
C3 – Segurar o aparelho sempre com
ambas as mãos.
Assumir uma posição estável e segura
nas pernas.
C4 - Evitar, por quanto possível, de
utilizar a motoenxada em terrenos lamacentos, em terrenos com pedras e
terrenos especialmente duros (congelados).
C5 - Nos declives, apoiar com segurança os pés no terreno.
C6 - Caminhar, nunca correr com a
máquina.
C7 - Em terrenos em pendência, avançar transversalmente, sem nunca proceder para cima ou para baixo.
C8 - Exercitar a máxima precaução
ao trocar de direcção em terrenos com
pendência.
C9 - Evitar de operar em terrenos com
uma pendência excessiva.
C10 - Usar extrema precaução ao inverter a marcha e no puxar a
motoenxada para trás.
C11 - Parar o motor (e de seguida as
lâminas) quando a motoenxada
deve atravessar um terreno diverso
57

P
MANUAL DE INSTRUÇÕES DA MOTOENXADA
do terreno a trabalhar e quando é
transportada para e da área de trabalho.
C12 - Não modificar as regulações
do motor, nem violar, para aumentar as rotações do motor.
C13 - Ao colocar em função o motor, prestar atenção seguindo as
instruções e mantendo os pés bem
afastados das lâminas.
C14 - Não colocar as mãos ou os
pés em proximidade ou abaixo das
partes rotatórias.
C15 - Nunca elevar e não transportar a máquina enquanto o motor
estiver ligado.
C16 - Parar o motor e desligar o
cabo da vela:
C17 - Antes de efectuar a limpeza, a
manutenção ou a inspecção, certifiquese que as lâminas e todas as outras
partes em movimento estejam totalmente paradas. Desligar o cabo da vela e
afastá-lo da mesma, de modo a evitar
uma ligação acidental.
C18 - Quando se bate um objecto estranho, parar o motor, desligar o cabo da
vela, inspeccionar cuidadosamente as
lâminas na busca de eventuais danos.
Mandar reparar os danos evidenciados antes de ligar o motor; dirija-se a
um centro de assistência especializado.
C19 - Sempre que a máquina apresentasse vibrações anormais, parar o
motor e procurar imediatamente a causa das vibrações. De norma, as vibrações indicam a presença de um problema.
C20 - Parar o motor:
20.1 T odas as vezes que se abando-
na a motoenxada.
20.2 Antes de cada abastecimento de
gasolina.
20.3 Antes de regular a altura da lâmi-
na (esperar até que as lâminas tenha parado).
C21 - Antes de elevar ou abaixar a
roda.
C22 - Antes de limpar ou retirar o
material das lâminas.
C23 - Colocar o acelerador ao mínimo durante o desligamento do motor e fechar a torneira da gasolina
(se previsto) depois da parada do
motor.
C24 - Use a máquina com
temperaturas superiores aos 5 °C,
de modo que o terreno seja totalmente descongelado; evite o uso
com terrenos muito secos e
compactos, porque resultariam
particularmente duros.
MANUTENÇÃO E DEPÓSITO
D1 - Manter bem apertados todos
os parafusos e porcas, de modo
que a máquina esteja em boas condições de funcionamento.
D2 - Nunca repor a motoenxada em
lugar fechado, deixando gasolina no
reservatório, considerando que os vapores de gasolina podem atingir uma
chama ou uma fonte de faíscas.
D3 - Esperar que o motor se resfrie
antes de repor a máquina num espaço
fechado.
D4 – Com a finalidade de reduzir o
risco de incêndio manter o motor, o
silenciador, limpos de grama, folhas ou
excesso de graxa.
D5 - Por razões de segurança substituir as partes desgastadas ou
danificadas. Usar somente peças de
reposição originais. Peças de reposição produzidas por outros fabricantes
poderiam adaptar-se irregularmente e
causar danos e perigos.
D6 - No caso em que seja necessário
58

MANUAL DE INSTRUÇÕES DA MOTOENXADA
P
esvaziar o reservatório efectuar a
operação ao ar livre.
D7 - Verifique ou mande verificar por
um centro de assistência a intervalos regulares, o aperto das lâminas
e dos parafusos de suporte do motor.
D8 - As lâminas da motoenxada são
cortantes e podem provocar cortes
na epiderme. É necessário adoptar
as apropriadas precauções quando
se trabalha em proximidade ou nas
lâminas.
3. DESCRIÇÕES DAS PARTES DA
MÁQUINA
DESCRIÇÃO (Fig.1)
A) Alavanca de comando de rotação das l
âminas.
B) Registo do cabo de comando das lâminas
C) Alavanca do acelerador.
D) Botões de bloqueio dos semi-manípulos
E) Pega da corda de arranque
F) Tampa do reservatório de combustível
G) Tampa de abastecimento do óleo do motor
H) Arrancador
I) Capuz da vela
L) Silenciador
M) Motor de explosão
N) Cárter de protecção das lâminas
O) Lâmina de profundidade de trabalho
P) Lâminas
Q) Redutor
R) Roda para o transporte
S) Discos fresas (somente TL 60)
B) SEMI-MANÍPULOS
Introduzir na chapa porta-manípulos os dois
semi-manípulos (5-6) e fixá-los com os parafusos (8) e os botões (7), prestando atenção a
interpor o disco (3).
C) BARRA PARA A REGULAÇÃO DE
PROFUNDIDADE DE TRABALHO
Fixar a barra (9) na sede da estrutura, interpor
a anilha (10) e fixar o todo com a cavilha de
segurança (11).
5. COLOCAÇÃO EM FUNÇÃO
ATENÇÃO !!
Este motor é expedido sem óleo.
NÃO LIGAR antes de ter enchido o
reservatório do óleo.
NÃO SUPERAR O NÍVEL MÁXIMO.
ATENÇÃO !!
Antes de colocar em função, consultar o anexo manual do produtor do motor.
1) Preparar o combustível e fazer o
abastecimento somente ao ar livre.
2) Conservar o combustível num recipiente previsto para este uso e com a
tampa bem fechada.
4. MONTAGEM (FIG.2)
A) - CHAPA SEMI-MANÍPULO
Montar a chapa de fixação do semi-manípulo
(1) no chassis da motoenxada, utilizando os 4
parafusos (2) e bloquear tudo com as porcas
(4).
6. ARRANQUE E P ARAGEM
ATENÇÃO! Cumprir com atenção os
avisos contidos no precedente Cap.
2 PRECAUÇÕES FUNDAMENTAIS DE SEGURANÇA.
59

P
MANUAL DE INSTRUÇÕES DA MOTOENXADA
INSTRUÇÕES PARA OS MOTORES COM COMANDO DE AR NA ALAVANCA DO ACELERADOR (Fig.3)
A alavanca controla a velocidade do motor. Para
o arranque a frio a alavanca deve ser colocada
na posição (2).
Um motor quente pode ser ligado na posição MÁ-
XIMO .
As melhores performances da motoenxada se obtêm na posição MÁXIMO .
INSTRUÇÕES PARA OS MOTORES COM
BOMBA (BOLBO) DE COMBUSTÍVEL (Fig.4)
A alavanca controla a velocidade do motor. Para
o arranque a frio levar a alavanca na posição MÁ-
XIMO (2). De seguida premer energicamente para o bolbo da bomba “primer” (fig.11) antes
de ligar o motor. (Além disso, se o motor se bloqueia pela falta de combustível, abastecer o reservatório de combustível e premer a bomba de
alimentação 3 vezes).
Fig. 11
NOTA: Em geral, não e necessário accionar a
bomba quando se liga um motor já quente.
Contudo, em condições climáticas frias, é possível que se deva repetir a operação inicial.
As melhores performances da motoenxada se
obtêm na posição MÁXIMO .
NOTA: Explicações mais detalhadas que
concernem o uso e a manutenção do motor
estão indicadas no manual do fabricante do
motor, em anexo a parte.
Segure o cabo direito com a mão
esquerda, sem premir a alavanca de
comando das fresas; coloque-se lateralmente
à enxada com o corpo assumindo uma posição
estável e longe do grupo das fresas.
Segure a corda de arranque (fig. 5) e puxe-a
até a colocação em movimento.
Deixar funcionar o motor por alguns segundos.
PARAGEM DO MOTOR
1) Para interromper o motor, colocar a alavan-
ca do acelerador (fig. 3-4) na posição (1).
7. UTILIZAÇÃO
COMO UTILIZAR A MOTOENXADA
1) Colocar-se em proximidade do terreno a traba-
lhar.
Controlar que eventuais corpos
estranhos, não sejam presentes no
terreno a trabalhar.
2) Posicione a roda de transporte na posição
“ALTA” (ver a fig. 6 - 1-2-3-4).
3) Ligar o motor. Vide Cap.6.
4) Para ligar a rotação das lâminas, premer a
alavanca de comando das lâminas (fig.7) e levála na posição (2). Ao soltar a alavanca, as lâminas se recuam.
ATENÇÃO!! Tão logo as lâminas
começam a rodar, as
motoenxadas tem tendência a
avançar no terreno.
ATENÇÃO!! No caso em que as
fresas entrem em rotação com a
alavanca livre, não utilize a
máquina, e dirija-se a um centro
de assistência autorizado
60

MANUAL DE INSTRUÇÕES DA MOTOENXADA
P
5) Para regular a velocidade de avanço da lâmina, e portanto a profundidade de trabalho das
lâminas, o operador deve:
- MÁXIMA PROFUNDIDADE DE TRABALHO
Premer nos semi-manípulos para afundar a
lâmina no terreno de modo da diminuir a velocidade de avanço da lâmina (fig.7), e aumentar a profundidade de trabalho.
- MÍNIMA PROFUNDIDADE DE TRABALHO
Diminuir a pressão nos semi-manípulos para
emergir a lâmina do terreno de modo a aumentar o avanço da lâmina (fig.7), e diminuir a
profundidade de trabalho.
8. MANUTENÇÃO
ATENÇÃO!! Desligue o motor e
remover a vela antes de realizar
qualquer manutenção.
ATENÇÃO!! Espere que o motor
esteja totalmente resfriado.
ATENÇÃO!! Utilize as luvas de segurança para qualquer intervenção de montagem e manutenção
nas lâminas.
MOTOR
Vide manual do fabricante em anexo.
VERIFIQUE OS PARAFUSOS E AS PARTES
ROTATÓRIAS
Antes de qualquer uso, controlar que não sejam presentes parafusos ou partes afrouxadas
e que não existam rachaduras ou desgastes
nas lâminas das lâminas.
Substituir as partes danificadas antes do uso.
SUBSTITUIÇÃO DAS LÂMINAS (Fig.9)
Afrouxar a mola e extrair o perno de bloqueio
(1). Extrair a lâmina desenfiando-a pela árvore
(2). Introduzir a nova lâmina, prestando atenção a fazer corresponder os furos de fixação
na árvore e bloquear tudo com o perno e a
mola.
REGISTO DO CABO DE COMANDO DAS LÂMINAS - REGULAÇÃO (Fig.1 part.B)
A operação de regulação e controlo
deve ser realizada por um centro de
assistência autorizado.
Uma regulação errada pode
constituir perigo!
LIMPEZA, TRANSPORTE E ARMAZENAGEM
# Em caso de interrupção de utilização superi-
or a 2 meses, esvaziar o reservatório do combustível.
# Não limpar com líquidos agressivos.
# Conservar o aparelho em lugar seco e segu-
ro não acessível as crianças.
# Em ocasião do transporte, esvaziar o reser-
vatório de combustível.
9. ELIMINAÇÃO
No fim de vida de trabalho da Motoenxada,
dirija-se a um centro de assistência qualificado
para informações relativas à colocação fora de
serviço, desmontagem e eliminação.
61

P
MANUAL DE INSTRUÇÕES DA MOTOENXADA
DADOS TÉCNICOS DA MOTOENXADA
TL 40/N TL 60
Masa (sem combustível) 36 Kg 39 Kg
Largura de fresagem 38 cm 56 cm
Regime máximo de rotação das fresadoras 80 1/min
Vibraçao EN 1033: 1995
UNI EN 709: 1998 5,9 m/s
Nível de potência acústica
EN 1553: 2001 LAcq 80,2 dB (A) - Lmax 98,7 dB (C)
UNI EN 709: 1998 @ 3.000 rpm
Potencia:
BRIGGS & STRA TTON - XC 35 - 450 SERIES
BRIGGS & STRATTON - XLS 50 - 625 SERIES 3,5 kW @ 3.600 rpm
HONDA - GVC 135 2,6 kW @ 3.600 rpm
SANDRIGARDEN 3,5 - 350 2,2 kW @ 3.600 rpm
SANDRIGARDEN 5,5 - 550 OHV 3,3 kW @ 3.600 rpm
2
@ 3.000 rpm
2,5 kW @ 3.600 rpm
note _________________________________
_________________________________________________
____________________________________________________
_________________________________________________
___________________________________________________
___________________________________________________
_________________________________________________
____________________________________________________
_________________________________________________
___________________________________________________
___________________________________________________
_________________________________________________
____________________________________________________
_________________________________________________
___________________________________________________
note _________________________________
_________________________________________________
____________________________________________________
_________________________________________________
___________________________________________________
___________________________________________________
_________________________________________________
____________________________________________________
_________________________________________________
___________________________________________________
___________________________________________________
_________________________________________________
____________________________________________________
_________________________________________________
___________________________________________________
62

MANUAL DE INSTRUÇÕES DA MOTOENXADA
P
note ______________________________
_________________________________________________
____________________________________________________
_________________________________________________
___________________________________________________
___________________________________________________
_________________________________________________
____________________________________________________
_________________________________________________
___________________________________________________
___________________________________________________
_________________________________________________
____________________________________________________
_________________________________________________
___________________________________________________
note ________________________________
_________________________________________________
____________________________________________________
_________________________________________________
___________________________________________________
___________________________________________________
_________________________________________________
____________________________________________________
_________________________________________________
___________________________________________________
___________________________________________________
_________________________________________________
____________________________________________________
_________________________________________________
___________________________________________________
___________________________________________________
_________________________________________________
____________________________________________________
_________________________________________________
___________________________________________________
___________________________________________________
_________________________________________________
____________________________________________________
_________________________________________________
___________________________________________________
___________________________________________________
_________________________________________________
____________________________________________________
_________________________________________________
___________________________________________________
___________________________________________________
_________________________________________________
____________________________________________________
_________________________________________________
___________________________________________________
63

GR
ЕГЧЕЙСЙДЙП ПДЗГЙЩN МПФПУКБРФЙКO
1. УХГЧБСЗФЗСЙБ
БгбрзфЭ РелЬфз, иЭлпхме нб убт ухгчбспэме
рпх ерелЭобфе Энб рспъьн кЮрпх фзт ефбйсЯбт
мбт.
Фп МПФПУКБРФЙКП убт кбфбукехЬуфзке
лбмвЬнпнфбт хрьшз фпхт йучэпнфет
кбнпнйумпэт буцблеЯбт уе иЭмбфб
рспуфбуЯбт фпх кбфбнблщфЮ.
Убхфь фп егчейсЯдйп ресйгсЬцпнфбй кбй
рбспхуйЬжпнфбй ïé лейфпхсгЯет
ухнбсмпльгзузт, чсЮузт кбиют кбй пй
еремвЬуейт ухнфЮсзузт, рпх еЯнбй бнбгкбЯет
гйб íá еобуцблйуфеЯ ç фЭлейб
брпфелеумбфйкьфзфб фпх МПФПУКБРФЙКПХ
óáò.
ГЙБ НБ ДЙЕХКПЛХНИЕЙ З БНБГНЩУЗ
Пй ейкьнет рпх бнбцЭспнфбй уфз
ухнбсмпльгзуз кбй уфзн ресйгсбцЮ фпх
мзчбнЮмбфпт всЯукпнфбй уфзн бсчЮ бхфпэ
фпх цхллбдЯпх.
Гйб нб кбфбуфеЯ рйп еэкплб кбфбнпзфЮ з
чсЮуз фпх мзчбнЮмбфпт, нб ухмвпхлеэеуфе
бхфЭт фйт уелЯдет ьфбн иб дйбвЬжефе фйт пдзгЯет
ухнбсмпльгзузт кбй чсЮузт.
Уфзн ресЯрфщуз рпх фп МПФПУКБРФЙКП
убт брбйфЮуей фечнйкЮ хрпуфЮсйоз Ю
ерйукехЮ, убт рбсбкблпэме нб брехихниеЯфе
уфпн бнфйрсьущрп Ю уе Энб еопхуйпдпфзмЭнп
кЭнфсп фечнйкЮт хрпуфЮсйозт.
2. ВБУЙКЕУ РСПЦХЛБОЕЙУ
БУЦБЛЕЙБУ
ГЕНЙКПЙ КБНПНЕУ
РСПЕЙДПРПЙЗУЕЙУ:
A1 - Фп МПФПУКБРФЙКП рсЭрей
рЬнфб нб чсзуймпрпйеЯфбй ме вЬуз
фйт пдзгЯет фпх кбфбукехбуфЮ
рпх ресйЭчпнфбй убхфь фп
егчейсЯдйп.
A2 - Ç чсЮуз фпх
МПФПУКБРФЙКПХ брбйфеЯ фзн
фЮсзуз фщн кбньнщн буцблеЯбт.
A3 - ¼лпй ьупй чсзуймпрпйпэн фп
МПФПУКБРФЙКП рсЭрей рсюфб
нб дйбвЬжпхн фп егчейсЯдйп пдзгйюн
кбй ухнфЮсзузт êáé нб
еопйкейюнпнфбй рлЮсщт ме фб
чейсйуфЮсйб юуфе нб кЬнпхн ущуфЮ
чсЮуз фзт ухукехЮт.
A3.1 - ЦхлЬофе бхфь фп егчейсЯдйп
гйб меллпнфйкЮ бнбцпсЬ.
A4 - Мзн ерйфсЭрефе фз чсЮуз фпх
МПФПУКБРФЙКПХ уе рбйдйЬ кбй
Ьфпмб рпх ден Эчпхн рлЮсз гнюуз
бхфюн фщн пдзгйюн.
ЕндечпмЭнщт, мрпсеЯ пй еинйкпЯ
кбнпнйумпЯ нб ресйпсЯжпхн фп ьсйп
злйкЯбт фпх чсЮуфз.
КЙНДХНПУ:
A5 - Дюуфе фзн брбйфпэменз
рспупчЮ уфб хлйкЬ рпх
екфйнЬуупнфбй брь фйт цсЭжет.
A6 - Мзн иЭфефе уе кЯнзуз кбй мз
чсзуймпрпйеЯфе фп мпфпукбрфйкь
кпнфЬ уе Ьфпмб, жюб Ю бнфйкеЯменб.
A7 - П чейсйуфЮт еЯнбй хреэихнпт
гйб бфхчЮмбфб Ю кйндэнпхт рпх
ибрбспхуйбуфпэн уе Ьллб Ьфпмб
Ю бнфйкеЯменЬ фпхт.
РСПЕФПЙМБУЙБ:
B1 - ЕрйиещсЮуфе кблЬ фзн
ресйпчЮ уфзн прпЯб укпреэефе нб
чсзуймпрпйЮуефе фп
мпфпукбрфйкь кбй брпмбксэнефе
кЬие бнфйкеЯменп рпх иб
мрпспэуе нб фйнбчфеЯ Ю нб
емрпдЯуей фз лейфпхсгЯб фпх
мзчбнЮмбфпт.
B2 - ЧсзуймпрпйЮуфе фп
МПФПУКБРФЙКП мьнп гйб фп
цсежЬсйумб едЬцпхт чщсЯт
емрьдйб.
64

ЕГЧЕЙСЙДЙП ПДЗГЙЩN МПФПУКБРФЙКO
GR
Мз чсзуймпрпйеЯфе фп мзчЬнзмб гйб
Ьллет дпхлейЭт.
B3 - КбфЬ фз чсЮуз фпх
мзчбнЮмбфпт íá цпсЬфе
ецбсмпуфЬ спэчб, ьчй цбсдйЬ.
ЦпсЬфе РБНФБ рспуфбфехфйкб
рбрпэфуйб кбй мбксэ рбнфельнй
ÐÏÔÅ мз чсзуймпрпйеЯфе фп
мзчЬнзмб ме гхмнЬ рьдйб Ю ме
убндЬлйб.
B4 - Нб цпсЬфе чпнфсЬ гЬнфйб.
B5 - Ï чсЮуфзт ôïõ
мпфпукбрфйкпэ рсЭрей нб еЯнбй уе
кблЮ цхуйкЮ кбфЬуфбуз. ÌÇ
ЧСЗУЙМПРПЙЕЙФЕ ôï
МПФПУКБРФЙКП еЬн еЯуфе
кпхсбумЭнпй, еЬн ден бйуиЬнеуфе
кблЬ Ю хрь фзн ерЮсейб
пйнпрнеэмбфпт Ю нбскщфйкюн.
B6 - РСПУПЧЗ! Фб кбхубЭсйб
еЯнбй дзлзфзсйюдз кбй рспкблпэн
буцхоЯб. ЕЬн кбнеЯт фб бнбрнеэуей
мрпсеЯ нб Эчпхн кбй ибнбфзцьсб
брпфелЭумбфб. Мзн бцЮнефе фп
мпфЭс нб лейфпхсгеЯ гйб рпллЮ юсб
уе клейуфь Ю бнербскют
бесйжьменп чюсп.
B7 - РСПУПЧЗ! З венжЯнз еЯнбй
Ьксщт еэцлекфз.
КЙНДХНПУ ЕГКБХМБФЩН КБЙ
РХСКБГЙБУ.
Уе ресЯрфщуз рхскбгйЬт, бн еЯнбй
ецйкфь, чсзуймпрпйЮуфе Энбн
рхспувеуфЮсб. ЕнбллбкфйкЬ
мрпсеЯфе нб сЯоефе чюмб уфйт
цльгет. Бн ден мрпсеЯфе нб
увЮуефе фйт цльгет бмЭущт,
брпмбксхниеЯфе брь фп мзчЬнзмб
уе брьуфбуз фпхлЬчйуфпн 20
мЭфсщн.
7.1 - ЦхлЬофе фз вежнЯнз уфб ейдйкЬ
дпчеЯб рпх рспвлЭрпнфбй гйбхфЮ
фз чсЮуз.
7.2 - КЬнфе бнецпдйбумь венжЯнзт
мьнп уе бнпйчфь чюсп. Мзн
ЛЕЙФПХСГЙБ
кбрнЯжефе кбфЬ фз дйЬскейб фпх
бнецпдйбумпэ.
7.3 - КЬнфе бнецпдйбумь венжЯнзт
рсйн иЭуефе уе лейфпхсгЯб фп мпфЭс.
РпфЭ мз вгЬжефе фзн фЬрб фпх
сежесвпхЬс кбй мзн кЬнефе
бнецпдйбумь венжЯнзт ьфбн фп
мпфЭс лейфпхсгеЯ Ю ьфбн еЯнбй жеуфь.
7.4 Уе ресЯрфщуз дйбсспЮт
венжЯнзт мзн рспурбиЮуефе нб
иЭуефе уе кЯнзуз фп мпфЭс бллЬ
мефбкйнЮуфе фп мзчЬнзмб мбксйЬ
брь фп узмеЯп ьрпх дйЭссехуе
венжЯнз. Брпцэгефе пфйдЮрпфе иб
мрпспэуе нб рспкблЭуей
урйниЮсб Ю цльгб, мЭчсй нб
еобфмйуфпэн енфелют пй бфмпЯ
венжЯнзт.
7.5 - КлеЯуфе фп сежесвпхЬс
венжЯнзт кбй фб дпчеЯб клеЯнпнфбт
уцйчфЬ фйт фЬрет.
B8 - БнфйкбфбуфЮуфе фп уйгбуфЮсб
бн еЯнбй елбффщмбфйкьт Ю бн Эчей
кбфбуфсбцеЯ.
B9 - Рсйн брь фз чсЮуз, нб
ерйиещсеЯфе рЬнфб прфйкЬ фйт
цсЭжет, фб рейсЬкйб емрлпкЮт фщн
цсежюн кбй фб мбчбЯсйб юуфе нб
мзн Эчпхн цибсеЯ Ю кбфбуфсбцеЯ.
БнфйкбфбуфЮуфе фб мбчбЯсйб рпх
Эчпхн цибсеЯ Ю кбфбуфсбцеЯ ме
рлЮсз уеф юуфе нб дйбфзсеЯфбй з
йупсспрЯб фпхт.
C1 - Мзн бцЮнефе нб лейфпхсгеЯ п
кйнзфЮсбт уе клейуфь Ю мйксь
чюсп üðïõ мрпсеЯ нб
ухуущсехфеЯ фп ерйкЯндхнп
мпнпоеЯдйп фпх Ьнисбкб рпх
ресйЭчефбй уфб кбхубЭсйб.
C2 - Нб чсзуймпрпйеЯфе фп
мзчЬнзмб уе едЬцз ьрпх хрЬсчей
цхуйкь цщт Ю п ербскЮт фечнзфьт
цщфйумьт.
65

GR
ЕГЧЕЙСЙДЙП ПДЗГЙЩN МПФПУКБРФЙКO
C3 - Нб ксбфЬфе фп мзчЬнзмб
рЬнфб кбй ме фб дэп чЭсйб.
З иЭуз убт нб еЯнбй рЬнфб уфбиесЮ
кбй буцблЮт кбй нб уфзсЯжеуфе кбй
уфб дэп рьдйб.
C4 - Нб брпцеэгефе, кбфЬ фп
дхнбфь, ôç чсЮуз фпх
мпфпукбрфйкпэ уе лбурюдз
едЬцз, уе едЬцз ме рпллЭт рЭфсет
кбй уе йдйбйфЭсщт уклзсЬ едЬцз.
C5 - Уфйт рлбгйЭт нб рбфЬфе ме
буцЬлейб фб рьдйб убт уфп
Эдбцпт.
C6 - Нб ресрбфЬфе кбй нб мзн
фсЭчефе рпфЭ ме фп мзчЬнзмб.
C7 - Уфйт рлбгйЭт нб рспчщсеЯфе
егкЬсуйб, чщсЯт нб рзгбЯнефе рпфЭ
рспт фб ерЬнщ Ю рспт фб кЬфщ.
C8 - Нб рспуЭчефе рплэ ьфбн
бллЬжефе кбфеэихнуз уфйт рлбгйЭт.
C9 - Нб брпцеэгефе фз чсЮуз фпх
мзчбнЮмбфпт уе едЬцз ме мегЬлз
клЯуз.
C10 - Нб рспуЭчефе йдйбЯфесб ьфбн
бллЬжефе кбфеэихнуз кбй ьфбн
фсбвЬфе фп мпфпукбрфйкь рспт фб
рЯущ.
C11 - ¼фбн фп мпфпукбрфйкь
рсЭрей нб ресЬуей уе Эдбцпт
дйбцпсефйкь брь бхфь уфп прпЯп
всЯукеуфе кбй ьфбн рсЭрей нб фп
мефбцЭсефе уфзн ресйпчЮ ьрпх иб
фп чсзуймпрпйЮуефе, нб уфбмбфЬфе
фп мпфЭс (кбй кбфЬ ухнЭрейб кбй
фйт цсЭжет).
C12 - Мзн бллЬжефе фйт схимЯуейт
фпх мпфЭс пэфе нб кЬнефе йдйбЯфесет
еремвЬуейт гйб нб бхоЮуефе фйт
уфспцЭт фпх мпфЭс.
C13 - ¼фбн иЭфефе уе лейфпхсгЯб фп
мпфЭс нб дЯнефе йдйбЯфесз рспупчЮ,
нб бкплпхиеЯфе фйт пдзгЯет кбй нб
ксбфЬфе фб рьдйб убт мбксйЬ брь
фйт цсЭжет.
C14 - Мзн вЬжефе фб чЭсйб Ю фб
рьдйб кпнфЬ Ю брь кЬфщ брь фб
ресйуфсецьменб фмЮмбфб.
C15 - Мзн бнхшюнефе рпфЭ пэфе
нб мефбцЭсефе фп мзчЬнзмб ьфбн фп
мпфЭс всЯукефбй уе кЯнзуз.
C16 - УфбмбфЮуфе фп мпфЭс кбй
брпухндЭуфе фп кблюдйп брь
фп мрпхжЯ:
C17 - Рсйн кЬнефе кбибсйумь,
ухнфЮсзуз Ю ерйиеюсзуз фпх
мзчбнЮмбфпт, нб вевбйюнеуфе ьфй
пй цсЭжет кбй фб Ьллб кйнпэменб
фмЮмбфб Эчпхн уфбмбфЮуей
енфелют. БрпухндЭуфе фп кблюдйп
брь фп мрпхжЯ кбй фпрпиефЮуфе фп
мбксйЬ брь фп Ядйп, юуфе нб
брпцехчиеЯ фхчбЯб еккЯнзуз.
C18 - ЕЬн чфхрЮуефе Энб оЭнп
уюмб, уфбмбфЮуфе фп мпфЭс,
брпухндЭуфе фп кблюдйп брь фп
мрпхжЯ кбй елЭгофе рспуекфйкЬ фйт
цсЭжет гйб нб деЯфе еЬн Эчей
рспклзиеЯ кЬрпйб влЬвз.
РзгбЯнефе гйб ерйукехЮ фхчьн
влЬвзт рсн обнбиЭуефе уе кЯнзуз
фп мпфЭс, брехихниеЯфе уе Энб
еоейдйкехмЭнп кЭнфсп фечнйкЮт
хрпуфЮсйозт.
C19 - ЕЬн фп мзчЬнзмб
рбспхуйЬжей ресЯесгпхт
ксбдбумпэт, уфбмбфЮуфе фп
мпфЭс кбй бнбжзфЮуфе бмЭущт фзн
бйфЯб фщн ксбдбумюн. УхнЮищт, пй
ксбдбумпЯ хрпдейкнэпхн ьфй
хрЬсчей кЬрпйп рсьвлзмб.
C20 - УфбмбфЮуфе фп мпфЭс:
20.1 КЬие цпсЬ рпх егкбфблеЯрефе
фп мпфпукбрфйкь.
20.2 Рсйн брь кЬие бнецпдйбумь
венжЯнзт.
20.3 Рсйн схимЯуефе фп эшпт фпх
мбчбйсйпэ (хнЯпх) (ресймЭнефе
мЭчсй нб уфбмбфЮупхн пй цсЭжет).
66

ЕГЧЕЙСЙДЙП ПДЗГЙЩN МПФПУКБРФЙКO
GR
C21 - Рсйн бнхшюуефе Ю
кбфевЬуефе фпн фспчь.
C22 - Рсйн кбибсЯуефе Ю вгЬлефе
фб дйЬцпсб хлйкЬ брь фйт цсЭжет.
C23 - ¼фбн рсЭрей нб увЮуефе фп
мпфЭс, вЬлфе фп гкЬжй уфп селбнфЯ
кбй клеЯуфе фз уфсьцйггб венжЯнзт
(еЬн рспвлЭрефбй) мефЬ фп
уфбмЬфзмб фпх мпфЭс.
C24 - ЧсзуймпрпйЮуфе фп мзчЬнзмб
ме иесмпксбуЯб Ьнщ фщн 5 °C, Эфуй
юуфе фп Эдбцпт нб мзн еЯнбй
рбгщмЭнп, брпцэгефе фз чсЮуз уе
рплэ оесЬ кбй ухмрбгЮ едЬцз,
гйбфЯ брпдейнэпнфбй еобйсефйкЬ
уклзсЬ.
УХНФЗСЗУЗ КБЙ БРПИЗКЕХУЗ
D1 - Нб цспнфЯжефе нб еЯнбй кблЬ
уцйгмЭнб ьлб фб рбоймЬдйб кбй пй
вЯдет Эфуй юуфе фп мзчЬнзмб нб
еЯнбй уе кблЮ кбфЬуфбуз
лейфпхсгЯбт
D2 - Мзн брпизкеэефе рпфЭ фп
мпфпукбрфйкь уе клейуфь чюсп
бцЮнпнфбт венжЯнз уфп
сежесвпхЬс, дедпмЭнпх ьфй пй
бфмпЯ фзт венжЯнзт мрпсеЯ нб
цфЬупхн уе мйб цльгб Ю уе мЯб
рзгЮ урйниЮсщн.
D3 - Рсйн брпизкеэуефе фп
мзчЬнзмб уе клейуфь чюсп,
ресймЭнефе нб ксхюуей фп мпфЭс.
D4 - Гйб нб мейщиеЯ п кЯндхнпт
рськлзузт рхскбгйЬт, цспнфЯуфе
юуфе фп мпфЭс кбй п уйгбуфЮсбт
нб еЯнбй кбибспЯ чщсЯт чьсфб,
цэллб Ю хресвплйкь гсЬуп.
D5 - Гйб льгпхт буцблеЯбт рсЭрей
нб бллЬжефе фб фмЮмбфб рпх Эчпхн
цибсеЯ Ю рпх Эчпхн кбфбуфсбцеЯ.
Нб чсзуймпрпйеЯфе мьнп гнЮуйб
бнфбллбкфйкЬ. Фб бнфбллбкфйкЬ
рпх кбфбукехЬжпнфбй брь Ьллпхт
кбфбукехбуфЭт мрпсеЯ нб мзн
рспубсмьжпхн кблЬ кбй нб
рспкблЭупхн жзмйЭт Ю нб еЯнбй
ерйкЯндхнб.
D6 - Уфзн ресЯрфщуз рпх иЭлефе
нб бдейЬуефе фп сежесвпхЬс кЬнфе
фп уе еощфесйкь чюсп.
D7 - Нб ерйиещсеЯфе Ю нб жзфЬфе нб
гЯнефбй Элегчпт, уе фбкфйкЬ
дйбуфЮмбфб, брь Энб кЭнфсп
фечнйкЮт хрпуфЮсйозт, гйб нб
ерйвевбйюнефбй ьфй пй цсЭжет кбй
пй вЯдет уфесЭщузт фпх мпфЭс еЯнбй
кблЬ уцйгмЭнет.
D8 - Пй цсЭжет фпх мпфпукбрфйкпэ
еЯнбй кпцфесЭт кбй мрпсеЯ нб
рспкблЭупхн кпшЯмбфб уфп дЭсмб.
РсЭрей нб хйпиефеЯфе фйт
брбсбЯфзфет рспцхлЬоейт ьфбн
есгЬжеуфе кпнфЬ Ю ме фйт цсЭжет.
3. РЕСЙГСБЦЗ ФМЗМБФЩН
ФПХ МЗЧБНЗМБФПУ
РЕСЙГСБЦЗ (ейк.1)
A) Мпчльт елЭгчпх ресйуфспцЮт фщн
цсежюн.
B) Сегпхлбдьспт кблщдЯпх кЯнзузт
цсежюн.
C) Мпчльт гкбжйпэ.
D) Рьмплб емрлпкЮт чейсплбвюн
E) ЛбвЮ фпх учпйнйпэ еккЯнзузт
F) ФЬрб сежесвпхЬс кбхуЯмпх
G) ФЬрб гйб ухмрлЮсщмб лбдйпэ уфп
мпфЭс
H) ЕккйнзфЮсбт
I) Кпхкпэлб мрпхжЯ
L) УйгбуфЮсбт
M) МпфЭс еущфесйкЮт кбэузт
N) Рспуфбфехфйкь кЬсфет цсежюн
O) МбчбЯсй (хнЯ) гйб есгбуЯб уе вЬипт
P) ЦсЭжет
Q) МейщфЮсбт
R) Фспчьт мефбцпсЬт
S) ДЯукпй цсежюн (мьнп TL 60)
67

GR
ЕГЧЕЙСЙДЙП ПДЗГЙЩN МПФПУКБРФЙКO
4. УХНБСМПЛПГЗУЗ (ЕÉÊ.2)
A) - РЛБКБ ЧЕЙСПЛБВЩН
ФпрпиефЮуфе фзн рлЬкб уфесЭщузт фщн
чейсплбвюн (1) уфп убуЯ фпх мпфпукбрфйкпэ,
ме фйт 4 вЯдет (2) кбй уфесеюуфе ме фб рбоймЬдйб
(4).
B) ЧЕЙСПЛБВЕУ
ЕйубгЬгефе уфзн рлЬкб фйт дэп чейсплбвЭт (5-
6) кбй уфесеюуфе ме фйт вЯдет (8) кбй фб рьмплб
(7), цспнфЯжпнфбт нб вЬлефе ендйЬмеуб фзн
рлЬкб (3).
C) МРБСБ СХИМЙУЗУ ФПХ ВБИПХУ
ЛЕЙФПХСГЙБУ
Уфесеюуфе фз мрЬсб (9) уфзн Эдсб фпх
рлбйуЯпх, вЬлфе бнЬмеуб фз спдЭлб (10)
кбй уфесеюуфе фб ме фзн кпрЯлйб (11)
5. ИЕУЗ УЕ ЛЕЙФПХСГЙБ
РСПУПЧЗ !!
Фп мпфЭс бхфь брпуфЭллефбй
чщсЯт нб ресйЭчей лЬдй.
МЗН ИЕФЕФЕ УЕ КЙНЗУЗ рсйн
гемЯуефе фп сежесвпхЬс ме лЬдй.
МЗН ОЕРЕСНБФЕ ФЗ МЕГЙУФЗ
УФБИМЗ.
РСПУПЧЗ !!
рпх нб рсппсЯжефбй гйбхфЮ фз чсЮуз
кбй ме фп кбрЬкй кблЬ уцйгмЭнп.
6. ЕНБСОЗ КБЙ РБХУЗ
ЛЕЙФПХСГЙБУ
РСПУПЧЗ! ФзсеЯфе рспуекфйкЬ фйт
рспейдпрпйЮуейт рпх
бнбцЭспнфбй уфп рспзгпэменп кецЬлбйп
2 ВБУЙКЕУ РСПЦХЛБОЕЙУ БУЦБЛЕЙБУ.
ПДЗГЙЕУ ГЙБ КЙНЗФЗСЕУ МЕ ФУПК УФП
МПЧЛП ГКБЖЙПХ (Ейк.3)
Ме фп мпчль мрпсеЯфе нб елЭгоефе фзн фбчэфзфб
фпх мпфЭс.Гйб фзн еккЯнзуз ьфбн фп мпфЭс еЯнбй
ксэп п мпчльт рсЭрей нб фпрпиефзиеЯ уфз иЭуз
(2).
¼фбн фп мпфЭс еЯнбй жеуфь мрпсеЯ нб феиеЯ уе
кЯнзуз еню всЯукефбй уфз иЭуз МЕГЙУФП .
Пй кблэфесет ерйдьуейт фпх мпфпукбрфйкпэ
ерйфхгчЬнпнфбй
ьфбн всЯукефбй уфз иЭуз МЕГЙУФП .
ПДЗГЙЕУ ГЙБ КЙНЗФЗСЕУ МЕ ЦПХУКБ
ШЕКБУМПХ КБХУЙМПХ (Ейк.4)
Ме фп мпчль мрпсеЯфе нб елЭгефе фзн фбчэфзфб
фпх мпфЭс. Гйб еккЯнзуз ьфбн фп мпфЭс еЯнбй ксэп
вЬлфе фп мпчль уфз иЭуз МЕГЙУФП
(2). Уфз ухнЭчейб рйЭуфе дхнбфЬ фз цпэукб
primer (ейк.11) рсйн иЭуефе уе кЯнзуз фп
мпфЭс. (ЕрЯузт, еЬн фп мпфЭс уфбмбфЮуей льгщ
Эллейшзт кбхуЯмпх, гемЯуфе фп сежесвпхЬс ме
кбэуймп кбй рйЭуфе фз цпэукб фспцпдпуЯбт 3
цпсЭт).
68
Рсйн иЭуефе уе кЯнзуз,
ухмвпхлехфеЯфе фп ухнпдехфйкь
егчейсЯдйп фпх кбфбукехбуфЮ фпх
мпфЭс.
1) РспефпймЬуфе фп кбэуймп кбй
кЬнфе бнецпдйбумь мьнп уе
еощфесйкь чюсп.
2) ЦхлЬофе фп кбэуймп уе дпчеЯп
åéê. 11

ЕГЧЕЙСЙДЙП ПДЗГЙЩN МПФПУКБРФЙКO
GR
УЗМЕЙЩУЗ: УхнЮищт ден еЯнбй бнбгкбЯп нб
рйЭуефе фз цпэукб ьфбн фп мпфЭс еЯнбй жеуфь.
Щуфьуп, ме ксэет клймбфйкЭт ухниЮкет, мрпсеЯ
нб чсейбуфеЯ нб ербнблЬвефе фзн бсчйкЮ
дйбдйкбуЯб.
Пй кблэфесет ерйдьуейт фпх мпфпукбрфйкпэ
ерйфхгчЬнпнфбй уфз иЭуз МЕГЙУФП .
УЗМЕЙЩУЗ: Ресйууьфесет
ереозгЮуейт учефйкЬ ме фз чсЮуз кбй
фз ухнфЮсзуз фпх мпфЭс бнбцЭспнфбй уфп
егчейсЯдйп фпх кбфбукехбуфЮ, рпх
рспмзиеэефбй оечщсйуфЬ.
РйЬуфе фзн деойЬ сЬвдп пдЮгзузт ме
фп бсйуфесь чЭсй, чщсЯт нб рйЭуефе фп
левйЭ чейсйумпэ фщн цсежюн. РзгбЯнефе уфп
рлЬй фпх укбрфйкпэ ме фп уюмб лбмвЬнпнфбт
мйб уфбиесЮ иЭуз кбй мбксйЬ брь фйт цсЭжет.
РйЬуфе фп учпйнЯ еккЯнзузт (ейк. 5) кбй фсбвЮофе
мЭчсй нб рЬсей мрспуфЬ.
БцЮуфе фп мпфЭс нб лейфпхсгЮуей гйб месйкЬ
дехфесьлерфб.
УФБМБФЗМБ МПФЕС
2) ФпрпиефЮуфе фпн фспчь мефбцпсЬт уфз
èÝóç ХШЗЛП (ВлЭре ейк.6 - 1-2-3-
4).
3) ИЭуфе уе лейфпхсгЯб фп мпфЭсВлЭре Кец. 6.
4) Гйб фзн ресйуфспцЮ фщн цсежюн, рйЭуфе фп
мпчль чейсйумпэ цсежюн (ейк.7) кбй
фпрпиефЮуфе фпн уфз иЭуз (2). БцЮнпнфбт фп
мпчль пй цсЭжет уфбмбфпэн.
РСПУПЧЗ!! Мьлйт бсчЯупхн нб
ресйуфсЭцпнфбй пй цсЭжет, фп
мпфпукбрфйкь феЯней нб кйнеЯфбй
рспт фб емрсьт уфп Эдбцпт.
РСПУПЧЗ!! Бн пй цсЭжет
мрбЯнпхн уе лейфпхсгЯб ме фп
мпчль елеэиесп, мз
чсзуймпрпйеЯфе фп мзчЬнзмб кбй
брехихниеЯфе óå Энб
еопхуйпдпфзмЭнп кЭнфсп
фечнйкЮт хрпуфЮсйозт.
5) Гйб нб схимйуфеЯ з фбчэфзфб кЯнзузт фзт
цсЭжбт, кбфЬ ухнЭрейб кбй фп вЬипт
лейфпхсгЯбт фщн цсежюн, п чейсйуфЮт рсЭрей:
1) Гйб нб дйбкьшефе фз лейфпхсгЯб фпх мпфЭс,
фпрпиефЮуфе фп мпчль гкбжйпэ (ейк.3-4) уфз
иеуз (1).
7. ЧСЗУЗ
РЩУ ИБ ЧСЗУЙМПРПЙЗУЕФЕ ФП
МПФПУКБРФЙКП
1) РзгбЯнефе кпнфЬ уфп Эдбцпт уфп прпЯп
укпреэефе нб есгбуфеЯфе.
ЕлЭгофе бн уфп Эдбцпт рпх
укпреэефе нб цсежЬсефе Эчпхн
меЯней фхчьн оЭнб бнфйкеЯменб.
- МЕГЙУФП ВБИПУ ЛЕЙФПХСГЙБУ
Нб рйЭуей фйт дэп чейсплбвЭт гйб нб вхийуфеЯ
фп мбчбЯсй уфп Эдбцпт юуфе нб ерйвсбдэней
фзн кЯнзуз фзт цсЭжбт (ейк. 7) кбй нб бхоЮуей
фп вЬипт лейфпхсгЯбт.
- ЕЛБЧЙУФП ВБИПУ ЛЕЙФПХСГЙБУ
нб мейюуей фзн рЯеуз уфб чеспэлйб гйб нб вгей
фп мбчбЯсй брь фп Эдбцпт юуфе нб бхозиеЯ з
фбчэфзфб кЯнзузт фзт цсЭжбт (ейк. 7) кбй нб
мейщиеЯ фп вЬипт лейфпхсгЯбт.
69

GR
ЕГЧЕЙСЙДЙП ПДЗГЙЩN МПФПУКБРФЙКO
8. УХНФЗСЗУЗ
РСПУПЧЗ!! Ðñéí брь
прпйбдЮрпфе ухнфЮсзуз,
увЮуфе фп мпфЭс кбй вгЬлфе фп
мрпхжЯ.
РСПУПЧЗ!! РесймЭнефе Эщт
ьфпх ксхюуей енфелют фп мпфЭс.
РСПУПЧЗ!! Нб цпсЬфе фб
гЬнфйб буцблеЯбт кЬие цпсЬ
рпх кЬнефе мйб ерЭмвбуз
ухнбсмпльгзузт кбй
ухнфЮсзузт уфйт цсЭжет.
МПФЕС
ВлЭре фп рспмзиехьменп егчейсЯдйп фпх
кбфбукехбуфЮ.
ЕЛЕГЧПУ УФЙУ ВЙДЕУ КБЙ УФБ
РЕСЙУФСЕЦПМЕНБ ФМЗМБФБ
Рсйн брь кЬие чсЮуз нб елЭгчефе кбй нб
уцЯггефе фхчьн вЯдет Ю еобсфЮмбфб оеуцйгмЭнб
кбй нб елЭгчефе бн хрЬсчпхн сщгмЭт Ю ципсЭт
уфб мбчбЯсйб фщн цсежюн.
БнфйкбфбуфЮуфе фб фмЮмбфб рпх Эчпхн цибсеЯ
рсйн брь фз чсЮуз.
КБИБСЙУМПУ МЕФБЦПСБ КБЙ
БРПИЗКЕХУЗ
# Уе ресЯрфщуз рпх ден чсзуймпрпйеЯфе фп
мзчЬнзмб гйб ресйууьфесп брь 2 мЮнет,
бдейЬуфе фп сежесвпхЬс кбхуЯмпх.
# Мзн кбибсЯжефе фп мзчЬнзмб ме дйбвсщфйкЬ
хгсЬ.
# ЦхлЬофе фп мзчЬнзмб уе уфегнь кбй буцблЮ
чюсп ьрпх ден Эчпхн рсьувбуз фб рбйдйЬ.
# ЕЬн рсЭрей нб фп мефбцЭсефе, бдейЬуфе фп
сежесвпхЬс кбхуЯмпх.
9. ДЙБИЕУЗ
Уфп фЭлпт фзт дйЬскейб жщЮт фпх
Мпфпукбрфйкпэ убт, брехихниеЯфе уе Энб
еопхуйпдпфзмЭнп кЭнфсп фечнйкЮт хрпуфЮсйозт
рспкеймЭнпх нб убт рбсЭчей рлзспцпсЯет
учефйкЬ ме фзн иЭуз екфьт лейфпхсгЯбт, фзн
бчсЮуфехуз кбй фз дйЬиеуЮ фпх.
БНФЙКБФБУФБУЗ ЦСЕЖЩН (Ейк.9)
ОеуцЯофе фп елбфЮсйп кбй бцбйсЭуфе фпн реЯсп
емрлпкЮт (1). БцбйсЭуфе фз цсЭжб фсбвюнфбт
фзн Эощ брь фпн Ьопнб (2). ФпрпиефЮуфе фзн
кбйнпэсгйб цсЭжб, рспуЭчпнфбт юуфе нб
рспубсмьжпхн пй прЭт уфесЭщузт уфпн Ьопнб
кбй мрлпкЬсефе ме фпн реЯсп кбй фп елбфЮсйп.
СЕГПХЛБДПСПУ УХСМБФПУЧПЙНПХ
ЦСЕЖЩН - СХИМЙУЗ
З сэимйуз кбй п Элегчпт рсЭрей нб
гЯнефбй брь Энб еопхуйпдпфзмЭнп
кЭнфсп фечнйкЮт хрпуфЮсйозт.
Фхчьн лбнибумЭнз сэимйуз
мрпсеЯ нб брпфелЭуей бйфЯб
кйндэнпх!
70
(Eйк.1 мЭспт B)

ЕГЧЕЙСЙДЙП ПДЗГЙЩN МПФПУКБРФЙКO
ФЕЧНЙКБ УФПЙЧЕЙБ МПФПУКБРФЙKOY
TL 40/N TL 60
ÌÜæá (ЧщсЯт кбэуймп) 36 Kg 39 Kg
РлЬфпт цсежбсЯумбфпт
МЭгйуфп ерЯредп 38 cm 56 cm
ресйуфспцЮт цсежюн 80 1/min
КсбдбумпЯ уфйт чейсплбвЭт
EN 1033: 1995 UNI EN 709: 1998 5,9 m/s
УфЬимз зчзфйкЮт рЯеузт
EN 1553: 2001 LAcq 80,2 dB (A) - Lmax 98,7 d B (C )
UNI EN 709: 1998 @ 3.000 rpm
Йучэт :
BRIGGS & STRA TTON - XC 35 - 450 SERIES
BRIGGS & STRATTON - XLS 50 - 625 SERIES 3,5 kW @ 3.600 rpm
HONDA - GVC 135 2,6 kW @ 3.600 rpm
SANDRIGARDEN 3,5 - 350 2,2 kW @ 3. 600 r pm
SANDRIGARDEN 5,5 - 550 OHV 3,3 kW @ 3.600 rpm
2
@ 3.000 rpm
2,5 kW @ 3 .60 0 r pm
GR
note ______________________________
_________________________________________________
____________________________________________________
_________________________________________________
___________________________________________________
___________________________________________________
_________________________________________________
____________________________________________________
_________________________________________________
___________________________________________________
___________________________________________________
_________________________________________________
____________________________________________________
note ________________________________
_________________________________________________
____________________________________________________
_________________________________________________
___________________________________________________
___________________________________________________
_________________________________________________
____________________________________________________
_________________________________________________
___________________________________________________
___________________________________________________
_________________________________________________
____________________________________________________
71

La SANDRIGARDEN si riserva il diritto di apportare modifiche
sia tecniche che estetiche al prodotto e al presente manuale senza preavviso.
SANDRIGARDEN reserves the right to make
any technical or stylistic modifications to the product or this manual without prior no.
Die Fa. SANDRIGARDEN behält sich das Recht vor, jederzeit und ohne Vorankündigung
technische und ästhetische Änderungen an Ihren Produkten vorzunehmen.
SANDRIGARDEN se réserve le droit d’apporter toute modification
technique ou esthétique sans avertir au préalable.
De firma SANDRIGARDEN behoudt zich het recht voor onaangekondigd zowel
technische wijzigingen als esthetische veranderingen aan te brengen.
SANDRIGARDEN s.r.l. se reserva el derecho de hacer modificaciones
técnicas y estéticas sin aviso previo.
A Sandrigarden s.r.l. reserva-se o direito de produzir modificações
quer técnicas quer estéticas sem aviso prévio.
Sandrigarden z o.o. rezerwuje sobie do wprowadzania zmiana
technicznych jak i estetycznych bez uprzedzenia.
Sede legale: via Manzoni, 22 - 36027 - ROSÀ (VI) - ITALIA
Uffici: via Verdi, 13 - 23847 - MOLTENO (LC) - ITALIA Tel. 031/3570411 - Fax.031/35704435
72
 Loading...