

Page 1
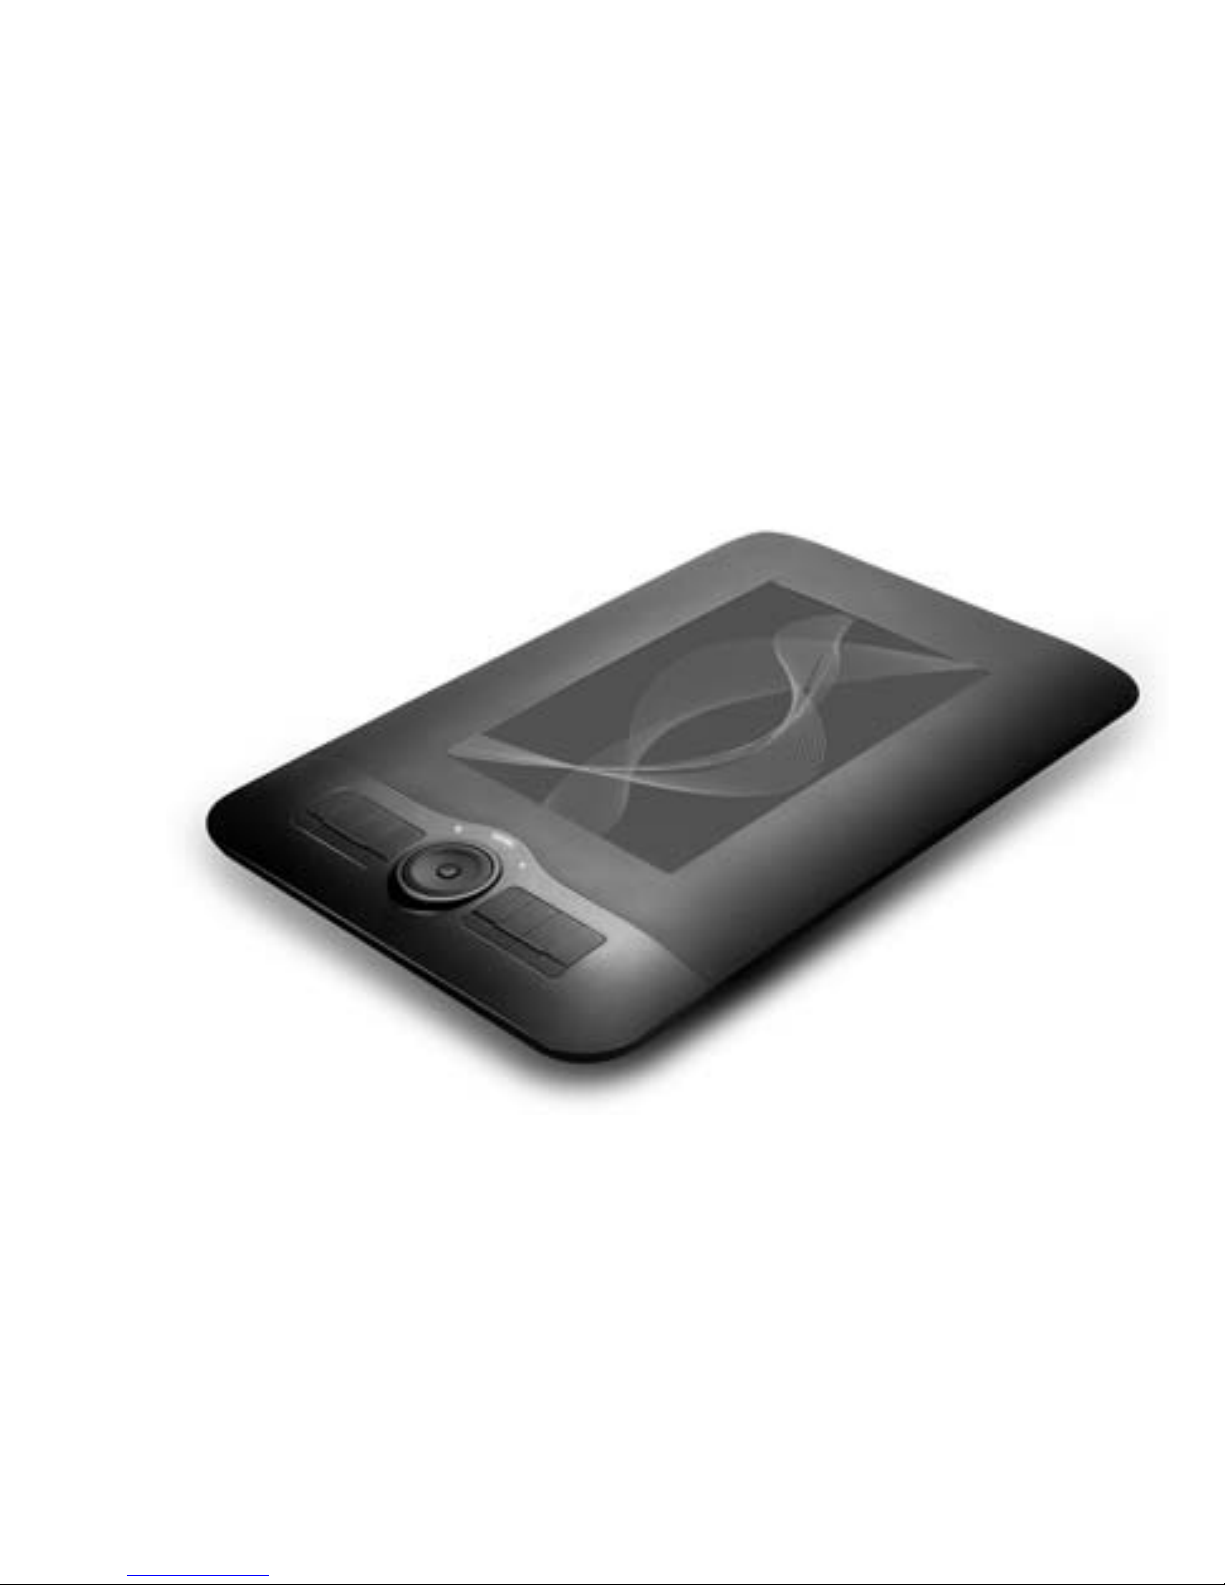
Venus Tablet
Quick Start Guide
Page 2
Venus Tablet Quick Setup Guide
Page 2
Welcome
Thank you very much for purchasing this V enus Tablet. Venus Tablet is a 9.5”
(24cm) large, professional graphic tablet. Advanced functions like batteryless pen with tilt sensitivity, 4000 Lpi resolution or the ergonomic design for
left and right handlers makes it best for illustrating, sketching or photo
editing. Venus Tablet offers a complete package for private and professional
users. It’s designed for graphic designer and fulfills the demands like photo
editing, illustration, page layout and art drawing. Both right hand usage and
left hand usage are available to use it.
Before you start enjoying this product it’s recommend to read this manual
and follow the instructions step by step to get the best result with y our new
graphic tablet.
Safety Notice
1. Do not drop, puncture, roll or disassemble the tablet.
2. Avoid all contact with water, and dry hands before using.
3. Do not expose to high temperature or leave in direct sunlight.
4. Use the Tablet with care. Make sure there are no shar p things scratch the
Tablet except the tip of pen. Keep away things made of metal.
5. For your own safety, avoid using the Tablet when there is a storm or
lightning.
6. Use only the accessories supplied by the manufacturer.
7. Keep the Tablet out of the reach of infants.
If the time arises to throw away your product, please recycle all the
components possible.
Batteries and rechargeable batteries are not to be disposed in your domestic
waste! Please recycle them at your local recycling point. Together we can
help to protect the environment.
Page 3
Venus Tablet Quick Setup Guide
Page 3
Content
Package Content …………………………………………………………………Page 3
System Requirements…………………………………………………………..Page 4
Driver Installation ………………………………………………………… ……Page 4
Connect the Tablet ……………………………………………………………..Page 4/5
Knowing you Tablet …………………………………………………………….Page 5
Knowing the Pen ………………………………………………………………..Page 6/7
The Control Panel ………………………………………………………………Page 7-9
Software Installation……………………………………………………………Page 10
Specifications … …………………………………………………………………..Page11
Warranty ……………………………………………………………………………Page 11
Package Content
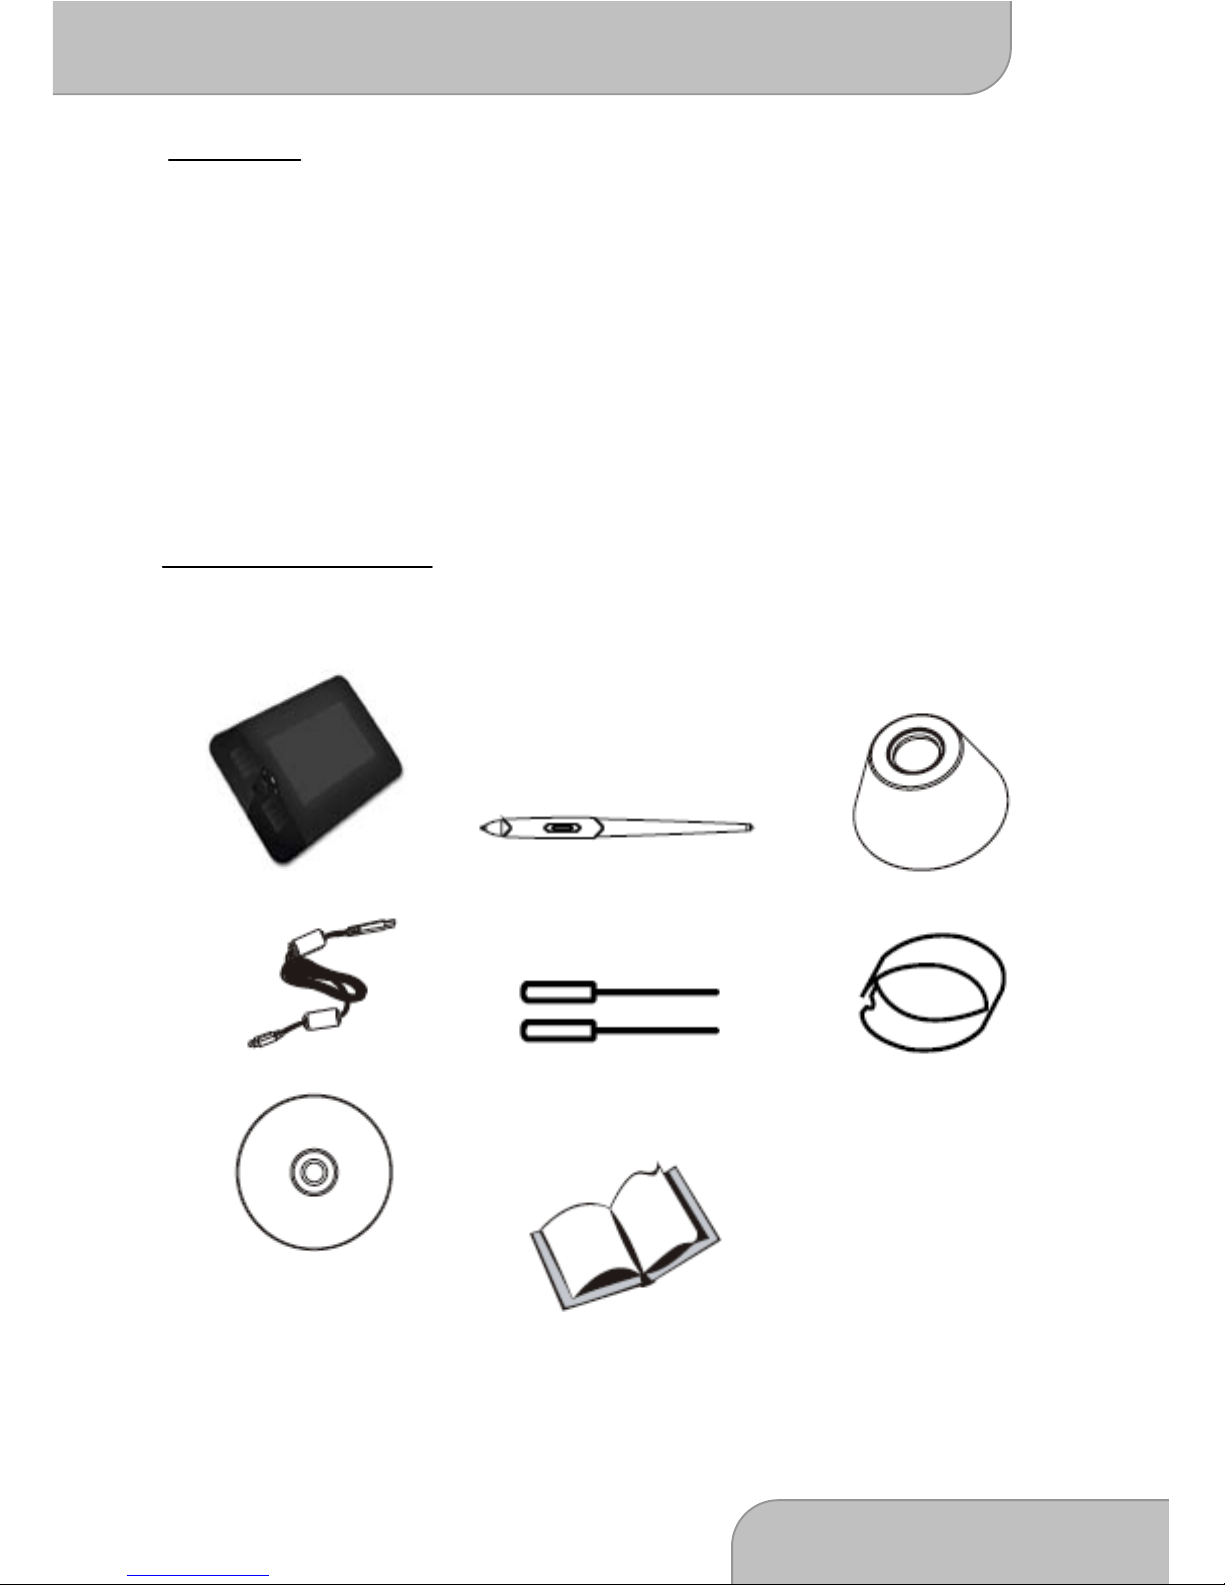
Please check if the following items are located in your packaging:
Venus Tablet
Pen
Pen Holder
2,5m USB cable
2x extra pen tips
Pen tip remover
3x CD for Windows,
MAC & Photoshop
Elements
This Quick Setup Guide
Please contact your dealer immediately if package is incomplete .
Page 4

Venus Tablet Quick Setup Guide
Page 4
System Requirements
For successf ul use and installation of your tablet the following minimum
system specifications are required:
Windows PC
Optical DVD drive
Free USB Port
Win7 / Win Vista (SP1 or
higher) / Win XP (SP2 or
higher)
MAC
Optical DVD drive
Free USB Port
MAC OS X 10.4 or higher
Driver Installation
Before starting with the driver installation please make sure that the tablet
is not connected to your PC or MAC.
Windows System:
1. Insert the Driver CD for Windows into your CD drive and wait until
the auto start window appears. On Windows Vista and Windows 7
you may confirm the Action by pressing >>Continue<< if the User
Access Control window appear.
2. Simply follow the steps on the screen and finish the installation with
restarting your system
MAC System:
1. Insert the Driver CD for MAC into your CD drive and wait until the
Drive is loaded.
2. Click on the Tablet Icon and simply follow the steps on the screen
and finish the installation with restarting your system.
Connect your Tablet
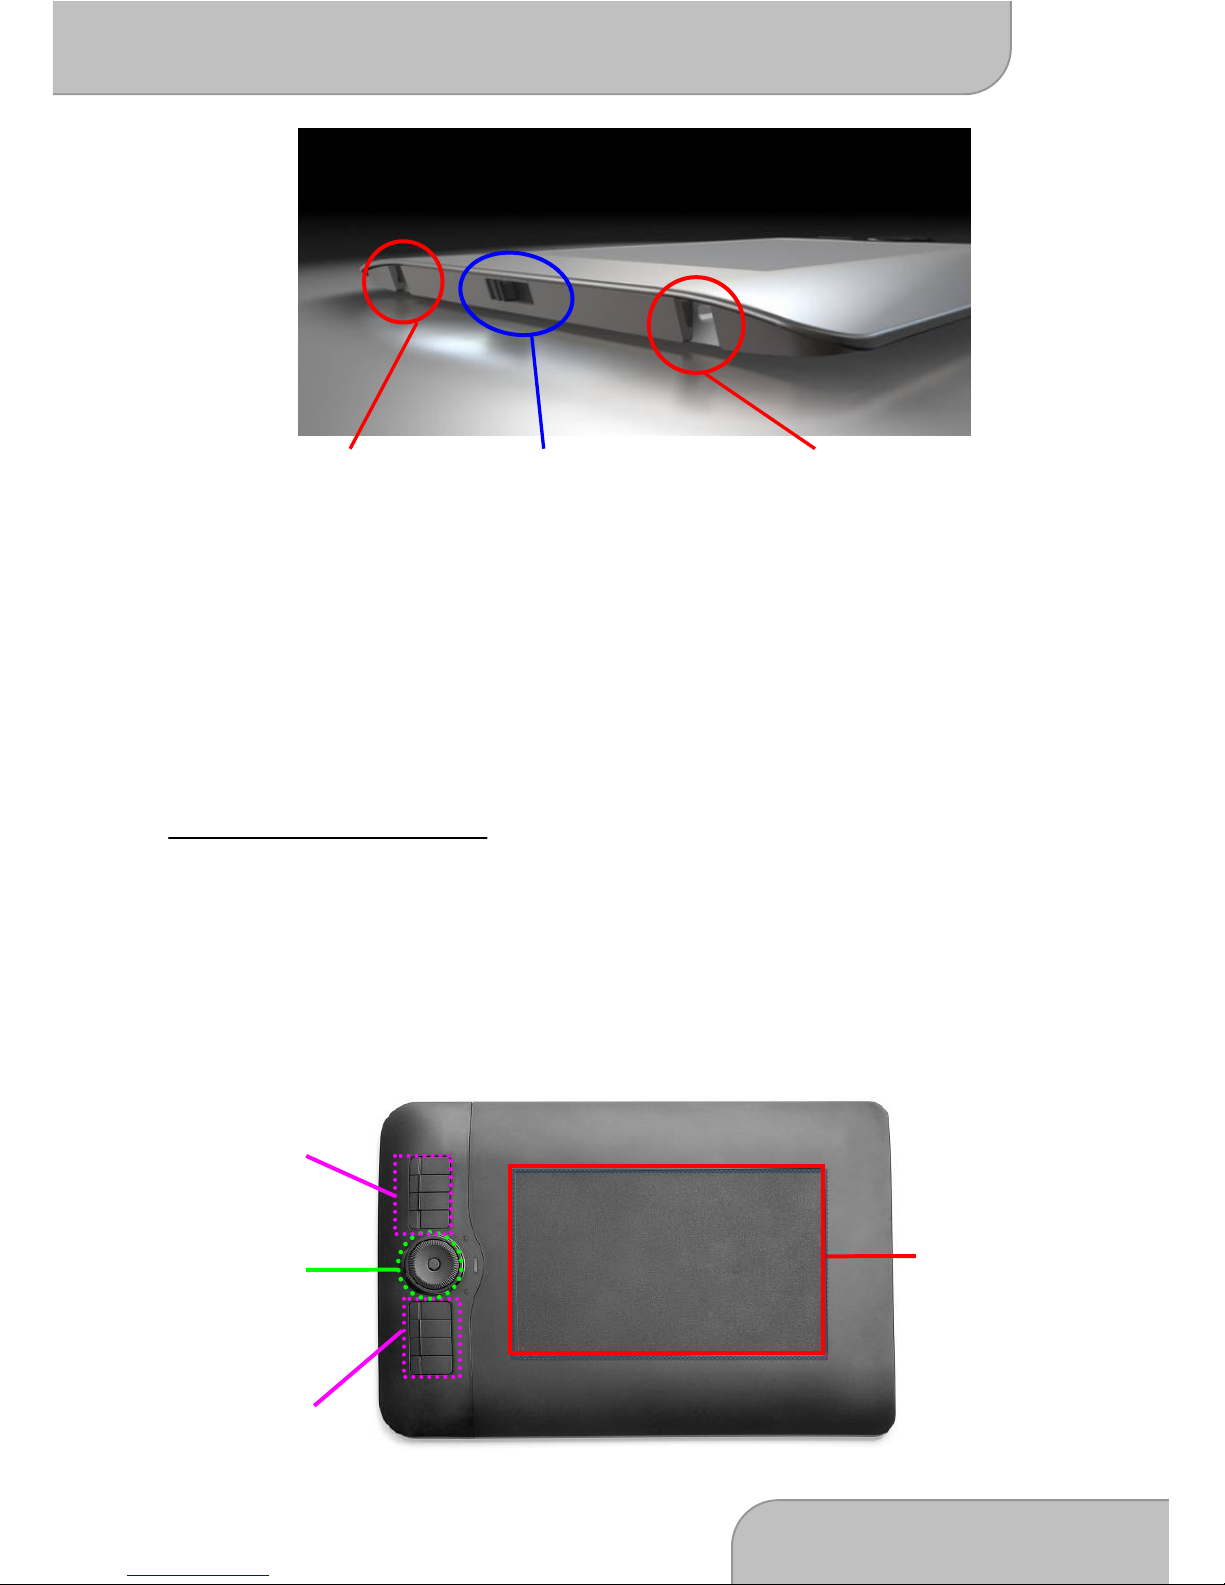
Venus tablet is made for left- and right hand users. To distinguish
between both modes, Venus Tablet comes with two USB ports, one for
each orientation. It’s imp ortant to use th e correct USB port f or the Mode
you like to use.
Page 5
Venus Tablet Quick Setup Guide
Page 5
1. Place the tablet on your desk in the direction you like to use it.
2. Select the USB port like explained in above picture by using the
USB Socket Slider.
3. Connect the Venus Tablet to your PC or MAC with the supplied
USB cable. It’s recommend not to connect to Hubs or front USB
ports of your PC tower.
4. After connection the big white Mode- LED will pop up and the
small white left/right hand indicator LED.
Knowing your Tablet
1. Working Area: The working area is the active area where the pen
response. The usage is different to mouse usage. The working area
is equal with your monitor, you can dirtly point on the place you lik e
to move the mouse to. If y ou move the pen to left bottom corner, the
pointer on your display directly goes to this point. This makes work
much more efficient and much quicker than using a mouse.
Left hand USB
Right hand USB port USB Socket Slider
Navigation wheel
with mode button
Hot Keys
Hot Keys
16:9 working area
Page 6
Venus Tablet Quick Setup Guide
Page 6
2. Hot Keys: Venus Tablet offers 8 Hot Keys in total which can be
programmed freely. More details how to program these buttons are
explained under >>The Control Panel<<
3. Navigation Wheel: The Navigation wheel can be used for vertical
scrolling, Zoon in/out or as volume adjuster. To switch between
these three functions press the centr al mode button in the middle of
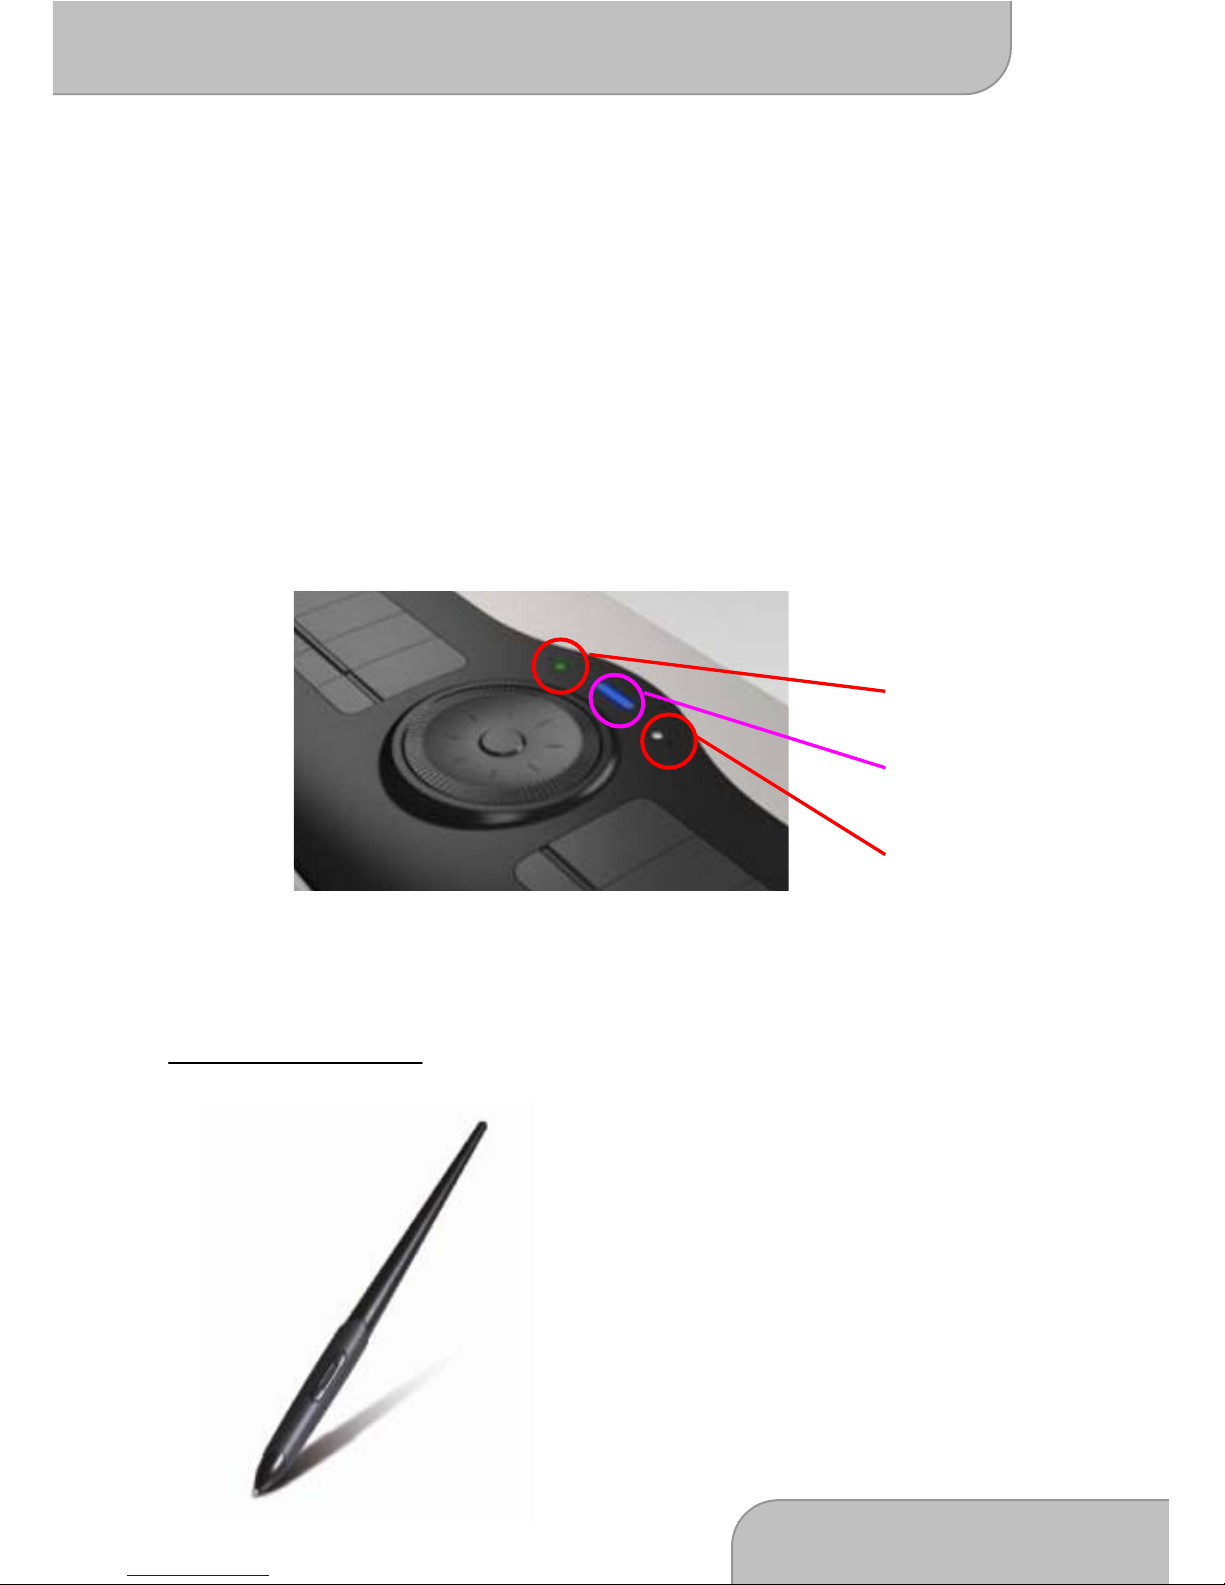
the navigation wheel. The Mode LED will change the color to
indicate the current status:
White LED Orange LED Green LED
Vertical Scroll Mode Zoom Mode Volume Mode
Please note that the navigation wheel will be in default V ertical Scroll setting
when rebooting the computer or re-plugging the USB cable.
Knowing your Pen
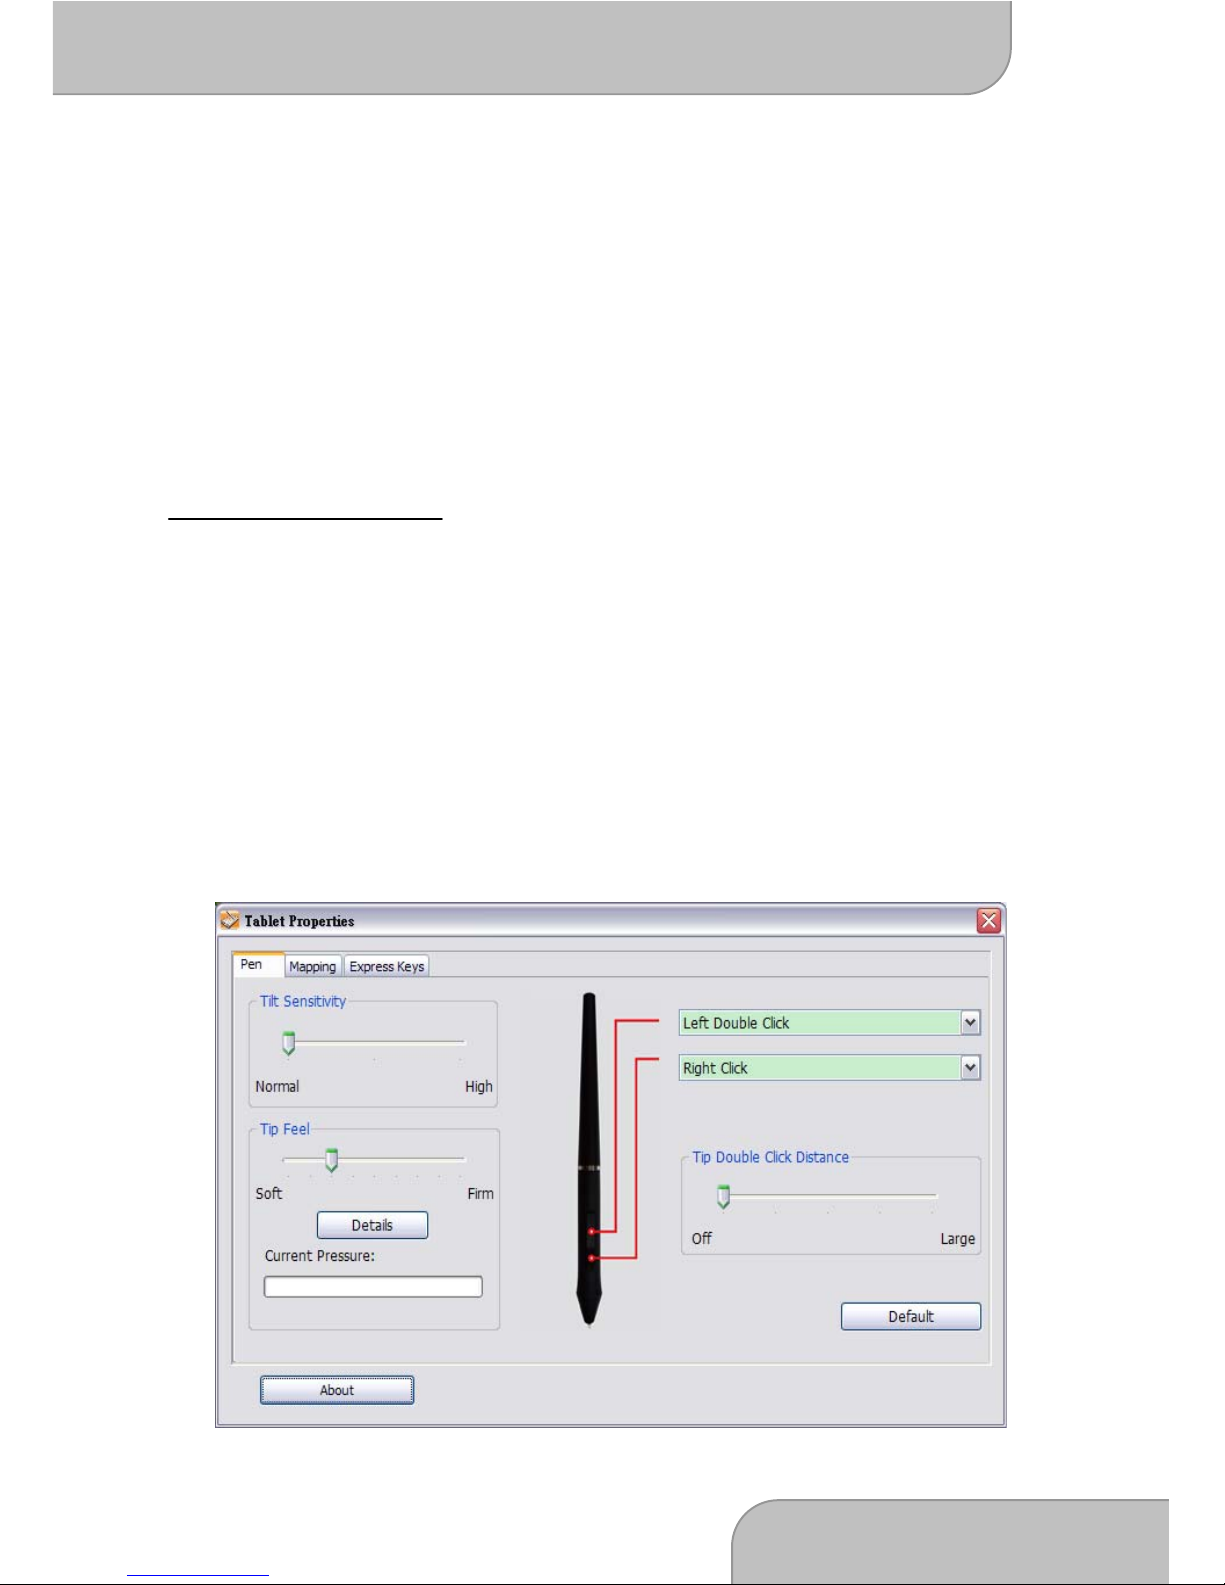
The Pen of Venus Tablet is the connection
between your hand and the graphic tablet.
Just use and hold the pen like a normal
pen. If you move over the tablet in max
10mm distance without touching it you can
see the movement of the pointer. The pen
tip is like left mouse buttons which also
offer double click function. Further, the pen
offers two buttons witch can be
programmed in Control Panel.
Right hand LED
Left hand LED
Mode LED
Page 7
Venus Tablet Quick Setup Guide
Page 7
After a time it’s necessary to exchange the pen tip. If the tip is not soft any
more or leaves scratches (scratch noise) on the graphic tablet it’s
recommend to exchange the tip to avoid any damage on your tablet.
1. Use the pen tip remover tool like a classical tool you know from
home. Grap the tip with the open end of the remover tool and pull
out the tip with care.
2. Place the new tip in the pen and gently push it in until the end is
reached. Don’t use to much pressure to avoid damage of the pen.
The Control Panel
This paragraph describes the Windows control panel but can be adopt to
MAC control panel as well.
After driver installation, restart and successful connection of your Graphic
tablet you will find a small Tablet Icon in the quick start bar close to your
clock. Click on the Icon to open the Control Panel. The Control Panel is
divided into 3 main parts
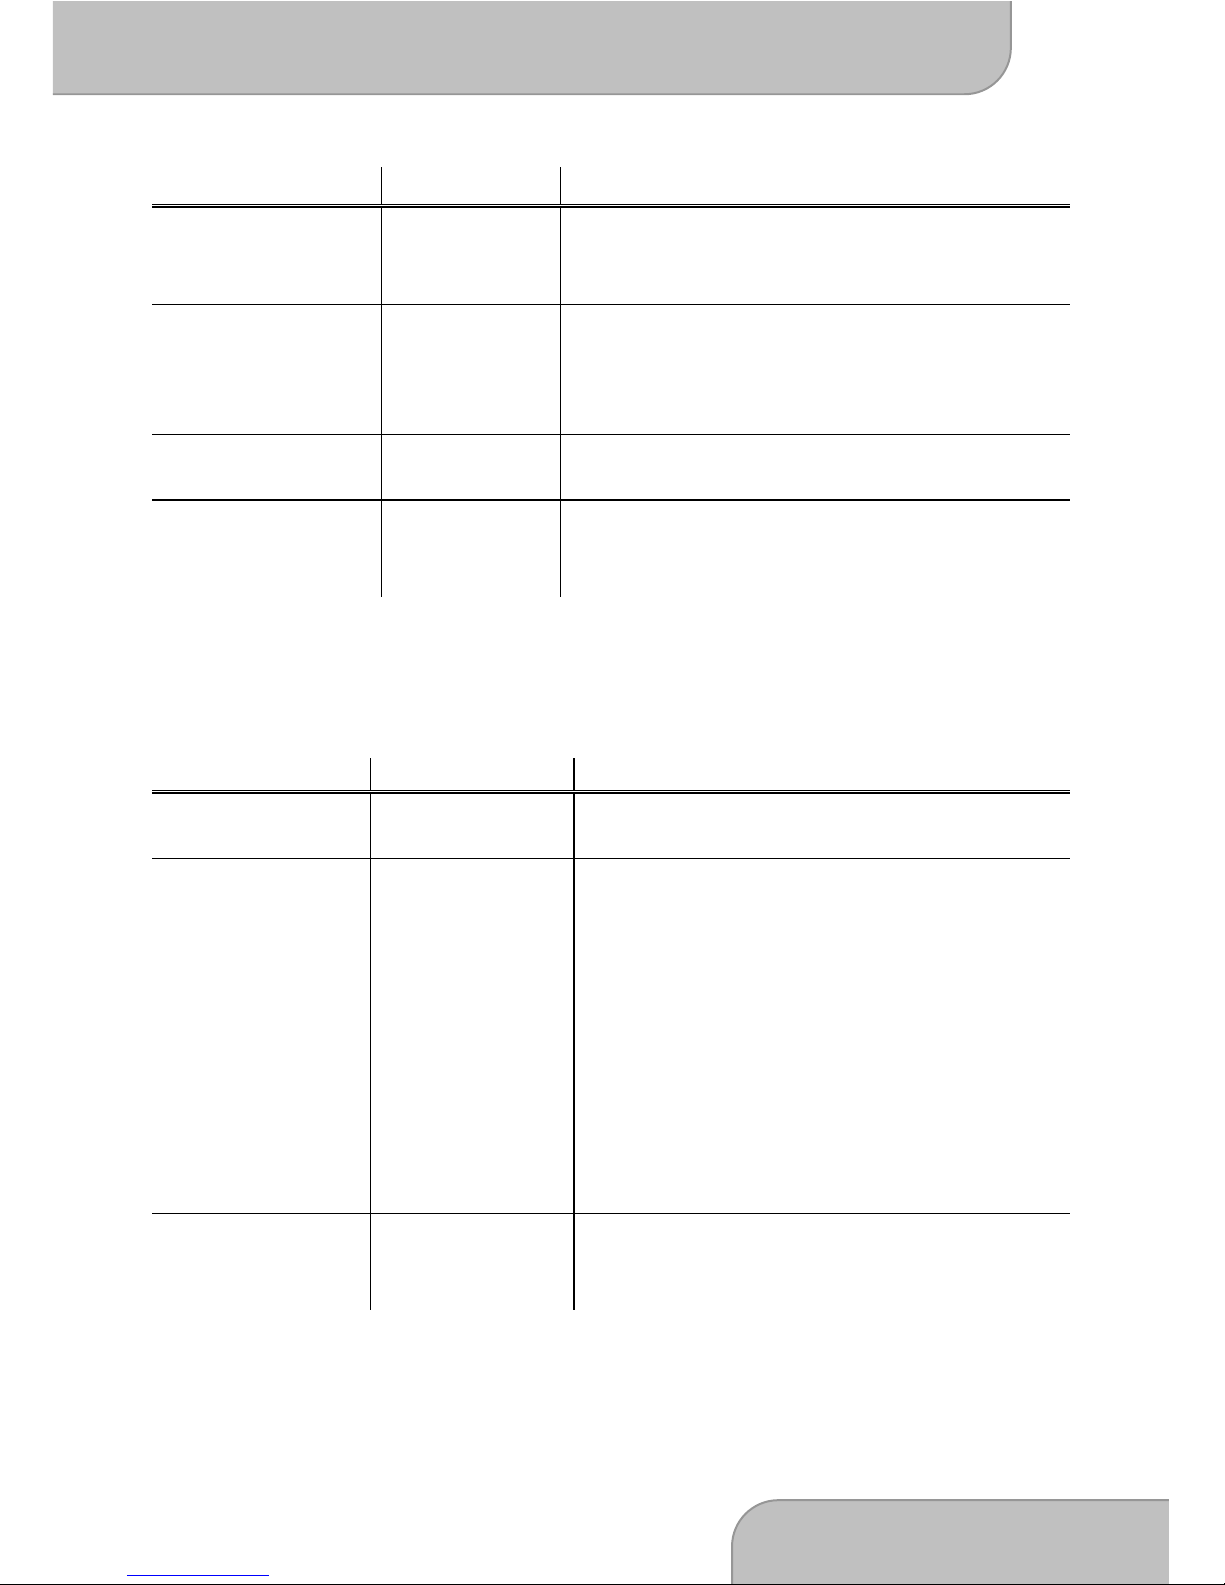
1. Pen: This page offers you a wide range of pen settings to customize
the pen to your needs. Setup the functions like followed
Page 8
Venus Tablet Quick Setup Guide
Page 8
Function Values Description
Tilt Sensitivity Normal ~
High
Adjusts how sensitive the pen reacts on
tilt. Important if you like to use the pen
like a felt pen.
Tip Feel Soft ~ Firm Adjusts the sensitivity of the pen tip and
see the result in Current pressure bar.
Use >>Details<< to setup more specific
values for the pen tip.
Button
configuration
Adjusts the function of the two but ton of
pen by choosing from drop-down list.
Tip Double Click
Distance
Off ~ Large Adjusts the time you have for a double
click on pen tip. You can also disable the
function by choosing off.
2. Mapping : This page offers a function to adjust the part on monitor
you’d like to use as active area f or the Pen. It’s also possible to use
one monitor as active area only.
Function Values Description
Mode Pen, Mouse Select if the Pen should behave like a
Tablet or a classical mouse.
Monitor Area All Screens,
Monitor,
Portion
Select >>All Screens<< to use the
complete monitor as working area.
If you have more than one monitor
connected you can choose
>>Monitor<< and select which monitor
should be the active one.
If you want to select a special area of
the monitor choose >>Portion<< and
select the active area by adjusting the
red fram in left >>Working Area
Settings<< field.
Force
Proportions
On, Off Active this field if your monitors have
different resolution and not the
complete are is useable.
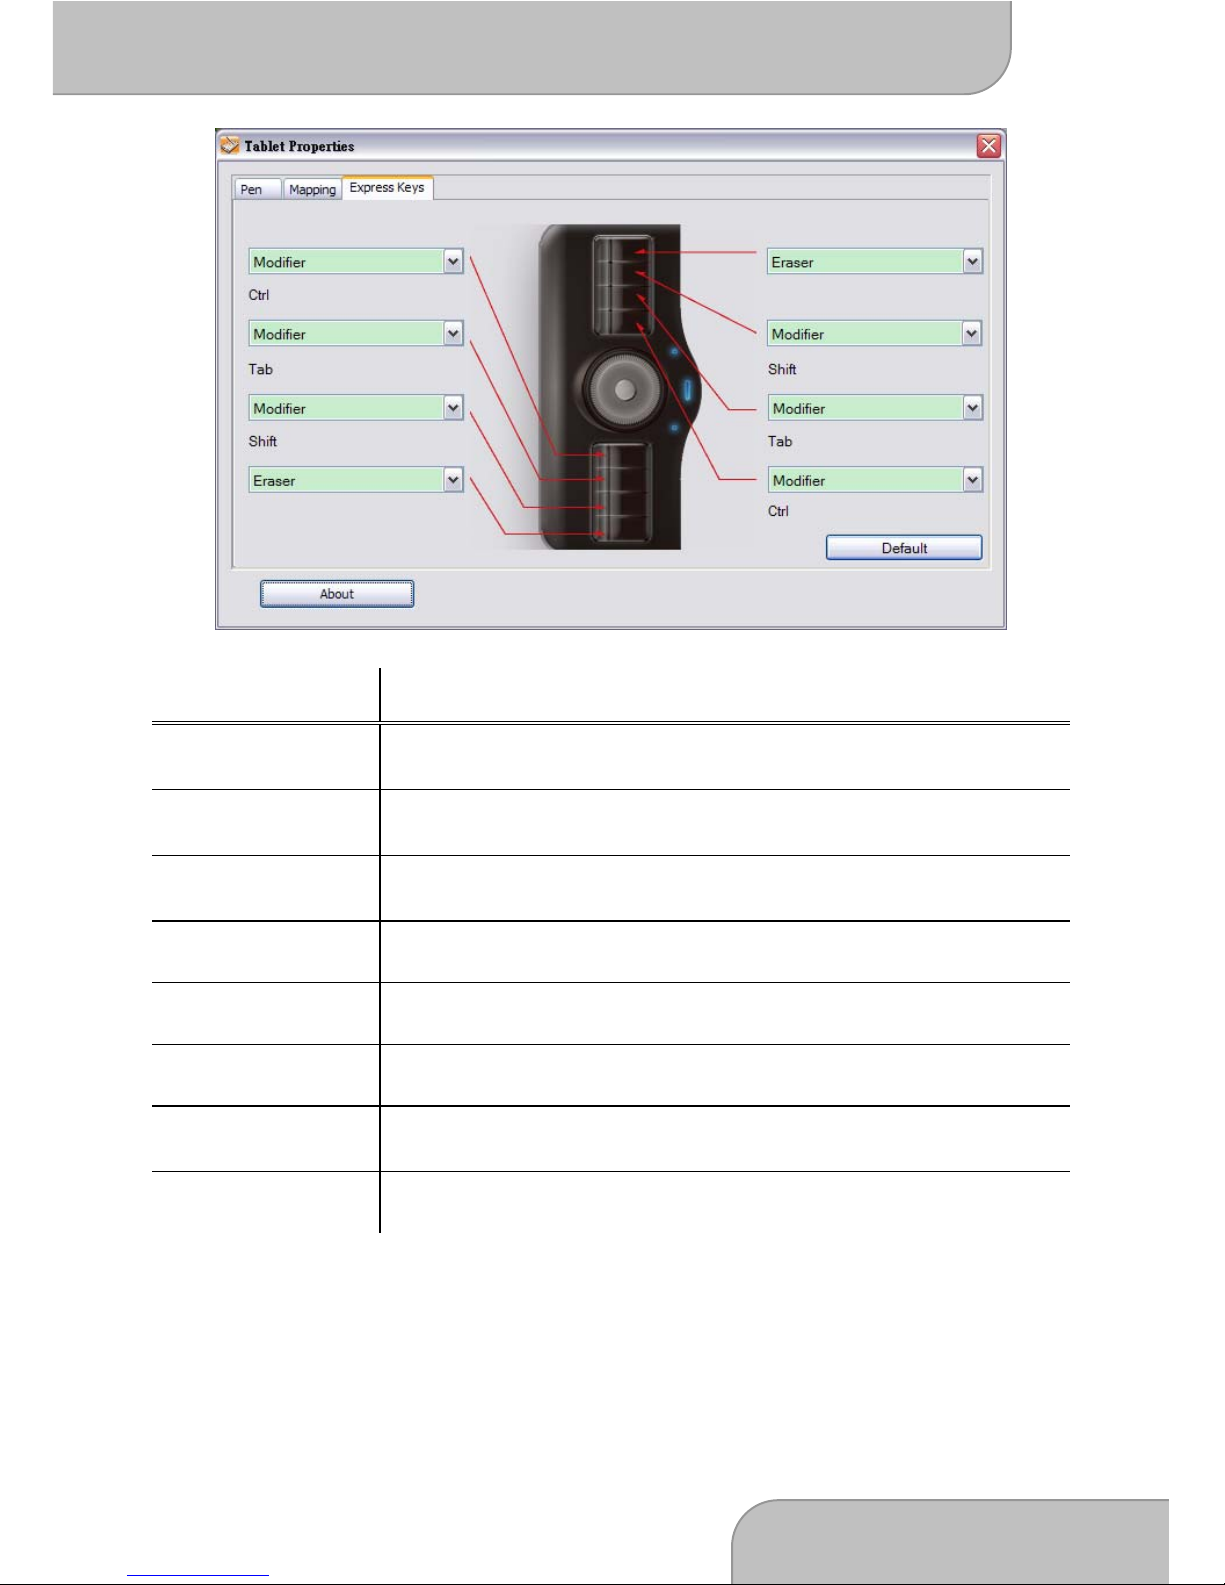
3. Express Keys: This page allows you to program the 8 Hot Keys of
the tablet to your requirements. Simply click on the K ey you’d like to
modify and choose one option from the drop down box.
Page 9
Venus Tablet Quick Setup Guide
Page 9
Function Description
Modifier Use typical commands like ALT, Tab or CTRL to program
on key
Key Stroke Use this function to program free key strokes. Just type
in the command in the window and confirm with OK
Open/Run Choose to open application from local disk and confirm
with OK
(Left/Right) Click Single mouse click (left or right click)
Left Double click Double mouse click
Middle click Program the mouse middle click
Pan/scroll Use to program Pan or scroll function from your graphic
program
Eraser Program to use Key for eraser function
Page 10
Venus Tablet Quick Setup Guide
Page 10
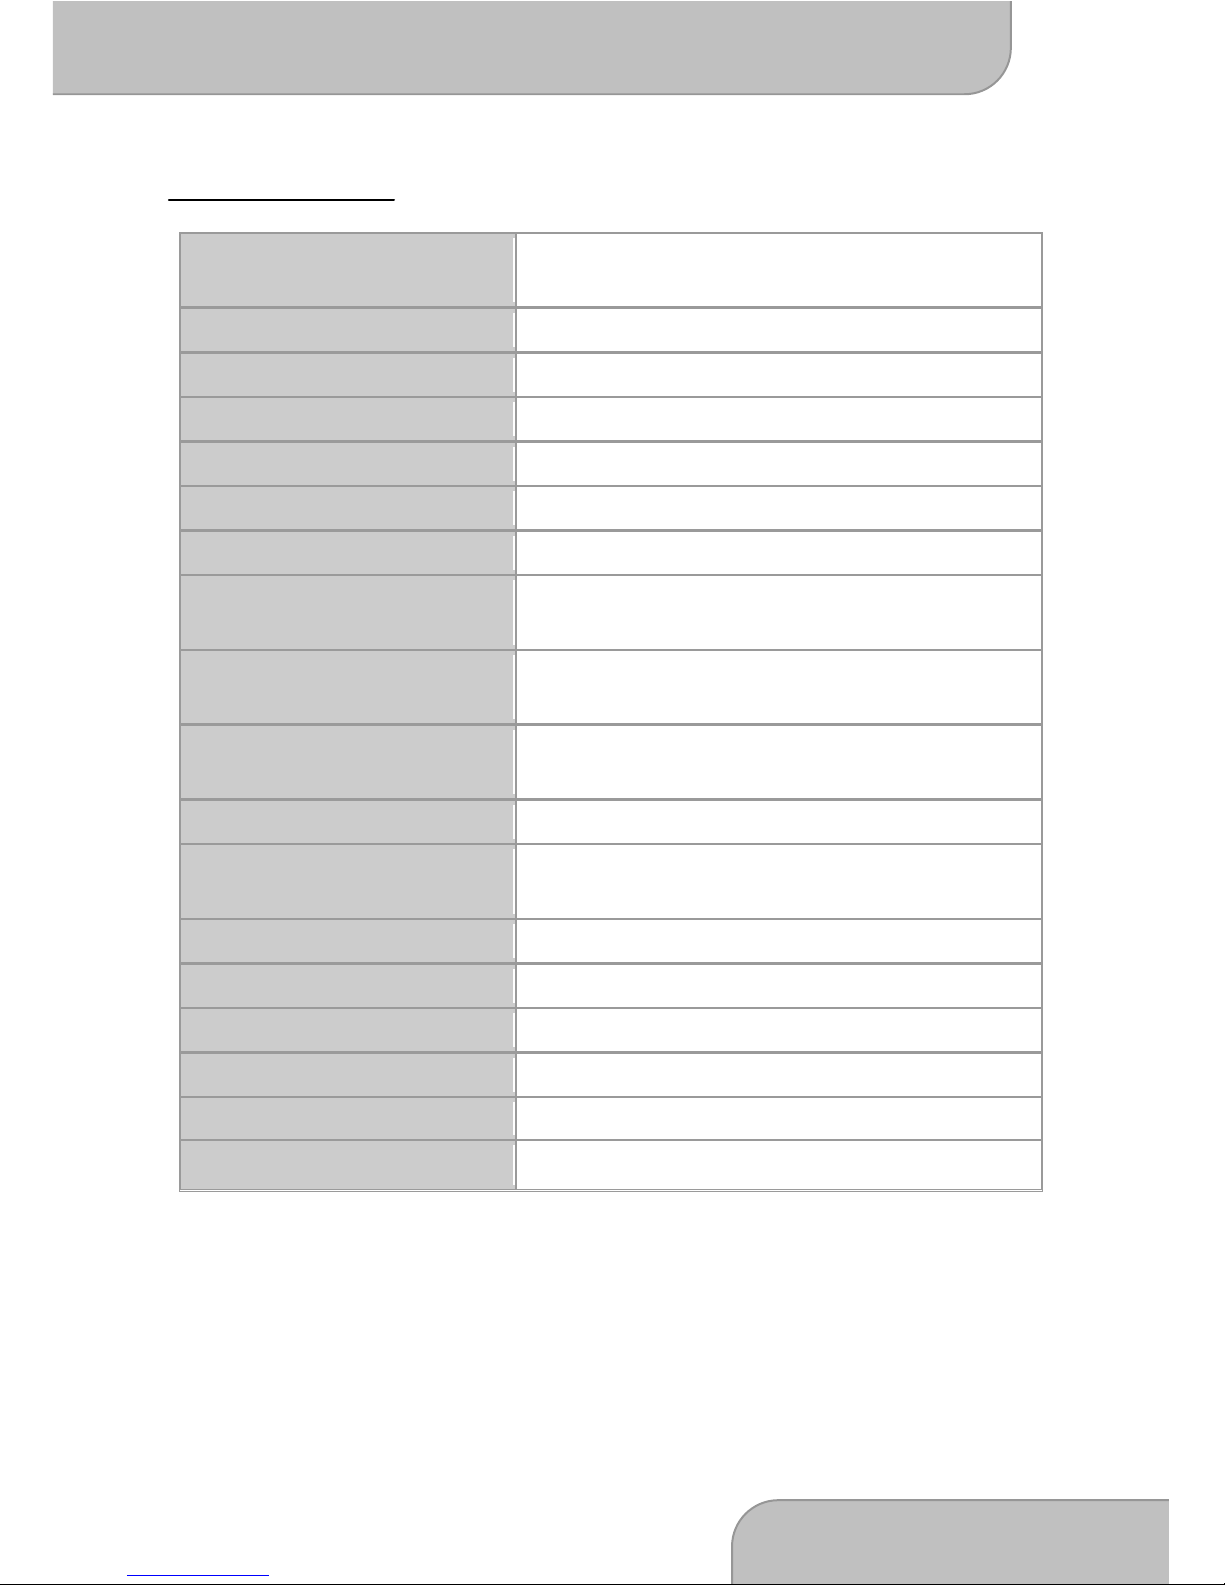
Specifications
Working Area
8.0” (203mm) x 5.0” (127mm) | 9.5”
(240mm) diagonal
Aspect Ratio 16:9
Resolution 4000 Lpi (Lines per inch)
Pressure Level 2048 true levels
Accuracy +/- 0.25mm
Report Rate 200 Rps (Reports per second)
Max. Reading Height 10mm (+/- 1mm)
Buttons on Tablet
8 free programmable buttons |
Navigation wheel with mode button
LED Indicators
White LED for left- or right- hand usa
g
e |
Green/Orange/white for mode selection
Pen
Battery-less, tilt sensitive, 2 free
programmable buttons
Tip travel Max. 0.8mm
Tip ON load
(switchable)
5g to 20g
Tilt Sensitivity 60°
Interface USB (USB 1.1 Full Speed)
Power Supply 5V DC via USB
Power consumption Below 150mA (0.75W)
Dimensions 34.7cm x 23.3cm x 1.7cm
Weight 700g
82-925W92010 V2.0
 Loading...