

Page 1
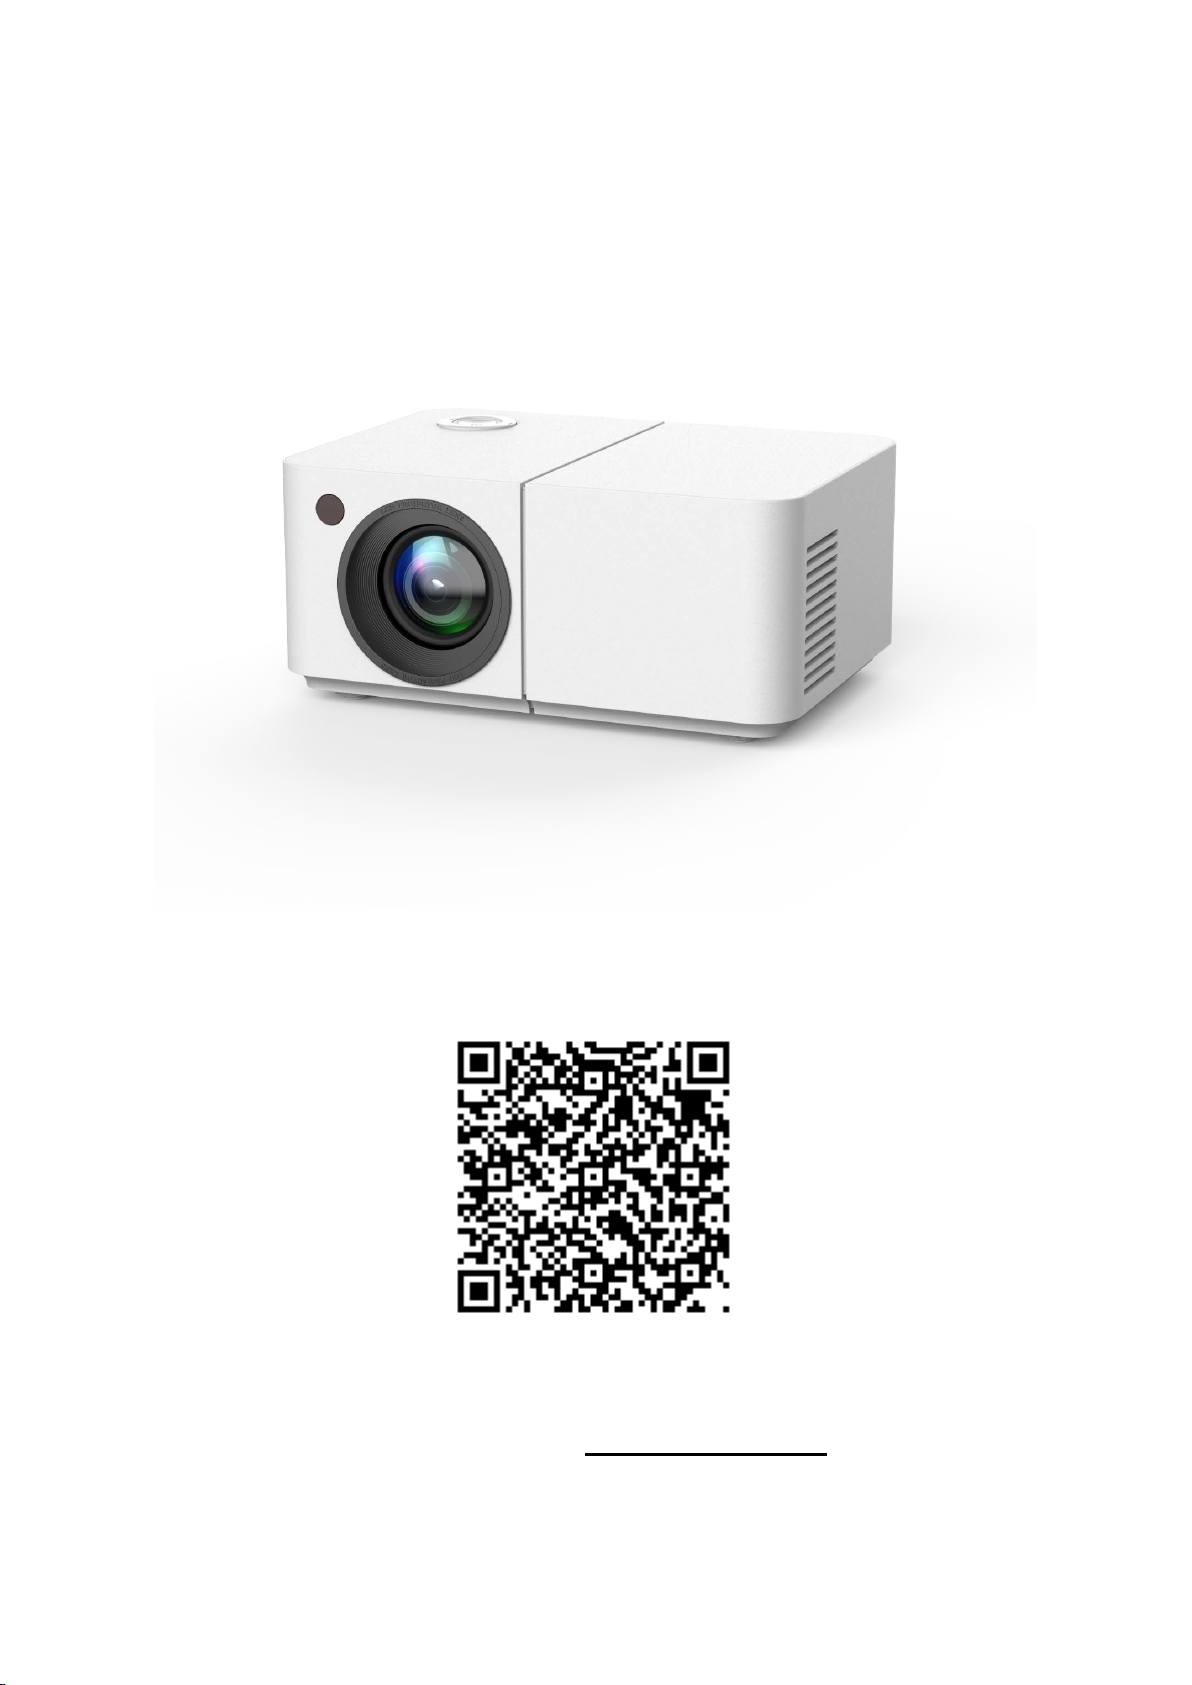
VenirCool P1 User Guide
Build Time:5/14/24
Scan the QR code to view the video tutorial.
For more infomation:https://venircool.com
Page 2

Read this First
Chapter 1 Read this First
Before using this documentation and the product it supports, ensure that you read and understand the following:
Operation of this equipment in a residential environment may cause radio interference.
High brightness lamp!
Avoid staring or directly looking at the light,especially for children.
1. Please wash the anti-dust mesh once a month in order to protect your projector!
2. Before using this machine,please remove the protective membrane from the top & bottom
cover.
● Please read this guide carefully before use;
● The company reserves the right of final interpretation;
● Appearance of the product and the UI please in kind prevail;
● If product technology or software upgrades, without prior notice.
1.1 Important Notes
How to use the device correctly:
1. Do not point the lens towards the human eye to avoid damage to the eyes caused by the
strong light of the lens after the machine is turned on.
2. Please do not block the air inlet/outlet of the device to avoid damage to the internal electronic devices due to the failure of the device to dissipate heat normally.
3. Do not use paper, cloth and other cleaning tools to directly wipe the lens to avoid damage to
the lens; please use a cleaning air blower to remove dust on the surface of the lens.
4. Please keep the device and its parts and accessories out of the reach of children.
5. Please ensure that the device is used in a dry and ventilated environment.
6. Do not store and use the device in overheated or cold places.
7. High (low) temperature will shorten the life of electronic devices;the allowable operating
environment is 0~35℃.
8. Do not forcefully squeeze the device or place shields above or on its back to avoid damage to
the device.
9. Do not drop, knock or strongly vibrate the device to cause damage to the internal circuit
board.
10. Do not attempt to disassemble the device without permission; if there is any problem, please
contact the after-sales service.
1
Page 3

Chapter 1
11. Do not repair any products by yourself; if the equipment or any parts are not working properly, you should consult the after-sales service or return to the factory for repair.
12. The equipment must not be exposed to water droplets or splashes, and objects filled with liquids such as vases should not be placed on the equipment.
2
Page 4

Discover your Projector
Chapter 2 Discover your Projector
Thank you for choosing a VenirCool Projector! We are dedicated to delivering the best solution to
you.
Before starting your tour, please read the following information:
Illustrations in this documentation might look different from your product.
Depending on the model, some optional accessories, features, software programs, and user
interface instructions might not be applicable to your projector.
Documentation content is subject to change without notice. To get the latest documentation, go
to https://venircool.com.
3
Page 5

Chapter 2
4
Page 6
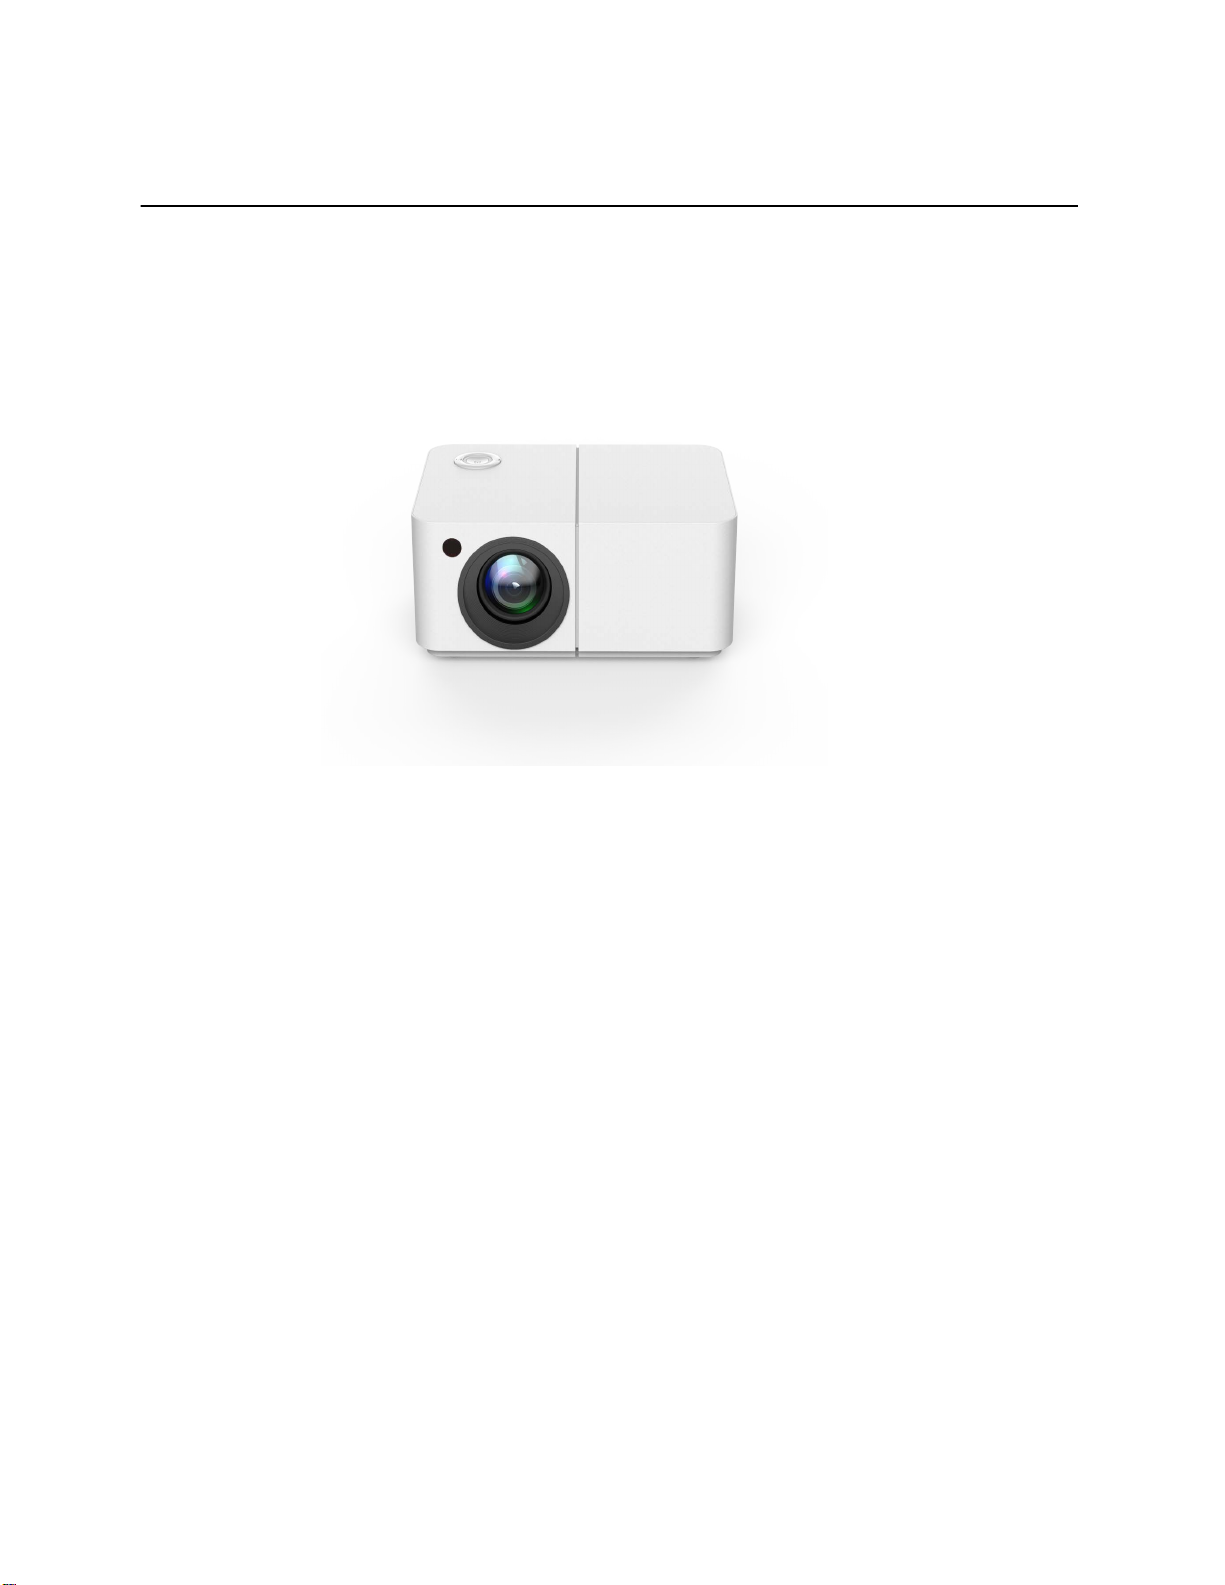
Chapter 3 Meet your projector
3.1 Front view
Meet your projector
4
Page 7
Chapter 3
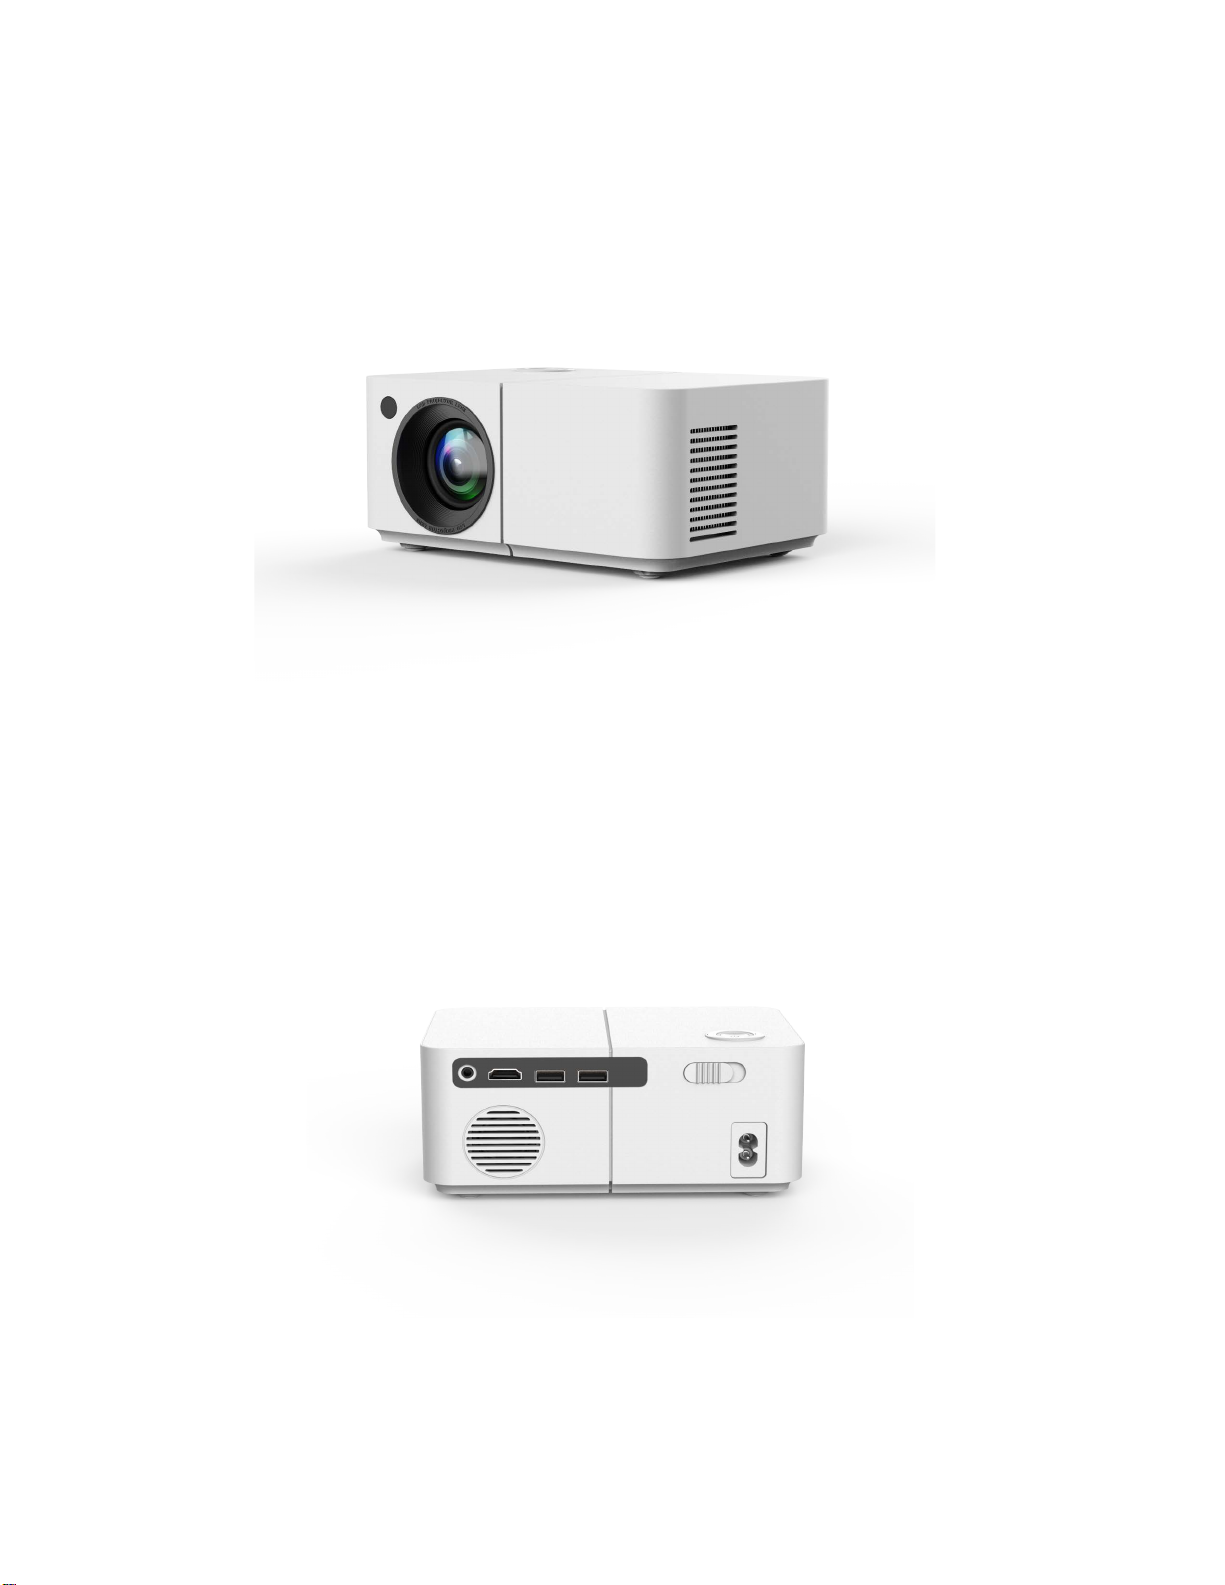
3.2 Side view
3.3 Rear view
5
Page 8
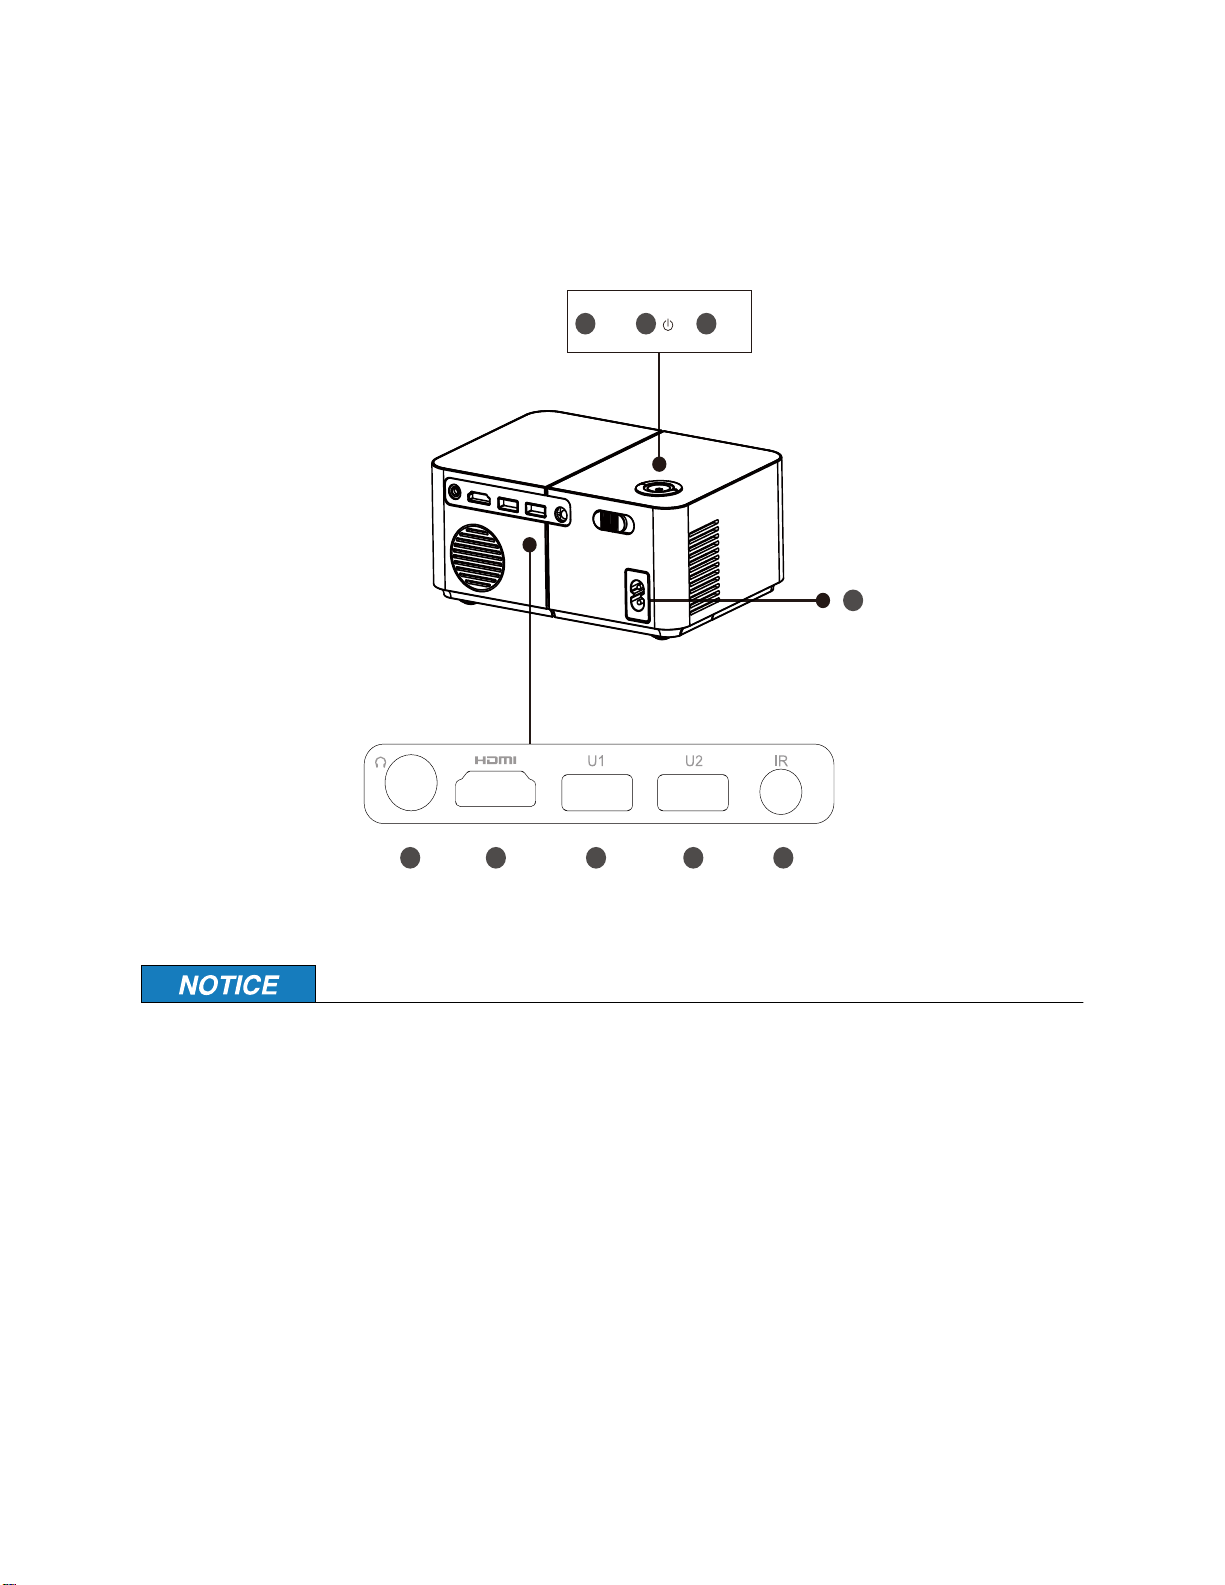
3.4 Projector Button
'
'
Meet your projector
The appearance of the product is subject to the actual product.
This picture is for reference only.
1. Manual focus-
2. Power button
3. Manual focus+
4. Headphone output
5. HDMI input
6. USB input 1
7. USB input 2
8. Infrared reception
9. Power input (110-240v~)
6
Page 9
Chapter 3
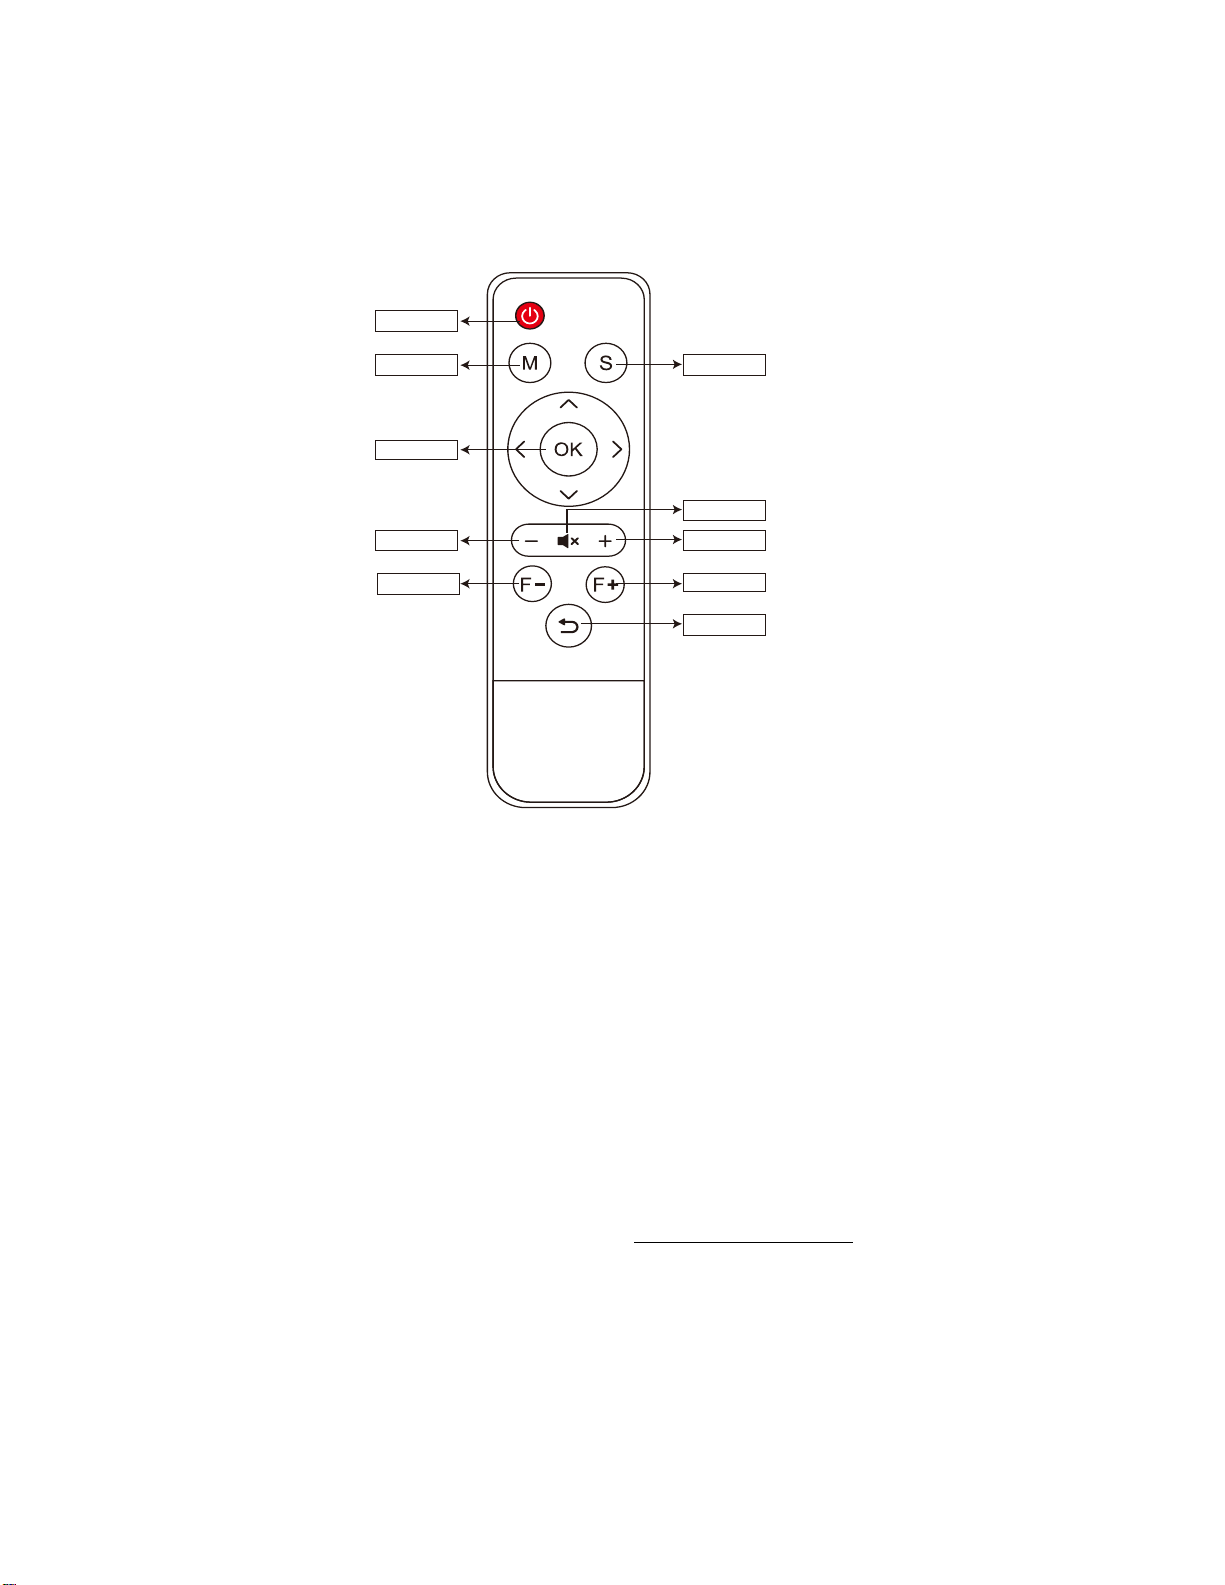
3.5 Remote control
1. Power
2. Menu
3. Arrow button
4. VOL-
5. Foucus -
6. Source
7. Mute
8. VOL+
9. Focus +
10. Back
3.6 Features and specifications
For detailed specifications of your computer, go to https://venircool.com and search by product.
7
Page 10
Get started with your projector
Chapter 4 Get started with your projector
4.1 Device on/off
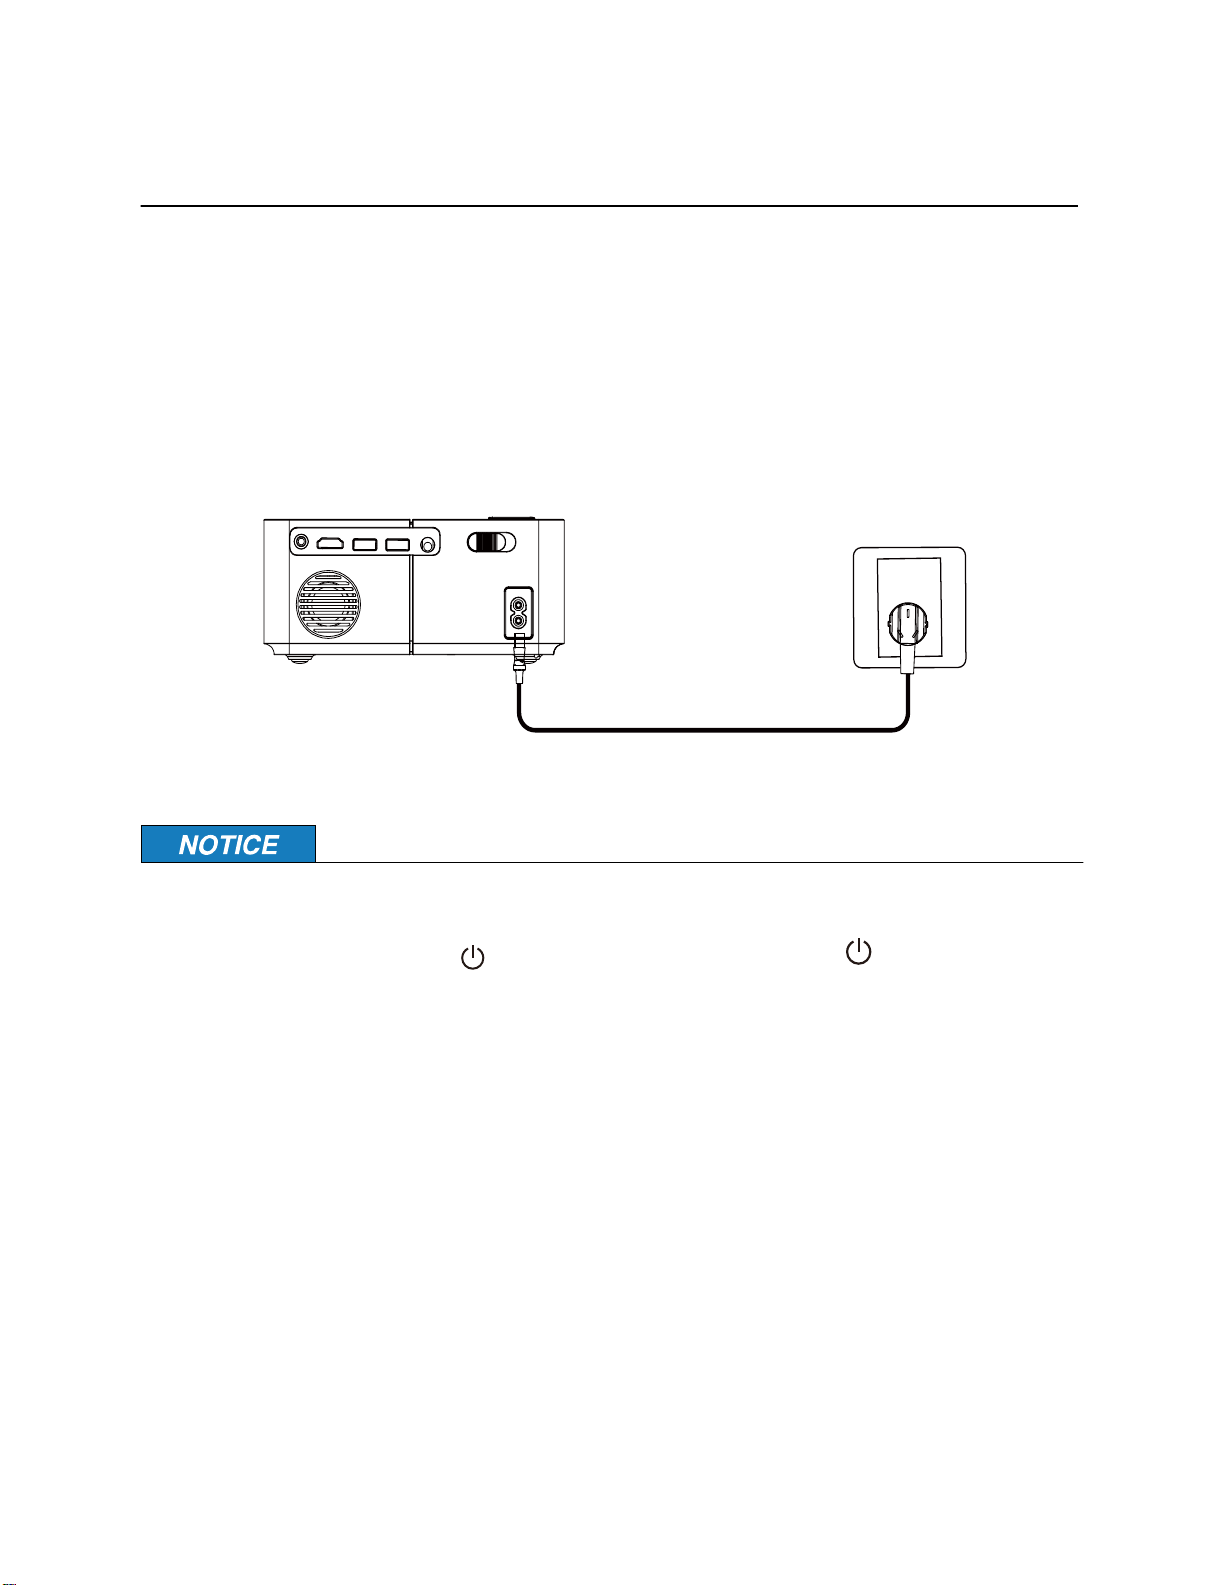
This mini projector does not include a built-in battery and must be plugged into the power
source to operate.
Step 1: Take out the machine from the packing box, remove the packing bag and lens cover, place
the projector on a basic level table, plug in the matching power cord, and then connect to the AC
power supply. At this time, the indicator light on the projector panel is Standby red.
Please make sure to firmly plug in the power cord to the projector, applying pressure to ensure it
does not shake or fall out.
Step 2: Press the on-off button " " on the body or the on-off button " " on the remote control to start the projector. At this time, the indicator light on the projector panel turns solid blue
and the lens emits light, and the projector is started.
4.2 Electric Focus
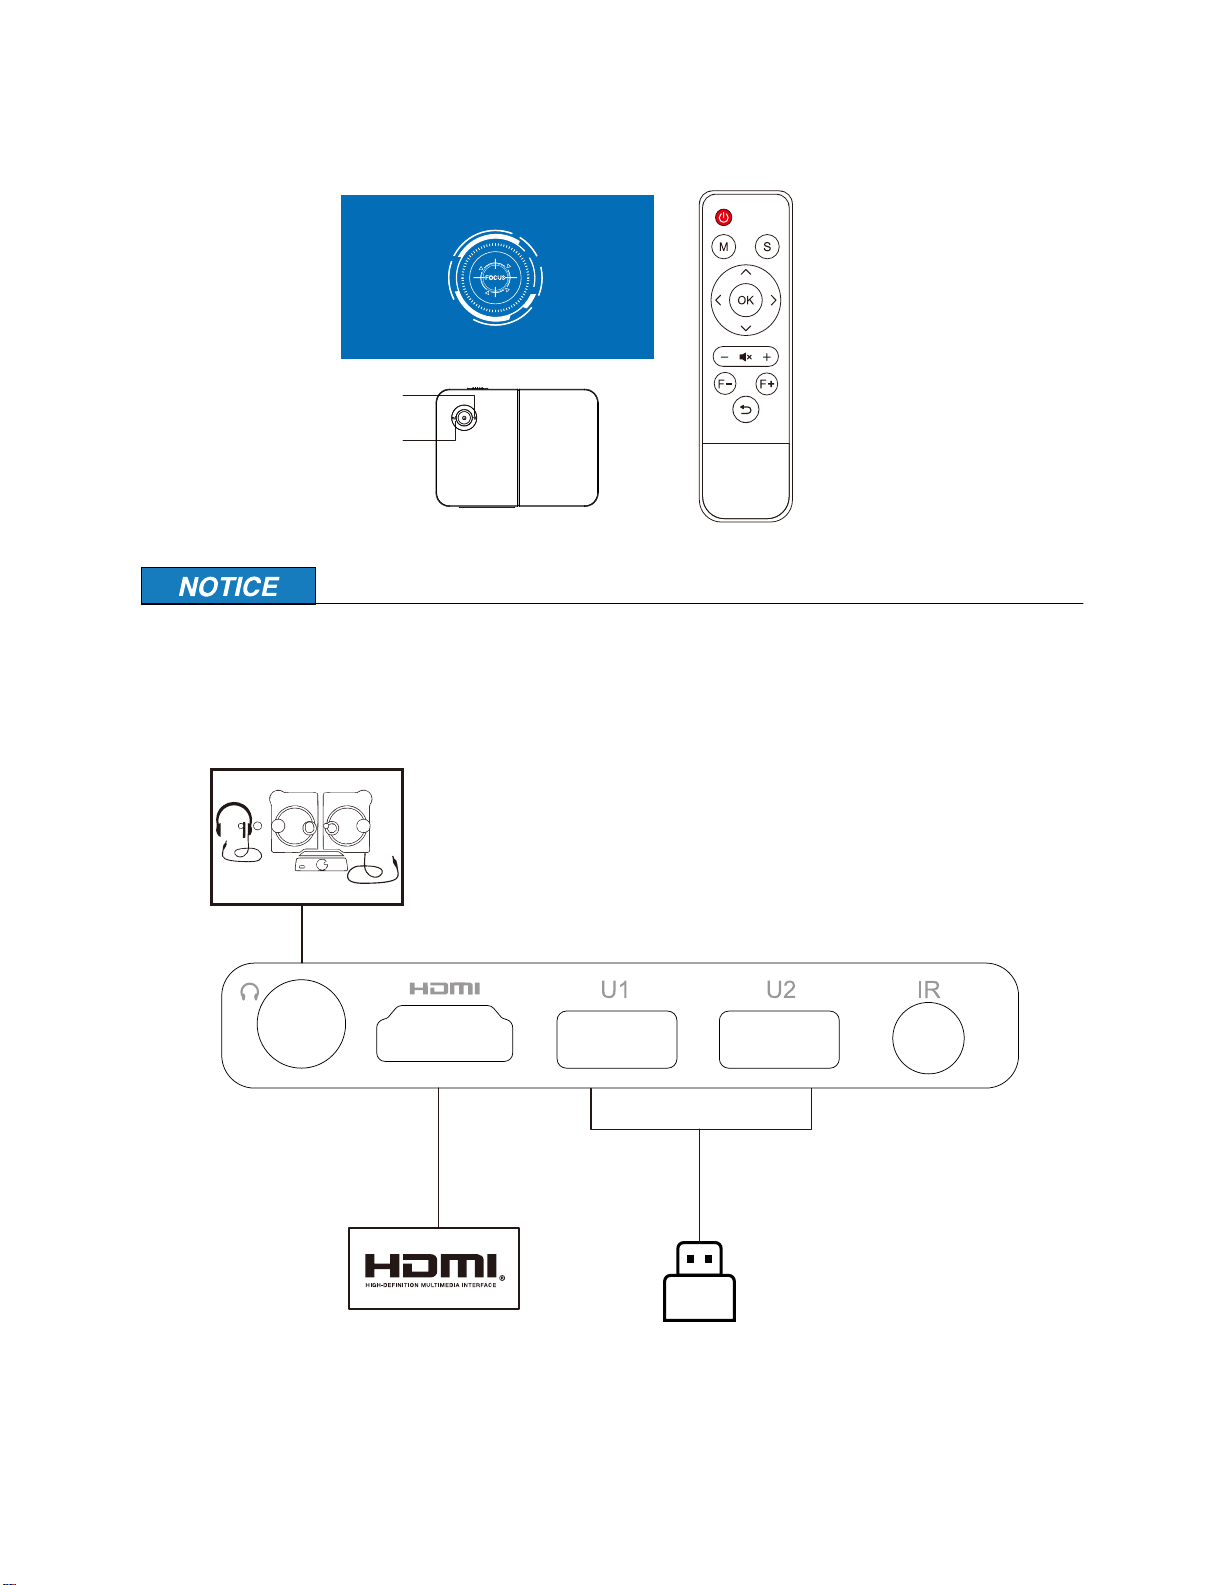
Press the F+/F- key on the remote control and the manual focus key F+/F- on the body to adjust
the focus.
8
Page 11
Chapter 4
'
'
The focus adjustment button on the projector is located next to the power button.
4.3 Projector connection
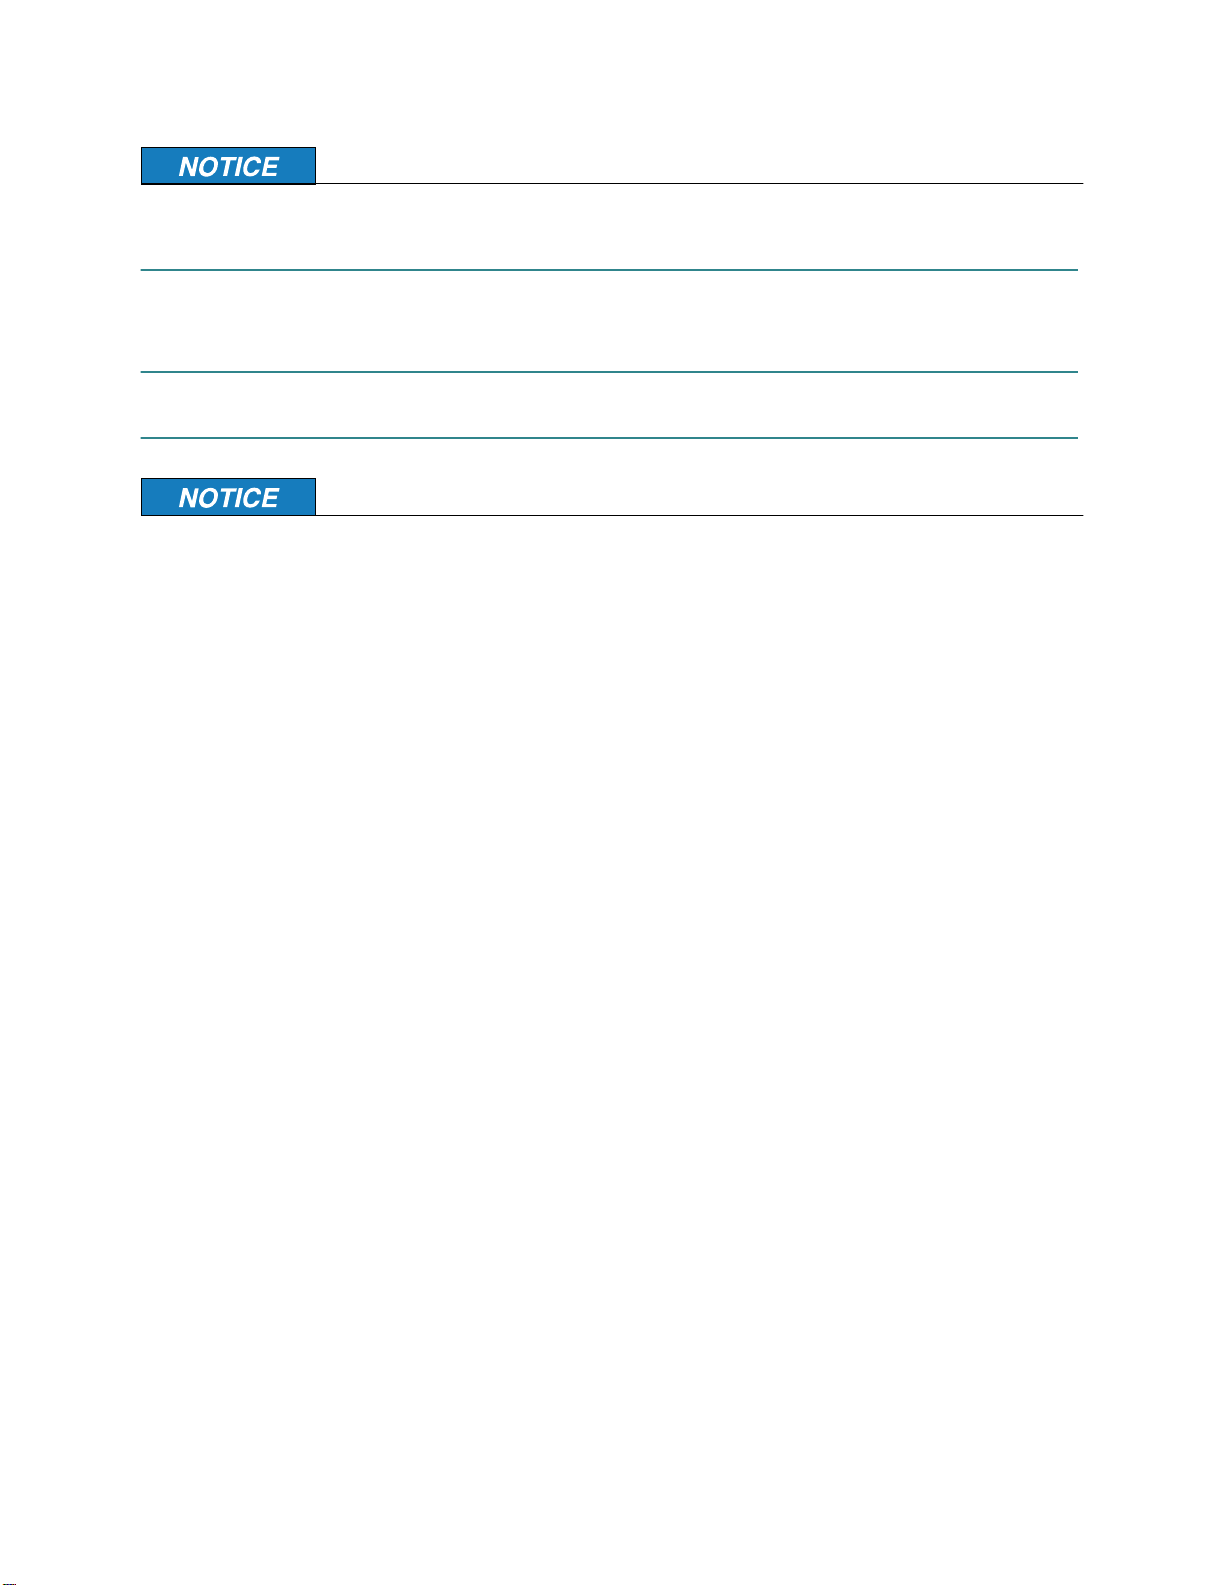
U1/U2 are both USB ports.
9
Page 12
Get started with your projector
USB storage devices supporting up to 2TB are available.
4.3.1 Connect to Network
4.3.2 Connect HDMI
4.3.3 Bluetooth Connection
Bluetooth connection only supports connection between the projector and Bluetooth speakers;
Bluetooth connection between the phone and the projector is not supported.
10
Page 13

Chapter 4
11
Page 14

Maintenance of the projector
Chapter 5 Maintenance of the projector
Smart projector is a high-tech product that integrates precision optics, electronics, and mechanics. If it is not properly maintained in daily use, it will affect the service life and effect of the projector. The importance of maintenance of the projector is as follows:
1. Dustproof: Due to the influence of the environment, excessive dust on the projector will
affect the heat dissipation. It is recommended to clean the dustproof filter of the projector
for one and a half months according to the actual environment.
2. Ventilation: Since the projector is a sound-optical integrated device, the light source generates heat when it is working. During installation and use, make sure that there are no objects
around to block the air inlet and outlet of the projector, because the heat dissipation of the
projector is Rely on cold air convection to improve the working stability and life of the projector.
3. Lens maintenance: The lens is the core component of the projector. It is directly related to
the clarity and effect of the picture. Too much dust on the lens will affect the image quality.
When the lens is dirty, please wipe the glass on the surface of the lens with a soft cotton
cloth. The lens can be wiped with a hard cloth or something corrosive.
4. Cleaning: Please clean up the excessive dust on the surface of the projector in time. Excessive
dust will affect the heat dissipation of the fuselage.
5. Moisture-proof: The projector is easily attacked by humid air. The working humidity of the
projector is about 45%-60%. If the air is too humid, it will affect the working stability of the
projector.
6. Shockproof: The projector must be strictly prevented from strong impact, extrusion and
vibration. Especially when the machine is working normally, try not to move and knock the
projector, which may cause the internal circuit of the machine to malfunction.
7. Do not install the projector on an unstable, shaky or uneven table.
8. Do not place containers filled with liquids on top of the projector.
9. Please turn off the power switch or unplug the power cord when the projector is not in use.
6
Page 15

Chapter 5
7
Page 16

Warranty Card
Please input:
Table 1: Customer Information
Customer's name:
Contact phone:
Customer's address:
Model(S/N):
Stores address:
Stores address:
Date of purchase:
 Loading...