

Page 1
MML16MC
MULTICOLOURED MESSAGE BOARD
VEELKLEURIGE LICHTKRANT
JOURNAL LUMINEUX MULTICOLORE
VIELFARBIGE LAUFSCHRIFT
PAINEL DE MENSAGEM MULTICOR
WIEL OKOLOROWA TABLICA INFORMACYJNA
USER MANUAL 2
7 X 80 P6 RGB LEDS
MENSAJE RODANTE MULTICOLOR
GEBRUIKERSHANDLEIDING 12
MODE D'EMPLOI 22
MANUAL DEL USUARIO 32
BEDIENUNGSANLEITUNG 42
MANUAL DO UTILIZADOR 52
INSTRUKCJA OBSŁUGI 62
Page 2
MML16MC
serviceable parts inside the d evice. Refer to an authorized deal er for service
Do not stare directly at the li ght source, as this may cause
Do not use th e device when damag e to housing or cables is noticed. Do n ot at tempt to service
rechar g eabl e b atteri es (alkaline). Disp ose of batteries in accordance
USER MAN UAL
1. Introduction
To all residents of the European Union
Important environmental information about this product
Thank you for choosing Velleman! Please read the manual thoroughly before bringing this device into
service. If the device was damaged in transit, don't install or use it and contact your dealer.
2. Safety Instructions
This symbol on th e device or the package indicates th a t d isposal of the device after its lifecycle
could harm the environment. Do not dispose of the unit (or batteries) as unsorted municipal
waste; it should be taken to a specialized company fo r recycling. This device should be
returned to your distributo r or to a local recycling service. Respect the local environmental
rules.
If in do ub t, co ntact y ou r loc a l was te dis p o sa l au t h o rit ie s .
Keep this device away from children and unauthorized users.
Indoor use only. Keep this device away from rain, moisture, splashing and dripping liquids.
Never put objects filled with liquids on top of or close to the d ev ice .
DO NOT disassemble or open the cover under any circumstances. Touching live wires can
cause life-threate ning el e ctroshock s.
Always disconnect mains power when device not in use or when servicing or maintenance
activities are p er formed. H andle the power c ord by the plug only.
There a r e no userand/or spare parts.
• epileptic seizure in sensi ti ve p eople
• temporarily loss of sight (flash blindness)
• permanent (ir reversi ble) eye d amage.
the device yourself but contact an authori sed deal er.
Warning: Do not puncture batteries or throw them in fire as th ey may expl ode. Do not
attempt to recharge nonwith local regulations. Keep batteries away from children.
3. Genera l Guidel ines
Refer to the Velleman® Service and Quality Warranty on the last pages of this manual.
• All modi f ications of the devi ce are f orbidden for safety reasons. Damage caused by user m odificati ons
to the device is not covered b y the warranty.
• Damage caused by disregard of certain guidelines in this manual is not covered by the warranty and
the dealer will not accept resp onsib i l ity for any en sui ng defects or probl ems.
• Familiarise yourself with the functions of the device before actually using it. Do no t allow operatio n
by unqualified people. Any damage that may occur will most probably be due to unprofessional use
of the de vice.
V. 01 – 14/11/2013 2 ©Velleman nv
Page 3
MML16MC
• Only use the device for its intended purpose. All other uses may lead to short circuits, burns,
el ectroshocks, l a mp explosion, crash, et c. Using the device in an unauthorised way will void the
warranty.
4. Features
• display colour (text and graphics): red, green, blue, yellow, magenta, cyan, white
• brightness: full bright white colour 2100 cd/m², 4-level brightness control
• memory: 26 text pages of 210 characters, and 16 pages of graphics
• real-time clock: built-in real-time clock with backup battery
• 12/24 h form at
• buzzer: built-in buzzer with pro grammable duration
• control: by 44-key IR remote contr ol
by PC - cable inc luded, USB to 3.5 mm stereo jack
• comes with: IR remote control, user manual, 2 mounting brackets, power adapter
5. Overview
Refer to the illustrations on page 2 of this manual.
6. Programming the board with the remote control
You can program the display with the included remote control or through your computer. See
"Programming the board with the computer software" for details.
First message
To type a message:
1. Connect the message board to a power supply using the included cable.
2. On the remote, press Q-PROG.
3. Type HELLO using the keys on the remote.
If yo u type a wrong character, press DEL to delete the last char acter.
4. Press ENTER.
The mes sag e app ears on the disp lay.
Display the time and date
1. P ress TI ME /DATE to disp lay the time and date message only.
2. P ress ESC to cance l time/date di spl a y fun ction.
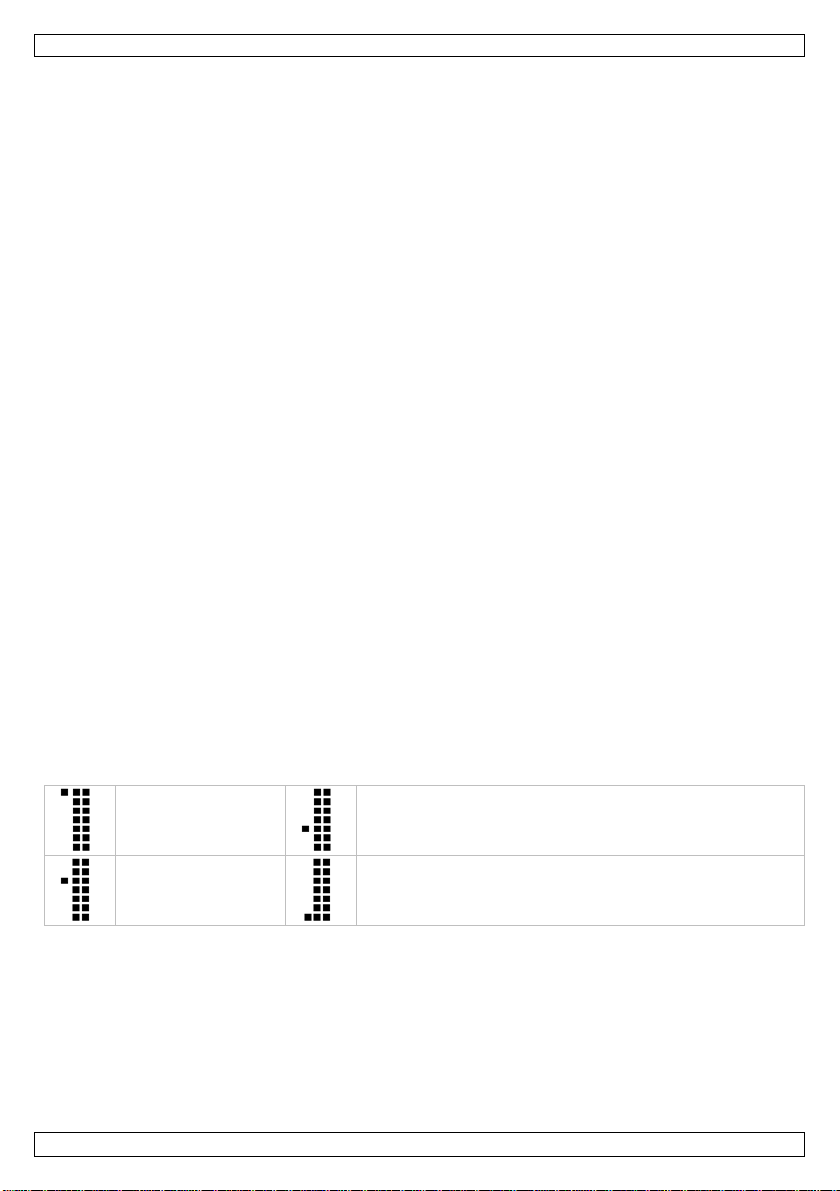
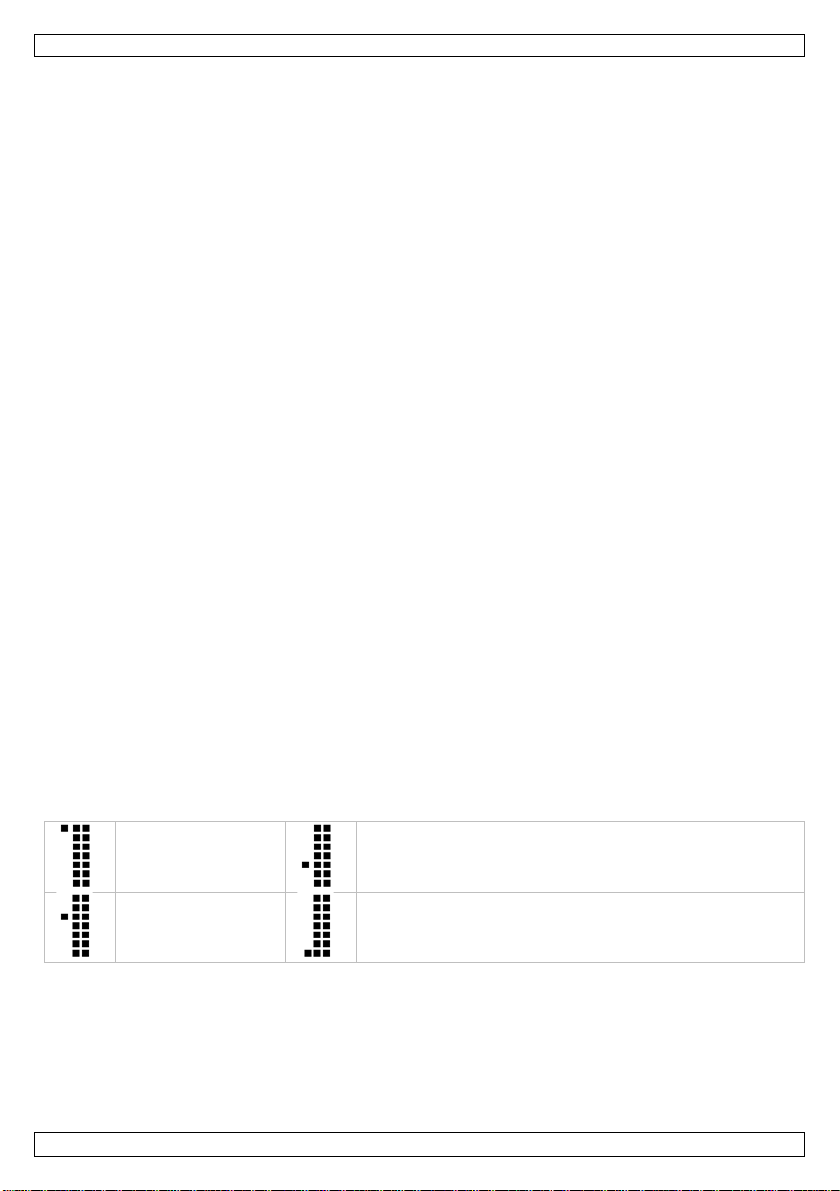
6.2 Alternat e characters: lower case, digits and symbol s
To display a lower case letter, a digit or a symbol, you need to change the keyb oard mode + shif t key.
The symbol on the display indicates what mo de is currently active.
Uppercase
White symbols on the keys (numb e rs, symb ols)
Lowercase
1. P ress Q-PROG.
2. Type one or more characters.
3. P ress SHIFT .
The lower case mode is now active.
4. Type one or more characters.
5. P ress SHIFT .
The numerical mode is now active.
6. Type one or more characters.
7. P ress SHIFT .
The symbol mode is now active.
V. 01 – 14/11/2013 3 ©Velleman nv
Green symbols on the keys (symbols)
Page 4

MML16MC
8. Type one or more characters
9. P ress SHIFT .
You are back in up p ercase mode.
10. Press ENT ER to display the message.
6.3 Letters with Accents and Diacritic Signs
You can type lett ers with a ccents. Let' s a ssume you want to type a ç and an ö.
1. P ress Q-PROG.
By default, the letters ar e in uppercase.
If you want lowercase, press SH IFT.
2. Type the C -key.
3. P ress EUROP -CHAR until ç appears.
4. P ress any another letter to type normal character.
5. Type the O-key.
6. P ress EUROP -CHAR until ö appears.
7. Press any another letter to type n ormal char acter.
8. P ress ENTE R to display the message.
7. Form at ting text
7.1 Font colour
You can change the font colour of a message as follows:
1. P ress Q-PROG.
The default colour is white.
2. Type a few letter s.
These letters will be whi te.
3. P ress COL OR to change the text colour.
Press COLOR multiple times to browse through the colours.
4. Type a few letters.
These next letters will have the other colour.
Repeat
5. P ress ENTE R to display the message.
7.2 Font size
You can di spl a y characters in vari ous LED widths, as f oll ows:
1. P ress Q-PROG.
2. Enter a few letters.
3. P ress FONT .
The font size changes.
4. Press FONT again to browse through the font sizes (narrow - normal- bold). The size remains active
until you select another one. You can add more characters.
5. P ress ENTE R to display the message.
7.3 Display a message with special effects
Apart from font colour and size, you can use various effects for a message.
To use th ese effects, you need to use a page and apply effects t o i t.
You can program up to 26 pages in the message board.
You can also display a combination of pages.
Programming a page includes the following settings:
• I_EFF: incoming animatio n
• STAY: th e time the messag e will stay on the display
• SPEE D: message speed
• MODE: normal or blink ing
• O_EFF: outgoing animation
• PAGE CONTENT: the actual message
To program a page:
V. 01 – 14/11/2013 4 ©Velleman nv
Page 5

MML16MC
1. On the remote, press PROG.
Wait until EDIT PAGE? appears on the display.
2. Press ENTER.
3. Press ↑ t o select the page you want to program (A to Z).
4. Press ENTER.
I_EFF appears.
5. Press ↑ to set an effect.
6. Press → to go to the next setting.
STAY appears.
7. Press ↑ t o set seconds.
8. Press → to go to the next setting.
SPEED appears.
9. Press ↑ to set speed.
10. Press → to go to the next setting.
MODE appears.
11. Press ↑ t o se t m od e ( n orma l or b l ink ) .
12. Press → to go to the next setting.
O_EFF appears.
13. Press ↑ to set the effect.
14. Press ENTER.
Page A Content appears.
15. Type the message. You can use various colors and font sizes (see above).
16. Press ENTER.
The programmed page appears.
7.4 Schedu le dis p la y
You can schedule one or more programmed pages to appear at a give date.
You can define up to 5 schedules.
To do so, you n eed to define
• A start da te
• An end date
• The page or pages to display
To program a schedule:
1. On the remote, press PR OG.
2. Press ↓ unti l EDIT SCHEDULE? appears.
3. Press ENTER.
4. Press ↑ to select the schedule you want to program ( 1 to 5).
5. Press ENTER.
6. Use ↑ or ↓ to set the start year.
7. Press → to go to the next setting (STA RT MONTH).
8. Use ↑ or ↓ to set the month.
9. Press → to go to the next setting (STA RT DAY).
10. Use ↑ or ↓ to set th e day.
11. Repeat steps 9 and 10 for:
o START HOUR
o START MIN
o STOP YEAR
o STOP MONTH
o STOP DAY
o STOP HOUR
o STOP MIN
12. When done, press ENTER.
Display Pages appears on the board.
13. Type the page or pages you want to display.
V. 01 – 14/11/2013 5 ©Velleman nv
Page 6

MML16MC
14. Press ENTER.
The page will be displayed at the set times.
If you want to clear a schedule, you need to reset th e device. See "Resetti ng the d evice" below.
7.5 Combining multiple pages
You can display multiple programmed pages in the order you want.
1. On the remote, press RUN-PAGE.
2. Type the p ag es you want t o c ombine, for exa mple BACD.
3. Press ENTER.
8. Message Board Settings
Devi ce ID
If you want to control you r de vic e with the included software, you need to assign an ID to the device
first. You can do this with the software or with the remote. With the software, you can control multiple
messag e boards.
You can connect multiple boards to each other with a data cable (not included).
You can set the device ID as follows:
1. On the remote, press FUNCT.
2. P ress ↓ to select SET ID.
3. Press ENTER.
4. Use ↑ or ↓ t o set the de vice ID.
5. Press ENTER.
System Date and Time
You can set the date and time of th e board as follows :
1. On the remote, press FUN CT.
2. P ress ↓ to select YEAR.
3. Press ENTER.
4. Use ↑ or ↓ to set the year.
5. Press ENTER.
6. Repeat steps 1 to 5 for:
o MONTH
o DAY
o HOUR
o MINUTE
Brightness
You can set the brightness as follows:
1. On the remote, press FUNCT.
2. P ress ↓ to select BRIGHTNESS.
3. Press ENTER.
4. Use ↑ or ↓ to set the brightness.
5. Press ENTER.
Key Sound
You can turn key sounds on or off as follows:
1. On the remote, press FUNCT.
2. P ress ↓ to select KEY SOUND.
3. Press ENTER.
4. Use ↑ or ↓ to select YES OR NO.
5. Press ENTER.
Resetting the device
1. On the remote, press FUNCT.
2. P ress ↓ to select CLEAR ALL.
3. Press ENTER.
4. Use ↑ or ↓ to select YES OR NO.
V. 01 – 14/11/2013 6 ©Velleman nv
Page 7

MML16MC
5. Press ENTER.
The board r eturns to its factory se tting s.
9. Programming the board with the com pute r so ft wa re
The mes sag e board c omes with software you can use to program the board.
• First, you will install the device driver.
• Next, you will install the software itself (Multi-Color Sign).
• Both programs are on the included CD.
• To install the software, you need an administrator account.
9.1 Installing the device driver
1. Connect the message board to a power supply using the included cable.
2. Connect the message board t o a USB port of your computer using the included cable.
3. Insert the installation CD in your computer.
4. On the CD, open th e folder New_driver_WinXP_SP2_3_Vista_Win7_32_64bit_Win8_32_64bit and
double click the installer file.
o For 64 bi t system, use CP210xVCPInstaller_x64.exe
o For 32 bi t system, use CP210xVCPInstaller_x86.exe
5. Follow the instructions from the wiz ard.
9.2 Installing the message board software
1. On the CD, open the folder Install_Software.
2. Double click setup.exe.
3. Follow the instructions from the wiz ard.
4. Launch the software (Start - Pro grams - Multi-Color Sign).
9.3 Message board software: getting started
The software allows performing the same tasks as you can do with the remote. There are a few
differences.
• Functions only available in the software:
o You can save message files and reuse them later.
o You can create bitmap graphics and add them to your message.
Before you start
Before you start, it is recommended :
• to set the ID of the message board
• to set the clock on th e message b oard
Set the message board ID
1. Connect the board to your computer.
2. Open the Multi-Color Sign software.
3. On the Functions menu, click Set ID.
4. Select an ID from the list (optional).
5. Click OK.
Set the clock
1. Open the Multi-Color Sign software.
2. On the Functions menu, click Set Clock.
3. Select the device I D for which you want to set the clock.
4. Set the time and d a te
5. Click OK.
9.4 Typing a message
With the software, you can:
• create and save a me ssage
• add formatting and effects
• send the message to the board
V. 01 – 14/11/2013 7 ©Velleman nv
Page 8
MML16MC
• save th e message for later use
First message
1. Open the Multi-Color Sign software.
2. Type a message.
3. Save your file.
You can now send your message to the board.
Send a message
When your messag e is finished, you need to send it to the message board.
1. Click the Send message icon .
2. Select the device I D and page you want to use.
If you select 0 a s th e ID, every b oard will display the messag e.
3. Click OK.
The board displays the message.
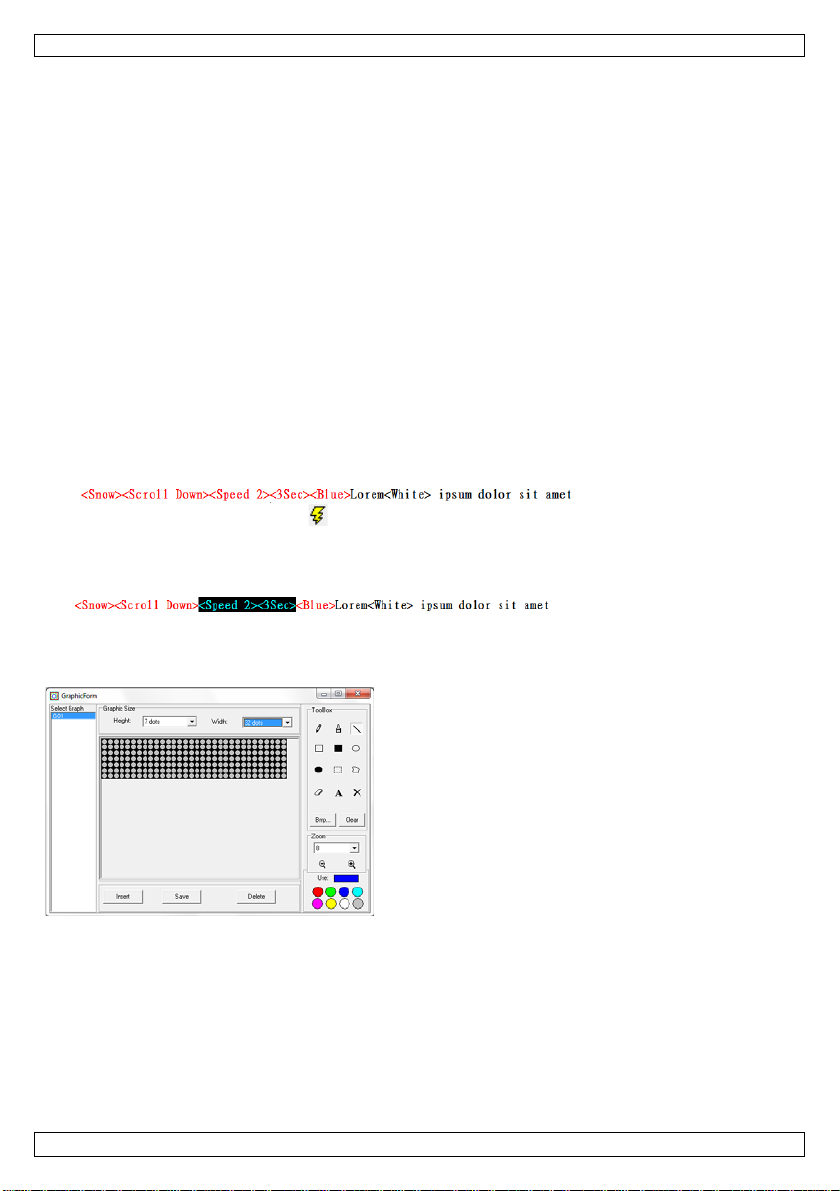
9.5 Formatting text
You can combine multiple colours and font sizes in one message.
Tags for text formatting
• The software uses tags t o add text formatting to your message.
• When you add format, the software inserts the corresponding tag at the cursor position.
• The format applies to the text followin g the tag, until you insert another tag.
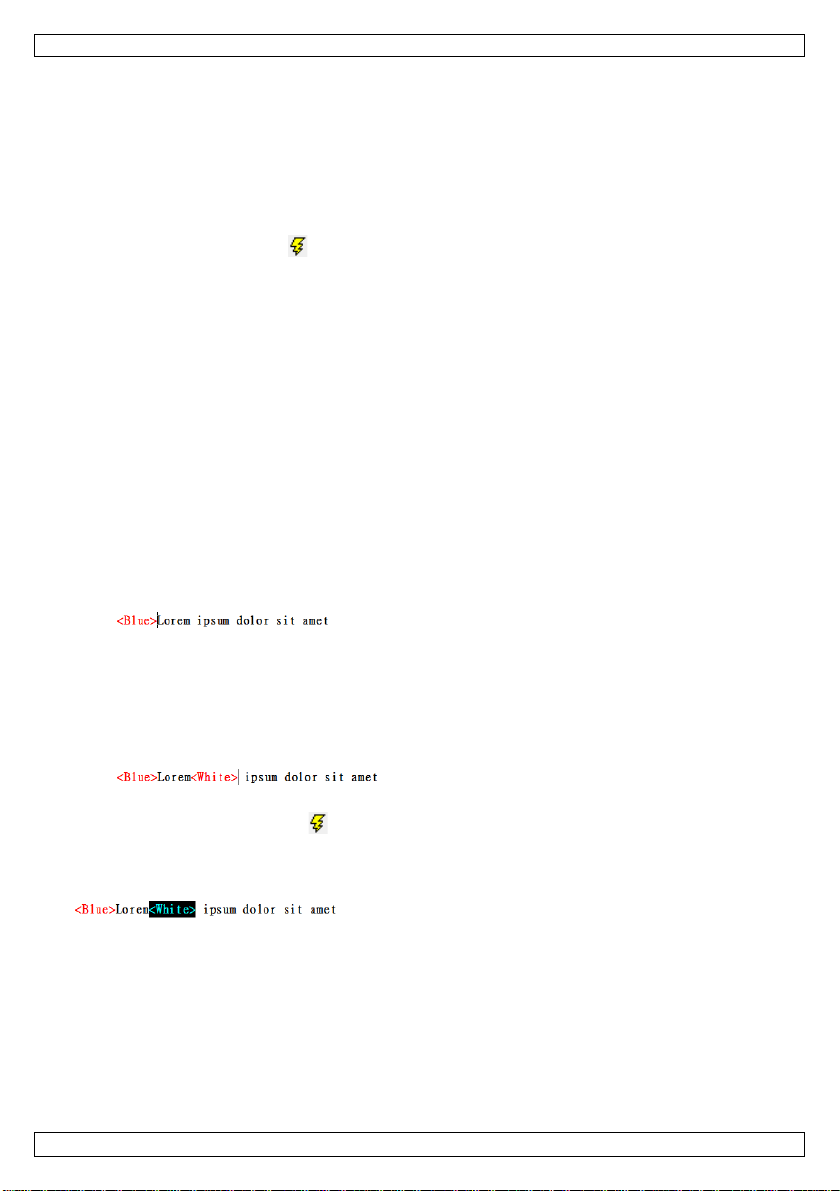
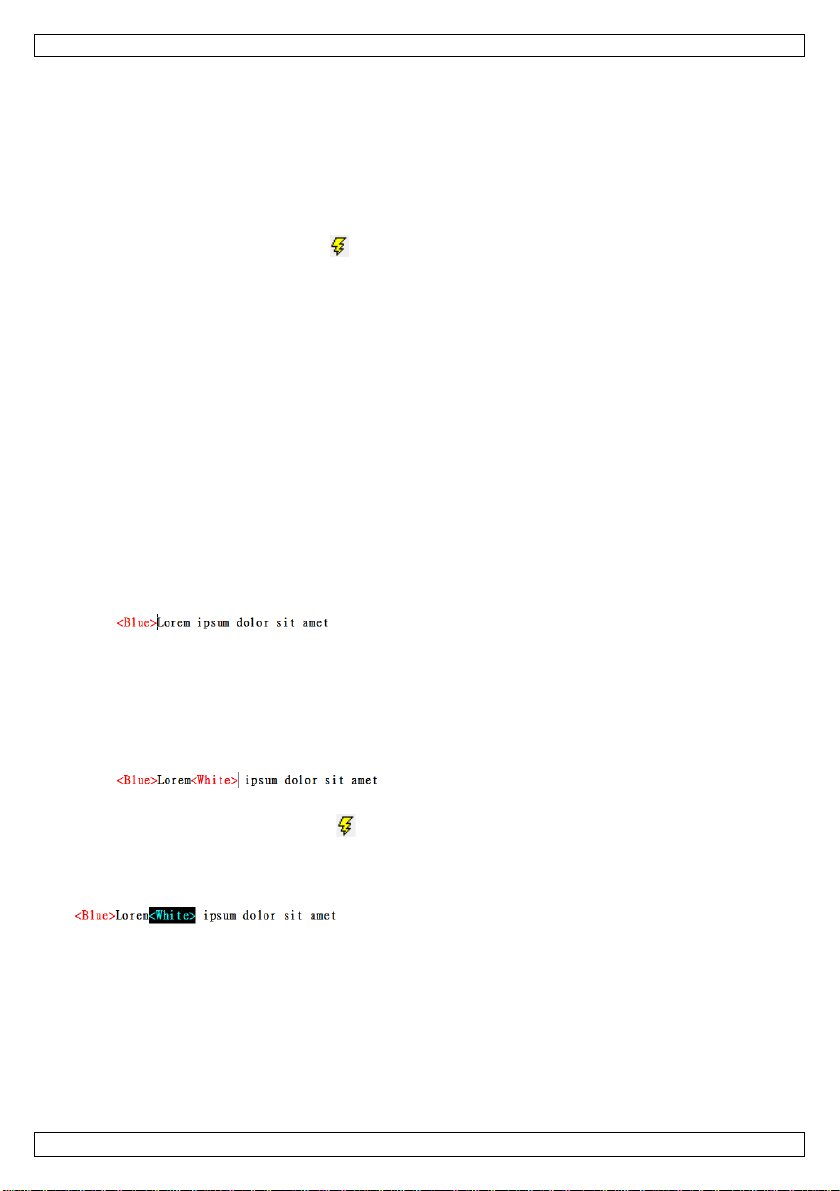
Example
1. Type a message containing multiple words.
2. To make th e enti r e sentenc e bl ue:
o Place the cursor at the beginning of the sentence.
o On the Color menu, click Blue.
The software inserts a tag for blue.
3. Send th e message to the b oard .
The mes sag e app ears in blue.
4. To make th e rest of the sentence white:
o Place the cursor after the first word.
o On the Color menu, click White.
The s oft ware inserts a tag for white.
5. S ave your message.
6. Send th e message to the b oard .
The mes sag e app ears in blue a nd whi te.
Remove form atting
• To remove te xt formatting, select the entire tag and p ress Delete on your key board.
9.6 Effects
You can apply various effe cts on a message. The effect categories are on the Commands menu:
• leading effect: how the text will a p pear
• clo sing effect: how the text will disappear
• display effect: how the message will display
• moving speed: speed of leading and closing effect
• display time: how long the message will display
• special settings (add sound; display date and time)
V. 01 – 14/11/2013 8 ©Velleman nv
Page 9
MML16MC
Tags for effects
• The software uses tags to add an effect to your messag e.
• When you add an effect, the software inserts the corresponding tag at the cursor position.
• You can only use 1 effect per category: if you insert 2 tags for moving speed, only the first one will
be taken into account.
• If you add leading and closing effects, make sure to insert the tag for the l eadi ng effect b ef ore th e
closing effect.
• For other ef fect tag s, the cursor positi on is not important: the effect applies to the entire message,
no matter where you insert the tag.
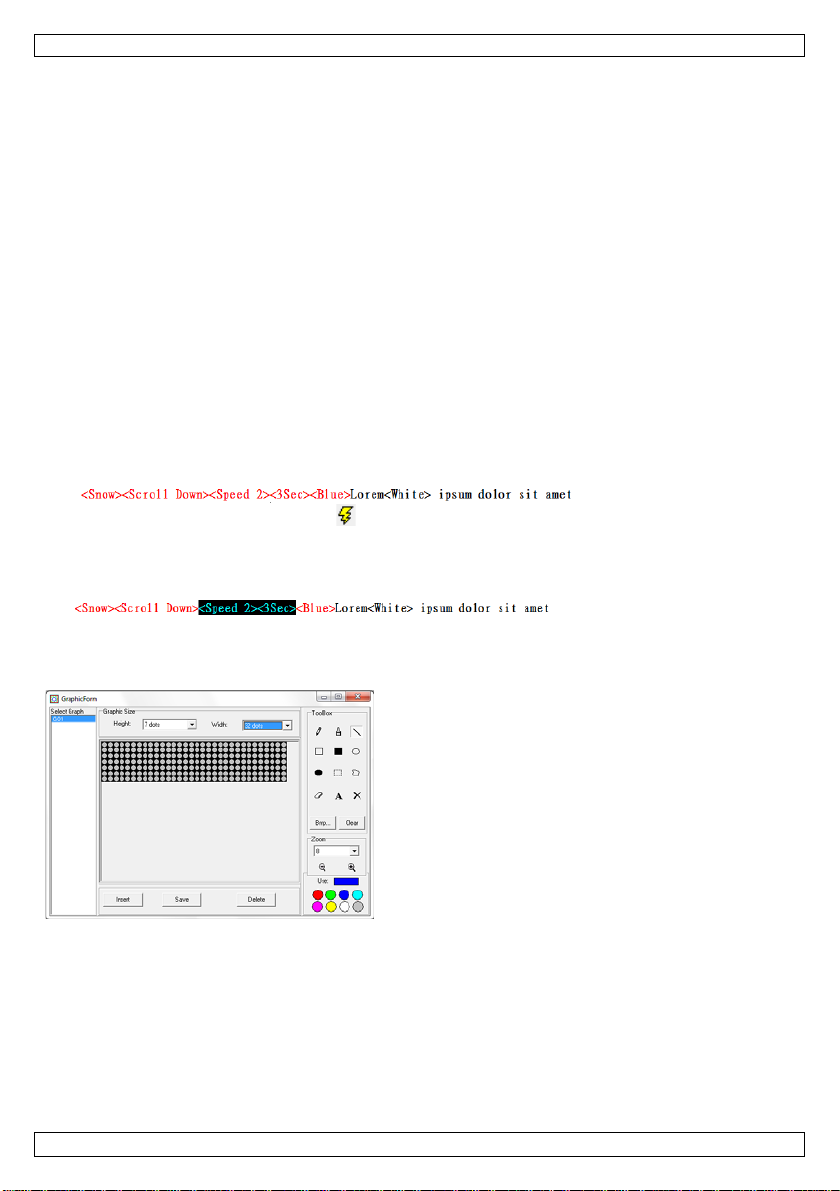
Example
1. Type a message containing multiple words.
You can use the message you created under 'Formatting Text' above if you have it.
2. On the Commands menu, click Leading Effect > Snow.
The software inserts the tag.
3. On the Commands menu, click Closing Effect > Scroll Down.
The software inserts the tag.
4. On the Commands menu, click Move Speed.
5. Set the speed to 2.
6. On the Commands menu, click Display Time.
7. Set the time to 3 seconds.
8. Save the file. The result lo oks like this:
9. Send th e message to the b oard .
Remove an effect
• To remove te xt formatting, select the tag or tags and press Delete on your keyb oard.
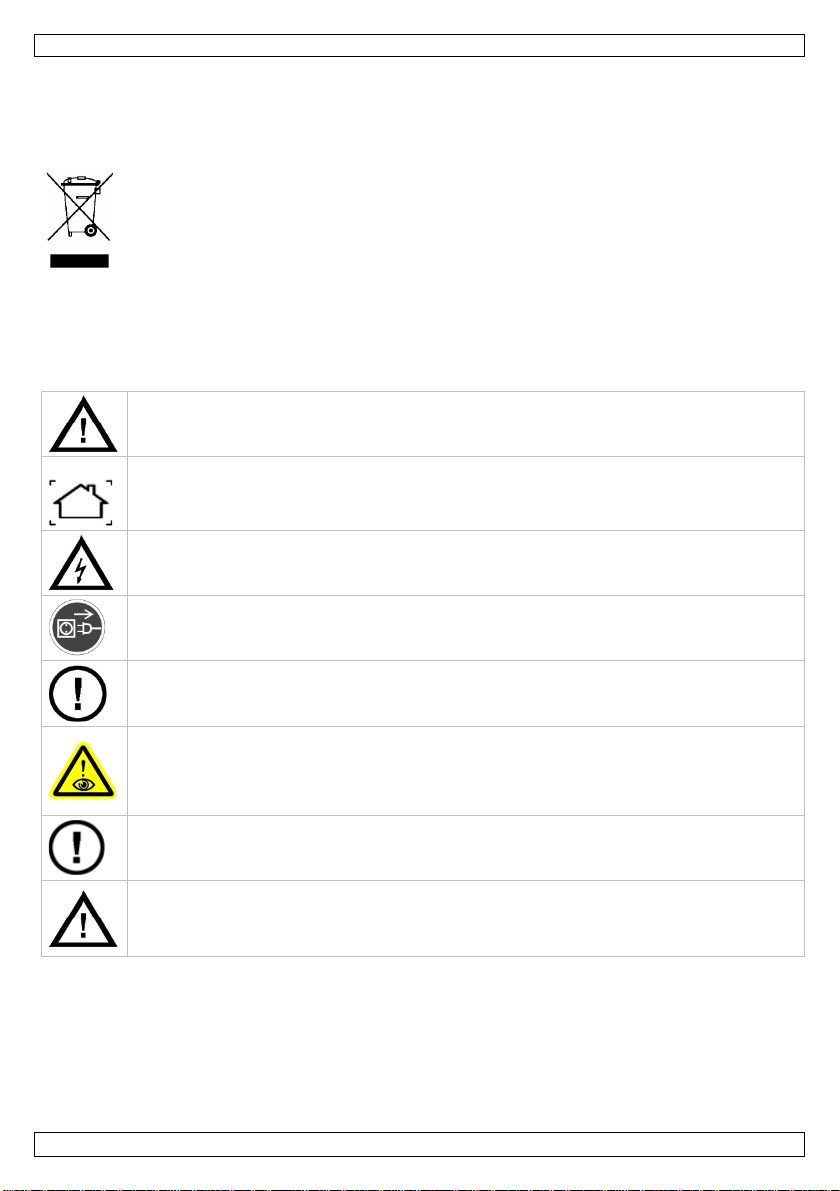
9.7 Using the graphic editor
With the graphic editor, you can cre at e graphics and i nsert them i n a message.
Create a graphic
1. On the Bmp Graphics menu, click Edit Graphic.
2. Set the graphic height and widht using the lists.
3. Click a colour.
4. Pick a tool from the t oolbox.
5. Create the graphic you want.
6. To save the graphic:
o Click Save.
o Select a name from the list and click OK.
V. 01 – 14/11/2013 9 ©Velleman nv
Page 10
MML16MC
Warning
viewing angle
120°
viewing distance
6-25 m
LED configurat ion
3-in-1 RGB
operating temperature
-20 °C to +45 °C
remote control: 2 x 1.5 V AAA batteries LR6C (incl.)
consumption
max. 20 W, average 5 W
dimensions
650 x 17 x 50 2 m m
viewable area
42 x 480 mm
weight
500 g
spare parts
remote c ontrol : MMLXXX/RC
Insert a graphic
1. In the text editor, insert the cursor at the end of the sentence.
2. Open the graphic editor (Bmp Graphics menu > Edit Graphic).
3. Select the name from the Select Graph column and click Insert.
4. Close the editor.
5. Send th e message to the b oard .
Delete a graphic
1. Open the graphic editor (Bmp Graphics menu > Edit Graphic).
2. Select a name from the Select Gr aph c olumn an d click Delete.
3. Click Yes.
10. Batteries
• Do not puncture batt eries or thr o w them in fire as th ey may explode.
• D o not att empt to rechar ge non-rechargeable batteries (alkaline).
• Dispose of batteries in accordance with local regulatio ns. Keep batteries away from
children.
To repl ace the battery of the remote control:
1. Sli d e open the battery cover at the ba ck and replace with a correct batteries (see Tech nical
Specifications). Respect the polarity.
2. Close the ba ttery cover.
Note: battery in message board.
The message board contains a CR2032 battery used for the device's internal memory. If you unplug the
board and notice that the d evice does no longer r emember the date and time, un screw the board cover
and insert a new battery of the same type.
11. Technical Spec ificat ions
display resolution 7 x 80 dots P6 RGB LEDs
pixel pitch 6 mm
operating humidity 20-90 %
power supply message board: 100-240 V ac 50-60 Hz to 5 V dc 4 A (adapter i ncl.);
2.5 x 5.5 mm jack
Use this device with original accessories only. Ve lleman nv cannot be held respons ible in the
event of damage or injury resulting from (i ncorrect) use of this device.
For more info concerning this product and the latest version of this manual, please visit our
website www.velleman.eu.
The information in this manual is subject to change without prior notice.
All r egistered tra d emar ks and trade names are properties of their respective owners and are used only
for the clarification of the compatibility of our products with the products of the different manufacturers.
Windo ws, Windows XP, Windows 2000, Windows Vista, Windows Aero, Windows 7, Windows 8, Windows
Mobi le, Windows Server are registered trademarks of Microsoft C orporation in the United States and
other countries.
V. 01 – 14/11/2013 10 ©Velleman nv
Page 11

MML16MC
© COPYRIGHT NOTICE
The copyright to this manual is owned by Velleman nv. All worldwide rights reserved. No part
of this man ual may be copied, reproduced , translated or reduc ed to any electronic medium or otherwise
without th e prior written consent of the copyright holder.
V. 01 – 14/11/2013 11 ©Velleman nv
Page 12
MML16MC
Kijk niet rechtstreeks in d e lichtbron
Herlaad geen al kali nebatterijen . Gooi batterijen weg volgens de plaatselijke milieuwetgevin g .
GEBRUIKERSHANDLEIDING
1. Inleiding
Aan alle ingezetenen van de Eu ropese Unie
Belangrijke milieu-info rmatie betreffende dit p roduct
verwijdering.
Dank u voor uw aankoop! Lees deze handleiding grondig voor u het toestel in gebruik n eemt. Wer d het
toestel beschadigd tijd ens het tran sport, i nstalleer het dan niet en raadpleeg uw dealer .
2. Veiligheidsinstructies
Dit symbool op h et toestel of de verpakking geeft aan dat, als het na zijn leven scyclus wordt
weggeworpen, dit toestel sch ad e kan toebrengen aan het milieu. Gooi dit toestel (en eventuele
batterijen) niet bij het gewone huishoudelijke afval; het moet bij een gespecia liseerd bedri j f
terechtkomen voor recyclage. U moe t dit toe stel naar uw verdeler of naar een lokaal
recycla g epunt b rengen. Resp ecteer de pla atselijke mili euwetgevin g .
Hebt u vragen, contacteer dan de plaatselijke autoriteiten betreffende de
Houd dit toestel b uiten het bereik van kind er en en onbevoegden.
Gebruik het toestel enkel bi nnenshuis. B esch erm het toe stel tegen regen, vochtigheid en
opspatten d e vloeist offen . Pl aa ts g een objecten gevuld met vloeistof op of naast het toest el.
Demon teer of open dit toestel NOOIT. Raak geen kabels aan di e onder stroo m staan, om
dodelijke elektroschokken te vermijden.
Trek de stekker uit het stopcontact voordat u h et toestel reinig t of als u het niet g ebrui kt.
Houd de voedingskabel altijd vast bij de stekker en niet bij de kabel.
Er zijn geen door de gebr uiker vervangbare onderdelen in dit toestel. V o or onderhoud en/of
reserveonderdelen, contacteer uw deal er.
, om het volgende te vermij den
• epilepsi ea anvall en bij g evoel ige personen
• tijdelijke blindheid (flitsblindheid)
• permanente (onherr oepel ijke) schade aan de ogen.
Gebruik het toestel niet in dien de behui zing of de bekabeling beschad igd is. Probeer in geen
geval het toestel zelf te reparer en maar contacteer uw verdeler.
WAARSCHUWING: U mag batterijen nooit doorboren of in het vuur gooien (explosiegevaar).
Houd batterijen uit het bereik van kinderen.
3. Algemene richtlijnen
Raadpleeg de Velleman® service- en kwaliteitsgarantie achteraan deze handleiding.
• Om veili gheidsredenen mag u geen wijzigingen aanbrengen. Schade door wijzigingen die de
gebruiker heeft aangebracht aan het toestel valt niet onder de garantie.
• De gar a ntie geldt ni et voor schade door het negeren van bepaalde richtlijnen in deze handleiding en
uw deal er zal d e verantwoordeli j kh ei d af wijzen voor def ecten of probl emen die hi er rechtstreeks
verband mee houden.
• Leer eerst d e functies van het toestel kennen voor u het g aat gebruiken. Ongeschoolde personen
V. 01 – 14/11/2013 12 ©Velleman nv
Page 13
MML16MC
Hoofdletters
Witte symbol en op de toetsen (nummers, symbolen)
Kleine let ter s
Groene symbol en op de toetsen (symbolen)
mogen dit toestel niet gebruiken. Meestal is beschadiging het gevolg van onprofessioneel gebruik van
het t oestel.
• Gebruik het toestel enkel waarvoor h et g emaakt is. A ndere toep a ssingen kun nen leiden tot
kortsluitingen, brandwonden, elektrische schokken, enz. De garantie vervalt automatisch bij
ongeoorloofd gebruik.
4. Eigenschappen
• weergavekleur (tekst en grafische pagina's): rood, groen, blauw, geel, magenta, cyaan, wit
• helderh ei d : zeer helder wit 2100 cd/m², 4 hel derheidsniveaus
• geheugen: 26 tekstpagina's met 210 karakters, en 16 grafische pagina's
• real timeklok: ingeb ouwde realtimeklok met r eserveb atterij
• 12/24 formaat
• zoemer: ingebouwde zoemer met instelbare duur
• aansturing: via afstandsbediening (44 toetsen)
via pc-kabel (meegeleverd), US B naar 3.5mm-jack
• inhoud: IR-afstandsbediening, gebruikershandleiding, 2 montagebeugels, netadapter
5. Omschrijving
Raadpleeg de afbeeldingen op pagina 2 van deze handleiding.
6. De lichtk ran t programmere n met de afstandsbe dienin g
U kunt d e d isplay programmeren met de meegel ever de af standsbediening of via uw computer . Zie "De
lichtkrant programmeren met de computersoftware".
Eerste bericht
Een bericht ingeven:
1. Sluit de lich tkr ant aan op een voeding sb ron met de m eegeleverde k a b el.
2. Op de afstandsbediening, druk op Q-PROG.
3. Typ HELLO met d e karaktertoetsen
Toetst u een verkeer d ka r a kter in, wis deze dan met d e DEL-toets.
4. D ruk op ENTER.
Het bericht verschijnt op het scherm.
Datum- en tijdweergave
1. Druk op TIME/DATE om en kel de tijd en de datu m weer te gev en.
2. Druk op ESC om de weerg ave van de datum en tijd te annuleren.
6.2 Verschillende karakters: kleine letters, nummers en symbolen
Gebruik de SHIFT-toets o m de tekst weer te geven in kleine letters, nummers of symbolen.
Het symbool op het scherm geeft d e huidige actieve modus weer .
1. Druk op Q-PROG.
2. Geef één of meerd ere karakters in.
3. Druk o p SHIFT.
De kleinelettermodus is g eactiveerd.
4. Geef één of meerd ere karakters in.
5. Druk o p SHIFT.
De numeri eke modus is geactiveerd.
6. Geef één of meerd ere karakters in.
V. 01 – 14/11/2013 13 ©Velleman nv
Page 14

MML16MC
7. Druk o p SHIFT.
De sy mboolmodus is g ea ctiveerd.
8. Geef één of meerd ere karakters in
9. Druk o p SHIFT.
U bevindt zich opnieuw in hoofdlettermodus.
10. Dru k op E N T ER om het b ericht weer te g even.
6.3 Letters met accenten en diakritische tekens
U kunt letters met accen ten ingeven. U wilt bijvoorbeel d ç en ö in vo eg en.
1. Druk op Q-PROG.
Standa ard worden d e letters weer g egeven in hoofdletters.
Dru k op SH IFT om naar kl eine letters over te schak elen.
2. D ru k op de C-toets.
3. Druk op EUROP-CHAR tot "ç" vers chi j nt.
4. Druk op om het even welke toets om normale kar a kters in te geven.
5. D ru k op de O-toets.
6. Druk op EUROP-CHAR tot "ö" verschijnt.
7. Druk op om het even welke letter om normale karakters in te g even.
8. D ruk op ENTER om het bericht weer te geven.
7. Tekstopmaak
7.1 Tekstkleur
U kunt de tekstkleur van een bericht wijzigen als volgt:
1. Druk op Q-PROG.
De standaardkleur is wit.
2. Geef enkele letters in.
Deze letters zij n wit.
3. D ru k op COLOR om de tekstkleur te wijzigen.
Druk meermaals op COLOUR om door de kl euren te bladeren.
4. Geef enkele letters in.
De volgende letters w orden in een andere kleur weergegeven.
Herhalen
5. Druk op ENTER o m het bericht weer te geven.
7.2 Tekstgrootte
U kunt kar akters met een ver schillen d e grootte weergev en als volgt:
1. Druk op Q-PROG.
2. Geef enkele letters in.
3. Druk op FONT.
De tekstgrootte is gewijzigd.
4. Druk nogmaals op FONT om de te kstgrootte te selecteren (s mal - normaal - vet). De g rootte blijft
actief tot u een andere gr o o tte selecteert. U kunt nog karakters toev oegen.
5. Druk op EN T ER om het beri cht weer te geven.
7.3 Een bericht met speciale effecten weergeven
Behalve de tekstkleur en -g r o otte, kunt u ook verschill ende effecten op een bericht toepassen .
Gebruik een pagina om deze effecten toe te passen.
U kunt tot 26 pagina's in de lichtkrant programmeren.
U kunt even eens een combinatie van pagina's weergeven.
Een pagina programmeren bestaat uit de volgende instellingen:
• I_E FF: invoegef f ecten
• STAY: d e w eergav eduur van het b ericht op het scherm
• SPEED: berichtsnelheid
• MODE: normaal of knipperen
• O_EFF: uitvoegeffecten
• PAGE CONTENT: het huidige bericht
V. 01 – 14/11/2013 14 ©Velleman nv
Page 15

MML16MC
Een pagina programmeren
1. Op de afstandsbediening, druk op PROG.
Wacht tot EDIT PAGE? verschijnt op het scherm.
2. D ruk op ENTER.
3. Druk op ↑ om de pagina te selecteren die u wil t p rogrammeren (A to t Z ).
4. D ruk op ENTER.
I_EFF verschijnt op het scherm.
5. Druk op ↑ om een effect in te stellen.
6. Druk op → om naar de volgende instelling te gaan.
STAY verschijnt op het scherm.
7. Druk op ↑ om seconden in te stellen.
8. Druk op → om naar de volgende instelling te gaan.
SPEED verschijnt op het scherm.
9. Druk op ↑ om de snelheid in te stellen.
10. Druk op → om naar de volgende instelling te gaan.
MODE verschijnt op het scherm.
11. Druk op ↑ om de modus in te stellen (normaal of knipperen).
12. Druk op → om naar de volgende instelling te gaan.
O_EFF verschijnt op het scherm.
13. Druk op ↑ om het effect in te stellen.
14. Druk op ENTER.
Inhoud pagina A verschijnt op het scherm.
15. Geef het ber icht in. U kunt verschillende kleuren en tekstgroottes gebr uiken (zie boven).
16. Druk op ENTER.
De gep r ogr ammeerde pagina verschi j nt op het sch erm.
7.4 Geprogramme erd bericht
U kunt één of meerdere gep rogrammeerde pagina's op een ingestelde d a tum weergeven.
U kunt tot 5 berichten programmeren.
Definieer hiervoor
• Een startdatum
• Een einddatum
• De weer te geven pagina('s)
Een bericht programmeren:
1. Op de afstandsbediening, druk op PROG.
2. Druk op ↓ tot EDIT SCHEDULE? verschijnt.
3. D ruk op ENTER.
4. Druk op ↑ om het ber icht te selecteren d a t u wi lt programmeren (1 tot 5).
5. D ruk op ENTER.
6. Druk op ↑ of ↓ om het star tj aar in te stellen.
7. Druk op → om naar de volgende instelling (START MONTH) te gaan.
8. Druk op ↑ of ↓ om de ma a nd in te stellen.
9. Druk op → om naar de volgende instelling te gaan (START DAY).
10. Druk op ↑ of ↓ om de da g in te stellen .
11. Herha al de stappen 9 en 10 voor:
o START HOUR
o START MIN
o STOP YEAR
o STOP MONTH
o STOP DAY
o STOP HOUR
o STOP MIN
12. Wanneer klaar, druk op ENTER.
Display P a ges verschijnt op het scherm.
V. 01 – 14/11/2013 15 ©Velleman nv
Page 16

MML16MC
13. Geef de pagina('s) in d ie u wilt weergeven.
14. Druk op ENTER.
De pagina wordt op de ingestelde tijd weergegeven.
Reset het toestel om een geprogrammeerd b er icht te wissen. Z ie hierond er "Het toe stel resetten".
7.5 Meerdere pagi n a's combineren
U kunt meerder e pagina's weer g even in de volg orde die u wilt.
1. Op de afstandsbediening, druk op RUN-PAGE.
2. Geef d e pagina's in die u wilt combineren, bijvoo rbeeld BACD.
3. D ruk op ENTER.
8. De li chtk ran tinste llin gen
Toestel-ID
Wijs eer st een I D-nummer toe aan het toestel, om uw toe stel met de meegeleverde software a a n te
sturen . U kunt d it met de software of met de af standsbediening. Met de software kunt u meer d ere
lichtkranten aansturen.
U kunt meerdere lichtkranten koppelen met een g egevenskab el (niet meegeleverd).
U kunt het toestel-ID instellen als volgt:
1. Op de afstandsbediening, druk op FUNCT.
2. Druk op ↓ om SET ID te selecteren.
3. D ruk op ENTER.
4. Druk op ↑ of ↓ om het toestel-ID in te stellen.
5. D ruk op ENTER.
Datum en uur
U kunt de datum en tijd instellen als volgt:
1. Op de afstandsbediening, druk op FUNCT.
2. Druk op ↓ om YEAR te selecteren.
3. D ruk op ENTER.
4. Druk op ↑ of ↓ om het jaar in te stellen.
5. D ruk op ENTER.
6. Herhaal de stappen 1 tot 5 voor:
o MONTH
o DAY
o HOUR
o MINUTE
Helderheid
U kunt de helderheid instellen als vo lgt:
1. Op de afstandsbediening, druk op FUNCT.
2. Druk op ↓ om BRIGHTNESS te selecteren.
3. D ruk op ENTER.
4. Druk op ↑ of ↓ om de h elderheid in te stellen.
5. D ruk op ENTER.
Toetsgeluid
U kunt de toetsgeluiden in- of uitschakelen als volgt:
1. Op de afstandsbediening, druk op FUNCT.
2. Druk op ↓ om KEY S OUN D te selecteren .
3. D ruk op ENTER.
4. Druk op ↑ of ↓ om YES OR NO te selecteren.
5. D ruk op ENTER.
Het toestel resetten
1. Op de afstandsbediening, druk op FUNCT.
2. Druk op ↓ om CLEAR A LL te selecter en.
3. D ruk op ENTER.
V. 01 – 14/11/2013 16 ©Velleman nv
Page 17

MML16MC
4. Druk op ↑ of ↓ om YES OR NO te selecteren.
5. D ruk op ENTER.
Het toe stel wordt na ar de fab r ieksinstellingen teru ggezet.
9. De lic ht krant met de co mputersof t wa re pro grammeren
De lichtkrant wordt geleverd met software, w a armee u het toestel kunt programmeren.
• Install eer eer st d e driver.
• Install eer ver vol gens de software (Mu lti-Color S ign).
• Beide programma's vindt u op de meegeleverde cd.
• U hebt een administr atoraccount nodig om de software te i nstalleren.
9.1 De driver i n st alleren
1. Sluit de lich tkr ant aan op een voeding sb ron met de m eegeleverde k a b el.
2. Sluit de lichtkrant aan op een USB-poort van uw computer met de meegeleverde kabel.
3. Plaats de installat ie-cd in uw computer.
4. Op de cd, open de map New_driver_WinXP_SP2_3_Vista_Win7_32_64bit_Win8_32_64bit en
dubbelklik op het installeerbestand.
o Voor een 64-bit systeem, gebr uik CP210xVCPI nstaller_x64.exe
o Voor een 32-bit systeem, gebr uik CP210xVCPI nstaller_x86.exe
5. Volg de instructies in de wizard.
9.2 De software van d e lichtkrant installeren
1. Op de cd, open de map Install_Software.
2. D u bbel klik op setup.exe.
3. Volg de instructies in de wizard.
4. Start de software (Start - Programs - Multi-Color Sign).
9.3 Softw are van de lichtkrant: aan de slag
Met de software kunt u dezelfde taken uitvoeren als met de afs tandbed iening. Er zijn enkele verschil len.
• Functies enkel beschikbaar in de software:
o U kunt berichtbestanden opslaan en deze later opnieuw gebruiken.
o U kunt afbeeldingen cr eër en en aan uw bericht toevoegen .
Voor u begint
Voor u begint, raden wij u aan om:
• het ID-nummer van de lichtkrant in te stellen
• de klok op de lichtkrant in te stellen
Het toestel-ID instellen
1. Sluit de lichtkrant aan op uw computer.
2. Op en de software (Multi-color Sign ).
3. Kli k in het functiemenu op Set ID.
4. Selecteer een ID-nummer uit de lijst (optioneel).
5. Klik op OK.
De klok instellen
1. Op en de software (Multi-color Sign ).
2. Kli k in het functiemenu op Set Clock.
3. Selecteer het toestel-ID waarvoo r u de klok wilt instellen.
4. De tijd en datum instellen
5. Klik op OK.
9.4 Een bericht ingeven
Met de software kunt u:
• een ber icht opstellen en opsla an
• opmaak en effecten toevoegen
• het bericht naar de lichtkrant verzenden
V. 01 – 14/11/2013 17 ©Velleman nv
Page 18
MML16MC
• het bericht opslaan voor later gebruik
Eerste bericht
1. Op en de software (Multi-color Sign ).
2. Geef een beri cht in.
3. Sla uw bestand op.
U kunt uw bericht nu naar de lichtkrant verzenden.
Een bericht verzenden
Stuur het bericht naar de lichtkrant wanneer het klaar is.
1. Klik op de icoon bericht ver zenden .
2. Selecteer het toestel-ID en pagina die u wilt gebruiken.
Al s u "0" selecteert als ID-nummer, d an zal elk toestel het beri cht weergeven.
3. Klik op OK.
De lichtkrant geeft h et b ericht weer.
9.5 Tekstopmaak
U kunt meerder e kleuren en tekstg roottes in één bericht combineren.
Tags voor tekstopmaak
• De soft ware maakt gebr u ik van tags om tekst opmaak aan uw bericht toe te voeg en.
• Wanneer u opma ak toevoegt, d an voegt de software de ov er eenkomsti g e ta g in bij de cursorpositi e.
• De tekstopmaak is van toepassing op de tekst tussen de tags.
Voorbeeld
1. Geef een beri cht met meerdere w o orden in.
2. De volledige zin in het blauw weergeven:
o Plaats de cursor in het begin van de zin.
o Klik in het kleurenmenu op Blue.
De software voeg t een tag in voor de kleur bl a uw.
3. Stuur het bericht naar de lichtkrant.
Het bericht verschijnt in het blauw.
4. Om de rest van de zin weer te geven in het wit:
o Plaats de cursor achter het eerste woord.
o Klik in het kleurenmenu op White.
De software voeg t een tag in voor de kleur wi t.
5. Sla uw bericht op.
6. Stuur het bericht naar de lichtkrant .
Het bericht verschijnt in het blauw en wit.
Opmaak verwij deren
• Sel ecteer de tag en d ruk op Del ete o m de tekstop maak te verwijderen.
9.6 Effecten
U kunt meerder e ef fecten op een ber icht toepassen . De categori eën i n het opdrachtenmenu zijn:
• leading effect: hoe de tekst zal verschij nen
• closing effect: hoe de tekst zal verdwijnen
• di splay effect: hoe het bericht zal verschijnen
• moving speed: snelheid van de in- en uitvoegeffecten
• display time: hoe lang het bericht zal verschijnen
• specia le instell ingen (geluid toevoegen; datum en tijd weergeven)
V. 01 – 14/11/2013 18 ©Velleman nv
Page 19
MML16MC
Tags voor effecten
• De software maakt gebruik van tags om een effect aan uw bericht t oe t e voegen .
• Wanneer u een effect toevoegt, voegt de software de overeenkomstige tag in bij de cursorpositie.
• U kunt slechts 1 effect per categorie g ebruiken: voegt u 2 tags in voor de bewegingssnelheid, dan
wordt enkel rekening gehouden met de eerste tag.
• voegt u in- en uitvoegef f ecten toe, zorg er dan voor dat u eer st de tag voor het invoegeffect invoegt
en dan pas de tag voor het uitvoegeffect.
• Voor andere tags is de cursorpositie niet b elangrijk: het effect is van toepassing op het volledige
bericht, om het even waar u de tag invoegt.
Voorbeeld
1. Een bericht met meerdere woorden invoegen.
U kunt h et bericht gebruiken dat u hebt gecreëer d in 'Tekst opmaken'.
2. Kli k in het opdrachtenmenu op Leading Effect > Snow.
De software voeg t de tag in.
3. Kli k in het opdrachtenmenu op Closing Effect > Scroll Down.
De software voeg t de tag in.
4. Kli k in het opdrachtenmenu op Move Speed.
5. Stel de snelheid in op 2.
6. Kli k in het opdrachtenmenu op Display Time.
7. Stel de tijd in op 3 seconden.
8. Sla het bestand op. Het resultaat ziet er als volgt uit:
9. Stuur het bericht naar de lichtkrant .
Een ef fect verwijderen
• Sel ecteer de tag( s) en druk op Delete om d e tekstopmaak te verwij d eren.
9.7 De grafisc h e editor gebruiken
Met de graf ische editor kunt u gr afisch e b eelden creëren en invoegen in een bericht.
Een grafisch b eel d creëren
1. Kli k in het menu Bmp Graphics op Edit Graphic.
2. Stel de beeldhoogte en -breedte in met de lijsten.
3. Klik op een kleur.
4. Kies een tool u it de werkset.
5. Maak het gewenste beeld.
6. E en grafi sch beeld opslaan:
o Klik op Save.
o Selecteer een naa m u it de lijst en kl ik op OK.
V. 01 – 14/11/2013 19 ©Velleman nv
Page 20

MML16MC
Waarschuwing
Houd batterijen uit het bereik
pixelafstand
6 mm
gezichtshoek
120°
kijkafstand
6-25 m
leds
3-in-1 RGB
voeding
lichtkrant: 100-240 Vac 50-60 Hz tot 5 Vdc 4 A (n etadapter meeg elev.);
afstandsbediening: 2 x 1.5 V AAA-batter ij LR6C (meegel ev.)
verbruik
max. 20 W, gemiddeld 5 W
afmetingen
650 x 17 x 50 2 m m
zichtbar e d eel
42 x 480 mm
gewicht
500 g
reserveonderdelen
afstandsbediening: MMLXXX/RC
Een grafisch beeld invoegen
1. P laats in de teksted itor de cur sor aan het einde van de zin.
2. Open de grafische editor (Bmp Graphics menu > Edit Graphic).
3. Selecteer de naam ui t de kolom Select Graph en klik op Insert.
4. Sluit de editor.
5. Stuur het bericht naar de lichtkrant .
Een grafisch b eel d verwijderen
1. Open de grafische editor (BMP Graphics menu > Edit graphic).
2. Selecteer een naam uit de kolom Select Graph en klik op Delete.
3. Klik op Yes.
10. Batterijen
• U mag batterijen nooit doorboren of in het vuur gooien (explosiegevaar).
• Herlaad geen al kali nebatterijen .
• Gooi b a tter ijen weg volg ens de plaatselij ke milieuwetgeving .
van kinderen.
De batter ijen van de af standsbedienin g vervangen:
1. Schuif het batterijdeksel aan d e achterkant van het toestel open en plaats nieu we batter ijen (zie
Technische specificaties). Resp ecteer d e polari teit.
2. Sluit het batterijdeksel.
Opmerking: batterij in de lichtkrant.
De lichtkrant wordt geleverd met een CR20 32-b atterij di e gebruikt wordt v oor h et interne geheugen van
het t oestel. Als u merkt dat b ij het loskoppelen van het toestel de datum en tijd ni et meer w ordt
weergeg even, schroef d an het deksel van de lichtkrant los en pla ats een nieuwe batterij van hetzelfde
type.
11. Technische specificaties
resolutie 7 x 80 punten P6 RGB-Leds
werktemperatuur -20 °C tot +45 °C
vochtigheidsgraad 20-90 %
2.5 x 5.5 m m-jack
Gebruik dit toestel enkel met originele accessoires. V elleman nv is niet aansprakelijk vo or
schade of k wetsuren bij (verkeerd) gebruik van dit toestel.
Voor meer informatie over dit product en de laatste versie van deze han dleidin g, zie
www.velleman.eu.
De informatie in deze handleiding kan te allen tijde wo rden gewij zi gd zonder vo orafgaand e
kennisgeving.
All e g eregistreer de handelsmerken en handelsnamen zijn eigendom van h un resp ectieve bezitters, en
zijn enkel gebruikt als voorbeeld van de compatibiliteit tussen onze producten en de producten van de
verschillende fabrikanten.
V. 01 – 14/11/2013 20 ©Velleman nv
Page 21

MML16MC
Windo ws, Windows XP, Windows 2000, Windows Vista, Windows Aero, Windows 7, Windows 8, Windows
Mobi le, Windows Server zijn geregistreerde han d elsmerken van Microsoft C orporati on in de Verenigde
Staten en in andere landen.
© AUTEURSRECHT
Velleman nv heeft het auteursrecht voor deze handleiding. Alle wereldwijde rechten
voorbehouden. Het is niet toegestaan om deze handleiding of ged eelten ervan over te nemen, te
kopiëren, te vertalen, te bewerken en op te slaan op e en elektronisch medium zonder voorafgaande
schriftelijke toeste mmin g van de rechtheb b ende.
V. 01 – 14/11/2013 21 ©Velleman nv
Page 22
MML16MC
Ne pas regarder directement dan s la source lumineuse, afin d'éviter les risques
Ne pas utiliser l'ap pareil si le boîti er ou le câb lage est endommag é. Ne pas essayer d e réparer
Avertissement : Ne jamais p erforer les p i les et ne pas les jeter au feu (dang er d ’explosion).
réglementation locale relative à la protection de l ’environnement. Garder les p i les hors de la
MODE D 'E M PLOI
1. Introduction
Aux résidents de l'Union europ éenne
Informations environnementales importantes concernant ce produit
En cas de doute, contacter les autorités loca les pour éliminat ion.
Nous vous remercions de votre achat ! Li r e le présent mode d'empl oi attentivement avant l a mise en
service de l'appareil. Si l'ap pareil a été endommagé pendant le transport, ne pas installer et consulter
votre reven d eur.
2. Consignes de sécurité
Ce symbole sur l'appare il ou l'emballage indique que l'é limination d'un appareil en fin de vie
peut polluer l'en vironnement. N e p as jeter un ap p areil électr ique ou él ectroni que (et des pi les
éventuelles) parmi les d échets municip a ux non sujets au tri sélectif; un e déchèterie traitera
l'appareil en question. Renvoyer cet app arei l à votre f our ni sseu r ou à un service de recyclage
local. Il convient de respecter la réglementation locale relative à la pro tectio n de
l'environnement.
Garder l'appareil hors de la portée des enf ants et des per sonnes non autorisées.
Util iser cet appareil uniquement à l'intérie ur. Protéger d e la pluie, d e l ’humi dité et des
projections d’eau. Ne jamais placer d’objets contenant du liquide sur l’appareil.
NE JAM AIS désassembler ni ouvrir le boîtier. Toucher un câble sous tension peut causer des
él ectrochocs mortels.
Toujour s d éb rancher l ’appareil s’il n’est pas utilisé et avant le nettoyage ou l'entretien . Ti rer
sur la fiche pour débrancher l'appareil ; non pas sur le câble.
Il n’y a au cune pièce réparable par l’utilisateur. Com man der des pièces de recha nge
éventuelles chez votre r evendeur.
• de crise d’épilepsie chez les p er sonnes sujettes
• d’aveug lement temp oraire (aveuglement par écla ir)
• d’endommagement permanent (irréversible) de l’œil.
l'appare il so i-même, contacter votre revendeur.
Ne jamais recharger des piles alcal ines. Se déba r rasser des pi les en respectant la
portée d es en fants.
3. Directives générales
Se référ er à l a garantie de service et de qu alité Velleman® en fin de ce mode d'emploi.
• Il est interdit de modifier l'appareil pour des raisons de sécurité. Les dommages occasionnés par des
modifications par le client ne tombent pas sous la garantie.
• Les dommages occasi onnés par des modificatio ns à l'appareil par le client, ne tombent pas sous la
garan tie et votre revendeur déclinera toute responsabili té p our les problèmes et l es d éf auts qui en
résultent.
V. 01 – 14/11/2013 22 ©Velleman nv
Page 23
MML16MC
Majuscules
Symboles b lancs sur les touches (chif fres, symboles)
Minuscules
Symboles verts sur les touches (symboles)
• Se familiariser avec le fonctionnement de l'appareil avant de l'utiliser. Seules d es p ersonnes
qualifiées sont autorisées à utiliser cet appareil. La plupart des dégâts sont causés par un usage non
professio nnel de l'appareil.
• N’utiliser l'appareil qu’à sa fonction prévue. Tout autre usage peut causer des courts-circuits, des
brûl ures, des électrochocs, etc. Un usage impropre annule d'office la garantie.
4. Caractéristiques
• couleur d ' af fichage (texte et pages graphiques) : rouge, vert, bleu, jau ne, magenta, cyanogène,
blanc
• luminosité : blanc très lumineux 2100 cd/m², 4 niveaux de luminosité
• mémoi re : 26 pages textuell es d e 210 caractères, et 16 pages graphi q ues
• horloge temps r éel : horloge temps réel intég rée avec pile de rechange
• for ma t 12 / 24h
• ronfleur : ronfleur incorporé avec durée programmable
• con trôle : par télécommande (44 touches)
par câble PC (incl .), USB ver s conn ecteur jack de 3.5 mm
• contenu : télécommande IR, mode d'emploi, 2 supports de montage, adaptateur secteur
5. Description
Se référ er aux figures en p age 2 de ce mode d'emploi.
6. Programmer le journal lumineux avec l a téléco mmand e
Il est possible de programmer l'écran avec la télécommande (incl.) ou depuis votre ordinateur. Vo ir
"Programmer le journal lumineux avec le lo gic iel informatique".
Premier mes sage
Saisir un messag e :
1. Connecter le journal lumineux à l'alimentation secteur avec le câble inclus.
2. Sur la télécommande, en foncer Q-PROG.
3. Composer H ELLO avec l es touches caractères.
En cas d' er reur, utiliser la touche DEL pour effacer le dernier caractèr e.
4. Appuyer sur ENTER.
Le me ssa ge s' a ffiche à l'écran.
Afficher l'heu re et la date
1. Appuyer sur TIME/DATE pour afficher l'heure et la date uniquement.
2. Enfoncer ESC pour supprimer l'affichage de la date et l’heure
6.2 Différent s c aractères : minuscules , chi ff res et symboles
Utiliser la touche SHIFT pour afficher une minuscule, un chiffre ou un symbole.
Le symbole sur l'affichage indi que quel mode est actuellement activé.
1. Enfoncer Q-PROG.
2. Saisir un ou plusieurs caractères.
3. Enfoncer SHIFT.
Le mode min uscules est activé.
4. Saisir un ou plusieurs caractères.
5. Enfoncer SHIFT.
Le mode numérique est activé.
V. 01 – 14/11/2013 23 ©Velleman nv
Page 24

MML16MC
6. Saisir un ou plusieurs caractères.
7. Enfoncer SHIFT.
Le mode symboles est a ctivé.
8. Saisir un ou plusi eur s ca ractères.
9. Enfoncer SHIFT.
Revenir en mode majus cul es.
10. Appuyer sur ENTER pour aff icher le message.
6.3 Lett res ac c entuées et signes diac ri tiques
Il est possi ble de saisir des lettres accentu ées. Par exempl e , pour sa isir les lettres ç et ö.
1. Enfoncer Q-PROG.
Par d é f a ut, les lettres sai sies sont affichées en maj uscules.
Enfoncer SHIFT pour passer en minuscules.
2. Enfoncer la touche C.
3. Enfoncer EUROP-CHAR jusqu'à ce que " ç" s' a f fi che.
4. Appuyer sur une touche quelconque pour saisir un caractère normal.
5. Enfoncer la touche C.
6. Enfoncer EUROP-CHAR jusqu'à ce que "ö" s'affiche.
7. Appuyer sur une lettre quelconque pour saisir un caractère normal.
8. Appu yer sur ENTER pour afficher le message.
7. Mi s e en f o rm e d u text e
7.1 Couleur de police
Il est possible de modifier la couleur de la police d'u n message comme suit :
1. Enfoncer Q-PROG.
La couleur par défaut est blanche.
2. Saisir quelques lettres.
Celles-ci seront af fi chées en bl a nc.
3. Appuyer sur COLOR pour modifier la couleur du texte.
Appuyer plusieurs fois sur COLOR pour naviguer dans les couleurs.
4. Saisir quelques lettres.
Celles-ci seront affichées dans une autre couleur.
Répéter
5. Appu yer sur ENTER pour afficher le message.
7.2 Taille de pol ice
Il est p ossibl e d 'a f ficher d es car a ctères en dif férentes largeurs, comme sui t :
1. Enfoncer Q-PROG.
2. Saisir quelques lettres.
3. Enfoncer FONT.
La taille de la poli ce est ajustée.
4. Appuyer de nouveau sur FONT pour naviguer dans les tailles de police (étroit - no rmal - gras) La
taill e reste activée jusqu'à ce qu'une autre s oi t sélectionnée. Il est possible d'ajouter d'autres
caractères.
5. Appu yer sur ENTER pour afficher le message.
7.3 Afficher un message avec des effets spéciaux
Outre la couleur et la taille de poli ce, il est possible d'appliquer plusi eurs effets à un message.
Utiliser une page po ur utiliser ces effets.
Il est possible de programmer jusqu'à 26 pages dans le journal lumineux.
Une c omb inaison de pa g es p eut également être affichée.
Programmer une page comprend les réglages suivants :
• I_E FF: effets d'entrée
• STAY: la durée du message sur l'af fichage
• SPEED: vitesse du message
• MODE: normal ou clignotant
• O_EFF: ef fets d e sortie
V. 01 – 14/11/2013 24 ©Velleman nv
Page 25

MML16MC
• PAGE CONTENT: le message actuel
Pour programmer une page :
1. Sur la télécommande, appuyer sur PROG.
Attendre jusqu'à ce que EDIT PAGE? s'affiche.
2. Appuyer sur ENTER.
3. Enfoncer ↑ pour sélectionner la page à programmer (de A à Z).
4. Appuyer sur ENTER.
I_EFF s'affiche.
5. Enfoncer ↑ pour régler un eff et.
6. Enfoncer → pour passer au réglage suivant.
STAY s'affiche.
7. Enfoncer ↑ pour régler les secondes.
8. Enfoncer → pour passer au réglage suivant.
SPEED s'affiche.
9. Enfoncer ↑ pour régler la vitesse.
10. Enfoncer → pour passer au réglage suivant.
MODE s'affiche.
11. Enfoncer ↑ pour régler le mode (normal ou clignotant) .
12. Enfoncer → pour passer au réglage suivant.
O_EFF s'affiche.
13. Enfoncer ↑ pour régler l'effet.
14. Appuyer sur ENTER.
Le conten u de la page A s'affiche.
15. Saisir le message. Il est po ssible d'utiliser plusieurs couleurs et tailles de police (vo ir ci-dessus).
16. Appuyer sur ENTER.
La page programmée s'affiche.
7.4 Message programmé
Il est possible d'afficher une ou plusieurs pages à une date donnée.
Jusqu'à 5 messag es programmés peu v ent être dé fi nis.
Pour cela, définir
• Une date de début
• Une date d e f in
• La page ou les pages à afficher
Pour configurer un message programmé :
1. Sur la télécommande, appuyer sur PROG.
2. Enfoncer ↓ jusqu'à ce que EDIT SCHEDULE? s'affiche.
3. Appuyer sur ENTER.
4. Enfoncer ↑ pour sélectionner le message programm é à confi gurer (d e 1 à 5).
5. Appuyer sur ENTER.
6. Utiliser ↑ ou ↓ pour r égler l'année de déb ut.
7. Enfoncer → pour passer au réglage suivant (START MONTH).
8. Utiliser ↑ ou ↓ pour régler le mois.
9. Enfoncer → pour passer au réglage suivant (START DAY).
10. Utiliser ↑ ou ↓ pour régler le jour.
11. Répéter les étapes 9 et 10 pour :
o START HOUR
o START MIN
o STOP YEAR
o STOP MONTH
o STOP DAY
o STOP HOUR
o STOP MIN
V. 01 – 14/11/2013 25 ©Velleman nv
Page 26

MML16MC
12. Une fois terminée, a p puyer su r ENTER.
Display P a ges s'affi che.
13. Saisir l a p ag e ou pag es à aff icher.
14. Appuyer sur ENTER.
La pag e ser a affichée aux heures r églées.
Réinitia liser l'appareil pour supprimer un message programmé. Voir ci-dessous "Réinitialiser
l'appare il".
7.5 Combiner plusieurs pages
Il est p ossibl e d 'a f ficher une séqu ence de pages d a ns l'ordre souhaité.
1. Sur la télécommande, appuyer sur RUN-PAGE.
2. Saisi r l es p ages à combiner, par exempl e B A CD .
3. Appuyer sur ENTER.
8. Réglages du journal lumineux
ID d'appareil
Affecter d'abord un identifiant pour co ntrôler votre appareil avec le logiciel inc lus. Vous pouvez faire cela
avec le logicie l ou la té lécommande. Avec le logiciel, il est possible de contrôler plus ieurs journaux
lumineux.
Connecter plusieurs journaux lumineux avec un câble de données (non incl.).
Régler l' ident ifiant de l'appareil co mme suit :
1. Sur la télécommande, appuyer sur FUNCT.
2. Enfoncer ↓ pour sélectionner SET ID.
3. Appuyer sur ENTER.
4. Utiliser ↑ ou ↓ pour régler l'identifiant de l'appare il.
5. Appuyer sur ENTER.
Date et heure
Il est p ossibl e d e régler la date et l'heure comme suit :
1. Sur la télécommande, appuyer sur FUNCT.
2. Enfoncer ↓ pour sélectionner YEAR.
3. Appuyer sur ENTER.
4. Utiliser ↑ ou ↓ pour régler l'année.
5. Appuyer sur ENTER.
6. Répéter les étapes 1 à 5 pour :
o MONTH
o DAY
o HOUR
o MINUTE
Brightness
Il est possible de régler la luminosité comme suit :
1. Sur la télécommande, appuyer sur FUNCT.
2. Enfoncer ↓ pour sélectionner BRIGHTNESS.
3. Appuyer sur ENTER.
4. Utiliser ↑ ou ↓ pou r ré g le r la lu min osité.
5. Appuyer sur ENTER.
Tonalités
Il est possible d'activer o u désactiver les tonalités comme suit :
1. Sur la télécommande, appuyer sur FUNCT.
2. Enfoncer ↓ pour sélectionner KEY SOUND.
3. Appuyer sur ENTER.
4. Utiliser ↑ ou ↓ pour sélectionner YES OR NO.
5. Appuyer sur ENTER.
Réinitia liser l'appareil.
1. Sur la télécommande, appuyer sur FUNCT.
V. 01 – 14/11/2013 26 ©Velleman nv
Page 27

MML16MC
2. Enfoncer ↓ pour sélectionner CLEAR ALL.
3. Appuyer sur ENTER.
4. Utiliser ↑ ou ↓ pour sélectionner YES OR NO.
5. Appuyer sur ENTER.
L'appareil revient au réglage par défaut.
9. Programmer le jo urnal lumineux avec le logiciel informatique.
Le journ al lumineux est livré avec logiciel permettant d e p rogrammer l'appareil.
• D'abord, installer le pilote.
• Ensuite, installer le logic iel (Multi-Color Sign).
• Les deux programmes se trouvent sur le CD inclus.
• Installer le lo gic iel sous un compte administrateur.
9.1 Insta ller le pil ote
1. Connecter le journal lumineux à une alimentation secteur avec le câble inclus.
2. Connecter le journal lumineux à un port USB de votre ordinateur avec le câble inclus.
3. Insérer le CD d'installation dans le lecteur .
4. Sur le CD, ouvrir le dossier New_d river_WinXP_SP2_3_Vista_Win7_32_64bit_Win8_32_64bit et
double-cliquer sur le fichier d' installation.
o Pour système 64 bits, utiliser CP210xVCPInstaller_x64.exe
o Pour système 32 bits, utiliser CP210xVCPInstaller_x86.exe
5. Suivre les instructions de l'assistant d'installation.
9.2 Installer le logiciel du journal lumineux
1. Sur le CD, ouvrir le dossier Install_Software.
2. Double-cliquer sur setup .exe.
3. Suivre les instructions de l'assistant d'installation.
4. Lancer le logiciel (Start - Programs - Multi-Color Sign).
9.3 Logiciel du journal lumineux : Démarrage
Le l ogiciel permet d'ef f ectuer les même s commandes q u'avec la télécommande. Il existe quelques
différences.
• Les fonctions uniquement disponibles dans le logiciel :
o Il est possible de sauvegard er des fi chiers de messag es et de les réuti l iser plus tard .
o Il est possible de créer des gr a p hiques bitmap et de l es ajouter à votre m essage.
Avant de commencer
Avant de commencer, il est consei l lé de :
• régler l' identifiant du journal lumineux
• régler l'heure sur le jo urnal lumineux
Régler l'ident ifiant du journal lum ineux
1. Connecter le journal lumineux à votre ordinateur.
2. Ouv r ir le log icie l Multi-Co lor Sign.
3. D ans le menu de fonctions, cliquer sur Set ID.
4. Sélectionner un ID dans la liste (optionnel).
5. Cliquer sur OK.
Régl er l'heure.
1. Ouv r ir le log icie l Multi-Co lor Sign.
2. D ans le menu de fonctions, cliquer sur Set Clock.
3. Sélectionner l'ident ifiant de l'appareil pour régler l'heure.
4. Régler l'heure et la date
5. Cliquer sur OK.
9.4 Saisir un message
Le logiciel vous permet de :
• créer et sauvegar der un message
V. 01 – 14/11/2013 27 ©Velleman nv
Page 28

MML16MC
• ajouter une mi se en forme et appliquer des eff ets
• envoyer le message au journal lumineux
• sauvegar d er le message pour usag e ultéri eur
Premier message
1. Ouv r ir le log icie l Multi-Co lor Sign.
2. Saisir un messag e.
3. Sauvegarder votre fichier.
Envoyer votre message au journal lumineux.
Envoyer un message
Une fois le message ter miné, envoyer le au journal lumineux.
1. Cliquer sur l'ico ne Envoyer .
2. Sélectionner l'identifiant de l'appareil et la page à utiliser.
Si "O" est sélectionné comme identifiant, chaque journal lumineux afficher le message.
3. Cliquer sur OK.
Le journal lumineux affiche le message.
9.5 Mise en forme du text e
Il est possible de combiner plusieurs couleur s et tail les de police dans un message.
Balises pour la mise en forme du texte
• Le l ogiciel utilise d es b al ises pour ajouter une mise en forme à votre messag e.
• En ajoutant une mise en forme, le logiciel insère la balise correspondante au niveau du curseur.
• La mise en forme s'applique au texte entre les b a lises.
Exemple
1. Saisir un message contenant plusieurs mots.
2. P our af f icher l a p hra se en tière en bleu :
o Placer le curseur en d ébut de la p hrase.
o Dans le menu Couleur, cliquer sur Bleu.
Le logiciel insère une balise pour la couleur bleu.
3. Envoyer le message au journal lumineux
Le message s'affich e en bleu.
4. P our af f icher l e r este d e la phrase en blanc :
o Placer le curseur der rière le pr emier mot.
o Dans le menu Couleur, cliquer sur White.
Le logiciel insère une balise pour la couleur blanc.
5. S auvega rder votre messag e.
6. Envoyer le message au journal lumineux .
Le message s'affich e en bleu et blanc.
Supprimer la mise en forme
• Pour supp rimer la mise en forme, sélectionner la balise et en foncer l a touche Delete de votre clavier.
9.6 Effets
Il est p ossibl e d 'a p pliqu er plusieurs effets à un message. Les catégories d'effet s d ans le men u de
commandes sont :
• leading effect: la man ière dont le texte s'afficher a
• clo sing effect: la manière dont le texte disparaîtra
• display effect: affichage du texte
V. 01 – 14/11/2013 28 ©Velleman nv
Page 29

MML16MC
• movin g sp eed: vitesse des effets d'entrée et de sortie
• display time: durée d’affichage du texte
• réglages spéciaux (ajouter du son; aff icher la date et l' heure)
Balises d'effets
• Le logiciel utilise des balises po ur ajouter un eff et à votre messag e.
• En ajoutant un effet, le logiciel insère la balise correspondante au niveau du curseur.
• Il n'est possible d'utiliser q u'un seul effet par catég orie : si vous insérez 2 balises de vi tesse, seul la
première balise sera pri se en compte.
• Si vous ajoutez des ef fets d 'entrée et d e sortie, i nsérer d 'abord l a b a lise d'entrée avant d'appliquer
l'ef fet de sortie.
• Pour d'au tr es balises d'effets, l'emplacement du curseur n'est pas important : l'effet sera ajouté au
message, peu importe l'emplacement de la balise.
Exemple
1. Saisir un message contenant plusieurs mots.
Il est p ossibl e d 'utiliser le message créé dan s "Mise en f orm e d u texte".
2. D ans le menu de commandes, cliquer sur Leading Effect > Snow.
Le logiciel insère la balise.
3. Dans le menu de commandes, cliquer sur Closing Effect > Scroll Down.
Le logiciel insère la balise.
4. Dans le menu de command es, cliquer sur Move S p eed.
5. Régler la vitesse sur 2.
6. Dans le menu de commandes, cliquer sur Display Time.
7. Régler l'h eure sur 3 secondes.
8. Sauvegarder le fichi er. L e résultat ressembl e à :
9. Envoyer le message au journal lumineux .
Supp rimer un eff et
• Pour supp rimer la mise en forme, sélectionner la balise ou bal ises et enfoncer la touch e Delete de
votre clavier.
9.7 Utiliser l'éditeur graphique
L'éditeur graphique vous per met de créer de s g raphiques et de l es i nsérer da ns un message.
Création graphique
1. D ans le menu Bmp Graphics, cliquer sur Edit Graphic.
2. Régler l'h auteur et la largeu r de l'image avec les li stes.
3. Cli quer sur une couleur.
4. Choisir un outil depuis la boîte à outils.
V. 01 – 14/11/2013 29 ©Velleman nv
Page 30

MML16MC
Avertissement
Se débarrasser des piles en resp ectant la réglementati on locale relative à la protection de
résolution
7 x 80 points P6 LEDs RV B
distance entre deux pixel s
6 mm
angle de vue
120°
distance de vue
6-25 m
LEDs
RVB 3-en-1
tempér ature de service
de -20 °C à +45 °C
taux d'humidité
20-90 %
alimentation
journal lumineux : 100-240 Vca 50-60 Hz à 5 Vcc 4 A (ad ap tateur incl. );
télécommande : 2 x pil e de 1.5 V type LR6C (incl.)
consommation
max. 20 W, moy en ne 5 W
zone d'affichage
42 x 480 mm
poids
500 g
pi èces d e rechang e
télécommande : MMLXXX/RC
5. Créer l'image souhaitée.
6. Pour sauvegarder l'image graphique :
o Cliquer sur Save.
o Sélectionner un nom dans la liste et cliquer sur OK.
Insérer une image graphique
1. Dans l'éditeur de texte, p lacer le curseur à la fi n de la phr ase.
2. Ouvrir l'éditeur graphique (Bmp Graphics menu > Edit Graphic).
3. Sélectionner le nom dans la colonne Select Graph et cliquer sur Insert.
4. Fermer l'éditeur.
5. Envoyer le message au journal lumineux .
Supprimer une image graphique
1. Ouvrir l'éditeur graphique (Bmp Graphics menu > Edit Graphic).
2. Sélectionner un nom dans la colonne Select Graph et cliquer sur Delete.
3. Cliquer sur Yes.
10. Piles
• Ne jamais perforer les piles et ne pas les jeter au feu (d anger d’expl osion).
• Ne jamais rechar g er des piles alcali nes.
•
l’environnement. Garder l es p iles hors de la p ortée des enfants.
Remplacer les piles de l a télécommande :
1. Ouvrir le couvercle du compartiment à piles situé au dos et remplacer les piles (voir Spécifications
techniques). Respecter la polarité.
2. Refermer le c ouver cle du compartiment à pi les.
Remarque : pile dans le journal lumineux.
Le journal lumineux est équipé d'une pile CR2032, qui est utili sée p our la mémoire interne de l'appareil.
Si l e jour nal lumineu x d éconn ecté n'affi che plus la date et l'heure, desserrer l e couvercle et insérer des
piles du même type.
11. Spécifications techniques
jac k de 2. 5 x 5.5 mm
dimensions 650 x 17 x 50 2 m m
N'employer cet appareil qu'avec d es accessoires d'origine. La SA Velleman ne peut, dans la
mesure conforme au droit applicable être tenue responsable des dommages ou lésion s
(dire cts ou indirects) pouvant résulter de l’ut ilisation de cet appareil.
Pour plus d'in formations concernant cet article et la dernière version de ce mode d'emploi,
consulter notre site www.velleman.eu.
V. 01 – 14/11/2013 30 ©Velleman nv
Page 31

MML16MC
Les spécifications et le contenu de ce mode d'emploi peuvent être modifiés sans avis
préalable.
Les mar q ues déposées et les raisons s o ciales sont la p r opriété de leu rs détenteu rs respectif s, et sont
uniquement u tilisées dans le but de démontrer la compati bilité entre nos articles et les articles des
fabricants.
Windo ws, Windows XP, Windows 2000, Windows Vista, Windows Aero, Windows 7, Windows 8, Windows
Mobi le, Windows Server sont de s marqu es commerciales enregistr ées de Microsoft Corporation aux Etats Unis et d'autr es pays.
© DROITS D’AUTEUR
SA Velleman est l’ayant droit des droits d’auteur pour ce mode d'emploi. Tous dro its mondiaux
réservés. Toute reproduction, traduction, copie ou diffusion, intégrale ou partielle, du contenu de ce
mode d'emploi par quelque procédé ou sur tout support électroniq ue que ce soit est interdite sans
l’accord préalable écrit de l’ayant droit.
V. 01 – 14/11/2013 31 ©Velleman nv
Page 32

MML16MC
desm onte ni abra la tapa b aj o ninguna circun stan cia. Puede sufrir un a p eligrosa descarga
Desconecte siempre el aparato de la red eléctrica si no va a usarlo durante un larg o período de
tiempo y a ntes d e su limpieza o mantenimiento. Tire siempre del enchuf e p a r a d esconectar el
No mire directamente a la fuente de luz porque esto podría causar
No utilice el aparato si la caja o los cab les están dañados. No utili ce este apar ato si la caja o el
MANUAL D E L USUAR I O
1. Introducción
A los ciudadanos de la Unión Europea
Importantes informaciones sobre el medio ambiente conc erniente a este producto
¡Gracias por elegir Velleman ! Lea atentamente las instrucci ones del manual antes de usar el aparato. Si
el aparato ha sufrido algún daño en el transporte no lo instale y póngase en contacto con su distribuidor.
2. Instrucciones de seguridad
Este sí mbolo en e ste aparato o el embalaje indica que, si tira las muestras inservibles, podrían
dañar el medi o ambiente. No tire este aparato (ni l as pi las, si las hu biera) en la basura
doméstica; debe i r a una empresa e sp ecializada en reciclaje. Devuel va este aparato a su
distribuidor o a la unidad de reciclaje lo cal. Respete las leyes locales en relación con el medio
ambiente.
Si tiene dudas, contacte con las autoridades locales para residuos.
Mantenga el aparato lejos del alcance de personas n o capa citadas y niños.
Utilice el aparato sólo en interiores. No exponga este equipo a lluvia, humedad ni a ningún
tipo de salpicadura o goteo. Nunca ponga un objeto c on líquido en el aparato.
NO
eléctrica al tocar un cable conectad o a l a red el éctrica.
cable de red, nunca del propio cable.
El usuario no habrá de efectuar el mantenimiento de ninguna pieza. Contacte con su
distribuidor si necesita piez as de recambio.
• un ataq ue epiléptico en personas sensibles
• pérdida temporal de la vista (por deslumbramiento)
• dañ os irre versibles en los ojos.
cable están d añados. La reparación debe ser realizada por personal especializado.
Advertencia: Nunca perfore las pilas y no las eche al fuego (peligro de explosión). Nunca
recargue pilas no recarg ab les (alcal inas). Respete las leyes locales en relación con el medio
ambiente al tirar las pilas. Mantenga las pilas lejo s del alcance de niños.
3. Norma s gene ra les
Véase la Garantía de servicio y calidad Vell eman® al final de este manual del usuario.
• Por razones d e seguridad , las modifi caciones no aut orizadas del ap arato están prohibidas. Los daños
causad os p or modificaciones no autorizadas, no están cubiertos por la g ar antía.
• Los daños causa dos por descuido de las inst rucciones de seguridad d e e ste manual inva l idarán su
garantía y su distribuidor no será responsable de ningún daño u otros problemas resultantes.
• Familiarícese con el funcio namiento del aparato antes de utilizarlo. Sólo personas cualificadas pueden
manejar e ste aparato. La may oría de los daños son cau sados por un uso in adecuado.
• Utilice sólo el aparato para las aplicaciones descr itas en este manu al. a fin de evitar p.ej.
V. 01 – 14/11/2013 32 ©Velleman nv
Page 33

MML16MC
cortocircuitos, que madur as, descarga s eléctri ca s, etc. S u uso incorrecto anula la ga rantía
completamente.
4. Características
• color de visualización (páginas de texto y páginas gráficas): rojo, verde, azul, amarillo, magenta,
cian, blanco
• brillo: blanco muy lumino so 2100 cd/m², 4 niveles de brillo
• memoria: 26 páginas de texto con 210 cara cteres y 16 páginas gr áf icas
• rel oj en tiempo re al: reloj en tiempo real incorporado con b aterí a d e emergencia
• formato 12/24h
• zumba dor: zumbador incorpor ado con duración programable
• control: con mando a distancia (44 botones)
con cabl e P C (incl. ), USB a conector jack d e 3.5mm
• in cluye: mando a distancia, manual del usuario, 2 soportes, adap tador de red
5. Descripción
Véase l as f iguras en la pági n a 2 de este manual del usuario.
6. Progra m a r el m en saj e ro dan te c on el mando a dista ncia
Es posi ble programar el aparato con el mando a distancia (incl.) o el ordenador. Para más inform ación,
consulte « Programar el men saj e rodante con el software ».
Primer mensaje
Introducir un mensaje:
1. Enchufe el mensaje rodante a una toma eléctrica con el cable incluido.
2. En el mando a distancia, pulse Q-PROG.
3. Introduzca HELLO con las teclas d el mando a distancia.
Si ha introducido una letra incorrecta, pulse la tecla DEL para borrarla.
4. Pul se ENTER.
El mensaje se visual iza en la pantalla.
Visua lizar la fecha y la ho ra
1. P u lse TIME/D AT E para visualizar sólo la fech a y la hora.
2. Pulse ESC para volver al funcio namiento normal.
6.2 Conmutar entre minúsc ulas, mayúsculas y los otros caracteres.
Para visualizar una letra minúscula, un dígito o un símbolo, cambie el modo pulsando la tecla SHIFT.
El símbolo en la pantalla indica el mo do actual.
Mayúsculas
Símbolos blancos en las teclas (n úmeros, símbolo s)
Minúsculas
1. Pulse Q-PROG.
2. Introduzca uno o más caracter es.
3. Pulse SHIFT.
Ahora, el mod o de minúsculas está activado.
4. Introduzca uno o más caracter es.
5. Pulse SHIFT.
Ahora, el modo de nú meros está activad o.
6. Introduzca uno o más caracter es.
7. Pulse SHIFT.
Ahora , el modo de sí m bolos está a cti vado.
V. 01 – 14/11/2013 33 ©Velleman nv
Símbolos verdes en las teclas (símbolo s)
Page 34

MML16MC
8. Introduzca uno o más caracter es.
9. Pulse SHIFT.
Está de n uevo el modo de mayúsculas.
10. Pul se E N T E R para visualizar el mensaje.
6.3 Letras especiales
Es posible intro ducir formas especiales de letr a s. Por ejemplo: ç y ö.
1. Pulse Q-PROG.
El modo de mayúsculas es el modo por d efec to.
Si quiere escri bir con minúsculas, pul se S CH IFT.
2. Pulse la tecla « C ».
3. Pulse EUROP-CHAR hasta que la letra « ç » se visual ice.
4. Pulse cualquier o tra letra p ar a conti nuar con l etr as est ándar.
5. Pulse la tecla « O ».
6. Pulse EUROP-CHAR hasta que la letra « ö » se visualice.
7. Pulse cualquier otra letra para introducir un carácter normal.
8. P u lse ENTER par a visu alizar el mensaje.
7. Da r fo rmato a un texto
7.1 Color
Cambie el color de la fo rma siguiente:
1. Pulse Q-PROG.
El color por defec to es blanco.
2. Introduzca unas letras.
Estas letras se visual izarán en blanco.
3. Pulse COLOR para modificar el co lor.
Pulse la tecla COLOR varias veces para desp lazars e por los col ores disp onibles.
4. Introduzca unas letras.
Las siguientes letras se visualiz arán en otro color.
Repita estos pasos
5. P u lse ENTER par a visu alizar el mensaje.
7.2 Tamaño
Cambie el tamaño de la forma siguiente:
1. Pulse Q-PROG.
2. Introduzca unas letras.
3. Pulse FONT.
El tamaño cambia.
4. Vuelva a pulsar FONT pa ra desplazars e por los tamaños disponibles (estrech o - normal- negrita). El
tamaño seleccionado qued a activo hasta que seleccione otr o. Es posible añadi r más caracteres.
5. P u lse ENTER par a visu alizar el mensaje.
7.3 Añadir efecto s es peciales
No sólo puede cambiar el color y el tamaño del texto si no también es posible añadir efectos.
Para utilizar estos efectos, utilice un a p ágina y aplique efectos en ella.
Es posi ble programar hasta 26 páginas.
También es posible visualizar una combinación de páginas.
Efectos esp e ciales:
• I_EFF: efecto de aparició n
• STAY: tiempo de visualización
• SPEED : velocidad
• MODE: normal o intermitente
• O_EFF: ef ecto de desapa r ición
• PAGE CONTENT: el mensaje actual
programar una página:
V. 01 – 14/11/2013 34 ©Velleman nv
Page 35

MML16MC
1. En el mando a distancia, pulse PROG.
Espere hasta que EDIT PAGE? se visualice en la pantalla.
2. Pul se ENTER.
3. Pulse ↑ para selecci onar la página que q uiere programar (de A a Z ).
4. Pul se ENTER.
I_EFF se visualiza.
5. Pulse ↑ para ajustar el efecto.
6. Pulse → para ir al siguiente ajuste.
STAY se visualiz a.
7. Pulse ↑ para ajustar los segundos.
8. Pulse → para ir al siguiente ajuste.
SPEED se visualiz a.
9. Pulse ↑ para ajustar la velocidad .
10. Pulse → para ir al siguiente ajuste.
MODE se visualiz a.
11. Pulse ↑ para ajustar el modo (n ormal o i ntermiten te).
12. Pulse → para ir al siguiente ajuste.
O_EFF se visualiz a.
13. Pulse ↑ para ajustar el efecto.
14. Pulse ENTER.
PAGE A CONTENT se visualiza.
15. Introduzca el mensaje. Puede utilizar varios colores y tamaños (véase arriba).
16. Pulse ENTER.
La página programada se vi su al iza.
7.4 Visualizar un mensaje durante un período determinado
Es posible visualizar una o más páginas programadas durante un período determinado.
Es posible programar hasta 5 períodos.
Para ello, introduzca
• una fech a d e activación
• una fech a d e d esactivación
• La(s) página(s) que quiere visualizar.
Programar un período determinado:
1. En el mando a distancia, pulse PROG.
2. Pulse ↓ hasta qu e EDIT S CH EDULE? se visualice.
3. Pul se ENTER.
4. Pulse ↑ para seleccionar el período (de 1 a 5).
5. Pul se ENTER.
6. Utilice ↑ o ↓ p ar a aj ustar el año.
7. Pulse → para ir al siguiente ajuste (START MONTH).
8. Utilice ↑ o ↓ p ar a aj ustar el mes.
9. Pulse → para ir al siguiente ajuste (START DAY).
10. Utilice ↑ o ↓ p ara ajustar el día.
11. Repita paso 9 y 10 para:
o START HOUR
o START MIN
o STOP YEAR
o STOP MONTH
o STOP DAY
o STOP HOUR
o STOP MIN
12. Cuando haya terminado, pulse ENTER.
DISPLAY PAGES se visualiza.
13. Introduzca la(s) página(s) que quiere visualizar.
V. 01 – 14/11/2013 35 ©Velleman nv
Page 36

MML16MC
14. Pulse ENTER.
La página se visualiza en la fech a y la hora programada.
Si quiere borrar el mensaje programado, reinicialice el aparato. Consulte « Reinic ializ ar el aparato ».
7.5 Combinar varias páginas
Es posible visualizar varias páginas programadas según el orden deseado.
1. En el mando a distancia, pulse RUN-PAGE.
2. Introduzca las páginas que quiere combinar. Por ejemplo: BACD.
3. Pul se ENTER.
8. Ajustes
ID del dispositivo
Primero, dele un ID al aparato si quiere controlarlo con el software incluido. Introduz ca la ID co n el
software o el mando a di stancia. Puede controlar varios mensajes rodantes con el software.
Puede interconectar varios mensaj es rodan te s con un ca bl e de datos (no incl.).
Ajuste la ID de la siguiente maner a:
1. En el mando a distancia, pulse FUNCT.
2. Pulse ↓ para selecci onar S E T ID.
3. Pul se ENTER.
4. Utilice ↑ o ↓ p ar a aj ustar la ID del aparato.
5. Pul se ENTER.
Fecha y hora
Ajuste l a f ech a y la hora de la siguiente manera:
1. En el mando a distancia, pulse FUNCT.
2. Pulse ↓ para selecci onar YEAR.
3. Pul se ENTER.
4. Utilice ↑ o ↓ p ar a seleccionar el año.
5. Pul se ENTER.
6. Repi ta el paso 1 a 5 para:
o MONTH
o DAY
o HOUR
o MINUTE
Brillo
Ajuste el brillo de la siguiente maner a:
1. En el mando a distancia, pulse FUNCT.
2. Pulse ↓ para selecci onar B R IGHTNESS.
3. Pul se ENTER.
4. Utilice ↑ o ↓ para seleccionar el brillo.
5. Pul se ENTER.
Sonido del teclado
Activar o desactive el sonido del teclado de la siguiente manera:
1. En el mando a distancia, pulse FUNCT.
2. Pulse ↓ para selecci onar K EY SOUND.
3. Pul se ENTER.
4. Utilice ↑ o ↓ p ar a seleccionar YES O N O.
5. Pul se ENTER.
Reinicia lizar el aparato
1. En el mando a distancia, pulse FUNCT.
2. Pulse ↓ para seleccionar CLEAR ALL.
3. Pulse ENTER.
4. Utilice ↑ o ↓ p ar a seleccionar YES O N O.
V. 01 – 14/11/2013 36 ©Velleman nv
Page 37

MML16MC
5. Pul se ENTER.
El ap arato vuelve a l a configuración de fábrica.
9. Progra m a r el m en saj e ro dan te c on el so ftware
Es posible programar el aparato con el software incluido .
• Primero, instale el driver.
• Luego, instale el software (Multi-Color Sign).
• Ambos pr ogra mas están en el CD (in cl.).
• Para i nstalar el software necesita u na cuenta de admini strad or.
9.1 Inst a lar el driver
1. Enchufe el mensaje rodante a una toma eléctrica con el cable incluido.
2. Conecte el mensaje rodante a un puerto USB del ordenador con el cable incluido.
3. Introduzca el CD en el lector de CD-ROM.
4. En el CD, abra la c arpeta New_driver_WinXP_SP2_3_Vis ta _Win7_32_64bit _Win8_32_64bit y haga
cli c dos veces en el archivo de i nstalación.
o Para un sistema de 64 bits, utilice CP210xVCPInstaller_x64.exe
o Para un sistema de 32 bi ts, utilice CP210xVCPInstaller_x86.exe
5. Si ga las instruccione s del a sistente de configuración.
9.2 Instalar el software
1. En el CD, abra l a car p eta Install_Softwar e.
2. Haga clic dos veces en setup.exe.
3. Si ga las instruccione s del a sistente de configuración.
4. Inicie el software (Start - Programs - Multi-Colo r Sign).
9.3 Software del mensaje rodante: introd ucción
Puede realizar las mismas tareas tanto con el software como con el mand o a d istancia. Sin embargo, hay
algunas diferencias.
• Funciones sólo disponibles en e l software:
o Puede guardar ficheros con mensajes y reutilizarlos más tarde.
o Pued e crear g ráfi cos de mapas de bits y añadirlos a su mensaje.
Antes de empezar
Antes de empezar, aconsejamos:
• ajustar la ID
• ajustar el relo j
Ajustar la ID del dispositivo
1. Conecte el mensaj e rodante al orden a dor.
2. Abra el software Multi-Color Sign.
3. En el menú FUNCTIONS, haga clic en SET ID.
4. Seleccione una ID de la lista (opcional).
5. Haga clic en OK.
Ajustar el reloj
1. Abra el software Multi-Color Sign.
2. En el menú de funciones, haga clic en SET CLOCK.
3. Seleccione la ID para la que quiere ajustar el re loj.
4. A j uste la fecha y la hora.
5. Haga clic en OK.
9.4 Introducir un mensaje
Con el soft w a r e puede:
• crear y guardar un mensaje
• añadir un formato de texto y efectos
• enviar el mensaje al aparato
V. 01 – 14/11/2013 37 ©Velleman nv
Page 38

MML16MC
• guard ar el mensaje para u so posterior
Primer mensaje
1. Abra el software Multi-Color Sign.
2. I ntroduzca un mensaje.
3. Guarde su fichero.
Ahora, puede enviar el mensaje al dispositivo.
Enviar un mensaje
Despu és d e haber terminado el mensaj e, envíelo al mensaje rodante.
1. Haga clic en el símbolo .
2. Seleccione la ID de l dispo sitivo y la página que quiere utilizar.
Si seleccio na 0 como ID, cada dispositivo visualizará el mensaje.
3. Haga clic en OK.
El mensaje se visualiza en el dispositivo.
9.5 Dar formato a un texto
Puede combinar varios colores y tamaños en un mensaje.
Etiquetas para dar formato al texto
• El software u tiliza etiquetas para d ar f ormato al texto.
• El software introduce la etiqueta correspondiente en la posición del cursor al añadir un formato.
• El f ormato se ap lica al texto que si g ue a la etiq u eta hasta que introduzca otra eti q ueta.
Ejemplo
1. Introduzca un mensaje con varias palabras.
2. P ara poner el texto entero en azul:
o Ponga el cursor al princ ipio del texto.
o En el menú COLOR, haga clic en BLUE.
El software introduce una etiqueta para el color azul.
3. Envíe el mensaje al aparato.
El mensaje se visualiza en azul.
4. P ara poner el resto del texto en blanco:
o Ponga el cursor detrás de la primera palabra.
o En el menú COLOR, haga clic en WHITE.
El software introduce una etiqueta para el color blanco.
5. Guarde su mensaje.
6. Envíe el mensaje al mensaje rodante. .
El mensaje se visualiza en azul y en blanco.
Eliminar un formato de texto
• Para elim inar un format o de texto, seleccione l a etiqueta entera y pulse DEL ETE en el teclado.
9.6 Efectos
Es posible u til izar varios efect os. Los efectos están en el menú C OMMANDS.
• leading effect: la man era de la que el texto aparecerá
• closing effect: la maner a de la q ue el texto desaparecerá
• display effect: la manera de la que el texto se visualiz ará
• moving speed: la velocidad con la que el texto aparece y desaparece
• display time: el tiempo de visualización
• Ajustes especiales (añadir sonido ; visualizar la fecha y la ho ra)
V. 01 – 14/11/2013 38 ©Velleman nv
Page 39

MML16MC
Etiquetas para efectos
• El software u tiliza etiquetas para añ ad ir un efecto al mensaj e.
• El software introduce la etiqueta correspondiente en la posición del cursor al añadir un efecto.
• Puede u ti l izar sólo un ef ecto por categorí a : Si in troduce dos etiquetas para la velocidad de
despl azamient o, s ól o l a p r imera será tomada en cuenta.
• Si añade la velo cidad de aparic ión y desaparición del texto, asegúrese de introducir la etiqueta para
el ef ecto con la q ue aparece el text o antes de la del efecto c on la que desaparece el texto.
• Para otra s etiquetas de ef ecto, la p osición del cursor no es importante: el efecto se aplica al mensaje
entero sin importar dónde se introduce la etiqueta.
Ejemplo
1. Introduzca un mensaje con varias palabras.
Puede utilizar el mensaje que ya ha creado (vé ase « Dar formato a un texto »).
2. En el menú COMMANDS, haga clic en Leading Effect > Snow.
El software introduzca una etiqueta.
3. En el menú COMMANDS, haga clic en Closing Effect > Scroll Down.
El software introduzca una etiqueta.
4. En el menú COMMANDS, haga clic en MOVE SPEED.
5. Ponga la velocidad en 2.
6. En el menú COMMANDS, haga clic en DISPLAY TIME.
7. Ponga el tiempo de visualizaci ón en 3 segundos.
8. Gu a r de el f ichero. El resul tado debería quedar así:
9. Envíe el mensaje al men saje rodante. .
Eliminar un efecto:
• Para eliminar un efecto, seleccione la(s) etiqueta(s ) d eseada(s) y pulse DELETE en el teclado.
9.7 Utilizar el editor de imágenes
Con el ed itor de imágenes puede crear imágenes e introducirla s en un mensaje.
Crear una imagen
1. En el menú Bmp Graphics, haga clic en Edit Graphic.
2. Seleccione la altura y la anchura de la imagen utiliz ando las listas.
3. Seleccione un color.
4. Para crear una imagen, seleccione una función en « toolbox ».
5. Cree la imagen deseada.
6. Guardar la imag en:
o Haga cli c en SAVE.
o Seleccione un nombre de la lista y haga clic en OK.
V. 01 – 14/11/2013 39 ©Velleman nv
Page 40

MML16MC
Advertencia
resolución
7 x 80 dots P6 LEDs RGB
píxeles
6 mm
ángulo de visión
120°
distancia
6-25 m
LEDs
RGB 3 en 1
temper atura de
de -20 °C a +45 °C
alimentación
mensaje r odante 100 -240 VAC 50-60 Hz to 5 VDC 4 A (adaptador incl. )
mando a distancia: 2 x pila AAA de 1.5 V, LR6C (incl.)
consumo
máx. 20 W, med i o 5 W
dimensiones
650 x 17 x 50 2 mm
pantalla
42 x 480 mm
peso
500 g
piezas de recambio
mand o a distancia: M MLX X X /RC
Introducir una imagen
1. En el editor de texto, ponga el cursor al final del texto .
2. Abra el editor gráfico (menú Bmp Graphics > Edit Graphic).
3. Seleccione el nombre en la lista « Select Graph » y haga clic en INSERT.
4. Cierre el edi tor de imágenes.
5. Envíe el mensaje al mensaje rodante. .
Eli minar una imagen
1. Abra el editor de imágenes (menú Bmp Graphics > Edit Graphic).
2. Seleccione el no mbre en la lista « Select Graph » y haga clic en DELETE.
3. Haga clic en YES.
10. Las pila s
• Nunca perfore las pilas y no las eche al fuego (peligro de explosión).
• Nunca recar g ue pilas no recargables (alcal inas).
• Respete las leyes locales en relación con el medio ambiente al tirar las pilas. Mantenga las
pilas lejos del alcance de niños.
Para reemplazar l a p i la del mando a distancia:
1. A bra el compar timien to de pilas de la parte trasera del aparato e reemplace las pilas agotada s por
una s del mismo ti po (vé a se « Especi fi ca ciones »). R espet e la polaridad.
2. Cierre el compartimiento de pilas.
Observación: pila del mensaje rodante.
El ap arato funciona con una pila CR2032 que se u tiliza para la memori a interna. D esatornille la tapa del
compartimiento de pilas e introduzca una nueva pila del mismo tipo si la fech a y la hora no se vi su al izan
después d e haber desconectado el apa r a to de la red eléctrica.
11. Especificaciones
funcionamiento
humedad 20-90 %
jack estándar de 2.5mm
Util ice este aparato sólo con los accesorios originales. Velleman N V no será responsable de
daños ni lesiones causados por un uso (indebido) de este aparato.
Para más información sobre este pro ducto y l a versión más reciente de este manual del
usuario, visite nuestra página www.velleman.eu.
Se pued en modifi car las especificaciones y el contenido de este manual sin previo aviso.
Todas l as marcas registradas y nombres comerciales son propied ad de sus respectivos d ueños y se
utilizan sólo para aclarar la compatibilidad de nuestros productos con los de diferentes fabricantes.
V. 01 – 14/11/2013 40 ©Velleman nv
Page 41

MML16MC
Windo ws, Windows XP, Windows 2000, Windows Vista, Windows Aero, Windows 7, Windows 8, Windows
Mobile, Windows Ser v er son marcas registrad a s de Microsoft C orporation en los Estados Uni dos y otros
países.
© DERECHOS DE AUTOR
Velleman NV dispone de los derechos de autor p a ra este manual del usuari o. Todos los
derechos mundiales reservados. Está estrictamente prohibido reproducir, traducir, copiar, editar y
guar d a r este manual d el usuario o partes d e ell o si n previo permiso escrito del derecho habi ente.
V. 01 – 14/11/2013 41 ©Velleman nv
Page 42

MML16MC
Blicken Sie nicht direkt in die Lichtquelle, um Folgendes zu vermeiden
Verwenden Sie das Gerä t nicht wenn das Gehäuse oder das Kabel beschädi g t ist. Lassen Sie
Warnung: Durchb ohr en Sie ni e die Batterien und werfen Sie diese ni ch t i ns Feuer
BEDIENUNGSANLEITUNG
1. Einführung
An alle Einwohner der Europäischen Union
Wichtige Umwelt informationen über dieses Produkt
Falls Zweifel bestehen, wenden Sie sich für Entsorgungsrichtlinien an Ihre örtliche Behörde.
Vielen Dank, dass Sie sich für Velleman entschieden haben! Lesen Sie diese Bedienungsanleitung vor
Inbetriebnahme sorgfältig durch. Überprüfen Sie, ob Transportschäden vorliegen. Sollte dies der Fall
sein, verwenden Sie das Gerät nicht und wenden Sie sich an Ihren Händler.
2. Sicherheitshinweise
Dieses Symbol auf dem Produkt oder der Verpackung zeigt an, dass die Entsorgung dieses
Produktes nach seinem Lebenszyklus der Umwelt Schaden zufügen kann. Entsorgen Sie die
Einhei t (oder verwendeten B atterien) nicht als unsortiertes Hausmüll; die Einheit oder
ver wend eten Ba tterien müssen von einer spezialisier ten Fir ma zwecks R ecyclin g entsorgt
werden. Diese Einheit muss an den Händler oder ein örtliches Recycling-Unternehmen
retourniert werden. Resp ektieren S ie die örtlichen Umweltvorschriften.
Halten Sie Kinder und Unbefugte vom Gerät fern.
Verwenden Sie das Gerät nur im Innenbere ich. Schützen Sie das Gerät vor Regen und
Feuchte. S etzen Sie d as Gerät keiner Flüssigkeit wie z.B. Tropf- oder Spritzwasser, aus.
Stel len Sie keine mit Flü ssigkeit b efüllten Geg enstände auf das Gerät.
KEINESFALLS. Das Berühren von unter Spannung stehenden Leitungen könnte zu
lebensgefährlichen elektrischen Schlägen führen.
Trennen Sie das Gerät bei Nichtbenutzung und vor jeder Reinigung vom Netz. Fassen Sie dazu
den Netzstecker an der Griff fläche an und ziehen Sie nie an der Netzlei tung.
Es gibt keine zu wartenden Teile. Bestellen Sie eventuell e Ersatzteil e bei Ihrem Fachhändler.
• epileptische An f äll e bei empf i ndlichen Menschen
• kurzzeitige Sehstörungen (Blitze)
• permanente und unwiderrufliche Augenschäden
di eses Gerät von ein em Fa chmann repa r ieren.
(Explosionsgefahr). Laden Sie keine nicht-wiederaufladb a r e B atterien (Alkali). Respektieren
Si e die örtlich en Umweltvorschriften beim Entsorgen d er Bat terien. Halten Si e die Batterien
von Kindern fern.
3. All g e me ine Richtl inien
Siehe Velleman® Service- und Qualitätsgarantie am Ende dieser Bedienungsanleitung.
• Eigenmächtige Veränderungen sind aus Sicherheitsgründen verboten. Bei Schäden verursacht durch
eigenmächtige Änderungen erlischt der Garantieanspruch.
• Bei Schäden, die durch Nichtbeachtung der Bedienungsanleitung verursacht werden, erlischt der
Garantieanspruch. Für daraus resultierende Folgeschäden übernimmt der Hersteller keine Haftung.
V. 01 – 14/11/2013 42 ©Velleman nv
Page 43

MML16MC
Großbuchstaben
Weiß e Z eichentasten (Zah len, Zeichen)
Kleinbuchstaben
Grüne Zeichentasten (Zeichen)
• Nehmen Sie das Gerät erst in Betrieb, nachdem Sie sich mit seinen Funktionen vertraut gemacht
haben. Lassen Sie das Gerät nicht von Personen bedienen, die sich nicht mit dem Gerät auskennen.
Meist ist die Beschädigung des Gerätes das Ergebnis von unfachmännischer Bedienung.
• Verwenden Sie das Gerät nur für Anwendungen beschrieben in dieser Bedienungsanleitung Jede
andere Verwendung ist mit Gefahren wie Kurzschluss, Brandwunden, elektrischem Schlag, usw.
verbunden. sonst kann dies zu Schäden am Produkt führen und erlischt der Garantieanspruch.
4. Eigenschaften
• Displayfar be (Textseiten und g raphische Seiten): rot, grün, blau, gelb, magenta, cyan, weiß
• Helligkeit: sehr h elles Weiß 2100 cd/m², 4 Helli gkeitsstufen
• Speicher: 26 Te xtseiten mit 21 0 Sch ri f tzeichen und 16 Grafikseiten
• Echtzeituhr: eingebaute Echtzeituhr mit Pufferbatterie
• 12/ 24 F orm a t
• Summer: eingebauter Su mmer mit einstellbare Dau er
• Ansteuerung: über Fernbedienung (44 Tasten)
über PC-Kabel (mitgeliefert), USB auf 3.5mm-Klinkenstecker
• Lieferumfang: IR-Fernbedienung, Bedienungsanleitung, 2 Halterungen, Netzteil
5. Beschreibung
Siehe Abbildungen, Seite 2 di eser Bedienungsanleitung.
6. Die Laufschrift über die Fernbedienung programmieren.
Das Gerät lässt sich entweder über d ie mitgelieferte Fern bedienung oder über einen Computer
programmieren. Für meh r Informationen, siehe « Das Gerät ü ber die Software programmieren »
Erste Nachricht
Um eine Nachricht einzugeben:
1. Verbi nden Sie die Laufschrift über das mitgelieferte Kabel mit dem Netz.
2. Auf der Fernbedienung, klicken Sie auf Q-PROG.
3. Geben Si e H ELLO mit den T asten der Fernbedienung ein.
Haben Sie ei n falsches Z eichen eingegeben, so drü cken S ie DEL, um das zuletzt eingeg ebene
Zeichen zu löschen.
4. Drücken S ie die Taste ENTER.
Die Nachricht wird im Display angez eigt.
Das Datum und die Uhrzeit anzeigen
1. Drücken Sie die Taste TIME/DATE, um nur das Datum und die Uhrzeit anzuzeigen.
2. Drücken Sie die Taste ESC um zum normalen Betrieb zurückzukehren.
6.2 Zwischen Großbuchstaben, Kleinbuch staben und den weiteren Zeichen
umschalten.
Um zwischen Kleinbuchstaben, Zahlen oder den anderen Zeichen umzuschalten, drücken S ie die Taste
SCHIFT.
Das Symbol im Display z eigt Ihnen, in welchem Eingabemodus Sie sich befinden.
1. Drücken S ie die Taste Q-PROG.
2. Geben Sie ein oder mehrere Zeichen ein.
3. Drücken S ie die Taste SCHIFT.
Der Kleinbuchstaben-Modus ist nun eingeschaltet.
V. 01 – 14/11/2013 43 ©Velleman nv
Page 44

MML16MC
4. Geben Si e ein oder mehrere Zeichen ei n.
5. Drücken S ie die Taste SCHIFT.
Der Z ahl en-Modus ist nun eingeschaltet.
6. Geben Si e ein oder mehrere Zeichen ein.
7. Drücken S ie die Taste SCHIFT.
Der Z eichen-Modus ist nun eingeschaltet.
8. Geben Si e ein oder mehrere Zeichen ei n.
9. Drücken S ie die Taste SCHIFT.
Sie befinden Sie nun wieder in den Großbuchstaben-Modus.
10. Drücken Sie die Taste ENTER, um die Nachricht anzuzeigen.
6.3 Sonderzeichen
Sie können besondere Formen von Buchstaben eingeben. Zum Beispiel: ç und ö eingeben.
1. Drücken S ie die Taste Q-PROG.
Der Großbuchstabenmodus ist der Standardmodus.
Um in den Kleinbuchstaben-Modus zu gelangen, drücken Sie auf die Taste SCHIFT.
2. Geben Sie den Grundbuchstabe C ein.
3. Drücken S ie die Taste EUROP-CHAR b is « ç » ersch e int.
4. Drücken Sie irgendeinen Buchstabe, um ein Standardzeichen einzugeben.
5. Geben Sie den Grundbuchstabe O ein.
6. Drücken S ie die Taste EUROP-CHAR bis « ö » erscheint.
7. Drücken Sie irgendeinen anderen Buchstabe, um einen normalen Buchstabe einzugeben.
8. Drücken Sie die Taste ENTER, um die Nachricht anzuzeigen.
7. Textformatierung
7.1 Schriftfarbe
Verän d ern Sie die S ch riftfarbe wie fol gt:
1. Drücken S ie die Taste Q-PROG.
Die Standardfarbe ist weiß.
2. Geben Si e einige Buch staben ein.
Diese Buchstaben sind weiß.
3. Drücken Sie die Taste COLOR, um die Schriftfarbe zu ändern.
Betäti gen Sie die Ta ste C OL OR mehrfach, b is Sie d ie gewünschte Farbe ausgewählt haben.
4. Geben Si e einige Buch staben ein.
Die folgenden Buchstaben werden eine andere Farb e haben.
Wiederholen
5. Drücken Sie die Taste ENTER, um die Nachricht anzuzeigen.
7.2 Schriftgröße
Verändern Sie die Schriftbreite wie folgt:
1. Drücken S ie die Taste Q-PROG.
2. Geben Si e einige Buch staben ein.
3. Drücken S ie die Taste FONT.
Die Textdar stellung verändert.
4. Betätigen Sie die Taste C OL OR mehrfach, b is Sie d ie gewünschte Schriftform (schmale S ch ri f t normale Text – Fettschrift) ausgewählt haben. Die gewählte Schriftgröße bleibt aktiv, bis eine
ander e ausgewählt wird. Sie können mehr Zeichen hinzufügen.
5. Drücken Sie die Taste ENTER, um die Nachricht anzuzeigen.
7.3 Sond ereffekte hinzufügen
Sie können nicht nur die Schriftfarbe und die Schriftgröße ändern, sondern auch Effekte hinzufügen.
Um diese Effekte zu verwenden, mü ssen S ie eine Seite auswählen und dieser Eff ekte hinzufügen.
Es können bis zu 26 Seiten programmiert werden.
Sie können auch eine Kombination von Seiten anzeigen.
Sondereffekte:
• I_EFF: Start -Effekt
• STAY Anzeigedauer
• SPEED Geschwindigkeit
V. 01 – 14/11/2013 44 ©Velleman nv
Page 45

MML16MC
• MODE: normal oder blinken
• O_EFF: Abschluss-Effekt
• PAGE CONTENT: die aktuelle Nachricht
Eine Seite p rogrammi eren:
1. Auf der Fer nbedienung, dr ücken Sie di e T a ste PR OG.
Warten Sie bis EDIT PAGE? im Display erscheint.
2. Drücken S ie die Taste ENTER.
3. Drücken Sie die Taste ↑, um die gewünschte Seite auszuwählen (A bis Z).
4. Drücken S ie die Taste ENTER.
I_EFF erscheint.
5. Drücken S ie die Taste ↑, um einen Effekt einzustellen.
6. Drücken Sie auf → um zur nächsten Einstellung zu gelangen.
STAY erscheint.
7. Drücken S ie die Taste ↑, um die Sekunden einzustellen.
8. Drücken S ie die Taste →, um zur nächsten Einstellung zu gelangen.
SPEED erscheint.
9. Drücken S ie die Taste ↑, um die Geschwindigkeit einzustellen.
10. Drü cken Sie die Taste →, um zur nächsten Einstellung zu gelangen.
MODE erscheint.
11. Drü cken Sie die Taste ↑, um den Modus einzustellen (normal oder blinken).
12. Drü cken Sie die Taste →, um zur nächsten Einstellung zu gelangen.
O_EFF erscheint.
13. Drü cken Sie die Taste ↑, um den Effekt einzustellen.
14. Drü cken Sie die Taste ENTER.
PAGE A CONTENT erscheint.
15. Geben Sie die Nachricht ein. Sie können vers chiedene Sch rif tfarben und -Größen eingeben (si ehe
oben).
16. Drü cken Sie die Taste E N T ER.
Die programmierte Seite wird angezeigt.
7.4 Zeit gesteuerte Anzeige
Si e könn en gespeicherte Seiten zu festgelegten Zeiten anzeigen.
Sie können bis zu 5 Zeitpunkte programmieren.
Geben Sie dafür Folgendes ein:
• Startdatum
• Enddatum
• Die Seite(n), die Sie anzeigen möchten
Einen bestimmten Zeitraum programmieren:
1. Auf der Fernbedien ung, dr ücken Sie die Taste PROG.
2. Drücken S ie die Taste ↓ bis EDIT SCHEDULE? erscheint.
3. Drücken S ie die Taste ENTER.
4. Drücken S ie die Taste ↑ um den Zeitpunkt auszuwählen (1 bis 5).
5. Drücken S ie die Taste ENTER.
6. Verwenden Sie ↑ oder ↓, um das Jahr einzustellen.
7. Drücken S ie die Taste →, um zur nächsten Einstellung zu gelangen (START MONTH).
8. Verwenden Sie ↑ oder ↓, um den Monat einzustellen.
9. Drücken S ie die Taste →, um zur nächsten Einstellung zu gelangen (START DAY).
10. Verwenden Sie ↑ oder ↓, um den Tag einz ustellen.
11. Wiederholen Sie Schritt 9 und 10 für:
o START HOUR
o START MIN
o STOP YEAR
o STOP MONTH
V. 01 – 14/11/2013 45 ©Velleman nv
Page 46

MML16MC
o STOP DAY
o STOP HOUR
o STOP MIN
12. Drü cken Sie die Taste E N T ER, um di e Programmierung zu beend en.
DISPLAY PAGES erscheint.
13. Geben Sie die Seite(n ) ein, die Sie anzeigen möchten.
14. Drü cken Sie die Taste E N T ER.
Die Seite wird am programmierten Zeitpunkt angezeigt.
Möchten Sie einen Zeitpunkt löschen, dann müssen Sie das Gerät auf Werkseinstellungen
zurücksetzen. Siehe « Das Gerät auf Werkseinstellungen zurücksetzen ».
7.5 Verschiedene Seiten kombinieren
Si e könn en verschiedene programmierte Seiten in der gewünschten Reihenfolge a nzeigen.
1. Auf der Fer nbedienung, dr ücken Sie di e T a ste R UN -PAGE.
2. Geben Si e d ie Seiten ein, die Sie kombinieren möchten. Z um Bei sp iel, BA CD .
3. Drücken Sie die Taste E N TER.
8. Weite r e Ei nstellungen
Geräte-ID
Weisen S ie einem Gerät zuerst eine ID zu, wenn Sie es über die mitg eli ef erte Software ansteuern
möchten. Geben S ie die ID über die S oft ware oder mit der Fernbedienung ei n. Über die S oftware lassen
sich mehrere Laufschriften ansteuern.
Mehrere Laufschriften können über Datenkabel (nicht mitgeliefert) miteinander verbunden werden.
Stellen Sie die ID wie folgt ein:
1. Auf der Fer nbedienung, dr ücken Sie di e T a ste FUNCT.
2. Drücken S ie die Taste ↓, um SET ID auszuwählen.
3. Drücken S ie die Taste ENTER.
4. Verwenden Sie ↑ oder ↓, um die ID einzustellen.
5. Drücken S ie die Taste ENTER.
Datum und Uhrzeit
Stellen Sie das Datum und die Uhrzeit wie folgt ein:
1. Auf der Fer nbedienung, dr ücken Sie di e T a ste FUNCT.
2. Drücken S ie die Taste ↓, um YEAR auszuwählen.
3. Drücken S ie die Taste ENTER.
4. Verwenden Sie ↑ oder ↓, um das Jahr einzustellen.
5. Drücken S ie die Taste ENTER.
6. Wiederholen Sie Schritt 1 bis 5 für:
o MONTH
o DAY
o HOUR
o MINUTE
Helligke it
Stellen Sie die Helligkeit wie folgt ein:
1. Auf der Fer nbedienung, dr ücken Sie di e T a ste FUNCT.
2. Drücken S ie die Taste ↓, um BRIGHTNESS auszuwählen.
3. Drücken S ie die Taste ENTER.
4. Verwenden Sie ↑ oder ↓, um die Helligkeit einzustellen.
5. Drücken S ie die Taste ENTER.
Tastenton
Schalten Sie die Tastententöne wi e folgt ein oder au s:
1. Auf der Fer nbedienung, dr ücken Sie di e T a ste FUNCT.
2. Drücken S ie die Taste↓, um KEY SOUND auszuwählen.
3. Drücken S ie die Taste ENTER.
4. Verwenden Sie ↑ oder ↓, um YES ODER NO auszuwählen.
V. 01 – 14/11/2013 46 ©Velleman nv
Page 47

MML16MC
5. Drücken S ie die Taste ENTER.
Das Gerät auf Werkseinstellungen zurücksetzen
1. Auf der Fer nbedienung, dr ücken Sie di e T a ste FUNCT.
2. Drücken S ie die Taste↓, um CLEAR ALL auszuwählen.
3. Drücken S ie die Taste ENTER.
4. Verwenden Sie ↑ oder ↓, um YES ODER NO auszuwählen.
5. Drücken S ie die Taste ENTER.
Das Gerät wird auf Werkseinstellungen zurückgesetzt.
9. Da s Gerä t übe r die So ftware pro grammieren
Das Gerät kann über d ie mitgeliefer te S oftware pr ogrammier t w erden.
• Installi eren Sie zuerst den Treiber .
• Installieren Sie danach die Software (Multi-Color Sign).
• Bei d e Programme stehen auf der mitgeli ef erten CD.
• Um die Software zu installieren, brauchen Sie ein Administratorkonto.
9.1 Den Treiber installieren
1. Verbi nden Sie die Laufschrift über das mitgelieferte Kabel mit dem Netz.
2. Verbinden Sie die Laufschrift über das mitgelieferte Kabel mit dem USB-Port Ihres Rechners.
3. Stecken Sie die CD in das CD-ROM-Laufwerk.
4. Auf der CD, öffnen Sie den Ordner New_driver_WinXP_SP2_3_Vista_Win7_32_64bit_Win8_32_64bit
und klicken Sie zwei Mal auf die Installationsdatei.
o Für ein 64-Bit-System, verwenden Sie CP210xVCPInstaller_x64.exe
o Für ein 32-Bit-System, verwenden Sie CP210xVCPInstaller_x86.exe
5. Befolgen S ie die Anweisungen des Setup-Assistenten.
9.2 Die Software installieren
1. Auf der CD, öffnen Sie den Ordner Install_Software.
2. Klicken Sie zwei Mal a uf setup.exe.
3. Befolgen S ie die Anweisungen des Setup-Assistenten.
4. Starten Sie die Software (Start - Pro grams - Multi-Co lor Sign).
9.3 Laufschrift-Software: erste Schritte
Mit der Software können Sie dieselben Aufgaben au sführen als mit d er Fernbedienun gen. Es gibt aber
einige Unterschi ede.
• Folgende Funktionen sind nur in der Software verfügbar:
o Sie können Nachrichtendateien speichern und später wiederverwenden.
o Sie können Bitmap-Grafiken kreieren und diese der Nachricht hinzufügen.
Bevor Sie starten
Bevor Sie starten, raten wir:
• die ID einzustellen
• die Uhr einz ustellen
Die Geräte-ID ei nstellen
1. Verbi nden Sie die Laufschrift mit d em C omputer.
2. Öffnen Sie die Multi-Co lor Sign-Software.
3. Im Menü FUNCTIONS, klicken Sie auf SET ID.
4. Wählen Sie eine ID aus der Liste aus (optional).
5. Klicken Sie auf OK.
Die Uhr e instellen
1. Öffnen Sie die Multi-Co lor Sign-Software.
2. Im Menü FUNCTIONS, klicken Sie auf SET CLOCK.
3. Wählen S ie die ID für die Sie die Uhr einstellen möchten.
4. Stellen Sie das Datum und die Uhrz eit ein.
5. Klicken Sie auf OK.
V. 01 – 14/11/2013 47 ©Velleman nv
Page 48

MML16MC
9.4 Eine Nachricht eingeben
Mit der Software können Sie:
• eine Nachricht eingeben und speichern
• Formatierung und Effekte hinzufügen
• die Nachricht zur Laufschrift senden
• die Nachricht für späteren Gebrauch speichern
Erste Nachricht
1. Öffnen Sie die Multi-Color Sign-Software.
2. Geben Sie eine Nachricht ein.
3. Speich ern Sie die Datei.
Sie können die Nachricht nun zur Laufschrift senden.
Eine Nachricht senden
Haben Sie die Nachricht eingegeben, dann müssen Sie diese zur Laufschrift senden.
1. Klicken Sie auf .
2. Wählen Sie die gewünschte ID und Seite aus.
Wählen Sie 0 als ID, dann zeigt jede Laufschrift die Nachricht an.
3. Klicken Sie auf OK.
Die Laufschrift zeigt die Nachricht an.
9.5 Textformatierung
Sie können die Formatierung (Farbe, Größe) innerhalb einer Nachricht wechseln.
Tags für Textformatierung
• Die Software verwendet Tags, um Formatierungsanweisungen einzufügen.
• Wählen Sie eine Formatierung aus, dann fügt die Software fügt das entsprechende Tag an der
gewünschten T extstelle ein.
• Die Formatierung gilt bis Si e ein neues Tag einfügen.
Beispiel
1. Geben Si e eine Nachricht mit mehreren Wörtern ein.
2. Den ganzen Text blau machen:
o Stellen Sie den Cursor am Anfang des Textes.
o I m Menü COLOR, klicken Sie auf BLUE.
Die Software fügt ein Tag für die Farbe Blau ein.
3. Senden Sie die Nachricht an die Laufschrift.
Der Text wird in Blau angezeigt.
4. Den üb rigen T eil des Textes in Weiß anzeigen:
o Stellen Sie d en Cursor nach dem ersten Wort.
o I m Menü COLOR, klicken Sie auf WHITE.
Die Software fügt ein Tag für die Farbe Weiß ein.
5. Eine Nachricht speichern
6. Senden Sie die Nachricht an die Laufschrift. .
Die Nachricht wird in Blau und Weiß angez eigt.
Eine Formatierung lös chen
• Um eine Formatierung zu löschen, wählen Sie das ganze Tag und drücken Sie auf die DELETE-Taste
der Tastatur.
V. 01 – 14/11/2013 48 ©Velleman nv
Page 49

MML16MC
9.6 Effekte
Si e könn en mehrere Effekte für eine Nachrich t auswählen. Di ese Effekte finden Sie im Menü COMMA N DS.
• leading effect: auf wel che Art der Text auf der Anzeige erscheint.
• closing effect: auf welche Art der Text au f der An zeige versch wi ndet.
• di splay effect: auf welch e A rt der Text angezeig t wird
• moving speed: Geschwindigkeit des Start- und Ablaufeffektes
• display time: wie lange der Text verweilt
• spezielle Einstellungen (einen Signalton abspie len, das Datum oder die Uhrzeit anzeigen)
Tags für Effekte
• Die Software verwendet Tags, um Effekte einzufüg en.
• Wählen Sie einen Effekt aus, dann fügt die Software das entsprechende Tag an der gewünschten
Textstelle e in.
• Sie können nur 1 Effekt pro Kategorie auswählen: Fügen Sie 2 Tags für die Geschwindigkeit ein, dann
wird nur das erste Tag berücksichtigt.
• Fügen S ie ein Start- u nd Absch lusseffekt ei n, beach ten Sie dann, dass Si e den Star tef fekt vor dem
Abschlusseffekt einfügen.
• Für andere Effekttags ist die Positio n des Cursors nicht wichtig: Der Effekt gilt für den ganzen Text,
egal wo Sie das Tag einfügen.
Beispiel
1. Geben Si e eine Nachricht mit mehreren Wörtern ein.
Verwenden Sie die Nachricht verwenden, die Sie schon kreiert haben (si ehe « Textformatierung » ).
2. Im Menü COMMANDS, klicken Sie auf Leading Effect > Snow.
Die Software fügt ein Tag ein.
3. Im Menü COMMANDS, klicken Sie auf Closing Effect > Scro ll Down.
Die Software fügt ein Tag ein.
4. Im Menü CO MMANDS , klicken Sie auf Move Speed.
5. Stellen Sie die Geschwindigkeit auf 2.
6. Im Menü COMMANDS, klicken Sie auf Display Time.
7. Stellen Sie die Zeit auf 3 Sekund en.
8. Speich ern Sie die Datei. Es sollte so aussehen:
9. Senden Sie die Nachricht an die Laufschrift. .
Einen Effekt löschen
• Um eine Textformatierung zu löschen, wählen Sie das Tag oder die Tags aus und drücken Si e die
DELETE-Taste der Tastatur.
9.7 Den Bilded itor verwenden
Mit dem Bildeditor können Sie Bilder kreieren und einfügen.
V. 01 – 14/11/2013 49 ©Velleman nv
Page 50

MML16MC
Achtung
nie die Batterien und werf en Sie diese nicht ins Feuer (Exp losionsgefahr).
Pixel
6 mm
Ei n Bild kreieren
1. Im Menü Bmp Graphics, klicken Sie auf Edit Graphic.
2. Stellen Sie die Höhe und die Breite für das Bild mit den Listen ein.
3. Wählen S ie ein e Far b e.
4. Wählen Sie zum Zeichnen eines Bildes eine Funktion unter « toolbox ».
5. Kreieren Sie d as gewünschte Bild.
6. Um das Bild zu speichern:
o Kli cken Sie auf SAVE.
o Wählen Sie einen Namen in der Liste und klicken Sie auf OK.
Ein B ild einfü gen
1. Im Texteditor, fü g en Sie den Cursor am En d e des Textes ein.
2. Öffnen Sie den Bildeditor (Bmp Graphics-Menü > Edit Graphic).
3. Wählen Sie einen Namen in der Liste « Select Graph » und klicken Sie auf INSERT.
4. Schließen Sie d en Editor
5. Senden S ie die Nachricht an die Laufschrift. .
Ein B ild löschen
1. Öffnen Sie den Bildeditor (Bmp Graphics-Menü > Edit Graphic).
2. Wählen Sie einen Namen in der Liste « Select Graph » und klicken Sie auf DELETE.
3. Klicken Sie auf YES.
10. Die Batterien
• Durchbohren Sie
• Laden S ie keine ni cht-wiederaufladbare Batterien (Alkali).
• Respektieren Sie d ie örtlichen Umweltvorsch rif ten beim Entsorgen d er Batterien. Halten
Si e die Batterien von Kin d ern fern.
Die Batterien der Fernb edienung ersetzen:
1. Öffnen Sie den Batteriedeckel auf d er Rückseite und ersetzen S ie die Batterien durch neue des
gl ei ch en Typs (siehe « Technische Daten »). Beachten Sie die richtige Polarität.
2. Schließen Sie d a s B atter iefach.
Bemerkung: Batterie der Laufschrift
Die Laufschrift funktioniert mit e iner CR2032-Batterie und wird für den i nternen Speich er verwendet.
Trennen Sie das Gerät vom Netz und bemerken Sie, dass das Datum und die Uhrzeit nicht mehr
angezeigt werden, dann öffnen Sie den Batteriedeckel und legen Si e eine neue Batterie gleich en Typs
ein.
11. Technische Daten
Auflösung 7 x 80 Punkte P6 RGB-LEDs
V. 01 – 14/11/2013 50 ©Velleman nv
Page 51

MML16MC
Betrachtungswinkel
120°
Sichtabstand
6-25 m
LEDs
3-in-1 RGB
Betriebstemperatur
-20 °C bi s +45 °C
Feuchte
20-90 %
Netzteil
Laufschrift 100-240 VAC 50-60 Hz to 5 VD C 4 A (Netztei l mitgeliefer t)
Fernbedienung: 2 x 1.5 V AAA-Batterien, L R6C (mitgel iefert)
Verbrauch
max. max. 20 W, durchschnittlich 5 W
Abmessungen
650 x 17 x 50 2 m m
Ersatz teile
Fernbedienung: MMLXXX/RC
Standard 2.5mm-Klinkenstecker
sichtbarer Teil 42 x 480 mm
Gewicht 500 g
Verwend en Sie dieses Gerät n ur mit originellen Zubehörteilen. Velleman NV übernimmt keine
Haftung für Schaden oder Verletzu ngen bei (f alscher) Anwendung dieses Gerätes.
Für mehr Informationen zu diesem Produkt und die neueste Version dieser
Bedienungsanleitung, siehe www.velleman.eu.
Alle Änderungen ohne vorherige Ankündigung vorbehalten.
Alle eingetragenen Warenzeichen und Handelsnamen sind Eigentum Ihrer jeweiligen Inhaber und dienen
nur zur Verdeutlichung der Kompatibilität unserer Produkte mit den Produkten verschiedener Hersteller.
Windo ws, Windows XP, Windows 2000, Windows Vista, Windows Aero, Windows 7, Windows 8, Windows
Mobi le, Windows Server sind eingetrag ene Warenzeichen von Microsoft Corporation in den VS und
anderen Ländern.
© URHEBERRECHT
Velleman NV besitzt das Urheberrecht für di ese Bedienungsanlei tung. Alle weltweiten Rechte
vorbehalten. Ohne vorher ige schri f tli che Genehmigung des Urhebers ist es nicht gestattet, d iese
Bedienungsanleitung ganz oder in Teilen zu reproduzieren, zu kopieren, zu übersetzen, zu bearbeiten
oder zu speichern.
V. 01 – 14/11/2013 51 ©Velleman nv
Page 52

MML16MC
Não olha directamente para uma fonte de luz
Não utilizar o aparelho se veri ficar que o exteri or ou os cabos estão danificados. Não tente
las no fogo, pois elas podem e xplodir. Não
MANUAL D O UT I L IZADO R
1. Introdução
Aos cidadãos da União Europeia
Importantes informações sobr e o meio ambiente no que r espei ta a este prod uto
Agradecemos o fact o de ter adquirido este aparelho. Leia atentamen te as instru ções do manual antes de
usar o aparelho. Caso o aparelho tenha sofrido algum dano durante o transporte não o instale e entre em
c on ta c t o com o se u distr ibu i d or .
2. Instruções de segurança
Este símbolo no aparelho ou na embalagem indica que, enquanto desperdícios, poderão causar
danos n o meio ambiente. Não deite o aparelh o (nem as pilhas, se as houv er ) no l ixo
doméstico; dirija-se a uma empresa especializada em reciclagem. Devolva o aparelho ao seu
distribuidor ou ao posto de reciclagem local. Respeite a legislação local re lativa ao meio
ambiente.
Em caso de dúvidas, contacte com as au to ridades locais para os resíduos.
Mantenha o aparelh o f ora do alcance de cri an ças e pessoas nã o qualificadas.
Usar apenas em interiores. Proteger o aparelho contra a chuva e humidade ou qualquer
tipo de salpicos ou gotas. Nunca co loque recipientes com líquidos em cima do aparelho.
NUNCA desm onte ou abra a t ampa do dispositi vo em qua isquer circunstâ ncias. Tocar em
cabos ligados à corrente pode pr o vocar choques eléctricos mort ais.
Desli g ue sempre a fi ch a d a tomada quando o apar elho não estiver a ser us ado ou quando
estiver em a decorrer qu aisquer operações de man utenção. Seg ure sempre na f icha para o
desligar o cabo da rede, nunca no próprio cabo.
O utili zador não terá de fa zer a manutenção das peç as. Contact e o seu distribuidor caso
necessite de p eça s de substitu ição.
para evitar
• um ataque epiléptico em pessoas sensíveis
• cegueira temporária
• lesões p erman entes e irreversíveis dos olho s.
proceder à reparação do aparelho. Contacte um distribuidor autorizado.
Advertência: Nunca perfura as pilhas nem jogátente recarregar pi lhas não recarregáveis (alcalino). Descart e as baterias de acordo com as
regulamentações locais. Mant enha as pilhas fora do alcance das cr ianças.
3. Normas gerais
Consulte a Garantia de serviço e qualidade Velleman® na parte final deste manual do utilizador.
• Por razões de segurança, estão proíbidas quaisquer modificações do aparelho desde que não
autorizadas. O s danos provocados por modif icações não aut orizada s, não estão coberto s p ela
garantia.
• Danos causados pelo não cu mpr iment o das normas de segurança referid as neste manual anulam a
garantia e o seu distribuidor não será responsável por qualquer danos ou outros problemas daí
resultantes.
V. 01 – 14/11/2013 52 ©Velleman nv
Page 53

MML16MC
Pode prog ramar a p lac a usando o controlo remo to ou atrav és do seu computador. Consulte "Progr amar a
Letra maiúscula
Símbolos br ancos nas telcas (números, símbolos )
Letra minúscula
Símbolos verde s nas tecl as (símbolos)
• Familiariz e-se com o funcionamento do aparel ho antes de o utilizar. O aparelh o só dev e ser
manuseado por pess o a s qualifica das. Os d a nos que possam ocorr e r serão provavelmente causados
por uma u tilização não prof iss ional do aparelho.
• Utilize o apar elho apenas para as apli cações descritas neste man ual. Todos os outros us os podem
levar a um curto-circuito, queimaduras, eletrochoques, explosão de lâmpada, de colisão, etc. Uma
utili zação incorrecta anu la a garantia completamente.
4. Características
• imagem a cores ( texto e gráficos): vermelho, verde, azul, amarelo, magenta, cião, branco
• brilho: 2100 cd/m² cor branca e brilho intenso, 4-níveis de brilho dispo níveis
• memória: 26 páginas de texto de 210 caracteres cada, e 16 páginas gráficas
• relógio em tempo re al: relógio incor pora do com bateria de apoio
• for ma t o 12/ 24h
• buzzer: buzzer incorporado com duração programável
• comando: através de cont rolo remoto com 44 teclas
através do PC - cabo incluído, ficha USB/ficha de telefone 3.5mm
• inclui: cont rolo remoto I R, manual do ut ilizador, 2 suport es de montagem, adaptador
5. Descrição
Ver as figur as da p ágina 2 deste manual d o utilizador.
6. Progra m a r a pla c a a pa rti r do controlo remo to
pl aca com o sof tware do compu dor" para mais informação.
Primeira mensag em
Para digitar a mensagem:
1. Ligu e a pl aca a uma fonte de alimentação utilizando o cabo f ornecido.
2. No contolo r emoto, pre ssione Q-PROG.
3. Digite H ELLO us and o as teclas do controlo remoto.
Caso digite um caracter errado, pressione DEL para apagar o último caracter.
4. Pressionar ENTER.
A mensagem apar ece no visor.
Mostrar a hora e a data
1. Pressione TIME /D A T E para exi b ir apenas hora e a data.
2. Pressione ES C par a cancelar a opção hora/data.
6.2 Caracteres alternados
Para i ntroduzir letras minúsculas, algarismos ou símbolos, tem de alterar o modo do teclado + tecla shift.
O s ímbol o no visor indica qual o modo que está activo.
1. Pressionar Q-PROG.
2. Digitar um ou mais caracteres.
3. Pressionar SHIFT.
O modo letra min úscula está agora activo.
4. Digitar um ou mais caracteres.
5. Pressionar SHIFT.
O modo numérico está agora activo.
V. 01 – 14/11/2013 53 ©Velleman nv
Page 54

MML16MC
6. Digitar um ou mais caracteres.
7. Pressionar SHIFT.
O modo símbolos está agora activo.
8. Digitar um ou mais caracteres.
9. Pressionar SHIFT.
Está de vol ta ao mod o l etras maiúsculas.
10. Pressi one E N T ER para exibir a mensagem.
6.3 Letras com Acentos e Sinais Diacríticos
Pode digitar letras com acentos. Vamos supor que pretende digitar um ç ou um ö.
1. Pressionar Q-PROG.
Por defeito as le tras estão e m mai úsculas.
Caso pretenda minúsculas, pressione SHIFT.
2. Digite a tecla C
3. Pressione EUROP-CHAR at é ap ar ecer o ç.
4. Pressione qualquer outra tecla para digitar o caracter normal.
5. Digite a tecla O
6. Pressione EUROP-CHAR at é ap ar ecer o ö.
7. Pressione qualquer outra tecla para digitar o caracter normal.
8. Pressione ENT ER para exibir a mensagem.
7. For m atar o texto
7.1 Cor da fonte
Pode al ter ar a cor da fonte de u ma mensagem da seguinte forma:
1. Pressionar Q-PROG.
Por defeito a cor é o bran co.
2. Digite algumas letras.
Estas letras ap ar ecem em branco.
3. Pressione COLOR para alterar a cor do texto.
Pressione COLOR várias vezes para a ce der às várias cores.
4. Digite algumas letras.
Estas novas letras terão a outra cor escolhida.
Repetição
5. Pressione ENT ER para exibir a mensagem.
7.2 Taman ho da fonte
Pode exib ir caracteres com LED s de vár ias larguras, da seguinte forma:
1. Pressionar Q-PROG.
2. Digite algumas letras.
3. Pressionar FONT.
O tamanho da fonte é al terado .
4. Pressione FONT novamente p ara a ced er aos vários tamanhos (estreito - normal - neg rito). O
tamanh o escolhido permanece activo até seleccionar outro. P ode adi cionar mais caracteres.
5. Pressione ENT ER para exibir a mensagem.
7.3 Apresentar a mensagem juntando efeitos espec iais.
Para al ém da cor e tamanho da fonte, pode usar outros efeitos especiais.
Para usar estes ef eitos esp eciais, necessita de usar uma página e aplicar-lhe os efeitos.
Pode programar até 26 páginas neste painel de mensagem.
Pode também ap r esentar páginas combinad as.
Programar uma pág ina implica as seguintes configurações:
• I_EFF: animaçã o de entrad a
• STAY: o te mpo que a men sagem permanecerá no visor
• SPEED: velocidade da mensagem
• MODE: normal ou intermitente
• O_EFF: animação de saída
• PAGE CONTEN T : a mensag em actual
V. 01 – 14/11/2013 54 ©Velleman nv
Page 55

MML16MC
Para programar uma p ágina:
1. No comando, pres sione PROG.
Aguarde até aparecer no visor "EDIT PAGE?"
2. Pressionar ENTER.
3. Pressione ↑ para seleccionar a página que pretende programar (de A a Z).
4. Pressionar ENTER.
Aparece I_EFF.
5. Pressio ne ↑ para sel ecci onar um efeito.
6. Pressione → para avançar para a configuração segui n te.
Aparece STAY.
7. Pressione ↑ para d efi nir os segundos.
8. Pressione → para avançar para a configuração segui n te.
Aparece SPEED.
9. Pressione ↑ para definir a velocidade.
10. Pressione → para av an çar p ara a configuração segui nte.
Aparece MODE .
11. Pressione ↑ p ar a s elec ciona r o m odo (n orma l ou i n t e r mitente) .
12. Pressione → para avan çar p ara a configuração segui nte.
Aparece O_EFF
13. Pressione ↑ para sel ecci onar o efeit o.
14. Pressionar ENTER.
O Conteúdo da Página A apar ece.
15. Di gite a mensagem Pode utilizar várias cores e tamanhos de f onte ( ver abaixo)
16. Pressionar ENTER.
A página programada apare ce.
7.4 Exibiçã o progr ama da
Pode agend ar a exibição de uma ou mais páginas programadas para serem mostrad as numa
determin ada data.
Pode agendar até 5 exib ições.
Para tal, é necessário definir
• A data de início
• A data de fim
• A página ou páginas a serem exibi das.
Para programar o agendamento:
1. No comando, pres sione PROG.
2. Pressione ↓ a té aparecer "EDIT SCHEDULE?".
3. Pressionar ENTER.
4. Pressione ↑ para seleccionar a agenda que pretende programar (de 1 a 5).
5. Pressionar ENTER.
6. Use ↑ ou ↓ para indicar o ano de início .
7. Pressione → para avançar (MÊS DE INÍC IO).
8. Use ↑ ou ↓ para indicar o mês.
9. Press → to go to the next setting (STAR T DAY ).
10. Use ↑ ou ↓ para definir o dia.
11. Repita os passos 9 e 10 para:
o START HOUR
o START MIN
o STOP YEAR
o STOP MONTH
o STOP DAY
o STOP HOUR
o STOP MIN
V. 01 – 14/11/2013 55 ©Velleman nv
Page 56

MML16MC
lo usando o softwa re ou o coma nd o à distâ ncia. Atr avés do software, pod e
12. Quando terminar, pressione ENTER
As página a exibir apar ecem no pai nel.
13. Indique a página ou páginas que pretende mostrar.
14. Pressionar ENTER.
A página será exibida n a al tu r a definida.
Se pretende eliminar um agendamento, tem de reinicializar o dispositivo. Veja "Reinic ializ ar o
Dispositivo" mais abaixo .
7.5 Combinar várias páginas
Pode exibir várias páginas programadas na ordem que pretender.
1. No comand o à distância, pressione RUN-PAGE.
2. Indique as páginas que pretende combinar, por exemplo BACD.
3. Pressionar ENTER.
8. Con figu raçã o do Painel de Mensagem
ID do disposit ivo
Caso pretenda controlar o seu dispo sitivo através do software incluído , é necessário atribuir primeiro um
ID ao dispositivo. Pode fazêcontrolar vários painéis d e men sag em.
Pode ligar vários painéis entre si através de um cabo de dados (não incluído)
Pode definir o ID do dispositivo da seguinte forma:
1. No comand o à distância, pressione FUN CT.
2. Pressione ↓ para seleccioanr SET ID.
3. Pressionar ENTER.
4. Use ↑ ou ↓ para definir o ID do dispositivo.
5. Pressionar ENTER.
data e hora do sistema
Pode acert ar a d ata e a hora do painel da seguinte forma:
1. No comand o à distância, pressione FUN CT.
2. Pressione ↓ par a selecci onar YEAR.
3. Pressionar ENTER.
4. Use ↑ ou ↓ para acertar o ano .
5. Pressionar ENTER.
6. Repita os passos 1 a 5 para:
o MONTH
o DAY
o HOUR
o MINUTE
Brilho
Pode regular o brilho da seguinte forma:
1. No comand o à distância, pressione FUN CT.
2. Pressione ↓ par a selecci onar BRI GHTNESS.
3. Pressionar ENTER.
4. Use ↑ ou ↓ para regular o brilho.
5. Pressionar ENTER.
Tecla de Som
Pode ligar ou desligar a tecla de som da seguinte forma:
1. No comand o à distância, pressione FUN CT.
2. Pressione ↓ para seleccionar KEY S OUND.
3. Pressionar ENTER.
4. Use ↑ ou ↓ para s eleccionar YES ou NO.
5. Pressionar ENTER.
Reiniciar o dispositivo
1. No comand o à distância, pressione FUN CT.
V. 01 – 14/11/2013 56 ©Velleman nv
Page 57

MML16MC
2. Pressione ↓ para selecionar CLEAR ALL.
3. Pressionar ENTER.
4. Use ↑ ou ↓ para s elccionar YES ou NO.
5. Pressionar ENTER.
São re st auradas a s configuraçõe s de fáb rica do dispositivo.
9. Progra m a r o pai ne l de mensagem atravé s do software do
computador.
O pai nel de mensagem é fornecido com um software que pode usar para fazer a progra mação.
• Primeiro deve proceder à instalação do controlador do dispositivo.
• Em seguida, instala o próprio software (Multi-Color Sign).
• Ambos os programas se encontr am no CD incluído.
• Para i nstalar o software, necessi ta d e uma c onta de admini strad or.
9.1 Instala ção do contr o lador do dis pos itiv o.
1. Ligue o painel de mensagem a uma fonte de alimentação usando o cabo fornecido.
2. Ligue o painel de mensagem a uma porta U SB do seu computador usa ndo o cabo fornecido.
3. Introduza o CD de instalação no seu computador.
4. No CD, abra a pasta New_driver_WinXP_SP2_3_Vista_Win7_32_64bit_Win8_32_64bit e faça duplo
clique no ficheiro de instalação.
o Para u m sistema de 64 bit, escolha CP210xVCPInstaller_x64.exe
o Para um sistema de 32 bit escolha CP210xVCPInstaller_x86.exe
5. Sig a as i nstruções do assistente.
9.2 Instalação do software do painel de mensagem
1. No CD, ab ra a pasta I nstall_Software.
2. Faça dupl o cl ique em setup.exe.
3. Siga as instruções do assistente.
4. Inicie o software (Start - Programs - Multi-Co lor Sign).
9.3 Softw are do painel de mensagem: inici ar
O software permite-lhe exe cutar as mesmas tarefa s do que o c o mando à di st ância. E st as são as
pequenas diferen ças.
• Funções apenas disponíveis no software:
o Pode guardar os ficheiros de mensag em e voltar a usá-los mais tarde.
o Pode criar gráfico s bitmap e adicioná-los à mensagem.
Antes de iniciar
Antes de iniciar , é recomen d ado que:
• defina o ID do painel de mensagem
• acerte o rel ógio do painel de mensagem
Definir o ID do painel de mensagem
1. Ligue o painel ao seu computador.
2. Abra o software Multi-Color Sign.
3. No menu Functions, clique em Set ID.
4. Seleccione um ID a partir da lista (opcional).
5. Clique OK.
Acertar o relógio
1. Abra o software Multi-Color Sign.
2. No menu Functions, clique em Set Clock.
3. Selec cione o ID do dispositivo do qual p reten de acertar o relógio.
4. Acerte a hora e a data
5. Clique OK.
9.4 Digit ar u ma mensagem
Us ando o software, pod e:
V. 01 – 14/11/2013 57 ©Velleman nv
Page 58

MML16MC
• criar e guard ar uma mensagem
• adi cionar formatação e efeitos
• enviar a mensagem par a o pain el
• guard ar a mensagem para usar posteriormente
Primeira mensag em
1. Abra o software Multi-Color Sign.
2. Digitar uma mensagem.
3. Guardar o ficheiro.
Pode agora enviar a su a mensagem para o painel .
Enviar uma mensagem
Assim que a mensagem estiver termin ada, é n ecessário enviá-la para o pai nel.
1. Clique no ícone de enviar mensagem .
2. Seleccione o ID do dispositivo e a página que pretende usar.
Se seleccionar 0 como ID, todos os painéis exibirão a men sagem.
3. Clique OK.
O pai nel exibe a mensagem.
9.5 Formatação do texto
Pode combinar várias cores e tamanhos de letra na me sma mensagem.
Marc as para formatação de texto
• O software usa marcas par a adicionar f orm atação de texto à sua mensagem.
• Quando ad iciona formataç ão, o softwa re i nsere a marca corresponden te na posição em que está o
cursor.
• A formata ção é aplicada ao texto que tem a marca, até inserir uma nova marc a.
Exemplo
1. Digite u ma mensagem que c ontenha várias palavras.
2. Para meter toda a fr ase na cor azul:
o Coloque o cursor n o início da frase.
o No meu Color, clique em Blue.
O software coloca uma marca para azul.
3. Envie a mensagem para o painel.
A mensagem aparece em azul.
4. Para meter o resto da frase em branco:
o Coloque o cursor na primeira palavra.
o No menu Col or, clique em White.
O software coloca uma marca para branco.
5. Guarde a mensagem.
6. Envie a mensagem para o painel. .
A mensagem aparece em azul e branco.
Remover a formatação
• Para remover a formatação de texto, seleccione a mar ca e pre ssione Delete no tecl a d o.
9.6 Efeitos
Pode aplicar vári os efeitos numa men sag em. As categorias de efeito s estão no menu Commands:
• efeito de abertu r a: a forma como o texto aparece.
• efei to de fecho: a forma como o texto de saparec e
V. 01 – 14/11/2013 58 ©Velleman nv
Page 59

MML16MC
• efei to de apresen ta ção como a mensagem é apresentada.
• velocidade de ap resentação velocidade co m que a men sagem aparece e desaparece
• tempo d e exibição: durante quanto te mpo a mensagem é exibida
• configurações especiais (adicionar som; mostrar data e h ora)
Marc as para efeitos
• O software utiliza marcas para ad icionar um efeito à sua mensagem.
• Sempre que adiciona um efeito, o software insere a mar ca correspondente na posição do cursor.
• Pode usar ap en as 1 efeito por cada categoria: Se inserir 2 opções par a velocidade, apen as o primeiro
será considerado.
• Se adiciona efei tos de abertura e fecho, certifique-se de q ue insere a marca p ara o efeito de abertura
e para o ef eito de fe cho.
• Para outras marcas de ef eitos, a posição do cursor nã o é i mportante: o efeito é aplicado a toda a
mensag em, ind ep endentemente do sí tio onde es tá a marca.
Exemplo
1. Digitar uma mensagem cont ento pal avr as mul típlas.
Pode usar a mensagem que criou com a opção "Formating Text" caso pretenda.
2. No menu Commands, clique em Leading Effect > Snow.
O software insere a etiq ueta.
3. No menu Commands, clique em Closing Effect > Scroll Down.
O software coloca a etiq ueta.
4. No menu Commands, clique em Move Speed.
5. Escolha a opção de velocidade 2.
6. No menu Commands, clique em Display Time.
7. Defina o tempo para 3 segundos.
8. Guardar o ficheiro. O resultado é semelhante a isto:
9. Enviar a mensag em par a o painel .
Remover um efei to
• Para remover a formatação do text o, seleccione a eti q ueta ou etiquetas e pres sione Delete no
teclado .
9.7 Usar o editor de gráfic os
Com o editor de gráficos, pode criar gráficos e inseri-los numa mensagem.
Criar um gráfico
1. No menu Bmp Graphics, clique em Edit Graphic.
2. Defin a a al tu ra e a larguar do gráfico usando as listas.
3. Escolha uma cor.
V. 01 – 14/11/2013 59 ©Velleman nv
Page 60

MML16MC
Advertência
Descarte as b aterias de acordo com as regulamentações locais. Mantenha as pilhas fora do
resolução
7 x 80 dots P6 RGB LEDs
píxeis
6 mm
ângulo de visão
120°
alcance d a visão
6-25 m
humidade em
20-90 %
control o remoto: 2 x pilhas 1.5 V AAA LR6C (incl.)
área visível
42 x 480 mm
peso
500 g
peças de sub sti tui çã o
c on trol o r em o to: M ML X X X / R C
4. Escolha a fer ramenta na barra de ferr amentas.
5. Crie o gráfico que des ej a .
6. Salvar um gráfi co:
o Clique em Save.
o Seleccione um no me da lista e cli q ue em OK.
Inserir um gráfico
1. No editor de texto, coloque o curso no f inal da fr ase.
2. Abra o editor de gráficos (menu Bmp Graphics > Edit Graphic).
3. Seleccione um n o me n a coluna Select Graph e clique em I nsert.
4. Fechar o editor.
5. Enviar a mensag em par a o painel .
Apagar um gráfico
1. Abra o editor de gráficos (menu Bmp Graphics > Edit Graphic).
2. Seleccione um n o me n a coluna Select Graph e clique em Delete.
3. Cllique em Yes
10. Pilhas
• Nunca perfura as pilhas nem jogá-l as no fogo, pois elas podem explodir.
• Não tente recarregar p ilhas não recarregáveis (alcalino).
•
al ca nce das cria nças.
Para substitui r as pilhas:
1. Abra a tampa d o compartimento das pilhas na parte tr aseira e substitua por uma pilhas do tipo
indicador (ver E specificaç ões Técnicas). Resp eite a polarida de.
2. Fechar o compar timento das pilhas.
Nota: bater ia no pain el de mensagem.
O painel de mensage m possui uma bateria CR2032 utiliz ada para a memória interna do dispositivo. Se ao
desligar a placa verificar qu e o dispositivo já não rete m a data e a hora, desaparafu se a tampa e
introduza uma nova bateria d o mesmo tipo.
11. Especificações
configuração LED 3-em-1 RGB
temper atura de
-20 °C a +45 °C
funcionamento
funcionamento
alimentação painel de mensagem: de 100-240 VAC 50-60 Hz a 5 VDC 4 A (adap tador
incl.); ficha standar d 2.5 mm
ficha 2.5 x 5.5 mm
consumo máx. máx. 20 W, média 5 W
dimensões 650 x 17 x 50 2 m m
Util ize este aparel ho apenas c om acessórios originais. A Velleman NV não será responsável
por quaisquer danos ou lesões causados pelo uso (indevido) do aparelho.
V. 01 – 14/11/2013 60 ©Velleman nv
Page 61

MML16MC
Para mai s informaç ão sobre este produ to e para ac eder à versão mais recente deste manual
do utilizador, v isite a nossa página www.velleman.eu.
Podem alterar-se as especificações e o conteúdo deste manua l sem aviso prévio.
Toda s as marcas r egistadas e desig nações come rci a is são propriedade d os seus respectivos donos e são
usadas apenas para clarificar a compatibilidade dos nossos produtos relativamente aos produtos dos
di f erentes fabri cantes.
Windo ws, Windows XP, Windows 2000, Windows Vista, Windows Aero, Windows 7, Windows 8, Windows
Mobile, Windows Server são marcas da Microsoft Corporation registadas tanto nos Estados Unidos com o
em outros países. iPad, iPod, iPod touch, iPhone, Mac, iMac, MacBook, PowerBook, Power Mac, Mac OS
são ma rca s da Apple Inc., registadas nos U .S. e em outros p a íses.
© DIREITOS DE AUTOR
A Velleman NV detém os direitos de autor d este manual do utilizador. Todos os direitos
mundiais reservados. É estritamente proibido reproduzir, traduzir, copiar, editar e gravar este manual
do utilizador ou partes deste sem prévia autorização escrita por parte da d etentora dos direitos.
V. 01 – 14/11/2013 61 ©Velleman nv
Page 62

MML16MC
Nie patrzeć wprost na źródło światła, gdyż może to spowodować
INSTRUKCJA OBSŁUGI
1. Wstęp
Przeznaczona dla mieszkańców Unii Europejskiej.
Ważne informacje dotyczące środowiska.
odpadów.
Dziękujemy za wybór produktu firmy Velleman! Prosimy o dokładne zapoznanie się z instrukcją obsługi
przed użyciem. Jeśli urządzenie zostało uszkodzone podczas transportu, prosimy o nie korzystanie z
niego i skontaktowanie się ze sprzedawcą.
2. Instrukcje bezpieczeństwa
Ten symbol umieszczony na urządzeniu bądź opakowaniu wskazuje, że usuwanie pro duktu
może być sz ko dliw e dla środowiska. Nie należy usuwać urządzenia lub baterii do pojemnika na
niesorotowane odpady komunalne, należy je przekazać specjalistycz nej firmie zajmującej się
recyklingiem. Urz ądze nie moż na zw rócić dystrybuto rowi lub lo k alne j firmie z ajm ując e j się
recykling iem . Należy postępow ać zgo dnie z z as adam i bez pieczeństwa dotyczącymi śro dow is k a.
W razie wątpliwości należy skontaktować się z firmą zajmującą się utylizacją
Chro nić urz ądzenie prz e d dziećmi i nieupo waż nio nymi uż ytkownik am i.
Wyłącznie do użytku wewnątrz pomieszczeń. Chro nić urz ądzenie przed deszczem,
wilgo cią, roz pry skami i ście kają c ym i ciecz am i. Nigdy nie sta w ia ć prz e dm iotów wy pełnio nyc h
cieczą na urządzeniu.
NIE WOLNOdemontować ani otwierać pokrywy ochronnej. Podczas instalac ji na leż y zachow ać
szczególną ostrożność: dotknięcie przewodów pod napięciem może prowadzić do
zagraż ającego życiu poraż enia prądem elektrycznym.
Kiedy urządzenie nie jest używane albo gdy przeprowadzane są prace serwisowe lub
konserwacyjne należy odłącz y ć urz ądz enie o d zasila n ia s iec io wego. Kabel za silają cy należ y
trzymać tylko za wtyczkę.
W urządzeniu nie występują części, które mogą być serwisowane przez użytkownika. W celu
uzyskania części serwisowych lub zamiennych należy skontaktować się z autoryzowanym
sprzedawcą.
• u osób na to wrażliwych atak padaczki
• ty mcz asow ą utratę wzroku (ś lepo ta olś nien io w a)
• trwałe (nieo dwracalne) uszkodzenie oczu.
Nie wyrz ucać urządz enia , jeśli z aobserwowano uszkodzenie o budowy lub kabli. Nie
podejmować próby naprawy urządzenia. W tym celu należy skontaktować się z
autoryzowanym sprzedawcą.
Uwaga: Nie przebijać ani nie wrzucać baterii do ognia, ponieważ mogą eksplodować. Nie
łado w ać bat erii, któ re nie są akum ulato rkami (alkalic z ne). Utylizo w ać bat e rie zgo dnie z
lokalnymi prz episa m i. Trz ym ać bat erie z dala od dziec i.
3. Informacje ogólne
Proszę zapoznać się z informacjami w części Usługi i gwarancja jakości Velleman® na końcu
niniejsz ej instrukcji.
• Wprowadzanie zmian w urządzeniu jest zabronione ze względów bezpieczeństwa. Należy pamiętać,
że uszkodzenia spowodowane przez zmiany wprowadzone przez użytkownika nie są objęte
gwarancją.
• Gwarancja nie obejmuje uszkodzeń spowodowanych w wyniku nieprzestrzegania niniejszej instrukcji,
V. 01 – 14/11/2013 62 ©Velleman nv
Page 63

MML16MC
Wielk ie l ite r y
Bia łe symbole na prz yc is kach (licz by, symbo le)
Małe litery
Zielone symbole na prz yciskach (symbole)
a sprzedaw ca nie po nos i o dpow iedz ialno ści za wynikłe usz ko dze nia lu b problem y .
• Przed rozpoczęciem pracy z urządzeniem należy zapoznać się z jego funkcjami. Nie pozwól, aby
osoby ni epr zeszkolone korzystały z urządzenia. Większość usterek jest zazwyczaj skutkiem
nieprofesjonalnego użytkowania urządzenia.
• Urządz enie należy używać jedynie zgodnie z przeznaczeniem. Jakiekolwiek użytkowanie niezgodnie z
przeznaczeniem może do prowadzić do zwarcia, poparzeń, porażenia prądem, wybuchu lampy,
wypadku itd. Uż ywanie urz ądzenia niezgodnie z przeznaczeniem spowoduje unieważnienie gwarancji.
4. Cechy
• wyśw ie tlany ko lo r (tekst i graf ika): cze rwony , zie lo ny, nieb ies ki, żó łty, fioletowo cze rwony , błękitny,
bia ły
• jasność: pełna jasność białego ko loru 2100 cd/m², czterostopniowa regulacja jasności
• pamięć: 26 stron tekstowych po 210 znaków oraz 16 stron graficznych
• zegar czasu rz eczywistego: wbudowany zegar czasu rzecz ywistego z baterią podtrzymującą
• for ma t 12 / 24h
• brzęczyk: wbudowany brzęczyk z programowanym czasem trwania
• sterowanie: 44-przyc iskow ym pilotem na podcz e rw ień ( IR)
za pośrednictwem PC - dołączony kabel, USB do gniazda telefonu 3,5mm
• standardowe wyposażenie: pilot zdalnego sterowania na podczerwień (IR), instrukcja obsługi, 2
uchwyty montażowe, zasilacz sieciowy
5. Przegląd
Patrz rysunki na stronie 2 niniejszej instrukcji.
6. Programowanie tablicy za pomocą pilota
Wyświetlacz można zaprogramować za pomocą dołączonego pilota lub komputera. Szczegółowe
informacje w punkcie „Programowanie tablicy przy użyciu oprogramowania komputerowego”.
Pierwszy komunikat
Aby wpisać kom unikat:
1. Podłączyć tablicę informacyjną do zasilania za pomocą dołączonego kabla.
2. Nacisnąć na pilocie przycisk Q-PROG.
3. Używając przycisków na pilocie wprowadzić tekst HELLO.
Omyłkowo wprowadzony znak można usunąć naciskając przycisk DEL.
4. Nacisnąć ENTER.
Komunika t po jaw i się na w yświetlac z u.
Wyświetla n ie go dz iny i daty
1. Nacisnąć przycisk TIME/DATE, aby wyświetlić sam komunikat z godziną i datą.
2. Nacisnąć ESC, aby wyjść z trybu wyświetlania godziny/daty.
6.2 Wprowadzanie różnych rodzajów znaków: małych liter, cyfr i symboli
Aby wyświetlić małe litery, cyfry lub symbole, należy zmienić tryb klawiatury za pomocą przycisku shift.
Symbol na wyświetlaczu pokazuje, jaki tryb jest obecn ie aktywny.
1. Nacisnąć Q-PROG.
2. Wprowadzić jeden lub więcej z naków.
3. Nacisnąć SHIFT.
Akty wowan y zostan i e tryb wprowadzania małych liter.
V. 01 – 14/11/2013 63 ©Velleman nv
Page 64

MML16MC
4. Wprowadzić jeden lub więcej z naków.
5. Nacisnąć SHIFT.
Aktywowany został tryb wprowadzania cyfr.
6. Wprowadzić jeden lub więcej z naków.
7. Nacisnąć SHIFT.
Aktywowany został tryb wprowadzania symboli.
8. Wprowadzić jeden lub więcej z naków.
9. Nacisnąć SHIFT.
Nastąpił po wrót do trybu wprow a dzania wielk ich liter.
10. Nacisnąć ENTER, aby wyśw ietlić komunikat .
6.3 Wprowadzanie lit er z akcentami i znakami diakrytycznymi.
Ist n ieje moż liw ość wprow adzania liter z akcentam i. Załóżmy, ż e ko niecz ne jest wpisanie ç ora z ö.
1. Nacisnąć Q-PROG.
Tryb wielkich liter jest try bem domyś lnym .
Aby przełączyć w tryb małych liter, nacisnąć SHIFT.
2. Nacisnąć przycisk C.
3. Naciskać przycisk EUROP-CHAR do momentu, aż pojawi się ç.
4. Nacisnąć jakikolwiek inny przycisk z literą, aby wprowadzić zwykły znak.
5. Nacisnąć przycisk O.
6. Naciskać przycisk EUROP-CHAR do momentu, aż pojawi się ö.
7. Nacisnąć jakikolwiek inny przycisk z literą, aby wprowadzić zwykły znak.
8. Nac is nąć ENTER, aby wyśw ietlić kom unikat.
7. Formatowanie tekstu
7.1 Kolor czcionki
Kolo r czcionki można zmienić w następujący sposób:
1. Nacisnąć Q-PROG.
Domyślnym kolo rem jest biały.
2. Wprowadz ić kilka liter.
Będą one białe.
3. Nacisnąć przycisk COLOR, aby zmienić kolor tekstu.
Nacisnąć kilk akro tnie prz yc isk COLOR, aby wybrać odpow ie dni ko lo r.
4. Wpro wadz ić k ilk a l ite r .
Te litery będą w wybranym kolo rze.
Czynność powtórzyć
5. Nac is nąć ENTER, aby wyśw ietlić kom unikat.
7.2 Rozmiar czci onki
Można wyśw ie tlać znak i o róż nej szerokości.
1. Nacisnąć Q-PROG.
2. Wprowadz ić kilka liter.
3. Nacisnąć przycisk FONT.
Zm ienia s ię roz m iar czcionki.
4. Nac is nąć ponow nie przyc is k FONT, aby wybrać odpow iedni ro zmiar czcionki (wąs k i - normalny -
pogrubiony). Wybrany rozmiar pozostaje aktywny do momentu jego zmiany. Można wprowadzić
więcej z naków.
5. Nac is nąć ENTER, aby wyśw ietlić kom unikat.
7.3 Wy św i et l anie komunikatu z efektami specjalnymi.
Oprócz koloru i rozmiaru czcionki można również ustawiać różne efekty dla wyświetlania komunikatu.
Aby skorzystać z tej funkcji, należy wybrać stronę i uruchomić dla niej efekty.
Na tablicy informacyjnej można zaprogramować aż 26 stron.
Można również wyśw iet lić k i lka wybranych stron.
Programowanie strony obejmuje następujące ustawienia:
• I_EFF: efekty pojawiania się tekstu
• STAY: czas, przez jaki wyświetlany będzie komunikat
• SPEED: szybkość przesuwania
V. 01 – 14/11/2013 64 ©Velleman nv
Page 65

MML16MC
• MODE: t ryb normalny lub migający
• O_EFF: ef ekty znikania tekstu
• ZAWARTOŚĆ STRONY: aktualny komunikat
Aby zaprogramować stronę:
1. Nacisnąć na pilocie przycisk PROG.
Poczekać, aż na wyświetlaczu pojawi się komunikat EDIT PAGE?
2. Nacisnąć ENTER.
3. Nacisnąć ↑, aby wy brać stronę, która ma być zaprogramowana (A-Z).
4. Nacisnąć ENTER.
Na wyświetlaczu pojawi się komunikat I_EFF.
5. Nacisnąć ↑, aby wybrać efekt.
6. Nacisnąć →, aby przejść do następnego ustawienia.
Na wyświetlaczu pojawi się komunikat STAY.
7. Nacisnąć ↑, aby ustawić czas wyświetlania.
8. Nacisnąć →, aby przejść do następnego ustawienia.
Na wyświetlaczu pojawi się komunikat SPEED.
9. Nacisnąć ↑, aby ustawić szybkość przesuwania.
10. Nacisnąć →, aby przejść do następnego ustawienia.
Na wyświetlaczu pojawi się komunikat MODE.
11. Nacisnąć ↑, aby ustawić tryb wyśw ietlania (normalny lub m igaj ący).
12. Nacisnąć →, aby przejść do następnego ustawienia.
Na wyświetlaczu pojawi się komunikat O_EFF.
13. Nacisnąć ↑, aby wybrać efekt.
14. Nacisnąć ENTER.
Na wyświetlaczu pojawi się zawartość strony A.
15. Wprowadzić komunikat. Można korzystać z różnych kolorów i rozmiarów czcionek (patrz wyżej).
16. Nacisnąć ENTER.
Na wyświetlaczu pojawi się zaprogramowana strona.
7.4 Harmonogram wyświetlania
Można ustawić datę wyświetlania jednej lub większej liczby zaprogramowanych stron.
Można ustawić maksymalnie 5 harmo no gramów.
W tym celu na leż y okreś lić:
• Datę rozpoczęcia
• Datę zakończenia
• Stro nę lub st ro ny do wyśw iet lenia
Aby zaprogramować harmonogram:
1. Nacisnąć na pilocie przycisk PROG.
2. Naciskać ↓ do momentu, aż na wyświetlaczu pojawi się komunikat EDIT SCHEDULE?
3. Nacisnąć ENTER.
4. Nacisnąć ↑, aby wybrać harmonogram, który ma być zaprogramowany (1-5).
5. Nacisnąć ENTER.
6. Użyć przycisków ↑ i ↓, aby ustawić rok rozpoczęcia .
7. Nacisnąć →, aby przejść do następnego ustawienia (START MONTH).
8. Użyć przycisków ↑ i ↓, aby ustawić miesiąc.
9. Nacisnąć →, aby przejść do następnego ustawienia (START DAY).
10. Użyć przycisków ↑ i ↓, aby ustawić dzień.
11. Powtórzyć czynności 9 i 10, aby ustawić:
o godzinę rozpoczęcia (START HOUR)
o minutę rozpoczęcia (START MIN)
o rok zakończenia (STOP YEAR)
o miesiąc zako ńczenia (STOP MONTH)
o dzień zakończenia (STOP DAY)
V. 01 – 14/11/2013 65 ©Velleman nv
Page 66

MML16MC
o godzinę zakończenia (STOP HOUR)
o minutę zakończenia (STOP MIN)
12. Zatw ierdz ić ustawienia przyciskiem ENTER.
Na wy św iet lacz u po jaw i się ko munika t Display Pages.
13. Wprowadzić stronę lub strony, które mają być wyświetlane.
14. Nacisnąć ENTER.
Stro na będzie wyświetlana zgodnie z ustawionym czasem.
W celu skasowania harmonogramu należy zresetować urządzenie. Patrz poniżej: „Resetowanie
urządzenia”.
7.5 Wyświetlanie kilku stron
Można wyśw ie tlić k ilka z apro gramow anych stron w poż ądanej kolejno ści.
1. Nacisnąć na pilocie przycisk RUN-PAGE.
2. Wprowadzić strony, które mają być wyświetlane, na przykład BACD.
3. Nacisnąć ENTER.
8. Us t awienia tablicy inform a c yjnej
ID urządzenia
W celu kontrolowania urządzenia za po mocą dołączonego oprogramowania należy najpierw przydzielić
urządzeniu identyfikator (ID). Można to zrobić przy użyciu oprogramowania komputerowego lub pilota.
Oprogramowanie komputerowe pozwala kontrolować kilka tablic informacyjnych jednocześnie.
Można połączyć ze sobą kilka tablic za pomocą kabla danych (brak w zestawie).
ID urządzenia należy ustawić w następujący sposób:
1. Nacisnąć na pilocie przycisk FUNCT.
2. Nacisnąć ↓, aby wybrać SET ID.
3. Nacisnąć ENTER.
4. Za pomocą przycisków ↑ i ↓ ustaw ić ID urz ądz enia.
5. Nacisnąć ENTER.
Data i czas syste mo wy
Datę i godzinę tablicy można ustawić w następujący sposób:
1. Nacisnąć na pilocie przycisk FUNCT.
2. Nacisnąć ↓, aby wybrać YEAR.
3. Nacisnąć ENTER.
4. Użyć przycisków ↑ i ↓, aby ustawić rok.
5. Nacisnąć ENTER.
6. Powtórzyć czynności 1-5, aby ustawić:
o MIES IĄC
o DZIEŃ
o GODZINA
o MINUTA
Jasność
Jasność można ustawić w następujący sposób:
1. Nacisnąć na pilocie przycisk FUNCT.
2. Nacisnąć ↓, aby wybrać BRIGHTNESS.
3. Nacisnąć ENTER.
4. Użyć przycisków ↑ i ↓, aby ustawić jasność.
5. Nacisnąć ENTER.
Dźwię k i prz y ciskó w
Dźwięki przycisków można włączyć i wyłączyć w następujący sposób:
1. Nacisnąć na pilocie przycisk FUNCT.
2. Nacisnąć ↓, aby wybrać KEY SOUND.
3. Nacisnąć ENTER.
4. Użyć przycisków ↑ i ↓, aby wybrać YES lub NO.
5. Nacisnąć ENTER.
V. 01 – 14/11/2013 66 ©Velleman nv
Page 67

MML16MC
Resetowanie urządzenia
1. Nacisnąć na pilocie przycisk FUNCT.
2. Nacisnąć ↓, aby wybrać CLEAR ALL.
3. Nacisnąć ENTER.
4. Użyć przycisków ↑ i ↓, aby wybrać YES lub NO.
5. Nacisnąć ENTER.
Przy wróc one zostaną ustawienia fabryczne tablicy.
9. Programowanie tablicy przy użyciu oprogramowania
komputerowego
Do tablicy informacyjnej dołączone jest oprogramowanie, którego można użyć do zaprogramowania
tablicy.
• Najpierw zainstalować sterownik urządzenia.
• Następnie zainstalo w a ć opro gramow anie (M ulti-Color Sign).
• Oba programy znajdują się na dołączonej płycie CD.
• Do zainstalowania oprogramowania niez będne jest konto administratora.
9.1 Instalowanie sterownika urządzenia
1. Podłączyć tablicę informacyjną do zasilania za pomocą dołączonego kabla.
2. Za pomocą dołączonego kabla podłączyć tablicę informacyjną do portu USB w komputerze.
3. Włożyć do komputera płytę instalacyjną.
4. Na płycie CD otworzyć folder New_driver_WinXP_SP2_3_Vista_Win7_32_64bit_Win8_32_64bit i
dw ukrotnie kliknąć p l ik in sta lacy jny.
o Dla systemów 64-bitowych - CP210xVCPInstaller_x64.exe
o Dla systemów 32-bitowych - CP210xVCPInstaller_x86.exe
5. Postępować według instrukcji kreatora.
9.2 Instalowanie oprogramowania tablicy informacyjnej
1. Na płycie CD otworzyć folder Install_Software.
2. Dwukrotnie kliknąć setup.exe.
3. Postępować według instrukcji kreatora.
4. Uruchomić oprogramowanie (Start - Programy - Multi-Colo r Sign).
9.3 Oprogramowanie tablicy informacyjnej: najważniejsze informacje
Opro gramowanie umoż liw ia w yko nyw anie ty ch s amyc h czynności, jakie można wykonać przy użyciu
pilo ta. Jest jednak kilka róż nic.
• Funkcje dostępne jedynie w oprogramowaniu:
o Komunikaty można zapisać do pliku i póź niej ponownie je wykorzystywać.
o Można stworzyć grafiki i dodać je do komunikatu.
Przed uruchomieniem
Przed rozpoczęciem zaleca się:
• us tawien ie ID t a b lic y in f ormacyj n e j
• ustawienie zegara na tablicy informacyjnej
Ustawianie ID tablicy informacyjnej
1. Po dłączyć tablicę do komputera.
2. Otworzyć oprogramowanie Multi-Color Sign.
3. W menu Functions kliknąć Set ID.
4. Wybrać adres ID z listy (opcja).
5. Kliknąć OK.
Ustawianie zegara
1. Otworzyć oprogramowanie Multi-Color Sign.
2. W menu Functions kliknąć Set Clock.
3. Wybierać adres ID urządzenia, dla którego ma być ustawiony zegar.
4. Ustawić godz inę i dat ę
V. 01 – 14/11/2013 67 ©Velleman nv
Page 68

MML16MC
5. Kliknąć OK.
9.4 Wprowadzanie kom un ikatu
Przy użyciu oprogramowania można:
• tworzyć i zapisywać komunikaty
• dodawać formatowanie i efekty
• wysyłać komunikaty na tablicę
• zapisywać komunikaty do późniejszego użytku
Pierwszy komunikat
1. Otworzyć oprogramowanie Multi-Color Sign.
2. Wprowadzić komunikat.
3. Zapisać plik .
Teraz można wysłać komunikat na tablicę.
Wysy ła nie kom unika t u
Kiedy wprowadzanie komunikatu zostanie z akończone, należy wysłać go na tablicę informacyjną.
1. Kliknąć ikonę Send message .
2. Wybrać adres ID urządzenia i stronę, która ma by ć uż yta.
Jeśli jako ID wybrane zostanie 0, komunikat będzie wyświetlany na wszystkich tablicach.
3. Kliknąć OK.
Tabl ica wyśw ietli ko munikat .
9.5 Formatowa nie tekstu
W jednym komunikacie można użyć kilku kolorów i rozmiarów czcionek.
Znaczniki formatowania tekstu
• Oprogramowanie korzysta ze znaczników w celu dodania w komunikacie formatowania tekstu.
• Po dodaniu formatowania program wstawia odpowiedni znacznik w miejscu kursora.
• Sformatowany zostanie tekst znajdujący się za znacznikiem aż do następnego znacznika.
Pr z y kład
1. Wprowadzić komunikat zawierający kilka wyrazów.
2. Aby całe zdanie było wyświetlane na niebiesko:
o Ustawić kursor na początku zdania.
o W menu Color kliknąć Blue.
Program wstawi z nacznik dla kolo ru niebieskiego.
3. Wysłać komunikat na tablicę.
Komunikat wyświetlany jest na niebiesko.
4. Aby reszta zdania była wyświetlana na biało:
o Ustawić kursor za pierwszym wyrazem.
o W menu Co lo r kliknąć White.
Opro gramowanie wst aw ia zna cz nik dla ko lo ru białego .
5. Zapisać komunikat.
6. Wysłać komunikat na tablicę .
Komunikat wyświetlany jest na niebiesko i bia ło .
Usuwanie formatowania
• Aby usunąć formatowanie tekstu, zaznaczyć cały znacznik i na klawiaturze nacisnąć Delete.
9.6 Efekty
Do komunikatu można dodać różne efekty. Kategorie efektów znajdują się w menu Komendy:
V. 01 – 14/11/2013 68 ©Velleman nv
Page 69

MML16MC
• efekty wprowadzające: jak tekst będzie się pojawiał
• efekty zamykające: jak tekst będzie znikał
• efekty wyświetlania tekstu: jak komunikat będzie wyświetlany
• sz y bkość przesuwania: sz y bko ść pojaw iania się i z nikania te k stu
• cz as wyświetlania: jak d ługo wyśw ie tlany bę dz ie komunika t
• ustawienia specjalne (do dawanie dź w ię k u; wyśw iet lanie daty i cz as u)
Znaczniki efektów
• Oprogramowanie korzysta ze znaczników w celu dodania efektów do komunikatu.
• Po dodaniu efektu program wstawia odpowiedni znacznik w miejscu kursora.
• Moż na użyć tylko 1 efektu z danej kategorii: jeśli dodane zostaną 2 znaczniki dla szybkości
przesuwania, tylko pierwszy znacznik będzie brany pod uwagę.
• Jeśli dodane zostaną efekty wprowadzające i zamykające, należy upewnić się, że znacznik efektu
wprowadzającego wstawiony zostanie przed efektem zamykającym.
• Przy znacznikach pozostałych efektów pozycja kursora nie ma znaczenia: efekt będz ie dodany do
całego komunikatu, bez względu na to, gdz ie wstawiony zostanie znacznik.
Pr z y kład
1. Wprowadz ić komunikat z awierający kilka wyrazów.
Można wykorzystać komunikat stworzony podczas powyższego formatowania tekstu.
2. W menu Commands kliknąć Leading Effect > Snow.
Program wstawi znacz nik.
3. W menu Komendy kliknąć Closing Effect > Scroll Down.
Program wstawi znacz nik.
4. W menu Commandskliknąć Move Speed.
5. Ustawić szybkość na 2.
6. W menu Commands klik nąć Dis p lay T im e.
7. Ustawić czas na 3 sekundy.
8. Zapisać plik. Komunikat wraz ze znacznikami wygląda następująco:
9. Wysłać komunikat na tablicę .
Usuwanie efektu
• Aby usunąć fo rmatowanie tekstu, zaznaczyć cały znacznik lub znacz niki i na klawiaturz e nacisnąć
Delete.
9.7 Korz ystanie z edytora grafic z nego
Za pomocą edytora graficznego można stworzyć grafikę i dodać ją do komunikatu.
Tworzenie grafiki
1. W menu Bmp Graphics kliknąć Edit Graphic.
V. 01 – 14/11/2013 69 ©Velleman nv
Page 70

MML16MC
Uwaga
roz dz ielczo ść wyśw iet lacz a
7 x 80-punktowa dioda LED RGB P6
raster piksela
6 mm
ką t widz e nia
120°
odle głość widzenia
6-25 m
konfiguracja LED
3 w 1 RGB
temper atur owy zakres
-20 °C do +45 °C
wilgotność robocza
20-90 %
zasilanie
tabli ca informacyjna : 1 00-2 40 VA C 50-60 Hz do 5 VDC 4 A (dołączony
Pilot: 2 baterie 1,5 V AAA LR6C (w zestawie)
pobór m ocy
maks. 20 W, średnio 5 W
masa
500 g
cz ęśc i z amienne
Pilot: MMLXXX/RC
2. Ustawić wysokość i szerokość grafiki za pomocą list.
3. Kliknąć ko lo r.
4. Wybrać narzędzie z zestawu narzędzi.
5. Utworzyć grafikę.
6. Aby zapisać grafikę:
o Kliknąć Save.
o Wybrać z listy nazwę i kliknąć OK.
Wstawianie grafiki
1. W edytorze tekstu ustawić kursor na końcu zdania.
2. Otworzyć edytor graficzny (menu Bmp Graphics> Edit Graphic).
3. Wybrać nazwę z kolumny Select Graph i kliknąć Insert.
4. Zamknąć edytor.
5. Wysłać komunikat na tablicę .
Usuwanie grafiki
1. Otworzyć edytor graficzny (menu Bmp Graphics> Edit Graphic).
2. Wybrać nazwę z kolumny Select Graph i kliknąć Delete.
3. Kliknąć Yes.
10. Baterie
• Nie prz e bijać ani nie wrz ucać ba terii do o gnia, ponie w aż mogą eksplo dować.
• Nie ładować baterii, które nie są akumulatorkami (alkaliczne).
• Ut yliz ować baterie z go dnie z lokalnymi prz episa m i. Trz ym ać bat erie z dala od dzieci.
Aby wymienić baterię:
1. Wysunąć klapkę baterii z tyłu i wymienić baterie na odpowiednie nowe (patrz specyfikacja
techniczna). Zwrócić uwagę na biegunowość przy umieszczaniu nowej baterii.
2. Zamknąć klapkę bat erii.
Uwaga: Bateria w tablicy informacyjn ej.
Tablica informacyjna jest wyposażona w baterię CR2032, z której korzysta wewnętrzna pamięć
urządzenia. Jeśli tablica zostanie odłączona od prądu nie zapamięta daty i godziny, odkręcić pokrywę
tablicy i wymienić baterię na nową tego samego typu.
11. Specyfi ka cja te c hniczna
pracy
adapter)
standard owe gniazdo 2,5 mm
wymiary 650 x 17 x 502 m m
powierz chnia wyświetlania 42 x 480 mm
V. 01 – 14/11/2013 70 ©Velleman nv
Page 71

MML16MC
Należy używać tylko orygina lnych akcesoriów. Firma Velleman NV nie może być pociągnięta
do odpowiedzia lnośc i w prz ypadku uszkodzeń lub obrażeń wynikających z (błęd nego)
korzystania z niniejszego urządzenia.
Aby uzyskać więcej informacji dotyczących tego prod ukt u oraz najnows zą wers ję instrukcj i,
należy odwiedz ić nasz ą s tronę internetową www.v e lleman.eu.
Informacje zawarte w niniejszej instrukcji obsługi mogą ulec zmianie bez wcześniejszego
powiadomienia.
Wszystkie zarejestrowane znaki i nazwy handlowe są własnością odnośnych podmiotów i są stosowane
wyłącznie w celu określenia kompatybilno ści naszych produktów z produktami innych producentów.
Windo ws, Windows XP, Windows 2000, Windows Vista, Windows Aero, Windows 7, Windows 8, Windows
Mobile oraz Windows Server to zarejestrowane znaki handlowe firmy Microsoft Corporation w Stanach
Zjednoczonych i innych krajach.
© IN FOR MA CJ A O PRAWACH AUT O R SKI CH
Niniejsza instrukcja jest własnością firmy Velleman NV i jest chroniona prawami autorskimi.
Wszystkie prawa są zastrzeżone na całym świecie. Żadna część tej instrukcji nie może być
kopiowana, przedrukowywana, tłumaczona lub konwertow ana na wszelkie nośniki elektroniczne lub w
inny spo só b, bez uprze dniej pisemnej zgo dy właścicie la praw auto rskic h.
V. 01 – 14/11/2013 71 ©Velleman nv
Page 72

Velleman® Service and Quality Warranty
Since its foundation in 1972, Velleman® acquired extensive experience in
the electronics world and currently distributes its products in over 85
countries.
All our products fulfil strict quality requirements and legal stipulations in
the EU. In order to ensure the quality, our products regularly go through
an extra quality check, both by an internal quality department and by
specialized external organisations. If, all precautionary measures
notwithstanding, problems should occur, please make appeal to our
warranty (see guarantee conditions).
General Warranty Conditions Concerning Consumer Products (for
EU):
• All consumer products are subject to a 24-month warranty on production
flaws and defective material as from the original date of purchase.
• Velleman® can decide to replace an article with an equivalent article, or
to refund the retail value totally or partially when the complaint is valid and
a free repair or replacement of the article is impossible, or if the expenses
are out of proportion.
You will be delivered a replacing article or a refund at the value of 100%
of the purchase price in case of a flaw occurred in the first year after the
date of purchase and delivery, or a replacing article at 50% of the
purchase price or a refund at the value of 50% of the retail value in case
of a flaw occurred in the second year after the date of purchase and
delivery.
• Not covered by warranty:
- all direct or indirect damage caused after delivery to the article (e.g. by
oxidation, shocks, falls, dust, dirt, humidity...), and by the article, as well
as its contents (e.g. data loss), compensation for loss of profits;
- consumable goods, parts or accessories that are subject to an aging
process during normal use, such as batteries (rechargeable, nonrechargeable, built-in or replaceable), lamps, rubber parts, drive belts...
(unlimited list);
- flaws resulting from fire, water damage, lightning, accident, natural
disaster, etc.…;
- flaws caused deliberately, negligently or resulting from improper
handling, negligent maintenance, abusive use or use contrary to the
manufacturer’s instructions;
- damage caused by a commercial, professional or collective use of the
article (the warranty validity will be reduced to six (6) months when the
article is used professionally);
- damage resulting from an inappropriate packing and shipping of the
article;
- all damage caused by modification, repair or alteration performed by a
third party without written permission by Velleman®.
• Articles to be repaired must be delivered to your Velleman® dealer,
solidly packed (preferably in the original packaging), and be completed
with the original receipt of purchase and a clear flaw description.
• Hint: In order to save on cost and time, please reread the manual and
check if the flaw is caused by obvious causes prior to presenting the
article for repair. Note that returning a non-defective article can also
involve handling costs.
• Repairs occurring after warranty expiration are subject to shipping costs.
• The above conditions are without prejudice to all commercial warranties.
The above enumeration is subject to modification according to the
article (see article’s manual).
Velleman® service- en kwaliteitsgarantie
Velleman® heeft sinds zijn oprichting in 1972 een ruime ervaring
opgebouwd in de elektronicawereld en verdeelt op dit moment producten
in meer dan 85 landen. Al onze producten beantwoorden aan strikte
kwaliteitseisen en aan de wettelijke bepalingen geldig in de EU. Om de
kwaliteit te waarborgen, ondergaan onze producten op regelmatige
tijdstippen een extra kwaliteitscontrole, zowel door onze eigen
kwaliteitsafdeling als door externe gespecialiseerde organisaties. Mocht
er ondanks deze voorzorgen toch een probleem optreden, dan kunt u
steeds een beroep doen op onze waarborg (zie waarborgvoorwaarden).
Algemene waarborgvoorwaarden consumentengoederen (voor
Europese Unie):
• Op alle consumentengoederen geldt een garantieperiode van 24
maanden op productie- en materiaalfouten en dit vanaf de oorspronkelijke
aankoopdatum.
• Indien de klacht gegrond is en een gratis reparatie of vervanging van
een artikel onmogelijk is of indien de kosten hiervoor buiten verhouding
zijn, kan Velleman® beslissen het desbetreffende artikel te vervangen
door een gelijkwaardig artikel of de aankoopsom van het artikel
gedeeltelijk of volledig terug te betalen. In dat geval krijgt u een
vervangend product of terugbetaling ter waarde van 100% van de
aankoopsom bij ontdekking van een gebrek tot één jaar na aankoop en
levering, of een vervangend product tegen 50% van de kostprijs of
terugbetaling van 50 % bij ontdekking na één jaar tot 2 jaar.
• Valt niet onder waarborg:
- alle rechtstreekse of onrechtstreekse schade na de levering veroorzaakt
aan het toestel (bv. door oxidatie, schokken, val, stof, vuil, vocht...), en
door het toestel, alsook zijn inhoud (bv. verlies van data), vergoeding voor
eventuele winstderving.
- verbruiksgoederen, onderdelen of hulpstukken die onderhevig zijn aan
veroudering door normaal gebruik zoals bv. batterijen (zowel oplaadbare
als niet-oplaadbare, ingebouwd of vervangbaar), lampen, rubberen
onderdelen, aandrijfriemen... (onbeperkte lijst).
- defecten ten gevolge van brand, waterschade, bliksem, ongevallen,
natuurrampen, enz.
- defecten veroorzaakt door opzet, nalatigheid of door een
onoordeelkundige behandeling, slecht onderhoud of abnormaal gebruik of
gebruik van het toestel strijdig met de voorschriften van de fabrikant.
- schade ten gevolge van een commercieel, professioneel of collectief
gebruik van het apparaat (bij professioneel gebruik wordt de
garantieperiode herleid tot 6 maand).
- schade veroorzaakt door onvoldoende bescherming bij transport van het
apparaat.
- alle schade door wijzigingen, reparaties of modificaties uitgevoerd door
derden zonder toestemming van Velleman®.
• Toestellen dienen ter reparatie aangeboden te worden bij uw
Velleman®-verdeler. Het toestel dient vergezeld te zijn van het
oorspronkelijke aankoopbewijs. Zorg voor een degelijke verpakking (bij
voorkeur de originele verpakking) en voeg een duidelijke foutomschrijving
bij.
• Tip: alvorens het toestel voor reparatie aan te bieden, kijk nog eens na
of er geen voor de hand liggende reden is waarom het toestel niet naar
behoren werkt (zie handleiding). Op deze wijze kunt u kosten en tijd
besparen. Denk eraan dat er ook voor niet-defecte toestellen een kost
voor controle aangerekend kan worden.
• Bij reparaties buiten de waarborgperiode zullen transportkosten
aangerekend worden.
• Elke commerciële garantie laat deze rechten onverminderd.
Bovenstaande opsomming kan eventueel aangepast worden
naargelang de aard van het product (zie handleiding van het
betreffende product).
Garantie de service et de qualité Velleman®
Depuis 1972, Velleman® a gagné une vaste expérience dans le secteur
de l’électronique et est actuellement distributeur dans plus de 85 pays.
Tous nos produits répondent à des exigences de qualité rigoureuses et à
des dispositions légales en vigueur dans l’UE. Afin de garantir la qualité,
nous soumettons régulièrement nos produits à des contrôles de qualité
supplémentaires, tant par notre propre service qualité que par un service
qualité externe. Dans le cas improbable d’un défaut malgré toutes les
précautions, il est possible d’invoquer notre garantie (voir les conditions
de garantie).
Conditions générales concernant la garantie sur les produits grand
public (pour l’UE) :
• tout produit grand public est garanti 24 mois contre tout vice de
production ou de matériaux à dater du jour d’acquisition effective ;
• si la plainte est justifiée et que la réparation ou le remplacement d’un
article est jugé impossible, ou lorsque les coûts s’avèrent
disproportionnés, Velleman® s’autorise à remplacer ledit article par un
article équivalent ou à rembourser la totalité ou une partie du prix d’achat.
Le cas échéant, il vous sera consenti un article de remplacement ou le
remboursement complet du prix d’achat lors d’un défaut dans un délai de
1 an après l’achat et la livraison, ou un article de remplacement
moyennant 50% du prix d’achat ou le remboursement de 50% du prix
d’achat lors d’un défaut après 1 à 2 ans.
• sont par conséquent exclus :
- tout dommage direct ou indirect survenu à l’article après livraison (p.ex.
dommage lié à l’oxydation, choc, chute, poussière, sable, impureté…) et
provoqué par l’appareil, ainsi que son contenu (p.ex. perte de données) et
une indemnisation éventuelle pour perte de revenus ;
- toute pièce ou accessoire nécessitant un remplacement causé par un
usage normal comme p.ex. piles (rechargeables comme non
rechargeables, intégrées ou remplaçables), ampoules, pièces en
caoutchouc, courroies… (liste illimitée) ;
- tout dommage qui résulte d’un incendie, de la foudre, d’un accident,
d’une catastrophe naturelle, etc. ;
- out dommage provoqué par une négligence, volontaire ou non, une
utilisation ou un entretien incorrect, ou une utilisation de l’appareil
contraire aux prescriptions du fabricant ;
Page 73

- tout dommage à cause d’une utilisation commerciale, professionnelle ou
collective de l’appareil (la période de garantie sera réduite à 6 mois lors
d’une utilisation professionnelle) ;
- tout dommage à l’appareil qui résulte d’une utilisation incorrecte ou
différente que celle pour laquelle il a été initialement prévu comme décrit
dans la notice ;
- tout dommage engendré par un retour de l’appareil emballé dans un
conditionnement non ou insuffisamment protégé.
- toute réparation ou modification effectuée par une tierce personne sans
l’autorisation explicite de SA Velleman® ; - frais de transport de et vers
Velleman® si l’appareil n’est plus couvert sous la garantie.
• toute réparation sera fournie par l’endroit de l’achat. L’appareil doit
nécessairement être accompagné du bon d’achat d’origine et être dûment
conditionné (de préférence dans l’emballage d’origine avec mention du
défaut) ;
• tuyau : il est conseillé de consulter la notice et de contrôler câbles, piles,
etc. avant de retourner l’appareil. Un appareil retourné jugé défectueux
qui s’avère en bon état de marche pourra faire l’objet d’une note de frais à
charge du consommateur ;
• une réparation effectuée en-dehors de la période de garantie fera l’objet
de frais de transport ;
• toute garantie commerciale ne porte pas atteinte aux conditions
susmentionnées.
La liste susmentionnée peut être sujette à une complémentation
selon le type de l’article et être mentionnée dans la notice d’emploi.
Garantía de servicio y calidad Velleman®
Desde su fundación en 1972 Velleman® ha adquirido una amplia
experiencia como distribuidor en el sector de la electrónica en más de 85
países. Todos nuestros productos responden a normas de calidad
rigurosas y disposiciones legales vigentes en la UE. Para garantizar la
calidad, sometemos nuestros productos regularmente a controles de
calidad adicionales, tanto a través de nuestro propio servicio de calidad
como de un servicio de calidad externo. En el caso improbable de que
surgieran problemas a pesar de todas las precauciones, es posible
recurrir a nuestra garantía (véase las condiciones de garantía).
Condiciones generales referentes a la garantía sobre productos de
venta al público (para la Unión Europea):
• Todos los productos de venta al público tienen un perìodo de garantìa
de 24 meses contra errores de producción o errores en materiales desde
la adquisición original;
• Si la queja está fundada y si la reparación o sustitución de un artìculo no
es posible, o si los gastos son desproporcionados, Velleman® autoriza
reemplazar el artículo por un artículo equivalente o reembolsar la
totalidad o una parte del precio de compra. En este caso, usted recibirá
un artículo de recambio o el reembolso completo del precio de compra si
encuentra algún fallo hasta un año después de la compra y entrega, o un
artículo de recambio al 50% del precio de compra o el reembolso del 50%
del precio de compra si encuentra un fallo después de 1 año y hasta los 2
años después de la compra y entrega.
Por consiguiente, están excluidos entre otras cosas:
- todos los daños causados directa o indirectamente al aparato (p.ej. por
oxidación, choques, caída,...) y a su contenido (p.ej. pérdida de datos)
después de la entrega y causados por el aparato, y cualquier
indemnización por posible pérdida de ganancias;
- partes o accesorios, que estén expuestos al desgaste causado por un
uso normal, como por ejemplo baterías (tanto recargables como no
recargables, incorporadas o reemplazables), bombillas, partes de goma,
etc. (lista ilimitada);
- defectos causados por un incendio, daños causados por el agua, rayos,
accidentes, catástrofes naturales, etc.;
- defectos causados a conciencia, descuido o por malos tratos, un
mantenimiento inapropiado o un uso anormal del aparato contrario a las
instrucciones del fabricante;
- daños causados por un uso comercial, profesional o colectivo del
aparato (el período de garantía se reducirá a 6 meses con uso
profesional);
- daños causados por un uso incorrecto o un uso ajeno al que está
previsto el producto inicialmente como está descrito en el manual del
usuario;
- daños causados por una protección insuficiente al transportar el
aparato.
- daños causados por reparaciones o modificaciones efectuadas por una
tercera persona sin la autorización explícita de Velleman®;
- se calcula gastos de transporte de y a Velleman® si el aparato ya no
está cubierto por la garantía.
• Cualquier artìculo que tenga que ser reparado tendrá que ser devuelto a
su distribuidor Velleman®. Devuelva el aparato con la factura de compra
original y transpórtelo en un embalaje sólido (preferentemente el
embalaje original). Incluya también una buena descripción del fallo;
• Consejo: Lea el manual del usuario y controle los cables, las pilas, etc.
antes de devolver el aparato. Si no se encuentra un defecto en el artículo
los gastos podrían correr a cargo del cliente;
• Los gastos de transporte correrán a carga del cliente para una
reparación efectuada fuera del período de garantía.
• Cualquier gesto comercial no disminuye estos derechos.
La lista previamente mencionada puede ser adaptada según el tipo
de artículo (véase el manual del usuario del artículo en cuestión).
Velleman® Service- und Qualitätsgarantie
Seit der Gründung in 1972 hat Velleman® sehr viel Erfahrung als Verteiler
in der Elektronikwelt in über 85 Ländern aufgebaut.
Alle Produkte entsprechen den strengen Qualitätsforderungen und
gesetzlichen Anforderungen in der EU. Um die Qualität zu gewährleisten
werden unsere Produkte regelmäßig einer zusätzlichen Qualitätskontrolle
unterworfen, sowohl von unserer eigenen Qualitätsabteilung als auch von
externen spezialisierten Organisationen. Sollten, trotz aller
Vorsichtsmaßnahmen, Probleme auftreten, nehmen Sie bitte die Garantie
in Anspruch (siehe Garantiebedingungen).
Allgemeine Garantiebedingungen in Bezug auf Konsumgüter (für die
Europäische Union):
• Alle Produkte haben für Material- oder Herstellungsfehler eine
Garantieperiode von 24 Monaten ab Verkaufsdatum.
• Wenn die Klage berechtigt ist und falls eine kostenlose Reparatur oder
ein Austausch des Gerätes unmöglich ist, oder wenn die Kosten dafür
unverhältnismäßig sind, kann Velleman® sich darüber entscheiden,
dieses Produkt durch ein gleiches Produkt zu ersetzen oder die
Kaufsumme ganz oder teilweise zurückzuzahlen. In diesem Fall erhalten
Sie ein Ersatzprodukt oder eine Rückzahlung im Werte von 100% der
Kaufsumme im Falle eines Defektes bis zu 1 Jahr nach Kauf oder
Lieferung, oder Sie bekommen ein Ersatzprodukt im Werte von 50% der
Kaufsumme oder eine Rückzahlung im Werte von 50 % im Falle eines
Defektes im zweiten Jahr.
• Von der Garantie ausgeschlossen sind:
- alle direkten oder indirekten Schäden, die nach Lieferung am Gerät und
durch das Gerät verursacht werden (z.B. Oxidation, Stöße, Fall, Staub,
Schmutz, Feuchtigkeit, ...), sowie auch der Inhalt (z.B. Datenverlust),
Entschädigung für eventuellen Gewinnausfall.
- Verbrauchsgüter, Teile oder Zubehörteile, die durch normalen Gebrauch
dem Verschleiß ausgesetzt sind, wie z.B. Batterien (nicht nur aufladbare,
sondern auch nicht aufladbare, eingebaute oder ersetzbare), Lampen,
Gummiteile, Treibriemen, usw. (unbeschränkte Liste).
- Schäden verursacht durch Brandschaden, Wasserschaden, Blitz,
Unfälle, Naturkatastrophen, usw.
- Schäden verursacht durch absichtliche, nachlässige oder
unsachgemäße Anwendung, schlechte Wartung, zweckentfremdete
Anwendung oder Nichtbeachtung von Benutzerhinweisen in der
Bedienungsanleitung.
- Schäden infolge einer kommerziellen, professionellen oder kollektiven
Anwendung des Gerätes (bei gewerblicher Anwendung wird die
Garantieperiode auf 6 Monate zurückgeführt).
- Schäden verursacht durch eine unsachgemäße Verpackung und
unsachgemäßen Transport des Gerätes.
- alle Schäden verursacht durch unautorisierte Änderungen, Reparaturen
oder Modifikationen, die von einem Dritten ohne Erlaubnis von Velleman®
vorgenommen werden.
• Im Fall einer Reparatur, wenden Sie sich an Ihren Velleman®-Verteiler.
Legen Sie das Produkt ordnungsgemäß verpackt (vorzugsweise die
Originalverpackung) und mit dem Original-Kaufbeleg vor. Fügen Sie eine
deutliche Fehlerbeschreibung hinzu.
• Hinweis: Um Kosten und Zeit zu sparen, lesen Sie die
Bedienungsanleitung nochmals und überprüfen Sie, ob es keinen auf de
Hand liegenden Grund gibt, ehe Sie das Gerät zur Reparatur
zurückschicken. Stellt sich bei der Überprüfung des Gerätes heraus, dass
kein Geräteschaden vorliegt, könnte dem Kunden eine
Untersuchungspauschale berechnet.
• Für Reparaturen nach Ablauf der Garantiefrist werden Transportkosten
berechnet.
• Jede kommerzielle Garantie lässt diese Rechte unberührt.
Die oben stehende Aufzählung kann eventuell angepasst werden
gemäß der Art des Produktes (siehe Bedienungsanleitung des
Gerätes).
Page 74

Velleman ® usługi i gwarancja jakości
Od czasu założenia w 1972, Velleman® zdobył bogate doświadczenie w
dziedzinie światowej elektroniki. Obecnie firma dystrybuuje swoje
produkty w ponad 85 krajach.
Wszystkie nasze produkty spełniają surowe wymagania jakościowe oraz
wypełniają normy i dyrektywy obowiązujące w krajach UE. W celu
zapewnienia najwyższej jakości naszych produktów, przechodzą one
regularne oraz dodatkowo wyrywkowe badania kontroli jakości, zarówno
naszego wewnętrznego działu jakości jak również wyspecjalizowanych
firm zewnętrznych. Pomimo dołożenia wszelkich starań czasem mogą
pojawić się problemy techniczne, prosimy odwołać się do gwarancji (patrz
warunki gwarancji).
Ogólne Warunki dotyczące gwarancji:
• Wszystkie produkty konsumenckie podlegają 24-miesięcznej gwarancji
na wady produkcyjne i materiałowe od daty zakupu.
• W przypadku, gdy usterka jest niemożliwa do usunięcia lub koszt
usunięcia jest nadmiernie wysoki Velleman ® może zdecydować o
wymianie artykułu na nowy, wolny od wad lub zwrócić zapłaconą kwotę.
Zwrot gotówki może jednak nastąpić z uwzględnieniem poniższych
warunków:
- zwrot 100% ceny zakupu w przypadku, gdy wada wystąpiła w ciągu
pierwszego roku od daty zakupu i dostawy
- wymiana wadliwego artykułu na nowy, wolny od wad z odpłatnością
50% ceny detalicznej lub zwrot 50% kwoty ceny nabycia w przypadku gdy
wada wystąpiła w drugim roku od daty zakupu i dostawy.
• Produkt nie podlega naprawie gwarancyjnej:
- gdy wszystkie bezpośrednie lub pośrednie szkody spowodowane są
działaniem czynników środowiskowych lub losowych (np. przez utlenianie,
wstrząsy, upadki, kurz, brud, ...), wilgotności;
- gwarant nie ponosi odpowiedzialności za szkody wynikających z utraty
danych;
- produkty konsumenckie, części zamienne lub akcesoria podatne na
process starzenia, wynikającego z normalnego użytkowania, np: baterie
(ładowalne, nieładowalne, wbudowane lub wymienne), żarówki, paski
napędowe, gumowe elementy napędowe... (nieograniczona lista);
- usterka wynika z działania pożaru, zalania wszelkimi cieczami,
uderzenia pioruna, upadku lub klęski żywiołowej, itp.;
- usterka wynika z zaniedbań eksploatacyjnych tj. umyślne bądź
nieumyślne zaniechanie czyszczenia, konserwacji, wymiany materiałów
ekspolatacyjnych, niedbalstwa lub z niewłaściwego obchodzenia się lub
niezgodnego użytkowania z instrukcją producenta;
- szkody wynikające z nadmiernego użytkowania gdy nie jest do tego celu
przeznaczony tj. działalność komerycjna, zawodowa lub wspólne
użytkowanie przez wiele osób - okres obowiązywania gwarancji zostanie
obniżony do 6 (sześć) miesięcy;
- Szkody wynikające ze źle zabezpieczonej wysyłki produktu;
- Wszelkie szkody spowodowane przez nieautoryzowaną naprawę,
modyfikację, przeróbkę produktu przez osoby trzecie jak również bez
pisemnej zgody firmy Velleman ®.
• Uszkodzony produkt musi zostać dostarczony do sprzedawcy ®
Velleman, solidnie zapakowany (najlepiej w oryginalnym opakowaniu),
wraz z wyposażeniem z jakim produkt został sprzedany. W przypadku
wysyłki towaru w opakowaniu innym niż oryginalnym ryzyko usterki
produktu oraz tego skutki przechodzą na właściciela produktu. Wraz z
niesprawnym produktem należy dołączyć jasny i szczegółowy opis jego
usterki, wady;
• Wskazówka: Aby zaoszczędzić na kosztach i czasie, proszę
szczegółowo zapoznać się z instrukcja obsługi; czy przyczyną wady są
okoliczności techniczne czy też wynikaja wyłącznie z nieznajomości
obsługi produktu. W przypadku wysyłki sprawnego produktu do serwisu
nabywca może zostać obciążony kosztmi obsługi oraz transportu.
• W przypadku napraw pogwarancyjnych lub odpłatnych klient ponosi
dodatkowo koszt wysyłki produktu do i z serwisu.
wymienione wyżej warunki są bez uszczerbku dla wszystkich
komercyjnych gwarancji.
Powyższe postanowienia mogą podlegać modyfikacji w zależności
od wyrobu (patrz art obsługi).
Garantia de serviço e de qualidade Velleman®
Desde a sua fundação em 1972 Velleman® tem adquirido uma amplia
experiencia no sector da eletrónica com uma distribuição em mais de 85
países.
Todos os nossos produtos respondem a exigências rigorosas e a
disposições legais em vigor na UE. Para garantir a qualidade,
submetemos regularmente os nossos produtos a controles de qualidade
suplementares, com o nosso próprio serviço qualidade como um serviço
de qualidade externo. No caso improvável de um defeito mesmo com as
nossas precauções, é possível invocar a nossa garantia. (ver as
condições de garantia).
Condições gerais com respeito a garantia sobre os produtos grande
público (para a UE):
• qualquer produto grande público é garantido 24 mês contra qualquer
vício de produção ou materiais a partir da data de aquisição efectiva;
• no caso da reclamação ser justificada e que a reparação ou substituição
de um artigo é impossível, ou quando os custo são desproporcionados,
Velleman® autoriza-se a substituir o dito artigo por um artigo equivalente
ou a devolver a totalidade ou parte do preço de compra. Em outro caso,
será consentido um artigo de substituição ou devolução completa do
preço de compra no caso de um defeito no prazo de 1 ano depois da data
de compra e entrega, ou um artigo de substituição pagando o valor de
50% do preço de compra ou devolução de 50% do preço de compra para
defeitos depois de 1 a 2 anos.
• estão por consequência excluídos:
- todos os danos directos ou indirectos depois da entrega do artigo (p.ex.
danos ligados a oxidação, choques, quedas, poeiras, areias,
impurezas…) e provocado pelo aparelho, como o seu conteúdo (p.ex.
perca de dados) e uma indemnização eventual por perca de receitas;
- consumíveis, peças ou acessórios sujeitos a desgaste causado por um
uso normal, como p.ex. pilhas (recarregáveis, não recarregáveis,
incorporadas ou substituìveis), lâmpadas, peças em borracha correias…
(lista ilimitada);
- todos os danos que resultem de um incêndio, raios, de um acidente, de
una catastrophe natural, etc.;
- danos provocados por negligencia, voluntária ou não, uma utilização ou
manutenção incorrecta, ou uma utilização do aparelho contrária as
prescrições do fabricante ;
- todos os danos por causa de uma utilização comercial, profissional ou
colectiva do aparelho ( o período de garantia será reduzido a 6 meses
para uma utilização profissional);
- todos os danos no aparelho resultando de uma utilização incorrecta ou
diferente daquela inicialmente prevista e descrita no manual de utilização;
- todos os danos depois de uma devolução não embalada ou mal
protegida ao nível do acondicionamento.
- todas as reparações ou modificações efectuadas por terceiros sem a
autorização de SA Velleman®;
- despesas de transporte de e para Velleman® se o aparelho não estiver
coberto pela garantia.
• qualquer reparação será fornecida pelo local de compra. O aparelho
será obrigatoriamente acompanhado do talão ou factura de origem e bem
acondicionado (de preferência dentro da embalagem de origem com
indicação do defeito ou avaria);
• dica: aconselha-mos a consulta do manual e controlar cabos, pilhas,
etc. antes de devolver o aparelho. Um aparelho devolvido que estiver em
bom estado será cobrado despesas a cargo do consumidor;
• uma reparação efectuada fora da garantia, será cobrado despesas de
transporte;
• qualquer garantia comercial não prevalece as condições aqui
mencionadas.
A lista pode ser sujeita a um complemento conforme o tipo de artigo
e estar mencionada no manual de utilização.
Legen Heirweg 33, 9890 Gavere, Belgium
Imported by Velleman nv
Made in PRC
www.velleman.eu
 Loading...