

Page 1
CAMCOLBUL28Z
1/3" HIGH RESOLUTION SONY EFFIO DSP CAMERA WITH
72 IR LEDs
1/3" HR SONY EFFIO DSP CAMERA MET 72 IR-LEDS
CAMÉRA 1/3" HR SONY EFFIO DSP AVEC 72 LEDS IR
CÁMARA 1/3" DE ALTA RESOLUCIÓN SONY EFFIO DSP CON
72 LEDs IR
1/3" HOCHAUFLÖSENDE SONY EFFIO DSP-KAMERA MIT
72 IR-LEDs
USER MANUAL 3
GEBRUIKERSHANDLEIDING 13
NOTICE D’EMPLOI 23
MANUAL DEL USUARIO 34
BEDIENUNGSANLEITUNG 44
Page 2
CAMCOLBUL28Z
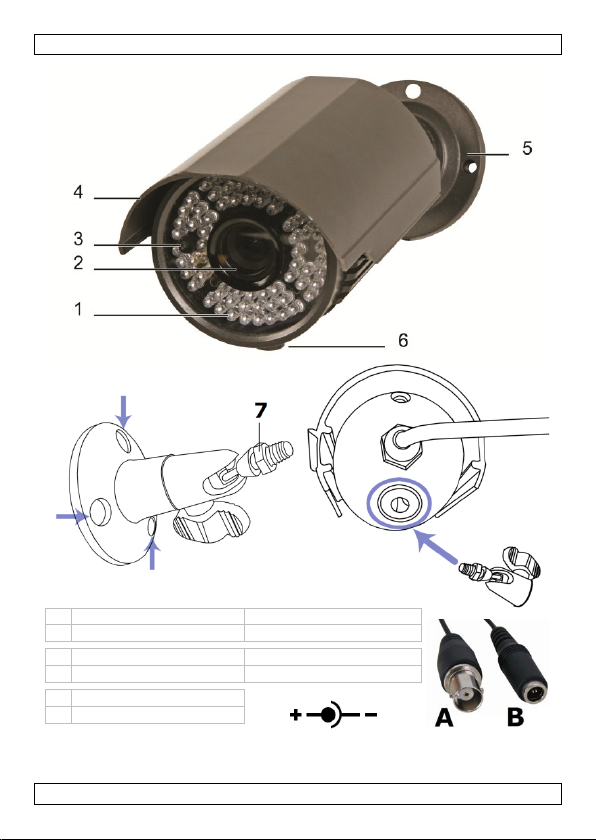
A
video
video
B
power
voeding
A
vídeo
vidéo B alimentación
alimentation
A
Video B
Stromversorgung
V. 01 – 13/06/2013 2 ©Velleman nv
Page 3
CAMCOLBUL28Z
Keep the device away from children and unauthorised users.
Risk of electric shock when opening the cover.
DO NOT disassemble or open the cover. There are no user-
serviceable parts inside the device. Refer to an authorized dealer
for service and/or spare parts.
USER MANUAL
1. Introduction
To all residents of the European Union
Important environmental information about this product
service. Respect the local environmental rules.
If in doubt, contact your local waste disposal authorities.
Thank you for choosing Velleman! Please read the manual thoroughly before
bringing this device into service. If the device was damaged in transit, don't
install or use it and contact your dealer.
2. Safety Instructions
3. General Guidelines
Refer to the Velleman® Service and Quality Warranty on the last pages
of this manual.
Familiarise yourself with the functions of the device before actually
All modifications of the device are forbidden for safety reasons. Damage
Only use the device for its intended purpose. Using the device in an
Damage caused by disregard of certain guidelines in this manual is not
Keep this device away from extreme heat.
This symbol on the device or the package indicates that disposal of
the device after its lifecycle could harm the environment. Do not
dispose of the unit (or batteries) as unsorted municipal waste; it
should be taken to a specialized company for recycling. This device
should be returned to your distributor or to a local recycling
using it.
caused by user modifications to the device is not covered by the
warranty.
unauthorised way will void the warranty.
covered by the warranty and the dealer will not accept responsibility for
any ensuing defects or problems.
V. 01 – 13/06/2013 3 ©Velleman nv
Page 4
CAMCOLBUL28Z
1
IR LEDs
5
bracket
2
lens 6 zoom and focus adjust
3
light sensor
7
camera bolt
4
sunshield
Protect this device from shocks and abuse. Avoid brute force when
operating the device.
DO NOT use this product to violate privacy laws or perform other illegal
activities.
4. Features
weatherproof
with B/W night vision (IR LEDs)
super high resolution
special functions via on-screen display (OSD) set-up menu
o shutter / AGC
o white balance.
5. Overview
Refer to the illustrations on page 2 of this manual.
6. Hardware installation
Refer to the illustrations on page 2 of this manual.
Choose a location for the camera, keeping following guidelines in mind:
o do not install the camera in locations where extremely high or low
temperatures or excessive vibrations may occur.
o avoid mounting the camera near high electro-magnetic fields.
o do not aim the camera at the sun or other extremely bright objects
or reflections (e.g. metal doors).
Use the mounting bracket [5] to determine the location of the mounting
holes. Drill the holes and secure the bracket [5] using screws.
Attach the camera to the mounting bracket [5] with the camera
bolt [7].
Connect the power connector [B] to the 12VDC power supply (not incl.).
Connect the BNC connector [A] to a monitor (not incl.).
Point the camera towards the field of interest and tighten the position
bolt.
Manually adjust the zoom and focus with the screws [6].
V. 01 – 13/06/2013 4 ©Velleman nv
Page 5
CAMCOLBUL28Z
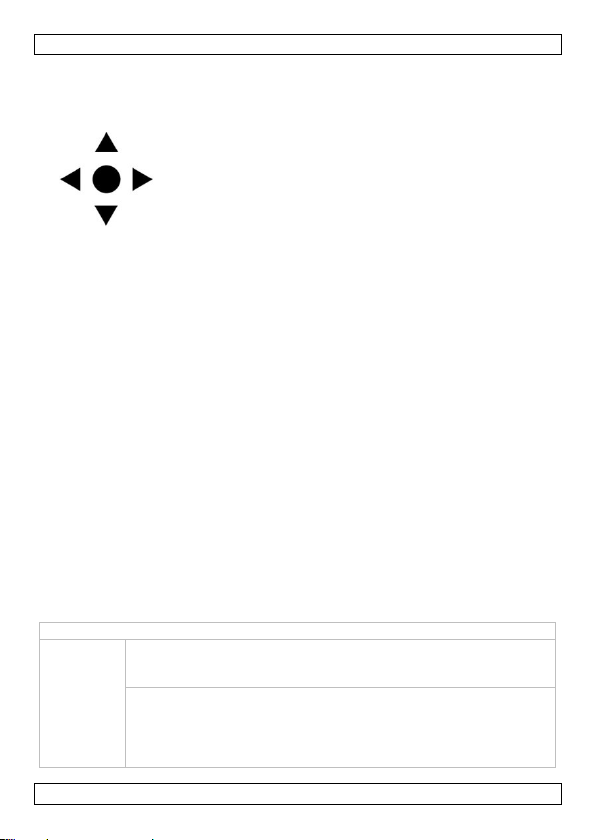
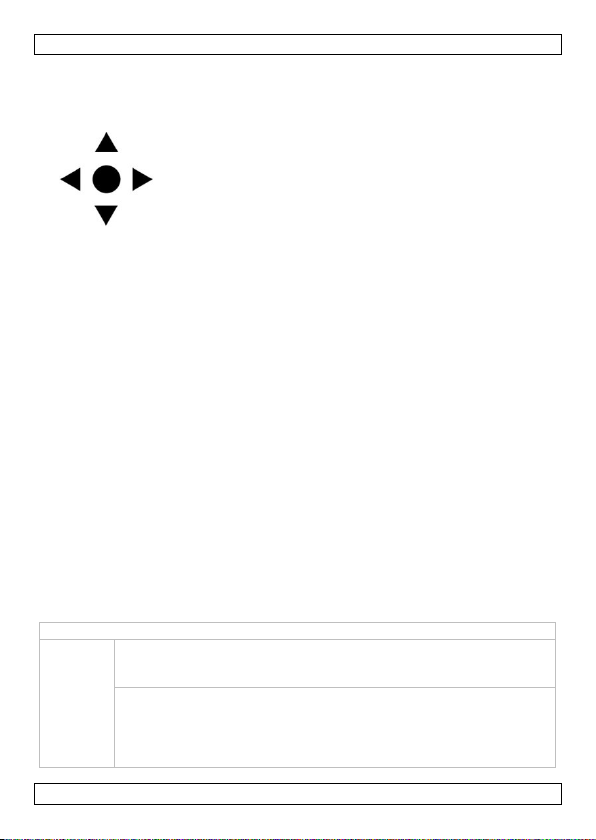
Press the middle button to access the menu, or to
select an option.
Press the up and down buttons to move up and
down in the menu.
Press the left and right buttons to modify the menu
parameters.
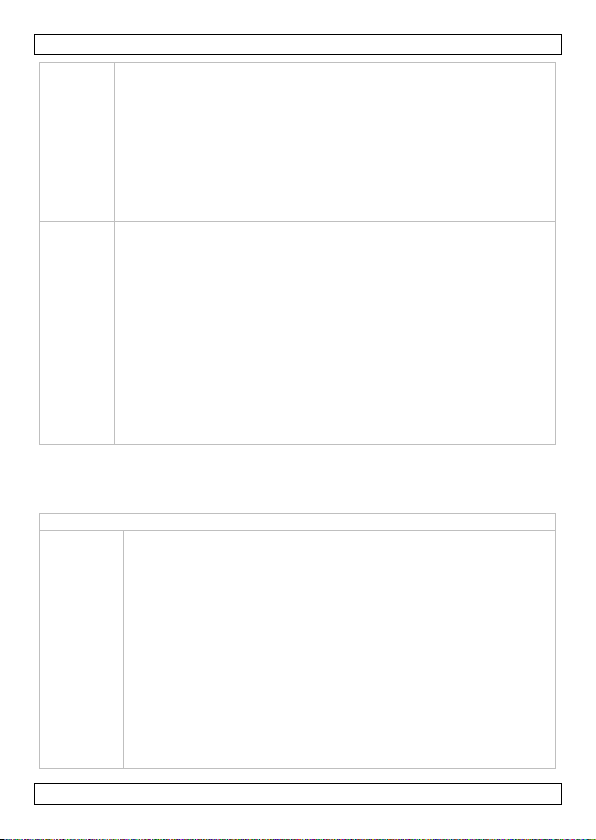
Display: SHUTTER/AGC
AUTO
SETUP
MODE = SHUT: the camera adjusts the image by changing
the shutter speed. You can configure high and low luminance
conditions.
HIGH LUMINANCE: use this to adjust bright images.
BRIGHTNESS: Set the brightness level for high luminance
mode. Default setting is 24.
Note: if you adjust this setting, we recommend that you do it
when there is a lot of light available.
7. OSD Settings
There is a small joystick in the camera cable that allows you to adjust the
settings of the camera using an on-screen display (OSD).
In the OSD menu:
NEXT/BACK: select this option and press the middle button to go to the
next/previous page of options in the menu.
RETURN: select this option and press the middle button to return to the
previous level in the menu.
EXIT: select this option and press the middle button to leave the OSD
menu without saving the settings.
SAVE ALL: select this option and press the middle button to save all
settings.
CAMERA RESET: select this option and press the middle button to reset
the camera to the factory defaults.
The OSD menu settings are described in detail below.
7.1 Lens
The LENS menu is not applicable to this camera. You can leave the settings
as they are.
7.2 Shutter/AGC
Use this menu option to control how the camera responds to high and low
light settings using auto-gain and shutter settings. You can choose
automatic or manual control. Automatic control is usually sufficient for most
environments.
V. 01 – 13/06/2013 5 ©Velleman nv
Page 6

CAMCOLBUL28Z
LOW LUMINANCE: use this to adjust dim images using
automatic gain control.
MODE: set to AGC to use automatic gain control. Set to
OFF to switch automatic gain control off.
BRIGHTNESS: Set the brightness level for low luminance
mode.
If you want to adjust this setting, we recommend that you do it
when it is very dark (night).
Note: AGC can introduce more noise in the image.
MANUAL
Use manual mode only in environments with the exact same
amount of light throughout the day. We recommend using the
automatic mode even under such conditions.
Note: if the scene becomes brighter or dimmer, the camera
will not adjust and the image may be over- or underexposed.
MODE = SHUT + AGC: you can set the shutter speed and
AGC as specified below:
SHUTTER: set the shutter speed between 1/50 and
1/10000. The slower the shutter speed, the brighter the
image. Faster shutter speeds are used if you want to
capture fast moving objects with less motions blur.
AGC: set the AGC between 6 and 44.8 dB.
Display: WHITE BAL
ATW
ATW = auto-tracking white balance. White balance makes sure
that white objects are always reproduced correctly. The ATW
option controls the automatic white balance adjustments. For
most environments, the default settings are sufficient.
SPEED: controls how fast the camera will adjust the white
balance. The higher the setting, the faster the adjustment.
Note: a too fast adjustment can result in colour oscillation.
DELAY CNT: specifies how often the camera checks for
colour changes and apply the ATW settings. The lower the
number, the more frequent the checks and adjustments.
ATW FRAME: sets the frame magnification for the camera to
identify the colour changes. (Recommended setting is 1.0.)
ENVIRONMENT: choose INDOOR for indoor environments,
and OUTDOOR for outdoor environments.
PUSH
This is a fixed setting.
7.3 White balance
Use this menu options to define the white balance adjustment.
V. 01 – 13/06/2013 6 ©Velleman nv
Page 7
CAMCOLBUL28Z
USER1
USER2
These are two user-definable setting that let you control red and
blue gain. This can be useful in environments that are saturated
with a single colour of light (for example bars or entertainment
venues), or it can help vision-impaired (colour-blind) users.
ANTI CR
Anti colour rolling. Some types of lighting can cause colour bars
rolling over the screen. Use this setting to compensate.
MANUAL
When you switch the camera on, it will acquire a white balance
value from the whitest object in view. The camera will then
reproduce white colour based on this value, regardless of
changes in colour temperature or other factors. If this value
gives insufficient colour quality, you can manually adjust the
balance between red and blue levels to improve the image.
PUSH
LOCK
Use this option to adjust white balance based on a white object
that you use as a baseline. Point the camera at the white object
and make sure it fills as much of the screen as possible. Click the
middle button on the joystick. The camera will now use the
colour of that white object as a baseline.
Display: BACKLIGHT
OFF
No backlight compensation
BLC
Back light compensation. The camera automatically brightens the
dim parts of the image.
HLC
Highlight compensation. Use this setting to compensate for extreme
differences between dark and light areas. For example, if someone
shines a bright light directly into the lens, the entire image can
become overexposed. With HLC, the camera masks the bright area
so that the area around the light source is still visible.
7.4 Back light
If there is a bright light in the background, for example from a window, the
image around it may be too dim to see clearly. In that case, use the
backlight function to compensate.
7.5 Picture adjustment
These are the common adjustments for video images: MIRROR to mirror
the image, BRIGHTNESS (brightness), CONTRAST (contrast),
SHARPNESS (sharpness), HUE (hue), and GAIN (gain).
7.6 ATR
Use the Adaptive Tone Reproduction (ATR) function to improve the colour
tones of subjects in images that contain both bright and dim areas (for
example, a wall with a window).
V. 01 – 13/06/2013 7 ©Velleman nv
Page 8

CAMCOLBUL28Z
Display: ATR
OFF
ATR is switched off
ON
ATR is active. Use the settings below.
LUMINANCE: Use this setting to adjust luminance.
CONTRAST: Use this setting to adjust contrast.
Display: MOTION DET
OFF
Motion detection is switched off
ON
Motion detection is active. Use the settings below.
DETECT SENSE: Set the motion detection sensitivity. With a higher
sensitivity, slighter movements will be detected.
BLOCK DISP: block display. Use this option to select squares in a
grid for motion detection.
1. Set BLOCK DISP to ENABLE and press the middle button. The
grid appears on the screen. Use the navigation buttons on the
joystick to select the squares and click the middle button to
enable/disable each of them for motion detection. Motion is
detected in the squares that show the grid. Motion is not
detected in squares that show the camera image without grid.
When you have finished, press and hold the middle button for
3 seconds, then release.
2. Next, set BLOCK DISP to ON.
3. To disable block display, set BLOCK DISP to OFF.
MONITOR AREA: use this option to select a predefined rectangular
area for motion detection. You can define up to 4 areas.
1. First, set MONITOR AREA to ON.
2. Select which of the 4 areas you want to define in AREA SEL
(1/4 … 4/4).
3. Use the TOP, BOTTOM, LEFT, and RIGHT settings to define the
top, bottom, left, and right edge of the area.
Note: ATR can introduce noise in night-time images.
7.7 Motion detection
Use this function to see motion detection during live monitoring. You can
use:
Block display: in a grid of squares, select the areas where you want to
use motion detection. If the camera detects motion in one of the enabled
squares, the image in that square will ‘flash’.
Monitor area selection: you can select up to 4 separate areas for motion
detection. If the camera detects motion, the outer edge of the area will
‘flash’.
V. 01 – 13/06/2013 8 ©Velleman nv
Page 9
CAMCOLBUL28Z
Display: PRIVACY
OFF
Privacy is switched off
ON
Privacy function is active. Use the settings below.
Select which of the 8 areas you want to define in AREA SEL
(1/8 … 8/8).
Use the TOP, BOTTOM, LEFT, and RIGHT settings to define the
top, bottom, left, and right edge of the area.
COLOR: sets the colour of the privacy area.
TRANSP: sets the transparency for the privacy area.
MOSAIC: creates a mosaic pattern in the privacy area. This is
useful if you want to make an area private, but still want to use
it for motion detection.
Display: DAY/NIGHT
COLOR
The camera always makes colour images.
B/W
The camera always makes black-and-white images.
BURST: you can switch burst on or off to improve the image
quality. The burst function sends a colour signal to the
monitor in B/W mode. This may degrade the clarity of the
image.
AUTO
The camera makes colour images during the day and black-andwhite images during the night. Use the settings below.
BURST: you can switch burst on or off to improve the image
quality. The burst function sends a colour signal to the
monitor in B/W mode. This may degrade the clarity of the
image.
DELAY CNT: delay counter. Defines the delay before the
camera switches from day to nigh mode or vice versa. This
prevents the camera from switching over too quickly if the
light conditions change only briefly.
DAYNIGHT: sets the threshold for switching from day to
night mode. The lower the setting, the less light is required
7.8 Privacy
Use this function to block a part of the image where you don’t want to view
activity. For example, if part of the image shows a public area where
recording may be illegal. You can define up to 8 areas.
7.9 Day / night
The camera can switch automatically between colour images in day
conditions and black-and-white images in night conditions. Use this function
to control the day/night behaviour of the camera.
Note: black-and-white images are much clearer and contain less noise at
low light levels.
V. 01 – 13/06/2013 9 ©Velleman nv
Page 10
CAMCOLBUL28Z
to switch to night mode. Recommended settings are 40-75
for indoors, and 150 for outdoors.
NIGHTDAY: sets the threshold for switching from night to
day mode. The higher the setting, the more light is required
to switch to day mode. Recommended settings are 50-85 for
indoors, and 175 for outdoors.
Remarks:
The DAY>NIGHT setting must always be lower than the
NIGHT>DAY setting.
Make sure that the difference between the two settings is
large enough. If the settings are too close together, the
camera will switch too often between the two modes.
Display: NR
OFF
Noise reduction is switched off.
Y
Use only luminance (Y) noise reduction.
C
Use only colour (C) noise reduction.
Y/C
Use both luminance (Y) and colour (C) noise reduction
(recommended setting).
Set Y LEVEL for luminance and C LEVEL for colour noise reduction.
Display: CAMERA ID
OFF
No name for the camera.
ON
You can enter two lines of 26 characters for the camera name.
Note: make sure that CHR1 is selected.
Position the cursor in the text line by selecting the arrow icons
on the OSD screen.
Use the navigation buttons on the joystick to select the
characters for the name. Press the middle button to confirm and
move to the next character.
Select CLR to delete a character.
Select POS to position the name on the monitor. Use the
navigation buttons on the joystick to move the text to the
desired position, and press the middle button to confirm.
7.10 Noise reduction
Use this function to set the noise reduction mode.
7.11 Camera ID
Use this function to give the camera a name. The name will appear on the
monitor. You can define where the name appears on the screen.
V. 01 – 13/06/2013 10 ©Velleman nv
Page 11

CAMCOLBUL28Z
IP rating
IP66
pick-up element
1/3" Sony 960H colour CCD image sensor
pixels
976(H) x 582(V) - PAL
horizontal resolution
700 TV lines
DSP
Sony Effio
min. illumination
0.001 Lux – F2.0
IR LEDs
72
max. IR projection distance
40m
S/N ratio
> 52dB (AGC off)
electronic shutter
1/50 to 1/100 000s
lens
f 6-22mm / F2.0
lens angle
104° ~ 33°
Colour Rolling Suppress
yes
white balance
automatic
AGC
yes
video output
1.0Vpp composite, 75 Ohm
power supply
DC 12V (use PS1205R, not incl.)
current consumption
125mA (IR off), 650mA (IR on)
operating temperature
-10°C ~ +40°C
dimensions
275 x 95 x 100mm
weight
1050g
7.12 Sync
Synchronisation setting for the camera. You cannot adjust this setting.
Synchronisation is always internal.
7.13 Language
Use this function to set the language of the OSD menu.
8. Technical specifications
Use this device with original accessories only. Velleman nv cannot
be held responsible in the event of damage or injury resulted from
(incorrect) use of this device.
For more info concerning this product and the latest version of this
user manual, please visit our website www.velleman.eu.
The information in this manual is subject to change without prior
notice.
V. 01 – 13/06/2013 11 ©Velleman nv
Page 12

CAMCOLBUL28Z
© COPYRIGHT NOTICE
This manual is copyrighted. The copyright to this manual is owned by
Velleman nv.
All worldwide rights reserved. No part of this manual may be copied,
reproduced, translated or reduced to any electronic medium or otherwise
without the prior written consent of the copyright holder.
V. 01 – 13/06/2013 12 ©Velleman nv
Page 13
CAMCOLBUL28Z
Houd buiten het bereik van kinderen en onbevoegden.
Elektrocutiegevaar bij het openen van de camera.
Deze camera mag NIET geopend worden. U mag geen
onderdelen vervangen. Bestel eventuele reserveonderdelen bij uw
dealer.
GEBRUIKERSHANDLEIDING
1. Inleiding
Aan alle ingezetenen van de Europese Unie
Belangrijke milieu-informatie betreffende dit product
Dit symbool op het toestel of de verpakking geeft aan dat, als het
na zijn levenscyclus wordt weggeworpen, dit toestel schade kan
toebrengen aan het milieu. Gooi dit toestel (en eventuele
batterijen) niet bij het gewone huishoudelijke afval; het moet bij
een gespecialiseerd bedrijf terechtkomen voor recyclage. U moet
dit toestel naar uw verdeler of naar een lokaal recyclagepunt
brengen. Respecteer de plaatselijke milieuwetgeving.
Hebt u vragen, contacteer dan de plaatselijke autoriteiten
betreffende de verwijdering.
Dank u voor uw aankoop! Lees deze handleiding grondig voor u het toestel
in gebruik neemt. Werd het toestel beschadigd tijdens het transport,
installeer het dan niet en raadpleeg uw dealer.
2. Veiligheidsinstructies
3. Algemene richtlijnen
Raadpleeg de Velleman® service- en kwaliteitsgarantie achteraan deze
handleiding.
Leer eerst de functies van het toestel kennen voor u het gaat gebruiken.
Om veiligheidsredenen mag u geen wijzigingen aanbrengen. Schade
door wijzigingen die de gebruiker heeft aangebracht valt niet onder de
garantie.
Gebruik het toestel enkel waarvoor het gemaakt is. Bij onoordeelkundig
gebruik vervalt de garantie.
De garantie geldt niet voor schade door het negeren van bepaalde
richtlijnen in deze handleiding en uw dealer zal de verantwoordelijkheid
afwijzen voor defecten of problemen die hier rechtstreeks verband mee
houden.
Bescherm tegen extreme hitte.
V. 01 – 13/06/2013 13 ©Velleman nv
Page 14
CAMCOLBUL28Z
1
IR-leds
5
beugel
2
lens 6 regelknop zoom en scherpstelling
3
lichtsensor
7
gewricht
4
zonnekap
Bescherm tegen schokken en vermijd brute kracht tijdens de bediening.
Installeer en gebruik deze camera niet voor illegale praktijken en
respecteer ieders privacy.
4. Eigenschappen
weerbestendig
zwart-wit nachtzicht (IR-leds)
super HR
speciale functies via On-Screen Display (OSD) instelmenu
o sluiter / AGC
o witbalans.
5. Overzicht
Raadpleeg de figuren op pagina 2 van deze handleiding.
6. Hardware-installatie
Raadpleeg de figuren op pagina 2 van deze handleiding.
Kies een geschikte installatieplaats en houd rekening met volgende
punten:
o Houd de camera weg van extreme temperaturen en trillingen.
o Installeer de camera niet in de buurt van magnetische velden.
o Richt de camera niet naar de zon of naar een lichtweerkaatsend
voorwerp (bv. een metalen deur).
Gebruik de beugel [5] om de plaats van de montagegaten te bepalen.
Boor de gaten en bevestig de beugel [5] met schroeven.
Bevestig de camera aan de beugel [5] met de schroef aan het
gewricht [7].
Koppel de voedingsaansluiting [B] aan de 12VDC-voeding (niet
meegeleverd).
Koppel de BNC-stekker [A] aan een monitor (niet meegeleverd).
Richt de camera naar de bewakingszone en draai de klemschroef vast.
Stel de zoom en scherpstelling handmatig in met de regelknoppen [6].
V. 01 – 13/06/2013 14 ©Velleman nv
Page 15
CAMCOLBUL28Z
Druk op de middelste toets voor toegang tot het
menu, of om een optie te selecteren.
Druk op de up- of down-toets om door het menu te
navigeren.
Druk op de linker- of rechtertoets om de
parameters van het menu te wijzigen.
Display: SHUTTER/AGC
AUTO
SETUP
MODE = SHUT: de camera past het beeld aan door de
sluitersnelheid te wijzigen. De camera kan ingesteld worden voor
hoge of lage omgevingshelderheid.
HIGH LUMINANCE: heldere beelden aanpassen.
BRIGHTNESS: instelling helderheidsniveau bij een grote
omgevingshelderheid. De standaardinstelling is 24.
Opmerking: Wij raden u aan om deze instelling te wijzigen in
een heldere omgeving.
7. OSD-instellingen (On screen display)
Met een mini-joystick in de camerakabel kunt u de camera-instellingen
regelen via een instelmenu (OSD).
In het instelmenu (OSD):
NEXT/BACK: selecteer deze optie en druk op de middelste toets om
naar de volgende/vorige pagina met menuopties te gaan.
RETURN: selecteer deze optie en druk op de middelste toets om naar
het vorige menuniveau terug te keren.
EXIT: selecteer deze optie en druk op de middelste toets om het
instelmenu te verlaten zonder de instellingen op te slaan.
SAVE ALL: selecteer deze optie en druk op de middelste knop om alle
instellingen op te slaan.
CAMERA RESET: selecteer deze optie en druk op de middelste toets om
de camera terug te zetten naar de fabrieksinstellingen.
De instellingen van het instelmenu worden hieronder in detail beschreven.
7.1 Lens
Het LENS-instelmenu is niet van toepassing op deze camera. Laat de
instellingen ongewijzigd.
7.2 Sluiter/AGC
Hiermee kan de reactie van de camera op hoge en lage lichtintensiteit
gecontroleerd worden via automatische versterking en sluiterinstellingen.
U kan kiezen tussen een automatische of handmatige controlefunctie. De
automatische controlefunctie volstaat voor de meeste omgevingen.
V. 01 – 13/06/2013 15 ©Velleman nv
Page 16
CAMCOLBUL28Z
LOW LUMINANCE: donkere beelden aanpassen met de
automatische versterkingsregeling.
MODE: stel in op AGC om de automatische
versterkingsregeling te gebruiken. Zet op OFF om de
automatische versterkingsregeling uit te schakelen.
BRIGHTNESS: instelling helderheidsniveau bij lage
omgevingshelderheid.
Wij raden u aan om deze instelling te wijzigen in een heel
donkere omgeving ('s nachts).
Opmerking: AGC kan meer ruis in de afbeelding veroorzaken.
MANUAL
Gebruik de manuele modus enkel in een omgeving met constant
omgevingslicht gedurende de hele dag. We raden u aan om de
automatische modus te gebruiken, zelfs in deze
omstandigheden.
Opmerking: als de omgeving donkerder of lichter wordt, zal de
camera de helderheid niet aanpassen en kan het beeld over- of
onderbelicht zijn.
MODE = SHUT + AGC: de sluitersnelheid en automatische
versterkingsregeling kunnen als volgt worden ingesteld:
SHUTTER: stel de sluitersnelheid in tussen 1/50 en 1/10000.
Hoe trager de sluitersnelheid, hoe lichter het beeld. Hoge
sluitersnelheden worden gebruikt om snelbewegende
voorwerpen vast te leggen met minder bewegingswaas.
AGC: stel de versterkingsregeling in tussen 6 en 44.8 dB.
Display: WHITE BAL
ATW
ATW = auto-tracking white balance (automatische witbalans).
Door de witbalans wordt gewaarborgd dat witte objecten
correct worden weergegeven. De ATW-functie regelt de
automatische witbalanscorrectie. De standaardinstellingen
voldoen voor vrijwel alle omgevingen.
SPEED: bepaalt de aanpassingssnelheid van de witbalans.
Hoe hoger de waarde, hoe sneller de camera de witbalans
aanpast.
Opmerking: een te snelle aanpassing kan leiden tot
kleurschommelingen.
DELAY CNT: bepaalt hoe vaak de camera de
kleurveranderingen nagaat en de witbalanscorrectie
toepast. Hoe lager de waarde, hoe frequenter de controles
en de aanpassingen.
ATW FRAME: regelt de beeldvergroting zodat de camera de
7.3 Witbalans
Deze menuoptie wordt gebruikt om de witbalans in te stellen.
V. 01 – 13/06/2013 16 ©Velleman nv
Page 17
CAMCOLBUL28Z
kleurverandering kan bepalen. (De aanbevolen
instellingswaarde is 1.0.)
ENVIRONMENT: kies INDOOR voor binnenruimtes, en
OUTDOOR voor buitenruimtes.
PUSH
Dit is een vaste instelling.
USER1
USER2
Twee personaliseerbare instellingen voor het regelen van rode
en blauwe kleurversterking. Een handige instelling voor
omgevingen verzadigd met één enkele kleur licht (bijv. bars of
feestzalen), of voor slechtzienden (kleurenblindheid).
ANTI CR
Anti-colour rolling. Bepaalde lichtomstandigheden kunnen
ervoor zorgen dat er lopende kleurbalken in het beeld
verschijnen. Gebruik deze instelling om dit te compenseren.
MANUAL
Bij het aanzetten van de camera wordt de witbalanswaarde
bepaald door het meest witte object in beeld. De camera
reproduceert de witte kleur aan de hand van deze waarde,
ongeacht de veranderingen in de kleurtemperatuur of andere
factoren. Indien deze waarde onvoldoende kleurkwaliteit biedt,
dan kan de kleurbalans tussen rood en blauw manueel
ingesteld worden voor een betere beeldkwaliteit..
PUSH
LOCK
Gebruik deze optie om de witbalans te regelen aan de hand van
een wit referentieobject. Richt de camera op een wit object
zodanig dat het camerabeeld hier volledig mee gevuld is. Druk
vervolgens op de middelste toets van de joystick. De camera
gebruikt nu de kleur van dat object als referentie.
Display: BACKLIGHT
OFF
Geen tegenlichtcompensatie
BLC
(Back light compensation) tegenlichtcompensatie. De camera past
de helderheid van de donkere beelddelen automatisch aan.
HLC
Hoge lichtcompensatie. Deze instelling wordt gebruikt voor het
compenseren van extreme contrasten tussen donkere en lichte
beeldgebieden. Bijvoorbeeld, als iemand een helder licht
rechtstreeks in de lens schijnt, kan het volledige beeld overbelicht
raken. Hoge lichtcompensatie dekt de te heldere beeldgebieden af
zodat het gebied rondom de lichtbron zichtbaar blijft.
7.4 Tegenlicht
Bij een helder licht in de achtergrond, zoals een venster, kan het beeld
errond te donker zijn en dus niet zichtbaar. Gebruik deze instelling als
tegenlichtcompensatie.
V. 01 – 13/06/2013 17 ©Velleman nv
Page 18

CAMCOLBUL28Z
Display: ATR
OFF
Functie ATR is uitgeschakeld.
ON
Functie ATR is ingeschakeld. Gebruik onderstaande instellingen.
LUMINANCE: Sterkte van de helderheid instellen.
CONTRAST: Beeldcontrast instellen.
Display: MOTION DET
OFF
Functie bewegingsdetectie is uitgeschakeld
ON
Functie bewegingsdetectie is ingeschakeld. Gebruik onderstaande
instellingen.
DETECT SENSE: de gevoeligheid van de bewegingsdetectie
instellen. Bij hogere gevoeligheid worden kleinere bewegingen
gedetecteerd.
BLOCK DISP: rasterpatroon. Met deze optie kunt u een vierkanten
markeren in een rasterpatroon om beweging te detecteren.
1. Schakel BLOCK DISP om naar ENABLE en druk op de
middelste toets. Het rasterpatroon verschijnt op het scherm.
Gebruik de navigatietoetsen om de vierkanten te selecteren en
druk op de middelste toets om de bewegingsdetectie te
activeren/deactiveren. Beweging wordt gedetecteerd in de
vierkanten die het rasterpatroon tonen. Beweging wordt niet
gedetecteerd in vierkanten die de camerabeelden tonen zonder
7.5 Beeldinstelling
Dit zijn de meest gebruikte beeldinstellingen: MIRROR (beeld spiegelen),
BRIGHTNESS (helderheid), CONTRAST (contrast), SHARPNESS
(beeldscherpte), HUE (kleurwaarde), en GAIN (versterking).
7.6 ATR (Adaptive Tone Reproduction)
Hierdoor verbetert de kleurkwaliteit van afbeeldingen met een groot
contrast tussen donkere en lichte beeldgebieden (bijvoorbeeld, een muur
met een venster).
Opmerking: De ATR-functie kan beeldruis introduceren bij nachtbeelden.
7.7 Bewegingsdetectie
Hiermee kunt u beweging detecteren tijdens het bekijken van live beelden.
Gebruik:
Rasterpatroon: markeer vierkanten in een rasterpatroon waar u
bewegingsdetectie wenst te gebruiken. Als de camera beweging ziet in
één van de gemarkeerde vierkanten, knippert het beeld in dat vierkant.
Beeldgebieden: er zijn maximum vier verschillende beeldgebieden
selecteerbaar. Bij bewegingsherkenning knippert het kader van het
beeldgebied.
V. 01 – 13/06/2013 18 ©Velleman nv
Page 19

CAMCOLBUL28Z
rasterpatroon. Als u alle gewenste vierkanten hebt geselecteerd,
houd dan de middelste toets ingedrukt gedurende 3 seconden,
en laat vervolgens los.
2. Schakel vervolgens BLOCK DISP om naar ON.
3. Zet BLOCK DISP op OFF om de instelling te deactiveren.
MONITOR AREA: Hiermee kunt u een vooraf ingesteld rechthoekig
beeldgebied selecteren om beweging te herkennen. Er zijn tot 4
verschillende beeldgebieden selecteerbaar.
1. Schakel eerst MONITOR AREA om naar ON.
2. Selecteer één van de 4 beeldgebieden die u wenst te definiëren
in AREA SEL (1/4 … 4/4).
3. Selecteer het gewenste beeldgebied met de TOP (boven),
BOTTOM (onder), LEFT (links), en RIGHT (recht) regelaars.
Display: PRIVACY
OFF
Privacy-functie is uitgeschakeld
ON
Privacy-functie is ingeschakeld. Gebruik onderstaande instellingen.
Selecteer één van de 8 beeldgebieden die u wenst te definiëren
in AREA SEL (1/8 … 8/8).
Selecteer het gewenste beeldgebied met de TOP (boven),
BOTTOM (onder), LEFT (links), en RIGHT (recht) regelaars.
COLOR: de kleur van de zone instellen.
TRANSP: de transparantie van de zone instellen.
MOSAIC: een mozaïekpatroon creëren in de privacyzone. Een
handige functie om delen van beelden onherkenbaar te maken
die u nog steeds wenst te gebruiken voor bewegingsdetectie.
Display: DAY/NIGHT
COLOR
De camerabeelden worden altijd in kleur weergeven.
7.8 Privacy
Hiermee worden bepaalde beelddelen beschermd tegen weergave op een
beeldscherm. Bijvoorbeeld, de beeldweergave van een publieke ruimte waar
registratie illegaal is. U kunt tot 8 beeldgebieden definiëren.
7.9 Dag / nacht
De camera kan automatisch omschakelen tussen kleurweergave tijdens de
dag en zwart-witweergave tijdens de nacht. Met deze functie bepaalt u het
gedrag van de camera overdag en 's nachts.
Opmerking: de beeldkwaliteit bij zwart-witweergave is beter en bevat
minder ruis bij weinig licht.
V. 01 – 13/06/2013 19 ©Velleman nv
Page 20

CAMCOLBUL28Z
B/W
De camerabeelden worden altijd in zwart-wit weergegeven.
BURST: aan/uitschakelbaar om de beeldkwaliteit te
verbeteren. Door het activeren van de functie wordt een
kleursignaal gestuurd naar de camera in zwart-witmodus.
Hierdoor kan de helderheid van het beeld verminderen.
AUTO
De camera maakt kleurbeelden tijdens de dag en zwartwitbeelden tijdens de nacht. Gebruik de onderstaande
instellingen.
BURST: aan/uitschakelbaar om de beeldkwaliteit te
verbeteren. Door het activeren van de functie wordt een
kleursignaal gestuurd naar de camera in zwart-witmodus.
Hierdoor kan de helderheid van het beeld verminderen.
DELAY CNT: vertragingswaarde. Definieert de vertraging
alvorens de camera wisselt van kleur- naar zwart-witmodus of
omgekeerd. Zo wordt vermeden dat de camera te vlug
omschakelt bij een kortstondige verandering van de
omgevingshelderheid.
DAYNIGHT: instelling van de drempelwaarde van de
helderheid voor het omschakelen van kleur- naar zwart-
witmodus. Hoe lager de waarde, hoe minder omgevingslicht
nodig is om over te schakelen naar zwart-witweergave. De
aanbevolen instellingen liggen tussen 40-75 voor
binnenruimtes, en 150 voor buitenruimtes.
NIGHTDAY: instelling van de drempelwaarde van de
helderheid voor het omschakelen van zwart-witmodus naar
kleurmodus. Hoe hoger de waarde, hoe meer omgevingslicht
er nodig is om over te schakelen naar kleurmodus. De
aanbevolen instellingen liggen tussen 50-85 voor
binnenruimtes, en 175 voor buitenruimtes.
Opmerkingen:
De DAYNIGHT-instelling moet steeds lager liggen dan de
NIGHTDAY-instelling.
Zorg ervoor dat het verschil tussen de twee instellingen
voldoende groot is. Indien de waarden te dicht bijeen liggen,
schakelt de camera te vaak tussen de twee modi.
Display: NR
OFF
Ruisonderdrukking is uitgeschakeld.
Y
Onderdrukking van helderheidsruis (Y)
C
Onderdrukking van kleurruis (C)
7.10 Ruisonderdrukking
Hier kan de modus voor ruisonderdrukking worden ingesteld.
V. 01 – 13/06/2013 20 ©Velleman nv
Page 21

CAMCOLBUL28Z
Y/C
Zowel helderheids- (Y) als kleurruis (C) onderdrukken (aanbevolen
instelling).
Het Y LEVEL instellen voor helderheidsruis en C LEVEL voor
kleurruis.
Display: CAMERA ID
OFF
Geen cameranaam.
ON
Voor de cameranaam kunnen twee lijnen met 26 karakters
ingegeven worden.
Opmerking: zorg ervoor dat CHR1 geselecteerd is.
Plaats de cursor in de tekstregel met de pijltjes op het
OSD-scherm.
Gebruik de navigatieknoppen op de joystick om de karakters
voor de naam te selecteren. Druk op de middelste knop om te
bevestigen en om naar het volgende karakter te gaan.
Selecteer CLR om een karakter te verwijderen.
Selecteer POS om de naam te plaatsen op het scherm. Gebruik
de navigatieknoppen op de joystick om de tekst te verplaatsen
naar de gewenste positie op het scherm, en druk op de
middelste knop om te bevestigen.
IP-norm
IP66
opneemelement
1/3" Sony 960H CCD-kleurencamera
aantal pixels
976(H) x 582(V) - PAL
horizontale resolutie
700 tv-lijnen
DSP
Sony Effio
min. verlichting
00.001 Lux – F2.0
IR-leds
72
7.11 Camera ID
Met deze functie kan een naam aan de camera worden gegeven. De naam
verschijnt op de monitor en u bepaalt waar de naam verschijnt op het
scherm.
7.12 Sync
De synchronisatie-instelling voor de camera kan niet gewijzigd worden.
Synchronisatie gebeurt altijd intern.
7.13 Taal
De gewenste taal selecteren voor de weergave van het instelmenu.
8. Technische specificaties
V. 01 – 13/06/2013 21 ©Velleman nv
Page 22

CAMCOLBUL28Z
max. bereik IR
40 m
S/R verhouding
> 52 dB (AGC uit)
elektronische sluiter
1/50 tot 1/100000 sec.
lens
f 6-22mm / F2.0
lenshoek
104° ~ 33°
Colour Rolling Suppress
ja
witbalans
automatisch
AGC
ja
video-uitgang
1,0 Vpp composiet, 75 ohm
voeding
12 VDC (gebruik PS1205R, niet meegelev.)
verbruik
125 mA (IR uit), 650 mA (IR aan)
werktemperatuur
-10°C ~ +40°C
afmetingen
275 x 95 x 100mm
gewicht
1050g
Gebruik dit toestel enkel met originele accessoires. Velleman nv is
niet aansprakelijk voor schade of kwetsuren bij (verkeerd) gebruik
van dit toestel.
Voor meer informatie over dit product en de laatste versie van deze
handleiding, zie www.velleman.eu.
De informatie in deze handleiding kan te allen tijde worden
gewijzigd zonder voorafgaande kennisgeving.
© AUTEURSRECHT
Velleman nv heeft het auteursrecht voor deze handleiding.
Alle wereldwijde rechten voorbehouden. Het is niet toegestaan om deze
handleiding of gedeelten ervan over te nemen, te kopiëren, te vertalen, te
bewerken en op te slaan op een elektronisch medium zonder voorafgaande
schriftelijke toestemming van de rechthebbende.
V. 01 – 13/06/2013 22 ©Velleman nv
Page 23

CAMCOLBUL28Z
Garder hors de la portée des enfants et des personnes non
autorisées.
Risque d’électrocution lors de l’ouverture du boîtier.
Ne jamais ouvrir ni désassembler la caméra. Il n’y a aucune
pièce maintenable par l’utilisateur. Commander des pièces de
rechange éventuelles chez votre revendeur.
NOTICE D’EMPLOI
1. Introduction
Aux résidents de l'Union européenne
Des informations environnementales importantes concernant ce
produit
Ce symbole sur l'appareil ou l'emballage indique que l’élimination
d’un appareil en fin de vie peut polluer l'environnement. Ne pas
jeter un appareil électrique ou électronique (et des piles
éventuelles) parmi les déchets municipaux non sujets au tri
sélectif ; une déchèterie traitera l’appareil en question. Renvoyer
les équipements usagés à votre fournisseur ou à un service de
recyclage local. Il convient de respecter la réglementation locale relative à la
protection de l’environnement.
En cas de questions, contacter les autorités locales pour élimination.
Nous vous remercions de votre achat ! Lire la présente notice attentivement
avant la mise en service de l’appareil. Si l’appareil a été endommagé
pendant le transport, ne pas l’installer et consulter votre revendeur.
2. Consignes de sécurité
3. Directives générales
Se référer à la garantie de service et de qualité Velleman® en fin de
notice.
Se familiariser avec le fonctionnement avant l’emploi.
Toute modification est interdite pour des raisons de sécurité. Les
dommages occasionnés par des modifications par le client ne tombent
pas sous la garantie.
N’utiliser qu’à sa fonction prévue. Un usage impropre annule d'office la
garantie.
La garantie ne s’applique pas aux dommages survenus en négligeant
certaines directives de cette notice et votre revendeur déclinera toute
responsabilité pour les problèmes et les défauts qui en résultent.
Protéger contre la chaleur extrême.
V. 01 – 13/06/2013 23 ©Velleman nv
Page 24

CAMCOLBUL28Z
1
DEL IR
5
étrier 2 objectif
6
Réglage du zoom et focalisation
3
capteur
7
articulation
4
pare-soleil
Protéger contre les chocs et le traiter avec circonspection pendant
l’opération.
Installer et utiliser la caméra en respectant la législation et la vie privée
des tiers.
4. Caractéristiques
résiste aux intempéries
avec vision nocturne N/B (LED IR)
super HR
fonctions spéciales depuis menu à l'écran (OSD)
o obturateur/AGC
o balance des blancs.
5. Description
Se référer aux illustrations à la page 2 de cette notice.
6. Installation de la caméra
Se référer aux illustrations à la page 2 de cette notice.
Choisir un endroit où installer la caméra en tenant compte des points
suivants :
o Ne pas exposer la caméra à des températures extrêmes, à des
vibrations et à des champs magnétiques.
o Ne pas pointer la caméra vers un objet réfléchissant la lumière (p.ex.
porte métallique).
Déterminer la position des trous de montage à l’aide de l’étrier [5]. Fixer
l’étrier à l’aide de vis.
Fixer la caméra à l’étrier [5] à l’aide de la vis de l’articulation [7].
Connecter la fiche d’entrée [B] à l’alimentation 12 VCC (non inclus).
Connecter la fiche BNC [A] à un moniteur (non inclus).
Pointer la caméra vers la zone à surveiller et serrer la vis de fixation.
Régler le zoom et la focalisation manuellement avec le réglage [6].
V. 01 – 13/06/2013 24 ©Velleman nv
Page 25

CAMCOLBUL28Z
Appuyez sur le bouton central pour accéder au
menu, ou pour sélectionner une option.
Appuyez sur les touches fléchées haut ou bas pour
naviguer dans le menu.
Appuyez sur les touches fléchées gauche/droite
pour ajuster les paramètres du menu.
Ecran : SHUTTER/AGC
AUTO
SETUP
MODE = SHUT : l'image est ajustée par la caméra en réglant la
vitesse d'obturation. Il est possible de régler la caméra en cas de
luminance élevée ou faible.
7. Paramètres OSD (Menu à l'écran)
Les paramètres peuvent être réglés par un mini joystick dans le câble de la
camera en utilisant le menu OSD.
Dans le menu OSD, sélectionnez :
NEXT/BACK : et appuyez sur le bouton central pour aller à la page
suivante/précédente d’options dans le menu.
RETURN : et appuyez sur le bouton central pour revenir au niveau de
menu précédent.
EXIT : et appuyez sur le bouton central pour quitter le menu OSD sans
sauvegarder les réglages.
SAVE ALL : et appuyez sur le bouton central pour sauvegarder tous les
réglages.
CAMERA RESET : et appuyez sur le bouton central pour restaurer les
réglages par défaut.
Les réglages du menu OSD sont décrits en détail ci-après.
7.1 Objectif
Le menu LENS n'est pas applicable pour cette caméra. Ne touchez pas aux
réglages.
7.2 Obturateur/AGC
Cette option vous permet de contrôler la réaction de la caméra aux réglages
de luminosité ambiante élevée et faible en utilisant des réglages
automatiques de gain et obturation. Vous pouvez sélectionner le réglage
automatique ou manuel. Généralement, le réglage automatique convient
pour la plupart d'environnements.
V. 01 – 13/06/2013 25 ©Velleman nv
Page 26

CAMCOLBUL28Z
HIGH LUMINANCE : ajuster des images claires.
BRIGHTNESS : réglez le niveau de luminosité pour une
luminosité ambiante élevée. Le réglage par défaut est 24.
Remarque : Nous vous conseillons d'ajuster ce réglage en cas
d'une luminosité ambiante élevée.
LOW LUMINANCE : ajuster les images avec une luminosité
ambiante faible avec la commande de gain automatique.
MODE : réglez sur AGC pour utiliser la commande de gain
automatique. Mettez sur OFF pour désactiver la commande
de gain automatique.
BRIGHTNESS : réglez le niveau de luminosité pour une
luminosité ambiante faible.
Nous vous conseillons d'ajuster le réglage en cas de luminosité
ambiante très faible (nuit).
Remarque : La commande AGC peut introduire plus de bruit
dans l'image.
MANUAL
Utilisez ce mode uniquement dans des environnements avec la
même luminosité ambiante que durant la journée. De plus, nous
vous conseillons d'utiliser le mode automatique dans les mêmes
conditions d'éclairage.
Remarque : En cas de luminosité trop faible ou élevée, la
camera ne s'ajustera pas et l'image risque d'être sur- ou sousexposée.
MODE = SHUT + AGC : réglez la vitesse d'obturation et AGC
comme suit :
SHUTTER : paramétrez la vitesse d'obturation entre 1/50 et
1/10000. Plus la vitesse d'obturation sera courte, plus nette
sera l'image. Les vitesses d'obturation courtes sont utilisées
pour capturer une séquence d'objets se déplaçant rapidement
avec moins de flou cinétique.
AGC : paramétrez la valeur du gain entre 6 et 44.8 dB.
Ecran : WHITE BAL
ATW
ATW = auto-tracking white balance (balance des blancs
automatique). La balance des blancs permet une reproduction
d'objets blancs correcte. L'option ATW contrôle le réglage de
balance des blancs automatique. Le réglage automatique
convient à pratiquement tout environnement.
SPEED : contrôle de vitesse de la balance des blancs. Plus
la valeur de réglage sera haute, plus vite la balance des
blancs sera ajustée.
7.3 Balance des blancs
Cette option est utilisée pour le réglage de la balance des blancs.
V. 01 – 13/06/2013 26 ©Velleman nv
Page 27

CAMCOLBUL28Z
Remarque : un ajustement trop rapide est susceptible de
provoquer une oscillation de couleurs.
DELAY CNT : valeur de retard définie par le nombre de fois
la transition de couleurs et le réglage de la balance des
blancs sont contrôlés et appliqués. Plus la valeur sera basse,
plus les contrôles et les ajustements seront fréquents.
ATW FRAME : réglage d'agrandissement d'image pour
définir la transition de couleurs. (réglage recommandé
est 1.0)
ENVIRONMENT : choisissez INDOOR pour une installation
à l'intérieur, et OUTDOOR pour une installation à
l'extérieur.
PUSH
Valeur de réglage fixe.
USER1
USER2
Deux réglages personnalisables permettant à l'utilisateur de
contrôler le gain rouge et bleu. Un réglage pratique pour des
environnements avec un seul niveau d'éclairage (p.ex. bars ou
autres lieux d'amusement), ou pour des utilisateurs malvoyants
(daltonien).
ANTI CR
Anti-colour rolling. Dans certaines conditions d'éclairage, des
barres de couleurs mouvantes apparaissent à l'écran. Utilisez
ce réglage pour compenser.
MANUAL
La valeur de la balance des blancs est déterminée par l'objet le
plus blanc affiché à l'écran lors de l'activation de la caméra. A
base de cette valeur, la caméra reproduira la couleur blanche,
n'importe les ajustements de température de couleurs ou
autres éléments. Si cette valeur offre une qualité de couleur
inférieure, la balance de couleurs entre les niveaux rouge-bleu
peut être ajustée manuellement pour améliorer la qualité de
l'image.
PUSH
LOCK
Permet le réglage de la balance des blancs avec un objet de
référence blanc. Dirigez la caméra sur un objet blanc de sorte
que la caméra n'affiche que l'objet. Appuyez ensuite sur le
bouton central pour que la balance des blancs soit effectuée et
enregistrée dans la caméra.
Ecran : BACKLIGHT
OFF
Pas de compensation du rétro-éclairage en cas de contre-jour
BLC
Compensation du retro-éclairage. Les zones de l'image trop foncées
sont automatiquement inversées.
7.4 Contre-jour
Dans le cas d'un arrière-plan lumineux, par exemple une fenêtre, il sera
presque impossible d’identifier d’autres objets dans l’image à part la fenêtre
éclairée. Utilisez cette fonction comme compensation du rétro-éclairage.
V. 01 – 13/06/2013 27 ©Velleman nv
Page 28

CAMCOLBUL28Z
HLC
Fonction d'inversion des zones claires de l’image activée. Ce réglage
est utilisé pour compenser des contrastes entre les zones sombres
et les zones lumineuses. Par exemple si la caméra est exposée
directement à une lumière, la lumière pourrait être surexposée. Les
zones trop claires sont masquées et la fonction permet une
meilleure visualisation des objets à proximité directe des zones trop
claires.
Ecran : ATR
OFF
fonction ATR est désactivée
ON
Fonction ATR est activée. Utilisez les réglages ci-après.
LUMINANCE : ajuster la luminosité.
CONTRAST : ajuster le contraste.
Ecran : MOTION DET
OFF
La fonction détection du mouvement est désactivée
ON
La fonction détection du mouvement est activée. Utilisez les
réglages ci-après.
7.5 Réglage de l'image
Les réglages d'image les plus utilisés sont : MIRROR pour inverser l'image,
BRIGHTNESS (luminosité), CONTRAST (contraste), SHARPNESS
(netteté), HUE (teinte), et GAIN (gain).
7.6 ATR (Adaptive Tone Reproduction)
Cette fonction permet d’améliorer l’affichage des images présentant un
grand contraste entre les environnements sombres et lumineux (par
exemple, un mur avec une fenêtre).
Remarque : La fonction ATR peut introduire du bruit dans l'image pendant
la nuit.
7.7 Détection de mouvement
La fonction vous permet de visualiser en direct les images en cas de
détection de mouvement. Utilisez :
Block display : Pour détecter un mouvement, sélectionnez dans un
quadrillage la zone à surveiller. Si un mouvement est détecté dans l’une
de ces zones, le cadre correspondant clignote pour vous signaler le
mouvement.
Monitor area selection : il est possible de sélectionner un maximum de
4 zones rectangulaires. Si un mouvement est détecté, le cadre
correspondant clignote pour vous signaler le mouvement.
V. 01 – 13/06/2013 28 ©Velleman nv
Page 29

CAMCOLBUL28Z
DETECT SENSE : ajuster la sensibilité de détection du mouvement.
Plus la sensibilité sera élevée, moins de mouvements seront
détectés.
BLOCK DISP : block display. Cette option vous permet de
sélectionner des zones dans un quadrillage pour détecter du
mouvement.
1. Mettez BLOCK DISP sur ENABLE et appuyez sur le bouton
central. Le quadrillage s'affiche à l'écran. Utilisez les touches
fléchées pour sélectionner les zones à surveiller et appuyez sur
le bouton central pour activer/désactiver la fonction de détection
pour chaque zone séparément. Du mouvement est détecté dans
les carrés qui visualisent le quadrillage. Il n'y a pas de détection
de mouvement dans les carrés qui visualisent l'image de caméra
sans quadrillage. Puis, appuyez et maintenez enfoncé le bouton
central pendant 3 secondes, puis relâchez.
2. Ensuite, mettez BLOCK DISP sur ON.
3. Pour désactiver, réglez BLOCK DISP sur OFF.
MONITOR AREA : Utilisez cette option pour sélectionner une zone
prédéfinie rectangulaire pour détecter du mouvement. Il est possible
de sélectionner un maximum de 4 zones à surveiller.
1. D'abord, réglez MONITOR AREA sur ON.
2. Sélectionnez une des 4 zones à définir dans AREA SEL
(1/4 … 4/4).
3. Les réglages TOP (haut), BOTTOM (bas), LEFT (gauche), et
RIGHT (droite) permettent de définir une zone à surveiller pour
détecter du mouvement.
Ecran : PRIVACY
OFF
La fonction masquage est désactivée
ON
La fonction masquage est activée. Utilisez les réglages ci-après.
Sélectionnez une des 8 zones à définir dans AREA SEL
(1/8 … 8/8).
Les réglages TOP (haut), BOTTOM (bas), LEFT (gauche), et
RIGHT (droite) permettent de définir une zone à masquer.
COLOR : régler la couleur de la zone à masquer.
TRANSP : régler la transparence de la zone à masquer.
MOSAIC : la zone sensible peut être affichée de manière
déformée dans la zone à masquer.
7.8 Zone de confidentialité (Privacy)
Il est possible de protéger une partie de l'image pour masquer une zone
sensible. Par exemple, en cas d'affichage d'une zone publique dans laquelle
l'enregistrement est illégal. Il est possible de couvrir un total de 8 zones.
V. 01 – 13/06/2013 29 ©Velleman nv
Page 30

CAMCOLBUL28Z
Une fonction pratique pour masquer une zone privée dans
l'image et pour détecter du mouvement.
Ecran : DAY/NIGHT
COLOR
Les images sont toujours affichées en couleur.
B/W
Les images sont toujours affichées en noir et blanc.
BURST : activer/désactiver la fonction pour améliorer la
qualité de l'image. Si le réglage est activé, un signal de
couleur est envoyé vers la caméra et activé en mode
d'affichage en noir et blanc. Cela pourrait réduire la
luminosité de l'image.
AUTO
La caméra commute automatiquement entre l‘affichage en
couleur et l‘affichage en noir et blanc, selon la luminosité
ambiante. Utilisez les réglages ci-après.
BURST : activer/désactiver la fonction pour améliorer la
qualité de l'image. Si le réglage est activé, un signal de
couleur est envoyé vers la caméra et activé en mode
d'affichage en noir et blanc. Cela pourrait réduire la
luminosité de l'image.
DELAY CNT : temporisation définie par la caméra avant de
commuter entre l‘affichage en couleur et l‘affichage en noir
et blanc ou vice versa. Cela évitera une commutation trop
rapide si les conditions d'éclairage ne changent que
brièvement.
DAYNIGHT : réglage de la luminosité de seuil pour
commuter entre l'affichage en couleur et l'affichage en noir
et blanc. Plus la valeur sera basse, moins de lumière sera
nécessaire pour commuter en mode d'affichage en noir et
blanc. Les réglages recommandés rangent entre 40-75 à
l'intérieur, et 150 à l'extérieur.
NIGHTDAY : réglage de la luminosité de seuil pour
commuter entre l'affichage en noir et blanc et l'affichage en
couleur. Plus la valeur sera élevée, plus de lumière sera
nécessaire pour commuter en mode d'affichage en couleur.
Les réglages recommandés rangent entre 50-85 à l'intérieur,
et 175 à l'extérieur.
7.9 Jour/nuit
La caméra commute automatiquement entre l'affichage en couleur et
l'affichage en noir/blanc selon la luminosité ambiante. La fonction permet de
contrôler les activités de la caméra durant la journée et la nuit.
Remarque : un affichage en noir/blanc plus clair et moins de bruit dans
l'image en cas de lumière faible.
V. 01 – 13/06/2013 30 ©Velleman nv
Page 31

CAMCOLBUL28Z
Remarques :
Les réglages DAYNIGHT doivent être toujours plus bas
que les réglages NIGHTDAY.
Il faut s'assurer que la différence entre les deux réglages est
assez grande. Sinon, la caméra commutera trop
fréquemment entre les deux modes d'affichage.
Ecran : NR
OFF
Fonction réduction du bruit est désactivée.
Y
Réduction du bruit pour le signal de luminosité (Y).
C
Réduction du bruit pour le signal de couleur (C).
Y/C
Réduction du bruit pour le signal de luminosité (Y) et de couleur (C)
(réglage recommandé).
Réglez Y LEVEL pour le signal de luminosité et C LEVEL pour la
réduction du bruit pour le signal de couleur.
Ecran : CAMERA ID
OFF
Pas de nom pour la caméra.
ON
Deux lignes avec 26 caractères peuvent être introduites pour le nom
de caméra.
Remarque : assurez-vous que CHR1 soit sélectionné.
Positionnez le curseur dans la ligne de texte avec les icônes
fléchés dans l'écran OSD.
Utilisez les boutons de navigation sur le joystick pour
sélectionner les caractères pour le nom. Appuyez sur le bouton
moyen pour confirmer et pour accéder au caractère suivant.
Sélectionnez CLR pour supprimer un caractère.
Sélectionnez POS pour positionner le nom sur le moniteur.
Utilisez les boutons de navigation sur le joystick pour déplacer le
texte à l'emplacement souhaité, et appuyez sur le bouton moyen
pour confirmer.
7.10 Réduction du bruit
La fonction permet de régler le mode pour la réduction du bruit.
7.11 Identification de la caméra
La fonction permet d'affecter un nom à la caméra. Le nom s'affiche sur le
moniteur et vous indiquez l'emplacement du nom dans l'écran à la position
souhaitée.
V. 01 – 13/06/2013 31 ©Velleman nv
Page 32

CAMCOLBUL28Z
résistance à l'eau
IP66
élément d'enregistrement
capteur d'image couleur CCD Sony 960H de 1/3"
nombre de pixels
976(H) x 582(V) - PAL
résolution horizontale
700 lignes TV
DSP
Sony Effio
éclairement min.
0.001 Lux – F2.0
LEDs IR
72
portée max. de l'IR
40 m
rapport S/B
> 52 dB (AGC désactivé)
obturateur électronique
1/50 à 1/100000 sec.
objectif
f 6-22mm / F2.0
angle de l'objectif
104° ~ 33°
Colour Rolling Suppress
oui
balance des blancs
automatique
AGC
oui
sortie vidéo
1,0 Vpp composite, 75 ohms
alimentation
12 VCC (utilisez PS1205R, non incl.)
consommation
125mA (LED IR éteintes), 650mA (LED IR allumées)
température de travail
-10°C ~ +40°C
dimensions
275 x 95 x 100mm
poids
1050g
7.12 Sync
Le réglage de synchronisation pour la caméra ne peut pas être ajusté. La
synchronisation se fait toujours interne.
7.13 Langue
Choisir la langue affichée sur le menu OSD.
8. Spécifications techniques
N’employer cet appareil qu’avec des accessoires d’origine. SA
Velleman ne sera aucunement responsable de dommages ou lésions
survenus à un usage (incorrect) de cet appareil.
Pour plus d’information concernant cet article et la dernière version
de cette notice, visitez notre site web www.velleman.eu.
Toutes les informations présentées dans cette notice peuvent être
modifiées sans notification préalable.
V. 01 – 13/06/2013 32 ©Velleman nv
Page 33

CAMCOLBUL28Z
© DROITS D’AUTEUR
SA Velleman est l’ayant droit des droits d’auteur pour cette notice.
Tous droits mondiaux réservés. Toute reproduction, traduction, copie ou
diffusion, intégrale ou partielle, du contenu de cette notice par quelque
procédé ou sur tout support électronique que se soit est interdite sans
l’accord préalable écrit de l’ayant droit.
V. 01 – 13/06/2013 33 ©Velleman nv
Page 34

CAMCOLBUL28Z
Mantenga el aparato lejos del alcance de personas no capacitadas
y niños.
Riesgo de descargas eléctricas al abrir la caja.
Nunca abra ni desmonte la cámara. El usuario no habrá de
efectuar el mantenimiento de ninguna pieza. Contacte con su
distribuidor si necesita piezas de recambio.
MANUAL DEL USUARIO
1. Introducción
A los ciudadanos de la Unión Europea
Importantes informaciones sobre el medio ambiente concerniente a
este producto
Este símbolo en este aparato o el embalaje indica que, si tira las
muestras inservibles, podrían dañar el medio ambiente.
No tire este aparato (ni las pilas, si las hubiera) en la basura
doméstica; debe ir a una empresa especializada en reciclaje.
Devuelva este aparato a su distribuidor o a la unidad de reciclaje
local. Respete las leyes locales en relación con el medio ambiente.
Si tiene dudas, contacte con las autoridades locales para residuos.
¡Gracias por haber comprado la CAMCOLBUL28Z! Lea atentamente las
instrucciones del manual antes de usarla. Si el aparato ha sufrido algún
daño en el transporte no lo instale y póngase en contacto con su
distribuidor.
2. Instrucciones de seguridad
3. Normas generales
Véase la Garantía de servicio y calidad Velleman® al final de este
manual del usuario.
Familiarícese con el funcionamiento del aparato antes de utilizarlo.
Por razones de seguridad, las modificaciones no autorizadas del aparato
están prohibidas. Los daños causados por modificaciones no autorizadas,
no están cubiertos por la garantía.
Utilice sólo el aparato para las aplicaciones descritas en este manual. Su
uso incorrecto anula la garantía completamente.
Los daños causados por descuido de las instrucciones de seguridad de
este manual invalidarán su garantía y su distribuidor no será responsable
de ningún daño u otros problemas resultantes.
No exponga este equipo a temperaturas extremas.
V. 01 – 13/06/2013 34 ©Velleman nv
Page 35

CAMCOLBUL28Z
1
LEDs IR
5
soporte
2
óptica
6
ajuste del zoom y el foco
3
sensor
7
articulación
4
capa antisolar
No agite el aparato. Evite usar excesiva fuerza durante el manejo y la
instalación.
Instale y utilice la cámara al respectar la legislación y la vida privada de
terceros.
4. Características
resistente a la intemperie
con visión nocturna B/N (LED IR)
súper alta resolución
funciones especiales por OSD
o shutter/control automático de ganancia (AGC)
o balance de blancos.
5. Descripción
Véase las figuras en la página 2 de este manual del usuario.
6. Instalar la cámara
Véase las figuras en la página 2 de este manual del usuario.
Elija un lugar de montaje adecuado y asegúrese de que:
o nunca instale la cámara en un lugar donde esté expuesta a
temperaturas extremas ni vibraciones.
o nunca instale la cámara cerca de campos electromagnéticos
o nunca dirija la cámara a un objeto reflectante (p.ej. puerta metálica).
Instale la cámara en el lugar deseado. Utilice el soporte [5] para
determinar el lugar de los agujeros de montaje. Fije el soporte con los
tornillos.
Fije la cámara al soporte [5] con el tornillo de la articulación [7].
Conecte el conector de entrada [B] a la alimentación 12 VCC (no incl.).
Conecte el conector BNC [A] a un monitor (no incl.).
Apunte la cámara a la zona que quiere vigilar y apriete el tornillo de
fijación.
Ajuste el zoom y el foco de manera manual con los tornillos [6].
V. 01 – 13/06/2013 35 ©Velleman nv
Page 36

CAMCOLBUL28Z
Pulse la tecla central para acceder al menú o para
seleccionar una opción.
Pulse la tecla arriba/abajo para desplazarse hacia
arriba o hacia abajo.
Pulse la tecla izquierda/derecha para modificar los
parámetros del menú.
Pantalla: SHUTTER/AGC
AUTO
SETUP
MODE = SHUT: La cámara ajusta la imagen al modificar la
velocidad del obturador. Es posible configurar el brillo en
condiciones de luminosidad intensa o baja.
HIGH LUMINANCE (alta sensibilidad a la luz): Activa la
iluminación automática en condiciones de iluminación media e
intensa.
BRIGHTNESS: Utilice esta función para ajustar el nivel de
brillo en condiciones de iluminación intensa (high luminance).
7. Ajustes por el menú en pantalla (OSD)
Hay una pequeña palanca de control en el cable de la cámara que le permite
configurar la cámara por el menú en pantalla (OSD).
El menú OSD:
NEXT/BACK: Seleccione esta opción y pulse la tecla central para ir a la
página siguiente/anterior de las opciones en el menú.
RETURN: Seleccione esta opción y pulse la tecla central para volver al
nivel anterior del menú.
EXIT: Seleccione esta opción y pulse la tecla central para salir del menú
OSD sin guardar los ajustes.
SAVE ALL: Seleccione esta opción y pulse la tecla central para guardar
todos los ajustes.
CAMERA RESET: Seleccione esta opción y pulse la tecla central para
restablecer los ajustes de fábrica.
Véase a continuación para más detalles sobre los ajustes del menú OSD.
7.1 Óptica
El menú LENS no es aplicable a esta cámara. No modifique los ajustes.
7.2 Obturador/Control automático de ganancia (AGC)
Utilice esta opción para controlar la cámara en lugares con poca o mucha luz
utilizando los ajustes automáticos de ganancia y obturador. Es posible elegir
entre el control automático y el control manual. El control automático de
ganancia es suficiente en la mayoría de los casos.
V. 01 – 13/06/2013 36 ©Velleman nv
Page 37

CAMCOLBUL28Z
Ajuste de fábrica: 24.
Observación: Ajuste esta función en un lugar con mucha luz.
LOW LUMINANCE: Utilice esta función para ajustar el brillo de
la imagen en condiciones de baja iluminación utilizando el control
automático de ganancia.
MODE: Seleccione AGC para utilizar el control automático de
ganancia. Seleccione OFF para desactivar el control
automático de ganancia.
BRIGHTNESS: Utilice esta función para ajustar el nivel de
brillo en el modo de baja luminosidad (low luminance).
Ajuste esta opción en la oscuridad (de noche).
Observación: La función AGC deteriora la relación señal-ruido,
ya que el ruido se amplifica conjuntamente con la señal.
MANUAL
Utilice el control manual de ganancia sólo en lugares donde la
luminosidad no sufra cambios durante todo el día. No obstante,
recomendamos utilizar el control automático de ganancia, incluso
bajo condiciones lumínicas suficientes.
Observación: La cámara no modifica el nivel de brillo en caso
de poca o mucha luz. Por tanto, es posible que la imagen sea
sobre- o subexpuesta.
MODE = SHUT + AGC: Véase a continuación para ajustar la
velocidad del obturador y el control automático de ganancia
(AGC).
SHUTTER: Introduzca una velocidad entre 1/50 y 1/10000.
Cuanto más lenta sea la velocidad del obturador, más
brillante será la imagen. Una velocidad del obturador más
rápida se utiliza para capturar objetos en movimiento rápido
con menos desenfoque del movimiento.
AGC: Ponga AGC entre 6 y 44.8 dB.
Pantalla: WHITE BAL
ATW
ATW = Auto Tracking White Balance (seguimiento automático
del balance de blancos). El balance de blancos se ajusta con el
fin de que un objeto "blanco" se muestre siempre como blanco.
La función ATW ajusta constantemente el balance de blancos a
medida que cambia la iluminación del entorno. En la mayoría
de los casos, los ajustes de fábrica son suficientes.
SPEED: La velocidad de corrección, es decir, la velocidad
con la que la cámara ajusta el balance de blancos. Cuanto
mayor sea el valor, más rápido será el ajuste.
7.3 Balance de blancos (AWB)
La función AWB está diseñada para fijar el balance de blancos correcto de
un solo entorno.
V. 01 – 13/06/2013 37 ©Velleman nv
Page 38

CAMCOLBUL28Z
Observación: Un ajuste demasiado rápido puede causar
oscilaciones en la temperatura de color.
DELAY CNT: Tiempo de control entre una corrección y la
siguiente. Cuanto menor sea el valor, más frecuentes serán
los controles y los ajustes.
ATW FRAME: Número de fotogramas necesarios para
activar el control. (valor recomendado: 1.0.)
ENVIRONMENT: Seleccione INDOOR para entornos
interiores y seleccione OUTDOOR para entornos donde la
escena tiene lugar en el exterior.
PUSH
Ajuste fijo.
USER1
USER2
El usuario realiza manualmente la operación de balance de
blancos con el ajuste rojo y azul. Puede ser útil cuando la
escena esté saturada con sólo un color de luz (p.ej. un bar) o
puede ayudar a daltónicos.
ANTI CR
Anti colour rolling. Es posible reprimir la variación de los colores
con esta función.
MANUAL
La cámara adquiere el valor de balance de blancos del objeto
más blanco que capta al activar la cámara. Por tanto, la cámara
se basa en este valor, a pesar de cambios en la temperatura
del color u otros factores. En caso de calidad de color
insuficiente, ajuste el balance entre rojo y azul manualmente
para mejorar la calidad de la imagen.
PUSH
LOCK
Utilice esta opción para ajustar el balance de blancos basado en
un objeto blanco. Debe enfocarse un objeto blanco de forma
que ocupe más del 70% de la pantalla del visor. Haga clic en la
tecla central. Ahora, la cámara utilizará el color de este objeto
blanco como base.
Pantalla: BACKLIGHT
OFF
La función BLC está desactivada.
BLC
Compensación de contraluz. La cámara compensa automáticamente
esta falta de luz haciendo el sujeto más visible.
HLC
Compensación de luces fuertes (highlight compensation). Utilice
esta función si existe una fuerte fuente de luz en un entorno con
baja iluminación. Por ejemplo: Una imagen puede ser
sobreexpuesta si alguien apunta una fuerte fuente de luz
directamente a la óptica. Gracias a la función HLC, la cámara
7.4 Backlight (Compensación de contraluz)
Un objeto iluminado a contraluz por una fuente de luz potente (p.ej.
ventana) normalmente aparecerá oscuro y menos visible que el resto de la
imagen. Si es el caso, la función BLC evita este problema y ofrece una
excelente compensación.
V. 01 – 13/06/2013 38 ©Velleman nv
Page 39

CAMCOLBUL28Z
enmascarará las áreas de brillo y hace que el área alrededor de la
fuente de luz quede visible.
Pantalla ATR
OFF
La función ATR está desactivada
ON
La función ATR está activada. Utilice los ajustes siguientes.
LUMINANCE: Seleccione este ajuste para modificar el brillo.
CONTRAST: Seleccione este ajuste para modificar el contraste.
Pantalla: MOTION DET
OFF
La función está desactivada
ON
La función está activada. Utilice los ajustes siguientes.
DETECT SENSE: Ajuste la sensibilidad del detector de movimientos.
Cuanto mayor sea el valor, mayor será la sensibilidad.
BLOCK DISP: Block display. Utilice esta opción para seleccionar las
zonas que quiera vigilar.
1. Ponga BLOCK DISP en la posición ENABLE y pulse la tecla
central. La rejilla aparece en la pantalla. Utilice los botones de
navegación para seleccionar la(s) zona(s) y haga clic en el botón
central para activar/desactivar la detección. Un movimiento sólo
7.5 Ajustar las imágenes
Los ajustes comunes son: MIRROR para invertir la imagen, BRIGHTNESS
(brillo), CONTRAST (contraste), SHARPNESS (nitidez), HUE (tono), y
GAIN (ganancia).
7.6 ATR
Utilice la función ATR (Adaptive Tone Reproduction/reproducción adaptable
de tonos) para equilibrar las áreas más claras y más oscuras de una escena
para así poder ver los objetos y los detalles (p.ej., una pared con una
ventana).
Observación: ATR puede introducir ruido en imágenes nocturnas.
7.7 Detección de movimientos
Esta función permite detectar movimiento durante el monitoreo en directo.
Puede seleccionar:
Block display: Seleccione las zonas que quiera vigilar dentro de la rejilla
de cuadrados. La imagen en la zona parpadeará si la cámara detecta un
movimiento.
Monitor area selection: Es posible seleccionar hasta 4 zonas sensibles al
movimiento. El borde exterior de la zona parpadeará si la cámara
detecta un movimiento.
V. 01 – 13/06/2013 39 ©Velleman nv
Page 40

CAMCOLBUL28Z
se detecta en zonas marcadas con la rejilla. No se detecta
ningún movimiento en zonas sin la rejilla. Si ha terminado,
mantenga pulsada la tecla central 3 segundos. Luego suelte.
2. Luego, ponga BLOCK DISP en la posición ON.
3. Para desactivar la función « block display », ponga BLOCK DISP
en OFF.
MONITOR AREA: Utilice esta función para seleccionar una zona
rectangular predefinida en la que se detectará movimientos. Es
posible seleccionar hasta 4 áreas.
1. Primero, ponga MONITOR AREA en ON.
2. Seleccione las 4 zonas que quiere fijar en AREA SEL
(1/4 … 4/4).
3. Utilice TOP, BOTTOM, LEFT, y RIGHT para determinar el borde
superior, el borde inferior, el borde izquierdo y el borde derecho.
Pantalla: PRIVACY
OFF
La función está desactivada
ON
La función está activada. Utilice los ajustes siguientes.
Seleccione las 8 áreas que quiere fijar en AREA SEL
(1/8 … 8/8).
Utilice TOP, BOTTOM, LEFT, y RIGHT para determinar el borde
superior, el borde inferior, el borde izquierdo y el borde derecho
de la zona.
COLOR: Para ajustar el color de la zona privada.
TRANSP: Para ajustar el nivel de transparencia de la zona
privada.
MOSAIC: Para enmascarar las zonas privadas con un efecto
mosaico. Utilice esta opción si quiere crear una zona privada con
detección de movimientos.
7.8 Enmascaramiento
Esta función permite enmascarar hasta ocho zonas. Por ejemplo, si está
prohibido grabar en una zona.
7.9 Día / noche
La cámara puede conmutar automáticamente entre el modo « color » (día,
condiciones de suficiente iluminación) y el modo « blanco y negro » (noche,
condiciones de escasa iluminación). Utilice esta función para controlar el
funcionamiento día/noche de la cámara.
Observación: Las imágenes en blanco y negro son más nítidas y incluyen
menos ruido a niveles de poca iluminación.
V. 01 – 13/06/2013 40 ©Velleman nv
Page 41

CAMCOLBUL28Z
Pantalla: DAY/NIGHT
COLOR
La cámara siempre tomará las imágenes en color.
B/W
La cámara siempre tomará las imágenes en blanco y negro.
BURST: Es posible activar/desactivar la función « burst »
para mejorar la calidad de imagen. Esta función envía una
señal de color al monitor en el modo B/N. Esto podría
disminuir la nitidez de la imagen.
AUTO
La cámara tomará las imágenes en color durante el día y en
blanco y negro de noche. Utilice los ajustes siguientes.
BURST: Es posible activar/desactivar la función « burst »
para mejorar la calidad de imagen. Esta función envía una
señal de color al monitor en el modo B/N. Esto podría
disminuir la nitidez de la imagen.
DELAY CNT: Temporizador de activación. Determina el
retardo antes de que la cámara conmuta del modo « día »
tal modo « noche » y viceversa. Utiliza esta función para
evitar una conmutación involuntaria entre ambos modos si
la intensidad luminosa sólo cambia brevemente.
DAYNIGHT: Para ajustar el umbral que determina la
conmutación del modo día al modo noche. Cuanto menor
sea el valor, mayor será la posibilidad de que la cámara
cambie de modo día a modo noche en caso de luz escasa.
Ajuste recomendado para interiores: 40-75. Ajuste
recomendado para exteriores: 150.
NIGHTDAY: Para ajustar el umbral que determina la
conmutación del modo noche al modo día. Cuanto mayor
sea el valor, más luz se necesitará para conmutar al modo
día. Ajuste recomendado para interiores: 50-85. Ajuste
recomendado para exteriores: 175.
Observaciones:
Asegúrese de que el ajuste DAYNIGHT siempre sea
menor que el ajuste NIGHTDAY.
Asegúrese de que haya una diferencia suficientemente
grande entre ambos valores. Si no fuera el caso, la cámara
conmutará demasiado a menudo entre el modo de día y el
modo de noche.
Pantalla: NR
OFF
La función de reducción de ruido está desactivada.
Y
Utilice sólo la reducción de ruido de luminancia (Y).
C
Utilice sólo la reducción de ruido de color (C).
7.10 Reducción del ruido
Utilice esta función para ajustar el modo de reducción de ruido.
V. 01 – 13/06/2013 41 ©Velleman nv
Page 42

CAMCOLBUL28Z
Y/C
Utilice la reducción de ruido de luminancia (Y) y color (C) (ajuste
recomendado).
Ajuste el Y LEVEL para la reducción de ruido de luminancia y el
nivel C LEVEL para la reducción de ruido del color.
Pantalla: CAMERA ID
OFF
La función está desactivada.
ON
Es posible introducir dos líneas de 26 caracteres para el nombre de
la cámara.
Observación: Asegúrese de que haya seleccionado CHR1.
Ponga el cursor en el renglón con las flechas de la
pantalla OSD.
Utilice las teclas de navegación de la palanca de control para
seleccionar los caracteres. Pulse la tecla central para confirmar y
para ir al siguiente carácter.
Seleccione CLR para borrar un carácter.
Seleccione POS para posicionar el nombre en el monitor. Utilice
las teclas de navegación de la palanca de control para mover el
texto hacia la posición deseada y pulse la tecla central para
confirmar.
resistencia al agua
IP66
elemento de imagen
CCD Sony 960H a color de 1/3"
número de píxeles
976(H) x 582(V) - PAL
resolución horizontal
700 líneas TV
DSP
Sony Effio
iluminación mínima
0.001 Lux – F2.0
LEDs IR
72
alcance IR máx.
40m
7.11 ID de la cámara
Utilice esta función para poner un nombre a la cámara. El nombre aparecerá
en el monitor. Puede determinar la posición del nombre en la pantalla.
7.12 Sync
Los ajustes de sincronización para la cámara. No es posible ajustar esta
función. La sincronización siempre es interna.
7.13 Idioma
Utilice esta función para modificar el idioma del menú OSD.
8. Especificaciones
V. 01 – 13/06/2013 42 ©Velleman nv
Page 43

CAMCOLBUL28Z
relación señal / ruido
> 52dB (AGC desactivado)
shutter electrónico
de 1/50 a 1/100000 seg.
óptica
f 6-22mm / F2.0
ángulo de visión
104° ~ 33°
Colour Rolling Suppress
sí
balance de blancos
automático
control automático de
ganancia (AGC)
sí
salida de vídeo
1.0Vpp compuesto, 75 ohm
alimentación
DC 12V (utilice PS1205R, no incl.)
consumo
125mA (LEDs IR apagados), 650mA (LEDs IR
encendidos)
temperatura de
funcionamiento
-10°C ~ +40°C
dimensiones
275 x 95 x 100mm
peso
1050g
Utilice este aparato sólo con los accesorios originales. Velleman NV
no será responsable de daños ni lesiones causados por un uso
(indebido) de este aparato.
Para más información sobre este producto y la versión más reciente
de este manual del usuario, visite nuestra página www.velleman.eu.
Se pueden modificar las especificaciones y el contenido de este
manual sin previo aviso.
© DERECHOS DE AUTOR
Velleman NV dispone de los derechos de autor para este manual del
usuario. Todos los derechos mundiales reservados. Está estrictamente
prohibido reproducir, traducir, copiar, editar y guardar este manual del
usuario o partes de ello sin previo permiso escrito del derecho habiente.
V. 01 – 13/06/2013 43 ©Velleman nv
Page 44

CAMCOLBUL28Z
Halten Sie Kinder und Unbefugte vom Gerät fern.
Stromschlaggefahr beim Öffnen der Kamera.
Öffnen Sie diese Kamera NICHT. Es gibt keine zu wartenden
Teile. Bestellen Sie eventuelle Ersatzteile bei Ihrem Fachhändler.
BEDIENUNGSANLEITUNG
1. Einführung
An alle Einwohner der Europäischen Union
Wichtige Umweltinformationen über dieses Produkt
Dieses Symbol auf dem Produkt oder der Verpackung zeigt an,
dass die Entsorgung dieses Produktes nach seinem Lebenszyklus
der Umwelt Schaden zufügen kann. Entsorgen Sie die Einheit (oder
verwendeten Batterien) nicht als unsortiertes Hausmüll; die Einheit
oder verwendeten Batterien müssen von einer spezialisierten Firma
zwecks Recycling entsorgt werden. Diese Einheit muss an den
Händler oder ein örtliches Recycling-Unternehmen retourniert werden.
Respektieren Sie die örtlichen Umweltvorschriften.
Falls Zweifel bestehen, wenden Sie sich für Entsorgungsrichtlinien
an Ihre örtliche Behörde.
Wir bedanken uns für den Kauf der CAMCOLBUL28Z! Lesen Sie diese
Bedienungsanleitung vor Inbetriebnahme sorgfältig durch. Überprüfen Sie,
ob Transportschäden vorliegen.
2. Sicherheitshinweise
3. Allgemeine Richtlinien
Siehe Velleman® Service- und Qualitätsgarantie am Ende dieser
Bedienungsanleitung.
Nehmen Sie das Gerät erst in Betrieb, nachdem Sie sich mit seinen
Funktionen vertraut gemacht haben.
Eigenmächtige Veränderungen sind aus Sicherheitsgründen verboten.
Bei Schäden verursacht durch eigenmächtige Änderungen erlischt der
Garantieanspruch.
Verwenden Sie das Gerät nur für Anwendungen beschrieben in dieser
Bedienungsanleitung sonst kann dies zu Schäden am Produkt führen und
erlischt der Garantieanspruch.
Bei Schäden, die durch Nichtbeachtung der Bedienungsanleitung
verursacht werden, erlischt der Garantieanspruch. Für daraus
resultierende Folgeschäden übernimmt der Hersteller keine Haftung.
V. 01 – 13/06/2013 44 ©Velleman nv
Page 45

CAMCOLBUL28Z
1
IR-LEDs
5
Halterung
2
Objektiv
6
Zoom- und Fokusregelung
3
Lichtsensor
7
Gelenk
4
Sonnenblende
Schützen Sie das Gerät vor extremen Temperaturen.
Vermeiden Sie Erschütterungen. Vermeiden Sie rohe Gewalt während
der Installation und Bedienung des Gerätes.
Installieren und verwenden Sie die Kamera nicht für illegale Praktiken
und beachten Sie die Intimsphäre aller.
4. Eigenschaften
wetterfest
mit S/W-Nachtsicht (IR-LED)
super hohe Auflösung
spezielle Funktionen über OSD
o Shutter/automatische Verstärkungsregelung (AGC)
o Weißabgleich
5. Umschreibung
Siehe Abbildungen, Seite 2 dieser Bedienungsanleitung.
6. Die Hardware installieren
Siehe Abbildungen, Seite 2 dieser Bedienungsanleitung.
Wählen Sie einen geeigneten Montageort für die Kamera und beachten
Sie Folgendes:
o Achten Sie bei der Wahl des Installationsortes darauf, dass das Gerät
keinen extremen Temperaturen und Vibrationen ausgesetzt werden.
o Montieren Sie die Kamera nie in der Nähe von elektromagnetischen
Feldern.
o Richten Sie die Kamera nie auf die Sonne oder andere reflektierende
Gegenstände.
Verwenden Sie die Halterung [5] um die Position der Montagelöcher zu
bestimmen. Bohren Sie die Löcher und befestigen Sie die Halterung [5]
mit Schrauben.
Befestigen Sie die Kamera mit der Schraube am Gelenk [7] an der
Halterung [5].
Verbinden Sie den 12 VDC-Eingang [B] mit dem 12VDC-Netzteil (nicht
mitgeliefert).
Verbinden Sie den BNC-Stecker [A] mit einem Monitor (nicht
mitgeliefert).
Richten Sie die Kamera auf die Zone, die Sie überwachen möchten, und
drehen Sie die Befestigungsschraube fest.
Regeln Sie das Zoom und den Fokus manuell über die Schrauben [6].
V. 01 – 13/06/2013 45 ©Velleman nv
Page 46

CAMCOLBUL28Z
Drücken Sie die mittlere Taste, um in das Menü zu
gelangen oder wählen Sie eine Option aus.
Drücken Sie die Oben/Unten-Taste, um nach oben
oder nach unten im Menü zu scrollen.
Drücken Sie die Links/Rechts-Taste, um die Menü-
Einstellungen zu ändern.
Display: SHUTTER/AGC
AUTO
SETUP
MODE = SHUT: Die Kamera passt das Bild an durch die
Verschlussgeschwindigkeit zu ändern. Sie können die Helligkeit
bei guten und schlechten Beleuchtungsverhältnissen einstellen.
HIGH LUMINANCE (hohe Lichtempfindlichkeit): Stellt bei
mittlerer und hoher Lichtintensität die automatische Belichtung
ein.
7. Einstellungen über das OSD-Menü
Mit dem kleinen Joystick im Kamerakabel können Sie die Einstellungen über
das On-Screen Display (OSD) regeln.
Das OSD-Menü:
NEXT/BACK: Wählen Sie diese Option aus und drücken Sie die mittlere
Taste, um zur nächsten/vorigen Seite der Optionen im Menü zu gehen.
RETURN: Wählen Sie diese Option aus und drücken Sie die mittlere
Taste, um zum vorigen Schritt im Menü zurückzukehren.
EXIT: Wählen Sie diese Option aus und drücken Sie die mittlere Taste,
um das OSD-Menü zu verlassen, ohne die Einstellungen zu speichern.
SAVE ALL: Wählen Sie diese Option aus und drücken Sie die mittlere
Taste, um alle Einstellungen zu speichern.
CAMERA RESET: Wählen Sie diese Option aus und drücken Sie die
mittlere Taste, um die Kamera auf Werkseinstellungen zurückzustellen.
Für mehr Informationen zu diesen Einstellungen, siehe unten.
7.1 LENS (Objektiv)
Die LENS-Funktion ist nicht auf diese Kamera anwendbar. Ändern Sie diese
Einstellungen nicht.
7.2 Shutter/Automatische Verstärkungsregelung (AGC)
Verwenden Sie diese Option, um zu kontrollieren wie die Kamera bei
schlechten und guten Beleuchtungsverhältnissen reagiert. Verwenden Sie
hierfür die Einstellungen für automatische Verstärkungsregelung und
Shutter. Wählen Sie zwischen automatischer oder manueller
Verstärkungsregelung. Die Automatische Verstärkungsregelung genügt
meistens.
V. 01 – 13/06/2013 46 ©Velleman nv
Page 47

CAMCOLBUL28Z
BRIGHTNESS: Legt den Wert für die hohe Helligkeit fest.
Standardwert: 24.
Bemerkung: Verwenden Sie diese Funktion bei sehr guten
Beleuchtungsverhältnissen.
LOW LUMINANCE: Verwenden Sie diese Funktion zum Regeln
der Bildhelligkeit wenn nicht genügend Licht vorhanden ist.
MODE: Stellen Sie auf AGC um die automatische
Verstärkungsregelung zu verwenden. Stellen Sie auf OFF
um die automatische Verstärkungsregelung auszuschalten.
BRIGHTNESS: Legt den Wert für die niedrige Helligkeit
fest.
Regeln Sie diese Einstellung wenn es sehr dunkel ist (nachts).
Bemerkung: Je größer die Verstärkung, desto mehr Rauschen
kommt ins Bild.
MANUAL
Verwenden Sie den manuellen Modus nur tagsüber in einer
Umgebung mit konstanten Lichtverhältnissen. Wir raten aber,
den automatischen Modus, sogar unter guten Umständen, zu
wählen.
Bemerkung: Wird die Szene heller oder dunklerer, dann regelt
die Kamera die Helligkeit nicht automatisch und kann es zu
einer Über- oder Unterbelichtung kommen.
MODE = SHUT + AGC: Stellen Sie die
Schuttergeschwindigkeit und die automatische
Verstärkungsregelung ein wie folgt:
SHUTTER: Stellen Sie die Verschlussgeschwindigkeit
zwischen 1/50 und 1/10000 ein. Je langsamer die
Shuttergeschwindigkeit, desto heller ist das Bild. Eine
höhere Verschlusszeit verhindert, dass sich schnell
bewegende Objekte unscharf werden.
AGC: stellen Sie die automatische Verstärkungsregelung
zwischen 6 und 44.8 dB ein.
Display: WHITE BAL
ATW
ATW = auto-tracking white balance (kontinuierlicher
Weißabgleich). Diese Funktion überwacht fortlaufend die
Farbtemperatur und passt den Weißabgleich entsprechend an.
Die Kamera wird so eingestellt, dass weiße Objekte immer
korrekt wiedergegeben werden. Für die meisten Szenen
genügen die Werkseinstellungen.
SPEED: Stellt die Erfassungsgeschwindigkeit der ATW-
Funktion ein. Je höher der Wert, desto schneller wird der
7.3 Weißabgleich
Mit dieser Funktion wird das Verfahren für den Weißabgleich festgelegt.
V. 01 – 13/06/2013 47 ©Velleman nv
Page 48

CAMCOLBUL28Z
Weißabgleich geregelt.
Bemerkung: eine zu schnelle Regelung kann zu
Farboszillationen führen.
DELAY CNT: Die Dauer bis zur nächsten Aktualisierung. Je
geringer der Wert, desto schneller werden die Einstellungen
aktualisiert.
ATW FRAME: Legt die Vergrößerung für den
Erfassungsrahmen fest. (Empfohlener Wert: 1.0.)
ENVIRONMENT: Wählen Sie INDOOR aus, um einen
Erfassungsrahmen für den Innenbereich festzulegen.
Wählen Sie OUTDOOR aus, um einen Erfassungsrahmen für
den Außenbereich festzulegen.
PUSH
Dies ist eine feste Einstellung.
USER1
USER2
Bei diesen feststehenden Weißabgleicheinstellungen können die
Rotverstärkung und die Blauverstärkung vom Benutzer
programmiert werden, was nur bei unveränderlicher
Beleuchtung nützlich ist (z.B. Bar). Diese Einstellungen können
auch für farbenblinde Benutzer nützlich sein.
ANTI CR
Anti-Farb-Roll-Modus. Diese Funktion unterdrückt
Farbabweichungen.
MANUAL
Schalten Sie die Kamera ein, dann wird der Weißabgleich
gemäß dem weißesten Gegenstand vorgenommen. Dieser Wert
wird dann verwendet, auch wenn die Farbtemperatur oder
andere Faktoren sich ändern. Genügt die Farbqualität nicht,
dann können Sie das Gleichgewicht zwischen rot und blau
manuell einstellen, um das Bild zu verbessern.
PUSH
LOCK
Um die optimale Höhe der Lichtstärke für die jeweilige
Umgebung zu definieren, richten Sie die Kamera auf ein weißes
Blatt Papier. Klicken Sie auf die mittlere Taste. Die
Weißabgleicheinstellung wird nun als feststehende Einstellung
übernommen.
Display: BACKLIGHT
OFF
Die BLC-Funktion ist ausgeschaltet
BLC
Gegenlichtkompensation. Diese Funktion wird verwendet, um dunkle
Bereiche des Bildes automatisch aufzuhellen.
HLC
High Light Compensation. Diese Funktion wird verwendet, um helle
Stellen, die die Kamera blenden könnten, zu schwärzen, und somit
eine deutliche Abbildung von Objekten zu ermöglichen. Zum
7.4 Gegenlichtkompensation (BLC)
Wenn starkes Hintergrundlicht herrscht (z.B. Fenster), können mit Hilfe der
Gegenlicht-Kompensation sowohl vom Objekt, als auch vom Hintergrund
klare Bilder erhalten werden.
V. 01 – 13/06/2013 48 ©Velleman nv
Page 49

CAMCOLBUL28Z
Beispiel: Ein Scheinwerfer, der direkt in die Kamera leuchtet, kann
zu Überbelichtung führen. Mit der HLC-Funktion werden zu helle
Bildbereiche ausgeblendet.
Display: ATR
OFF
Die ATR-Funktion ist ausgeschaltet
ON
Die ATR-Funktion ist eingeschaltet. Verwenden Sie nachfolgende
Einstellungen.
LUMINANCE: Verwenden Sie diese Einstellung, um die Brillanz
zu regeln.
CONTRAST: Verwenden Sie diese Einstellung, um den Kontrast
zu regeln.
Display: MOTION DET
OFF
Die Funktion ist ausgeschaltet.
ON
Die Funktion ist eingeschaltet. Verwenden Sie nachfolgende
Einstellungen.
DETECT SENSE: Stellen Sie die Empfindlichkeit der
Bewegungserkennung ein. Ein höherer Wert bedeutet mehr
Empfindlichkeit.
7.5 Bildeinstellung (Picture adjustment)
Dies sind die gängigen Einstellungen: MIRROR (Spiegeln), um das Bild zu
spiegeln, BRIGHTNESS (Helligkeit), CONTRAST (Kontrast), SHARPNESS
(Bildschärfe), HUE (Sättigung) und GAIN (Verstärkung).
7.6 ATR
Verwenden Sie die ATR-Funktion (Adaptive Farbton-Reproduktion) um den
Farbton in hellen und dunklen Bereichen zu verbessern (z.B eine Wand mit
Fenster).
Bemerkung: ATR kann bei Bilder, die nachts gemacht worden sind, ein
Bildrauschen verursachen.
7.7 Bewegungserkennung
Verwenden Sie diese Funktion für Bewegungserkennung während LiveÜberwachung.
Block display: Wählen Sie in einem Quadratraster die Bereiche, die Sie
überwachen möchten. Erkennt die Kamera eine Bewegung, in einem der
aktivierten Quadrate, dann blinkt das Bild in diesem Quadrat.
Monitor area selection: Es sind bis zu 4 separate
Bewegungsdetektorbereiche verfügbar. Erkennt die Kamera eine
Bewegung, dann blinkt der äußere Rand.
V. 01 – 13/06/2013 49 ©Velleman nv
Page 50

CAMCOLBUL28Z
BLOCK DISP: Blockanzeige. Verwenden Sie diese Funktion, um die
Bereiche, die Sie überwachen möchten auszuwählen.
1. Stellen Sie BLOCK DISP auf ENABLE und drücken Sie die
mittlere Taste. Das Raster erscheint im Display. Verwenden Sie
die Navigationstasten, um die Bereiche auszuwählen und klicken
Sie auf die mittlere Taste, um die Bewegungserkennung zu
aktivieren/desaktivieren. Bewegung wird nur detektiert wenn das
Raster eingeschaltet ist. Es gibt keine Bewegungserfassung ohne
Raster. Halten Sie die mittlere Taste 3 Sekunden gedrückt und
lassen Sie danach los.
2. Stellen Sie BLOCK DISP dann auf ON.
3. Um die Blockanzeige auszuschalten, stellen Sie BLOCK DISP auf
OFF.
MONITOR AREA: Verwenden Sie diese Funktion, um einen
vorprogrammierten rechteckigen Bereich, den Sie überwachen
möchten, auszuwählen.
Es gibt bis zu 4 Bewegungsdetektorbereiche.
1. Stellen Sie MONITOR AREA auf ON.
2. Wählen Sie die 4 Bereiche, die Sie in AREA SEL festlegen
möchten, aus (1/4 … 4/4).
3. Verwenden Sie TOP, BOTTOM, LEFT, und RIGHT um die obere,
untere, linke und rechte Kante einzustellen.
Display: PRIVACY
OFF
Die Funktion ist ausgeschaltet
ON
Die Funktion ist eingeschaltet. Verwenden Sie nachfolgende
Einstellungen.
Wählen Sie die 8 Bereiche, die Sie in AREA SEL festlegen
möchten, aus (1/8 … 8/8).
Verwenden Sie TOP, BOTTOM, LEFT, und RIGHT um die obere,
untere, linke und rechte Kante einzustellen.
COLOR: Zum Einstellen der Farbe der Maske.
TRANSP: Zum Einstellen des Transparenzwert der Maske.
MOSAIC: Zum Einstellen des Mosaikeffekts einer Maske. Dies
kann nützlich sein wenn Sie einen Bereich maskieren möchten,
aber doch noch die Bewegungserkennung haben möchten.
7.8 Geschützte Bereiche
Verwenden Sie diese Funktion, um bestimmte Bereiche des Bildes zu
maskieren. Zum Beispiel: die Anzeige eines öffentlichen Bereichs kann
illegal sein. Es sind bis zu 8 Bereichsmasken verfügbar.
V. 01 – 13/06/2013 50 ©Velleman nv
Page 51

CAMCOLBUL28Z
Display: DAY/NIGHT
COLOR
Die Kamera macht immer Farbbilder.
B/W
Die Kamera macht immer Schwarz/Weißbilder.
BURST: Um die Bildqualität zu erhöhen, können Sie die
Burst-Funktion ein- oder ausschalten. Diese sendet ein
Farbsignal zum Monitor in S/W-Modus. Dies könnte die
Bildschärfe verringern.
AUTO
Die Kamera schaltet je nach Lichteinfall zwischen Farbe und
Schwarz/Weiß um. Verwenden Sie nachfolgende Einstellungen.
BURST: Um die Bildqualität zu erhöhen, können Sie die
Burst-Funktion ein- oder ausschalten. Diese sendet ein
Farbsignal zum Monitor in S/W-Modus. Dies könnte die
Bildschärfe verringern.
DELAY CNT: Verzögerungszeit. Bestimmen Sie die Zeitdauer
zwischen dem Umschalten von Tag- auf Nachtmodus oder
umgekehrt. Dies verhindert ein unbeabsichtigtes Hin-und-herSchalten zwischen Tag- und Nachtmodus wenn die
Lichtverhältnisse sich nur kurz ändern.
DAYNIGHT: Zum Einstellen des Schwellenwerts, der die
Umschaltung von Tag auf Nacht bestimmt. Ein geringerer
Wert führt dazu, dass die Kamera bei geringerer Helligkeit
von Tag auf Nacht umschaltet. Empfohlener Wert im
Innenbereich: 40-75. Empfohlener Wert im Außenbereich:
150.
NIGHTDAY: Zum Einstellen des Schwellenwerts, der die
Umschaltung von Nacht auf Tag bestimmt. Ein höherer Wert
führt dazu, dass die Kamera bei höherer Helligkeit von Nacht
auf Tag umschaltet. Empfohlener Wert im Innenbereich: 50-
85. Empfohlener Wert im Außenbereich: 175.
Bemerkungen:
Beachten Sie, dass der DAYNIGHT-Modus niedriger als die
NIGHTDAY-Einstellung ist.
Beachten Sie, dass die Differenz zwischen den beiden
Einstellungen groß genug ist. Ist dies nicht der Fall, so
schaltet die Kamera zu häufig zwischen Tag- und Nachtmodus
hin und her.
7.9 Tag / Nacht
Die Kamera kann automatisch zwischen Farbbildern (tagsüber) und
Schwarz/Weißbildern (nachts) schalten. Verwenden Sie diese Funktion, um
den Tag/Nachtbetrieb zu überprüfen.
Bemerkung: Schwarz/Weißbilder sind viel heller und haben weniger
Bildrauschen bei geringerer Helligkeit.
V. 01 – 13/06/2013 51 ©Velleman nv
Page 52

CAMCOLBUL28Z
Display: NR
OFF
Die Funktion ist ausgeschaltet.
Y
Verwenden Sie nur die Rauschunterdrückungsstärke für das
Helligkeitssignal (Y).
C
Verwenden Sie nur die Rauschunterdrückungsstärke für das
Farbwertsignal (C)
Y/C
Verwenden Sie die Rauschunterdrückungsstärke für das
Helligkeitssignal (Y) und das Farbwertsignal (C) (empfohlene
Einstellung).
Stellen Sie den Y-PEGEL und den C-PEGEL ein.
Display: CAMERA ID
OFF
Der Name wird nicht angezeigt.
ON
Für den Kameranamen können zwei Zeilen mit 26 Zeichen
eingegeben werden.
Bemerkung: Beachten Sie, dass CHR1 ausgewählt ist.
Stellen Sie den Cursor über die Ikonen im OSD-Display
auf der Zeile.
Verwenden Sie die Navigationstasten des Joysticks, um die
Zeichen für den Namen auszuwählen. Drücken Sie die mittlere
Taste, um zu bestätigen und zum nächsten Zeichen zu gehen.
Wählen Sie CLR aus, um das Zeichen zu löschen.
Wählen Sie POS aus, um den Namen zu positionieren.
Verwenden Sie die Navigationstasten des Joysticks, um den Text
in die gewünschte Position zu stellen und drücken Sie die
mittlere Taste, um zu bestätigen.
7.10 Rauschunterdrückung
Verwenden Sie diese Funktion zum Einstellen der Rauschunterdrückung.
7.11 Kamera-ID
Verwenden Sie diese Funktion, um der Kamera einen Namen zuzuweisen.
Der Name wird im Monitor angezeigt. Die Position des Textes auf dem
Bildschirm kann ausgewählt werden.
7.12 Sync
Dies ist die Synchronisation-Einstellung der Kamera. Diese Funktion kann
nicht eingestellt werden. Synchronisation ist immer intern.
7.13 Sprache
Verwenden Sie diese Funktion, um die OSD-Menüsprache einzustellen.
V. 01 – 13/06/2013 52 ©Velleman nv
Page 53

CAMCOLBUL28Z
Wasserfestigkeit
IP66
Aufnahme-Element
1/3" Sony 960H CCD-Farbkamera
Pixelanzahl
976(H) x 582(V) - PAL
horizontale Auflösung
700 TV-Zeilen
DSP
Sony Effio
minimale Lichtstärke
0.001 Lux – F2.0
IR-LEDs
72
max. IR-Bereich
40m
Signal/Rauschabstand
> 52dB (AGC aus)
elektronischer Verschluss
von 1/50 bis 1/100.000 Sek.
Objektiv
f 6-22mm / F2.0
Objektivwinkel
104° ~ 33°
Colour Rolling Suppresion
ja
Weißabgleich
automatisch
automatische
Verstärkungsregelung (AGC)
ja
Video-Ausgang
1.0 Vpp Komposite, 75 Ohm
Stromversorgung
DC 12V (verwenden Sie PS1205R, nicht
mitgeliefert.)
Stromverbrauch
125mA (IR-LEDs aus), 650mA (IR-LEDs ein)
Betriebstemperatur
-10°C ~ +40°C
Abmessungen
275 x 95 x 100mm
Gewicht
1050g
8. Technische Daten
Verwenden Sie dieses Gerät nur mit originellen Zubehörteilen.
Velleman NV übernimmt keine Haftung für Schaden oder
Verletzungen bei (falscher) Anwendung dieses Gerätes.
Für mehr Informationen zu diesem Produkt und die neueste Version
dieser Bedienungsanleitung, siehe www.velleman.eu.
Alle Änderungen ohne vorherige Ankündigung vorbehalten.
© URHEBERRECHT
Velleman NV besitzt das Urheberrecht für diese
Bedienungsanleitung. Alle weltweiten Rechte vorbehalten. Ohne vorherige
schriftliche Genehmigung des Urhebers ist es nicht gestattet, diese
Bedienungsanleitung ganz oder in Teilen zu reproduzieren, zu kopieren, zu
übersetzen, zu bearbeiten oder zu speichern.
V. 01 – 13/06/2013 53 ©Velleman nv
Page 54

Velleman® Service and Quality Warranty
Since its foundation in 1972, Velleman® acquired
extensive experience in the electronics world and currently
distributes its products in over 85 countries.
All our products fulfil strict quality requirements and legal
stipulations in the EU. In order to ensure the quality, our
products regularly go through an extra quality check, both
by an internal quality department and by specialized
external organisations. If, all precautionary measures
notwithstanding, problems should occur, please make
appeal to our warranty (see guarantee conditions).
General Warranty Conditions Concerning Consumer
Products (for EU):
• All consumer products are subject to a 24-month
warranty on production flaws and defective material as
from the original date of purchase.
• Velleman® can decide to replace an article with an
equivalent article, or to refund the retail value totally or
partially when the complaint is valid and a free repair or
replacement of the article is impossible, or if the expenses
are out of proportion.
You will be delivered a replacing article or a refund at the
value of 100% of the purchase price in case of a flaw
occurred in the first year after the date of purchase and
delivery, or a replacing article at 50% of the purchase
price or a refund at the value of 50% of the retail value in
case of a flaw occurred in the second year after the date
of purchase and delivery.
• Not covered by warranty:
- all direct or indirect damage caused after delivery to the
article (e.g. by oxidation, shocks, falls, dust, dirt,
humidity...), and by the article, as well as its contents (e.g.
data loss), compensation for loss of profits;
- consumable goods, parts or accessories that are subject
to an aging process during normal use, such as batteries
(rechargeable, non-rechargeable, built-in or replaceable),
lamps, rubber parts, drive belts... (unlimited list);
- flaws resulting from fire, water damage, lightning,
accident, natural disaster, etc.…;
- flaws caused deliberately, negligently or resulting from
improper handling, negligent maintenance, abusive use or
use contrary to the manufacturer’s instructions;
- damage caused by a commercial, professional or
collective use of the article (the warranty validity will be
reduced to six (6) months when the article is used
professionally);
- damage resulting from an inappropriate packing and
shipping of the article;
- all damage caused by modification, repair or alteration
performed by a third party without written permission by
Velleman®.
• Articles to be repaired must be delivered to your
Velleman® dealer, solidly packed (preferably in the
original packaging), and be completed with the original
receipt of purchase and a clear flaw description.
• Hint: In order to save on cost and time, please reread the
manual and check if the flaw is caused by obvious causes
prior to presenting the article for repair. Note that returning
a non-defective article can also involve handling costs.
• Repairs occurring after warranty expiration are subject to
shipping costs.
• The above conditions are without prejudice to all
commercial warranties.
The above enumeration is subject to modification
according to the article (see article’s manual).
Velleman® service- en kwaliteitsgarantie
Velleman® heeft sinds zijn oprichting in 1972 een ruime
ervaring opgebouwd in de elektronicawereld en verdeelt
op dit moment producten in meer dan 85 landen. Al onze
producten beantwoorden aan strikte kwaliteitseisen en
aan de wettelijke bepalingen geldig in de EU. Om de
kwaliteit te waarborgen, ondergaan onze producten op
regelmatige tijdstippen een extra kwaliteitscontrole, zowel
door onze eigen kwaliteitsafdeling als door externe
gespecialiseerde organisaties. Mocht er ondanks deze
voorzorgen toch een probleem optreden, dan kunt u
steeds een beroep doen op onze waarborg (zie
waarborgvoorwaarden).
Algemene waarborgvoorwaarden
consumentengoederen (voor Europese Unie):
• Op alle consumentengoederen geldt een garantieperiode
van 24 maanden op productie- en materiaalfouten en dit
vanaf de oorspronkelijke aankoopdatum.
• Indien de klacht gegrond is en een gratis reparatie of
vervanging van een artikel onmogelijk is of indien de
kosten hiervoor buiten verhouding zijn, kan Velleman®
beslissen het desbetreffende artikel te vervangen door
een gelijkwaardig artikel of de aankoopsom van het artikel
gedeeltelijk of volledig terug te betalen. In dat geval krijgt
u een vervangend product of terugbetaling ter waarde van
100% van de aankoopsom bij ontdekking van een gebrek
tot één jaar na aankoop en levering, of een vervangend
product tegen 50% van de kostprijs of terugbetaling van
50 % bij ontdekking na één jaar tot 2 jaar.
• Valt niet onder waarborg:
- alle rechtstreekse of onrechtstreekse schade na de
levering veroorzaakt aan het toestel (bv. door oxidatie,
schokken, val, stof, vuil, vocht...), en door het toestel,
alsook zijn inhoud (bv. verlies van data), vergoeding voor
eventuele winstderving.
- verbruiksgoederen, onderdelen of hulpstukken die
onderhevig zijn aan veroudering door normaal gebruik
zoals bv. batterijen (zowel oplaadbare als niet-oplaadbare,
ingebouwd of vervangbaar), lampen, rubberen
onderdelen, aandrijfriemen... (onbeperkte lijst).
- defecten ten gevolge van brand, waterschade, bliksem,
ongevallen, natuurrampen, enz.
- defecten veroorzaakt door opzet, nalatigheid of door een
onoordeelkundige behandeling, slecht onderhoud of
abnormaal gebruik of gebruik van het toestel strijdig met
de voorschriften van de fabrikant.
- schade ten gevolge van een commercieel, professioneel
of collectief gebruik van het apparaat (bij professioneel
gebruik wordt de garantieperiode herleid tot 6 maand).
- schade veroorzaakt door onvoldoende bescherming bij
transport van het apparaat.
- alle schade door wijzigingen, reparaties of modificaties
uitgevoerd door derden zonder toestemming van
Velleman®.
• Toestellen dienen ter reparatie aangeboden te worden
bij uw Velleman®-verdeler. Het toestel dient vergezeld te
zijn van het oorspronkelijke aankoopbewijs. Zorg voor een
Page 55

degelijke verpakking (bij voorkeur de originele verpakking)
en voeg een duidelijke foutomschrijving bij.
• Tip: alvorens het toestel voor reparatie aan te bieden,
kijk nog eens na of er geen voor de hand liggende reden
is waarom het toestel niet naar behoren werkt (zie
handleiding). Op deze wijze kunt u kosten en tijd
besparen. Denk eraan dat er ook voor niet-defecte
toestellen een kost voor controle aangerekend kan
worden.
• Bij reparaties buiten de waarborgperiode zullen
transportkosten aangerekend worden.
• Elke commerciële garantie laat deze rechten
onverminderd.
Bovenstaande opsomming kan eventueel aangepast
worden naargelang de aard van het product (zie
handleiding van het betreffende product).
Garantie de service et de qualité Velleman®
Depuis 1972, Velleman® a gagné une vaste expérience
dans le secteur de l’électronique et est actuellement
distributeur dans plus de 85 pays.
Tous nos produits répondent à des exigences de qualité
rigoureuses et à des dispositions légales en vigueur dans
l’UE. Afin de garantir la qualité, nous soumettons
régulièrement nos produits à des contrôles de qualité
supplémentaires, tant par notre propre service qualité que
par un service qualité externe. Dans le cas improbable
d’un défaut malgré toutes les précautions, il est possible
d’invoquer notre garantie (voir les conditions de garantie).
Conditions générales concernant la garantie sur les
produits grand public (pour l’UE) :
• tout produit grand public est garanti 24 mois contre tout
vice de production ou de matériaux à dater du jour
d’acquisition effective ;
• si la plainte est justifiée et que la réparation ou le
remplacement d’un article est jugé impossible, ou lorsque
les coûts s’avèrent disproportionnés, Velleman®
s’autorise à remplacer ledit article par un article équivalent
ou à rembourser la totalité ou une partie du prix d’achat.
Le cas échéant, il vous sera consenti un article de
remplacement ou le remboursement complet du prix
d’achat lors d’un défaut dans un délai de 1 an après
l’achat et la livraison, ou un article de remplacement
moyennant 50% du prix d’achat ou le remboursement de
50% du prix d’achat lors d’un défaut après 1 à 2 ans.
• sont par conséquent exclus :
- tout dommage direct ou indirect survenu à l’article après
livraison (p.ex. dommage lié à l’oxydation, choc, chute,
poussière, sable, impureté…) et provoqué par l’appareil,
ainsi que son contenu (p.ex. perte de données) et une
indemnisation éventuelle pour perte de revenus ;
- toute pièce ou accessoire nécessitant un remplacement
causé par un usage normal comme p.ex. piles
(rechargeables comme non rechargeables, intégrées ou
remplaçables), ampoules, pièces en caoutchouc,
courroies… (liste illimitée) ;
- tout dommage qui résulte d’un incendie, de la foudre,
d’un accident, d’une catastrophe naturelle, etc. ;
- out dommage provoqué par une négligence, volontaire
ou non, une utilisation ou un entretien incorrect, ou une
utilisation de l’appareil contraire aux prescriptions du
fabricant ;
- tout dommage à cause d’une utilisation commerciale,
professionnelle ou collective de l’appareil (la période de
garantie sera réduite à 6 mois lors d’une utilisation
professionnelle) ;
- tout dommage à l’appareil qui résulte d’une utilisation
incorrecte ou différente que celle pour laquelle il a été
initialement prévu comme décrit dans la notice ;
- tout dommage engendré par un retour de l’appareil
emballé dans un conditionnement non ou insuffisamment
protégé.
- toute réparation ou modification effectuée par une tierce
personne sans l’autorisation explicite de SA Velleman® ; frais de transport de et vers Velleman® si l’appareil n’est
plus couvert sous la garantie.
• toute réparation sera fournie par l’endroit de l’achat.
L’appareil doit nécessairement être accompagné du bon
d’achat d’origine et être dûment conditionné (de
préférence dans l’emballage d’origine avec mention du
défaut) ;
• tuyau : il est conseillé de consulter la notice et de
contrôler câbles, piles, etc. avant de retourner l’appareil.
Un appareil retourné jugé défectueux qui s’avère en bon
état de marche pourra faire l’objet d’une note de frais à
charge du consommateur ;
• une réparation effectuée en-dehors de la période de
garantie fera l’objet de frais de transport ;
• toute garantie commerciale ne porte pas atteinte aux
conditions susmentionnées.
La liste susmentionnée peut être sujette à une
complémentation selon le type de l’article et être
mentionnée dans la notice d’emploi.
Garantía de servicio y calidad Velleman®
Desde su fundación en 1972 Velleman® ha adquirido una
amplia experiencia como distribuidor en el sector de la
electrónica en más de 85 países. Todos nuestros
productos responden a normas de calidad rigurosas y
disposiciones legales vigentes en la UE. Para garantizar
la calidad, sometemos nuestros productos regularmente a
controles de calidad adicionales, tanto a través de nuestro
propio servicio de calidad como de un servicio de calidad
externo. En el caso improbable de que surgieran
problemas a pesar de todas las precauciones, es posible
recurrir a nuestra garantía (véase las condiciones de
garantía).
Condiciones generales referentes a la garantía sobre
productos de venta al público (para la Unión
Europea):
• Todos los productos de venta al público tienen un
período de garantía de 24 meses contra errores de
producción o errores en materiales desde la adquisición
original;
• Si la queja está fundada y si la reparación o sustitución
de un artículo no es posible, o si los gastos son
desproporcionados, Velleman® autoriza reemplazar el
artículo por un artículo equivalente o reembolsar la
totalidad o una parte del precio de compra. En este caso,
usted recibirá un artículo de recambio o el reembolso
completo del precio de compra si encuentra algún fallo
hasta un año después de la compra y entrega, o un
artículo de recambio al 50% del precio de compra o el
reembolso del 50% del precio de compra si encuentra un
Page 56

fallo después de 1 año y hasta los 2 años después de la
compra y entrega.
Por consiguiente, están excluidos entre otras cosas:
- todos los daños causados directa o indirectamente al
aparato (p.ej. por oxidación, choques, caída,...) y a su
contenido (p.ej. pérdida de datos) después de la entrega y
causados por el aparato, y cualquier indemnización por
posible pérdida de ganancias;
- partes o accesorios, que estén expuestos al desgaste
causado por un uso normal, como por ejemplo baterías
(tanto recargables como no recargables, incorporadas o
reemplazables), bombillas, partes de goma, etc. (lista
ilimitada);
- defectos causados por un incendio, daños causados por
el agua, rayos, accidentes, catástrofes naturales, etc.;
- defectos causados a conciencia, descuido o por malos
tratos, un mantenimiento inapropiado o un uso anormal
del aparato contrario a las instrucciones del fabricante;
- daños causados por un uso comercial, profesional o
colectivo del aparato (el período de garantía se reducirá a
6 meses con uso profesional);
- daños causados por un uso incorrecto o un uso ajeno al
que está previsto el producto inicialmente como está
descrito en el manual del usuario;
- daños causados por una protección insuficiente al
transportar el aparato.
- daños causados por reparaciones o modificaciones
efectuadas por una tercera persona sin la autorización
explícita de Velleman®;
- se calcula gastos de transporte de y a Velleman® si el
aparato ya no está cubierto por la garantía.
• Cualquier artículo que tenga que ser reparado tendrá
que ser devuelto a su distribuidor Velleman®. Devuelva el
aparato con la factura de compra original y transpórtelo en
un embalaje sólido (preferentemente el embalaje original).
Incluya también una buena descripción del fallo;
• Consejo: Lea el manual del usuario y controle los cables,
las pilas, etc. antes de devolver el aparato. Si no se
encuentra un defecto en el artículo los gastos podrían
correr a cargo del cliente;
• Los gastos de transporte correrán a carga del cliente
para una reparación efectuada fuera del período de
garantía.
• Cualquier gesto comercial no disminuye estos derechos.
La lista previamente mencionada puede ser adaptada
según el tipo de artículo (véase el manual del usuario
del artículo en cuestión).
Velleman® Service- und Qualitätsgarantie
Seit der Gründung in 1972 hat Velleman® sehr viel
Erfahrung als Verteiler in der Elektronikwelt in über 85
Ländern aufgebaut.
Alle Produkte entsprechen den strengen
Qualitätsforderungen und gesetzlichen Anforderungen in
der EU. Um die Qualität zu gewährleisten werden unsere
Produkte regelmäßig einer zusätzlichen Qualitätskontrolle
unterworfen, sowohl von unserer eigenen
Qualitätsabteilung als auch von externen spezialisierten
Organisationen. Sollten, trotz aller Vorsichtsmaßnahmen,
Probleme auftreten, nehmen Sie bitte die Garantie in
Anspruch (siehe Garantiebedingungen).
Allgemeine Garantiebedingungen in Bezug auf
Konsumgüter (für die Europäische Union):
• Alle Produkte haben für Material- oder Herstellungsfehler
eine Garantieperiode von 24 Monaten ab Verkaufsdatum.
• Wenn die Klage berechtigt ist und falls eine kostenlose
Reparatur oder ein Austausch des Gerätes unmöglich ist,
oder wenn die Kosten dafür unverhältnismäßig sind, kann
Velleman® sich darüber entscheiden, dieses Produkt
durch ein gleiches Produkt zu ersetzen oder die
Kaufsumme ganz oder teilweise zurückzuzahlen. In
diesem Fall erhalten Sie ein Ersatzprodukt oder eine
Rückzahlung im Werte von 100% der Kaufsumme im Falle
eines Defektes bis zu 1 Jahr nach Kauf oder Lieferung,
oder Sie bekommen ein Ersatzprodukt im Werte von 50%
der Kaufsumme oder eine Rückzahlung im Werte von 50
% im Falle eines Defektes im zweiten Jahr.
• Von der Garantie ausgeschlossen sind:
- alle direkten oder indirekten Schäden, die nach Lieferung
am Gerät und durch das Gerät verursacht werden (z.B.
Oxidation, Stöße, Fall, Staub, Schmutz, Feuchtigkeit, ...),
sowie auch der Inhalt (z.B. Datenverlust), Entschädigung
für eventuellen Gewinnausfall.
- Verbrauchsgüter, Teile oder Zubehörteile, die durch
normalen Gebrauch dem Verschleiß ausgesetzt sind, wie
z.B. Batterien (nicht nur aufladbare, sondern auch nicht
aufladbare, eingebaute oder ersetzbare), Lampen,
Gummiteile, Treibriemen, usw. (unbeschränkte Liste).
- Schäden verursacht durch Brandschaden,
Wasserschaden, Blitz, Unfälle, Naturkatastrophen, usw.
- Schäden verursacht durch absichtliche, nachlässige oder
unsachgemäße Anwendung, schlechte Wartung,
zweckentfremdete Anwendung oder Nichtbeachtung von
Benutzerhinweisen in der Bedienungsanleitung.
- Schäden infolge einer kommerziellen, professionellen
oder kollektiven Anwendung des Gerätes (bei
gewerblicher Anwendung wird die Garantieperiode auf 6
Monate zurückgeführt).
- Schäden verursacht durch eine unsachgemäße
Verpackung und unsachgemäßen Transport des Gerätes.
- alle Schäden verursacht durch unautorisierte
Änderungen, Reparaturen oder Modifikationen, die von
einem Dritten ohne Erlaubnis von Velleman®
vorgenommen werden.
• Im Fall einer Reparatur, wenden Sie sich an Ihren
Velleman®-Verteiler. Legen Sie das Produkt
ordnungsgemäß verpackt (vorzugsweise die
Originalverpackung) und mit dem Original-Kaufbeleg vor.
Fügen Sie eine deutliche Fehlerbeschreibung hinzu.
• Hinweis: Um Kosten und Zeit zu sparen, lesen Sie die
Bedienungsanleitung nochmals und überprüfen Sie, ob es
keinen auf de Hand liegenden Grund gibt, ehe Sie das
Gerät zur Reparatur zurückschicken. Stellt sich bei der
Überprüfung des Gerätes heraus, dass kein
Geräteschaden vorliegt, könnte dem Kunden eine
Untersuchungspauschale berechnet.
• Für Reparaturen nach Ablauf der Garantiefrist werden
Transportkosten berechnet.
• Jede kommerzielle Garantie lässt diese Rechte
unberührt.
Die oben stehende Aufzählung kann eventuell
angepasst werden gemäß der Art des Produktes
(siehe Bedienungsanleitung des Gerätes).
Legen Heirweg 33, 9890 Gavere, Belgium
Made in PRC
Imported by Velleman nv
www.velleman.eu
 Loading...