

Page 1
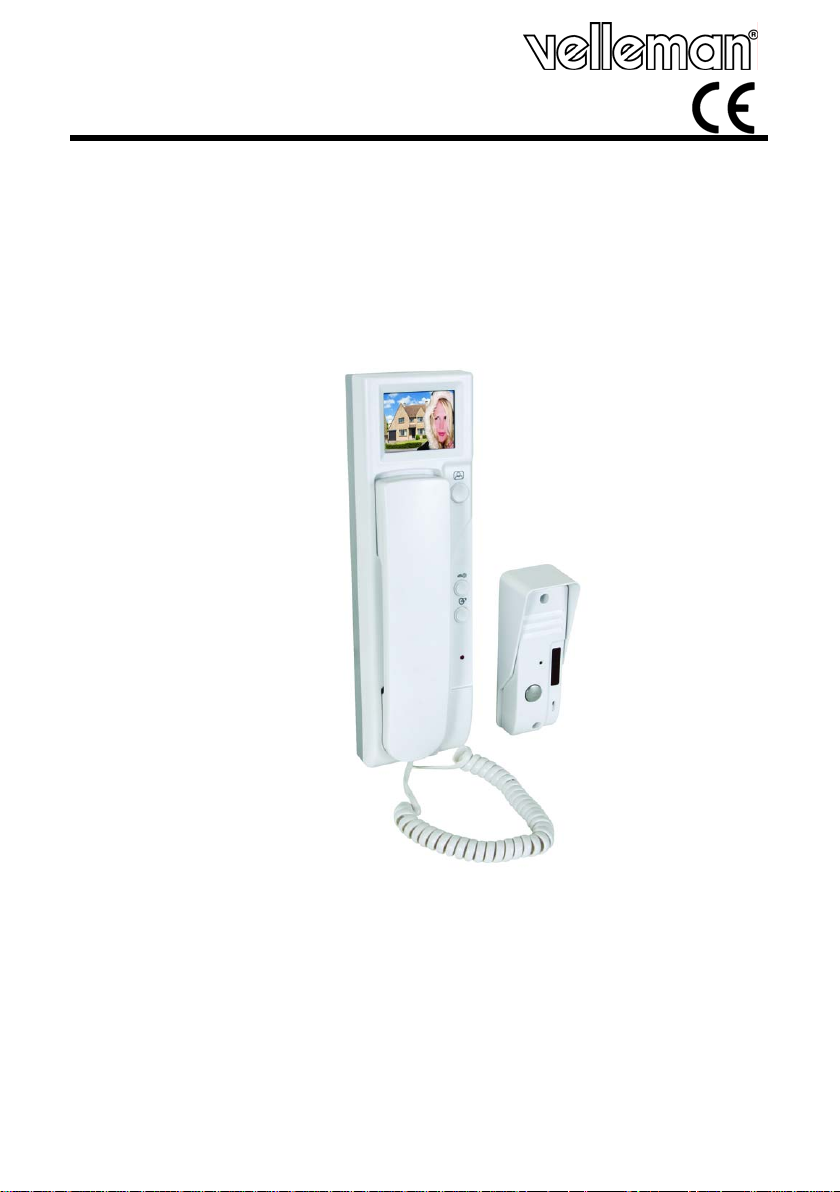
CAMSET20
COLOUR VIDEO INTERCOM DOORPHONE
KLEUREN VIDEO INTERCOMSYSTEEM
INTERPHONE VIDÉO COULEUR
VIDEO-TÜRSPRECHANLAGE – FARBE
VIDEOPORTERO – COLOR
USER MANUAL 3
GEBRUIKERSHANDLEIDING 6
NOTICE D’EMPLOI 9
MANUAL DEL USUARIO 12
BEDIENUNGSANLEITUNG 15
Page 2

CAMSET20
01 (19/11/2008) 2 Velleman
Figure 1
®
Page 3

CAMSET20
User manual
1. Introduction
To all residents of the European Union
Important environmental information about this product
Respect the local environmental rules.
If in doubt, contact your local waste disposal authorities.
Thank you for choosing Velleman! Please read the manual thoroughly before bringing
this device into service. If the device was damaged in transit, don't install or use it and
contact your dealer.
2. Safety Instructions
• Damage caused by disregard of certain guidelines in this manual is not covered by
the warranty and the dealer will not accept responsibility for any ensuing defects or
problems.
• Note that damage caused by user modifications to the device is not covered by the
warranty.
3. General Guidelines
• Protect this device from shocks and abuse. Avoid brute force when operating the
device.
• Protect the device against extreme heat and dust.
• Familiarise yourself with the functions of the device before actually using it.
• All modifications of the device are forbidden for safety reasons.
• Only use the device for its intended purpose. Using the device in an unauthorised
way will void the warranty.
• Unplug the device from the mains when it is not used for a long time.
4. Features
• camera with IR LEDs for night vision
• two-way audio intercom
• 2.36" TFT LCD colour display
• door can be unlocked through the monitor
5. Overview
Refer to the drawings on page 2 of this manual.
This symbol on the device or the package indicates that disposal of the
device after its lifecycle could harm the environment.
Do not dispose of the unit (or batteries) as unsorted municipal waste; it
should be taken to a specialized company for recycling.
This device should be returned to your distributor or to a local recycling
service.
Keep the device away from children and unauthorized users.
Keep this device away from rain, moisture, splashing and dripping liquids.
DO NOT disassemble or open the cover. No user-serviceable parts inside.
Refer to an authorized dealer for service and/or spare parts.
01 (19/11/2008) 3 Velleman
®
Page 4

CAMSET20
display/ handset E status LED
A LCD display F luminance adjustment button
B display ON/OFF button G contrast adjustment button
C door unlock button H hue adjustment button
D warning button I volume control switch
camera/doorbell
J speaker M doorbell button
K camera N microphone
L IR LEDs O light sensor
wiring
1 yellow video 3 red power
2 black ground 4 white audio
6. Installation
Camera/doorbell
• Choose a location for the camera/doorbell. Refer to the drawing on page 2 of this
manual for the detection range of the camera (left drawing: side view, right
drawing top view). Avoid pointing the camera towards direct sunlight or bright
surfaces.
• The camera/doorbell unit has two connection cables, a 4-wire monitor cable to
connect the camera/doorbell with the display/handset and a 2-wire cable which
can be used to trigger an automatic lock release mechanism (not incl.).
Note:
the maximum load of the automatic release contact is 1K.
• Make a hole in the wall and guide the cable coming from the monitor (and
automatic release lock when applicable) through.
• Place the sunshield over that hole and mark the mounting hole locations.
• Drill two mounting holes (Ø6mm) and insert the included screw anchors.
• Place the sunshield on the back of the camera unit (cables go through).
• Connect the 4-pins connector with the cable coming from the display/handset.
When applicable, connect the 2-pins connector with the cable from the lock release
mechanism (not incl.).
• Screw the camera/doorbell unit with sunshield onto the wall with the included
screws. Close the screw holes with the included plastic caps. Note that the flat cap
goes into the upper screw hole, the angled cap in the lower.
Display/handset
• Choose a location for the display/handset. Note that the included cable is 10m
long.
• Make a hole in the wall and guide the monitor cable through. Note that the back of
the handset has slots at the top and at the bottom to guide the cable through
when drilling through the wall is no option.
• Attach the handset to the wall with the included mounting bracket. Use the bracket
to mark the mounting hole locations. Refer to the drawing on page 2 for the
correct mounting direction of the bracket (arrow indicates top).
• Drill two mounting holes (Ø6mm) and insert the included screw anchors.
• Screw the mounting bracket on the wall with the included screws.
• Connect the leads of the monitor cable. Refer to the drawing on page 2 and §5 for
connection details.
• Connect the plug of the power adaptor to the jack at the back of the handset as
indicated in the drawing on page 2 of this manual.
• Position the display/handset unit over the mounting bracket and slide it down to
secure it.
• Plug the power adaptor in the mains. The system is now ready for use.
01 (19/11/2008) 4 Velleman
®
Page 5

CAMSET20
7. Operation
• Pressing the doorbell button [M] will trigger a sound signal in the display/handset. It
will also switch on the camera [K] and display [A].
• Set the volume of the sound signal with the volume control switch [I] (3 positions).
• Adjust the luminance of the display [A] with the luminance adjustment button [F].
• Adjust the contrast of the display [A] with the contrast adjustment button [G].
• Adjust the hue of the display [A] with the hue adjustment button [H].
• Pick up the handset to talk to the visitor.
• When an automatic door opener (not incl.) is installed, press on the door unlock
button [C] to trigger the unlocking mechanism.
• At any time, press the display ON/OFF button [B] to activate the camera [K] and
the display. To switch them off, press the ON/OFF button [B] again. After ±90
seconds, the camera and display will turn off automatically.
• Picking up the handset will turn the camera [K] and display [A] on, as well as the
speaker [J] and microphone [N]. Putting the handset down will turn everything off.
• The status LED [E] turns on whenever the display [A] is on (camera active).
• In case of emergency, press and hold the warning button [D]. The display [A] and
camera [K] are activated and the speaker [J] generates an alarm signal until the
warning button [D] is released.
8. Technical specifications
power supply 15VDC / 1A
operating temperature -10~+50°C
current consumption 300 ±50mA
type 2.36" TFT colour
monitor
camera
door unlock
function
dimensions
weight
Use this device with original accessories only. Velleman nv cannot be held
responsible in the event of damage or injury resulted from (incorrect) use of
this device. For more info concerning this product, please visit our website
www.velleman.eu
The information in this manual is subject to change without prior notice.
pixels 480 x 240
controls
brightness, contrast, hue, volume, camera
ON/OFF, door unlock, alarm
type pinhole
viewing angle 50°
IR LEDS 2
output voltage 12VDC
maximum load 1Kohm
monitor 265 x 80 x 50mm
camera 125 x 45 x 35mm
monitor ±385g
camera ±102g
.
01 (19/11/2008) 5 Velleman
®
Page 6
CAMSET20
Gebruikershandleiding
1. Inleiding
Aan alle ingezetenen van de Europese Unie
Belangrijke milieu-informatie betreffende dit pro d uc t
een lokaal recyclagepunt brengen. Respecteer de plaatselijke milieuwetgeving.
Hebt u vragen, contacteer dan de plaatselijke autoriteiten inzake
verwijdering.
Dank u voor uw aankoop! Lees deze handleiding grondig voor u het toestel in
gebruik neemt. Werd het toestel beschadigd tijdens het transport, installeer het dan
niet en raadpleeg uw dealer.
2. Veiligheidsinstructies
• De garantie geldt niet voor schade door het negeren van bepaalde richtlijnen in
deze handleiding en uw dealer zal de verantwoordelijkheid afwijzen voor defecten
of problemen die hier rechtstreeks verband mee houden.
• Schade door wijzigingen die de gebruiker heeft aangebracht aan het toestel vallen
niet onder de garantie.
3. Algemene richtlijnen
• Bescherm tegen schokken. Vermijd brute kracht tijdens de bediening.
• Leer eerst de functies van het toestel kennen voor u het gaat gebruiken.
• Om veiligheidsredenen mag de gebruiker geen wijzigingen aanbrengen.
• Gebruik dit systeem enkel waarvoor het gemaakt is. Bij onoordeelkundig gebruik
vervalt de garantie.
• Ontkoppel de intercom van het lichtnet wanneer u hem een lange tijd niet gebruikt.
4. Eigenschappen
• camera met infraroodleds voor nachtzicht
• tweewegs audio-intercom
• 2,36" kleuren TFT-LCD
• ontgrendeling van de deur via de monitor
5. Omschrijving
Raadpleeg de figuren op pagina 2 van deze handleiding.
Dit symbool op het toestel of de verpakking geeft aan dat, als het na zijn
levenscyclus wordt weggeworpen, dit toestel schade kan toebrengen aan
het milieu. Gooi dit toestel (en eventuele batterijen) niet bij het gewone
huishoudelijke afval; het moet bij een gespecialiseerd bedrijf
terechtkomen voor recyclage. U moet dit toestel naar uw verdeler of naar
Houd uit de buurt van kinderen en onbevoegden.
Bescherm tegen regen, vochtigheid, extreme temperaturen, stof en
opspattende vloeistoffen.
Geen van de toestellen mag geopend worden. De gebruiker mag geen
onderdelen vervangen. Bestel eventuele reserveonderdelen bij uw dealer.
01 (19/11/2008) 6 Velleman
®
Page 7

display-hoorn E statusled
A lcd-scherm F regelknop helderheid
B aan-uitschakelaar display G regelknop contrast
C deurontgrendeling H regelknop kleurschakering
D alarmknop I regelknop volume
camera-deurbel
J luidspreker M deurbel
K camera N microfoon
L infraroodleds O lichtsensor
bekabeling
1 geel video 3 rood voeding
2 zwart aarding 4 wit audio
CAMSET20
6. Installatie
Camera-deurbel
• Kies een geschikte montageplaats. Raadpleeg de de figuur op pagina 2 van deze
handleiding voor meer informatie over het detectiebereik (figuur links: zijaanzicht,
figuur rechts: bovenaanzicht). Richt de camera niet naar de zon of een
lichtweerkaatsend object toe.
• De camera-deurbel heeft twee aansluitkabels, een 4-aderige monitorkabel voor de
aansluiting van de camera-deurbel aan de display-hoorn, en een 2-aderige kabel
voor de aansluiting van een automatisch deurontgrendelmechanisme (niet
meegelev.).
Opmerking
• Boor een gat in de muur voor de kabel van de monitor (en eventueel het
automatische ontgrendelmechanisme).
• Plaats het zonnescherm over het gat en markeer de ligging van alle
montagegaten.
• Boor twee montagegaten (Ø 6 mm) en plaats de meegeleverde schroefpluggen.
• Bevestig het zonnescherm achteraan de camera.
• Koppel de 4-pins connector aan de kabel van de display-hoorn. Koppel de 2-pins
connector aan de kabel van het ontgrendelmechanisme indien van toepassing.
• Bevestig het zonnescherm met de camera-deurbel aan de muur met behulp van de
meegeleverde schroeven. Bedek de schroeven nu met de afdekplaatjes: het platte
afdekplaatje is bestemd voor de bovenste schroef, het schuine afdekplaatje is
bestemd voor de onderste schroef.
Display-hoorn
• Kies een geschikte montageplaats (de aansluitkabel is 10 m lang).
• Boor een gat in de muur voor de kabel van de monitor. De display-hoorn heeft
achteraan uitsparingen voor de kabel indien u geen gat in de muur kunt boren.
• Markeer de ligging van alle montagegaten met behulp van de meegeleverde
beugel. Raadpleeg de figuur op pagina 2 van deze handleiding.
• Boor twee montagegaten (Ø 6 mm) en plaats de meegeleverde schroefpluggen.
• Bevestig de beugel aan de muur met behulp van de meegeleverde schroeven.
• Maak de aansluiting van de monitorkabel. Raadpleeg §5 en de figuur op pagina 2
voor meer details.
• Koppel de voedingsadapter aan de display-hoorn (zie figuur op pagina 2).
• Schuif de display-hoorn over de montagebeugel en klik vast.
• Koppel de voedingsadapter aan het lichtnet. De intercom is nu klaar voor gebruik.
: De maximale last van het automatische ontgrendelmechanisme
bedraagt 1 k.
01 (19/11/2008) 7 Velleman
®
Page 8

CAMSET20
7. gebruik
• Bij een druk op de deurbel [M] zal de display-hoorn rinkelen. De camera [K] en de
display [A] worden ingeschakeld.
• Regel het volume van de rinkel met de regelknop [I] (3 standen).
• Regel de helderheid van de display [A] met de regelknop [F].
• Regel het contrast van de display [A] met de regelknop [G].
• Regel de kleurschakering van de display [A] met de regelknop [H].
• Neem de hoorn op om de bezoeker te spreken.
• Met een automatisch ontgrendelmechanisme (niet meegelev.) kunt u de deur
openen via de ontgrendelknop [C].
• Druk op de aan-uitschakelaar [B] om de camera [K] en de display in of uit te
schakelen. Na ± 90 seconden schakelen de camera en de display automatisch uit.
• Bij het opnemen van de hoorn worden de camera [K], de display [A], de luidspreker
[J] en de microfoon [N] automatisch ingeschakeld; bij het neerleggen van de hoorn
worden ze uitgeschakeld.
• De statusled [E] licht op wanneer de display [A] ingeschakeld is (camera actief).
• Bij een noodgeval, houd de alarmknop [D] ingedrukt. De display [A] en de camera
[K] worden ingeschakeld. De luidspreker [J] produceert een alarmsignaal tot u de
alarmknop [D] loslaat.
8. Technische specificaties
voeding 15 VDC / 1 A
werktemperatuur -10~+50°C
verbruik 300 ± 50 mA
type 2,36" kleuren TFT-LCD
monitor
camera
deurontgrendeling
afmetingen
gewicht
Gebruik dit toestel enkel met originele accessoires. Velleman nv is niet
aansprakelijk voor schade of kwetsuren bij (verkeerd) gebruik van dit
toestel. Voor meer informatie over dit product , zie www.velleman.eu
informatie in deze handleiding kan te allen tijde worden gewijzigd zonder
voorafgaande kennisgeving.
pixels 480 x 240
regelingen
type pinhole
kijkhoek 50°
infraroodleds 2
uitgangsspanning 12 VDC
maximale last 1 k
monitor 265 x 80 x 50 mm
camera 125 x 45 x 35 mm
monitor ± 385 g
camera ± 102 g
helderheid, contrast, kleurschakering, volume,
camera in-/uitschakeling, deurontgrendeling,
alarm
. De
01 (19/11/2008) 8 Velleman
®
Page 9

CAMSET20
NOTICE D’EMPLOI
1. Introduction
Aux résidents de l'Union européenne
Des informations environnementales importantes concernant ce produit
fournisseur ou à un service de recyclage local. Il convient de respecter la
réglementation locale relative à la protection de l’environnement.
En cas de questions, contacter les autorités locales pour élimination.
Nous vous remercions de votre achat ! Lire la présente notice attentivement avant la
mise en service de l’appareil. Si l’appareil a été endommagé pendant le transport, ne
pas l’installer et consulter votre revendeur.
2. Prescriptions de sécurité
• La garantie ne s’applique pas aux dommages survenus en négligeant certaines
directives de cette notice et votre revendeur déclinera toute responsabilité pour les
problèmes et les défauts qui en résultent.
• Les dommages occasionnés par des modifications par le client ne tombent pas
sous la garantie.
3. Directives générales
• Protéger contre les chocs et traiter avec circonspection pendant l’opération.
• Se familiariser avec le fonctionnement avant l’usage.
• Toute modification est interdite pour des raisons de sécurité.
• N’utiliser qu’à sa fonction prévue. Un usage impropre annule d'office la garantie.
• Déconnecter du réseau électrique lorsque l’interphone n’est pas utilisé.
4. Caractéristiques
• caméra à DEL IR pour vision nocturne
• interphone audio à 2 voies
• TFT-LCD 2,36" couleur
• déverrouillage de la porte depuis le moniteur
5. Description
Consulter les illustrations à la page 2 de cette notice.
Ce symbole sur l'appareil ou l'emballage indique que l’élimination d’un
appareil en fin de vie peut polluer l'environnement. Ne pas jeter un
appareil électrique ou électronique (et des piles éventuelles) parmi les
déchets municipaux non sujets au tri sélectif ; une déchèterie traitera
l’appareil en question. Renvoyer les équipements usagés à votre
Garder hors de la portée de personnes non qualifiées et de jeunes
enfants.
Protéger de la pluie, de l’humidité, des températures extrêmes, de la
poussière et des projections d’eau.
Ne jamais ouvrir le boîtier. Il n’y a aucune pièce maintenable par
l’utilisateur. Commander des pièces de rechange éventuelles chez votre
revendeur.
01 (19/11/2008) 9 Velleman
®
Page 10

moniteur/combiné E DEL d’état
A moniteur LCD F réglage clarté
B bouton marche/arrêt moniteur G réglage contraste
C déverrouillage de la porte H réglage nuance
D bouton de panique I réglage volume
caméra/portier
J haut-parleur M sonnette
K caméra N microphone
L DEL IR O capteur
câblage
1 jaune vidéo 3 rouge alimentation
2 noir masse 4 blanc audio
CAMSET20
6. Installation
Ensemble caméra/portier
• Choisir un emplacement approprié. Consulter l’illustration à la page 2 de cette
notice pour plus d’information concernant la portée de détection (ill. gauche : vue
de côté ; ill. droite : vue du haut). Ne pas aligner la caméra vers le soleil ou vers
un objet réfléchissant.
• L’ensemble caméra/portier a deux câbles de connexion, un câble de connexion 4
conducteurs vers l’ensemble moniteur/combiné et un câble de connexion 2
conducteurs pour le système de déverrouillage de la porte (non incl.).
Remarque
• Percer un trou dans le mur et guider le câble provenant du moniteur (et du
système de déverrouillage si applicable) dans le trou.
• Placer le pare-soleil au-dessus du trou et marquer l’emplacement de chaque trou
de montage.
• Percer deux trous (Ø 6 mm) et y insérer un cheville.
• Fixer le pare-soleil à l’arrière de la caméra.
• Raccorder le connecteur à 4 broches au câble de l’ensemble moniteur/combiné. Si
applicable, raccorder le connecteur à 2 broches au câble du système de
déverrouillage (non incl.).
• Fixer l’ensemble caméra/portier et le pare-soleil au mur à l’aide des vis incluses.
Recouvrir chaque vis avec une coiffe en plastique (placer la coiffe plate sur la vis
supérieure et la coiffe oblique sur la vis inférieure).
Ensemble moniteur/combiné
• Choisir un emplacement approprié en tenant compte du câble de raccordement
inclus (10 m).
• Percer un trou dans le mur et guider le câble provenant du moniteur dans le trou.
L’arrière de l’ensemble moniteur/combiné est pourvu de trous pour le guidage des
câbles au cas où il n’y a pas de trou disponible.
• Placer le support de montage au-dessus du trou et marquer l’emplacement de
chaque trou de montage. Consulter l’illustration à la page 2.
• Percer deux trous (Ø 6 mm) et y insérer un cheville.
• Fixer le support de montage au mur à l’aide des vis incluses.
• Raccorder le câblage du moniteur (voir §5 et l’illustration à la page 2 pour plus de
détails).
• Raccorder l’alimentation secteur à la prise d’alimentation comme illustré à la page
2 de cette notice.
• Fixer l’ensemble moniteur/combiné au support de montage.
• Raccorder l’alimentation au réseau électrique. Votre interphone est prêt à l’emploi.
: La charge maximale du système de déverrouillage est de 1 k.
01 (19/11/2008) 10 Velleman
®
Page 11

CAMSET20
7. Emploi
• L’ensemble moniteur/combiné émet une tonalité lorsque l’on enfonce la sonnette
[M]. En même temps, la caméra [K] et le moniteur [A] s’enclenchent.
• Régler le niveau de volume de la tonalité avec le réglage [I] (3 positions).
• Régler la clarté du moniteur [A] avec le réglage [F].
• Régler le contraste du moniteur [A] avec le réglage [G].
• Régler la nuance du moniteur [A] avec le réglage [H].
• Décrocher le combiné pour parler à l’interlocuteur.
• La porte peut être déverrouillée avec le bouton de déverrouillage [C] lorsqu’un
système de déverrouillage automatique (non incl.) a été installé.
• Enfoncer le bouton marche/arrêt [B] du moniteur pour allumer/éteindre la caméra
[K] et le moniteur (la caméra et le moniteur s’éteignent automatiquement après un
délai de ± 90 secondes).
• En décrochant le combiné, la caméra [K], le moniteur [A], le haut-parleur [J] et le
microphone [N] sont automatiquement activés. Raccrocher pour les désactiver.
• La DEL d’état [E] s’allume lorsque le moniteur [A] est activé [A] (caméra activée).
• En cas d’alerte, maintenir enfoncé le bouton de panique [D]. Le moniteur [A] et la
caméra [K] sont activés, et le haut-parleur [J] émet une tonalité d’alarme jusqu’à
ce que le bouton de panique [D] soit renfoncé.
8. Spécifications techniques
alimentation 15 VCC/1 A
température de service -10~+50°C
consommation 300 ± 50 mA
type TFT-LCD 2,36" couleur
moniteur
caméra
déverrouillage
de porte
dimensions
poids
N’employer cet appareil qu’avec des accessoires d’origine. SA Velleman ne
sera aucunement responsable de dommages ou lésions survenus à un usage
(incorrect) de cet appareil. Pour plus d’information concernant cet article,
visitez notre site web www.velleman.eu
dans cette notice peuvent être modifiées sans notification préalable.
pixels 480 x 240
réglage
type Sténopé
angle de vue 50°
DEL IR 2
tension de sortie 12 VCC
charge maximale 1 k
moniteur 265 x 80 x 50 mm
caméra 125 x 45 x 35 mm
moniteur ± 385 g
caméra ± 102 g
clarté, contraste, nuance, volume, caméra
marche/arrêt, déverrouillage de la porte,
alarme
. Toutes les informations présentées
01 (19/11/2008) 11 Velleman
®
Page 12

CAMSET20
MANUAL DEL USUARIO
1. Introducción
A los ciudadanos de la Unión Europea
Importantes informaciones sobre el medio ambiente concerniente a este
producto
ambiente.
Si tiene dudas, contacte con las autoridades locales para residuos.
¡Gracias por haber comprado el CAMSET20! Lea atentamente las instrucciones del
manual antes de usarlo. Si el aparato ha sufrido algún daño en el transporte no lo
instale y póngase en contacto con su distribuidor.
2. Instrucciones de seguridad
• Los daños causados por descuido de las instrucciones de seguridad de este manual
invalidarán su garantía y su distribuidor no será responsable de ningún daño u
otros problemas resultantes.
• Los daños causados por modificaciones no autorizadas, no están cubiertos por la
garantía.
3. Normas generales
• No agite el aparato. Evite usar excesiva fuerza durante el manejo y la instalación.
• Familiarícese con el funcionamiento del aparato antes de utilizarlo.
• Por razones de seguridad, las modificaciones no autorizadas del aparato están
prohibidas.
• Utilice sólo el aparato para las aplicaciones descritas en este manual. Un uso
desautorizado anula la garantía completamente.
• Desconecte el aparato de la red eléctrica si no lo utiliza.
4. Características
• cámara con LEDs IR para visión nocturna
• videoportero con audio de 2 vías
• 2.36" TFT LCD display color
• es posible desbloquear la puerta por el monitor
Este símbolo en este aparato o el embalaje indica que, si tira las muestras
inservibles, podrían dañar el medio ambiente. No tire este aparato (ni las
pilas, si las hubiera) en la basura doméstica; debe ir a una empresa
especializada en reciclaje. Devuelva este aparato a su distribuidor o a la
unidad de reciclaje local. Respete las leyes locales en relación con el medio
Mantenga el aparato lejos del alcance de personas no capacitada s
y niños.
No exponga este equipo a lluvia, humedad, temperaturas
extremas, polv o ni a ningún tipo de salpicadura o goteo.
Nunca abra la caja. El usuario no habrá de efectuar el mantenimiento de
ninguna pieza. Contacte con su distribuidor si necesita piezas de
recambio.
01 (19/11/2008) 12 Velleman
®
Page 13

CAMSET20
5. Descripción
Véase la figura en la página Error! Bookmark not defined. de este manual del
usuario.
monitor/auricular E LED de estado
A pantalla LCD F ajuste brillo
B botón ON/OFF monitor G ajuste contraste
C desbloqueo de la puerta H ajuste matiz
D botón de pánico I ajuste volumen
cámara/timbre
J altavoz M timbre
K cámara N micrófono
L LED IR O sensor
cables
1 amarillo vídeo 3 rojo alimentación
2 negro masa 4 blanco audio
6. Instalación
Conjunto cámara/timbre
• Elija un lugar de montaje adecuado. Véase la figura en la página 2 de este manual
del usuario para más información sobre el alcance de detección (fig. de la
izquierda: vista lateral; fig. de la derecha: vista superior). No dirija la cámara al
sol ni un objeto reflectante.
• El conjunto cámara/timbre tiene dos cables de conexión, un cable de conexión de
4 conductores al conjunto monitor/auricular y un cable de conexión de 2
conductores para el sistema de desbloqueo de la puerta (no incl.).
Nota
: La carga máx. del sistema de desbloqueo es de 1 k.
• Taladre un agujero en la pared e introduzca el cable del monitor (y del sistema de
desbloqueo si fuera aplicable) en el agujero.
• Ponga la capa antisolar sobre el agujero y marque la
montaje.
• Taladre dos agujeros (Ø 6mm) e introduzca un taco.
• Fije la capa antisolar a la parte trasera de la cámara.
• Conecte el conector de 4 polos al cable del conjunto monitor/auricular. Si fuera
aplicable, conecte el conector de 2 polos al cable del sistema de desbloqueo (no incl.).
• Fije el conjunto cámara/timbre y la capa antisolar a la pared con los tornillos
incluidos. Cubra cada tornillo con una capa de plástico (ponga la capa plana en el
tornillo superior y la capa oblicua en el tornillo inferior).
Conjunto monitor/auricular
• Elija un lugar de montaje adecuado. Tenga en cuenta el cable de conexión incluido
(10m).
• Taladre un agujero en la pared e introduzca el cable del monitor en el agujero. La
parte trasera del conjunto monitor/auricular está equipada con huecos para guiar
los cables si no es posible taladrar un agujero.
• Ponga el soporte de montaje sobre el agujero y marque la posición de cada
agujero de montaje. Véase la figura en la página 2.
• Taladre dos agujeros (Ø 6mm) e introduzca un taco.
• Fije el soporte de montaje con los tornillos incluidos a la pared.
• Conecte los cables del monitor (véase §5 y la figura en la página 2 para más
detalles).
• Conecte la alimentación de red al enchufe (véase la figura en la página 2 de este
manual del usuario).
• Fije el conjunto monitor/auricular al soporte de montaje.
• Conecte la alimentación a la red eléctrica. El videoportero está listo para utilizar.
01 (19/11/2008) 13 Velleman
posición de cada agujero de
®
Page 14

CAMSET20
7. Uso
• El conjunto monitor/auricular emite una señal sonora al pulsar el timbre [M]. Al
mismo tiempo, la cámara [K] y el monitor [A] se activan.
• Ajuste el nivel del volumen de la señal sonora con el ajuste [I] (3 posiciones).
• Ajuste el brillo del monitor [A] con el ajuste [F].
• Ajuste el contraste del monitor [A] con el ajuste [G].
• Ajuste el matiz del monitor [A] con el ajuste [H].
• Descuelgue el auricular para hablar con el visitante.
• Es posible desbloquear la puerta con el botón de desbloqueo [C] si está instalado un
sistema de desbloqueo automático (no incl.).
• Pulse el botón ON/OFF [B] del monitor para activar/desactivar la cámara [K] y el
monitor (la cámara y el monitor se desactivan automáticamente después de un
tiempo de ± 90 segundos).
• Al descolgar el auricular se activan automáticamente la cámara [K], el monitor [A],
el altavoz [J] y el micrófono [N]. Cuelgue para desactivarlos.
• El LED de estado [E] se ilumina si el monitor [A] está activado (cámara activada).
• En caso de alarma, mantenga pulsado el botón de pánico [D]. El monitor [A] y la
cámara [K] se activan, y el altavoz [J] emite una señal sonora de alarma hasta que
suelte el botón de pánico [D].
8. Especificaciones
alimentación 15 VCC/1 A
Temperatura de funcionamiento -10~+50°C
Consumo 300 ± 50 mA
tipo TFT-LCD 2,36" color
monitor
cámara
desbloqueo
de la puerta
dimensiones
peso
Utilice este aparato sólo con los accesorios originales. Velleman NV no será
responsable de daños ni lesiones causados por un uso (indebido) de este
aparato. Para más información sobre este producto, visite nuestra página
web www.velleman.eu
contenido de este manual sin previo aviso.
píxeles 480 x 240
ajuste
tipo pinhole
ángulo de visión 50°
LED IR 2
tensión de salida 12 VCC
carga máx. 1 k
monitor 265 x 80 x 50 mm
cámara 125 x 45 x 35 mm
monitor ± 385 g
cámara ± 102 g
brillo, contraste, matiz, volumen, cámara
ON/OFF, desbloqueo de la puerta, alarma
. Se pueden modificar las especificaciones y el
01 (19/11/2008) 14 Velleman
®
Page 15

CAMSET20
BEDIENUNGSANLEITUNG
1. Einführung
An alle Einwohner der Europäischen Union
Wichtige Umweltinformationen über dieses Produkt
werden. Diese Einheit muss an den Händler oder ein örtliches RecyclingUnternehmen retourniert werden. Respektieren Sie die örtlichen Umweltvorschriften.
Falls Zweifel bestehen, wenden Sie sich für Entsorgungsrichtlinien an Ihre
örtliche Behörde.
Wir bedanken uns für den Kauf der CAMCOLVC2! Lesen Sie diese
Bedienungsanleitung vor Inbetriebnahme sorgfältig durch. Überprüfen Sie, ob
Transportschäden vorliegen. Sollte dies der Fall sein, verwenden Sie das Gerät nicht
und wenden Sie sich an Ihren Händler.
2. Sicherheitshinweise
• Bei Schäden, die durch Nichtbeachtung der Bedienungsanleitung verursacht
• Bei Schäden verursacht durch eigenmächtige Änderungen erlischt der
3. Allgemeine Richtlinien
• Vermeiden Sie Erschütterungen. Vermeiden Sie rohe Gewalt während der Installation und
• Nehmen Sie das Gerät erst in Betrieb, nachdem Sie sich mit seinen Funktionen
• Eigenmächtige Veränderungen sind aus Sicherheitsgründen verboten.
• Verwenden Sie das Gerät nur für Anwendungen beschrieben in dieser
• Trennen Sie die Video-Türsprechanlage vom Netz wenn Sie diese eine längere Zeit
4. Eigenschaften
• Kamera mit IR-LEDs für Nachtsicht
• Gegensprechanlage mit 2-wege Audioübertragung
• 2.36" TFT LCD-Farbdisplay
• die Tür kann über Monitor entriegelt werden
01 (19/11/2008) 15 Velleman
Dieses Symbol auf dem Produkt oder der Verpackung zeigt an, dass die
Entsorgung dieses Produktes nach seinem Lebenszyklus der Umwelt
Schaden zufügen kann. Entsorgen Sie die Einheit (oder verwendeten
Batterien) nicht als unsortiertes Hausmüll; die Einheit oder verwendeten
Batterien müssen von einer spezialisierten Firma zwecks Recycling entsorgt
Halten Sie Kinder und Unbefugte vom Gerät fern.
Schützen Sie das Gerät vor Regen und Feuchte, Staub und extremen
Temperaturen. Setzen Sie das Gerät keiner Flüssigkeit wie z.B. Tropfoder Spritzwasser, aus.
Öffnen Sie NIE das Gerät. Es gibt keine zu wartenden Teile. Bestellen Sie
eventuelle Ersatzteile bei Ihrem Fachhändler
werden, erlischt der Garantieanspruch. Für daraus resultierende Folgeschäden
übernimmt der Hersteller keine Haftung.
Garantieanspruch.
Bedienung des Gerätes.
vertraut gemacht haben.
Bedienungsanleitung sonst kann dies zu Schäden am Produkt führen und erlischt
der Garantieanspruch.
nicht verwenden.
®
Page 16

CAMSET20
5. Umschreibung
Siehe Abbildung, Seite Error! Bookmark not defined. dieser Bedienungsanleitung.
Display/Hörer-Einheit E Status-LED
A LCD-Schirm F Einstellknopf Helligkeit
B EIN/AUS-Schalter des Displays G Einstellknopf Kontrast
C Türentriegelung H Einstellknopf Farbton
D Alarmtaste I Einstellknopf Lautstärke
Kamera-Klingel
J Lautsprecher M Klingel
K Kamera N Mikrofon
L IR-LEDs O Lichtsensor
Kabel
1 gelb Video 3 rot Stromversorgung
2 schwarz Masse 4 weiß Audio
6. Installation
Kamera/Klingel-Einheit
• Wählen Sie einen geeigneten Montageort aus. Siehe Abbildung, Seite 2 dieser
Bedienungsanleitung für mehr Informationen über den Erfassungsbereich
(Abbildung links: Seitenansicht, Abbildung rechts: Draufsicht). Richten Sie die
Kamera nicht auf die Sonne oder einen Gegenstand.
• Die Kamera-Klingel hat zwei Anschlusskabel, ein 4-adriges Monitorkabel für den
Anschluss der Kamera/Klingel-Einheit an die Display/Hörer-Einheit, und ein 2adriges Kabel für den Anschluss eines automatischen Türentriegelungssystem
(nicht mitgeliefert).
Bemerkung
• Bohren Sie ein Loch in der Wand für das Kabel des Monitors (und eventuell das
automatische Türentriegelungssystem).
• Installieren Sie die Sonnenblende über das Loch und markieren Sie die Position
aller Montagelöcher.
• Bohren Sie zwei Montagelöcher (Ø 6mm) und befestigen Sie die mitgelieferten
Dübel.
• Befestigen Sie die Sonnenblende auf der Rückseite der Kamera.
• Verbinden Sie den 4-pol. Anschluss mit dem Kabel der Display/Hörer-Einheit.
Verbinden Sie den 2-pol. Anschluss mit dem Kabel des Türentriegelungssystems
wenn zutreffend.
• Befestigen Sie die Sonnenblende mit der Kamera-Klingel mit den mitgelieferten
Schrauben an der Wand. Bedecken Sie die Schrauben nun mit den Plastikkappen:
die flache Plastikkappe ist für die obere Schraube, die schräge Plastikkappe ist für
die untere Schraube.
Display/Hörer-Einheit
• Wählen Sie einen geeigneten Montageort aus (das Anschlusskabel ist 10m lang).
• Bohren Sie ein Loch in der Wand für das Kabel des Monitors. Die Display/Hörer-
Einheit hat auf der Rückseite Aussparungen für das Kabel wenn Sie kein Loch in
der Wand bohren können.
• Markieren Sie die Position aller Montagelöcher mit der mitgelieferten Halterung.
Siehe Abbildung, Seite 2 dieser Bedienungsanleitung.
• Bohren Sie zwei Montagelöcher (Ø 6 mm) und befestigen Sie die mitgelieferten
Dübel.
• Befestigen Sie die Halterung mit den mitgelieferten Schrauben an der Wand.
• Machen Sie den Anschluss des Monitorkabels. Siehe §5 und Abbildung, Seite 2 für
mehr Einzelheiten.
• Verbinden Sie das Netzteil mit der Display/Hörer-Einheit (siehe Abbildung, Seite 2).
01 (19/11/2008) 16 Velleman
: Die max. Last des automatischen Türentriegelungssystems ist 1 k.
®
Page 17

CAMSET20
• Schieben Sie die Display/Hörer-Einheit über die Halterung und klicken Sie fest.
• Verbinden Sie das Netzteil mit dem Netz. Die Video-Türsprechanlage ist nun
gebrauchsfertig.
7. Anwendung
• Bei einem Druck auf der Klingel [M] ertönt die Display/Hörer-Einheit. Die Kamera
[K] und das Display [A] werden eingeschaltet.
• Regeln Sie die Lautstärke vom Geklingel mit dem Einstellknopf [I] (3 Positionen).
• Regeln Sie die Helligkeit des Display [A] mit dem Einstellknopf [F].
• Regeln Sie den Kontrast des Displays [A] mit dem Einstellknopf [G].
• Regeln Sie den Farbton des Displays [A] mit dem Einstellknopf [H].
• Nehmen Sie den Hörer ab, um mit dem Besucher zu sprechen.
• Mit einem automatischen Türentriegelungssystem (nicht mitgeliefert) können Sie die
Tür über die Entriegelungsstaste [C] öffnen.
• Drücken Sie den EIN/AUS-Schalter [B] um die Kamera [K] und das Display ein-
oder auszuschalten. Nach ± 90 Sekunden werden die Kamera und das Display
automatisch desaktiviert.
• Beim Abnehmen des Hörers werden die Kamera [K], das Display [A], den
Lautsprecher [J] und das Mikrofon [N] automatisch eingeschaltet; beim Auflegen
des Hörers werden diese ausgeschaltet.
• Die Status-LED [E] leuchtet wenn das Display [A] eingeschaltet ist (Kamera aktiv).
• Im Notfall, halten Sie die Alarmtaste [D] gedrückt. Das Display [A] und die Kamera
[K] werden eingeschaltet. Der Lautsprecher [J] erzeugt ein Alarmsignal bis Sie die
Alarmtaste [D] loslassen.
8. Technische Daten
Stromversorgung 15 VDC / 1 A
Betriebstemperatur -10~+50°C
Stromverbrauch 300 ± 50 mA
Typ 2.36" TFT Farbe
Monitor
Kamera
Funktion zur
Entriegelung
der Tür
Abmessungen
Gewicht
Verwenden Sie dieses Gerät nur mit originellen Zubehörteilen. Velleman NV
übernimmt keine Haftung für Schaden oder Verletzungen bei (falscher)
Anwendung dieses Gerätes. Für mehr Informationen zu di esem Produkt ,
siehe www.velleman.eu
vorbehalten.
01 (19/11/2008) 17 Velleman
Pixel 480 x 240
Einstellungen
Typ Pinhole
Blickwinkel 50°
IR-LEDs 2
Ausgangsspannung 12 VDC
max. Last 1 k
Monitor 265 x 80 x 50 mm
Kamera 125 x 45 x 35 mm
Monitor ± 385 g
Kamera ± 102 g
Helligkeit, Kontrast, Farbton, Lautstärke,
Kamera EIN/AUS, Tür entriegeln, Alarm
. Alle Änderungen ohne vorherige Ankündigung
®
 Loading...