

Page 1

CAMCOLVC23
FU LL HD ACTION AN D S PORTS CAMERA
FULL HD A CT IE- EN SPORTCAMER A
CAM ÉRA D'ACTION ET DE SPORT FULL HD
CÁMAR A FULL HD D E ACCIÓN Y PARA D EPORTI STAS
FULL HD A CT ION- UND SPO RTKAME RA
CÂMAR A DE AÇÃO E D ESP ORTO FU LL HD
KAME RA AKCJI ORAZ KAME RA S PO RTOW A FU LL HD
USER M ANUAL 3
GEBRUIKERSHANDLEIDING 13
M ODE D'EMPLOI 23
MANUAL DEL USUARIO 34
BEDIENUNGSANLEITUNG 44
MANUAL DO UTIL IZADOR 55
INSTRUKCJA OBSŁUGI 65
Page 2

CAMCOLVC23
V. 0 2 – 27/05/2014 2 ©Vellema n nv
Page 3

CAMCOLVC23
V. 0 2 – 27/05/2014 3 ©Vellema n nv
USER MAN UAL
1. Introduction
T o all residents of the European Union
Important environmental information about this product
T h is sy mbol o n the de vi ce o r th e pa ckag e ind i ca tes t ha t
disp osa l o f the device af te r its life cycle could harm the
env ironmen t. Do n ot d is pos e of t he u nit (o r batt eries) a s
u n so rted municipa l wa ste; it sho u ld be taken to a
s peci alized company fo r recycl i ng . Th i s dev i ce shou l d be
return e d to you r di stri butor or to a lo cal recy cl i ng serv i ce. Res pect
the loc al enviro n ment al rules.
If in doubt, contact your loca l waste dispo sal authorities.
Thank you fo r choosing V ellem a n! P l e ase re ad the manual thoroughly
before b ring ing this de vice in to service . I f the device was damaged in
tra n s i t, do n't i nstall or use i t a nd contact you r dea ler.
2. S afety Ins tr u c tions
WARNING
Do not puncture or throw batteries in fire as they mi ght
explode.
Keep batteries aw ay from children.
This device contains an internal rechargeable battery.
When t he dev ice is end-of-life, it m ust be disposed of in
acco rdance wi t h local regu l ati ons.
DO NOT di sas semble o r open the co ver. T he re are no
user-ser vice ab le p a rt s ins id e t he d evice.
3. General Guideli n es
Refer to the Velleman® Se rvice and Qua lity Warranty on the last
pages of this ma nua l.
• Keep this device a way f rom dus t and extreme temperatures.
• Pro te ct this dev i ce fro m sh ocks and ab use. A v oi d b rute force wh en
operating the device.
• Do no t aim th e camera at the su n o r o the r e xtremel y b righ t
objects.
• D o not to uch t he lens.
Page 4

CAMCOLVC23
V. 0 2 – 27/05/2014 4 ©Vellema n nv
• Fam ilia rise yo u rse lf with the functions o f the d e vice before actua lly
using it.
• All modificat io ns of th e devic e are forbidd en for s afety r ea sons.
Da mage ca u se d b y user m od if i catio ns to the devi ce i s not covered
by t he warran t y.
• O n ly use the d e vice fo r its intended pu rpose. Using t he devi ce in
an unautho ris ed way will void the wa rranty.
• Dam age caused b y dis rega rd of certain g uide lines in this manua l
is no t co vered b y the warranty and the dea l er will no t accept
r esponsibil i t y for any e n sui ng def ec ts or problems.
• There are no user -
serviceable parts inside the device. Refer to an
au t horize d dealer for servi ce and/or spare parts.
• Do not use this product to violate privacy laws or perform illegal
activities.
4. Features
• a ction and sports camera wi th d ifferen t mounting brackets an d
waterpro of case
• the video capture ca mera records images on a micro S D card (not
included)
• video recording quality: 1080p HD video - 30 f p s
• e as y and user -friendly setup
• to uch co lour disp lay
• IR re m ote con t ro l
• 2 video recording modes:
o car mod
e: the recorder will erase the oldest file when the micro
SD-c ar d is full
o video fu n ctio n : the re corde r will reco rd video until th e micro
SD-c ar d is full
5. Overview
Re fe r to the illu s trations on page 2 o f this manua l .
1
Infra red light
2
Cam era le ns
3
Charging in dic ator
4
Display off indicator
5
Displ ay on /o ff button
6
Display
7
Power button
8
Microphone
9
Shutter butt on
10
Tripod socket
11
Micro SD slot
12
Reset butt on
Page 5

CAMCOLVC23
V. 0 2 – 27/05/2014 5 ©Vellema n nv
13
HDMI port
14
U S B port
6. Inserting a Memory Card
• Push the Mic ro SD card in to the card sl ot. The arrow on the cover
in di ca tes h ow to insert the card.
• To take out the Micro SD card, gently press the end of the
mem o ry ca rd and it will p op u p .
Note
For 1080P vid e o ca pture , i t is recom m ended t o u se a cl ass 1 0 S D
card o f 8 GB or larger.
7. Charging the Camera
• To charge t he cam era, conne ct th e US B p ort of the camera [14] to
a USB port of y ou r compu ter with the included USB cable.
• The re d indicat or [3] lights up when the camera is charging and
t ur ns off when ful ly c har ged. C ha rg ing take s abo ut 2-4 hours.
• T he cam era functions cannot be used while conne cted to your
compute r.
• If the camera is turned o n while connected to the co mputer, you
can access the f i les on th e ca m era's SD card .
• See S afety Ins t ruct i ons above fo r detai ls ab ou t b atte ry disposal.
8. Operation
8.1 Turn the Camera on and off
Tu rn on the ca m era
To turn o n the camera, pre ss a nd hold the
powe r button for 2 seconds.
Turn off the cam e ra
T o tu rn o ff the ca m era, s ho rt p ress the
powe r button .
P o we r sa ve m ode
When the c am er a re m ai ns unused for a
cer tain t im e, i t en ters power save m ode.
The ind ica t or on the b ack [4] lights up.
Turn off the display
You can turn off the display with button
[5].
8.2 S ettin g the ti me a nd date
1. Tap the DATE/ TIME ic on on the display.
Page 6

CAMCOLVC23
V. 0 2 – 27/05/2014 6 ©Vellema n nv
2. U s e the arrows ▲ and ▼ to change a setting.
3. Us e the arrows ► and ◄ to s witch to another i te m ( day, mo nt h,
ye ar, m inutes, s eco nds and da te format).
4. Tap the SET icon.
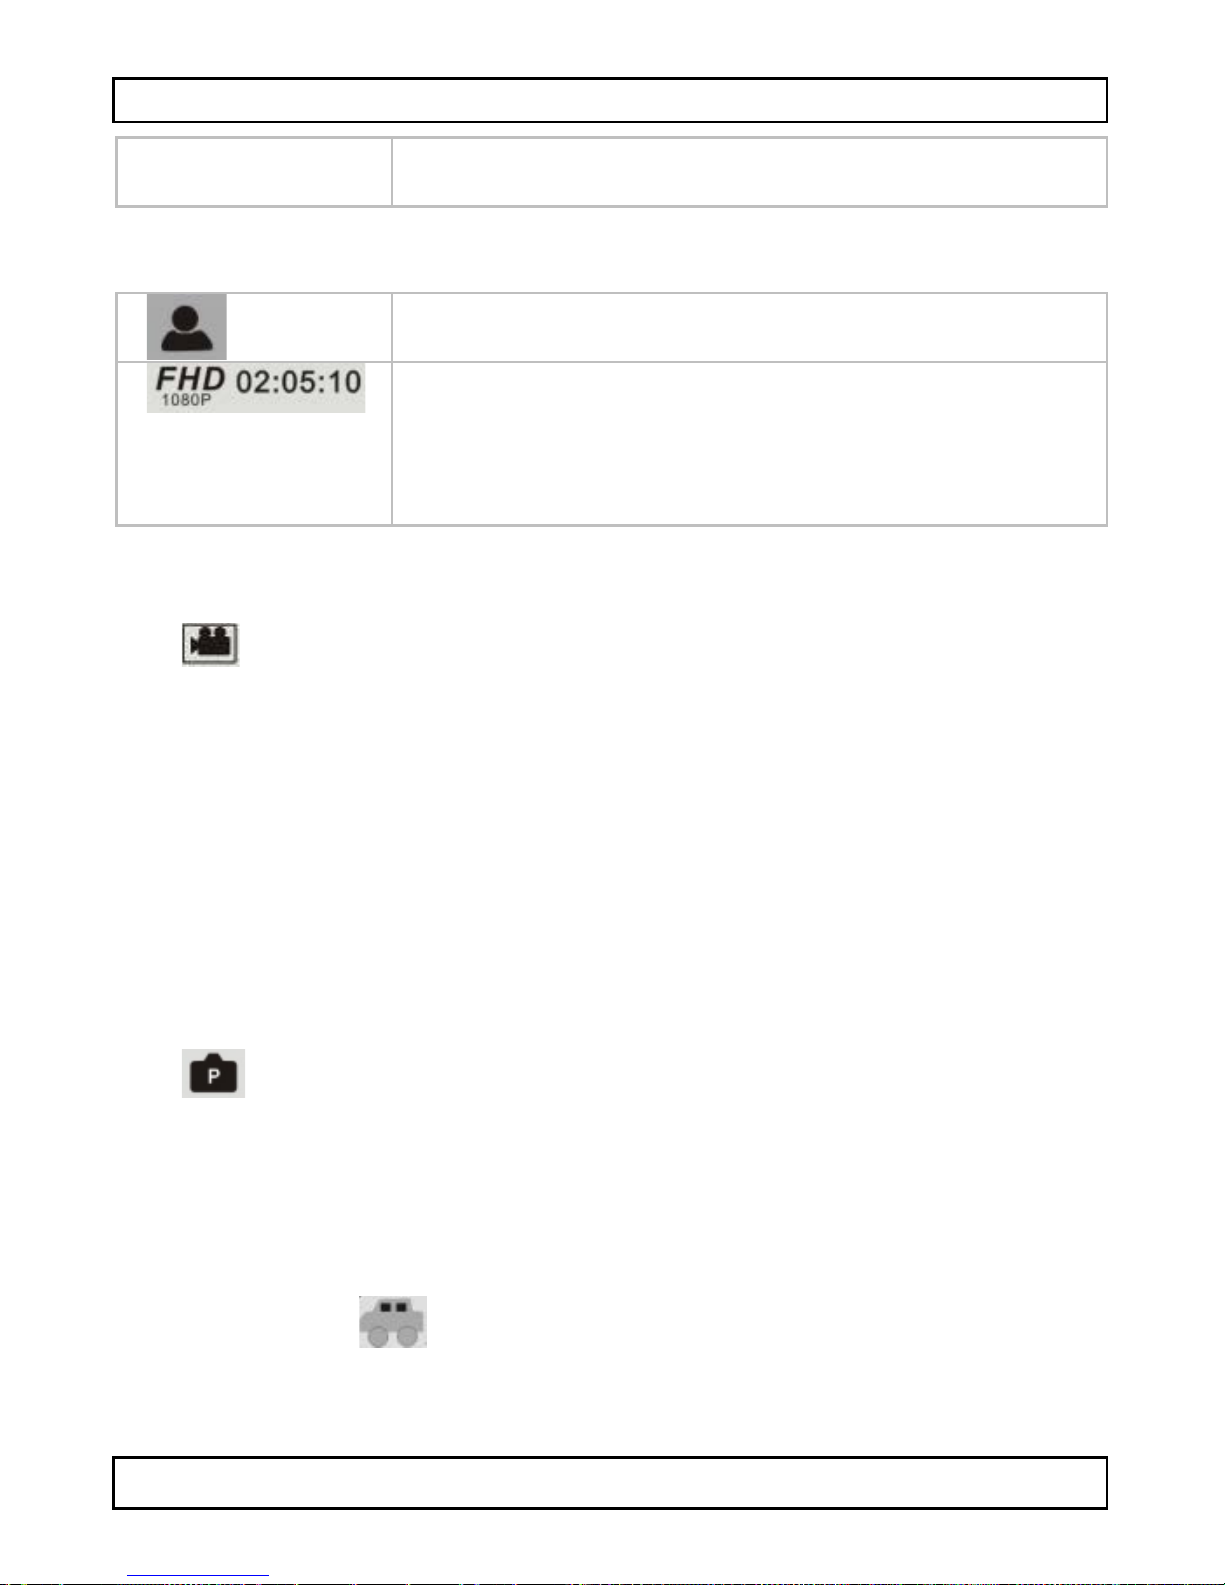
8.3 Camera Modes
The camera has 3 modes, each represented by an icon in the upper
le ft of the displa y.
video
photo
car
T he cam era always starts in video mode when you switch it on. Tap
t h e m ode i con until the mode you wa nt is active.
8.4 Icons and Settings
Using t he icons
To use t he i cons
• Tap a function icon to access the opti ons.
The options appear at t he b ot tom o f t h e display.
• T ap the op tion you wa nt.
• Tap the f unct i on i co n a gai n t o cancel.
Generic icon s
T he icons be lo w a re availa b le in a ll modes (video, p hoto , vehicle).
sets date and time
battery level
playback
z oom in - zoom ou t
The zoom factor is displayed b etween bot h icons.
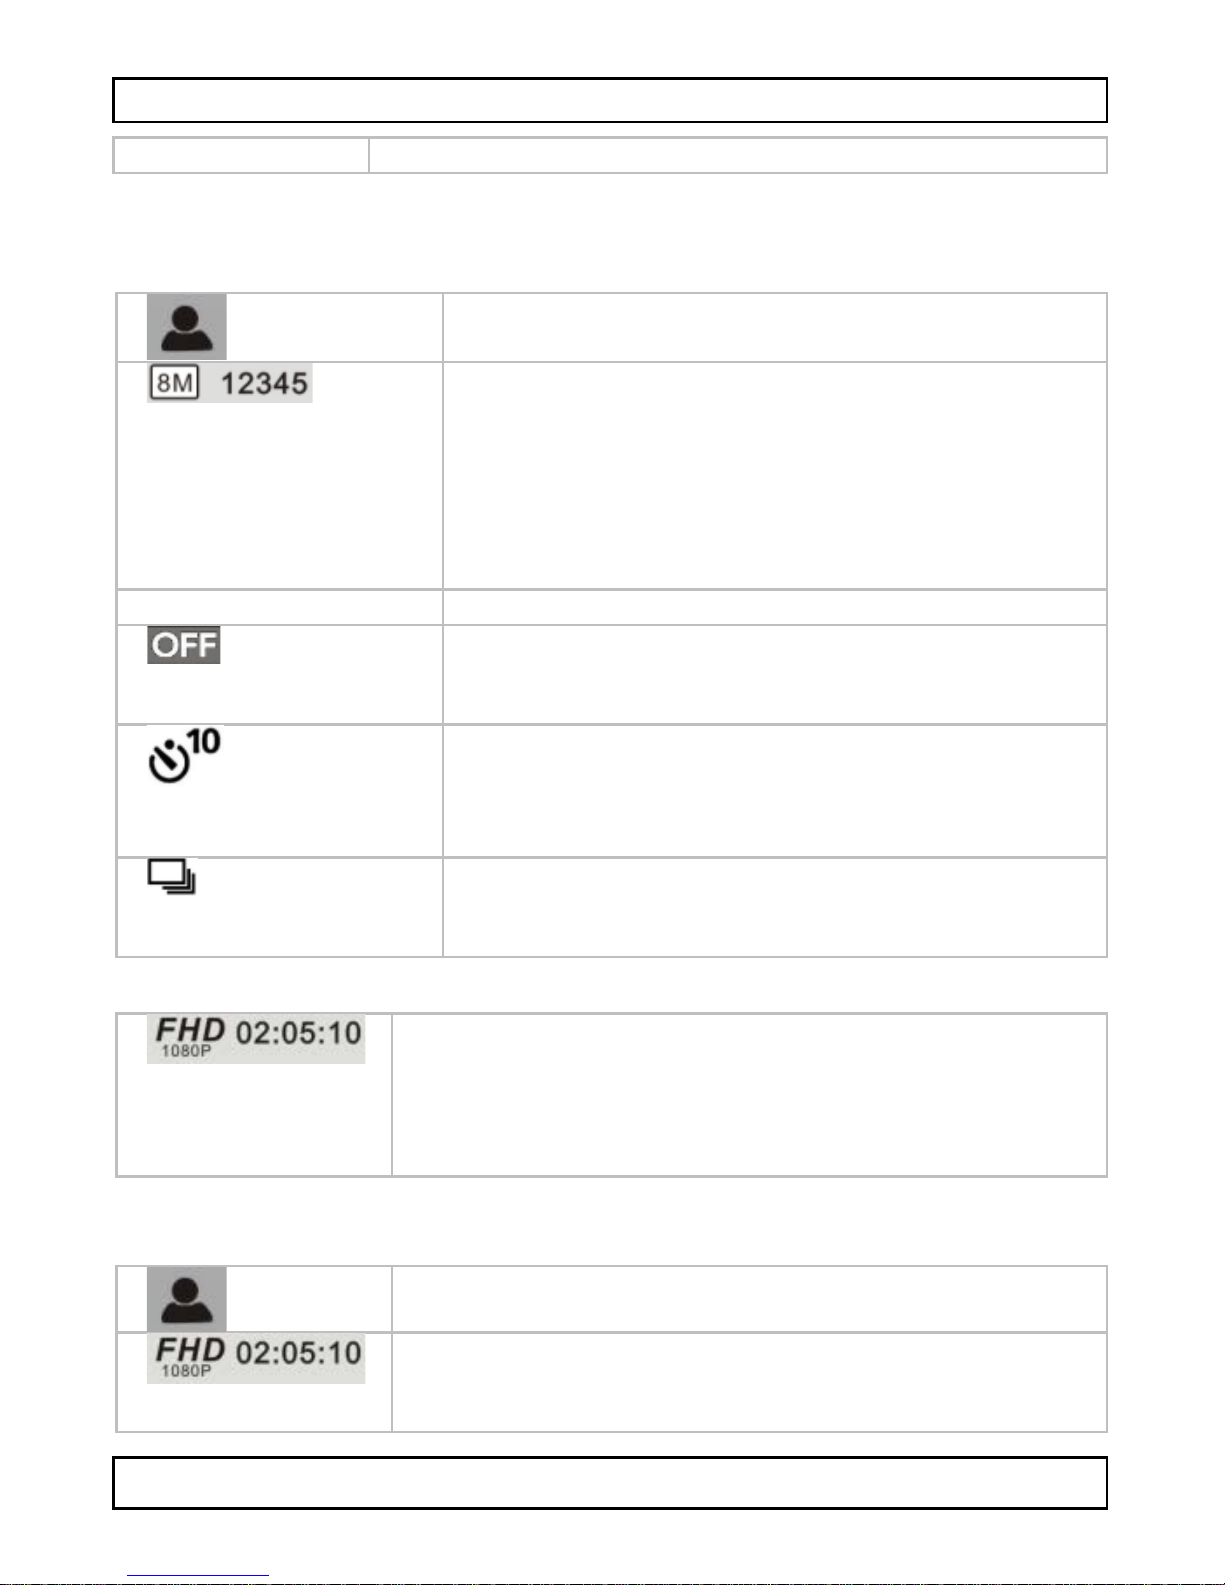
Icons in photo mode
The sp ecif i c funct ions for p h oto mode ar e:
Turns face recognit io n on or of f .
Page 7

CAMCOLVC23
V. 0 2 – 27/05/2014 7 ©Vellema n nv
Sets the image resolution.
The number ne xt to t he i con shows the
rem ai ni ng number o f im age s you ca n ca rd
take in the selected resolution (depending
on the size of the SD card).
[Sh oot in g modes]
The ico n s hows the s ho oting m ode t hat is
cu rrentl y set .
No shooting mode is set.
Self-timer
The pi ct u re is ta ken 10 seconds after you
push the shutte r butto n.
Continuous shooting
Takes 3 p i ctures with one press o n t he
shutte r button.
Icons in video mode
Sets the video resolution.
Th e tim e ne x t to the ic o n is the rem aini n g tim e
you can record in the selecte d resolutio n
(depending on the size of the SD car d ).
Icons in vehicle mode
Allo ws f lipping th e camera image. Useful if you
are han ging t he cam era ups i de down .
Sets the video resolution.
Th e tim e ne x t to the ic o n is the rem aini n g tim e
you can record in the selecte d resolutio n
( dependi ng on the size of the S D ca r d) .
8.5 Recording Video
• When yo u s wit ch on the ca m era , i t start s in v i d eo m ode .
When i n another mode, ta p the m o de i co n to chang e t he m ode.
• Press the shu t te r butt on to start recording.
The displa y shows the recording time.
• Press t he shu t ter but t on agai n to sto p recordi n g.
Page 8

CAMCOLVC23
V. 0 2 – 27/05/2014 8 ©Vellema n nv
Notes
• If the SD card i s f ul l , th e ca m era stops reco rdi ng.
8.6 Taki n g a P icture
• Tap the mod e icon t o set the photo mode .
• P res s the s h utter bu tton to take a picture.
See section Icons and settings above for de tails about the options.
8.7 Vehicle Mode
• T ap the mode icon to set th e v ehi cle mode .
• Press the shu t te r butt on to start recording.
The displa y shows the recording time.
• Press t he shu t ter but t on agai n to sto p recordi n g.
Notes
• In vehicle mode, the camera does not stop recording when the
card i s fu l l . It erases the o l de st f iles and conti nu e s record in g.
• See section Icons and settings above for detail s about th e options.
8.8 Viewing Files
To view a picture or a recording:
• Tap t he Playback icon .
• T ap the type of f ile yo u want to vie w .
• S e lect t he file fr o m the list .
• Tap ► or ◄ to b ro ws e th rou g h the files .
The images are shown in the backgro und.
• Tap the Playback icon to exit.
8.9 Deleting Files
To delete a picture or a recording:
• T ap the Playback icon .
• T ap the type of f ile yo u want to del ete .
• S e lect t he file fr o m the list .
• Tap Delete.
• Ta p Y es t wi ce to conf i rm.
Page 9

CAMCOLVC23
V. 0 2 – 27/05/2014 9 ©Vellema n nv
• Tap the Playback icon to exit.
9. Mana ging files from your Computer
You c an m anage f i les on the S D card by co nnec ting t he ca mera to a
computer. To do so:
1. Switch on t he ca m era.
2. C on nect the U SB po rt of the cam era [1 4 ] to a USB port o f your
computer with the included USB ca ble.
• The camera appears as a removable disk on your computer.
• The c amer a saves th e fil es in t h e f ol lowing folders
o VIDEO: record i ngs take n i n v i deo m ode
o CAR: re cordings take n in ve hicle mode
o JPG: pic t ur e s
Note
The camera functions cannot be used while the cam era is connected
to yo ur computer.
When done, safe ly re move t he d evi ce fro m yo ur com pu ter:
Windo ws®
To sa fe l y rem ove the de vi ce:
1. Click the icon Safel y Re move Hardwar e in t he not i fi cat ion area
a t the rig ht of the ta skb ar and click the de vi ce tha t you wa n t to
remove.
W indo ws will display a notif icatio n te llin g you it's s afe to remo ve
t h e dev ice.
2. Unplug the device from the USB port.
Macintosh®
1. In the F i nder, cl i ck the Eject i con next to the de vi ce .
2. Unplug the device from the USB port.
Page 10

CAMCOLVC23
V. 0 2 – 27/05/2014 10 ©Vellema n nv
10. Remote Control
M a ke sure t he rem ote co ntrol co ntai ns a batte ry .
• P oi n t the rem ote to the infrared eye o n the camera.
• The remote has the following buttons
o P o we r: turns off the camera.
o Snap: tak es a picture .
o Video: records vid e o.
11. Waterproof Housing
The camera comes with a waterproof housing. It is recommended to
test the hous in g without the camera before use.
• Before sealing the waterproof case, m a ke sure the camera
h ousin g’s rubber se al is clean. A single hair or g rain o f sa nd can
cau se a l e ak. You ca n te st the housi ng by clos ing the ca se witho u t
inserting the camera. Submerse the case completely in water for
about a minute. Remove the case from the water, dry off its
exterior with a towel, then open the case. If the entire interior is
dry , t he cas e is sa fe for us e und er water.
• R e memb er to put the cam era in the des ired mode before inserting
the camera in the waterpro o f c as e. There i s no ext ernal b utton to
change the ca mera mo de.
• After every use in salt water, you will n eed to rinse the o u tside o f
the housing with non-sal t wa t er a n d dry it. No t d oing th is ca n
eventually ca use co rrosion of the hinge pin and salt build-up in th e
seal, which can cause fa ilure .
• To cl e an the seal , ri nse in f re sh wa t er and s ha k e dry. Drying the
seal with a cl oth may cause the seal to leak . Re-ins ta ll the seal
i nto the grooves i n the backdoor o f t he hous i ng.
12. Cleaning and Maintenance
Battery
WARNING
• D o not pun ct ure or throw b at teri e s in f i re a s t hey
mi gh t e xplo de .
•
Keep batteri es aw ay from children.
This device contains an inte rnal, non-removable ,
rec h argeable bat t ery. Whe n t he device is end-of-life, it
must b e dis posed o f in a cco rda n ce with lo cal regu la tio ns.
Page 11

CAMCOLVC23
V. 0 2 – 27/05/2014 11 ©Vellema n nv
• There are no user -servi ce abl e parts.
• W ipe the de vice regu la rly with a d ry, lint-free cloth. D o not us e
al co hol or s ol vent s.
13. Technical Specifications
st orage capaci ty
m ax . 32 G B S D -HC card ( not i ncl.)
pick-up elemen t
5 megapixel CMOS
vie win g ang le
120° (wide angle ) f = 2.9 mm
built-in microphone
yes
PC camera function
no
aperture
F3.1
white ba lance
auto
HDMI port
yes
video
video resolution: 1080P @ 30fps
v i de o f ile form at: H.2 64 (AVI)
reco rding capacit y: ±1 00 MB /mi n
image
image resol utio n: 5 megapixel
image resol utio n: 12 megapixel
interpolated
ba ttery in cam e ra
built-in lithium 1500mAh batte ry
lifetime: ± 2 .5 hour s
ba ttery in rem ote control
3V lit hiu m CR 20 25
dim ensions
70 x 52 x 34 mm
we ig ht
72 g
Use this device with origina l accessories only. Velleman nv
cannot be held responsible in the event of damage or injury
resulting from (incorrect) use of this devi ce. For more info
concerning this product and the latest version of this ma nual,
please visit ou r website www.velleman.eu. The inf ormati on in
this manual is subject to change without prior notice.
W ind o ws , W ind o ws XP, Windows 2 00 0, Windows V i sta, Windows
Aero, Windows 7, Windows 8, Windows Mobile, Windows Server a re
re g istered tradema rks o f Microsof t Corp oration in the U ni ted States
and other countries.
Page 12

CAMCOLVC23
V. 0 2 – 27/05/2014 12 ©Vellema n nv
iPad , iPod, iPod touch, iPhone, Mac, iMac, Ma cBook, Powe rBo o k,
P o we r Mac, Mac OS are trademarks of Apple Inc., registered in the
U.S. and other countries.
© COPYRIGHT NO T ICE
The copyright to this manual is owned by Velleman nv. All
worldwide rights reserved. No part of this manual may be copied,
r eprodu c ed, tran sl ated or reduce d to any elec tr on ic m edium or
o the rwis e witho u t the p rior writte n conse n t of the cop yrig h t h older.
Page 13

CAMCOLVC23
V. 0 2 – 27/05/2014 13 ©Vellema n nv
GEBRUIKERSHANDLEIDING
1. Inleiding
Aan all e ing ez eten en van de Eur opes e Unie
B e langrijk e m i lie u-informatie betr effende dit prod uct
Dit sy mbool op het toe s tel of de verpa kking ge ef t a an dat ,
a ls he t na z ijn le ve nscyclus wordt wegge worpen, dit toestel
sc ha de kan toebr e ngen aa n het mi l ieu. Gooi di t toestel ( e n
ev entuele batteri jen) niet bi j het gewone h u ishou delijk e
af val ; het moet bi j ee n ges p ecial ise erd bedrijf
terechtkomen voor recyclage. U m oet dit toestel naar uw verdeler of
naar een lokaal recyclagepunt brengen. Respecteer de plaatselijke
milieuwetgeving.
H eb t u vrag en, c on tac teer d an d e pl aats e li j k e au tor itei te n
betr effend e d e verwijd ering.
Dank u voor uw a ankoop! Lees deze ha ndle iding grondig voor u het
to estel in geb ruik neemt. Werd h et toes tel besch ad igd tijden s he t
tra nsport, installeer het da n nie t e n ra adpleeg uw de aler.
2. Veiligheidsinstructies
WAARSCHUWING
U ma g b at teri jen nooit d oor b oren of i n he t v uur gooi e n
(explosiegevaar).
H oud batterijen uit h et ber eik van ki nderen.
D i t toestel bev at e en in terne herla a dbare batterij.
Wanneer het product het einde van zijn levensduur heeft
bereikt , on tdoe u er dan v an vol gens de pl aatse li jk e
regelgeving.
Demon teer of op en d i t toeste l NOOI T. Er z i jn geen do or
de gebruik er ve rv angb are onderdelen in dit toestel.
3. Algemene richtlijnen
Raadp leeg de Velleman® service- en kw aliteitsgarantie
ac ht eraan de ze handleidi n g.
• Bescherm dit toestel tegen stof en extreme temperaturen.
• Bescherm tegen schokken. Vermijd brute kracht tijdens de
bedie ning.
Page 14

CAMCOLVC23
V. 0 2 – 27/05/2014 14 ©Vellema n nv
• Ri cht d e c amera nooi t naar d e zon o f naar an d ere weerka ats ende
objecten toe.
• Bed ek de lens nooit .
• Leer eerst de functies van het toestel kennen voor u het gaat
gebruiken.
• Om veiligheidsredenen mag u geen wijzigingen aanbrengen.
Sch a de d oo r wijzig in gen die de gebrui ker heeft aangebracht aan
het to es tel valt niet o nder d e garant ie.
• Gebruik het toestel enkel waarvoor het gem aakt is. De garantie
vervalt aut omatisch bij ongeoorloofd gebruik.
•
D e ga rantie gel d t niet v oor sch ade do or h et negeren va n b ep aalde
richtlijne n in d eze handleid ing en uw dealer za l de
verantwoordelijkheid afwijzen voor defecten of problemen die hier
rechtstreeks verband mee houden.
• Er zijn geen door de gebruiker vervangbare onderdelen in dit
toestel . Voor onderhoud en/of res erve onderdelen, conta cteer uw
dealer.
•
Installeer en gebruik deze camera NIET voor illegale praktijken en
respecteer ieders privacy.
4. Eigenschappen
• actie- en sport ca mera m et mo ntageb eugels en wat erd i cht e
cassette
• opn a me op mi cr oSD -kaart (niet meegelev.)
• opnamekwaliteit: 1 080p HD V ideo - 30 fps
• ge ma kke lij ke c o nfigur at ie
• aanraakgevoelig kleurenscherm
• IR-afstandsbediening
• 2 opnam emodi
o v o ert uigmo d us: de record er wi s t het ou d ste bestand a ls de
microSD-kaart vo l is
o vid eomod us : de reco rder b l ijft op nemen to t de mi croS D-kaart
v ol is
5. Omschrijving
Raadp leeg de af be eldinge n op pa gina 2 van dez e hand leidi ng.
1
IR-led
2
Cameralens
Page 15

CAMCOLVC23
V. 0 2 – 27/05/2014 15 ©Vellema n nv
3
Laadindicator
4
Ind i c ator scherm
uitgeschakeld
5
Knop scherm in/uitschakelen
6
Scherm
7
Aan/uit-knop
8
Microfoon
9
Sluiterknop
10
Statiefaansluiting
11
MicroSD-kaartslot
12
Resetknop
13
HDMI-poort
14
USB-poort
6. Een geheugenkaart plaatsen
• Plaats de mi cr oSD-kaart in het kaartslot. De pij l geeft aan hoe u
de k aar t mo et plaatsen.
• Om d e mi croSD -k aart t e v erwi jderen, d ruk vo orzi chti g op de
ge he ug enk a art en daarna kunt u de SD-kaart eruit trekken.
Opmerking
Voor 1080P v i d eo-opname rade n wij u aan om een SDgeheugenkaart van 8 GB (of hoger) met snelheidsklasse 10 te
gebruiken.
7. De camera opl ad en
• Om d e came ra op te la den, slui t u d e U S B-poort van de came ra
[14] aan op een USB-poort van uw computer met de
meegeleverde USB-kabel.
•
De rode led [3] licht op wanneer de camera aan het opladen is en
schakelt uit wanneer de batterij volledig opgeladen is. Het duurt
ongeveer 2 à 4 uur, om de camera volledig op te la d en.
• U kunt de camerafuncties niet gebruiken zolang de camera
aangesloten is op uw com pute r.
• Is de aangesloten cam era i nges c hakel d, da n ku nt u de besta nde n
op de S D -kaart van de camera openen.
• Raadpleeg 'Veiligheudsinstructies' voor het verwijderen v an de
ba tterij.
8. Gebruik
8.1 De camera in- en uit scha k e len
De camera
inschakelen
Houd de aan/uit -knop gedurende 2
Page 16

CAMCOLVC23
V. 0 2 – 27/05/2014 16 ©Vellema n nv
seconden ingedruk t om de camera in te
schakelen.
De camera
uitschak elen
O m de ca m era ui t te sch akelen, druk ko rt
op de aan/uit-knop .
Energiebesparende
modus
Als u de ca m era gedu ren de een bep aalde
tijd ni et gebruikt, dan gaat het toestel
over in energiebesparende modus. De led
aan de achterk ant [4] licht op.
H et s cherm
uitschak elen
U kunt h et sc herm uit sc hake len m et de
k nop Sche rm i n-/ uitsc ha kelen [5].
8.2 De tijd e n datum instellen
1. D ruk op het i c oo nt je D A TE/TIME op het s cherm.
2. G eb ruik de pi jl tjes ▲ en ▼ om een instelling te wijzig en.
3. G eb ruik de pi jl tjes ► en ◄om naar een ander i tem te g aan (dag,
maa nd, jaar , min ut en, s ec onden en dat umfo rm aa t).
4. Dru k op het icoon tje SET .
8.3 Cameramodi
De camera heeft 3 modi, linksboven weergegeven op het scherm
d. m.v. een ic oontj e.
video
foto
auto
Bij het inschakelen start de camera altijd op in videomodus. Druk op
het modusicoontje tot de gewenste modus geactiveerd is.
8.4 Iconen en Instellingen
De ic onen gebr ui ken
Om d e ico nen te gebru ike n
• Druk op een functie-icoontje om de opties weer te geven.
De opties worden onderaan het scherm weergegeven.
• D ruk op de gewens te o ptie.
• Druk no g maals op h et f unctie-icoontje om te annule ren.
Page 17

CAMCOLVC23
V. 0 2 – 27/05/2014 17 ©Vellema n nv
Generieke icon en
De onderstaan d e ic onen zijn beschi kbaar in alle modi (vide o, fot o,
voertuig)
d e da tum en ti jd instel len
batterijniveau
afspelen
inzoomen - uitzoomen
D e zoo mfac tor wordt tu ss en de beid e i co nen
weergegeven.
Iconen in fotomodus
De s pe cifieke fun cties voor fo tomod us z ijn:
Ge z ichtsde te ctie in - of uit schake l e n.
D e beeldre sol utie instel len.
H et g etal na as t h et icoontje too n t he t
rester end aantal f oto's op de ge heugenka art
in de geselecteerde resolutie (afhankelijk
van de grootte van de SD-kaart).
[Sho oti ng m ode s]
Het icoontje geeft de huidige opnamemodus
weer.
Er is geen opname m odu s i ngesteld.
Zelfontspanner
Na 10 second en wor dt ee n f oto ge nomen
na dat u d e slui ter k no p he bt i ngedrukt.
Continu-opname
Neemt 3 foto's met één druk op de
sluiterknop.
Iconen in videomodus
De v ide or esol utie instel len.
De tijd na as t he t i coo n tje too n t de resterende
o pn ametijd in d e ges el ectee rd e res olutie
( afha nk el i jk van d e groott e va n d e S D -kaart).
Page 18

CAMCOLVC23
V. 0 2 – 27/05/2014 18 ©Vellema n nv
Iconen in voertuigmodus
De camerabeelden omdraaien. Deze functie is
handig wanneer de camera ondersteboven
gehoude n wordt.
De v ide or esol utie instel len.
De tijd naast het icoontje toont de resterende
o pn ametijd in d e ges el ectee rd e res olutie
( afha nk el i jk van d e groott e va n d e S D -kaart).
8.5 Een videob es tand opn emen
• Bij het inschakelen, s ta rt de camera op in videomodus .
B evindt de ca mera zic h in een andere m odu s , druk d an op het
modusicoontje om de modus te wijzigen.
• Druk op de sluiterknop om te beginnen opnemen.
Het scherm geeft de opnametijd weer.
• Druk nogmaals op de sluiter knop om de opname t e st oppen.
Opmerkingen
• Als de SD-kaa rt vol is, dan stop t de camer a met opnemen.
8.6 Foto's maken
•
Druk op het modusicoontje om de cam era in fotomodus te zetten
.
• Druk op de sluiter knop om een foto te maken.
V oo r meer in form atie over de opt ie s , z ie "Ico n en en i nst elli ng en " .
8.7 Voertuigmodus
• Druk op het modusicoontje om de cam era in voertuigm odus te
zetten. .
• D ruk op de sl ui terkn op o m de opn ame te b eg innen .
Het scherm geeft de opnametijd weer.
• Druk nogmaals op de sluiter knop om de opname t e st oppen.
Opmerkingen
• In voertuigm odus s to pt de cam er a ni et met op ne m e n als d e SD -
ka art vol is . De recorde r wis t h et ouds te bes tan d en bli jft
opnemen.
•
V oo r meer in form atie over de opt ie s , z ie "Ico n en en i nst elli ng en " .
Page 19

CAMCOLVC23
V. 0 2 – 27/05/2014 19 ©Vellema n nv
8.8 Bestanden wee rgeven
Een foto of opn ame weergeven:
• D ruk op het afspeelico o ntje .
• Druk op het bestandstype dat u w ilt w eergeven .
• Selecteer het bestand in de lijst.
• Druk op ► of ◄ om door de bestand e n te b la dere n.
D e afbe eldi ngen worden als achterg rond weerg egeven.
• D ruk op het afspeelico o ntje om af te sluite n.
8.9 Be sta nden wisse n
Een foto of opn am e wis sen:
• D ruk op het afspeelico o ntje .
• Druk op het bestandstype dat u w ilt w issen .
• Selecteer het bestand in de lijst.
• Dr uk op Delete.
• Druk tweemaal op Yes om te bevestigen.
• D ruk op het afspeelico o ntje om af te sluite n.
9. Bestan d en beh er en van uw computer
U kunt bestande n op de SD-kaart beheren door de camera aan te
sluiten op een computer. Ga als volgt te werk:
1. Schakel de camera in.
2. Sluit de USB-poo rt van de camera [1 4] aan op een U S B-poort
v an u w c o mpu t er met de meege leverd e U S B-kabel.
• De
camera wordt weergegeven als een verwisselbare schijf op uw
compute r.
• De camera slaa t d e bes tan den op in d e volge nd e map pen
o VIDEO: opnames gemaakt in videomodus
o CAR : opn a m es gem aakt in voertu i gmodus
o J PG: afbeeldingen
Opmerking
U kunt de ca merafuncties nie t gebruiken zo la ng de came ra
aangesloten is op uw com pute r.
Page 20

CAMCOLVC23
V. 0 2 – 27/05/2014 20 ©Vellema n nv
Wanneer u klaar bent, verwijdert u het toestel veilig van uw
compute r.
Windo ws®
Om het toestel veilig te verwijderen:
1. Klik op het icoontje Safely Remove Hardware (hardware veilig
verwijderen) in he t s ysteemvak re chts op de taakbalk en kl ik
op het toestel dat u wilt verwijderen.
Windows geeft het volgende bericht weer: toestel kan veilig
verwijderd worden.
2. Ontkoppel het toestel van de USB-poort.
Macintosh®
1. Klik in de Finder op het eject-ico ontje (uitwerpen) naast het
to estel.
2. Ontkoppel het toestel van de USB-poort.
10. Afstandsbediening
C ontrolee r of er een batterij in d e af standsbe dieni ng z it.
• Richt de afsta ndsbe diening op de infra ro odsensor van de camera.
• Toet sen op de afstandsbedi ening
o P o we r: de camera uitschake l e n.
o Snap: e en foto nem e n.
o Video: video opn emen .
11. Waterd ichte ca ssette
De camera wordt geleverd met een waterdichte cassette. Test de
ca s sette z on de r came ra voo r u he t toes tel geb ru ikt.
• Cont roleer of de rubb erpa kki ng proper is vo or het af dichten va n
de waterdichte cassette. Een enkel haartje of zandkorrel kan een
lek ve roo rz aken. U k u nt dit testen d oor de ca sse tte te slu iten
zonder de camera erin te plaatsen. Dompel de cassette gedurende
één minuut geheel onder in water. Neem de cassette uit het
wat er, droo g de bui tenk ant af met een h andd oe k en o pen de
Page 21

CAMCOLVC23
V. 0 2 – 27/05/2014 21 ©Vellema n nv
behuizing. Als de binnenkant droog is, dan ka n de casse tte
ge bru ikt worden o nder wa t er.
• Vergeet niet om de camera in de gewenste modus te zetten voor
u de camera in de wate rd i chte casse tte plaa ts t. Er is g een exte rne
knop voor het veranderen van de modus.
• Na elk g eb ruik in zout wat er, m oet u de buitenka nt van de
cassette spo elen m et niet -zout water en daarna afdrogen. Als u
d it niet doet, dan kan d it uite in delijk leiden to t corrosie op de
scharnie rpe n en zoutopbouw in de a fdichting. Dit kan leiden tot
gebreken.
•
Als u de afdichting wilt reinigen, spoel deze dan schoon met zoet
wat er en schud dro og . D rogen met ee n d oek ka n l eiden t o t een
l ek in de afdichting. Plaats de afdichting opnieuw in de groe ven
aan de ac h terka nt van de ca ssette.
12. Reini ging en onderhoud
Batterij
WAARSCHUWING
• U mag b at te r i jen nooi t do orbo re n of in het v uur
go oien (e x plosieg e v aar ).
• H oud batterijen uit h et ber eik van ki nderen.
Dit toestel bevat een interne, oplaadbare batterij die niet
kan worden verwijderd. Wanneer het product het einde
va n zijn leve nsduur hee ft bere ikt, ontdoe u e r dan va n
volgens de plaatselijke regelgeving.
• Er z ijn g e e n d oor de geb ruiker te v erva ngen onderdelen.
• Maa k het to es tel ger egeld sch o on m et een droge, niet p l uizend e
do ek . Ge br uik g e e n al c ohol of o plosm idd e len.
13. Technische specificaties
opslagcapaciteit
m ax . 32 G B op SD-HC kaart ( ni et
meegelev.)
opneemelement
5 megapixels C MO S
kijkhoek
120° (brede hoek) f = 2.9 m m
inge bouwde microfoon
ja
pc-camerafunctie
nee
lensopening
F3.1
Page 22

CAMCOLVC23
V. 0 2 – 27/05/2014 22 ©Vellema n nv
witbalans
auto
HDMI-poort
ja
video
vide ore sol utie: 1 080P @ 30fp s
formaat vid eobestand: H.264 (AVI )
o pname capa citeit: ±10 0 MB/m in
beeld
beeldresolutie: 5 mega pixels
beeldresolutie: 12 megapixels
geïnterpoleerd
bat te ri j ( c am era)
inge bou wde lithium batte rij 15 00m Ah
levensd uur: ± 2,5 uur
batterij (afstandsbedie ning)
3 V lithium CR 2 025
afmetingen
70 x 52 x 34 mm
gewich t
72 g
Geb r ui k di t toestel enkel met originele ac c essoires. Velleman
nv is niet aa nsprake lijk voor schade of kwetsuren bij
( ver keer d) g ebrui k van dit toes tel. Voor meer in formatie over
dit product en de laatste versie van deze ha ndleiding, zie
www.vell eman.eu . De informatie in deze handleiding ka n te
all en tijde worden gewijzigd zonder voorafgaande
kennisgeving.
Windows, Windows XP , Wi ndows 2000, Windows Vi sta, Wind ows
Aero, Windows 7, Windows 8, Windows Mobile, Windows Server zijn
geregistreerde handelsmerken van Mi cr osoft Corporation i n de
Verenigde Staten en in andere landen.
iPad , iPod, iPod touch, iPhone, Mac, iMac, Ma cBook, Powe rBo o k,
Power Mac, Mac OS zijn handelsmerken van Apple Inc., geregistreerd
in de V.S. en ande re landen.
© AUTEURSRECHT
Vel leman nv heeft het auteursrecht voor deze handleiding.
A lle wereld wijde rechten voorbe houden. Het is niet toe gestaan
om d eze handlei di ng of ged eel t en erv an ov er te ne m en, te kopiëre n,
t e ver talen, te bewerke n en op te sla an op ee n ele ktronisch m edi um
zo nder v o oraf gaand e sch rif telijke toes temming van de
rechthebbende.
Page 23

CAMCOLVC23
V. 0 2 – 27/05/2014 23 ©Vellema n nv
MOD E D'EM PLOI
1. Introduction
Aux résidents de l'Union européenne
Informations environnementales importantes concernant ce
produit
Ce s ymbole sur l'a ppare il o u l'em balla ge ind ique que
l'élimination d'un appare il en fin de vie peut polluer
l' e nv i ron ne m ent. N e pa s jeter un a ppar eil électri que o u
élec tr on ique (et des pile s éve n t uelle s ) parmi le s déchets
mun i ci paux n on sujets au tri sélec ti f ; u ne d échèterie
traitera l'appareil en question. Renvoyer cet apparei l à v otre
four nis se ur o u à un s er v i ce d e r ec y cl ag e local. Il convient de
respecter la réglementation locale relative à la protection de
l'environnement.
En cas de doute, contacter les autori tés locales pour
élim ination.
Nous vous remercions de votre achat ! Lir e le présent mode d'emploi
a ttentivement a van t la mise en s e rvice de l'ap pare il. Si l'a ppa reil a
été endommagé pendant le transport, ne pas installer et consulter
votre revendeur.
2. Consignes de sécurité
AVERTISSEMENT
Ne jamais perfo re r les piles et ne pas les jeter au feu
(dange r d’explosion).
G arder l es p i les hor s de la portée d es enfan t s .
C et ap p areil cont ient une pi le rec h arg eable . A la fin de sa
durée de vie, se débarrasser de ce produit en respectant
l a lé gi s lation d'éliminat ion loc ale .
NE JA MAIS désassem ble r o u o uvri r le boî t ier. I l n ’y a
aucune pièce réparable par l’utilisateur.
3. Directives générale s
Se référer à la garan tie de ser vice et de qu al ité Vell eman ® en
fi n de ce mode d'emp l oi.
• Protéger contre la poussière et les températur es extrêmes.
Page 24

CAMCOLVC23
V. 0 2 – 27/05/2014 24 ©Vellema n nv
• Protéger l’appareil des ch ocs. Traiter l'ap pareil avec ci rcon s pecti on
p e ndant l ’o pératio n.
•
de ne jamais aligner la caméra vers le soleil ou vers un tout objet
réfléchissant.
• Ne pa s couvrir la len tille .
• Se familiariser avec le fonction ne m ent de l'apparei l avant de
l'utiliser.
• Il es t in terdi t de mod ifi er l' appareil po u r des rais o ns d e sécu rité.
L es dom m ages o cca sionn és p ar des mo di ficati ons pa r le clie nt ne
t omb ent p as sous la g arant ie.
• N ’utiliser l'a ppareil qu’ à sa f onct i on prév ue. Un usage impropre
annule d'off ice la gar an t ie.
• Les dommage s occas io nnés p a r des modifica tions à l'a ppare il par
le client, ne tombent pas sous la garantie et votre revendeur
déclinera toute responsabilité pour les problèmes et les défauts
qui e n r ésultent.
• Il n’ y a aucune pièc e ré parable par l ’ u tilisateur. Commander des
pièces de rechange éventuelles chez votre revendeur.
•
Installer et utiliser la caméra en respectant la législation et la vie
pri v é e des tiers.
4. Caractérist iques
• caméra d'action et de sport av ec supports de mont age et caisson
étanche
• enreg is trement sur carte m icroSD (non incl.)
• q ua l ité d'enreg i s trement 10 8 0p H D Vi deo - 30 fps
• c onfigur at ion fa c ile
• écran tacti le à couleu r
• t éléco m mande IR
• 2 mod es d'enregistr emen t
o mode vé hicule : l'enregistreur supprim e l e f ic hier le plu s ancie n
lorsque la carte microSD est pleine
o m ode vid é o : l 'en regi stre ur con tin ue à enregistrer jusqu 'à c e
qu e la carte m ic r o S D so it ple ine
5. Description
Se référer aux figures en page 2 de ce mode d'emploi.
1
L ED IR
2
O b je ctif
Page 25

CAMCOLVC23
V. 0 2 – 27/05/2014 25 ©Vellema n nv
3
Indi cateur de cha rg e
4
Indi cateur éc ran étein t
5
B outon écran O n/Of f
6
Afficheur
7
Int errupteur marche/arrêt
8
Microphone
9
B outon d'obturate ur
10
A da ptateur de trépied
11
Sl ot pour carte mi croSD
12
Bouton de réinitialisatio n
13
Port HDMI
14
Port USB
6. Ins érer une car te mémoi re
• I ns érer la ca rte mi croS D dans le slot de ca rte. La f lèche ind i que la
dire ction d' inse rtion de la carte.
• Pou r ret i rer la carte mi croS D , appu y er d o ucem ent su r l a carte
mémoire jusqu'à ce qu'elle se libère.
Remarque
Pou r e nregistr
er de la vidéo 1080P, utiliser une carte SD classe 10 de
8 G o ou s upérieur.
7. C h arg er l a camér a
• Pou r c harger la caméra, c onnecter le port USB de l a cam éra [ 14]
à un port USB de votre ordinateur avec le câble USB inclus.
• L'indica te ur rouge [3] s'allume pour indiquer que la caméra se
charg e et s' éteint lorsqu e la batterie est co mp lète men t ch arg ée.
Une ch arge complète prend environ 2 à 4 heur es.
• I l n'es t pas po ssible d 'u tiliser les fon ctio ns de l'a ppa re il tant que la
caméra est c onnec té e à v otre ordinateur.
•
Si la caméra connectée est allumée, il est possible d'accéder aux
f i chi ers su r la carte SD de la ca m éra.
• Consultez 'Consi gnes de sécurité' pour plus d'informations sur la
mis e au re but des piles.
8. Emploi
8.1 Allumer et éteindre l a c améra
Allumer la caméra
Pou r a l l um er la cam éra, main te nir e nfo nc é
le bouton durant 2 secon de s.
Etei nd re la c am éra
Pour éteindre la caméra, appuyer
bri èveme nt sur .
M ode d 'écon omie
Si la caméra n'e st pa s utilisée pendant un
Page 26

CAMCOLVC23
V. 0 2 – 27/05/2014 26 ©Vellema n nv
d'énergie
certain temps, l' appar eil passe en mode
d
'économ ie d'énergie. La LED à l'arrière
[4] s' allume.
Etei nd re l 'écran
Il est possible d'éteindre l'écran avec le
bouton écran on/off [5].
8.2 Rég l er l'h eure et la date
1. Taper su r l' i cô ne D A TE/ TIME su r l 'écran.
2. U t i l i ser les f lèche s ▲ et ▼ pour change r un réglage.
3. U t i l i ser les f lèche s ► et ◄ pour passer à l'optio n suiva nte (jour,
mois, année, mi nut es, sec ondes et format de date)
4. Taper sur l' icô ne S ET.
8.3 Modes de caméra
La caméra dispose de 3 modes d'enregistremen t, cha cu n représ en té
par un i côn e affi ché à g auche de l'é cran.
vidéo
photo
véhicule
La caméra démarre en mode vidéo par défaut. Taper sur l'icône de
mode jusqu'à ce que le mode souhaité soit activé.
8.4 Icônes et réglages
Utiliser les icônes
Pou r util iser les icônes
• Tap er sur une i cône d e fonction p ou r ac céd er a ux opt ion s .
Les options s'affichent en bas de l'écran.
• Taper sur l 'opt ion souhaitée.
• Taper à n ouvea u sur l'ic ôn e d e f onc tion p our ann uler .
Icônes génériques
Les icôn e s suiv ants s ont d i s ponibles d ans tou s les modes (vidéo,
photo, véhicule).
régler la date et l'heure
nive au d e la b at t e r ie
Page 27

CAMCOLVC23
V. 0 2 – 27/05/2014 27 ©Vellema n nv
lecture
zoom avant - zoom arri ère
Le facteur d'agrandissement s'affiche entre les
d eux i cônes.
Icônes en mode photo
Les fonctions spécifiques pour le mode photo sont :
Act i v er ou d ésact i ver la dét ect ion de v isag e.
R égler la r é s o lution d'im age .
Le chiffre af f i ché à côté de l 'i côn e représente
l e n ombre d 'im ages restantes sur la carte
SD dans la résol utio n séle ct i onnée (en
fonc t io n de la tai lle d e la car te SD).
[Sho oti ng m ode s]
L ' icône aff iche le m ode de prise de v ue
actuel.
Pas de mode de prise de vue sélectionné.
Retardateur
L a phot o est prise environ 1 0 sec ondes
aprè s avo ir appuyé sur le bouton
d'obturateur.
Prise de v ue en rafale
Perm et de prend re 3 pho to s par un seul
appui sur le bo uto n d'obturate ur.
Icôn es en mode vidéo
R égler la r é s o lution v id é o.
Le temps affiché à côté de l'icône représente le
temps d'en reg i s trement restant d an s la
résolution sélectionnée (en fonction de la taille
d e la ca rte SD) .
Icônes e n m ode vé hic ule
Permet d'inverser l'image de la caméra. Une
fonction pratique lorsque la caméra est tenue à
Page 28

CAMCOLVC23
V. 0 2 – 27/05/2014 28 ©Vellema n nv
l'envers.
R égler la r é s o lution v id é o.
Le temps affiché à côté de l'icône représente le
temps d'en reg i s trement restant d an s la
résolution
sélectionnée (en fonction de la taille
d e la ca rte SD) .
8.5 Enregistrer une vidéo
• La caméra démarre en mode vidéo par défaut .
L orsque la caméra est d ans un au t re mo de, taper s ur l'i cône d e
m ode pour cha n ger le m ode.
• Appuye r sur le bouton d'obturate ur pour commencer à
enregistrer.
Le temps d'enregistrement s'affiche à l'écran.
• Appuy er à nouveau sur le bouton d'obturateur pour arrêt er
d'enregistrer.
Remarques
• L orsque la carte SD es t pl e i ne, la caméra a rrêt e d'en re gistrer.
8.6 P re ndr e une pho t o
• Taper sur l'icône d e m o de p ou r m ettre la caméra en mode photo.
.
• Appuye r sur le bouton d'obturate ur pour pre ndre une photo.
Pour plus d'info rmatio ns sur le s options, consulter "Icônes e t
ré glages".
8.7 Mode véhicule
• Tap er sur l'icô n e de mode pour mett re la caméra en m o de
véhicule. .
• Appuye r sur le bouton d'obturate ur pour commencer à
enregistrer.
Le temps d'enregistrement s'affiche à l'écran.
• Appuy er à nouveau sur le bouton d'obturateur pour arrêt er
d'enregistrer.
Page 29

CAMCOLVC23
V. 0 2 – 27/05/2014 29 ©Vellema n nv
Remarques
• En m ode vé hi cul e, la cam éra n'a rrête pas d 'en re gistrer lo rsque la
carte SD est pleine. L'enregistreur supprime le fichier le plus
ancien et continue à enregistr er.
• Pour plus d'info rmatio ns sur le s options, consulter "Icônes e t
ré glages".
8.8 Visua liser des fi chi er s
Pour visualise r une photo ou un enregistreme nt :
• Taper sur l' icô ne de le ct ure .
• Taper sur le type de fichier que vous souhaitez visualiser
.
• Sé le ctionne r le fich ie r dans la liste.
• Taper sur ► ou ◄ p our nav igu er da ns les fichier s.
Les images son t affichées com m e fond d 'écra n.
• Taper sur l' icô ne de le ct ure pour quitt er.
8.9 Supprimer des fichiers
Pour supprimer une pho to o u un enregistrement :
• Taper sur l' icô ne de le ct ure .
• Taper sur le t ype de f ichie r que v ous souhai t e z s upp rimer
.
• Sélectio nne r le fichier dan s la liste.
• Taper sur Delete.
• Taper deux fois sur Yes pour confir mer.
• Taper sur l' icô ne de le ct ure pour quitt er.
9. Gérer des fichiers depuis votre ordinateur
Il est possible de gérer les fichiers sur la carte SD en connectant la
caméra à un ordinate ur. Proc éder co m me suit :
1. Allumer la caméra .
2. Connecter le port USB de la caméra [14] au port USB de votre
ord i nateu r avec le câbl e US B in cl u s.
• La ca mé ra s'affiche co mme u n disque a mo vib le sur votre
ordinateur.
Page 30

CAMCOLVC23
V. 0 2 – 27/05/2014 30 ©Vellema n nv
• La caméra sauvegarde le s fichiers dans les dossiers suivants
o VI D EO : enreg i s trem en ts fa i ts en m o de vid éo
o CA R : enregist rements faits en mo de véhi cule
o JPG : pho tos
Remarque
I l n'es t pas po ssible d 'u tiliser les fon ctio ns de l'a ppa re il tant que la
caméra est co nne c té e à v otre ordinateur.
Une fois term iné, déconnecter l'appareil de votre ordinateur en toute
sécurité :
Windo ws®
Déconnecter l'appareil en toute sécurité :
1.
Cliquer sur l'icône Safely Remove Hardware (retirer le matériel en
t o ute sécu rité) dans la zon e de notificatio n situé e à droit e de la
barre de tâches et cliquer sur l'appareil que vous souhaitez
déconnecter.
Windows affichera une notification pour indiquer que v ous pouvez
déconnecter l'appareil en toute sécurité.
2. Déconnecter l'appareil du port USB .
Macintosh®
1. Dans le Finder, cliquer sur l'icône Eject (éjecter) à côté de
l'appareil.
2. Déconnecter l'appareil du port USB.
10. Télécommande
Vérifier qu'une pile est installée dans la télécommande.
• Pointer la télécommande vers le capteur infrarouge de la caméra .
• La té lé comma nde est do tée de s boutons suivants
o P o we r : débranche la caméra.
o Snap : prendre une photo .
o Video : enregi strer une vidéo.
Page 31

CAMCOLVC23
V. 0 2 – 27/05/2014 31 ©Vellema n nv
11. Caisson étanche
L a cam éra es t liv rée dan s un ca is son étanch e. Tester le caisson sans
la caméra avant de l'utiliser.
• Avant de fermer le caisson étanche, contrôler si la bague
d'é tanchéité en caoutchouc est pro pre. Un seul cheve ux ou g ra in
de sable peut causer une fuite. Il est possible de tester le caisson
en le fermant sans insérer la caméra. Immerger le caisson
complè teme nt da ns l'ea u penda nt enviro n 1 minute. Sortir le
caisson de l 'e au , séc her l 'extérieur av ec une s erv iette , puis ou vri r
l e cai ss on . Si l ' intérieur e s t en t ière m en t sec, le caisson peut êtr e
utilisé sous l'e au san s danger.
• Ne pas oubl ier de met tre la caméra dans le mode souhaité avant
d 'i nsérer la cam éra dans le caisson étan che. I l n ' y a pas de bou ton
externe pour changer le mode de caméra.
• Aprè s chaque utilis ation dans de l'eau salée, rincer l'exté rie ur du
caisson et le joint à l'eau douce et laisser bien sécher. Ne pas faire
ainsi pourrait à t erme c auser une formation de corrosion de la
broche de charnière et l'accumulation de sel dans le joint, ce qui
peut provoquer un dysfonctionnement.
• Pour nettoyer le joint, rincer à l'eau fraîche et secouer pour le
sécher. Sécher avec un tissu risque de causer une fuite dans le
jo in t. Ré installer le join t dans la rainu re à l'arrière du caisson .
12. N ettoyage et en tr eti en
Les piles
AVERTISSEMENT
•
Ne jamais perforer les piles et ne pas les jeter au
feu (danger d’explosion).
• G arder l es p i les hor s de la portée d es enfan t s .
Cet appareil est doté d'une batterie rechargeable interne
non amovible. A la f i n d e sa du ré e de v ie, se dé bar rasser
de c e pr o duit en respe c t ant la législation d'élimin a t io n
loca le.
• Il n’y a aucune pièce réparable par l’utilisateur.
• Essuye r réguliè rement l’a ppa re il a ve c un chiffon sec non
peluch eux. É vit er l’u sag e d’ alco ol et de solv ant s.
Page 32

CAMCOLVC23
V. 0 2 – 27/05/2014 32 ©Vellema n nv
13. Spécificat ions techniques
cap aci té d e m émoire
m ax. 32 Go sur carte S D -HC (non
incl.)
capte ur
5 mégapixels C MO S
angle de v ue
120° ( gran d an gle) f = 2. 9 m m
microphone incorporé
oui
f on ct io n de ca m éra PC
non
ouverture
F3.1
balance des blancs
auto
port HD MI
oui
vidéo
résol ution vi d é o : 108 0P @ 30fp s
format de fichie r vidé o : H.264 (AVI)
cap aci té d'enregistr emen t : ± 1 00
MB/min
image
ré solution d'image : 5 mé gapixels
r ésolu t ion d'ima ge : 12 m égapixels
interpolés
bat te ri e ( c am éra)
batte rie au lithium in té g rée de 15 00
mAh
durée de vie : ± 2,5 heures
batterie (télécommande)
lithium 3V CR2025
dim ensions
70 x 52 x 34 mm
poids
72 g
N 'empl o yer cet appareil qu 'avec des access oir es d' or igin e. L a
SA Velleman ne peu t, dans la mesur e conforme au droit
app li c able êtr e tenue resp onsable d es dommages o u lé sion s
(directs ou indirects) pouvant résulter de l’utilisation de cet
appareil. Pour plus d'informations concerna nt cet artic le et la
der n ièr e versi on de ce mode d' emplo i, con sulter n otr e si te
www.vel leman.eu . L es spécifi cati ons et le contenu de ce
mod e d'emp loi peu vent être modi fi és sans avis préal able.
Windows, Windows XP , Wi ndows 2000, Windows Vi sta, Wind ows
Aero, Windows 7, Windows 8, Windows Mobile , Windows Server sont
des marques commerciales enregistr ées de Microsoft Corporation aux
Etats-Unis et d 'a utres pa y s.
Page 33

CAMCOLVC23
V. 0 2 – 27/05/2014 33 ©Vellema n nv
iPad , iPod, iPod touch, iPhone, Mac, iMac, Ma cBook, Powe rBo o k,
Po we r Mac, Mac OS sont des m arqu e s d' Apple In c. , déposées aux
États-Uni s et dan s d'autres pays.
© DROITS D’A U TEU R
SA Velleman est l’ayant dr oit des dr oits d’au teu r pour ce
mode d' emploi . T ou s droits mondiaux réservés. To ute
reproduction, traductio n, copie ou diffusion, intégrale ou pa rtielle, du
c ont e nu de c e mode d' emploi par quelque pr oc é dé ou sur tout
support électr on ique que c e s oit est inter d i te sans l ’ac cord préa lable
é crit de l’a yant dro it.
Page 34
CAMCOLVC23
V. 0 2 – 27/05/2014 34 ©Vellema n nv
MANUAL DEL USUARIO
1. Introducción
A los ciudadanos de la Unión Europea
Impor tan tes in formac iones sob re el medio ambiente
concer niente a este p ro ducto
Est e símb olo en e ste apar ato o el emb alaje indica que, si
tira las muestras inservibles, podrían daña r el medio
ambie nte. No tire este aparato (ni las pilas, si las hubiera)
en la ba su ra do mé st i ca ; de be ir a una e mpresa
esp eci al izad a en r eci cl aje. Dev uelva este a parat o a su
di
stribuidor o a la unidad de reciclaje local. Respete las leyes locales
en relac ió n c on el med io a m b iente.
Si tiene dudas, contacte con las autoridades l ocal es para
residuos.
¡Gr acias por el egir Velleman! L ea ate ntament e las instr ucc iones del
manual a nt e s d
e usar el aparato. Si el aparato ha sufrido algún daño
en el transporte no lo instale y póngase en contacto con su
distribuidor.
2. Instrucciones de seguridad
ADVERTENCIA
Nu nca perfore las pi las y no la s e che al fu e go (pe l i gro de
explosión).
Mante nga las pil as lejos del alca n ce d e niños.
Est e apar ato fun ciona c on una batería recarga b le. A l final
de su vida útil, respete las leyes locales en relación con el
medi o ambiente.
NUNCA desmonte ni abra la caja. El usuario no habrá de
efectu ar el man t enimiento de ninguna pie za.
3. Normas generales
Véase la Gar an tí a d e servi cio y calid ad Velleman ® al final de
est e manual del usuario.
• No e xponga este equipo a pol vo ni te m peraturas e xtre m as.
•
No agite el aparato. Evite usar excesiva fuerza durante el manejo
y la instalación.
Page 35

CAMCOLVC23
V. 0 2 – 27/05/2014 35 ©Vellema n nv
• nunca dirija la cámara al sol ni un objeto reflectante .
• No t oq ue la lente.
• Fam ilia rícese co n e l fun cionam iento del ap a rato antes de u tiliza rlo.
• P o r ra zones de se gurida d , la s modificacio nes no auto rizadas del
aparat o están prohibidas. L os daños causados por modifica ciones
no aut ori za das, no están cu bier to s p or la g arantía.
• Utilice sólo el aparato para las aplicaciones descr it as en est e
manual. Su uso inco rrecto anula la garantía completamente.
• L os daño s ca usa dos por descu id o de la s instrucciones de
segurid ad de este man ual i nvalidarán su g ar a nt í a y su dist ri buidor
no s er á respons a ble de ningún dañ o u ot ro s pro blema s
resultantes.
• E l usu ar i o no ha brá d e efec t uar el ma nt e nimiento de ninguna
pieza. Contacte con su distribuidor si necesita piezas de re cam b io .
• Instale y utilice la cámara al respetar la le gislación et la vida
privada de terceros.
4. Características
• cámara de acción y para deporti stas co n diferentes soportes y
caja resistente al agua.
• el aparato graba las imágenes en una tarjeta micro SD (no incl.)
• cali dad de g ra bación 1080p H D v ídeo - 30 f p s
• fá cil co n f igu ració n
• p an talla tá ctil a co lo r
• mando a dis tan cia IR
• 2 modos de grabación:
o modo de coche : el fichero más viejo se borrará si la tarje ta
micro SD es tá llena .
o función de vídeo: la cámara sigue g rabando ha sta que la
tarjeta mi cro S D e sté l len a .
5. Descripción
V éas e la s f iguras en la p ág ina 2 de este manual d el usuario .
1
Ilumi nac ión inf rar roja
2
Ó p tica
3
L ED de c arga (RECH AR GE)
4
Indi cad or de p an tal la
desactivada
5
B otó n d e pantalla ON/ OF F
6
Panta lla
7
B o tó n ON/OF F
8
Micrófono
Page 36

CAMCOLVC23
V. 0 2 – 27/05/2014 36 ©Vellema n nv
9
Botón de obturador
10
Conexi ón para un t rí pode
11
Ranura para la tarjeta micro
SD
12
Bo tón de reinicializa ción
(reset)
13
pue rto HDMI
14
puerto USB
6. Introducir una tarjeta de memoria
• Introduzca la tarjeta micro SD en la ranura. La flecha en la caja
ind ica cómo in troducir la ta rje ta m icro SD.
• Para sacarla, pre sione cuidadosamente sobre la tarjeta.
Observación
Para grab ar v íde o a 1 080P, utili ce una tarjeta (clase 10) d e 8 GB o
superior.
7. C arg ar la cámara
•
Para cargar la cámara, conecte el puerto USB de la cámara [14] al
puert o USB d el orden ador co n el cable US B i n clui do.
•
El LED rojo se ilum ina durante la carga y se desactiva si la cámara
está completamente cargada. La cámara tarda unas 2 a 4 horas
en cargars e.
• No es pos i b le uti lizar las f unciones de la cámara m ien t ra s es té
conectada al ord ena dor.
•
Si activa la cámara mientras está conectada al ordenador, puede
acceder a los ficheros de la tarjeta SD.
• Para m ás i n formac ión sobre la eliminación de baterí as, consu l te «
I nstrucciones de seguridad » ( vé a se arriba ) .
8. Funcionamiento
8.1 Activar y desac ti var la cámara
Activar la cámara
Para activar la cámara, mantenga pulsado
el bot ón ON /OFF durante 2 s e gundos.
Desactivar la cámara
Para desactivar la cámara, pulse
b re vem en te el bo tón ON/OFF .
Modo d e ahorro de
energía
El modo de ahorro de energía se activa
aut omátic amente después de un período
de inactividad. El LED de la parte trasera
[ 4] del apar ato se i lum i na.
Page 37
CAMCOLVC23
V. 0 2 – 27/05/2014 37 ©Vellema n nv
Desactivar el
monito r
De s acti ve la p antalla c on e l b otón [5].
8.2 Ajustar la hora y la fecha
1. Pu lse el ico no D A TE/TI ME .
2. Utilice la fl ech a ▲ y ▼ p ara cambiar el ajuste.
3. Utilice la fl ech a ► y ◄ para s eleccionar otro punto (día, m e s ,
año , min utos, se gun dos y fecha ) .
4. Pulse el icono SET.
8.3 Modos de funcionamiento
La cámara tiene 3 m odos de funcionam iento, representados por un
icono en la part e superi or izqu i erda de la pan tal la.
vídeo
foto
coche
L a cáma ra s ie m p re s e act iva e n el m o do d e víd eo. Pulse el icono d e
m odo has t a que s e active el m odo de se ado.
8.4 Iconos y Co nfiguración
Utilizar los iconos
P a ra utilizar los iconos
• Pu lse un icono de f unci ón para acce der a las opci ones.
L as o pci ones se vis ualizan en la parte inferior de la pantalla.
• Pulse la opción de seada .
• Vuel va a pulsar el icono d e func ión p ar a canc e l ar .
Iconos generales
Los sigu i ente s i con os están disp onibles en todo s l os mo do s de
funcionamiento (vídeo, foto, coche).
ajustar la fecha y la hora
nivel d e la b at ería
reproducción
acercar - alejar
Page 38
CAMCOLVC23
V. 0 2 – 27/05/2014 38 ©Vellema n nv
El factor de z oom s e v isu al iza entre am bos iconos .
Iconos en el modo de foto
Funciones específicas:
Act i var o desacti v ar la fu n ci ó n de
reconocimi ento facial.
A j ustar la r esol ución la im agen.
El número ju nto al i co no mue stra el n úm ero
d e imáge nes res tan te qu e se p uede g ra bar
e n la ta rje ta micro SD a l u tiliza r la
resoluci ón seleccionada (depende del
tamañ o de la ta rje ta SD) .
[Sho oti ng m ode s]
El icono muest ra el m odo de dis paro ac tual.
No e s t á selec ci onad o ningún modo de
disparo.
D i s par ador au to m ático
La foto está sa cad a au tom áticamen te 1 0
segundos después de habar pulsado el botón
de obturador.
Tomar fotos de manera continua
Tom a 3 fotos con una s ola presión en el
botón de obturador.
Iconos en el modo de vídeo
A j usta la res oluc ió n d e v íde o .
El t i emp o junto al i cono muest ra el tiempo
restante que se puede grabar en la resolución
seleccionada (depende del tamaño de la tarjeta
SD).
Iconos en el modo de coche
Permite inver tir la imag e n. Pr á c t ic o si c ue lga la
cámara al re vés.
A j usta la res oluc ió n d e v íde o .
El t i emp o junto al i cono muest ra el tiempo
restante que se puede grabar en la resolución
Page 39

CAMCOLVC23
V. 0 2 – 27/05/2014 39 ©Vellema n nv
seleccionada (depende del tamaño de la tarjeta
SD).
8.5 Grabar un vídeo
• La cá mara se activa en el modo de vídeo. .
S i quiere s elec cionar otro modo, pulse el i con o de modo.
• Puls e el botón d e o btur a dor para emp e zar a gr abar .
L a pantalla mue str a el t ie m p o de gra b ación.
•
Vuelva a pulsar el botón de obturador para detener la grabación.
Observaciones
• Si la tarjeta SD está llena, la cámara detiene la grabación.
8.6 Sacar una foto
• Pul se el icono de modo para aju star el modo de fot o. .
• Puls e el botón d e obt ura d or para sacar una foto.
Pa ra más i nfo rmación sobre la s opci one s, cons ulte « Ico nos y
configuración ».
8.7 Modo de coche
• Pulse el i con o de modo p ara selec ci onar el modo de coc he. .
• Puls e el botón d e o btur a dor para emp e zar a gr abar .
L a pantalla mue str a el t ie m p o de gra b ación.
• Vuelva a pulsar el botón de obturador para detener la grabación.
Observaciones
• En el modo de coche, la cámara no detiene la grabación si la
tarjeta está llena. Borra los ficheros más viejos y continúa
grabando.
• Pa ra más i nfo rmación sobre la s opci one s, cons ulte « Iconos y
configuración ».
8.8 Visua liza r ficheros
Para visualizar una imagen o una grabación:
• Puls e el icon o d e r eprod u cc i ón . .
• Seleccione el tipo de fichero que quiere visualizar. .
• S elecci one el f i cher o d e la lista.
Page 40
CAMCOLVC23
V. 0 2 – 27/05/2014 40 ©Vellema n nv
• Pulse ► o ◄ para desplazarse por los ficheros.
Las i mágen es se visualiz an en el f ondo.
• Puls e el icon o d e r eprod u cc i ón para s ali r.
8.9 Borrar ficheros
Para borrar una imagen o una grabación:
• Puls e el icon o d e r eprod u cc i ón . .
• Seleccione el tipo de fichero que quiere borrar. .
• S elecci one el f i cher o d e la lista.
• Pulse « Delete ».
• Pulse « Yes » dos veces para confirmar.
• Puls e el icon o d e r eprod u cc i ón para s ali r.
9. Gestionar archivo s de l ordenador
Puede ge stionar archivos en la tarjeta SD al conectar la cámara al
ordenador. Procedimie nto
1. Act i ve l a cá m ara.
2. Conecte el p uerto USB d e la c áma ra [14] al puer to US B del
ordenador con el cable USB incluido.
• L a cámara aparece c omo d i s co ext raíb le e n el ordena dor.
• La cámara alm acena los ficheros en las siguientes carpetas.
o VIDEO: gra bacion es realiza das e n el modo d e v íde o.
o CAR: grabaciones realizadas en el modo de coche.
o JPG: im ágenes
Observación
No es pos i b le uti lizar las f unciones de la cámara m ien t ra s es té
conectada al ord ena dor.
Después de haber term inado, quite el aparato de f orma seg u ra:
Windo ws®
Para qu i tar e l aparato de f o rma seg u ra:
1. Haga clic en el icono Safely Remove Hardware (quitar hardware
de form a s egura) e n el áre a de not i ficac ió n s i tuada a l a der echa
de la barra de tareas y haga clic en el aparato que quiere quitar.
Page 41

CAMCOLVC23
V. 0 2 – 27/05/2014 41 ©Vellema n nv
Wi ndows v i s ual i zará una noti fic ación p ara informarle q ue p uede
qu ita r el dispositivo de forma seg u ra.
2. Desconecte el aparato de la puerta USB.
Macintosh®
1. En e l Fin de r, haga clic e n e l ico no Eje ct (e xpulsa r) al lad o de l
dispositivo.
2. Des conect e el apar a to d e la p uerta US B.
10. Mando a distancia
Asegúrese de que haya introducido una batería en el mando a
distancia.
• A p un te el mando a distancia al ojo i nf rarrojo de l a cámara.
• El ma ndo a dist ancia está equ i pado con l os si guientes bo to nes.
o Powe r: desact i var l a cámara.
o Sn ap: s aca r u na foto .
o Vi deo: gra bar un v í de o.
11. Caj a r esi sten te al agua
La cámara está equipada con una caja resistente al agua. Antes del
uso, pruebe la caja sin la cámara.
• An tes de se l lar la ca ja resi s tente al a g ua, asegúres e de que la
junt a de
goma de la caja esté limpia. Un pe lo o un grano de arena
puede causar una fuga. Pruebe la caja al cerrarla sin introducir la
cámara. Sumerja la caja en agua durante aproximadamente un
minut o. Quite la c aja d el agua y s é q uela con un pañ o. L ueg o , abra
la caja. Si el interio r es tá seco, puede utilizar la caja bajo el agu a.
• Ponga la cámara en el modo deseado antes de introducir la
cámara en la caja resistente al agua. No está equipada con un
botón e xter n o p ara cambiar el m odo.
• D espués de c ada uso e n agua salad a, l im p ie el e xt erior d e la caja
c on agua dulce y séque la. Si n o la lim pia, el pin de l a bisa gra
puede ox idarse y la sal acumulada en la junta puede causar un
mal funcio nam iento.
Page 42

CAMCOLVC23
V. 0 2 – 27/05/2014 42 ©Vellema n nv
•
Para limpiar la junta, enjuague con abundante agua y agite para
secar . No se que la junta con un paño. Esto po dría causar fugas.
Vuelva a fijar la junta a la caja.
12. Lim pieza y mante nim iento
Batería
ADVERTENCIA
• Nunca perfore las pilas y no las e che al fuego
(peligro de explosión).
•
Mantenga las pilas lejos del alcance de niños.
Est e apar ato fun ciona c on una batería recarga b le,
inte rno , no e xtraíble . Al fina l de su vida útil, res pe te las
l eyes l o cales e n relac ión con el medio ambiente.
• E l usu ar i o no ha brá d e efec t uar el ma nt e nimiento de ninguna
pieza.
• L i m p ie el aparat o reg u lar mente con un paño h ú m ed o sin pelusas.
N o utilice alc ohol ni disolv ent es.
13. Especificaciones
capacidad de memori a
m áx . 32 GB en tarjeta SD-HC (no
incl.)
e lem ento de imag en
5 megapíxeles CMO S
ángulo de vis ión
120° (gran angula r) f = 2.9 mm
micrófono incorporado
sí
función d e c ám ar a P C
no
abertura
F3.1
balance de blancos
automático
pue rto HDMI
sí
vídeo
resolució n vídeo : 1080P @ 30fps
formato de fichero de vídeo: H.264
(AVI)
cap acidad de grabac ión: ± 100
MB/min
imagen
re solución de la imagen: 5
megapíxeles
re solución de la imagen: 12
me g ap íx e le s, interpolació n
Page 43

CAMCOLVC23
V. 0 2 – 27/05/2014 43 ©Vellema n nv
batería (cámara)
batería de litio 1500mAh inco rp orada
duració n de v i da ± 2.5 horas
b ate ría (mando a d is tan cia)
batería de litio CR2025 de 3V
dim ensiones
70 x 52 x 34 mm
peso
72 g
Utilice este aparato sólo con los accesorios originales.
Vel leman N V no será r espon s abl e de d añ os n i l esio n es
causados por un uso (indebido) de este aparato. Para más
i n for mación sob r e este prod ucto y la versión más reci en te de
este manual del usuario, visite nuestra página
www.ve llema n.eu. Se pueden modificar las especificaciones y
el c onten id o de es te manu al sin previ o avi s o.
Windows, Windows XP , Wi ndows 2000, Windows Vi sta, Wind ows
A ero, Windows 7, Wi ndows 8, Wi ndows M ob i le, Windows Server son
marcas registradas de Microsoft Corporation en los Estados Unidos y
otros países.
iPad , iPod, iPod touch, iPhone, Mac, iMac, Ma cBook, Powe rBo o k,
Po we r Mac, Mac OS son m arcas comerci ales de App le In c.,
reg ist radas en EE. UU. y otros países.
© DERECHOS DE AUT OR
Vel leman N V di spon e de lo s derecho s de autor para es te
manual de l usuario. Todos los derechos mundiales
reservados. Está estrictamente prohibido repr oducir, traducir,
copiar, editar y gu ardar e ste m anual del usuario o p art es de el lo sin
previo permiso escrito del derecho habiente.
Page 44

CAMCOLVC23
V. 0 2 – 27/05/2014 44 ©Vellema n nv
BEDIENUNGSANLEITUNG
1. Einführung
An alle Einw ohner der Europäischen Union
Wichtige Umweltinformationen über dieses Produkt
Diese s Symbol auf dem Produ kt oder der V erpackung zei gt
an, dass die Entso rgung di e ses Pro duktes na ch se i ne m
L e benszy k l us der Umwelt S chad en zuf ügen k ann.
Entsorgen Sie die Einheit (oder verwendeten Batterien)
nicht als u nso rtiertes Hausmü ll; die Einheit oder
v erwend eten B atterien müsse n v on einer spezi al isierten F i rm a
zw ecks Recycling entsorgt werden. Diese Einheit muss an den
Händl er oder ein örtlic hes Recyc ling-Unte rnehmen retourniert
werden. Res p ektier en Sie die örtlichen U mweltvo rschrif ten.
Falls Zweifel bestehe n, wenden Sie sich für
Entsorgungsrichtli nien an Ihre örtliche Behörde.
Vielen Dank, dass Sie sich für Velleman entschieden haben! Lesen
Sie diese Be dienungsanle itung vo r Inbetriebnahme so rgfältig durch.
Übe rprüfe n Sie, ob Tran spo rtschäde n vo rliege n . So llte dies de r Fall
sein, ve rwenden Sie da s Gerä t nicht und wenden Sie sich an Ihren
Händler.
2. Sicherheitshinweise
ACHTUNG
Durchbohren Sie nie die Batterien und werfen Sie diese
nicht ins Feuer (Ex plosionsgefahr).
Halten Sie die Batterien von Kindern fern.
D i ese s Gerät e n th ä l t eine i n tern e wi eder a u f ladb are
Batterie . Entso rgen Sie d as Pro dukt am Ende s einer
Lebensdauer gemäß den gelt enden gesetzlich en.
Demontieren oder öffnen Sie das Gerät NIE. Es gibt keine
zu war tend e n Tei le.
3. Allgemeine Richtlinien
Siehe Velleman ® S ervice- und Qua litätsgarantie am E n de dies er
Bedienungsanleitung.
• Schützen Sie das Gerät vor Staub und extremen Tempe ra turen.
Page 45

CAMCOLVC23
V. 0 2 – 27/05/2014 45 ©Vellema n nv
• Vermeiden Sie Erschütterungen. Wenden Sie bei der Bedienung
keine Gewalt an.
• Richten Sie die Kamera nie auf die Sonne oder andere
reflektierende Gegenstände.
• B er ühr en Sie nie die Linse .
• Nehm en S ie da s Ger ät erst i n Bet rieb, nach de m Sie si ch mi t
sei nen Funktionen vert raut g emac ht ha ben.
• Eigenmä chtige Verände rungen sind aus Sicherhe itsg ründen
verboten. Bei Schäden verursacht durch eigenmächtige
Änder ungen er l ischt der Garantiean spruch.
• Verwenden Sie da s Ger ät nur für Anwendungen be sc hrie ben in
die ser Be dien ungsanleitun g sonst k an n di e s zu Schäden am
Pr od ukt führe n und er l ischt der Gar a ntieanspruch.
• Be i Schäden, die durch Nichtbeachtung der Bedie nungsanleitung
verursacht w erden, erli scht der Garan t iean s pru ch. Fü r daraus
resultierende Folgeschäden übernimmt der Hersteller keine
Haftung.
• Es gi bt keine zu wart ende n Tei le. Bestel le n S ie eventuel le
Ersat ztei le bei Ih re m Fachhänd ler.
• Installie re n und ve rwenden Sie das Gerät nicht für illegale
Pr a ktiken un d b e ac hten S ie di e Int imsp häre aller
4. Eigenschaften
• Action- und Spor tk a m er a mit ver sc hiede nen Halter un gen un d
wasse rdichtes Ge häuse
• Auf nahm e auf Mi rco S D-Karte (nicht mitgeli efert)
• Auf nahme qualität: 1080p H D Video - 30 fps
• ei nf ache K onf ig uration
• Farb-Berührungsbildschirm
• IR-Fernbedienung
• 2 Aufnahme-Modi:
o Fahrzeug-
Modus: die älteste Datei wird gelöscht wenn die Micro
SD-Ka rte vo ll is t
o Video-Fu nkt io n: der R e korder zei chnet auf b is d i e Micro S D -
Ka rte vo ll is t
5. Beschreibung
Siehe Abbildungen, Seite 2 dieser Bedienungsanleitung.
Page 46

CAMCOLVC23
V. 0 2 – 27/05/2014 46 ©Vellema n nv
1
Inf ra ro t-Licht
2
Kamera-Objektiv
3
Lade-L ED (RECHARG E)
4
Display AUS-Anzeige
5
Display EIN/AUS-Taste
6
Display
7
Schalter
8
Mikrofon
9
Shutter-Tas te
10
Anschluss für Sta tiv
11
Einschub für Micro SD-Karte
12
Reset-Tas te (R ück s e tzun g)
13
HDMI-Port
14
USB-Port
6. Eine SD-Karte einl eg en
• Schieben Sie die Mi cro SD -Karte in de n Ka rteneinschub. De r Pfeil
auf das Gehäuse zeigt an, wie Sie die Karte einschieben müssen.
• Um die Micr o S D-K ar te zu ent fernen, dr ücken Si e vorsichtig auf
die K a r te .
Bemerkung
F ür 1 080P-Aufnahme, verwenden Sie eine SD-Karte ( K la sse 10 ) vo n
8 GB o der höher.
7. Die Kamera auflad en
• Um die Kame ra a ufzulade n, ve rbinden Sie den USB-Port der
Kamera über das mitgelieferte USB-Kab el [ 14 ] mit dem USB-Port
de s R echn ers.
• Die rote LED leuchtet während des Ladevorgangs und wird
a usgescha lte t wen n diese vollstä ndig au fge laden ist. Es dau e rt
etwa 2 bi s 4 St un de n.
• Di e Ka merafunkti o nen können ni c ht ver wendet werde n sol a nge
die Kamera mit dem Com puter verbunden ist.
• S chalten S ie die Kamera ei n wenn die se mi t d em Co mputer
verbunden ist, dann haben Sie Zugang zu den Dateien der SD-
Karte.
• Für mehr Inform ationen übe r die Entsorgung des Akkus, sie he «
Sicherheitshinweise » (oben).
8. Bedienung
8.1 Die Kamera e in- und ausschalten
Die Kamera
einschalten
Um die Kamera einzuschalten, halten Sie
di e EIN/AUS -Taste e twa 2 Se kund en
Page 47

CAMCOLVC23
V. 0 2 – 27/05/2014 47 ©Vellema n nv
gedrückt.
Die Kamera
ausschalten
Um die Kamera auszuschalten, drücken
Sie die EIN/AUS-Taste k urz. .
Energiesparmodus
D er En ergies parm o dus wi rd a utomatisch
eingeschaltet wenn die Kamera einige Zeit
nicht verwe ndet wird. Die LED auf der
Rück seite [4] leuchtet.
Den Mo nito r
ausschalten
Sc halten Si e das D is pl ay mit Taste [5]
aus.
8.2 Die Z eit und das Datum eins tell en
1. Drücken S ie da s DAT E/ TIM E-Symbol .
2. V erwend e n S ie die Pfeile ▲ und ▼ , um die Einste llung zu
ändern.
3. V erwend e n S ie die Pfeile ► und ◄ u m ei nen a nd er en Pun kt
auszuwählen (Tag, Monat, Jahr, Minuten, Sekunden und
Datum ).
4. Drück en Sie auf SET .
8.3 Betriebsmodi
Die Kamera hat 3 Betriebsmodi. Jeder Modus wird durch e in Symbol
o ben links im Display darges te llt.
Video
Foto
Kfz
Schalten Sie die Kamera ein, dann wird immer der Video-Modus
aktivier t. Drüc ken Si e auf das Modu s-Symb ol bi s d er gewünsc hte
Modus ein gesch altet wird.
8.4 Symbole und Einstellungen
Die S ymb ol e verw end en
Um die Symbole zu verwenden
• D rücken Sie ein Funktionen-Sym bol, um in den Optionen zu
gelangen.
Die Optionen ersche inen unten im Display.
Page 48

CAMCOLVC23
V. 0 2 – 27/05/2014 48 ©Vellema n nv
• Drücke n Sie die gewünschte Option .
• Drücken Sie das Funktione n-S ymbol wieder , um ab zubr echen.
Allgemeine Symbo le
Fol ge n de S ymbole sind in a l len Mo di ve rfüg bar ( V ide o, Foto, Kfz).
das Datum und die U hrzeit einstellen
Batterieniveau
Wiedergabe
heranzoomen - herauszoomen
De r Zoom fakto r wird z wischen z wei Symb olen
angezeigt.
Symbole im Foto-Modus
Spe zifische F unkt i onen:
G esic h tserk ennu ng ein- oder ausschalten.
Die Bildauflö sung ei nst ell en.
D i e N ummer neben dem Symb o l zei gt die
verbleibende Anzahl der Bilder, die Sie auf
der S D -Kar t e in der g ewünsc ht e n Auflösung
speichern
kö nnen (hängt von de r Grö ße de r
SD-K art e ab).
[Sho oti ng m ode s]
Das Symbol zei gt den aktu ell eingestellten
Auslös e m odu s a n.
Es wurde kein Auslösemodus eingeste llt.
Selbstauslöser
D as B i l d wird 1 0 S ek unden nac h de m
Drücken der Shutter-Taste g ema cht.
Kontinuierliche
N immt 3 F otos mit ein em Druck auf der
Shutter-Tas te .
Symbole im Video-Modus
Video-Auflös ung ein stellen.
Die Zeit neben dem Symbol ist die verbleibende
Zei t , die S ie i n der gewünsc ht en Auflösung
Page 49
CAMCOLVC23
V. 0 2 – 27/05/2014 49 ©Vellema n nv
aufnehmen können (hängt von der Gr öße der
SD-K art e ab).
Symbole im Fahrze ug-Modus
erla ub t , das Kam era bild um zudrehe n. Prakt is ch
we nn Sie die Kame ra umgek ehrt hä ngen.
Stellt di e Vide o-Auflös ung ein
Die Zeit neben dem Symbol ist die verbleibende
Zei t , die S ie i n der gewünsc ht en Auflösung
aufnehmen können (hängt von der Gr öße der
SD-K art e ab).
8.5 Video-Aufnahme
• Schalten Sie die Kamera ein, dann wird der Video-Modus aktivi ert.
.
Befindet die Kamera sich in einem anderen Modus, dann drücken
S i e da s Modus-Symbol, um den Modus zu ändern.
• Drücken Si e die Shutt er-Taste, um die Aufnahme zu sta rten.
Das Display zeigt die Aufnahmezeit an.
• Drücken Sie die Shutter-Tast e wieder, um d ie A uf nahm e zu
stoppen.
Bemerkungen
• Ist die S D -Ka rt e voll, dann wird die A ufnahme gestoppt.
8.6 Ei n Foto machen
• Drücke n Sie da s Mo dus-S y m bol, um de n Foto-Modus einz ustel len.
.
• Drücken Sie die Shutter-Tast e, um das F oto zu machen.
Für mehr Inform ationen übe r die Optione n, s iehe « Symbole und
Einstellungen ».
8.7 Fahrzeug-Modus
• Drücken Sie das Modus -Sy mb ol , um de n Fa hrzeug-Modus
einzustellen. .
• Drücken Sie die Shutter-Taste, um die Aufnahme zu sta rten.
Das Display zeigt die Aufnahmezeit an.
Page 50

CAMCOLVC23
V. 0 2 – 27/05/2014 50 ©Vellema n nv
• Drücken Sie die Shutter-Tast e wieder, um d ie A uf nahm e zu
stoppen.
Bemerkungen
• Im Fahr z eug-Modus stoppt die Kame ra die Aufnahm e nicht wenn
d ie Karte voll ist. D ie ältes ten Da teien werden gelösch t un d d ie
K amer a bleibt au f neh men .
• Für mehr Inform ationen übe r die Optione n, s iehe « Symbole und
Einstellungen ».
8.8 Dateien anzei g en
Um ein Bild oder eine Aufnahm e zu sehen:
• Drücken Sie die Wi e dergabe-Taste .
• Drücken Sie a uf den gewünschte n Da te ityp .
• Wählen Sie die Datei der Liste.
• Drücke n Sie au f ► oder ◄ u m durch di e Dateien zu blätt er n.
Die Bilder werden im Hintergrund angezeigt.
• Drü ck en S ie die Wiedergabe-Taste um den Modus zu
verlassen.
8.9 Dateien lösche n
Um ein Bild oder e ine Aufnahme zu löschen:
• Drücken Sie die Wi e dergabe-Taste .
• Drücke n Sie au f den Dateit yp, d en Sie lö sc hen möc hten
.
• Wählen Sie die ge wünschte Da te i aus der Liste aus.
• Drücken Sie auf « Delete ».
• Drücken Sie zwe i Mal auf « Yes », um zu bestätigen.
• Drücken Sie die Wi e dergabe-Taste um den Mo dus zu
verlassen.
9. Computer-Datei en verw al ten
Verwalten Sie Dateien auf der SD-Karte, indem Sie die Kamera an
einen Compute r anschließe n. Vorgangsweise:
1. S chalten S ie die Kamera ei n .
Page 51
CAMCOLVC23
V. 0 2 – 27/05/2014 51 ©Vellema n nv
2. Verbinden Sie den USB-Port der Kam era über das mitgelieferte
USB-K abel [ 14] mi t dem U S B -Port des Rechn ers.
• D i e Ka mera er s ch eint als W echselplat te a u f de m PC.
• D i e Ka mera spei cher t die Dateien in f olgend en Ord n ern:
o V ID E O : Aufn a hme n im Video-Modus
o CAR : Aufnahmen im Fah rzeug-Modus
o JP G: Bilde r
Bemerkung
D i e Ka merafunkt io nen könne n n i cht ver wendet werde n sol an ge die
Kam era mit dem Co mputer ve rbun de n ist.
Ist alles f er t i g, dann k ön nen Sie d as Ger ät v om Co mp ut er entfer ne n:
Windo ws®
Um das Gerät sicher zu entfernen:
1.
Klicken Sie auf das Symbol Safely Remove Hardware (Hardware
sicher e ntfer ne n) im Benachrichtig ungsbereich re chts von der
Taskleiste und klicken Sie auf das Gerät, dass Sie entfernen
möchten.
Es ersche int die Meldung : das Ge rä t kann s iche r entfe rnt werden.
2. Trennen Sie das Gerät vom USB-Port.
Macintosh®
1. Klicken Sie i m Finder auf das E j ect-Symbo l (auswerfen) neben
da s Ger ät .
2. Trennen Sie das Gerät vom USB-Port.
10. Fernbedienung
Beachten Sie, dass Sie einen Akku eingelegt haben.
• Richten Sie die Fernbedienung auf das IR -Auge der K amera.
• Die Fernbedie nu n g is t mit folgen den Tas ten ausges tatte t.
o P owe r: d ie Kamera aussch al ten.
o Snap: ein Foto machen.
o Vide o: ei ne A ufnahme m achen.
Page 52
CAMCOLVC23
V. 0 2 – 27/05/2014 52 ©Vellema n nv
11. Wasserdichtes Gehäuse
Die Kam era wird mit einem wasserdichten Gehäuse geliefert. Vor
de m Ge brauc h, teste n S ie das Gehäuse o hne K a m era.
• Bev o r Sie das wasserd i chte G ehä us e ab dich ten , b eachten Sie,
da ss die Gummi dic htu ng de s Gehäuses s auber i st. Ei n einzig e s
H a ar oder S andkorn ka n n ein Le ck ve rursachen . T esten Sie da s
Gehäuse, indem Sie es ohne Kamera schließen. Tauchen Sie das
Gehäuse während etwa einer Minute in Wasser. Nehmen Sie das
Gehäuse aus dem Wasser und trocknen Sie die Außenseite mit
einem Tuch ab. Öffnen Sie das Gehäuse danach. Ist di e Innenseite
trocke n, dann is t es s i c her, da s Gehäuse unter W ass er zu
gebrauchen.
•
Stellen Sie die Kamera in den gewünschten Modus, bevor Sie die
Kamera in das wasserdichte Gehäuse stecken. Es gibt keine
e xter ne T as te, um de n Kameramodus zu änd ern.
•
Nach jedem Gebrauch in Salzwasser, reinigen Sie die Außenseite
m it Süßwass er und tro cken Sie diese ab. Tun Sie dies nicht, dann
ka nn der Scha rnierstift roste n und Sa lz auf der Dichtung kann e in
Ausfall verursache n.
• Um die Dichtung zu reinigen, spulen Sie diese mit Süßw asser ab
und schütteln Sie trocken. Trocke n Sie die Dichtung nicht mit
einem Tuch. Dies könnte ein Leck verursachen. Befestigen Sie die
Dichtung wieder am Gehäuse.
12. Reinigung und Wa rtung
Batterie
ACHTUNG
• Durchbohre n Sie nie die Ba tterie n und werfen Sie
die se nicht ins Fe uer ( E xplosi o nsgefahr ).
• Halten Sie die Batterien von Kindern fern.
D i ese s Gerät e n th ä l t eine i n tern e, nicht ent fer n bare,
wieder aufladbare Batterie. Entsorgen Sie das Produkt
am Ende seiner Lebensdauer gemäß den geltenden
gesetzlichen.
• Es gi bt keine zu wart ende n Tei le.
• Verwenden Sie zur Re inigung ein f eucht e s, fuss elf reie s Tuch .
Verwenden Sie auf keinen Fall Alkohol oder irgendwelche
Lösungsmittel.
Page 53

CAMCOLVC23
V. 0 2 – 27/05/2014 53 ©Vellema n nv
13. Technische Daten
Speicherkapazität
m ax . 32 GB auf SD-HC-K arte (nicht
mitgeliefert)
Aufnahme-Element
5 Megapix el CM OS
Betrachtungswinkel
120° (Weitwinkel) f = 2.9 mm
integriertes Mi krofon
ja
P C Kamerafu nktion
nein
Öffnung
F3.1
Weißabgleich
automatisch
HDMI-Port
ja
Video
Video-Auflösung: 1080P @ 30fps
Format Videodat ei H.264 (AVI)
A u f nah mekap az i tät : ±100 MB/M in.
Bild
B i l da uf lö sung: 5 Me gapixel
Bildaufl ö sung: 12 M egapi xel,
Interpolation
Akku (Kamera)
int egri er t er 1500 mAh Li t hiumak ku
L e bensdauer: ± 2.5 St unden
Batterie (Fernbedienung)
3V Lit hiu m CR2025
Abmessungen
70 x 52 x 34 mm
Ge wicht
72 g
Verwen d en Sie dies es Ger ät nur mi t originellen Zube hörteilen.
Vel leman N V über nimmt kei n e H aftung für Schad en oder
Verletzungen bei (fal s c h er) Anwend ung di eses Gerätes . Für
mehr Informationen zu diesem Produkt und die neueste
Vers ion dies er Bedi enu ngs anleitun g , siehe www.velleman.eu .
Alle Ä nderungen ohne vorherige Ankündigung vorbehalten.
Windows, Windows XP , Wi ndows 2000, Windows Vi sta, Wind ows
Aero, Windows 7, Windows 8, Windows Mobile , Windows Server sind
eingetra gene Warenzeichen von Microsoft Co rpo ra tion in den VS und
anderen Ländern.
iPad , iPod, iPod touch, iPhone, Mac, iMac, Ma cBook, Powe rBo o k,
Power Mac, Mac OS sind Warenzeichen von Apple Inc., eingetragen
in den USA und a ndere n Lä nde rn.
Page 54

CAMCOLVC23
V. 0 2 – 27/05/2014 54 ©Vellema n nv
© URHEBERRECHT
Velleman NV besit zt das Urheberrecht für diese
Bedienungsanleitung. Alle welt weiten Rech te vorbehal ten .
O hne vorherige schrif tliche Genehmig ung des U rhebers ist es n icht
gestattet, d iese Bedie nungsanleitung ga nz ode r in Teilen zu
r epr oduzi eren, z u k opier e n, zu üb er setzen, zu b e ar be i t e n oder z u
speichern.
Page 55

CAMCOLVC23
V. 0 2 – 27/05/2014 55 ©Vellema n nv
MANU AL DO UTILIZ ADOR
1. Introdução
Aos cidadãos da União Europeia
Impor tan tes in formaç ões sob r e o mei o ambien te no qu e
res p ei ta a este prod u to
Este sí mbolo no aparelho ou na embalagem indica que,
enquant o desperdícios, poderão causar danos no meio
ambiente. Não deite o aparelho (nem as pilhas, se as
houv er) no li xo doméstico; dirij a-se a um a empresa
especializada em reciclagem. Devolva o aparelho ao seu
distrib uidor ou ao posto de reciclagem local. Resp eite a l egi sl ação
loca l relativa a o meio am biente.
Em caso de dúvidas, contacte com as autori d ades locais par a
os resí duos.
Agradecemos o facto de ter adquirido este aparelho. Leia
atentamente as i nstruções do manual antes de usar o apar elho. Caso
o aparelho tenha sofrido algum dano durante o transporte não o
i n stale e ent re e m c ontac to c om o s eu di st ribuidor.
2. Instruções de segurança
ADVERTÊNCIA
Nunca perfura a s pilhas nem jogá-las no f ogo, pois elas
podem explodir.
Mante nha as pilhas fora do alcance das crianças.
Es t e equ i pa m en to tem incorpo rada uma bateria
recarregáv e l i nterna. No t ermo d a s ua duraç ão o
equi pa men to deve ser eliminado d e acor do c om a
legisl ação local.
NU NCA t ente desmo n t ar ou abrir o aparel ho. O uti l izad or
não terá d e fa zer a m anutençã o das peça s .
3. Normas gerais
Consulte a G ar an tia de ser vi ç o e qu al idad e Vel leman® na parte
final deste manual do utiliza dor.
• Não ex po nh a o eq uipamento ao pó nem a tempe ra turas extrema s.
Page 56

CAMCOLVC23
V. 0 2 – 27/05/2014 56 ©Vellema n nv
• Proteja o aparelho de quedas e m á utilização. Evite usar força
e xce ss i va a o ut il i zar o apar elho.
• Não apon te a câ mara par a o sol ou para objec to s dem asiado
brilhantes.
• Nã o toqu e na le nte.
• Familiarize-se com o fun cion amento d o aparelho ante s de o
utilizar.
• Po r razões de seg urança, es tão p roíbidas qu aisq uer modi f i cações
d o aparel ho desde que não autorizadas. Os danos provocados po r
m odifi caç ões n ão autorizadas, não estão cobertos pel a garantia.
• Utilize o aparelh o apenas para as aplicações descr itas nest e
manual . Uma utilização incorrecta anul a a garantia
completamente.
• Danos causa dos pelo n ã o cumprim ento da s norm as de segura nça
referidas neste manual anula m a garantia e o seu dis tri b u idor nã o
ser á responsável por qualquer danos ou outros problemas daí
resultantes.
• O utilizador não t erá de fazer a manut enç ão das peças. Contacte o
se u di st ri buidor caso necessi te de peças de su bsti t ui çã o.
• Não u se este pro d uto para v iol a r as le is d e priv acida d e ou
desem penha r atividade s ilegais.
4. Características
•
câmara d e a çã o e despo rto c om di feren tes sup o rt es de mon tagem
e e xter ior à prov a de águ a
• a câmara co m captação de víde o grav a a s im agens num m i cro
cartão SD (nã o incl .)
• quali da de de g ravação de v í deo víd e o 1 080p H D - 30 fps
• fácil instalação
• ecrã tá ct i l a cores
• controlo remoto IR
• 2 mod os de gravação de v ídeo
o m odo carro: o grav a do r apaga o f i c heiro mai s anti go se m pre
que o mi cr o car tão S D es tiver ch eio
o função ví d eo: o gravador continua a grav er até que o micro
cartão SD esteja cheio
5. Descrição
V er as fi guras d a página 2 deste manual do u t iliz ador.
Page 57
CAMCOLVC23
V. 0 2 – 27/05/2014 57 ©Vellema n nv
1
Lu z in fra ve rm elho s
2
L ente da c âm ara
3
Indicador de carga
4
Indicador d e ecrã de sli gado
5
Botão para ligar/desligar o
ecrã
6
Ecrã
7
b o tão LIGADO/DESLI GADO
8
Microfone
9
B otão do o btur ad or
10
E ncaixe do tr ip é
11
Ranhu ra para Mi cro S D
12
Botão de rei nic ial iz ação
13
porta HD MI
14
port a USB
6. Ins erir o C ar tão de M emóri a
• I n t rod uz a o M icro Cartão SD na ra nhura indi cad a. A seta no
ext erio r i ndic a a po siçã o d e inserçã o.
• Para retirar o Micro Cartão SD, pressione levemente a
e xtr emi da de do cartão de m emóri a par a o f az er saltar .
Nota
Pa ra captação de ví deo 1080p , recom end a -se a utilização de cartão
SD cl asse 10 de 8 G B ou su perior.
7. C arr eg ar a câmara
•
Para carregar a câmara, ligue a porta USB da câmara [14] à porta
USB do seu computador usando o cabo USB incluído.
•
O indicador vermelho [3] acende para indicar que a câmara está a
carr eg ar e d esli ga quan d o estiver t otalm ente carregad a. O
carregamento demor a cerca de 2-4 horas.
• As funções da câmara não podem ser usadas enquanto esta
es t i ve r l ig a da a o computador.
•
Se a câmara for ligada enquanto está conectada ao computador,
pode aceder aos f i cheiros qu e es tã o n o car tã o S D.
• Con sulte as In struções de Se gu ran ça para mais informação acerca
de como desc art ar a bater ia
8. Utilização
8.1 Liga r e desliga r a câmara
Li gar a câma ra
Para ligar a câmara mantenha
pres sion ado o b otã o d ur ante 2
Page 58

CAMCOLVC23
V. 0 2 – 27/05/2014 58 ©Vellema n nv
segundos.
D esli gar a câ m ara
Para desligar a câ mara pressione
b re vem en te o m esmo bo tão. .
Modo poupança de
energia
Quando a câmara não está em
funcionamento durante algum tem po, esta
passa para o modo de poupanç a de
energ ia. O i ndica dor na parte t raseira [ 4]
acende.
Desligue o ecrã
Po de de sligar o ecr ã u san do o botão [5].
8.2 Acertar a hora e a data
1. Cl iq ue no í cone D AT E/TIM E no ecrã.
2. Use as setas ▲ e ▼ para al terar os dad os.
3. Use as setas ► e ◄ para pass ar a outr a opçã o (dia, m ês, ano,
mi nu t os, se gun to s e form ato da data) .
4. Cl iq ue no í cone S ET
8.3 Modos de funcionamento da câmara
A câmara tem 3 mo dos , ca da u m rep resentado por um ícone na
parte superior esquerda do ecrã.
vídeo
fotografia
carro
A câmara fica sempre no modo vídeo quando é ligada . C lique no
ícone do modo que pretende ativar.
8.4 Ícon es e Defin ições
Utilizar os ícones
P a ra utilizar os ícones
• Clique num ícone de função para aceder às opções.
As opções aparecem na parte inferior do ecrã.
• Escolha a opçã o que preten de.
• Cl iq ue novamente no í cone de fu nçõe s para cancelar.
Page 59

CAMCOLVC23
V. 0 2 – 27/05/2014 59 ©Vellema n nv
Ícones genéricos
Os í co nes ab aixo est ão di sponíveis em t od os os modos (ví de o,
fotografia, veículo)
acertar a d ata e a hor a
estado da ba teria
reprodução
zoom ligado - zoom de sl i ga do
O nível de zoom aparece entre os dois ícones.
Ícones no modo fotografia
As funções específicas par a o modo f otografi a, são:
L i gar ou de slig ar a ident i ficaçã o de ro sto.
De fini r a resoluç ão da imag em .
O nú mer o j unto a o íc o ne in di ca o número de
i m agens que ainda pod e g uar dar com a
resolução escolhida (dependendo do
taman ho d o cartão SD ) .
[Modos de dispar o]
O íco ne ind i ca qual o modo d e dispa ro que
está at i vo.
Não está definido qualquer modo de disparo
Auto-temporizador
A fotografia é ti rada 10 seg u n do s apó s ter
carr egad o no bot ã o d o o bturad or.
Disparo contínuo
Tira 3 fotografias tendo pressionado apenas
uma vez o botão do obturador.
Ícones no modo vídeo
De fini r a resoluç ão de v íd e o
O te mp o q ue ap arec e ju n t o ao íco ne
corre sponde a o t em po dispon í v el pa ra grav ação
na res oluç ão escolh ida (de pende ndo d o
taman ho d o cartão SD ) .
Page 60

CAMCOLVC23
V. 0 2 – 27/05/2014 60 ©Vellema n nv
Ícones no modo veí culo
Permit e a inversão da i mage da câmara. Útil no
caso de a câmara estar virada ao contrário.
Define a resolução de vídeo.
O te mp o q ue ap arec e ju n t o ao í con e
corre sponde a o t em po dispon í v el pa ra grav ação
na res oluç ão escolh ida (de pende ndo d o
taman ho d o cartão SD ) .
8.5 Gr avação d e vídeo
• Semp re qu e lig a a câmara esta f i ca no modo vídeo .
Se estiver noutro modo, clique no ícone d e m odo para alter ar.
• Pressione o botão do obturador para começar a gravar.
No ecr ã aparece o te mpo d e gravação .
• Pre ssione n ova m ente o botã o do obtura dor para parar a grav ação.
Notas
• S e o cartão S D estiver ch e io, a câ m ara i nterr ompe a gravação .
8.6 Tirar uma fotografi a
• Cl ique no ícon e de modo para pa ssar ao mo d o fotogr afi a .
• Pressione o botão do obturador para tirar uma fotografia.
Co n sul te a secç ão Íc ones e Defin i ções p ara mai s informação acer ca
da s vár i a s opçõe s.
8.7 M o d o Veícul o
• Clique no ícone de modo para passar ao modo veículo .
• Pressione o botão do obturador para começar a gravar.
No ecr ã aparece o te mpo d e gravação .
• Pressione novament e o botão do obturador para parar de grav ar.
Notas
• No modo veículo, a câmara não pára de gravar quando o cartão
SD estive r cheio. Ap aga o s fiche iros ma is an tigos e continua a
gravar.
• Consulte a secção Ícones e D ef inições par a mais infor maç ão
acerc a das vár ia s opç ões.
Page 61

CAMCOLVC23
V. 0 2 – 27/05/2014 61 ©Vellema n nv
8.8 Visua liza r os ficheiros
V i s ual izar u m a fot ografia o u uma g ravaç ão:
• Cl iq ue no ícone Pl ayback (reprodução) .
• E scolha o tip o de f ic heiro que preten de vis ual iz ar .
• Se le cio ne o fiche iro a partir da lis ta.
• Clique ► ou ◄ para se mover pelos ficheiros.
As imagens aparec em como fundo.
• Clique no ícone Playback para sai r.
8.9 Apagar ficheiros
Para apa gar um a ima gem ou g ravação:
• Clique no ícone Playback .
• Escolha o t i po de fi chei ro que pretende apagar .
• Se le cio ne o fiche iro a partir da lis ta.
• Clique em Delete (apagar).
• Cliqu e e m Yes ( sim) d u a s vez e s para conf i rmar .
• Clique no ícone Playback para sair.
9. Gerir os ficheiros a partir do seu Computador
Pode fazer a gestão dos ficheiros do cartão SD ligando a câmara ao
seu computador. Para tal:
1. L i gue a câ mara.
2. L i gue a por ta US B d a câm ara [14] à porta US B do se u
com p utad or u sando o cab o USB incluído.
• A câm ara aparece co m o um dispos i t i v o am oví v el no seu
computador.
• A câm ara gu arda o s fi cheiros nas segu int e s pastas
o VÍDEO: grav ações feit as no modo vídeo
o AUTO MÓVEL: gravações feitas no modo ve ículo
o JPG: ima g en s
Nota
As funções da câmara não podem s er us ad as en quanto esta e st i ver
ligada ao comput ador.
Page 62

CAMCOLVC23
V. 0 2 – 27/05/2014 62 ©Vellema n nv
Quan to te rmi nar, re m ov a o dis posi t i vo em s egu ra nça:
Windo ws®
Para remover o dispositivo em segurança:
1. Clique n o íc one Remover Hardware e m Segurança na áre a de
notificaç õe s à d i rei ta da bar ra de tarefas e clique no d ispo s itivo
que pretende re m over .
O Win d ows emite uma notii fic açã o a inf ormar que é segur o
rem over o dispos i tiv o.
2. Retire o disp ositivo da port a USB.
Macintosh®
1. No Finder, clique no ícone Eject j unto ao dispositivo.
2. Retire o disp ositivo da po rt a USB .
10. Contro lo remoto
Veri fique se o control o re moto tem a bat eria.
• A pon te o c on t rolo re moto para o olho de infraver m elhos da
câmara.
• O controlo remoto tem os seguintes botões:
o P o we r: desliga a câmara
o Snap: para t ir ar uma fot ograf ia
o Video: para gravar um vídeo
11. Exterior à prova de água
O e xterior d a câm ara é à prova de água. Rec omenda -se q ue teste a
caixa exte rior sem a câmara antes de a utilizar.
• A n t es d e v edar a caixa es tan q ue, ver i f ique s e a b orr acha de
v edaçã o est á per feita m en te limpa. Um si m ples cab e l o o u grão de
areia é o suf i ci e n te p ara pro . ocar uma i nfi ltração. Po d e faz er o
teste fechando a caixa sem introduzir a câmara. Mergulhe a
câmara em água completamente durante cerca de um minuto.
R eti re a caixa d e dentr o de água, enx u gue o exterior com um a
t oalha e, dep ois, ab ra a c aix a. S e o i nter i o r est i ver tot almente
seco, é seg u ro ut ili zar a caixa deb aix o d e ág ua.
Page 63

CAMCOLVC23
V. 0 2 – 27/05/2014 63 ©Vellema n nv
• Não se e squeç a de c oloc ar a câmara no modo des eja d o a n tes de a
i n t roduzi r na caix a estanqu e. Não existe qu alquer b otã o e xterior
para alterar o m odo da câmara.
•
A p ós utili zação e m água salgada, dev e pa ssar a c aix a e xterior por
águ a doce e secá-la- Se não o fizer poderá provoc ar,
ev ent ualm ente, o cor ros ão do pino d a dobradiça e a ac umulação
de sa l no selo , o que le vará a m au funcionamento.
• Para limp ar o s elo d eve pa ssar por á gua doce e aban ar at é secar .
S ecar o s elo usando u m pano p ode or iginar po ssíveis f uga s.
Reinst ale o se lo nas ranhu ras na parte d e trás da ca ixa .
12. Limpeza e manutenção
Recarregar
ADVERTÊNCIA
• Nunca per f ura as pilhas nem jogá -las no fog o, pois
el as podem explodir.
• Mante nha as pilhas fora do alcance das crianças.
Es te d ispos itivo contém uma ba te ria in te rna , não
amovível e recarregável. No termo da sua duração o
equi pa men to deve ser eliminado d e acor do c om a
legisl ação local.
• O utilizador não deverá fazer a man utenção das peças.
• Limpe o aparel ho regularmente com um pano seco sem pêlos.
Evite o us o de álco ol ou dis solventes .
13. Especificações
capacidade de memória
cartão SD-HC de no m áx. 32 G B (não
incl.)
e lem ento de imag em
5 megapixeis C MO S
ângulo de visão
120° (grande angular) f = 2.9 mm
microfone incorporado
sim
função c âmara PC
não
abertura
F3.1
white ba lance
automático
porta HD MI
sim
vídeo
resolução de vídeo: 1080P @ 30fps
Page 64

CAMCOLVC23
V. 0 2 – 27/05/2014 64 ©Vellema n nv
formato de ficheiro de vídeo: H.264
(AVI)
capacidade de gravação: ±100
MB/min
imagem
res oluçao d e image m: 5 mega p ixeis
re soluçao de imagem: 12 m egapixeis
interpolados
bateria da câmara
bateria de lítio 1500mAh inco rp orada
duração: ± 2.5 horas
bateria do controlo re moto
Lí t io 3V CR2025
dim ensões
70 x 52 x 34 mm
peso
72 g
Utilize este aparelho ape nas com acessórios originais. A
Velleman NV não será res ponsáve l por quaisq uer da nos ou
l es ões causados pel o uso (ind evido) do aparelho. Para mais
i n formação sobr e este prod u to e par a aceder à versão mais
rec en te des te manu al do utiliza dor, visite a nossa página
www.vel leman.eu . Pod em alter ar -se as especificações e o
conteúd o deste manu al sem avi so prévi o .
Windows, Windows XP , Wi ndows 2000, Windows Vi sta, Wind ows
Aero, Windows 7, Windows 8, Windows Mobile , Windows Server são
marcas
da Microsoft C orporation registadas tanto nos Esta dos Unidos
co mo em o u tros países. iPad , iP od, iPod touch , iPhon e, Mac, iMa c,
MacBook, PowerBook, Power Mac, Mac OS são marcas da Apple Inc.,
registadas n o s U. S . e e m o utros países.
iPad , iP od , iPo d táctil, i Phone, Mac, iM ac, MacBo ok, Powe rB ook,
Power Mac, Mac OS são marcas registadas da Apple Inc., registadas
n os E.U . A. e e m out ros paíse s.
© DIREITOS DE AUTOR
A Velleman NV detém os direi to s de auto r d este manual do
util iz a d or . Tod os o s d ir eitos m und iais r e servados. É
es t ri ta me nte proi bid o re produzir, t raduzi r, copiar, edi tar e grava r
este manu al do utiliz ador o u p artes deste s em prév i a autor ização
es c ri ta por parte da dete ntora dos direi t os.
Page 65

CAMCOLVC23
V. 0 2 – 27/05/2014 65 ©Vellema n nv
INSTRUKCJA OBSŁUGI
1. Wstęp
Przeznaczona dla m ieszka ńcó w Unii E uropejskiej.
Ważne informacje dotyczące środo wiska.
Ten symbol umieszczony na urządzeniu bądź opakowaniu
wsk a zuje, że usuwa nie produk tu mo że b yć szk od liwe dla
środowiska. Nie należy usuwać urządzenia lub baterii do
zbior cze go p oje mn i k a n a od pady k om unal n e , na leży je
przekazać specjalistycznej firmie zajmującej się
recyklingiem. Urządzenie można zwrócić dystrybutorowi lub lokalnej
firmie zajmującej się recyklingiem. Należy postępować zgodnie z
zasadami bezpieczeństwa dotyczącymi środowiska.
W razie wątpliwości na le ży sk ontakt o wać się z fi rmą
zajmującą się uty lizacją od padó w.
Dziękujemy za zakup produktu Velleman! Prosimy o dokładne
zapoznanie się z instrukcją obsługi przed użyciem. Jeśli urządzenie
zostało uszkodzone podczas transportu, prosimy o nie korzystanie z
niego i skontaktowanie się ze sprzedawcą.
2. Instrukcje bezpieczeństwa
UWAGA
Nie przebijać i nie wrzucać baterii do ognia.
Ba te rie n a leż y ch ro nić p rze d dz ie ćm i.
Niniejsze urządzenie posiada wewnętrzny akumulator.
Gdy urządzenie ulegnie zużyciu, należy je utylizować
zg od nie z lokalnymi prz epi s ami.
NIE WOLNO otwierać lub rozmontowywać urządzenia. W
urządzeniu nie występują części, które mogą być
s e rwi s o wa n e p rze z uż y t ko wn i k a .
3. Informacje ogólne
Proszę zapoznać się z info rma cjami w czę ści Usługi i gwaranc ja
jakości Velleman® na końcu niniejszej instrukcji.
• Chronić urządzenie przed zbyt wysoką temperaturą i pyłem.
• Chronić urządzenie przed wstrząsami i użytkować wyłącznie
zgo dnie z p rzeznaczen iem. Podczas o bsługi urzą dzenia unik a ć
stosowania siły.
Page 66

CAMCOLVC23
V. 0 2 – 27/05/2014 66 ©Vellema n nv
• Nie ustawiać kamery w kierunku słońca ani innych bardzo jasnych
przedmiotów.
• Nie dotyka ć obiektywu.
• Przed rozpoczęciem pracy z urządzeniem należy zapoznać się z
jego funkcjam i.
• Wprowadzanie zmian w urządzeniu jest zabronione ze względów
bezpieczeństwa. Należy pamiętać, że uszkodzenia spowodowane
przez zmiany wprowadzone przez użytkownika nie są objęte
gwarancją.
• Urządzenie należy używać wyłącznie zgodnie z przeznaczeniem.
Używanie urządzenia niezgodnie z przeznaczeniem spowoduje
unieważnienie gwarancji.
• Gwarancja nie obejmuje uszkodzeń spowodowanych w wyniku
nieprzestrzegania niniejsze j instrukcji, a sprzeda wca nie pono si
odpowiedzialności za wynikłe uszkodzenia lub problemy.
• W urządzeniu nie występują części, które mogą być serwisowane
przez użytkownika. W ce lu uzyska nia części se rwis owych lub
zamiennych należy skontaktować się z autoryzowanym
sprzedawcą.
• Nie używać produktu do celów naruszających przepisy dotyczące
prywatności ani do działań niezgodnych z prawem.
4. Właściwości
• k amera akc ji oraz kamera sportowa z róż nym i rodzajam i
mocowań i wodoszczelną obudową.
• kam era rejest ruje ob razy na k arci e mi cro S D ( brak w zes ta wie)
• jakość rejestrowanego obrazu wideo: wideo HD 1080p - 30 fps
• prosta i łatwa regulacja
• kolorowy wyś wietlacz dotykowy
• pilot z dalnego st erowania na podczerwień
• 2 t ry by rejestracji wideo:
o tryb samochodowy: w prz yp adk u za pe łnienia ka rty micro SD
nagrywarka wykasuje najstarszy plik
o funk cja wideo : nagrywarka zapisuje obra z wideo do mom entu
z ape łn ie nia ka rty m icro SD
5. Przegląd
Patrz ry sunki na s tro nie 2 niniejszej ins truk cji.
Page 67

CAMCOLVC23
V. 0 2 – 27/05/2014 67 ©Vellema n nv
1
Czujnik podcze rwieni
2
Obiektyw kamery
3
Wskaźnik ładowania
4
Wska źnik wyłą czenia
wyś wietlacza
5
P rz y ci sk wł / wy ł wyś wi e t l a cz a
6
Wyświetlacz
7
W ł ą cz n ik
8
Mikrofon
9
Przycisk migaw ki
10
Gniazdo statywu
11
Gniazdo mic ro SD
12
Prz yci sk re setowan ia
13
Port HDMI
14
Port USB
6. Wkładanie karty pamięci
•
Wsunąć kartę micro SD w gniazdo na kartę. Strzałka na pokrywie
wskazuje sposób włożenia karty.
•
Aby wyjąć kartę micro SD, należy delikatnie wcisnąć koniec karty
p am ię ci, wó wcz a s k a rta wys u n i e s ię .
Uwaga
W przypadku rejestracji obrazu wideo 1080P zaleca się stosowanie
karty SD klasy 10 o pojemności 8 GB lub większej.
7. Łado wa nie kamery
• Aby naładować kamerę, należy połączyć port USB kamery [14] z
po rtem USB komp utera przy użyciu dołączonego kabla USB.
•
Podczas ładowania zapala się czerwony wskaźnik [3]; gaśnie on,
gdy kamera jest w pełni naładowana. Ładowanie trwa od 2 do 4
godzin.
• Gdy kamera jest podłączona do komputera, nie można jej używać.
• Jeśli podłączona do komputera kamera jest włączona, można
uzyskać dostęp do plików znajdujących się na karcie SD kamery.
• Szczegółowe informacje dotyczące utylizacji baterii podano w
po wyższych instrukcjach bezpie czeństwa.
8. Obsługa
8.1 Włączyć i wył ączyć kamerę.
Włączyć kamerę.
Aby włączyć kamerę, należy wcisnąć i
prz ytrzyma ć przez ok. 2 sek . prz ycisk
zasilania .
Wyłączyć kamerę.
Aby wyłączyć kamerę, na leży wcis ną ć
Page 68

CAMCOLVC23
V. 0 2 – 27/05/2014 68 ©Vellema n nv
przycisk zasilania (bez przytrzymywania).
.
Tryb oszczędzania
energii
Jeżeli kamera nie będzie używana przez
pewien czas, przełącza się w tryb
o sz czę dz ania e ne rg ii. Za pa la się wsk aźnik
znajdujący się z tyłu [4].
Wyłączyć
wyś wietlacz.
Wyświe tla cz można wyłą czyć przycisk iem
[5].
8.2 Usta wianie godziny i daty
1. Nacis nąć ikonkę DATE/TI ME n a wy ś wi e t l a cz u .
2. Strzałki ▲ i ▼ służą do zmian y us tawień.
3. Strzałki ► i ◄ s łużą do p rz e łą cza n ia po z ycji ( dz ie ń, m ie s ią c, rok ,
minuty, sekundy oraz format daty).
4. Nacisnąć ikonę SET.
8.3 T ryby pracy kamery
Kamera pracuje w 3 trybach, którym przyporządkowane są
odpowiednie ikonki znajdujące się w górnej części ekranu z lewej
strony.
wide o
foto
samochód
Po włączeniu kamera automatycznie ustawiona jest w trybie wideo.
Aby ustawić wymagany tryb, należy, nacisną ć ikonkę trybu.
8.4 I k o n k i i u s t awienia
Uży wa n ie ikonek
Używanie ikonek:
• Nacisnąć ikonkę funk cji, aby prze jść do o pcji.
Opcje pokazują się w dolnej części wyświetlacza.
• Nacisnąć wymaganą opcję.
• Nacis nąć pono wnie ikonk ę funkcji, aby anulo wa ć.
Page 69
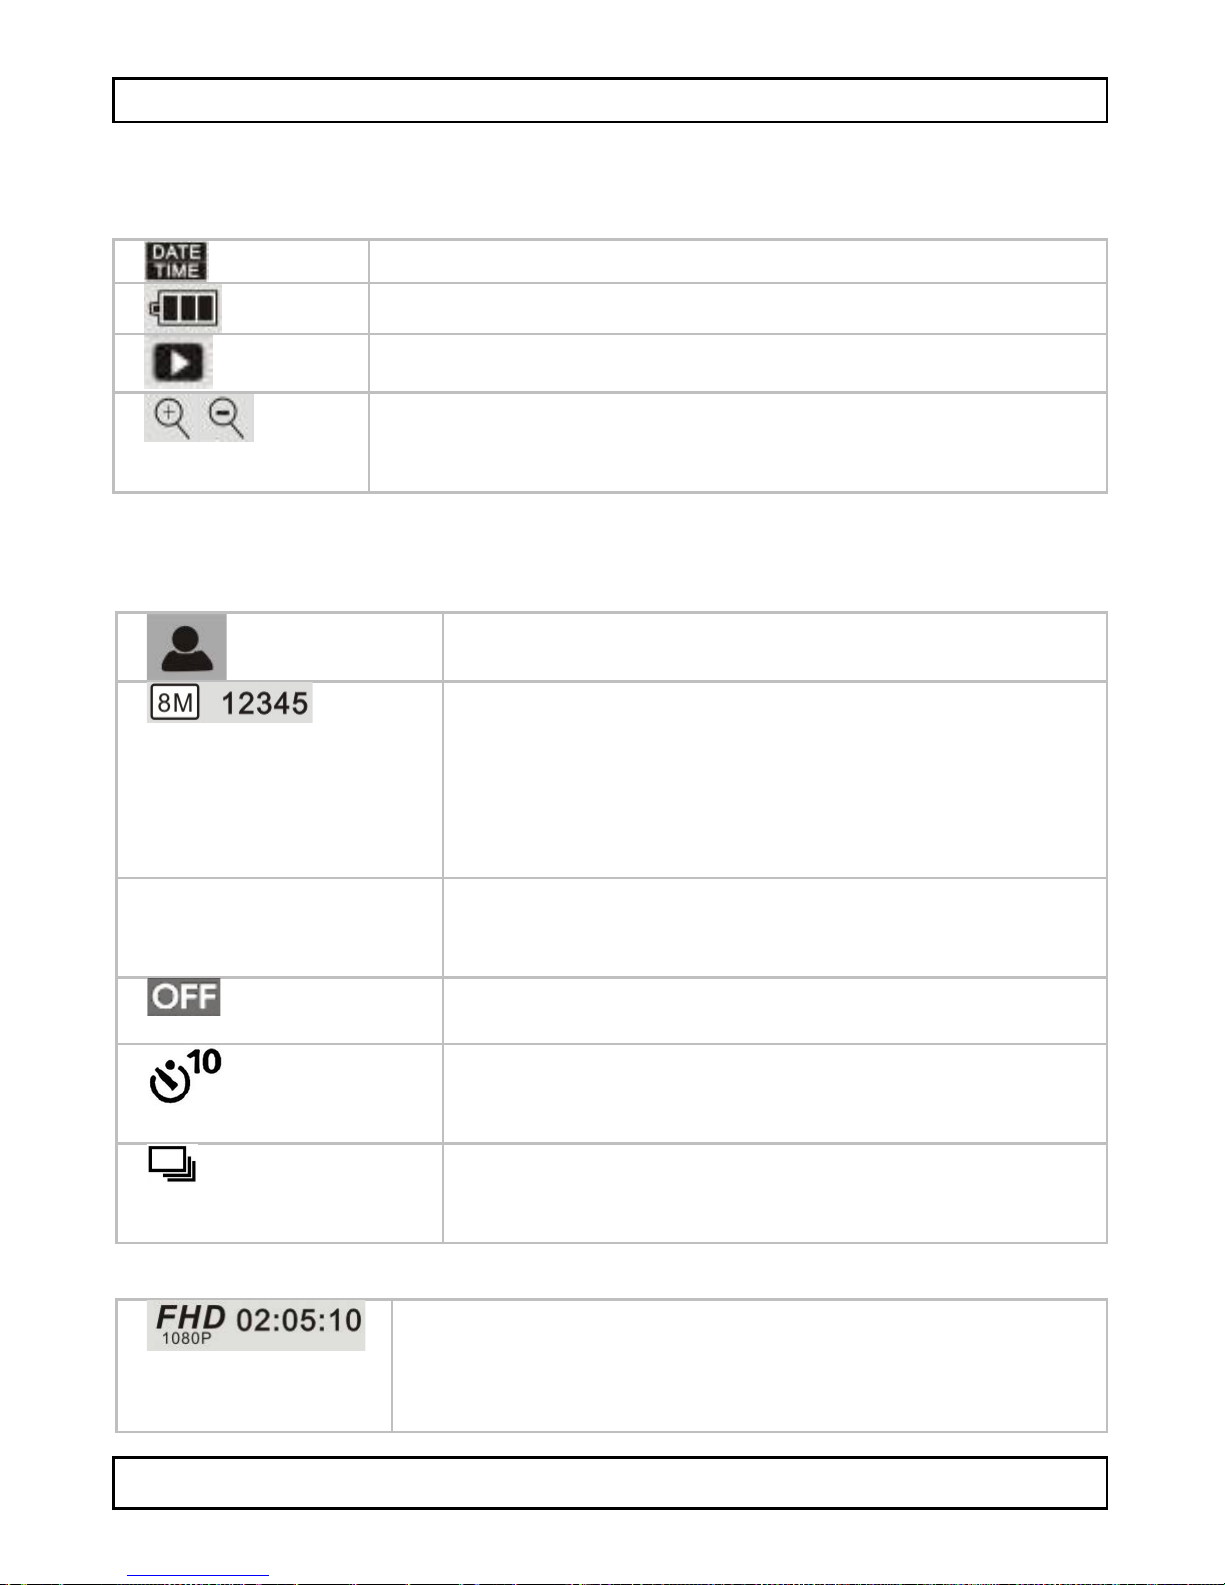
CAMCOLVC23
V. 0 2 – 27/05/2014 69 ©Vellema n nv
I k o n k i o g óln e
Przedstawione poniżej ikonki dostępne są we wszys tk i ch trybach
(wid eo, f oto, s amoc hó d ) .
us ta wie n ie da ty i godzin y
stan akumul at ora
o d twarzan ie plikó w
p rz yb l iż an ie - oddalanie
Współczynnik skali je st wyświe tlany między
obiem a ik onkami.
Ikonki w trybie foto
Posz cz e gól ne f unkcje try bu foto:
W łą czan ie lu b wyłą cz an ie trybu
rozpoznawania twarzy.
Ustawianie rozdzielczości obrazu.
Liczba obok ikonki wskazuje pozostałą ilość
z d ję ć, k tó re m o ż na wy k o na ć w wy b ra n e j
roz dzielczości (w zależności od pojem no ści
ka rty SD) .
[Tryby
wykonywania
zdję ć]
I kon ka ws kaz uje ak tua lnie us tawion y tryb
wykonywania zdjęć
Brak ustawionego trybu wykonywania zdjęć.
Samowyzwalacz
Zdję cie wyk on ywa n e jes t 10 sek und p o
na ciśnięciu przycisk u miga wki.
Ciągłe wykonywanie zdjęć
Wykonuje 3 zdjęcia za jednym wciśnięciem
przycisku.
I k o n k i w try bie w id e o
Ustawianie rozdzielczość wideo.
Czas obok ikonk i wskazuje po zostały czas
f i l m o wa n ia w wy b ra n e j roz dz ie l czo ś ci ( w
za leżnoś ci od rozm ia ru ka rty SD).
Page 70

CAMCOLVC23
V. 0 2 – 27/05/2014 70 ©Vellema n nv
Ikonki w trybie samochodowym
Umo żliwia obra canie o brazu z kame ry P rzyda tne
p rzy podwieszan iu kam ery do góry no gami .
Ustawianie rozdzielczości wideo.
Czas obok ikonk i wskazuje po zostały czas
f i l m o wa n ia w wy b ra n e j roz dz ie l czo ś ci ( w
za leżnoś ci od rozm ia ru ka rty SD).
8.5 Nag r y wa n i e wid eo
• Po włączeniu kamera ustawiona jest w tryb ie wideo . .
Jeżeli ustawiony jest inny tryb, należy nacisnąć ikonkę trybu, aby
g o zm ie n ić.
• Wcis nąć przycisk miga wki, ab y rozpocząć nag rywa nie .
Na wyświetlaczu pojawia się czas nagrywania.
•
Wcisnąć ponownie przycisk migawki, aby zatrzymać nagrywanie.
Uwagi
• Jeśli karta SD jest pełna, kamera zatrzymuje nagrywanie.
8.6 Wykony wan ie zdjęć
• Nacisnąć ikonkę trybu, aby ustawić tryb foto .
• Wcis nąć przycisk miga wki, ab y wyk onać zdjęcie .
Informacje szczegółowe dotyczące opcji przedstawiono powyżej w
s ek cji „Iko nk i i us ta wie n ia ”.
8.7 Tryb samochod ow y
• Nacisnąć ikonkę trybu, aby ustawić tryb samochodowy .
• Wcis nąć przycisk miga wki, ab y rozpocząć nag rywa nie .
Na wyświetlaczu pojawia się czas nagrywania.
•
Wcisnąć ponownie przycisk migawki, aby zatrzymać nagrywanie.
Uwagi
• W trybie samochodowym kamera nie przestaje nagrywać, gdy
karta jest pełna. Kamera kasuje najstarsze pliki i kontynuuje
nagrywanie.
• Informacje szcz egóło we do tyczące opcji przedsta wio n o p o wyż e j w
s ek cji „Iko nk i i us ta wie n ia ”.
Page 71
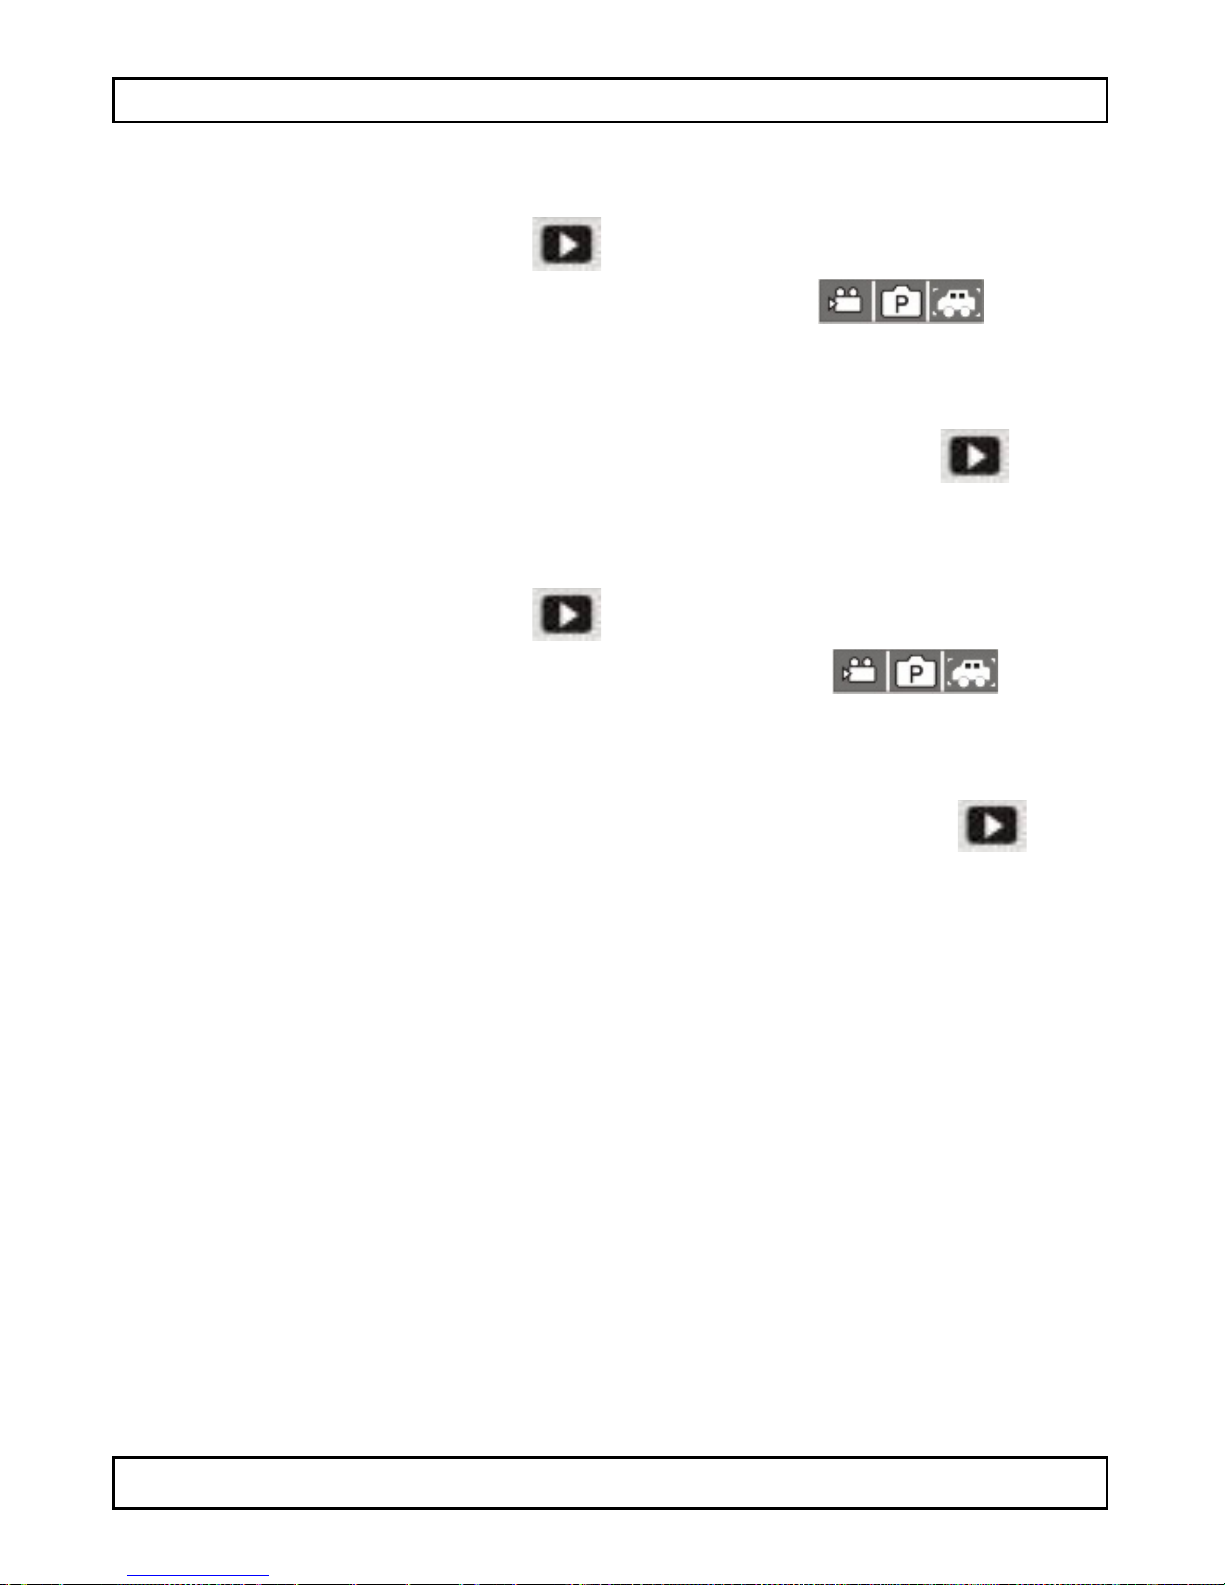
CAMCOLVC23
V. 0 2 – 27/05/2014 71 ©Vellema n nv
8.8 Przeglądan ie plikó w
Aby obejrzeć zdjęcie lub nagranie:
• Nacisnąć ikonkę Playback .
• Nacisnąć typ pliku, który ma zostać obejrzany. .
• W yb ra ć pl ik z listy.
• Nacisnąć ► lub ◄, aby przeglądać pliki.
Obrazy pokazyw ane są w tle.
• Aby wyjść z trybu odtwarzania, dotknąć ikonki Playback .
8.9 Usuwanie plików
Aby ska sować zdjęcie lub nagranie :
• Nacisnąć ikonkę Playback .
• Nacisnąć typ pliku, który ma zostać skasowany. .
• W yb ra ć pl ik z listy.
• Nacisnąć Delete (kasowanie).
• Nacisnąć dwukrotnie Yes (tak), aby potwierdzić.
• Aby wyjść z trybu odtwarzania, nacisnąć ikonkę Playback .
9. Zarządzan ie plikami za poś redn ict wem kom putera
Po podłączeniu kamery do komputera istnieje możliwość zarządzania
plikami na karcie SD. W tym celu należy:
1. Włączyć kamerę.
2. P o łącz yć port USB kame ry [1 4] z po rtem USB k omp u tera przy
użyciu dołączonego kabla USB.
• Kame ra pojawia się na komputerze jako dysk wymienny.
• Kamera zapisuje pliki w następujących folderach
o VIDE O : nagr ania wyk o na n e w tr ybie wid eo
o CAR: nag ra ni a wyk o na n e w tryb ie s amo chodo wym
o J PG : o bra zy
Uwaga
Gd y kame ra je s t podłączo na do kompu te ra , nie mo żna k o rz ysta ć z
jej funkc ji .
Page 72
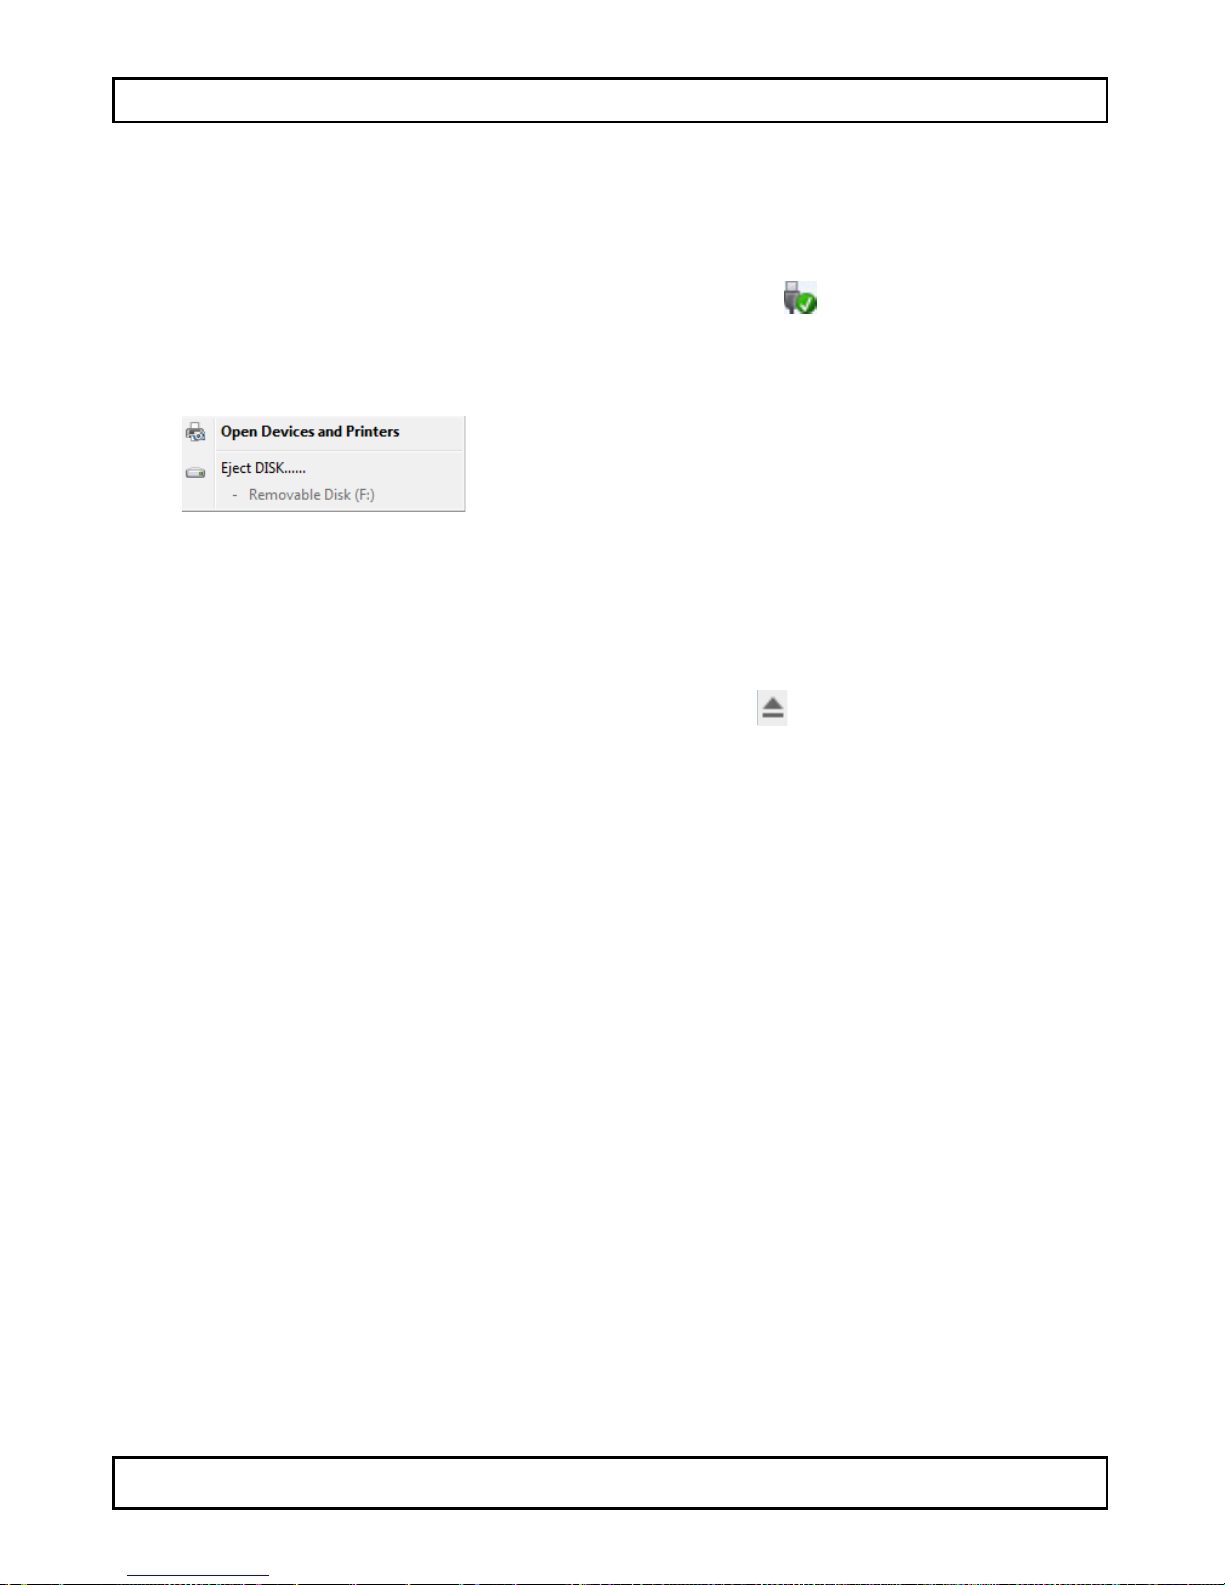
CAMCOLVC23
V. 0 2 – 27/05/2014 72 ©Vellema n nv
Po zakończeniu pracy należy bezpiecznie usunąć urządzenie z
ko mputera:
Windo ws®
Ab y be zpie cz nie us unąć u rządzenie:
1. Kliknąć ikonkę Bezpieczne usuwanie sprzętu w o bs z a rz e
powiadomień z prawej strony paska narzędzi, a następnie kliknąć
urządze nie, które chcem y usuną ć.
System Windows wyś wietli komunikat o możliwości bezpiecznego
usunięcia sprzętu.
2. Odłączyć urządzenie od portu USB .
Macintosh®
1. W programie Finder kliknąć na ikonę Eject , znajdującą się obok
urządzenia.
2. Odłączyć urządzenie od portu USB.
10. pilot zda lne go st ero wan ia na po dczer wień
Należy upewnić się, że w pilocie zdalnego sterowania znajdują się
ba te rie.
• Sk ie ro wa ć pilota na czujni k podcz erwieni kamery.
• Pilot posiada następują ce przycisk i
o Power: wyłączanie kame ry.
o Snap: wykonywanie zdjęć.
o Video : na g rywan ie wid eo .
11. Wodoszczelna obudowa
Kamera wyposażona jest w wodoszczelną obudowę. Przed użyciem
zaleca się sprawdzenie obudo wy bez kame ry.
• Przed zam knięciem wo doszczelne j o budo wy sprawdzić, czy
gumowa uszczelka obudowy kame ry jest czysta. Pojedynczy włos
lub ziarno piasku mogą powodować przeciek. Obudowę można
sprawdzić, zamykając ją bez kamery w środku. Całkowicie
zanurzyć ob udo wę w wodzie na ok . m inutę. W yją ć ob ud o wę z
wod y, osuszyć z zewnątrz rę cznikiem , a nas tępnie otworzyć. Jeśli
Page 73
CAMCOLVC23
V. 0 2 – 27/05/2014 73 ©Vellema n nv
wnętrze jest suche, obudowę można bezpiecznie stosować pod
wo d ą .
•
Przed umieszczeniem kamery w wodoszczelnej obudowie należy
pam ię tać, aby ustawić wymagany tryb. Nie ma zewnętrznego
przycisku pozwalającego na zmianę trybu kamery.
• Każdorazowo po użyciu w słonej wodzie należy przepłukać
o bu do wę z ze wn ą t rz s ło dką wo dą i os us z y ć. W p rz e ciwn y m
wypadku może dojść do korozji sworznia zawiasy i osadzania się
so li na uszczelce , co może b yć przycz yną awarii.
• Aby oczyścić uszcze lkę, na leży spłukać ją słodką wo dą i osuszyć
poprze z potrząsa nie . Osuszanie usz czelk i szma tką może
powodować nieszczelność. Ponownie zamocować uszczelkę w
r o wk u w d rz wiczk a ch obudo wy.
12. Czyszczeni e i konserw acja
Bateria
UWAGA
• Nie przebijać i nie wrzucać baterii do ognia.
• Ba te rie n a leż y ch ro nić p rze d dz ie ćm i.
Opisywane urządzenie posiada wewnętrzny,
niewymienny akumulator. Gdy skończy się jego
przydatność, urządzenie usuwać zgodnie z lokalnymi
przepisami.
• W urządzeniu nie występują części, które mogą być serwisowane
przez użytkownika.
• Re gula rnie wycie ra ć urzą dze n ie s u chą , n ie s trzęp ią cą s ię
ściereczką. Nie stosować alkoholu ani rozpuszczalników.
13. Specyfikacja techniczna
po jemnoś ć pam ięci
karta SD-HC m a ks. 32 GB
(niedołączona)
przetwornik obrazu
5 megapi kseli CMOS
ką t wi d z en ia
120° (szeroki kąt) f = 2,9 mm
wbud o wa ny m i k ro f on
tak
funkcja kamery PC
brak
apertura
F3.1
balans bieli
auto
Page 74

CAMCOLVC23
V. 0 2 – 27/05/2014 74 ©Vellema n nv
port HD MI
tak
wide o
rozdzielczo ść: 1080P p rzy 30fps
format p liku wide o: H.2 64 (AVI)
p rę dko ś ć za p is u: ±1 0 0 M B/m in
obraz
rozdzielczość: 5 megapikseli
ro z dz ie lczo ś ć: 12 megap ik se li
interpolowana
bate ria w kam erze
wbud o wa ny ak u mu la t o r lito wy
1500mAh
trwałość: ± 2,5 godz.
bateria w p ilo cie zdalnego
stero wa nia
bateria litowa 3V CR20 25
wymiary
70 x 52 x 34 mm
masa
72 g
Należy uży wa ć ty lko oryginalnyc h akcesoriów . Firma
Velleman NV nie może by ć pocią gn ięta do od po wiedz ialn ości
w przy padku us zkodze ń lub ob rażeń wyn ikający ch z
(bł ędneg o) korzystania z ni niejszego ur ządzen ia. A by u zyskać
więcej informac ji dotyczących pr oduktu ora z najno wszą
wers ję niniejs zej instrukcj i, na leży od wiedz ić naszą st ronę
internetową www.velleman.eu. Informacje zawarte w
nin iejsze j inst r ukcj i o bsł ug i mo gą ulec zm ian ie bez
wcześn iejszeg o p o wia dom ie nia.
Windows, Windows XP , Wi ndows 2000, Windows Vi sta, Wind ows
Aero, Windows 7, Windows 8, Windows Mobile oraz Windows Server
to zarejestrowane znaki handlowe firm y Microsoft Corporation w
Stanach Zjednoczonych i innych k raja ch.
iPad , iPod, iPod touch, iPhone, Mac, iMac, Ma cBook, Powe rBo o k,
Power Mac oraz Ma c O S to zareje strowane zn aki ha ndlowe firmy
Apple Inc., zarejestro wane j w USA i innych k ra jach.
Page 75

CAMCOLVC23
V. 0 2 – 27/05/2014 75 ©Vellema n nv
© INFORMACJA O PRAWACH AUTO RSKIC H
Niniej sza in strukcja jest własnośc ią firmy Vel leman NV i je st
chron iona pra wami autorsk im i. Wszystkie pra wa są
zastrzeżone na całym świecie. Żadna część tej instrukcji nie może
być kopiowana, przedrukowywana, tłumaczona lub konwertowana na
wszelkie nośniki elektroniczne lub w inny sposób, bez uprzedniej
pisem nej zgody właściciela praw a utorsk ich.
Page 76

Velleman® Service and Quality Warranty
Since its foundation in 1972, Velleman®
acquired extensive experience in the
electronics world and currently distributes its
products in over 85 countries.
All our products fulfil strict quality requirements
and legal stipulations in the EU. In order to
ensure the quality, our products regularly go
through an extra quality check, both by an
internal quality department and by specialized
external organisations. If, all precautionary
measures notwithstanding, problems should
occur, please make appeal to our warranty
(see guarantee conditions).
General Warranty Conditions Concerning
Consumer Products (for EU):
• All consumer products are subject to a 24month warranty on production flaws and
defective material as from the original date of
purchase.
• Velleman® can decide to replace an article
with an equivalent article, or to refund the retail
value totally or partially when the complaint is
valid and a free repair or replacement of the
article is impossible, or if the expenses are out
of proportion.
You will be delivered a replacing article or a
refund at the value of 100% of the purchase
price in case of a flaw occurred in the first year
after the date of purchase and delivery, or a
replacing article at 50% of the purchase price
or a refund at the value of 50% of the retail
value in case of a flaw occurred in the second
year after the date of purchase and delivery.
• Not covered by warranty:
- all direct or indirect damage caused after
delivery to the article (e.g. by oxidation,
shocks, falls, dust, dirt, humidity...), and by the
article, as well as its contents (e.g. data loss),
compensation for loss of profits;
- consumable goods, parts or accessories that
are subject to an aging process during normal
use, such as batteries (rechargeable, nonrechargeable, built-in or replaceable), lamps,
rubber parts, drive belts... (unlimited list);
- flaws resulting from fire, water damage,
lightning, accident, natural disaster, etc.…;
- flaws caused deliberately, negligently or
resulting from improper handling, negligent
maintenance, abusive use or use contrary to
the manufacturer’s instructions;
- damage caused by a commercial,
professional or collective use of the article (the
warranty validity will be reduced to six (6)
months when the article is used
professionally);
- damage resulting from an inappropriate
packing and shipping of the article;
- all damage caused by modification, repair or
alteration performed by a third party without
written permission by Velleman®.
• Articles to be repaired must be delivered to
your Velleman® dealer, solidly packed
(preferably in the original packaging), and be
completed with the original receipt of purchase
and a clear flaw description.
• Hint: In order to save on cost and time,
please reread the manual and check if the flaw
is caused by obvious causes prior to
presenting the article for repair. Note that
returning a non-defective article can also
involve handling costs.
• Repairs occurring after warranty expiration
are subject to shipping costs.
• The above conditions are without prejudice
to all commercial warranties.
The above enumeration is subject to
modification according to the article (see
article’s manual).
Velleman® service- en kwaliteitsgarantie
Velleman® heeft sinds zijn oprichting in 1972
een ruime ervaring opgebouwd in de
elektronicawereld en verdeelt op dit moment
producten in meer dan 85 landen. Al onze
producten beantwoorden aan strikte
kwaliteitseisen en aan de wettelijke bepalingen
geldig in de EU. Om de kwaliteit te
waarborgen, ondergaan onze producten op
regelmatige tijdstippen een extra
kwaliteitscontrole, zowel door onze eigen
kwaliteitsafdeling als door externe
gespecialiseerde organisaties. Mocht er
ondanks deze voorzorgen toch een probleem
optreden, dan kunt u steeds een beroep doen
op onze waarborg (zie waarborgvoorwaarden).
Page 77

Algemene waarborgvoorwaarden
consumentengoederen (voor Europese
Unie):
• Op alle consumentengoederen geldt een
garantieperiode van 24 maanden op
productie- en materiaalfouten en dit vanaf de
oorspronkelijke aankoopdatum.
• Indien de klacht gegrond is en een gratis
reparatie of vervanging van een artikel
onmogelijk is of indien de kosten hiervoor
buiten verhouding zijn, kan Velleman®
beslissen het desbetreffende artikel te
vervangen door een gelijkwaardig artikel of de
aankoopsom van het artikel gedeeltelijk of
volledig terug te betalen. In dat geval krijgt u
een vervangend product of terugbetaling ter
waarde van 100% van de aankoopsom bij
ontdekking van een gebrek tot één jaar na
aankoop en levering, of een vervangend
product tegen 50% van de kostprijs of
terugbetaling van 50 % bij ontdekking na één
jaar tot 2 jaar.
• Valt niet onder waarborg:
- alle rechtstreekse of onrechtstreekse schade
na de levering veroorzaakt aan het toestel (bv.
door oxidatie, schokken, val, stof, vuil,
vocht...), en door het toestel, alsook zijn
inhoud (bv. verlies van data), vergoeding voor
eventuele winstderving.
- verbruiksgoederen, onderdelen of
hulpstukken die onderhevig zijn aan
veroudering door normaal gebruik zoals bv.
batterijen (zowel oplaadbare als nietoplaadbare, ingebouwd of vervangbaar),
lampen, rubberen onderdelen,
aandrijfriemen... (onbeperkte lijst).
- defecten ten gevolge van brand,
waterschade, bliksem, ongevallen,
natuurrampen, enz.
- defecten veroorzaakt door opzet, nalatigheid
of door een onoordeelkundige behandeling,
slecht onderhoud of abnormaal gebruik of
gebruik van het toestel strijdig met de
voorschriften van de fabrikant.
- schade ten gevolge van een commercieel,
professioneel of collectief gebruik van het
apparaat (bij professioneel gebruik wordt de
garantieperiode herleid tot 6 maand).
- schade veroorzaakt door onvoldoende
bescherming bij transport van het apparaat.
- alle schade door wijzigingen, reparaties of
modificaties uitgevoerd door derden zonder
toestemming van Velleman®.
• Toestellen dienen ter reparatie aangeboden
te worden bij uw Velleman®-verdeler. Het
toestel dient vergezeld te zijn van het
oorspronkelijke aankoopbewijs. Zorg voor een
degelijke verpakking (bij voorkeur de originele
verpakking) en voeg een duidelijke
foutomschrijving bij.
• Tip: alvorens het toestel voor reparatie aan
te bieden, kijk nog eens na of er geen voor de
hand liggende reden is waarom het toestel niet
naar behoren werkt (zie handleiding). Op deze
wijze kunt u kosten en tijd besparen. Denk
eraan dat er ook voor niet-defecte toestellen
een kost voor controle aangerekend kan
worden.
• Bij reparaties buiten de waarborgperiode
zullen transportkosten aangerekend worden.
• Elke commerciële garantie laat deze rechten
onverminderd.
Bovenstaande opsomming kan eventueel
aangepast worden naargelang de aard van
het product (zie handleiding van het
betreffende product).
Garantie de service et de qualité
Velleman®
Depuis 1972, Velleman® a gagné une vaste
expérience dans le secteur de l’électronique et
est actuellement distributeur dans plus de 85
pays.
Tous nos produits répondent à des exigences
de qualité rigoureuses et à des dispositions
légales en vigueur dans l’UE. Afin de garantir
la qualité, nous soumettons régulièrement nos
produits à des contrôles de qualité
supplémentaires, tant par notre propre service
qualité que par un service qualité externe.
Dans le cas improbable d’un défaut malgré
toutes les précautions, il est possible
d’invoquer notre garantie (voir les conditions
de garantie).
Conditions générales concernant la
garantie sur les produits grand public
(pour l’UE) :
• tout produit grand public est garanti 24 mois
contre tout vice de production ou de matériaux
à dater du jour d’acquisition effective ;
• si la plainte est justifiée et que la réparation
ou le remplacement d’un article est jugé
impossible, ou lorsque les coûts s’avèrent
Page 78

disproportionnés, Velleman® s’autorise à
remplacer ledit article par un article équivalent
ou à rembourser la totalité ou une partie du
prix d’achat. Le cas échéant, il vous sera
consenti un article de remplacement ou le
remboursement complet du prix d’achat lors
d’un défaut dans un délai de 1 an après l’achat
et la livraison, ou un article de remplacement
moyennant 50% du prix d’achat ou le
remboursement de 50% du prix d’achat lors
d’un défaut après 1 à 2 ans.
• sont par conséquent exclus :
- tout dommage direct ou indirect survenu à
l’article après livraison (p.ex. dommage lié à
l’oxydation, choc, chute, poussière, sable,
impureté…) et provoqué par l’appareil, ainsi
que son contenu (p.ex. perte de données) et
une indemnisation éventuelle pour perte de
revenus ;
- toute pièce ou accessoire nécessitant un
remplacement causé par un usage normal
comme p.ex. piles (rechargeables comme non
rechargeables, intégrées ou remplaçables),
ampoules, pièces en caoutchouc, courroies…
(liste illimitée) ;
- tout dommage qui résulte d’un incendie, de
la foudre, d’un accident, d’une catastrophe
naturelle, etc. ;
- out dommage provoqué par une négligence,
volontaire ou non, une utilisation ou un
entretien incorrect, ou une utilisation de
l’appareil contraire aux prescriptions du
fabricant ;
- tout dommage à cause d’une utilisation
commerciale, professionnelle ou collective de
l’appareil (la période de garantie sera réduite à
6 mois lors d’une utilisation professionnelle) ;
- tout dommage à l’appareil qui résulte d’une
utilisation incorrecte ou différente que celle
pour laquelle il a été initialement prévu comme
décrit dans la notice ;
- tout dommage engendré par un retour de
l’appareil emballé dans un conditionnement
non ou insuffisamment protégé.
- toute réparation ou modification effectuée par
une tierce personne sans l’autorisation
explicite de SA Velleman® ; - frais de
transport de et vers Velleman® si l’appareil
n’est plus couvert sous la garantie.
• toute réparation sera fournie par l’endroit de
l’achat. L’appareil doit nécessairement être
accompagné du bon d’achat d’origine et être
dûment conditionné (de préférence dans
l’emballage d’origine avec mention du défaut) ;
• tuyau : il est conseillé de consulter la notice
et de contrôler câbles, piles, etc. avant de
retourner l’appareil. Un appareil retourné jugé
défectueux qui s’avère en bon état de marche
pourra faire l’objet d’une note de frais à charge
du consommateur ;
• une réparation effectuée en-dehors de la
période de garantie fera l’objet de frais de
transport ;
• toute garantie commerciale ne porte pas
atteinte aux conditions susmentionnées.
La liste susmentionnée peut être sujette à
une complémentation selon le type de
l’article et être mentionnée dans la notice
d’emploi.
Garantía de servicio y calidad Velleman®
Desde su fundación en 1972 Velleman® ha
adquirido una amplia experiencia como
distribuidor en el sector de la electrónica en
más de 85 países. Todos nuestros productos
responden a normas de calidad rigurosas y
disposiciones legales vigentes en la UE. Para
garantizar la calidad, sometemos nuestros
productos regularmente a controles de calidad
adicionales, tanto a través de nuestro propio
servicio de calidad como de un servicio de
calidad externo. En el caso improbable de que
surgieran problemas a pesar de todas las
precauciones, es posible recurrir a nuestra
garantía (véase las condiciones de garantía).
Condiciones generales referentes a la
garantía sobre productos de venta al
público (para la Unión Europea):
• Todos los productos de venta al público
tienen un período de garantía de 24 meses
contra errores de producción o errores en
materiales desde la adquisición original;
• Si la queja está fundada y si la reparación o
sustitución de un artículo no es posible, o si
los gastos son desproporcionados, Velleman®
autoriza reemplazar el artículo por un artículo
equivalente o reembolsar la totalidad o una
parte del precio de compra. En este caso,
usted recibirá un artículo de recambio o el
reembolso completo del precio de compra si
encuentra algún fallo hasta un año después
de la compra y entrega, o un artículo de
Page 79

recambio al 50% del precio de compra o el
reembolso del 50% del precio de compra si
encuentra un fallo después de 1 año y hasta
los 2 años después de la compra y entrega.
Por consiguiente, están excluidos entre
otras cosas:
- todos los daños causados directa o
indirectamente al aparato (p.ej. por oxidación,
choques, caída,...) y a su contenido (p.ej.
pérdida de datos) después de la entrega y
causados por el aparato, y cualquier
indemnización por posible pérdida de
ganancias;
- partes o accesorios, que estén expuestos al
desgaste causado por un uso normal, como
por ejemplo baterías (tanto recargables como
no recargables, incorporadas o
reemplazables), bombillas, partes de goma,
etc. (lista ilimitada);
- defectos causados por un incendio, daños
causados por el agua, rayos, accidentes,
catástrofes naturales, etc.;
- defectos causados a conciencia, descuido o
por malos tratos, un mantenimiento
inapropiado o un uso anormal del aparato
contrario a las instrucciones del fabricante;
- daños causados por un uso comercial,
profesional o colectivo del aparato (el período
de garantía se reducirá a 6 meses con uso
profesional);
- daños causados por un uso incorrecto o un
uso ajeno al que está previsto el producto
inicialmente como está descrito en el manual
del usuario;
- daños causados por una protección
insuficiente al transportar el aparato.
- daños causados por reparaciones o
modificaciones efectuadas por una tercera
persona sin la autorización explícita de
Velleman®;
- se calcula gastos de transporte de y a
Velleman® si el aparato ya no está cubierto
por la garantía.
• Cualquier artículo que tenga que ser
reparado tendrá que ser devuelto a su
distribuidor Velleman®. Devuelva el aparato
con la factura de compra original y
transpórtelo en un embalaje sólido
(preferentemente el embalaje original). Incluya
también una buena descripción del fallo;
• Consejo: Lea el manual del usuario y
controle los cables, las pilas, etc. antes de
devolver el aparato. Si no se encuentra un
defecto en el artículo los gastos podrían correr
a cargo del cliente;
• Los gastos de transporte correrán a carga
del cliente para una reparación efectuada
fuera del período de garantía.
• Cualquier gesto comercial no disminuye
estos derechos.
La lista previamente mencionada puede ser
adaptada según el tipo de artículo (véase el
manual del usuario del artículo en
cuestión).
Velleman® Service- und Qualitätsgarantie
Seit der Gründung in 1972 hat Velleman®
sehr viel Erfahrung als Verteiler in der
Elektronikwelt in über 85 Ländern aufgebaut.
Alle Produkte entsprechen den strengen
Qualitätsforderungen und gesetzlichen
Anforderungen in der EU. Um die Qualität zu
gewährleisten werden unsere Produkte
regelmäßig einer zusätzlichen
Qualitätskontrolle unterworfen, sowohl von
unserer eigenen Qualitätsabteilung als auch
von externen spezialisierten Organisationen.
Sollten, trotz aller Vorsichtsmaßnahmen,
Probleme auftreten, nehmen Sie bitte die
Garantie in Anspruch (siehe
Garantiebedingungen).
Allgemeine Garantiebedingungen in Bezug
auf Konsumgüter (für die Europäische
Union):
• Alle Produkte haben für Material- oder
Herstellungsfehler eine Garantieperiode von
24 Monaten ab Verkaufsdatum.
• Wenn die Klage berechtigt ist und falls eine
kostenlose Reparatur oder ein Austausch des
Gerätes unmöglich ist, oder wenn die Kosten
dafür unverhältnismäßig sind, kann
Velleman® sich darüber entscheiden, dieses
Produkt durch ein gleiches Produkt zu
ersetzen oder die Kaufsumme ganz oder
teilweise zurückzuzahlen. In diesem Fall
erhalten Sie ein Ersatzprodukt oder eine
Rückzahlung im Werte von 100% der
Kaufsumme im Falle eines Defektes bis zu
1 Jahr nach Kauf oder Lieferung, oder Sie
bekommen ein Ersatzprodukt im Werte von
50% der Kaufsumme oder eine Rückzahlung
im Werte von 50 % im Falle eines Defektes im
zweiten Jahr.
Page 80

• Von der Garantie ausgeschlossen sind:
- alle direkten oder indirekten Schäden, die
nach Lieferung am Gerät und durch das Gerät
verursacht werden (z.B. Oxidation, Stöße, Fall,
Staub, Schmutz, Feuchtigkeit, ...), sowie auch
der Inhalt (z.B. Datenverlust), Entschädigung
für eventuellen Gewinnausfall.
- Verbrauchsgüter, Teile oder Zubehörteile, die
durch normalen Gebrauch dem Verschleiß
ausgesetzt sind, wie z.B. Batterien (nicht nur
aufladbare, sondern auch nicht aufladbare,
eingebaute oder ersetzbare), Lampen,
Gummiteile, Treibriemen, usw. (unbeschränkte
Liste).
- Schäden verursacht durch Brandschaden,
Wasserschaden, Blitz, Unfälle,
Naturkatastrophen, usw.
- Schäden verursacht durch absichtliche,
nachlässige oder unsachgemäße Anwendung,
schlechte Wartung, zweckentfremdete
Anwendung oder Nichtbeachtung von
Benutzerhinweisen in der
Bedienungsanleitung.
- Schäden infolge einer kommerziellen,
professionellen oder kollektiven Anwendung
des Gerätes (bei gewerblicher Anwendung
wird die Garantieperiode auf 6 Monate
zurückgeführt).
- Schäden verursacht durch eine
unsachgemäße Verpackung und
unsachgemäßen Transport des Gerätes.
- alle Schäden verursacht durch unautorisierte
Änderungen, Reparaturen oder
Modifikationen, die von einem Dritten ohne
Erlaubnis von Velleman® vorgenommen
werden.
• Im Fall einer Reparatur, wenden Sie sich an
Ihren Velleman®-Verteiler. Legen Sie das
Produkt ordnungsgemäß verpackt
(vorzugsweise die Originalverpackung) und
mit dem Original-Kaufbeleg vor. Fügen Sie
eine deutliche Fehlerbeschreibung hinzu.
• Hinweis: Um Kosten und Zeit zu sparen,
lesen Sie die Bedienungsanleitung nochmals
und überprüfen Sie, ob es keinen auf de Hand
liegenden Grund gibt, ehe Sie das Gerät zur
Reparatur zurückschicken. Stellt sich bei der
Überprüfung des Gerätes heraus, dass kein
Geräteschaden vorliegt, könnte dem Kunden
eine Untersuchungspauschale berechnet.
• Für Reparaturen nach Ablauf der
Garantiefrist werden Transportkosten
berechnet.
• Jede kommerzielle Garantie lässt diese
Rechte unberührt.
Die oben stehende Aufzählung kann
eventuell angepasst werden gemäß der Art
des Produktes (siehe Bedienungsanleitung
des Gerätes).
Velleman ® usługi i gwarancja jakości
Od czasu założenia w 1972, Velleman®
zdobył bogate doświadczenie w dziedzinie
światowej elektroniki. Obecnie firma
dystrybuuje swoje produkty w ponad 85
krajach.
Wszystkie nasze produkty spełniają surowe
wymagania jakościowe oraz wypełniają normy
i dyrektywy obowiązujące w krajach UE. W
celu zapewnienia najwyższej jakości naszych
produktów, przechodzą one regularne oraz
dodatkowo wyrywkowe badania kontroli
jakości, zarówno naszego wewnętrznego
działu jakości jak również wyspecjalizowanych
firm zewnętrznych. Pomimo dołożenia
wszelkich starań czasem mogą pojawić się
problemy techniczne, prosimy odwołać się do
gwarancji (patrz warunki gwarancji).
Ogólne Warunki dotyczące gwarancji:
• Wszystkie produkty konsumenckie podlegają
24-miesięcznej gwarancji na wady
produkcyjne i materiałowe od daty zakupu.
• W przypadku, gdy usterka jest niemożliwa do
usunięcia lub koszt usunięcia jest nadmiernie
wysoki Velleman ® może zdecydowa
ć o
wymianie artykułu na nowy, wolny od wad lub
zwrócić zapłaconą kwotę. Zwrot gotówki może
jednak nastąpić z uwzględnieniem poniższych
warunków:
- zwrot 100% ceny zakupu w przypadku, gdy
wada wystąpiła w ciągu pierwszego roku od
daty zakupu i dostawy
- wymiana wadliwego artykułu na nowy, wolny
od wad z odpłatnością 50% ceny detalicznej
lub zwrot 50% kwoty ceny nabycia w
przypadku gdy wada wystąpiła w drugim roku
od daty zakupu i dostawy.
• Produkt nie podlega naprawie
gwarancyjnej:
- gdy wszystkie bezpośrednie lub pośrednie
szkody spowodowane są działaniem
czynników środowiskowych lub losowych (np.
Page 81

przez utlenianie, wstrząsy, upadki, kurz, brud,
...), wilgotności;
- gwarant nie ponosi odpowiedzialności za
szkody wynikających z utraty danych;
- produkty konsumenckie, części zamienne lub
akcesoria podatne na process starzenia,
wynikającego z normalnego użytkowania, np:
baterie (ładowalne, nieładowalne, wbudowane
lub wymienne), żarówki, paski napędowe,
gumowe elementy napędowe...
(nieograniczona lista);
- usterka wynika z działania pożaru, zalania
wszelkimi cieczami, uderzenia pioruna,
upadku lub klęski żywiołowej, itp.;
- usterka wynika z zaniedbań
eksploatacyjnych tj. umyślne bądź nieumyślne
zaniechanie czyszczenia, konserwacji,
wymiany materiałów ekspolatacyjnych,
niedbalstwa lub z niewłaściwego obchodzenia
się lub niezgodnego użytkowania z instrukcją
producenta;
- szkody wynikające z nadmiernego
użytkowania gdy nie jest do tego celu
przeznaczony tj. działalność komerycjna,
zawodowa lub wspólne użytkowanie przez
wiele osób - okres obowiązywania gwarancji
zostanie obniżony do 6 (sześć) miesięcy;
- Szkody wynikające ze
źle zabezpieczonej
wysyłki produktu;
- Wszelkie szkody spowodowane przez
nieautoryzowaną naprawę, modyfikację,
przeróbkę produktu przez osoby trzecie jak
również bez pisemnej zgody firmy Velleman
®.
• Uszkodzony produkt musi zostać
dostarczony do sprzedawcy ® Velleman,
solidnie zapakowany (najlepiej w oryginalnym
opakowaniu), wraz z wyposażeniem z jakim
produkt został sprzedany. W przypadku
wysyłki towaru w opakowaniu innym niż
oryginalnym ryzyko usterki produktu oraz tego
skutki przechodzą na właściciela produktu.
Wraz z niesprawnym produktem należy
dołączyć jasny i szczegółowy opis jego usterki,
wady;
• Wskazówka: Aby zaoszczędzić na kosztach i
czasie, proszę szczegółowo zapoznać się z
instrukcja obsługi; czy przyczyną wady są
okoliczności techniczne czy też wynikaja
wyłącznie z nieznajomości obsługi produktu.
W przypadku wysyłki sprawnego produktu do
serwisu nabywca może zostać obciążony
kosztmi obsługi oraz transportu.
• W przypadku napraw pogwarancyjnych lub
odpłatnych klient ponosi dodatkowo koszt
wysyłki produktu do i z serwisu.
wymienione wyżej warunki są bez uszczerbku
dla wszystkich komercyjnych gwarancji.
Powyższe postanowienia mogą podlegać
modyfikacji w zależności od wyrobu (patrz
art obsługi).
Garantia de serviço e de qualidade
Velleman®
Desde a sua fundação em 1972 Velleman®
tem adquirido uma amplia experiencia no
sector da eletrónica com uma distribuição em
mais de 85 países.
Todos os nossos produtos respondem a
exigências rigorosas e a disposições legais
em vigor na UE. Para garantir a qualidade,
submetemos regularmente os nossos
produtos a controles de qualidade
suplementares, com o nosso próprio serviço
qualidade como um serviço de qualidade
externo. No caso improvável de um defeito
mesmo com as nossas precauções, é possível
invocar a nossa garantia. (ver as condições de
garantia).
Condições gerais com respeito a garantia
sobre os produtos grande público (para a
UE):
• qualquer produto grande público é garantido
24 mês contra qualquer vício de produção ou
materiais a partir da data de aquisição
efectiva;
• no caso da reclamação ser justificada e que
a reparação ou substituição de um artigo é
impossível, ou quando os custo são
desproporcionados, Velleman® autoriza-se a
substituir o dito artigo por um artigo
equivalente ou a devolver a totalidade ou
parte do preço de compra. Em outro caso,
será consentido um artigo de substituição ou
devolução completa do preço de compra no
caso de um defeito no prazo de 1 ano depois
da data de compra e entrega, ou um artigo de
substituição pagando o valor de 50% do preço
de compra ou devolução de 50% do preço de
compra para defeitos depois de 1 a 2 anos.
• estão por consequência excluídos:
- todos os danos directos ou indirectos depois
da entrega do artigo (p.ex. danos ligados a
Page 82

oxidação, choques, quedas, poeiras, areias,
impurezas…) e provocado pelo aparelho,
como o seu conteúdo (p.ex. perca de dados) e
uma indemnização eventual por perca de
receitas;
- consumíveis, peças ou acessórios sujeitos a
desgaste causado por um uso normal, como
p.ex. pilhas (recarregáveis, não recarregáveis,
incorporadas ou substituíveis), lâmpadas,
peças em borracha correias… (lista ilimitada);
- todos os danos que resultem de um
incêndio, raios, de um acidente, de una
catastrophe natural, etc.;
- danos provocados por negligencia, voluntária
ou não, uma utilização ou manutenção
incorrecta, ou uma utilização do aparelho
contrária as prescrições do fabricante;
- todos os danos por causa de uma utilização
comercial, profissional ou colectiva do
aparelho ( o período de garantia será reduzido
a 6 meses para uma utilização profissional);
- todos os danos no aparelho resultando de
uma utilização incorrecta ou diferente daquela
inicialmente prevista e descrita no manual de
utilização;
- todos os danos depois de uma devolução
não embalada ou mal protegida ao nível do
acondicionamento.
- todas as reparações ou modificações
efectuadas por terceiros sem a autorização de
SA Velleman®;
- despesas de transporte de e para
Velleman® se o aparelho não estiver coberto
pela garantia.
• qualquer reparação será fornecida pelo local
de compra. O aparelho será obrigatoriamente
acompanhado do talão ou factura de origem e
bem acondicionado (de preferência dentro da
embalagem de origem com indicação do
defeito ou avaria);
• dica: aconselha-mos a consulta do manual e
controlar cabos, pilhas, etc. antes de devolver
o aparelho. Um aparelho devolvido que estiver
em bom estado será cobrado despesas a
cargo do consumidor;
• uma reparação efectuada fora da garantia,
será cobrado despesas de transporte;
• qualquer garantia comercial não prevalece
as condições aqui mencionadas.
A lista pode ser sujeita a um complemento
conforme o tipo de artigo e estar
mencionada no manual de utilização.
Made in PRC
Imported by Velleman nv
Legen Heirweg 33, 9890 Gavere, Belgium
www.velleman.eu
 Loading...