

Page 1
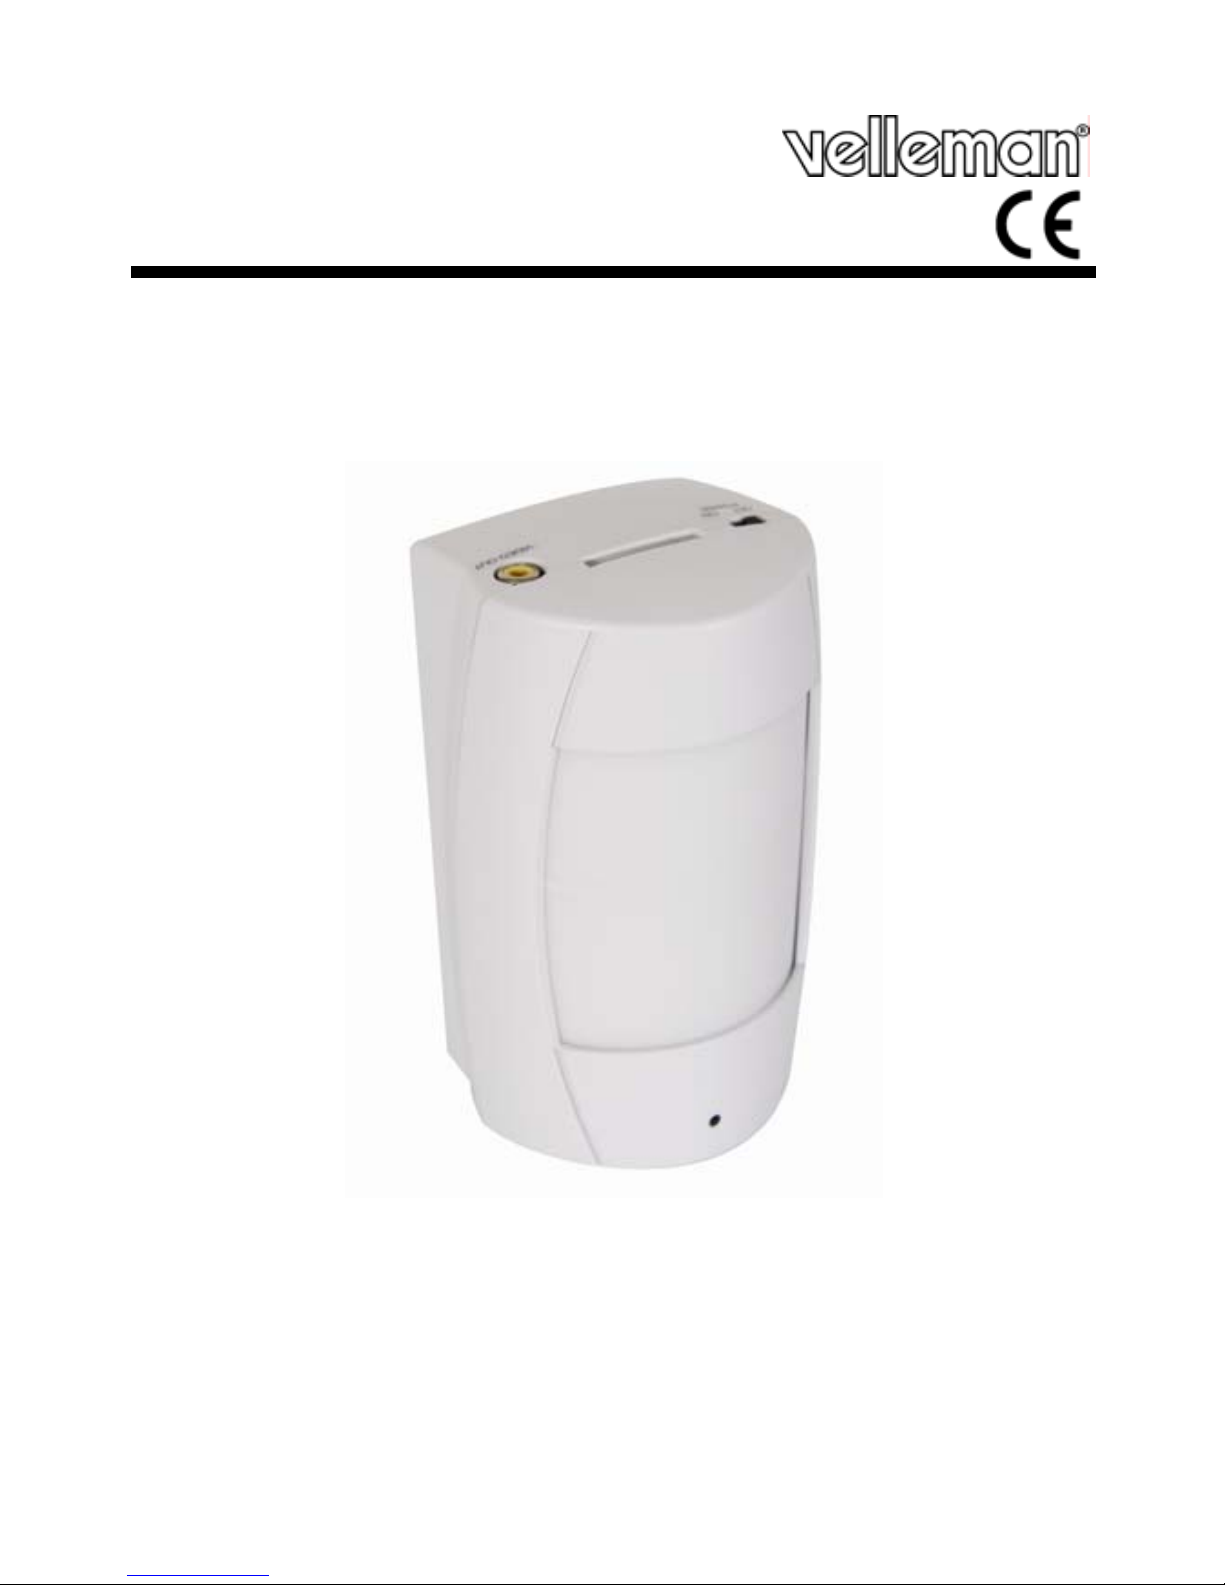
CAMCOLVC1
DIGITAL VIDEO COLOUR CAMERA IN PIR HOUSING
DIGITALE KLEURENCAMERA IN PIR-BEHUIZING
CAMÉRA COULEUR NUMÉRIQUE DANS BOÎTIER PIR
CÁMARA COLOR DIGITAL EN CARCASA PIR
ÜBERWACHUNGSKAMERA IN PIR-GEHÄ USE
USER MANUAL 3
GEBRUIKERSHANDLEIDING 9
NOTICE D’EMPLOI 15
MANUAL DEL USUARIO 21
BEDIENUNGSANLEITUNG 27
Page 2
CAMCOLVC1
Figure 1
14/01/2009 2 ©Velleman® Components nv
Page 3
CAMCOLVC1
User manual
1. Introduction
To all residents of the European Union
Important environmental information about this prod uct
This symbol on the device or the package indicates that disposal
of the device after its lifecycle could harm the environment.
Do not dispose of the unit (or batteries) as unsorted municipal
waste; it should be taken to a specialized company for recycling.
This device should be returned to your distributor or to a local
recycling service.
Respect the local environmental rules.
If in doubt, contact your local waste disposal authorities.
Thank you for choosing Velleman! Please read the manual thoroughly before
bringing this device into service. If the device was damaged in transit, don't
install or use it and contact your dealer.
2. Safety Instructions
For indoor use only. Keep this device away from rain, moisture,
splashing and dripping liquids.
Keep the device away from children and unauthorised users.
There are no user-serviceable parts inside the device.
Refer to an authorized dealer for service and/or spare parts.
• Damage caused by user modifications to the device or by disregard of
certain guidelines in this manual is not covered by the warranty and the
dealer will not accept responsibility for any ensuing defects or problems.
3. General Guidelines
• Protect this device from shocks and abuse. Avoid brute force when
operating.
• Protect the device against extreme heat (e.g. direct sunlight, heater …),
dust and moisture.
• Familiarise yourself with the functions of the device before actually using it.
• All modifications of the device are forbidden for safety reasons.
• Only use the device for its intended purpose. Using the device in an
unauthorised way will void the warranty.
4. Features
• automatic image control functions
• the video capture camera records images on SD card (not included)
• 3 recording modes: manual, timer or motion detection (with adjustable
14/01/2009 3 ©Velleman® Components nv
Page 4
CAMCOLVC1
motion sensitivity level)
• live video can be watched while under recording process
• selectable compression image qualities and frame rates
• user-friendly OSD setup menu and front panel design
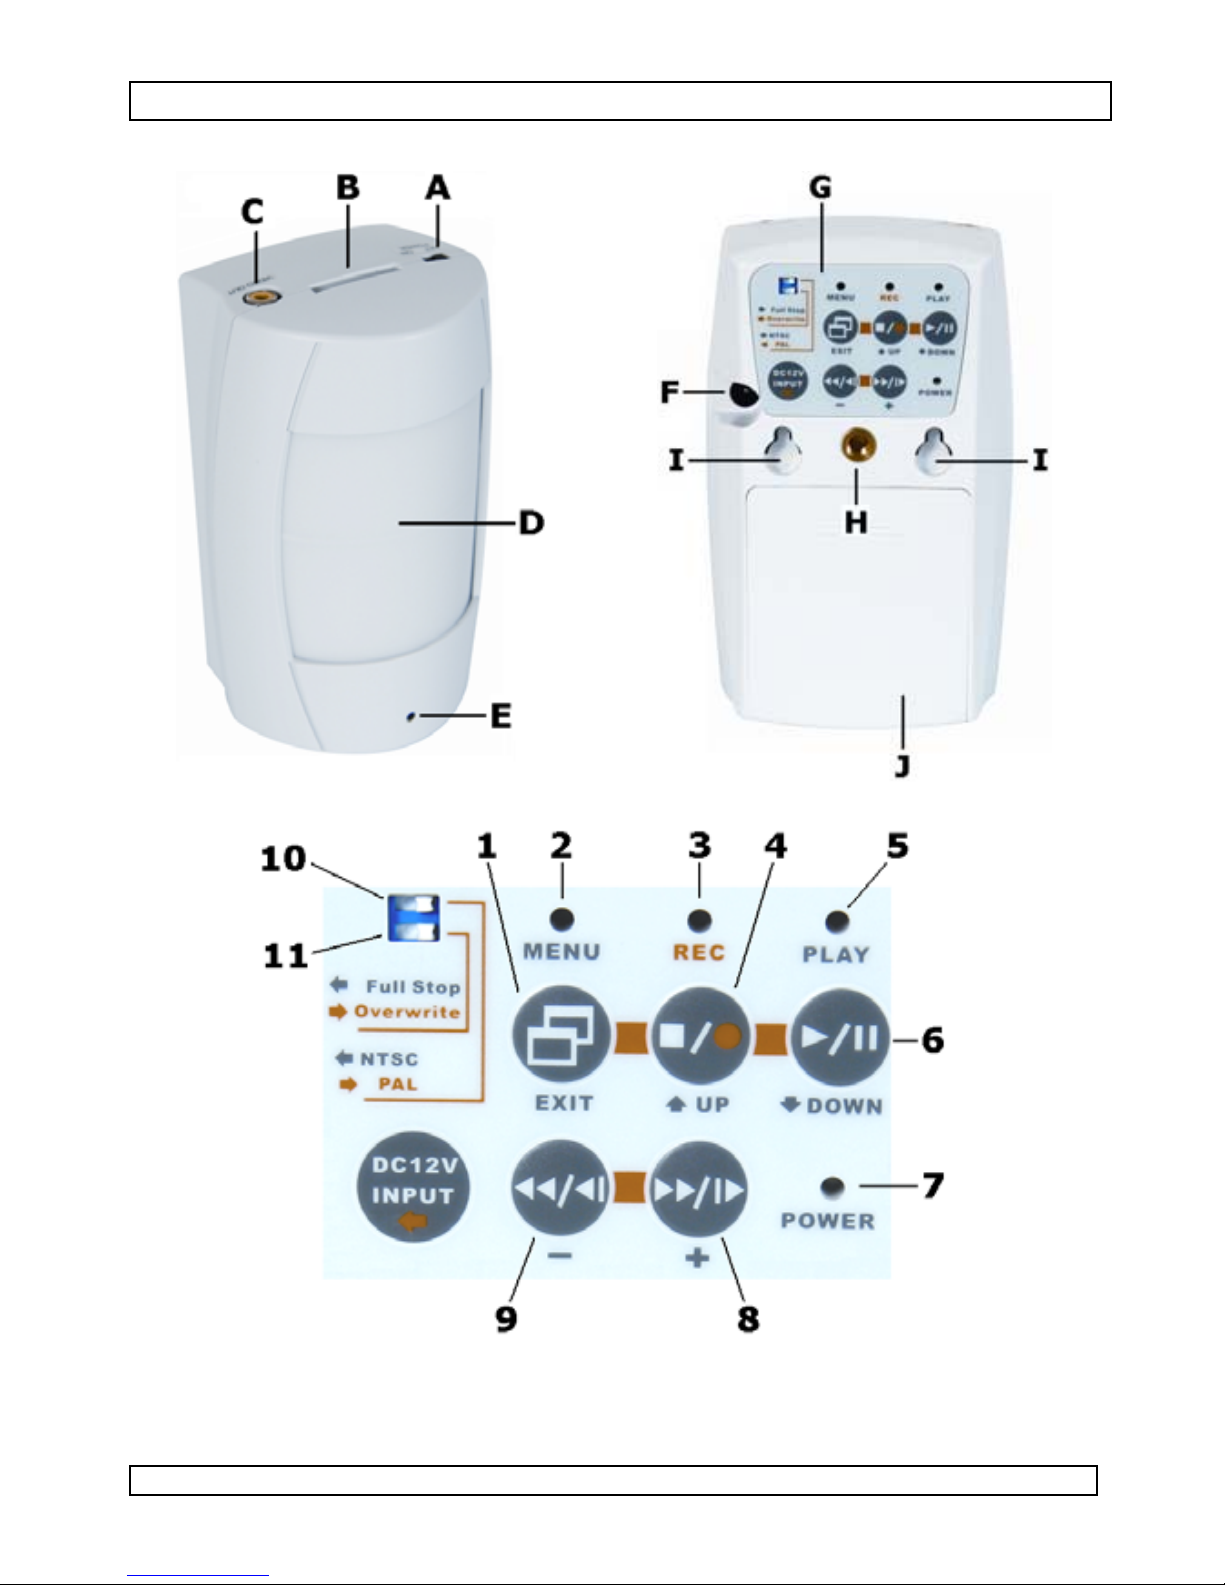
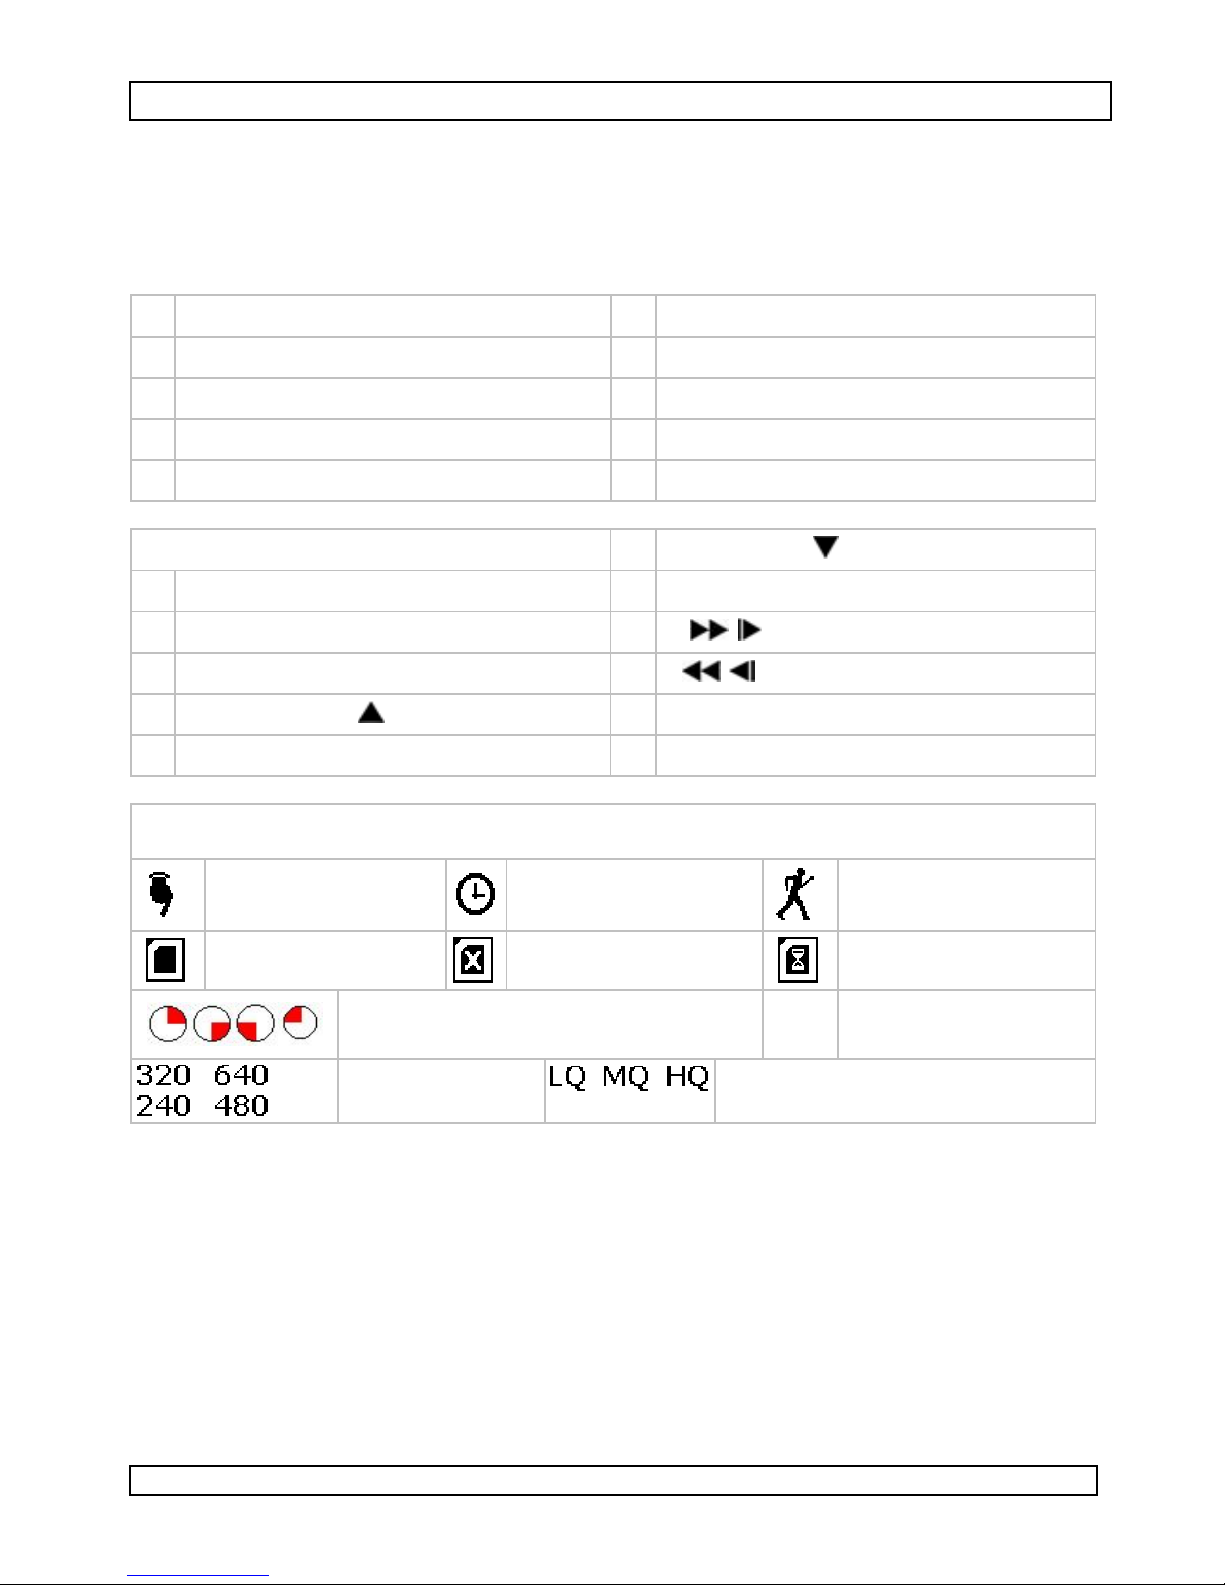
5. Overview
Refer to the illustration on page 2 of this manual
A power on/off switch F power input
B SD card slot G control panel
C video output RCA connector H mounting bracket thread
D PIR sensor (covered) I wall mounting hooks
E CMOS sensor J battery compartment
Control panel 6 play / pause/ down button
1 menu / exit button 7 power LED
2 menu LED 8 + / FFW / step forward
3 record LED 9 - / REV / step reverse
4 record / stop / up button 10 NTSC/PAL selector switch
5 play LED 11 stop/overwrite selector switch
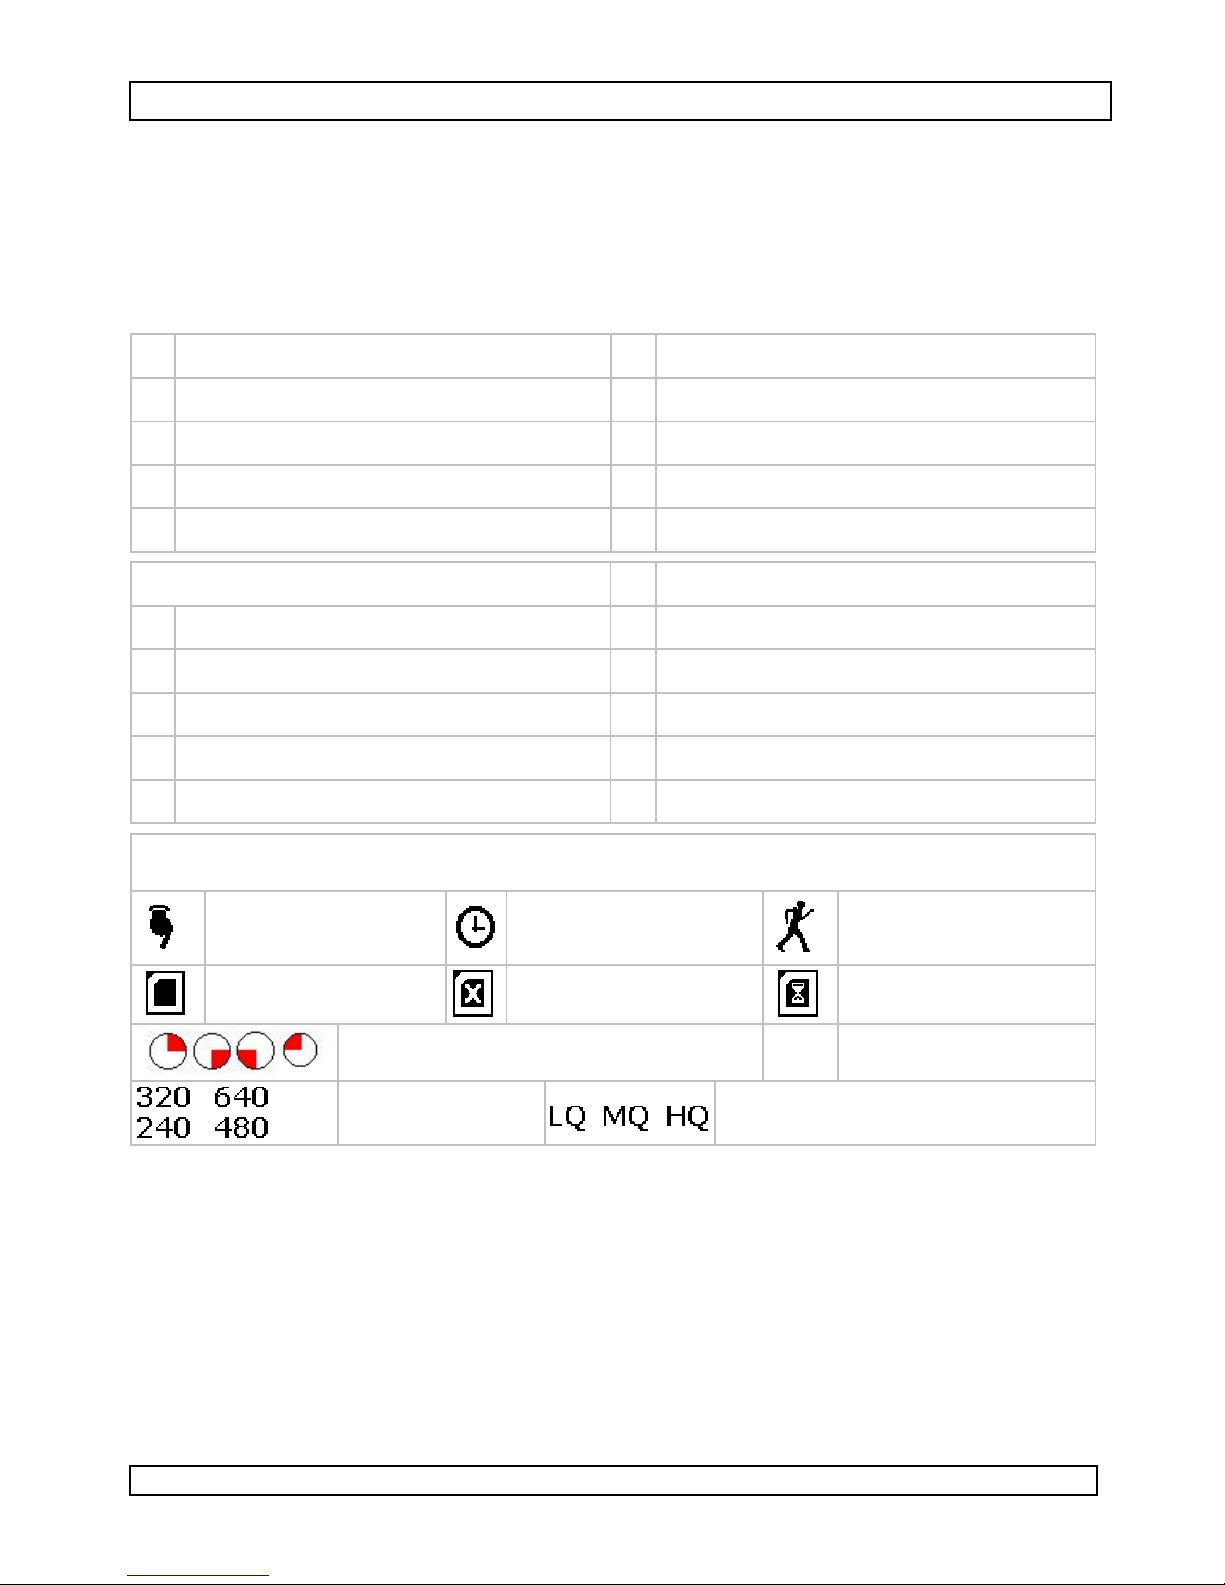
Screen icons
manual recording
memory normal
recording in progress
resolution Low – Medium – High Quality
scheduled (timed)
recording
memory error
C
motion triggered
recording
file under test
continuous record
6. Installation
• Choose the location for the camera, keeping following guidelines in mind:
• Do not install the camera in locations where extremely high or low
temperatures, high humidity, water vapour or steam, dust or excessive
vibrations may occur.
• Avoid mounting the camera near high electro-magnetic fields as this will
influence image quality.
• Do not aim the camera at the sun or other extremely bright objects or
reflections.
14/01/2009 4 ©Velleman® Components nv
Page 5

CAMCOLVC1
• Note that the controls are located on the back of the device, so easy
access should be anticipated.
• The camera can be powered by batteries (not incl.) or via the included
mains adaptor. When using the adaptor, a mains outlet must be foreseen at
max. 1m distance from the camera.
• Mount the camera on the wall or ceiling. Use either the wall mounting hooks
[I] or the included mounting bracket.
• wall mounting: screw 2 screws in the wall, level with 38mm space in
between and a leave a gap of ±4mm between screw head and wall.
Hook the camera over the screws.
• mounting bracket: use the wall plate to determine the location of the
screws and screw the wall plate to the wall. Attach the mounting bracket
to the camera using the mounting bracket thread [H]. Screw the
camera on the wall plate.
• The camera can be powered by batteries (not incl.) or via the included
mains adaptor.
• To view the camera images in real-time, the included video cable can be
used (length ±1.5m).
7. Configuration/operation
• Insert batteries in the device (see §8) or plug the connector from the power
adaptor into the power input [F ] and plug the adaptor in a mains outlet.
• Insert an SD memory card (not incl.) into the SD card slot [B] (cut away
corner towards on/off switch [A]).
• Set the video system (PAL or NTSC) with the dipswitch [10], for NTSC
move it to the left. Use a small object e.g. a tip of a pencil.
• Set whether the camera should stop or overwrite the memory card
content when the memory card is full. To stop recording when the card is
full, move the dipswitch [11] to the left.
Note: only move the dipswitches while the camera is off.
• Use the included video cable to connect the video output jack [C] with a
video input of a monitor (not incl.). Switch on the monitor.
• Switch on the camera by moving the power on/off switch [A] to the ON-
position.
Note: when a new card is inserted, the record LED [3] will blink for a
certain time. Wait until the blinking stops.
• Press the menu button [1] to enter the camera menu. The menu LED [2]
switches on and menu is shown on the monitor. Refer to the next page
for a menu overview.
• To navigate through a menu, use the up [4] and down [6] button. Select
a menu item with the + button [8]. To change parameter values use the
+ [8] or – [9] button. To exit a menu item, use the menu button [1].
14/01/2009 5 ©Velleman® Components nv
Page 6
CAMCOLVC1
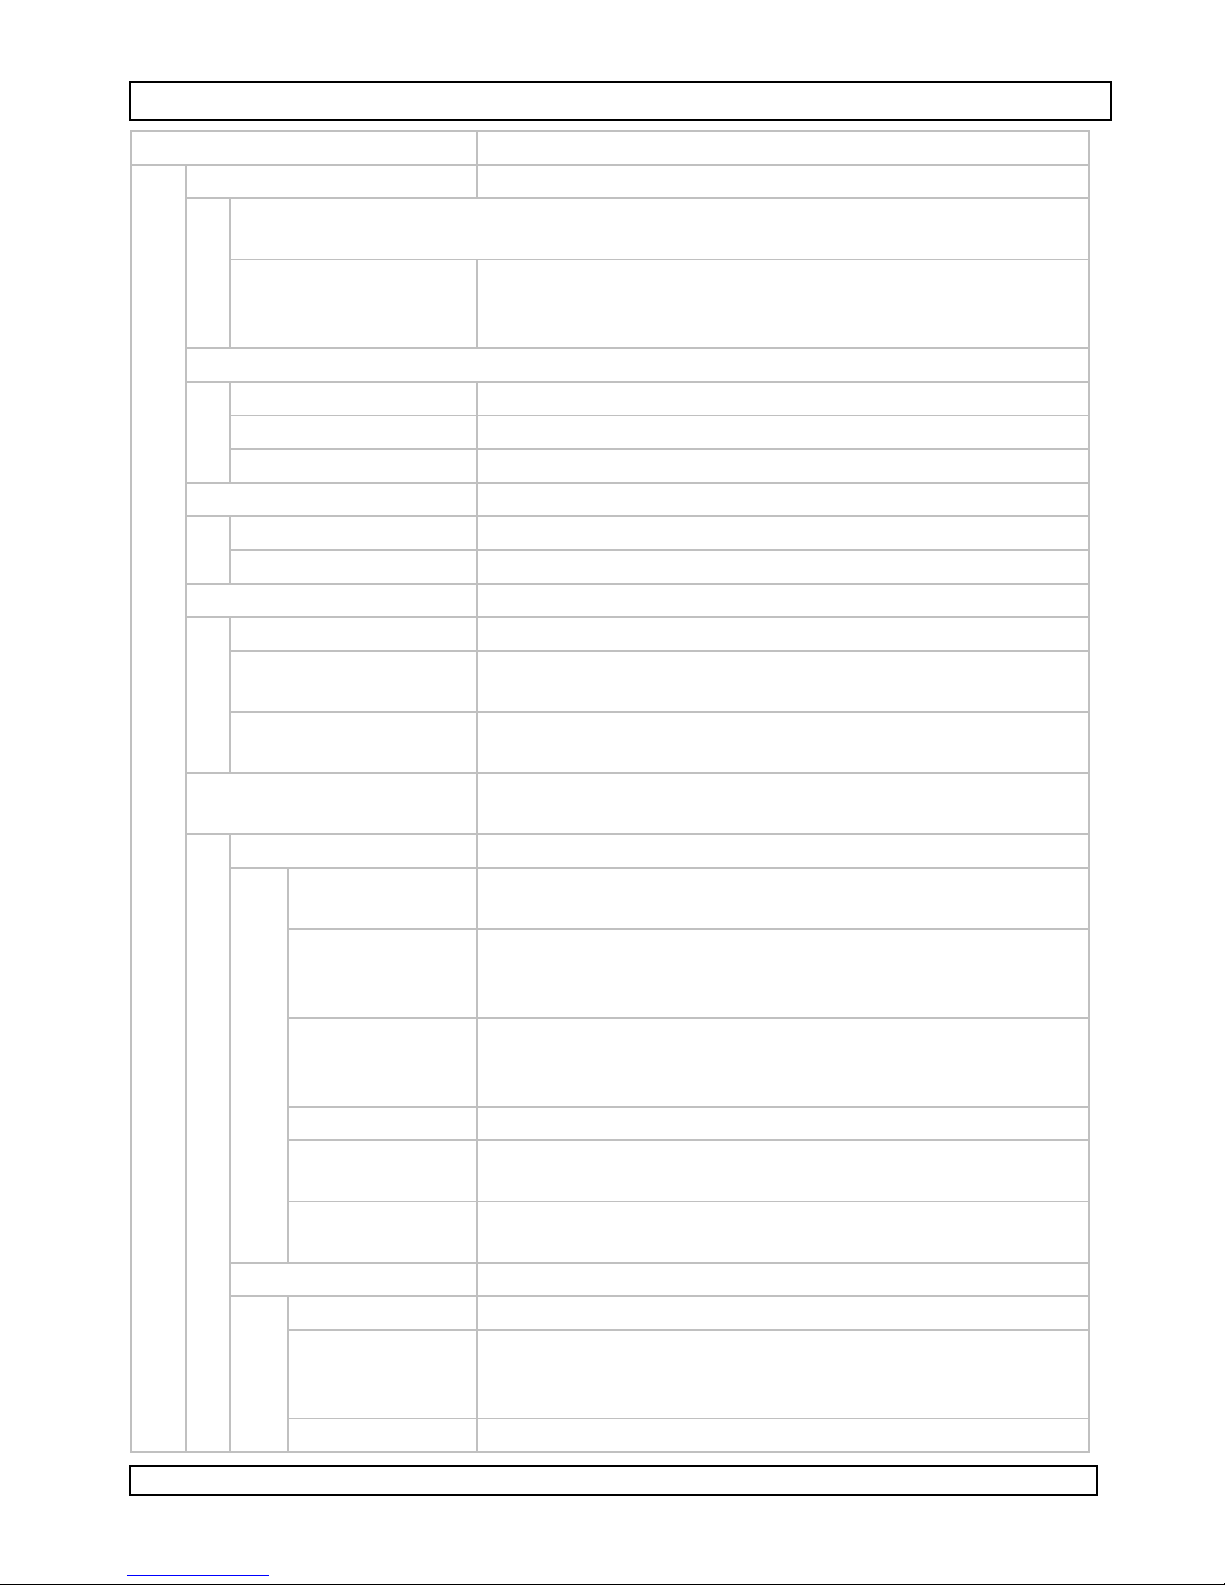
MAIN MENU remarks
SEARCH AND PLAY Play back recorded files
An overview is shown of the available files (sorted by date). Select a
recording and press the menu button [1].
CHOISE Choose PLAY to play the selected recording or EXIT
to leave the ‘search and play’ menu.
Press the menu button [1] again.
SET DATE/TIME
DATE FORMAT Set date format: Y/M/D - M/D/Y - D/M/Y
SET DATE Set date (Y/M/D-M/D/Y-D/M/Y)
SET TIME Set time (hh:mm:ss)
SET MOTION DETECT Verify and set the motion detect threshold
MD ENERGY Indicates current energy level
MD TRESHOLD Set between 0~100%
MANUAL RECORD Set parameters for manual recording.
VIDEO SIZE Choose video size 320x240 or 640x480
FRAME RATE Select frame rate:
320x240: 1~30FPS / 640x480: 1~12FPS
QUALITY Set quality:
LOW – MEDIUM - HIGH
SCHEDULE RECORD Set parameters for scheduled recording
An overview of the current settings is shown
MOTION RECORD Set parameters for motion triggered recording
RECORD Enable or disable (ON – OFF) motion triggered
recording.
SCHEDULE Set timeframe during which motion triggered
recording is enabled
00:00 – 00:00 indicates always
DURATION Select how long recording is enabled when motion is
detected
5SEC – 10SEC – 15SEC – 20SEC – 30SEC
VIDEO SIZE Choose video size 320x240 or 640x480
FRAME RATE Select frame rate:
320x240: 1~30FPS / 640x480: 1~12FPS
QUALITY Set quality:
LOW – MEDIUM - HIGH
CONTINUE RECORD set parameters for timed recording
RECORD Enable or disable (ON – OFF) timed recording
SCHEDULE Set timeframe during which timed recording is
enabled
00:00 – 00:00 indicates always
VIDEO SIZE Choose video size 320x240 or 640x480
14/01/2009 6 ©Velleman® Components nv
Page 7
CAMCOLVC1
FRAME RATE Select frame rate:
320x240: 1~30FPS / 640x480: 1~12FPS
QUALITY Set quality:
LOW – MEDIUM - HIGH
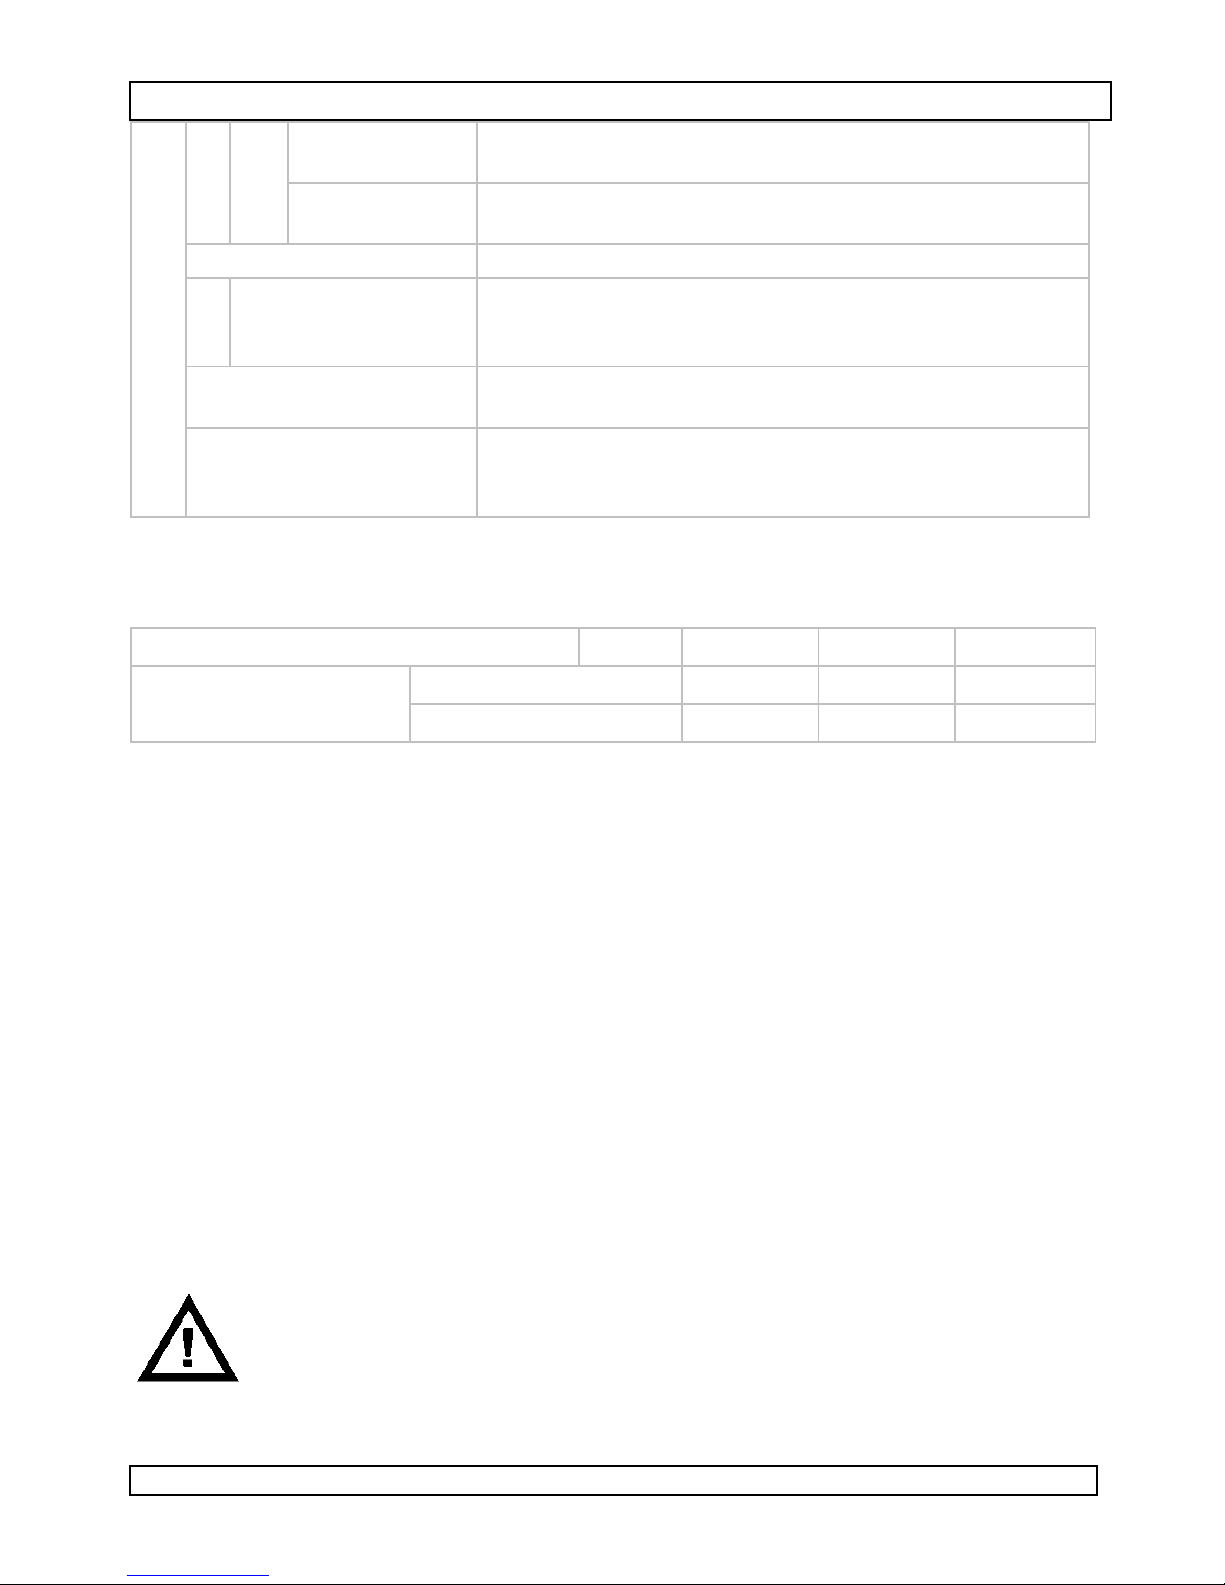
SC CARD OPTIONS shows overview, total space and remain space
FORMAT WARNING!
DATA ON SD CARD WILL BE CLEARNED?
NO: EXIT YES:+
SYSTEM STATUS shows system version and overview of current
settings
FACTORY DEFAULT RECALL DEFAULT NOW?
NO: EXIT YES:+
Note that day and time are not reset.
• Mount the camera in the desired location. Check on a regular basis
whether the SD card is full or not. Refer to the table below for an
indication of the recording times.
Memory 1GB (not incl.) quality low medium high
frame rate/resolution
30fps / 352 x 240 1100min 540min 440min
12fps / 640 x 480 800min 480min 250min
• To start manual recording, press the record button [4]. The record LED [3]
lights up. To stop, press the record button [4] again.
• To start playing back the recorded files in sequence, press the play button [6].
The play LED [5] lights up. To enter pause mode, press the play button [6]
again. To stop play-back, press the stop button [4].
• Use the forward [8] and reverse [9] buttons to for fast forward and fast
reverse play-back. When in pause-mode, press and hold the step forward
[8] or step reverse [9] button to move forward or backward 1 frame at a
time.
8. Batteries
• Move the power on/off switch [A] to the off-position.
• Open the battery compartment [J] by sliding the battery cover down.
• Insert 4 new AA-batteries in the battery compartment following the
polarity indications inside the compartment.
• Slide the battery cover back in place.
• Remove the batteries when the device is not in use.
• Do not throw batteries in fire as they may explode.
WARNING: handle batteries with care, observe warnings on
battery casing. Dispose of batteries in accordance with local
regulations. Keep batteries away from children.
14/01/2009 7 ©Velleman® Components nv
Page 8

CAMCOLVC1
9. Technical specifications
pick-up element 1/6" colour CMOS sensor
lens board lens f3.62mm / F2.8
effective pixels VGA (640 x 480)
S/N ratio 46dB
auto electronic shutter
1/60s - 1/15000s
(AES)
min. illumination 2 lux/F 2.0
video output port 1Vp-p / 75 ohms (RCA)
video output format PAL or NTSC (switch settable)
recording resolution VGA (640 x 480) / QVGA (320 x 240)
compress quality level high / medium / low
recording mode manual, timer or motion detection
recording interval 10s/5s/3s/2s/1FPS/2FPS/4FPS/6FPS/8FPS/MAX
memory full functions stop / overwrite
playback mode forward/rewind/x1/x2/x4/x8/x16/x32/pause/step
search playback date & time
motion detection full screen / adjustable detect sensitivity rate
on-screen display mode / date / time / status / setup menu
recording resolution QVGA 1~30FPS / VGA 1~12FPS
power supply
12VDC ±10% / 180mA (incl.) or 4 x AA batteries
(not incl.)
power adapter 230VAC / 12VDC - 500mA (incl.)
dimensions 130 x 80 x 70mm
weight 810g
Use this device with original accessories only. Velleman nv cannot
be held responsible in the event of damage or injury resulted from
(incorrect) use of this device.
For more info concerning this product, please visit our website
www.velleman.eu
.
The information in this manual is subject to change without prior
notice.
© COPYRIGHT NOTICE
This manual is copyrighted. The copyright to this manual is owned by Velleman Components
nv. All worldwide rights reserved. No part of this manual may be copied, reproduced, translated or
reduced to any electronic medium or otherwise without the prior written consent of the copyright
holder.
14/01/2009 8 ©Velleman® Components nv
Page 9

CAMCOLVC1
GEBRUIKERSHANDLEIDING
1. Inleiding
Aan alle ingezetenen van de Europese Unie
Belangrijke milieu-informatie betreffende dit product
Dit symbool op het toestel of de verpakking geeft aan dat, als het na
zijn levenscyclus wordt weggeworpen, dit toestel schade kan
toebrengen aan het milieu. Gooi dit toestel (en eventuele batterijen)
niet bij het gewone huishoudelijke afval; het moet bij een
gespecialiseerd bedrijf terechtkomen voor recyclage. U moet dit toestel
naar uw verdeler of naar een lokaal recyclagepunt brengen. Respecteer
de plaatselijke milieuwetgeving.
Hebt u vragen, contacteer dan de plaatselijke autoriteiten betreffende de
verwijdering.
Dank u voor uw aankoop! Lees deze handleiding grondig voor u het toestel in
gebruik neemt. Werd het toestel beschadigd tijdens het transport, installeer het
dan niet en raadpleeg uw dealer.
2. Veiligheidsinstructies
Enkel voor gebruik binnenshuis. Bescherm tegen regen, vochtigheid,
stof, extreme temperaturen en opspattende vloeistoffen.
Houd buiten het bereik van kinderen en onbevoegden.
U mag geen onderdelen vervangen. Bestel eventuele reserveonderdelen
bij uw dealer.
• De garantie geldt niet voor schade door het negeren van bepaalde richtlijnen in
deze handleiding en uw dealer zal de verantwoordelijkheid afwijzen voor
defecten of problemen die hier rechtstreeks verband mee houden.
3. Algemene richtlijnen
• Bescherm de camera tegen schokken. Vermijd brute kracht tijdens de bediening
van dit toestel.
• Leer eerst de functies van de camera kennen voor u hem gaat gebruiken.
• Om veiligheidsredenen mag u geen wijzigingen aanbrengen aan de camera.
• Gebruik de camera enkel waarvoor hij gemaakt is. Bij onoordeelkundig gebruik
vervalt de garantie.
• Installeer en gebruik deze camera niet voor illegale praktijken en respecteer
ieders privacy.
4. Eigenschappen
• automatische beeldregeling
• opname op SD-kaart (niet meegeleverd)
• 3 opnamemodi: manuele opname, geprogrammeerde opname, opname na
bewegingswaarneming (met instelbare gevoeligheid)
14/01/2009 9 ©Velleman® Components nv
Page 10
CAMCOLVC1
• beelden kunnen bekeken worden tijdens opname
• beeldcompressie en aantal frames zijn selecteerbaar
• gebruiksvriendelijk instelmenu en voorpaneel
5. Omschrijving
Raadpleeg de figuren op pagina 2 van deze handleiding.
A aan-uitschakelaar F voedingsingang
B slot voor SD-kaart G bedieningspaneel
C RCA video-uitgang H koppelstuk
D PIR-sensor (met afdekking) I gaten voor muurmontage
E CMOS-sensor J batterijvak
Bedieningspaneel 6 PLAY/PAUSE/
1 MENU/EXIT 7 voedingsled
2 menuled 8 +/ /
3 opnameled 9 -/ /
4 RECORD/STOP/ 10 keuzeschakelaar NTSC/PAL
5 afspeelled 11 keuzeschakelaar stop/overschrijven
Symbolen op het scherm
manuele opname
geheugen normaal
opname
resolutie laag – gemiddeld – hoog
geprogrammeerde
opname
geheugenfout
opname na beweging
bestandstest
ononderbroken
C
opname
6. Installatie
• Kies een geschikte montageplaats voor de camera:
• Installeer de camera weg van extreme temperaturen, vochtigheid, dampen,
stoom, stof en plaatsen onderhevig aan trillingen.
• Installeer de camera weg elektromagnetische velden om verlies van
beeldkwaliteit te vermijden.
• Richt de camera niet naar de zon of andere zeer heldere objecten.
• Installeer de camera op een manier zodat de bedieningen achteraan na
installatie gemakkelijk bereikbaar blijven.
14/01/2009 10 ©Velleman® Components nv
Page 11

CAMCOLVC1
• U kunt de camera voeden via batterijen (niet meegeleverd) of via de
meegeleverde voedingsadapter. Installeer de camera bij gebruik van de
voedingsadapter op maximaal 1 meter van een stopcontact.
• Deze camera is geschikt voor muur- en plafondmontage. Gebruik de
montagehaken [I] of de meegeleverde montagebeugel.
• muurmontage: schroef de 2 schroeven in de muur (afstand tussen de 2
schroeven van 38 mm, afstand tussen muur en schroefkop van ± 4 mm).
Bevestig de camera aan de schroeven.
• montagebeugel: plaats de muurbeugel tegen de muur en markeer de
montagegaten. Bevestig de muurbeugel aan de muur. Bevestig de arm en het
koppelstuk [H] aan de camera. Schroef de camera aan de muurbeugel vast.
• Gebruik de meegeleverde videokabel (lengte ± 1,5 m) indien u de beelden in real
time wenst te bekijken.
7. Configuratie/gebruik
• Plaats de batterijen in de camera (zie §8) of plug de connector van de
voedingsadapter in de voedingsingang [F]. Koppel de voedingsadapter aan het
lichtnet.
• Plaats een SD-kaart (niet meegeleverd) in het SD-slot [B] (afgeknotte hoek naar
de aan-uitschakelaar toe [A]).
• Bepaal het videosysteem (PAL of NTSC) met de DIP-schakelaar [10]: links voor
NTSC. Gebruik hiervoor een puntig object.
• Bepaal de opnamemodus bij vol geheugen: stoppen of overschrijven. Plaats de
DIP-schakelaar [11] indien de opname moet stoppen.
Opmerking: verplaats de schakelaars enkel indien de camera uitgeschakeld is.
• Koppel de RCA video-uitgang [C] aan de video-ingang van de monitor met behulp
van de meegeleverde videokabel. Schakel de monitor in.
• Schakel nu de camera in door de aan-uitschakelaar [A] op ON te plaatsen.
Opmerking: bij het plaatsen van een nieuwe SD-kaart zal de opnameled [3]
enkele keren knipperen. Wacht tot deze led stopt met knipperen.
• Druk op MENU [1] om het menu weer te geven. De menuled [2] brandt.
Raadpleeg de volgende pagina voor een overzicht van het menu.
• Scroll door het menu met [4] en [6]. Selecteer een item met + [8].
Wijzig de waarde met + [8] en – [9]. Verlaat een item met MENU [1].
14/01/2009 11 ©Velleman® Components nv
Page 12

CAMCOLVC1
HOOFDMENU opmerkingen
SEARCH AND PLAY afspelen van opgenomen bestanden
u krijgt een chronologisch overzicht van de beschikbare bestanden -
selecteer een opname en druk op MENU [1]
CHOISE druk op PLAY om een opname af te spelen, druk op
EXIT om het menu te verlaten
druk opnieuw op MENU [1]
SET DATE/TIME
DATE FORMAT kies formaat: J/M/D - M/D/J - D/M/J
SET DATE stel datum in (J/M/D - M/D/J - D/M/J)
SET TIME stel uur in (uu:mm:ss)
SET MOTION DETECT controleer en stel bewegingsgevoeligheid in
MD ENERGY geeft het huidige niveau weer
MD TRESHOLD stel in tussen 0 ~ 100 %
MANUAL RECORD stel parameters voor manuele opname in
VIDEO SIZE kies formaat: 320x240 of 640x480
FRAME RATE kies framesnelheid:
320x240: 1 ~ 30 fps/640x480: 1 ~ 12 fps
QUALITY stel beeldkwaliteit in:
LOW – MEDIUM - HIGH
SCHEDULE RECORD stel parameters voor opname in
u krijgt een overzicht van de huidige instellingen
MOTION RECORD stel parameters voor bewegingsopname in
RECORD schakel bewegingsopname in of uit (ON – OFF)
SCHEDULE stel tijdspanne in waarin modus is ingeschakeld
00:00 – 00:00 = continu
DURATION stel opnameduur na bewegingswaarneming in
5SEC – 10SEC – 15SEC – 20SEC – 30SEC
VIDEO SIZE kies formaat: 320x240 of 640x480
FRAME RATE kies framesnelheid:
320x240: 1 ~ 30 fps/640x480: 1 ~ 12 fps
QUALITY stel beeldkwaliteit in:
LOW – MEDIUM - HIGH
CONTINUE RECORD stel parameters voor geprogrammeerde opname in
RECORD schakel geprogrammeerde opname in of uit (ON –
OFF)
SCHEDULE stel tijdspanne in waarin modus is ingeschakeld
00:00 – 00:00 = continu
VIDEO SIZE kies formaat: 320x240 of 640x480
FRAME RATE kies framesnelheid:
320x240: 1 ~ 30 fps/640x480: 1 ~ 12 fps
14/01/2009 12 ©Velleman® Components nv
Page 13

CAMCOLVC1
QUALITY stel beeldkwaliteit in:
LOW – MEDIUM - HIGH
SC CARD OPTIONS geeft overzicht, totale capaciteit en vrije ruimte
weer
FORMAT WARNING!
DATA ON SD CARD WILL BE CLEARED?
NO: EXIT YES:+
SYSTEM STATUS systeemversie en overzicht van huidige instellingen
FACTORY DEFAULT RECALL DEFAULT NOW?
NO: EXIT YES:+
datum en tijd worden niet gereset
• Installeer de camera op de gewenste plaats. Controleer regelmatig of de SD-
kaart vol is. Raadpleeg de tabel met de opnameduur hieronder:
SD-kaart 1 GB (niet meegeleverd) kwal. laag gemiddeld hoog
framesnelh./resolutie
30 fps/352 x 240 1100 min. 540 min. 440 min.
12 fps/640 x 480 800 min. 480 min. 250 min.
• Druk op REC [4] om een opname handmatig te starten. De opnameled [3] licht
op. Stop de opname met een druk op REC [4].
• Om de opnamebestanden sequentieel af te spelen, druk op PLAY [6]. De
afspeelled [5] licht op. Druk opnieuw op PLAY [6] om te pauzeren, druk op
STOP [4] om te stoppen.
• Spoel door of terug met [8] of [9]. Pauzeer eerst de opname en druk
daarna op
[8] of [9] om de opname frame per frame te bekijken.
8. Batterijen
• Plaats de aan-uitschakelaar [A] op OFF.
• Open het batterijvak [J] door het deksel naar beneden toe te schuiven.
• Plaat vier nieuwe AA-batterijen volgens de polariteitaanduidingen.
• Sluit het batterijvak.
• Verwijder de batterijen uit de camera na gebruik.
• Gooi batterijen nooit in het vuur.
LET OP! Respecteer de richtlijnen op de verpakking van de
batterijen. Houd de batterijen buiten het bereik van kinderen.
14/01/2009 13 ©Velleman® Components nv
Page 14

CAMCOLVC1
9. Technische specificaties
opneemelement 1/6" kleuren CMOS
lens boardlens f 3,62 mm/F 2,8
pixels VGA (640 x 480)
signaal-ruisverhouding 46 dB
AES 1/60 s - 1/15000 s
min. verlichting 2 lux/F 2,0
video-uitgang 1 Vp-p/75 Ω (RCA)
formaat video-uitgang PAL of NTSC (selecteerbaar)
opnameresolutie VGA (640 x 480) / QVGA (320 x 240)
compressie hoog/gemiddeld/laag
opnamemodus manueel, geprogrammeerd, na beweging
opname-interval 10 s/5 s/3 s/2 s/1 fps/2 fps/4 fps/6 fps/8 fps/MAX
bij vol geheugen stoppen/overschrijven
afspeelmodus
beeldzoekmodus datum en tijd
bewegingswaarneming
on-screendisplay modus/datum/tijd/status/instelmenu
opnameresolutie QVGA 1~30 fps/VGA 1~12 fps
voeding
voedingsadapter 230 VAC/12 VDC – 500 mA (meegeleverd)
afmetingen 130 x 80 x 70 mm
gewicht 810 g
Gebruik dit toestel enkel met originele accessoires. Velleman nv is niet
aansprakelijk voor schade of kwetsuren bij (verkeerd) gebruik van dit
toestel. Voor meer informatie over dit product, zie www.velleman.eu. De
informatie in deze handleiding kan te allen tijde worden gewijzigd zonder
voorafgaande kennisgeving.
© AUTEURSRECHT
Velleman Components nv heeft het auteursrecht voor deze handleiding.
Alle wereldwijde rechten voorbehouden. Het is niet toegestaan om deze
handleiding of gedeelten ervan over te nemen, te kopiëren, te vertalen, te
bewerken en op te slaan op een elektronisch medium zonder voorafgaande
schriftelijke toestemming van de rechthebbende.
doorspoelen/terugspoelen/x1/x2/x4/x8/x16/x32/
pauze/stap
full screen / regelbare gevoeligheid voor waarneming
(1 ~ 99)
12 VDC ± 10 %/180 mA (meegeleverd) of 4 x AAbatterijen (niet meegeleverd)
14/01/2009 14 ©Velleman® Components nv
Page 15

CAMCOLVC1
NOTICE D’EMPLOI
1. Introduction
Aux résidents de l'Union européenne
Des informations environnementales importantes concernant ce produit
Ce symbole sur l'appareil ou l'emballage indique que l’élimination d’un
appareil en fin de vie peut polluer l'environnement. Ne pas jeter un
appareil électrique ou électronique (et des piles éventuelles) parmi les
déchets municipaux non sujets au tri sélectif ; une déchèterie traitera
l’appareil en question. Renvoyer les équipements usagés à votre
fournisseur ou à un service de recyclage local. Il convient de respecter la
réglementation locale relative à la protection de l’environnement.
En cas de questions, contacter les autorités locales pour élimination.
Nous vous remercions de votre achat ! Lire la présente notice attentivement avant
la mise en service de l’appareil. Si l’appareil a été endommagé pendant le
transport, ne pas l’installer et consulter votre revendeur.
2. Consignes de sécurité
Uniquement pour usage à l’intérieur. Protéger contre la pluie,
l’humidité, la poussière, les températures extrêmes et les projections
d’eau.
Tenir hors de la portée des enfants et des personnes non autorisées.
Il n’y a aucune pièce maintenable par l’utilisateur. Commander des
pièces de rechange éventuelles chez votre revendeur.
• La garantie ne s’applique pas aux dommages survenus en négligeant certaines
directives de cette notice et votre revendeur déclinera toute responsabilité pour
les problèmes et les défauts qui en résultent.
3. General Guidelines
• Protéger la caméra contre les chocs et la traiter avec circonspection pendant
l’opération.
• Se familiariser avec le fonctionnement de la caméra avant de l’utiliser.
• Toute modification de la caméra est interdite pour des raisons de sécurité.
• N’utiliser la caméra qu’à sa fonction prévue. Un usage impropre annule d'office
la garantie.
4. Caractéristiques
• réglages de l'image automatiques
• enregistrement sur carte SD (non incl.)
• 3 modes d’enregistrement : manuel, programmé, détection de mouvement
(avec niveau de sensibilité réglable)
• visionnage et enregistrement des images en simultanée
• compression de l'image et nombre de trames sélectionnables
• menu de réglage et esthétique du panneau frontal agréables d'emploi
14/01/2009 15 ©Velleman® Components nv
Page 16

CAMCOLVC1
5. Description
Se référer aux illustrations à la page 2 de cette notice.
A commutateur marche/arrêt F entrée d’alimentation
B port pour carte SD G panneau de contrôle
C sortie vidéo RCA H attache pour support mural
D capteur PIR (couvert) I trous de montage mural
E capteur CMOS J compartiment des piles
Panneau de contrôle 6 PLAY/PAUSE/
1 MENU/EXIT 7 DEL de puissance
2 DEL de menu 8 +/ /
3 DEL d’enregistrement 9 -/ /
4 REC/STOP/ 10 sélecteur NTSC/PAL
5 DEL de lecture 11 sélecteur arrêt/écrasement
Symboles à l’écran
enregistrement
manuel
mémoire normale
enregistrement
programmé
erreur de mémoire
enregistrement en cours
résolution
basse – moyenne – haute
enregistrement après
détection de
mouvement
fichier sous test
enregistrement
C
continu
qualité
6. Installation
• Choisir un endroit où installer la caméra :
• ne pas installer la caméra à un endroit sujet à des variations de température, à
l’humidité, à la vapeur, à la poussière et à des vibrations ;
• ne pas installer la caméra à proximité d’un champ magnétique ;
• ne jamais aligner la caméra vers le soleil ou vers n objet réfléchissant la
lumière ;
• installer la caméra de manière à ce que les commandes sur le panneau arrière
restent accessibles.
• Cette caméra peut être alimentée par des piles (non incl.) ou depuis un
adaptateur secteur. Installer la caméra à une distance de max. 1 m d’une prise de
courant lors de l’utilisation de l’adaptateur.
14/01/2009 16 ©Velleman® Components nv
Page 17

CAMCOLVC1
• Monter la caméra au mur ou au plafond à l’aide de vis [I] ou du support :
• montage mural : visser 2 vis dans le mur à une distance de 38 mm l’une de
l’autre et laisser ne distance de ± 4 mm entre le mur et la tête de la vis accrocher la caméra aux vis
• support de montage : placer le support contre le mur et tracer les trous de
montage, fixer le bras et la connexion [H] à la caméra, et fixer l’ensemble au
support
• Utiliser le câble vidéo inclus (longueur ± 1,5 m) pour visionner les images captées
en temps réel.
7. Configuration/emploi
• Insérer les piles (voir §8) ou raccorder l’alimentation à la prise d’entrée [F].
Connecter l’alimentation au réseau.
• Insérer la carte mémoire SD (non incl.) dans le port [B] (coin découpé vers le
commutateur marche/arrêt [A]).
• Sélectionner le mode vidéo (PAL ou NTSC) à l’aide de l’interrupteur DIP [10]
(NTSC : gauche). Utiliser un objet pointu pour déplacer l’interrupteur.
• Sélectionner le mode d’enregistrement lors de mémoire pleine (arrêt ou
écrasement). Placer l’interrupteur DIP [11] vers la gauche pour arrêter
l’enregistrement.
Remarque : éteindre la caméra avant de déplacer les interrupteurs DIP.
• Raccorder la caméra à un moniteur en connectant la sortie vidéo de la caméra [C]
à l’entrée du moniteur à l’aide du câble vidéo inclus. Allumer le moniteur.
• Allumer la caméra en plaçant le commutateur marche/arrêt [A] sur la position
ON.
Remarque : la DEL d’enregistrement [3] clignotera lors de l’insertion d’une
nouvelle carte SD - patienter jusqu’à ce que le clignotement s’arrête.
• Enfoncer MENU [1] pour accéder au menu. La DEL de menu [2] s’allume et le
menu s’affiche à l’écran. Se référer à la table ci-dessous pour un aperçu général
du menu.
• Naviguer dans le menu avec les touches [4] et [6]. Sélectionner un sous-
menu avec + [8], modifier la valeur avec + [8] ou – [9] et quitter le sousmenu avec la touche MENU [1].
MENU remarque
SEARCH AND PLAY lecture des fichiers
une liste chronologique des fichiers disponibles s’affiche - sélectionner un
fichier et enfoncer la touche MENU [1]
CHOISE enfoncer PLAY pour démarrer la lecture ou EXIT
pour quitter le menu
renfoncer la touche MENU [1]
SET DATE/TIME
DATE FORMAT format de la date : A/M/J - M/J/A - J/M/A
SET DATE régler la date (A/M/J - M/J/A - J/M/A)
SET TIME régler l’heure (hh:mm:ss)
14/01/2009 17 ©Velleman® Components nv
Page 18

CAMCOLVC1
SET MOTION DETECT paramétrage de la sensibilité de la détection de
mouvement
MD ENERGY niveau actuel
MD TRESHOLD paramétrer entre 0 ~ 100 %
MANUAL RECORD paramétrage de l’enregistrement manuel
VIDEO SIZE sélectionner format vidéo 320x240 ou 640x480
FRAME RATE sélectionner vitesse de l’image :
320x240 : 1 ~ 30 IPS/640x480 : 1 ~ 12 IPS
QUALITY sélectionner qualité de l’image :
LOW - MEDIUM - HIGH
SCHEDULE RECORD paramétrage d’enregistrement
un aperçu des paramétrages actuels s’affiche
MOTION RECORD paramétrage de l’enregistrement après détection de
mouvement
RECORD activation/désactivation (ON – OFF)
SCHEDULE paramétrer fenêtre d’activation du mode
00:00 – 00:00 = toujours
DURATION sélectionner durée d’enregistrement
5SEC – 10SEC – 15SEC – 20SEC – 30SEC
VIDEO SIZE sélectionner format vidéo 320x240 ou 640x480
FRAME RATE sélectionner vitesse de l’image :
320x240 : 1 ~ 30 IPS/640x480 : 1 ~ 12 IPS
QUALITY sélectionner qualité de l’image :
LOW - MEDIUM – HIGH
CONTINUE RECORD paramétrage de l’enregistrement programmé
RECORD activation/désactivation (ON – OFF)
SCHEDULE paramétrer fenêtre d’activation du mode
00:00 – 00:00 = toujours
VIDEO SIZE sélectionner format vidéo 320x240 ou 640x480
FRAME RATE sélectionner vitesse de l’image :
320x240 : 1 ~ 30 IPS/640x480 : 1 ~ 12 IPS
QUALITY sélectionner qualité de l’image :
LOW - MEDIUM – HIGH
SC CARD OPTIONS aperçu, espace total et espace libre
FORMAT WARNING!
DATA ON SD CARD WILL BE CLEARNED?
NO: EXIT YES:+
SYSTEM STATUS version et aperçu des paramétrages actuels
FACTORY DEFAULT RECALL DEFAULT NOW?
NO: EXIT YES:+
la date ne sera pas réinitialisée
14/01/2009 18 ©Velleman® Components nv
Page 19

CAMCOLVC1
• Installer la caméra à l’endroit choisi. Vérifier régulièrement si la carte SD
est pleine. Voir la table ci-dessous pour un aperçu de la durée
d’enregistrement.
Mémoire 1 Go (non incl.) qualité basse moyenne haute
vitesse/résolution
30 IPS/352x240 1100 min 540 min 440 min
12 IPS/640x480 800 min 480 min 250 min
• Démarrer manuellement un enregistrement en enfonçant la touche REC [4]. La
DEL d’enregistrement [3] s’allume. Arrêter l’enregistrement en renfonçant la
touche REC [4].
• Démarrer/interrompre la lecture chronologique des fichiers avec la touche PLAY
[6]. La DEL de lecture [5] s’allume. Arrêter la lecture en enfonçant la touche
STOP [4].
• Avancer/reculer rapidement avec met [8]/ [9]. Interrompre la lecture
et enfoncer la touche op [8] of [9] pour avancer/reculer image par
image.
8. Les piles
• Éteindre la caméra en plaçant le commutateur marche/arrêt [A] sur OFF.
• Ouvrir le compartiment des piles [J] en faisant glisser le couvercle vers le
bas.
• Insérer quatre nouvelles piles type R6 dans le compartiment selon les
indications de polarité.
• Refermer le compartiment des piles.
• Retirer les piles après usage.
• Ne jamais jeter des piles au feu.
ATTENTION ! Respecter les consignes de sécurité sur
l’emballage des piles. Garder les piles hors de la portée des
enfants.
14/01/2009 19 ©Velleman® Components nv
Page 20

CAMCOLVC1
9. Spécifications techniques
capteur capteur CMOS couleur 1/6"
objectif intégré f3,62 mm/F2,8
pixels VGA (640 x 480)
rapport signal/bruit 46 dB
obturateur AES 1/60 s - 1/15000 s
éclairement min. 2 lux/F2,0
sortie vidéo 1 Vp-p/75 Ω (RCA)
format sortie vidéo PAL ou NTSC (sélectionnable)
résolution d’enregistrement VGA (640 x 480)/QVGA (320 x 240)
niveau de compression haut/moyen/bas
modes d’enregistrement
intervalle d’enregistrement 10 s/5 s/3 s/2 s/1 IPS/2 IPS/4 IPS/6 IPS/8 IPS/MAX
fonctions mémoire pleine arrêt/écrasement
mode de lecture avance/recul/x1/x2/x4/x8/x16/x32/pause/image
fonctions de recherche date/heure
détection de mouvement plein écran/niveau de sensibilité réglable
menu à l’écran mode/date/heure/état/menu de paramétrage
résolution d’enregistrement QVGA 1 ~ 30 IPS/VGA 1 ~ 12 IPS
alimentation
adaptateur secteur 230 VCA/12VCC – 500 mA (incl.)
dimensions 130 x 80 x 70 mm
poids 810 g
N’employer cet appareil qu’avec des accessoires d’origine. SA Velleman ne
sera aucunement responsable de dommages ou lésions survenus à un
usage (incorrect) de cet appareil. Pour plus d’information concernant cet
article, visitez notre site web www.velleman.eu. Toutes les informations
présentées dans cette notice peuvent être modifiées sans notification
préalable.
© DROITS D’AUTEUR
SA Velleman Components est l’ayant droit des droits d’auteur pour cette
notice.
Tous droits mondiaux réservés. Toute reproduction, traduction, copie ou diffusion,
intégrale ou partielle, du contenu de cette notice par quelque procédé ou sur tout
support électronique que se soit est interdite sans l’accord préalable écrit de
l’ayant droit.
manuel, programmé et après détection de
mouvement
12 VCC ± 10 %/180 mA (incl.) ou 4 piles R6 (non
incl.)
14/01/2009 20 ©Velleman® Components nv
Page 21

CAMCOLVC1
MANUAL DEL USUARIO
1. Introducción
A los ciudadanos de la Unión Europea
Importantes informaciones sobre el medio ambiente concerniente a este
producto
Este símbolo en este aparato o el embalaje indica que, si tira las
muestras inservibles, podrían dañar el medio ambiente.
No tire este aparato (ni las pilas, si las hubiera) en la basura
doméstica; debe ir a una empresa especializada en reciclaje. Devuelva
este aparato a su distribuidor o a la unidad de reciclaje local.
Respete las leyes locales en relación con el medio ambiente.
Si tiene dudas, contacte con las autoridades locales para residuos.
¡Gracias por haber comprado la CAMCOLVC1! Lea atentamente las instrucciones
del manual antes de usarla. Si el aparato ha sufrido algún daño en el transporte no
lo instale y póngase en contacto con su distribuidor.
2. Instrucciones de seguridad
Sólo para el uso en interiores. No exponga este equipo a lluvia,
humedad, temperaturas extremas, polvo ni a ningún tipo de
salpicadura o goteo.
Mantenga el aparato lejos del alcance de personas no capacitadas y
niños.
El usuario no habrá de efectuar el mantenimiento de ninguna pieza.
Contacte con su distribuidor si necesita piezas de recambio.
• Los daños causados por descuido de las instrucciones de seguridad de este
manual invalidarán su garantía y su distribuidor no será responsable de ningún
daño u otros problemas resultantes.
3. Normas generales
• No agite el aparato. Evite usar excesiva fuerza durante el manejo y la
instalación.
• Familiarícese con el funcionamiento del aparato antes de utilizarlo.
• Por razones de seguridad, las modificaciones no autorizadas del aparato están
prohibidas.
• Utilice sólo el aparato para las aplicaciones descritas en este manual. Un uso
desautorizado anula la garantía completamente.
4. Características
• ajustes automáticos de la imagen
• la cámara digital graba las imágenes en una tarjeta SD (no incl.)
• 3 modos de grabación: grabación manual, grabación programada o grabación
después de la detección de movimientos (con nivel de sensibilidad ajustable)
• visualización y grabación de forma simultánea de las imágenes
• compresión de la imagen y número de frames seleccionables
14/01/2009 21 ©Velleman® Components nv
Page 22

CAMCOLVC1
• menú de ajuste y panel frontal fáciles de utilizar
5. Descripción
Véase la figura en la página Error! Bookmark not defined. de este manual del
usuario.
A interruptor ON/OFF F entrada de alimentación
B puerto para la tarjeta SD G panel de control
C salida de vídeo RCA H Fijación para soporte mural
D sensor PIR (abierto) I agujeros de montaje mural
E sensor CMOS J compartimiento de pilas
Panel de control 6 PLAY/PAUSE/
1 MENU/EXIT 7 LED de potencia
2 LED de menú 8 +/ /
3 LED de grabación 9 -/ /
4 REC/STOP/ 10 selector NTSC/PAL
5 LED de reproducción 11 selector parar/sobre-escribir
Símbolos en la pantalla
grabación después
de la detección de
movimientos
fichero bajo test
C
grabación continua
calidad
baja – media – alta
grabación manual
memoria normal
grabación
resolución
grabación
programada
error de memoria
6. Instalación
• Elija un lugar de montaje adecuado y asegúrese de que:
• nunca instale la cámara en un lugar donde esté expuesta a temperaturas
extremas y vibraciones;
• nunca instale la cámara cerca de campos electromagnéticos;
• nunca dirija la cámara al sol ni otro objeto reflectante;
• instale la cámara de tal manera que los mandos de la parte trasera quedan
accesibles.
• Esta cámara funciona con pilas (no incl.) o un adaptador de red. Instale la cámara
a una distancia de máx. 1m de un enchufe al utilizar el adaptador.
14/01/2009 22 ©Velleman® Components nv
Page 23

CAMCOLVC1
• Fije la cámara con los tornillos [I] o el soporte a la pared o al techo:
• montaje mural: atornille 2 tornillos en la pared a una distancia de 38mm el uno
del otro y deje una distancia de ± 4 mm entre la pared y la cabeza del tornillo Fije la cámara a los tornillos
• soporte de montaje: ponga el soporte contra la pared y marque los agujeros de
montaje, fije el brazo y la conexión [H] a la cámara, y fije el conjunto al
soporte
• Utilice el cable de vídeo incl. (longitud ± 1,5m) para visualizar las imágenes
grabadas en tiempo real.
7. Configuración/uso
• Introduzca las pilas (véase §8) o conecte la alimentación a la entrada [F].
Conecte la alimentación a la red.
• Introduzca la tarjeta memoria SD (no incl.) en el puerto [B] (esquina cortada
hacia el interruptor ON/OFF [A]).
• Seleccione el modo de vídeo (PAL o NTSC) con el interruptor DIP [10] (NTSC:
izquierda). Utilice un objeto puntiagudo para desplazar el interruptor.
• Seleccione el modo de grabación si la memoria está llena (parar o sobre-
escribir). Desplace el interruptor DIP [11] hacia la izquierda para parar la
grabación.
Nota: desactive la cámara antes de desplazar los interruptores DIP.
• Conecte la cámara a un monitor al conectar la salida de vídeo de la cámara [C] a
la entrada del monitor con el cable de vídeo incl. Active el monitor.
• Active la cámara al poner el conmutador ON/OFF [A] en la posición ON.
Nota: el LED de grabación [3] parpadeará al introducir una nueva tarjeta SD -
espere hasta que se pare el parpadeo.
• Pulse MENU [1] para entrar en el menú. El DEL de menú [2] se ilumina y el
menú se visualiza en la pantalla. Véase la lista a continuación para un resumen
general del menú.
• Desplácese en el menú con las teclas [4] y [6]. Seleccione un submenú
con + [8], modifique el valor con + [8] o – [9] y salga del submenú con la
tecla MENU [1].
MENU nota
SEARCH AND PLAY reproducción de los ficheros
una lista cronológica de los ficheros disponibles se visualiza - seleccione
un fichero y pulse la tecla MENU [1]
CHOISE pulse PLAY para activar la reproducción o EXIT para
salir del menú
vuelva a pulsar la tecla MENU [1]
SET FECHA/TIME
FECHA FORMAT formato de la fecha: A/M/J - M/J/A - J/M/A
SET FECHA ajustar la fecha (A/M/J - M/J/A - J/M/A)
SET TIME ajustar la hora (hh:mm:ss)
14/01/2009 23 ©Velleman® Components nv
Page 24

CAMCOLVC1
SET MOTION DETECT ajustar la sensibilidad de la detección de
movimientos
MD ENERGY nivel actual
MD TRESHOLD ajustar entre 0 ~ 100 %
MANUAL RECORD ajustar la grabación manual
VIDEO SIZE seleccionar formato vídeo 320x240 ó 640x480
FRAME RATE seleccionar la velocidad de la imagen:
320x240 : 1 ~ 30 IPS/640x480 : 1 ~ 12 IPS
QUALITY seleccionar la calidad de la imagen :
LOW - MEDIUM - HIGH
SCHEDULE RECORD ajustar la grabación
se visualiza un resumen de los ajustes actuales
MOTION RECORD ajuste de la grabación después de la detección de
movimientos
RECORD activación/desactivación (ON – OFF)
SCHEDULE ajustar la pantalla de activación del modo
00:00 – 00:00 = siempre
DURATION seleccionar la duración de grabación
5SEC – 10SEC – 15SEC – 20SEC – 30SEC
VIDEO SIZE seleccionar el formato de vídeo 320x240 ó 640x480
FRAME RATE seleccionar la velocidad de la imagen:
320x240: 1 ~ 30 IPS/640x480: 1 ~ 12 IPS
QUALITY seleccionar la calidad de la imagen:
LOW - MEDIUM – HIGH
CONTINUE RECORD ajustar la grabación programada
RECORD activación/desactivación (ON – OFF)
SCHEDULE ajustar la pantalla de activación del modo
00:00 – 00:00 = siempre
VIDEO SIZE seleccionar el formato de vídeo 320x240 ó 640x480
FRAME RATE seleccionar velocidad de la imagen :
320x240 : 1 ~ 30 IPS/640x480 : 1 ~ 12 IPS
QUALITY seleccionar la calidad de la imagen:
LOW - MEDIUM – HIGH
SC CARD OPTIONS resumen, espacio total y espacio libre
FORMAT WARNING!
DATA ON SD CARD WILL BE CLEARNED?
NO: EXIT YES:+
SYSTEM STATUS versión y resumen de los ajustes actuales
FACTORY DEFAULT RECALL DEFAULT NOW?
NO: EXIT YES:+
la fecha no se reinicializa
14/01/2009 24 ©Velleman® Components nv
Page 25

CAMCOLVC1
• Instale la cámara en el lugar seleccionado. Controle regularmente si la
tarjeta SD está llena. Véase la siguiente lista para un resumen de la
duración de grabación.
Memoria 1 GB (no incl.) calidad baja media alta
30 IPS/352x240 1100 min.
540 min. 440 min.
velocidad/resolución
12 IPS/640x480 800 min. 480 min. 250 min.
• Active una grabación de forma manual al pulsar la tecla REC [4]. El LED de
grabación [3] se ilumina. Desactive la grabación al volver a pulsar la tecla REC
[4].
• Active/interrumpa la reproducción cronológica de los ficheros con la tecla PLAY
[6]. El LED de reproducción [5] se ilumina. Desactive la reproducción al pulsar
la tecla STOP [4].
• Avance/retroceda de manera rápida con [8]/ [9]. Interrumpa la
reproducción y pulse la tecla [8] o [9] para avanzar/retroceder imagen
por imagen.
8. Las pilas
• Desactive la cámara al poner el interruptor ON/OFF [A] en la posición
OFF.
• Abra el compartimiento de pilas [J] al hacer deslizar la tapa hacia abajo.
• Introduzca cuatro nuevas pilas AA en el compartimiento. Respete la
polaridad.
• Cierre compartimiento de pilas.
• Saque las pilas después del uso.
• Nunca eche las pilas al fuego.
¡OJO!: Respete las advertencias del embalaje. Mantenga las
pilas lejos del alcance de niños.
14/01/2009 25 ©Velleman® Components nv
Page 26

CAMCOLVC1
9. Especificaciones
elemento de imagen sensor CMOS color de 1/6"
óptica montada sobre CI f3,62 mm/F2,8
píxeles VGA (640 x 480)
relación señal / ruido 46 dB
shutter AES 1/60 s - 1/15000 s
iluminación mínima 2 lux/F2,0
salida de vídeo 1 Vp-p/75 Ω (RCA)
formato salida de vídeo PAL o NTSC (seleccionable)
resolución de grabación VGA (640 x 480)/QVGA (320 x 240)
nivel de compresión alto / medio / bajo
modos de grabación
intervalo de grabación 10 s/5 s/3 s/2 s/1 IPS/2 IPS/4 IPS/6 IPS/8 IPS/MAX
funciones en caso de
memoria llena
modo de reproducción avanzar/retroceder/x1/x2/x4/x8/x16/x32/pausa/imagen
funciones de búsqueda fecha/hora
detección de
movimientos
menú en la pantalla modo / fecha / hora / estado / menú de ajuste
resolución de grabación QVGA 1 ~ 30 IPS/VGA 1 ~ 12 IPS
alimentación 12 VCC ± 10 %/180 mA (incl.) o 4 pilas AA (no incl.)
adaptador de red 230 VCA/12VCC – 500 mA (incl.)
dimensiones 130 x 80 x 70mm
peso 810 g
Utilice este aparato sólo con los accesorios originales. Velleman NV no
será responsable de daños ni lesiones causados por un uso (indebido) de
este aparato. Para más información sobre este producto, visite nuestra
página web www.velleman.eu. Se pueden modificar las especificaciones y
el contenido de este manual sin previo aviso.
© DERECHOS DE AUTOR
Velleman NV dispone de los derechos de autor para este manual del
usuario.
Todos los derechos mundiales reservados.
Está estrictamente prohibido reproducir, traducir, copiar, editar y guardar este
manual del usuario o partes de ello sin previo permiso escrito del derecho
habiente.
grabación manual, grabación programada o grabación
después de la detección de movimientos
se desactiva la grabación / sobre-escribir
pantalla completa /nivel de sensibilidad ajustable
14/01/2009 26 ©Velleman® Components nv
Page 27

CAMCOLVC1
BEDIENUNGSANLEITUNG
1. Einführung
An alle Einwohner der Europäischen Union
Wichtige Umweltinformationen über dieses Produkt
Dieses Symbol auf dem Produkt oder der Verpackung zeigt an, dass
die Entsorgung dieses Produktes nach seinem Lebenszyklus der
Umwelt Schaden zufügen kann. Entsorgen Sie die Einheit (oder
verwendeten Batterien) nicht als unsortiertes Hausmüll; die Einheit
oder verwendeten Batterien müssen von einer spezialisierten Firma
zwecks Recycling entsorgt werden. Diese Einheit muss an den Händler
oder ein örtliches Recycling-Unternehmen retourniert werden.
Respektieren Sie die örtlichen Umweltvorschriften.
Falls Zweifel bestehen, wenden Sie sich für Entsorgungsrichtlinien an Ihre
örtliche Behörde.
Wir bedanken uns für den Kauf der CAMCOLVC1! Lesen Sie diese
Bedienungsanleitung vor Inbetriebnahme sorgfältig durch. Überprüfen Sie, ob
Transportschäden vorliegen. Sollte dies der Fall sein, verwenden Sie das Gerät
nicht und wenden Sie sich an Ihren Händler.
2. Sicherheitshinweise
Nur für die Anwendung im Innenbereich.
Schützen Sie das Gerät vor Regen und Feuchte, Staub und extremen
Temperaturen. Setzen Sie das Gerät keiner Flüssigkeit wie z.B. Tropfoder Spritzwasser, aus.
Halten Sie Kinder und Unbefugte vom Gerät fern.
Es gibt keine zu wartenden Teile. Bestellen Sie eventuelle Ersatzteile bei
Ihrem Fachhändler.
• Bei Schäden, die durch Nichtbeachtung der Bedienungsanleitung verursacht
werden, erlischt der Garantieanspruch. Für daraus resultierende Folgeschäden
übernimmt der Hersteller keine Haftung.
3. Allgemeine Richtlinien
• Vermeiden Sie Erschütterungen. Vermeiden Sie rohe Gewalt während der Installation
und Bedienung des Gerätes.
• Nehmen Sie das Gerät erst in Betrieb, nachdem Sie sich mit seinen Funktionen
vertraut gemacht haben.
• Eigenmächtige Veränderungen sind aus Sicherheitsgründen verboten.
• Verwenden Sie das Gerät nur für Anwendungen beschrieben in dieser
Bedienungsanleitung sonst kann dies zu Schäden am Produkt führen und
erlischt der Garantieanspruch.
• Installieren und verwenden Sie die Kamera nicht für illegale Praktiken und
beachten Sie die Intimsphäre aller.
14/01/2009 27 ©Velleman® Components nv
Page 28

CAMCOLVC1
4. Eigenschaften
• automatische Bildsteuerungsfunktionen
• Speicherung der Bilder auf SD-Karte (nicht mitgeliefert)
• 3 Aufnahme-Modi: manuelle Aufnahme, programmierte Aufnahme oder
Aufnahme bei Bewegungsdetektion (mit einstellbarer Empfindlichkeit)
• Sie können sich während der Aufnahme die Bilder ansehen
• wählbare Datenkomprimierung für Bildqualität und Bildfrequenz
• benutzerfreundliches OSD-Konfigurationsmenü und Frontplattendesign
5. Umschreibung
Siehe Abbildungen, Seite Error! Bookmark not defined. dieser
Bedienungsanleitung.
A EIN/AUS-Schalter F Netzeingang
B Karteneinschub für SD-Karte G Bedienfeld
C RCA Video-Ausgang H Kupplung
D PIR-Sensor (mit Deckel) I Löcher für die Wandmontage
E CMOS-Sensor J Batteriefach
Bedienfeld 6 PLAY/PAUSE/
1 MENU/EXIT 7 Stromversorgungs-LED
2 Menü-LED 8 +/ /
3 Aufnahme-LED 9 -/ /
4 RECORD/STOP/ 10 Wählschalter NTSC/PAL
5 Wiedergabe-LED 11 Wählschalter Stopp/überschreiben
Symbole im Display
manuelle Aufnahme
Speicher normal
Aufnahme
Auflösung
programmierte
Aufnahme
Speicherfehler
niedrig – durchschnittlich –
hoch
Aufnahme nach
Bewegung
Dateientest
ununterbrochene
C
Aufnahme
6. Installation
• Wählen Sie einen geeigneten Montageort für die Kamera:
• Achten Sie bei der Wahl des Installationsortes darauf, dass das Gerät keinen
extremen Temperaturen und Vibrationen ausgesetzt werden.
14/01/2009 28 ©Velleman® Components nv
Page 29

CAMCOLVC1
• Montieren Sie die Kamera nie in der Nähe von elektromagnetischen Feldern;
• Richten Sie die Kamera nie auf die Sonne oder andere reflektierende
Gegenstände.
• Installieren Sie die Kamera so, dass die Bedienungen auf der Rückseite nach
Installation einfach erreichbar bleiben.
• Die Kamera funktioniert mit Batterien (nicht mitgeliefert) oder mit dem
mitgelieferten Netzteil. Installieren Sie die Kamera bei Anwendung des Netzteils in
einem Abstand von max. 1 Meter einer Steckdose.
• Diese Kamera eignet sich für Wand- und Deckenmontage. Verwenden Sie die
Montagehaken [I] oder den mitgelieferten Montagebügel.
• Wandmontage: Schrauben Sie die 2 Schrauben in die Wand (Abstand zwischen
den 2 Schrauben von 38mm, Abstand zwischen Wand und Schraubkopf von
± 4 mm). Befestigen Sie die Kamera an den Schrauben.
• Montagebügel: befestigen Sie den Montagebügel an der Wand und markieren
Sie die Montagelöcher. Befestigen Sie den Montagebügel an der Wand.
Befestigen Sie den Arm und die Kupplung [H] an der Kamera. Befestigen Sie
die Kamera am Montagebügel.
• Verwenden Sie das mitgelieferte Videokabel (Länge ± 1,5 m) wenn Sie sich die
Bilder in Echtzeit ansehen möchten.
7. Konfiguration/Anwend un g
• Legen Sie die Batterien in die Kamera ein (siehe §8) oder verbinden Sie das
Netzteil mit dem Netzeingang [F]. Verbinden Sie das Netzteil mit dem Netz.
• Legen Sie eine SD-Karte (nicht mitgeliefert) in den Karteneinschub [B] ein
(schneiden Sie den Winkel in Richtung des EIN/AUS-Schalters weg [A]).
• Bestimmen Sie das Videosystem (PAL oder NTSC) mit dem DIP-Schalter [10]:
links für NTSC. Verwenden Sie hierfür einen spitzen Gegenstand.
• Bestimmen Sie den Aufnahmemodus bei vollem Speicher: stoppen oder
überschreiben. Verschieben Sie die DIP-Schalter [11] nach links wenn die
Aufnahme stoppen muss.
Bemerkung: verschieben Sie die Schalter nur wenn die Kamera ausgeschaltet ist.
• Verbinden Sie den RCA Video-Ausgang [C] über das mitgelieferte Videokabel mit
dem Video-Eingang des Monitors. Schalten Sie den Monitor ein.
• Schalten Sie nun die Kamera ein, indem Sie den EIN/AUS-Schalter [A] auf ON
stellen.
Bemerkung: Beim Einlegen einer neuen SD-Karte blinkt die Aufnahme-LED [3]
einige Male. Warten Sie bis diese LED nicht mehr blinkt.
• Drücken Sie auf MENU [1] um das Menü anzuzeigen. Die Menü-LED [2]
leuchtet. Siehe folgende Seite für eine Übersicht des Menüs.
• Scrollen Sie mit [4] und [6] durch das Menü. Wählen Sie ein Item mit +
[8]. Ändern Sie den Wert mit + [8] en – [9]. Verlassen Sie ein Item mit MENU
[1].
HAUPTMENÜ Bemerkungen
SEARCH AND PLAY aufgenommene Dateien wiedergeben
Sie bekommen eine chronologische Übersicht der verfügbaren Dateien –
14/01/2009 29 ©Velleman® Components nv
Page 30

CAMCOLVC1
wählen Sie eine Aufnahme und drücken Sie MENU [1]
CHOISE drücken Sie auf PLAY um eine Aufnahme
abzuspielen, drücken Sie auf EXIT um das Menü zu
verlassen
drücken Sie wieder auf MENU [1]
SET DATE/TIME
DATE FORMAT Wählen Sie das Format: J/M/D - M/D/J - D/M/J
SET DATE Stellen Sie das Datum ein (J/M/D - M/D/J - D/M/J)
SET TIME Stellen Sie die Uhr ein (hh:mm:ss)
SET MOTION DETECT Überprüfen und stellen Sie die
Bewegungsempfindlichkeit ein
MD ENERGY Zeigt das aktuelle Niveau an
MD TRESHOLD Stellen Sie ein zwischen 0 ~ 100 %
MANUAL RECORD Stellen Sie die Parameter für die manuelle
Aufnahme ein
VIDEO SIZE Wählen Sie das Format: 320x240 oder 640x480
FRAME RATE Wählen Sie die Bildfrequenz:
320x240: 1 ~ 30 fps/640x480: 1 ~ 12 fps
QUALITY Stellen Sie die Bildqualität ein:
LOW – MEDIUM - HIGH
SCHEDULE RECORD Stellen Sie die Parameter für die Aufnahme ein
Sie bekommen eine Übersicht der aktuellen
Einstellungen
MOTION RECORD Stellen Sie die Parameter für die
Bewegungsaufnahme ein
RECORD Schalten Sie die Bewegungsaufnahme ein oder aus
(ON – OFF)
SCHEDULE Stellen Sie den Zeitraum für die Aufnahme bei
Bewegungsdetektion ein
00:00 – 00:00 = kontinuierlich
DURATION Stellen Sie die Aufnahmedauer nach
Bewegungsdetektion ein
5SEC – 10SEC – 15SEC – 20SEC – 30SEC
VIDEO SIZE Wählen Sie das Format: 320x240 of 640x480
FRAME RATE Wählen Sie die Bildfrequenz:
320x240: 1 ~ 30 fps/640x480: 1 ~ 12 fps
QUALITY Stellen Sie die Bildqualität ein:
LOW – MEDIUM - HIGH
CONTINUE RECORD Stellen Sie die Parameter für die programmierte
Aufnahme ein
RECORD Schalten Sie die programmierte Aufnahme ein oder
aus (ON – OFF)
14/01/2009 30 ©Velleman® Components nv
Page 31

SCHEDULE Stellen Sie den Zeitraum für die Aufnahme bei
VIDEO SIZE Wählen Sie das Format: 320x240 of 640x480
FRAME RATE Wählen Sie die Bildfrequenz:
QUALITY Stellen Sie die Bildqualität ein:
SC CARD OPTIONS Zeigt eine Übersicht, die Gesamtkapazität und den
FORMAT WARNING!
SYSTEM STATUS Version des Systems und Übersicht der aktuellen
FACTORY DEFAULT RECALL DEFAULT NOW?
CAMCOLVC1
Bewegungsdetektion ein
00:00 – 00:00 = kontinuierlich
320x240: 1 ~ 30 fps/640x480: 1 ~ 12 fps
LOW – MEDIUM - HIGH
freien Raum an
DATA ON SD CARD WILL BE CLEARED?
NO: EXIT YES:+
Einstellungen
NO: EXIT YES:+
Datum und Zeit werden nicht rückgesetzt
• Installieren Sie die Kamera im gewünschten Ort. Überprüfen Sie regelmäßig, ob
die SD-Karte voll ist. Siehe nachfolgende Liste mit der Aufnahmedauer:
SD-Karte 1 GB (nicht mitgeliefert) Qualität niedrig durchschnittlich
Bildfrequenz/Auflösung
30 fps/352 x 240 1100 Min.
12 fps/640 x 480 800 Min. 480 Min. 250 Min.
540 Min. 440 Min.
hoch
• Drücken Sie auf REC [4] um eine Aufnahme manuell zu starten. Die Aufnahme-
LED [3] leuchtet. Stoppen Sie die Aufnahme mit einem Druck auf REC [4].
• Um die Aufnahmedateien in Sequenz abzuspielen, drücken Sie auf PLAY [6].
Die Wiedergabe-LED [5] leuchtet. Drücken Sie wieder auf PLAY [6] um zu
pausieren. Drücken Sie auf STOP [4] um zu stoppen.
• Drücken Sie auf [8] oder [9] um vor- oder rückzuspulen. Pausieren Sie
zuerst die Aufnahme und drücken Sie danach auf [8] oder [9] um sich
die Aufnahme Bild pro Bild anzusehen.
8. Batterien
• Stellen Sie den EIN/AUS-Schalter [A] auf OFF.
• Öffnen Sie das Batteriefach [J] indem Sie den Deckel nach unten schieben.
• Legen Sie vier neue AA-Batterien ein. Respektieren Sie die Polarität.
• Schließen Sie das Batteriefach.
• Entfernen Sie die Batterien aus der Kamera nach Anwendung
• Werfen Sie die Batterien nie ins Feuer.
ACHTUNG: Beachten Sie die Warnungen der Verpackung.
Halten Sie die Batterien von Kindern fern.
14/01/2009 31 ©Velleman® Components nv
Page 32

CAMCOLVC1
9. Technische Daten
Aufnahme-Element 1/6" CMOS-Farbkamera
integriertes Objektiv f 3,62 mm/F 2,8
Pixelanzahl VGA (640 x 480)
Signal/Rauschabstand 46 dB
AES 1/60 s - 1/15000 s
minimale Lichtstärke 2 lux/F 2,0
Video-Ausgang 1 Vp-p/75 Ω (RCA)
Video-Ausgangsformat PAL oder NTSC (einstellbar)
Aufnahmeauflösung VGA (640 x 480) / QVGA (320 x 240)
Komprimierung high / medium / low
Aufnahmemodus
Aufnahmeintervall 10 s/5 s/3 s/2 s/1 fps/2 fps/4 fps/6 fps/8 fps/MAX
Speicherfunktionen stoppen/überschreiben
Wiedergabemodus
Wiedergabesuche Datum & Zeit
Bewegungsdetektion
On-Screen-Display Modus / Datum / Zeit / Status / Konfigurationsmenü
Auflösung der Aufnahme QVGA 1~30 FPS/VGA 1~12 FPS
Stromversorgung
Netzteil 230 VAC/12 VDC – 500 mA (mitgeliefert)
Abmessungen 130 x 80 x 70 mm
Gewicht 810 g
Verwenden Sie dieses Gerät nur mit originellen Zubehörteilen. Velleman
NV übernimmt keine Haftung für Schaden oder Verletzungen bei
(falscher) Anwendung dieses Gerätes. Für mehr Informationen zu diesem
Produkt, siehe www.velleman.eu. Alle Änderunge n ohne vorherige
Ankündigung vorbehalten.
© URHEBERRECHT
Velleman Components NV besitzt das Urheberrecht für diese
Bedienungsanleitung.
Alle weltweiten Rechte vorbehalten.
ohne vorherige schriftliche Genehmigung des Urhebers ist es nicht gestattet, diese
Bedienungsanleitung ganz oder in Teilen zu reproduzieren, zu kopieren, zu
übersetzen, zu bearbeiten oder zu speichern.
manuelle Aufnahme, programmierte Aufnahme oder
Aufnahme bei Bewegungsdetektion
vorspulen / zurückspulen / x1 / x2 / x4 / x8 / x16 /
x32 / Pause / Schritt
Full Screen / regelbare Detektionsempfindlichkeit (1
~ 99)
12 VDC ± 10 %/180 mA (mitgeliefert) oder 4 x AABatterien (nicht mitgeliefert)
14/01/2009 32 ©Velleman® Components nv
 Loading...