

Page 1
ASSEMBLY MANUAL OCTOBER 2016
ANALOG INPUT EXTENSION SHIELD FOR ARDUINO
WWW.VELLEMANPFORMAKERS.COM
Page 2
Introduction
The Arduino UNO™ is equipped with 6 analog inputs but some projects call for more. For
example; sensor- or robot projects. The analog input extension shield only uses 4 I/O lines
(3 digital, 1 analog) but adds a whopping 24 inputs, so in total you have 29 analog inputs
at your disposal.
Features:
• 24 analog inputs
• only 4 I/O lines are used
• stackable design
• complete with library and examples
• works with Arduino UNO™ and compatible boards
Specications:
• analog inputs: 0 - 5 VDC
• uses pins: 5, 6, 7 and A0 on Arduino UNO™ board
• dimensions: 54 x 66 mm (2.1” x 2.6”)
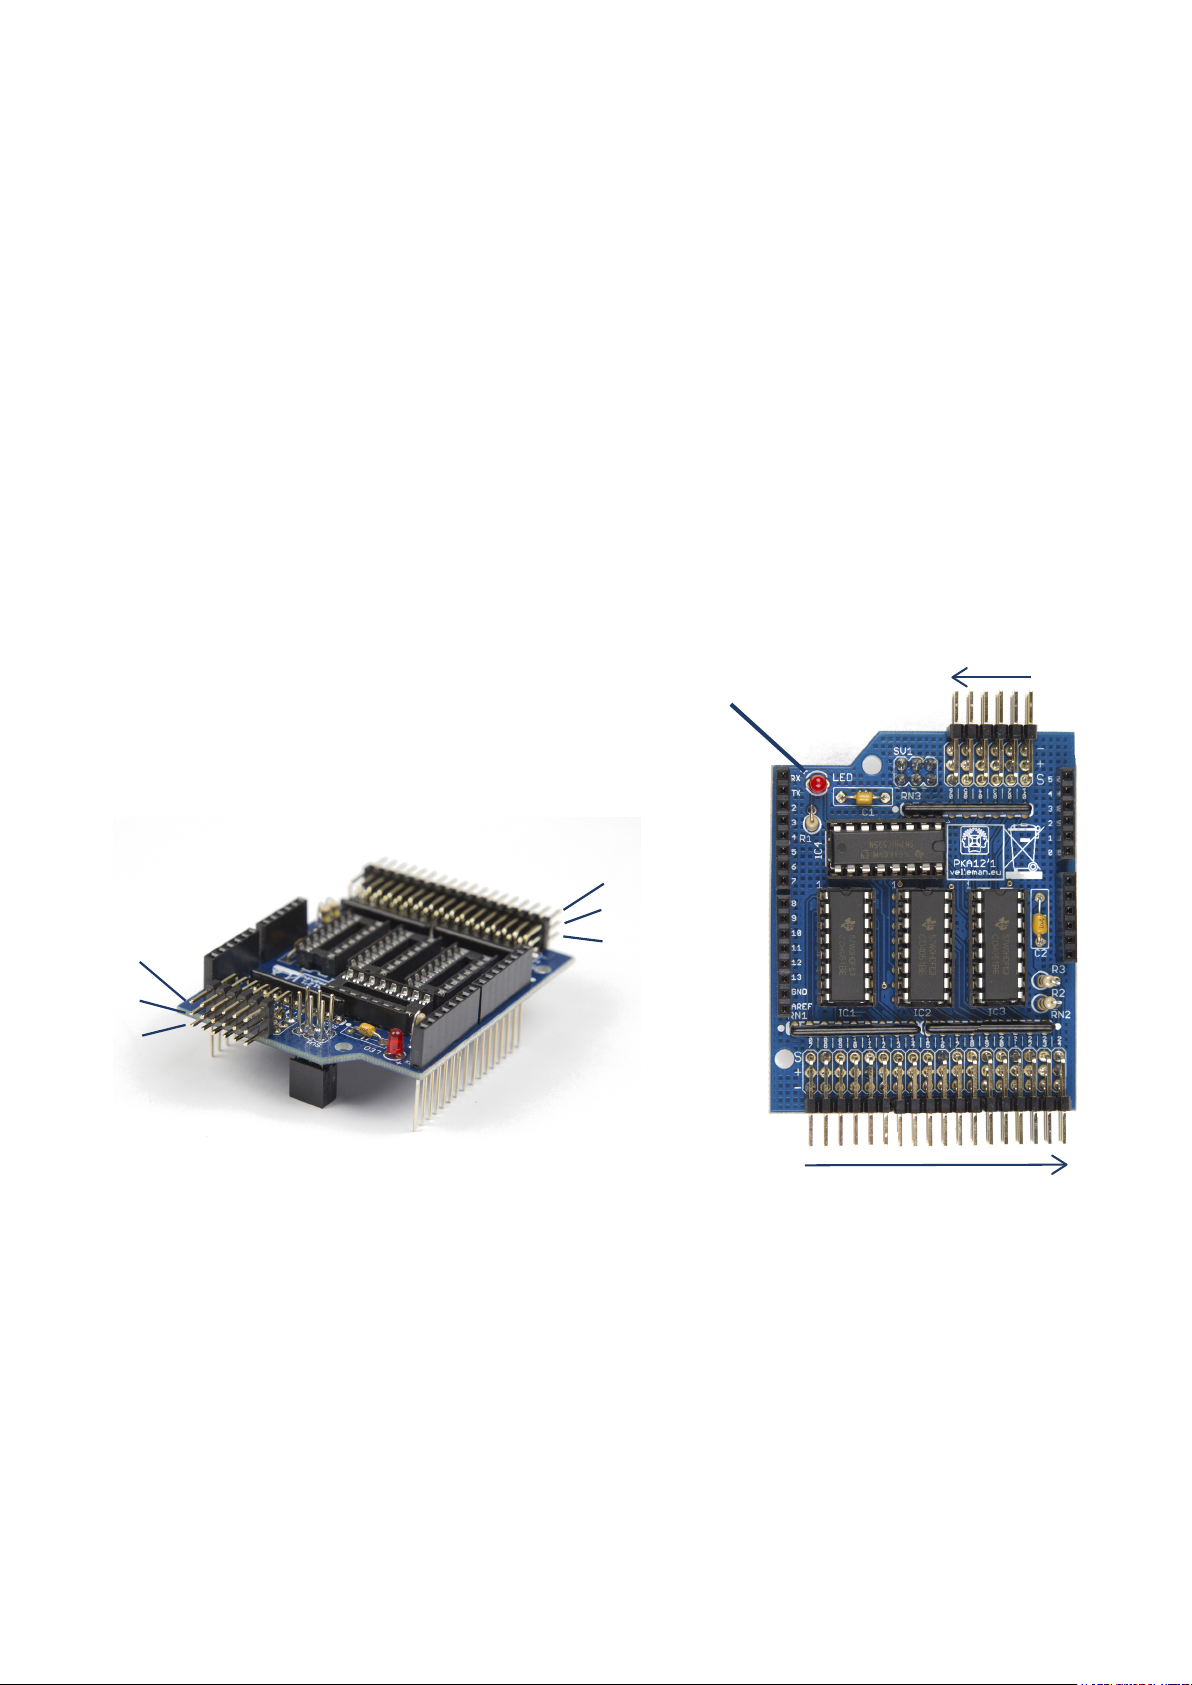
ANALOG INPUT
6
1
Input
5V
GND
INDICATOR LED
(Flashes when data
is being read)
Input
5V
GND
7
ANALOG INPUT
24
In this manual, we will explain how to assemble the KA12 and how to install the included
Arduino library with an example sketch.
KA1 2ASSEMBLYMANUAL
2
Page 3
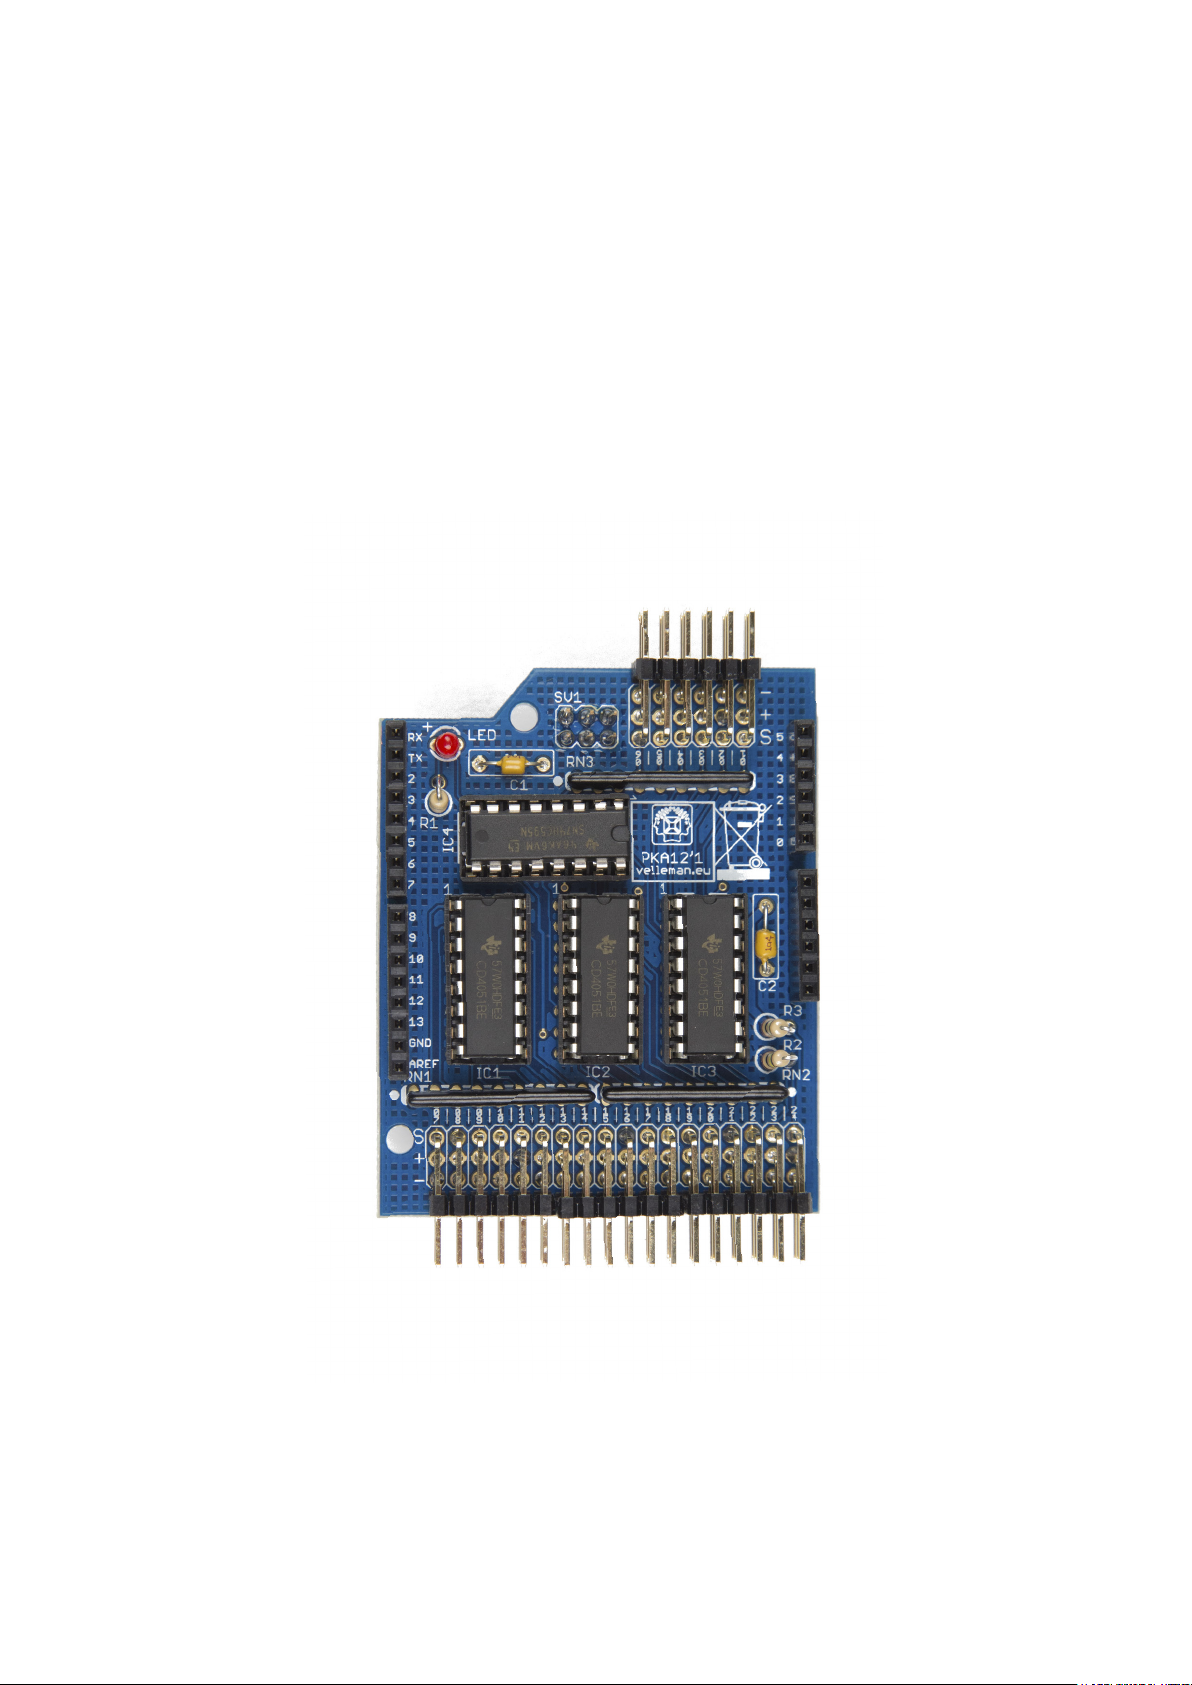
Table of contents
1. What’s in the box 4
2. Building instructions 4
3. Connecting the KA12 8
4. Installing the Arduino Library 9
Page 4

1. What’s in the box
1. 1 X PCB
2. 1 X 470 Ohm resistor
(yellow, purple, brown)
3. 2 X 100k Ohm resistor
(brown, black, yellow)
4. 2 X ceramic multilayer capacitor
5. 3 X resistor array 100k
6. 1 X 3 mm red LED
7. 4 X IC holder (16 pins)
8. 4 X pinheader with 6x3 pins
1.
12.
13.
5.
8.
6. 7.
9.
9. 2 X 8 pin female header
10. 2 X 6 pin female header
11. 2 X 3 pin female header
12. 3 X IC - CD4051BE
13. 1 X IC - SN74HC595N
2. Building instructions
4.
2.
3.
Component side
10.11.
Solder side
KA1 2ASSEMBLYMANUAL
4
Page 5

A.
B.
Position the 470 Ohm resistor as shown in
the picture and solder.
R1: 470 Ohm (yellow, black, brown)
Position the two 100k Ohm resistors as
shown in the picture and solder them.
R2, R3: 100k Ohm (brown, black, yellow)
C.
D.
C1, C2: carmic multilayered capacitors
RN1, RN2, RN3: resistor array 100k
KA1 2ASSEMBLYMANUAL
5
Page 6

E.
LED: red LED
F.
Mind the polarity!
+
+
IC1, ..., IC4: IC holders
Mind the direction of the notch!
G.
Solder all the 6x3 pinheader connectors.
Make sure the bent pins are soldered!
KA1 2ASSEMBLYMANUAL
6
Page 7

H.
I.
Solder both the 6 pin female headers and
the 8 pin female headers into place.
Do not cut the pins!
SV1: two 3 pin female headers
Insert the pins on the solder side and
solder on the component side!
Make sure the top of the headers are
equally leveled and do not exceed the
J.
K.
top of the other pins. This way, it will t
nicely onto your Arduino Uno.
Do not cut the pins!
IC1, IC2, IC3: IC - CD4051BE
Mind the direction of the notch! It
should match the notch on the IC
holder!
IC4: IC - SN74HC595N
Mind the direction of the notch! It
should match the notch on the IC
holder!
KA1 2ASSEMBLYMANUAL
7
Page 8

3. Connecting the KA12
It is very important to insert the KA12 correctly onto the Arduino Uno to avoid damage to the pins and to ensure a good connection. Here are the most important attention points:
A. This 6 pin female header ts precisely into the ‘ANALOG IN’ on the Arduino.
B. The two 3 pin female headers slide over the 6 ICSP pins on the Arduino.
C. The numbers beside the 8 pin female headers on the KA12 should correspond with the Digital I/O’s.
D. Slide the pins carefully into the Arduino to prevent damage.
A.
C.
Input
5V
GND
INDICATOR LED
(Flashes when data
is being read)
Input
5V
GND
ANALOG INPUT
6
7
ANALOG INPUT
1
24
KA1 2ASSEMBLYMANUAL
8
Page 9

4. Installing the Arduino Library
1. Install the library:
Go to the KA12 download page on the Velleman website:
http://www.vellemanprojects.eu/support/downloads/?code=KA12
Download ‘velleman_KA12’ extract and copy the “velleman_KA12” folder to your Documents\Arduino\libraries.
2. Example sketch:
A. Open the Arduino software
B. Then click le/Examples/Velleman_KA12/Velleman_KA12
3. The code:
#include <Velleman_KA12.h>
int all[24];
int sensor;
void setup() {
Serial.begin(115200);
ka12_init();
}
void loop() {
ka12_readAll(all);
for (int i=0; i < 24; i=i+1) {
Serial.print(i);
Serial.print(“ / “);
Serial.println(all[i]);
}
sensor = ka12_read(1);
Serial.print(“Value sensor 1 :”);
Serial.println(sensor);
delay(1000);
}
4. Line by line
In order to make the KA12’s functions easy to use, we made a library.
Line 1 and 6 declare the use and initialize the library. This must be done in every sketch that uses the KA12. The
library gives you the possibility to easily read all sensor values and save them in an int-array or to read one value
and save this to an int.
To read all sensors you should declare an int-array with 24 places (line 2). To ll the array we use the readAll
command (line 8). In the example we display all the values to the serial monitor using a for loop (line 9 to 12).
The serial communication is set up in line 5.
If you only need one value you can use the “ka12_read” command (line 13).
KA1 2ASSEMBLYMANUAL
9
Page 10

VellemanProjects @Velleman_RnD
VELLEMAN nv - Legen Heirweg 33, Gavere (Belgium)
vellemanprojects.com
 Loading...