

Page 1
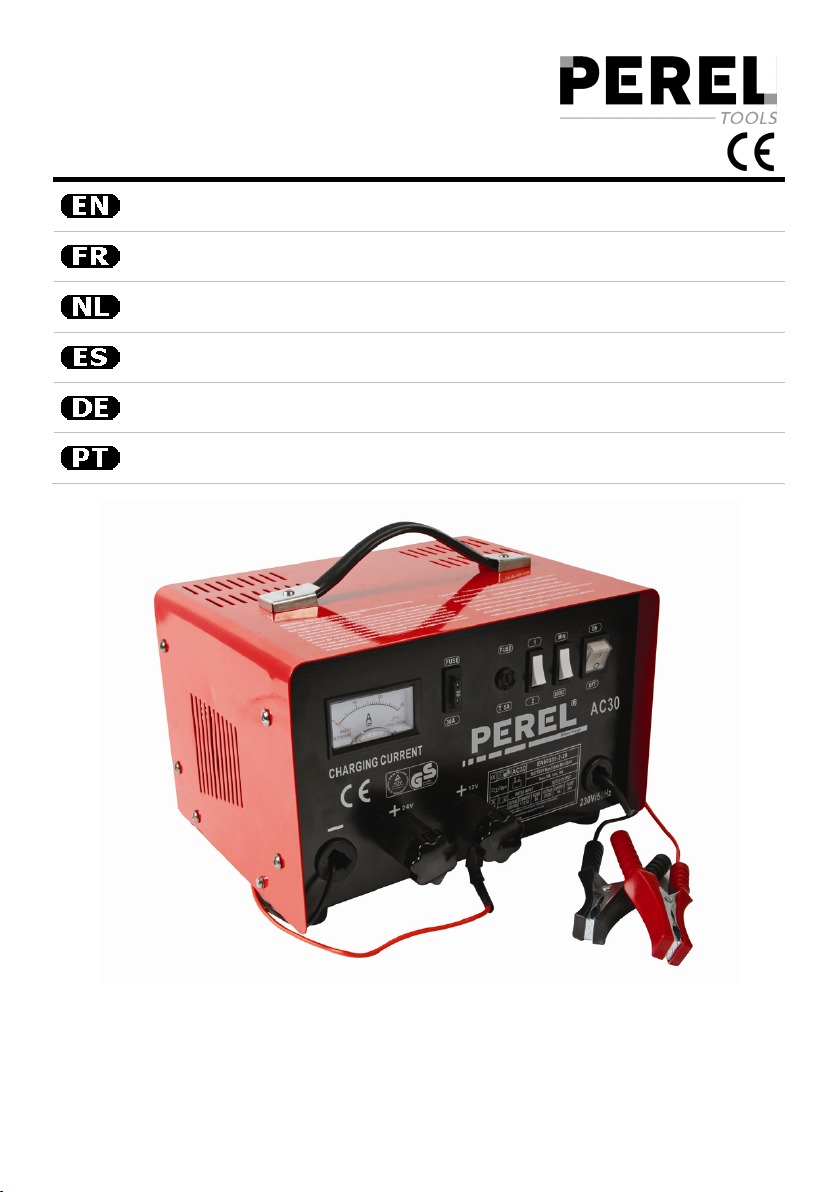
AC30
CHARGER FOR 12/24V LEAD-ACID BATTERIES WITH BOOST
FUNCTION - 20A
LADER VOOR 12/24V LOOD-ZUURBATTERIJEN - MET
BOOSTFUNCTIE - 20A
LADER VOOR 12/24V LOOD-ZUURBATTERIJEN - MET
BOOSTFUNCTIE - 20A
CARGADOR DE BATERÍAS PARA BATERÍAS DE PLOMO-ÁCIDO
12/24V - CON FUNCIÓN BOOST - 20A
LADEGERÄT FÜR 12/24V BLEI-SÄURE-AKKUS - MIT BOOSTFUNKTION - 20A
CARREGADOR PARA BATERIAS DE CHUMBO-ÁCIDO 12 V/24V –
COM FUNÇÃO BOOST – 20A
USER MANUAL 3
NOTICE D’EMPLOI 6
GEBRUIKERSHANDLEIDING 9
MANUAL DEL USUARIO 12
BEDIENUNGSANLEITUNG 15
MANUAL DO UTILIZADOR 18
Page 2
AC30
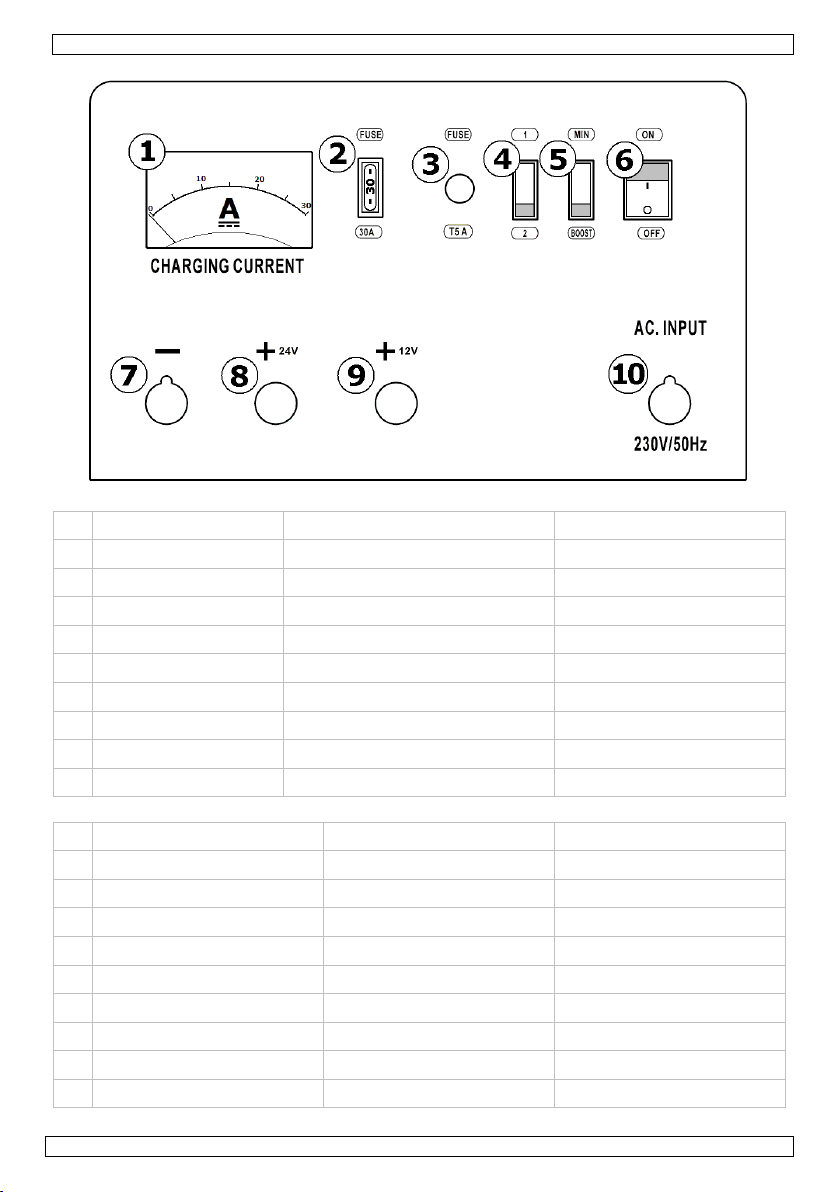
1 current meter ampèremètre stroommeter
2 fuse 30A fusible 30 A 30A-zekering
3 fuse 5A fusible 5 A 5A-zekering
4 1/2 switch sélecteur 1/2 1/2-schakelaar
5 MIN/BOOST switch interrupteur MIN/BOOST MIN/BOOST-schakelaar
6 ON/OFF switch interrupteur on/off aan-uitschakelaar
7 DC output “-” sortie CC “-” DC-uitgang “-”
8 DC output “+24V” sortie CC “+24V” DC-uitgang “+24V”
9 DC output “+12V” sortie CC “+12V” DC-uitgang “+12V”
10 AC input prise CA AC-ingang
1 amperímetro Stromzähler amperímetro
2 fusible 30 A 30A-Sicherung fusível de 30 A
3 fusible 5 A 8A-Sicherung fusível de 5 A
4 selector 1/2 1/2-Schalter selector 1 / 2
5 interruptor MIN/BOOST MIN/BOOST-Schalter interruptor MIN/BOOST
6 interruptor ON/OFF EIN/AUS-Schalter Interruptor ON/OFF
7 salida CC “-” DC-Ausgang “-” saída CC “-”
8 salida CC “+24V” DC-Ausgang “+24V” saída CC “+24V”
9 salida CC “+12V” DC-Ausgang “+12V” saída CC “+12V”
10 entrada CA AC-Eingang entrada CA
29/06/2010 ©Velleman nv
2
Page 3
AC30
User manual
1. Introduction
To all residents of the European Union
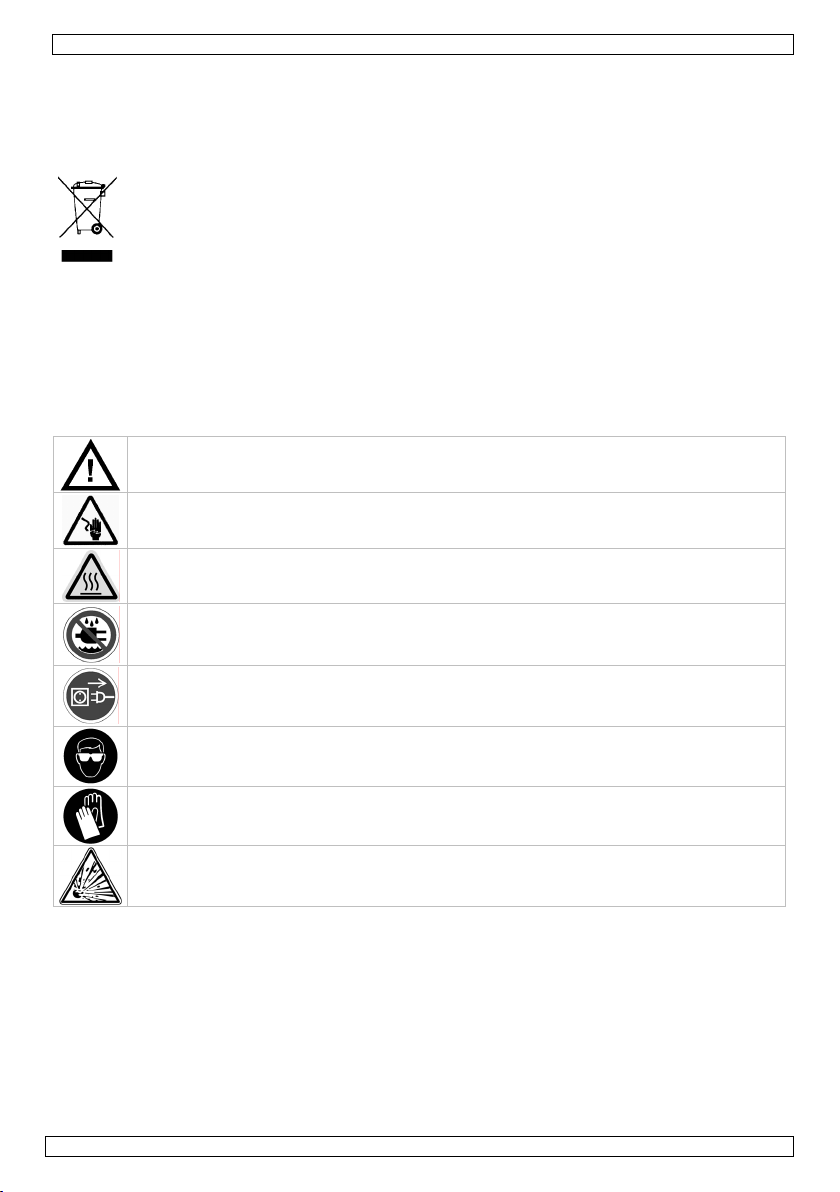
Important environmental information about this product
Respect the local environmental rules.
If in doubt, contact your local waste disposal authorities.
Thank you for choosing Perel! Please read the manual thoroughly before bringing this device into
service. If the device was damaged in transit, don't install or use it and contact your dealer.
The AC30 battery charger is designed to charge 12 or 24V lead-acid batteries; maximum current is
20A. It is not suitable to charge sealed lead-acid (SLA) or valve regulated lead-acid (VLRA) batteries!
2. Safety Instructions
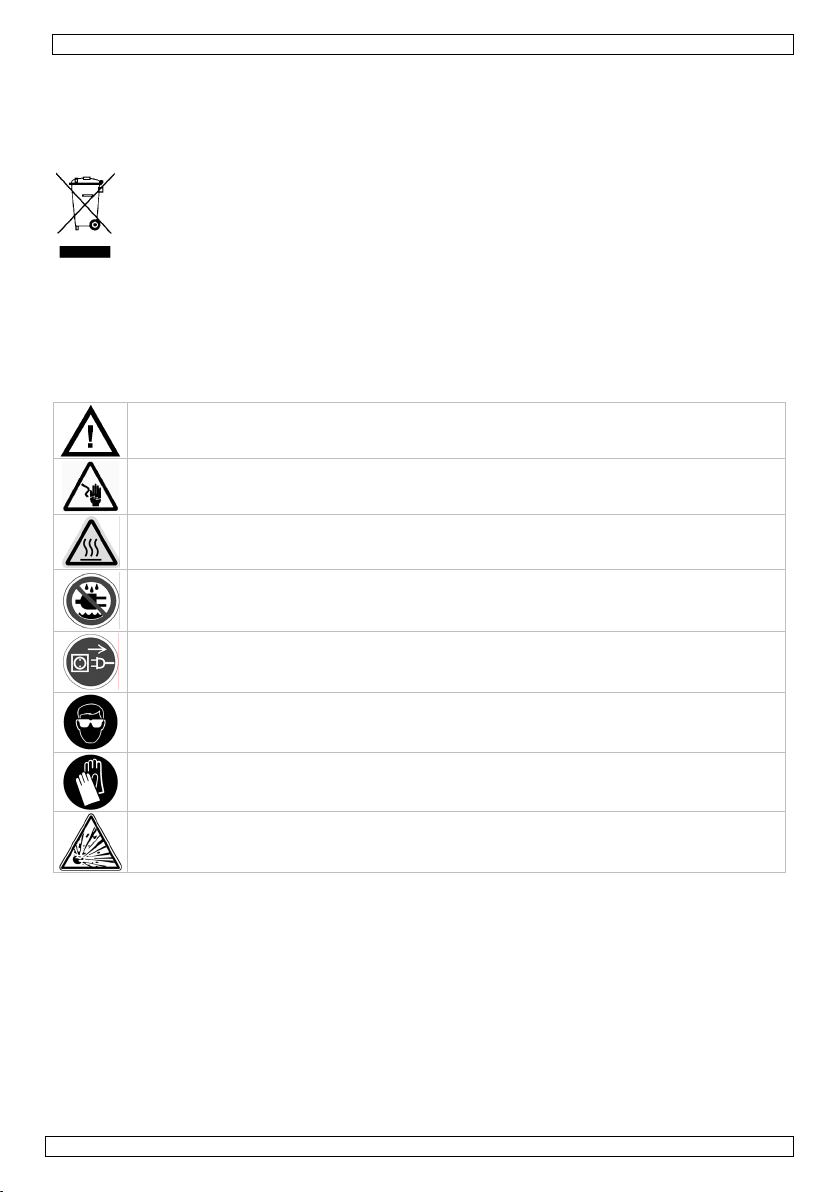
This symbol on the device or the package indicates that disposal of the device after its
lifecycle could harm the environment.
Do not dispose of the unit (or batteries) as unsorted municipal waste; it should be taken to a
specialized company for recycling.
This device should be returned to your distributor or to a local recycling service.
Keep out of reach of children and unauthorized users.
Be very careful: touching live wires can cause life-threatening electroshocks.
Do not touch the device during operation as the housing heats up.
Keep this device away from rain, moisture, splashing and dripping liquids. Never put
objects filled with liquid on top of the device.
Disconnect mains power when the device is not in use. Handle the power cord by the plug
only. Keep power cables away from heat, oil and sharp edges.
Always wear safety goggles when handling batteries.
Always wear adequate safety gloves (acid proof) when handling non-sealed batteries.
Explosion hazard: the charging process produces electrolytic gasses which might be ignited
when in contact with sparks or open fires. Do not wear synthetic cloths while charging to
reduce the risk of electrostatic discharges.
• Make sure that the available voltage does not exceed the voltage stated in the specifications of this
manual.
• Do not crimp the power cord or leads and protect them against damage. Have an authorised dealer
replace it if necessary.
• Do not use the device when damage to housing or cables is noticed. Do not attempt to service the
device yourself but contact an authorised dealer. Do not try to open the housing of the battery
or battery charger.
• Note that damage caused by user modifications to the device is not covered by the warranty.
• Do not expose the battery and charger to full sunlight or high temperatures. Keep the ventilation
slots free of dirt and obstacles at all times.
• Acid may start to boil. This is not unusual, but in order to prevent accidents switch off the charger
and let the battery cool down.
• Charging has to take place in a well ventilated area.
• Always handle batteries with care.
29/06/2010 ©Velleman nv
3
Page 4
• When smoke or stench from scorched insulation is noticed, immediately unplug the charger from
the mains.
• There are no user-serviceable parts in the charger. Contact your dealer for spare parts if necessary.
• Never charge multiple batteries simultaneously.
• Do not attempt to recharge non-rechargeable or defective batteries. This charger is not suitable to
charge Sealed Lead-Acid (SLA) or Valve Regulated Lead-Acid (VLRA) batteries.
• Do not short-circuit the charging clamps!
• Only replace the fuses by fuses with the same specifications.
AC30
3. General Guidelines
Refer to the Velleman® Service and Quality Warranty on the last pages of this manual.
• Protect this device from shocks and abuse. Avoid brute force when operating the device.
• Protect the device against extreme heat, dust and moisture.
• Familiarise yourself with the functions of the device before actually using it.
• All modifications of the device are forbidden for safety reasons.
• Only use the device for its intended purpose. Using the device in an unauthorised way will void
the warranty.
• Damage caused by disregard of certain guidelines in this manual is not covered by the warranty
and the dealer will not accept responsibility for any ensuing defects or problems.
4. Features
• overload protection (for charger)
• integrated ampere meter
• for various motor cars, vans and light trucks
• included accessories:
o charging cable (1.5m + 1.5m)
o two clamps
o 2 replaceable fuses
5. Preparation
Always check the condition of the cables and clamps before using the battery charger. Do
not use when damage is noticed!
Refer to the illustrations on page 2 of this manual.
• Disconnect the battery from the vehicle before charging. To do this, first remove the negative
pole connection, and then proceed with the positive pole connection.
• Clean the poles with a steel brush or sandpaper.
• Open the filler caps and check the level of the battery acid. When necessary, add distilled water
(liquid level must be ±1cm below fill opening).
Note: battery acid is corrosive; avoid contact with skins or clothing. Any spills should be washed
off immediately with plenty of water. Consult a doctor when necessary.
• Open all filler caps and leave them open during charging, unless the battery has special safety
features built-in (e.g. spark arrestor). Refer to the data sheet of the battery or consult a specialist
to find out.
• Make sure the battery charger is not connected to the mains [10].
• Verify whether the battery is a 12V or 24V type. Connect the negative (red) lead with the
appropriate terminal: +12V [9] for 12V batteries, +24V [8] for 24V batteries. The terminal knob
must be screwed tightly on the terminal.
• Connect the positive clamp of the battery charger (red) with the positive pole (+) of the battery.
Make sure the clamp is secured tight.
• Connect the negative clamp of the battery charger (black) with the negative pole (-) of the
battery. Make sure the clamp is secured tight.
• Plug the battery charger into a suitable mains outlet.
6. Operation
Refer to the illustrations on page 2 of this manual.
• When all preparations are done (see §5), switch on the charger [6].
• Set the MIN/BOOST switch [5] to BOOST for fast charging (high current, 20A). MIN for slow
charging. When MIN is selected the output current can be set to low (1, charging current = 12A)
or normal (2, charging current = 16A) using the 1/2 switch [4].
• The current meter [1] indicates the charging current. The more the battery is charged, the less
current it will draw. When the current reaches 0 (zero) the charging process must be stopped to
prevent the increasing battery voltage level from destroying the battery.
29/06/2010 ©Velleman nv
4
Page 5

Note: another way to determine the charge level of the battery is by measuring the density of the
AC30
acid using a density meter (see table below).
density = 1.285g/ml battery fully charged
density = 1.21g/ml) battery half charged
density = 1.16g/ml) battery depleted
• When the battery is fully charged, immediately switch off the charger [6]. Overcharging will
destroy the battery.
• Disconnect the battery from the charger, starting with the clamp on the negative pole (black)
and than proceed with the clamp on the positive pole (red).
7. Fuses
The AC30 has 3 safety fuses installed.
• Thermal fuse: this fuse cuts of the output power when the temperature of the charger is too
high. Power automatically restores when the temperature drops below an acceptable level.
• Input fuse [3]: protects the charger from power anomalies on the mains input power. To
replace, disconnect the charger from the mains and disconnect the connected battery. Unscrew
the holder [3] (counter clockwise) and replace the broken fuse by a fuse with the same
specifications (F5A/250V). Tightly screw the holder back in place.
• Output fuse [2]: protects the connected battery from over-current. To replace, disconnect the
charger from the mains and disconnect the connected battery. Simply unplug the fuse from the
socket and install a new one. Only use a fuse with the same specifications (30A).
8. Maintenance
• Always remove the plug from the mains socket and disconnect batteries when servicing or
cleaning the charger.
• Never use water or any other liquids to clean the charger.
• Keep the cables clean, but avoid using cleaners based on benzene, trichloroethylene, chloride,
ammonia … as they affect or even dissolve plastic parts.
• Check liquid level of batteries once per month and fill up when necessary.
• Dispose of batteries in accordance with local regulations.
9. Technical specifications
rated input voltage 230V
rated output current 16A
boost current 20A
exchangeable fuse 30A
reference battery capacity min. 92Ah ~ max. 250Ah
IP-code IP20
weight 11.6kg
dimensions 375 x 260 x 210mm
Use this device with original accessories only. Velleman nv cannot be held responsible in
the event of damage or injury resulted from (incorrect) use of this device. For more info
concerning this product and the latest version of this user manual, please visit our website
www.perel.eu. The information in this manual is subject to change without prior notice.
© COPYRIGHT NOTICE
This manual is copyrighted. The copyright to this manual is owned by Velleman nv. All worldwide rights
reserved. No part of this manual may be copied, reproduced, translated or reduced to any electronic medium or
otherwise without the prior written consent of the copyright holder.
~ 50Hz
AC
29/06/2010 ©Velleman nv
5
Page 6
AC30
NOTICE D’EMPLOI
1. Introduction
Aux résidents de l'Union européenne
Des informations environnementales importantes concernant ce produit
En cas de questions, contacter les autorités locales pour élimination.
Nous vous remercions de votre achat ! Lire la présente notice attentivement avant la mise en service
de l’appareil. Si l’appareil a été endommagé pendant le transport, ne pas l’installer et consulter votre
revendeur.
Le chargeur AC30 convient pour la recharge de batteries à l’acide de plomb 12 ou 24 V (courant
maximal de 20 A). Éviter d’utiliser ce chargeur avec des batteries à l’acide de plomb scellées (SLA) ou
à régulation par soupape (VLRA) !
2. Prescriptions de sécurité
Ce symbole sur l'appareil ou l'emballage indique que l’élimination d’un appareil en fin de vie
peut polluer l'environnement. Ne pas jeter un appareil électrique ou électronique (et des
piles éventuelles) parmi les déchets municipaux non sujets au tri sélectif ; une déchèterie
traitera l’appareil en question. Renvoyer les équipements usagés à votre fournisseur ou à un
service de recyclage local. Il convient de respecter la réglementation locale relative à la
protection de l’environnement.
Garder le chargeur hors de la portée de personnes non qualifiées et de jeunes enfants.
Attention : toucher un câble sous tension peut causer des électrochocs mortels.
Ne pas toucher l’appareil lorsqu’il est en service : le boîtier chauffe !
Tenir le chargeur à l’écart de la pluie, de l’humidité et d’éclaboussures. Ne jamais placer
d’objet contenant un liquide sur l’appareil.
Débrancher l’appareil s’il n’est pas utilisé ou pour le nettoyer. Tirer la fiche pour débrancher
l'appareil ; non pas le câble. Protéger les câbles de la chaleur, de l’huile et des objets
coupants.
Porter des lunettes de protection en maniant une batterie.
Porter des gants de protection (résistant à l’acide) lors de la manipulation de batteries non
scellées.
Risque d’explosion : Le processus de recharge produit des gaz électrolytiques inflammables.
Ne pas porter de vêtements synthétiques afin d’éviter les décharges électrostatiques.
• La tension réseau ne peut pas dépasser la tension mentionnée dans les spécifications à la fin de
cette notice.
• Le câble d’alimentation ne peut pas être replissé ou endommagé. Demander à votre revendeur de
renouveler le câble d’alimentation si nécessaire.
• Ne jamais utiliser un chargeur ou des câbles endommagés. Confier toute réparation à un
technicien qualifié.
• Les dommages occasionnés par des modifications à l’appareil par le client ne tombent pas sous la
garantie.
• Ne pas ouvrir la batterie ou le chargeur.
• Conserver la batterie et le chargeur à l’abri du soleil et de températures extrêmes. Ne jamais
obstruer les fentes de ventilation.
• L’acide de la batterie peut bouillir, ce qui n’est pas anormal. Il est toutefois conseillé d’éteindre le
chargeur et de laisser refroidir la batterie le cas échéant.
29/06/2010 ©Velleman nv
6
Page 7
• Charger une batterie dans un endroit bien ventilé.
• Manier la batterie avec précaution.
• Déconnecter le chargeur du réseau électrique en cas de fumée ou d’odeur.
• Il n’y a aucune pièce maintenable par l’utilisateur. Commander des pièces de rechange
éventuelles chez votre revendeur.
• Ne jamais recharger plusieurs batteries simultanément.
• Ne pas recharger des batteries non rechargeables ou défectueuses. Ce chargeur ne convient pas
pour la recharge de batteries à l’acide de plomb scellées (SLA) ou à régulation par soupape
(VLRA).
• Ne pas court-circuiter les pinces !
• Remplacer les fusibles par des fusibles identiques uniquement.
AC30
3. Directives générales
Se référer à la garantie de service et de qualité Velleman® en fin de notice.
• Protéger le chargeur contre les chocs et le traiter avec circonspection pendant l’opération.
• Tenir le chargeur à l’écart de la poussière, l’humidité et des températures extrêmes.
• Se familiariser avec le fonctionnement de l’appareil avant de l’utiliser.
• Toute modification de l’appareil est interdite pour des raisons de sécurité.
• N’utiliser le chargeur qu’à sa fonction prévue. Un usage impropre annule d'office la garantie.
• La garantie ne s’applique pas aux dommages survenus en négligeant certaines directives de cette
notice et votre revendeur déclinera toute responsabilité pour les problèmes et les défauts qui en
résultent.
4. Caractéristiques
• protection contre les surcharges
• ampèremètre intégré
• pour voitures et camionnettes
• accessoires fournis
o câbles (1,5 m + 1,5 m)
o deux pinces
o 2 fusibles de rechange
5. Préparation
Vérifier l’état des câbles et du chargeur avant chaque emploi. Ne jamais employer un
chargeur ou des câbles endommagés !
Se référer aux illustrations en page 2 de cette notice.
• Déconnecter la batterie du véhicule avant la charge en commençant par la cosse négative et
ensuite par la cosse positive.
• Nettoyer les cosses à l’aide d’une brosse métallique ou du papier de verre.
• Retirer les bouchons de fermeture et vérifier le niveau de l’acide. Rajouter de l’eau distillée ou
déminéralisée si nécessaire (le liquide doit recouvrir tous les éléments de 1 cm).
Remarque : L’acide est un liquide corrosif ; éviter donc tout contact avec la peau ou les
vêtements. En cas de contact avec l’acide, rincer immédiatement à l’eau claire et consulter un
médecin si nécessaire.
• Retirer tous les bouchons de fermeture pendant la recharge, sauf si la batterie est équipée d’un
dispositif pare-étincelles. Se reporter à la fiche technique de la batterie ou consulter un technicien.
• S’assurer que le chargeur n’est pas raccordé au réseau électrique [10].
• Vérifier et déterminer le type de batterie (12 V ou 24 V). Connecter le câble négatif (rouge) à la
cosse +12V [9] pour une batterie 12 V ou à la cosse +24V [8] pour une batterie 24 V. Visser
l’écrou fermement sur la cosse.
• Connecter solidement la pince positive (rouge) du chargeur à la cosse positive (+) de la
batterie.
• Connecter solidement la pince négative (noir) du chargeur à la cosse négative (+) de la batterie.
• Connecter le chargeur au réseau électrique.
6. Emploi
Se référer aux illustrations en page 2 de cette notice.
• Allumer le chargeur [6].
• Placer le sélecteur MIN/BOOST [5] sur BOOST pour une recharge rapide (haut courant, 20 A) ou
sur MIN pour une recharge lente. Lorsque le sélecteur est placé sur MIN, sélectionner un courant
de sortie faible (1, courant de charge = 12 A) ou normal (2, courant de charge = 16 A) avec le
sélecteur 1/2 [4].
29/06/2010 ©Velleman nv
7
Page 8

• L’ampèremètre [1] indique le courant de charge. Plus le niveau de charge de la batterie est
AC30
important, moins la batterie absorbera de courant. Une fois l’aiguille de l’ampèremètre sur 0
(zéro), il faut interrompre le processus de recharge afin d’éviter les endommagements dus au
niveau de tension de batterie croissant.
Remarque : Il est possible de déterminer le niveau de charge en mesurant la densité de l’acide à
l’aide d’un densimètre (voir tableau ci-dessous).
densité = 1,285 g/ml batterie entièrement rechargée
densité = 1,21 g/ml) batterie à moitié rechargée
densité = 1,16 g/ml) batterie entièrement déchargée
• Une fois la batterie complètement rechargée, immédiatement déconnecter la batterie du chargeur
[6]. Une surcharge peut détruire la batterie.
• Déconnecter la batterie du chargeur en commençant avec la pince négative (noir) et ensuite la
pince positive (rouge).
7. Fusibles
Le chargeur AC30 intègre 3 fusibles.
• Fusible thermique : Ce fusible coupe l’alimentation lors d’une surchauffe du chargeur.
L’alimentation sera rétablie une fois que le chargeur soit descendu à la température ambiante.
• Fusible d’entrée [3] : Protège le chargeur d’anomalies d’alimentation. Remplacement :
Déconnecter le chargeur du réseau électrique et déconnecter la batterie. Desserrer le porte-fusible
[3] et remplacer par un fusible avec les mêmes spécifications (F5 A/250 V). Réinsérer le portefusible dans le chargeur et resserrer.
• Fusible de sortie [2] : Protège la batterie connectée des surcharges. Remplacement :
Déconnecter le chargeur du réseau électrique et déconnecter la batterie. Retirer le fusible et
remplacer par un nouvel exemplaire de 30 A.
8. Maintenance
• Déconnecter le chargeur du réseau électrique et déconnecter la batterie avant le nettoyage.
• Ne jamais nettoyer le chargeur avec de l’eau ou tout autre liquide.
• Éviter les produits à base de benzène, de trichloréthylène, de chlorure, d’ammoniac…
• Vérifier régulièrement le niveau du liquide de la batterie et remplir si nécessaire.
9. Spécifications techniques
tension d’entrée 230 V
courant de sortie 16 A
courant d’attaque 20 A
fusible 30 A
capacité de référence min. 92 Ah ~ max. 250 Ah
indice IP IP20
poids 11,6 kg
dimensions 375 x 260 x 210 mm
N’employer cet appareil qu’avec des accessoires d’origine. SA Velleman ne sera
aucunement responsable de dommages ou lésions survenus à un usage (incorrect) de cet
appareil. Pour plus d’information concernant cet article et la version la plus récente de
cette notice, visiter notre site web www.perel.eu. Toutes les informations présentées dans
cette notice peuvent être modifiées sans notification préalable.
© DROITS D’AUTEUR
SA Velleman est l’ayant droit des droits d’auteur pour cette notice.
Tous droits mondiaux réservés. Toute reproduction, traduction, copie ou diffusion, intégrale ou partielle, du contenu de
cette notice par quelque procédé ou sur tout support électronique que se soit est interdite sans l’accord préalable écrit
de l’ayant droit.
~ 50 Hz
CA
29/06/2010 ©Velleman nv
8
Page 9

AC30
GEBRUIKERSHANDLEIDING
1. Inleiding
Aan alle ingezetenen van de Europese Unie
Belangrijke milieu-informatie betreffende dit product
Dank u voor uw aankoop! Lees deze handleiding grondig voor u het toestel in gebruik neemt. Werd
het toestel beschadigd tijdens het transport, installeer het dan niet en raadpleeg uw dealer.
De AC30 acculader is geschikt voor het laden van 12V of 24V lood-zuuraccu’s (max. stroom van
20 A). Vermijd gebruik met SLA- of VRLA-accu’s!
2. Veiligheidsinstructies
Dit symbool op het toestel of de verpakking geeft aan dat, als het na zijn levenscyclus wordt
weggeworpen, dit toestel schade kan toebrengen aan het milieu. Gooi dit toestel (en
eventuele batterijen) niet bij het gewone huishoudelijke afval; het moet bij een
gespecialiseerd bedrijf terechtkomen voor recyclage. U moet dit toestel naar uw verdeler of
naar een lokaal recyclagepunt brengen. Respecteer de plaatselijke milieuwetgeving.
Hebt u vragen, contacteer dan de plaatselijke autoriteiten inzake verwijdering.
Houd dit toestel uit de buurt van kinderen en onbevoegden.
Wees voorzichtig: raak geen kabels aan die onder stroom staan om dodelijke elektroshocks
te vermijden.
Raak het toestel niet aan wanneer het in gebruik is: de behuizing wordt warm.
Houd dit toestel uit de buurt van regen, vochtigheid en opspattende vloeistoffen. Plaats
geen object gevuld met een vloeistof bovenop de acculader.
Trek de stekker uit het stopcontact (trek nooit aan de kabel!) voordat u het toestel reinigt
en als u het niet gebruikt. Bescherm kabels tegen hitte, olie en scherpe voorwerpen.
Draag een veiligheidsbril bij het hanteren van accu’s.
Draag beschermende handschoenen (zuurbestendig) tijdens het hanteren van open accu’s.
Ontploffingsgevaar: Het laadproces veroorzaakt licht ontvlambare elektrolytische gassen die
kunnen ontbranden door vonken of een vlam. Draag geen synthetische kleding tijdens het
laadproces om elektrostatische ontlading te vermijden.
• De beschikbare netspanning mag niet hoger zijn dan de spanning in de specificaties achteraan de
• De voedingskabel mag niet omgeplooid of beschadigd zijn. Laat uw dealer zo nodig een nieuwe
• Vermijd de acculader te gebruiken indien d kabels of de behuizing beschadigd is. Neem contact op
• Schade door wijzigingen die de gebruiker heeft aangebracht aan het toestel vallen niet onder de
• Open nooit de behuizing van de accu of van de acculader.
• Stel de accu en de acculader nooit bloot aan de zon of hoge temperaturen. U mag de
• Zuur kan bij het laden koken. Dit is niet ongewoon. Laat niettemin de acculader afkoelen en
• Laad een accu in een goed geventileerde ruimte.
• Hanteer de accu met zorg.
29/06/2010 ©Velleman nv
handleiding.
kabel plaatsen.
met uw verdeler voor alle reparaties.
garantie.
ventilatieopeningen nooit bedekken.
ontkoppel van het lichtnet.
9
Page 10

• Bij rookontwikkeling of geur moet u de acculader onmiddellijk van het lichtnet ontkoppelen.
• De gebruiker mag geen onderdelen vervangen. Bestel eventuele reserveonderdelen bij uw dealer.
• Laad nooit meerdere accu’s tegelijkertijd.
• Laad nooit een niet-herlaadbare of defecte accu. Deze lader is niet geschikt voor het laden van
SLA- of VRLA-accu’s.
• U mag de laadklemmen nooit kortluiten!
• Vervang een defecte zekering enkel door een zekering met dezelfde specificaties.
AC30
3. Algemene richtlijnen
Raadpleeg de Velleman® service- en kwaliteitsgarantie achteraan deze handleiding.
• Bescherm dit toestel tegen schokken. Vermijd brute kracht tijdens de bediening van dit toestel.
• Bescherm dit toestel tegen extreme temperaturen, stof en vochtigheid.
• Leer eerst de functies van het toestel kennen voor u het gaat gebruiken.
• Om veiligheidsredenen mag de gebruiker geen wijzigingen aanbrengen aan het toestel.
• Gebruik het toestel enkel waarvoor het gemaakt is. Bij onoordeelkundig gebruik vervalt de
garantie.
• De garantie geldt niet voor schade door het negeren van bepaalde richtlijnen in deze handleiding
en uw dealer zal de verantwoordelijkheid afwijzen voor defecten of problemen die hier
rechtstreeks verband mee houden.
4. Eigenschappen
• beveiligd tegen overbelasting (lader)
• ingebouwde ampèremeter
• voor auto's en bestelwagens
• meegeleverde accessoires:
o laadkabel (1,5 m + 1,5 m)
o twee klemmen
o 2 reservezekeringen
5. Voorbereiding
Controleer altijd eerst de kabels en de klemmen alvorens de acculader in gebruik te nemen.
Gebruik het toestel niet indien het beschadigd is!
Raadpleeg de figuur op pagina 2 van deze handleiding.
• Ontkoppel de accu van het voertuig: ontkoppel eerst de negatieve pool en pas daarna de
positieve pool.
• Maak de polen schoon met een staalborstel of met schuurpapier.
• Open de vulopeningen en controleer het niveau van het accuzuur. Vul bij met gedistilleerd water
indien nodig (alle elementen binnenin de accu moeten 1 cm onder de vloeistof zitten).
Opmerking: Accuzuur is een bijtende vloeistof. Vermijd contact met huid of kleding. Bij contact
met de vloeistof, spoel onmiddellijk af onder koud stromend water. Raadpleeg een arts indien nodig.
• Verwijder de dop van de vulopeningen tijdens het laadproces, uitgenomen indien de accu beschikt
over een beveiliging tegen vonken. Raadpleeg de technische fiche van de gebruikte accu.
• Zorg dat de acculader van het lichtnet ontkoppeld is [10].
• Controleer het type accu (12 V of 24 V). Sluit de negatieve (rood) kabel aan op de gepaste
terminal: +12V [9] voor een 12V-accu of +24V [8] voor een 24V-accu. Schroef de moer goed
vast op de terminal.
• Koppel de positieve pool van de acculader (rood) met de positieve pool (+) van de batterij. Zorg
voor een goede aansluiting.
• Koppel de negatieve pool van de acculader (zwart) met de negatieve pool (-) van de batterij.
Zorg voor een goede aansluiting.
• Koppel de lader aan het lichtnet.
6. Gebruik
Raadpleeg de figuur op pagina 2 van deze handleiding.
• Schakel de lader in [6].
• Plaats de MIN/BOOST-schakelaar [5] op BOOST voor een versneld laadproces (hoge stroom,
20 A) of op MIN voor een traag laadproces. Als de MIN-stand geselecteerd is, kunt u voor een
lage uitgangsstroom (1, laadstroom = 12 A) of een normale uitgangsstroom (2, laadstroom =
16 A) kiezen met de ½-schakelaar [4].
• De stroommeter [1] geeft de laadstroom weer. Hoe hoger het laadniveau van de accu, hoe
minder stroom deze afneemt. Stop het laadproces van zodra de naald op 0 (nul) staat om
beschadiging aan de accu te vermijden.
29/06/2010 ©Velleman nv
10
Page 11

Opmerking: U kunt het laadniveau ook meten door de dichtheid van het accuzuur te meten met
AC30
een dichtheidsmeter (zie tabel hieronder).
dichtheid = 1,285 g/ml accu volledig geladen
dichtheid = 1,21 g/ml) accu half geladen
dichtheid = 1,16 g/ml) accu leeg
• Schakel de lader uit [6] van zodra de accu volledig geladen is om overbelasting te vermijden.
• Ontkoppel de accu van de acculader. Begin met de negatieve klem (zwart) en ontkoppel pas
daarna de positieve klem (rood).
7. Zekeringen
De AC30 heeft 3 veiligheidszekeringen.
• Thermische zekering: Deze zekering schakelt de lader uit in geval van oververhitting. De lader
wordt automatisch ingeschakeld van zodra de temperatuur voldoende zakt.
• Ingangszekering [3]: Beschermt de lader tegen overbelasting. Vervanging: Ontkoppel de lader
van het lichtnet en ontkoppel de aangesloten accu. Schroef de houder [3] los en vervang de
defecte zekering door een nieuwe met dezelfde specificaties (F5 A/250 V). Schroef de houder
opnieuw in de lader.
• Uitgangszekering [2]: Beschermt de accu tegen overbelasting. Vervanging: Ontkoppel de lader
van het lichtnet en ontkoppel de aangesloten accu. Verwijder de zekering uit de lader en vervang
door een nieuwe met dezelfde specificaties (30 A).
8. Onderhoud
• Ontkoppel altijd eerst de acculader alvorens hem te reinigen.
• Maak de acculader nooit schoon met water of een ander vloeistof.
• Houd de kabels schoon. Vermijd gebruik van reinigingsmiddelen op basis van benzeen,
trichloorethyleen, chloride, ammoniak… om de plastic onderdelen niet te beschadigen.
• Controleer elke maand het niveau in de accu en vul bij indien nodig.
9. Technische specificaties
ingangsspanning 230 V
uitgangsspanning 16 A
booststroom 20 A
zekering 30 A
referentiecapaciteit accu min. 92 Ah ~ max. 250 Ah
IP-norm IP20
gewicht 11,6 kg
afmetingen 375 x 260 x 210 mm
Gebruik dit toestel enkel met originele accessoires. Velleman nv is niet aansprakelijk voor
schade of kwetsuren bij (verkeerd) gebruik van dit toestel. Voor meer informatie over dit
product en de meest recente versie van deze handleiding, zie www.perel.eu. De informatie
in deze handleiding kan te allen tijde worden gewijzigd zonder voorafgaande kennisgeving.
© AUTEURSRECHT
Velleman nv heeft het auteursrecht voor deze handleiding.
Alle wereldwijde rechten voorbehouden. Het is niet toegestaan om deze handleiding of gedeelten ervan over te nemen,
te kopiëren, te vertalen, te bewerken en op te slaan op een elektronisch medium zonder voorafgaande schriftelijke
toestemming van de rechthebbende.
~ 50 Hz
AC
29/06/2010 ©Velleman nv
11
Page 12

AC30
MANUAL DEL USUARIO
1. Introducción
A los ciudadanos de la Unión Europea
Importantes informaciones sobre el medio ambiente concerniente a este producto
Si tiene dudas, contacte con las autoridades locales para residuos.
¡Gracias por haber comprado el AC30! Lea atentamente las instrucciones del manual antes de usarlo.
Si el aparato ha sufrido algún daño en el transporte no lo instale y póngase en contacto con su
distribuidor.
El cargador AC30 es apto para recargar baterías de plomo-ácido de12 ó 24 V (corriente máx. de
20 A). ¡No utilice este aparato con baterías de plomo-ácido selladas (SLA) o con una regulación por
válvula (VLRA)!
2. Instrucciones de seguridad
Este símbolo en este aparato o el embalaje indica que, si tira las muestras inservibles,
podrían dañar el medio ambiente.
No tire este aparato (ni las pilas, si las hubiera) en la basura doméstica; debe ir a una
empresa especializada en reciclaje. Devuelva este aparato a su distribuidor o a la unidad de
reciclaje local.
Respete las leyes locales en relación con el medio ambiente.
Mantenga el aparato lejos del alcance de personas no capacitadas y niños.
¡Ojo!: Tocar un cable bajo tensión puede causar descargas eléctricas mortales.
¡No toque el aparato durante su operación: la caja se calienta!
No exponga este equipo a lluvia, humedad ni a ningún tipo de salpicadura o goteo. Nunca
ponga un objeto con líquido en el aparato.
Desconecte siempre el aparato si no va a usarlo durante un largo período de tiempo o antes
de limpiarlo. Tire siempre del enchufe para desconectar el cable de red, nunca del propio
cable. No exponga los cables al calor, el aceite y objetos afilados.
Lleve gafas de protección al manejar una batería.
Lleve guantes de protección (resistente al ácido) al manejar baterías no selladas.
Riesgo de explosión: El procedimiento de carga produce gases electrolíticos inflamables. No
lleve ropa sintética para evitar las descargas electroestáticas
• Asegúrese de que la tensión de red no sea mayor que la tensión indicada en las especificaciones.
• No aplaste el cable de alimentación y protéjalo contra posibles daños causados por algún tipo de
superficie afilada. Si es necesario, pida a su distribuidor reemplazar el cable de alimentación.
• Nunca utilice un cargador ni cables dañados. La reparación debe ser realizada por personal
especializado.
• Los daños causados por modificaciones no autorizadas, no están cubiertos por la garantía.
• No abra la batería ni el cargador.
• No exponga la batería y el cargador a sol y temperaturas extremas. Nunca bloquee los orificios de
ventilación.
• El ácido de la batería puede hervir, lo que no es anormal. No obstante, desactive el cargador y
deje que se enfríe.
• Cargue una batería en un lugar bien aireado.
• Maneje la batería cuidadosamente.
29/06/2010 ©Velleman nv
12
Page 13

• Desconecte el cargador de la red eléctrica en caso de humo u olor.
• El usuario no habrá de efectuar el mantenimiento de ninguna pieza. Contacte con su distribuidor
si necesita piezas de recambio.
• Nunca recargue varias baterías simultáneamente.
• No recargue baterías no recargables o defectuosas. Este cargador no es apto para recargar
baterías selladas de plomo-ácido (SLA) o con una regulación por válvula (VLRA).
• ¡No cortocircuite las pinzas!
• Reemplace sólo los fusibles por fusibles idénticas.
AC30
3. Normas generales
Véase la Garantía de servicio y calidad Velleman ® al final de este manual del usuario.
• No agite el aparato. Evite usar excesiva fuerza durante el manejo y la instalación.
• No exponga este aparato a polvo, humedad y temperaturas extremas.
• Familiarícese con el funcionamiento del aparato antes de utilizarlo.
• Por razones de seguridad, las modificaciones no autorizadas del aparato están prohibidas.
• Utilice sólo el aparato para las aplicaciones descritas en este manual. Un uso desautorizado anula
la garantía completamente.
• Daños causados por el usuario anularán la garantía. El distribuidor no será responsable de ningún
daño u otros problemas resultantes.
4. Características
• protección de sobrecarga
• amperímetro incorporado
• para coches y furgonetas de reparto
• accesorios incluidos
o cables (1,5 m + 1,5 m)
o dos pinzas
o 2 fusibles de recambio
5. Preparación
Controle el estado de los cables y del cargador antes de cada uso. ¡Nunca utilice un
cargador o cables dañados!
Véase las figuras en la página 3 de este manual del usuario.
• Desconecte la batería del coche antes de la carga. Primero desconecte el polo negativo, luego el
polo positivo.
• Limpie los polos con un cepillo de alambre o papel de lija.
• Saque las tapas y controle el nivel del ácido. Añada agua destilada o desmineralizada si fuera
necesario (asegúrese de que el líquido cubra todos los elementos de 1 cm).
Nota: El ácido es un líquido corrosivo; por consiguiente, evite cualquier contacto con la piel o la
ropa. En caso de contacto con el ácido, enjuague inmediatamente con agua clara y contacte con
un médico si fuera necesario.
• Saque todas las tapas durante la recarga, salvo si la batería está equipada con una protección
contra chispas. Véase la ficha técnica de la batería o consulte un técnico.
• Asegúrese de que el cargador no esté conectado a la red eléctrica [10].
• Verifique y determine el tipo de batería (12 V o 24 V). Conecte el cable negativo (rojo) al
terminal +12V [9] para una batería de 12 V o al terminal +24V [8] para una batería de 24 V.
Atornille la tuerca firmemente al terminal.
• Conecte el polo positivo (rojo) del cargador solidamente al polo positivo (+) de la batería.
• Conecte el polo negativo (negro) del cargador solidamente al polo negativo (+) de la batería.
• Conecte el cargador a la red eléctrica.
6. Uso
Véase las figuras en la página 3 de este manual del usuario.
• Active el aparato [6].
• Ponga el selector MIN/BOOST [5] en BOOST para una recarga rápida (alta corriente, 20 A) o en la
posición MIN para una recarga lenta. Si el selector está en MIN, seleccione una corriente de salida
baja (1, corriente de carga = 12 A) o normal (2, corriente de carga = 16 A) con el selector 1/2
[4].
• El amperímetro [1] indica la corriente de carga. Cuanto más importante es el nivel de carga de la
batería, menos corriente absorba la batería. En cuanto la aguja del amperímetro esté en la
29/06/2010 ©Velleman nv
13
Page 14

posición 0 (cero), interrumpa el procedimiento de recarga para evitar los daños causados por el
AC30
nivel de tensión de batería creciente.
Nota: Es posible determinar el nivel de carga al medir la densidad del ácido con un densímetro
(véase lista abajo).
densidad = 1,285 g/ml batería completamente cargada
densidad = 1,21 g/ml) batería a mitad cargada
densidad = 1,16 g/ml) batería completamente descargada
• Si la batería está completamente cargada, desconecte inmediatamente la batería del cargador
[6]. Una sobrecarga puede destruir la batería.
• Desconecte la batería del cargador al empezar con el polo negativo (negro) y luego el polo
positivo (rojo).
7. Fusibles
El cargador AC30 incorpora 3 fusibles.
• Fusible térmico: Este fusible corta la alimentación en caso de un sobrecalentamiento del cargador.
La alimentación se restablece después de que el cargador haya bajado a la temperatura
ambiente.
• Fusible de entrada [3]: Proteja el cargador contra anomalías de alimentación. Recambio:
Desconecte el cargador de la red eléctrica y desconecte la batería. Desatornille el portafusibles
[3] y reemplace el fusible por un fusible idéntico (F5 A/250 V). Vuelva a introducir el portafusibles
en el cargador y atornille.
• Fusible de salida [2]: Proteja la batería conectada contra sobrecargas. Recambio: Desconecte el
cargador de la red eléctrica y desconecte la batería. Saque el fusible y reemplácelo por un fusible
idéntico de 30 A.
8. Mantenimiento
• Desconecte el cargador de la red eléctrica y desconecte la batería antes de limpiarlo.
• Nunca limpie el cargador con agua ni otro líquido.
• No utilice productos a base de benceno, tricloroetileno, cloruro, amoníaco, etc. para no dañar las
piezas de plástico.
• Controle regularmente el nivel de líquido de la batería y llene si fuera necesario.
9. Especificaciones
tensión de entrada 230V
corriente de salida 16A
corriente ‘boost’ 20A
fusible 30A
capacidad de referencia batería mín. 92Ah ~ máx. 250Ah
grado de protección IP IP20
peso 11.6kg
dimensiones 375 x 260 x 210mm
Utilice este aparato sólo con los accesorios originales. Velleman nv no será responsable de
daños ni lesiones causados por un uso (indebido) de este aparato. Para más información
sobre este producto y la versión más reciente de este manual del usuario, visite nuestra
página www.perel.eu. Se pueden modificar las especificaciones y el contenido de este
manual sin previo aviso.
© DERECHOS DE AUTOR
Velleman NV dispone de los derechos de autor para este manual del usuario.
Todos los derechos mundiales reservados. Está estrictamente prohibido reproducir, traducir, copiar, editar y guardar
este manual del usuario o partes de ello sin previo permiso escrito del derecho habiente.
~ 50Hz
CA
29/06/2010 ©Velleman nv
14
Page 15

AC30
BEDIENUNGSANLEITUNG
1. Einführung
An alle Einwohner der Europäischen Union
Wichtige Umweltinformationen über dieses Produkt
Falls Zweifel bestehen, wenden Sie sich für Entsorgungsrichtlinien an Ihre örtliche
Behörde.
Wir bedanken uns für den Kauf des AC30! Lesen Sie diese Bedienungsanleitung vor Inbetriebnahme
sorgfältig durch. Überprüfen Sie, ob Transportschäden vorliegen. Sollte dies der Fall sein, verwenden
Sie das Gerät nicht und wenden Sie sich an Ihren Händler.
Das AC30 Ladegerät eignet sich zum Laden von 12V- oder 24V-Blei-Säure-Akkus (max. Strom von
20 A). Verwenden Sie keine SLA- oder VRLA-Akkus!
2. Sicherheitshinweise
Dieses Symbol auf dem Produkt oder der Verpackung zeigt an, dass die Entsorgung dieses
Produktes nach seinem Lebenszyklus der Umwelt Schaden zufügen kann. Entsorgen Sie die
Einheit (oder verwendeten Batterien) nicht als unsortiertes Hausmüll; die Einheit oder
verwendeten Batterien müssen von einer spezialisierten Firma zwecks Recycling entsorgt
werden. Diese Einheit muss an den Händler oder ein örtliches Recycling-Unternehmen
retourniert werden. Respektieren Sie die örtlichen Umweltvorschriften.
Halten Sie Kinder und Unbefugte vom Gerät fern.
Seien Sie während der Installation des Gerätes sehr vorsichtig: das Berühren von unter
Spannung stehenden Leitungen könnte zu lebensgefährlichen elektrischen Schlägen führen.
Berühren Sie das Gehäuse während des Betriebs nicht, denn das Gehäuse heizt auf.
Schützen Sie das Gerät vor Regen und Feuchte. Setzen Sie das Gerät keiner Flüssigkeit wie
z.B. Tropf- oder Spritzwasser, aus. Stellen Sie keine mit Flüssigkeit befüllten Gegenstände
auf das Gerät.
Trennen Sie das Gerät bei Nichtbenutzung und vor jeder Reinigung vom Netz. Fassen Sie
dazu den Netzstecker an der Grifffläche an und ziehen Sie nie an der Netzleitung. Schützen
Sie die Kabel vor Hitze, Öl und scharfen Gegenständen.
Tragen Sie eine Schutzbrille beim Hantieren der Batterie.
Tragen Sie immer geeignete Sicherheitshandschuhe(säurefest) beim Arbeiten mit offenen
Akkus.
Explosionsgefahr: Das Ladeverfahren verursacht leicht entflammbare elektrolytische Gase,
die sich durch Funken oder eine Flamme entzünden können. Tragen Sie keine synthetische
Kleidung während des Ladeverfahrens, um elektrostatische Entladung zu vermeiden.
• Vergewissern Sie sich, dass die anzuschließende Netzspannung nicht höher ist als die
• Achten Sie darauf, dass die Netzleitung nicht gequetscht oder durch scharfe Kanten beschädigt
• Verwenden Sie das Ladegerät nicht wenn die Kabel oder das Gehäuse beschädigt sind. Lassen Sie
• Bei Schäden verursacht durch eigenmächtige Änderungen erlischt der Garantieanspruch.
• Öffnen Sie nie das Gehäuse der Batterie oder des Ladegerätes.
• Setzen Sie die Batterie und das Ladegerät keiner Sonne oder hohen Temperaturen aus. Blockieren
• Säure kann beim Laden kochen. Dies ist nicht unnormal. Lassen Sie das Ladegerät trotzdem
• Laden Sie eine Batterie in einen gut gelüfteten Raum.
• Hantieren Sie die die Batterie vorsichtig.
29/06/2010 ©Velleman nv
Netzspannung beschrieben in dieser Bedienungsanleitung.
werden kann. Bei Beschädigungen soll eine Fachkraft das Kabel ersetzen.
dieses Gerät von einem Fachmann reparieren.
Sie nie die Lüftungsschlitze.
abkühlen und trennen Sie es vom Netz.
15
Page 16

• Trennen Sie das Ladegerät sofort vom Netz bei Rauch- oder Geruchserzeugung.
• Es gibt keine zu wartenden Teile. Bestellen Sie eventuelle Ersatzteile bei Ihrem Fachhändler.
• Laden Sie nie mehrere Akkus gleichzeitig.
• Laden Sie nie einen nicht-wiederaufladbaren oder defekten Akku. Das Gerät eignet sich nicht zum
Laden von SLA- oder VRLA-Akkus.
• Beachten Sie, dass Sie die de Ladeklemmen nie kurzschließen!
• Ersetzen Sie eine defekte Sicherung nur durch eine Sicherung mit denselben technischen Daten.
AC30
3. Allgemeine Richtlinien
Siehe Velleman® Service- und Qualitätsgarantie am Ende dieser Bedienungsanleitung.
• Vermeiden Sie Erschütterungen. Vermeiden Sie rohe Gewalt während der Installation und
Bedienung des Gerätes.
• Schützen Sie das Gerät vor extreme Temperaturen, Staub und Feuchte.
• Nehmen Sie das Gerät erst in Betrieb, nachdem Sie sich mit seinen Funktionen vertraut gemacht
haben.
• Eigenmächtige Veränderungen sind aus Sicherheitsgründen verboten.
• Verwenden Sie das Gerät nur für Anwendungen beschrieben in dieser Bedienungsanleitung sonst
kann dies zu Schäden am Produkt führen und erlischt der Garantieanspruch.
• Bei Schäden, die durch Nichtbeachtung der Bedienungsanleitung verursacht werden, erlischt der
Garantieanspruch. Für daraus resultierende Folgeschäden übernimmt der Hersteller keine
Haftung.
4. Eigenschaften
• Überlastschutz (Ladegerät)
• eingebautes Amperemeter
• für Autos und Lieferwagen
• mitgelieferte Zubehörteile:
o Kabel (1,5 m + 1,5 m)
o zwei Klemmen
o 2 ersetzbare Sicherungen
5. Vorbereitung
Überprüfen Sie immer zuerst die Kabel und Klemmen ehe Sie das Ladegerät verwenden.
Verwenden Sie das Gerät nicht wenn es beschädigt ist!
Siehe Abbildungen, Seite 2 dieser Bedienungsanleitung.
• Trennen Sie die Batterie vom Fahrzeug: trennen Sie zuerst den negative Pol und erst danach
den positiven Pol.
• Reinigen Sie die Pole mit einem Stahldrahtbürste oder Schmirgelpapier.
• Öffnen Sie die Einfüllöffnungen und überprüfen Sie das Niveau der Batteriesäure. Füllen Sie mit
destilliertem Wasser nach wenn nötig (beachten Sie, dass alle Elemente innerhalb des Akkus sich
1 cm unter der Flüssigkeit befinden).
Bemerkung: Batteriesäure ist eine beißende Flüssigkeit. Vermeiden Sie Kontakt mit Haut oder
Kleidung. Bei Berührung mit der Flüssigkeit, spülen Sie sofort mit fließendem Wasser.
Konsultieren Sie Ihren Arzt wenn nötig.
• Entfernen Sie die Kappe Einfüllöffnungen während des Ladeverfahrens, außer wenn der Akku über
einen Schutz vor Funken verfügt. Siehe die technischen Daten eines verwendeten Akkus.
• Beachten Sie, dass das Ladegerät vom Netz getrennt ist [10].
• Überprüfen Sie den Batterietyp (12 V oder 24 V). Verbinden Sie das negative (rot) Kabel mit dem
geeigneten Anschluss: +12V [9] für eine 12V-Batterie oder +24V [8] für eine 24V-Batterie.
Befestigen Sie die Mutter gut am Anschluss.
• Verbinden Sie den positiven Pol vom Ladegerät (rot) mit dem positiven Pol (+) der Batterie.
Beachten Sie einen guten Anschluss.
• Verbinden Sie den negativen Pol vom Ladegerät (schwarz) mit dem negativen Pol (-) der
Batterie. Beachten Sie einen guten Anschluss.
• Verbinden Sie das Gerät mit dem Netz.
6. Anwendung
Siehe Abbildungen, Seite 2 dieser Bedienungsanleitung.
• Schalten Sie das Gerät ein [6].
• Stellen Sie den MIN/BOOST-Schalter [5] auf BOOST für ein schnelles Ladeverfahren (hoher
Strom, 20 A) oder auf MIN für ein langsames Ladeverfahren. Haben Sie die MIN-Position
29/06/2010 ©Velleman nv
16
Page 17

ausgewählt, so können Sie mit dem 1/2-Schalter [4] für einen niedrigen Ausgangsstrom (1,
AC30
Ladestrom = 12 A) oder einen normalen Ausgangsstrom (2, Ladestrom = 16 A) wählen.
• Das Strommessgerät [1] zeigt den Ladestrom an. Je höher das Ladeniveau des Akkus, umso
weniger Strom abgenommen wird. Stoppen Sie das Ladeverfahren sobald die Nadel auf 0 (Null)
steht, um Beschädigungen des Akkus zu vermeiden.
Bemerkung: Sie können das Ladeniveau auch messen, indem Sie die Dichte der Batteriesäure mit
einem Dichtemesser messen (siehe Liste unten).
Dichte = 1,285 g/ml Akku völlig geladen
Dichte = 1,21 g/ml) Akku halb geladen
Dichte = 1,16 g/ml) Akku leer
• Schalten Sie das Ladegerät ab [6] sobald der Akku völlig geladen ist, um Überlast zu vermeiden.
• Trennen Sie die Batterie vom Ladegerät. Beginnen Sie mit dem negativen Pol (schwarz) und
trennen Sie erst danach den positiven Pol (rot).
7. Sicherungen
Das AC30 hat 3 Sicherheitssicherungen.
• Thermische Sicherung: Diese Sicherung schaltet das Ladegerät bei Überhitzung ab. Das Gerät
wird automatisch eingeschaltet sobald die Temperatur genügend sinkt.
• Eingangssicherung [3]: Schützt das Gerät vor Überlast. Ersatz: Trennen Sie das Gerät vom Netz
und trennen Sie den angeschlossenen Akku vom Gerät. Schrauben Sie den Sicherungshalter [3]
los und ersetzen Sie die defekte Sicherung durch eine neue des gleichen Typs (F5 A/250 V).
Schrauben Sie den Sicherungshalter wieder fest.
• Ausgangssicherung [2]: Schützt das Gerät vor Überlast. Ersatz: Trennen Sie das Gerät vom Netz
und trennen Sie den angeschlossenen Akku vom Gerät. Entfernen Sie die Sicherung aus dem
Sicherungshalter und ersetzen Sie diese durch eine neue des gleichen Typs (30 A).
8. Wartung
• Trennen Sie immer zuerst das Ladegerät ehe Sie es reinigen.
• Reinigen Sie das Ladegerät nie mit Wasser oder irgendwelche andere Flüssigkeit.
• Halten Sie die Kabel sauber. Verwenden Sie keine Reinigungsmittel mit Benzol, Trichloräthylen,
Chlorid, Ammoniak, usw. um die Kunststoffteile nicht zu beschädigen.
• Überprüfen Sie jeden Monat das Batterieniveau und füllen Sie nach wenn nötig.
9. Technische Daten
Eingangsspannung 230V
Ausgangsstrom 16A
Boost-Strom 20A
Sicherung 30A
Referenzkapazität Akku min. 92Ah ~ max. 250Ah
IP-Schutzart IP20
Gewicht 11.6kg
Abmessungen 375 x 260 x 210mm
Verwenden Sie dieses Gerät nur mit originellen Zubehörteilen. Velleman NV übernimmt
keine Haftung für Schaden oder Verletzungen bei (falscher) Anwendung dieses Gerätes. Für
mehr Informationen zu diesem Produkt und die neueste Version dieser
Bedienungsanleitung, siehe www.perel.eu. Alle Änderungen ohne vorherige Ankündigung
vorbehalten.
© URHEBERRECHT
Velleman NV besitzt das Urheberrecht für diese Bedienungsanleitung.
Alle weltweiten Rechte vorbehalten. Ohne vorherige schriftliche Genehmigung des Urhebers ist es nicht gestattet, diese
Bedienungsanleitung ganz oder in Teilen zu reproduzieren, zu kopieren, zu übersetzen, zu bearbeiten oder zu
speichern.
~ 50Hz
AC
29/06/2010 ©Velleman nv
17
Page 18

AC30
MANUAL DO UTILIZADOR
1. Introdução
Aos cidadãos da União Europeia
Informações importantes sobre o meio ambiente no que respeita a este produto.
Em caso de dúvidas, contacte as autoridades locais para os resíduos.
Agradecemoso facto de ter adquirido o AC30! Leia atentamente as instruções do manual antes de
usar o aparelho. Caso o aparelho tenha sofrido algum dano durantel transporte não o instale e entre
em contacto com o seu distribuidor.
O carregador de baterias AC30 foi concebido para carregar baterias chumbo-ácido de 12 ou 24V; a
corrente máxima é de 20A. Não é aconselhável carregar baterias chumbo-ácido seladas (SLA) ou
baterias chumbo-ácido com válvula (VLRA)!
2. Instruções de segurança
Este símbolo presente no aparelho ou na embalagem indica que enquanto desperdícios
podem causar danos no meio ambiente. Não deite o aparelho (nem as pilhas se as houver)
no lixo doméstico; deve dirigir-se a uma empresa especializada em reciclagem. Devolva o
aparelho ao seu distribuidor ou a uma unidade de reciclagem local. Respeite as leis locais
relativas ao meio ambiente.
Mantenha o aparelho fora do alcance de pessoas não capacitadas e crianças.
Atenção!: Tocar num cabo de baixa tensão pode causar descargas eléctricas mortais.
Não toque no aparelho enquanto está em funcionamento: a caixa aquece!
Não exponha o aparelho à chuva, humidade nema qualquer tipo de salpicos ou gotas.
Nunca coloque um objecto com líquido sobre o aparelho.
Desligue sempre o aparelho caso não o vá usar durante um longo período de tempo ou
antes de o limpar. Desligue sempre o cabo de rede na ficha e nunca desligue o próprio
cabo. Mantenha os cabos afastados do calor, óleo ou superfícies pontiagudas.
Use óculos de protecção para manusear uma bateria.
Usar sempre luvas de protecção adequadas (à prova de ácido) quando estiver a lidar com
baterias não seladas.
Risco de explosão: o processo de carregamento produz gases electrolíticos que podem ser
inflamáveis em contacto com o lume ou faíscas. Não use roupas sintéticas durante o
processo de carregamento das baterias para evitar o risco de descargas electroestáticas.
• Certifique-se de que a tensão de rede não é superior à tensão indicada nas especificações.
• Não pise o cabo de alimentação e proteja-o de possíveis danos causados por qualquer tipo de
superficie cortante. Caso seja necessário, peça ao seu distribuidor para substituir o cabo de
alimentação.
• Nunca use um carregador ou cabos danificados. A reparação debe ser sempre feita por pessoal
especializado.
• Os danos causados por modificações não autorizadas não estão cobertos pela garantia.
• Não abra a bateria nem o carregador.
• Não exponha a bateria nem o carregador a temperaturas extremas. Por isso, desligue o
carregador e deixe que arrefeça.
• O ácido da bateria pode fervilhar, o que é normal. Por isso, desligue o carregador e deixe que
arrefeça.
• Carregue a bateria num local bem arejado.
29/06/2010 ©Velleman nv
18
Page 19

• Pegue na bateria cuidadosamente.
• Desligue o carregador da rede eléctrica em caso de fumo ou cheiros.
• O utilizador não deverá de fazer a manutenção de qualquer peça. Contacte o seu distribuidor caso
necessite de peças de substituição.
• Nunca carregue mais do que uma bateria em simultâneo.
• Não tente carregar baterias que não são recarregáveis ou têm alguma anomalia. Este carregador
não é adequado para carregar baterias chumbo-ácido seladas (SLA) ou baterias chumbo-ácido com
válvula (VLRA).
• Não colocar as pinças de carregamento em curto-circuito!
• Substitua sempre os fusíveis por fusíveis com as mesmas especificações.
AC30
3. Normas gerais
Ver a garantia de serviço e qualidade Velleman® no final do manual do utilizador.
• Não abane o aparelho. Evite usar força excessiva ao manusear o aparelho e durante a instalação.
• Não exponha o aparelho ao pó, humidade e temperaturas extremas.
• Familiarize-se com o funcionamento do aparelho antes de o usar.
• Por razões de segurança, as modificações não autorizadas ao aparelho estão proíbidas.
• Use oaparelho apenas para as aplicações descritas neste manual. O uso desautorizado anula a
garantía completamente.
• Danos causados pelo utilizador anulam a garantia. O distribuidor não será responsável por
qualquer dano ou outros problemas resultantes.
4. Características
• Protecção contra sobrecarga
• Amperímetro incorporado
• Para carros e carrinhas de distribuição
• Acessórios incluídos
o cabos (1,5 m + 1,5 m)
o duas pinças
o 2 fusíveis de substituição
5. Preparação
Verifique o estado dos cabos e do carregador antes de cada utilização. Nunca utilize um
carregador ou cabos danificados!
Ver as figuras da página 2 deste manual do utilizador.
• Desligue a bateria do carro antes de a carregar. Primeiro desligue o polo negativo, depois o polo
positivo.
• Limpe os polos com uma escova de arame ou papel de lixa.
• Abra as tampas e verifique o nível de ácido da bateria. Sempre que necessário, adicione água
destilada (o nível de líquido deve ser ±1cm abaixo da abertura).
Nota: o ácido das baterias é corrosivo; evitar o contacto com a pele ou com as roupas. Quaisquer
salpicos devem ser enxaguados de imediato com água abundante. Consulte o médico se
necessário.
• Abra as tampas da bateria durante o processo de carregamento, excepto se a bateria tiver um
dispositivo de segurança específico. Consulte a folha de especificações da bateria ou um
especialista no assunto para obter essa informação.
• Certifique-se de que o carregador não está ligado à rede eléctrica [10].
• Verifique se a bateria é de 12V ou 24V. Ligue o cabo negativo (vermelho) ao terminal adequado:
+12V [9] para baterias de 12V, +24V [8] para baterias de 24V. A porca do terminal deve estar
devidamente apertada.
• Ligue o polo positivo (vermelho) do carregador ao polo positivo (+) da bateria.
• Liguel polo negativo (preto) do carregador ao polo negativo (+) da bateria.
• Ligue o carregador à corrente eléctrica.
6. Utilização
Ver as figuras da página 2 deste manual do utilizador.
• Após todos os preparativos (ver §5), ligar o carregador [6].
• Coloque o interruptor MIN/BOOST [5] na posição BOOST para um carregamento mais rápido
(corrente elevada, 20A). Na posição MIN para carregamento mais lento. Quando selecciona MIN a
corrente de saída pode ser mais baixa (1, corrente de carga = 12A) ou normal (2, corrente de
carga = 16A) usando o botão 1/2 [4].
29/06/2010 ©Velleman nv
19
Page 20

• O amperímetro [1] indica a corrente de carregamento. Quanto mais carregada estiver a bateria,
AC30
menos corrente irá entrar. Quando a corrente chega a 0 (zero) o processo de carregamento deve
ser interrompido para prevenir o aumento de voltagem da bateria o que provocar danos.
Nota: outra forma de determinar o nível de carga da bateria é medir a densidade do ácido usando
um medidor de densidade (ver a tabela abaixo).
densidade = 1.285g/ml bateria totalmente carregada
densidade = 1.21g/ml) bateria com metade da carga
densidade = 1.16g/ml) bateria descarregada
• Quando a bateria estiver completamente carregada, desligue imediatamente o carregador [6].
Sobre-carregamento pode danificar a bateria.
• Desligue a bateria do carregador começando pelo polo negativo (preto) e depois pelo polo
positivo (vermelho).
7. Fusíveis
O AC30 tem 3 fusíveis de segurança instalados.
• Fusível térmico: este fusível corta a saída de energia sempre que a temperatura do carregador
estiver demasiado elevada. A potência é restaurada automaticamente logo que a temperatura
baixe para um nível aceitável.
• Fusível de entrada [3]: protege o carregador contra anomalias a nível da entrada de energia.
Para o substituir, desligue o carregador da corrente e desligue também qualquer bateria que
esteja ligada ao carregador. Desaparafuse o suporte do fusíve [3] (sentido contrário aos
ponteiros do relógio) e substitua o fusível fundido por outro com as mesmas especificações
(F5A/250V). Volte a apertar o suporte do fusível.
• Fusível de saída [2]: protege as baterias ligadas ao carregador contra uma possível sobrecarga.
Para o substituir, desligue o carregador da corrente e desligue também qualquer bateria que
esteja ligada ao carregador. Desencaixe o fusível e instale um novo. Use apenas fusíveis com as
mesmas especificações (30A).
8. Manutenção
• Desligue o carregador da rede eléctrica e desligue a bateria antes antes de o limpar.
• Nunca limpe o carregador com água ou outro líquido.
• Não use produtos à base de benzeno, tricloroetileno, cloreto, amoníaco, etc. para para não
danificar as peças de plástico.
• Verifique regularmente o nível de líquido da bateria e encha-a se for necessário.
9. Especificações
tensão de entrada 230V
corrente de saída 16A
posição boost 20A
fusível 30A
capacidade de referência bateria mín. 92Ah ~ máx. 250Ah
grau de protecção IP IP20
peso 11.6kg
dimensões 375 x 260 x 210mm
Utilize este aparelho apenas com os acessórios originais. A Velleman NV não será
responsável por quaisquer danos ou lesões causadas pelo uso (indevido) do aparelho. Para
más información sobre este producto e para consultar a versão mais recente deste manual
do utilizador, visite nuestra página www.perel.eu. Podem alterar-se as especificações e o
conteúdo deste manual sem aviso prévio.
© DIREITOS DE AUTOR
A Velleman NV detem os direitos de autor deste manual do utilizador.
Todos os direitos mundiais reservados. É estrictamente proíbido reproduzir, traduzir, copiar, editar e gravar este
manual do utilizador ou partes deste sem prévia autorização escrita por parte da detentora dos direitos.
~ 50Hz
Ca
29/06/2010 ©Velleman nv
20
Page 21

Velleman® Service and Quality Warranty
Velleman® has over 35 years of experience in the electronics
world and distributes its products in more than 85 countries.
All our products fulfil strict quality requirements and legal
stipulations in the EU. In order to ensure the quality, our
products regularly go through an extra quality check, both by
an internal quality department and by specialized external
organisations. If, all precautionary measures notwithstanding,
problems should occur, please make appeal to our warranty
(see guarantee conditions).
General Warranty Conditions Concerning Consumer
Products (for EU):
• All consumer products are subject to a 24-month warranty
on production flaws and defective material as from the
original date of purchase.
• Velleman® can decide to replace an article with an
equivalent article, or to refund the retail value totally or
partially when the complaint is valid and a free repair or
replacement of the article is impossible, or if the expenses are
out of proportion.
You will be delivered a replacing article or a refund at the
value of 100% of the purchase price in case of a flaw occurred
in the first year after the date of purchase and delivery, or a
replacing article at 50% of the purchase price or a refund at
the value of 50% of the retail value in case of a flaw occurred
in the second year after the date of purchase and delivery.
• Not covered by warranty:
- all direct or indirect damage caused after delivery to the
article (e.g. by oxidation, shocks, falls, dust, dirt, humidity...),
and by the article, as well as its contents (e.g. data loss),
compensation for loss of profits;
- frequently replaced consumable goods, parts or accessories
such as batteries, lamps, rubber parts, drive belts...
(unlimited list);
- flaws resulting from fire, water damage, lightning, accident,
natural disaster, etc. …;
- flaws caused deliberately, negligently or resulting from
improper handling, negligent maintenance, abusive use or use
contrary to the manufacturer’s instructions;
- damage caused by a commercial, professional or collective
use of the article (the warranty validity will be reduced to six
(6) months when the article is used professionally);
- damage resulting from an inappropriate packing and
shipping of the article;
- all damage caused by modification, repair or alteration
performed by a third party without written permission by
Velleman®.
• Articles to be repaired must be delivered to your Velleman®
dealer, solidly packed (preferably in the original packaging),
and be completed with the original receipt of purchase and a
clear flaw description.
• Hint: In order to save on cost and time, please reread the
manual and check if the flaw is caused by obvious causes
prior to presenting the article for repair. Note that returning a
non-defective article can also involve handling costs.
• Repairs occurring after warranty expiration are subject to
shipping costs.
• The above conditions are without prejudice to all commercial
warranties.
The above enumeration is subject to modification
according to the article (see article’s manual).
Velleman® service- en kwaliteitsgarantie
Velleman® heeft ruim 35 jaar ervaring in de
elektronicawereld en verdeelt in meer dan 85 landen.
Al onze producten beantwoorden aan strikte kwaliteitseisen en
aan de wettelijke bepalingen geldig in de EU. Om de kwaliteit
te waarborgen,
ondergaan onze producten op regelmatige tijdstippen een
extra kwaliteitscontrole, zowel door onze eigen
kwaliteitsafdeling als door externe gespecialiseerde
organisaties. Mocht er ondanks deze voorzorgen toch een
probleem optreden, dan kunt u steeds een beroep doen op
onze waarborg (zie waarborgvoorwaarden).
Algemene waarborgvoorwaarden
consumentengoederen (voor Europese Unie):
• Op alle consumentengoederen geldt een garantieperiode van
24 maanden op productie- en materiaalfouten en dit vanaf de
oorspronkelijke aankoopdatum.
• Indien de klacht gegrond is en een gratis reparatie of
vervanging van een artikel onmogelijk is of indien de kosten
hiervoor buiten verhouding zijn, kan Velleman® beslissen het
desbetreffende artikel te vervangen door een gelijkwaardig
artikel of de aankoopsom van het artikel gedeeltelijk of
volledig terug te betalen. In dat geval krijgt u een vervangend
product of terugbetaling ter waarde van 100% van de
aankoopsom bij ontdekking van een gebrek tot één jaar na
aankoop en levering, of een vervangend product tegen 50%
van de kostprijs of terugbetaling van 50 % bij ontdekking na
één jaar tot 2 jaar.
• Valt niet onder waarborg:
- alle rechtstreekse of onrechtstreekse schade na de levering
veroorzaakt aan het toestel (bv. door oxidatie, schokken, val,
stof, vuil, vocht...), en door het toestel, alsook zijn inhoud
(bv. verlies van data), vergoeding voor eventuele
winstderving.
- verbruiksgoederen, onderdelen of hulpstukken die
regelmatig dienen te worden vervangen, zoals bv. batterijen,
lampen, rubberen onderdelen, aandrijfriemen... (onbeperkte
lijst).
- defecten ten gevolge van brand, waterschade, bliksem,
ongevallen, natuurrampen, enz.
- defecten veroorzaakt door opzet, nalatigheid of door een
onoordeelkundige behandeling, slecht onderhoud of
abnormaal gebruik of gebruik van het toestel strijdig met de
voorschriften van de fabrikant.
- schade ten gevolge van een commercieel, professioneel of
collectief gebruik van het apparaat (bij professioneel gebruik
wordt de garantieperiode herleid tot 6 maand).
- schade veroorzaakt door onvoldoende bescherming bij
transport van het apparaat.
- alle schade door wijzigingen, reparaties of modificaties
uitgevoerd door derden zonder toestemming van Velleman®.
• Toestellen dienen ter reparatie aangeboden te worden bij uw
Velleman®-verdeler. Het toestel dient vergezeld te zijn van
het oorspronkelijke aankoopbewijs. Zorg voor een degelijke
verpakking (bij voorkeur de originele verpakking) en voeg een
duidelijke foutomschrijving bij.
• Tip: alvorens het toestel voor reparatie aan te bieden, kijk
nog eens na of er geen voor de hand liggende reden is
waarom het toestel niet naar behoren werkt (zie handleiding).
Op deze wijze kunt u kosten en tijd besparen. Denk eraan dat
er ook voor niet-defecte toestellen een kost voor controle
aangerekend kan worden.
• Bij reparaties buiten de waarborgperiode zullen
transportkosten aangerekend worden.
• Elke commerciële garantie laat deze rechten onverminderd.
Bovenstaande opsomming kan eventueel aangepast
worden naargelang de aard van het product (zie
handleiding van het betreffende product).
Garantie de service et de qualité Velleman®
Velleman® jouit d’une expérience de plus de 35 ans dans le
monde de l’électronique avec une distribution dans plus de 85
pays.
Tous nos produits répondent à des exigences de qualité
rigoureuses et à des dispositions légales en vigueur dans l’UE.
Afin de garantir la qualité, nous soumettons régulièrement
nos produits à des contrôles de qualité supplémentaires, tant
par notre propre service qualité que par un service qualité
externe. Dans le cas improbable d’un défaut malgré toutes les
précautions, il est possible d’invoquer notre garantie (voir les
conditions de garantie).
Conditions générales concernant la garantie sur les
produits grand public (pour l’UE) :
Page 22

• tout produit grand public est garanti 24 mois contre tout
vice de production ou de matériaux à dater du jour
d’acquisition effective ;
• si la plainte est justifiée et que la réparation ou le
remplacement d’un article est jugé impossible, ou lorsque les
coûts s’avèrent disproportionnés, Velleman® s’autorise à
remplacer ledit article par un article équivalent ou à
rembourser la totalité ou une partie du prix d’achat. Le cas
échéant, il vous sera consenti un article de remplacement ou
le remboursement complet du prix d’achat lors d’un défaut
dans un délai de 1 an après l’achat et la livraison, ou un
article de remplacement moyennant 50% du prix d’achat ou le
remboursement de 50% du prix d’achat lors d’un défaut après
1 à 2 ans.
• sont par conséquent exclus :
- tout dommage direct ou indirect survenu à l’article après
livraison (p.ex. dommage lié à l’oxydation, choc, chute,
poussière, sable, impureté…) et provoqué par l’appareil, ainsi
que son contenu (p.ex. perte de données) et une
indemnisation éventuelle pour perte de revenus ;
- tout bien de consommation ou accessoire, ou pièce qui
nécessite un remplacement régulier comme p.ex. piles,
ampoules, pièces en caoutchouc, courroies… (liste illimitée) ;
- tout dommage qui résulte d’un incendie, de la foudre, d’un
accident, d’une catastrophe naturelle, etc. ;
- out dommage provoqué par une négligence, volontaire ou
non, une utilisation ou un entretien incorrects, ou une
utilisation de l’appareil contraire aux prescriptions du fabricant
;
- tout dommage à cause d’une utilisation commerciale,
professionnelle ou collective de l’appareil (la période de
garantie sera réduite à 6 mois lors d’une utilisation
professionnelle) ;
- tout dommage à l’appareil qui résulte d’une utilisation
incorrecte ou différente que celle pour laquelle il a été
initialement prévu comme décrit dans la notice ;
- tout dommage engendré par un retour de l’appareil emballé
dans un conditionnement non ou insuffisamment protégé.
- toute réparation ou modification effectuée par une tierce
personne sans l’autorisation explicite de SA Velleman® ; frais de transport de et vers Velleman® si l’appareil n’est plus
couvert sous la garantie.
• toute réparation sera fournie par l’endroit de l’achat.
L’appareil doit nécessairement être accompagné du bon
d’achat d’origine et être dûment conditionné (de préférence
dans l’emballage d’origine avec mention du défaut) ;
• tuyau : il est conseillé de consulter la notice et de contrôler
câbles, piles, etc. avant de retourner l’appareil. Un appareil
retourné jugé défectueux qui s’avère en bon état de marche
pourra faire l’objet d’une note de frais à charge du
consommateur ;
• une réparation effectuée en-dehors de la période de
garantie fera l’objet de frais de transport ;
• toute garantie commerciale ne porte pas atteinte aux
conditions susmentionnées.
La liste susmentionnée peut être sujette à une
complémentation selon le type de l’article et être
mentionnée dans la notice d’emploi.
Garantía de servicio y calidad Velleman®
Velleman® disfruta de una experiencia de más de 35 años en
el mundo de la electrónica con una distribución en más de 85
países.
Todos nuestros productos responden a normas de calidad
rigurosas y disposiciones legales vigentes en la UE. Para
garantizar la calidad, sometimos nuestros productos
regularmente a controles de calidad adicionales, tanto por
nuestro propio servicio de calidad como por un servicio de
calidad externo. En el caso improbable de que surgieran
problemas a pesar de todas las precauciones, es posible
apelar a nuestra garantía (véase las condiciones de garantía).
Condiciones generales referentes a la garantía sobre
productos de venta al público (para la Unión Europea):
• Todos los productos de venta al público tienen un período de
garantía de 24 meses contra errores de producción o errores
en materiales desde la adquisición original;
• Si la queja está fundada y si la reparación o la sustitución de
un artículo es imposible, o si los gastos son
desproporcionados, Velleman® autoriza reemplazar el artículo
por un artículo equivalente o reembolsar la totalidad o una
parte del precio de compra. En este caso, recibirá un artículo
de recambio o el reembolso completo del precio de compra al
descubrir un defecto hasta un año después de la compra y la
entrega, o un artículo de recambio al 50% del precio de
compra o la sustitución de un 50% del precio de compra al
descubrir un defecto después de 1 a 2 años.
• Por consiguiente, están excluidos entre otras cosas:
- todos los daños causados directamente o indirectamente al
aparato y su contenido después de la entrega (p.ej. por
oxidación, choques, caída,...) y causados por el aparato, al
igual que el contenido (p.ej. pérdida de datos) y una
indemnización eventual para falta de ganancias;
- partes o accesorios que deban ser reemplazados
regularmente, como por ejemplo baterías, lámparas, partes
de goma, ... (lista ilimitada)
- defectos causados por un incendio, daños causados por el
agua, rayos, accidentes, catástrofes naturales, etc. ;
- defectos causados a conciencia , descuido o por malos
tratos, un mantenimiento inapropiado o un uso anormal del
aparato contrario a las instrucciones del fabricante;
- daños causados por un uso comercial, profesional o colectivo
del aparato (el período de garantía se reducirá a 6 meses con
uso profesional) ;
- daños causados por un uso incorrecto o un uso ajeno al que
est está previsto el producto inicialmente como está descrito
en el manual del usuario ;
- daños causados por una protección insuficiente al
transportar el aparato.
- daños causados por reparaciones o modificaciones
efectuadas por una tercera persona sin la autorización
explicita de SA Velleman® ;
- se calcula gastos de transporte de y a Velleman® si el
aparato ya no está cubierto por la garantía.
• Cualquier reparación se efectuará por el lugar de compra.
Devuelva el aparato con la factura de compra original y
transpórtelo en un embalaje sólido (preferentemente el
embalaje original). Incluya también una buena descripción del
defecto ;
• Consejo: Lea el manual del usuario y controle los cables, las
pilas, etc. antes de devolver el aparato. Si no se encuentra un
defecto en el artículo los gastos podrían correr a cargo del
cliente;
• Los gastos de transporte correrán a carga del cliente para
una reparación efectuada fuera del periode de garantía.
• Cualquier gesto comercial no disminuye estos derechos.
La lista previamente mencionada puede ser adaptada
según el tipo de artículo (véase el manual del usuario
del artículo en cuestión)
Velleman® Service- und Qualitätsgarantie
Velleman® hat gut 35 Jahre Erfahrung in der Elektronikwelt
und vertreibt seine Produkte in über 85 Ländern.
Alle Produkte entsprechen den strengen Qualitätsforderungen
und gesetzlichen Anforderungen in der EU. Um die Qualität zu
gewährleisten werden unsere Produkte regelmäßig einer
zusätzlichen Qualitätskontrolle unterworfen, sowohl von
unserer eigenen Qualitätsabteilung als auch von externen
spezialisierten Organisationen. Sollten, trotz aller
Vorsichtsmaßnahmen, Probleme auftreten, nehmen Sie bitte
die Garantie in Anspruch (siehe Garantiebedingungen).
Allgemeine Garantiebedingungen in Bezug auf
Konsumgüter (für die Europäische Union):
• Alle Produkte haben für Material- oder Herstellungsfehler
eine Garantieperiode von 24 Monaten ab Verkaufsdatum.
• Wenn die Klage berechtigt ist und falls eine kostenlose
Reparatur oder ein Austausch des Gerätes unmöglicht ist,
oder wenn die Kosten dafür unverhältnismäßig sind, kann
Page 23

Velleman® sich darüber entscheiden, dieses Produkt durch
ein gleiches Produkt zu ersetzen oder die Kaufsumme ganz
oder teilweise zurückzuzahlen. In diesem Fall erhalten Sie ein
Ersatzprodukt oder eine Rückzahlung im Werte von 100% der
Kaufsumme im Falle eines Defektes bis zu 1 Jahr nach Kauf
oder Lieferung, oder Sie bekommen ein Ersatzprodukt im
Werte von 50% der Kaufsumme oder eine Rückzahlung im
Werte von 50 % im Falle eines Defektes im zweiten Jahr.
• Von der Garantie ausgeschlossen sind:
- alle direkten oder indirekten Schäden, die nach Lieferung am
Gerät und durch das Gerät verursacht werden (z.B. Oxidation,
Stöße, Fall, Staub, Schmutz, Feuchtigkeit, ...), sowie auch der
Inhalt (z.B. Datenverlust), Entschädigung für eventuellen
Gewinnausfall.
- Verbrauchsgüter, Teile oder Zubehörteile, die regelmäßig
ausgewechselt werden, wie z.B. Batterien, Lampen,
Gummiteile, Treibriemen, usw. (unbeschränkte Liste).
- Schäden verursacht durch Brandschaden, Wasserschaden,
Blitz, Unfälle, Naturkatastrophen, usw.
- Schäden verursacht durch absichtliche, nachlässige oder
unsachgemäße Anwendung, schlechte Wartung,
zweckentfremdete Anwendung oder Nichtbeachtung von
Benutzerhinweisen in der Bedienungsanleitung.
- Schäden infolge einer kommerziellen, professionellen oder
kollektiven Anwendung des Gerätes (bei gewerblicher
Anwendung wird die Garantieperiode auf 6 Monate
zurückgeführt).
- Schäden verursacht durch eine unsachgemäße Verpackung
und unsachgemäßen Transport des Gerätes.
- alle Schäden verursacht durch unautorisierte Änderungen,
Reparaturen oder Modifikationen, die von einem Dritten ohne
Erlaubnis von Velleman® vorgenommen werden.
• Im Fall einer Reparatur, wenden Sie sich an Ihren
Velleman®-Verteiler. Legen Sie das Produkt ordnungsgemäß
verpackt (vorzugsweise die Originalverpackung) und mit dem
Original-Kaufbeleg vor. Fügen Sie eine deutliche
Fehlerumschreibung hinzu.
• Hinweis: Um Kosten und Zeit zu sparen, lesen Sie die
Bedienungsanleitung nochmals und überprüfen Sie, ob es
keinen auf de Hand liegenden Grund gibt, ehe Sie das Gerät
zur Reparatur zurückschicken. Stellt sich bei der Überprüfung
des Geräts heraus, dass kein Geräteschaden vorliegt, könnte
dem Kunden eine Untersuchungspauschale berechnet.
• Für Reparaturen nach Ablauf der Garantiefrist werden
Transportkosten berechnet.
• Jede kommerzielle Garantie lässt diese Rechte unberührt.
Die oben stehende Aufzählung kann eventuell
angepasst werden gemäß der Art des Produktes (siehe
Bedienungsanleitung des Gerätes).
Garantia de serviço e de qualidade Velleman®
Velleman® tem uma experiência de mais de 35 anos no
mundo da electrónica com uma distribuição em mais de 85
países.
Todos os nossos produtos respondem a exigências rigorosas e
a disposições legais em vigor na UE. Para garantir a
qualidade, submetemos regularmente os nossos produtos a
controles de qualidade suplementares, com o nosso próprio
serviço qualidade como um serviço de qualidade externo. No
caso improvável de um defeito mesmo com as nossas
precauções, é possível invocar a nossa garantia. (ver as
condições de garantia).
Condições gerais com respeito a garantia sobre os
produtos grande público (para a UE):
• qualquer produto grande público é garantido 24 mês contra
qualquer vício de produção ou materiais a partir da data de
aquisição efectiva;
• no caso da reclamação ser justificada e que a reparação ou
substituição de um artigo é impossível, ou quando os custo
são desproporcionados, Velleman® autoriza-se a substituir o
dito artigo por um artigo equivalente ou a devolver a
totalidade ou parte do preço de compra. Em outro caso, será
consentido um artigo de substituição ou devolução completa
do preço de compra no caso de um defeito no prazo de 1 ano
depois da data de compra e entrega, ou um artigo de
substituição pagando o valor de 50% do preço de compra ou
devolução de 50% do preço de compra para defeitos depois
de 1 a 2 anos.
• estão por consequência excluídos :
- todos os danos directos ou indirectos depois da entrega do
artigo (p.ex. danos ligados a oxidação, choques, quedas,
poeiras, areias, impurezas…) e provocado pelo aparelho, como
o seu conteúdo (p.ex. perca de dados) e uma indemnização
eventual por perca de receitas ;
- todos os bens de consumo ou acessórios, ou peças que
necessitam uma substituição regular e normal como p.ex.
pilhas, lâmpadas, peças em borracha, correias… (lista
ilimitada) ;
- todos os danos que resultem de um incêndio, raios, de um
acidente, de una catastrophe natural, etc. ;
- danos provocados por negligencia, voluntária ou não, uma
utilização ou manutenção incorrecta, ou uma utilização do
aparelho contrária as prescrições do fabricante ;
- todos os danos por causa de uma utilização comercial,
profissional ou colectiva do aparelho ( o período de garantia
será reduzido a 6 meses para uma utilização profissional);
- todos os danos no aparelho resultando de uma utilização
incorrecta ou diferente daquela inicialmente prevista e
descrita no manual de utilização ;
- todos os danos depois de uma devolução não embalada ou
mal protegida ao nível do acondicionamento.
- todas as reparações ou modificações efectuadas por
terceiros sem a autorização de SA Velleman® ;
- despesas de transporte de e para Velleman® se o aparelho
não estiver coberto pela garantia.
• qualquer reparação será fornecida pelo local de compra. O
aparelho será
obrigatoriamente acompanhado do talão ou factura de origem
e bem acondicionado (de
preferência dentro da embalagem de origem com indicação do
defeito ou avaria) ;
• dica : aconselha-mos a consulta do manual e controlar
cabos, pilhas, etc. antes de
devolver o aparelho. Um aparelho devolvido que estiver em
bom estado será cobrado despesas a cargo do consumidor ;
• uma reparação efectuada fora da garantia, será cobrado
despesas de transporte ;
• qualquer garantia comercial não prevalece as condições aqui
mencionadas.
A lista pode ser sujeita a um complemento conforme o
tipo de artigo e estar mencionada no manual de
utilização.
 Loading...