


timeSWITCH 140
GB, ES, PT, TR


For the owner and heating engineer
Operating and installation manual
timeSWITCH 140
Two-channel timer with week programme
GB

Contents
Contents
1 Notes on the documentation . . . 4
1.1 Storage of the documents ........... 4
1.2 Symbols used .................................. 5
1.3 Applicability of the manual ......... 5
Operating manual. . . . . . . . . . . . . . . . 6
2 Overview of the device . . . . . . . 6
2.1 Intended use.................................... 6
2.2 Safety ................................................ 7
2.3 Overview of the control
elements ........................................... 8
2.4 Overview of the display................ 9
2
Operating and installation manual timeSWITCH 140 two-channel timer with week programme / 838312_02
3 Operation. . . . . . . . . . . . . . . . . . . 10
3.1 Setting the current day of the
week and the time ......................... 10
3.2 Default setting ................................ 10
3.4 Setting the operating modes ...... 16
3.5 Special functions ............................ 16
3.6 Calendar ........................................... 19
4 Information button . . . . . . . . . . . 19
5 Recycling and disposal. . . . . . . . 20

Contents
Installation manual . . . . . . . . . . . . . . 21
6 Installation instructions . . . . . . 21
6.1 Notes on the installation and
operation .......................................... 21
6.2 CE label ............................................. 21
6.3 Intended use.................................... 21
7 Safety instructions and
regulations . . . . . . . . . . . . . . . . . 22
7.1 Safety instructions ........................ 23
7.2 Regulations ...................................... 23
8 Installation . . . . . . . . . . . . . . . . . 23
9 Start-up . . . . . . . . . . . . . . . . . . . . 25
9.1 Installer level (calendar) .............. 25
9.2 Service/diagnostics level ............. 27
10 Handing over to the owner . . . . 28
11 Customer service and
warranty . . . . . . . . . . . . . . . . . . . 29
12 Technical data . . . . . . . . . . . . . . 29
GB
3Operating and installation manual timeSWITCH 140 two-channel timer with week programme / 838312_03

1 Notes on the documentation
1 Notes on the documen-
tation
The following notes are intended to help
you throughout the entire documentation.
Further documents apply in combination
with this installation and operation manual.
We accept no liability for any damage
caused by failure to observe these
manuals.
Other applicable documents
Operating, installation and assembly
manuals for all system components
Operating and installation manual timeSWITCH 140 two-channel timer with week programme / 838312_024
1.1 Storage of the documents
Please pass on this operating and installation manual to the owner of the system so that he or she can keep it available whenever it is required.
Notes on the documentation 1
1.2 Symbols used
Please observe the safety instructions in
this manual.
The symbols used in the manual are
explained below:
Caution!
Potentially dangerous situations
for the product and environment!
Note!
Useful information and instructions
• Symbol for a required task
1.3 Applicability of the manual
This operating manual applies exclusively to units with the following article
numbers:
306760
The part number of your unit can be
obtained from the identification plate.
GB
5Operating and installation manual timeSWITCH 140 two-channel timer with week programme / 838312_03

2 Overview of the device
Operating manual
2 Overview of the device
2.1 Intended use
The timeSWITCH 140 is a state-of-the-art
two-channel timer which has been
designed in accordance with approved
safety regulations. Nevertheless, there is
still a risk of injury or death to the user
or others or of damage to the device and
other property in the event of improper
use.
6 Operating and installation manual timeSWITCH 140 two-channel timer with week programme / 838312_03
The timeSWITCH 140 timer is a twochannel timer with a day and week
programme which is used to time control
a Vaillant boiler with or without hot water
supply.
If the device is used together with a
Vaillant combi boiler, it can take over the
programming of the warm start function
(control of the hot water release).
Any other use or extended use is considered to be improper. The manufacturer/
supplier is not liable for any resulting
damage. The heating engineer and/or
the owner alone bear the risk.
Intended use includes the observance of
the operating and installation manual.

Caution!
Any improper use is forbidden!
2.2 Safety
The timer must be installed by a suitably
qualified heating engineer, who is
responsible for adhering to the relevant
standards and regulations.
Overview of the device 2
GB
7Operating and installation manual timeSWITCH 140 two-channel timer with week programme / 838312_03

2 Overview of the device
2.3 Overview of the control
elements
FP
i
Fig. 2.1 Overview of the control elements
Key
1 Display
2 Dial (turn and click)
1
I Information button
F Special function button
P Programming/Calendar function button
2
8 Operating and installation manual timeSWITCH 140 two-channel timer with week programme / 838312_03
Overview of the device 2
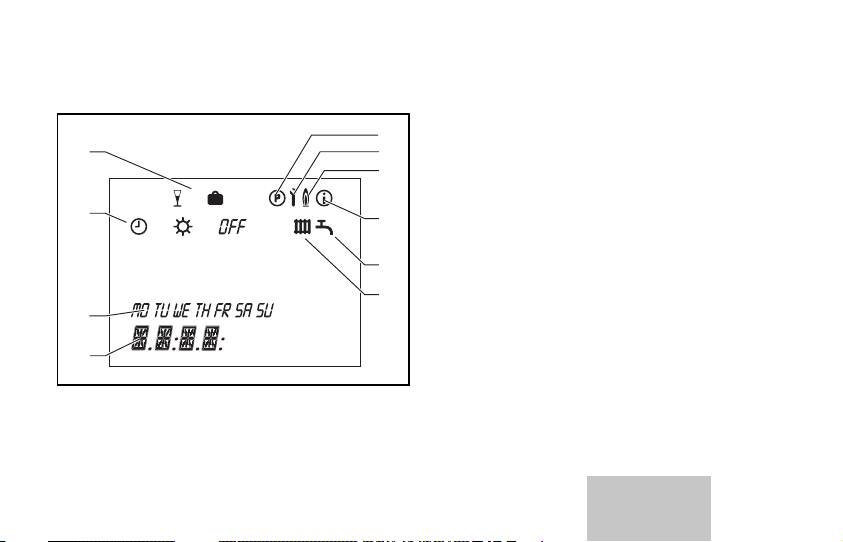
2.4 Overview of the display
10
9
8
7
Fig. 2.2 Overview of the display
Key
1 Programming of the timer programme
2 Installer and service/diagnostics level
1
2
3 Indicator that boiler is in operation
3
4 Information level
5 Hot water channel (heating request)
4
6 Heating channel (heating request)
7 Time
5
8 Days of the week
9 Operating modes
6
10 Special functions
GB
9Operating and installation manual timeSWITCH 140 two-channel timer with week programme / 838312_03

3 Operation
3 Operation
The heating and hot water channels
(only in the event of a heating or hot
water channel request during the programmed time), the current day of the
week, the current time and the special
function (if activated) are displayed on
the basic display.
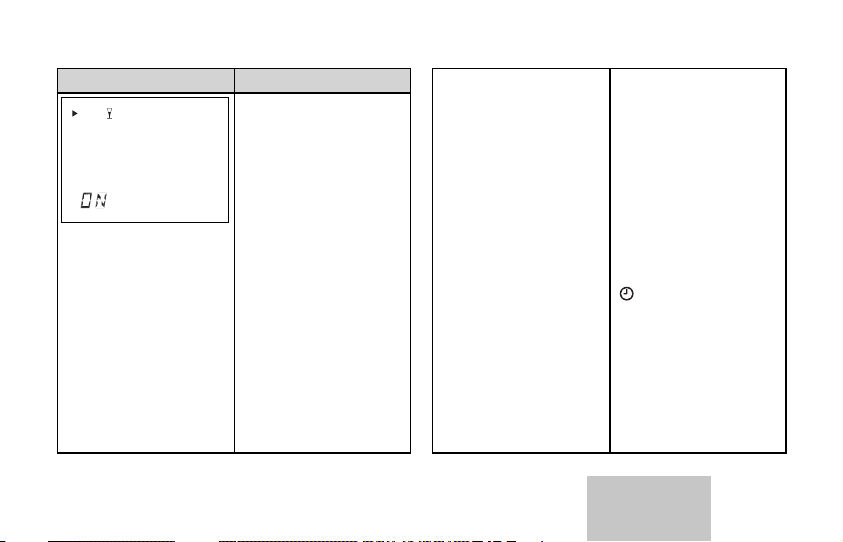
3.1 Setting the current day of the
week and the time
The current time and the day of the
week are set on the basic display.
• Press the dial three times until the day
of the week flashes.
10 Operating and installation manual timeSWITCH 140 two-channel timer with week programme / 838312_03
• Turn the dial to select the desired day.
• Press the dial again until the hour
display flashes.
• Turn the dial to select the current hour.
• Press the dial again until the minute
display flashes.
• Turn the dial to set the minutes.
The basic display reappears after about
five seconds.
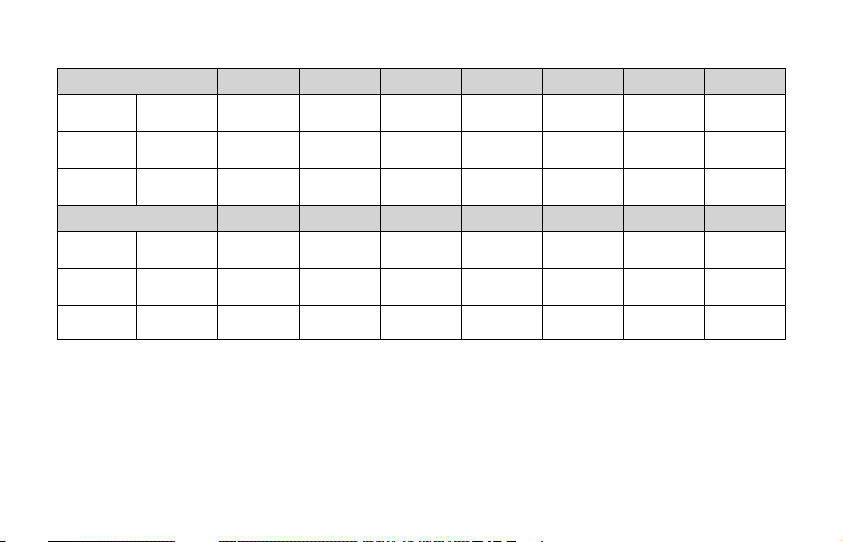
3.2 Default setting
The timer is supplied with a basic programme with default settings (table 3.1).
The heating and hot water control follow
this basic programme until it is changed.

Operation 3
Time
window
H1 Mo–Fr 6:00 22:00
H2 - - H3 - - H1 Sa 7:00 23:00
H2 - - H3 - - H1 Su 7:00 23:00
H2 - - H3 - - -
Table 3.1 Heating/Hot water basic programme
Day of the
week / Week
block
Start
time
End
time
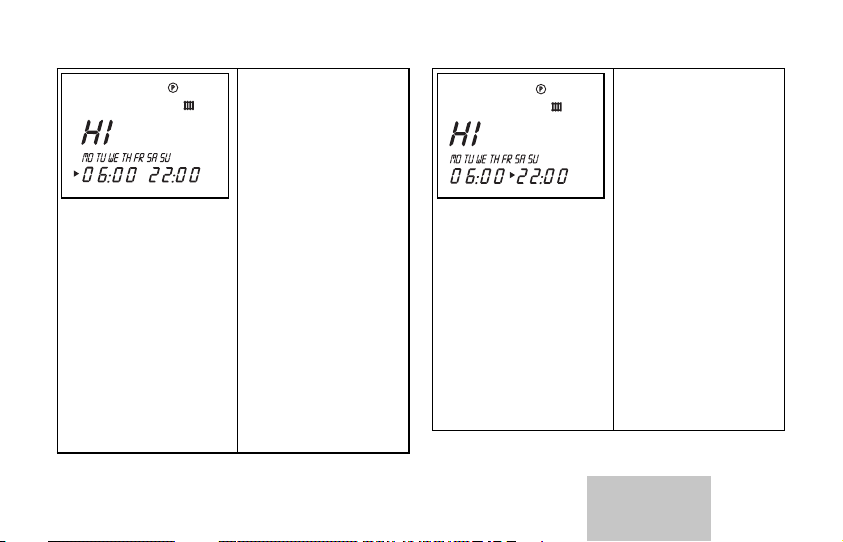
3.3 Programming heating times
for heating and hot water
(warm start)
You can program three time profiles
(H1, H2 and H3) for each channel (heating or hot water):
– For individual days (Monday (Mo) to
Sunday (Su))
– For a group of days, e. g.
5 days (Monday (Mo) to Friday (Fr)),
2 days (Saturday (Sa) to Sunday (Su))
or 7 days (Monday (Mo) to Sunday (Su))
GB
11Operating and installation manual timeSWITCH 140 two-channel timer with week programme / 838312_03
3 Operation
Heating Mo Tu We Th Fr Sa Su
H1
H2
H3
Hot water Mo Tu We Th Fr Sa Su
H1
H2
H3
Table 3.2 Time profiles for heating and hot
water
Start
End
Start
End
Start
End
Start
End
Start
End
Start
End
12 Operating and installation manual timeSWITCH 140 two-channel timer with week programme / 838312_03

Operation 3
Note!
To change the default settings of
the basic programme, you can
enter your personal time profiles
in this table.
The following steps are required to
change the basic programme:
• Press the programming button “P” to
go to the programming level.
The symbol P appears on the display and
the radiator symbol flashes.
• Turn the dial to select the desired
heating channel (radiator symbol) or
hot water channel (tap symbol).
• Press the dial again to select the time
profile (H1, H2 or H3).
The day(s) of the week, start time and
end time appear on the display.
The basic display reappears if you press
the “P” button again.
For clarification, the individual steps are
illustrated in the following table:
GB
13Operating and installation manual timeSWITCH 140 two-channel timer with week programme / 838312_03

3 Operation
Display Required steps
Press the programming button “P”.
Turn the dial to select
the desired channel
(heating or hot water).
Press the dial.
The cursor marks the
time profile.
Press the dial to
select the desired
time window H1, H2
or H3.
Press the dial. The day
of the week display
flashes.
Turn the dial to select
one or various days.
You can select the
following:
– Individual days:
Mo = Monday
Tu = Tuesday
We = Wednesday
Th = Thursday
Fr = Friday
Sa = Saturday
Su = Sunday
– 5 days: (Mo – Fr)
– 2 days: (Sa – Su)
– 7 days: (Mo –Su)
14 Operating and installation manual timeSWITCH 140 two-channel timer with week programme / 838312_03
Operation 3
Press the dial to
change the start time.
The hour display
flashes.
Turn the dial to select
an hour.
Press the dial again.
Turn the dial to select
the minutes.
Press the dial to
change the end time.
The hour display
flashes.
Turn the dial to select
an hour.
Press the dial again.
Turn the dial to select
the minutes.
Press the “P” button
to return to the basic
display.
Table 3.3 Setting parameters
GB
15Operating and installation manual timeSWITCH 140 two-channel timer with week programme / 838312_03

3 Operation
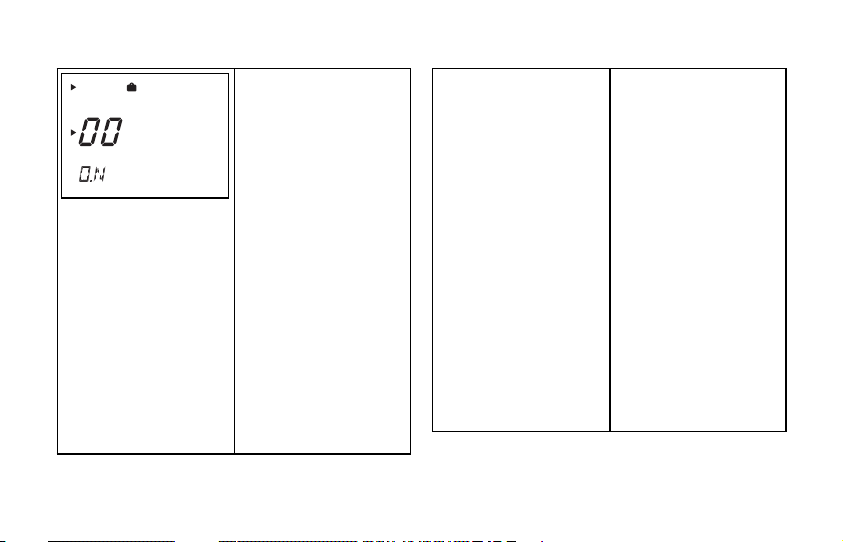
3.4 Setting the operating modes
The operating mode of the boiler is set
on the basic display.
• Press the dial once to select the
operating mode of the heating channel.
• Press the dial twice to select the operating mode of the hot water channel.
The current operating mode display
flashes.
• Turn the dial to select the desired
operating mode.
The basic display reappears after about
five seconds.
16 Operating and installation manual timeSWITCH 140 two-channel timer with week programme / 838312_03
Possible operating modes
Automatic
The heating/hot water mode
switches between “Ready for
operation” and “Off” according
to the programmed times.
Heating
The heating/hot water mode
remains permanently set to
“Ready for operation”.
Off
The heating/hot water mode
remains permanently set to Off.
3.5 Special functions
• Press the “F” button to select special
functions (see table 3.4):
Operation 3
Display Required steps
Party function
Press the special function button “F” to set
the party function.
The timer programme
is consequently deactivated temporarily.
Operation remains
switched on up to the
next time profile (H1
– H3), regardless of
whether the timer is
set to the “Ready for
operation” or “Off”
operating mode. The
timer programme is
then reactivated.
The basic display reappears after about ten
seconds.
To deactivate the
party function, you
merely have to press
the “F” button.
The party function is
only available in automatic operating mode
( ).
GB
17Operating and installation manual timeSWITCH 140 two-channel timer with week programme / 838312_03
3 Operation
Holiday function
Press the special function button “F” twice
to set the holiday
function.
Set the number of
days for which the timer programme is to be
deactivated by turning
the dial.
Operation remains in
Off operating mode
until midnight of the
last set day day. The
timer programme is
then reactivated.
Table 3.4 Special functions
The basic display reappears after about ten
seconds.
To deactivate the
holiday function, you
merely have to press
the “F” button.
18 Operating and installation manual timeSWITCH 140 two-channel timer with week programme / 838312_03

Operation 3, Information button 4
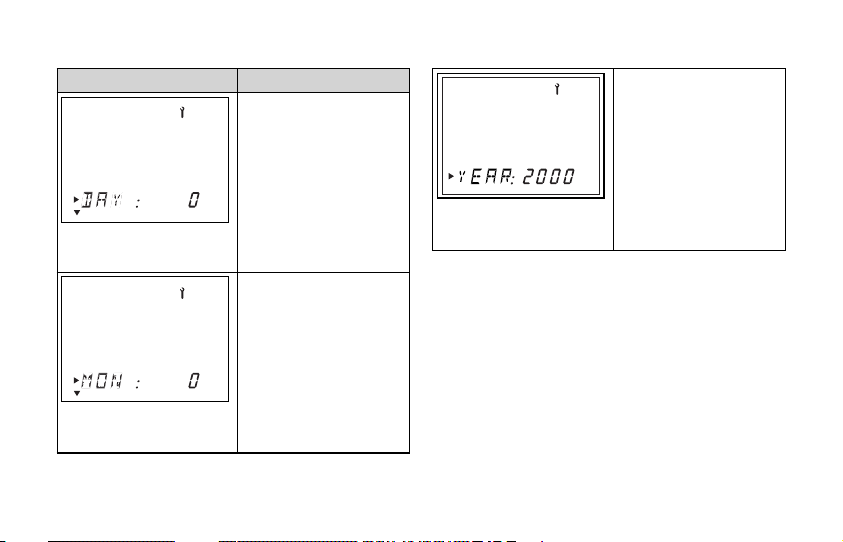
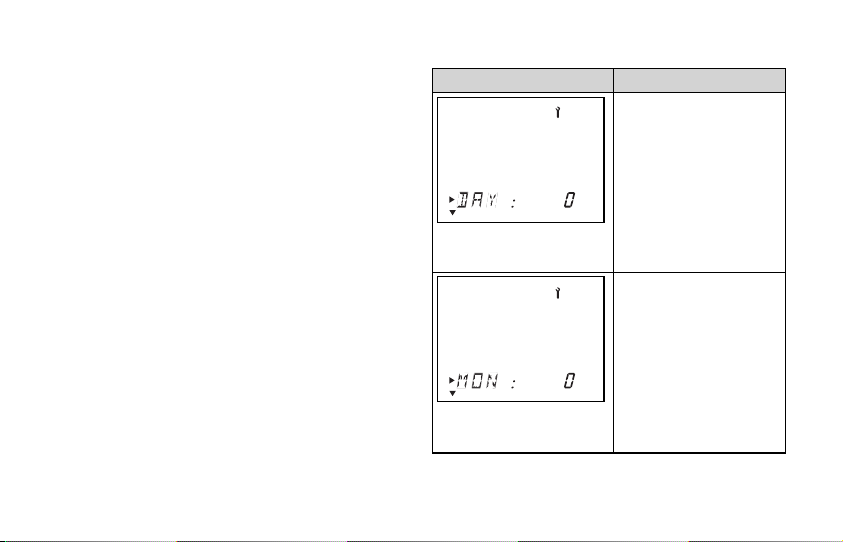
3.6 Calendar
The timer has a calendar to enable
automatic summer/winter changeover.
The calendar must be activated on the
installer level (Section 9.1).
If the calendar has been activated:
• Press the dial repeatedly until the day
(“Day”), month (“Mon”) or year
(“Year”) is displayed.
The selected value flashes.
• Turn the dial to change the flashing
value.
The basic display reappears after about
five seconds.
4 Information button
• Press the information button “I” to
activate the information level.
The information symbol appears on the
display. You can display the following
information by repeatedly pressing the
“I” button:
– Name of the timeSWITCH (TS 140)
– Display of the day/month/year (if the
calendar is activated)
– The timer programmes set for heating
(each time window per day)
– The timer programmes set for hot
water (each time window per day)
GB
19Operating and installation manual timeSWITCH 140 two-channel timer with week programme / 838312_03

5 Recycling and disposal
5 Recycling and disposal
Neither the timer nor any of the accessories belong in the household waste.
Make sure the old device and any existing accessories are disposed of properly.
20 Operating and installation manual timeSWITCH 140 two-channel timer with week programme / 838312_03

Installation instructions 6
Installation manual
6 Installation instructions
6.1 Notes on the installation and
operation
The device may be installed, set, connected to the power supply and started
up only by a qualified electrician or
a suitably qualified heating engineer.
6.2 CE label
The CE label shows that, in combination
with Vaillant boilers, the timeSWITCH 140
two-channel timer meets the basic
requirements of the directive on electro-
magnetic compatibility (89/336/EEC
directive) and the low voltage directive
(73/23/EEC directive).
6.3 Intended use
The timeSWITCH 140 is a state-of-the-art
two-channel timer which has been designed
in accordance with approved safety regulations. Nevertheless, there is still a risk
of injury or death to the user or others or
of damage to the device and other property in the event of improper use.
The timeSWITCH 140 timer is a two-channel
timer with a day and week programme
which is used to time control a Vaillant
boiler with or without hot water supply.
GB
21Operating and installation manual timeSWITCH 140 two-channel timer with week programme / 838312_03

6 Installation instructions, 7 Safety instructions and regulations
If the device is used together with a
Vaillant combi boiler, it can take over
the programming of the warm start
function (control of the hot water
release). The timer is built into the front
of Vaillant ecoTEC combi boilers.
Any other use or extended use is considered to be improper. The manufacturer/
supplier is not liable for any resulting
damage. The heating engineer and/or
the owner alone bear the risk.
Intended use includes the observance of
the operating and installation manual.
Caution!
Any improper use is forbidden!
22 Operating and installation manual timeSWITCH 140 two-channel timer with week programme / 838312_03
7 Safety instructions and
regulations
The device must be installed by a qualified engineer, who is responsible for
adhering to the existing standards and
regulations. We accept no liability for
any damage caused by failure to observe
these instructions.

Safety instructions and regulations 7, Installation 8
7.1 Safety instructions
Caution!
Risk of damage to the device by
short-circuits!
Before performing work on the
device, switch off the power
supply and secure it against
being switched on again.
Connect or disconnect the timer
and boiler only if they are not live.
7.2 Regulations
All wiring must be in accordance with
Building Regulations Part P and BS 7671
(IEE Wiring Regulations), and must be
carried out by a suitably qualified person.
8 Installation
The timer is connected to the boiler by
means of the contact pins on the back of
the timer. You must push the timer into
the installation recess intended for this
purpose in the electronic box of the
boiler to connect the boiler to the mains
supply.
GB
23Operating and installation manual timeSWITCH 140 two-channel timer with week programme / 838312_03
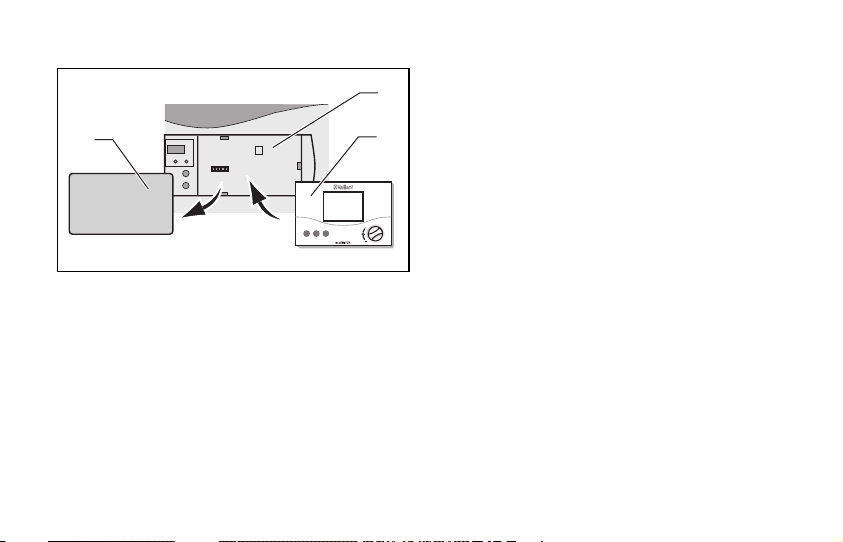
8 Installation
• Switch off the boiler.
1
• Disconnect the appliance from the
3
2
mains supply.
• Remove the cover (3) from the elec-
tronic box.
• Align the five contact pins on the rear
FP
i
of the timer (2) with the contacts in
the installation recess (1).
• Push the timer carefully into the
Fig. 8.1 Installing the timer
installation recess until it clicks into
place.
Key
1 Installation recess in the electronic box
2 Timer
3 Cover
24 Operating and installation manual timeSWITCH 140 two-channel timer with week programme / 838312_03

Start-up 9
9 Start-up
• Switch on the boiler.
• Start up the boiler in accordance with
the operating and installation manual
of the boiler.
You should activate the calendar on the
installer level to enable automatic summer/winter changeover.
A further operating level, the service
and diagnostics level, which is intended
only for heating engineers, is stored for
support in service and diagnostic cases.
9.1 Installer level (calendar)
Activate the calendar by setting the
current date:
• Press the programme button “P” for
about 10 seconds to activate the
installer level.
The spanner symbol appears on the display.
The set day (“Day”) is displayed.
You can now set the calendar
(see table 9.1).
GB
25Operating and installation manual timeSWITCH 140 two-channel timer with week programme / 838312_03
9 Start-up
Display Setting
Turn the dial to set
the current day
(“Day”, 1 – 31).
Then press the dial
once to go to the
month setting.
Turn the dial to set
the current month
(“Month”, 1 – 12).
Then press the dial
once to go to the year
setting.
Table 9.1 Setting the calendar
• Press the “P” button once to exit the
installer level and go to the basic display.
The display automatically returns to the
Turn the dial to set
the current year
(“Year”).
basic display from the installer level
after 60 minutes.
26 Operating and installation manual timeSWITCH 140 two-channel timer with week programme / 838312_03

Start-up 9
9.2 Service/diagnostics level
Besides checking the displays, you can
also query the software version of the
timer on the service/diagnostics level.
• Press the “P” button and the dial
simultaneously for about three seconds
to go to the service/diagnostics level.
The spanner symbol appears on the
display. You can now conduct the tests
(see table 9.2).
Dial
Click the
dial.
Click
the dial
again.
Table 9.2 Service/diagnostics level
Test
option
Display
test
Software
version
What happens?
All display elements
are displayed.
The software version is displayed.
• Press the “P” button once to exit the
service/diagnostics level and go to the
basic display.
The display automatically returns to the
basic display after 60 minutes.
GB
27Operating and installation manual timeSWITCH 140 two-channel timer with week programme / 838312_03
10 Handing over to the owner
10 Handing over to the owner
You must show the owner how to operate
the timer and inform the owner about its
functions. Please use this checklist:
Handover Done
Hand over the manuals intended for the owner as well as the documents of the device.
Go through the operating manual with the owner and answer any questions.
Draw special attention to the safety instructions, which the owner must follow.
Tell the owner to keep the manuals near the boiler together with the timer.
Table 10.1 Handing over to the owner
28 Operating and installation manual timeSWITCH 140 two-channel timer with week programme / 838312_03

Customer service and warranty 11, Technical data 12
11 Customer service and
warranty
Vaillant service
To ensure regular servicing, it is strongly
recommended that arrangements are
made for a Maintenance Agreement.
Please contact Vaillant Service Solutions
(0870 6060 777) for further details.
Vaillant warranty
We only grant a Vaillant manufacturers
warranty if a suitably qualified engineer
has installed the system in accordance
with Vaillant instructions. The system
owner will be granted a warranty in
accordance with the Vaillant terms and
conditions. All requests for work during
the guarantee period must be made to
Vaillant Service Solutions
(0870 6060 777).
12 Technical data
Unit Value
Operating voltage U
Max. operating temperature °C 50
Current consumption mA
Level of protection
Protection class
Table 12.1 Technical data
max
V24
< 17
IP 20
III
GB
29Operating and installation manual timeSWITCH 140 two-channel timer with week programme / 838312_03


Para el propietario y el servicio de asistencia técnica
Instrucciones de uso y de instalación
timeSWITCH 140
Temporizador bicanal con programa semanal
ES

Índice
Índice
1 Observaciones sobre la
documentación . . . . . . . . . . . . . . 4
1.2 Símbolos utilizados ........................ 4
1.3 Validez de las instrucciones ........ 5
Instrucciones de uso . . . . . . . . . . . . . 6
2 Vista general del aparato . . . . . 6
2.1 Utilización adecuada ..................... 6
2.2 Seguridad ......................................... 7
2.3 Vista general de los elementos
de mando ......................................... 8
2.4 Vista general de la pantalla ........ 9
2
Instrucciones de uso y de instalación del temporizador bicanal con programa semanal timeSWITCH 140 / 838312_03
3 Uso . . . . . . . . . . . . . . . . . . . . . . . . 10
3.1 Programar el día de la semana
y la hora ........................................... 10
3.2 Configuración de fábrica ............. 10
3.3 Programar los periodos de
calantamiento para la
calefacción y el agua caliente
(arranque en caliente) .................. 11
3.4 Programar los modos de
funcionamiento .............................. 16
3.5 Funciones especiales .................... 16
3.6 Calendario ........................................ 19
4 Tecla de información . . . . . . . . . 19
5 Reciclaje y eliminación de
residuos . . . . . . . . . . . . . . . . . . . . 20

Índice
Instrucciones de instalación . . . . . . . 21
9 Puesta en marcha . . . . . . . . . . . 25
9.1 Nivel del especialista
Instrucciones de instalación . . . . . . 21
6
6.1 Observaciones sobre la
(calendario) ..................................... 25
9.2 Nivel de servicio/diagnóstico...... 27
instalación y el uso ........................ 21
6.2 Homologación CE ........................... 21
10 Entrega al propietario . . . . . . . . 28
6.3 Utilización adecuada ..................... 21
11 S.A.T. oficial y garantía . . . . . . . 29
7 Indicaciones de seguridad y
normativas . . . . . . . . . . . . . . . . . 22
12 Datos técnicos . . . . . . . . . . . . . . 31
7.1 Indicaciones de seguridad ........... 23
7.2 Normativas ...................................... 23
8 Montaje . . . . . . . . . . . . . . . . . . . . 23
Instrucciones de uso y de instalación del temporizador bicanal con programa semanal timeSWITCH 140 / 838312_03
ES
3

1 Observaciones sobre la documentación
1 Observaciones sobre la
documentación
Las siguientes indicaciones sirven de
guía para toda la documentación. Estas
instrucciones de instalación y de uso se
complementan con otra documentación
vigente.
No nos responsabilizamos de los
daños ocasionados por ignorar estas
instrucciones.
1.1 Documentación complementaria
vigente
Instrucciones de uso, instalación y montaje de todos los componentes de la instalación.
4 Instrucciones de uso y de instalación del temporizador bicanal con programa semanal timeSWITCH 140 / 838312_03
1.2 Símbolos utilizados
Tenga en cuenta las indicaciones de
seguridad especificadas en estas instrucciones.
A continuación, se describen los símbolos utilizados en el texto:
¡Atención!
Posible riesgo para el producto y
el medio ambiente.
¡Nota!
Información e indicaciones útiles.
• Símbolo de una actividad que debe
realizarse.

Conservación de la documentación
Entregue las instrucciones de uso y de
instalación al propietario de la instalación. Éste se encargará de conservarlas
para que estén disponibles en caso necesario.
1.3 Validez de las instrucciones
Estas instrucciones de uso sólo tienen
validez para los aparatos con las siguientes referencias:
306760
La referencia del aparato se encuentra
en la placa de características.
Observaciones sobre la documentación 1
ES
5Instrucciones de uso y de instalación del temporizador bicanal con programa semanal timeSWITCH 140 / 838312_03

2 Vista general del aparato
Instrucciones de uso
2 Vista general del aparato
2.1 Utilización adecuada
El temporizador bicanal timeSWITCH 140
está fabricado según las normas de
seguridad técnica y el estado de la técnica. Sin embargo, una utilización inadecuada puede poner en peligro la integridad corporal y la vida del usuario o de
terceros, así como producir daños en el
aparato u otros daños materiales.
6 Instrucciones de uso y de instalación del temporizador bicanal con programa semanal timeSWITCH 140 / 838312_03
El temporizador timeSWITCH 140 es un
temporizador bicanal con programa diario y semanal para el control temporal
de una caldera Vaillant con o sin calentamiento de agua.
Cuando se usa el aparato conectado a un
calefactor combinado de Vaillant, puede
hacerse cargo de la programación de la
función de arranque en caliente (control
de la autorización de agua caliente).
Cualquier otro uso será considerado no
adecuado. El fabricante/distribuidor no
se responsabilizará de los daños causados por usos inadecuados. El servicio de
asistencia técnica y/o el propietario asumirán todo el riesgo.

El cumplimiento de las instrucciones de
uso y de instalación forma parte de la
utilización adecuada.
¡Atención!
Se prohíbe cualquier otro uso.
2.2 Seguridad
Sólo un servicio de asistencia técnica
oficial, responsable del cumplimiento de
las normas y prescripciones vigentes,
puede instalar el temporizador.
Vista general del aparato 2
ES
7Instrucciones de uso y de instalación del temporizador bicanal con programa semanal timeSWITCH 140 / 838312_03

2 Vista general del aparato
2.3 Vista general de los elementos
de mando
FP
i
Fig. 2.1 Vista general de los elementos de
mando
Leyenda
1 Pantalla
2 Botón de ajuste (girar y hacer clic)
1
I Tecla de información
F Tecla de función especial
P Tecla de programación/función de calendario
2
8 Instrucciones de uso y de instalación del temporizador bicanal con programa semanal timeSWITCH 140 / 838312_03

Vista general del aparato 2
2.4 Vista general de la pantalla
10
9
8
7
Fig. 1.2 Vista general de la pantalla
Leyenda
1 Programación del programa temporal
2 Nivel de especialistas y
1
2
3
4
5
6
nivel de servicio/diagnóstico
3 Indicador de caldera en funcionamiento
4 Nivel de Información
5 Canal de agua caliente (demanda de calor)
6 Canal de calefacción (demanda de calor)
7 Hora
8 Día de la semana
9 Modos de funcionamiento
10 Funciones especiales
ES
9Instrucciones de uso y de instalación del temporizador bicanal con programa semanal timeSWITCH 140 / 838312_03

3 Uso
3 Uso
En la indicación base se indican los canales de calefacción y de agua caliente
(sólo cuando haya demanda de calor del
canal de calefacción o de agua caliente
en el tiempo programado), el día de la
semana actual, la hora actual y la función especial (si está activada).
3.1 Programar el día de la semana y
la hora
El día de la semana y la hora actuales se
programan en la indicación base.
• Pulse el botón de ajuste tres veces
hasta que parpadee el día de la
semana.
10 Instrucciones de uso y de instalación del temporizador bicanal con programa semanal timeSWITCH 140 / 838312_03
• Gire el botón de ajuste para seleccionar el día deseado.
• Vuelva a pulsar el botón de ajuste hasta
que parpadee la indicación de la hora.
• Gire el botón de ajuste para seleccionar la hora actual.
• Vuelva a pulsar el botón de ajuste hasta
que parpadee la indicación de los minutos.
• Gire el botón de ajuste para programar
los minutos.
La indicación de la pantalla salta a la in dicación base después de unos 5 segundos.
3.2 Configuración de fábrica
El temporizador se suministra con un
programa básico de fábrica (tabla 3.1).

Uso 3
El control de la calefacción y del agua
caliente se basan en este programa hasta que se modifica.
Período
de tiempo
H1 Mo–Fr 6:00 22:00
H2 - - H3 - - H1 Sa 7:00 23:00
H2 - - H3 - - H1 Su 7:00 23:00
H2 - - H3 - - -
Tabla 3.1 Programa básico de calefacción/
Día/bloque
de la semana
agua caliente
Hora
inicio
Hora
parada
3.3 Programar los periodos de
calantamiento para la calefacción y el agua caliente (arranque
en caliente)
Puede programar tres perfiles temporales para cada canal (calefacción o agua
caliente) (H1, H2 y H3):
– para días sueltos (de lunes (Mo) a
domingo (Su))
– para un grupo de días, por ejemplo,
de 5 días (de lunes (Mo) a viernes
(Fr)),
de 2 días (de sábado (Sa) a domingo
(Su)) o de 7 días (de lunes (Mo) a
domingo (Su)).
ES
11Instrucciones de uso y de instalación del temporizador bicanal con programa semanal timeSWITCH 140 / 838312_03

3 Uso
Calefacción Mo Tu We Th Fr Sa Su
H1
H2
H3
Agua caliente Mo Tu We Th Fr Sa Su
H1
H2
H3
Tabla 3.2 Perfiles temporales para calefac-
Inicio
Final
Inicio
Final
Inicio
Final
Inicio
Final
Inicio
Final
Inicio
Final
ción y agua caliente
12 Instrucciones de uso y de instalación del temporizador bicanal con programa semanal timeSWITCH 140 / 838312_03

Uso 3
¡Nota!
Si desea modificar el programa
básico de fábrica, puede anotar
en esta tabla sus perfiles temporales personales.
Para modificar el programa básico,
proceda de la siguiente forma:
• Pulse la tecla de programación “P”
para acceder al nivel de programación.
En la pantalla aparece el icono P y el
icono de radiador parpadea.
• Gire el botón de ajuste para seleccionar el canal deseado: calefacción
(icono de radiador) o agua caliente
(icono de grifo).
• Vuelva a pulsar el botón de ajuste
para seleccionar el perfil temporal (H1,
H2 o H3).
En la pantalla aparece(n) el(los) día(s)
de la semana, la hora de inicio y la de fin.
Volviendo a pulsar la tecla “P”, la pantalla salta a la indicación base.
En la tabla siguiente se enumeran de
nuevo los pasos que deben realizarse a
modo de ilustración:
ES
13Instrucciones de uso y de instalación del temporizador bicanal con programa semanal timeSWITCH 140 / 838312_03

3 Uso
Pantalla Pasos necesarios
Pulse la tecla de
programación “P”
Gire el botón de ajuste
para seleccionar el
canal deseado (calefacción o agua caliente).
Pulse el botón de
ajuste.
El cursor marca el
perfil temporal.
Vuelva a pulsar el
botón de ajuste para
seleccionar el perfil
temporal deseado
(H1, H2 o H3).
Pulse el botón de
ajuste. La indicación
de los días de la semana parpadean.
Gire el botón de ajuste
para seleccionar uno
o varios días.
Puede seleccionar lo
siguiente:
– Días sueltos:
Mo = lunes
Tu = martes
We = miércoles
Th = jueves
Fr = viernes
Sa = sábado
Su = domingo
- 5 días: (Mo – Fr)
- 2 días: (Sa – Su)
- 7 días: (Mo – Su)
14 Instrucciones de uso y de instalación del temporizador bicanal con programa semanal timeSWITCH 140 / 838312_03

Uso 3
Pulse el botón de
ajuste para modificar
la hora de inicio.
La indicación de las
horas parpadea.
Gire el botón de ajuste
para seleccionar una
hora.
Vuelva a pulsar el
botón de ajuste.
Gire el botón de ajuste
para seleccionar los
minutos.
Pulse el botón de
ajuste para modificar
la hora de fin.
La indicación de las
horas parpadea.
Gire el botón de ajuste
para seleccionar una
hora.
Vuelva a pulsar el
botón de ajuste.
Gire el botón de ajuste
para seleccionar los
minutos.
Pulse la tecla “P” para
volver a la indicación
base.
Tabla 3.3 Programar parámetros
ES
15Instrucciones de uso y de instalación del temporizador bicanal con programa semanal timeSWITCH 140 / 838312_03

3 Uso
3.4 Programar los modos de
funcionamiento
La programación del modo de funcionamiento
de la caldera se realiza en la indicación base.
• Pulse el botón de ajuste una vez para
seleccionar el modo de funcionamiento
del canal de calefacción.
• Pulse el botón de ajuste dos veces
para seleccionar el modo de funcionamiento del canal de calefacción.
La indicación del modo de funcionamiento actual parpadea.
• Gire el botón de ajuste para seleccionar
el modo de funcionamiento deseado.
Después de 5 segundos aprox. la pantalla vuelve a la indicación base.
16 Instrucciones de uso y de instalación del temporizador bicanal con programa semanal timeSWITCH 140 / 838312_03
Modos de funcionamiento posibles
Automático
El funcionamiento de la calefacción/agua caliente cambia entre
listo para funcionar y apagado
según el tiempo que programado.
Calentar
El funcionamiento de la calefacción/agua caliente permenece en
listo para funcionar.
Apagado
El funcionamiento de la calefacción/
agua caliente permenece apagado.
3.5 Funciones especiales
• Pulse la tecla “F” para seleccionar funciones especiales (véase tabla 2.4):

Uso 3
Pantalla Pasos necesarios
Función fiesta
Pulse una vez la tecla
“F” de función especial
para programar la
función fiesta. De esta
forma, se desactiva el
programa del temporizador.
Independientemente de
que el temporizador
indique listo para
funcionar o parado,
permanece en funcionamiento hasta el
siguiente perfil temporal (H1 – H3). A continuación, el programa
de temporizador vuelve a estar activado.
Después de unos 10
segundos la pantalla
salta a la indicación
base.
Si desea volver a desactivar la función fiesta, pulse la tecla “F”.
La función fiesta sólo
está disponible en el
modo de funcionamiento automático (
) .
ES
17Instrucciones de uso y de instalación del temporizador bicanal con programa semanal timeSWITCH 140 / 838312_03

3 Uso
Función vacaciones
Pulse dos veces la
tecla “F” de función
especial para programar la función vacaciones.
Programe girando
el botón de ajuste el
número de días en que
se debe desactivar el
programa de temporizador.
Permacece en el modo
de funcionamiento
OFF hasta la medianoche del último día
programado y, a continuación, se vuelve a
activar el programa de
temporizador.
Tabla 3.4 Funciones especiales
Después de unos 10
segundos la pantalla
salta a la indicación
base.
Si desea volver a
desactivar la función
vacaciones, pulse la
tecla “F”.
18 Instrucciones de uso y de instalación del temporizador bicanal con programa semanal timeSWITCH 140 / 838312_03

Uso 3, Tecla de informatión 4
3.6 Calendario
El temporizador está equipado con un
calendario que posibilita cambiar de
forma automática entre el horario de
verano y de invierno. El calendario se
activa en el nivel del especialista (cap. 9.1).
Cuando se ha activado el calendario:
• Pulse el botón de ajuste hasta que se
indique el día (“Day”), el mes (“Mon”)
o el año (“Year”).
El valor seleccionado parpadea.
• Gire el botón de ajuste para modificar
el valor que está parpadeando.
Después de unos 5 segundos la pantalla
vuelve a la indicación base.
4 Tecla de información
• Pulse la tecla de Información “I” para
activar el nivel de información.
El icono de información aparece en la
pantalla. Pulsando varias veces la tecla
“I” puede ver la siguiente información:
– nombre de timeSWITCH (TS 140)
– indicación de día/mes/año (cuando el
calendario está activado)
– programa de tiempo programado para
la calefacción (cada periodo de tiempo
por día)
– programa de tiempo programado para
el agua caliente (cada periodo de tiempo por día)
ES
19Instrucciones de uso y de instalación del temporizador bicanal con programa semanal timeSWITCH 140 / 838312_03

5 Reciclaje y eliminación de residuos
5 Reciclaje y eliminación
de residuos
El temporizador y todos sus accesorios
no deben desecharse con la basura
doméstica. Asegúrese de que el aparato
antiguo y, dado el caso, los accesorios
existentes, se eliminen adecuadamente.
20 Instrucciones de uso y de instalación del temporizador bicanal con programa semanal timeSWITCH 140 / 838312_03

Instrucciones de instalación 6
Instrucciones de instalación
Instrucciones de instalación
6
6.1 Observaciones sobre la instalación y el uso
Sólo un servicio de asistencia técnica
oficial o un electricista cualificado están
autorizados a realizar el montaje, la
conexión eléctrica, ajustes en el aparato
y la primera puesta en marcha.
6.2 Homologación CE
Con la homologación CE se certifica que
el temporizador bicanal timeSWITCH 140
combinado con calderas Vaillant cumple
los requisitos básicos de las directivas
sobre la compatibilidad electromagnética
(directiva 89/336/CEE) y baja tensión
(directiva 73/23/CEE).
6.3 Utilización adecuada
El temporizador bicanal timeSWITCH 140
está fabricado según las normas de
seguridad técnica y el estado de la técnica. Sin embargo, una utilización inadecuada puede poner en peligro la integridad corporal y la vida del usuario o de
terceros, así como producir daños en el
aparato u otros daños materiales.
El temporizador timeSWITCH 140 es un
temporizador bicanal con programa diario y semanal para el control temporal
ES
21Instrucciones de uso y de instalación del temporizador bicanal con programa semanal timeSWITCH 140 / 838312_03

6 Instucciones de instalación, 7 Indicaciones de seguridad y normativas
de una caldera Vaillant con o sin calentamiento de agua.
Cuando se usa el aparato conectado a un
calefactor combinado de Vaillant, puede
hacerse cargo de la programación de la
función de arranque en caliente (control
de la autorización de agua caliente). El
temporizador se monta en la parte
delantera de las calderas combinadas
ecoTEC de Vaillant.
Cualquier otro uso será considerado no
adecuado. El fabricante/distribuidor no
se responsabilizará de los daños causados por usos inadecuados. El servicio de
asistencia técnica y/o el propietario asumirán todo el riesgo.
El cumplimiento de las instrucciones de
22 Instrucciones de uso y de instalación del temporizador bicanal con programa semanal timeSWITCH 140 / 838312_03
uso y de instalación forma parte de la
utilización adecuada.
¡Atención!
Se prohíbe cualquier otro uso.
7 Indicaciones de seguri-
dad y normativas
Sólo un servicio de asistencia técnica
oficial, responsable del cumplimiento de
las normas y normativas vigentes, puede
instalar el regulador. No nos hacemos
responsables de los daños ocasionados
por ignorar estas instrucciones.

Indicaciones de seguridad y normativas 7, Montaje 8
7.1 Indicaciones de seguridad
¡Atención!
Peligro de daños en el aparato
por cortocircuito.
Antes de manipular el aparato
desconecte la alimentación de
corriente y asegúrese de que
ésta no puede volver a conectarse accidentalmente.
Extraiga o introduzca el temporizador de/en la carcasa sólo
cuando no haya tensión.
7.2 Normativas
- Código Técnico de la Edificación (CTE)
- Reglamento de Instalaciones Térmicas
en los Edificios (RITE)
- Reglamento de Electrotécnico de Baja
Tensión (REBT)
- Normativas regionales de cada
Comunidad Autónoma
- Ordenanzas Municipales
8 Montaje
La conexión a la caldera se realiza
mediante las clavijas de contacto del
lado posterior del temporizador. Debe
introducir el temporizador en la cavidad
prevista para ello en la caja de distribu-
ES
23Instrucciones de uso y de instalación del temporizador bicanal con programa semanal timeSWITCH 140 / 838312_03

8 Montaje
ción de la caldera para conectarlo eléctricamente a la caldera.
3
Leyenda
1 Cavidad en la caja de distribución
2 Temporizador
3 Cubierta
1
• Apague la caldera.
2
• Desenchufe el aparato de la corriente.
• Desprenda la cubierta (3) de la caja de
distribución.
FP
i
• Ajuste las cinco clavijas de contacto de
la parte posterior del temporizador (2)
a los contactos de la cavidad (1).
Fig. 8.1 Montar el temporizador
• Presione cuidadosamente el temporizador hasta que encaje en la cavidad.
24 Instrucciones de uso y de instalación del temporizador bicanal con programa semanal timeSWITCH 140 / 838312_03

Puesta en marcha 9
9 Puesta en marcha
• Conecte la caldera a la corriente.
• Ponga en marcha la caldera según las
instrucciones de uso y de instalación
correspondientes.
Debería activar el calendario en el nivel
del especialista para posibilitar el cambio
automático al horario de verano y de
invierno.
Hay otro nivel de uso para la asistencia
en caso de mantenimiento o diagnosis
destinado al servicio de asistencia técnica: el nivel de servicio y diagnóstico.
9.1 Nivel del especialista
(calendario)
Active el calendario programando la
fecha actual:
• Mantenga pulsada de tecla de progra-
mación “P” durante unos 10 segundos
para activar el nivel del especialista.
En la pantalla aparece el icono de llave.
Aparece el valor de programación día
(“Day”).
Ya puede programar el calendario (véase tabla 9.1).
ES
25Instrucciones de uso y de instalación del temporizador bicanal con programa semanal timeSWITCH 140 / 838312_03

9 Puesta en marcha
Pantalla Ajuste
Gire el botón de ajuste
para programar el día
actual (“Day” 1 – 31).
A continuación, pulse
el botón de ajuste una
vez para acceder al
valor de mes.
Gire el botón de ajuste
para programar el mes
actual (“Mon” 1 - 12).
A continuación, pulse
el botón de ajuste una
vez para acceder al
valor de año.
Tabla 9.1 Programar el calendario
• Pulse una vez la tecla “P” para salir
del nivel del especialista y acceder a la
indicación base.
La indicación salta automáticamente
Gire el botón de ajuste
para programar el año
(“Year”) actual.
después de 60 minutos del nivel del
especialista a la indicación base.
26 Instrucciones de uso y de instalación del temporizador bicanal con programa semanal timeSWITCH 140 / 838312_03

Puesta en marcha 9
9.2 Nivel de servicio/diagnóstico
En el nivel de servicio/diagnóstico se
puede comprobar las indicaciones de
pantalla y consultar la versión del software del temporizador.
• Pulse a la vez la tecla “P” y el botón
de ajuste durante unos 3 segundos
para acceder al nivel de servicio/diagnóstico.
En la pantalla aparece el icono de llave.
Ahora puede realizar los tests (véase
tabla 9.2).
Botón de
ajuste
Haga clic
con el botón
de ajuste.
Vuelva
hacer clic
con el botón
de ajuste.
Tabla 9.2 Nivel de servicio/diagnóstico
Posibilidad
de test
Test de
pantalla
Versión de
software
¿Qué sucede?
Se muestran
todos los elementos de pantalla.
Se indica la
versión del software.
• Pulse una vez la tecla “P” para salir
del nivel de servicio/diagnóstico y
acceder a la indicación base.
Después de 60 minutos, la indicación
salta automáticamente a la indicación
base.
ES
27Instrucciones de uso y de instalación del temporizador bicanal con programa semanal timeSWITCH 140 / 838312_03

10 Entrega al propietario
10 Entrega al propietario
Debe informar al propietario sobre la
manipulación y el funcionamiento del
temporizador. Utilice la lista de verificación siguiente:
Entrega Realizado
Entregue al propietario las instrucciones correspondientes y la documentación del
aparato para que las guarde.
Revise con el propietario las instrucciones de uso y conteste a sus preguntas.
Indíquele especialmente qué medidas de seguridad debe tener en cuenta.
Advierta al propietario que las instrucciones deben guardarse cerca de la caldera
con temporizador.
Tabla 10.1 Entrega al propietario
28 Instrucciones de uso y de instalación del temporizador bicanal con programa semanal timeSWITCH 140 / 838312_03

S.A.T. oficial y garantía 11
11 S.A.T. oficial y garantía
S.A.T. oficial
Vaillant cuenta con una extensa y competente red de Servicio de Asistencia
Técnica en toda España. Nuestra red le
asegura un apoyo total en todas las circunstancias, situaciones y lugares.
Cuando usted instala Vaillant, Vaillant le
asegura que su cliente quedará plenamente satisfecho.
Garantía del Fabricante
- De acuerdo con lo establecido en la
Ley 23/2003 de 10 de Julio de
Garantías en la Venta de Bienes de
Consumo, Vaillant se hace responsable
de las faltas de conformidad que se
manifiesten en un plazo de dos años
desde la entrega.
- La garantía de los repuestos tendrá
una duración de dos años desde la
fecha de entrega del aparato.
- Esta garantía es válida exclusivamente
dentro del territorio español.
Condiciones de garantía
Salvo prueba en contrario, se entenderá
que los bienes son conformes y aptos
para la finalidad con la que se adquieren,
siempre y cuando se cumplan las
siguientes condiciones:
1º El aparato garantizado deberá corres-
ponder a los aparatos que el fabrican-
ES
29Instrucciones de uso y de instalación del temporizador bicanal con programa semanal timeSWITCH 140 / 838312_03

11 S.A.T. oficial y garantía
te diseña expresamente para España,
y deberá ser instalado en España.
2ºTodas las posibles reparaciones debe-
rán ser efectuadas exclusivamente por
nuestro Servicio Técnico Oficial.
3º Todas las posibles reparaciones debe-
rán ser efectuadas exclusivamente
por nuestro Servicio Técnico Oficial
Vaillant.
4º Para la plena eficacia de la garantía,
será imprescindible que esté anotada
la fecha de compra y validada
mediante el sello y firma del establecimiento que realizó la venta.
30 Instrucciones de uso y de instalación del temporizador bicanal con programa semanal timeSWITCH 140 / 838312_03
5º El consumidor deberá informar a
Vaillant de la falta de conformidad
del bien, en un plazo inferior a dos
meses desde que tuvo conocimiento
de la misma.
La garantía excluye expresamente averías producidas por:
a) Uso inadecuado del bien, o no segui-
miento del procedimiento de instalación y mantenimiento, descrito en el
libro de instrucciones y demás documentación facilitada a tal efecto.
b)Sobrecarga de cualquier índole.
c) Manipulación de los equipos por perso-
nas no autorizadas.

12 Datos técnicos
Unidad Valor
Datos técnicos 12
Tensión de servicio U
Temperatura de funcionamiento máx.
Consumo de corriente mA < 17
Tipo de protección
Clase de protección
Tabla 12.1 Datos técnicos
V24
máx.
°C 50
IP 20
III
ES
31Instrucciones de uso y de instalación del temporizador bicanal con programa semanal timeSWITCH 140 / 838312_03


Para o utilizador e para o técnico especializado
Manual de instruções e de instalação
timeSWITCH 140
Temporizador de 2 canais com programa semanal
PT

Índice
Índice
1 Notas relativas à
documentação . . . . . . . . . . . . . . . 4
1.1 Guardar os documentos ............... 4
1.2 Símbolos utilizados ........................ 5
1.3 Validade do manual ....................... 5
Manual de instruções . . . . . . . . . . . . 6
2 Vista geral do aparelho . . . . . . . 6
2.1 Utilização adequada ...................... 6
2.2 Segurança ........................................ 7
2.3 Vista geral dos elementos de
comando ........................................... 8
2.4 Vista geral do mostrador ............. 9
3 Utilização . . . . . . . . . . . . . . . . . . 10
3.1 Regular o dia da semana e a
hora actual ...................................... 10
3.2 Regulação de fábrica .................... 10
3.3 Programar os tempos de aquecimento para a água quente e o
aquecimento (arranque quente) 11
3.4 Regular os modos de operação . 16
3.5 Funções especiais .......................... 17
3.6 Calendário anual ............................ 19
4 Botão de informação . . . . . . . . . 20
5 Reciclagem e eliminação . . . . . . 20
2
Manual de instruções e de instalação Temporizador de 2 canais com programa semanal timeSWITCH 140 / 838312_03

Índice
Manual de instalação . . . . . . . . . . . . . 21
6 Manual de instalação . . . . . . . . . 21
6.1 Notas relativas à instalação e
funcionamento................................ 21
6.2 Símbolo CE ...................................... 21
6.3 Utilização adequada ...................... 21
7 Indicações de segurança . . . . . . 23
7.1 Indicações de segurança .............. 23
8 Montagem . . . . . . . . . . . . . . . . . . 24
9 Colocação em funcionamento . . 25
9.1 Nível do técnico especializado
(calendário anual) .......................... 26
9.2 Nível de assistência/diagnóstico 27
10 Entrega ao utilizador . . . . . . . . . 29
11 Garantia. . . . . . . . . . . . . . . . . . . . 30
12 Dados técnicos . . . . . . . . . . . . . . 30
PT
3Manual de instruções e de instalação Temporizador de 2 canais com programa semanal timeSWITCH 140 / 838312_03

1 Notas relativas à documentação
1 Notas relativas à
documentação
As seguintes notas pretendem oferecer
auxílio durante toda a documentação.
Em combinação com este manual de
instalação e de instruções são válidos
outros documentos.
Não nos responsabilizamos por danos
resultantes do incumprimento deste
manual.
Documentos a serem respeitados
Manuais de instruções, de instalação e
de montagem de todos os componentes
da unidade.
4 Manual de instruções e de instalação Temporizador de 2 canais com programa semanal timeSWITCH 140 / 838312_03
1.1 Guardar os documentos
Entregue este manual de instruções e de
instalação ao utilizador da unidade. Este
será responsável pela sua conservação,
para que o manual esteja disponível em
caso de necessidade.

Notas relativas à documentação 1
1.2 Símbolos utilizados
Respeite as indicações de segurança
deste manual.
Em seguida, são explicados os símbolos
utilizados no texto:
Atenção!
Possíveis situações perigosas
para o produto e ambiente!
Nota!
Informações úteis e notas!
• Símbolo para uma actividade necessária.
1.3 Validade do manual
Este manual é válido exclusivamente
para os aparelhos com os números de
artigo seguintes:
306760
Poderá consultar o número de artigo do
seu aparelho na placa de identificação
do mesmo.
PT
5Manual de instruções e de instalação Temporizador de 2 canais com programa semanal timeSWITCH 140 / 838312_03

2 Vista geral do aparelho
Manual de instruções
2 Vista geral do aparelho
2.1 Utilização adequada
O temporizador de 2 canais
timeSWITCH 140 está construído de
acordo com o estado tecnológico actual
e as normas de segurança técnica em
vigor. Contudo, em caso de utilização
não adequada, poderão ocorrer perigos
para o corpo e a vida do utilizador ou de
terceiros ou a danificação dos aparelhos
ou de outros bens materiais.
6 Manual de instruções e de instalação Temporizador de 2 canais com programa semanal timeSWITCH 140 / 838312_03
O temporizador timeSWITCH 140 é um
temporizador de 2 canais com programa
diário e semanal para o comando temporal de um aparelho de aquecimento
Vaillant com e sem a preparação da água
quente.
Se o aparelho for utilizado em conjunto
com um aparelho de aquecimento combinado Vaillant, ele pode assumir a programação da função do arranque quente
(comando da libertação da água quente).
Uma outra utilização ou uma utilização
para além da referida é considerada
como não adequada. O fabricante/fornecedor não se responsabiliza pelos danos
resultantes desse facto. O risco é da

exclusiva responsabilidade do técnico
especializado e/ou do utilizador.
O cumprimento do manual de instruções
e de instalação fazem parte da utilização
adequada.
Atenção!
Qualquer uso indevido é proibido!
2.2 Segurança
O temporizador tem de ser instalado por
um técnico qualificado que será responsável pelo cumprimento das normas e
prescrições relevantes.
Vista geral do aparelho 2
PT
7Manual de instruções e de instalação Temporizador de 2 canais com programa semanal timeSWITCH 140 / 838312_03

2 Vista geral do aparelho
2.3 Vista geral dos elementos de
comando
FP
i
Fig. 2.1 Vista geral dos elementos de comando
Legenda
1 Mostrador
2 Regulador (rodar e clicar)
1
I Botão de informação
F Botão da função especial
P Botão da programação/função calendário
2
8 Manual de instruções e de instalação Temporizador de 2 canais com programa semanal timeSWITCH 140 / 838312_03

Vista geral do aparelho 2
2.4 Vista geral do mostrador
10
9
8
7
Fig. 2.2 Vista geral do mostrador
Legenda
1 Programação dos tempos
2 Nível do técnico especializado
1
2
3
4
5
6
e de assistência/diagnóstico
3 Indicação aparelho de aquecimento em fun-
cionamento
4 Nível de informação
5 Canal de água quente (pedido térmico)
6 Canal de aquecimento (pedido térmico)
7 Hora
8 Dias da semana
9 Modos de operação
10 Funções especiais
PT
9Manual de instruções e de instalação Temporizador de 2 canais com programa semanal timeSWITCH 140 / 838312_03

3 Utilização
3 Utilização
Na indicação básica são exibidos os canais
de aquecimento e de água quente (apenas
quando foi pedido um canal de aquecimento ou água quente no tempo programado), o dia da semana actual, as horas
actuais e a função especial (se activada).
3.1 Regular o dia da semana e a
hora actual
A regulação do dia da semana e da hora
actual é realizada a partir da indicação
básica.
• Pressione o regulador três vezes até o
dia da semana começar a piscar.
10 Manual de instruções e de instalação Temporizador de 2 canais com programa semanal timeSWITCH 140 / 838312_03
• Rode o regulador para seleccionar o
dia pretendido.
• Volte a pressionar o regulador até a
indicação das horas começar a piscar.
• Rode o regulador para seleccionar a
hora actual.
• Volte a pressionar o regulador até a
indicação dos minutos começar a piscar.
• Rode o regulador para ajustar os minutos.
Após aprox. 5 segundos, a indicação no
mostrador comuta novamente para a
indicação básica.
3.2 Regulação de fábrica
O temporizador é fornecido com um programa base regulado de fábrica (Tab. 3.1).
O comando do aquecimento e da água

Utilização 3
quente executa este programa base até à
sua alteração.
Janela de
tempo
H1 Mo–Fr 6:00 22:00
H2 - - H3 - - H1 Sa 7:00 23:00
H2 - - H3 - - H1 Su 7:00 23:00
H2 - - H3 - - -
Tab. 3.1 Programa base aquecimento/
Dia / bloco da
semana
água quente
Hora
início
Hora
fim
3.3 Programar os tempos de aque-
cimento para a água quente e o
aquecimento (arranque quente)
Para cada canal (aquecimento ou água
quente), existe a possibilidade de programar três perfis de tempo (H1, H2 e
H3):
– para dias individuais (Segunda-feira
(Mo) até Domingo (Su))
– para um grupo de dias, p.ex. 5 dias
(Segunda-feira (Mo) até Sexta-feira
(Fr)), 2 dias (Sábado (Sa) até Domingo
(Su)) ou 7 dias (Segunda-feira (Mo) até
Domingo (Su)).
PT
11Manual de instruções e de instalação Temporizador de 2 canais com programa semanal timeSWITCH 140 / 838312_03

3 Utilização
Aquecimento Mo Tu We Th Fr Sa Su
H1
H2
H3
Água quente Mo Tu We Th Fr Sa Su
H1
H2
H3
Tab. 3.2 Perfis de tempo para aquecimento e
Início
Fim
Início
Fim
Início
Fim
Início
Fim
Início
Fim
Início
Fim
água quente
12 Manual de instruções e de instalação Temporizador de 2 canais com programa semanal timeSWITCH 140 / 838312_03

Utilização 3
Nota!
Se pretender alterar o programa
base regulado de fábrica, os seus
perfis de tempo pessoais podem
ser introduzidos nesta tabela.
Para alterar o programa base, é necessário executar os seguintes passos:
• Pressione o botão da programação
“P” para activar o nível de programação.
O mostrador exibe o símbolo P e o símbolo do elemento de aquecimento pisca.
• Rode o regulador para seleccionar o
canal de aquecimento (símbolo elemento de aquecimento) ou o canal da
água quente (símbolo torneira) pretendido.
• Volte a premir o regulador para seleccionar o perfil de tempo (H1, H2 ou H3).
O mostrador exibe o dia da semana, a
hora início e a hora fim.
Se voltar a pressionar o botão “P”, a
indicação comuta novamente para a
indicação básica.
Na seguinte tabela estão novamente
descritos os vários passos de modo elucidativo:
PT
13Manual de instruções e de instalação Temporizador de 2 canais com programa semanal timeSWITCH 140 / 838312_03

3 Utilização
Mostrador Passos necessários
Pressione o botão da
programação “P”.
Rode o regulador
para seleccionar o
canal pretendido
(aquecimento ou água
quente).
Pressione o regulador.
O cursor assinala o
perfil de tempo.
Rode o regulador para
seleccionar a janela
de tempo pretendida
H1, H2 ou H3.
Pressione o regulador.
A indicação dos dias
da semana pisca.
Rode o regulador para
seleccionar um dia ou
vários dias.
Poderá seleccionar o
seguinte:
– Dias individuais:
Mo = 2ª feira
Tu = 3ª feira
We = 4ª feira
Th = 5ª feira
Fr = 6ª feira
Sa = Sábado
Su = Domingo
– 5 dias: (Mo – Fr)
– 2 dias: (Sa – Su)
– 7 dias: (Mo – Su)
14 Manual de instruções e de instalação Temporizador de 2 canais com programa semanal timeSWITCH 140 / 838312_03

Utilização 3
Pressione o regulador
para alterar a hora
início.
A indicação das horas
pisca.
Rode o regulador para
seleccionar uma hora.
Volte a pressionar o
regulador.
Rode o regulador
para seleccionar os
minutos.
Pressione o regulador
para alterar a hora
fim.
A indicação das horas
pisca.
Rode o regulador para
seleccionar uma hora.
Volte a pressionar o
regulador.
Rode o regulador
para seleccionar os
minutos.
Pressione o botão “P”
para voltar à indicação
básica.
Tab. 3.3 Regular os parâmetros
PT
15Manual de instruções e de instalação Temporizador de 2 canais com programa semanal timeSWITCH 140 / 838312_03

3 Utilização
3.4 Regular os modos de operação
A regulação do modo de operação do
aparelho de aquecimento é realizada a
partir da indicação básica.
• Pressione o regulador uma vez para
seleccionar o modo de operação do
canal do aquecimento.
• Pressione o regulador duas vezes para
seleccionar o modo de operação do
canal da água quente.
A indicação para o modo de operação
actual pisca.
• Rode o regulador para seleccionar o
modo de operação pretendido.
16 Manual de instruções e de instalação Temporizador de 2 canais com programa semanal timeSWITCH 140 / 838312_03
Após aprox. 5 segundos, a indicação comuta novamente para a indicação básica.
Modos de operação possíveis
Automático
A operação aquecimento/água
quente comuta de acordo com os
tempos programados entre operacional e desligado.
Aquecimento
A operação aquecimento/água
quente permanece constantemente no estado operacional.
Desligado
A operação aquecimento/água
quente permanece constantemente no estado desligado.

Utilização 3
3.5 Funções especiais
• Pressione o botão “F” para seleccionar
as funções especiais (ver Tab. 3.4):
Mostrador Passos necessários
Função festa
Pressione o botão da
função especial “F”
uma vez para regular a
função festa.
O programa do temporizador é desactivado
temporariamente.
Independentemente se
o temporizador está
no modo de operação
operacional ou desligado, o funcionamento
permanece ligado até
ao próximo perfil de
tempo (H1 – H3).
PT
17Manual de instruções e de instalação Temporizador de 2 canais com programa semanal timeSWITCH 140 / 838312_03

3 Utilização
Depois, o programa do
temporizador volta a
ser activado.
Após aprox. 10 segundos, a indicação comuta para a indicação
básica.
Se pretender desactivar a função festa,
apenas terá de pressionar o botão “F”.
A função festa apenas
está disponível no
modo de operação
Automático (
).
Função férias
Pressione o botão da
função especial “F”
duas vezes para regular
a função férias.
Rodando o regulador,
ajuste o número de dias
em que o programa do
temporizador deve ser
desactivado.
O funcionamento permanece no modo de
operação desligado até
à meia noite do último
dia regulado e, depois,
o programa do temporizador é novamente
activado.
18 Manual de instruções e de instalação Temporizador de 2 canais com programa semanal timeSWITCH 140 / 838312_03

Utilização 3
Após aprox. 10 segundos,
a indicação comuta
para a indicação básica.
Se pretender desactivar
a função férias, apenas
terá de pressionar o
botão “F”.
Tab. 3.4 Funções especiais
3.6 Calendário anual
O temporizador está equipado com um
calendário anual que possibilita a mudança
automática da hora de Verão/Inverno. O
calendário anual tem de ser activado no
nível do técnico especializado (Cap. 9.1).
Se o calendário anual estiver activado:
• Pressione o regulador até o mostrador
exibir o dia (“Day”), o mês (“Mon”) ou
o ano (“Year”).
O valor seleccionado pisca.
• Rode o regulador para alterar o respectivo valor intermitente.
Após aprox. 5 segundos, a indicação comuta novamente para a indicação básica.
PT
19Manual de instruções e de instalação Temporizador de 2 canais com programa semanal timeSWITCH 140 / 838312_03

4 Botão de informação, 5 Reciclagem e eliminação
4 Botão de informação
• Pressione o botão de infirmação “I”
para activar o nível de informação.
O símbolo da informação é exibido no
mostrador. Se pressionar várias vezes o
botão “I”, existe a possibilidade de consultar as seguintes informações:
– Nome do timeSWITCH (TS 140)
– Indicação Dia/Mês/Ano (se o calendá-
rio anual estiver activado)
– Programas de tempo regulados para o
aquecimento (cada janela de tempo
em cada dia)
Programas de tempo regulados para a água
–
quente (cada janela de tempo em cada dia)
20 Manual de instruções e de instalação Temporizador de 2 canais com programa semanal timeSWITCH 140 / 838312_03
5 Reciclagem e eliminação
O temporizador como todos os acessórios
não pertencem ao lixo doméstico. Assegurese de que o seu aparelho antigo e,
eventualmente, os acessórios existentes
sejam eliminados adequadamente.

Manual de instalação 6
Manual de instalação
6 Manual de instalação
6.1 Notas relativas à instalação e
funcionamento
A montagem, a conexão eléctrica, as
regulações no aparelho, bem como a primeira colocação em funcionamento apenas podem ser realizadas por um electricista ou técnico qualificado.
6.2 Símbolo CE
Com o símbolo CE documenta-se que o
temporizador de 2 canais timeSWITCH
140 em combinação com os aparelhos de
aquecimento Vaillant cumpre as exigências fundamentais da directiva relativa à
compatibilidade electromagnética
(Directiva 89/336/CEE) e a directiva
sobre baixa tensão (Directiva 73/23/CEE).
6.3 Utilização adequada
O temporizador de 2 canais timeSWITCH
140 está construído de acordo com o
estado tecnológico actual e as normas
de segurança técnica em vigor. Contudo,
em caso de utilização não adequada,
poderão ocorrer perigos para o corpo
e a vida do utilizador ou de terceiros ou
a danificação dos aparelhos ou de
outros bens materiais.
PT
21Manual de instruções e de instalação Temporizador de 2 canais com programa semanal timeSWITCH 140 / 838312_03

6 Manual de instalação
O temporizador timeSWITCH 140 é um
temporizador de 2 canais com programa
diário e semanal para o comando temporal
de um aparelho de aquecimento Vaillant
com e sem a preparação da água quente.
Se o aparelho for utilizado em conjunto
com um aparelho de aquecimento combinado Vaillant, ele pode assumir a programação da função do arranque quente
(comando da libertação da água quente).
O temporizador é montado na parte da
frente dos aparelhos de aquecimento
combinados ecoTEC da Vaillant.
Uma outra utilização ou uma utilização
para além da referida é considerada
como não adequada. O fabricante/fornecedor não se responsabiliza pelos danos
22 Manual de instruções e de instalação Temporizador de 2 canais com programa semanal timeSWITCH 140 / 838312_03
resultantes desse facto. O risco é da
exclusiva responsabilidade do técnico
especializado e/ou do utilizador.
O cumprimento do manual de instruções
e de instalação fazem parte da utilização
adequada.
Atenção!
Qualquer uso indevido é proibido!

Indicações de segurança 7
7 Indicações de segurança
O aparelho tem de ser instalado por uma
empresa técnica reconhecida que será
responsável pelo cumprimento das normas e prescrições existentes. Não nos
responsabilizamos por danos resultantes
do incumprimento deste manual.
7.1 Indicações de segurança
Atenção!
Perigo de danos no aparelho
devido a curto-circuito.
Antes dos trabalhos no aparelho,
desconecte a alimentação eléctrica e bloquei-a contra nova
conexão.
Conecte ou desconecte o temporizador e o aparelho de aquecimento apenas em estado sem tensão.
PT
23Manual de instruções e de instalação Temporizador de 2 canais com programa semanal timeSWITCH 140 / 838312_03

8 Montagem
8 Montagem
A conexão com o aparelho de aquecimento é realizada através dos pinos de
3
1
2
contacto localizados na parte traseira do
temporizador. Para estabelecer a ligação
eléctrica ao aparelho de aquecimento,
o temporizador tem de ser inserido na
FP
i
cavidade existente na caixa de distribuição do aparelho de aquecimento.
Fig. 8.1 Montar o temporizador
Legenda
1 Cavidade na caixa de distribuição
2 Temporizador
3 Tampa de cobertura
24 Manual de instruções e de instalação Temporizador de 2 canais com programa semanal timeSWITCH 140 / 838312_03

Montagem 8, Colocação em funcionamento 9
• Desligue o aparelho de aquecimento.
• Separe o aparelho da alimentação da
corrente eléctrica.
• Solte a tampa de cobertura (3) da
caixa de distribuição.
• Alinhe os pinos de contacto localizados na parte traseira do temporizador
(2) com os contactos da cavidade (1).
• Pressione cuidadosamente o temporizador até ele engrenar na cavidade.
9 Colocação em
funcionamento
• Ligue a alimentação da corrente eléctrica do aparelho de aquecimento.
• Coloque o aparelho de aquecimento
em funcionamento de acordo com o
manual de instruções e de instalação.
O calendário anual deve ser activado no
nível do técnico especializado para possibilitar a mudança automática da hora
de Verão/Inverno.
Para auxiliar em caso de assistência
e diagnóstico, existe um outro nível de
operação para o técnico especializado,
o nível de assistência e diagnóstico.
PT
25Manual de instruções e de instalação Temporizador de 2 canais com programa semanal timeSWITCH 140 / 838312_03
9 Colocação em funcionamento
9.1 Nível do técnico especializado
(calendário anual)
Active o calendário anual ajustando
a data actual:
• Mantenha o botão da programação
“P” premido durante aprox. 10 segun-
Mostrador Regulação
Rode o regulador para
regular o dia actual
(“Day”, 1 – 31).
Depois, pressione o
regulador uma vez
para activar o valor de
regulação do mês.
dos para activar o nível do técnico
especializado.
O mostrador exibe o símbolo da chave
de parafusos. O valor de regulação do
dia (“Day”) é exibido.
Agora, poderá ajustar o calendário anual
(ver Tab 9.1).
Rode o regulador para
regular o mês actual
(“Mon”, 1 – 12).
Em seguida, pressione
o regulador uma vez
para activar o valor de
regulação do ano.
26 Manual de instruções e de instalação Temporizador de 2 canais com programa semanal timeSWITCH 140 / 838312_03

Colocação em funcionamento 9
Rode o regulador para
regular o ano actual
(“Year”).
Tab. 9.1 Regular o calendário anual
• Pressione o botão “P” uma vez para
abandonar o nível do técnico especializado e voltar à indicação básica.
Após 60 minutos, a indicação comuta
automaticamente do nível do técnico
especializado para a indicação básica.
9.2 Nível de assistência/diagnóstico
No nível de assistência/diagnóstico,
existe a possibilidade de verificar as
indicações do mostrador e a versão de
software do temporizador.
• Pressione simultaneamente o botão
“P” e o regulador durante aprox. 3
segundos para activar o nível de assistência/diagnóstico.
O mostrador exibe o símbolo da chave
de parafusos. Agora poderá executar
os testes (ver Tab 9.2).
PT
27Manual de instruções e de instalação Temporizador de 2 canais com programa semanal timeSWITCH 140 / 838312_03

9 Colocação em funcionamento
Regulador
Clicar no
regulador.
Voltar a
clicar no
regulador.
Tab. 9.2 Nível de assistência/diagnóstico
Possibilidade
de teste
Teste do mostrador
Versão do software
O que acontece?
Todos os elementos do mostrador
são exibidos.
A versão do software é exibida.
• Pressione o botão “P” uma vez para
abandonar o nível de assistência/diagnóstico e voltar à indicação básica.
Após 60 minutos, a indicação comuta
automaticamente para a indicação básica.
28 Manual de instruções e de instalação Temporizador de 2 canais com programa semanal timeSWITCH 140 / 838312_03

Entrega ao utilizador 10
10 Entrega ao utilizador
O utilizador tem de ser informado sobre
o manuseamento e o funcionamento do
temporizador. Por favor, utilize esta lista
de verificação:
Entrega Realizado
Entregue os manuais e os papéis do aparelho destinados ao utilizador para o próprio guardar os mesmos.
Em conjunto com o utilizador, consulte o manual de instruções e, eventualmente,
responda às suas questões.
Informe o utilizador, especialmente em relação às indicações de segurança que ele
terá de respeitar.
Alerte o utilizador para o facto dos manuais serem guardados nas proximidades
do aparelho de aquecimento com o temporizador.
Tab. 10.1 Entrega ao utilizador
PT
29Manual de instruções e de instalação Temporizador de 2 canais com programa semanal timeSWITCH 140 / 838312_03

11 Garantia, 12 Dados técnicos
11 Garantia
A garantia deste produto está ao abrigo
12 Dados técnicos
Unidade Valor
da legislação em vigor.
Tensão de serviço U
Temperatura de funcionamento máx.
Consumo de corrente mA
Tipo de protecção
Classe de protecção
Tab. 12.1 Dados técnicos
V24
máx
°C 50
< 17
IP 20
III
30 Manual de instruções e de instalação Temporizador de 2 canais com programa semanal timeSWITCH 140 / 838312_03

Kullanıcı ve Vaillant yetkili servisi için
Kullanım ve montaj kılavuzu
timeSWITCH 140
Isıtma ve sıcak su için haftalık programlama saati
TR

İçindekiler
İçindekiler
1 Kılavuzlar ile ilgili bilgiler . . . . . 4
1.1 Dokümanların saklanması ............ 4
1.2 Kullanılan semboller ...................... 4
1.3 Kılavuzun geçerliliği ...................... 5
Kullanım kılavuzu . . . . . . . . . . . . . . . 6
2 Cihaz ile ilgili bilgiler . . . . . . . . . 6
2.1 Amacına uygun kullanım .............. 6
2.2 Emniyet ........................................... 7
2.3 Kumanda elemanlarına genel
bakış .................................................. 8
2.4 Ekrana genel bakış ........................ 9
2
Isıtma ve sıcak su için haftalık programlama saati kullanım ve montaj kılavuzu timeSWITCH 140 / 838312_03
3 Kullanım . . . . . . . . . . . . . . . . . . . 10
3.1 Güncel günün ve saatin
ayarlanması ..................................... 10
3.2 Fabrika ayarı ................................... 10
3.3 Kalorifer ve sıcak su için ısıtma
zamanlarının programlanması
(sıcak start) ..................................... 11
3.4 İşletim modunun ayarlanması .... 16
3.5 Özel fonksiyonlar .......................... 16
3.6 Takvim .............................................. 19
4 Bilgi tuşu . . . . . . . . . . . . . . . . . . . 19
5 Geri dönüşüm ve atıkların
yok edilmesi . . . . . . . . . . . . . . . 20

İçindekiler
Montaj kılavuzu . . . . . . . . . . . . . . . . . 21
6 Montaj ve işletim hakkında
uyarılar . . . . . . . . . . . . . . . . . . . . 21
6.1 CE İşareti .......................................... 21
6.2 Amacına uygun kullanım .............. 21
7 Emniyet uyarıları ve
talimatlar . . . . . . . . . . . . . . . . . . 22
7.1 Emniyet uyarıları ............................ 23
7.2 Şartnameler, Kurallar ve
Standartlar ...................................... 23
8 Montaj . . . . . . . . . . . . . . . . . . . . . 24
9 Devreye Alma . . . . . . . . . . . . . . . 25
9.1 Yetkili satıcı düzeyi (takvim) ....... 26
9.2 Servis-/Arıza teşhis düzeyi .......... 28
10 Kullanıcıya teslim edilmesi . . . . 29
11 Müşteri servisi ve garanti . . . . . 30
12 Teknik Bilgiler . . . . . . . . . . . . . . . 31
TR
3Isıtma ve sıcak su için haftalık programlama saati kullanım ve montaj kılavuzu timeSWITCH 140 / 838312_03

1 Kılavuzlar ile ilgili bilgiler
1 Kılavuzlar ile ilgili bilgiler
Aşağıdaki uyarılar bütün kılavuzlar için
yol gösterici niteliğindedir. Bu montaj ve
kullanım kılavuzu ile bağlantılı olarak
başka dokümanlar da geçerlidir.
Bu kılavuzlara uyulmaması sonucu
oluşacak hasarlardan sorumluluk kabul
edilmez.
Birlikte geçerli olan dokümanlar
Tüm sistem elemanlarının kullanım,
kurulum ve montaj kılavuzları.
4 Isıtma ve sıcak su için haftalık programlama saati kullanım ve montaj kılavuzu timeSWITCH 140 / 838312_03
1.1 Dokümanların saklanması
Bu kullanım ve montaj kılavuzunu kullanıcıya verin. Bu kılavuz kullanıcı tarafından gerektiğinde kullanılmak üzere saklanacaktır.
1.2 Kullanılan semboller
Bu kılavuzdaki emniyet uyarılarını dikkate alın.
Aşağıda, metinlerde kullanılan semboller
açıklanmıştır:

Dikkat!
Ürün ve çevre için tehlikeli
durum olasılığı!
Uyarı!
Faydalı bilgiler ve uyarılar!
• Gerekli bir etkinlik sembolü.
1.3 Kılavuzun geçerliliği
Bu kullanım kılavuzu sadece aşağıdaki
ürün numaralı cihazlar için geçerlidir:
306760
Cihazınızın ürün numarasını tip etiketinden okuyabilirsiniz.
Kılavuzlar ile ilgili bilgiler 1
TR
5Isıtma ve sıcak su için haftalık programlama saati kullanım ve montaj kılavuzu timeSWITCH 140 / 838312_03

2 Cihaz ile ilgili bilgiler
Kullanım kılavuzu
2 Cihaz ile ilgili bilgiler
2.1 Amacına uygun kullanım
Isıtma ve sıcak su için haftalık programlama saati timeSWITCH 140 tekniğin en
son durumuna ve genel olarak kabul
edilmiş emniyet tekniği kurallarına göre
üretilmiştir. Buna rağmen uygunsuz kullanımlarda kullanıcının veya üçüncü
şahısların hayati tehlikesi veya cihazların
veya diğer maddi eşyaların hasar görmeleri söz konusudur.
Program saati timeSWITCH 140, direkt
sıcak su veren veya vermeyen bir
6 Isıtma ve sıcak su için haftalık programlama saati kullanım ve montaj kılavuzu timeSWITCH 140 / 838312_03
Vaillant ısıtıcı cihazının zamana bağlı
kumanda edilebilmesi için ısıtma ve sıcak
su için günlük veya haftalık programlama saatidir.
Cihaz, bir Vaillant ısıtma cihazı ile birlikte
kullanılıyorsa, sıcak start işlevinin programlanması (sıcak su onayının kumanda
edilmesi) yapılabilir.
Bunun dışındaki her türlü kullanım amacına uygun olmayan kullanım olarak
tanımlanır. Bu durumda sorumluluk
tümüyle kullanıcıya aittir. Riski tamamen
uzman tesisatçı ve/veya kullanıcı üstlenmektedir.
Kurallara uygun kullanıma kullanım ve
 Loading...