

Page 1
Operator's Guide to the
AV Bridge MATRIX PRO
AV Encoder
Document 411-0020-33 Rev B
March 2021
Page 2

Contents
Overview 1
About this Guide 1
Features 1
A Quick Look at the AV Encoder 2
Front Panel 2
Using the Front Panel for Basic Operation 3
Muting Audio and Video from the Front Panel 3
Front Panel Display Menu 3
User Access to the Web Interface 5
Muting Audio or Video from the Web Interface 6
Working with Audio 6
Selecting Cameras 7
Selecting a PIP Source and Layout 7
Moving to Camera Presets 8
Controlling Pan, Tilt, Zoom, and Focus 8
About Viewing Streams 9
Working with Macros 9
Going to Standby (Low Power) Mode 10
ii
Page 3

Overview
This guide provides information about the AV Bridge MATRIX PRO AV encoder:
n 999-8230-000 – North America
n 999-8230-001 – Europe and UK
n 999-8230-009 – Australia and New Zealand
About this Guide
This guide covers:
n The controller's physical features
n Console operation
n Basic troubleshooting
It does not include installation or system administration and setup. For complete product information, see
the Complete Manual for the AV Bridge MATRIX PRO AV Encoder, which includes unpacking and
installation, system administration, configuration, and technical specifications.
Features
Inputs and Outputs:
n Quick-Connect inputs for three Vaddio cameras
n Video input for computer or other video source
n HDMI output
n Four EasyMic microphone inputs
n Four additional balanced mic/line inputs with 48 V phantom power
n Four balanced audio outputs
n Simultaneous USB and IP streaming
n External RS-232 control input
Cameras and Video:
n Automatically identifies and configures for Vaddio cameras
n Access to settings stored on each connected camera
n Independently configurable output resolutions
n Configurable picture-in-picture (PIP) for conferencing
n Split screen – top/bottom or quad split showing all four video inputs simultaneously
n Seamless video transitions with software adjustable transition time - cross-fades and straight cuts
Audio:
n Automatic audio mixing with controls to to manage audio levels manually if desired
n Acoustic echo cancellation with selectable AEC reference
n Assignable chairman priority gives one microphone a 3dB boost over the others
n Crosspoint gain configurable separately for each point in the audio matrix
Control
n Browser-based web interface for operation, configuration and system administration
n Triggers for programmed actions such as changing the video source, moving a camera to one of its
presets, and most other operations:
o
Up to 10 external hardware trigger inputs
o
Up to 50 software triggers
o
Up to four EasyMIC MicPOD One Touch triggers
1
Page 4
Operator's Guide to the AV Bridge MATRIX PRO AV Encoder
A Quick Look at the AV Encoder
Here's what all the controls do, and what all the connectors are for.
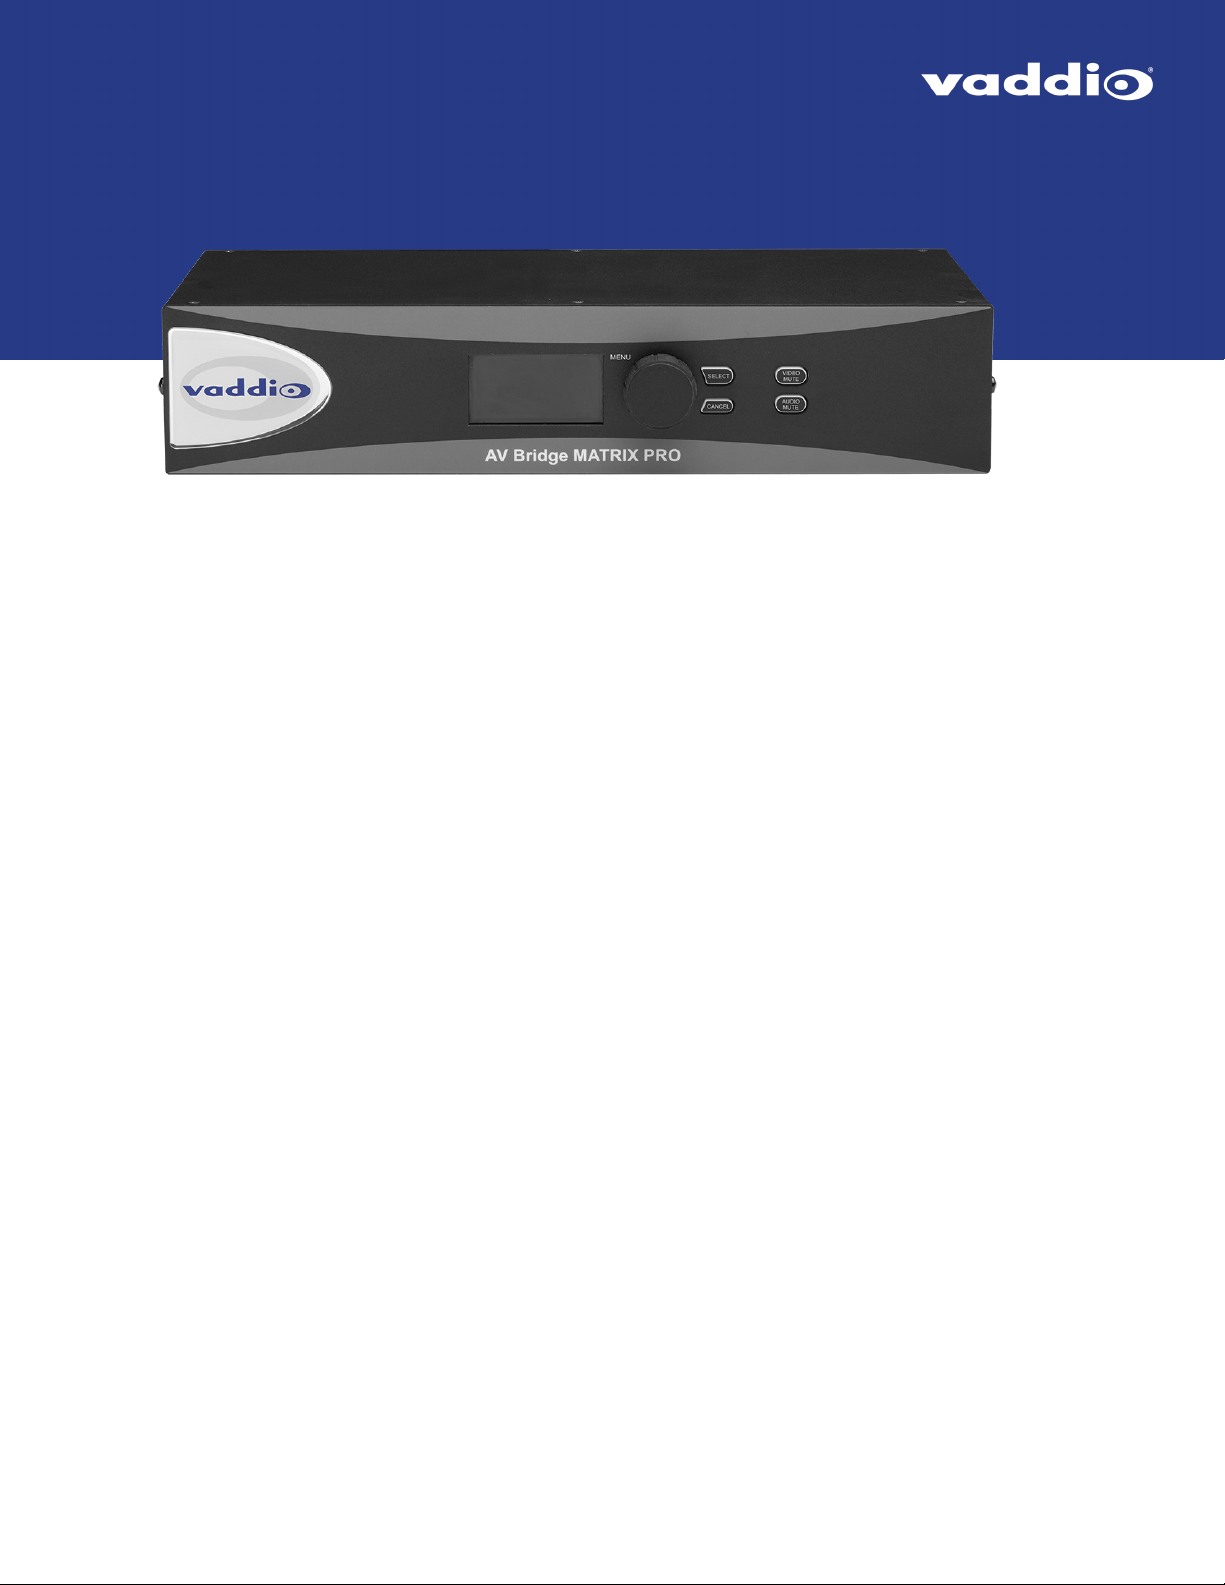
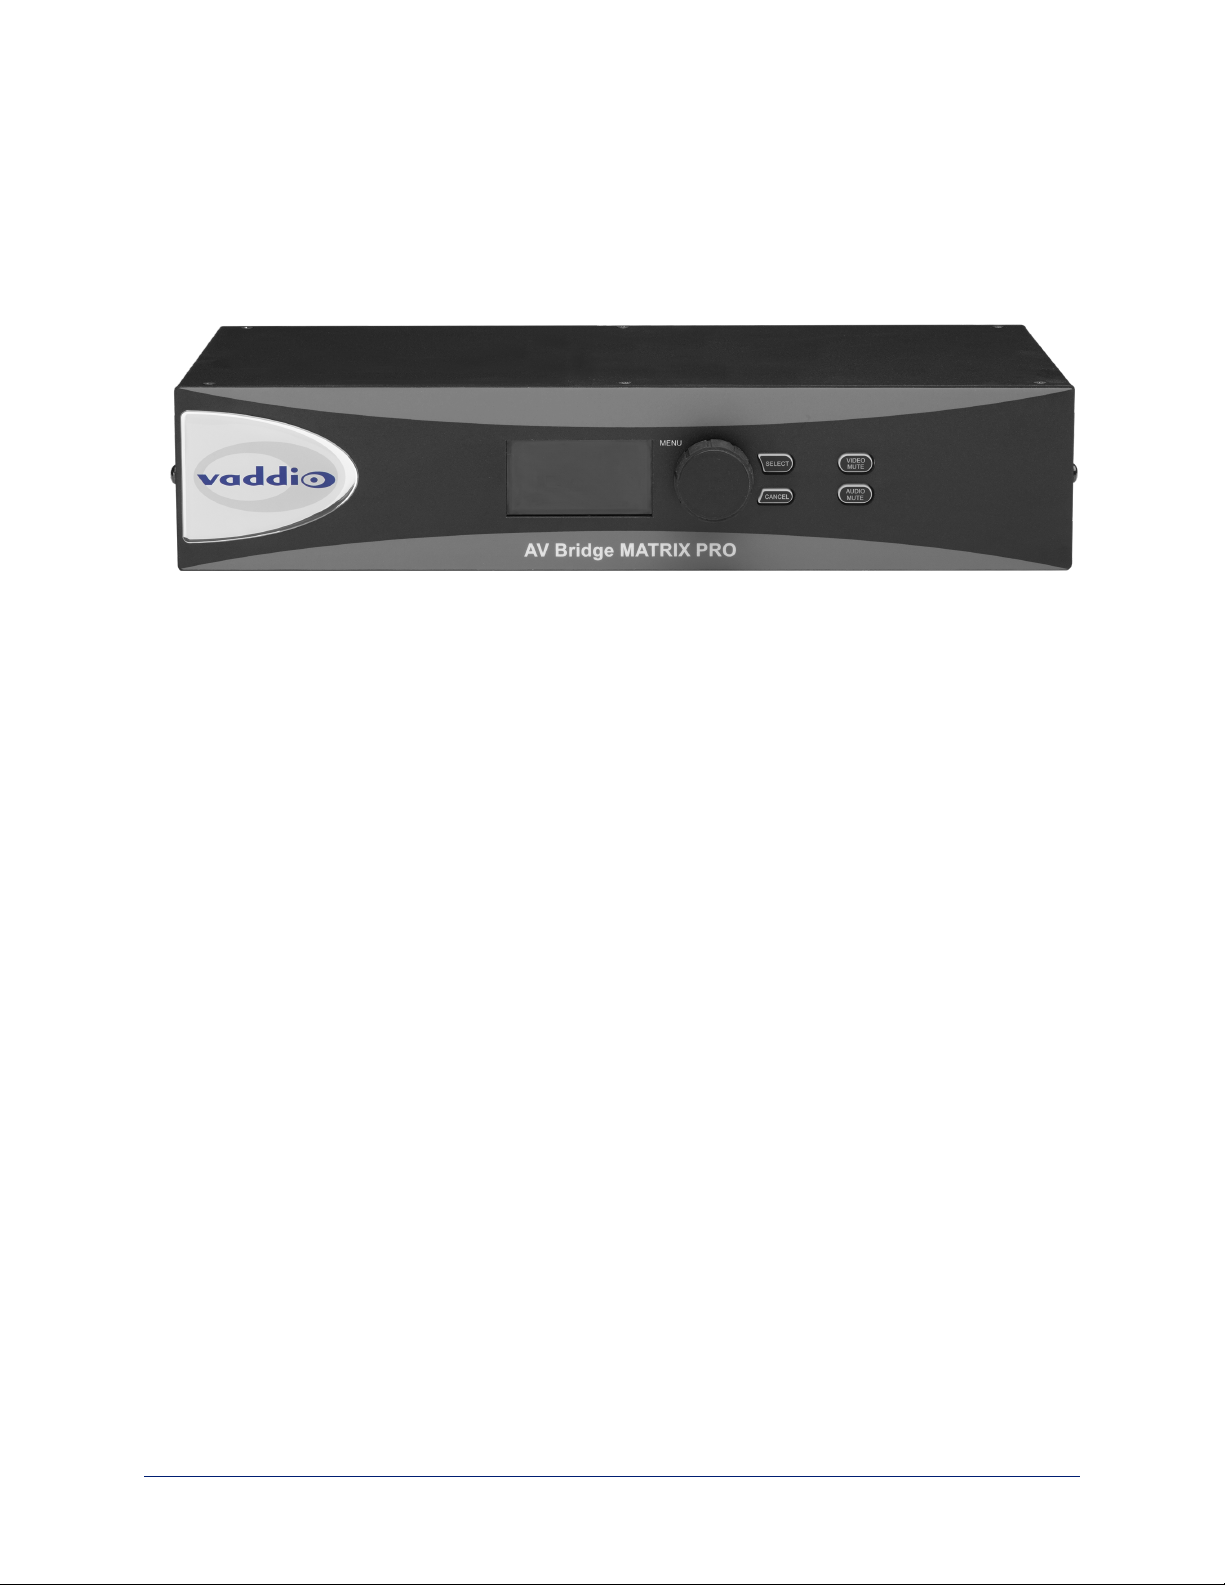
Front Panel
The front panel controls may be locked by the administrator.
n 8-line illuminated display – View basic operation and configuration menu and system information
n Menu knob – Navigate the operation/configuration menu
n Select and Cancel buttons – Work with the operation/configuration menu
n Video Mute button – Stop sending video. Press the button again to resume sending video from the
selected source.
n Audio Mute button – Stop sending audio. Press the button again to resume sending audio.
n Dimensionally enhanced puffy badge – We have spared no expense to provide a lovely, dimensionally
enhanced, puffy badge to enhance your visual experience. It's quite shiny. We hope you'll enjoy it.
2
Page 5

Operator's Guide to the AV Bridge MATRIX PRO AV Encoder
Using the Front Panel for Basic Operation
The front panel provides basic information and controls.
Note
The administrator has the option to lock the front panel.
Muting Audio and Video from the Front Panel
You may choose to mute audio, video, or both for privacy, or while preparing the room for a meeting or other
event.
Audio mute disables the microphone inputs and the audio portion of the stream. It does not disable PC
audio input or HDMI audio output; if you mute audio while playing content from a PC, the audio portion of
the content is not muted.
Video mute disables all video outputs and sends the selected video mute pattern – either black video or
color bars.
Front Panel Display Menu
The illuminated display presents a menu of basic information and controls, including:
n Video source for the program output
n Volume settings for audio inputs and outputs
n Information on streaming, network settings, and firmware versions
To work with the front panel display menu:
n Use the menu knob to navigate through the menu. The > symbol shows what will be selected when you
press the Select button.
n Press the Select button to open the desired sub-menu or select the desired option.
n To return to the main menu, press the Cancel button.
Video Select: Control. This menu indicates the current source of the program output with the * symbol.
Use the menu knob and Select button to select a different program source
3
Page 6

Operator's Guide to the AV Bridge MATRIX PRO AV Encoder
Audio Inputs and Audio Outputs: Control. These menus display the current volume setting for the
selected item. Use the menu knob and Select button to adjust the volume.
Streaming: Information only. This menu displays the resolution for each stream, along with the frame rate
for the USB stream and the quality setting for the IP stream. USB streaming resolution is auto-negotiated;
IP streaming is configured in the web interface.
When streaming with Vaddio’s USB 2.0 or 3.0 products, the resolution/frame rate is mainly determined by
the processing power of the PC, available network bandwidth at the time of negotiation, the resolution
tables within your soft codec and your streaming device to a maximum of 720P/30fps for USB 2.0 and
1080P/60fps for USB 3.0.
Vaddio’s USB streaming devices have a very wide resolution table to be compatible with an assortment of
soft codecs as well as being browser friendly (IE, Chrome, Firefox, Safari to name a few). They also use
the USB video (UVC) and audio (UAC) drivers inherent within the computers OS, so there's no need for
separate or proprietary drivers.
Network Settings: Information only. This menu displays the IP address, gateway address, subnet mask,
and MAC address.
4
Page 7

Operator's Guide to the AV Bridge MATRIX PRO AV Encoder
Versions: Information only. This menu displays the firmware versions in use.
User Access to the Web Interface
You can access the web interface using the device's IP address – or its hostname, if your network
supports hostname resolution. In your browser's address bar, enter https:// followed by the device's IP
address or hostname.
Contact the system administrator if you do not know the current password.
If the system is configured for guest access, you will not need to log in.
5
Page 8

Operator's Guide to the AV Bridge MATRIX PRO AV Encoder
Muting Audio or Video from the Web Interface
Audio and video mute controls are available on the front panel and at the top of each page of the web
interface.
Audio mute disables the microphone inputs and the audio portion of the stream. It does not disable PC
audio input or HDMI audio output; if you mute audio while playing content from a PC, the audio portion of
the content is not muted.
Video mute disables all video outputs and sends the selected video mute pattern – either black video or
color bars.
Working with Audio
OPERATOR'S HOME PAGE
Audio controls include mute/unmute buttons, volume read-outs, and volume slider controls for the audio
output currently used as the master/AEC reference and for USB Record (the audio originating at your end
of a conference).
6
Page 9

Operator's Guide to the AV Bridge MATRIX PRO AV Encoder
Selecting Cameras
OPERATOR'S HOME PAGE
The web interface shows the active video sources in red. Depending on the current configuration, you may
be able to set Stream and Program outputs separately. If the device is configured to route the stream to the
Program output, the web interface displays only one row of buttons for the video output.
Note
The IP and USB streams use the same video source.
Select the desired source for the available output(s).
Selecting a PIP Source and Layout
ALL OPERATOR PAGES
The PIP is only available in the stream.
In the web interface, the button for the active PIP source is highlighted. If all four PIP source buttons are
highlighted, the stream is using the quad screen layout; if no buttons are highlighted, there is no PIP.
1. Select Layout to check or change the PIP layout.
2. Select the desired PIP source, if not using the Quad Screen layout.
7
Page 10

Operator's Guide to the AV Bridge MATRIX PRO AV Encoder
Moving to Camera Presets
OPERATOR'S HOME PAGE
If presets have been defined for the selected video input, they are available on the Home page. The
administrator has the option to customize the labels for the video inputs and the presets for each.
Select the video input to work with, then select the desired preset.
Controlling Pan, Tilt, Zoom, and Focus
OPERATOR'S CAMERA PAGE
The Camera page presents the same controls that are available from the selected video input's web
interface. No controls are available for Input 4 unless the connected device is a camera.
Select the video input to work with, then move or focus the camera as needed.
8
Page 11

Operator's Guide to the AV Bridge MATRIX PRO AV Encoder
About Viewing Streams
Streaming is disabled by default. The USB stream and IP stream are enabled separately. If you are unable
to view the desired stream, this usually means it is not enabled. Contact your system administrator.
To view the IP stream:
n You will need to know the streaming URL for the IP stream. This information is available on the front
panel, under the Network menu.
n You will need a stream viewer application such as VLC Media Player.
To view the USB stream:
Connect a computer to the USB port on the device, and do one of these things:
n Open a stream viewer and select the camera as the video capture device.
n Start or join a conference.
When viewing either stream, keep in mind that there is always inherent latency and network-dependent
latency, so the video and audio may not be perfectly synchronized. An audio delay adjustment is available
to administrators on the Audio page of the web interface.
Working with Macros
MACROS PAGE (USER OR GUEST ACCESS)
Macros provide shortcuts for common sequences of actions. For example, the system administrator might
create a macro that moves and zooms a camera to frame the presenter at the podium, then switches to that
camera and the podium microphone.
If macros have been defined, you can select them from the Macros page.
9
Page 12

Operator's Guide to the AV Bridge MATRIX PRO AV Encoder
Going to Standby (Low Power) Mode
ALL PAGES
The standby control is available at the top of each page of the web interface.
When the system is in standby, no audio or video is sent or received and most of the web interface controls
are unavailable.
Depending on how the device is configured, connected cameras may also go to standby mode.
10
Page 13

Vaddio is a brand of Legrand AV Inc. · www.legrandav.com · Phone 800.572.2011 / +1.763.971.4400 · Fax
+1.763.971.4464 · Email av.vaddio.support@legrand.com
Visit us at www.legrandav.com for firmware updates, specifications, drawings, manuals, technical support
information, and more.
©2021 Legrand AV Inc.
Vaddio is a registered trademark of Legrand AV Inc. All other brand names or marks are used for
identification purposes and are trademarks of their respective owners. All patents are protected under
existing designations. Other patents pending.
Commercial AV Brands Chief | Da-Lite | Middle Atlantic | Projecta | Vaddio
 Loading...