

Page 1

Modbus
Fieldbus
Option Board
USER’S MANUAL
Subject to changes without notice
VACON
CX/CXL/CXS
FREQUENCY CONVERTERS
F O R S M O O T H C O N T R O L
Page 2

VACON CX Modbus user’s manual Page 2
________________________________________________________________________________________
________________________________________________________________________________________
Vacon Oy Phone +358-201-2121 Fax: +358-201-212 205
INDEX
1. GENERAL............................................................................................................................................3
2. SPECIFICATIONS................................................................................................................................4
3. MODBUS.............................................................................................................................................5
3.1 General ...........................................................................................................................................5
3.2 Modbus frames ................................................................................................................................6
3.3 Modbus functions .............................................................................................................................6
3.4 Error detection .................................................................................................................................6
3.5 Exception responses ........................................................................................................................7
4. INSTALLATION ...................................................................................................................................8
5. CONNECTIONS.................................................................................................................................. 10
5.1 Board layout .................................................................................................................................. 10
5.2 Modbus connections ....................................................................................................................... 10
5.3 I/O-control connections ................................................................................................................... 11
6. COMMISSIONING.............................................................................................................................. 12
7. MODBUS-VACON CX INTERFACE...................................................................................................... 13
7.1 Modbus function codes ................................................................................................................... 13
7.1.1 Function code 1, Read Control Bits .......................................................................................... 13
7.1.2 Function code 2, Read Status Bits........................................................................................... 13
7.1.3 Function code 3, Read Parameters .......................................................................................... 13
7.1.4 Function code 4, Read Variables ............................................................................................. 14
7.1.5 Function code 5, Write Control Bits.......................................................................................... 14
7.1.6 Function code 6, Write Parameter............................................................................................ 14
7.1.7 Function code 8, Diagnostic.................................................................................................... 14
7.2 VACON control interface ................................................................................................................. 16
7.3 VACON parameters........................................................................................................................ 17
7.3.1 Frequency reference ............................................................................................................... 17
7.3.2 Monitoring variables ................................................................................................................ 17
7.3.3 Active Fault Code................................................................................................................... 18
7.3.4 Parameter Write and Read...................................................................................................... 19
7.4 CONNECTIONS (small Modbus Board for Vacon CXS, Vacon CX211OPT) ........................................... 20
7.4.1 Board layout .......................................................................................................................... 20
7.4.2 Modbus connections ............................................................................................................... 20
7.5 Installation of CX211OPT in Vacon CXS drives ................................................................................... 21
Page 3

VACON CX Modbus user’s manual Page 3
________________________________________________________________________________________
________________________________________________________________________________________
Vacon Oy Phone +358-201-2121 Fax: +358-201-212 205
1. GENERAL
Vacon frequency converters can be connected to the Modbus by using the fieldbus board. The converter
can then be controlled, monitored and programmed from the Host system.
The used I/O can be also extended with the Fieldbus board:
• 4 digital inputs (standard signals)
• 4 digital outputs (standard signals)
• Thermistor input (can be directly connected to the motor thermistors for overtemperature trip)
• Encoder input
The Fieldbus board can be installed into the already existing place of the option board inside the frequency
converter.
The control connections are isolated from the mains potential and I/O ground is connected to the frame of
the device via a 1 MΩ resistor and 4.7 nF capacitor*. The control I/O ground can be connected also
directly to the frame by changing the position of the jumper X9 (GND ON/OFF) to ON-position. Digital
inputs and digital outputs are also isolated from the I/O ground.
NOTE !
Internal components and circuit boards (except for the isolated I/O terminals) are at mains
potential when the frequency converter is connected to the mains. This voltage is extremely
dangerous and may cause death or severe injury if you come in contact with it.
The control I/O terminals are isolated from the mains potential, but the I/Os (if jumper X9 is in
OFF position) may have dangerous voltage connected even if the power is off on the frequency
converter.
* Default value (X9 is GND OFF- position)
Page 4
VACON CX Modbus user’s manual Page 4
________________________________________________________________________________________
________________________________________________________________________________________
Vacon Oy Phone +358-201-2121 Fax: +358-201-212 205
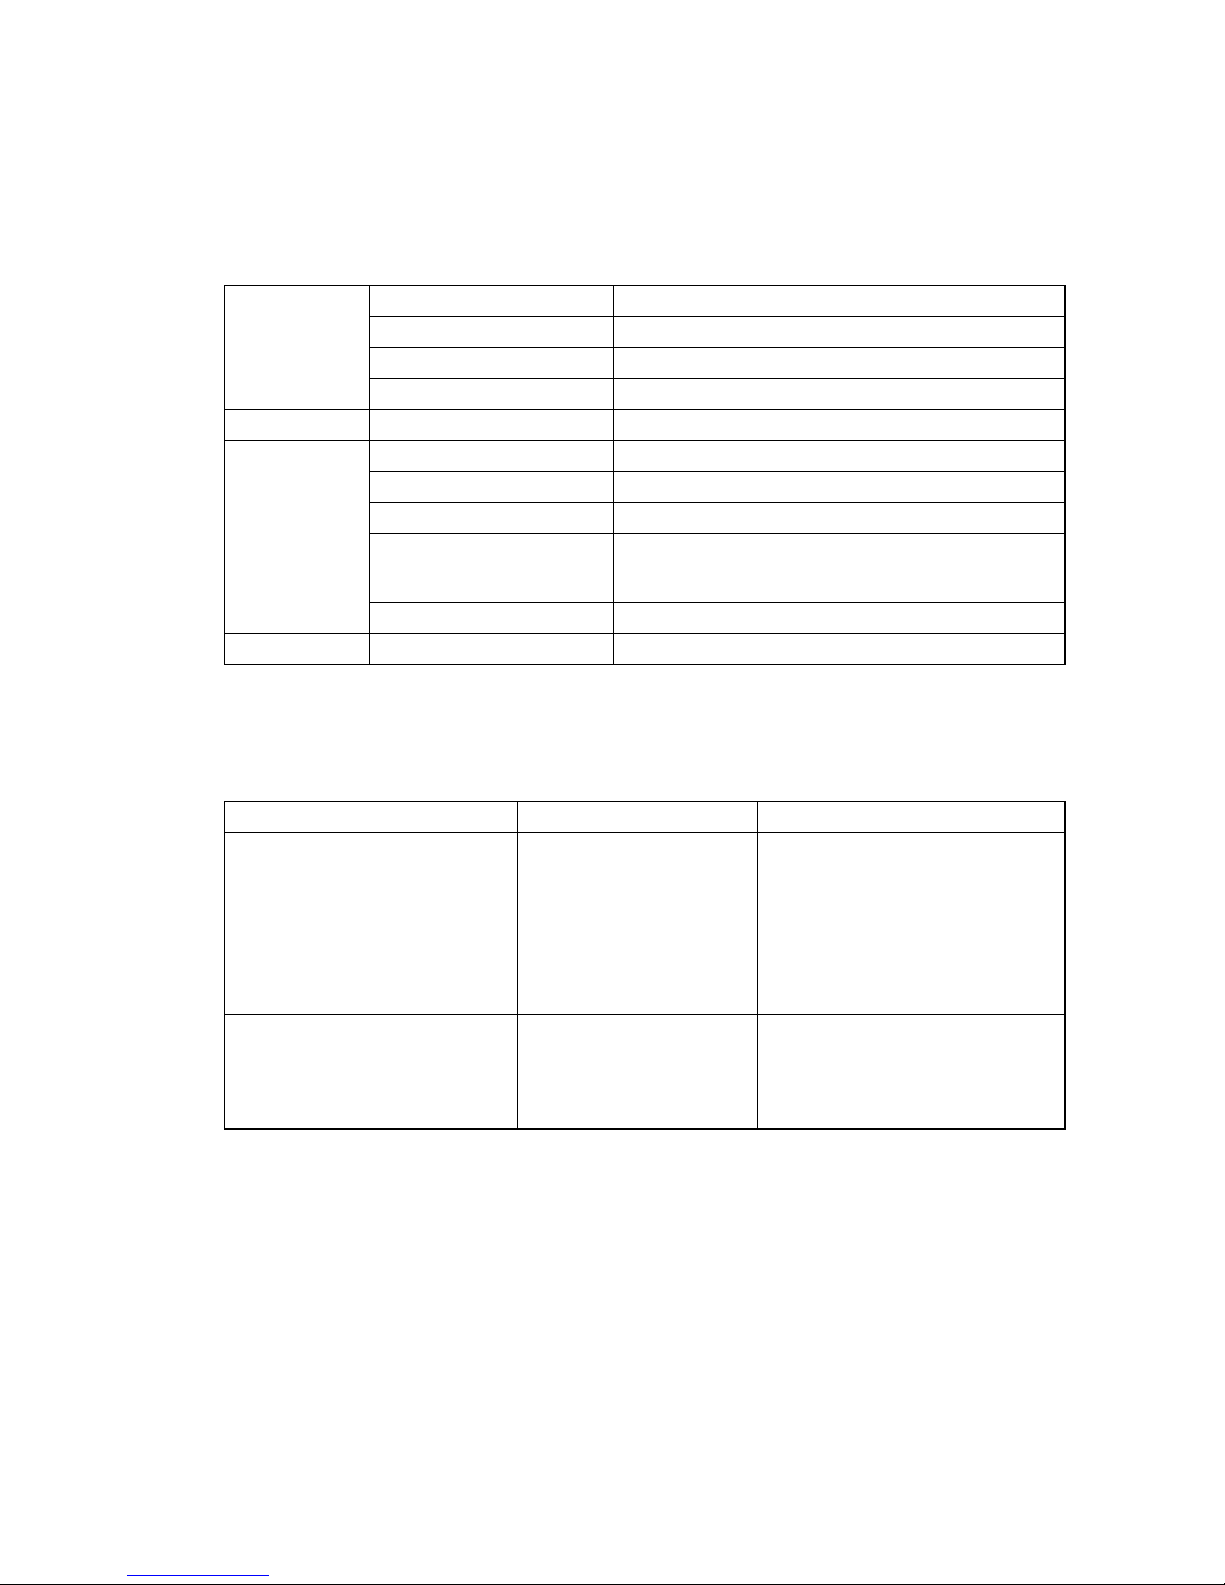
2. SPECIFICATIONS
Modbus - Interface 9-pin DSUB connector (female)
connections Transfer method RS-485, Half duplex
Transfer cable Twisted pair (1 pair and shield)
Electrical isolation 500 V DC
I/O -control Digital input (4 pcs) 24 V: “0” ≤10 V, “1” ≥18 V, Ri = 5 kΩ
connections Digital output (4 pcs) Open collector output, 50 mA/48 V
Termistor input (1 pcs) R
trip
= 4.7 kΩ
Encoder input (3 pcs) 24 V: “0” ≤10 V, “1” ≥18 V, Ri = 3.3 kΩ
5 V : “0” ≤2 V, “1” ≥3 V, Ri = 330 Ω
Aux. voltage 24 V (±20%), max 50 mA
Safety Fulfills EN50178 standard
Table 2-1. Specifications
Communication mode RTU
Function codes 1
2
3
4
5
6
8
Broadcast (codes 5,6)
Read Digital Output
Read Digital Input
Read Holding Register
Read Input Register
Write Single Digital Output
Write Single Register
Diagnostic
Communication parameters
- Address
- Parity
- Stop Bits
- Baud Rate
1 to 247
None, Odd or Even
1
300 to 19200 Baud
Table 2-2. Modbus communication data
Page 5
VACON CX Modbus user’s manual Page 5
________________________________________________________________________________________
________________________________________________________________________________________
Vacon Oy Phone +358-201-2121 Fax: +358-201-212 205
3. MODBUS
3.1 General
The MODBUS protocol is an industrial communications and distributed control system to integrate PLCs,
computers, terminals, and other monitoring, sensing, and control devices. MODBUS is a Master-Slave
communications protocol. The Master controls all serial activity by selectively polling one or more slave
devices. The protocol provides for one master device and up to 247 slave devices on a common line.
Each device is assigned an address to distinguish it from all other connected devices.
The MODBUS protocol uses the master-slave technique, in which only one device (the master) can initiate
a transaction. The other devices (the slaves) respond by supplying the request data to the master, or by
taking the action requested in the query. The master can address individual slaves or initiate a broadcast
message to all slaves. Slaves return a message (‘response’) to queries that are addressed to them
individually. Responses are not returned to broadcast queries from the master.
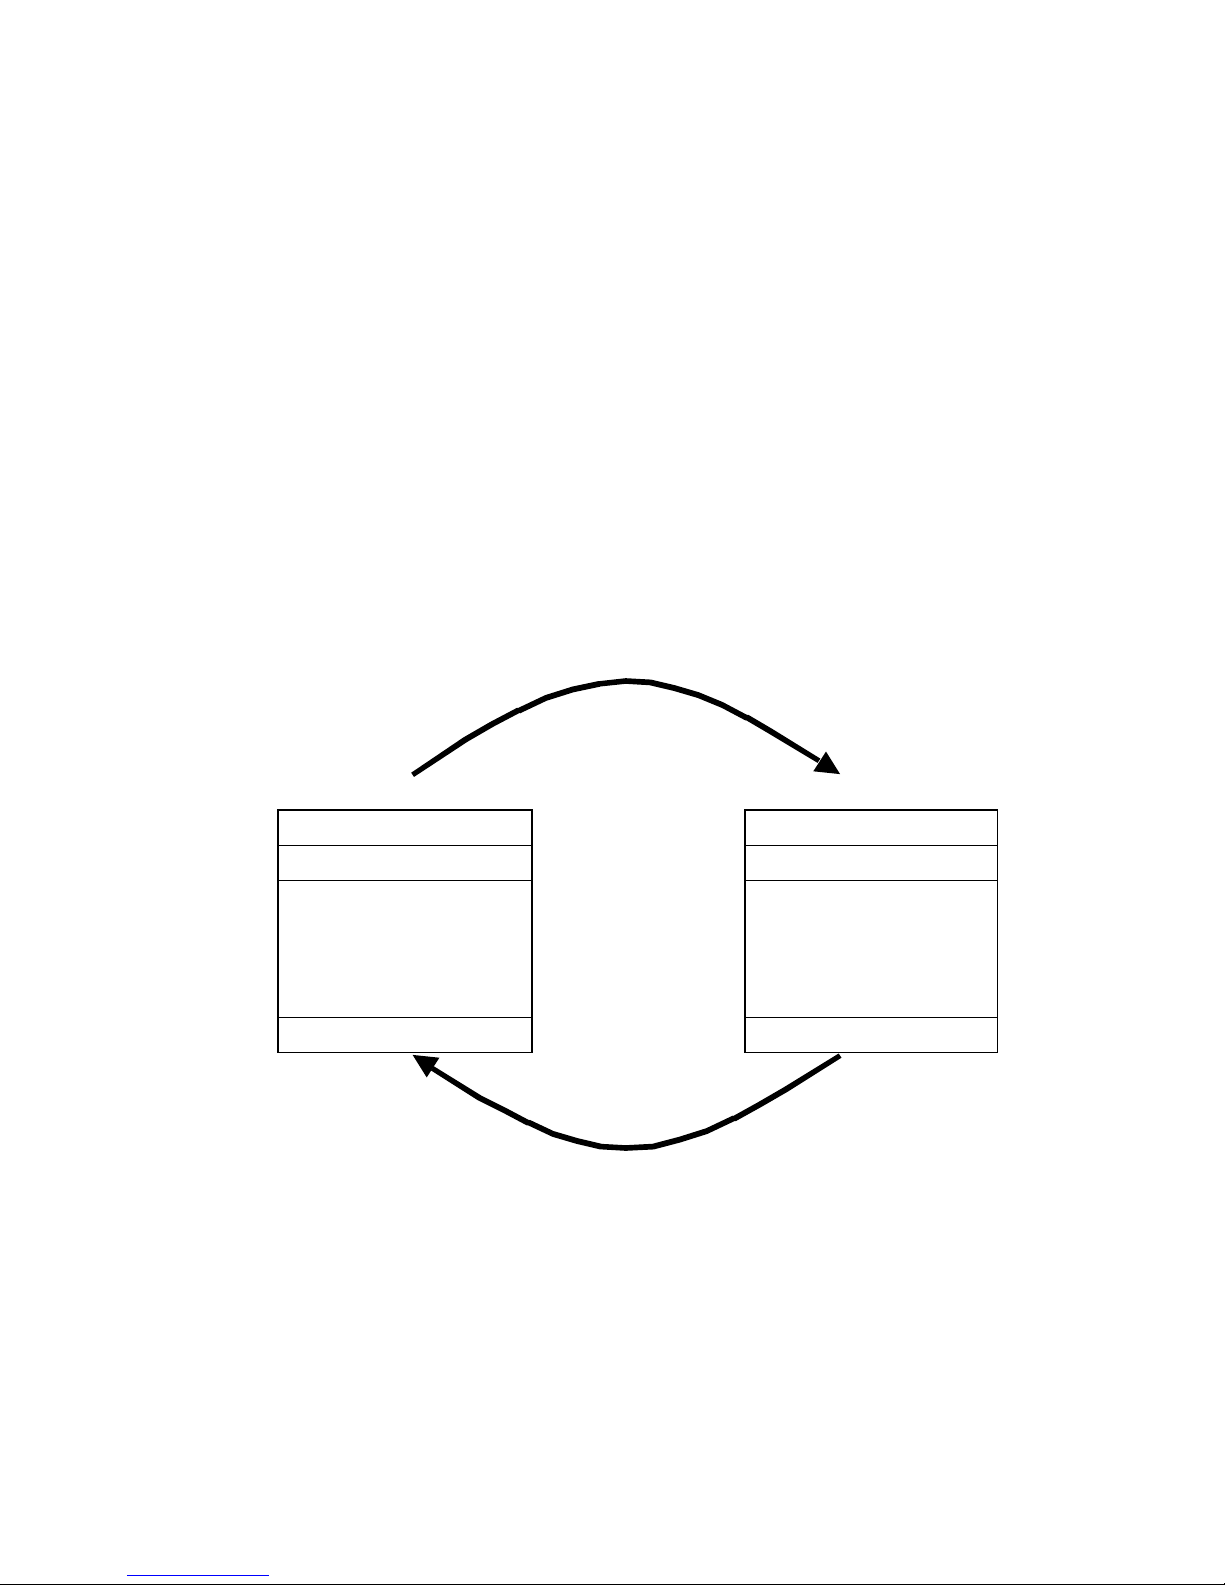
A transaction comprises a single query and single response frame or a single broadcast frame. The
transaction frames are defined below.
Query message from master
Device address Device address
Function code Function code
Eight-Bit Eight-Bit
Data Bytes Data Bytes
Error Check Error Check
Response message from slave
Page 6

VACON CX Modbus user’s manual Page 6
________________________________________________________________________________________
________________________________________________________________________________________
Vacon Oy Phone +358-201-2121 Fax: +358-201-212 205
3.2 Modbus frames
Two modes of transmission are available for use in a MODBUS system. The modes are ASCII (American
Standard Code for Information Interchange), and RTU, (Remote Terminal Unit.). The Fieldbus board uses
only RTU mode.
The format for each byte in RTU mode:
Coding system: 8-bit binary, hexadecimal 0-9, A-F
Two hexadecimal characters contained in each 8-bit field of the message.
Bits per Byte: 1 start bit
8 data bits, least significant bit sent first
1 bit for even/odd parity, no bit for no parity
1 stop bit if parity is used; 2 bits if no parity
Error Check Field: Cyclical Redundancy Check (CRC)
In RTU mode, messages start and end with a silent 3.5 characters times (T1-T2-T3-T4). The entire
message frame must be transmitted as a continuous stream. A typical message frame is shown below.
Start Address Function Data CRC Check End
T1-T2-T3-T4 8 bits 8 bits n*8bits 16 bits T1-T2-T3-T4
The individual slave devices are assigned addresses in the range of 1 - 247. Address 0 is used for the
broadcast address, which all slave devices recognize.
3.3 Modbus functions
The Function Code field tells the addressed slave what function to perform. The following table lists those
functions supported by the Fieldbus board:
Code Name Meaning of Fieldbus board
01 READ COIL STATUS Read Control bits
02 READ INPUT STATUS Read Status bits
03 READ HOLDING REGISTER Read VACON parameter
04 READ INPUT REGISTER Read VACON variable
05 FORCE SINGLE COIL Write Control bits
06 PRESET SINGLE REGISTER Write VACON parameter
08 DIAGNOSTICS Test and checking of the communication system
3.4 Error detection
Communications errors usually consist of a changed bit or bits within a message. Communications errors
are detected by character framing, a parity check, and a redundancy check.
The MODBUS system provides several levels of error checking to assure the quality of the data
transmission. To detect multibit errors where the parity has not changed, the system uses redundancy
checks: Cyclical Redundancy Check, (CRC), for the RTU mode and Longitudinal Redundancy Check,
(LRC), for the ASCII mode. The Fieldbus board uses only RTU mode.
Page 7

VACON CX Modbus user’s manual Page 7
________________________________________________________________________________________
________________________________________________________________________________________
Vacon Oy Phone +358-201-2121 Fax: +358-201-212 205
3.5 Exception responses
If the slave receives the query without a communication error, but cannot handle it, the slave will return an
exception response informing the master of the nature of the error. The exception response codes are
listed below.
Code Name Description
01 ILLEGAL FUNCTION The message function requested is not recognized by the
slave.
02 ILLEGAL DATA ADDRESS The received data address is not an allowable address for
the slave.
03 ILLEGAL DATA VALUE The received data value is not an allowable value for the
slave.
04 SLAVE DEVICE ERROR An unrecoverable error occurred while the slave was
attempting to perform the requested action,
06 SLAVE DEVICE BUSY The message was received without error, but the slave was
engaged in processing a long duration program command
In an exception response, the slave sets a most-significant bit (MSB) of the function code to 1. The slave
returns an exception code in the data field.
Example:
Query:
01 01 04 2E 00 01 CRC16
Slave
address
Function Starting
address HI
Starting
address LO
Number of
bits HI
Number of
bits LO
2 bytes
Exception Response:
01 81 02 CRC16
Slave
address
Function Response
code
2 bytes
Page 8

VACON CX Modbus user’s manual Page 8
________________________________________________________________________________________
________________________________________________________________________________________
Vacon Oy Phone +358-201-2121 Fax: +358-201-212 205
4. INSTALLATION
NOTE! These instructions apply if you have received the Modbus board as an accessory.
Otherwise the board has already been installed for you at the factory.
Before starting the commissioning, carefully read the safety instructions from the "User's manual
CX/CXL/CXS frequency converter" chapter 2. Check that you have got all the Fieldbus board parts:
Fieldbus board, plastic board, power cable (black terminal), data cable (blue terminal) and earthing screw.
Fieldbus board can be installed into the already existing place of the option board inside the frequency
converter (see figure 4-1).
A
Remove the control panel and jumper X4 from the control board (1).
B
Install the power cable into the control board terminal X5 (2) and data cable to terminal X14
(3). Power cable can also be installed into terminal X6, if the power cable from the power
board is connected to terminal X5.
C
Bend the data cable to an "S-curve" as far as possible from the power board transformer (4)
before you place the plastic board onto the control board.
D
Remove the protection foil of the plastic board and install the plastic board onto the control
board. Check the right position of the plastic board (5).
E
Place the Fieldbus board onto the plastic board by the larger holes and push it downwards so
that the narrow part of the hole in the board fits the cut on the sleeve. Check that the
installation is stable. If you have difficulties placing the plastic board and Fieldbus board,
slightly bend regulator A4 (6) and capacitor C59 (7) of the control board.
F
Install the power cable to the terminal X1 of the Fieldbus board (8)and data cable to terminal
X4 (9).
G
Install the jumper you removed from terminal X4 of the control board, into terminal X9 of the
Fieldbus board (10) in ON or OFF position.
H
If the packet includes the cable cover (11), install that into position shown in figure 4-1.
I
Install the earthing screw (12).
J
After this, install the control panel and connect the needed control signals.
K
If the the Modbus line ends at the Fieldbus board, install the jumper to terminal X12 (see figure
5-1) of the Fieldbus board.
L
If you use a 5 V encoder input, install the jumper to terminal X7 see figure 5-1) of the Fieldbus
board.
Page 9

VACON CX Modbus user’s manual Page 9
________________________________________________________________________________________
________________________________________________________________________________________
Vacon Oy Phone +358-201-2121 Fax: +358-201-212 205
Figure 4-1. Fieldbus board installed on the control board
Fieldbus board
Page 10

VACON CX Modbus user’s manual Page 10
________________________________________________________________________________________
________________________________________________________________________________________
Vacon Oy Phone +358-201-2121 Fax: +358-201-212 205
5. CONNECTIONS
5.1 Board layout
Terminals:
X10 I/O - terminals
X11 Termistor input
X7 Encoder terminal
X5 Modbus terminal
X12 Line terminator (120Ω )ON/OFF
X15 Connector for cable Shield
Diagnostic LED:
UL Supply Voltage, Green.
UL led is active if the Fieldbus board has supply voltage.
5.2 Modbus connections
D SUB connector:
Signal Connector
D SUB 9-pin
Board Connector
X5 - terminal
Description
Data (A) 2 X5 – 4 Data Out
Data (B) 3 X5 – 5 Data In
GND 7 X5 – 6 Common
Shield X15 Cable shield
Table 5-1. D-sub connector
X10
X11
UL
X5
Extra terminal
D-sub connector
X12
X15
X7
Figure 5-1. Fieldbus board
12345
9 8 7 6
1 2
9 10
Page 11

VACON CX Modbus user’s manual Page 11
________________________________________________________________________________________
________________________________________________________________________________________
Vacon Oy Phone +358-201-2121 Fax: +358-201-212 205
5.3 I/O-control connections
Terminal Signal Description
301 DID1 Programmable:
External fault
OR
Select of Active Control
Source
Contact open = no fault
Contact closed = fault
Contact open = VACON IO-terminal
Contact closed = Fieldbus
302 DID2 Run disable Contact open = start of motor enabled
Contact closed = start of motor disabled
303 DIE3 Acceler. / Decel. time
selection
Contact open = time 1 selected
Contact closed = time 2 selected
304 DIE4 Jogging speed selection Contact open = no action
Contact closed = jogging speed
305 COMD Common for DID1-DID2 Connect to GND or +24 V
306 +24 V Control voltage output Voltage for switches, etc. max. 0.1 A
307 COME Common for DIE3-DIE4 Connect to GND or +24 V
308 GND I/O ground Ground for reference and controls
309 DID5A+ Pulse input A
310 DID5A- (differential input)
311 DID6B+ Pulse input B 90 degrees phase shift compared
312 DID6B- (differential input) to pulse input A
313 DID7Z+ Pulse input Z one pulse per one revolution
314 DID7Z- (differential input)
315 GND I/O ground Ground for reference and controls
316 DOD1 Open collector output 1 READY
317 DOD2 Open collector output 2 RUN
318 DOD3 Open collector output 3 FAULT
319 DOD4 Open collector output 4 FIELDBUS CONTROL
320 GND I/O ground Ground for reference and controls
Signal from
327 TI+ Termistor input
motor termistor
328 TI-
Figure 5-2. Control connections
READY = ON, when the mains voltage has been applied and the VACON CX is ready to operate
RUN = ON, when the motor is running
FAULT = ON, if a fault occurs
FIELDBUS CONTROL = ON, when the fieldbus board is the Active Control Source
Enco-
der
Page 12

VACON CX Modbus user’s manual Page 12
________________________________________________________________________________________
6. COMMISSIONING
Read first through the c ommissioning of the frequency converter in Vacon CX/CXL/CXS Frequency
Converter, User's Ma nual (Chapter 8.)
Commissioning of the Fieldbus board:
Check that Multi-purpo s e Control Application II (or e.g. Fieldbus Application) is selected.
- Parameter P0.1 = 0
Start-up test:
DRIVE APPLICATION
MASTER SOFTWARE
Slave address e.g. is 1
1. Check that the control panel is not the active control source.
(See User's manual CX/CXL/CXS frequency converter, Chapter 7.)
2. Set parameter “Fieldbus control selec t” to value 1(On).
1. Write to address 00000 value FF00hex (RUN).
message: 01 05 00 00 FF 00 8C 3A
2. Read Run State, address 10002.
message: 01 02 00 02 00 01 49 CA
If response value is 1 --> Communication is OK.
3. Set to address 40000 value 3E8hex (frequency reference 10,00 Hz).
message: 01 06 00 01 03 E8 D8 B4
4. The VACON CX shoud now be running and the output frequency shoud be 10,00 Hz.
5. Write to address 00000 value 0000hex (STOP).
message: 01 05 00 00 00 00 CD CA
________________________________________________________________________________________
Vacon Oyj Phone +358-201-2121 Fax: +358-201-212 205
Page 13

VACON CX Modbus user’s manual Page 13
________________________________________________________________________________________
________________________________________________________________________________________
Vacon Oy Phone +358-201-2121 Fax: +358-201-212 205
7. MODBUS-VACON CX INTERFACE
Features of Modbus-Vacon CX interface:
• Direct control of Vacon CX ( e.g. Run, Stop, Direction, Speed reference, Fault reset)
• Full access to all Vacon CX parameters
• Monitor Vacon CX status (e.g. Output frequency, Output current, Fault code ..)
• Diagnostic of modbus communications
7.1 Modbus function codes
7.1.1 Function code 1, Read Control Bits
This function is used to read control bits.
The transaction frames:
Query:
Slave
address
Function
code
Starting
Address HI
Starting
Address LO
Number of
points HI
Number of
points LO
CRC16
1 byte 1 byte 1 byte 1 byte 1 byte 1 byte 2 bytes
Response:
Slave
address
Function
code
Byte count Data bits CRC16
1 byte 1 byte 1 byte 1 byte 2 bytes
7.1.2 Function code 2, Read Status Bits
This function is used to read status bits.
The transaction frames:
Query:
Slave
address
Function
code
Starting
Address HI
Starting
Address LO
Number of
points HI
Number of
points LO
CRC16
1 byte 1 byte 1 byte 1 byte 1 byte 1 byte 2 bytes
Response:
Slave
address
Function
code
Byte count Data bits CRC16
1 byte 1 byte 1 byte 1 byte 2 bytes
7.1.3 Function code 3, Read Parameters
This function is used to read VACON CX parameters.
The transaction frames:
Query:
Slave
address
Function
code
Starting
Address HI
Starting
Address LO
Number of
points HI
Number of
points LO
CRC16
1 byte 1 byte 1 byte 1 byte 1 byte 1 byte 2 bytes
Response:
Slave
address
Function
code
Byte count Data HI Data LO CRC16
1 byte 1 byte 1 byte 1 byte 1 byte 2 bytes
Page 14

VACON CX Modbus user’s manual Page 14
________________________________________________________________________________________
________________________________________________________________________________________
Vacon Oy Phone +358-201-2121 Fax: +358-201-212 205
7.1.4 Function code 4, Read Variables
This function is used to read VACON CX variables.
The transaction frames:
Query:
Slave
address
Function
code
Starting
Address HI
Starting
Address LO
Number of
points HI
Number of
points LO
CRC16
1 byte 1 byte 1 byte 1 byte 1 byte 1 byte 2 bytes
Response:
Slave
address
Function
code
Byte count Data HI Data LO CRC16
1 byte 1 byte 1 byte 1 byte 1 byte 2 bytes
7.1.5 Function code 5, Write Control Bits
This function is used to set or clear control bits.
The transaction frames:
Query:
Slave
address
Function
code
Output
Address HI
Output
Address LO
Force DataHIForce DataLOCRC16
1 byte 1 byte 1 byte 1 byte 1 byte 1 byte 2 bytes
Response:
Slave
address
Function
code
Output
Address HI
Output
Address LO
Force DataHIForce DataLOCRC16
1 byte 1 byte 1 byte 1 byte 1 byte 1 byte 2 bytes
7.1.6 Function code 6, Write Parameter
This function is used to write VACON CX parameters.
The transaction frames:
Query:
Slave
address
Function
code
Register
Address HI
Register
Address LO
Data HI Data LO CRC16
1 byte 1 byte 1 byte 1 byte 1 byte 1 byte 2 bytes
Response:
Slave
address
Function
code
Register
Address HI
Register
Address LO
Data HI Data LO CRC16
1 byte 1 byte 1 byte 1 byte 1 byte 1 byte 2 bytes
7.1.7 Function code 8, Diagnostic
Diagnostic function uses the subfunction code field in the query to define the type of test to be performed.
The transaction frames:
Query:
Slave
address
Function
code
SubfunctionHISubfunctionLOData HI Data LO CRC16
1 byte 1 byte 1 byte 1 byte 1 byte 1 byte 2 bytes
Response:
Page 15

VACON CX Modbus user’s manual Page 15
________________________________________________________________________________________
________________________________________________________________________________________
Vacon Oy Phone +358-201-2121 Fax: +358-201-212 205
Slave
address
Function
code
SubfunctionHISubfunctionLOData HI Data LO CRC16
1 byte 1 byte 1 byte 1 byte 1 byte 1 byte 2 bytes
Subfunction codes:
00 Echo
The slave sends back the query message (loop back).
01 Reinitialization
The slave communication part is to be initialized and its events counter is to be cleared. This
function is the only one that brings a slave out of Listen Only Mode.
04 Set Listen Only Mode
Forces the slave into Listen Only Mode (LOM). In this mode the slave doesn’t process messages.
The only function that will be processed after this mode is entered will be the Reinitialization (01).
0A Clear counters
Clears all counters.
0B Bus message count
The quantity of correct messages seen on the line without CRC error or checksum error.
0C Bus communication error count
The quantity of messages received with checksum error.
0D Bus exception count
The quantity of Modbus exception responses transmitted to the master by the slave.
0E Slave message count
The quantity of all types of messages addressed to the slave.
0F Slave no response count
The quantity of messages addressed to the slave for which it returned no response.
Page 16

VACON CX Modbus user’s manual Page 16
________________________________________________________________________________________
________________________________________________________________________________________
Vacon Oy Phone +358-201-2121 Fax: +358-201-212 205
7.2 VACON control interface
Direct control of Vacon CX uses following function codes and addresses:
Fieldbus Board VACON CX
CONTROL
Function code 5, Write
M Function code 1, Read
A Address: 00 00 RUN/STOP
00 01 DIRECTION
S 00 02 FAULT RESET
T
STATUS
E
Function code 2, Read
R
Address: 00 00 CONTROL SOURCE
00 01 READY STATE
00 02 RUN STATE
00 03 DIRECTION STATE
00 04 FAULT STATE
Example 1: Read VACON CX run state
Response: Run state ( 0=stop or 1=run)
Query:
01 02 00 02 00 01 CRC16
Slave addr Function Address HI Address LO Number of
points HI
Number of
points LO
2 bytes
Response:
01 02 01 01 CRC16
Slave addr Function Byte count Data 2 bytes
Example 2: Send start command to VACON CX.
Response is an echo of the query.
Query:
01 05 00 00 FF 00 CRC16
Slave addr Function Address HI Address LO Data HI Data LO 2 bytes
Response:
01 05 00 00 FF 00 CRC16
Slave addr Function Address HI Address LO Data HI Data LO 2 bytes
Page 17

VACON CX Modbus user’s manual Page 17
________________________________________________________________________________________
________________________________________________________________________________________
Vacon Oy Phone +358-201-2121 Fax: +358-201-212 205
7.3 VACON parameters
The Vacon variables and parameters can be read and written by using the following function codes and
addresses:
Modbus Address Modbus Register Function code Vacon Par/Var Access rights
40000 - 40099 40001 - 40100 3, 6 References R/W
40100 - 49999 40101 - 49100 3, 6 Parameters R/W
30000 - 30099 30001 - 30100 4 Variables R
30100 30101 4 Fault Code R
7.3.1 Frequency reference
If the Modbus master is the active control source, the frequency reference can be changed by using the
function code 6 or read by using the function code 6. Modbus address according to reference as follows.
Modbus address Range Step Default
40000 Par 1.1 - Par 1.2 0,01 Hz 0,00 - 50,00 Hz
The reference value should be given without decimals (e.g. ref. 10 Hz -> value 1000)
Example 1: Set frequency reference value 10,00 Hz to Vacon CX.
Response is an echo of the query.
Query:
01 06 00 00 03 E8 CRC16
Slave addr Function Address HI Address LO Data HI Data LO 2 bytes
Response:
01 06 00 00 03 E8 CRC16
Slave addr Function Address HI Address LO Data HI Data LO 2 bytes
7.3.2 Monitoring variables
Monitored item can be read by using the function code 4. Modbus address according to monitored item
numbers as follows.
Modbus address Vacon variable
30000 n1
30001 n2
. .
. .
30099 n99
Number Data name Step Unit Description
n1 Output frequency 0,01 Hz Frequency to the motor
n2 Motor speed 1 rpm Calculated motor speed
n3 Motor current 0,1 A Measured motor current
n4 Motor torque 1 % Calculated actual torque/nominal torque of the unit
n5 Motor power 1 % Calculated actual power/nominal power of the unit
n6 Motor voltage 1 V Calculated motor voltage
n7 DC-link voltage 1 V Measured DC-link voltage
Page 18

VACON CX Modbus user’s manual Page 18
________________________________________________________________________________________
________________________________________________________________________________________
Vacon Oy Phone +358-201-2121 Fax: +358-201-212 205
n8 Temperature 1 °C Temperature of the heat sink
n9 Operating day counter DD.dd
Operating days 1), not resettable
n10 Operating hours, "trip
counter”
HH.hh
Operating hours 2), can be reset with program-button
#3
n11 MW-hours 0,001 MWh Total MW hours, not resettable
n12 MW-hours, "trip counter" 0,001 MWh MW-hours, can be reset with programmable button #4
n13 Voltage/analogue input 0,01 V Voltage of the terminal Uin+ (control board)
n14 Current/analogue input 0,01 mA Current of terminals Iin+ and Iin- (control board)
n15 Digital input status, gr. A 0 = Open Input, 1 = Closed Input (Active)
n16 Digital input status, gr. B 0 = Open Input, 1 = Closed Input (Active)
n17 Digital and relay output
status
0 = Open Input, 1 = Closed Input (Active)
n18 Control program Version number of the control software
n19 Unit nominal power 0,1 kW Shows the power size of the unit
n20 Motor temperature rise 1 % 100%= temperature of motor has risen to nominal
value
1)
DD = full days, dd = decimal part of a day
2)
HH = full hours, hh = decimal part of an hour
Table 7-1 Monitored Items
Example 1: Read value of Vacon variable 3.
Response: Value of monitored item ( 156 = 15,6 A).
Query:
01 04 00 02 00 01 CRC16
Slave addr Function Address HI Address LO Number of
points HI
Number of
points LO
2 bytes
Response:
01 04 02 00 9C CRC16
Slave addr Function Byte count Data HI Data LO 2 bytes
7.3.3 Active Fault Code
When a fault status is active, fault code can be read by using the function code 3. Modbus address
according to the fault code as follows.
Modbus address Vacon variable
30100 Active fault code
List and description of the fault codes are in USER’S MANUAL VACON CX/CXL/CXS
Example 1: Read active fault code.
Response: fault code 1 = Overcurrent
Query:
01 04 00 64 00 01 CRC16
Slave addr Function Address HI Address LO Number of
points HI
Number of
points LO
2 bytes
Response:
01 04 02 00 01 CRC16
Slave addr Function Byte count Data HI Data LO 2 bytes
Page 19

VACON CX Modbus user’s manual Page 19
________________________________________________________________________________________
________________________________________________________________________________________
Vacon Oy Phone +358-201-2121 Fax: +358-201-212 205
7.3.4 Parameter Write and Read
Parameters can be read by using the function code 3 and written by using the function code 6. Modbus
address according to parameter numbers as follows.
Modbus address Vacon parameter group Vacon parameter number
40000 - 40099 Reference 1 - 99
40100 - 40199 Group 1 1 - 99
40200 - 40299 Group 2 1 - 99
. .
. .
49800 - 49899 Group 98 1 - 99
49900 - 49999 Group 0 1 - 99
Numbering of the parameter as well as parameter ranges and steps can be found in the application
manual in question. The parameter value should be given without decimals.
Example 1: Write value 25 to Vacon parameter 3.2
Response is an echo of the query.
Query:
01 06 01 2D 00 19 CRC16
Slave addr Function Address HI Address LO Data HI Data LO 2 bytes
Response:
01 06 01 2D 00 19 CRC16
Slave addr Function Address HI Address LO Data HI Data LO 2 bytes
Example 2: Read value of Vacon parameter 1.2
Response: Value of parameter 1.2
Query:
01 03 00 65 00 01 CRC16
Slave addr Function Address HI Address LO Number of
points HI
Number of
points LO
2 bytes
Response:
01 03 02 00 32 CRC16
Slave addr Function Byte count Value HI Value LO 2 bytes
Page 20

VACON CX Modbus user’s manual Page 20
________________________________________________________________________________________
________________________________________________________________________________________
Vacon Oy Phone +358-201-2121 Fax: +358-201-212 205
7.4 CONNECTIONS (small Modbus Board for Vacon CXS, Vacon CX211OPT)
7.4.1 Board layout
Terminals:
X5 Screw terminal to Modbus CXS
Diagnostic LED:
H5 Supply Voltage, Red.
H3 led is active if the Fieldbus board has supply voltage.
7.4.2 Modbus connections
Screw Connector connector X5: (Terminal resistors not included in the package)
Signal Connector X5 Description
Shield X5-1 Cable shield
- X5-2 RxD/TxD-P X5-3 Receive/Transmission data positive (B)
RxD/TxD-N X5-4 Receive/Transmission data negative (A)
DGND X5-5 Data Ground
Table 7-2. Screw connector terminals
Note! If Vacon is the last device then the bus termination must be set. Install the resistors to the screw terminal
(see table 5-1)
H3
X5
H1
1 2 3 4 5
Figure 7-1. Modbus board
120 Ω
Termination for
the last node
H5
Page 21

VACON CX Modbus user’s manual Page 21
________________________________________________________________________________________
________________________________________________________________________________________
Vacon Oy Phone +358-201-2121 Fax: +358-201-212 205
7.5 Installation of CX211OPT in Vacon CXS drives
NOTE: The option boards on the pictures may not look exactly the same as the one you have purchased.
These instructions are, still, applicable.
A
Remove the control panel and the panel base.
B
Remove the fixing screw from the control
board and replace it with a stand sleeve (4).
C
Connect the power cable (5) to terminal X5 of
the control board. The power cable can also
be connected to terminal X6 if terminal X5 is
already reserved by the power cable from the
power board.
D
Remove the protective foil of the plastic board
and place the plastic board above the control
board. Be sure to place the plastic board
correctly so that the stand sleeve (4) comes
out through the hole on the board.
E
Place the board on the protective plastic
board (6) and connect the data cable (2) to
terminal X14 of the control board. The stand
sleeve should come out through the metaledged hole.
F
Secure the board on the stand sleeve with
the screw (3) attached.
4
5
6
4
X14
2
3
Page 22

VACON CX Modbus user’s manual Page 22
________________________________________________________________________________________
________________________________________________________________________________________
Vacon Oy Phone +358-201-2121 Fax: +358-201-212 205
G
Connect the power cable (5) to terminal X9 on
the option board.
H
Attach the control panel base with four
screws.
I
Check the connections. Remove all foreign objects from inside the frequency drive. Put the
control panel and the frequency drive cover back to their places.
Page 23

VACON OY
PL 25
Runsorintie 7
65381 VAASA
Puh: 0201 2121
Fax: 0201-212 205
Päivystys: 040-8371 150
E-mail: vacon@vacon.com
http://www.vacon.com
Ud00136e.doc
3.10.2000
 Loading...