

Page 1

ADSL Wireless Gateway
Quick Installation Guide for
Windows 95, 98, Me, NT 4.0, 2000, and XP;
Macintosh and Linux Operating Systems
English
Français
Deutsch
Italiano
Español
Português
ADSL Wireless Gateway
Model 9106
Part Number: R24.0450.00
1
Page 2

Page 3

U.S. Robotics Corporation
935 National Parkway
Schaumburg, Illinois
60173-5157
USA
No part of this documentation may be reproduced in any form or by any means or used to make any
derivative work (such as a translation, transformation, or adaptation) without written permission from
U.S. Robotics Corporation. U.S. Robotics Corporation reserves the right to revise this documentation
and to make changes in the products and/or content of this document from time to time without obligation to provide notification of such revision or change. U.S. Robotics Corporation provides this documentation without warranty of any kind, either implied or expressed, including, but not limited to,
implied warranties of merchantability and fitness for a particular purpose. If there is any software on
removable media described in this documentation, it is furnished under a license agreement included
with the product as a separate document, in the hard copy documentation, or on the removable media
in a directory file named LICENSE.TXT or !LICENSE.TXT. If you are unable to locate a copy, please contact U.S. Robotics and a copy will be provided to you.
UNITED STATES GOVERNMENT LEGEND If you are a United States government agency, then this documentation and the software described herein are provided to you subject to the following:
All technical data and computer software are commercial in nature and developed solely at private
expense. Software is delivered as “Commercial Computer Software” as defined in DFARS 252.2277014 (June 1995) or as a “commercial item” as defined in FAR 2.101(a) and as such is provided with only
such rights as are provided in U.S. Robotics standard commercial license for the Software. Technical
data is provided with limited rights only as provided in DFAR 252.227-7015 (Nov 1995) or FAR 52.22714 (June 1987) whichever is applicable. You agree not to remove or deface any portion of any legend
provided on any licensed program or documentation contained in, or delivered to you in conjunction
with, this Quick Installation Guide.
Copyright © 2003 U.S. Robotics Corporation. All rights reserved. U.S. Robotics and the U.S. Robotics
logo are registered trademarks of U.S. Robotics Corporation. Other product names are for identification purposes only and may be trademarks of their respective companies. Product specifications subject to change without notice.
1
Page 4

2
Page 5

For current product support and contact information, go to the following Web
site:
http://www.usr.com/broadbandsupport
Thank you for purchasing the U.S. Robotics
Gateway. The following instructions will walk you through installation of the
gateway.
SureConnect
ADSL Wireless
Installation Overview and System Requirements
NOTE: It is important that you have your serial number written down for
future reference. If you ever need to call our technical support
department, you will need this number to receive assistance. You can
find your 12-character serial number on a bar code sticker located on
the bottom of the gateway and also on the box. You will also need your
model number. It is noted below.
Write your serial number in the space provided below.
9106
Serial Number Model Number
What You Need Before You Begin
• Active ADSL and Internet service from your local telephone company
or Internet Service Provider (ISP).
• Your user name and password, if they were assigned.
• Some installations may require a special splitter between the gateway
and telephone wall jack. The splitter must include both a phone jack
and a router jack. If it does not, do not install it between the wall jack
and the gateway.
Your ISP should be able to provide the following, if needed:
• VPI/VCI values
• ADSL Standard (Modulation)
• Encapsulation Mode
• Authentication (PAP or CHAP) for PPP connections
3
Page 6
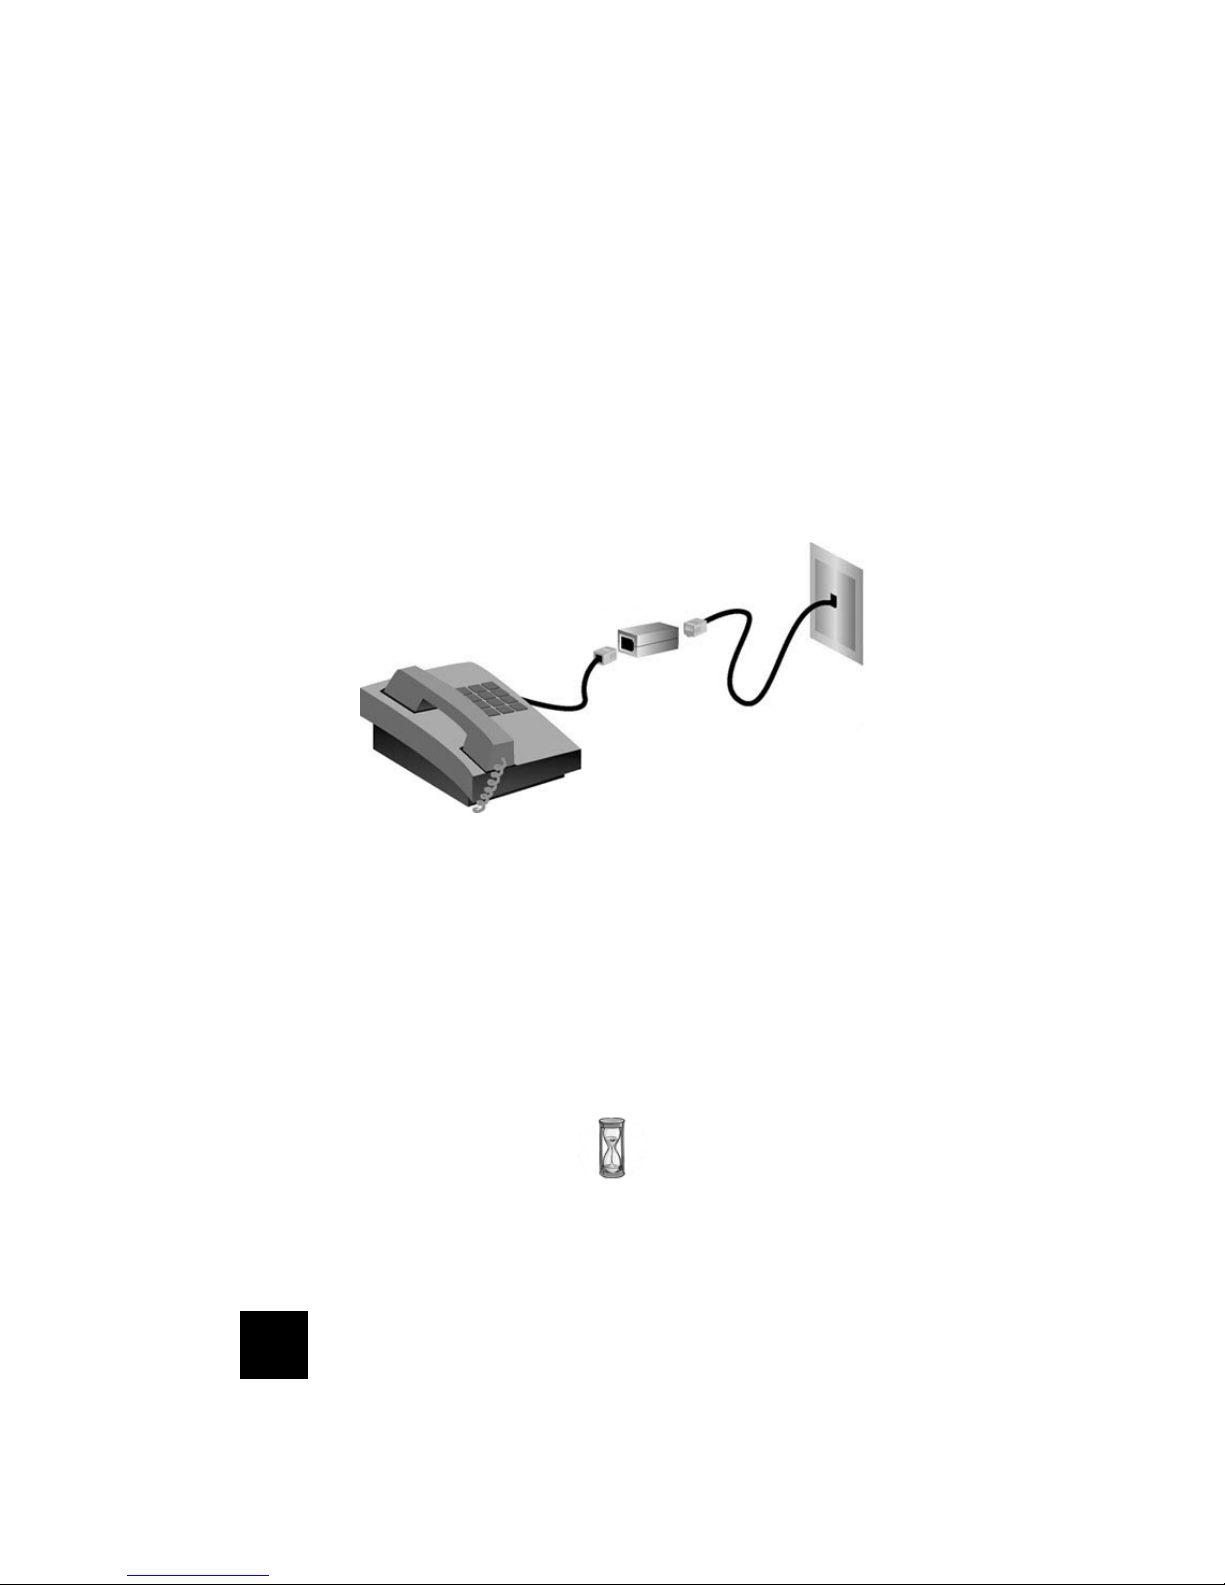
Modem Installation
Step 1. Connect Microfilters (if included or required by
your ISP)
Your ISP will determine if microfilters are necessary. If microfilters were not
included, check with your ISP to determine if microfilters are needed.
To install the microfilter, plug the phone into the microfilter, and then plug the
microfilter into the telephone wall jack. Do not install a microfilter on the cable
that connects your gateway to the telephone jack unless your microfilter has a
connection for both the telephone and the ADSL device.
Step 2. Setting Up Your Computer for Installation (Macintosh and Linux users skip to Step 3)
Before you plug the gateway into the computer, you must first install the
software. Make sure that your computer is on. You should have your operating
system CD-ROM readily available.
1. Insert the Installation CD-ROM into your computer’s CD-ROM drive. The
installation will start automatically. This process may take a moment.
In the event the installation does not start automatically, click Windows
Start and then Run. Type D:\setup.exe in the dialogue box and click OK. (If
your CD-ROM drive uses a different letter, type that letter in place of D.)
4
4
Page 7

2. Follow the on-screen instructions to complete the software installation.
3. A qualification test will run to verify that your system meets the minimum
requirements for installation. The Results screen will display those items in
your configuration that passed with a green flag and the ones that failed
with a red flag. If your system passed the qualification, click Next.
If your system fails the qualification test, click View Report to identify
which component(s) failed. For additional information, refer to the
Troubleshooting section of this installation guide.
Step 3. Install the Antennas and Cables
1. Attach the antennas to the back of the gateway.
2. Plug the AC power adapter into the 16VAC jack on the back of your U.S.
Robotics
into a standard wall outlet. If the PWR LED on the front panel is not
illuminated, press the Power switch on the back of the gateway.
The gateway will initialize after the power is turned on. This process may
take a moment.
SureConnect
ADSL Wireless Gateway. Plug the AC power adapter
For Windows Users only: Click Next. The necessary files will be copied to
your system.
3. Connect one end of the included grey telephone cable to the grey
telephone port on the back of your gateway labelled ADSL. Connect the
other end into the telephone wall jack. For Windows Users only: Click
Next.
4. Select one of the following connection options.
Via a wireless connection:
Scan for the Wireless Gateway and associate to it. For Windows Users
only: Click Next.
5
5
Page 8

Via an Ethernet connection:
Install the yellow Ethernet cable. While networking up to four devices is
optional, additional devices should be connected after the initial setup is
complete. Insert one end of the yellow Ethernet cable into the yellow
Ethernet 1, Ethernet 2, Ethernet 3, or Ethernet 4 port on the back of the
gateway. Connect the other end of the Ethernet cable to the Ethernet port
on your computer’s 10/100 network interface card (NIC). For Windows
Users only: Click Next.
Setup will detect your modem and then install the SureConnect ADSL
EasyConfigurator. This process may take a moment.
For Macintosh and Linux users: Insert the CD-ROM and follow the onscreen instructions. Mac 10 Users: Double-click the CD icon from your
desktop, open Install.htm, and follow the on-screen instructions.
Step 4. Configure the Gateway with EasyConfigurator
NOTE: For NT 4.0 users, Service Pack 3 or later is required in order to run
EasyConfigurator.
1. The SureConnect ADSL EasyConfigurator screen will appear and prompt
you for a user name and password as demonstrated in the following
graphic:
6
6
Page 9

These fields are case sensitive. Be sure your Caps Lock mode is off. The
default user name is admin. The default password is admin. Make sure
these values are correct and click Login. This process may take a moment.
2. Select your country and your Internet Service Provider (ISP) from the lists.
Click Apply. If you do not see your ISP listed, refer to the Troubleshooting
section of this installation guide.
3. EasyConfigurator will now configure your gateway. This process may take
a moment.
When the current state is CONNECTED TO INTERNET, as demonstrated in
the following graphic, your U.S. Robotics
Gateway is successfully configured for Internet access. You can start
browsing now. Register your product and test your connection by going to
the following Web site: www.usr.com/productreg
SureConnect
7
ADSL Wireless
7
Page 10

If you did not receive this message, refer to the Troubleshooting section of
this installation guide.
Step 5. (Optional) Verify the Wireless Configuration
Click the Wireless menu at the top of the screen. EasyConfigurator will query
your gateway and after some time, display the current wireless state.
8
8
Page 11

The default settings are as follows:
Wireless Status = Enabled
Access Point = SSID Broadcast Enabled
WEP Encryption = Disabled
If you want to change these parameters, click Configure Wireless. A Web
browser will launch momentarily. It is recommended that you enable WEP and
assign a security secret key. Make sure you assign the same secret key to your
wireless devices to ensure future connectivity. To further guarantee wireless
security, enable the Mac Filter options on the Wireless - Mac Filter web user
interface screen. For more information about this and additional wireless
parameters, refer to the User Guide located on the Installation CD-ROM.
If you have any difficulties connecting to the U.S. Robotics
Wireless Gateway, check the following top three issues and see if they apply to
your situation.
• If you are attempting to create a wireless connection but cannot connect to
the U.S. Robotics
wireless card is set to Infrastructure mode. If the wireless cards are set to
802.11b AdHoc mode, you will not be able to connect to the U.S. Robotics
SureConnect
Infrastructure mode, it should automatically connect to the Access Point of
the U.S. Robotics
cards do not automatically connect, rescan until they detect the U.S.
Robotics
• If you create a wireless connection to the U.S. Robotics
Wireless Gateway but are experiencing poor link quality, check the positioning of the U.S. Robotics
tances, multiple floors, or steel or concrete walls can diminish the link
quality. If possible, reposition the U.S. Robotics
less Gateway to reduce the effect of any of these obstacles.
SureConnect
SureConnect
ADSL Wireless Gateway. When each wireless card is set to
SureConnect
ADSL Wireless Gateway and connect.
ADSL Wireless Gateway, make sure each
ADSL Wireless Gateway. If the wireless
SureConnect
ADSL Wireless Gateway. Long dis-
9
SureConnect
SureConnect
SureConnect
ADSL
ADSL
ADSL Wire-
9
Page 12

Troubleshooting
To help diagnose the problem, first use the following troubleshooting checklist.
✔ Confirm that you are using the AC power adapter that came with your
gateway and that it is secured to the gateway and to an active wall
outlet. Make sure the Power switch is switched to the on position.
The PWR LED should be illuminated.
✔ Confirm that you have secured the telephone cable to the telephone
wall jack and to the gateway. The ADSL LED should be illuminated.
✔ Confirm that you have secured the Ethernet cable(s) to the Ethernet 1,
2, 3, or 4 port on the gateway and to the computer’s network interface
card (NIC). The corresponding Ethernet LED(s), on the front of the
gateway, should be illuminated.
✔ When connected wirelessly with the gateway, verify that the wireless
client is correctly installed, and if so, whether or not it is correctly set
(no WEP by default, infrastructure mode). In addition, verify to ensure
the client is synchronized with the gateway. Refer to your client’s
documentation for more information.
✔ Open EasyConfigurator to the Status page and confirm that your
gateway is functioning properly. To verify Wireless with the gateway,
go to the Wireless page and check that the status is correct.
Status LEDs
The U.S. Robotics
front of the gateway: PWR, Ethernet 1, 2, 3, 4, ADSL, WAN IP, and WLAN. The
operational status of the gateway is indicated by the LED conditions listed in the
following table.
10
SureConnect
ADSL Wireless Gateway has eight LEDs on the
10
Page 13

PWR
WAN IP
WLAN
Ethernet
1, 2, 3, 4
ADSL
On Green Power is being received from the AC power adapter.
Off No power is detected.
On Green
Flashing Green IP connected and passing data.
Red Failed to get IP from ISP.
Off ADSL is not synchronized or in bridge mode.
On Green Wireless client connected to the gateway.
Flashing Green Wireless data is flowing.
Off No wireless client connected to the gateway.
On Green
Flashing Green Data traffic is flowing.
Off
On Green A DSL link has been established.
Flashing Green A DSL link is being negotiated.
Off The DSL link has failed.
Gateway Back
The Gateway gets a public IP Address from the
Internet Service Provider (ISP), in PPP mode.
A physical connection between the gateway and the
computer has been established and detected through
the Ethernet cable.
A physical connection between the gateway and the
computer has not been established through the
Ethernet cable.
Item Description
ADSL Digital subscriber line RJ-11 service jack on the back of the gateway
1 Ethernet Port 1 on the back of the gateway
2 Ethernet Port 2 on the back of the gateway
3 Ethernet Port 3 on the back of the gateway
4 Ethernet Port 4 on the back of the gateway
Reset Resets the gateway
16VAC Input jack that accepts cable from AC power adapter
Power Push button switch that turns the gateway on and off
11
11
Page 14

NOTE: To reset the gateway, insert a pin or paperclip to push the reset
button. This will restart the gateway. If you press this button for more
than 5 seconds, it will then reset the gateway’s configuration to the
factory defaults.
More Troubleshooting Tips
My ISP is not listed in the EasyConfigurator ISP field.
Possible Solution: If your ISP or country is not listed, select the Not Listed
option. You will then have to configure the settings in the “Line
configuration” area of the screen. Your ISP will provide you with the correct
values and settings. Then click Apply. This process may take a moment.
The LEDs are not illuminated when I turn on the gateway.
Possible Solution: Review the Troubleshooting Checklist at the beginning
of this section.
12
12
Page 15

The ADSL light is flashing or is not illuminated.
Possible Solution: Review the Troubleshooting Checklist at the beginning
of this section.
I can't access the Internet.
Possible Solution:
• Review the Troubleshooting Checklist at the beginning of this section.
• Make sure that you have an active ISP account.
• Check your VCI/VPI settings, user name, password, and authentication
type via EasyConfigurator. To check these variables, access
EasyConfigurator and select the Status tab. In addition, the user name
and password may be case sensitive. Be sure to check that the CAPS
LOCK key is off.
• Contact your ISP for further assistance.
I don’t know if my assigned IP Address is Static or Dynamic.
Possible Solution: If you have active DSL service, you probably have a
Dynamic IP address. Check with your ISP to verify this information. Some
ISPs assign Static IP addresses.
I am no longer able to access the Internet.
Possible Solution: You need to verify the connection setting of your Web
browser and that the HTTP Proxy feature of your Web browser is disabled.
You need to do this so that your Web browser can read the configuration
pages. Launch your Web browser.
Internet Explorer users: Click Tools, Internet Options, and then the
Connections tab. Select Never dial a connection, click Apply, and then click
OK. Click Tools again, then click Internet Options. Click the Connections
tab, and click LAN Settings. Clear all the check boxes and click OK. Click OK
to close Internet Options.
Netscape Navigator users: Click Edit, Preferences, and then double-click
Advanced in the Category window. Click Proxies, select Direct connection
to the Internet, and then click OK. Click Edit again, then click Preferences.
Under Category, double-click Advanced, then click Proxies. Select Direct
connection to the Internet and click OK.
13
13
Page 16

I can’t connect special applications.
Possible Solution: If you have the U.S. Robotics
SureConnect
ADSL
Wireless Gateway properly connected and can access the Internet but are
experiencing difficulties connecting with special applications (e.g., ICQ,
Battle.net, etc.), you must assign specific ports in order to bypass the
firewall function. For more information about how to configure this
function, refer to the User Guide located on the Installation CD-ROM.
While trying to check my network configuration settings in Windows Me or XP, I
can’t find the Network icon.
Possible Solution: The default setting in Windows Me and XP is to not show
all of the icons within the Control Panel. Click Windows Start, Settings, and
then Control Panel. Within Control Panel, click View all Control Panel
options on the left side of the screen. All of the Control Panel icons should
now be visible.
I don’t know how to configure the TCP/IP protocol to work with the gateway.
Possible Solution: You may be able to resolve this problem by opening the
Help menu in your operating system. Check the help messages for TCP/IP.
While trying to surf the Internet, I received a “Page Not Found” or similar error.
Possible Solution: Check if your computer has acquired an IP Address from
the gateway. If not, try to release/renew the IP Address. Refer to the User
Guide on the CD-ROM for more information.
Possible Solution: Check if your gateway received an IP Address from your
Internet Service Provider (ISP). Refer to the Ping Procedure in this guide.
For additional information, refer to the User Guide on the Installation CDROM.
My wireless connection can not access the Internet.
Possible Solution: Verify that the client is correctly installed, configured,
and can see the gateway.
Possible Solution: Go to the EasyConfigurator Wireless page and verify that
wireless is enabled and working properly.
Possible Solution: Review the Troubleshooting Checklist at the beginning
of this section and verify that the ADSL connection is working.
14
14
Page 17

Troubleshooting Ping Procedure
1. Click Windows Start and then Run.
Windows 95, 98, and Me: Type command in the dialogue box. Click
OK.
Windows NT 4.0, 2000, and XP: Type cmd in the dialogue box. Click
OK.
2. Type ping 127.0.0.1 after the DOS command prompt. This is your local
host address. The address assures that TCP/IP installs and functions
properly. If you can’t complete this ping, disconnect the gateway and
repeat the installation procedure.
3. Type ping followed by your computer’s IP address. This assures that
your computer responds to requests. If you cannot complete this ping,
make sure all of the cables are connected properly and that all of the
correct drivers are installed.
4. Type ping followed by your gateway address to check the
communication with your gateway (the default gateway address is
192.168.1.1). This assures that you can connect to other computers and
the gateway. If you can establish communication with the gateway,
you can access the Administration page and configure settings. If you
cannot complete this ping, make sure the AC power adapter is plugged
in and the gateway is properly connected to your computer.
5. Type ping followed by the outside Internet address of your gateway.
This is the address that is provided either by your ISP or by the outside
LAN. This will ensure that your gateway functions properly and allows
traffic to pass through.
6. Type ping followed by your known DNS server address. This will allow
you to match valid Internet host names to IP addresses and to verify
that you can access the Internet.
What if I don’t receive a successful message from a ping to the gateway’s
gateway?
Possible Solution: No return message indicates that the computer cannot
communicate with the gateway through IP address assignment.
• Check the computer’s IP address (Network Interface Card). Make sure
that it is in the same subnet as the gateway address. (For example, if
the gateway address is 192.168.1.1, the computer’s IP address must be
192.168.1.x, where x is greater than 1.) If it is not, release and then
renew the IP address for your computer.
15
15
Page 18

Technical Support
• For current product support and contact information, go to the
U.S. Robotics Web site at: http://www.usr.com/broadbandsupport
Many of the most common difficulties users experience have been
addressed in the FAQ and Troubleshooting Web pages for your
specific product.
• If you can’t connect to the Internet, contact your ISP for assistance.
• If your ISP is unable to help you and you still cannot connect to the
Internet, contact the U.S. Robotics Technical Support Department.
Technical questions about U.S. Robotics products can be answered by
technical support specialists. Refer to the User Guide on the
Installation CD-ROM to obtain the contact information for the
technical support department in your area.
16
16
Page 19
Regulatory Information
Manufacturer’s Declarations of Conformity
We, U.S. Robotics Corporation of 935 National Parkway, Schaumburg, Illinois, 60173-5157,USA, declare
under our sole responsibility that the U.S. Robotics
declaration relates is in conformity with the following standards and/or other normative documents:
EN300 328-2
EN301 489-1
EN301 489-17
EN60950
EN55022
EN55024
This equipment complies with Article 3.1(a) of Directive 1999/5/EC for the protection of the health and
safety of the user.
We, U.S. Robotics Corporation, hereby declare that this product is in compliance with the essential
requirements and other relevant provisions of Directive 1999/5/EC.
This product can be used in the following countries:
Germany, Austria, Belgium, Switzerland, Netherlands, Luxembourg, Italy, France, UK, Ireland, Spain,
Portugal, Sweden, Norway, Denmark, Finland, Iceland, and Greece
Regarding IEEE 802.11g we currently have the following information about restrictions in the R&TTE
countries:
Country frequency band max. output power
France 2454-2483.5 MHz 10 mW EIRP outdoor
CE Declaration of Conformity
SureConnect
ADSL Wireless Gateway to which this
Operating Channels: IEEE 802.11g compliant
This device complies with the European requirements governing exposure to electromagnetic
radiation. This equipment should be installed and operated with minimum distance 20 cm between the
radiator and your body. This wireless device is a transmitter/receiver and has been designed and
manufactured to comply with the exposure limits recommended by the Council of the European Union
and the International Commission on Non-Ionizing Radiation Protection (ICNIRP, 1999) for the entire
population. The exposure standard for portable equipment uses the "Specific Absorption Rate" as unit
of measure. The maximum SAR value of this wireless device measured in the conformity
test is 1.08 W/kg.
11 channels (US, Canada)
13 channels (ETSI)
14 channels (Japan)
EU Detachable Antenna Information
This USR wireless device has been designed to operate with the antenna included in this package only.
Together this device and antenna combination has been tested and approved by a European Agency
conforming with the European R&TTE directive 1999/5/EC to meet the radiated power level
requirement of 100mW e.i.r.p. Replacement of this antenna must only done with an authorized USR
component that has been designed and tested with the unit to the requirements of directive 1999/5/
EC. Please refer to the USR web site to get product antenna ordering information.
In Europe:
FRS Europe BV.
Draaibrugweg 2
1332 AC Almer
The Netherlands
Go to http://www.usr.com to see the most recent channel restriction information.
17
17
Page 20

U.S. Robotics Corporation Two (2) Year Limited Warranty
1.0 GENERAL TE RMS:
1.1 This Limited Warranty is extended only to the original end-user purchaser (CUSTOMER) and is not transferable.
1.2 No agent, reseller, or business partner of U.S. Robotics Corporation (U.S. ROBOTICS) is authorised to modify the
terms of this Limited Warranty on behalf of U.S. ROBOTICS.
1.3 This Limited Warranty expressly excludes any product that has not been purchased as new from U.S. ROBOTICS
or its authorised reseller.
1.4 This Limited Warranty is only applicable in the country or territory where the product is intended for use (As indicated by the Product Model Number and any local telecommunication approval stickers affixed to the product).
1.5 U.S. ROBOTICS warrants to the CUSTOMER that this product will be free from defects in workmanship and materials, under normal use and service, for TWO (2) YEARS fro m the date of purchase from U.S. ROBOTICS or from its
authorised reseller.
1.6 U.S. ROBOTICS sole obligation under this warranty shall be, at U.S. ROBOTICS sole discretion, to repair th e
defective product or part with new or reconditioned parts; or to exchange the defective product or part with a
new or reconditioned product or part that is the same or similar; or if neither of the two foregoing options is reasonably available, U.S. ROBOTICS may, at its sole discretion, provide a refund to the CUSTOMER not to exceed
the latest published U.S. ROBOTICS recommended retail purchase price of the product, less any applicable service fees. All products or parts that are exchanged for replacement will become the property of U.S. ROBOTICS.
1.7 U.S. ROBOTICS warrants any replacement product or part for NINETY (90) DAYS from the date the product or part
is shipped to Customer.
1.8 U.S. ROBOTICS makes no warranty or representation that this product will meet CUSTOMER requirements or
work in combination with any hardware or software products provided by third parties.
1.9 U.S. ROBOTICS makes no warranty or representation that the operation of the software products provided with
this product will be uninterrupted or error free, or that all defects in software products will be corrected.
1.10 U.S. ROBOTICS shall not be responsible for any software or other CUSTOMER data or information contained in or
stored on this product.
2.0 CUSTOMER OBLIGATIONS
2.1 CUSTOMER assumes full responsibility that this product meets CUSTOMER specifications and requirements.
2.2 CUSTOMER is specifically advised to make a backup copy of all software provided with this product.
2.2 CUSTOMER assumes full responsibility to properly install and configure this product and to ensure proper installation, configuration, operation and compatibility with the operating environment in which this product is to
function.
2.3 CUSTOMER must fur nish U.S. ROBOTICS a dated Proof of Purchase (copy of original purchase receipt from U.S.
ROBOTICS or its authorised reseller) for any warranty claims to be authorised.
3.0 OBTAINING WARRANTY SERVICE:
3.1 CUSTOMER must contact U.S. ROBOTICS Technical Support or an authorised U.S. ROBOTICS Service Centre
within the applicable warranty period to obtain warranty service authorisation.
3.2 Customer must provide Product Model Number, Product Serial Number and dated Proof of Purchase (copy of
original purchase receipt from U.S. ROBOTICS or its authorised reseller) to obtain warranty service authorisation.
3.3 For information on how to contact U.S. ROBOTICS Technical Support or an authorised U.S. ROBOTICS Service
Centre, please see the U.S ROBOTICS corporate Web site at: www.usr.com
3.4 CUSTOMER should have the following information / items readily available when contacting U.S. ROBOTICS
Technical Support:
Product Model Number
Product Serial Number
Dated Proof of Purchase
CUSTOMER contact name & telephone number
CUSTOMER Computer Operating System version
U.S. ROBOTICS Installation CD-ROM
U.S. ROBOTICS Installation Guide
4.0 WARRANTY REPL ACEMENT:
4.1 In the event U.S. ROBOTICS Technical Support or its authorised U.S. ROBOTICS Service Centre determines the
product or part has a malfunction or failure attributable directly to faulty workmanship and/or materials; and the
product is within the TWO (2) YEAR warranty term; and the CUSTOMER will include a copy of the dated Proof of
Purchase (original purchase receipt from U.S. ROBOTICS or its authorised reseller) with the product or part with
the returned product or part, then U.S. ROBOTICS will issue CUSTOMER a Return Material Authorisation (RMA)
and instructions for the return of the product to the authorized U.S. ROBOTICS Drop Zone.
4.2 Any product or part retur ned to U.S. ROBOTICS without an RMA issued by U.S. ROBOTICS or its authorised U.S .
ROBOTICS Service Centre will be returned.
4.3 CUSTOMER agrees to pay shipping charges to return the product or part to the authorised U.S. ROBOTICS Return
Centre; to insure the product or assume the risk of loss or damage which may occur in transit; and to use a shipping container equivalent to the original packaging.
4.4 Responsibility for loss or damage does not transfer to U.S. ROBOTICS until the returned product or part is
18
18
Page 21

received as an authorised return at an authorised U.S. ROBOTICS Return Centre.
4.5 Authorised CUSTOMER returns will be unpacked, visually inspected, and matched to the Product Model Number
and Product Serial Number for which the RMA was authorised. The enclosed Proof of Purchase will be inspected
for date of purchase and pl ace of purchase. U.S. ROBOTICS may deny warranty service if visual inspection of the
returned product or part does not match the CUSTOMER supplied information for which the RMA was issued.
4.6 Once a CUSTOMER return has been unpacked, visually inspected, and tested U.S. ROBOTICS will, at its sole discretion, repair or replace, using new or reconditioned product or parts, to whatever extent it deems necessary to
restore the product or part to operating condition.
4.7 U.S. ROBOTICS will make reasonable effort to ship repaired or replaced product or part to CUSTOMER, at U.S.
ROBOTICS expense, not later than TWENTY ONE (21) DAYS after U.S. ROBOTICS receives the authorized CUSTOMER return at an authorised U.S. ROBOTICS Return Centre.
4.8 U.S. ROBOTICS shall not be liable f or any damages caused by delay in delivering or furnishing repaired or
replaced product or part.
5.0 LIMITATIONS
5.1 THIRD-PARTY SOFTWAR E: This U.S. ROBOTICS product may include or be bundled with third-party software, the
use of which is governed by separate end-user license agreements provided by third-party software vendors.
This U.S. ROBOTICS Limited Warranty does not apply to such third-party software. For the app licable warranty
refer to the end-user license agreement governing the use of such software.
5.2 DAMAGE DUE TO MISUSE, NEGLECT, NON-COMPLIANCE, IMPROPER INSTALLATION, AND/OR ENVIRONMENTAL
FACTORS: To the extent permitted by applicable law, this U.S. ROBOTICS Limited Warranty does not apply to normal wear and tear; damage or loss of data due to interoperability with current and/or future versions of operating system or other current and/or future software and hardware; alterations (by persons other than U.S.
ROBOTICS or authorized U.S. ROBOTICS Service Centres); damage caused by operator error or non-compliance
with instructions as set out in the us er documentation or other accompanying documentation; damage caused
by acts of nature such as lightning, storms, floods, fires, and earthquakes, etc. Products evidencing the product
serial number has been tampered with or removed; misuse, neglect, and improper handling; damage caused by
undue physical, temperature, or electrical stress; counte rfeit products; damage or loss of data caused by a computer virus, worm, Trojan horse, or memory content corruption; failures of the product which result from accident, abuse, misuse (including but not limited to improper installation, connection to incorrect voltages, and
power points); failures caused by p roducts not supplied by U.S. ROBOTICS; damage cause by moisture, corrosive environments, high voltage surges, shipping, abnormal working conditions; or the use of the product outside the borders of the country or territory intended for u se (As indicated by the Product Model Number and any
local telecommunication approval stickers affixed to the product).
5.3 TO THE FULL EXTENT ALLOWED BY LAW, THE FOREGOING WARRANTI ES AND REMEDIES AR E EXCLUSIVE AND
ARE IN LIEU OF ALL OTHER WARRANTIES, TERMS, OR CONDITIONS, EXPRESS OR IMPLI ED, EITHER IN FACT OR
BY OPERATION OF LAW, STATUTORY OR OTHERWISE, INCLUDING WARRA NTIES, TERMS, OR CONDITION S OF
MERCHANTABILITY, FITNESS FOR A PARTICULAR PU RPOSE, SATISFACTORY QUALITY, CORRESPONDE NCE WITH
DESCRIPTION, AN D NON-INFRINGEM ENT, ALL OF WHICH ARE E XPRESSLY DISCLAIMED. U.S. ROBOTICS NEITHER
ASSUMES NOR AUTHORISES ANY OTHER PE RSON TO ASSUME FO R IT ANY OTHER LIABILITY IN CONNECT ION
WITH THE SALE, INSTALLATION, MAINTENANCE, WARRANTY, OR USE OF ITS PRODUCTS.
5.4 LIMITATION OF LIABILITY. TO THE FULL EXTENT ALLOWED BY LAW, U.S. ROBOTICS ALSO EXCLUDES FOR ITSELF
AND ITS SUPPLIERS A NY LIABILITY, WHETHER BAS ED IN CONTRACT OR TORT (INCLUDING NEGLIG ENCE), FOR
INCIDENTAL, CONSEQUENTIAL, INDIRECT, SPECIAL, OR PUNITIVE DAMAGES OF ANY KIND, OR FOR LOSS OF
REVENUE OR PROFITS, LOSS OF BUSINESS, LOSS OF INFORMATION OR DATA, OR OTHER FINANCIAL LOSS ARISING OUT OF OR IN CONNECTION WITH THE SALE, INSTALLATION, MAINTENANCE, USE, PERFORMANCE, FAILURE,
OR INTERRUPTION OF ITS PRODUCTS, EVEN IF U.S. ROBOTICS OR ITS AUTHORISED RESELLER HAS BE EN
ADVISED OF THE POSSIB ILITY OF SUCH DAMAGES, AND LIMITS ITS LIAB ILITY TO REPAIR, REPLACEMENT, OR
REFUND OF THE PURCHASE PRICE PAID, AT U.S. ROBOTICS OPTION. THIS DISCLAIMER OF LIABI LITY FOR DAMAGES WILL NOT BE AFFECTED IF ANY REMEDY PROVIDED HEREIN SHALL FAIL OF ITS ESSENTIAL PURPOSE.
6.0 DISCLAIMER: Some countries, states, territories or provinces do not allow the exclusion or limitation of implied
warranties or the limitation of incidental or consequential damages for certain products supplied to consumers,
or the limitation of liability for personal injury, so the above limitations and exclusions may be limited in their
application to CUSTOMER. When the implied warranties are not allowed by law to be excluded in their entirety,
they will be limited to the TWO (2) YEAR duration of this written warranty. This warranty gives CUSTOMER specific legal rights, which may vary depending on local law.
7.0 GOVERNING L AW: This Limited Warranty shall be governed by the laws of the State of Illinois, U.S.A. excluding
its conflicts of laws principles and excluding the United Nations Convention on Contracts for the International
Sale of Goods.
U.S. Robotics Corporation
935 National Parkway
Schaumburg, IL 60173
U.S.A
19
19
Page 22

20
20
Page 23

U.S. Robotics Corporation
935 National Parkway
Schaumburg, Illinois
60173-5157
Etats-Unis
Il est interdit de reproduire cette documentation, que ce soit en tout ou en partie, sous quelque forme
et par quelque moyen que ce soit en vue d'effectuer des travaux dérivés (tels que traduction,
transformation ou adaptation) sans la permission écrite d'U.S. Robotics Corporation. U.S. Robotics
Corporation se réserve le droit de revoir cette documentation et de modifier le produit et/ou le
contenu de ce document le cas échéant et sans préavis. U.S. Robotics Corporation fournit cette
documentation sans garantie implicite ou explicite d'aucune sorte, et notamment sans aucune
garantie de commercialisation et d'adaptation à un usage particulier. Si cette documentation décrit un
logiciel sur support amovible, ce dernier est soumis à un accord de licence inclus avec le produit sur un
document séparé, soit sur la documentation écrite soit sur le support amovible, dans un fichier
répertoire appelé LICENSE.TXT ou !LICENSE.TXT. Si vous ne parvenez pas à localiser un exemplaire,
veuillez contacter U.S. Robotics qui vous en fera parvenir un.
GOUVERNEMENT DES ETATS-UNIS Si vous êtes une agence du gouvernement des Etats-Unis, cette
documentation et le logiciel qu'elle décrit vous sont fournis aux termes des conditions suivantes :
Toutes les données techniques et les logiciels informatiques sont par nature commerciaux et
développés uniquement sur des fonds privés. Le logiciel est fourni en tant que « Logiciel informatique
commercial », comme défini dans le DFARS 252.227-7014 (juin 1995) ou en tant qu'« objet
commercial », comme défini dans le FAR 2.101(a) et est donc fourni avec les mêmes droits que ceux
énumérés dans la licence commerciale standard de logiciels U.S. Robotics. Les données techniques
sont fournies avec des droits limités, comme défini dans le DFAR 252.227-7015 (nov 1995) ou le FAR
52.227-14 (juin 1987), suivant les cas. Vous vous engagez à ne pas retirer ni altérer toute légende
d'une documentation ou d'un programme contenu dans ce guide d'installation rapide ou livré avec lui.
Copyright © 2003 U.S. Robotics Corporation. Tous droits réservés. U.S. Robotics et le logo
U.S. Robotics sont des marques déposées d'U.S. Robotics Corporation. Tous les autres noms
de produits sont utilisés à des fins d’identification uniquement et sont susceptibles d’être des
marques de leurs sociétés respectives. Les spécifications des produits peuvent être modifiées
sans préavis.
21
Page 24

22
Page 25

Pour obtenir de l'aide sur ce produit ou nous contacter, visitez le site Web
suivant :
http://www.usr.com/broadbandsupport
Nous vous remercions d'avoir choisi la passerelle U.S. Robotics
ADSL Wireless Gateway. Les instructions suivantes vous indiqueront comment
l'installer.
SureConnect
Configuration requise et informations générales
sur l'installation
REMARQUE : nous vous recommandons vivement de noter votre
numéro de série afin de pouvoir vous y référer par la suite. Vous
en aurez besoin si vous devez appeler notre service d'assistance
technique. Vous trouverez ce numéro de série de 12 caractères sur
la boîte et sur l'étiquette de code-barre figurant sous la passerelle.
Vous aurez également besoin de votre numéro de modèle, indiqué
ci-dessous.
Inscrivez votre numéro de série dans l'espace ci-dessous.
9106
Numéro de série Numéro de modèle
Ce qu'il vous faut avant de commencer
• Services ADSL et Internet actifs, proposés par votre opérateur
téléphonique local ou votre fournisseur d'accès Internet (FAI).
• Votre nom d'utilisateur et votre mot de passe, si votre FAI vous
en a attribué.
• Dans certaines installations, un séparateur de type spécial doit se
trouver entre la passerelle et la prise murale. Le séparateur doit
disposer d'une prise téléphonique et d'une prise pour routeur.
Si ce n'est pas le cas, ne l'installez pas entre la prise murale et la
passerelle.
Votre FAI devrait pouvoir fournir, si nécessaire, les éléments suivants :
• Valeurs VPI/VCI
• Norme ADSL (Modulation)
• Mode d'encapsulation
• Authentification (PAP ou CHAP) pour connexions PPP
23
Page 26

Installation du modem
Etape 1. Connexion de microfiltres (si votre FAI l'exige ou
s'ils sont livrés avec la passerelle)
La nécessité de microfiltres sera déterminée par votre FAI. Si aucun microfiltre
n'est livré avec la passerelle, contactez votre FAI pour savoir s'il faut en installer.
Si tel est le cas, branchez le téléphone au microfiltre, puis branchez le microfiltre
à la prise téléphonique murale. N'installez pas de microfiltre sur le câble reliant
votre passerelle à la prise téléphonique, à moins que le microfiltre ne dispose
d'une prise pour le téléphone et pour le dispositif ADSL.
Etape 2. Configuration de l'ordinateur pour l'installation
(si vous êtes sur Macintosh ou Linux, passez directement
à l'étape 3)
Avant de brancher la passerelle à l'ordinateur, vous devez installer le logiciel.
Allumez votre ordinateur. Gardez le CD-ROM de votre système d'exploitation à
portée de main.
1. Insérez le CD-ROM d'installation dans le lecteur de CD-ROM de votre
ordinateur. L'installation se lance automatiquement. Cela peut prendre
quelques instants.
Si l'installation ne commence pas automatiquement, cliquez sur Démarrer
puis sur Exécuter. Entrez ensuite D:\setup.exe dans la boîte de dialogue et
cliquez sur OK. (Si la lettre correspondant à votre lecteur de CD-ROM n'est
pas D, entrez la lettre appropriée.)
24
24
Page 27

2. Suivez les instructions à l'écran pour terminer l'installation du logiciel.
3. Un test de qualification sera alors exécuté pour vérifier que votre système
répond à la configuration minimale requise pour l'installation. Dans l'écran
Results (Résultats), un drapeau vert apparaîtra face aux éléments de
votre configuration qui remplissent les conditions et un drapeau rouge
s'affichera près de ceux qui ne les remplissent pas. Si votre système
remplit les conditions du test de qualification, cliquez sur Next (Suivant).
Si votre système ne remplit pas les conditions du test, cliquez sur View
Report (Afficher le rapport) pour identifier le ou les composants en cause.
Pour plus d'informations, reportez-vous à la section « Dépannage » de ce
guide d'installation rapide.
Etape 3. Installation des antennes et des câbles
1. Branchez les antennes à l'arrière de la passerelle.
2. Branchez une extrémité de l'adaptateur secteur AC sur la prise
d'alimentation 16 VAC située à l'arrière de votre passerelle
U.S. Robotics
extrémité sur une prise murale standard. Si le voyant DEL
d'alimentation (PWR) situé à l'avant de la passerelle est
éteint, appuyez sur l'interrupteur à l'arrière de la passerelle.
La passerelle s'initialise dès la mise sous tension. Cela peut prendre
quelques instants.
SureConnect
ADSL Wireless Gateway et l'autre
Utilisateurs de Windows seulement : cliquez sur Next (Suivant).
Les fichiers nécessaires seront copiés sur votre système.
3. Branchez une extrémité du cordon téléphonique gris fourni au port
téléphonique « ADSL » également gris situé à l'arrière de votre passerelle.
Branchez l'autre extrémité sur la prise téléphonique murale. Utilisateurs
de Windows seulement : cliquez sur Next (Suivant).
4. Sélectionnez l'une des options de connexion ci-dessous :
Via une connexion sans fil :
recherchez la passerelle sans fil et associez-la à votre ordinateur.
Utilisateurs de Windows seulement : cliquez sur Next (Suivant).
25
25
Page 28

Via une connexion Ethernet :
Installez le câble Ethernet de couleur jaune. Vous pouvez mettre en réseau
jusqu'à quatre périphériques, mais les périphériques supplémentaires ne
doivent être connectés qu'une fois l'installation initiale terminée. Il suffit
alors d'insérez l'une des extrémités du câble Ethernet jaune dans l'un
des ports Ethernet 1, 2, 3 ou 4 également jaunes situés à l'arrière de la
passerelle. Branchez l'autre extrémité du câble dans le port Ethernet
de la carte réseau 10/100 de votre ordinateur. Utilisateurs de Windows
seulement : cliquez sur Next (Suivant).
Le programme d'installation détectera votre modem et installera le
configurateur SureConnect ADSL EasyConfigurator. Cela peut prendre
quelques instants.
Utilisateurs de Macintosh et de Linux : insérez le CD-ROM et suivez les
instructions à l'écran. Utilisateurs de Mac 10 : double-cliquez sur l'icône
CD de votre bureau, ouvrez Install.htm et suivez les instructions à l'écran.
Etape 4. Configuration de la passerelle avec
EasyConfigurator
REMARQUE : les utilisateurs de NT 4.0 auront besoin de l'outil Service
Pack 3 ou supérieur pour exécuter EasyConfigurator.
1. L'écran du configurateur SureConnect ADSL EasyConfigurator s'affiche et
vous invite à entrer un nom d'utilisateur et un mot de passe, comme
indiqué sur l'écran suivant :
26
26
Page 29

Ces champs sont sensibles à la casse. Assurez-vous que le verrouillage des
majuscules est désactivé. Le nom d'utilisateur par défaut est admin. Le
mot de passe par défaut est admin. Vérifiez que les données entrées sont
correctes et cliquez sur Login (Se connecter). Cela peut prendre quelques
instants.
2. Sélectionnez votre pays et votre fournisseur d'accès Internet (FAI) dans les
listes. Cliquez sur Apply (Apppliquer). Si votre FAI n'est pas listé, veuillez
vous reporter à la section « Dépannage » de ce guide d'installation.
3. EasyConfigurator configure alors votre passerelle. Cela peut prendre
quelques instants.
Quand le statut est CONNECTED TO INTERNET (Connecté à Internet),
comme sur l'écran ci-dessous, votre passerelle U.S. Robotics
ADSL Wireless Gateway est correctement configurée pour l'accès à
Internet. Vous pouvez alors vous connecter à Internet. Enregistrez
votre produit et testez votre connexion, en visitant le site Web suivant :
www.usr.com/productreg
27
SureConnect
27
Page 30

Si le statut n'a pas changé, veuillez vous reporter à la section
« Dépannage » de ce guide d'installation.
Etape 5. (Optionnel) Vérification de la configuration
sans fil
Sélectionnez le menu Wireless (Sans fil) en haut de l'écran. EasyConfigurator va
alors interroger votre passerelle et, après un certain temps, les paramètres
courants du mode sans fil s'afficheront.
28
28
Page 31

Les paramètres par défaut sont :
Wireless Status = Enabled (Statut du mode sans fil = Activé)
Access Point = SSID Broadcast Enabled (Point d'accès = Diffusion SSID activée)
WEP Encryption = Disabled (Cryptage WEP = Désactivé)
Si vous voulez modifier ces paramètres, cliquez sur Configure Wireless
(Configuration sans fil). Un navigateur Web s'ouvrira pendant un instant.
Il est recommandé d'activer le cryptage WEP et de définir une clé secrète de
sécurité. Assurez-vous de bien affecter la même clé secrète à vos différents
périphériques afin d'éviter tout problème de connectivité par la suite. Pour
garantir une plus grande sécurité, activez les options Mac Filter via l'interface
utilisateur web du Wireless - Mac Filter. Pour plus d'informations et pour
connaître tous les paramètres du mode sans fil, veuillez vous reporter au
guide de l'utilisateur sur le CD-ROM d'installation.
Si la passerelle U.S. Robotics
des problèmes de connexion, lisez les deux suggestions suivantes et voyez si
elles correspondent à votre situation.
• Si vous tentez d'établir une connexion sans fil mais que vous n'arrivez pas
à vous connecter à la passerelle U.S. Robotics
Gateway, vérifiez que toutes les cartes sans fil sont réglées en mode
Infrastructure. Si elles sont en mode 802.11b AdHoc, vous ne pourrez pas
vous connecter à la passerelle U.S. Robotics
Gateway. Lorsque chaque carte sans fil est réglée sur Infrastructure, la
connexion à la passerelle U.S. Robotics
Gateway devrait s'établir automatiquement. Si la connexion ne se fait
pas automatiquement, procédez de nouveau à la recherche jusqu'à ce
que les cartes sans fil détectent la passerelle U.S. Robotics
ADSL Wireless Gateway et qu'elles se connectent.
• Si vous arrivez à vous connecter à la passerelle U.S. Robotics
ADSL Wireless Gateway mais que la liaison est de mauvaise qualité,
vérifiez le positionnement de la
à plusieurs étages de vous ou derrière un mur en acier ou en béton,
la qualité de la liaison risque d'être altérée. Si possible, déplacez la
passerelle U.S. Robotics
que ces obstacles ne gênent plus l'établissement de la connexion.
SureConnect
SureConnect
ADSL Wireless Gateway vous pose
SureConnect
SureConnect
SureConnect
ADSL Wireless
ADSL Wireless
ADSL Wireless
SureConnect
SureConnect
passerelle. En effet, si elle est trop loin,
ADSL Wireless Gateway afin
29
29
Page 32

Dépannage
Pour déterminer la nature du problème et le résoudre plus facilement,
commencez par consulter la liste de dépannages ci-dessous.
✔ Vérifiez que vous utilisez l'adaptateur secteur AC fourni avec votre
passerelle et qu'il est bien branché à votre passerelle et à une prise
murale qui fonctionne. Vérifiez que l'interrupteur est allumé. Le
voyant DEL d'alimentation (PWR) devrait être allumé.
✔ Vérifiez que vous avez bien branché le cordon téléphonique à la prise
téléphonique murale et à la passerelle. Le voyant DEL ADSL devrait
être allumé.
✔ Vérifiez que vous avez bien branché le(s) câble(s) Ethernet aux ports
Ethernet 1, 2, 3 ou 4 de la passerelle et à la carte d'interface réseau
de l'ordinateur. Les voyants DEL Ethernet correspondants, situés à
l'avant de la passerelle, devraient être allumés.
✔ Une fois connecté à la passerelle, vérifiez que le client sans fil est
correctement installé. S'il est en place, vérifiez qu'il est correctement
réglé (cryptage WEP activé, mode infrastructure pour toutes les cartes
sans fil). De plus, assurez-vous que le client et la passerelle sont
synchronisés. Pour plus de détails, consultez votre documentation
client.
✔ Pour vous assurer du bon fonctionnement de votre passerelle,
consultez la page Status (Statut) d'EasyConfigurator. Pour contrôler
le statut de la communication sans fil avec votre passerelle, consultez
la page Wireless (Sans fil).
Voyants DEL de statut
La passerelle U.S. Robotics
voyants DEL situés à l'avant de la passerelle : PWR, Ethernet 1, 2, 3, 4, ADSL,
WAN IP et WLAN. Le tableau ci-dessous indique l'état de fonctionnement de la
passerelle selon le statut des voyants.
30
SureConnect
ADSL Wireless Gateway comporte huit
30
Page 33

PWR
WAN IP
WLAN
Ethernet
1, 2, 3, 4
ADSL
Allumé, vert L'adaptateur secteur AC transmet du courant.
Eteint Pas d'alimentation détectée.
Allumé, vert
Clignotant, vert
Rouge La transmission de l'adresse IP a échoué.
Eteint L'ADSL n'est pas synchronisé ou est en mode Pont.
Allumé, vert Le client sans fil est connecté à la passerelle.
Clignotant, vert Les données circulent.
Eteint Ancun client sans fil n'est connecté à la passerelle.
Allumé, vert
Clignotant, vert Le trafic de données circule.
Eteint
Allumé, vert La liaison DSL a été établie.
Clignotant, vert L'établissement de la liaison DSL est en cours.
Eteint La liaison DSL a échoué.
Arrière de la passerelle
Le fournisseur d'accès Internet (FAI) envoie une
adresse IP publique à la passerelle, en mode PPP.
Connexion IP réussie et transmission de données en
cours.
La connexion physique entre la passerelle et
l'ordinateur a été établie et détectée par le
câble Ethernet.
La connexion physique entre la passerelle et
l'ordinateur via le câble Ethernet n'a pas été
établie.
Elément Description
ADSL
1Port Ethernet 1
2Port Ethernet 2
3Port Ethernet 3
4Port Ethernet 4
Reset Réinitialise la passerelle
16VAC
Power Bouton permettant d'allumer et d'éteindre la passerelle
Prise RJ-11 pour service DSL (Digital Subscriber Line), située au dos de la
passerelle
Prise permettant de brancher un câble pour relier la passerelle à un
adaptateur secteur AC
31
31
Page 34

REMARQUE : pour réinitialiser la passerelle, enfoncez le bouton Reset
à l'aide d'une épingle ou d'un trombone. La passerelle redémarrera.
Si vous appuyez sur ce bouton pendant plus de 5 secondes, les
paramètres par défaut de la passerelle seront rétablis.
Conseils de dépannage supplémentaires
Je ne trouve pas mon FAI dans la liste d'EasyConfigurator ISP.
Solution possible : si votre FAI ou votre pays ne figure pas dans la liste,
sélectionnez l'option Not Listed (Ne figure pas dans la liste). Vous
devez alors configurer vos paramètres dans la fenêtre intitulée « Line
configuration » (Configuration de la ligne). Votre FAI vous fournira les
valeurs et les paramètres adéquats. Cliquez sur Apply (Appliquer).
Cela peut prendre quelques instants.
Aucun voyant DEL n'est allumé lorsque la passerelle est sous tension.
Solution possible : passez en revue la liste de dépannage qui se trouve au
début de cette section.
32
32
Page 35

Le voyant DEL ADSL clignote ou est éteint.
Solution possible : passez en revue la liste de dépannage qui se trouve au
début de cette section.
Je ne peux pas accéder à Internet.
Solution possible :
• Passez en revue la liste de dépannage qui se trouve au début de cette
section.
• Vérifiez que votre compte FAI est actif.
• A l'aide d'EasyConfigurator, vérifiez vos paramètres VCI/VPI, votre
nom d'utilisateur, votre mot de passe et votre type d'authentification.
Pour vérifier ces variables, ouvrez EasyConfigurator et sélectionnez
l'onglet Status (Statut). De plus, le nom d'utilisateur et le mot de passe
sont peut-être sensibles à la casse. Assurez-vous que le verrouillage
des majuscules est désactivé.
• Contactez votre FAI pour obtenir de l'aide supplémentaire.
Je ne sais pas si l'adresse IP qui m'a été attribuée est statique ou dynamique.
Solution possible : si vous disposez d'un accès DSL actif, votre adresse IP
est sûrement dynamique. Contactez votre fournisseur d'accès pour vous en
assurer, car certains FAI attribuent des adresses IP statiques.
Je n'arrive plus à me connecter à Internet.
Solution possible : vérifiez les paramètres de connexion de votre
navigateur Web et désactivez l'utilisation d'un proxy HTTP par votre
navigateur Web. Votre navigateur Web pourra ainsi lire les pages de
configuration. Lancez votre navigateur Web.
Utilisateurs d'Internet Explorer : cliquez sur Outils, Options Internet, puis
sur l'onglet Connexions. Choisissez Ne jamais établir de connexion, cliquez
sur Appliquer, puis sur OK. Cliquez de nouveau sur Outils, puis sur Options
Internet. Cliquez sur l'onglet Connexions et sur le bouton Paramètres LAN.
Décochez toutes les cases et cliquez sur OK. Cliquez sur OK pour fermer la
fenêtre des Options Internet.
Utilisateurs de Netscape Navigator : cliquez sur Edition, Préférences et
double-cliquez sur Avancées dans la fenêtre Catégorie. Cliquez sur Proxy,
choisissez Connexion directe à Internet et cliquez sur OK. Cliquez de
nouveau sur Edition et sur Préférences. Sous Catégorie, double-cliquez
sur Avancées, puis cliquez sur Proxy. Choisissez Connexion directe à
Internet et cliquez sur OK.
33
33
Page 36

Je ne peux pas me connecter aux applications spéciales.
Solution possible : si votre passerelle U.S. Robotics
SureConnect
ADSL
Wireless Gateway est correctement connectée et que vous pouvez accéder
à Internet, mais que vous avez du mal à vous connecter aux applications
spéciales (telles que ICQ, Battle.net, etc.), vous devez utiliser des
ports spécifiques pour outrepasser la fonction de pare-feu. Pour
plus d'informations sur la configuration de cette fonction, veuillez
vous reporter au guide de l'utilisateur sur le CD-ROM d'installation.
Lorsque j'essaie de vérifier mes paramètres de configuration réseau dans
Windows Me ou XP, je ne trouve pas l'icône Réseau.
Solution possible : la configuration par défaut dans Windows Me et XP
n'affiche pas toutes les icônes dans le panneau de configuration. Cliquez
sur Démarrer, Paramètres puis Panneau de configuration. Cliquez alors sur
Afficher toutes les options du panneau de configuration, sur la gauche de
l'écran. Toutes les icônes du panneau de configuration devraient
apparaître.
Je ne sais pas comment configurer le protocole TCP/IP pour qu'il fonctionne
avec la passerelle.
Solution possible : vous pouvez peut-être résoudre ce problème en
ouvrant le menu Aide de votre système d'exploitation. Consultez les
rubriques se rapportant à TCP/IP.
En essayant de surfer sur Internet, j'ai reçu un message d'erreur « Page
introuvable » ou similaire.
Solution possible : vérifiez que la passerelle a bien transmis une adresse IP
à votre ordinateur. Si ce n'est pas le cas, essayez de libérer / renouveler
l'adresse IP. Pour en savoir plus, consultez le guide de l'utilisateur sur le
CD-ROM.
Solution possible : vérifiez que votre passerelle a bien reçu une adresse IP
de votre fournisseur d'accès Internet (FAI). Reportez-vous à la section
Procédure de commande Ping de ce guide. Pour plus de renseignements,
reportez-vous au guide de l'utilisateur sur le CD-ROM d'installation.
Je ne peux pas accéder à Internet via ma connexion sans fil.
Solution possible : vérifiez que le client est correctement installé et
configuré et qu'il peut communiquer avec la passerelle.
Solution possible : ouvrez la page Wireless (Sans fil) du configurateur
EasyConfigurator et vérifiez que la liaison sans fil est activée et qu'elle
fonctionne correctement.
Solution possible : parcourez la liste des dépannages qui se trouve au
début de cette section et assurez-vous que la connexion ADSL fonctionne.
34
34
Page 37

Procédure d'utilisation de la commande Ping
1. Cliquez sur Démarrer, puis sur Exécuter.
Windows 95, 98 et Me : entrez command dans la boîte de dialogue.
Cliquez sur OK.
Windows NT 4.0, 2000 et XP : entrez cmd dans la boîte de dialogue.
Cliquez sur OK.
2. Entrez ping 127.0.0.1 dans l'invite de commande DOS. Il s'agit de votre
adresse d'hôte local. Cette adresse permet de vérifier que le protocole
TCP/IP est installé et fonctionne correctement. Si cette intervention
échoue, déconnectez la passerelle et recommencez la procédure
d'installation.
3. Entrez ping suivi de l'adresse IP de votre ordinateur. Vous
pourrez ainsi vérifier que votre ordinateur répond aux besoins
de la communication. Si cette intervention échoue, assurez-vous
que les câbles sont bien connectés et que tous les pilotes appropriés
sont installés.
4. Entrez ping suivi de l'adresse de votre passerelle pour vérifier la
communication avec votre passerelle (son adresse par défaut est
192.168.1.1.) Vous pourrez alors vous connecter aux autres ordinateurs
et à la passerelle. Si vous parvenez à établir une communication
avec la passerelle, vous pouvez accéder à la page Administration
et configurer les paramètres. Si cette intervention échoue, assurezvous que l'adaptateur secteur AC est correctement branché et que la
passerelle est bien connectée à votre ordinateur.
5. Entrez ping suivi de l'adresse Internet sortante de votre passerelle.
Cette adresse est fournie par le FAI ou par le réseau local extérieur.
Cette intervention permet de vérifier que la passerelle fonctionne
correctement et qu'elle autorise le transfert des données.
6. Entrez ping suivi de l'adresse connue de votre serveur DNS. Ceci
permet de traduire des noms d'hôtes Internet valides en adresses
IP et de vérifier que vous pouvez accéder à Internet.
Ma requête Ping auprès de la passerelle reste sans réponse. Que faire ?
Solution possible : si vous ne recevez pas de réponse, cela signifie que
votre ordinateur ne peut pas communiquer avec la passerelle via l'adresse
IP qui lui a été attribuée.
• Vérifiez l'adresse IP de votre ordinateur (carte d'interface réseau).
Assurez-vous qu'elle se trouve dans le même sous-réseau que
l'adresse de la passerelle (par exemple, si l'adresse de la passerelle
est 192.168.1.1, l'adresse IP de votre ordinateur doit être 192.168.1.x,
avec x supérieur à 1). Si ce n'est pas le cas, libérez puis renouvelez
l'adresse IP de votre ordinateur.
35
35
Page 38

Assistance technique
• Pour obtenir de l'aide sur ce produit ou nous contacter,
visitez le site Web d'U.S. Robotics à l'adresse :
http://www.usr.com/broadbandsupport
Vous trouverez la réponse à la plupart des problèmes rencontrés par
les utilisateurs dans les pages Web FAQ et Dépannage consacrées à
votre produit.
• Si vous ne parvenez pas à vous connecter à Internet, contactez votre
FAI pour obtenir de l'aide.
• Si votre FAI n'est pas en mesure de vous aider et que vous ne
pouvez toujours pas vous connecter à Internet, contactez le
service d'assistance technique d'U.S. Robotics. Nos spécialistes
répondront à toutes les questions techniques concernant les produits
U.S. Robotics. Reportez-vous au guide de l'utilisateur qui se trouve
sur le CD-ROM d'installation pour obtenir les coordonnées du service
d'assistance technique de votre région.
36
36
Page 39

Informations légales
Déclarations de conformité du fabriquant
Nous, U.S. Robotics Corporation, sis au 935 National Parkway, Schaumburg, Illinois, 60173-5157, EtatsUnis, déclarons (et assumons l'entière responsabilité de cette déclaration) que la passerelle U.S.
Robotics
à laquelle se rapporte la présente déclaration, est conforme aux normes et/ou
autres documents normatifs suivants :
EN300 328-2
EN301 489-1
EN301 489-17
EN60950
EN55022
EN55024
Cet équipment est conforme à l'article 3.1.(a) de la directive 1999/5/CE, pour la protection de la santé
et de la sécurité de l'utilisateur.
Nous, U.S. Robotics Corporation, déclarons que ce produit est conforme aux spécifications essentielles
et autres dispositions de la Directive 1999/5/EC.
Vous pouvez utiliser ce produit dans les pays suivants :
Allemagne, Autriche, Belgique, Suisse, Pays-Bas, Luxembourg, Italie, France, Royaume-Uni, Irlande,
Espagne, Portugal, Suède, Norvège, Danemark, Finlande, Islande et Grèce.
En ce qui concerne la norme IEEE 802.11g, voici des informations sur les restrictions en vigueur dans les
pays appliquant la directive R&TTE :
Pays Bande de fréquence maximum Puissance de sortie maximum
France 2 454 - 2 483,5 MHz 10 MW PIRE l'extérieur
Déclaration de conformité CE
SureConnect
ADSL Wireless Gateway,
Canaux utilisés : Conforme à la norme IEEE 802.11g
Cet appareil est conforme aux exigences européennes régissant l'exposition au rayonnement
électromagnétique. Cet équipement doit être installé et utilisé, avec une distance minimum de 20
centimètres, entre l’émetteur et votre corps. Cet appareil sans fil est un émetteur/récepteur, et a été
conçu et fabriqué pour se conformer aux limites d'exposition recommandées par le Conseil de l'Union
Européenne et la Commission Internationale sur la Protection de Rayonnement Non Ionisant
(International Commission on Non-Ionizing Radiation Protection ICNIRP 1999,) à la population entière.
Le standard d'exposition pour un équipement portatif utilise le débit d'absorption spécifique DAS
comme unité de mesure. La valeur maximale de DAS mesurée dans l'essai de conformité pour cet
appareil sans fil est 1,08 W/kg.
11 canaux (Etats-Unis, Canada)
13 canaux (ETSI)
14 canaux (Japon)
Information (EU) sur l' antenne amovible
Cet appareil sans fil USR a été conçu pour fonctionner avec l'antenne fournie dans ce paquet
seulement. Cet ensemble appareil et antenne a été testé et approuvé par une agence européenne
conformément à la directive européenne R&TTE 1999/5/CE, pour satisfaire l'exigence du niveau de
puissance rayonnée de 100mW e.i.r.p. Le remplacement de l'antenne ne peut se faire qu'avec une
pièce autorisée par USR, qui aura été conçue et testée avec son unité conformément aux exigences de
la directive 1999/5/CE. Veuillez vous reporter au site web d'USR pour obtenir toute information de
commande d'antenne.
En Europe :
FRS Europe BV.
Draaibrugweg 2
1332 AC Almere
Pays-Bas
Rendez-vous à l'adresse http://www.usr.com afin de connaître les informations les plus récentes en
matière de restriction de canaux.
37
37
Page 40

Garantie limitée de deux (2) ans d'U.S. Robotics Corporation
1.0 CONDITIONS GENERALES :
1.1 Cette garantie limitée ne s'applique qu'à l'acheteur d'origine (le CLIENT) et n'est pas transférable.
1.2 Aucun agent, revendeur ou partenaire commercial d'U.S. Robotics Corporation (U.S. ROBOTICS) n'est autorisé
à modifier les conditions de cette garantie limitée au nom d'U.S. ROBOTICS.
1.3 Cette garantie limitée exclut expressément tout produit n'ayant pas été acheté neuf auprès d'U.S. ROBOTICS
ou de l'un de ses revendeurs agréés.
1.4 Cette garantie limitée ne s'applique que dans le pays ou le territoire destiné à l'utilisation du produit (tel
qu'indiqué par le numéro de modèle du produit ou par toute autre étiquette d'homologation locale apposée
sur le produit).
1.5 U.S. ROBOTICS garantit au CLIENT que ce produit est dénué de défauts et vices de fabrication, dans des
conditions normales d'utilisation et d'exploitation, pour une durée de DEUX (2) ANS à compter de la date
d'achat auprès d'U.S. ROBOTICS ou d'un revendeur agréé.
1.6 Dans le cadre de cette garantie, la seule obligation sera, pour U.S. ROBOTICS, de réparer le produit ou la
pièce défectueuse avec des pièces neuves ou reconditionnées, d'échanger le produit ou la pièce défectueuse
avec des pièces neuves ou reconditionnées ou, si aucune des deux options précédentes n'est applicable,
U.S. ROBOTICS peut, à sa seule dis crétion, rembourser au CLIENT le prix a cquitté, sans dépasser le dernier
prix d'achat commercial recommandé par U.S. ROBOTICS pour le produit, moins toutes les charges de services
applicables. Tous les produits ou composants remplacés deviendront la propriété d'U.S. ROBOTICS.
1.7 U.S. ROBOTICS garantit tout produit ou pièce de remplacement pour une période de QUATRE-VINGT-DIX (90)
JOURS à partir de la date d'expédition du produit ou de la pièce au client.
1.8 U.S. ROBOTICS ne garantit ni ne déclare que ce produit répondra aux exigences du CLIENT ou fonctionnera en
association avec tout produit logiciel ou matériel fourni par des tiers.
1.9 U.S. ROBOTICS ne garantit ni ne déclare que le fonctionnement des logiciels fournis avec ce produit sera
ininterrompu ou sans erreur, ou que tous les défauts de ces logiciels seront corrigés.
1.10 U.S. ROBOTICS ne saurait être responsable des données logicielles ou informations du client contenues ou
stockées dans ce produit.
2.0 OBLIGATIONS DU CLIENT
2.1 Il est de la responsabilité du CLIENT de vérifier que ce produit répond à ses attentes et à ses exigences.
2.2 Nous conseillons au CLIENT de créer une copie de sauvegarde de tous les logiciels fournis avec ce produit.
2.2 Il est de la responsabilité du CLIENT d'installer et de configurer correctement ce produit et de s'assurer que
son installation, sa configuration et son fonctionnement sont adaptés et compatibles avec l'environnement
d'exploitation de ce produit.
2.3 Pour que sa demande de ga rantie soit acceptée, le CLI ENT doit, dans tous les cas, fournir à U.S. ROBOTICS
une preuve d'achat datée (original du ticket de caisse d'U.S. ROBOTICS ou d'un de ses revendeurs agréés).
3.0 POUR OBTENIR UN SERVICE DE GARANTIE :
3.1 Le CLIENT doit contacter un centre d'assistance U.S. ROBOTICS ou un service après-vente agréé U.S. ROBOTICS
pendant la période de garantie applicable afin d'obtenir une autorisation de service de garantie.
3.2 Pour obtenir une autorisati on de service de garantie, le client doit fournir le numéro de modèle du produit,
le numéro de série du produit et une preuve d'achat datée (original du ticket de caisse d'U.S. ROBOTICS ou
d'un de ses revendeurs agréés).
3.3 Pour savoir comment contacter le service d'assistance technique ou un service après-vente agréé U.S.
ROBOTICS, veuillez visiter le site Web de la société U.S. ROBOTICS à l'adresse suivante : www.usr.com
3.4 Lorsqu'il contacte le service d'assistance technique U.S. ROBOTICS, le CLIENT doit avoir les informations
suivantes à portée de main :
Numéro de modèle du produit
Numéro de série du produit
Preuve d'achat datée
Nom et numéro de téléphone du CLIENT
Version du système d'exploitation de l'ordinateur du CLIENT
CD-ROM d'installation U.S. ROBOTICS
Guide d'installation U.S. ROBOTICS
4.0 REMPLACEMENT DE LA GARANTIE:
4.1 Dans l'éventualité où le service technique U.S. ROBOTICS ou un service après-vente agréé U.S. ROBOTICS
constaterait que le produit ou la pièce possède un mauvais fonctionnement ou un problème attribuable
directement à un défaut matériel ou humain, si le produit est dans sa période de garantie de DEUX (2) ANS
et si le CLIENT joint à la pièce ou au produit retourné un exemplaire de la preuve d'achat datée (original du
ticket de caisse d'U.S. ROBOTICS ou d'un de ses revendeurs agréés), U.S. ROBOTICS enverra au CLIENT une
Autorisation de Retour de Matériel (RMA, Return Material Authorisation) et des instructions de retour du
produit vers la zone de largage U.S. ROBOTICS.
4.2 Tout produit ou pièce retourné à U.S. ROBOTICS sans RMA délivré par U.S. ROBOTICS ou par un service
après-vente agréé U.S. ROBOTICS sera renvoyé.
4.3 Le CLIENT accepte de payer les frais d'expédition nécessaires au retour du produit ou de la pièce au ce ntre de
retour agréé U.S. ROBOTICS, d'assurer le produit ou d'assumer les risques de perte ou de dommage encourus
lors de l'expédition et d'utiliser un emballage d'expédition équivalent à l'emballage d'origine.
4.4 Le transfert de responsabilité pour tout dommage ou perte à U.S. ROBOTICS ne sera effectif que lorsque la pièce
ou le produit retourné sera reçu et accepté par un centre de retour agréé U.S. ROBOTICS.
4.5 Les retours CLIENTS autorisés seront déballés, inspectés et comparés au numéro de modèle du produit et au
numéro de série du produit autorisés par le RMA. La preuve d'achat jointe sera inspectée pour vérification de la
date et du lieu d'achat. U.S. ROBOTICS se réserve le droit de refuser tout service de garantie si l'inspection de la
pièce ou du produit retourné ne correspond pas aux renseignements fournis par le CLIENT et pour lesquels le
38
38
Page 41

RMA a été attribué.
4.6 Une fois le retour CLIENT déballé, inspecté et testé, U.S. ROBOTICS s'engage, à sa seule discrétion, à le réparer
ou le remplacer, au moyen de pièces ou produits neufs ou reconditionnés, dans les limites que la société juge
nécessaires pour redonner au produit ou à la pièce une condition normale de fonctionnement.
4.7 U.S. ROBOTICS fera son maximum pour expédier au CLIENT les pièces ou produits réparés ou remplacés, aux
frais d'U.S. ROBOTICS, dans les VINGT-ET-UN (21) JOURS suivant la réception par U.S. ROBOTICS du retour
CLIENT autorisé à un centre de retour agréé U.S. ROBOTICS.
4.8 U.S. ROBOTICS ne sera en aucun cas responsable des dommages provoqués par un retard de livraison des
pièces ou des produits réparés ou remplacés.
5.0 LIMITATIONS
5.1 LOGICIEL DE TIERS : il est possible que ce produit U.S. ROBOTICS comprenne un logiciel de tiers ou soit livré
avec un tel logiciel, dont l'utilisation est régie par des accords de licence utilisateur séparés fournis par des
revendeurs de logiciels de tiers. La présente garantie limitée d'U.S. ROBOTICS ne couvre pas de tels logiciels.
Pour la garantie applicable, veuillez vous reporter à l'accord de licence utilisateur correspondant à ces logiciels.
5.2 DOMMAGES LIES A U N MAUVAIS USAGE, UNE N EGLIGENCE, UN DEFAUT D'OBSERVATION, UNE MAUVAISE
INSTALLATION ET / OU DES FACTEURS ENVIRONNE MENTAUX : dans les limites accordées par la loi en vigueur,
la présente garantie limitée d'U.S. ROBOTICS ne s'applique pas aux conditions d'usure normales ; à la perte ou
aux dommages de données liés à une interopérabilité avec des versions actuelles et / ou futures du système
d'exploitation ou d'autres logiciels et matériels actuels et / ou futurs ; aux modifications (par des personnes
n'appartenant pas à U.S. ROBOTICS ou à un service après-vente agréé U.S. ROBOTICS) ; aux dommages
provoqués par une erreur de manipulation ou par le défaut d'observation des instructions décrites dans la
documentation de l'utilisateur ou dans toute documentation annexe ; aux dommages provoqués par des
catastrophes naturelles telles que les éclairs, les tempêtes, les inondations, les incendies ou les tremblements
de terre ; aux produits dont l e numéro de série a été volontairement falsifié ou effacé ; à une mauvaise
utilisation, une négligence ou une mauvaise manipulation ; aux dommages provoqués par des accidents
imprévisibles de nature électrique, physique ou de température ; aux contrefaçons ; aux pertes et dommages de
produits provoqués par un virus informatique, un ver ou un cheval de Troie, ou une corruption dans le contenu
de la mémoire ; aux échecs du produit liés à un accident, un abus ou une mauvaise utilisation (notamment une
mauvaise installation ou une connexion à une tension ou à une prise inappropriée) ; aux échecs provoqués par
des produits non fournis par U.S. ROBOTICS ; aux dommages liés aux environnements humides ou corrosifs, à
une surtension, à l'expédition ou à des conditions d'utilisation inappropriées ; ou à l'utilisation du produit en
dehors des frontières du pays ou du territoire destiné à son utilisation (tel qu'indiqué par le numéro de modèle
du produit ou par toute étiquette d'homologation locale apposée sur le produit).
5.3 DANS LA MES URE OU LA LOI LE PERMET, LES GARANTIES ET LES RECOURS PRECEDEMMENT CITES SONT
EXCLUSIFS ET REM PLACENT LES AUTRES GARANTIES, TERM ES OU CONDITIONS, EXPLICITES OU IMPLICITES,
DE FACTO OU DE JURE, STATUTAIRES OU AUTRES, NOTAMMENT LES GARANTIES, TE RMES OU CONDITIONS
DE COMMERCIALISATION, D'ADAPTATION A UN USAGE PARTICULIER, DE QUALITE SATISFAISANTE, DE
CORRESPONDANCE A LA DESCRIPTION FOURNIE ET DE NON-INFRACTION, QUI SONT TOUS EXPRES SEMENT
REJETES. U.S. ROBOTICS N'ASSUME NI N'AUTORISE AUCUNE PE RSONNE A ASSUMER EN SON NOM TOUTE
AUTRE RESPON SABILITE EN RAPPORT AVEC LA VENTE, L'INSTALLATION, L'ENTRETIEN, LA G ARANTIE OU
L'UTILISATION DE SES PRODUITS.
5.4 LIMITATION DE RESPONSABILITE. DANS LA MESURE OU LA LOI LE PERMET, U.S. ROBOTICS REJETTE, AU NOM
DE LA SOCIETE ET DE SES FOURNISSEU RS, TOUTE RESPONSABI LITE, CONTRACTUELLE OU DE DROIT CIVIL (Y
COMPRIS LA NEGLIGENCE), POUR LES DOMMAGES ACCESSOIRES, IN DIRECTS, PARTICULIERS OU PUNITIFS
DE QUELQUE NATURE QUE CE SOIT, AINSI QUE TOUTE RESPONSAB ILITE DECOULANT DE TOUT MANQUE
A GAGNER, PERTE D'ACTIVITE, PE RTE D'INFORMATIONS OU DE DONNEES OU AUTRE PERTE FINANCIERE
RESULTANT DE OU LIEE A LA VENTE, L'INSTALLATION, L'ENTRETIEN, L'UTILISATION, LES PERFORMANCES,
LA PANNE OU L'INTERRUPTION DE FONCTIONN EMENT DE SES PRODUITS, MEME SI U.S. ROBOTICS OU SES
REVENDEU RS AGREES ONT ETE INFORM ES DE L'EVENTUALITE DE TELS DOMMAGES. U.S. ROBOTICS LIMITE SA
RESPONSABILITE A L A REPARATION, AU REMPLACEMENT OU AU R EMBOURSEMENT DU PRIX ACQUITTE, A SA
DISCRETION. CETTE LIMITATION DE RESPONSABI LITE LIEE AUX DOMMAGES RESTE RA INCHANGEE MEME SI LES
SOLUTIONS PROPOSEES DANS LA PRESENTE S'AVERENT INEFFICACES.
6.0 REJET DE RESPONSABI LITE : certains pays, états ou provinces n'autorisent pas l'exclusion ou la limitation
des garanties implicites ou la limitation de responsabilité quant aux dommages accessoires ou indirects pour
certains produits fournis aux clients, ou encore la limitation de responsabilité en cas de blessure, de sorte que
les limitations et exclusions énoncées ci-dessus peuvent ne pas s'appliquer au CLIENT. Lorsque les garanties
implicites ne peuvent pas être exclues dans leur intégralité, elles seront limitées à la durée de DEUX (2) ANS de
la garantie écrite applicable. Cette garantie confère au CLIENT des droits légaux spécifiques qui peuvent varier
en fonction de la loi locale.
7.0 LOI APPLICABLE : la présente garantie limitée est régie par la législation de l'état de l'Illinois, Etats-Unis, à
l'exception de ses conflits de principes de droit et à l'exception de la Convention des Nations Unies sur les
contrats de vente internationale de marchandises.
U.S. Robotics Corporation
935 National Parkway
Schaumburg, IL 60173
Etats-Unis
39
39
Page 42

40
40
Page 43

U.S. Robotics Corporation
935 National Parkway
Schaumburg, Illinois
60173-5157
USA
Kein Teil dieser Dokumentation darf ohne schriftliche Genehmigung der U.S. Robotics Corporation in
irgendeiner Form oder mit irgendwelchen Mitteln vervielfältigt oder für irgendwelche
Weiterbearbeitung (beispielsweise Übersetzung, Konvertierung oder Anpassung) verwendet werden.
Die U.S. Robotics Corporation behält sich das Recht vor, diese Dokumentation von Zeit zu Zeit zu
überarbeiten und Veränderungen an den Produkten und/oder dem Inhalt dieser Dokumentation
vorzunehmen, ohne eine solche Überarbeitung bzw. Änderung mitteilen zu müssen. Die U.S. Robotics
Corporation liefert diese Dokumentation ohne jegliche Garantie, weder stillschweigend noch
ausdrücklich, einschließlich, jedoch nicht beschränkt auf stillschweigende Garantien der
handelsüblichen Qualität und Eignung für einen bestimmten Zweck. Software, die wie in dieser
Dokumentation beschrieben auf Wechselspeichermedien geliefert wird, unterliegt einem
Lizenzvertrag. Dieser liegt dem Produkt als eigenes Dokument, als gedruckte Dokumentation oder auf
dem Wechselspeichermedium in einer Datei namens LICENSE.TXT oder !LICENSE.TXT bei. Falls Ihnen
kein Exemplar vorliegt, können Sie eines von U.S. Robotics anfordern.
HINWEISE FÜR BEHÖRDEN DER VEREINIGTEN STAATEN: Für eine Verwendung bei Behörden der
Vereinigten Staaten muss bezüglich der Dokumentation und der hierin beschriebenen Software
Folgendes beachtet werden:
Alle technischen Daten und die Computer-Software sind gewerblicher Natur. Die Entwicklung wurde
rein aus privater Hand finanziert. Die Software wird als "Computer-Handelssoftware" gemäß
Definition in DFARS 252.227-7014 (Juni 1995) oder als "Handelsartikel" gemäß Definition in FAR
2.101(a) ausgeliefert. Insofern beinhaltet sie nur die in der standardmäßigen Handelslizenz für die
Software von U.S. Robotics vorgesehenen Rechte. Die technischen Daten unterliegen, je nach
Anwendbarkeit, nur den in DFAR 252.227-7015 (Nov. 1995) oder FAR 52.227-14 (Juni 1987)
niedergelegten eingeschränkten Rechten. Sie verpflichten sich, keinen Teil einer Vorschrift, die mit
einem lizenzierten Programm oder der Dokumentation, die mit diesem Programm oder zusammen mit
dieser Installationsanleitung ausgeliefert wird, zu löschen oder zu streichen.
Copyright © 2003 U.S. Robotics Corporation. Alle Rechte vorbehalten. U.S. Robotics und das
U.S. Robotics-Logo sind eingetragene Marken der U.S. Robotics Corporation. Alle weiteren
Produktbezeichnungen werden nur zur Identifizierung verwendet und sind möglicherweise Marken der
jeweiligen Hersteller. Produktspezifische Angaben können ohne vorherige Ankündigung geändert werden.
41
Page 44

42
Page 45

Aktuelle Produkt-Support- und Kontaktinformationen finden Sie auf der
folgenden Website:
http://www.usr.com/broadbandsupport
Vielen Dank, dass Sie sich für das U.S. Robotics
Gateway entschieden haben. Anhand der folgenden Anweisungen werden Sie
durch die Installation des Gateways geführt.
SureConnect
ADSL Wireless
Überblick über Installation und
Systemanforderungen
HINWEIS: Es ist sehr wichtig, dass Sie sich die Seriennummer notieren.
Diese Nummer benötigen Sie, wenn Sie sich an unsere SupportAbteilung wenden. Die 12-stellige Seriennummer finden Sie auf einem
Strichcode-Aufkleber auf der Gateway-Unterseite und der Verpackung.
Sie benötigen außerdem Ihre Modellnummer, die bereits unten
eingetragen ist.
Tragen Sie die Seriennummer in das unten stehende Feld ein.
9106
Seriennummer Modellnummer
Was Sie zunächst brauchen:
• Aktiver ADSL- und Internetdienst Ihrer Telefongesellschaft oder Ihres
Internet Service Providers (ISP).
• Benutzername und Kennwort, falls bereits zugewiesen.
• Manchmal muss zwischen Gateway und Telefonwandbuchse ein
spezieller Verteiler geschaltet sein. Dieser Verteiler muss sowohl für
eine Telefonbuchse als auch für einen Gateway-Anschluss geeignet
sein. Ist dies nicht der Fall, darf der Verteiler nicht zwischen
Wandbuchse und Gateway geschaltet werden.
Ihr ISP sollte bei Bedarf Folgendes zur Verfügung stellen:
• Werte für VPI/VCI
• ADSL-Standard (Modulation)
• Kapselungsmodus
• Authentifizierung (PAP oder CHAP) für PPP-Verbindungen
43
Page 46

Installation des Modems
1. Schritt: Anschließen von Mikrofiltern (falls beiliegend
oder von Ihrem ISP verlangt)
Ihr ISP bestimmt, ob Sie Mikrofilter benötigen. Wenn keine Mikrofilter beiliegen,
fragen Sie Ihren ISP, ob Mikrofilter erforderlich sind.
Zur Installation des Mikrofilters stecken Sie das Telefon-Anschlusskabel in den
Mikrofilter und schließen diesen danach an der Telefonwandbuchse an.
Installieren Sie keinen Mikrofilter an dem Kabel, das Ihr Gateway mit der
Telefonbuchse verbindet, sofern der Filter nicht mit einer entsprechenden
Buchse für das Telefon und das ADSL-Gerät ausgestattet ist.
2. Schritt: Einrichten Ihres Computers für die Installation
(Macintosh- und Linux-Benutzer sollten direkt zum 3.
Schritt übergehen)
Vor dem Anschließen des Gateways an den Computer müssen Sie zunächst die
Software installieren. Ihr Computer muss eingeschaltet sein. Halten Sie
außerdem die CD-ROM Ihres Betriebssystems bereit.
1. Legen Sie die Installations-CD-ROM in das CD-ROM-Laufwerk Ihres
Computers ein. Das Installationsprogramm startet automatisch. Das kann
einen Augenblick dauern.
Klicken Sie auf Windows Start und dann auf Ausführen, wenn die
Installation nicht automatisch gestartet wird. Geben Sie D:\setup.exe in das
Dialogfeld ein und klicken Sie auf OK. (Wenn Ihr CD-ROM-Laufwerk einen
anderen Buchstaben verwendet, geben Sie diesen anstelle von D ein.)
44
44
Page 47

2. Befolgen Sie die Bildschirmanweisungen, bis die Software-Installation
abgeschlossen ist.
3. In einem Test wird nun überprüft, ob Ihr System die
Mindestvoraussetzungen für die Installation erfüllt. Auf dem Bildschirm
"Results" (Ergebnisse) werden diejenigen Elemente, die die Prüfung
bestanden haben, mit einer grünen Flagge markiert. Eine rote Flagge
kennzeichnet unzureichende Elemente. Wenn Ihr System die Überprüfung
bestanden hat, klicken Sie auf Next (Weiter).
Wenn das System die Überprüfung nicht bestanden hat, klicken Sie auf
View Report (Bericht anzeigen). Es werden die unzureichenden
Komponenten angezeigt. Im Abschnitt zur Fehlerbehebung in dieser
Installationsanleitung finden Sie weitere Informationen.
3. Schritt: Anschließen der Antennen und Kabel
1. Schließen Sie die Antennen an die Rückseite des Gateways an.
2. Stecken Sie den Wechselstromadapter in die 16 V-Wechselstrombuchse an
der Rückseite Ihres U.S. Robotics
Stecken Sie den Netzadapter in eine Steckdose. Falls die "PWR"-LED an
der Vorderseite nicht aufleuchtet, drücken Sie den Netzschalter an der
Rückseite des Gateways.
Das Gateway wird initialisiert, sobald die Stromversorgung eingeschaltet
ist. Das kann einen Augenblick dauern.
SureConnect
ADSL Wireless Gateway.
Nur für Windows-Benutzer: Klicken Sie auf Next (Weiter). Die
erforderlichen Dateien werden auf Ihr System kopiert.
3. Stecken Sie ein Ende des beigefügten grauen Telefonkabels in den mit
"ADSL" gekennzeichneten grauen Telefonanschluss an der Rückseite des
Gateways. Stecken Sie das andere Ende in die Telefonwandbuchse. Nur für
Windows-Benutzer: Klicken Sie auf Next (Weiter).
4. Wählen Sie eine der folgenden Verbindungsoptionen.
Über eine Wireless-Verbindung:
Suchen Sie nach dem Wireless Gateway und nehmen Sie dessen
Zuordnung vor. Nur für Windows-Benutzer: Klicken Sie auf Next (Weiter).
45
45
Page 48

Über eine Ethernet-Verbindung:
Anschließen des gelben Ethernet-Kabels: Sie können bis zu vier Geräte
vernetzen, doch der Anschluss weiterer Geräte sollte erst erfolgen,
nachdem Sie das erste Setup abgeschlossen haben. Schließen Sie ein
Ende des gelben Ethernet-Kabels an den gelben Ethernet 1-, Ethernet 2-,
Ethernet 3- oder Ethernet 4-Anschluss an der Rückseite des Gateways an.
Stecken Sie das andere Ende des Ethernet-Kabels in den EthernetAnschluss der 10/100-Netzwerkkarte Ihres Computers. Nur für Windows-
Benutzer: Klicken Sie auf Next (Weiter).
Beim Setup wird Ihr Modem erkannt und der SureConnect ADSL
EasyConfigurator installiert. Das kann einen Augenblick dauern.
Für Macintosh- und Linux-Benutzer: Legen Sie die CD-ROM ein und
befolgen Sie die Anweisungen auf dem Bildschirm. Mac-10-Benutzer:
Doppelklicken Sie auf das CD-Symbol auf Ihrem Schreibtisch, öffnen Sie
Install.htm und befolgen Sie die Anweisungen auf dem Bildschirm.
4. Schritt: Konfiguration des Gateways mit dem
EasyConfigurator
HINWEIS: Benutzer von NT 4.0 benötigen das Service Pack 3 oder eine
höhere Version, um den EasyConfigurator auszuführen.
1. Es erscheint der SureConnect ADSL EasyConfigurator-Bildschirm, auf dem
Sie, wie in der folgenden Abbildung gezeigt, einen Benutzernamen und ein
Kennwort eingeben müssen.
46
46
Page 49

Bei diesen Feldern ist die Groß-/Kleinschreibung zu berücksichtigen.
Deaktivieren Sie daher die Feststelltaste. Der Standard-Benutzername
lautet admin. Das Standard-Kennwort lautet admin. Vergewissern Sie sich,
dass Sie diese Werte richtig eingegeben haben, und klicken Sie auf Login
(Anmeldung). Das kann einen Augenblick dauern.
2. Wählen Sie Ihr Land und Ihren Internet Service Provider (ISP) aus den
Listen aus. Klicken Sie auf Apply (Übernehmen). Falls Ihr ISP nicht auf
dieser Liste erscheint, lesen Sie bitte den Abschnitt zur Fehlerbehebung in
dieser Installationsanleitung.
3. Der EasyConfigurator konfiguriert daraufhin Ihr Gateway. Das kann einen
Augenblick dauern.
Wenn als aktueller Status CONNECTED TO INTERNET (Internetverbindung
hergestellt) angegeben wird, wie in der folgenden Abbildung gezeigt, ist
Ihr U.S. Robotics
Zugriff konfiguriert. Sie können nun das Internet nutzen. Registrieren Sie
Ihr Produkt und überprüfen Sie Ihre Verbindung, indem Sie zur folgenden
Website gehen: www.usr.com/productreg
SureConnect
ADSL Wireless Gateway für den Internet-
47
47
Page 50

Falls Sie diese Meldung nicht erhalten, lesen Sie bitte den Abschnitt zur
Fehlerbehebung in dieser Installationsanleitung.
5. Schritt: (Optional) Überprüfen der drahtlosen Verbindung
Klicken Sie oben auf dem Bildschirm auf das Menü "Wireless". EasyConfigurator
fragt dann das Gateway ab und zeigt Ihnen nach einiger Zeit den aktuellen
Status der Wireless-Verbindung an.
48
48
Page 51

Die Standardeinstellungen lauten wie folgt:
Wireless-Status = Aktiviert
Access Point = SSID-Weitergabe aktiviert
WEP-Verschlüsselung = Deaktiviert
Falls Sie diese Parameter ändern möchten, klicken Sie auf Wireless
konfigurieren. Daraufhin wird ein Webbrowser gestartet. Wir empfehlen Ihnen,
WEP zu aktivieren und einen sicheren Geheimschlüssel zuzuweisen. Achten Sie
darauf, diesen Schlüssel auch Ihren Wireless-Geräten zuzuweisen, um künftige
Verbindungen zu ermöglichen. Sie können die Sicherheit der WirelessVerbindung noch weiter steigern, indem Sie auf der Web-Benutzeroberfläche für
den Mac-Filter die Optionen zum Mac-Filter aktivieren. Weitere Informationen
zur Konfiguration dieser und weiterer Wireless-Parameter finden Sie in der
Bedienungsanleitung auf der U.S. Robotics Installations-CD.
Sollten Sie beim Herstellen einer Verbindung zum U.S. Robotics
ADSL Wireless Gateway Probleme haben, überprüfen Sie, ob einer der beiden
nachfolgend beschriebenen Fälle auf Sie zutrifft.
• Wenn Sie keine Wireless-Verbindung zum U.S. Robotics
Wireless Gateway herstellen können, sollten Sie überprüfen, ob alle
Wireless Cards auf den Modus Infrastructure (Infrastruktur) eingestellt sind.
Wurde für eine Wireless Card der Modus "802.11b AdHoc" gewählt, können
Sie keine Verbindung zum U.S. Robotics
Gateway herstellen. Sind alle Wireless Cards auf den Modus Infrastructure
eingestellt, sollte die Verbindung zum Access Point des U.S. Robotics
SureConnect
die Verbindung nicht automatisch hergestellt wird, wiederholen Sie den
Scanvorgang, bis die Cards das U.S. Robotics
Gateway erkennen und eine Verbindung zustande kommt.
• Lässt die Qualität einer Wireless-Verbindung zum U.S. Robotics
SureConnect
den Standort des U.S. Robotics
prüfen. Große Entfernungen (auch über mehrere Stockwerke hinweg),
Stahl- oder Betonwände sowie andere Drahtlosgeräte können die
Verbindungsqualität beeinträchtigen. Wählen Sie nach Möglichkeit einen
neuen Standort für das U.S. Robotics
um diese Hindernisse zu umgehen und die Empfangsqualität zu verbessern.
ADSL Wireless Gateway automatisch hergestellt werden. Falls
ADSL Wireless Gateway zu wünschen übrig, empfiehlt es sich,
SureConnect
SureConnect
SureConnect
ADSL Wireless Gateway zu
SureConnect
ADSL Wireless Gateway,
SureConnect
SureConnect
ADSL Wireless
ADSL Wireless
ADSL
49
49
Page 52

Fehlerbehebung
Verwenden Sie zunächst die folgende Checkliste zur Fehlerbehebung, um die
Ursache des Problems festzustellen.
✔ Vergewissern Sie sich, dass Sie den Wechselstromadapter
verwenden, der mit Ihrem Gateway geliefert wurde, und dass er
ordnungsgemäß an das Gateway sowie an eine funktionierende
Steckdose angeschlossen ist. Vergewissern Sie sich, dass der
Netzschalter eingeschaltet ist. Die "PWR"-LED sollte aufleuchten.
✔ Vergewissern Sie sich, dass das Telefonkabel ordnungsgemäß in der
Telefonwandbuchse und im Gateway steckt. Die "ADSL"-LED sollte
aufleuchten.
✔ Vergewissern Sie sich, dass alle Ethernet-Kabel sicher im Anschluss
Ethernet 1, 2, 3, oder 4 des Gateways und in der
Netzwerkschnittstellenkarte (NIC) des Computers stecken. Die
entsprechenden Ethernet-LEDs an der Vorderseite des Gateways
sollten leuchten.
✔ Bei einer Wireless-Verbindung mit dem Gateway prüfen Sie bitte die
richtige Installation des Wireless-Client und dessen Einstellungen
(standardmäßig keine WEP, Infrastruktur-Modus). Vergewissern Sie
sich auch, dass der Client mit dem Gateway synchronisiert wurde.
Weitere Informationen finden Sie in der Dokumentation zu Ihrem
Client.
✔ Öffnen Sie die Statusseite des EasyConfigurator, um zu bestätigen,
dass Ihr Gateway vorschriftsmäßig funktioniert. Zum Überprüfen der
drahtlosen Verbindung gehen Sie zur Seite "Wireless".
Status-LEDs
An der Vorderseite des U.S. Robotics
es acht LEDs: PWR, Ethernet 1, 2, 3, 4, ADSL, WAN IP und WLAN. Den
Betriebsstatus des Gateways erkennen Sie an den unten dargestellten LEDZuständen.
50
SureConnect
50
ADSL Wireless Gateway gibt
Page 53

Das Gerät wird vom Wechselstromadapter mit Strom
versorgt.
Das Gateway empfängt im PPP-Modus vom Internet Service
Provider (ISP) eine öffentliche IP-Adresse.
Es wurde eine physische Verbindung zwischen Gateway und
Computer über das Ethernet-Kabel aufgebaut und erkannt.
Es wurde keine physische Verbindung zwischen Gateway
und Computer über das Ethernet-Kabel aufgebaut.
PWR
WAN IP
WLAN
Ethernet
1, 2, 3, 4
ADSL
Leuchtet grün
Aus Es wurde keine Stromversorgung erkannt.
Leuchtet grün
Blinkt grün IP-Verbindung eingerichtet; Daten werden übermittelt.
Rot Empfang der IP-Adresse vom ISP fehlgeschlagen.
Aus ADSL nicht synchronisiert oder im Bridge-Modus.
Leuchtet grün Wireless-Client ist mit dem Gateway verbunden.
Blinkt grün Wireless-Datenverkehr läuft.
Aus Kein Wireless-Client mit dem Gateway verbunden.
Leuchtet grün
Blinkt grün Datenverkehr läuft.
Aus
Leuchtet grün Die DSL-Verbindung wurde aufgebaut.
Blinkt grün Die Abstimmung einer DSL-Verbindung läuft.
Aus Die DSL-Verbindung ist fehlgeschlagen.
Rückseite des Gateways
Text Beschreibung
ADSL Digitaler Teilnehmeranschluss für RJ-11-Stecker an der Rückseite des Gateways.
1 Ethernet-Anschluss 1 an der Rückseite des Gateways.
2 Ethernet-Anschluss 2 an der Rückseite des Gateways.
3 Ethernet-Anschluss 3 an der Rückseite des Gateways.
4 Ethernet-Anschluss 4 an der Rückseite des Gateways.
RESET Zum Zurücksetzen des Gateways.
16 V AC Eingangsbuchse für das Stromkabel (vom Wechselstromadapter).
Power Drucktaste zum Ein- und Ausschalten des Gateways.
51
51
Page 54

HINWEIS: Zum Zurücksetzen des Gateways drücken Sie die ResetTaste, indem Sie eine Nadel oder eine Büroklammer einführen. Dann
wird ein Neustart des Gateways durchgeführt. Wenn Sie die Taste
länger als 5 Sekunden gedrückt halten, werden die werkseitigen
Standardeinstellungen der Gatewaykonfiguration wiederhergestellt.
Weitere Tipps zur Fehlerbehebung
Mein ISP ist im ISP-Feld des EasyConfigurator nicht enthalten.
Lösungsvorschlag: Sollte Ihr ISP oder Ihr Land hier nicht aufgeführt sein,
wählen Sie die Option Not Listed (Nicht enthalten). In diesem Fall müssen
Sie die Einstellungen im Bildschirmbereich "Line configuration"
(Leitungskonfiguration) manuell konfigurieren. Die entsprechenden Werte
und Einstellungen erfahren Sie von Ihrem ISP. Klicken Sie dann auf Apply
(Übernehmen). Das kann einen Augenblick dauern.
Beim Einschalten des Gateways leuchtet keine LED auf.
Lösungsvorschlag: Gehen Sie die Checkliste zur Fehlerbehebung am
Anfang dieses Abschnitts durch.
52
52
Page 55

Die ADSL-LED blinkt oder leuchtet gar nicht.
Lösungsvorschlag: Gehen Sie die Checkliste zur Fehlerbehebung am
Anfang dieses Abschnitts durch.
Ich kann keine Verbindung zum Internet herstellen.
Lösungsvorschlag:
• Gehen Sie die Checkliste zur Fehlerbehebung am Beginn dieses
Abschnitts durch.
• Vergewissern Sie sich, dass Sie ein aktives ISP-Konto besitzen.
• Überprüfen Sie Ihre VCI/VPI-Einstellungen, Ihren Benutzernamen, das
Kennwort und die Art der Authentifizierung über den EasyConfigurator.
Sie rufen diese Variablen ab, indem Sie den EasyConfigurator öffn en und
die Registerkarte "Status" wählen. Darüber hinaus müssen Sie bei der
Eingabe von Namen und Kennwort die Groß-/Kleinschreibung beachten.
Vergewissern Sie sich, dass die FESTSTELLTASTE deaktiviert ist.
• Wenden Sie sich an Ihren ISP, wenn Sie weitere Unterstützung benötigen.
Ich weiß nicht, ob ich eine statische oder dynamische IP-Adresse habe.
Lösungsvorschlag: Wenn der DSL-Dienst freigeschaltet ist, verfügen Sie
wahrscheinlich über eine dynamische IP-Adresse. Wenden Sie sich an den
ISP, um diese Information zu überprüfen. Einige ISPs weisen statische IPAdressen zu.
Ich kann nicht mehr auf das Internet zugreifen.
Lösungsvorschlag: Überprüfen Sie die Verbindungskonfiguration Ihres
Webbrowsers und achten Sie darauf, dass die HTTP-Proxy-Funktion des
Webbrowsers deaktiviert ist. Dies ist notwendig, damit der Webbrowser die
Konfigurationsseiten lesen kann. Starten Sie Ihren Webbrowser.
Benutzer von Internet Explorer: Klicken Sie auf Extras, Internetoptionen
und dann auf die Registerkarte "Verbindungen". Markieren Sie Keine
Verbindung wählen, klicken Sie auf Übernehmen und dann auf OK. Klicken
Sie erneut auf Extras und wählen Sie Internetoptionen. Gehen Sie zur
Registerkarte "Verbindungen" und klicken Sie auf LAN-Einstellungen.
Deaktivieren Sie alle Kontrollkästchen und klicken Sie auf OK. Klicken Sie
auf OK, um das Dialogfeld "Internetoptionen" zu schließen.
Benutzer von Netscape Navigator: Klicken Sie zunächst auf Bearbeiten,
Einstellungen und doppelklicken Sie dann im Kategoriefenster auf
Erweitert. Klicken Sie auf Proxies, wählen Sie Direkte Verbindung zum
Internet und klicken Sie auf OK. Klicken Sie erneut auf Bearbeiten und dann
auf Einstellungen. Danach doppelklicken Sie unter "Kategorie" auf
Erweitert und klicken auf Proxies. Wählen Sie Direkte Verbindung zum
Internet und klicken Sie auf OK.
53
53
Page 56

Ich kann keine Verbindung zu Spezialanwendungen herstellen.
Lösungsvorschlag: Falls das U.S. Robotics
SureConnect
ADSL Wireless
Gateway ordnungsgemäß angeschlossen ist und auch auf das Internet
zugreifen kann, Sie aber trotzdem Probleme beim Herstellen einer
Verbindung zu einigen Spezialanwendungen haben (z. B. ICQ, Battle.net
usw.), müssen Sie spezifische Anschlüsse zuweisen, um die Firewall zu
umgehen. Weitere Informationen zur Konfiguration dieser Funktion finden
Sie in der Bedienungsanleitung auf der U.S. Robotics Installations-CD.
Beim Überprüfen meiner Netzwerkkonfiguration unter Windows Me oder XP
finde ich das Netzwerksymbol nicht.
Lösungsvorschlag: Standardmäßig sind Windows Me und XP so
eingestellt, dass nicht alle Symbole in der Systemsteuerung angezeigt
werden. Klicken Sie unter Windows auf Start, Einstellungen und dann
Systemsteuerung. Klicken Sie in der Systemsteuerung links auf dem
Bildschirm auf die Option zum Anzeigen aller Systemsteuerungsoptionen.
Es sollten nun alle Systemsteuerungsoptionen zu sehen sein.
Ich weiß nicht, wie ich das TCP/IP-Protokoll für die Verwendung mit dem
Gateway konfigurieren muss.
Lösungsvorschlag: Sie können dieses Problem beheben, indem Sie das
Hilfe-Menü Ihres Betriebssystems öffnen. Weitere Informationen finden Sie
in der Hilfe zu TCP/IP.
Während des Surfens im Internet habe ich die Fehlermeldung "Seite nicht
gefunden" oder eine ähnliche Meldung erhalten.
Lösungsvorschlag: Überprüfen Sie, ob Ihr Computer eine IP-Adresse vom
Gateway erhalten hat. Wenn nicht, versuchen Sie die IP-Adresse
freizugeben/zu aktualisieren. Lesen Sie dazu die Bedienungsanleitung auf
der CD-ROM.
Lösungsvorschlag: Überprüfen Sie, ob Ihr Gateway eine IP-Adresse von Ihrem
Internet Service Provider (ISP) erhalten hat. Lesen Sie die Informationen zum
Ping-Vorgang in dieser Bedienungsanleitung. Weitere Informationen
entnehmen Sie bitte der Bedienungsanleitung auf der CD-ROM.
Meine Wireless-Verbindung kann nicht auf das Internet zugreifen.
Lösungsvorschlag: Überprüfen Sie, ob der Client richtig installiert und
konfiguriert wurde und das Gateway erfassen kann.
Lösungsvorschlag: Gehen Sie zur Seite "Wireless" des EasyConfigurator
und überprüfen Sie dort den Status der Wireless-Verbindung.
Lösungsvorschlag: Gehen Sie die Checkliste zur Fehlerbehebung zu Beginn
dieses Abschnitts durch und überprüfen Sie den Status Ihrer ADSL-Verbindung.
54
54
Page 57

Fehlerbehebung mit dem Befehl "ping"
1. Klicken Sie unter Windows auf Start und dann auf Ausführen.
Windows 95, 98 und Me: Geben Sie command in das Dialogfeld ein.
Klicken Sie auf OK.
Windows NT 4.0, 2000 und XP: Geben Sie cmd in das Dialogfeld ein.
Klicken Sie auf OK.
2. Geben Sie hinter der DOS-Eingabeaufforderung ping 127.0.0.1 ein.
Hierbei handelt es sich um die lokale Hostadresse. Diese Adresse
bestätigt, dass TCP/IP installiert ist und ordnungsgemäß funktioniert.
Kann der Ping-Vorgang nicht vollständig ausgeführt werden, trennen
Sie die Verbindung zum Gateway und wiederholen Sie die Installation.
3. Geben Sie ping und die IP-Adresse Ihres Computers ein. Dadurch wird
bestätigt, dass Ihr Computer Anforderungen beantwortet. Kann der
Ping-Vorgang nicht vollständig ausgeführt werden, überprüfen Sie, ob
alle Kabel korrekt angeschlossen und alle Treiber installiert sind.
4. Geben Sie ping gefolgt von Ihrer Gateway-Adresse ein, um die
Verbindung Ihres Gateways zu überprüfen (die Standard-Adresse des
Gateways ist 192.168.1.1). Dadurch wird gewährleistet, dass Sie die
Verbindung zu anderen Computern und zum Gateway herstellen
können. Wenn es möglich ist, eine Verbindung zum Gateway
herzustellen, können Sie auch auf die Administrationsseite zugreifen
und die Einstellungen konfigurieren. Kann der Ping-Vorgang nicht
vollständig ausgeführt werden, überprüfen Sie, ob der
Wechselstromadapter des Gateways angeschlossen und
ordnungsgemäß mit dem Computer verbunden ist.
5. Geben Sie ping und die externe Internetadresse des Gateways ein.
Diese Adresse erhalten Sie entweder vom ISP oder vom Administrator
des externen LAN. Dadurch wird sichergestellt, dass das Gateway
einwandfrei funktioniert und die Übertragung von Daten ermöglicht.
6. Geben Sie ping und die Adresse des DNS-Servers ein. Hiermit wird die
Auflösung gültiger Internet-Hostnamen zu IP-Adressen ermöglicht und
überprüft, ob Sie eine Internetverbindung herstellen können.
Was ist, wenn ich keine Erfolgsmeldung für ein Ping zum Gateway erhalte?
Lösungsvorschlag: Wenn Sie keine Antwort erhalten, bedeutet dies, dass
der Computer nicht mit der IP-Adresse des Gateways kommunizieren kann.
• Überprüfen Sie die IP-Adresse des Computers (Netzwerkkarte). Achten
Sie darauf, dass sie zum selben Subnetz gehört wie die GatewayAdresse. (Wenn beispielsweise die Gateway-Adresse 192.168.1.1
lautet, muss die IP-Adresse des Computers 192.168.1.x sein, wobei x
größer als 1 ist.) Ist dies nicht der Fall, geben Sie die IP-Adresse für
Ihren Computer frei und aktualisieren Sie sie dann.
55
55
Page 58

Technischer Support
• Aktuelle Produkt-Support- und Kontaktinformationen finden Sie auf
der U.S. Robotics-Website unter:
http://www.usr.com/broadbandsupport
Viele der gängigsten Schwierigkeiten, die Benutzer erleben, werden in
den FAQ (Häufig gestellte Fragen) und den Webseiten zur
Fehlerbehebung für Ihr Produkt angesprochen.
• Wenn Sie keine Verbindung zum Internet herstellen können, wenden
Sie sich an Ihren ISP.
• Falls Ihr ISP Ihnen nicht behilflich sein kann und immer noch keine
Verbindung zum Internet möglich ist, wenden Sie sich an den
Technischen Support von U.S. Robotics. Technische Fragen zu U.S.
Robotics-Produkten werden dort von Experten beantwortet. Die für
Ihre Region gültigen Kontaktinformationen für den Technischen
Support finden Sie in der Bedienungsanleitung auf der InstallationsCD-ROM.
56
56
Page 59

Hinweise zu Vorschriften
Erklärung des Herstellers zur Konformität
Wir, die U.S. Robotics Corporation, 935 National Parkway, Schaumburg, Illinois, 60173-5157, USA,
bestätigen auf eigene Verantwortung, dass das U.S. Ro botics
das sich diese Erklärung bezieht, folgende Standards und/oder andere Vorschriften erfüllt:
EN300 328-2
EN301 489-1
EN301 489-17
EN60950
EN55022
EN55024
Diese Ausrüstungen hält sich an Artikel 3.1(a) von RICHT1999/5/EC für den Schutz der Gesundheit und
der Sicherheit des Verbrauchers an.
Wir, die U.S. Robotics Corporation, erklären hiermit, dass dieses Produkt alle wesentlichen
Anforderungen und sonstigen relevanten Vorschriften der Richtlinie 1999/5/EC erfüllt.
Dieses Produkt kann in den folgenden Ländern verwendet werden:
Deutschland, Österreich, Belgien, Schweiz, Niederlande, Luxemburg, Italien, Frankreich,
Großbritannien, Irland, Spanien, Portugal, Schweden, Norwegen, Dänemark, Finnland, Island und
Griechenland
Zu IEEE 802.11g stehen uns derzeit die folgenden Informationen über Einschränkungen in den Ländern
der R&TTE-Richtlinie zur Verfügung:
Land Frequenzband Max. Ausgangsleistung
Frankreich 2454-2483,5 MHz 10 mW EIRP Freiluft
CE-Erklärung zur Einhaltung von Richtlinien:
SureConnect
ADSL Wireless Gateway, auf
Betriebskanäle: IEEE 802.11g-konform
Dieses Gerät entspricht den europäischen Schutzbestimmungen bezüglich Schäden durch
elektromagnetische Strahlung. Bei der Installation und Verwendung dieses Geräts sollte ein Abstand
von mindestens 20 cm zwischen der Strahlungsquelle und Ihrem Körper eingehalten werden. Dieses
Wireless-Gerät ist ein Sender/Empfänger, der gemäß den vom Rat der Europäischen Union und der
Internationalen Kommission für den Schutz vor nichtionisierender Strahlung (ICNIRP, 1999) für die
ganze Bevölkerung empfohlenen Grenzwerten für Strahlenschutz entwickelt und produziert wurde. Die
Strahlenbelastung für tragbare Geräte wird in der Einheit "Spezifische Absorptionsrate (SAR)"
gemessen. Der maximale SAR-Wert dieses Wireless-Geräts betrug beim Konformitätstest 1,08 W/kg.
11 Kanäle (USA, Kanada)
13 Kanäle (ETSI)
14 Kanäle (Japan)
Informationen zur abnehmbaren Antenne (EU)
Dieses USR-Wireless-Gerät wurde ausschließlich für den Betrieb mit der in dieser Packung enthaltenen
Antenne entwickelt. Die Kombination von Gerät und Antenne wurde von einer europäischen Prüfstelle
gemäß der R&TTE-Richtlinie 1999/5/EG geprüft und anerkannt, um den Anforderungen für eine
Antennenstrahlungsleistung von 100 mW (EIRP) zu entsprechen. Die Antenne darf nur durch ein
autorisiertes USR-Bauteil ersetzt werden, das entsprechend den Anforderungen der Richtlinie
1999/5/EG für das Gerät entwickelt und getestet wurde. Bitte informieren Sie sich auf der USR-Website
über Einzelheiten zur Bestellung einer Produktantenne.
In Europa:
FRS Europe BV.
Draaibrugweg 2
1332 AC Almere
Niederlande
Unter http://www.usr.com finden Sie aktuelle Informationen zu Kanal-Einschränkungen.
Begrenzte Garantie der U.S. Robotics Corporation für zwei (2) Jahre
57
57
Page 60

1.0 ALLGEMEINE BE DINGUNGEN:
1.1 Diese begrenzte Garantie gilt nur für den ursprünglichen Käufer und Endbenutzer (den KUNDEN) und ist nicht
übertragbar.
1.2 Kein Vertreter, Händler oder Geschäftspartner der U.S. Robotics Corporation (U.S. ROBOTICS) ist dazu berechtigt
die Bedingungen dieser begrenzten Garantie im Namen von U.S. ROBOTICS zu modifizieren.
1.3 Jegliche Produkte, die nicht fabrikneu von U.S. ROBOTICS oder einem seiner Vertragshändler erworben wurden,
sind ausdrücklich von dieser begrenzten Garantie ausgeschlossen.
1.4 Diese begrenzte Garantie ist nur in dem Land oder Gebiet gültig, in dem das Produkt zur Benutzung vorgesehen
ist (wie durch die Modellnummer des Produktes und am Produkt angebrachte Aufkleber für örtliche
Telekommunikationssysteme angezeigt).
1.5 U.S. ROBOTICS garantiert dem KUNDEN, dass dieses Produkt bei normaler Verwendung für ZWEI (2) JAHRE ab
dem Datum des Kaufs bei U.S. ROBOTICS oder einem autorisierten Händler keine Verarbeitungs- und
Materialmängel aufweist.
1.6 Die Verpflichtung von U.S. ROBOTICS unter dieser ausdrücklichen Garantie beschränkt sich nach alleinigem
Ermessen von U.S. ROBOTICS darauf, das defekte Produkt oder Teil mit neuen oder überholten Ersatzteilen zu
reparieren; oder das defekte Produkt oder Teil durch ein gleiches oder gleichwertiges, neues oder überholtes
Produkt oder Teil zu ersetzen; oder U.S. ROBOTICS kann, falls keine der vorstehenden Möglichkeiten mit
angemessenen Bemühungen durchführbar ist, dem KUNDEN nach alleinigem Ermessen den Kaufpreis erstat ten,
dessen Höhe die aktuelle Preisempfehlung von U.S. ROBOTICS für das Produkt unter Abzug anwendbarer
Gebühren nicht überschreitet. Alle ersetzten Produkte oder Teile gehen in den Besitz von U.S. ROBOTICS über.
1.7 U.S. ROBOTICS gewährt für jedes ersetzte Produkt oder Teil eine Garantie von NEUNZ IG (90) TAGEN ab dem
Versanddatum des Produktes oder Teils an den KUNDEN.
1.8 U.S. ROBOTICS gibt keine Zusicherung oder Erklärung dafür ab, dass dieses Produkt die Anforderungen des
KUNDEN erfüllt oder in Kombination mit jeglichen Hardware- oder Softwareprodukten von Drittanbietern
funktioniert.
1.9 U.S. ROBOTICS gibt keine Zusicherung oder Erklärung dafür ab, dass der Betrieb des mit diesem Produkt
gelieferten Softwareproduktes ununterbrochen oder störungsfrei abläuft oder dass jegliche Defekte von
Softwareprodukten behoben werden.
1.10 U.S. ROBOTICS übernimmt keine Verantwortung für jegliche Software oder andere Daten oder Informationen des
KUNDEN, die in diesem Produkt enthalten oder darin gespeichert sind.
2.0 VERPFLICHTU NGEN DES KUNDEN
2.1 Der KUNDE trägt die alleinige Verantwortung dafür, dass dieses Produkt die Spezifikationen und Anforderungen
des KUNDEN erfüllt.
2.2 Dem KUNDEN wird insbesondere angeraten, eine Sicherungskopie sämtlicher mit diesem Produkt gelieferter
Software zu erstellen.
2.3 Der KUNDE trägt die alleinige Verantwortung für die korrekte Installation und Konfiguration dieses Produktes
sowie für die vorschriftsmäßige Installation, Konfiguration, den Betrieb und die Kompatibilität mit dem
Betriebssystem, unter dem das Produkt betrieben werden soll.
2.4 Der KUNDE muss U.S. ROBOTICS einen datierten Kaufbeleg (eine Kopie der Original-Kaufquittung von U.S.
ROBOTICS oder seinem Vertragshändler) vorlegen, um einen Garantieanspruch geltend zu machen.
3.0 WAS IM GARANTIEFALL ZU TUN IST:
3.1 Der KUNDE muss sich zur Wahrnehmung seines Garantieanspruchs innerhalb der gültigen Garantiezeit mit dem
Technischen Support von U.S. ROBOTICS oder einem offiziellen Vertrags-Servicecenter von U.S. ROBOTICS in
Verbindung setzen.
3.2 Der KUNDE muss die Modellnummer und die Seriennummer des Produktes sowie einen datierten Kaufbeleg
(eine Kopie der Original-Kaufquittung von U.S. ROBOTICS oder einem seiner Vertragshändler) vorlegen, um
einen Garantieanspruch geltend zu machen.
3.3 Informationen dazu, wie Sie Kontakt zum Technischen Support von U.S. ROBOTICS oder einem offiziellen
Vertrags-Servicecenter von U.S. ROBOTICS aufnehmen, finden Sie auf der Firmen-Website von U.S ROBOTICS
unter: www.usr.com
3.4 Der KUNDE sollte bei der Kontaktaufnahme mit dem Technischen Support von U.S. ROBOTICS die folgenden
Informationen/Artikel bereithalten:
Modellnummer des Produktes
Seriennummer des Produktes
Datierter Kaufbeleg
Name und Telefonnummer des KUNDEN
Version des Betriebssystems des KUNDEN
U.S. ROBOTICS Installations-CD-ROM
U.S. ROBOTICS Installationsanleitung
4.0 ERSATZ IM RAHMEN DER GARANTIE:
4.1 Falls der Technische Support von U.S. ROBOTICS oder ein offizielles Vertrags-Servicecenter von U.S. ROBOTICS
feststellt, dass die Fehlfunktion oder das Versagen eines Produktes oder Teils direkt auf Material- und/oder
Verarbeitungsfehler zurückzuführen ist; und dieser Fehler innerhalb des Garantiezeitraums von ZWEI (2) JAHREN
auftritt; und der KUNDE dem Produkt oder Teil eine Kopie des datierten Kaufbelegs (der Original-Kaufquittung
von U.S. ROBOTICS oder einem seiner Vertragshändler) beilegt, erhält der KUNDE von U.S. ROBOTICS eine
Materialrückgabenummer (RMA) und Anweisungen zur Rückgabe des Produktes oder Teils an die offizielle
58
58
Page 61

Rücksendeadresse von U.S. ROBOTICS.
4.2 Jedes Produkt oder Teil, das ohne RMA von U.S. ROBOTICS oder einem offiziellen Vertrags-Servicecenter von
U.S. ROBOTICS an U.S ROBOTICS zurückgeschickt wird, geht an den Absender zurück.
4.3 Der KUNDE erklärt sich bereit, die Portokosten für die Rücksendung des Produktes oder Teils an das offizielle
Vertrags-Servicecenter von U.S. ROBOTICS zu übernehmen; das Produkt zu versichern oder das Risiko von
Verlust oder Beschädigung beim Transport einzugehen; und einen Transportbehälter zu verwenden, der der
Originalverpackung entspricht.
4.4 Die Verantwortung für Verlust oder Beschädigung geht nicht auf U.S. ROBOTICS über, bis das zurückgesandte
Produkt oder Teil als autorisierte Rücksendung an einer offiziellen Rücksendeadresse von U.S. ROBOTICS
eintrifft.
4.5 Autorisierte Rücksendungen des KUNDEN werden ausgepackt, begutachtet und mit der Modell- und
Seriennummer des Produktes verglichen, für die die RMA ausgegeben wurde. Der beigelegte Kaufbeleg wird auf
Kaufdatum und Namen des Händlers überprüft. U.S. ROBOTICS kann den Garantiedienst verweigern, wenn das
zurückgesandte Produkt oder Teil nach der Begutachtung nicht den Informationen des KUNDEN entspricht, nach
denen die RMA vergeben wurde.
4.6 Nach dem Auspacken, Begutachten und Testen einer Rücksendung des KUNDEN kann U.S. ROBOTICS das
Produkt oder Teil nach eigenem Ermessen unter Verwendung neuer oder überholter Produkte oder Teile in dem
Umfang reparieren oder ersetzen, der erforderlich ist, um das Produkt oder Teil wieder in einen betriebsbereiten
Zustand zu versetzen.
4.7 U.S. ROBOTICS unternimmt alle angemessenen Anstrengungen, das reparierte oder ersetzte Produkt oder Teil auf
Kosten von U.S. ROBOTICS spätestens EINUNDZWA NZIG (21) TAGE nach Empfang der autorisierten Rücksendung
durch den KUNDEN an einer offiziellen Rücksendeadresse von U.S. ROBOTICS an den KUNDEN zurück zuschicken.
4.8 U.S. ROBOTICS kann nicht für Schäden haftbar gemacht werden, die durch Verzögerungen bei der Lieferung oder
Übergabe reparierter oder ersetzter Produkte oder Teile entstehen.
5.0 EINSCHRÄNKUNGEN
5.1 SOFTWARE VON DRITTANBIETERN: Dieses U.S. ROBOTICS-Produkt kann Software von Drittanbietern, deren
Verwendung durch einen separaten Lizenzvertrag eines Drittanbieters von Software geregelt wird, beinhalten
bzw. mit solcher gebündelt sein. Diese begrenzte U.S. ROBOTICS-Garantie gilt nicht für derartige Software von
Drittanbietern. Hinsichtlich der anwendbaren Garantie informieren Sie sich bitte im Endbenutzer-Lizenzvertrag,
der die Benutzung derartiger Software regelt.
5.2 BESCHÄDIGUNG AUFG RUND VON MISSBRAUCH, VERNACHLÄSSIG UNG, MISSACHTUNG VON VORSCHRIFTEN,
FEHLERHAFT ER INSTALLATION UND/ODER UMGE BUNGSEINFLÜSSEN: Im gesamten gesetzlich zulässigen
Umfang gilt diese beschränkte U.S. ROBOTICS-Garantie nicht für normale Abnutzungserscheinungen;
Beschädigung oder Verlust von Daten aufgrund der Interoperabilität mit aktuellen und/oder zukünftigen
Betriebssystem-Versionen oder anderer aktueller und/oder zukünftiger Software und Hardware; Änderungen
(durch Personen außerhalb von U.S. ROBOTICS oder Vertrags-Servicecentern von U.S. ROBOTICS); Schäden
durch Bedienungsfehler oder Nichtbefolgung der Anweisungen in der Benutzerdokumentation oder anderen
dazugehörigen Dokumentationen; Schäden durch höhere Naturgewalten wie Blitzschlag, Sturm oder Gewitter,
Überflutung, Feuer und Erdbeben usw.; Produkte, deren Seriennummer verändert oder entfernt wurde;
Missbrauch, Vernachlässigung und falsche Behandlung; Schäden durch übermäßige physikalische,
temperaturbedingte oder elektrische Beanspruchung; gefälschte Produkte; Beschädigung oder Verlust von
Daten durch einen Computervirus, Wurm, ein Trojanisches Pferd oder Speicherschäden; Fehler des Produktes,
die auf Unfälle, Missbrauch, falschen Gebrauch (einschließlich, aber nicht beschränkt auf fehlerhafte Installation
oder Anschluss an die falsche Spannungsquelle bzw. Steckdose) zurückzuführen sind; Fehler, die durch
Produkte hervorgerufen wurden, die nicht von U.S. ROBOTICS bereitgestellt wurden; Schäden durch
Feuchtigkeit, Korrosion in der Umgebung, Hochspannungsströme, Transport oder ungewöhnliche
Arbeitsbedingungen; oder die Verwendung des Produktes außerhalb der Grenzen des für die Verwendung
vorgesehenen Landes oder Gebietes (wie durch die Modellnummer des Produktes und an das Produkt
angebrachte Aufkleber für örtliche Telekommunikationssysteme angezeigt).
5.3 DIESE GARA NTIEN UND ENTSCHÄDIGUNGE N ERSETZEN IM GESAMTEN G ESETZLICH ZULÄSSIGEN RAHM EN
ALLE SONSTIGEN AUSDRÜCKLICHE N UND STILLSCHWEIGENDE N GARANTIEN, OB DE FACTO ODER DURCH DIE
ANWENDUNG DE S GEWOHNHEITSRECHTS ODER GESETZ ES, EINSCHLIESSLICH JEDWEDE R GARANTIEN,
KONDITIONEN ODER BE DINGUNGEN DER HANDE LSÜBLICHEN QUALITÄT, EIGNUNG FÜR EIN EN BESTIMMTEN
ZWECK, ZUFRIEDE NSTELLENDEN QUALITÄT, ÜBEREINSTIMMUNG MIT DER PRODUKTBESCHRE IBUNG UND
RECHTMÄSSIGKEIT, DIE HIERM IT AUSDRÜCKLICH ABGELEHNT WERDEN. WEDE R U.S. ROBOTICS SELBST NOCH
EIN VON U.S. ROBOTICS BERECHTIGTER DR ITTER ÜBERNIMMT IM ZUSAMMENHANG MIT VERKAUF,
INSTALLATION, WARTUNG, GARANTIE UND VERWENDUNG DIESE R PRODUKTE EINE ANDERE HAFTUNG, IN
WELCHER FORM AUCH IMME R.
5.4 HAFTUNGSUMFANG. IM GESAMTEN GESETZLICH ZULÄSSIGEN UMFANG SCHLIESST U.S. ROBOTICS JEGLICHE
HAFTUNG SEINERSEITS ODER SEINER ZULIEFERER FÜR BEGLEIT-, FOLGE-, INDIREKTE ODER ANDERWEITIGE
SCHÄDEN SOWIE BUSSGELDER, EINKOMMENS- ODER GEWINNAUSFALL, GESCHÄFTSAUSFALL, VERLUST VON
INFORMATIONEN ODE R DATEN ODER ANDE RWEITIGE FI NANZIELLE SCHÄDEN AUS, DIE I N VERBINDUNG MIT
VERKAUF, INSTALLATION, WARTUNG, ANWENDUNG, LEISTUNG ODER DIENSTUNTE RBRECHUNG SEINER
PRODUKTE ENTSTANDEN SIND, OB VERTRAGS- ODER ANDERWEITIG ZIVILRECHTLICH (EI NSCHLIESSLICH
FAHRLÄSSIGKEIT) U ND SELBST WENN U.S. ROBOTICS ODER S EINE VERTRAGSHÄNDLER AUF DI E MÖGLICHKEIT
59
59
Page 62

DERARTIGER SCHÄDEN HINGEWIESE N WURDEN. U.S. ROBOTICS BEGRENZT SEINE HAFTUNG AUF R EPARATUR,
ERSATZ ODER ERSTATTUNG DES KAUFPREISES IM ERMESSEN VON U.S. ROBOTICS. DER
HAFTUNGSAUSSCH LUSS BLEIBT AUCH DANN BESTEHEN, WENN EI NE IM RAHMEN DER GARANTI E GELEISTETE
ABHILFE I HREN ZWECK NICHT ERFÜLLT.
6.0 HAFTUNGSAUSSCH LUSS: Einige Länder, Staaten, Gebiete oder Provinzen gestatten keine Beschränkung oder
Begrenzung stillschweigend mit eingeschlossener Garantien oder die Beschränkung von Begleit- oder
Folgeschäden für bestimmte an Verbraucher gelieferte Produkte oder die Haftungsbegrenzung für
Personenschäden, wodurch die vorgenannten Beschränkungen und Ausschlüsse möglicherweise nur begrenzt
auf den KUNDEN zutreffen. Falls der vollständige Ausschluss der stillschweigenden Garantien gesetzlich nicht
zulässig ist, gilt auch für sie die Frist von ZWEI (2) JAHREN entsprechend dieser schriftlichen Garantie. Diese
Garantie gewährt dem KUNDEN spezielle gesetzliche Rechte, die von Land zu Land unterschiedlich sein können.
7.0 ANWENDBARES R ECHT: Diese begrenzte Garantie unterliegt den Gesetzen des Staates Illinois, USA, mit
Ausnahme des internationalen Privatrechts und der Konvention der Vereinten Nationen zu Verträgen für den
Handel zwischen verschiedenen Ländern.
U.S. Robotics Corporation
935 National Parkway
Schaumburg, IL 60173
USA
60
60
Page 63

U.S. Robotics Corporation
935 National Parkway
Schaumburg, Illinois
60173-5157
USA
Questa documentazione non può essere né parzialmente né interamente riprodotta in alcuna forma o
utilizzata per ottenere opere derivate (quali traduzioni, trasformazione o adattamento) senza l'autorizzazione scritta di U.S. Robotics Corporation. U.S. Robotics Corporation si riserva il diritto di revisionare
la presente documentazione e di apportare modifiche periodiche ai prodotti e/o al contenuto di
questo documento senza alcun obbligo di notifica. U.S. Robotics Corporation fornisce la presente documentazione senza alcuna garanzia, implicita o esplicita, ivi comprese, ma non a titolo esclusivo,
garanzie implicite di commerciabilità e idoneità a scopi particolari. Se la presente documentazione
descrive software su supporto rimovibile, esso viene fornito ai sensi di un contratto di licenza accluso
al prodotto come documento separato, nella documentazione permanente o sul supporto rimovibile in
un file chiamato LICENSE.TXT o !LICENSE.TXT. Qualora sia impossibile reperire una copia della suddetta documentazione, rivolgersi a U.S. Robotics.
LEGENDA DELLA NORMATIVA DEGLI STATI UNITI - La documentazione e il software descritti nel presente accordo sono forniti agli enti governativi degli Stati Uniti con le restrizioni riportate di seguito.
Tutti i dati tecnici e il software per computer sono di natura commerciale e sono stati sviluppati esclusivamente con fondi privati. Il software viene commercializzato come "Commercial Computer Software" secondo la definizione data in DFARS 252.227-7014 (giugno 1995) o come "articolo
commerciale" secondo la definizione data in FAR 2.101(a) e come tale la sua fruizione è consentita solo
nei limiti dei diritti espressamente attribuiti nella licenza commerciale standard di U.S.Robotics per il
software. I dati tecnici vengono forniti con diritti limitati secondo quanto stabilito in DFAR 252.2277015 (novembre 1995) o FAR 52.227-14 (giugno 1987) laddove applicabile. L'utente si impegna a non
rimuovere od obliterare alcuna porzione di qualsiasi legenda presente in qualsiasi programma concesso in licenza o documentazione contenuta nella guida all'installazione rapida o fornita con essa.
Copyright © 2003 U.S. Robotics Corporation. Tutti i diritti riservati. U.S.Robotics e il logo U.S.Robotics
sono marchi regist rati di U.S.Robot ics Corporation. Gli altri nomi di prodotti sono usati esclusivamente
a scopo identificativo e possono essere marchi delle rispettive società. Le specifiche del prodotto sono
soggette a modifica senza preavviso.
61
Page 64

62
Page 65

Per informazioni aggiornate sui prodotti e su come contattare l'assistenza
tecnica, visitare il sito Web:
http://www.usr.com/broadbandsupport
Grazie per aver acquistato U.S. Robotics
Le istruzioni riportate di seguito illustrano l'installazione del gateway.
SureConnect
ADSL Wireless Gateway.
Introduzione all'installazione e requisiti di
sistema
NOTA: è molto importante annotare e conservare il numero di serie. Il
numero di serie è necessario per ottenere l'assistenza del supporto
tecnico. Il numero di serie, costituito da 12 caratteri, è indicato
sull'etichetta adesiva con il codice a barre situata sulla parte inferiore
del gateway e sulla confezione. È inoltre necessario disporre del
numero di modello, che è indicato qui sotto.
Annotare il numero di serie nello spazio sottostante.
9106
Numero di serie Numero modello
Elementi necessari per iniziare
• Servizi ADSL e Internet forniti dalla compagnia telefonica o dal
provider di servizi Internet locale (ISP).
• Nome utente e password, nel caso siano stati assegnati.
• Alcune installazioni potrebbero richiedere uno speciale splitter tra il
gateway e la presa telefonica a muro. Lo splitter deve includere una
presa sia per il telefono che per il router. In caso contrario, non
installarlo tra la presa telefonica a muro e il gateway.
L'ISP deve fornire i seguenti servizi e informazioni (se richiesti):
• Valori VPI/VCI
• Standard ADSL (modulazione)
• Modalità di incapsulamento
• Autenticazione (PAP o CHAP) per connessioni PPP
63
Page 66

Installazione del modem
Fase 1. Collegamento dei microfiltri (se inclusi o richiesti
dal proprio ISP)
L'ISP stabilirà se i microfiltri sono necessari. Se i microfiltri non sono inclusi,
verificarne la necessità con il proprio ISP.
Per installare un microfiltro, collegare il telefono al microfiltro, quindi collegare
il microfiltro alla presa a muro del telefono. Non installare microfiltri sul cavo che
collega il gateway alla presa del telefono, a meno che il microfiltro non sia dotato
di una connessione sia per il telefono che per il dispositivo ADSL.
Fase 2. Configurazione del computer per l'installazione
(utenti Macintosh e Linux: passare alla fase 3)
Prima di collegare il gateway al computer, è necessario installare il software.
Accertarsi che il computer sia acceso. È necessario disporre del CD-ROM del
sistema operativo in uso.
1. Inserire il CD-ROM di installazione nell'unità CD-ROM. L'installazione si avvia
automaticamente. Questa procedura potrebbe richiedere qualche istante.
Se l'installazione non dovesse avviarsi automaticamente, fare clic su
Avvio/Start, quindi su Esegui. Digitare D:\setup.exe nella finestra di
dialogo e fare clic su OK. Se l'unità CD-ROM utilizza una lettera diversa,
digitare tale lettera invece di "D".
64
64
Page 67

2. Seguire le istruzioni sullo schermo per completare l’installazione del
software.
3. Verrà eseguito un test di qualifica per verificare che il sistema soddisfi i
requisiti minimi di installazione. La schermata Results (Risultati) visualizza
gli elementi della configurazione che hanno superato il test con una
bandierina verde e quelli che non lo hanno superato con una bandierina
rossa. Se il sistema supera il test di qualifica, fare clic su Next (Avanti).
Se il sistema non supera il test di qualifica, fare clic su View Report
(Visualizza report) per individuare i componenti che non hanno superato il
test. Per ulteriori informazioni, consultare la sezione Risoluzione dei
problemi di questa guida all’installazione.
Fase 3. Installazione di antenne e cavi
1. Installare le antenne sul retro del gateway.
2. Collegare un'estremità dell'adattatore CA alla presa 16VAC sul retro di U.S.
Robotics
presa di corrente standard. Se il LED PWR non si accende, premere
l'interruttore di alimentazione sul retro del gateway.
La procedura di inizializzazione del gateway viene avviata all'accensione.
Questa procedura potrebbe richiedere qualche istante.
SureConnect
ADSL Wireless Gateway e l'altra estremità ad una
Solo per gli utenti Windows: fare clic su Avanti. I file richiesti verranno
copiati sul sistema.
3. Collegare un'estremità del cavo telefonico grigio in dotazione alla porta
telefonica grigia, identificata dalla dicitura "ADSL", sul retro del gateway e
collegare l'altra estremità alla presa a muro del telefono. Solo per gli
utenti Windows: fare clic su Avanti.
4. Selezionare una delle seguenti opzioni di connessione.
Connessione in modalità wireless:
Ricercare il gateway wireless da associare. Solo per gli utenti Windows:
fare clic su Avanti.
65
65
Page 68

Connessione Ethernet:
Installazione del cavo Ethernet di colore giallo. Il collegamento in rete per
un massimo di quattro dispositivi è opzionale. I dispositivi aggiuntivi
devono essere collegati dopo aver terminato l'installazione iniziale.
Collegare un'estremità del cavo Ethernet giallo nella porta Ethernet 1,
Ethernet 2, Ethernet 3 o Ethernet 4 sul retro del gateway. Collegare l'altra
estremità alla porta Ethernet della scheda NIC 10/100 del computer. Solo
per gli utenti Windows: fare clic su Avanti.
Il programma di installazione rileva il modem e inizia l'installazione di
SureConnect ADSL EasyConfigurator. Questa procedura potrebbe
richiedere qualche istante.
Utenti Macintosh e Linux: inserire il CD-ROM e seguire le istruzioni a video.
Utenti Mac 10: fare doppio clic sull'icona del CD dal desktop, aprire il file
Install.htm e seguire le istruzioni a video.
Fase 4. Configurazione del gateway con EasyConfigurator
NOTA: per eseguire EasyConfigurator, gli utenti di NT 4.0 necessitano di
Service Pack 3 o superiore.
1. Viene visualizzata la videata SureConnect ADSL EasyConfigurator in cui è
richiesto di inserire nome utente e password come mostrato nell'immagine
seguente:
66
66
Page 69

Questi campi rilevano la distinzione tra maiuscole e minuscole. Accertarsi
di disattivare la modalità per le lettere maiuscole. Il nome utente
predefinito è admin. La password predefinita è admin. Accertarsi di
inserire i dati correttamente e fare clic su Login. Questa procedura
potrebbe richiedere qualche istante.
2. Selezionare il proprio Paese e il provider di servizi Internet (ISP) dagli
elenchi. Fare clic su Apply (Applica). Se il proprio ISP non compare
nell'elenco, consultare la sezione Risoluzione dei problemi di questa guida
all’installazione.
3. A questo punto, EasyConfigurator eseguirà la configurazione del gateway.
Questa procedura potrebbe richiedere qualche istante.
Se lo stato corrente è CONNECTED TO INTERNET (Connesso a Internet),
come mostrato nell'immagine seguente, U.S. Robotics
Wireless Gateway è stato configurato correttamente per l'accesso a
Internet ed è possibile iniziare la navigazione. Registrare il prodotto e
verificare la connessione visitando il seguente sito Web:
www.usr.com/productreg
67
SureConnect
ADSL
67
Page 70

Se non viene visualizzato questo messaggio consultare la sezione
Risoluzione dei problemi di questa guida all’installazione.
Fase 5. (Opzionale) Verifica della configurazione wireless
Fare clic sul menu Wireless nella parte superiore della videata. EasyConfigurator
eseguirà un'interrogazione del gateway e successivamente visualizzerà lo stato
wireless corrente.
68
68
Page 71

Le impostazioni predefinite sono descritte di seguito:
Stato wireless = Attivato
Access Point = Trasmissione SSID attivata
Crittografia WEP = Attivata
Se si desidera modificare questi parametri, fare clic su Configure Wireless
(Configurazione wireless). Verrà avviato un browser Web. Si consiglia di attivare
la crittografia WEP e assegnare una chiave segreta di protezione. Per garantire
le connessioni future, accertarsi di assegnare la stessa chiave segreta ai
dispositivi wireless. Per garantire ulteriormente la protezione wireless, attivare
le opzioni Mac Filter nella videata di interfaccia utente Web Wireless - Mac Filter.
Per ottenere maggiori informazioni su questi parametri wireless e su quelli
aggiuntivi, consultare la guida utente sul CD-ROM di installazione.
Se si presentano difficoltà nella connessione a U.S. Robotics
Wireless Gateway, verificare se si tratta dei due problemi principali descritti di
seguito.
• Se si sta cercando di creare una connessione wireless ma non è possibile
collegarsi a U.S. Robotics
che tutte le schede wireless siano impostate sulla modalità Infrastructure
(Infrastruttura). Se le schede wireless sono impostate sulla modalità
802.11b AdHoc, non sarà possibile collegarsi a U.S. Robotics
ADSL Wireless Gateway. Quando ogni scheda wireless è impostata sulla
modalità Infrastructure (Infrastruttura), la connessione all'Access Point di
U.S. Robotics
automatica. Se le schede wireless non si connettono automaticamente,
eseguire nuovamente la scansione finché non viene rilevato U.S. Robotics
SureConnect
• Se la connessione wireless a U.S. Robotics
Gateway che viene creata presenta problemi di qualità nel collegamento,
verificare la posizione di U.S. Robotics
Gateway. Lunghe distanze, piani differenti e pareti di cemento o acciaio
possono influire negativamente sulla qualità del collegamento. Se
possibile, spostare U.S. Robotics
ridurre l'effetto di eventuali ostacoli.
SureConnect
ADSL Wireless Gateway ed eseguita la connessione.
SureConnect
ADSL Wireless Gateway dovrebbe essere
ADSL Wireless Gateway, assicurarsi
SureConnect
SureConnect
SureConnect
ADSL Wireless Gateway per
SureConnect
SureConnect
ADSL Wireless
ADSL Wireless
ADSL
69
69
Page 72

Risoluzione dei problemi
Per una più semplice individuazione dei problemi, consultare il seguente elenco.
✔ Verificare che si stia utilizzando l'adattatore di alimentazione CA
fornito con il gateway e che esso sia collegato correttamente al
gateway e ad una presa a muro attiva. Accertarsi che l’interruttore di
alimentazione sia attivato (ON). Il LED PWR deve essere acceso.
✔ Verificare che il cavo telefonico sia collegato correttamente alla presa
telefonica a muro e al gateway. Il LED ADSL deve essere acceso.
✔ Verificare che i cavi Ethernet siano collegati correttamente alla porta
Ethernet 1, 2, 3 o 4 del gateway e alla scheda di interfaccia di rete
(NIC) del computer. I LED Ethernet corrispondenti, nella parte
anteriore del gateway, devono essere illuminati.
✔ Durante la connessione al gateway in modalità wireless, verificare che
il client wireless sia correttamente installato e impostato (nessuna
crittografia WEP predefinita, modalità Infrastructure). Inoltre,
verificare che il client sia sincronizzato con il gateway. Per ulteriori
informazioni, consultare la documentazione relativa al client.
✔ Aprire EasyConfigurator alla pagina Status (Stato) e verificare che il
gateway funzioni correttamente. Per verificare la connessione
wireless al gateway, andare alla pagina Wireless e controllare che lo
stato sia corretto.
LED di stato
U.S. Robotics
parte anteriore: PWR, Ethernet 1, 2, 3, 4, ADSL, WAN IP e WLAN. Lo stato di
funzionamento del gateway viene indicato dalle condizioni dei LED riportate
nella tabella seguente.
70
SureConnect
ADSL Wireless Gateway dispone di otto LED sulla
70
Page 73

PWR
WAN IP
WLAN
Ethernet
1, 2, 3, 4
ADSL
Luce verde accesa Il gateway è alimentato dall'adattatore di alimentazione CA.
Spento Non viene rilevata alimentazione.
Luce verde accesa
Luce verde
lampeggiante
Rosso Errore nella ricezione di un IP dall'ISP.
Spento Il servizio ADSL non è sincronizzato o in modalità bridge.
Luce verde accesa Client wireless connesso al gateway.
Luce verde
lampeggiante
Spento Nessun client wireless connesso al gateway.
Luce verde accesa
Luce verde
lampeggiante
Spento
Luce verde accesa È stato stabilito un collegamento DSL.
Luce verde
lampeggiante
Spento Il collegamento DSL non ha avuto esito positivo.
Retro del gateway
Il gateway riceve un Indirizzo IP pubblico dal provider di
servizi Internet (ISP), in modalità PPP.
IP connesso e trasmissione dei dati in corso.
Trasmissione di dati wireless in corso.
È stato stabilito e rilevato un collegamento fisico tra
gateway e computer attraverso il cavo Ethernet.
Flusso di dati in corso.
Non è stato stabilito e rilevato un collegamento fisico tra
gateway e computer attraverso il cavo Ethernet.
È in corso la negoziazione di un collegamento DSL.
Voce Descrizione
ADSL Presa RJ-11 per la linea DSL situata sul retro del gateway.
1 Porta Ethernet 1 situata sul retro del gateway.
2 Porta Ethernet 2 situata sul retro del gateway.
3 Porta Ethernet 3 situata sul retro del gateway.
4 Porta Ethernet 4 situata sul retro del gateway.
Reset Ripristina il gateway.
16VAC Presa per il cavo dell'adattatore di alimentazione CA.
Power Interruttore di accensione/spegnimento del gateway.
71
71
Page 74

NOTA: per ripristinare il gateway, premere il pulsante Reset
utilizzando un oggetto appuntito, come una graffetta o uno spillo.
Questa operazione riavvierà il gateway. Se il tasto viene premuto per
più di 5 secondi, vengono ripristinate le impostazioni predefinite del
gateway.
Altri consigli per la risoluzione dei problemi
Il proprio ISP non risulta nell'elenco dell'apposito campo in EasyConfigurator.
Soluzione possibile: se il proprio ISP o Paese non risulta nell'elenco,
selezionare l'opzione Not Listed (Non elencato). Le impostazioni dovranno
quindi essere configurate nella sezione "Line configuration"
(Configurazione linea) della videata. I valori e le impostazioni corretti
vengono forniti dall'ISP. Quindi fare clic su Apply (Applica). Questa
procedura potrebbe richiedere qualche istante.
All'accensione del gateway i LED non si illuminano.
Soluzione possibile: fare riferimento alla lista di controllo per la risoluzione
dei problemi riportata all'inizio di questa sezione.
72
72
Page 75

Il LED ADSL lampeggia o è spento.
Soluzione possibile: fare riferimento alla lista di controllo per la risoluzione
dei problemi riportata all'inizio di questa sezione.
Impossibile accedere a Internet.
Soluzione possibile:
• Fare nuovamente riferimento alla lista di controllo per la risoluzione
dei problemi riportata all'inizio di questa sezione.
• Assicurarsi di possedere un account ISP attivo.
• Verificare le impostazioni VCI/VPI, il nome utente, la password e il tipo
di autenticazione mediante EasyConfigurator. Per verificare queste
variabili, accedere a EasyConfigurator e selezionare la scheda Status
(Stato). Inoltre, il nome utente e la password potrebbero rilevare la
distinzione tra maiuscole e minuscole. Accertarsi di disattivare la
modalità per le lettere maiuscole.
• Per ulteriore assistenza, rivolgersi al provider di servizi Internet.
Si ignora se l'indirizzo IP assegnato sia statico o dinamico.
Soluzione possibile: se si utilizza un servizio DSL attivo, è molto probabile
che si possieda un indirizzo IP dinamico. Contattare il proprio ISP per
verificare questa informazione. Alcuni provider assegnano indirizzi IP statici.
Impossibile accedere di nuovo ad Internet.
Soluzione possibile: controllare le impostazioni di connessione del
browser Web e verificare che la funzione Proxy HTTP del browser sia
disattivata. Queste condizioni sono necessarie affinché il browser Web
possa leggere le pagine di configurazione. Aprire il browser Web.
Utenti Internet Explorer: fare clic su Strumenti, Opzioni Internet e
selezionare la scheda Connessioni. Selezionare Non utilizzare mai la
connessione di accesso remoto, fare clic su Applica, quindi su OK. Fare
nuovamente clic su Strumenti, quindi su Opzioni Internet. Fare clic sulla
scheda Connessioni, quindi su Impostazioni LAN. Deselezionare tutte le
caselle di controllo e fare clic su OK. Fare clic su OK per chiudere la finestra
Opzioni Internet.
Utenti Netscape Navigator: fare clic su Modifica, Preferenze, quindi fare
doppio clic su Avanzate nella finestra Categoria. Fare clic su Proxy,
selezionare Connessione Internet diretta, quindi fare clic su OK. Fare
nuovamente clic su Modifica, quindi su Preferenze. Sotto Categoria, fare
doppio clic su Avanzate, quindi fare clic su Proxy. Selezionare Connessione
Internet diretta, quindi fare clic su OK.
73
73
Page 76

È impossibile connettere applicazioni speciali.
Soluzione possibile: se U.S . Robot ics
SureConnect
ADSL Wireless Gateway è
collegato correttamente ed è possibile connettersi a Internet ma si incontrano
problemi nella connessione con applicazioni speciali (quali ICQ, Battle.net,
ecc.), è necessario assegnare delle porte specifiche al fine di ignorare la
funzione di firewall. Per ottenere maggiori informazioni sulla configurazione
di questa funzione, consultare la guida utente sul CD-ROM di installazione.
Impossibile trovare l'icona Rete durante la verifica della configurazione di rete in
Windows Me o XP.
Soluzione possibile: per impostazione predefinita, in Windows Me e XP
non vengono visualizzate tutte le icone del Pannello di controllo. Fare clic
su Avvio/Start, Impostazioni e scegliere Pannello di controllo. Nel
Pannello di controllo, fare clic su Visualizzare tutte le opzioni del Pannello
di controllo sul lato sinistro della videata. Verranno così mostrate tutte le
icone del Pannello di controllo.
Non si sa come configurare il protocollo TCP/IP per il funzionamento con il gateway.
Soluzione possibile: per risolvere questo problema, potrebbe essere
necessario accedere al menu Guida del proprio sistema operativo.
Consultare gli argomenti della guida relativi al protocollo TCP/IP.
Durante la navigazione su Internet, è comparso l'errore "Impossibile
visualizzare la pagina" o simile.
Soluzione possibile: controllare che il computer abbia ottenuto un indirizzo
IP dal gateway. In caso contrario, cercare di rilasciare/rinnovare l'indirizzo
IP. Per informazioni, consultare la guida utente sul CD-ROM.
Soluzione possibile: controllare che il gateway abbia ricevuto un indirizzo
IP dal provider di servizi Internet (ISP). Consultare la procedura ping in
questa guida. Per ulteriori informazioni, consultare la guida utente sul
CD-ROM di installazione.
Impossibile accedere a Internet con la connessione wireless.
Soluzione possibile: verificare che il client sia correttamente installato e
configurato in modo da rilevare il gateway.
Soluzione possibile: accedere alla pagina EasyConfigurator Wireless e
verificare che la connessione wireless sia attivata e funzioni in modo
corretto.
Soluzione possibile: consultare la lista di controllo per la risoluzione dei
problemi riportata all'inizio di questa sezione e verificare che la
connessione ADSL sia in funzione.
74
74
Page 77

Procedura ping per la risoluzione dei problemi
1. Fare clic sul pulsante Avvio/Start di Windows e scegliere Esegui.
Windows 95, 98 e Me: digitare command nella finestra di dialogo. Fare
clic su OK.
Windows NT 4.0, 2000 e XP: digitare cmd nella finestra di dialogo.
Fare clic su OK.
2. Digitare ping 127.0.0.1 dopo il prompt dei comandi DOS: questo è
l'indirizzo dell'host locale. L'indirizzo garantisce che TCP/IP sia
installato e funzioni correttamente. Se non è possibile eseguire questo
comando ping, scollegare il gateway e ripetere la procedura
d'installazione.
3. Digitare ping seguito dall'indirizzo IP del computer. Ciò fa in modo che
il computer risponda alle richieste. Se non è possibile eseguire questo
comando ping, verificare che tutti i cavi siano collegati correttamente
e che tutti i driver necessari siano installati.
4. Per verificare la comunicazione con il proprio gateway, digitare ping
seguito dall'indirizzo del gateway (l'indirizzo predefinito del gateway è
192.168.1.1). Ciò garantisce la connessione tra gli altri computer e il
gateway. Se si è stabilita una comunicazione con il gateway, è
possibile accedere alla pagina relativa all'amministrazione e
configurare le impostazioni. Se non è possibile eseguire questo
comando ping, accertarsi che la spina dell'adattatore di alimentazione
CA sia inserita e che il gateway sia collegato correttamente al
computer.
5. Digitare ping seguito dall'indirizzo Internet esterno del gateway.
Questo indirizzo viene fornito dal provider o dalla rete LAN esterna.
Questa procedura garantisce che il gateway funzioni correttamente e
consenta il passaggio del traffico.
6. Digitare ping seguito dall'indirizzo del server DNS noto. Ciò consente
di far corrispondere i nomi di host Internet validi agli indirizzi IP e di
verificare l'accesso a Internet.
Non vengono visualizzati messaggi indirizzati al gateway indicanti l'esito
positivo della procedura ping.
Soluzione possibile: ciò indica che il computer non riesce a comunicare con
il gateway mediante l'assegnazione dell'indirizzo IP.
• Verificare l'indirizzo IP del computer (scheda di interfaccia di rete).
Assicurarsi che sia situato nella stessa sottorete dell'indirizzo del
gateway. Ad esempio, se l'indirizzo del gateway è 192.168.1.1, l'indirizzo
IP del computer deve essere 192.168.1.x, dove x è maggiore di 1. In caso
contrario, rilasciare e quindi rinnovare l'indirizzo IP del computer.
75
75
Page 78

Supporto tecnico
• Per informazioni aggiornate sui prodotti e su come contattare
l'assistenza tecnica, visitare il sito Web di U.S. Robotics all'indirizzo
http://www.usr.com/broadbandsupport
La maggior parte dei problemi riscontrati dagli utenti sono trattati
nelle pagine del sito Web che riportano le domande frequenti (FAQ) e
la risoluzione dei problemi per un dato prodotto.
• Se non è possibile collegarsi ad Internet, rivolgersi all'ISP per
assistenza.
• Se l'ISP non è in grado di risolvere il problema e non è possibile
collegarsi ad Internet, contattare telefonicamente il supporto tecnico
di U.S. Robotics. Il personale addetto all'assistenza è in grado di
rispondere a quesiti di natura tecnica circa i prodotti U.S. Robotics.
Fare riferimento alla guida utente nel CD-ROM di installazione per
ottenere informazioni su come contattare il supporto tecnico nella
propria zona.
76
76
Page 79

Informazioni di conformità
Dichiarazioni di conformità del produttore
U.S. Robotics Corporation (935 National Parkway, Schaumburg, Illinois, 60173-5157, USA) dichiara
sotto la propria responsabilità che U.S. Robotics
la presente dichiarazione è conforme ai seguenti standard o ad altra documentazione normativa
rilevante:
EN300 328 -2
EN301 489 -1
EN301 489 -17
EN60950
EN55022
EN55024
Questo dispositivo è conforme all'articolo 3.1(a) della Direttiva 1999/5/EC per la protezione della salute
e sicurezza dell'utente.
U.S. Robotics Corporation dichiara che il suddetto prodotto è conforme ai requisiti essenziali e ad altre
norme rilevanti della direttiva europea 1999/5/EC.
Questo prodotto può essere utilizzato nei seguenti Paesi:
Germania, Austria, Belgio, Svizzera, Paesi Bassi, Lussemburgo, Italia, Francia, Regno Unito, Irlanda,
Spagna, Portogallo, Svezia, Norvegia, Danimarca, Finlandia, Islanda e Grecia
In merito allo standard IEEE 802.11g, al momento disponiamo delle seguenti informazioni relative alle
restrizioni vigenti nei Paesi interessati dalla Direttiva R&TTE:
Paese banda di frequenza massima potenza di uscita
Francia 2454-2483.5 MHz 10 mW EIRP esterno
Dichiarazione di conformità CE
SureConnect
ADSL Wireless Gateway a cui si riferisce
Canali operativi: Conforme a IEEE 802.11g
Questo dispositivo risponde ai requisiti della Comunità Europea riguardanti l’esposizione alle
emissioni elettromagnetiche. Questo apparato dovrebbe essere installato per funzionare ad una
distanza minima di 20 cm tra antenna ed il Vostro corpo. Questo dispositivo wireless è composto da
trasmettitore/ricevitore ed è stato progettato e prodotto per rientrare nei limiti esposti dal Consiglio
dell’Unione Europea per la Protezione di Radiazioni Non-Ionizzanti (Non-Ionizing Radiation Protection
ICNIRP, 1999) per la popolazione. L’esposizione standard per apparati portatili utilizza come unità di
misura il cosidetto SAR (Specific Absorption Rate). Il valore massimo SAR di questo dispositivo
wireless misurato ai fini della conformità e’ 1.08W/Kg
11 canali (USA, Canada)
13 canali (ETSI)
14 canali (Giappone)
Informazioni UE relative all'antenna rimovibile
Questo dispositivo USR wireless è stato ideato esclusivamente per il funzionamento con l'antenna
inclusa in questa confezione. Questo dispositivo, combinato con l'antenna, è stato valutato e
approvato da un'ente europeo in conformità con la normativa europea R&TTE 1999/5/EC, che fissa il
livello massimo di potenza irradiata a 100mW e.i.r.p. È possibile sostituire questa antenna solo con un
dispositivo USR autorizzato, ideato e testato con questa unità, in base alla direttiva 1999/5/EC. Fare
riferimento al sito Web di USR per ottenere informazioni su come ordinare l'antenna.
In Europa:
FRS Europe BV.
Draaibrugweg 2
1332 AC Almer
Paesi Bassi
Visitare il sito http://www.usr.com per informazioni sulle recenti restrizioni relative ai canali.
Due (2) anni di garanzia limitata di U.S. Robotics Corporation
77
77
Page 80

1.0 CONDIZIONI GENERA LI
1.1 L a presente garanzia limitata è concessa esclusivamente all'utente/acquirente originale (CLIENTE) e non è
trasferibile.
1.2 Nessun agente, rivenditore o partner commerciale di U.S. Robotics Corporation (U.S. ROBOTICS) è autorizzato a
modificare i termini della garanzia per conto di U.S. ROBOTICS.
1.3 La presente garanzia limitata esclude espressamente ogni prodotto che non sia stato acquistato come nuovo
presso U.S. ROBOTICS o un rivenditore autorizzato.
1.4 La presente garanzia limitata è applicabile esclusivamente nel Paese o territorio in cui è previsto l'uso del
prodotto (come indicato dal numero di modello e da eventuali etichette di approvazione delle telecomunicazioni
locali affisse sul prodotto).
1.5 U.S. ROBOTICS garantisce al CLIENTE che questo prodotto è esente da difetti di fabbricazione e materiali, in
normali condizioni di uso e servizio, per DUE (2) ANNI a partire dalla data di acquisto presso U.S. ROBOTICS o un
rivenditore autorizzato.
1.6 Nel rispetto della presente garanzia, U.S. ROBOTICS si impegna, a propria discrezione, a riparare il prodotto o
componente difettoso con componenti nuovi o revisionati oppure sostituire il prodotto o componente difettoso
con un prodotto o componente nuovo o revisionato; qualora le due suddette opzioni non siano possibili, U.S.
ROBOTICS potrà, a propria discrezione, rimborsare il CLIENTE con una somma non superiore al più recente
prezzo di acquisto al dettaglio pubblicato da U.S. ROBOTICS per il prodotto, con la detrazione di eventuali tariffe
di commissione. Tutti i prodotti o componenti sostituiti diventano di proprietà di U.S. ROBOTICS.
1.7 U.S. ROBOTICS garantisce i prodotti o componenti sostituiti in garanzia per NOVANTA (90) GIORNI a partire dalla
data in cui il prodotto o componente viene inviato al Cliente.
1.8 U.S. ROBOTICS non garantisce né afferma che il prodotto sarà rispondente alle necessità del CLIENTE o
funzionerà in combinazione con qualsiasi prodotto hardware o software di altre case.
1.9 U.S. ROBOTICS non garantisce né afferma che il funzionamento del software fornito con il presente prodotto
sarà ininterrotto ed esente da errori o che tutti i difetti dei prodotti software verranno corretti.
1.10 U.S. ROBOTICS non è responsabile di eventuale software o dati contenuti o memorizzati dal CLIENTE nel
presente prodotto.
2.0 OBBLIGHI DEL CLIE NTE
2.1 Il CLIENTE si assume ogni responsabilità riguardo alla corrispondenza del prodotto a specifiche ed esigenze del
CLIENTE stesso.
2.2 Si raccomanda al CLIENTE di creare una copia di backup di tutto il software fornito con il presente prodotto.
2.2 Il CLIENTE si assume ogni responsabilità riguardo alla corretta installazione e configurazione del presente
prodotto ed è tenuto a garantire installazione e configurazione corrette, nonché compatibilità con l'ambiente
operativo in cui il prodotto verrà utilizzato.
2.3 Il CLIENTE deve fornire a U.S. ROBOTICS una prova di acquisto datata (copia della ricevuta originale di acquisto
presso U.S. ROBOTICS o un rivenditore autorizzato) per ottenere l'autorizzazione di ogni intervento in garanzia.
3.0 SERVIZIO I N GARANZIA
3.1 Il CLIENTE deve rivolgersi al supporto tecnico U.S. ROBOTICS o a un centro di assistenza U.S. ROBOTICS
autorizzato entro il periodo di garanzia applicabile per ricevere l'autorizzazione al servizio in garanzia.
3.2 Il cliente deve fornire i numeri di modello e di serie del prodotto e una prova di acquisto datata (copia della
ricevuta originale di acquisto presso U.S. ROBOTICS o un rivenditore autorizzato) per ottenere l'autorizzazione
dell'intervento in garanzia.
3.3 Per maggiori informazioni su come contattare il supporto tecnico U.S. ROBOTICS o un centro di assistenza U.S.
ROBOTICS autorizzato, visitare il sito Web di U.S ROBOTICS all'indirizzo www.usr.com.
3.4 Quando contatta il supporto tecnico U.S. ROBOTICS, il CLIENTE deve assicurarsi di avere a disposizione i
seguenti dati/elementi:
Numero di modello del prodotto
Numero di serie del prodotto
Prova di acquisto datata
Nome di contatto e numero telefonico del CLIENTE
Versione del sistema operativo in uso
CD-ROM di installazione U.S. ROBOTICS
Guida all'installazione U.S. ROBOTICS
4.0 SOSTITUZIONE IN GARANZIA
4.1 Nel caso in cui il supporto tecnico U.S. ROBOTICS o il centro di assistenza U.S. ROBOTICS autorizzato determini
che il prodotto o componente presenti un problema direttamente attribuibile a difetti di fabbricazione e/o
materiali e il prodotto sia ancora nel periodo di garanzia di DUE (2) ANNI, U.S. ROBOTICS fornirà al CLIENTE un
numero RMA (Return Material Authorisation) e le istruzioni per la restituzione del prodotto alla sede di recapito
U.S. ROBOTICS autorizzata, a condizione che il CLIENTE includa una copia della prova di acquisto datata
(ricevuta originale di acquisto presso U.S. ROBOTICS o un rivenditore autorizzato) insieme al prodotto o
componente restituito.
4.2 I prodotti o componenti inviati a U.S. ROBOTICS senza un numero RMA fornito da U.S. ROBOTICS o da un centro
di assistenza U.S. ROBOTICS autorizzato verranno immediatamente restituiti.
4.3 Il CLIENTE si impegna a sostenere le spese di spedizione per l'invio del prodotto al centro restituzioni U.S.
ROBOTICS autorizzato, ad assicurare il pacco inviato o ad assumersi il rischio di perdita o danneggiamento
durante la spedizione e ad utilizzare un imballaggio equivalente alla confezione originale.
78
78
Page 81

4.4 U.S. ROBOTICS non si assume alcuna responsabilità per la perdita o il danneggiamento del pacco fino al
momento del ricevimento dell'articolo da parte di un centro restituzioni U.S. ROBOTICS autorizzato.
4.5 I prodotti resi su autorizzazione verranno disimballati, ispezionati e confrontati con i numeri di modello e di serie
del prodotto per cui il numero RMA era stato autorizzato. La data e il luogo di acquisto indicati nella prova di
acquisto allegata verranno verificati. U.S. ROBOTICS si riserva il diritto di negare il servizio in garanzia nel caso in
cui l'ispezione del prodotto o componente restituito non corrisponda alle informazioni fornite dal CLIENTE e
sulla base delle quali è stata autorizzata la restituzione.
4.6 Una volta che l'articolo restituito è stato disimballato, ispezionato e testato, U.S. ROBOTICS, a propria
discrezione, provvederà a ripararlo o sostituirlo utilizzando prodotti o componenti nuovi o revisionati, fino a
ripristinare le condizioni operative del prodotto.
4.7 U.S. ROBOTICS si impegna a fare il possibile per restituire al CLIENTE il prodotto o componente sostituito o
riparato, a spese di U.S. ROBOTICS, entro VENTUNO (21) GIOR NI dalla data di ricevimento dell'articolo presso il
centro restituzioni U.S. ROBOTICS autorizzato.
4.8 U.S. ROBOTICS non sarà responsabile di eventuali danni causati da ritardi nella restituzione di prodotti o
componenti sostituiti o riparati.
5.0 LIMITAZIONI
5.1 SOFTWARE DI TERZE PARTI: questo prodotto U.S. ROBOTICS può includere software di terze parti oppure esservi
allegato; l'uso di tali software è regolato da un distinto contratto di licenza per l'utente finale fornito dai
produttori del software. La presente garanzia limitata U.S. ROBOTICS non si applica a tali prodotti software di
altre case. Fare riferimento al contratto di licenza per l'utente finale che regola l'uso di tali prodotti software per
la relativa garanzia.
5.2 DANNI DOVUTI AD USO IMPROPRIO, NE GLIGENZA, INOSSERVANZA DELLE NORME DI UTILIZZO, I NSTALLAZIONE
INADEGUATA E/O FATTORI AMBIENTALI: nei limiti consentiti dalla legge, la presente garanzia limitata U.S.
ROBOTICS non è applicabile alla normale usura del prodotto, a danni o perdita di dati causati da interoperabilità
con versioni attuali o future del sistema operativo in uso o altro software e hardware attuale o futuro, ad
alterazioni (da parte di persone diverse da rappresentanti U.S. ROBOTICS o staff di centri di assistenza U.S.
ROBOTICS autorizzati), a danni causati da errori dell'operatore o dall'inosservanza delle istruzioni indicate nel
manuale o altra documentazione per l'utente, a danni causati da fenomeni naturali quali fulmini, tempeste,
alluvioni, incendi, terremoti, ecc., a prodotti il cui numero di serie è stato manomesso o rimosso, a uso improprio
e negligenza, a danni causati da eccessive condizioni fisiche, termiche o elettriche, a prodotti contraffatti, a
danni o perdita di dati causati da virus, bachi, cavalli di Troia informatici o danneggiamenti di memoria, a difetti
del prodotto causati da incidenti e utilizzo improprio (comprese, ma non a titolo esclusivo, installazione
inadeguata e connessione a voltaggi e prese non corretti), a guasti causati da prodotti non forniti da U.S.
ROBOTICS, a danni causati da umidità, ambienti corrosivi, sovratensione, trasporto, anormali condizioni di
utilizzo e all'uso del prodotto al di fuori del Paese o territorio in cui ne è previsto l'uso (come indicato dal numero
di modello e da eventuali etichette di approvazione delle telecomunicazioni locali affisse sul prodotto).
5.3 NEI LIMITI CONSENTITI DALLA LEGGE, LE SUDDETTE GARANZIE E I SUDDETTI RIME DI SONO ESCLUSIVI E
SOSTITUISCONO TUTTE LE ALTRE GARAN ZIE O CONDIZIONI, E SPRESSE O IMPLICITE, DI FATTO O AI SENSI DELL A
LEGGE, STATUTARIE O DI ALTRA NATURA, COMPRESE LE GA RANZIE O LE CONDIZIONI DI COMME RCIABILITÀ,
IDONEITÀ A SCOPI PARTICOLARI, QUALITÀ SODDISFACENTE, CORRISPONDENZA ALL A DESCRIZIONE E NON
VIOLAZIONE, RISPETTO ALLE QUALI SI DECLINA OGNI R ESPONSABILITÀ. U.S. ROBOTICS NON SI ASSUME NÉ
AUTORIZZA ALTRE PERSONE AD ASSUMERE PE R SUO CONTO ULTERIORI RESPONSABILITÀ I N RELAZIONE ALLA
VENDITA, ALL'INSTALLAZIONE, ALLA MANUTENZIONE, ALLA GARANZ IA O ALL'USO DEI PROPRI PRODOTTI.
5.4 LIMITAZIONE DE LLA GARANZIA. FATTE SALVE LE DISPOSIZION I PREVISTE DALLA LEGGE, U.S. ROBOTICS E I SUOI
FORNITORI NON POTRANNO ESSE RE RITENUTI RESPONSABILI PER INADEMPIMENTO O ATTO ILLECITO,
COMPRESA LA NEGLIGENZA, DI QUALSIASI DANNO CONSEQUENZIALE, INDIRETTO, SPECIFICO O PUNITIVO DI
QUALSIASI TIPO O DE LLA PERDITA DI INTROITI, PROFITTI O AFFARI, DELLA PE RDITA DI INFORMAZ IONI O DATI O
DI ALTRE PERDITE FINANZIARI E DOVUTE O COLLEGATE ALLA VENDITA, ALL'INSTALLAZIONE, ALLA
MANUTENZIONE, ALL'U SO, ALLE PRESTAZIONI, AL GUASTO O ALL'INTERRUZIONE DI SE RVIZIO DEI SUOI
PRODOTTI, ANCHE QUALORA U.S. ROBOTICS O UNO DEI SUOI RIVENDITORI AUTORIZZATI SIA STATO AVVERTITO
DELLA POSSIB ILITÀ DI TALI DANNI. LA R ESPONSABILITÀ DI U.S. ROBOTICS È LIMITATA ALLA RIPARAZIONE, ALLA
SOSTITUZIONE O AL RIMBORSO DEL PREZZO DI ACQUISTO DEL PRODOTTO, A SUA DISCREZIONE. QUESTA
LIMITAZIONE DI RESPON SABILITÀ PER DANNI NON VIEN E MODIFICATA QUALORA I RIMEDI DE SCRITTI NON
CONSEGUANO IL LORO SCOPO FONDAMENTALE.
6.0 LIMITAZIONE DELLA GARANZ IA: alcuni Paesi, Stati, territori o regioni non autorizzano l’esclusione o la
limitazione delle garanzie implicite o la limitazione dei danni incidentali o consequenziali per alcuni prodotti
forniti ai consumatori o la limitazione della responsabilità per danni personali; pertanto, le suddette limitazioni
o esclusioni potrebbero non essere applicabili o essere applicabili solo parzialmente. Nei casi in cui per legge
non sia consentito escludere del tutto le garanzie implicite, le stesse saranno limitate ai DUE (2) ANNI di durata
della presente garanzia scritta. La presente garanzia attribuisce al CLIENTE diritti legali specifici che possono
variare da Paese a Paese.
7.0 DIRITTO APPLICABILE: la presente garanzia limitata è soggetta alle leggi in vigore nello stato dell'Illinois, Stati
Uniti, ad esclusione dei relativi principi sui conflitti di legge e dell'applicazione della Convenzione delle Nazioni
Unite sui contratti per la vendita internazionale di beni (International Sale of Goods).
U.S. Robotics Corporation
79
79
Page 82

935 National Parkway
Schaumburg, IL 60173
U.S.A.
80
80
Page 83

U.S. Robotics Corporation
935 National Parkway
Schaumburg, Illinois
60173-5157
EE.UU.
Queda prohibida la reproducción parcial o íntegra de esta documentación, así como su utilización para
realizar cualquier trabajo derivado (como traducción, transformación o adaptación) sin contar con el
consentimiento por escrito de U.S. Robotics Corporation. U.S. Robotics Corporation se reserva el derecho a revisar esta documentación y a realizar cambios tanto en los productos como en el contenido de
este documento siempre que lo estime oportuno, sin obligación alguna de notificar dicha revisión o
cambio. U.S. Robotics Corporation presenta esta documentación sin garantía de ningún tipo, ya sea
implícita o explícita, lo cual incluye las garantías implícitas de comerciabilidad y adecuación para un
propósito determinado, pero sin limitarse a las mismas. Todo software suministrado en soporte
extraíble y descrito en esta documentación se suministra bajo un acuerdo de licencia que acompaña al
producto como documento independiente, como parte de la copia impresa de la documentación o como
archivo denominado LICENSE.TXT o !LICENSE.TXT dentro de un directorio del soporte extraíble. Si no
encuentra ninguno de estos textos, póngase en contacto con U.S. Robotics para que se los proporcione.
Derechos limitados de utilización para la administración de Estados Unidos: Para los organismos
gubernamentales de Estados Unidos, esta documentación y el software descritos a continuación se
suministran bajo las siguientes condiciones:
Todos los datos técnicos y el software informático son de naturaleza comercial y han sido desarrollados con financiación exclusivamente privada. Los programas se proporcionan como software
informático comercial (“Commercial Computer Software”) de acuerdo con la definición de DFARS
252.227-7014 (junio de 1995) o como artículo comercial (“commercial item”) según la definición de FAR
2.101(a) y, como tales, se incorporan exclusivamente con los derechos de uso del Software estableci-
dos en la licencia comercial estándar de U.S. Robotics. Los datos técnicos se proporcionan con derechos limitados y exclusivamente de acuerdo con lo indicado en DFAR 252.227-7015 (noviembre de
1995) o FAR 52.227-14 (junio de 1987), según el caso. Usted acepta no borrar ni alterar parte alguna de
las leyendas que figuren en cualquiera de los programas sujetos a la licencia de uso o la documentación contenida en esta guía breve de instalación o cualquier documentación adjunta a la misma.
Copyright© 2003 U.S. Robotics Corporation. Reservados todos los derechos. U.S. Robotics y el
logotipo de U.S. Robotics son ma rcas registradas de U.S. Robotics Corporation. Los demás nombres de
productos constan únicamente a efectos identificativos y bien podrían tratarse de marcas comerciales
propiedad de sus respectivos titulares. Los datos técnicos del producto están sujetos a cambios sin
previo aviso.
81
Page 84

82
Page 85

Si desea recibir información actualizada sobre los servicios de asistencia, visite
el sitio
http://www.usr.com/broadbandsupport
Gracias por adquirir U.S. Robotics
instrucciones que encontrará a continuación para completar la instalación de la
puerta de enlace.
SureConnect
ADSL Wireless Gateway. Siga las
Generalidades relativas a la instalación y
requisitos del sistema
NOTA: No olvide anotar el número de serie del módem y tenerlo a mano
por si volviera a hacerle falta más adelante. Si alguna vez tiene que
llamar a nuestro servicio de asistencia técnica, le hará falta este
número para que le puedan atender. Se trata del número de 12 cifras
que encontrará en la pegatina del código de barras, bajo la puerta de
enlace y en la caja. También necesitará el número de modelo que le
especificamos a continuación.
Escriba el número de serie en la casilla correspondiente.
9106
Número de serie Número de modelo
Antes de empezar
• Debe contar con conexión a Internet y ADSL de su compañía
telefónica o de su proveedor de acceso a Internet (ISP).
• Tenga a mano su nombre de usuario y contraseña, en caso de que se
los hayan proporcionado.
• En algunas instalaciones necesitará un disyuntor especial entre la
puerta de enlace y el cajetín de la línea telefónica. Para incorporar el
disyuntor este deberá incorporar una clavija de conexión para el
teléfono y la clavija de la puerta de enlace.
En caso necesario, su proveedor de acceso a Internet debe proporcionarle lo
siguiente:
• Valores VPI/VCI
• Estándar ADSL (modulación)
• Modo de encapsulado
• Autenticación (PAP o CHAP) para conexiones PPP
83
Page 86

Instalación del módem
Paso 1. Conexión de los microfiltros (si están incluidos o si
lo exige su ISP)
Su ISP establecerá si se requieren microfiltros. Si estos no se adjuntan, consulte
con su ISP para que le indique si son necesarios.
Conecte el teléfono al microfiltro y, a continuación, este último al cajetín de la
línea telefónica. No instale un microfiltro en el cable de conexión de la puerta de
acceso al cajetín telefónico a menos que el microfiltro se conecte tanto con el
teléfono como con el dispositivo ADSL.
Paso 2. Configuración del equipo para la instalación (las
instrucciones para los usuarios de Macintosh y Linux
están a partir del paso 3)
Antes de conectar la puerta de enlace al ordenador, debe instalar el software.
Asegúrese de que el sistema está encendido. Tenga a mano el CD del sistema
operativo de su equipo.
1. Introduzca el CD de instalación en la unidad de CD-ROM del equipo. La
instalación se iniciará automáticamente. Puede que el proceso tarde unos
minutos.
Si la instalación no comienza automáticamente, haga clic primero en Inicio
y después en Ejecutar. Escriba D:\setup.exe en el cuadro de diálogo que
verá a continuación y haga clic en Aceptar. Si su unidad de CD-ROM tiene
asignada una letra diferente, tecléela en lugar de la D.
84
84
Page 87

2. Siga las instrucciones que irán apareciendo en pantalla hasta que el
proceso de instalación finalice.
3. Se ejecutará una prueba de estudio para comprobar que el sistema
cumple con los requisitos mínimos de la instalación. La pantalla Results
(Resultados) mostrará los componentes de la configuración del sistema.
Los que pasaron la prueba aparecerán con una bandera verde y los que no
lo hicieron, con una bandera roja. Si el sistema pasa la prueba con éxito,
haga clic en Next (Siguiente).
Si el sistema no supera la prueba de estudio, haga clic en View Report (Ver
informe) para identificar los componentes que dieron lugar a error. Si
necesita más información, consulte la sección Solución de problemas de
esta guía de instalación.
Paso 3. Instalación de las antenas y los cables
1. Conecte las antenas a la parte trasera de la puerta de enlace.
2. Conecte el adaptador de CA en la entrada de 16 V CA en la parte trasera de
su U.S. Robotics
adaptador a una toma de corriente. Si el indicador de encendido PWR que
hay en el panel frontal no se enciende, pulse el interruptor de alimentación
que encontrará en la parte trasera de la puerta de enlace.
SureConnect
ADSL Wireless Gateway. Enchufe el
La puerta de enlace se iniciará en cuanto se conecte a la corriente. Puede
que el proceso tarde unos minutos.
Si es usuario de Windows: haga clic en Next (Siguiente). Los archivos
necesarios se copiarán en el sistema.
3. Conecte un extremo del cable gris incorporado al puerto del teléfono del
mismo color situado en la parte trasera de la puerta de enlace que viene
indicada con ADSL. El otro extremo deberá conectarlo al cajetín telefónico.
Si es usuario de Windows: haga clic en Next (Siguiente).
4. Seleccione una de las siguientes opciones de conexión.
A través de una conexión inalámbrica: Busque el Wireless Gateway y
asócielo. Si es usuario de Windows: haga clic en Next (Siguiente).
85
85
Page 88

A través de una conexión Ethernet:
Conecte el cable Ethernet amarillo. En caso de poseer cuatro dispositivos,
la conexión en red es opcional, pero si el número es superior, se deberán
conectar una vez completada la configuración inicial. Inserte uno de los
extremos del cable Ethernet a cualquiera de los cuatro puertos (Ethernet 1,
Ethernet 2, Ethernet 3 o Ethernet 4) situados en la parte trasera de la
puerta de enlace. El otro extremo del cable deberá insertarlo en el puerto
Ethernet de la tarjeta de interfaz de red 10/100 de su ordenador. Si es
usuario de Windows: haga clic en Next (Siguiente).
El programa de instalación detectará su módem y, a continuación, instalará
SureConnect ADSL EasyConfigurator. Puede que el proceso tarde unos
minutos.
Si es usuario de Macintosh o Linux: introduzca el CD-ROM y siga las
instrucciones que aparecen en pantalla. Si es usuario de Mac 10: haga
doble clic en el icono del CD desde su escritorio, abra Install.htm y siga las
instrucciones que aparecen en pantalla.
Paso 4. Configuración de la puerta de enlace con el
EasyConfigurator
NOTA: Los usuarios de NT 4.0 necesitarán Service Pack 3 (o superior)
para poder ejecutar EasyConfigurator.
1. Aparecerá la pantalla del SureConnect ADSL EasyConfigurator, que le
indicará cuáles son su nombre de usuario y contraseña, tal y como se
muestra en el siguiente gráfico:
86
86
Page 89

Estos campos distinguen entre mayúsculas y minúsculas. Asegúrese de
que la tecla Caps Lock (mayúsculas) está desactivada. El nombre de
usuario predeterminado es admin. La contraseña predeterminada es
admin. Asegúrese de que introduce los valores correctos y haga clic en
Login (inicio de sesión). Puede que el proceso tarde unos minutos.
2. Seleccione el país y el proveedor de acceso a Internet (ISP) de la lista.
Haga clic en Aplicar. Si no aparece su ISP en la lista, consulte la sección
Solución de problemas en esta guía de instalación.
3. EasyConfigurator configurará su puerta de enlace. Puede que el proceso
tarde unos minutos.
Cuando el estado operativo sea CONECTADO A INTERNET, tal y como se
muestra en el siguiente gráfico, su U.S. Robotics
Wireless Gateway estará configurado para acceder a Internet. Ya puede
empezar a navegar. Registre su producto y compruebe que la conexión
funciona correctamente en el siguiente sitio Web:
www.usr.com/productreg
87
SureConnect
ADSL
87
Page 90

Si no ha recibido este mensaje, consulte la sección Solución de problemas
de esta guía de instalación.
Paso 5. Comprobación de la configuración inalámbrica
(opcional)
Haga clic en el menú Wireless en la parte superior de la pantalla.
EasyConfigurator consultará con su puerta de enlace y, al cabo de unos minutos,
mostrará el estado actual de la conexión inalámbrica.
88
88
Page 91

Los valores predeterminados son los siguientes:
Estado de la conexión inalámbrica = activado
Punto de acceso = SSID Broadcast (Emisión SSID) desactivada
Cifrado WEP = desactivado
Si desea modificar los parámetros, haga clic en Configure Wireless (Configurar
Wireless). Un navegador de Internet se ejecutará momentáneamente. Se
recomienda activar WEP y asignar una clave secreta de seguridad. Asegúrese de
asignar la misma clave a sus dispositivos inalámbricos para garantizar futuras
conexiones. Para mayor seguridad, active las opciones de filtro MAC en el menú
Wireless de la interfaz Web del usuario de filtro MAC. Si necesita más
información al respecto o sobre otros parámetros inalámbricos adicionales,
consulte la guía del usuario del CD de instalación.
Si tiene algún problema al conectarse a su U.S. Robotics
Wireless Gateway, compruebe si los casos descritos a continuación se
corresponden con las anomalías experimentadas.
• Si intenta establecer una conexión inalámbrica pero no puede conectarse
a la U.S. Robotics
cada Wireless Card está configurada en el modo Infrastructure
(Infraestructura). Si las tarjetas están configuradas en el modo 802.11b
AdHoc, no podrá conectarlas a su U.S. Robotics
Wireless Gateway. Cuando cada Wireless Card esté establecida en el modo
Infrastructure (Infraestructura), deberá conectarse automáticamente al
punto de acceso de la U.S. Robotics
Si las Wireless Cards no se conectan automáticamente, vuelva a efectuar la
instalación hasta que detecten la U.S. Robotics
Wireless Gateway se conecten.
• Si opta por establecer una conexión inalámbrica con la U.S. Robotics
SureConnect
deficiente, compruebe la posición de la puerta de enlace. Las grandes
distancias, la ubicación de los dispositivos entre distintos pisos o las
paredes de hormigón o acero pueden reducir la calidad de la conexión.
Siempre que sea posible, cambie su U.S. Robotics
Wireless Gateway de sitio para reducir el efecto de estos obstáculos.
SureConnect
ADSL Wireless Gateway, asegúrese de que
SureConnect
ADSL Wireless Gateway, pero la calidad de la conexión es
SureConnect
SureConnect
ADSL Wireless Gateway.
SureConnect
SureConnect
ADSL
ADSL
ADSL
ADSL
89
89
Page 92

Solución de problemas
Para resolver el problema, utilice la lista de comprobación que aparece a
continuación.
✔ Asegúrese de usar el adaptador de corriente que se incluía con la
puerta de enlace y de que está debidamente conectado a una toma de
corriente adecuada y la puerta de enlace. Compruebe que el
interruptor está en la posición de encendido (on). Si es así, el LED
PWR estará iluminado.
✔ Compruebe que el cable del teléfono se ha conectado correctamente
al cajetín telefónico y a la puerta de enlace. Si es así, el LED ADSL
estará iluminado.
✔ Asegúrese de haber conectado correctamente el cable o cables
Ethernet a alguno de los puertos Ethernet (1, 2, 3 o 4) de la puerta de
enlace y a la tarjeta de interfaz de red (NIC) del ordenador. Los LED
Ethernet correspondientes situados en la parte frontal de la puerta de
enlace deberán iluminarse si todo es correcto.
✔ Cuando esté conectado de forma inalámbrica, compruebe que el
cliente inalámbrico está conectado correctamente y, de ser así, si la
configuración es la apropiada (sin cifrado WEP predeterminado, modo
de infraestructura). A continuación, asegúrese de que el cliente está
sincronizado con la puerta de enlace. Para más información, consulte
la información relativa al cliente.
✔ Abra EasyConfigurator en la página Status (Estado) y compruebe que
su puerta de enlace funciona adecuadamente. Para verificar el
funcionamiento de la conexión inalámbrica con la puerta de enlace,
vaya a la página Wireless y compruebe el estado.
Indicadores LED de estado
La U.S. Robotics
LED en la parte delantera: PWR, Ethernet 1, 2, 3, 4, ADSL, WAN IP y WLAN. Podrá
conocer el estado operativo de la puerta de enlace según las condiciones
enumeradas en la siguiente tabla.
90
SureConnect
ADSL Wireless Gateway tiene ocho indicadores
90
Page 93

PWR
WAN IP
WLAN
Ethernet
1, 2, 3, 4
ADSL
Verde Se recibe corriente desde el adaptador de corriente.
Apagado No se detecta la corriente.
Verde
Verde parpadeante Dirección IP conectada y datos en proceso de transmisión.
Rojo Fallo al obtener la dirección IP del ISP.
Apagado
Verde Cliente inalámbrico conectado a la puerta de enlace.
Verde parpadeante Transmisión inalámbrica de datos en curso.
Apagado
Verde
Verde parpadeante Transmisión de datos en curso.
Apagado
Verde Se ha establecido la conexión DSL.
Verde parpadeante Se está procediendo a la conexión DSL.
Apagado Indica que ha fallado la conexión DSL.
La puerta de enlace obtiene una dirección IP pública del
proveedor de acceso a Internet (ISP), en modo PPP.
La línea ADSL no está sincronizada o se encuentra en modo
bridge (puente).
No hay ningún cliente inalámbrico conectado a la puerta de
enlace.
Se ha establecido y detectado una conexión física entre la
puerta de enlace y el ordenador a través del cable Ethernet.
No se ha establecido una conexión física entre la puerta de
enlace y el ordenador a través del cable Ethernet.
Parte trasera de la puerta de enlace
Componente Descripción
ADSL
1 Puerto Ethernet número 1 de la parte trasera de la puerta de enlace
2 Puerto Ethernet número 2 de la parte trasera de la puerta de enlace
3 Puerto Ethernet número 3 de la parte trasera de la puerta de enlace
4 Puerto Ethernet número 4 de la parte trasera de la puerta de enlace
Reiniciar Reinicia la puerta de enlace
16 V CA Clavija de entrada del cable del adaptador de corriente
Alimentación Botón que enciende y apaga la puerta de acceso
Clavija de servicio de la línea de suscriptor digital RJ-11 en la parte
trasera de la puerta de enlace
91
91
Page 94

NOTA: Para reiniciar la puerta de enlace, inserte una patilla o clip para
pulsar el botón Reset (reinicio). La puerta de enlace se reiniciará en
unos instantes. Si presiona dicho botón durante más de 5 segundos,
se restablecerá la configuración predeterminada.
Preguntas y respuestas más comunes
Mi ISP no aparece enumerado en el campo ISP del EasyConfigurator.
Solución posible: si su ISP o país no se encuentra en la lista, seleccione la
opción Not Listed (Otros). A continuación, deberá configurar los valores en
el apartado "Line configuration” (Configuración de la línea). Su ISP le
proporcionará las configuraciones y valores correctos. A continuación,
haga clic en Apply (Aplicar). Puede que el proceso tarde unos minutos.
Los indicadores LED no se iluminan cuando enciendo la puerta de enlace.
Solución posible: revise la lista de comprobación para la solución de
problemas que aparece al principio de esta sección.
92
92
Page 95

El LED ADSL parpadea o no se enciende.
Solución posible: revise la lista de comprobación para la solución de
problemas que aparece al principio de esta sección.
No puedo conectarme a Internet.
Solución posible:
• Revise la lista de comprobación para la solución de problemas que
aparece al principio de esta sección.
• Asegúrese de que dispone de una cuenta activa con un proveedor de
acceso a Internet.
• Compruebe los parámetros VCI/VPI, su nombre de usuario y tipo de
autenticación. Para ello, acceda a EasyConfigurator y, a continuación,
seleccione la ficha Status (Estado). Es posible que los campos del
nombre de usuario y la contraseña distingan entre mayúsculas y
minúsculas. Asegúrese de que la tecla CAPS LOCK (mayúsculas) está
desactivada.
• Si necesita ayuda, contacte con su ISP.
No sé si la dirección IP que tengo asignada es estática o dinámica.
Solución posible: si tiene activado el servicio DSL, probablemente disponga
de una cuenta IP dinámica. En cualquier caso, consulte estos datos con su
proveedor, pues algunos de ellos asignan direcciones IP estáticas.
Ya no puedo acceder a Internet.
Solución posible: deberá verificar la conexión del navegador de Internet y
que la opción HTTP proxy está desactivada para que el navegador de
Internet pueda leer las páginas de configuración. Abra el navegador de
Internet.
Si es usuario de Internet Explorer: hag a clic en Herramientas, Opciones de
Internet y, luego, en la ficha Conexiones. Marque la opción No marcar una
conexión nunca, haga clic en Aplicar y, a continuación, en Aceptar. Vuelva
a hacer clic en Herramientas y, luego, en Opciones de Internet. Haga clic en
la ficha Conexiones y, a continuación, en Configuración LAN. Desactive
todas las casillas y haga clic en Aceptar. Haga clic en Aceptar para cerrar las
opciones de Internet.
Si es usuario de Netscape Navigator: haga clic en Editar, Preferencias y,
luego, doble clic en la opción Avanzadas de la ventana Categoría. Haga clic
en Servidores proxy, marque la opción Conexión directa a Internet y,
luego, haga clic en Aceptar. Vuelva a hacer clic en Editar y, a continuación,
en Preferencias. En la ventana Categoría, haga doble clic en Avanzadas, y
luego haga clic en Servidores proxy. Marque la opción Conexión directa a
Internet y, seguidamente, haga clic en Aceptar.
93
93
Page 96

No puedo conectarme a aplicaciones especiales.
Solución posible: si tiene una U.S. Robotics
SureConnect
ADSL Wireless
Gateway conectada correctamente y puede acceder a Internet pero
encuentra problemas para conectarse a aplicaciones especiales (p.ej., ICQ,
Battle.net, etc.), deberá asignar puertos concretos para pasar a través de la
función de cortafuegos. Si necesita más información sobre cómo configurar
está función, consulte la guía del usuario del CD de instalación.
Cuando intento comprobar la configuración de red en Windows Me o XP, no
encuentro el icono Red.
Solución posible: la configuración predeterminada en Windows Me y XP no
muestra todos los iconos del Panel de control. Haga clic en Inicio, coloque
el cursor en Configuración y elija Panel de control. A continuación, haga clic
en Ver todas las opciones del Panel de control en la parte izquierda de la
pantalla. Entonces podrá ver todos los iconos del Panel de control.
No sé cómo configurar el protocolo TCP/IP para que funcione con la puerta de
enlace.
Solución posible: abra el menú de ayuda de su sistema operativo. Consulte
los mensajes referentes a TCP/IP.
Cuando navego por Internet recibo el mensaje “No se puede mostrar la página”
u otro mensaje de error similar.
Solución posible: compruebe si la puerta de enlace asignó una dirección IP
a su ordenador. Si no es así, libere o renueve la dirección IP. Si desea más
información, consulte la guía del usuario del CD de instalación.
Solución posible: compruebe si su proveedor de acceso a Internet (ISP)
asignó una dirección IP a su ordenador. Si desea más información, consulte
la sección sobre el procedimiento de ping o la guía del usuario del CD de
instalación.
Mi conexión inalámbrica no puede acceder a Internet.
Solución posible: compruebe que el cliente está bien instalado y
configurado y que puede ver la puerta de enlace.
Solución posible: vaya a la página Wireless de su EasyConfigurator y
asegúrese de que la conexión inalámbrica está activada y funciona
correctamente.
Solución posible: revise la lista de comprobación para la solución de
problemas que aparece al principio de esta sección y compruebe que la
conexión ADSL funciona adecuadamente.
94
94
Page 97

Procedimiento de ping para la resolución de problemas
1. Haga clic en Inicio y luego en Ejecutar.
Para Windows 95, 98 y Me: escriba command en el cuadro de diálogo
y haga clic en Aceptar.
Para Windows NT 4.0, 2000 y XP: escriba cmd en el cuadro de diálogo
y haga clic en Aceptar.
2. Escriba ping 127.0.0.1 cuando aparezca la ventana del DOS. Esta es la
dirección local de su host. La dirección comprueba que el TCP/IP se ha
instalado y funciona correctamente. Si no puede completar este ping,
desconecte la puerta de enlace y repita el procedimiento de instalación.
3. Escriba ping seguido de la dirección IP de su ordenador. De esta forma,
se garantiza que el ordenador responda a las consultas del sistema.
Si no puede completar este ping, asegúrese de que todos los cables
están bien conectados y de que tiene instalados los controladores
adecuados.
4. Escriba ping seguido de la dirección de su puerta de enlace para
comprobar la comunicación con esta (la dirección predeterminada de
la puerta de enlace es 192.168.1.1). De esta forma podrá conectar con
otros equipos y la puerta de enlace. Si puede establecer comunicación
con esta última, podrá acceder a la página Administration
(Administración) y configurar los valores. Si no puede completar este
ping, asegúrese de que el adaptador de corriente está enchufado y de
que la puerta de enlace está bien conectada a su ordenador.
5. Escriba ping seguido de la dirección externa de Internet de la puerta de
enlace. Esta es la dirección proporcionada por su ISP o por una LAN
externa. Así se asegurará de que la puerta de enlace funciona
adecuadamente y de que los datos pasan a través de ella.
6. Escriba ping seguido de su dirección de servidor DNS. De esta forma
podrá unir los nombres de host de Internet con direcciones IP y
comprobar que accede a Internet.
¿Qué pasa si no recibo un mensaje confirmando que el procedimiento de ping a
la puerta de enlace ha sido satisfactorio?
Solución posible: la ausencia de mensajes de confirmación indica que el
ordenador no se puede comunicar con la puerta de enlace a través de la
dirección IP asignada.
• Compruebe la dirección IP del ordenador (tarjeta de interfaz de red).
Asegúrese de que se encuentra en la misma subred que la dirección de
la puerta de enlace. Por ejemplo, si la dirección de la puerta de enlace
es 192.168.1.1, la dirección IP del ordenador deberá ser 192.168.1.x
(donde x equivale a una cifra mayor que 1). Si no es así, libere y
renueve la dirección IP.
95
95
Page 98

Asistencia técnica
• Si desea recibir información actualizada sobre los servicios de
asistencia, visite el sitio Web de U.S. Robotics:
http://www.usr.com/broadbandsupport
La mayoría de los problemas que experimentan los usuarios aparecen
en las páginas de preguntas más habituales y resolución de
problemas del producto correspondiente.
• Si no puede establecer una conexión a Internet, póngase en contacto
con su ISP.
• Si su ISP no le aporta la solución adecuada, póngase en contacto con
el servicio de asistencia técnica de U.S. Robotics. Los informáticos de
nuestro servicio podrán atender las consultas técnicas sobre los
productos de U.S. Robotics. Consulte la guía del usuario que
encontrará en el CD de instalación para obtener información de
contacto del servicio de asistencia técnica en su zona.
96
96
Page 99

Información normativa
Declaración de conformidad del fabricante
U.S. Robotics Corporation, sita en el 935 National Parkway, Schaumburg, Illinois,
60173-5157 (Estados Unidos), declara bajo su entera y exclusiva responsabilidad que el producto U.S.
Robotics
cumple las siguientes normas y disposiciones:
EN300 328-2
EN301 489-1
EN301 489-17
EN60950
EN55022
EN55024
Este equipo se conforma con Artículo 3.1(a) de Directivo 1999/5/EC para la protección de la salud y la
seguridad del usuario.
Por el presente documento declaramos que este producto cumple todos los requisitos fundamentales
y disposiciones pertinentes de la Directiva 1999/5/CE.
Este producto puede usarse en los siguientes países:
Alemania, Austria, Bélgica, Dinamarca, España, Finlandia, Francia, Grecia, Irlanda, Islandia, Italia,
Luxemburgo, Noruega, Países Bajos, Portugal, Reino Unido, Suecia y Suiza.
Respecto al estándar IEEE 802.11g disponemos de la siguiente información sobre las restricciones en
los países que cumplen con la directiva R&TTE:
País Banda de frecuencia Salida máx.
Francia 2.454-2.483,5 MHz 10 mW EI RP exterior
Declaración de conformidad CE
SureConnect
ADSL Wireless Gateway, al que hace referencia la presente documentación,
Canales operativos: Cumple con IEEE 802.11g
Este dispositivo cumple con los requerimientos europeos controlando la exposición a la radiación
electromagnética. Este equipo debe ser instalado y ser operado con una distancia mínima de 20 cm
entre el radiador y su cuerpo. Este dispositivo inalámbrico es un transmisor/receptor y ha sido
diseñado y fabricado para cumplir con los límites de exposición recomendados por el Consejo de la
Unión Europea y la comisión internacional sobre la protección de no radiación de ionización para la
población entera El estándar de exposición para el equipo portátil utiliza el "Grado Específico de la
Absorción" como la unidad de medida. El valor máximo de SAR para este dispositivo inalámbrico
medido de acuerdo con las pruebas es de 1.08 W/kg.
11 canales (Estados Unidos, Canadá)
13 canales (ETSI) o 14 canales (Japón)
Información UE sobre la antena extraíble
Este dispositivo inalámbrico de USR ha sido diseñado para funcionar únicamente con la antena
incluida en este paquete. Esta aplicación ha sido sometida a varias pruebas y cuenta con la
aprobación de una agencia europea, de acuerdo con la Directiva 1999/5/CE para cubrir el nivel de
energía radiada de 100 mW (EIRP). La antena solo se puede reemplazar con componentes USR
autorizados que hayan sido diseñados y probados según los requisitos de la Directiva 1999/5/CE.
Visite el sitio Web de USR para obtener más información sobre cómo adquirir una antena.
En Europa:
FRS Europe BV.
Draaibrugweg 2
1332 AC Almere
Países Bajos
Visite http://www.usr.com para consultar la información más reciente sobre la restricción de canales.
Garantía limitada de U.S. Robotics Corporation de 2 (dos) años
97
97
Page 100

1.0 CONDICIONES
1.1 La presente garantía limitada se otorga en exclusiva al usuario final (en lo sucesivo, "cliente") y es intransferible.
1.2 Ningún agente, distribuidor o socio de U.S. Robotics Corporation (en lo sucesivo, "U.S. Robotics") está
autorizado a modificar las condiciones de esta garantía limitada en nombre de U.S. Robotics.
1.3 Esta garantía se aplica exclusivamente a los productos nuevos que se adquieran de U.S. Robotics o sus
distribuidores autorizados.
1.4 Las condiciones de esta garantía solo son válidas en el país o región donde se vaya a utilizar el producto
conforme a lo previsto en sus caracter ísticas (según lo indicado en el número de modelo del product o y en las
etiquetas de compatibilidad de la compañía telefónica local que lo acompañan).
1.5 U.S. Robotics garantiza al cliente que este producto no presentará desperfectos materiales ni de fabricación en
condiciones de uso y servicio normales, durante 2 (dos) años desde la fecha de compra a U.S Robotics o un
distribuidor autorizad o.
1.6 La única obligación que U.S. Robotics contrae de acuerdo con esta garantía, y a su discreción, será reparar el
producto o componente defectuoso con componentes nuevos o reparados, o bien cambiar el producto o
componente defectuoso por otro nuevo o reparado que sea igual o similar al original. Si ninguna de las dos
opciones anteriores fuera factible, U.S. Robotics podrá, siempre a su discreción, devolver al cliente el importe
desembolsado, cantidad que no excederá nunca el precio indicado en la última lista de precios recomendados
para el producto publicada por U.S. Robotics y a la que habrá de restarse cualquier gasto incurrido por servicios
prestados. Los productos o componentes defectuosos que se reemplacen, serán propiedad de U.S. Robotics.
1.7 U.S. Robotics garantiza los productos o componentes sustituidos durante 90 (noventa) días a partir del
momento en que estos se envían al cliente.
1.8 U.S. Robotics no declara formalmente ni garantiza que el producto cumpla con los requisitos para el uso
particular que el cliente le quiera dar, o que funcione con equipos de hardware o programas de otros
fabricantes.
1.9 U.S. Robotics no declara formalmente ni garantiza que el software que acompaña al producto funcione de forma
ininterrumpida y sin errores, o que se vayan a reparar los problemas que el software pueda presentar.
1.10 U.S. Robotics no es responsable del software, datos o información del cliente que se almacenen en el producto.
2.0 OBLIGACIONES DEL CLIENTE
2.1 Al adquirir el producto, el cliente asume la responsabilidad de que cumple con los requisitos y datos técnicos
previstos para el uso particular que le quiera dar.
2.2 Se aconseja explícitamente al cliente que haga copias de seguridad de todos los software que acompañan al
producto.
2.3 Es responsabilidad del cliente instalar y configurar el producto de forma correcta. Así mismo, el cliente deberá
asegurarse de que la instalación, configuración y funcionamiento del producto es compatible con el sistema
operativo del equipo en el que se va a utilizar.
2.4 El cliente deberá proporcionar a U.S. Robotics una copia del recibo de compra original fechado por U.S. Robotics
o alguno de sus distribuidores autorizados, para aprobar cualquier reclamación de acuerdo con las condiciones
de esta garantía.
3.0 OBTENCIÓN DE LOS SERVICIOS EN GARANTÍA
3.1 Para obtener la autorización del servicio en garantía, el cliente deberá ponerse en contacto con un centro de
asistencia técnica de U.S. Robotics u otro autorizado por U.S. Robotics dentro del período de garantía vigente.
3.2 El cliente debe proporcionar el número de modelo y de serie del producto, así como una copia del recibo de
compra original fechado por U.S. Robotics o alguno de sus distribuidores autorizados para obtener la
autorización de servicio en garantía.
3.3 Para obtener los datos de contacto del centro de asistencia técnica de U.S. Robotics o cualquier otro centro
autorizado por U.S. Robotics, visite el sitio Web corporativo de U.S. Robotics en: www.usr.com
3.4 Cuando el cliente contacte con el servicio de asistencia técnica de U.S. Robotics, deberá disponer de la siguiente
información y artículos:
Número de modelo del producto
Número de serie del producto
Recibo de compra fechado
Nombre y teléfono del cliente
Versión del sistema operativo del cliente
CD de instalación de U.S. Robotics
Guía de instalación de U.S. Robotics
4.0 SUSTITUCIÓN DEL PRODUCTO
4.1 U.S. Robotics proporcionará al cliente un número para autorizar la devolución del producto (RMA) e
instrucciones para su envío al centro de U.S. Robotics correspondiente si se cumplen las siguientes condiciones:
(1) si el servicio de asistencia técnica de U.S. Robotics u otro autorizado por U.S. Robotics determina que el
funcionamiento defectuoso del producto o componente se debe a un fallo en la fabricación o en los materiales;
(2) si el periodo de garantía de 2 (dos) años no ha expirado; y (3) si el cliente incluye una copia del recibo de
compra original fechado por U.S. Robotics o un distribuidor autorizado junto con el producto o componente
defectuoso.
4.2 Cualquier producto o componente enviado a U.S. Robotics sin un número RMA especificado por U.S. Robotics u
otro centro autorizado será devuelto al cliente.
4.3 El cliente pagará los gastos de envío para la devolución del producto o componente defectuoso al centro
98
98
 Loading...