

Page 1
SFG 500/600 DOUGH SHEETER
OPERATOR’S MANUAL
Persons under age 18 are not permitted to operate or have accessibility to
operate this equipment per U.S. Dept. Of Labor Employment Standards
Administration Fact Sheet No. ESA913.
SFG REV A
Page 2

CONTENTS:
1.0) DESCRIPTION OF THE MACHINE PAGE … 3
2.0) IDENTIFICATION PAGE … 4
3.0) OPERATIVE CONDITIONS PAGE … 4
4.0) MACHINE CONTROLS PAGE … 4
5.0) SAFETY WARNINGS PAGE … 5
6.0) INITIAL STARTUP PAGE … 5
7.0) SHEETER OPERATION PAGE … 5
8.0) CLEANING PAGE …. 6
9.0) SAFETY DEVICES PAGE …. 6
10.0) SERVICING PAGE …. 6
WARRANTY STATEMENT PAGE …. 6
INSTRUCTION MANUAL: This manual gives the directions necessary for proper and safe
use of this machine and must be read before any of these operations. This manual must
be read by the machine operators; it is important for them to know how to carry out their
functions properly. This manual is an integral part of the machine and must be kept in a
suitable place so as to safeguard its integrity and make it possible to consult it during all
machine life.
Compliance with this manual ensures proper operator's use and safety.
2
Page 3

1.0 DESCRIPTION OF THE MACHINE
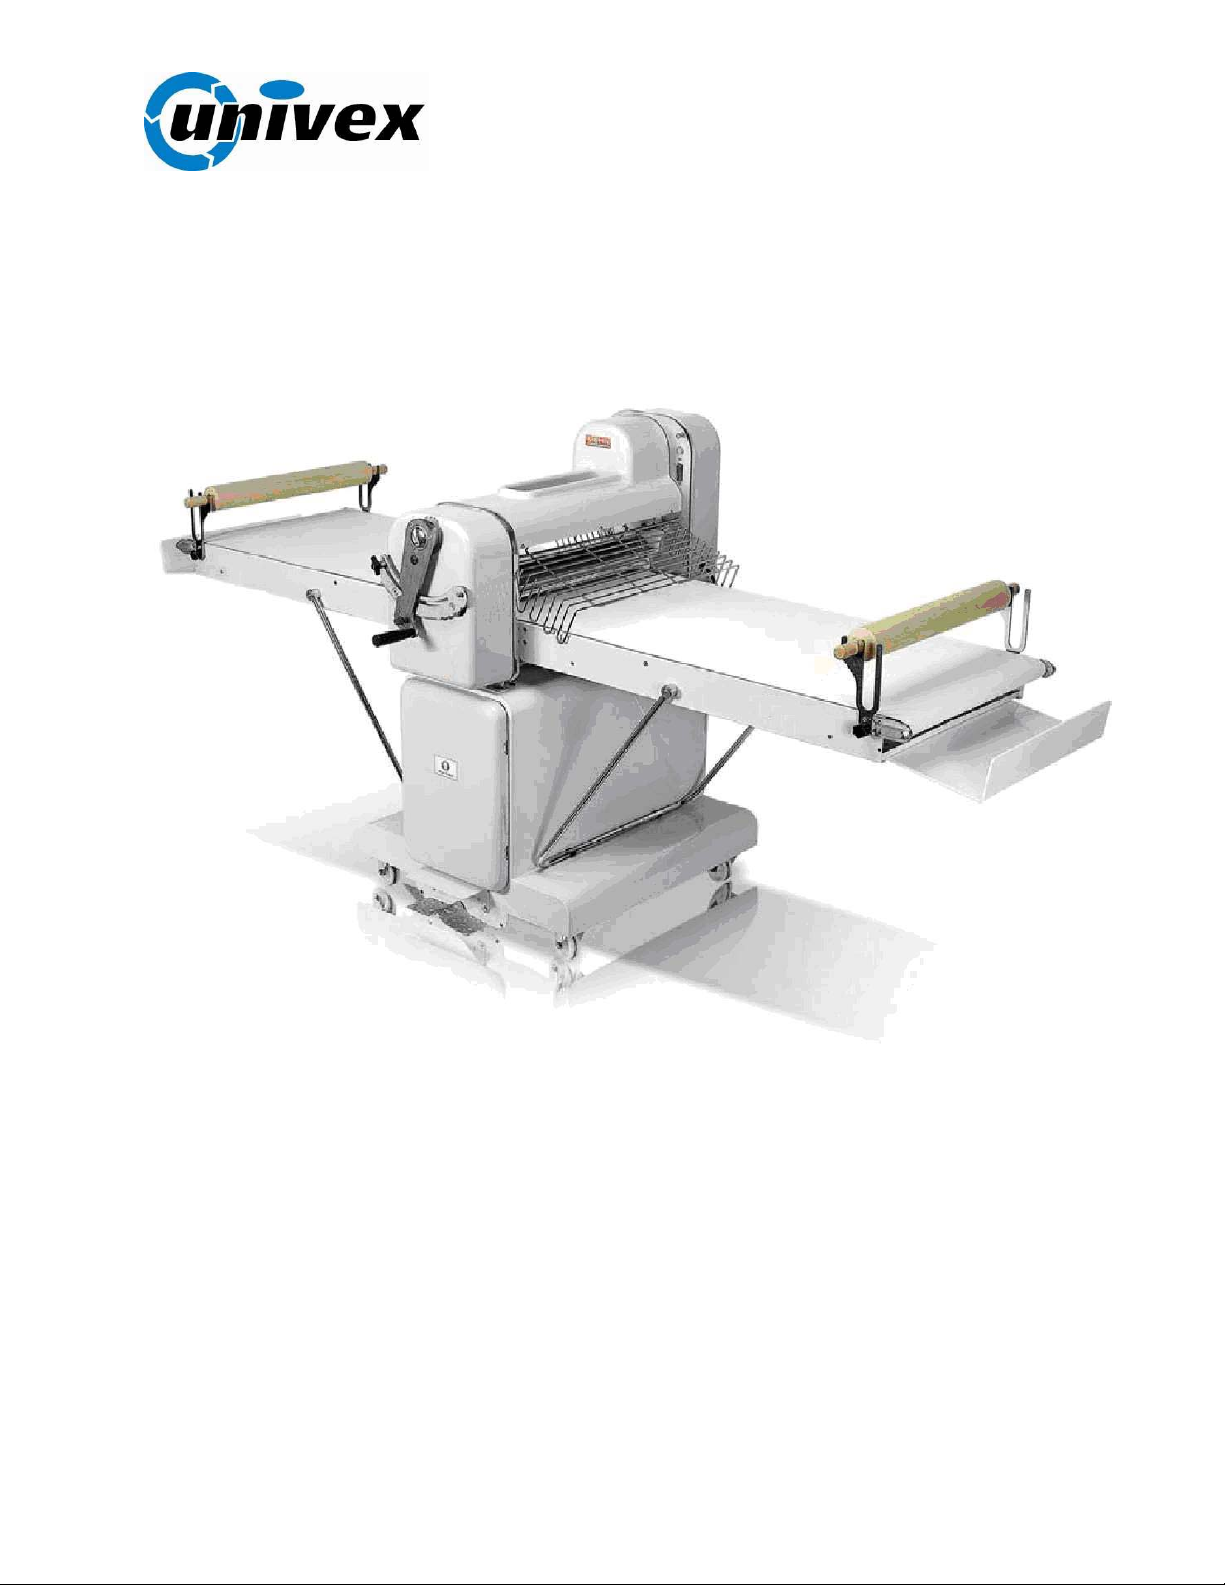
1.1) GENERAL: The SFG pastry processors are rolling machines to be used in
catering, bakery and restaurants to prepare dough products. The gradual mixture
thinning is executed by passing the pastry mixture through a couple of rollers,
gradually adjusting the thickness until the finished product is obtained. The belts
located on the sides of the rollers pass the mixture back and forth as the controls
are reversed and thickness is gradually varied. One belt feeds the rollers, and
the other removes the material thinned out by the same. Since the thinned out
material is longer than the one to be "fined" down, the roller dragging speed of
the removal belt must be faster than the feeding belt. The operator must reverse
motion at every single pass. The speeds of the belts are reversed automatically as
the motion is reversed. The operator chooses sheeting direction by a lever or a
pedal, according to the machine type. The thinning of the dough product mixture
is executed by means of a spring action lever that locks into a toothed selector
guide that keeps the position desired. When the mixture gets so long and
cannot stay on the belt, it can be dropped on special trays or it can be rolled up on
the rolling pins placed at the end of the conveyor belts.
FIGURE 1
OVERVIEW
Roller adjusting lever
Pedal and optional
lever to change
roller direction.
Belt and relevant rolling
pins and trays
3
Page 4

2.0) IDENTIFICATION. A plate similar to the one below identifies the machine; it shows
the machine model types, serial numbers, and the electrical operating characteristics.
FIGURE 2
IDENTIFICATION PLATE
MODEL SERIAL NUMBER
VOLTAGE FREQ Hz PHASE Kw
3 OLD ROCKINGHAM RD
SALEM, NH O3079
1-800-258-6358
3.0) OPERATING ENVIROMENT
Local conditions: The machine should be installed in a lighted, airy building, on a
compact and level support. Temperature ranging from 5°C to 40°C (40
humidity not over 50% at 20°C (68
o
F), or not over 90% at 40°C (104°F).
o
– 104oF);
Lighting: Lighting available for the operator must comply with the type of work being
carried out.
Vibrations: When operations are properly executed, vibrations cannot provoke dangerous
situations.
Acoustic emissions: <75 dbA – normal use.
Electromagnetic environment: This machine has been conceived to operate in an
electromagnetic industrial environment.
4.0) MACHINE CONTROLS
1) Master circuit breaker with mains
signal lamp.
2) Control lever and motion reverse.
(upon request)
3) Control pedal and motion reverse.
4) Adjusting lever for fining down.
5) Trigger for lever 4
6) Ratchet of lever 4
7) Protection grid
FIGURE 3
CONTROLS
4
Page 5

5.0) SAFETY WARNINGS: Area around the machine must be properly light
ed, free of
obstructions, and clean. Operators must wear appropriate clothes for operating the machines,
antislip shoes (if necessary protected on toe), sleeves properly buttoned up on wrists,
appropriate head gear to restrain long hair, no dangling clothes such as ties, napkins,
ripped clothes, open jackets, etc, to avoid any risk of getting tangled.
6.0) INITIAL STARTUP: Make sure the protection grids are lowered before any operation
when the current is on. Just press button 1 (Fig. 3) to start the machine. The indicator lamp
will light.
Operate foot pedal (3) or foot pedal (2), if equipped, (Fig. 3) to verify the belt moves in the
direction of the arrow shown in figure 3. Raising the lever 2 (or stepping on the foot pedal on
the opposite side) should reverse the operation of the belts. Test the adjusting lever of the
roller by moving lever 4 (Fig. 3) from the right to the left. The spring loaded trigger will catch
in the toothed selector. To release the thickness control setting, press trigger 5 (Fig. 3)which
will allow free movement of the lever.
When the thickness of the pastry mixture has been achieved, it can be stored in the
memory by means of ratchet 6 (Fig. 3); this prevents the adjusting lever from moving forward
from the thickness established.
Test the protection grids to ensure that the safety microswitches controlling the protection
grids work correctly by lifting the grids one at a time as the machine is operating. When
you lift them the machine must stop. If the machine does not stop, consult the factory. The
machine is operational.
7.0) SHEETER OPERATION: This machine is normally used for the production of pastry
products but can be used for other applications using rolled dough. Consult factory for
your specific application.
To “fine” down the pastry mixture, you must place on the belt, a “block” of pastry/dough
mixture composed of alternate layers of butter or margarine and outside the flour dough. If
necessary, it is also important to dust some flour on the areas in contact with the blocks,
belts, and rollers; in the central area of the crown there’s a special housing (Item
3, Fig. 4) for this purpose. Adjust the rollers using the Thickness Control Handle (Item
4, Fig. 3) to reduce thickness by 10-15%, initially, and start the machine. The “block” will
be sheeted towards the rollers and reduced by them as the dough mixture passes from
one side of the sheeter to the other. The thickness is reduced and the “block” is enlarged
and lengthened with each pass.
When the “block” is out of the rollers, the motion must be reversed by means of Lever 2
(Fig. 3) or Pedal 3 (Fig. 3) and, at the same time, the rollers must be adjusted via the
Thickness Control Handle 4 (Fig. 3) to carry out another “fining” OR “thinning”.
The pastry/dough mixture becomes wider and wider as the process goes on; for this
reason, at the end of any belt there are two trays (Item 1, Fig. 4) to carry the
finished product. When they are full, the rolling pins (Item 2, Fig. 4) must be used to
roll up the product.
FIGURE 4
SHEETER OPERATION
5
Page 6

8.0) CLEANING: Clean the machine by removing the deposits on rollers and belts. Belts
should be wiped with dry cloths, DO NOT USE LIQUID CLEANERS ON THE CONVEYOR
BELTS. Disassemble the scrapers and clean them with warm water and mild detergent.
Take care in handling the scrapers such that the edges are not damaged.
9.0) SAFETY DEVICES: The machine is fitted with a set of safety devices that safeguard
the operator. These must not be rigged or cut out or serious bodily injury may
result.
Check their proper operation before starting the machine.
x Master circuit breaker: it cuts off electric supply; it is essential to pull out the plug
from the electric cabinet to carry out mechanical servicing.
x Thermal switch: it cuts off electric supply if the electric motor overheats
x Fixed protections: all guards fastened with screws must not be removed;
authorised personnel only can perform it for servicing.
x Mobile protections: the protection grid movement activates microswitches that
prevent the machine from operating if the mechanical elements are not properly
positioned.
10.0) SERVICING
Only trained and certified technicians should perform service on this equipment. Consult
the factory for a local Service Company.
WARRANTY
The Univex SFG Dough Sheeters carry a one-year, on-site parts and labor warranty
against any defects in materials or workmanship. The one-year period begins on
the date of purchase by the end user and remains in full effect provided the unit is
used properly in accordance with our instructions. Any work to be performed under
this warranty must be performed between the hours of 8:00 AM and 5:00 PM local
time, Monday through Friday. Univex will not cover overtime charges of any kind.
Please contact the Univex Warranty Service Department at 1-800-258-6358 to report
warranty claims before arranging repair or attempting to return the unit to Univex
Corporation.
Damages incurred in transit or incurred because of installation error, accident,
alteration or misuse are not covered. Transit damage should be reported to the
carrier immediately.
Univex will not be liable for any consequential, compensatory, incidental or special
damages.
6
 Loading...