

Universal Remote Control, Inc.
www.universalremote.com
UR3L-SR4
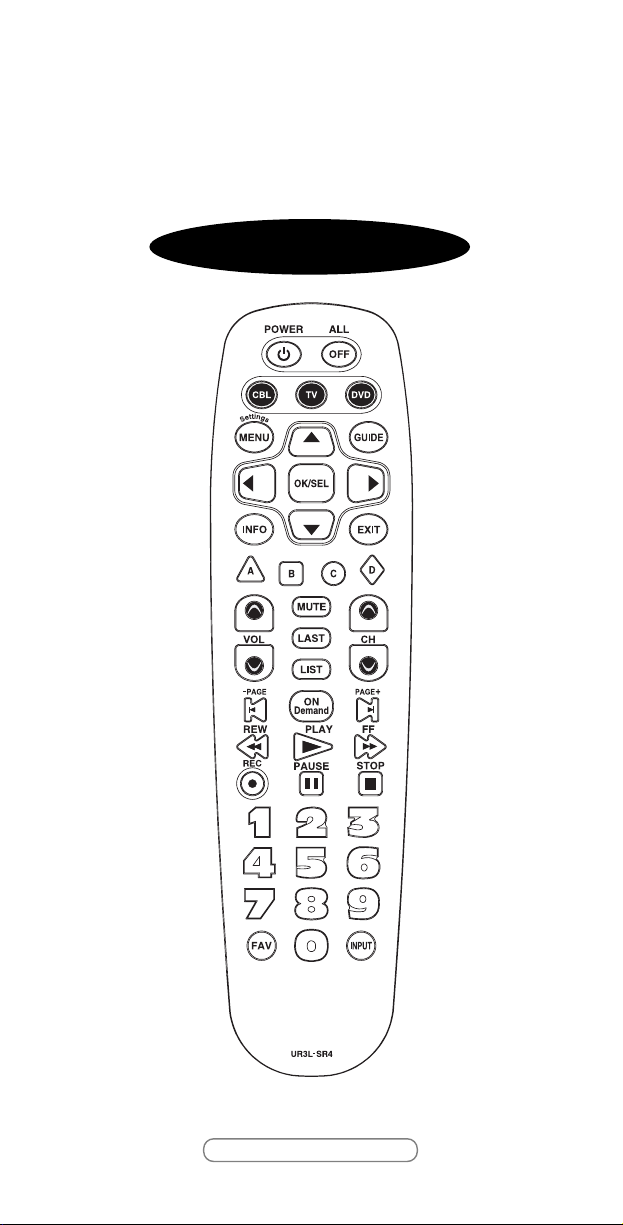
Operating Manual
For Easy Clicker

1
This remote control is designed to operate most Digital
and Analog Cable Boxes, as well as TVs, and a VCR or
DVD player.
Introduction
1
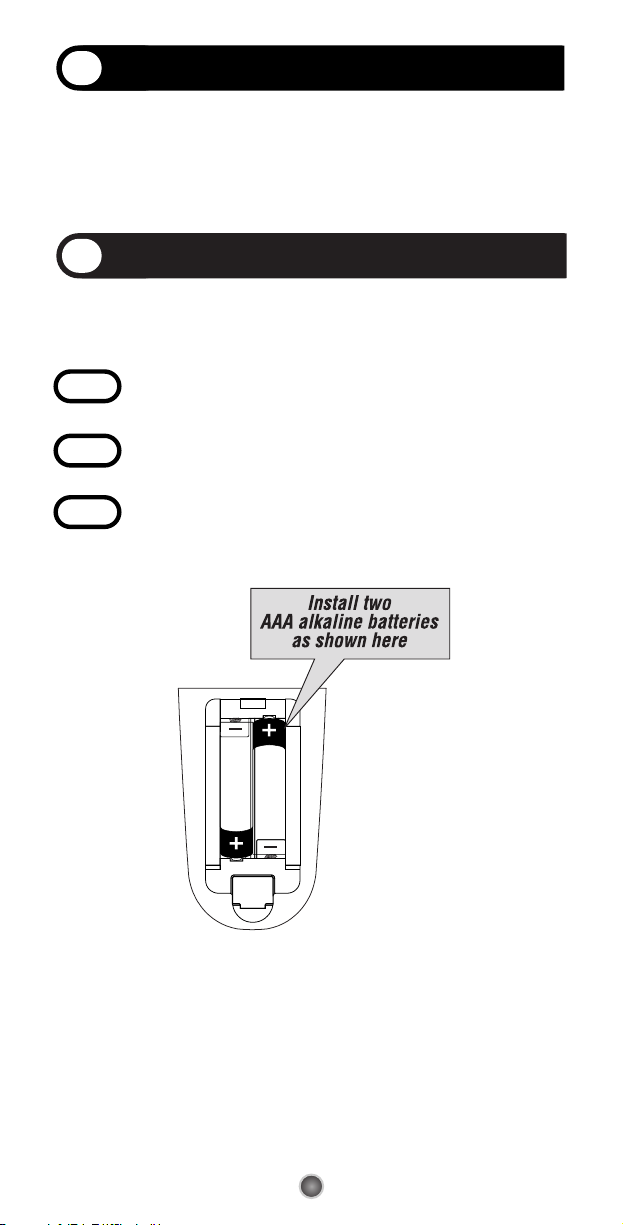
Before you program or operate the remote control, you must
install two new AAA alkaline batteries.
STEP1 Remove the battery compartment cover from the
back of your remote control.
STEP2 Check battery polarity carefully, and install the batter-
ies as shown in the illustration below.
STEP3 Replace the battery compartment cover.
Replacing Batteries
2
2
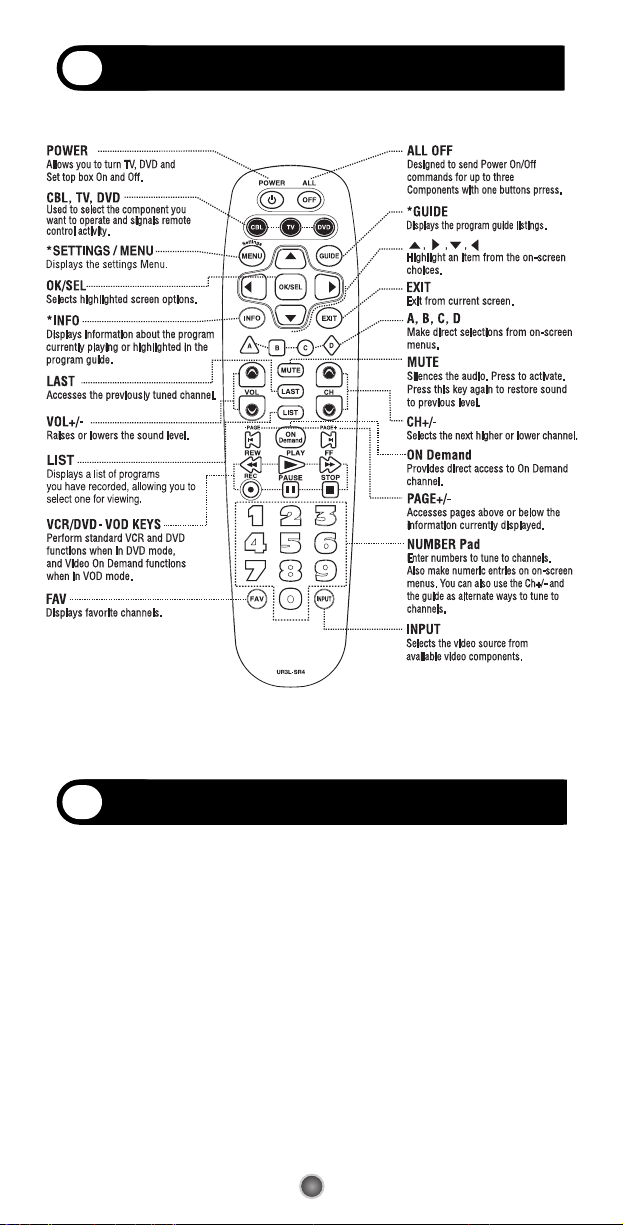
Button Functions
3
Programming the Remote Control.
4
*Note : In this section, when you are instructed to press a
[DEVICE] button, that means you should press either
the CBL, TV, or DVD button, depending on which
device you are programming the remote to operate.
A.
A.
Manual Pr
Manual Pr
ogramming
ogramming
The remote control can be programmed by entering a threedigit code number that corresponds to particular brands and
models of equipment. The three-digit code numbers are listed
in the code tables sections of this instruction manual.

3
STEP1 Turn on the equipment that you want the remote con-
trol to operate Cable Box, TV and DVD.
STEP2 Press the [DEVICE] button and the [OK/SEL] button
simultaneously for three seconds. The corresponding
device LED will turn on indicating that it is ready to be
programmed. The LED will remain on for 30 seconds.
The next step must be entered while the LED is on.
STEP3 Point the remote control toward the equipment and
enter the three-digit code number assigned to your
brand from the code tables. If there are more than
one three-digit number listed for your brand, try one
code number at a time until your equipment turns off.
*Note : You can verify that you have selected the correct code
by pressing the [POWER] button. The equipment
should turn on or off.
STEP4 Store the three-digit code by pressing the same
[DEVICE] button once again. The device LED will blink
twice to confirm that the code has been stored.
*Note : Try all the functions on the remote control. If any of the
functions do not operate as they should, repeat the
instructions from Step 2 using the next three-digit code
number from the same brand list.
B.
B.
Auto Sear
Auto Sear
ch Method
ch Method
If none of the three digit code numbers assigned to your brand
of equipment works, or the code table does not list your brand,
you can use the Auto Search Method to find the correct
three-digit code number for your equipment by following
steps:
STEP1 Turn on the equipment that you want the remote con-
trol to operate (Cable Box, TV or DVD).
STEP2 Press the [DEVICE] button and the [OK/SEL] button
simultaneously for three seconds. The device LED
will turn on indicating that it is ready to be programmed. The LED will remain on for 30 seconds.
The next step must be entered while the LED is on.
4
STEP3 Press the [CH+] or [CH-] button one at a time or keep
it pressed. The remote will emit a series of Power
ON/OFF code signals. Release the [CH+] or [CH-] button as soon as the equipment turns off.
*Note : You can verify that you selected the correct code by pressing
the [POWER] button. The equipment should turn On or Off.
STEP4 Press the same [DEVICE] button to store the code.
The Device LED will blink twice to confirm that the
code has been stored.
C.
C. TT
o find the Thr
o find the Thr
ee-Digit Code that W
ee-Digit Code that W
as
as
PrProgrammed using the Auto Sear
ogrammed using the Auto Sear
ch Method
ch Method
STEP1 Press the appropriate [DEVICE] button and the
[OK/SEL] button simultaneously for three seconds.
The device LED will turn on for 30 seconds. The next
step must be performed while the LED is on.
STEP2 Press the [INFO] button. The device LED will blink a
number of times indicating the number of each digit
for the code. Each digit is separated by a one second
interval of the LED being off.
Example : One blink, then three blinks, then eight blinks indi-
cates the code number 138.
*Note : Ten blinks indicates the number 0.
D.
D. PrPr
ogramming a Second TV to the DVD Button
ogramming a Second TV to the DVD Button
STEP1 Press the [DVD] button and the [OK/SEL] button
simultaneously for 3 seconds. The DVD LED will turn
on for 30 seconds. The next step must be performed
while the LED is on.
STEP2 Press the [TV] button.
STEP3 Point the remote control toward the TV and enter the
three-digit code for your TV from the TV codes table.
STEP4 Store the three-digit code by pressing the [DVD] but-
ton. The device LED will blink twice to confirm that
the code has been stored.
5
E.
E.
The Lear
The Lear
ning Method
ning Method
STEP1 Press the [COMPONENT] button (CBL, TV or DVD) to
be programmed and the [INPUT] buttons simultaneously for 3 seconds until the Component LED light
turns on.
STEP2 Line up the UR3L-SR4 to the other remote, head-to-
head, 1 or 2 inches apart.
STEP3 Press any button on the UR3L-SR4 that you want to
teach a command to. For example, if you want to
teach the [MUTE] button, press the [MUTE] button.
STEP4 Press and hold the [MUTE] button on the other remote
until the UR3L-SR4 Component LED light blinks twice.
*Note : The LED will blink 5 times if there was an error in the
learning process. In so, repeat STEPS 3 and 4. Continue
learning other buttons by repeating STEPS 3 and 4.
STEP5 Once you have completed teaching UR3L-SR4 all
desired commands for that Component, save the
learned commands by pressing the [COMPONENT]
and [INPUT] buttons simultaneously until the
Component LED blinks 3 times. Now test all the buttons to make sure they learned correctly.
FF.
.
Erasing a Single Lear
Erasing a Single Lear
ned Command
ned Command
STEP1 Press the [COMPONENT] and [INPUT] buttons simul-
taneously for 3 seconds until the Component LED
light turns on.
STEP2 Press and hold the button you want to erase for 3
seconds. The Component LED will blink twice to confirm the erasure.
STEP3 To exit, press and hold both the [COMPONENT] and
[INPUT] buttons simultaneously until the Component
LED blinks 3 times.
6
G.
G.
Erasing All Lear
Erasing All Lear
ned Commands fr
ned Commands fromom
One Component
One Component
STEP1 Press the [COMPONENT] and [INPUT] buttons simul-
taneously for 3 seconds until the Component LED
light turns on.
STEP2 Press and hold both the [COMPONENT] button you
want to erase and the [PAUSE] button for 5 seconds.
The Component LED will blink twice to confirm the
erasure.
STEP3 To exit, press and hold both the [COMPONENT] and
[INPUT] buttons simultaneously until the Component
LED blinks 3 times.
H. Pr
H. Pr
ogramming the All Of
ogramming the All Of
f Button
f Button
This allows you to program the All Off button so it can send up
to three power On/Off commands with one button press.
STEP1 Press the [CBL] button.
STEP2 Press the [All OFF] button and the [OK/SEL] button
simultaneously for 3 seconds. The [CBL] button will
turn on for 30 seconds.
STEP3 Press the first [COMPONENT] button you want to
store in the [ALL OFF] button and then the [POWER]
button. Repeat this for other Components until you
have stored all the desired power commands into the
[ALL OFF] button.
STEP4 Press the [CH+] button to save the power commands
you stored. The [CBL] button will blink twice to confirm the commands have been saved.
I. Pr
I. Pr
ogramming for Advanced Functions.
ogramming for Advanced Functions.
If your remote model has custom-programmable Macro buttons available, they can be programmed to act as a ‘Macro’ or
Favorite Channel button in CABLE mode. This allows you to program up to five 2-digit channels, four 3-digit channels or three 4digit channels that can be accessed With one button press.
 Loading...