

Uniden XS620 Quick Start Manual
XS620
Cordless Telephone
with Dual Keypad
and Speaker Phone
power status speaker
page
mic
speaker
pause flash redial
1
2
abc
4
ghi
5
jkl
6
mno
7
pqrs
8
tuv
0
oper
9
wxyz
#
3
def
tone
START GUIDE
QUICK
Here!
Quick Start Guide - next page ...
Start
Start
Here!
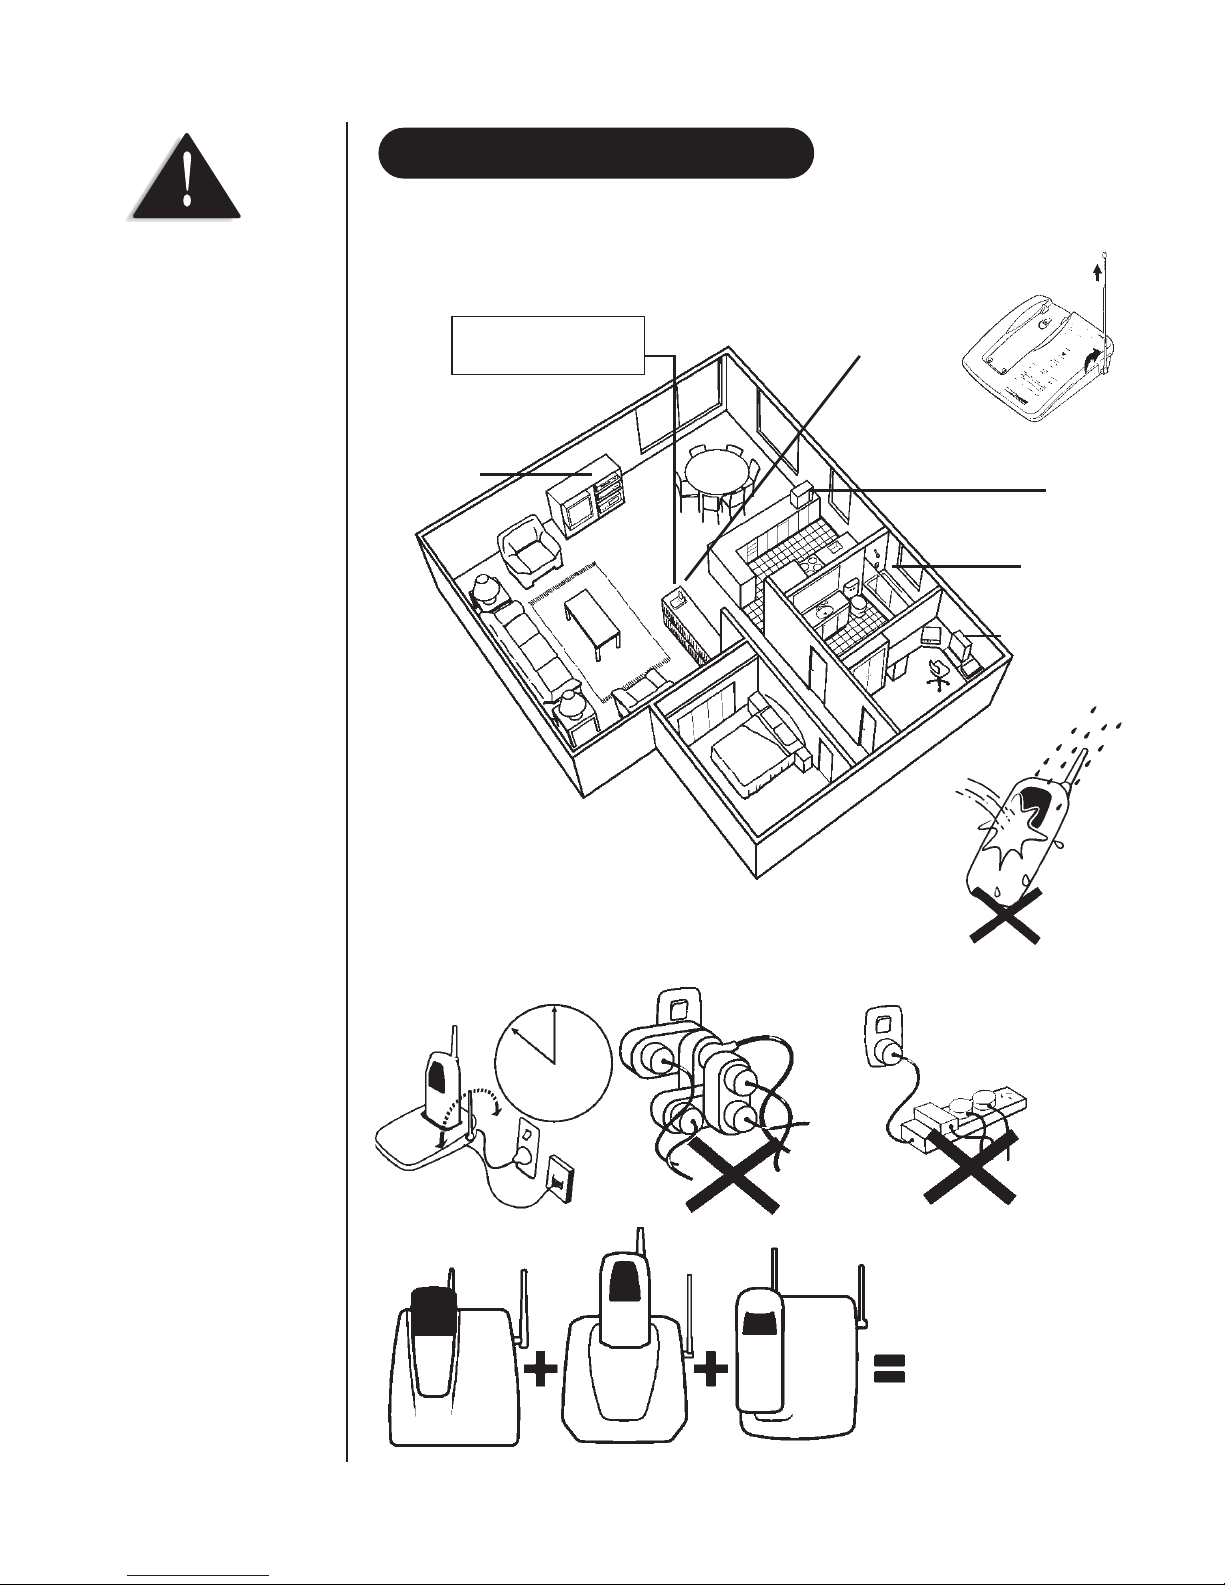
Choosing the best location for your XS620
When choosing a location for your phone there are a number of appliances the
phone should be not be near, and area you should avoid.
INSTALLATION & SAFETY
This symbol indicates
important operating
and servicing
instructions.
PRECAUTIONS
AVOID Television sets and
other electronic
appliances
CHARGE the new phone
for 15 - 20 hrs
and raise the
antenna before
making a call.
DON’T overload the
power outlet.
AVOID multi power
boards
AVOID -
connecting
more than
3
phones as ringing
may be impaired
AVOID -
Microwave
ovens
Always
fully
extend
antenna
AVOID -
Moisture
AVOID -
Computers
CHOOSE a central location
AVOID Moisture
i
Here!
ii
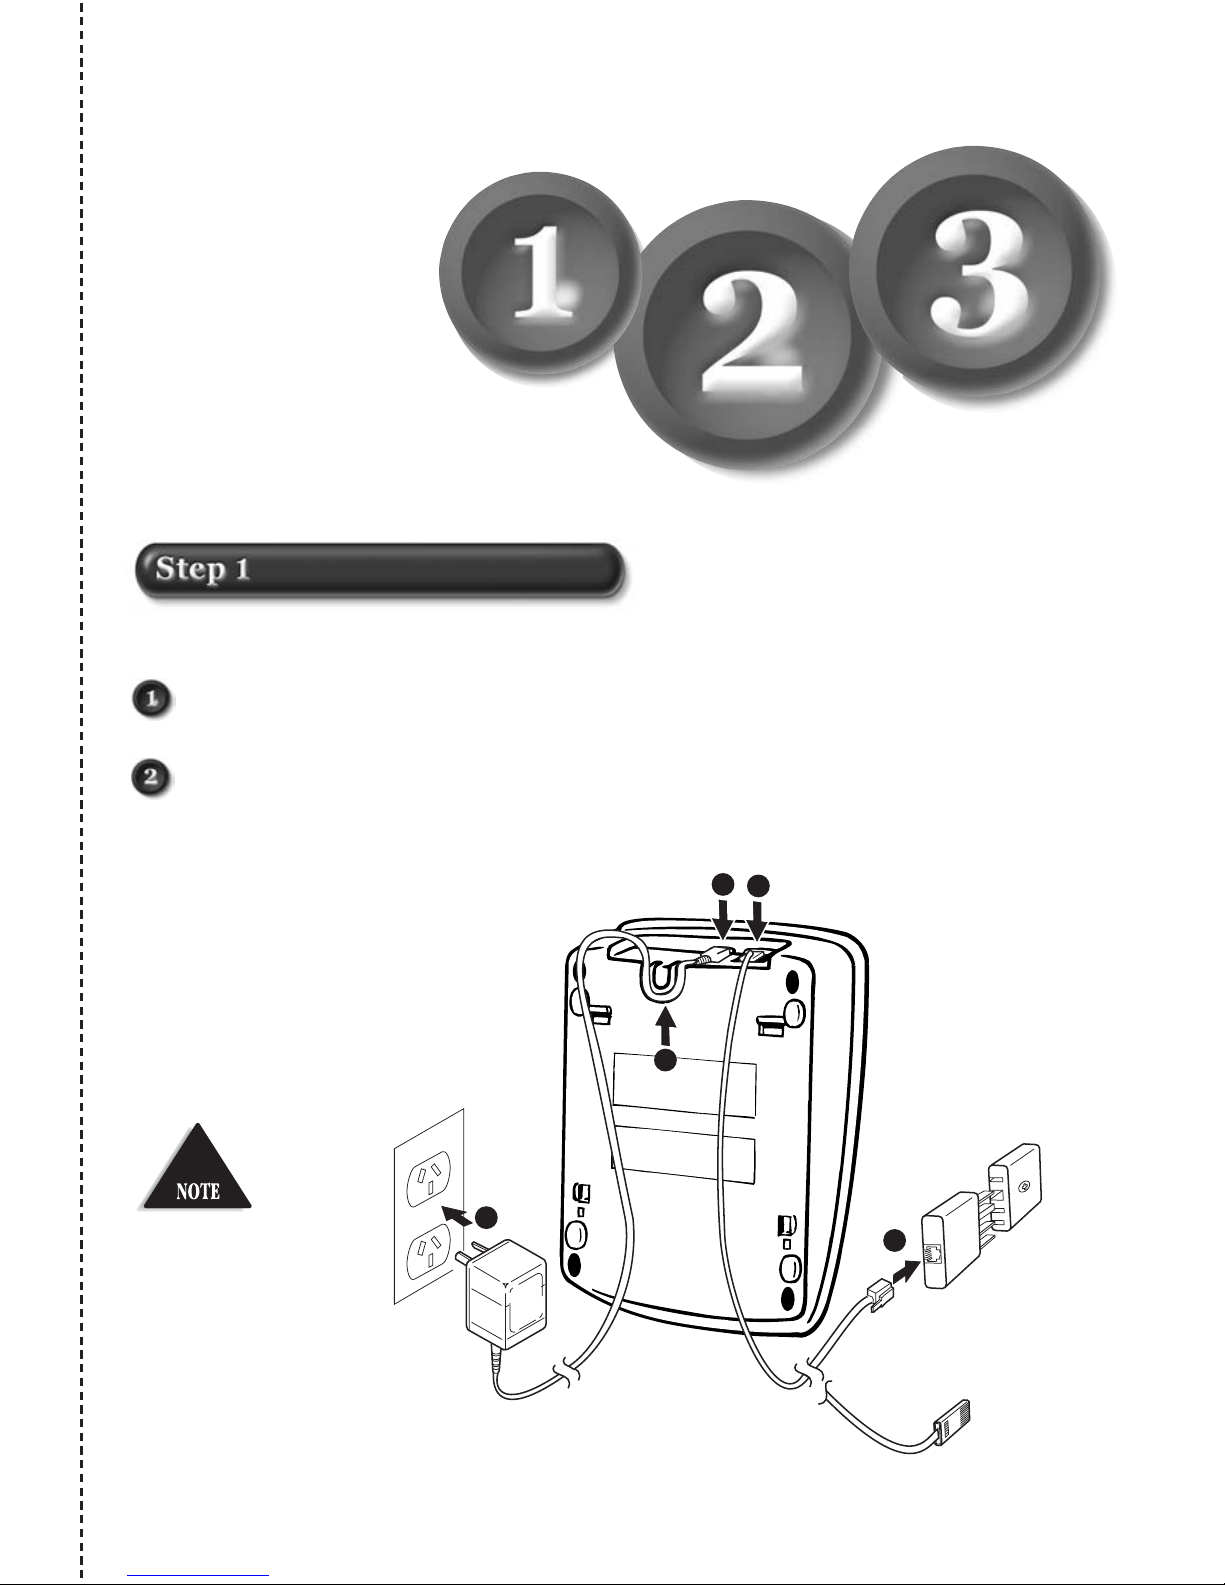
Installing the Base Unit
This page is a very condensed version of your owners manual. It is designed to allow you to get your
phone installed and operating as quickly as possible - however it does not attempt to explain any of
the advanced features of your phone.
CONNECTIONS
Plug the telephone cord into the XS620 base unit,
then into the telephone socket on the wall.
Plug the AC Adaptor cord into the XS620 base
unit, then into the power point and switch on.
Quick Start Guide
Start
Start
Here!
!
Make sure the AC
Adaptor remains
switched on at all
times.
AC
Adaptor
Power
point
Line in
From
Telephone
Socket
2
1
2
1
2
Australia
New
Zealand
✃
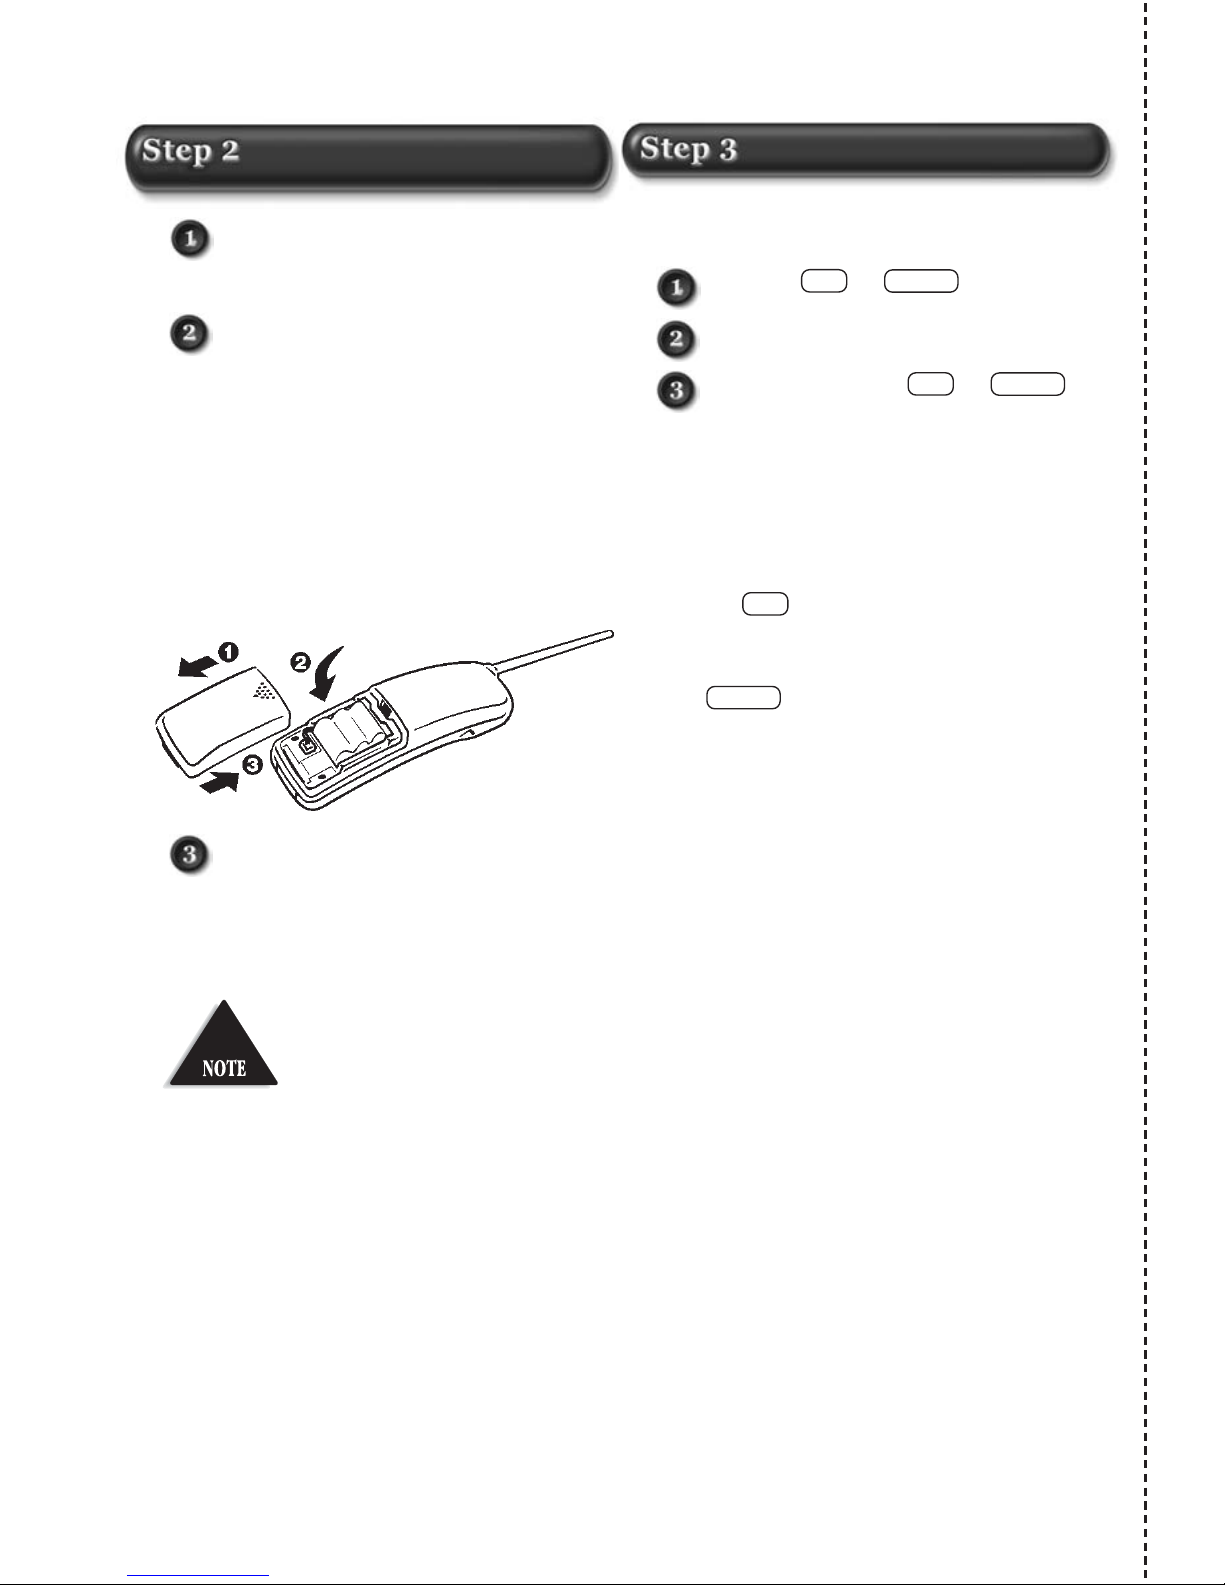
Press battery cover to release.
Slide cover off.
Connect the battery plug to the socket
at the rear of the battery compartment.
Make sure the plug is the right
way round. The RED and BLACK
battery wires must match the RED and
BLACK printed on the phone case for
the plug to fit properly. Press firmly
until it clicks into place.
Position the battery in the
compartment and slide the cover back
into place.
MAKING A CALL
Press the or button.
Dial the number and make the call.
To hang up press the or
button or put handset on base.
RECEIVING A CALL
When the phone rings pick up handset from
base.
OR
Press the button if the handset is away
from the base.
OR
Push on the base to use the speaker
phone.
speaker
talk
speaker
talk
speaker
talk
Installing the
Handset Batteries
Making/Receiving Calls
iii
✃
!
Place the handset on
the Base Unit and
charge uninterrupted
for 15-20 hours.

1
Installation & Safety . . . . . . . . . . . . . . . . . . . . . . . . . . . . . . . . . . . . . . . . . . i
Quick Start Guide
Installing the Base Unit . . . . . . . . . . . . . . . . . . . . . . . . . . . . . . . . . . . . . . ii
Installing the Handset Batteries . . . . . . . . . . . . . . . . . . . . . . . . . . . . . . . . iii
Making and Receiving Calls . . . . . . . . . . . . . . . . . . . . . . . . . . . . . . . . . . iii
Contents . . . . . . . . . . . . . . . . . . . . . . . . . . . . . . . . . . . . . . . . . . . . . . . . . . . 1
Included in your Package . . . . . . . . . . . . . . . . . . . . . . . . . . . . . . . . . . . . . . 2
Controls & Functions . . . . . . . . . . . . . . . . . . . . . . . . . . . . . . . . . . . . . . . 3-4
Welcome and Features . . . . . . . . . . . . . . . . . . . . . . . . . . . . . . . . . . . . . . . . 5
Wall Mounting . . . . . . . . . . . . . . . . . . . . . . . . . . . . . . . . . . . . . . . . . . . . . 6-7
Using your Phone
Battery Maintenance . . . . . . . . . . . . . . . . . . . . . . . . . . . . . . . . . . . . . . . . 8
Cleaning the Battery Contacts . . . . . . . . . . . . . . . . . . . . . . . . . . . . . . . . . 8
Adjusting the Ringer and Earpiece Volume . . . . . . . . . . . . . . . . . . . . . . . . 8
Making and Receiving the Calls . . . . . . . . . . . . . . . . . . . . . . . . . . . . . . . . 9
Selecting a Different Channel . . . . . . . . . . . . . . . . . . . . . . . . . . . . . . . . . 10
Finding the Handset . . . . . . . . . . . . . . . . . . . . . . . . . . . . . . . . . . . . . . . 10
Call Waiting/Flash . . . . . . . . . . . . . . . . . . . . . . . . . . . . . . . . . . . . . . . . . 10
3 Way Conference . . . . . . . . . . . . . . . . . . . . . . . . . . . . . . . . . . . . . . . . 10
Memory Dialing
Storing a Number in Memory . . . . . . . . . . . . . . . . . . . . . . . . . . . . . . . . . 11
Entering a Pause in Memory Dialing . . . . . . . . . . . . . . . . . . . . . . . . . . . 11
Dialing a Stored Number . . . . . . . . . . . . . . . . . . . . . . . . . . . . . . . . . . . . 11
Chain Dialing . . . . . . . . . . . . . . . . . . . . . . . . . . . . . . . . . . . . . . . . . . . 12
Erasing a Stored Number . . . . . . . . . . . . . . . . . . . . . . . . . . . . . . . . . . . . 12
Replacing a Stored Number . . . . . . . . . . . . . . . . . . . . . . . . . . . . . . . . . . 12
Troubleshooting . . . . . . . . . . . . . . . . . . . . . . . . . . . . . . . . . . . . . . . . . . . . 13
Warranty . . . . . . . . . . . . . . . . . . . . . . . . . . . . . . . . . . . . . . . . . . . . . . . . . 14
CONTENTS
CONTENTS
OF YOUR OWNERS MANUAL
2
mem vol/ringer
redial flash
pause chan
talk
talk/batt low
12
4
56
789
0
#
3
abc
ghi jkl mno
pqrs tuv wxyz
def
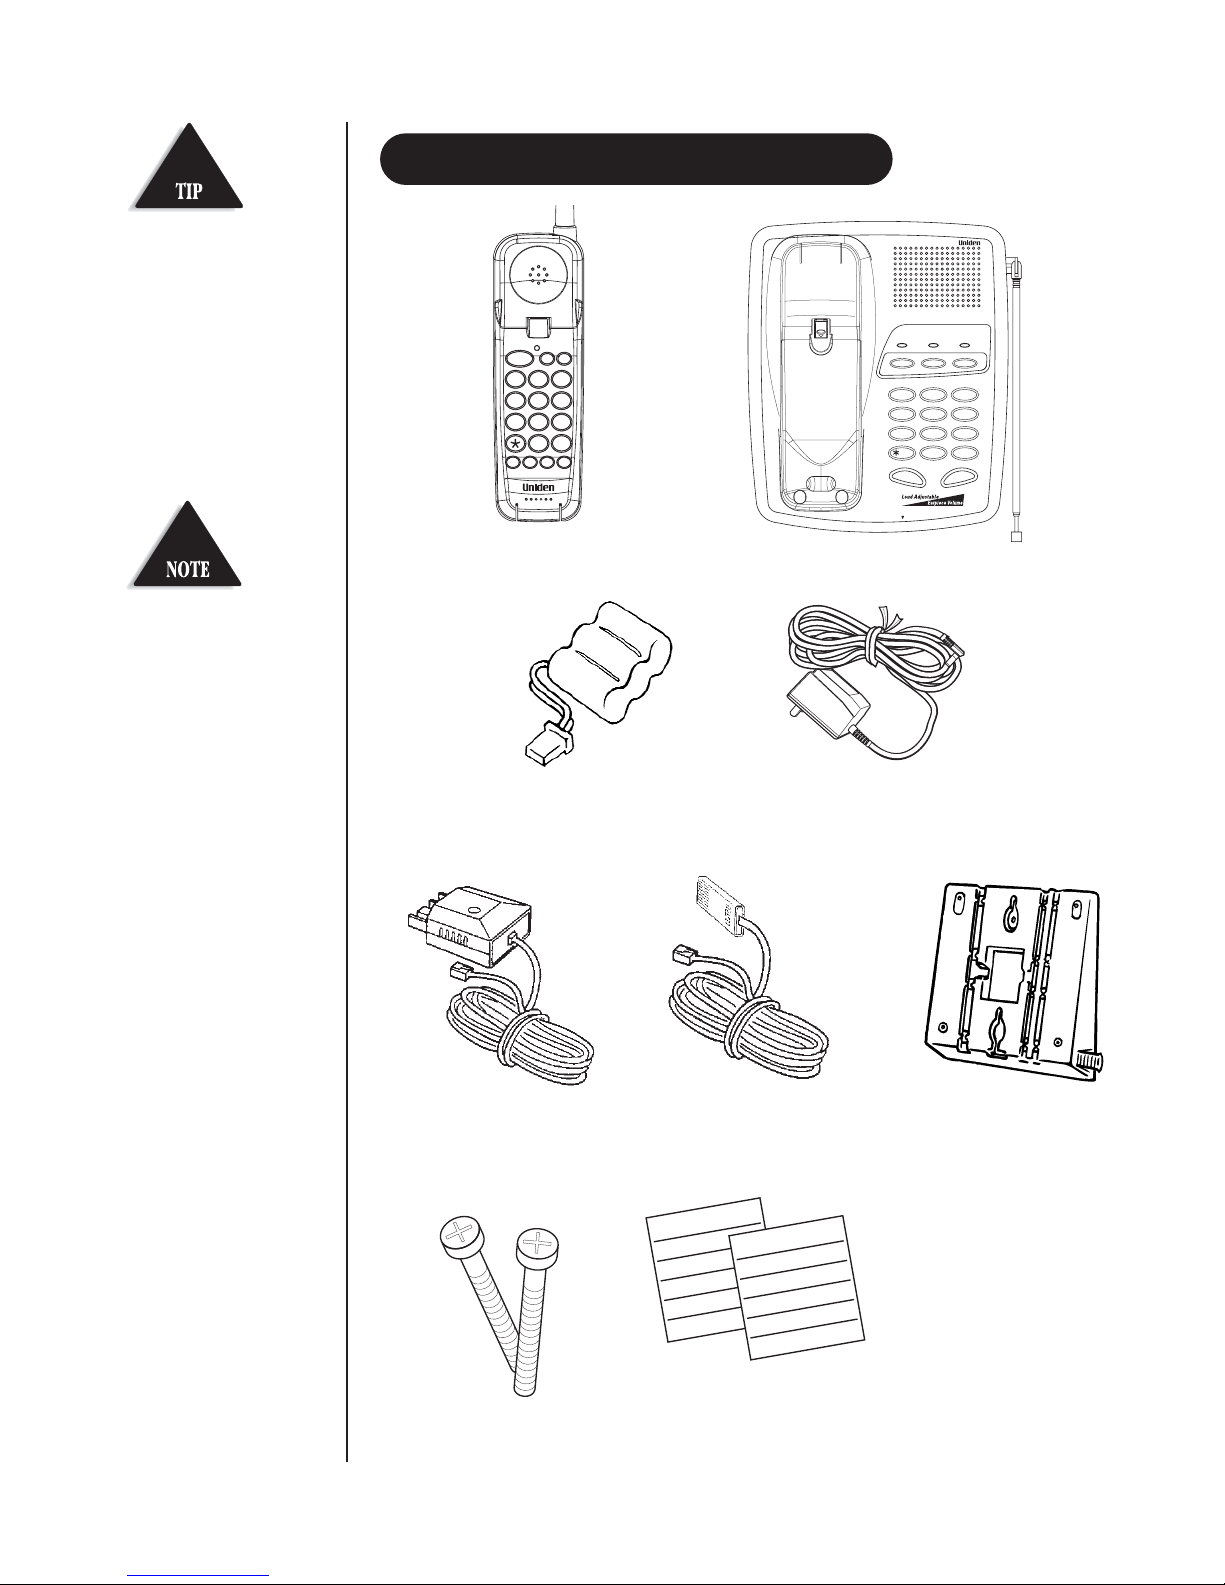
INCLUDED IN YOUR PACKAGE
Handset Base
power status speaker
page
mic
speaker
pause flash redial
1
2
abc
4
ghi5jkl6mno
7
pqrs8tuv
0
oper
tone
9
wxyz
#
3
def
To get the most from
your phone, please
read this owner’s
manual thoroughly.
Be sure to complete
and mail the product
registration form.
!
If any of these items
are missing or
damaged, contact your
place of purchase
immediately.
Mounting Screws
● This Owner’s
Manual
● Registration Card
● and other printed
materials
Rechargeable Battery
(BT434)
AC Adaptor
Telephone Cord/Plug
(Australia Only)
Telephone Cord
(NZ Only)
Wall Mount
Bracket
2 x Memory Stickers
memory
memory
 Loading...