

Specifications and Main Features
- General Characteristics:
- Frequency Control: Transmission controlled by crystal oscillator
- Modulation: Frequency modulation
- Operating Temperature: Minimum – 10 degrees centigrade, Maximum – 50 degrees centigrade
- Base Unit Characteristics:
- Receive Frequency: MHz: 39.775 to 40.000 (10 channels)
- Transmit Frequency: 30.075 MHz to 30.300 MHz (10 channels)
- Power Requirements: 230 ~ 240 AC 50Hz
- Size: 197 mm (Width) x 140 mm (Depth) x 48 mm (Height)
- Weight: Approximately 0.445 kilograms
- Handset Characteristics:
- Receive Frequency: 30.075 MHz to 30.300 MHz (10 channels)
- Transmit Frequency: 39.775 MHz to 40.000 MHz (10 channels)
- Power Requirements: Rechargeable Ni-Cd battery pack
- Size: 55 mm (Width) x 68 mm (Depth) x 307 mm (Height) (with an antenna)
- Weight: Approximately 0.283 kilograms (with battery)
- Battery Characteristics:
- Type: BT-161
- Capacity: 270 mAH, 3.6 V
- Talk Mode: 6 hours
- Standby Duration: 2 weeks
- Battery Save Duration: 6 weeks
- Major Attributes:
- UltraClear Plus noise reduction
- Ten 30/39 MHz Channels
- Twenty Number Memory
- High Effective Range
- Three One Touch Memory Dialing buttons
- Status Monitoring Room
- Two-Way Paging / Intercom
- Call Transfer function
- Call Three Way
- Redial / Pause and Flash function
- Auto Standby function
- Auto Talk function
- Tone/Pulse Dial/Synonyms (Only for Australian Variants)
- Securities in Building Code Digitally Auto Security Systems.
- Volume of Handsets Control, Volume from Ringer
- Volume of Base Unit Control, Volume from Ringer
- Conserving Power Feature
- Sitting for a Handset 2 Ways
- Holders of the handset Retainer Angled Handset Altering the Position
Frequently Asked Questions
- Q: What do I do if the light which indicates that the battery is being charged does not come on when the Handset is placed on the docking station?
- A: Ensure the AC Adaptor is connected to the Base Unit and the outlet and that the Handset is correctly positioned in the Base Unit.
- Q: Swiping the Pulse selecting and Tone clenches the hand right?
- A: Use the TONE/PULSE switch on the Base Unit to select the Dialing method used.
- Q: I noticed that the sounds coming from the device is not up to optimal amost it sound weak or scratchy?
- A: Check that the antenna of the Base Unit is fully extended to vertical position and you may want to depress the CHANNEL button to change the channel.
- Q: How do I go about saving a certain number into the memory?
- A: Take off the Handset and push MEM followed by : type in your desired phone number (maximum of 16 digits) press MEM instead and 2 digits from (01-20) to serve as location in memory.
- Q: In case a conversation ends and the Handset is not returned to the Base Unit, does anything happen?
- A: If a call comes to an end, then you must do the action of manually hanging the phone by pressing the ‘TALK’ button.
- Q: After purchasing the phone, how long does the Battery Pack have to be recharged for the first use?
- A: For the first use of the phone, the Battery Pack must be charged between the time span of around 12-16 hours.
- Q: Is it possible for me to operate the XC 340 as a device that monitors the entire room?
- A: The Handset can indeed be used to monitor room activity near the Base Unit. To enable this option, press INT’COM on the Handset followed by TALK so as to enable room monitoring capabilities on the device.
- Q: Which steps shall I follow to transfer a call from the Base Unit to the Handset?
- A: Start off by pressing INT’COM which is available on the Base Unit, after which you will need to press INT’COM or TALK located on the Handset in order to assist with call transfer.
User Manual
Page 1
"-'-'j
ll~~::
mI
::::::::
:::~:::
:~':':'.
::~::~~
.:.~:.:.:
'.;.;.;.',
@
I
XC 340
Cordless Telephone
Operating Guide
For Australia and New Zealand
..
Page 2
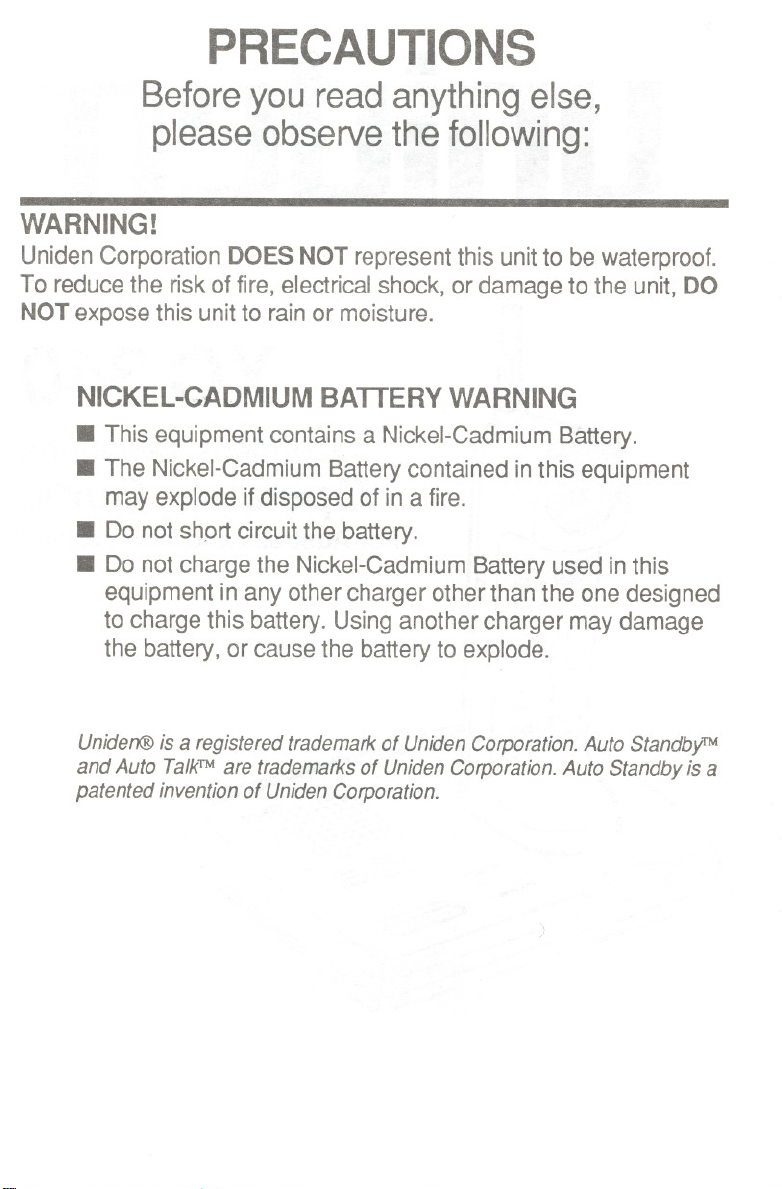
PRECAUTIONS
Before you read anything else,
please observe the following:
WARNING!
Uniden Corporation DOES NOT represent this unit to be waterproof.
To reduce the risk of fire, electrical shock, or damage to the unit, DO
NOT expose this unit to rain or moisture.
NICKEL-CADMIUM BATTERY WARNING
.This equipment contains a Nickel-Cadmium Battery.
. The Nickel-Cadmium Battery contained in this equipment
may explode if disposed of in a fire.
. Do not shprt circuit the battery.
. Do not charge the Nickel-Cadmium Battery used in this
equipment in any other charger other than the one designed
to charge this battery. Using another charger may damage
the battery, or cause the battery to explode.
Uniden@ is a registered trademark of Uniden Corporation. Auto StandbyTM
and Auto TalkTMare trademarks of Uniden Corporation. Auto Standby is a
patented invention of Uniden Corporation.
)
Page 3
Table of Contents
ImportantSafety Instructions 2
About Your XC 340 4
Unpacking , , 4
XC340 Features 5
Automatic DigitalCode Security 5
Base Unit Controls & Functions 6
HandsetControl& Functions , 8
Readthis before installation
InstallingYour XC 340 11
Selectingthe InstallationLocation 11
Connectingthe Telephone Line 11
Installingthe Telephone on a Desk or Tabletop 12
Mountingthe Telephone on a Wall 13
Settingthe Handset Retainer 13
Mountingthe Baseon a Wall 13
Installingthe Battery Pack (BT-161) 14
Chargingthe Battery Pack 15
Low Battery Indicator
Cleaningthe BatteryContacts ; 15
UsingYour XC 340 16
SelectingPulse or Tone Dialing 16
Settingthe Handset Ringer Tone 16
Settingthe Handset Ringer Volume 16
Settingthe Base Unit Ringer Volume 16
Placing a Call 17
Selectinga Channel 17
Usingthe Flash Button 17
Settingthe Handset Receiver Volume 17
Settingthe Base Unit ReceiverVolume "... 17
Usingthe Redial Button 17
Answering a Call 18
Storinga Number " 19
Storing a Mixed Tone/Pulse Number with a
Pulse Dial System(Australian models Only) 19
Dialinga Stored Number 20
StoringOne-Touch DialingNumbers 20
Dialing aOne-Touch Number """""""""""""""""""""""""""""'" 20
Chain Dialing 20
Erasing a Stored Number 21
Usingthe 2-Way Page/Intercom Feature 21
Transferringa Call .'. 22
Usingthe XC 340 As a Room Monitor 23
"""""""""""""" 15
Troubleshooting 24
ImportantElectricalConsiderations 25
Range 25
RadioInterference , 25
Morethan One CordlessTelephone 25
Specifications 26
Page 4
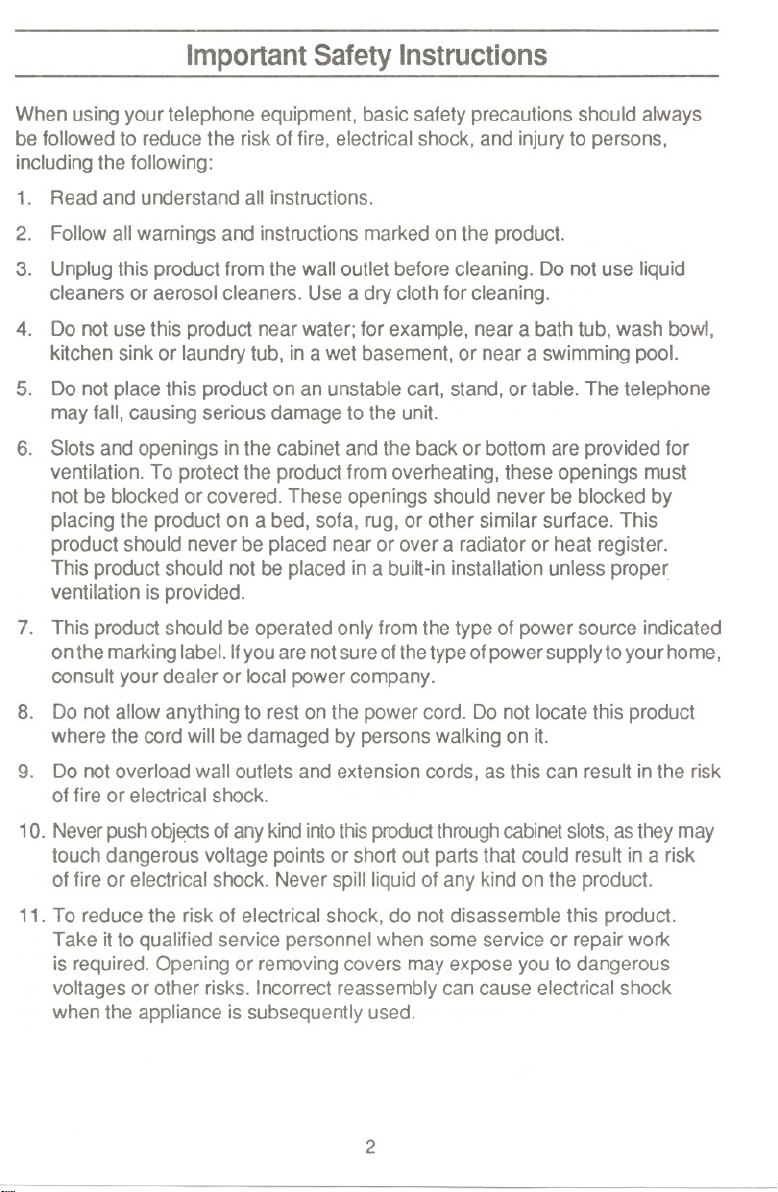
ImportantSafety Instructions
When usingyour telephone equipment,basic safetyprecautions should always
be followed to reducethe riskof fire, electricalshock, and injuryto persons,
includingthe following:
1. Read and understand all instructions.
2. Follow allwarnings and instructionsmarkedon the product.
3. Unplugthis product fromthe wall outlet beforecleaning. Do not use liquid
cleanersor aerosolcleaners. Useadry cloth for cleaning.
4. Do not use this product nearwater; for example,near abath tub, wash bowl,
kitchen sink or laundrytub, ina wet basement, or near a swimming pool.
5. Do not placethis product on an unstablecart, stand,or table.The telephone
may fall, causing serious damage to the unit.
6. Slots and openings in the cabinetand the backor bottom are providedfor
ventilation. To protectthe productfrom overheating,these openings must
notbe blocked or covered. These openings shouldneverbe blocked by
placing the product on a bed, sofa, rug, or other similar surface. This
product should neverbe placed nearor over a radiatoror heat register.
This productshould not be placed ina bui~-ininstallationunless prope~
ventilation isprovided.
7. This product shouldbe operatedonlyfrom thetype of power source indicated
onthe markinglabel.Ifyouarenotsureofthetypeofpowersupplyto yourhome,
consult your dealer or local powercompany.
8. Do not allow anythingto restonthe power cord. Do notlocate this product
where the cord will bedamaged by personswalking on it.
9. Do notoverloadwall outlets and extensioncords,asthis can result in the risk
of fireor electrical shock.
1O. Never push obj~s of any kind into this product through cabinet slots, as they may
touch dangerous voltage points or short out parts that could result in a risk
of fire or electrical shock. Never spill liquid of any kind on the product.
11. To reduce the risk of electrical shock, do not disassemble this product.
Take it to qualified service personnel when some service or repair work
is required. Opening or removing covers may expose you to dangerous
voltages or other risks. Incorrect reassembly can cause electrical shock
when the appliance is subsequently used.
2
Page 5

12. Unplugthis productfrom the wall outlet and re1erservicingto qualified
service personnel under the followingconditions:
A. When the power supplycord is damagedor frayed.
B. If liquid has been spilled into the product.
C. Ifthe producthas been exposedto rainor water.
D. Ifthe productdoes not operate normallywhen following the operating
instructions.Adjust only those controlsthat are covered by the operating
instructions.Improperadjustmentof othercontrols may result in damage,
andwill often requireextensivework by a qualifiedtechnicianto restore
the product10normal operation.
E. Ifthe product has beendropped,or the cabinet has beendamaged.
F. Ifthe productexhibits a distinctchange in performance.
13. Do notuse the telephone to reporta gas leakinthe vicinityof the leak.
CAUTION: TO REDUCETHE RISK OF FIRE OR INJURYTO PERSONS BY
THE BATTERY, READ AND FOllOW THESE INSTRUCTIONS:
1. Use onlythe appropriate type and sizebatterypack specifiedin this
OperatingGuide.
2. Do notdisposeof the battery pack in a fire.The cell mayexplode.
3. Do notopen or mutilatethe battery pack. Releasedelectrolyte is corrosive
and maycause damage tothe eyes or skin. It maybetoxic if swallowed.
I
4. Exercisecare in handlingthe battery inorder notto short the battery with
conducting materialssuch as rings, bracelets,and keys. The batteryor
conductor mayoverheat and causeburns.
5. Chargethe battery packprovidedwith or identifiedfor usewith this product
only in accordancewijh the instructionsand limitations specified inthe
instructionmanual providedfor this product.
6. Observe proper polarityorientationbetweenthe batterypackplug and socket.
SAVE THESE INSTRUCTIONS
3
Page 6
About your XC 340
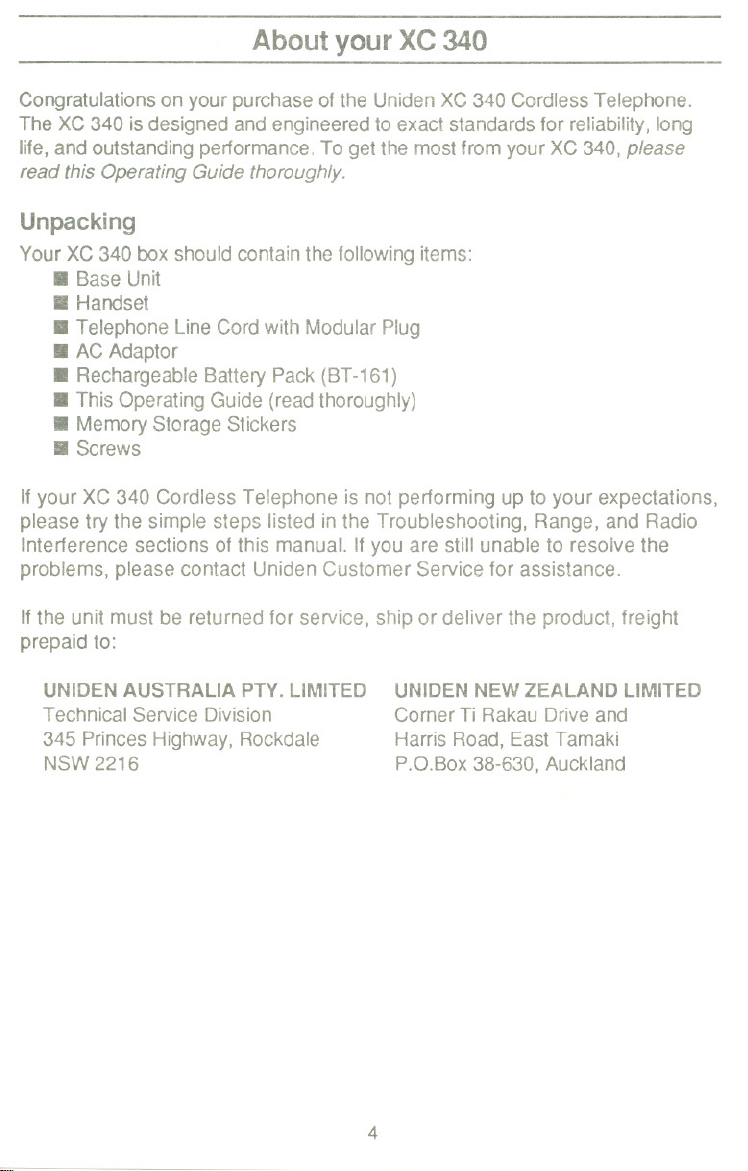
Congratulationson your purchase of the Uniden XC 340 Cordless Telephone.
The XC 340 is designed and engineeredto exact standardsfor reliability,long
life,and outstanding performance.To get the mostfrom yourXC 340, please
read this Operating Guide thoroughly.
Unpacking
YourXC340boxshouldcontainthefollowingitems:
. BaseUnit
. Handset
. Telephone LineCordwith ModularPlug
. AC Adaptor
. RechargeableBattery Pack (BT-161)
. This Operating Guide (readthoroughly)
. MemoryStorage Stickers
. Screws
If your XC 340 Cordless Telephone is not performing up to your expectations,
please try the simple steps listed in the Troubleshooting, Range, and Radio
Interference sections of this manual. If you are still unable to resolve the
problems, please contact Uniden Customer Service for assistance.
If the unit must be returned for service, ship or deliver the product, freight
prepaid to:
UNIDENAUSTRALIA PTY. LIMITED
Technical Service Division
345 PrincesHighway, Rockdale
NSW2216
UNIDENNEWZEALAND LIMITED
CornerTi RakauDrive and
Harris Road, East Tamaki
P.D.Box38-630,Auckland
4
Page 7
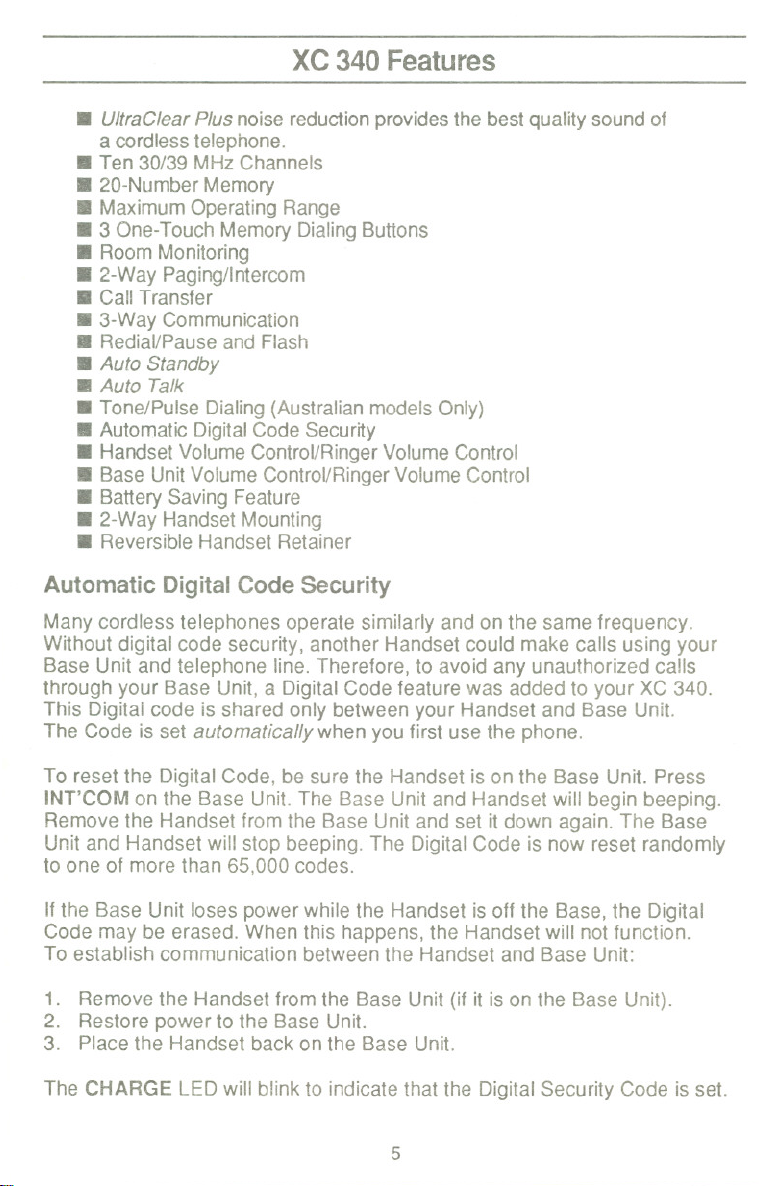
XC340 Features
. UltraClearPlus noise reductionprovidesthe bestquality soundof
a cordlesstelephone.
. Ten 30/39 MHz Channels
. 20-NumberMemory
. MaximumOperating Range
. 3 One-TouchMemory DialingButtons
. Room Monitoring
. 2-Way Paging/Intercom
. Call Transfer
. 3-WayCommunication
. Redial/Pauseand Flash
. Auto Standby
. Auto Talk
. Tone/Pulse Dialing(Australianmodels Only)
. Automatic DigitalCode Security
. Handset Volume Control/RingerVolumeControl
. Base Unit Volume Control/RingerVolume Control
. Battery Saving Feature
. 2-Way Handset Mounting
. ReversibleHandset Retainer
Automatic DigitalCode Security
Many cordless telephones operate similarly and on the same frequency.
Without digital code security, another Handset could make calls using your
Base Unit and telephone line. Therefore, to avoid any unauthorized calls
through your Base Unit, a Digital Code feature was added to your XC 340.
This Digital code is shared only between your Handset and Base Unit.
The Code is set automatically when you first use the phone.
To reset the Digital Code, be sure the Handset is on the Base Unit. Press
INT'COM on the Base Unit. The Base Unit and Handset will begin beeping.
Remove the Handset from the Base Unit and set it down again. The Base
Unit and Handset will stop beeping. The Digital Code is now reset randomly
to one of more than 65.000 codes.
If the Base Unit loses power while the Handset is off the Base, the Digital
Code may be erased. When this happens, the Handset will not function.
To establish communication between the Handset and Base Unit:
1. Remove the Handset from the Base Unit (if it is on the Base Unit).
2. Restore power to the Base Unit.
3. Place the Handset back on the Base Unit.
The CHARGE LED will blink to indicate that the Digital Security Code is set.
5
Page 8

Base Unit Controls & Functions
RING- OFFLOHISwitch
TONE PULSESwitch
TELUNE
.
DCIN9V+%-
BASEUNITAntenna
HandsetRetainer
..
Microphone
BaseUnit
RINGERSwitch
TONE/PULSE
Switch
TEL LINE Jack
INUSELED
I
Speaker
co@
0
IdI!R
CHANNEL
U,"'AC"AA
PLUS
~
...........
...........
...........
...........
...........
...........
...........
...........
...........
0
0
VolumeControl
(Onside)
..~.
-.
CHARGELED
Use to set the ringer volume level ("LO", "HI", or "OFF")
of the Base Unit for incoming calls, or the page alert tone
level when paged from the Handset.
Use to select either Tone Dialing or Pulse Dialing.
(Functional on Australian Models only)
Plug a standard telephone line cord into this jack and the
other end of the cord into the standard telephone socket.
IMrCOM-..-
t
INTCOM Button
SPEAKERLED
SPEAKERButton
6
Page 9
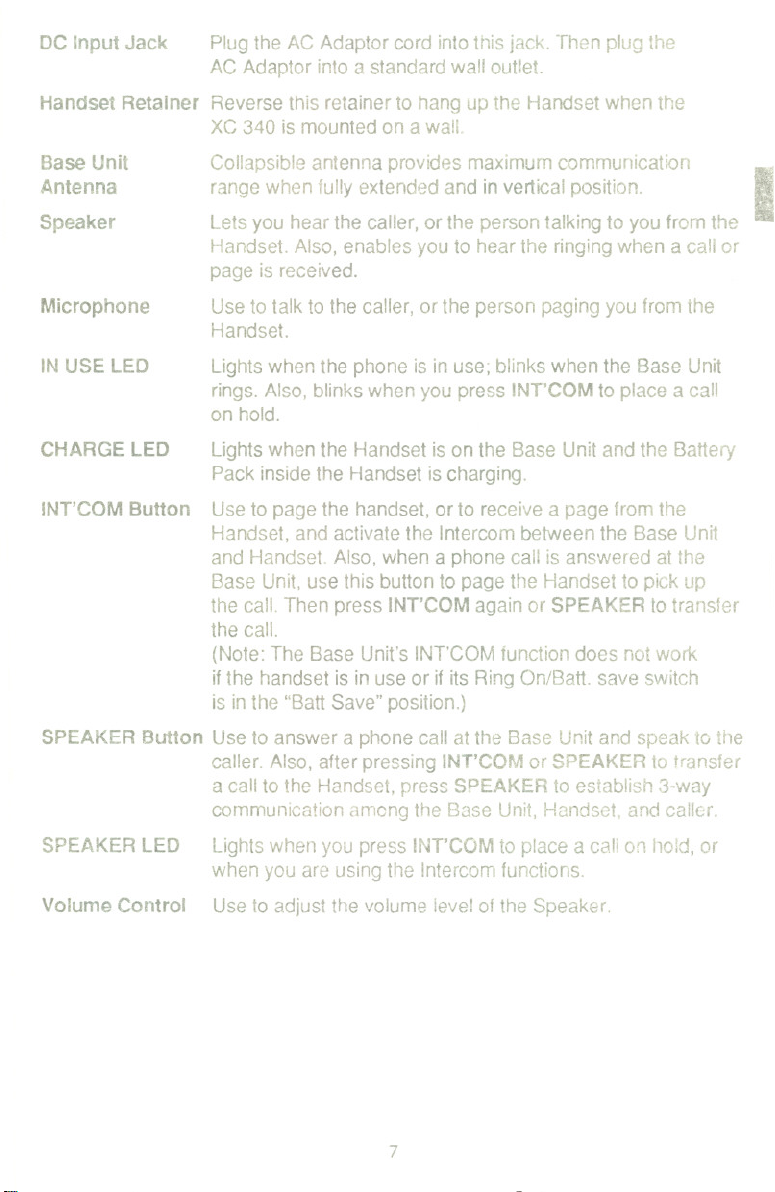
DC Input Jack Plugthe AC Adaptorcord intothisjack. Then pluGthe
AC Adaptor intoa standardwall outlet.
Handset Retainer Reversethis retainerto hang up the Handsetwhen the
XC340 is mountedon a wall.
Base Unit
Collapsibleantenna providesmaximumcommunicatior, .
Antenna
Speaker
Microphone
IN USE LED
CHARGE LED
INT'COM
SPEAKER Button Use to answer a phone call at the
SPEAKER LED
Button Use to page the handset, or to receive a page from the
Volume Control
range when fullyextended and in verticalposition. !
Lets you hear the caller, or the person talking to you from the
Handset. Also, enables you to hear the ringing when a call or
is received.
page
Use to talk to the caller, or the person paging you from the
Handset.
Lights when the phone is in use; blinks when the Base Unit
rings. Also, blinks when you press INT'COM to place a call
on hold.
Lights when the Handset is on the Base Unit and the Batte.-y
Pack inside the Handset is charging.
Handset, and activate the Intercom between the Base Unit
and Handset. Also, when a phone call is answered at the
Base Unit, use this button to page the Handset to pick up
the call. Then press INT'COM again or SPEAKER to transfer
the call.
(Note: The Base Unit's INT'COM function does not work
if the handset is in use or if its Ring On/Batt. save switch
is in the "Batt Save" position.)
caller. Also, after pressing INT'COM or SPEAKER to
a call to the Handset, press SPEAKER to establish 3-way
communication among the Base Unit, Handset, and caller.
Lightswhen you press INT'COMto place acall on !loid, or
when you are using the Intercom functions.
Use to adjust the volume ieve! of the Speaker.
Base Unit and speak to the
transfer
7
Page 10

HandsetControl & Functions
Handset
Antenna
TALK/BATT L°
TALKButton I MTTLON.)., BATTSAVE
1-9,0, TONE*,
TONEButton ". ~~ @ €>
ONE-TOUCHDI~~ -~ -~ ~~..I MEMButton
INTC Button mi=~ ~ RDUPButton
FLASHlR.TONE f ~ VOLUME/R.VOL
Handset
Antenna
TALKI
BA TT LOW
LED
TALK Button
W - -F'" .:rj I CHANNELButton
LED , '
#Button
-L;
TALK "DIU( owre. ON
. RING ON
ABC CS' 'r BATT Switch
G) @ @ SA~
OH .K. M\IO
@)@@
paRS 1\N WXYZ
c»
I
(!)@@
Buttons C- - -- - --~ I
Button ~ I Button
Flexible antenna.
The red LED lights steady when: (a) the phone is in use;
(b) you use MEM to store, erase, or dial a number in
memory. The red LED flashes every
Battery Pack is Iow and needs to be recharged.
Press to place or answer a call. When finished, press this button
to hang up. Also, after paging the Base Unit to announce that
a call is waiting, press TALK to transfer the call. Press TALK
again to establish 3-way communication among the Handset,
Base Unit, and caller.
3 seconds when the
8
Page 11

TONE
Button
(Australian
Models only)
ONE-TOUCH
DIAL Buttons
INT'C Button
FLASH/R.
TONE Button
When the TONE/PULSE switch on the Base Unit is in the
PULSE position, the TONE button allows tone dialing for
access to long distance services, etc. Also, use when storing
a mixed Tone/Pulse number. The TONE button counts as
one digit of the number.
Special memory locations for storing numbers. Press the
appropriate button to dial a number.
Use to page the Base Unit, or to receive a page from the
Base Unit, and to establish communication between the
Handset and Base Unit. Also, when a phone call is answered
at the Handset, use INT'C to place the call on hold and to
page the Base Unit to pick up the call.
This button has a dual function: (a) When making a call,
press to send a timed "hook-flash" on the telephone line for
accessing services such as call waiting, etc. (b) When the
telephone is not in use, press to select one type of the two
ringer tones.
I
CHANNEL
Button Use to select one of 10 channels for the clearest operation.
RINGON!
BATT SAVE
Switch
MEMButton
RDLlP Button
VOLUME!
A.VOL Button
(Note: Operates only when the phone is in use.)
(On the side of the Handset) Set the switch to "RING ON"
to enable ringing when a call is received. Set the switch to
"BATT SAVE" to save battery energy when the Handset is
not in use, and disable ringing at the Handset.
Use when storing numbers in memory, erasing numbers from
memory, and to dial a stored number.
This button has a dual function: Itredials the last dialed number,
or inserts a pause within memory dialing sequences.
This button has a dual function: (a) When making a call,
press once to adjust the volume of the earpiece speaker
(loud or soft). (b) When the telephone is not in use, press
to select the Handset ringer volume (high or Iow).
9
Page 12

Read This Before Installation
We have designed your telephone to conform to Australia or New Zealand Radio
Frequency regulations,and you can connect itto most telephone lines. However,
each device that you connect draws power from the phone line. We refer to the
powerdrawn as the device's ringer equivalencenumberor REN.The REN is
shown on the bottomof yourtelephone (NewZealand Models only). Ifyou are
using morethan one phone or other deviceonttle line,add up allthe REN's.
Ifthe total ismore than five,your phones might not ring. In ruralareas,a total
RENof three might impairringingoperation.
Note: You must notconnect your phone to anyof the following;
.Coin operated systems
.Party-linesystems
.Most electronic key phone systems
Your phone operates onstandard radiofrequencies. It is possiblefor other radio
unitsoperating nearbyon similar frequenciesto unintentionallyinterceptyour
conversationorcause interterence. Possible lack of privacy can occur with any
cordlesstelephone.
.IMPORTANTNOTICE
You must charge the new battery for at least 12hours before
you use the phone.
10
Page 13

Installing Your XC 340
,..--
Selecting the Installation Location
Selecta locationfor the XC 340 to avoid excessiveheat or hurnidity (asin a
kitchenor bathroom),The Base Unitof your XC 340 can beplaced on adesk
or tab!etop neara standard230/240VAC outlet and standardtelephone line
socket, or mounted on a wall plate. Keepthe Base Unitand Handsetawayfrom
sourcesof electricalnoise, (motors,fluorescentlighting). Be surethere is
sufficientspaceto safelyextend the Base Unitantenna fully.
Connecting the Telephone Li"e
Plugthe telephone linecord fromthe Base Unitinto a standardtelephone
socket.
(Note: Ifyou do not have a telephone socket, contact Te/eeomfor further
information)
CAUTION:
. Never install telephone wiring during a lightning storm.
. Never install telephone jacks in wet locations unless the jack is specifically
designed for wet locations.
. Never touch uninsuiated telephone wires or terminals unless the telephone
line has been disconnected at the network interface.
11 Use caution when installing or modifYing telephone lines.
I
11
Page 14

Installing the Telephone on a Desk or Tabletop
TO TELEPHONE
SOCKET
AC ADAPTOR
1. Place the Base Uniton a desk ortabletop, and plug one endof the Telephone
Line Cord (supplied) intothe "TEL LINE"jack on the Base.
2. Plugthe other endof the TelephoneLine Cord intothe telephone socket.
3. Plugthe AC Adaptor cord intothe 9V DC inputjack on the Base Unit.
(Note: Use only the AC Adaptorsupplied with the XC 340.)
4. Plugthe AC Adaptor intoa standard230/240VACwall outlet.
(Note: TheAC wall outlet shouldbe switched on atall times.)
5. Routethe power cord where itwill not createa trip hazard,or where itcould
becomechafed andcreate afire or other electrical hazards.
The unique design of your XC 340 allowsyou to placethe Handseton the Base
Uniteitherfacedown or in an uprightposition.The Battery Packinthe Handset
is automatically recharged in eitherposition.
12
Page 15

Mounting the Telephone on a Wall
The XC340 isdesigned to be mounteddirectly on a wall.
Settingthe HandsetRetainer
1. Remove the Handset Retaineron the Base Unitby slidingit upward.
2. Flip the Retainerover so the tab isfacing up.
3. Slidethe Retainerback intothe Base Unit.
~
I 1
I 1
1 1
Mounting the Base On a Wall
+
ToTELLINEJack
-11-5 mm
-r ~-----
100 mm ~
~ ~__n-
+ [Q]
~
To DC IN 9V
Input Jack
@'
To Telephone Socket
1. Carefullyselect a locationaway from electrical cables, pipes, or other items
behindthe mountinglocationthat could cause a hazardwhen inserting
screws into the wall.
2. Inserttwo mounting screws 10cmapartvertically, allowingabout5mm
betweenthe wall and screw heads for mountingthe phone. Make sure
the screws are securelyfastened, and that the wall material is capable for
supportingtheweight of the Base Unit;otherwise, damageto the Base Unit
would result.
13
Page 16

3. Plug one end of the Telephone Line Cord (supplied) into the "TEL LINE"
jack on the Base Unit. Lay the cord inside the molding on the bottom of
the Base Unit.
4. Plugthe AC Adaptor cord intothe 9V DC inputjack on the Base Unit.
(Note: Useonly the AC Adaptor suppliedwith the XC 340.) Placethe cord
insidethe moldedchannel onthe bottom of the Base Unit.
5. Placethe Base Unitonto the mountingscrews and slide downwardto
secure.Then hangthe Handseton the Base Unit.
6. Plugthe other end ofthe TelephoneLine Cord intothe telephonesocket.
7. Plugthe AC Adaptor intoa standard230/240VACwall outlet.
8. Routethe power cord where itwill notcreatea trip hazard,or where itcould
become chafed and create a fireor other electrical hazards.
Installing the Battery Pack (BT -161)
N B R I
The built-in Memory Backupfeatureallows upto 3 minutes afterdisconnecting
the old Battery Packfor installinga newonewithout losing any phone numbers
stored in the telephone's memory.
1. Remove the battery compartment
cover on the back of the Handset
by sliding it down.
...
2. Connect the Nickel-CadmiumBattery
Packby pluggingit into the socketon
the top of the battery compartment.
(Note: Theconnector fitsonly one
wayand requiresonly a minimal
amount ofpressure to insert.Always
install the Battery Cablewith the
BLACK wireto the left.)
3. Place the BatteryPack insidethe
compartment and slidethe battery
cover back. Make surethe wires from
the Battery Packdo notget caught in
the cover.
14
~
t
._".
-
---
,.
1
Page 17

Charging the Battery Pack
The rechargeable Nickel-Cadmium Battery Pack included with your XC 340 must
be charged for approximately 12-16 hours before using the phone for the first
time. Place the Handset on the Base Unit and make sure the CHARGE LED
lights. If the CHARGE LED does not light, check to see that the AC Adaptor is
plugged in and the wall outlet is switched on.
Low Battery Indicator
be charged, the TALK/BA TT LOW LED flashes every 3 seconds. If this occurs
while you are on the phone, a short alert beep will also be heard. When this
happens, complete your call as early as possible, and return the Handset to
the Base Unit for charging. Once the battery is Iow, you will only be able to press
the TALK button to return the phone to Standby. Allow 12 to 16 hours without
any interruption for the handset to fully recharge.
Cleaning the Battery Contacts
To maintain a good charge condition, it is important to clean all 8 charge con-
tacts on the Handset and Base Unit about once a month. Use a pencil
eraser or other contact cleaner. Do not use any liquids or solvents.
CONTACTS
CONTACTS
IDIen
...........
...........
...........
...........
IN USE.
CHARGE.
...........
...........
~....
...........
...........
1J@~
IHT'COM -.......
( I 0.1
"WJ<"'"-
GII..
...,.....
CD(jfci
@@@-
c1J-@(iJ--
@@)@)
, . .-
----
......-
..- .....
CID eR) CID CID
CONTACTS
I
CONTACTS
15
Page 18

Using Your XC 340
Selecting Pulse or Tone Dialing
(Available on Australian Models only)
Australianmodels can use either Pulse Dialingor Tone Dialing,depending on the.
localservice. NewZealand modelsare Tone Dialingonly.
To setthe phone for Tone or Pulse Dialing,placethe TONE/PULSE switch on
the Base Unit in the properposition.
Setting the Handset Ringer Tone
Pressthe FLASH/R. TONE button on the Handset to select either of two ringer
tones.
(Note: This sets the ringer tones only when the phone is not in use.)
Setting the Handset Ringer Volume
Press the VOLUME/R. VOL button on the Handset to select either high or Iow ringer
volume.
(Note: This sets the ringer volume only when the phone is not in use.)
Setting the Base Unit Ringer Volume
To enablethe Base Unitto ringwhen a call or page is received,set the BASE
UNITRINGERswitch to either"LO" or "HI".(Note: When a callis ON HOLD
at the Handset and the Base Unit is paged, the Base Unit willring even when
the BASE UN" RINGER switch is set in the "OFF" position.)
16
Page 19

Placing a Call
To place a call with your XC340:
1.
Removethe Handsetfrom the Base Unitand press TALK.
2. Dialthe number you arecalling.
3. When you have finished the call, pressTALK or returnthe Handset onto the
Base Unit.
NOTE: Ifyou don't place the Handset back on theBase Unit,you willneed
topress TALK TO HANG UP THEPHONE.
Selecting a Channel
The CHANNEL buttonon the Handsetallowsyouto choose among ten factory
setchannels. Ifyou are receivingany interferenceon achannel, press the button
to switchto anotherchannel. This function works only when the phone is in use.
NOTE:If you have more thanone cordlessphone in your house,they must
be set todifferent channels.
Using the Flash Button
Use FLASH to send a timed "hook-flash" on the telephone line for accessing
services such as call waiting, etc. To use this function, simply press the
FLASH/A.TONE button while operating
the Handset.
Setting the Handset Receiver Volume
Whileon a phone call using the Handset, press the VOLUME/A. VOl button to
select e~herloudor softearpiece speakervolume.
Setting the Base UnitReceiver Volume
While on a phone call using the Base Unit,slide the Volume Control to adjustthe
volume levelof the Speaker.
Using the Redial Button
ADl/P dials the last number that you have called. This function is extremely
usefulwhen the numberyou called is busy. To use thisfunction, simply press
AOUP. The last numberyou calledwill then bedialed again.
NOTE: If any other keyis pressedbefore ROUP, this functionwill not work.
I
17
Page 20

Answering a Call
Youcanansweratelephonecall eitherattheHandsetorthe Base Unit.YourXC340
will ring at both locations (providedthat bothunit's ringersare switchedON)when
someoneis callingyour number.
To answer a call atthe Handset:
1. If the Handsetis noton the Base Unit, press TALK to answer the call.
-OR-
If the Handset is on the Base Unit, the Auto Talk function, allows you to
answer the call by simply lifting the Handset from the Base Unit and begin-
ning your conversation.
NOTE: Auto Talk function will not work if the Handset Ring ON/Baft Save
Switch is set to "Baft Save" position.
. After answering, you can place the call ON HOLD at any time by pressing
INT'C. You will hear a series of 3 beep tones while the call is holding.
To resume the conversation, press TALK.
. You may also transfer the call to the person at the Base Unit, if desired.
(See "Transferring a Call" later in this manual.)
2. When you have finished your conversation, place the Handset back on the
Base Unit. The Auto Standby functions automatically hang up the phone.
NOTE: If you don't place the Handset back on the Base Unit, press TALK
to hang up the phone.
NOTE: Sometimes when you press TALK to hang up the phone, you may
get an error tone and the phone will not disconnect. This may occur
during conversations under noisy conditions. If this happens, place
the Handset back on the Base Unit or press TALK again while
holding the Handset close to the Base Unit.
To answer a
1. Press SPEAKER.
2. Speak into the microphone.
. After answering, you can place the call ON HOLD at any time by pressing
. While on a call, you can switch to the Handset to resume the conversa-
. You may also transfer the call to the person at the Handset, if desired.
call at the Base Unit:
INT'COM. You will hear a series
To resume the conversation, press INT'COM again.
tion, if desired. To do this, simply lift the Handset from the Base Unit and
continue your conversation. To switch back to the Base Unit, press
SPEAKER, and then place the Handset back on the Base.
(See "Transferring a Call" later in this manual.)
of 3 beep tones while the call is holding.
18
Page 21

3. When you have finished your conversation, press SPEAKER to hang up.
(Note: Ifyou switched to the Handset, you can hangup by placingthe
Handset backon the Base Unit or pressingTALK.)
Storing a Number
1. Remove the Handset andpress MEM.(The TALK/BATT LOW LED lights.)
2. Enterthe number (up to 16digits)to be stored.
3. Ifyouwishto enteradelaybetweennumbers(foraccessinga switchboard,orlong
distanceservice),press ROUP at the point in the number sequenceyou wish
to pause. (Note: TheRDUP buttoncount~as one digit.) PressingROUP
morethan once will increasethe lengthof the pause between numbers.
4. Press MEMand atwo digit number (01-20)for the memory location.
NOTE: Youhave20secondsafterpressingMEMtoenterthenumberyou
wish to store, and use two digits for the memory location. Otherwise,
an error tone willbe heard.
5. Write down the stored numberand its memory locationnumber onone of the
enclosed stickers.
Storing a MixedTone/Pulse Number with a Pulse Dial System
(Available on Australian Models Only)
If your phone is set up for Pulse Dialing, you can store a mixed mode number
(up to 16 digits) to easily access long distance services.
1. Press MEM. (The TALK/BATT LOW LED lights.)
2. Enterthe numberto be storedin PulseMode.
3. PressTONE on the Handset.(Note: The TONE buttoncountsas onedigit.)
4. Enterthe numberto be storedinTone Mode.
5. If you wish to enter a delay between numbers (for accessing a switchboard,
or long distance service), press RDL/P at the point in the number sequence
you wish to pause. (Note: The RDUP button counts as one digit.) Pressing
RDUP more than once will increase the lengthof the pause between numbers.
6. Press MEM and a two digit number (01-20) for the memory location.
NOTE:
You have 20 seconds after pressing MEM to enter the number you
wish to store and use two digits for the memory location. Otherwise,
an error tone will be heard.
I
19
Page 22

Dialing a Stored Number
To dial a numberpreviouslystored in memory,press TALK, then press MEM
andthe memory locationnumber (01-20).
Storing One-Touch Dialing Numbers
To store a ONE-TOUCH DIALlNG number:
1. RemovetheHandsetandpressMEM.(TheTALK/BAITLOW LED lights.)
2. Enterthe number (up to 16digits) to be stored.
3. If youwish to enter a delaybetween numbers(for accessing a switchboard,
or longdistance service), press RDL/Pat the pointin the numbersequence
you wish to pause. (Note: The RDUP buttoncounts as one digit.) Pressing
RDUPmorethanoncewillincreasethelengthofthe pause between numbers.
NOTE: You can alsostore a mixedtone-pulsenumber in aONE-TOUCH
DIALlNG button. Todo this,followsteps 2 through5 in "Storinga
Mixed Tone/PulseNumber".
4. Press MEMand the ONE-TOUCHDIALlNG button (1,2, or 3) youwish to
program.
NOTE: You have 20 seconds afterpressing MEM to enter the number you
wishto store. Otherwise,an errortone willsound.
5. Write down the stored numberand its ONE-TOUCHDIALlNG button number
on oneof the enclosedstickers.
To store additional ONE-TOUCH DIALlNG numbers, repeat steps 1through 5.
Dialing a One-Touch Number
To dial a number previously stored in a ONE-TOUCH DIALlNG button (1, 2, or
3), press TALK, and then press the ONE-TOUCH DIALlNG button for that number.
Chain Dialing
On certain occasions, after dialing a number, you may be requested by the party
or service you are calling to enter a special access code, such as when performing
a banking transaction. You can do this conveniently by first storing the access
code into one of the memory numbers. Then, after dialing the main number,
20
Page 23

press MEM and the memory location number of the access code at
the appropriate time.
Erasing aStored Number
1. Remove the Handsetfrom the Base Unit.
2. Press MEMtwice.
3. Pressthe memory locationnumber orthe ONE-TOUCH DIALlNGbuttonyou
want to clear.
Using the 2-Way Page/Intercom Feature
The 2-Way Page/Intercomfunction allows you to communicate betweenthe
Base Unitand Handset. To usethe Intercomfunction:
. The RING ON/BAIT SAVE switchon the Handsetmustbe inthe "RING
ON" position.
. The BASE UNIT RINGERswitch must be set to either "LO"or "Hli'.
(Note: Whena callis ON HOLD at theHandsetand the Base Unitis
paged, the Base Unit willring even whentheBASE UNITRINGER
switch is set to the 'OFF11position.)
I
Paging from the Base Unit
BASE UNIT
INT'COM again to disconnect.
Press INT'COM.(If no answer) press
To end the conversation, press
INT'COM.
- To end the conversation, press TALK.
HANDSET
Press TALK or INT'C, and answer the
page.
-OR-
21
Page 24

Paging from the Handset
BASE UNIT
Press INT'COM or SPEAKER, and
answer the page.
To end the conversation, press INT'COM.
Press INT'C. (If no answer, press INT'C
again to disconnect.)
-OR-
To end the conversation, press TALK.
HANDSET
Transferring a Call
When a phone call is answered at the Base Unit or Handset, you can transfer
that call to the other station (that is, from the Base Unit to the Handset, or from
the Handset to the Base Unit). You can also establish 3-way communication
among the two stations and the calling party.
Transferring a Call from the Base Unit
BASE UNIT
Press INT'COM. The SPEAKER LED
flashes. (If no answer, press INT'COM
again to disconnect.)
The Base Unit's INUSE LED flashes.
Announce there is a call waiting.
Press INT'COM to transfer call.
Press SPEAKER to enable 3-way
conversation.
Press SPEAKER to disconnect.
Press TALK or INT'C, and answer the
page.
Talk to caller. (To transfer call back to
Base Unit, see "Transferring a Call from
the Handset" on next page.)
Press TALK to disconnect.
HANDSET
22
Page 25

Transferring a Callfrom the Handset
BASE UNIT HANDSET
Press INT'C. (If no answer, press INT'C
again to disconnect.)
Press SPEAKER or INrCOM, and answer
the page. The IN USE LED flashes.
Announce there is a call waiting.
Press TALK to transfer call.
Talk to caller. (To transfer call back to
Handset, see "Transferring a Call from
the Base Unit"
Press SPEAKER to disconnect.
on previous page.)
Press TALK to enable 3-way conversation
Press TALK to disconnect.
Using the XC 340 as a Room Monitor
You may use the XC 340 Handsetto monitoractivity nearthe Base Unitwithout
anyone presentat the Base Unit.
To turn Room Monitoring on:
1. Remove the Handset from the Base Unit.
2. Press INT'COMon the Handset.
3. PressTALK on the Handset.Two-way communicationsare now set up
betweenthe Base Unitandthe Handset.
NOTE: Press VOLUME/R. VOL on the Handset to adjust the earpiece
volumes to loud or soft.
To turn mon~oring off, press TALK at the Handset.
23
Page 26

Troubleshooting
Ifyour XC 340 Cordless Telephone is not performing to your expectations,
please try these simple steps. Ifyou are still unable to resolve the problems,
contact Uniden Customer Service for assistance.
Problem
Charge light does not come on when
Handset is placed on Base Unit.
.Make sure the AC Adaptor is plugged
into the Base Unit and wall outlet.
.Make sure the Handset is properly
seated in Base Unit.
Suggestion
.Make sure the Nickel-Cadmium Battery
Pack is plugged in inside the Handset.
.Make sure that the charge contacts on
the Handset and Base Unit are clean.
(See page 15, for instructions)
Audio sounds weak and/or scratchy.
.Make sure that the Base Unit antenna
is fully extended and vertical.
.Move the Handset and/or Base Unit to
different locations and try again.
.Press the CHANNEL button to select
another channel.
Can't make or receive calls. .Move the Handset closer to the Base.
.Check both ends of the Base Unit
telephone line cord.
.Make sure the AC Adaptor is plugged
into the Base Unit and wall outlet.
.Disconnect the AC Adaptor for a few
minutes, and then reconnect it.
Handset can't ring or receive a page.
.Nickel-Cadmium Battery Pack may be
weak. Charge the battery on the Base
Unit for more than 12 hours.
.Set the RING ON/BA TT SAVE switch
on the Handset to "RING ON".
. Extend the Base Unit antenna vertically.
.The Handset may be too far away from
the Base Unit.
.Place the Base Unit away from noise
sources.
.The Digital Security Code may be
erased. Set the Digital Code.
(See page 5 for instructions.)
Base Unit can't ring or receive a page.
.Set the BASE UNIT RINGER switch to
"LO" or "HI".
24
Page 27

ImportantElectrical Considerations
Unplugall electricalapplianceswhen you knowan electricalstorm isapproaching.
Lightningcan pass through your householdwiring anddamage any device
connectedto it. The XC 340 has noexception. Note:Pleasedo not attempt
to unplug any appliance during an electrical storm.
Range
The XC 340 is designed to achieve the maximum possible range for transmitting
and receiving according to the highest specifications. We have rated this phone
to operate at a maximum distance wnh the qualification that the range depends
upon the environment in which the telephone is used. Many factors limit the
range, and itwould be impossible to include all the variables in our rating.
The Maximum Range rating of the XC 340 is meant to be used as a means
of comparison against other range claims.
Radio Interference
Radio interference may occasionally cause buzzing and humming in your cordless
Handset, or clicking noises in the Base Unft.This interference is caused by external
sources such as a TV, refrigerator,vacuum cleaner, fluorescent lighting, or electrical
storm. Your unftis NOT DEFECTIVE. Ifthese noises continue and are too distracting,
please check around your home to see what appliances may cause the problem.
In addition, we recommend that the base not be plugged into a circuit that also
powers a major appliance because of the potential for interference. Be certain
that the antenna of the base unit is fully extended if necessary.
In the unlikely event that you consistently hear other voices or distracting
transmissions on your XC 340, you may be receiving radio signals from another
cordless telephone or other source of interference. If you cannot eliminate
this type of interference, you need to change the channel. Press CHANNEL
on the Handset to select the best channel for the clearest performance.
MoreThan One Cordless Telephone
If you wish to use more than onecordless telephone inyour house,they must be
operated on different channels. PressCHANNELto selectone that providesthe
clearest performance.
25
I
Page 28

General
SpecificaJions
FrequencyControl
Modulation
OperatingTemperature
BaseUnit
Receive Frequency
Transmit Frequency
PowerRequirements
Size
Weight
Handset
Receive Frequency
Transmit Frequency
PowerRequirements
Size
Weight
Crystalcontrolled transmission
FM
-10°Cto 50°C
39.775to 40.000 MHz (10 Channels)
30.075to 30.300MHz (10 Channels)
230 -240AC 50 Hz
197 mm(W)x 140mm (0) x 48 mm (H)
Approx.0.445 kgms.
30.075to 30.300MHz (10 Channels)
39.775to 40.000 MHz (10Channels)
RechargeableNi-Cd Battery Pack
55 mm (W)x 68 mm(0) x 307 mm (H)
(withantenna)
Approx. 0.283Kgms. (with battery)
Battery BT-161
Capacity 270 mAH,3.6V
Talk Mode 6 hours
Standby Mode 2 weeks
BatterySave Mode 6 weeks
Specifications shown are typical and subject to change without notice.
26
Page 29

WARRANTY
UNIDEN xc 340 1 YEAR WARRANTY
(Batteries and Accessories are covered for 90 Days ONLY)
Note: Please keep your sales docket as it provides evidence of warranty. Warranty is only valid in the
country where the product has been purchased.
WARRANTOR: UnidenAustralia Pty. Limited ACN 001865498
ELEMENTS OF WARRANTY: Uniden warrants to the original retail owner for the duration of this
warranty,its XC340CordlessTelephone(hereinafterreferredtoasthe Product),to befreefrom defects
in materials and craftsmanship with only the limitations or exclusions set out below.
WARRANTY DURATION: This warranty to the original retail owner only, shall terminate and be of no
further effect ONE (1) Year after the date of original retail sale. This warranty will be deemed invalid if
the product is: (A) Damaged or not maintained as reasonable and necessary, (B) Modified, altered or
used as part of any conversion kits, subassemblies, or any configurations not sold by Uniden. (C)
Improperly in~talled, (D) Repaired by someone other than an authorised Uniden Repair Agent for a
defect or malfunction covered by this warranty, (E) Used in conjunction with any equipment or parts or
as a part of a system not manufactured by Uniden, (F) Installed, programmed or serviced by anyone
other than an authorised Uniden Repair Agent, (G) Where the Serial Number label of the product has
been removed or damaged beyond recognition.
PARTS COVERED: This warranty covers for One year, the Base/Charging Unit and Handset only. All
accessories (Antenna, Battery, AC Adaptor, Cable, Modular Plug, etc.) are covered for 90 Days only.
STATEM ENT OF REM EDY: In the event that the product does not conform to this warranty at any time
while this warranty is in effect, the warrantor at its discretion, will repair the defect or replace the product
and retum it to you without charge for parts and service. THIS WARRANTY DOES NOT COVER OR
PROVIDE FOR THE REIMBURSEMENT OR PAYMENT OF INCIDENTAL OR CONSEQUENTIAL
DAMAGES.
Uniden New Zealand Limited
WARRANTY CARD: If awarranty card has been included with this productthen please fill it in and return
to us within 14days of purchase. Your name and the Serial number of the product will then be registered
in our database and this will help us process your claim with greater speed and efficiency should you
require warranty service.
PROCEDUREFOR OBTAINING PERFORMANCEOF WARRANTY: In the event that the product
does not conform to thiswarranty,-the Product should be shipped or delivered, freight pre-paid, with
evidence of original purchase (e.g., a copy of the sales docket), to thewarrantor at:
UNIDEN AUSTRALIA PTY LIMITED
SERVICE DIVISION
345 Princess Highway, Rockdale, NSW 2216
Ph (02) 599 3100 FAX (02) 5993278
Customers in other States should ship or deliver the Product
freight pre-paid to their nearest Uniden Authorised Repair Centre.
(Contact Uniden for the nearest Warranty Agent to you)
UNIDEN NEWZEALAND LIMITED
Corner Ti Rakau Drive and Harris Road
EastTamaki, Auckland
Ph (9) 2738383 FAX (9) 2740009
27
Page 30

unid~n@
@ 1995 Uniden Corporation. All rights reserved.
UDZZO1340BZ Printed in Hong Kong
 Loading...