

Page 1
DC166 Visual Presenter
Quick Start Guide
[Important]
To download quick start guide, multilingual
manuals, software, and drivers, please visit
Lumens website at
http://www.lumens.com.tw/goto.htm
English -0
Page 2

1. Package Content
DC166 Quick Start Guide User Manual
(To download this manual in
the other languages, visit
Lumens website)
Download Card Remote Control
USB Cable C-Video Cable Power Cord
Microscope Adapter Accessory Pouch
Backlight (Optional)
RS-232 Adapter
(Optional)
VGA Cable
Appearance may vary
depending on country/region
Presenter Protector
Padded Carry Bag
(Optional)
Bag
English -1
Page 3

2. System Diagram
Projector PC Monitor
Television
PC
English -2
SD Card
Page 4

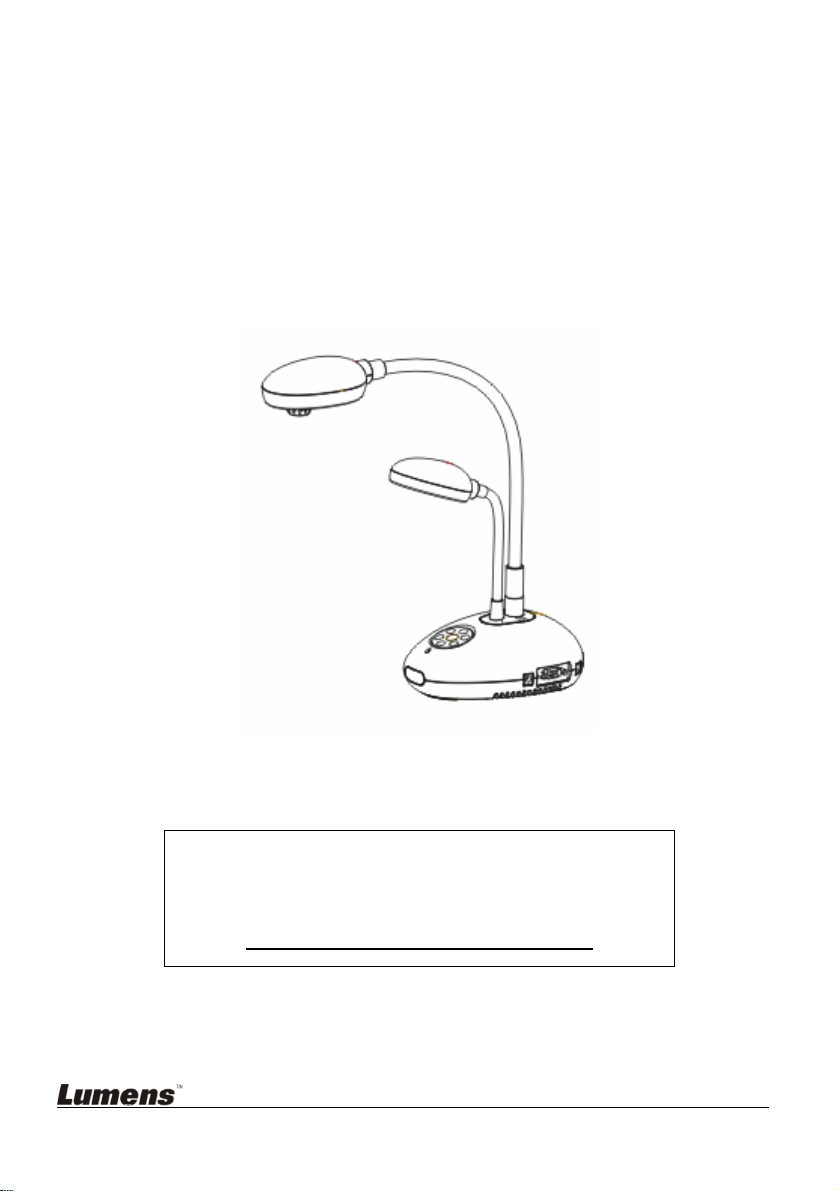
3. Product Overview
3. Control Panel
5. Remote sensor
1. Gooseneck
2 Lamp
4. LED indicator
6. Lens
7. DIP switch
(Bottom)
English -3
Page 5

4. Connecting Devices
4.1 Step 1: Plugging in the Power Outlet
<Note> Appearance of power cord may vary depending on
country/region.
4.2 Step 2: Connection projector with other hardware devices
4.2.1 Connecting to a Projector or Monitor
z Connect the VAG cable to the VGA OUT port on the DC166 and to the
VGA IN port on the projector or monitor.
4.2.2 Connecting to a TV
AC Outlet
1. Connect the C-VIDEO cable to the VIDEO port on the DC166 and the
C-VIDEO port on the TV.
2. Adjust DIP Switch Setting
NTSC: America, Taiwan, Panama, Philippine, Canada, Chile, Japan and Mexico.
English -4
234
Page 6
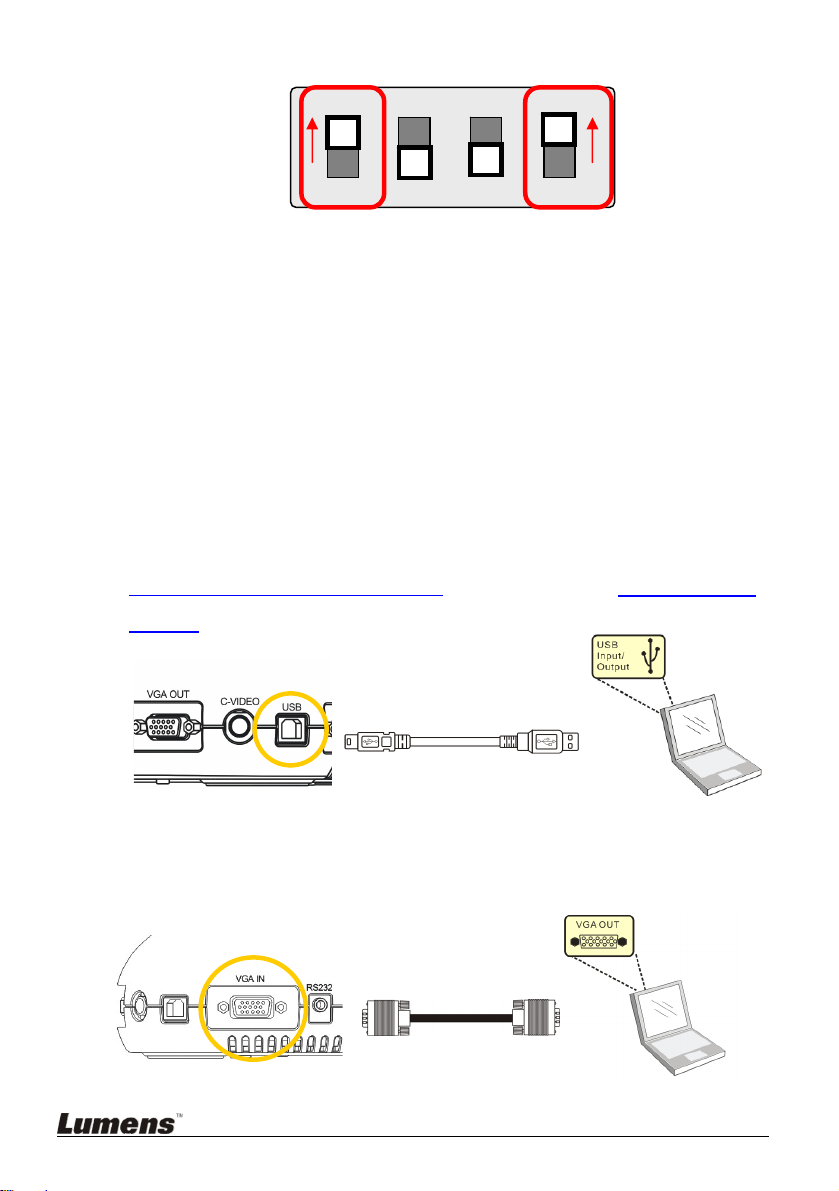
PAL: Country/region not listed above.
234
<Note>: OSD is not available in C-VIDEO. Some functions are not
available on the control panel and the remote control in this mode.
<Note>: VGA OUT is not supported once C-VIDEO is enabled.
3. DIP switch settings will not availabe until the DC166 has been restarted.
4.2.3 Connecting to a Computer
z Connecting to a computer through USB
Connect the USB cable to the USB port on the DC166 and the USB port
on the computer. Next, download the queue
™ program at
http://www.lumens.com.tw/goto.htm. Please refer to the queue™ user
manual for more detailed instructions.
z Connecting to a computer through VGA IN
Connect the VGA cable to the VGA IN port on the DC166 and the VGA
OUT port on the computer.
English -5
Page 7

z Connecting to a computer through RS-232
Connect the RS-232 adapter (Optional) to the RS-232 port on the DC166
and the RS-232 port on the computer.
5. Start Using the DC166
5.1 Powering on the DC166
Control Panel Remote Control
z When using the remote control, aim at the remote sensor at the
DC166 and press the power button.
z Once the visual presenter is turned on, the LED on the projector will
flash a few times and then stay lit. Please contact your distributor if
LED is not on.
*For a detailed introduction to menu functions and additional operating
instructions, please refer to the
user manual.
English -6
 Loading...