

Page 1

Astra 2100U
OWNER’S GUIDE
Page 2

Trademarks
UMAX is a trademark of UMAX Technologies, Inc. Astra is a trademark of
UMAX Technologies, Inc. IBM PC/AT is a trademark of International Business
Machines Corporation. MS-Windows, Windows, and MS-DOS are trademarks
of Microsoft Corporation. PhotoDeluxe is a trademark of Adobe Systems, Inc.
Presto! PageManager is a trademark of NewSoft Technology Corporation.
Other names and trademarks appearing herein are trademarks of their resp ect ive
holders.
Copyright
©1999 UMAX Technologies, Inc. All rights reserved. No part of this
publication may be reproduced, transmitted, transcribed, stored in a retrieval
system, or translated into any language or computer language, in any form or by
any means, electronic, mechanical, magnetic, opti cal, chemical, manual, or
otherwise, without the prior written permission of UMAX Technologies, Inc.
Page 3

TABLE OF CONTENTS
CHAPTER 1. GETTING STARTED.............................. 1
Introduction...............................................................................................1
Unpacking the Scanner.............................................................................1
Package Contents....................................................................................1
Getting to Know Your Scanner...............................................................2
Astra 2100U Scanner Elements..............................................................2
Astra 2100U Back Panel.........................................................................2
System Requirements...............................................................................3
Installing the Software..............................................................................3
Installing PhotoDeluxe on Your PC........................................................4
Installing PhotoDeluxe on Your Macintosh............................................5
Install VistaScan and Bundle Software (Presto! PageManager, Presto!
PhotoAlbum, Presto! PageType, Presto! ImageFolio, OmniPage LE and
Online Manuals) .....................................................................................6
Installing the Hardware ...........................................................................6
About Scanner Connectors...................................................................... 7
Setting Up – General Information...........................................................7
Connecting the Hardware Interface Cables.............................................8
Connecting the Power Adapter...............................................................9
CHAPTER 2. YOUR FIRST SCAN............................. 11
Scanning Your First Image With PhotoDeluxe ....................................11
Scanning an Image from the PC ...........................................................11
Scanning an Image from the Macintosh................................................14
Turning the Scanner Lamp On and Off ...............................................16
iii
Page 4

CHAPTER 3. SCANNING BASICS ............................17
Setting VistaScan Preferences............................................................... 17
General................................................................................................. 17
Scan Destination................................................................................... 19
Scanner Information............................................................................. 22
VistaScan Beginner Window Features................................................. 23
VistaScan Advanced Features.............................................................. 27
Using VistaAccess – Direct Access......................................................44
Using VistaShuttle................................................................................ 46
Using the UMAX Copy Utility ............................................................ 48
CHAPTER 4. PUSH BUTTON SCANNING................51
Configuring the Push Buttons.............................................................. 51
Using the Push Buttons.......................................................................... 58
CHAPTER 5. SCANNING PROJECTS.......................61
Using VistaScan to Scan a Photo to E-mail......................................... 63
Using VistaScan with PhotoDeluxe to Create Web-ready Images..... 63
Using Presto! PageManager to Scan a Form and Edit it with
PageType................................................................................................. 68
Creating a Calendar with PhotoDeluxe................................................ 70
Converting Scanned Text to Editable Text with OmniPage............... 73
Opening OmniPage LE ........................................................................ 73
Converting Scanned Text with OmniPage LE......................................74
Creating an Album with Presto! PhotoAlbum.................................... 76
Opening PhotoAlbum:.......................................................................... 76
Creating a Photo Album....................................................................... 77
iv
Page 5

UMAX Astra 2100U Owner’s Guide
CHAPTER 6. HOW TO GET HELP............................ 79
Using Online Manuals ............................................................................79
Accessing the UMAX VistaScan Online Manual.................................79
Accessing the Adobe PhotoDeluxe Online Manual..............................80
Accessing the Presto! PageManager Online Manual............................81
Accessing the Caere OmniPage Online Manual...................................81
Installing Acrobat Reader for Macintosh Users....................................82
Troubleshooting......................................................................................82
General Problems and Solutions...........................................................82
Windows 98/95 OSR2 Problems and Solutions....................................83
Macintosh Version Problems and Solutions.........................................87
Contacting Technical Support...............................................................91
Maintenance............................................................................................92
Cleaning...................................................................................................92
APPENDIX A. TECHNICAL SPECIFICATIONS.........93
Scanner Specifications............................................................................93
FCC DECLARATION OF CONFORMITY................... 95
WARRANTY...............................................................96
INDEX......................................................................... 97
v
Page 6

vi
Page 7

CHAPTER 1. Getting Started
Introduction
Thank you for purchasing the UMAX Astra 2100U scanner. This
versatile unit is perfect for the home or office. Use this scanner to
add variety and flair to your documents, or to help you share
images with others.
The Astra 2100U scanner is equipped with a USB connector that
allows you to make a fast and easy connection to the USB port on
your PC, or USB-equipped Macintosh computer (such as the iMac
or blue and white G3).
In addition to being easy to connect, this scanner is also easy to use.
Simply follow the instructions in this guide and you’ll be scanning
in no time. With the powerful software included with your scanner,
you can create an archive of scanned images, e-mail or fax images
to friends or clients, or create your own web site gallery. Get ready
to unleash your creativity with the UMAX Astra 2100U scanner.
Unpacking the Scanner
Your scanner package includes the cables and software you need to
get the scanner up and running. The scanner package should
contain all of the items listed below. If you do not find all of the
listed items, contact the retailer from whom you purchased the
scanner, or contact UMAX. For information about contacting
UMAX directly, refer to
Chapter 6. How to Find Help
.
Package Contents
UMAX Astra 2100U Flatbed scanner
•
USB Interface Cable
•
Quick Start Guide and Owner’s Manual
•
Power Adapter
•
•
®
Adobe
2.0 for Macintosh)
PhotoDeluxe® CD-ROM (Home Edition 3.0 for PC,
1
Page 8
UMAX Scanner CD-ROM. This CD-ROM contains software
•
for UMAX VistaScan, VistaAccess, VistaShuttle (PC), Caere
OmniPage® LE OCR, NewSoft® Presto! PageManager,
NewSoft
®
Presto! PhotoAlbum™ LE, NewSoft® Presto!
PageType™ (PC), UMAX Copy Utility (PC), Presto!
ImageFolio LE (PC)
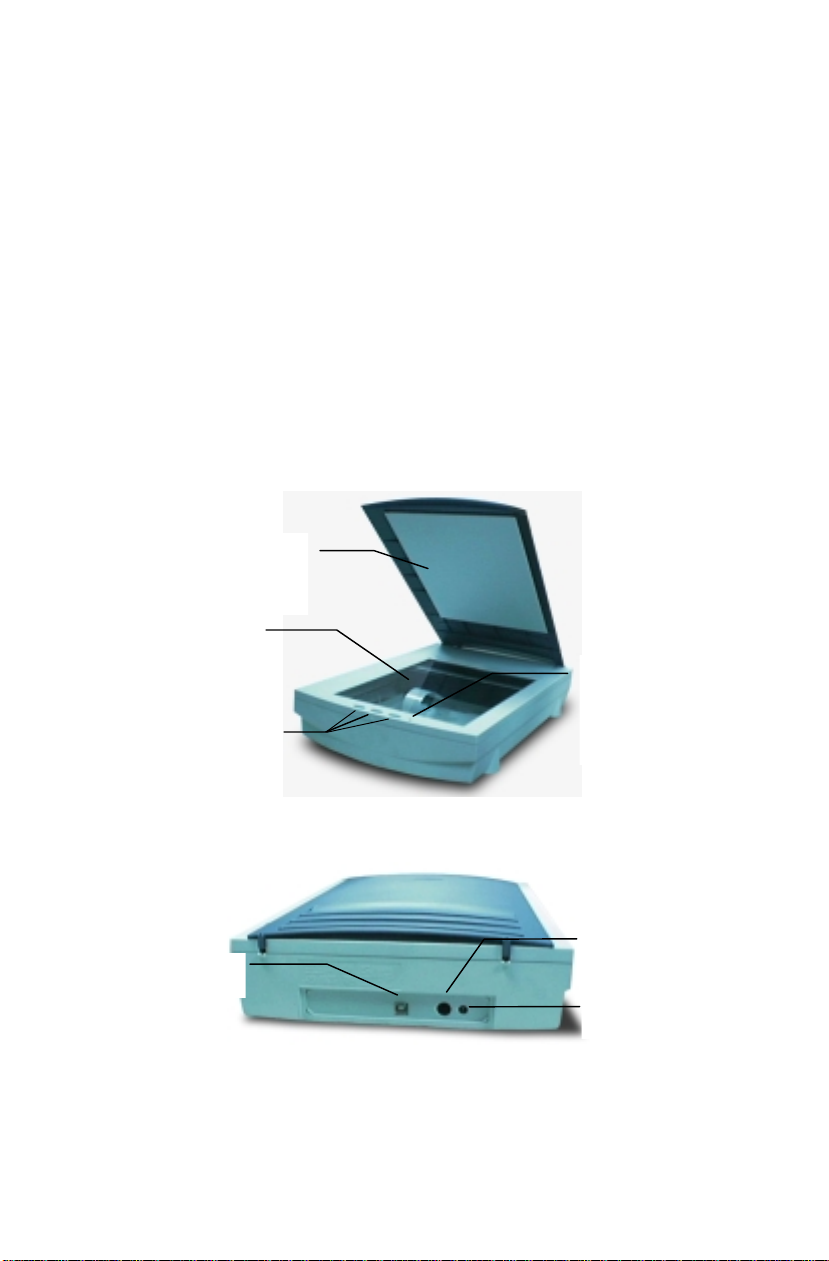
Getting to Know Your Sca nner
To gain a complete understanding of the information contained in
this manual, it is important that you become familiar with your
scanner. The graphics below identify the key scanner components.
®
The plastic cover that protects the
Document Cover
object glass.
Object Glass
The glass surface on which
documents or images are
placed.
Scan, Copy and Custom
(OCR or E-Mail) Buttons
Astra 2100U Scanner Elements
4-Pin USB Connector
Astra 2100U Back Panel
Power Indicator
Illuminates to
indicate that the
scanner is
powered on.
Transparency
Receptacle
Power Adapter
Receptacle
2
Page 9

UMAX Astra 2100U Owner’s Guide
System Requirements
This section defines the minimum system requirements necessary to
operate either the Astra 2100U scanner. Please refer to the section
below that applies to your scanner and computer type.
PC Requirements
An IBM-compatible PC with 80486, Pentium processor or
•
higher
Microsoft
•
USB interface connector
•
At least 16 MB RAM memory (32 MB recommended)
•
CD-ROM drive
•
170 MB of available hard disk space
•
Macintosh Requirements
iMac or USB-compatible Macintosh
•
Macintosh OS 8.1 or higher
•
USB interface connector
•
At least 16 MB RAM memory (32 MB recommended)
•
CD-ROM drive
•
170 MB of available hard disk space
•
®
Windows 98, 95 OSR2, or higher
Installing the Software
The PhotoDeluxe installation procedure is different for Macintosh
and PC computers. Therefore, we have provided two separate sets
of instructions. Follow the set of instructions for your computer.
3
Page 10

Installing PhotoDeluxe on Your PC
NOTE:
higher. Use the following steps to install your scanning software
rather than using the add/remove programs to install the software.
1.
2.
3.
4.
5.
6.
PhotoDeluxe is compatible with Windows 98, 95 and
Insert the CD-ROM labeled “PhotoDeluxe” into your
computer’s CD-ROM drive. Your computer should
automatically read the disk and display a series of screens
regarding product licensing. Follow the onscreen instructions.
NOTE:
ROM after insertion, click the
A dialog box appears. Type “d:\autoplay.exe” in the open text
box. If your CD-ROM is designated with another letter,
substitute the appropriate let ter for the dr iv e.
A Licensing Agreement window appears. Enter the country
where you are currently located in and click
Read the licensing agreement and then click
A PhotoDeluxe Install window appears. Click the
button. Follow the onscreen instructions.
When you get to the Setup Type window, choose
Fill in the user information.
If your computer does not automatically read the CD-
Start
bar and select
Run…
Next.
Agree.
Install
Typical
.
7.
8.
9.
10.
4
Next
Click
installing PhotoDeluxe Home Edition 3.0, Adobe Acrobat
Reader 3.01, Adobe ATM 4.0 and Microsoft Internet Explorer
4.01. Follow the onscreen instructions.
After Adobe Acrobat Reader 3.01 has been installed, a ReadMe
file appears. When you have read the ReadMe, select
the File menu.
The Adobe Type Manager window appears. Click the
button. Follow the onscreen instructions.
When the Adobe Product Registration window appears, enter
the relevant information and continue following the onscreen
instructions.
in the Start Copying Files window to begin
Exit
Install
from
Page 11

UMAX Astra 2100U Owner’s Guide
11.
When a screen appears asking if you want to restart your
computer to finish the installation procedure, select
click the OK button.
Yes
and
NOTE:
select “Programs,” and then select “Adobe.” A cascading file
appears with “Read Me” information and other selections to choose
from. For information about setting up desktop shortcuts, refer to
your Microsoft Windows documentation.
To access these files you must click on the “Start” bar,
Installing PhotoDeluxe on Your Macintosh
1.
Insert the CD-ROM labeled “PhotoDeluxe” into your
computer’s CD-ROM drive. Your computer should
automatically read the disk and display the folders contained on
the CD-ROM.
2.
Double-click on the Adobe PhotoDeluxe Installer icon. Follow
the onscreen instructions.
3.
An Adobe ReadMe file appears. After reading the text, click
Continue.
4.
A PhotoDeluxe Installer window appears. Click the
button. Follow the onscreen instructions.
5.
Complete the product registration form and click
Install Now
the
your computer by clicking the
restarts, re-insert the PhotoDeluxe CD- ROM.
button. After installation is complete, restart
Restart
button. After the system
Install
Next
. Click
6.
Double-click on the ATM application fold er ins ide the
PhotoDeluxe CD-ROM window. Double-click on the Font and
Utilities folder, then Double-click on the Installer icon. Click
Install
the
after the installation is comple te.
icon to install the ATM files. Restart your system
5
Page 12

Install VistaScan and Bundle Software (Presto!
PageManager, Presto! PhotoAlbum, Presto!
PageType, Presto! ImageFolio, OmniPage LE
and Online Manuals)
1.
Insert the UMAX Scanner CD into your computer’s CD-ROM
drive after you have finished installing the software on the
PhotoDeluxe CD.
:
FOR PC USERS
begin installing the programs contained on this disk after
inserting it into the CD-ROM, click on the
Run…
box. If your CD-ROM is designated with another letter,
substitute the appropriate let ter for the dr iv e.
A dialog box appears. Type “d:/setup” in the dialog
If your computer does not automatically
Start
bar, select
FOR MACINTOSH USERS:
window opens on your desktop, double-click on the UMAX
CD Installer icon to begin the software installation.
2.
Follow the onscreen instructions to complete the installation of
Presto! PageManager, UMAX VistaScan, OmniPage LE and
the online User’s Guide
3.
Restart your computer as suggested by the onscreen
instructions to complete the ins ta lla tion.
When the UMAX VistaScan
.
Installing the Hardware
After you have removed the scanner from the box and verified that
all of the package contents have been included, please check to
make sure that your computer is compatible with the scanner’s
connectors.
6
Page 13

UMAX Astra 2100U Owner’s Guide
About Scanner Connectors
USB Connectors
Many newer computers, both PC and Macintosh, rely on USB
technology as the primary method of communication between the
computer and its peripherals. With this new USB “plug-and-play”
technology your computer automatically configures peripherals.
If your computer has a USB port, you must make sure that this port
is enabled in the system BIOS. Please refer to the troubleshooting
section to learn more about enabling the USB port.
Checking Your Computer’s Connectors
To use your scanner you need to understand what type of
connectors you have on your computer. To determine the connector
type, look at the back panel of your computer:
A USB port is a small slot ½” long and ¼” wide.
•
NOTE:
If your computer has a USB port, check to make sure that
your computer's operating system supports USB. The following
factory-installed operating systems support USB: Microsoft
Windows 95 OSR2, 98 or higher, and Mac OS 8.1.
Setting Up – General Information
Find a suitable location near your computer to place the
•
scanner.
CAUTION:
scanner on an uneven surface can damage the internal
components.
Make sure the surface is flat. Operating your
7
Page 14
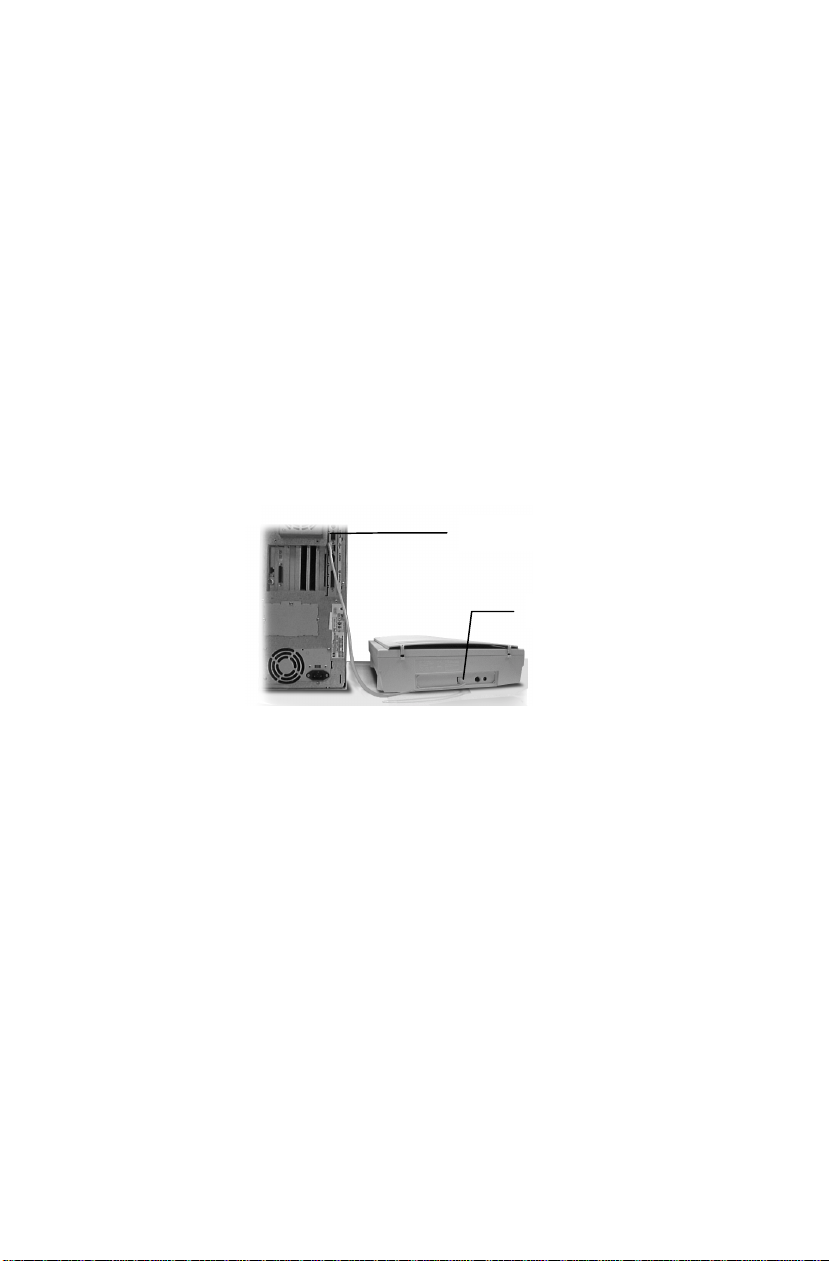
Connecting the Hardware Interface Cables
If your computer has a USB port, follow the instructions in the
Connecting the USB Cable
computer.
Connecting the USB Cable
The instructions for connecting the hardware interface cable are
different for PC and Macintosh users. Refer to the section below
that applies to your computer type.
PC Connection
1. Locate the USB cable that is provided. Plug one end of this
cable firmly into the USB port on the back of the computer.
section to connect the scanner to your
USB Connector Port
USB Connector Port
Plug the other end of this cable into the port located on the back
panel of the scanner.
Macintosh Connection
1. Locate the USB cable that is provided. Plug one end of it firmly
into one of the USB ports. iMac computer ports are located on
the right side of the computer, or at either side of the keyboard.
The USB port on other Macintosh computers is located on the
back panel of the computer, or on a USB interface card.
2. Plug the other end of this cable into the port located on the back
panel of the scanner.
8
Page 15

UMAX Astra 2100U Owner’s Guide
Connecting the Power Adapter
1. Plug the scanner’s power adapter into an electrical outlet.
2. Insert the other end of this cable into the power adapter
receptacle on the rear panel of the scanner. The power indicator
on the front panel of the scanner should now be illuminated.
9
Page 16

10
Page 17

CHAPTER 2. Your First Scan
Before you begin your first scan, you must install the scanner and
the bundled software. Refer to the
and scanner test instructions.
You can perform a basic scan using any of the software
applications bundled with this scanner. For your first scan, we
suggest using the PhotoDeluxe software.
PCs and Macintosh have two different versions of the PhotoDeluxe
software, so we have included two separate sets of instructions.
Please follow the proper set of instructions for your system.
Quick Start Guide
Scanning Your First Image With
PhotoDeluxe
Open the PhotoDeluxe software application.
Scanning an Image from the PC
for installation
1. Click the
2. Click
3. Select
4. Select
5. Click
6. The PhotoDeluxe screen appears with the Seasonal Activities
option present. Initially, we recommend you bypass this
section. To bypass this section, click
Cancel
7. Click the
8. Click the
Scanners…
screen. Click the
Start
bar in the bottom-left corner of the screen.
Programs
Adobe
PhotoDeluxe Home Edition 3.0
Adobe PhotoDeluxe Home Edition 3.0
.
Get & Fix Photo
Get Photo
.
.
.
Install
tab. A row of icons appears.
icon. A drop-down list appears. Click the
option. A tabbed bar appears at the top of the
Scanner
tab.
and then click
.
11
Page 18

9. Click the
Choose Scanner
in the input source list. The
highlighted. Click OK. (
time.) Click the
Mode
icon. Click on the
VistaScan
NOTE:
You only need to do this one
tab. Click the
input source is
Custom
VistaScan
icon. The
VistaScan window opens. VistaScan software controls the
various functions of the scanner and provides a communication
path between the scanner and the PhotoDeluxe software.
entry
NOTE:
Before using your scanner for the first time, use the
Scanner Test utility to verify that the scanner is able to
communicate with the computer. A test window appears the
first time you launch the VistaScan software after installing the
scanner.
10. Click the
window opens. Click the
Scanner Test
, and the UMAX Scanner Test Program
Test
button to test the scanner.
11. If the scanner passes, “Scanner Link Successful,” appears in the
status box. Click OK. If the scanner test fails, check your
connections and try the test again.
12. Click the
Custom
icon.
13. Select an item you would like to scan (a picture, a drawing,
etc.).
14. Lift the document cover and place the item face-down so the
top center of the document aligns with the arrow (∇) at the back
edge of the object glass.
12
Page 19

UMAX Astra 2100U Owner’s Guide
15. Click the
Preview
button on the right side of the VistaScan
Beginner window. The scanner begins a low-resolution scan of
the item.
16. When the preview scan is complete the preview image is
displayed in the Preview window (on the left side of the
VistaScan window).
You can change the view of the Preview image using the
“Zoom Tool,” or select a scanning region using the “Frame
Selection Tool.” To find out more about how to use these tools,
click on the user tips text that appears when your cursor pauses
over the tool.
NOTE:
You must have a browser installed in order to view the
VistaScan online help.
17. In the
Click to Scan
section of the VistaScan Beginner
window, click the icon that corresponds to the type of image
you are scanning.
For example, if you are scanning a color photograph, choose
“Color Photo.” To scan text or a black and white drawing,
choose “Text/Lineart.” The image is scanned and you return to
the PhotoDeluxe window.
NOTE:
Choosing an icon in the “Click to Scan” area does two
things: it activates the scanner, and automatically sets the
scanner settings. This ensures you get the best scanning results
for the item you are scanning.
18. A pop-up message appears on the right side of the screen
indicating that you should click the
19. Click the
Done
tab. A
Save as
Done
tab.
window opens. Enter a file name
for the scanned image. Indicate which fold er or direct ory yo u
want to save the image file to, and specify in what file format
you want to save the image.
NOTE:
If you do not assign a file name, the computer
automatically assigns a name that consists of the date, and a
two-digit reference number.
20. Enter a graphic title for the image that will appear in the My
Photos window.
13
Page 20

21. Click on the
down menu. Click the
Save & Send
Save
icon. Choose save from the drop-
button to save the image.
22. Close the VistaScan window by clicking
Exit
.
Scanning an Image from the Macintosh
1. Double-click the
2. Double-click the
3. Double-click the
launch PhotoDeluxe. The PhotoDeluxe screen appears.
4. Click the
5. Click the
6. Click the
sources. Click on the
source list. The
Click OK. The VistaScan Beginner window appears.
NOTE:
PhotoDeluxe. It will remember your selection the next time you use
the application.
7. Select an item you would like to scan (a picture, a brochure,
etc.).
Get Photo
Get Photo
Scanner
You only need to select the device driver once in
Hard Drive
Adobe PhotoDeluxe 2.0
Adobe PhotoDeluxe
button.
tab.
button to display a menu of available input
UMAX VistaScan
UMAX VistaScan
icon.
folder.
application icon to
entry in the input
input source is highlighted.
8. Lift the document cover and place the item face-down so the
top center of the image aligns with the arrow (∇) at the back
edge of the object glass.
14
Page 21

UMAX Astra 2100U Owner’s Guide
9. Click the
Preview
button on the right side of the VistaScan
Beginner window and the scanner begins a low-resolution scan.
10. When the preview scan is complete the preview image is
displayed in the Preview window (on the left side of the
VistaScan window).
You can change the view size of the Preview image before
scanning the final image using the “Zoom Tool,” or select a
region to scan using the “Frame Selection Tool.” To find out
more about how to use these tools, click on the user tips text
that appears when your cursor pauses over the tool.
NOTE:
You must have a browser installed in order to view the
VistaScan online help.
11. In the
Click to Scan
section of the VistaScan Beginner
window, click the icon that corresponds to the type of image
you are scanning.
For example, if you are scanning a color photograph, choose
“Color Photo.” To scan text or a black and white drawing,
choose “Text/Lineart.” The image is scanned and you return to
the PhotoDeluxe window.
12. When the scan is complete, a window appears requesting that
you save the document. Type a name in the field that appears to
the right of “Save this document as:”
NOTE:
Acquire
By default the image is saved as “untitled - #” in the
section of the floating gallery window. You can also
choose to save the image in the hard drive or on the desktop by
clicking on the arrow to the right of the My Photos box at the
top of this window.
13. After a moment the image appears in the My Photos gallery
window. Double-click the thumbnail to view a full-size, highresolution scan of the image in the work area.
14. Exit PhotoDeluxe by selecting
Quit
from the File menu.
15
Page 22

Turning the Scanner Lamp On a nd Off
For PC Users Only:
using the Astra 2100U’s built-in Power Saving utility. The lamp
remains on whenever the scanner has power, unless you turn it off
using the UMAX Power Saving utility. Turning off the scanner
lamp when you are not scanning prolongs the life of the lamp.
The Power Saving window appears when you close VistaScan.
It appears in the bottom-right corner of your desktop by default.
The window displays an image of the scanner with the lamp
illuminated.
To turn the scanner lamp off:
Click on the image of the scanner in the Power Saving utility
window. After a second or two, the light in the scanner image goes
out, and your scanner lamp is turned off.
To turn the scanner lamp on:
You can turn the scanner lamp on and off
Open the VistaScan software, or simply click on the scanner image
in the Power Saving utility window.
NOTE:
light. The Power Indicator light is the very small, green light
located on the front panel of the scanner. This indicator remains ON
whenever the scanner is plugged into an electrical outlet (regardless
of whether the Power Saving utility is engaged).
16
The scanner lamp is different from the Power Indicator
Page 23

CHAPTER 3. Scanning Basics
VistaScan is the primary program or driver you use to scan with
your Astra 2100U scanner. It is a TWAIN-compliant program,
which means that it can be run from other programs that support
scanning, like PhotoDeluxe, OmniPage, and others. It is also a
stand-alone program, which allows you to scan images for a variety
of uses, even without launching another program first.
Setting VistaScan Preferences
Preferences control scanner settings that you generally do not
modify every time you use the scanner. The Preference settings are
used as the default settings for several of the scan settings.
To access the VistaScan Preferences, click the
the upper right corner of the VistaScan window.
The Preferences cover three areas:
General
•
Scan Destination
•
Scanner Information
•
A tab at the top of the Preferences window indicates each
VistaScan preference group. To view the Preference settings for an
area, click on the associated tab.
Preferences
icon in
General
The General tab contains preference settings that control color
matching and color correction, and whether to display the ruler and
tips.
17
Page 24
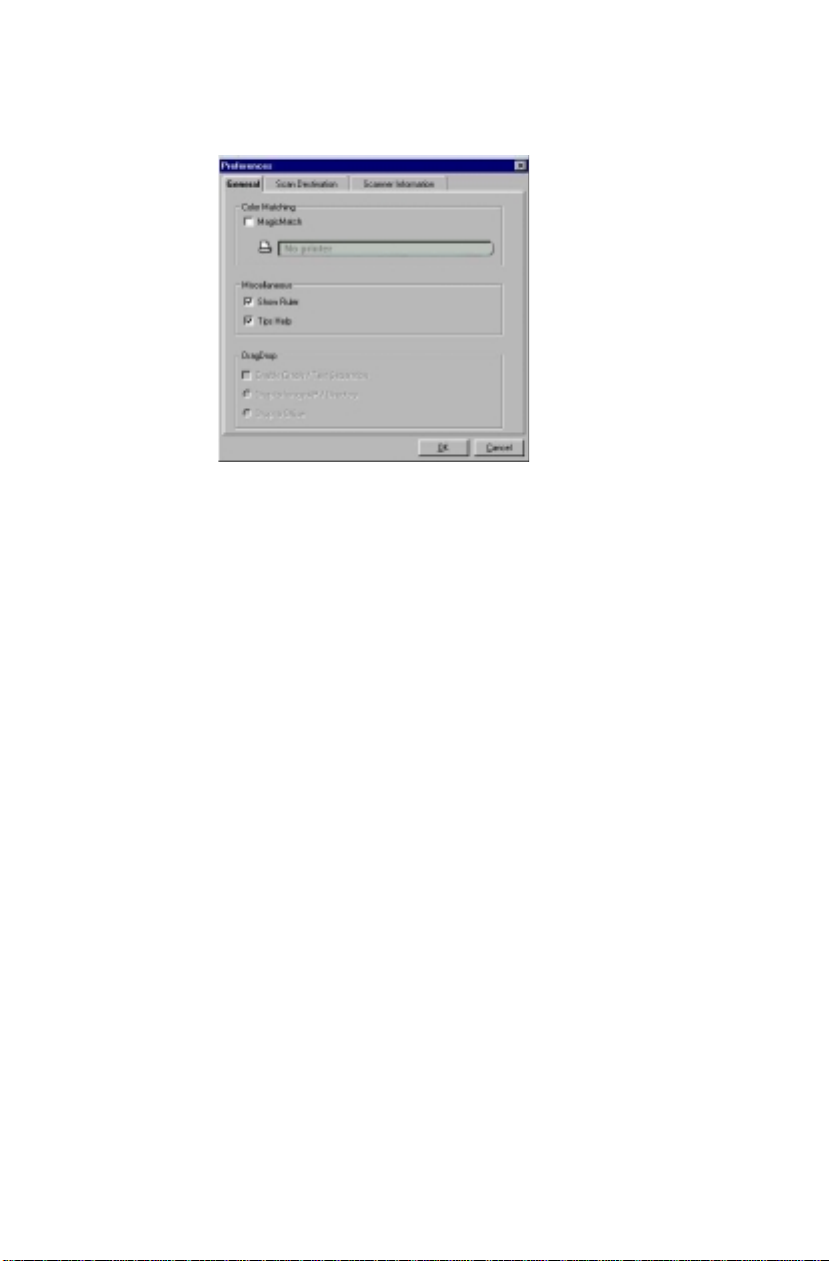
Color Matching/Correction
Color Matching allows you to fine-tune the colors of scanned
images so that they emulate the colors of your original source
documents as closely as possible. This is accomplished using
MagicMatch.
When you click on the MagicMatch checkbox (so a checkmark
appears) the Profile List displays. A profile is a list of applicable
calibration profiles, which MagicMatch uses to render a final output
image. If a printer or calibration profile is not chosen, MagicMatch
will calibrate the image to optimize its display on a monitor.
MagicMatch only functions when you are scanning in color mode.
When you are using Magic Match, it automatically disables the
Level/Curve and Color Adjustment/Balance settings in the
VistaScan Advanced window.
18
Page 25
UMAX Astra 2100U Owner’s Guide
Show Ruler
The Show Ruler command displays or hides the rulers that border
the top and left sides of the Preview window. These rulers
correspond to the rulers on your scanner's object glass. Clicking on
Show Ruler
the
checkbox turns off (removes the checkmark) and
hides the ruler. Clicking on the checkbox again turns the feature on
(displays a checkmark) and shows the ruler.
Tips Help
The Tips Help option determines whether tips are displayed when
you pause with your cursor over a VistaScan option. Click on the
Tips Help
box to enable tips (displays a checkmark). When a
checkmark appears, clicking the checkbox disables the tips and
removes the checkmark.
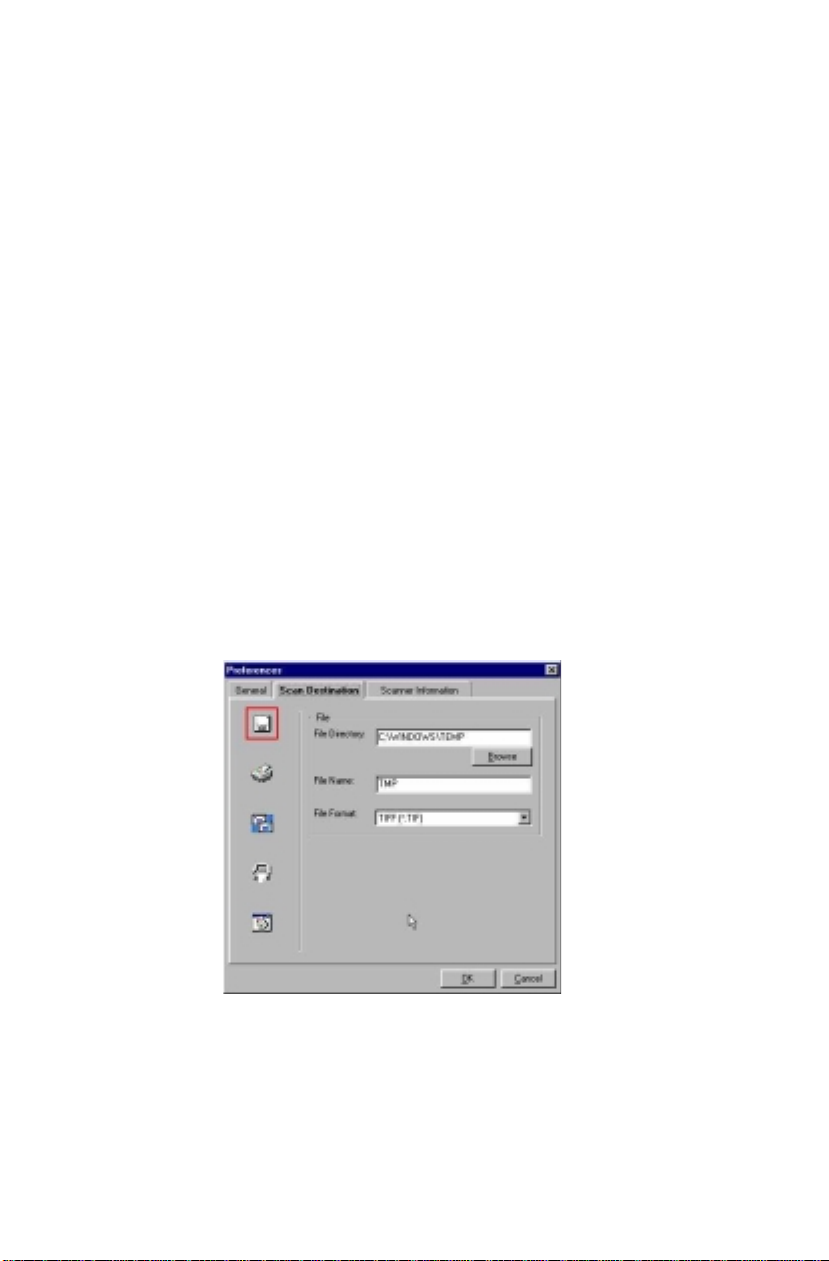
Scan Destination
The options in this Preferences tab specify how scanned images are
stored, printed, faxed, transferred to another application, or
transmitted via e-mail.
19
Page 26

File
To set the location for your stored images:
1.
Click on the
of the Scan To icon set.
2.
Enter the directory in which you want to store the scanned
image file, in the File Directory text box. If you are not sure of
the directory path, click the
directory.
3.
Enter the file name under which you want to store the scanned
image files (such as TMP) in the
4.
Select the file format in which you want to save scanned
images from the
Printer
To specify which printer to use when printing scanned images:
1.
Click on the
default appears to the right of the Scan To icon set.
File
icon. The file preferences appear to the right
File Format
Printer
Browse
icon. The printer currently selected as the
button to locate the desired
File Name
drop down list.
text box.
2.
If you want to change any of the printer settings, click on the
Properties
Make any changes you want, and then click OK to return to the
Preference settings.
20
button. The standard Print Setup dialog box opens.
Page 27

UMAX Astra 2100U Owner’s Guide
E-mail
To specify which e-mail application to use when you e-mail
scanned images:
1.
Click on the
right of the Scan To icon set.
2.
Click on the button next to the e-mail software you are using
(Microsoft Exchange or Lotus cc:Mail).
3.
Select the image format you want to use when you attach
scanned images to your email application from the
Format
Fax
1.
Click on the
driver is not selected) currently selected as the default appears
to the right of the Scan To icon set.
E-mail
drop down list.
Fax
icon. The e-mail preferences appear to the
icon. The fax driver (or printer driver if a fax
Image
2.
If you want to change any of the settings, click on the
Properties
Make any changes you want, and then click OK to return to the
Preference settings.
Application
1.
Click on the
appear to the right of the Scan To icon set.
button. The standard Print Setup dialog box opens.
Application
icon. The application preferences
21
Page 28
2.
Enter the application name to which you want to send the
scanned image files (such as Presto! PageManager) in the
Application Name
text box.
3.
Enter the file name of the application executable in the
Name
text box. If you are not sure of the directory path, click
Browse
the
4.
Select the image format in which you want to save scanned
images from the
button to locate the correct path.
Image Format
drop down list.
File
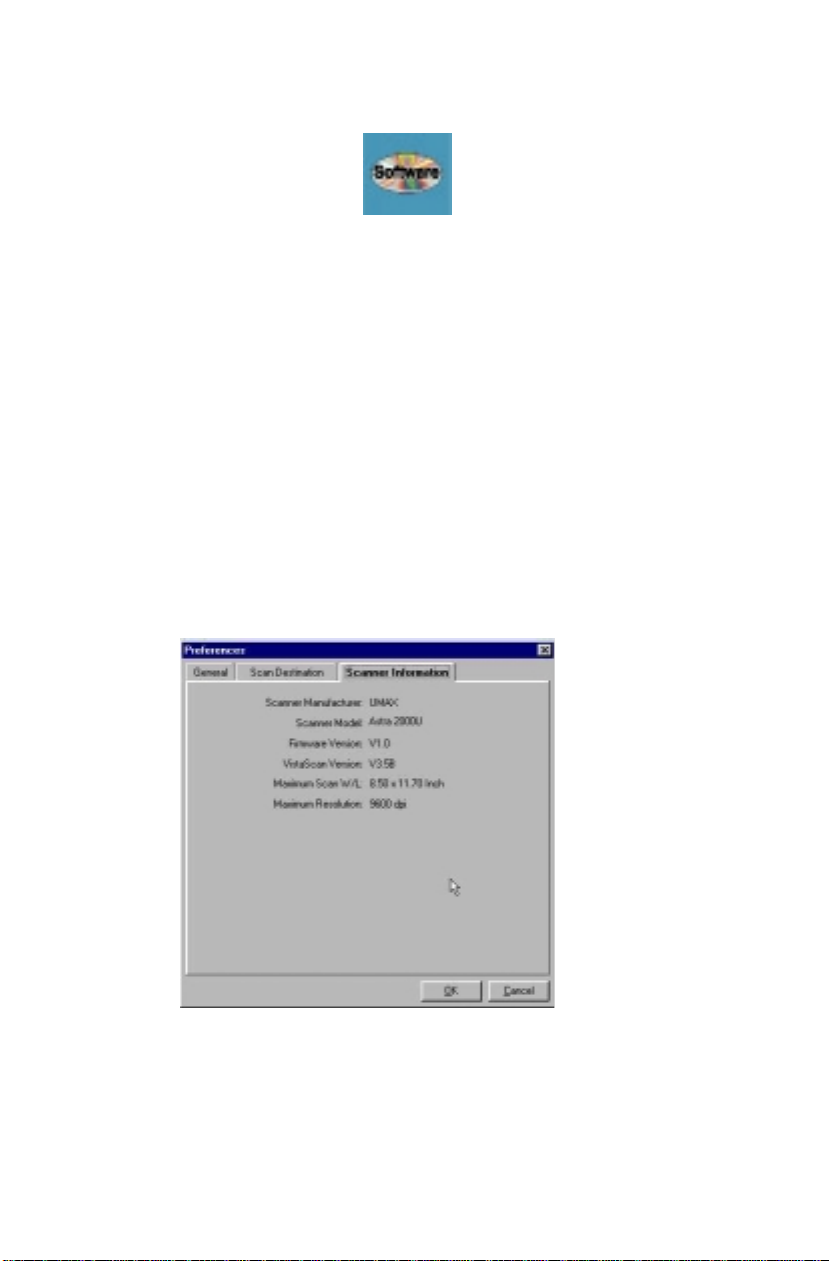
Scanner Information
The Scanner Information tab displays important information about
your scanner.
22
Page 29
UMAX Astra 2100U Owner’s Guide
The information includes:
Scanner Manufacturer
•
Scanner Model
•
Firmware Version
•
VistaScan Versio n
•
Maximum Scan Width and Length
•
Maximum Resolution
•
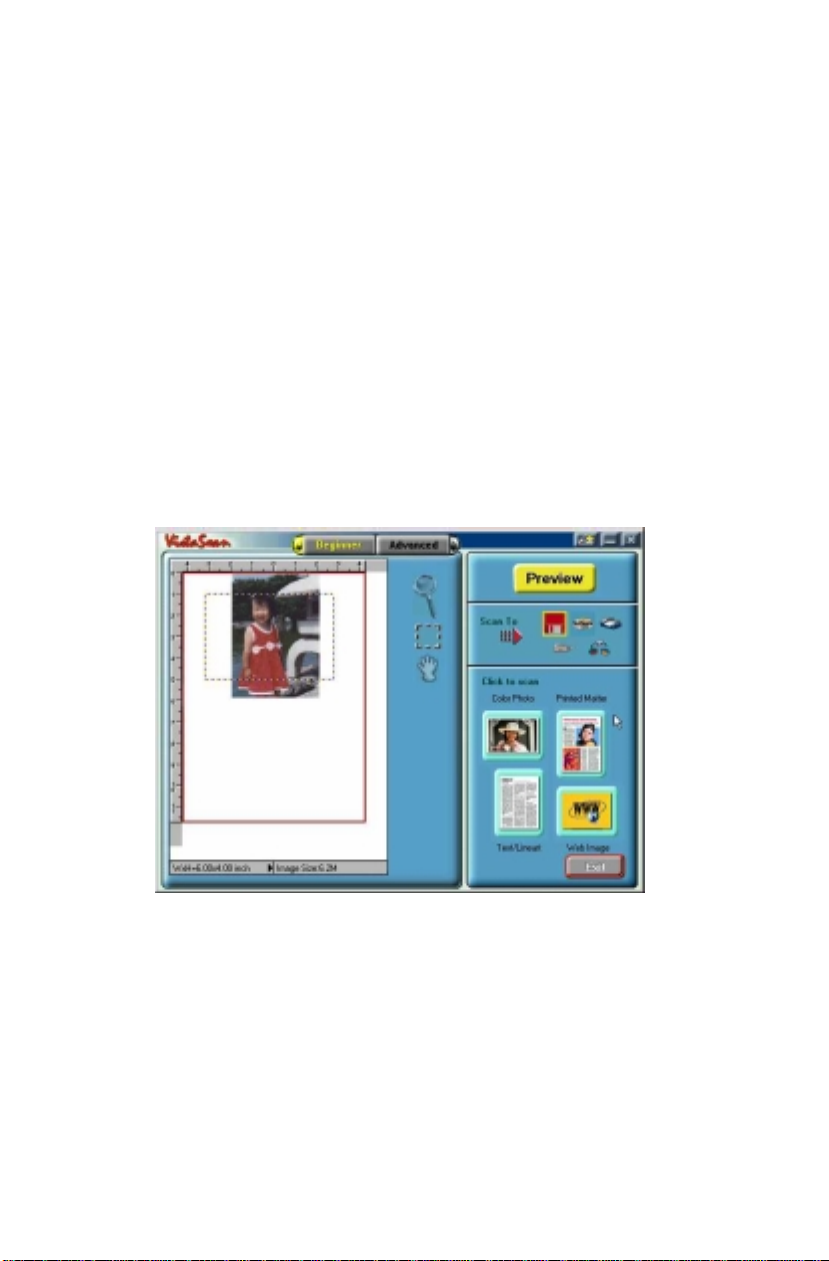
VistaScan Beginner Window Features
The VistaScan Beginner window appears when you launch
VistaScan. The features of the VistaScan Beginner window let you
scan a wide variety of documents, photos, and graphics. Just click a
button.
Scanning an item via the Beginner window consists of just a few
steps:
1.
Perform a preview scan of the item to be scanned by clicking
Preview
the
button. The item is quickly scanned at lowresolution, and is displayed in the Preview window (on the left
side of the VistaScan Beginner window).
23
Page 30
2.
Select what you want to do with the image after it is scanned
using the Scan To icons.
3.
Specify what kind of image you are going to scan, and start the
final scan process using the Click To Scan icons.
Performing the Preview Scan
The Preview feature lets you scan an item at low-resolution so you
can define the specific area to be scanned when you scan at higher
resolution.
To preview the item you are going to scan:
1.
Place the item you want to scan face-down on the object glass,
under the inverted triangle that appears in the center of the rear
ruler.
2.
Click the
window.
The image is quickly scanned and displayed in the Preview
window.
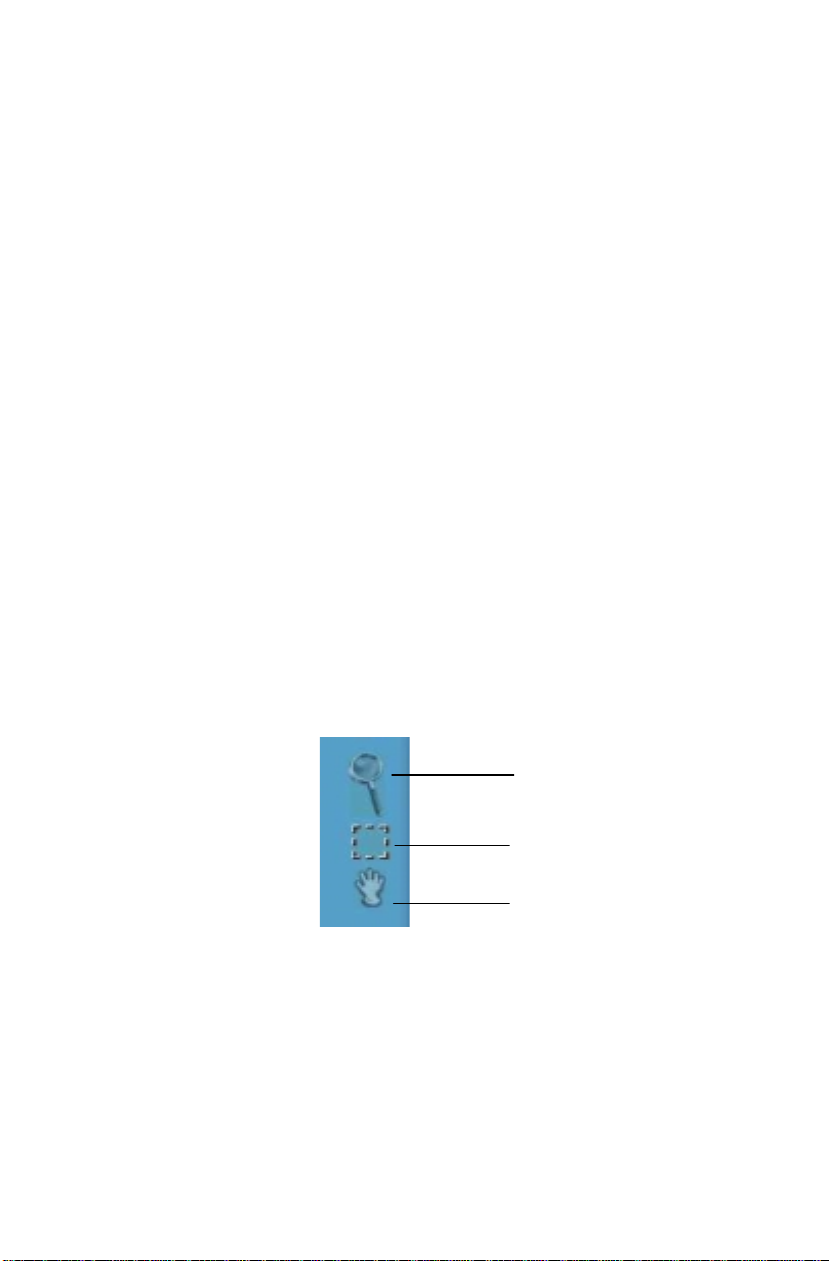
There are three Preview tools in the VistaScan Beginner window.
Zoom tool
the Preview window. To use the Zoom tool:
Once the preview image appears in the Preview window, click on
Magnifying Glass
the
Preview
– Lets you enlarge or reduce the view of the image in
button on the right side of the Beginner
Zoom Tool
Frame Tool
Move Tool
icon.
24
Page 31

UMAX Astra 2100U Owner’s Guide
Move your cursor into the Preview window and click. The image
enlarges. To reduce the view size, press the shift key (the command
key on the Macintosh) and click in the Preview window.
Frame tool
– Lets you select the portion of the image displayed in
the Preview window you want scanned in the final scan step.
You can size the selection frame by clicking on the
Frame
tool and
placing your cursor over one of the four edges of the frame (which
changes the cursor shape to a two-headed arrow), drag the Frame
inward to reduce the size, or outward to increase the siz e.
You can also move a selected frame by positioning the cursor
inside the frame (which changes the cursor shape to a four-direction
arrow), and dragging the frame to another location in the Preview
window.
Move tool
– Lets you move an image in the Preview window so
you can see portions that are not visible because the image is
zoomed too large to display completely. Click on the
Move
tool.
Put the cursor inside the Preview window (which changes the
cursor shape to a hand). Scroll the image view by clicking and
dragging the cursor.
Selecting the Scan to Device or Application
To specify the device or application to which you want to send the
scanned item, click on the icon that represents this device or
application.
The icons include:
File
– stores the scanned image in a file using the file name
specified in the VistaScan Preferenc es.
25
Page 32

Print
g
– prints the scanned item on the default printer.
Fax
– faxes the scanned item using your fax driver.
Application
– sends the scanned item to the applications
specified in the VistaScan Preferenc es.
E-mail
– sends the scanned item as a graphic file to your
Microsoft Exchange or Lotus cc:Mail e-mail application.
NOTE:
(
Other e-mail applications are not supported.)
Defining the Type of Image to Scan
The Beginner window provides pre-defined scanning options so
you can quickly and easily scan any of the following items:
Color Photos – use this setting when you want to scan color or
•
black and white photos
Printed Matter – use this setting when you want to scan
•
something that has been printed like a brochure, magazine, etc.
Text/Lineart documents – use this setting when you want to
•
scan the text contained in a document, or when you want to
scan simple lineart graphics
Web Images – use this setting when you want to scan graphics
•
and then use them on the web
To specify the type of image you are going to scan, click on the
icon that represents the type of item you want to scan.
Color Photos
Settings icon
Text/Lineart
Settings icon
26
Printed Matter
Settings icon
Web Image
Settin
s
Page 33

UMAX Astra 2100U Owner’s Guide
Clicking on any of these icons automatically starts the final scan
process using the pre-defined scan settings. The scanned image is
saved or sent to the device or application you specified by clicking
on the Scan To icon.
VistaScan Advanced Features
The VistaScan Advanced window gives you the ability to adjust the
scan setting individually so you can customize the settings for the
type of document you are going to scan. If you are a novice
computer user, you may want to use the VistaScan Beginner
window until you are more familiar with VistaScan and the
scanning process. The Beginner window options are preset to
provide a quick and easy way to scan images.
If you are an experienced computer user with some scanning
experience, you can use the features contained in the Advanced
window to optimize the scan process for the specific item you are
going to scan.
The Advanced window contains the following tools and features
you can use to scan documents:
Original Document Source Settings
•
Image Mode Settings
•
Resolution Settings
•
Descreen Settings
•
Filter Settings
•
Scaling Options
•
Auto Adjustment Setting
•
Scan Control Unit
•
Multiple Scan Mode Settings
•
Color Adjustment Feature Panel
•
27
Page 34

Changing the Original Document Source
The Original Document Source setting identifies the item you want
to scan.
You can choose from the following settings:
Flatbed Reflective:
Scans paper originals (non-transparencies)
e.g., photographs, documents, and brochures.
Three other setting options appear onscreen that are not available
with this scanner: UTA Transmissive, UTA Negative, Automatic
Document Feeder.
Changing the Image Mode
VistaScan can scan a wide variety of im ag e types.
True Color, RGB:
Scans a full color photo or document. The
RGB indicates the colors of Red, Green and Blue. This setting
creates larger files than the B/W Photo setting.
28
Page 35

UMAX Astra 2100U Owner’s Guide
True Color, CMYK:
Converts RGB (video) color data into
CMYK (printed) color data using a special color transformation
process. When scanning is completed the CMYK image is ready for
printing on a CMYK color printer.
NOTE:
256 Colors
Most ink jet printers use RGB rather than CMYK printing.
: Scans color images using 256 colors. The 256 color
images take up less memory and hard disk space than the True
Color RGB option.
Web Photo:
Scans an image at the appropriate resolution for
display on the monitor.
B/W Photo:
Scans black-and-white photos using 256 shades of
gray (ranging from white to black) so you get smooth shade
transitions in your scanned image.
B/W Document:
Scans text documents, black-and-white line art,
and other black-and-white documents. This selection creates the
smallest files.
FAX:
Scans at the appropriate resolution for faxing.
OCR:
Scans at the appropriate settings for optimal OCR
recognition.
True Color 36-bit RGB:
Scans a full-color photo or document
using 36-bits of information to define each pixel. The RGB
indicates the colors of Red, Green and Blue. This setting creates
larger files than the True Color RGB setting.
B/W Photo, 12-bit:
Scans a black-and-white photo using 12-bits
of data to define each pixel. This setting produces more gray shade
accuracy than the B/W Photo option, but also produces larger file
sizes.
NOTE
: Not all graphic applications support 36-bit graphic files.
To determine whether the software you want to use is capable of
working with 36-bit graphics, refer to your software documentation.
29
Page 36

Changing the Resolution Setting
Scanning resolution is measured in dots per inch (DPI). Resolution
determines the amount of information the scanner will capture in a
scanned image. The higher the resolution, the finer the image detail,
and the larger the file sizes.
VistaScan lets you choose from the following resolution settings:
Higher – this option opens a drop down menu that contains
•
higher resolution settings which include 9600, 8400, 7200,
6000, 4800, 3600, 2400, 1800, and 1600 dpi selections.
1200
•
800
•
600
•
400
•
300
•
200
•
150
•
100
•
75
•
Custom
•
30
Page 37

UMAX Astra 2100U Owner’s Guide
The table below gives you an idea of the file sizes you can expect
based on the original image size and the resolution setting you
specify. These values are based on scanning images in 24-bit, True
Color RGB mode. Image sizes shown below are given in
megabytes.
Table 1. Resolution/File-Size Guidelines
Resolution
(dots per inch)
72 0.30 0.53 1.39
100 0.58 1.00 2.68
200 2.29 4.01 10.70
300 5.15 9.01 24.10
400 9.16 16.00 42.80
600 20.60 36.10 96.30
800 36.60 64.10 171.20
1200 82.40 144.20 385.20
NOTE
: Choosing the True Color RGB 36-bit setting captures more
Image Size
4x5
Image Size
5x7
Image Size
8.5x11
data than the 24-bit setting. This means that the file sizes listed
above will be larger if you scanned images using the True Color
36-bit RGB setting.
Choosing the Best Resolution for Your Scanning Project
To choose the best resolution for scanning, determine what you are
going to do with the image once it is scanned. Matching your
scanning resolution to the image use will give you the best image
for that purpose and will keep the file sizes to the minimum needed.
31
Page 38

Table 2. Recommended Resolutions
Image Use Recommended Resolution
Printing 300 – 600*
Viewing on the Screen 72
Viewing on the Web 72
OCR, B/W 300
Pre-Press 600
Enlarging or reducing 600
* Depending on the resolution of your printer
Using Custom Resolution Settings
You can also specify custom resolution settings that you can use
when you scan. The maximum custom resolution setting you can
define is 2400 dpi. To define the custom resolution settings:
1.
Choose the Custom… option from the Resolution drop down
menu. The Custom Resolution window opens.
2.
Enter the desired resolution setting (between 50 and 2400 dpi)
in the Custom resolution #1 text box.
3.
Repeat step 2 to define the Custom resolution #2 and Custom
resolution #3 settings.
32
Page 39

UMAX Astra 2100U Owner’s Guide
4.
Click OK. The settings you defined appear on the Resolution
setting drop down menu, under the Custom heading.
Changing the Descreen Feature
The Descreen option helps eliminate the patterns that can appear
when you scan printed images found in magazines, brochures,
catalogues, etc. This is accomplished by changing the number of
lines that appear in every inch (lines per inch) of the scanned image.
The Descreen feature is unavailable when you have chosen the B/W
Document, Fax or OCR resolution settings.
To change the Descreen setting:
1.
Click the Descreen option to display the drop down menu.
2.
Choose one of the descreen options:
No Descreen
Magazine
smoothes the fine dot pattern found in glossy magazines.
Newspaper
grain pattern commonly found in newspaper images.
— No Descreening.
— Specifies 133 lines per inch. This option
— Specifies 85 lines per inch. Smoothes the coarse
33
Page 40

Art print
dot pattern found in high quality art prints.
— Specifies 175 lines per inch. Smoothes the fine
Custom
you to specify a custom line screen value. Refer to the
Custom Descreen Settings
set custom descreen values.
Using Custom Descreen Settings
You can also specify custom descreen settings that you can use
when you want to change the lines per inch setting to eliminate
patterns that are generated while scanning printed images. You can
enter custom settings that range from 35 to 400 lines per inch. To
define the custom descreen settings:
1.
Choose the Custom… option from the Descreen drop down
menu. The Custom Descreen window opens.
2.
Enter the desired lines per inch setting (between 35 and 400 lpi)
in the Custom descreen lpi #1 text box.
3.
Repeat step 2 to define the Custom descreen #2 and Custom
descreen #3 settings.
4.
Click OK. The settings you defined appear on the Descreen
setting drop down menu, under the Custom heading.
– Opens the Custom Descreen window, which allows
Using
section for information about how to
Changing the Filter Setting
Image filters are used to soften or sharpen edges and boundaries of
an image.
34
Page 41

UMAX Astra 2100U Owner’s Guide
VistaScan provides the following filter options:
No Filter
— Use this option when you do not want to sharpen or
blur the image.
Sharpen
— Use this option to sharpen lines that may be fuzzy or
not clean in the original image.
Sharpen More
— Use this option when you want to sharpen the
image more than the standard Sharpen filter does.
Blur
— Use this option when you want to soften the edges of an
image.
Blur More
— Use this option when you want to soften the edges
more than the Blur filter does.
Changing the Scale Factor
Scaling lets you automatically enlarge or reduce an image from its
original size (100%) as it is scanned. The scale factor affects the
size of the scanned image and the printed scan output.
You can scale the image using any of the scale factors listed below:
200%
•
150%
•
100%
•
50%
•
25%
•
35
Page 42

10%
•
Custom
•
You can also specify a custom scale factor by choosing the Custom
option from the Scaling drop down menu. See the
Scaling Settings
custom scale factor.
Using Custom Scale Settings
You can specify custom scaling settings to use when you scan. To
define the custom scaling settings:
1.
Choose the Custom… option from the Scaling drop down
menu. The Custom Scaling window opens.
section for more information about specifying a
Using Custom
2.
Enter the desired scale factor in either the Width or Height text
box. When locked, ( ) width and height entries are identical.
The width and height fields are dynamic, updating one field
automatically changes the other field. If the scale output size is
unlocked (
dimensions individually .
3.
To change the unit of measure, click on the down arrow next to
Height and/or Width text boxes to display the possible settings.
You can choose from Inch, Centimeter, Pixel or Percent.
4.
Click OK.
36
), you can set the width and height output
Page 43

UMAX Astra 2100U Owner’s Guide
Using the Auto Adjustment Feature
Auto Adjustment provides a simple way to adjust the light and dark
values of a color or grayscale image you want to scan.
To automatically adjust the light and dark values:
1. Place the item you want to scan on the scanner object glass.
2. Click the
Preview
button from the VistaScan Advanced
window.
3. Select an area that you want to adjust using the
You can edit the
Preview image
before scanning the final
Frame
tool.
image using the “Zoom Tool” and the “Frame Selection Tool.”
To find out more about how to use these tools, click on the user
tips text that appears when your cursor pauses over the tool.
NOTE
: To use VistaScan online help you must have a browser
installed on the system.
4. Click the
Auto Adjustment
check box. The selected area is
adjusted and the preview image refreshes, displaying the results
you can expect when you perform the final scan.
Using the Scan Control Unit
The Scan Control unit contains the Preview and Scan buttons, and
the Scan To options.
37
Page 44

Selecting the Scan to Device or Application
To specify the device or application to which you want to send the
scanned item:
1.
Click on the arrow above the Scan To text on the Scan Control
unit. The Scan Control unit panel slides back to display the
Scan To icons.
Click on the icon that represents the device or application to which
you want to send the scanned item. The icons include:
File
— stores the scanned image in a file using the file name
specified in the VistaScan Preferenc es.
Print —
Fax
Application
specified in the VistaScan Preferenc es.
E-mail
Microsoft Exchange or Lotus cc:Mail e-mail application.
Using the Multiple Scan Mode
You can select multiple portions of the image you scanned in
Preview mode using the Multiple Frame tool.
38
prints the scanned item on the default printer.
— faxes the scanned item using your fax driver.
— sends the scanned item to the applications
— sends the scanned item as a graphic file to your
Page 45

UMAX Astra 2100U Owner’s Guide
The Multiple Frame tool allows you to create two or more selection
frames in the Preview Window.
To create more than one selection frame:
1.
After you have scanned an image in Preview scan mode, click
Multiple Frame
on the
2.
Select the area you want contained in the first frame by clicking
tool.
on the point at which you want to begin the frame, and then
dragging the tool diagonally until the area of interest is
contained in the marquis box.
3.
Click outside of a selected area to save the frame. To create
other frames, repeat steps 1 and 2 until you have created all the
desired frames.
4.
After you create a frame, the Single Frame tool is automatically
selected so you can resize or move the frame you just created.
To select one of the frames you created, double-click on the desired
frame. The frame border of the active frame changes to a marquis
style frame (dotted lines). Once a frame is selected, double-click on
a frame to display the Job Information window for that image,
which contains the image information.
To remove a selected frame:
1.
Click on the
Job List
button. Thumbnails of the selected
frames appear in the job list window.
2.
Click on the thumbnail of the frame you want to remove. A red
box appears around the selected thumbnail. The fram e in the
39
Page 46

Preview window associated with the thumbnail, changes to a
dashed outline.
3.
Click on the “X” button, located in the bottom-left corner of the
thumbnail, to remove the frame.
Using the Color Adjustment Features
The Color Adjustment features allow you to make adjustments to
the colors and/or tones in an image. The following lists the color
adjustment settings you can modify:
Brightness, contrast, highlights, shadows, and gamma
•
Image tones
•
Color balance
•
Rotation/Invert
•
Adjusting Image Brightness, Contrast, Highlights and Shadows
When you click on the Brightness/Contrast tab from the Color
Adjustment panel a series of slide bars appear. Adjust the
associated tones by dragging the slider in one of the bars to the left
or the right.
40
Page 47

UMAX Astra 2100U Owner’s Guide
Using the Brightness Bar
This setting determines the overall intensity level (gray level) of an
image. Moving the slider on the scroll bar to the right increases the
brightness. Moving it to the left decrease s the brig htne ss. The
default setting is zero 0. The maximum brightness setting is 100,
the minimum setting is –100.
Using the Contrast Bar
This setting controls the difference between light and dark areas in
an image. Moving the slider on the scroll bar to the right increases
the gray shades between light and dark areas. Moving it to the left
decreases gray shades between light and dark areas. The default
setting is zero 0. The maximum contrast setting is 100, the
minimum setting is –100.
Highlight Bar
This setting defines the lightest (whitest) tones in the scanned
image. If you broaden the range that includes the highlight points,
the pixels within the newly specified range are be remapped
allowing you to see more details in a color/gray image.
Moving the slider on the scroll bar to the left increases the
brightness. Moving it to the right decr eas es the brig htne ss. The
default setting is 255. The maximum highlight setting is 255; the
minimum is 1 (which is white).
Shadow Bar
The Shadow bar defines the darkest tones in the scanned image.
Moving the slider on the scroll bar to the left increases the
brightness in shadowed areas. Moving it to the right decr eas es the
brightness in shadowed areas. The default setting is 0. The
maximum shadow setting is 254 (which is black), the minimum
setting is 0.
41
Page 48

Gamma Bar
The Gamma bar alters the mid-range gray tones in the scanned
image. All optical devices, such as monitors and scanners, have
some variance in their light sensitivity characteristics. To get a
scanned image with good results, VistaScan provides gamma
adjustment capabilities so you can compensate for this variance in
your scanner.
Moving the slider on the scroll bar to the right increases the
brightness of the mid-range gray tones. Moving it to the left
decreases the brightness of the mid-range gray tones. The default
setting is 1.2.
Reset Button
Click the
Reset
button to cancel the changes and return the value to
the default setting.
Adjusting the Image Tones
The Curve command is another way to make precise adjustments in
the highlight, midtones, or shadow levels in your images. Using
this feature corrects the gray/color values in an image. You change
the values by altering the shape of the curve that represents the
brightness values of pixels.
42
Page 49

UMAX Astra 2100U Owner’s Guide
Click Reset to cancel the changes and return the value to the default
setting.
Adjusting the Color Balance
The Color Adjustment feature controls the hue and saturation of a
particular color.
When you click on the Color Balance tab from the Color
Adjustments panel, a continuous color spectrum wheel appears.
When you click in the wheel the image tones are shifted to the
particular hue that is represented in that area.
Click the
Reset
button to cancel the changes and returns the value
to default setting.
Rotating/Inverting an Image
You can rotate an image clockwise or counter clockwise, and you
can flip images 180 degrees vertically or horizontally.
43
Page 50

The following lists the possible rotate and flip selections:
Flip/Rotate Horizontally — flips the image horizontally and
•
rotates it 90 degrees counter clockwise.
Flip Horizontal — flips the image horizontally.
•
Rotate 90 CCW — rotates the image 90 degrees counter
•
clockwise.
Rotate 90 CW — rotates the image 90 degrees clockwise.
•
Normal — does not rotate or flip the image.
•
Flip Vertical — flips the image vertically.
•
Rotate 180 — rotates the image 180 degrees clockwise.
•
Inverts an image — changes all the dark tones in an image to
•
light tones, and all of the light tones to dark tones. This option
can NOT be reversed using the Edit menu Undo command.
Clicking on the image that shows the desired orientation rotates or
flips the image. Clicking the Reset button cancels the rotate or flip
action and returns the image to the original orientation.
Using VistaAccess – Direct Access
VistaAccess is a utility that provides instant access to several
VistaScan applications. VistaAccess loads at startup, and can be
found in the system tray. When VistaAccess is open, it allows you
to open any of the listed applications with a few clicks of your
mouse.
44
Page 51

To use VistaAccess from the PC:
UMAX Astra 2100U Owner’s Guide
a) Click on the
Start
bar. Click on the
the Programs pop-up menu appears, click the
Programs
option. When
VistaScan
option. The VistaScan pop-up menu appears. Click the
VistaAccess
option to display the scanner icon in the Windows
Task bar (near the time display in the lower right corner of the
window in the system tray).
b) Click the scanner icon in the system tray using your right
mouse button. A pop-up menu appears which contains:
VistaScan
•
VistaShuttle
•
Copy Utility
•
Scanner Test
•
Push Button Configuration
•
Power Saving On/Off Control
•
Find/Refresh Scanner
•
Exit
•
c) Click on one of the listed applications or utilities to launch the
software.
d) Click the
scanner. Click the
help. Click the
Find/Refresh Scanner
Help
option to view VistaAccess online
Exit
option to remove the scanner icon from the
option to re-initialize the
Windows Task bar and close VistaAccess.
To use VistaAccess from the Macintosh :
1.
Click on the control strip in the lower left corner of the
Desktop. A drop down menu appears which contains:
VistaScan
•
Power Saving On/Off Control
•
Find/Refresh Scanner
•
2.
Click on one of the listed applications or utilities to launch the
software.
45
Page 52

3.
Click the
scanner. Click the
help. Click the
Finder area and close VistaAccess.
Find/Refresh Scanner
Help
option to view VistaAccess online
Exit
option to remove the scanner icon from the
option to re-initialize the
Using VistaShuttle
VistaShuttle is a PC-based application that provides an easy way
for you to create greeting cards, wallpaper for your computer
desktop, a screen saver for your computer, e-cards (e-mail greeting
cards), and more.
NOTE
To use VistaShuttle to create an E-Card (electronic greeting card
you send via e-mail):
1.
2.
3.
: VistaShuttle is not compatible with Macintosh.
Click the scanner icon in the system tray (to the far right of the
Windows task bar) using your right mouse button. Select the
VistaShuttle application from the VistaAccess menu. The
VistaShuttle Main window appears.
Click on the E-Card icon. The VistaScan Beginner window
opens so you can scan an item to include in your electronic
greeting card.
Lift the scanner’s document cover and place your document
face-down in the center of the scanner’s object glass.
4.
46
Preview
Click
Preview image before scanning the final image using the
to preview the scanned item. You can edit the
Page 53

UMAX Astra 2100U Owner’s Guide
“Zoom Tool” and the “Frame Selection Tool.” To find out
more about how to use these tools, click on the user tips text
that appears when your cursor pauses over the tool.
NOTE:
VistaScan online help.
5.
Click the icon that most closely represents the item you are
going to scan in the Click To Scan area of the VistaScan
Beginner window.
The item is scanned, and VistaScan automatically closes. After
a moment the VistaShuttle E-Card window appears with the
scanned item in the default E-Card template.
6.
Click on the scanned item to display the image handles. Drag
one of the image handles outward to enlarge the image, or
inward to reduce the image.
You can customize the E-Card template frame that surrounds
the scanned item, the stamp graphic or the paper type by
clicking the desired option from the buttons in the left column.
You must have a browser installed in order to view the
7.
Click and drag any of the E-Card template elements to move
them around, creating your own E-Card style.
8.
Choose the Add text command from the Text menu (or click on
the Text button from the left-hand column). The Text Setting
window opens.
9.
Enter the E-Card greeting text in the text box.
47
Page 54

10.
You can modify the font type, font size, font style (bold, italic,
underlined), text alignment (left, right or centered), and text
color by selecting an option from the dropdown lists or by
clicking on the associated icon from the button bar at the top of
the E-Card window.
11.
Click the
12.
Click the
Text Setting window. You can move the text box around the
E-Card until you find the right spot. Click outside the text box
to anchor the text to the chosen spot.
13.
Click the Mail button from the E-Card window. The Send
dialog box appears.
14.
Choose your e-mail application from those listed (only
Microsoft Exchange and Lotus cc:Mail are supported), and
click the Send button to open the application and attach your
E-Card to the message.
15.
Send your e-mail message.
Finish
button to place the text on the card.
Close
button in the upper right corner to close the
Using the UMAX Copy Utility
The UMAX Copy utility is a PC-based application that lets you
scan and automatically print copies of an image.
NOTE
48
: The UMAX Copy Utility is not Macintosh compatible.
Page 55

To use the copy utility:
UMAX Astra 2100U Owner’s Guide
1.
Click on the
Programs pop-up menu appears, click the
The VistaScan pop-up menu appears. Click the UMAX Copy
Utility selection to open the program.
2.
The UMAX Copy Utility window appears.
3.
Select your copy settings. Click the
copies, then click Exit when you are finished.
UMAX Copy Utility Features
Start
bar. Click the
Programs
Copy
option. When the
VistaScan
button to make the
option.
Brightness:
print the copies of the scanned image. If the image is too dark,
click the up arrow to lighten the copy. If the image is too light,
click the down arrow to darken the copy.
Original Image:
— Color, Gray or B/W. The Single Photo option automatically
crops unnecessary white space around the image (no matter where
the image is placed), reducing memory storage space and speeding
up the scanning.
Printout Qualit y:
for high quality images.
Lets you select the brightness levels to use when you
Lets you specify the type of image to be copied
Choose Normal for draft quality, or choose Best
49
Page 56

B/W images
•
— Selecting Best or Normal produces the same
output.
Gray images
•
— Selecting Best uses an enhanced filter to
improve image quality but slows down the print speed.
Color image
•
— Selecting Normal uses an enhanced filter to
improve color quality; selecting Best uses the MagicMatch
function to produce the best image quality.
Printer Setup
Reset
— Returns any settings you have modified to the default
— Opens the Printer Setup dialog box.
settings.
Exit
— Returns you to the desktop window.
Numeric Buttons
— Lets you specify the number of copies by
clicking on the desired number. The number appears to the left.
Scaling
— Sets the printout size of your scanned image; the default
is 100%.
Copy/Stop
— Copy your scanned image by clicking the
Copy
button. When copying begins the button text changes to read Stop.
To stop printing copies, click the
Stop
button.
50
Page 57

CHAPTER 4. Push Button Scanning
The defining feature of the Astra 2100U is its push button
functionality. You can scan an image to e-mail, perform OCR
(optical character recognition), or even use the scanner as a copy
machine by pushing one of the three buttons on the front panel of
the scanner.
You can increase your productivity by accessing all of the normal
scanner functions without having to launch the software
applications through the onscreen interface.
Before you can use these time-saving functions, you need to
configure the settings for each button. Follow the appropriate set of
instructions below to configure the variables for each button.
Configuring the Push Buttons
To access the configuration utility for the push buttons, follow the
appropriate instructions below:
For PC Users:
1. Click the scanner icon in the Task bar using your right mouse
button. A pop-up menu appears which contains:
VistaScan
•
VistaShuttle
•
Copy Utility
•
Scanner Test
•
Push Button Configuration
•
Power Saving On/Off Control
•
Find/Refresh Scanner
•
Exit
•
2. Click the
Push Button Configuration
option.
51
Page 58

For Macintosh Users:
1. Click on the
Finder
in the upper right corner of the Desktop. A
drop down menu appears which contains:
Hide VistaAccess
•
Hide Others
•
Show All
•
Finder
•
VistaAccess
•
2. Click on the
Push Button Configuration
option.
The Push Button Configuration window appears.
NOTE:
There are three icons in the Push Button Configuration
window. Each icon represents a separate scanner button
function. Clicking on the icon displays a window with
variables.
52
Page 59

UMAX Astra 2100U Owner’s Guide
Configuring the Scanner Button Values
1. When the Push Button Configuration utility opens, the scanner
settings are automatically displayed. Select the image editing
software you want to scan to when you press the Scan push
button, by clicking on the arrow to the right of the
Destination
field. A list of the available applications appears.
Scan
Choose one of the available applications from the drop-down
menu.
2. If the application you want to scan to is not shown in the Scan
Destination drop-down list, click the Add button (to the right of
the scan Destination drop-down list). The Add Application
window opens. Enter the application name in the Application
Name text box. Enter the path and the executable file name for
the application you want to use in the File Location text box.
If you are not sure of the path or the exact executable name,
click the
Browse
button to locate the appropriate file.
3. Click OK to return to the Push Button Configuration window.
Select the application you added to the Scan Destination dropdown list.
4. Select the type of image you are scanning by clicking on the
arrow to the right of the Document Type field and choosing one
of the available document types from the drop-down menu.
53
Page 60

5. Select the desired resolution by clicking on the arrow to the
right of the Resolution field and choosing one of presets from
the drop-down menu.
6. Select a scanning intensity level (brightness) by clicking on the
arrow to the right of the Brightness field and choosing the
desired brightness level from the drop-down menu.
7. Indicates the type of material the original image is printed on.
Select either Reflective or Transmissive by clicking the arrow
to the right of the Original field.
8. Select the size of the original image by clicking on the arrow to
the right of the Scan Area field.
9. Click the OK button to save the Scan push button configuration
settings. These settings will be used whenever you press the
Scan button on the front of the scanner.
NOTE:
You can also click the Default button to return the values
in each field to the default settings. Then click OK.
Configuring the Copy Button Values
1. Click the
Copy
icon to open the window that contains the
variables you are adjusting.
54
Page 61

UMAX Astra 2100U Owner’s Guide
2. Select the printer driver you want to use to print the copies, by
clicking on the arrow to the right of the Copy Destination field.
Choose one of the available printers that is connected to your
computer from the drop-down menu.
3. Select the type of image you are scanning by clicking on the
arrow to the right of the Document Type field and choosing one
of the available document types from the drop-down menu.
4. Select the desired resolution by clicking on the arrow to the
right of the Resolution field and choosing one of resolution
presets from the drop-down menu.
5. Select a scanning intensity level (brightness) by clicking on the
arrow to the right of the Brightness field and choosing the
desired brightness level from the drop-down menu.
6. Original indicates the type of material the original image is
printed on. Select either Reflective or Transmissive by clicking
the arrow to the right of the Original field.
7. Select the file size for the scanned image by clicking on the
arrow to the right of the Scan Area field and choosing the
desired dimensions from the drop-down menu.
8. Click the OK button to save the Copy push button
configuration settings. These settings will be used whenever
you press the Copy button on the front of the scanner.
NOTE:
values in each field to the default settings. Then click
You can also click the Default button to return the
OK
these values for the copy button.
save
55
Page 62

Configuring the Custom Button Values
1.
Click on the
variables you are adjusting.
NOTE:
mail and OCR (optical character recognition) features. You
configure the variables for each function separately.
To configure the values for the e-mail function:
1.
If the E-mail icon is not selected (enclosed in a red box), click
E-mail
the
Custom
The Custom icon controls the values for both the E-
icon.
icon to open the window that contains the
56
Page 63

UMAX Astra 2100U Owner’s Guide
2.
Select the e-mail application (only Microsoft Exchange and
Lotus cc:Mail are supported) to send the scanned im ag e to, by
clicking on the arrow to the right of the Mail Dest ina tion field .
3.
Select the type of image you are scanning by clicking on the
arrow to the right of the Document Type field and choosing one
of the available document types from the drop-down menu.
4.
Select the desired resolution by clicking on the arrow to the
right of the Resolution field and choosing one of resolution
presets from the drop-down menu.
5.
Select a scanning intensity level (brightness) by clicking on the
arrow to the right of the Brightness field and choosing the
desired brightness level from the drop-down menu.
6.
Original indicates the type of material the original image is
printed on. Select either Reflective or Transmissive by clicking
the arrow to the right of the Original field.
7.
Select the file size for the scanned image by clicking on the
arrow to the right of the Scan Area field and choosing the
desired dimensions from the drop-down menu.
8.
Click the OK button to save the Custom E-mail push button
configuration settings. The Custom setting is now configured to
scan and send the scanned image to the selected e-mail
application.
To configure the Custom button to scan and OCR a document,
refer to the
Character Recognition) function
NOTE:
values in each field to the default settings. Then click
these values for the e-mail function of the Custom button.
To configure the values for the OCR (Optical
section that follows.
You can also click the Default button to return the
OK
save
57
Page 64

To configure the values for the OCR (optical character
recognition) function:
1. If the OCR icon is not selected (enclosed in a red box), click the
OCR icon.
2. Select the text editing application to use by clicking on the
arrow to the right of the OCR Destination field. Choose an
application from the drop-down menu.
3. NOTE: You do not need to select values for Document Type,
Resolution, Brightness, nor for Scan Area.
4. Original indicates the type of material the original image is
printed on. Select either Reflective or Transmissive by clicking
the arrow to the right of the Original field.
5. Click the OK button to save the Custom OCR push button
configuration settings. The Custom setting is now configured to
scan, OCR and then send the editable text to the selected OCR
Destination application.
6. To configure the Custom button to scan and e-mail a document,
refer to the
section above.
To configure the values for the e-mail func tio n
NOTE:
values in each field to the default settings. Then click
these values for the OCR function of the Custom button.
You can also click the Default button to return the
OK
save
Using the Push Buttons
Once you have configured the variables for each of the push
buttons, you can scan images and text by simply pressing one of the
buttons on your scanner.
58
Page 65

UMAX Astra 2100U Owner’s Guide
To scan using one of the scanner push buttons:
1. Press the Scan, Copy, or Custom (i.e. e-mail or OCR) button.
2. A Scan Progress window appears showing you the status of the
scanning task.
3. When the scan is complete, the image you scanned appears in
the application you specified when you configured the button.
59
Page 66

60
Page 67

CHAPTER 5. Scanning Projects
The UMAX Astra 2100U scanner includes bundled software to
help you with a variety of tasks. This chapter shows you how to
make a personalized calendar, create Web-ready images, and even
turn a page of text into an online text document that you can edit.
Using VistaScan to Scan and Print Images
To perform your first scan:
1. Open the VistaScan software application.
For PC Users:
a. Click on the
When the Programs pop-up menu appears, click the
VistaScan
Click the
the Windows Task bar (near the time display in the lower
right corner of the window in the system tray).
b. Click the scanner icon in the Task bar using your right
mouse button. A pop-up menu appears.
c. Click on VistaScan to launch the softwa re.
Or you can also:
a. Click on the
screen.
b. Click
c. Select
d. Click
For Macintosh Users:
a. Click on the
Desktop (near the Finder). A pop-up menu appears.
b. Click on VistaScan to launch the softwa re.
Start
bar. Click on the
option. The VistaScan pop-up menu appears.
VistaAccess
Start bar
Programs
VistaScan
VistaScan
Scanner icon
option to display the scanner icon in
in the bottom-left corner of the
.
.
.
in the upper right corner of the
Programs
option.
61
Page 68

Or you can also:
a. Double-click the
b. Double-click the
c. Double-click the
Hard Drive
icon.
UMAX VistaScan
UMAX VistaScan
folder.
application icon to
launch VistaScan.
2. The VistaScan Beginner window appears. Lift the scanner’s
document cover and place your document face-down in the
center of the scanner’s object glass.
3. Click the
Preview
button to preview the scanned item. You can
edit the Preview image before scanning the final image using
the “Zoom Tool” and the “Frame Selection Tool.” To find out
more about how to use these tools, click on the user tips text
that appears when your cursor pauses over the tool.
NOTE:
This feature is only available if you have a browser
installed.
4. Click the
Printer
icon in the “Scan to” control panel to indicate
that you want to scan and print the image.
5. Click one of the four icons in the
Click to Scan
area of the
VistaScan Beginner window. Your selection identifies the type
of image you are about to scan and tells VistaScan how to set
the scanner options for the best results. The image type
selections include: Color photos, Text/lineart, Web Images and
Printed Matter setting s.
Once you click on the desired image type, the scanner starts
scanning the image using the appropriate settings.
For Macintosh Users:
After the scan is complete, a print window appears. Verify that
the destination settings are correct and then click the
Print
button.
6. When the scan is complete, the image is printed on your printer.
62
Page 69

UMAX Astra 2100U Owner’s Guide
Using VistaScan to Scan a Photo
to E-mail
Scanning an image to e-mail is similar to the procedure described in
the
Using VistaScan to Scan and Print Images
guide. Follow steps 1 through 3 as listed in the Scan and Print
instructions, then proceed with the following steps:
section earlier in this
1. Click on the
values for scanning an image to e-mail.
NOTE:
the VistaScan Beginner window. For information about setting
preferences, refer to
2. Click on the
VistaScan Beginner window. The scanner starts scanning the
image using the appropriate settings for web images.
3. After the image is scanned, a Microsoft Exchange or Lotus
cc:Mail e-mail window appears with an icon representing the
scanned image embedded in the message area of the window.
NOTE
or Lotus cc:Mail refer to the user documentation that came with
the application.
4.
Fill out the rest of the standard e-mail information (address,
subject, etc.) as you ordinarily would. Send the e-mail.
E-mail
You may need to adjust the destination preferences in
Web Image
: For more information about using Microsoft Exchange
icon to set the scanner settings to the best
Setting the VistaScan Preferences
icon in the
Click to Scan
section.
area of the
Using VistaScan with PhotoDeluxe to
Create Web-ready Images
You can add flair to your Web pages by importing scanned photos.
The version of PhotoDeluxe is different for PC and Macintosh
users. Follow the appropriate set of instructions based on the type
of system you are using.
63
Page 70

For PC Users:
1.
Open the PhotoDeluxe application. For detailed instructions on
how to start PhotoDeluxe, refer to steps 1-5 from
Your First Scan
2.
The PhotoDeluxe screen appears. Click on the Get & Fix Photo
tab in the upper-left corner, and then select the Get Photo
button.
The Get Photo drop down menu appears.
.
Get Photo
Button
Chapter 2.
3.
Click the
displaying the Beginner window.
4.
Select an image you want to post on a web site (i.e., a picture,
a postcard, etc.).
5.
Lift the document cover and place the item face-down in the
center of the object glass of the scanner.
64
Scanners…
option. The VistaScan software opens
Page 71

UMAX Astra 2100U Owner’s Guide
6.
Click the
scan of the image. The preview image displays in the Preview
window.
7.
Click on the
the VistaScan window. After the image is scanned, VistaScan
automatically closes and you return to the PhotoDeluxe
window. The scanned image appears in the PhotoDeluxe work
area.
8.
Click the
appears in the
PhotoDeluxe window.
9.
Click on the
10.
Choose the
down menu.
11.
Follow the onscreen instructions for trimming, sizing, reducing,
and specifying the file format (either GIF or JPEG compressed
formats).
If you choose the GIF format:
notifying you it will convert the photo to the GIF format. Click OK.
Export GIF
An
Preview
Done
button. The scanner begins a low-resolution
Web Image
tab. A thumbnail of the image you scanned
Open Photos
Save & Send
To the World Wide Web…
window appears.
icon in the
window on the left side of the
icon.
An
Click to Scan
option from the drop-
Export Options
section of
window appears
Save
Save
A
button.
If you choose the JPEG format:
12.
Select the location where you want to save the image by
clicking on the arrow to the right of the
displays your folder or directory structure. Choose a location by
clicking on it.
13.
Enter the name you would like to save the file as in the
name
field. Click the
14.
Click the
the destination you specified.
Done
tab. Your Web-ready image is now located in
window appears.
Save in
field. This
File
65
Page 72

For Macintosh Users:
1.
Open the PhotoDeluxe application. The PhotoDeluxe window
appears.
Refer to
start PhotoDeluxe.
2.
Place the item you would like to scan (i.e. a picture, a brochure,
etc.) face-down so the top center of the image aligns with the
arrow (∇) at the top of the object glass.
3.
Click the
Beginner window. A window appears notifying you that the
scanner is calibrating.
4.
The preview image should now be displayed in the Preview
window area on the left side of the VistaScan window.
5.
You can edit the
image using the “Zoom Tool” and the “Frame Selection Tool.”
6.
Click the
VistaScan Beginner window. The image is scanned and you
return to the PhotoDeluxe window.
NOTE:
things: it activates the scanner, and automatically sets all of the
scanner settings to ensure you get the best scanning results.
Chapter 2. Your First Scan
Preview
Web Image
Choosing an icon in “Click to Scan” area does two
button on the right side of the VistaScan
Preview image
icon in the
for instructions on how to
before scanning the final
Click to Scan
section of the
66
Page 73

UMAX Astra 2100U Owner’s Guide
7.
When the scan is complete, a window appears requesting that
you save the document. Type a name in the field that appears to
the right of “Save this document as:”
NOTE:
Acquire
choose to save the image in the hard drive or on the desktop by
clicking on the arrow to the right of the My Photos box at the
top of this window.
8.
After a moment the image appears in the My Photos gallery
window. Double-click the thumbnail to view a full-size,
high-resolution scan of the image in the work area.
9.
Click the
10.
Click the
By default the image is saved as “untitled - #” in the
section of the floating gallery window. You can also
Send
button.
To the Internet
tab.
11.
Click the
you to alter the image.
•
•
•
Web Page
Click the
want to use. Click OK when finished.
Click the
Click the
resolution to make the image easier to download.
button. A new window appears allowing
1Trim
2Size
3Reduce
tab to select the portion of the image you
tab to adjust the size of the image.
tab to convert the image to a lower
67
Page 74

Click the
•
or GIF format. A Save window appears. Choose a location
in which to save the image. Click the OK button in the
window that appears to continue converting the image to
the format you chose.
4Choose
tab to convert the image to either JPEG
12.
13.
Click the
Select
5Done
Quit
tab to finish.
from the File menu to exit PhotoDeluxe.
Using Presto! PageManager to Scan a
Form and Edit it with PageType
NOTE:
application. The following procedure is for PC users only.
1.
2.
3.
4.
5.
6.
7.
Presto! PageType is not a Macintosh compatible
Click the
Click
Select
Select
The Presto! PageManager window appears.
Choose
choose
VistaScan Beginner window appears.
Lift the document cover and place the form you want to scan
face-down in the center of the object glass of the scanner.
Start
bar in the bottom-left corner of the screen.
Programs
Presto! PageManager
Presto! PageManager
Select Source
VistaScan
.
from the File menu. A window appears,
. Select
Acquire
.
.
from the File menu. The
8.
Click the
9.
Click the
the scan.
10.
When the scan is complete, click the
of the window. The scanned image of your form appears in the
PageManager Inbox window.
68
Preview
Text/Lineart
button.
icon in the
Click to Scan
Exit
button at the bottom
area to begin
Page 75

UMAX Astra 2100U Owner’s Guide
11.
Click and drag the scanned form down to the PageType
application icon. PageType opens and automatically displays
the scanned form.
12. Fill in the form text desired using the PageType tools.
13. Save the image when you have finished editing the form
by selecting
Save As
from the File menu and entering the
relevant information.
69
Page 76

Creating a Calendar wit h PhotoDeluxe
You can create your own calendar using PhotoDeluxe. This process
differs for PC and Macintosh users. Follow the appropriate
instructions for the system that you are using.
For PC Users:
1. Insert the PhotoDeluxe CD in your CD-ROM drive.
NOTE:
drive to access the calendar temp lates.
2. Open PhotoDeluxe (refer to
3. The PhotoDeluxe window appears.
4. Click the
5. Click the
The PhotoDeluxe CD must be loaded in the CD-ROM
Chapter 2. Your First Scan
instructions on how to start PhotoDeluxe).
Cards & More
Calendars
option from the drop-down menu.
button.
icon, and choose the
for
Monthly Calendars
70
Page 77

UMAX Astra 2100U Owner’s Guide
6. Follow the onscreen instructions through step 5, then click the
Add tab and choose the scanner icon. The VistaScan Beginner
window opens automatically.
7. Click the
Preview
button to perform a low resolution scan.
8. Click on the icon that most closely matches the item you are
going to scan in the
9. The
Open Photos
Click to Scan
area.
dialog box displays a thumbnail version of
the image you scanned.
10. Drag the thumbnail from the Acquire section of the My Photos
dialog box to the desired location on the calendar.
select
Save
from the File menu to store the calendar page, or
Print
to print the calendar page.
11. Click
12. Repeat this process until all calendar pages are complete.
71
Page 78

For Macintosh Users:
1. Insert the PhotoDeluxe CD in your CD-ROM drive.
NOTE:
The PhotoDeluxe CD must be loaded in the CD-ROM
drive to access the calendar temp lates.
2. Open PhotoDeluxe (refer to
Chapter 2. Your First Scan
instructions on how to start PhotoDeluxe).
3. The PhotoDeluxe window appears.
4. Click the
5. Click the
Cards & Calendars
Calendars
button and follow the onscreen
tab.
instructions:
a. Click the
1Calendar
tab. Click the
Month
button. Choose
a month, and then click OK.
b. Click the
c. Click the
2Year
tab and select the appropriate year.
3Layout
tab. Click the
Choose layout
Several layouts appear after the com puter has had time to
read the information from the CD. Select a layout from the
Template floating window.
d. Click the
4Style
tab. Click the
Choose Style
button.
Double-click one of the styles that appear in the Templates
window.
e. Click the
5Add
tab. Click the
Scanner
button to launch the
VistaScan Beginner window.
f. Click the
Preview
button, then click one of the icons from
the Click to Scan section.
g. A window appears requesting that you save the document.
Type a name in the field that appears to the right of “Save
this document as:”
NOTE:
the
By default, the image is saved as “untitled - #” in
Acquire
section of the floating gallery window. You
can also choose to save the image in the hard drive or on
the desktop by clicking on the arrow to the right of the My
Photos box at the top of this window.
for
button.
72
Page 79

UMAX Astra 2100U Owner’s Guide
h. After a moment the image appears in the My Photos gallery
window. Double-click the thumbnail to view a full-size,
high-resolution scan of the image in the work area.
i. Click the
6. Drag the thumbnail from the Acquire section of the My Photos
dialog box, to the area on the calendar where you wish to place
the photograph.
Done
tab.
or
Save As
Print
to print the calendar page.
from the File menu to store the calendar page,
7. Select
Converting Scanned Text to Editable Text
with OmniPage
OmniPage lets you scan an image that contains text and convert it
to editable text so you do not have to retype the text. The process
differs slightly for PC and Macintosh users. Follow the appropriate
instructions for the system that you are using.
Opening OmniPage LE
For PC Users:
1. Click the
2. Click
3. Select the
4. Select
LE window appears.
Start
bar in the bottom-left corner of the screen.
Programs
OminPage LE
.
Caere Applications
option.
to launch the application. The OmniPage
73
Page 80

For Macintosh Users:
1. Double-click the
2. Double-click
3. Double-click the
appears. (If this toolbar does not appear, click on the
menu and select
4. Click
Select Scanner
Astra Series
Hard Drive
OmniPage LE
OmniPage LE
Show Toolbar
from the Settings menu. Select
then click OK.
icon.
.
icon. An OmniPage toolbar
Window
).
UMAX
Converting Scanned Text with OmniPage LE
1. Position the image you want to scan face-down on the
scanner’s object glass.
74
Page 81

UMAX Astra 2100U Owner’s Guide
2. From the OmniPage LE window, click the
select Flatbed. Click
For PC Users:
1.
Choose
from the Paper Path field in the Load Scanner dialog box, then
click
text appears in the OmniPage window.
2.
Click the
3.
A small dialog box appears. If you have additional pages to
scan, click the
4.
Click
pages, and enter the file name, file directory and file type (the
format in which you want to save the file).
5.
Click OK to save the recognized text.
6.
Open your word processor application. Open the file that you
just saved so you can review, edit, cut or copy portions of the
text.
Acquire Image
Scan
to scan the image. When the scan is complete, the
OCR
Stop Scanning
Done
.
from the File menu. Select
button to perform the character recognition.
Add Pages
button and repeat steps 2 and 3.
when you have scanned all the desired
Scanner
icon and
Flatbed
For Macintosh Users:
1.
2.
3.
4.
5.
6.
7.
Scanner
Select
Flatbed
Click
Click the
is complete, the text appears in the OmniPage window.
Click the
Save As
Click
Choose
Open your word processor application. Open the file that you
just saved so you can review, edit, cut or copy portions of the
text.
Quit
from the Settings menu.
from the Select Scanner window.
Scan Image
Perform OCR
to save the converted text.
from the File menu to close OmniPage LE.
button to scan the image. When the scan
button.
75
Page 82

Creating an Album with
Presto! PhotoAlbum
A variety of templates are included in Presto! PhotoAlbum that you
can use for albums. You can also save an album you create and use
it later as a template for creating another albums. This process
differs for PC and Macintosh users. When a step is different for PC
or Mac users, a note gives platform-specific instructions.
Opening PhotoAlbum:
1.
Open the Presto! PhotoAlbum program.
For PC Users:
a. Click the
b. Click
c. Select
d. Select
appears.
For Macintosh Users:
a. Double-click the
b. Double-click the
c. Double-click the
launch VistaScan. The PhotoAlbum window appears.
Start
Programs
Presto! Pho to A lb um
Presto! Pho to A lb um
bar in the bottom-left corner of the screen.
.
.
. The PhotoAlbum window
Hard Drive
Presto! PhotoAlbum
Presto! PhotoAlbum
icon.
application folder.
application icon to
76
Page 83

Creating a Photo Album
UMAX Astra 2100U Owner’s Guide
1. Click on the
Create
button, and then click on the
Template
button.
2. Choose an album template category by selecting one of the
category icons in the column on the left.
3. Display the available template outlines by clicking on the
template thumbnail. Browse through the template thumbnails
using the scroll bar.
NOTE
: Clicking on the thumbnail displays a description of the
layout. The description includes information when the layout
was originally created and how many pages are contained in the
layout.
4. When you have chosen a template, click OK. After a moment
the template appears.
5. Click on the
Command
icon in the upper-left corner of the
floating Photo Browser window. If this window is not
displayed, click on the Photo Browser button, located on the
left side of the row of three icons on the bottom of the screen.
6. Choose
Choose
7. Click on the Photo Browser window
and then click
Select TWAIN Source
VistaScan,
then click the
Acquire
to activate the scanner and launch
from the drop-down menu.
Select
button.
Command
icon again,
VistaScan. The VistaScan Beginner window opens.
8. Lift the document cover and place the image you want to scan
face-down in the center of the object glass of the scanner.
9. Click the
Preview
button to perform a preliminary low-
resolution scan of the photo you want to include in the album..
10. Specify the area to be scanned in the final scan using the
VistaScan
Frame
Tool.
77
Page 84

11. Click on the
Color Photos
icon in the
Click to Scan
VistaScan Beginner window. The scanner performs the final,
high-resolution scan.
For PC Users:
area of the
After the scan is complete, click the
Exit
button.
12. A thumbnail of the image you just scanned appears in the Photo
Browser window.
13. Click and drag this image into the spaces that read, “Put Photo
Here!”
14. Repeat this process by scanning more photos and inserting
them in the blank cell photo frames until you have filled the
whole album.
15. Choose the
Save As
command from the
Album
menu. Enter
the file name and directory location in which you want to store
the album. Click OK to save the album.
78
Page 85

CHAPTER 6. How to Get Help
The Astra 2100U scanners have been designed to be reliable,
easy-to-install, and easy-to-use. If you encounter any problems
while installing or using your scanner, please follow the solutions
outlined below.
Consult the online manual.
•
Read the troubleshooting section below.
•
Contact UMAX directly.
•
Using Online Manuals
All bundled software comes with online help, which essentially is
an online manual. Read the following information to find out how
to access the manuals for each individual software application.
Accessing the UMAX VistaScan Online Manual
For PC Users:
If the VistaScan application is already open, you can locate the
manual by clicking on the user tips that pop up when your mouse
scrolls over a tool. If VistaScan is not open, follow the instructions
below.
1. Click
2. Click
3. Click
4. Click
launch the
Start
.
Programs
VistaScan
VistaScan User’s Guide
.
.
VistaScan User’s Guide
. Your Internet browser should
.
79
Page 86

For Macintosh Users:
If the VistaScan application is already open, you can locate the
manual by clicking on the ? icon located in the upper right corner.
If VistaScan is not open, follow the instructions below.
1. Double-click the
2. Double-click the
3. Double-click the
should launch the
Hard Drive
UMAX VistaScan
VistaScan Help
VistaScan User’s Guide
icon on the desktop.
folder.
. Your Internet browser
.
Accessing the Adobe PhotoDeluxe Online
Manual
For PC Users:
1. Place the PhotoDeluxe CD in the CD-ROM drive. (If the install
screen automatically launches, skip to step 4.)
2. Double-click
3. Right-click the
4. Click
For Macintosh Users:
1. Place the Adobe PhotoDeluxe CD in the CD-ROM drive.
ReadMe & Guide
best suited to your needs.
My Computer
CD-ROM drive
. From here, you can select the manual
.
and select
AutoPlay.
2. Double-click the
3. Double-click
4. Double-click
please install Adobe Acrobat Reader 3.01. See “Installing
Acrobat Reader” below for instructions.)
80
PhotoDeluxe CD
English.
Getting Started.pdf
icon on the desktop.
. (If you receive an error,
Page 87

UMAX Astra 2100U Owner’s Guide
Accessing the Presto! PageManager Online
Manual
For PC Users:
1. Click
2. Click
3. Click
4. Click
For Macintosh Users:
1. Double-click the
2. Double-click the
3. Double-click
Start.
Programs
Presto! PageManager Deluxe.
PageManager User’s Manual.
install Adobe Acrobat reader 3.01. See “Installing Acrobat
Reader” below for instructions.)
.
Hard Drive
Presto! PageManager 2.31.02
User’s Guide.pdf.
icon on the desktop.
(If you receive an error, please
folder.
Accessing the Caere OmniPage Online Manual
For PC Users:
1. Click
2. Click
3. Click
Start.
Programs.
Caere Application
.
4. Click
For Macintosh Users:
1. Double-click the
2. Double-click the
English Documentation
.
Hard Drive
OmniPage LE
icon on the desktop.
folder.
81
Page 88

3. Double-click
please install Adobe Acrobat Reader 3.01. See “Installing
Acrobat Reader” below for instructions.)
OmniPage Ltd.pdf
. (If you receive an error,
Installing Acrobat Reader for Macintosh Users
To read the OmniPage LE online manual you need to use Adobe
Acrobat Reader. If it is not already installed on your computer,
follow the installation instructions below.
1. Place the VistaScan CD in the CD-ROM drive.
2. Double-click the
3. Double-click the
4. Double-click the
5. Double-click the
6. Double-click the
UMAX VistaScan CD
Acrobat Reader Install folder.
3.0 folder
Reader folder.
Install Acrobat 3.0
.
icon.
icon.
Troubleshooting
This scanner is designed to be reliable and easy to install. If you
have any problems with your scanner, please read the notes that
follow to find out probable causes of the problem.
General Problems and Solutions
Problem:
The scanner lamp fails to light, flickers or dims
Solution:
1. Check to ensure the power adapter is plugged in completely.
2. The scanning lamp is failing or has failed and needs to be
changed. Please contact your dealer or UMAX Technical
Support.
82
Page 89

UMAX Astra 2100U Owner’s Guide
Problem:
The scanner text failed. The scanner text utility is a PC-based
utility. Macintosh users will not encounter this problem.
Solution
Make sure the interface cable is properly connected to the USB
connector port on your computer. Find/refresh the scanner after
reinserting the USB cable. Try the other USB port on the computer.
:
Windows 98/95 OSR2 Problems and Solutions
Problem:
Your computer does not recognize your USB scanner.
USB support must be installed and enabled or the scanner will not
work. Different USB chipsets have different levels of USB
compliance. The initial USB chipset that was released was the
INTEL82371SB. It supports most low draw devices such as mice
and joysticks, but high draw devices such as scanners might have
trouble functioning on the “SB” chipset.
Later chipset versions include SIS, ALI, and both have many fully
functional chipsets as well as Intel’s 82371AB and 82371AB/EB.
Solution:
To determine your USB chipset type:
1.
Click the
pop-up menu appears.
2.
Click on Properties command using the left mouse button. This
brings up the Device Manager.
3.
The last item listed in the Device Manager should be Universal
Serial Bus Controllers.
4.
Click the + beside the Universal Serial Bus Controllers entry.
Two items display, (your chipset) PCI to USB Open Host
Controller and Root Hub.
My Computer
icon using the right mouse button. A
83
Page 90

If a yellow exclamation point appears, or if one or both of them are
not present, please contact your computer manufacturer. If the USB
section is not shown in the Device Manager, we recommend you
contact your computer manufacturer to enable USB.
Problem:
Your USB port worked with other USB devices, but does not work
with the scanner.
Solution:
It is important that you connect the scanner’s power and USB
cables in the following order:
1. Plug the power adapter cord into the scanner and into an outlet.
The scanner’s power will then be ON.
2. Connect the USB cable to the USB port on the back of the
computer.
NOTE:
If you unplug the scanner’s power to turn it off, you must
also disconnect the USB cable from the computer. To resume use of
the scanner, reconnect the power cord, and then the USB cable.
To use your Astra 2100 scanner, it is important that your computer
is set up to correctly support a USB device. You must have the
following:
Windows 95 OSR2, revision B or later
•
To check your system:
1. Right click on your
2. Select
3. Select the
Properties
General
My Computer
.
tab.
icon.
4. You should see a Windows version number of 4.00.950B
or 4.00.950C.
84
Page 91

UMAX Astra 2100U Owner’s Guide
5. If you have a different version, contact your reseller or
Microsoft for an upgrade.
Windows USB Supplement installed
•
To check your system:
1. Click
2. Click
3. Click
4. Double click the
5. You should see a listing for “USB Supplement/OSR2.”
6. If you do not see the supplement listed, you must install it
Problem:
IRQ steering is disabled. For USB to function properly, IRQ
Steering must be enabled.
Solution:
The IRQ Steering setting is located in the Device Manager. Follow
the steps below to find out if the IRQ steering is enabled:
1.
Click on the
A pop-up menu appears.
2.
Click on Properties command using the left mouse button. This
brings up the Device Manager.
Start
on the Windows taskbar.
Settings
Control Panel
from the Windows95 CD.
.
.
Add/Remove Software
My Computer
icon using the right mouse button.
icon.
3.
In the Device Manager click the + symbol beside the System
Devices item.
4.
Double-click the PCI Bus to display the PCI Bus Properties.
5.
Click on the tab labeled IRQ Steering.
85
Page 92

6.
The bottom half of this tab displays the IRQ Routing Status.
Look for the following items:
IRQ Routing enabled
•
IRQ read from (where it is read from)
•
IRQ Mini-port loaded successfully
•
IRQ Mini-port data processed successfully
•
If you see these items as listed above, IRQ Steering is enabled. If
you do not see the information, contact your computer
manufacturer. USB will not function properly without IRQ
Steering.
Problem:
Scanner is not present in the Device Manager. The scanner must be
present in the Device Manager. If there is no listing for the it, the
scanner will not work.
Solution:
Follow the steps below to determine if the scanner is present in the
Device Manager.
1.
Click the
pop-up menu appears.
2.
Click on Properties command using the left mouse button. This
brings up the Device Manager.
3.
The scanner should be listed under the heading of Imaging
Device.
4.
If it is not present, insert the UMAX VistaScan CD-ROM into
the CD-ROM drive and reinstall VistaScan.
5.
Unplug the scanner cable from the back of the computer, and
then plug it back into the USB port.
6.
Verify there is power to the scanner.
7.
If the scanner does not show up, and there is no change in the
Device Manager, try the another USB port. If the scanner still
does not appear, contact your computer manufacturer.
86
My Computer
icon using the right mouse button. A
Page 93

UMAX Astra 2100U Owner’s Guide
Problem:
Your system resources are low. Your system resources are the
amount of free resources your system can call on at a given time.
This should be at 90% or above to run a scanner. Anything under
60% will cause system freezes or link fails when you attempt to
access the scanner.
Solution:
Follow the steps below to determine if your system resources are
too low to operate the scanner.
1.
Click the
pop-up menu appears.
2.
Click on Properties command using the left mouse button.
3.
Click the Performance tab (the fourth tab under System
Properties).
4.
Look in the System Resources area (the second section). This
number should be above 90%.
5.
If not, press and hold down the CTRL+ALT keys and tap the
Delete key once. This brings up the Close Programs window.
6.
You need to end all tasks running except the EXPLORER and
SYSTRAY items. To end a task, highlight an item in the Close
Programs window and click the
step for each task you want to end.
My Computer
icon using the right mouse button. A
End Task
Button. Repeat this
Macintosh Version Problems and Solutions
Problem:
When I daisy chain the scanner with other USB capable devices, I
get a scanner error.
87
Page 94

Solution:
Many Macintosh computers have at least two USB ports. We
recommend that you connect your scanner directly to one of these
ports. Daisy-chaining the scanner, or running the scanner through a
hub can cause the signal to be lost before it is communicated to
your computer.
To make the troubleshooting process easier, disconnect your
scanner from other USB capable devices or hubs when
troubleshooting.
Problem:
I cannot get the scanner to install properly, or it does not run once it
is installed.
Solution:
If you are having problems installing or using the Astra 2100U
scanner, ensure that Macintosh OS 8.1 or higher is installed on your
computer.
Problem:
The system takes too long to scan.
Solution:
Disable virtual memory, reboot your computer with the extensions
disabled (hold down the SHIFT key during re-boot) and try again.
Booting with the shift key still loads the extension.
Problem:
Your system goes to the Finder when you try to acquire the
scanner.
Solution:
Plug the scanner into its own power outlet. If still does the same
thing, please call UMAX Technical Support.
88
Page 95

Problem:
UMAX Astra 2100U Owner’s Guide
The following error message appeared:
“Error: Not Enough
Power to Function”
Solution:
The Macintosh OS generates this message if:
A device draws too much power from the USB bus
•
One or more devices plugged into a hub require more power
•
than is available
You attached a self-powered device (such as a printer or floppy
•
drive) to your computer without plugging it into an electrical
outlet.
Remove all other devices from the USB chain, so the scanner is the
only device on the USB chain. Make sure that the scanner power
adapter is plugged directly into the wall, not into a power strip.
Problem:
The following error message appeared: “Error: No Driver Found”
Solution:
The Macintosh OS generates this message if it could not find a
driver in the System Folder for the USB device you just connected.
You may have forgotten to install the software that came with the
device, or you may have put the device driver (i.e., the software that
allows Macintosh to recognize and communicate with the USB
device) in the wrong place in your System Folder.
Re-install the software driver from the VistaScan CD-ROM. Make
sure the extension is loaded and on.
89
Page 96

Problem:
The following error message appeared: "Scanner not found" or
"Unable to control scanner"
Solution:
Follow this procedure:
1. Confirm the scanner is plugged into the computer’s USB port.
2. Go to the Apple System Profiler, listed under the Apple menu.
3. Go to the Devices & Volumes tab (Command + 2). Verify the
scanner is listed under the USB tree as:
Class: 0
Product ID: 16
Vendor ID: 5638
4. If not, disconnect the USB cable from the computer.
5. Go to Command, Update All Information (Command + U).
6. Reconnect the scanner, and Update All Information again. Is
the scanner listed? If yes, you can begin scanning. If no, please
call UMAX Technical Support.
Try the following solutions, if you are still experiencing
scanning problems:
1. Plug the scanner power adapter directly into the wall outlet and
not in a surge protector.
2. If using a USB hub, plug the scanner directly into the
Macintosh USB port.
3. If you are using an iMac, do not run the scanner off the
keyboard.
4. Download all updates for your Macintosh for USB from the
Apple’s Web site http://www.apple.com
90
Page 97

UMAX Astra 2100U Owner’s Guide
Contacting Technical Support
UMAX Astra scanners are designed to be reliable, easy-to-install,
and easy-to-use. If you encounter any problems while installing
your scanner:
Check out the UMAX Web site at www.umax.com/support
•
E-mail UMAX with your technical support question at:
•
support@umax.com
Call UMAX automated interactive support 24-hours a day at
•
1-800-468-8629
Contact your dealer or call the UMAX support line between
•
A.M
. – 6 P.M. (PST), Monday-Friday, at 510-492- 5827.
6
NOTE: You are eligible to receive 90-days of free technical
support from the scanner purchase date. If you call after the
90-day period, you will be charged a flat fee of $19.95 per call.
All charges will be billed to your (major) credit card.
Before calling, please be sure to have the following information
ready:
The scanner model and serial number
•
The version number of the scanner driver (located on the front
•
of the CD)
The computer model you are using
•
The printer and model that you are using (if applicable)
•
The application software packages that you are using
•
Error codes or messages seen
•
A description of what you were doing at the time of the
•
malfunction so that the problem can be recreated
Other observations that may aid the technic ian in iden tifying
•
the problem and solution
91
Page 98

When you call, please be in front of your computer. You will need
to have your scanner and the computer turned on. Try to have as
much information about your problem as possible. This information
allows the technician to more effectively troubleshoot your
problem.
Maintenance
With the exception of periodic cleaning, the scanner is virtually
maintenance-free. Please read the fol lowi ng section to lea rn how to
properly maintain the scanner.
Cleaning
Regularly cleaning the object glass will ensure that dirt or smudges
will not reduce the quality of your scanned images. Before you
clean the glass, make sure the scanner is turned off and the power
cord is unplugged.
Clean the object glass and document cover with a soft damp cloth
and a mild detergent or alcohol.
Warning:
glass. Spraying the liquid directly on the glass may cause the liquid
to penetrate the seams around the glass and contaminate the mirrors
and lenses inside the scanner. Please be sure you spray the liquid on
the cleaning cloth and then wipe the glass clean.
92
Do not spray the cleaning fluid directly on the object
Page 99

Appendix A. Technical
Specifications
The following table defines the technical specifications for the
Astra 2100U Scanners.
Scanner Specifications
Scanner Type
Scanning Element
Optical Resolution
Maximum Resolution
Color Density
Light Source
Optics
Interface
Operating System
Scanning Modes
Maximum Document
Size
Scanner Dimensions
Approx. Scanner
Weight
1-pass color flatbed
Color CCD
600 dpi x 1200 dpi
9600 dpi x 9600 dpi
36-bit color
Cold Cathode Lamp
Enclosed Optical System
Astra 2100U — USB
Astra 2100U — Windows
95, 98, Mac OS 8.0+ (for
iMac and USB-compatible
Macintosh computers)
B/W, halftone, 8-bit
grayscale, 12-bit
grayscale, 24-bit color, 36
bit color
8.5” x 11.7”
18.4” x 12.2” x 3.9”
7.8 lbs.
93
Page 100

94
 Loading...