

Ulead DVD MOVIEFACTORY 5 PLUS User Manual

DVD MovieFactory
User Guide
Ulead Systems, Inc.
August 2006

Ulead DVD MovieFactory® 5 Plus
© 2000-2006 Ulead Systems, Inc. All rights reserved. No part of this publication may be reproduced or
transmitted in any form or by any means, electronic or mechanical, including photocopying, recording or
storing in a retrieval system, or translated into any language in any form without the express written
permission of Ulead Systems, Inc.
Software license
The software described in this document is furnished under a License Agreement, which is included with the
product. This Agreement specifies the permitted and prohibited uses of the product.
Licenses and trademarks
ICI Library © 1991- 1992 C-Cube Microsystems.
Ulead, the Ulead logo, and Ulead DVD MovieFactory are trademarks and/or registered trademarks of Ulead
Systems, Inc. Intel and Pentium are registered trademarks of Intel Corporation. Microsoft, Windows,
Windows Media, Windows NT, Microsoft office, DirectX, DirectX Media and other Microsoft products
referenced herein are either trademarks or registered trademarks of Microsoft Corporation in the United
States and/or other countries. Apple, QuickTime and the QuickTime logo are trademarks of Apple Computer,
Inc., registered in the United States and other countries. QuickTime and the QuickTime logo are trademarks
used under license. Adobe, the Adobe logo, Acrobat, and the Acrobat logo are Trademarks of Adobe Systems
Incorporated.
Manufactured under license from Dolby Laboratories. Dolby and the Double-D symbol are trademarks of
Dolby Laboratories.
All other product names and any registered and unregistered trademarks mentioned are used for
identification purpose only and remain the exclusive property of their respective owners.
Template files
Files provided as samples on the program CD can be used for personal demonstrations, productions and presentations. No
rights are granted for commercial reproduction or redistribution of any sample files.
North & South America
Ulead Systems Inc.
http://www.ulead.com
Support: http://www.ulead.com/tech
Germany
Ulead Systems GmbH
http://www.ulead.de
Support: http://www.ulead.de/tech
International
Ulead Systems, Inc.
http://www.ulead.com
http://www.asiapac.ulead.com
http://www.ulead.com.tw
Support:
http://www.ulead.com/tech
http://www.asiapac.ulead.com/tech
http://www.ulead.com.tw/tech
United Kingdom
http://www.ulead.co.uk
Support: http://www.ulead.co.uk/tech
Japan
Ulead Systems Inc.
http://www.ulead.co.jp
Support: http://www.ulead.co.jp/tech
France
http://www.ulead.fr
Support: http://www.ulead.fr/tech
China
Ulead Systems, Inc.
http://www.ulead.com.cn
Support: http://www.ulead.com.cn/tech

ULEAD DVD MOVIEFACTORY USER GUIDE 3
DVD MovieFactory
Table of Contents
Welcome to Ulead DVD MovieFactory . . . . . . . . . . . . . . . . . . . . . . . . . . . . . . 5
DVD MovieFactory launcher . . . . . . . . . . . . . . . . . . . . . . . . . . . . . . . . . . . . . . 5
Video Disc . . . . . . . . . . . . . . . . . . . . . . . . . . . . . . . . . . . . . . . . . . . . . . . . . . . . . . . . . .6
Slideshow Disc . . . . . . . . . . . . . . . . . . . . . . . . . . . . . . . . . . . . . . . . . . . . . . . . . . . . . .6
Audio/Data Disc . . . . . . . . . . . . . . . . . . . . . . . . . . . . . . . . . . . . . . . . . . . . . . . . . . . . .6
Import . . . . . . . . . . . . . . . . . . . . . . . . . . . . . . . . . . . . . . . . . . . . . . . . . . . . . . . . . . . . .6
Edit Disc . . . . . . . . . . . . . . . . . . . . . . . . . . . . . . . . . . . . . . . . . . . . . . . . . . . . . . . . . . .6
Copy Disc . . . . . . . . . . . . . . . . . . . . . . . . . . . . . . . . . . . . . . . . . . . . . . . . . . . . . . . . . .6
Disc Tools . . . . . . . . . . . . . . . . . . . . . . . . . . . . . . . . . . . . . . . . . . . . . . . . . . . . . . . . . .7
Preferences . . . . . . . . . . . . . . . . . . . . . . . . . . . . . . . . . . . . . . . . . . . . . . . . . . . . . . . . .7
Disc information . . . . . . . . . . . . . . . . . . . . . . . . . . . . . . . . . . . . . . . . . . . . . . . . . . . . .7
Drive information . . . . . . . . . . . . . . . . . . . . . . . . . . . . . . . . . . . . . . . . . . . . . . . . . . . . .7
Label@Once . . . . . . . . . . . . . . . . . . . . . . . . . . . . . . . . . . . . . . . . . . . . . . . . . . . . . . . .7
DVDCopy . . . . . . . . . . . . . . . . . . . . . . . . . . . . . . . . . . . . . . . . . . . . . . . . . . . . . . . . . .7
Video Disc . . . . . . . . . . . . . . . . . . . . . . . . . . . . . . . . . . . . . . . . . . . . . . . . . . . . . 8
Select source and import (Step: 1/3) . . . . . . . . . . . . . . . . . . . . . . . . . . . . . . . . . . . . .9
Add Media . . . . . . . . . . . . . . . . . . . . . . . . . . . . . . . . . . . . . . . . . . . . . . . . . . . . . . . . . . . . . . . . . . 9
Edit Media . . . . . . . . . . . . . . . . . . . . . . . . . . . . . . . . . . . . . . . . . . . . . . . . . . . . . . . . . . . . . . . . . 10
Add/Edit Chapters . . . . . . . . . . . . . . . . . . . . . . . . . . . . . . . . . . . . . . . . . . . . . . . . . . . . . . . . . . . 16
Export Selected Clips . . . . . . . . . . . . . . . . . . . . . . . . . . . . . . . . . . . . . . . . . . . . . . . . . . . . . . . . 17
Select a template to create menu (Step 2/3) . . . . . . . . . . . . . . . . . . . . . . . . . . . . . . .18
Menu template categories . . . . . . . . . . . . . . . . . . . . . . . . . . . . . . . . . . . . . . . . . . . . . . . . . . . . . 19
Applying menu templates . . . . . . . . . . . . . . . . . . . . . . . . . . . . . . . . . . . . . . . . . . . . . . . . . . . . . 19
Editing menu templates . . . . . . . . . . . . . . . . . . . . . . . . . . . . . . . . . . . . . . . . . . . . . . . . . . . . . . . 19
Using motion menus . . . . . . . . . . . . . . . . . . . . . . . . . . . . . . . . . . . . . . . . . . . . . . . . . . . . . . . . . 20
Customizing menu templates . . . . . . . . . . . . . . . . . . . . . . . . . . . . . . . . . . . . . . . . . . . . . . . . . . 20
Manipulating objects . . . . . . . . . . . . . . . . . . . . . . . . . . . . . . . . . . . . . . . . . . . . . . . . . . . . . . . . . 21
Editing menu thumbnail and text style . . . . . . . . . . . . . . . . . . . . . . . . . . . . . . . . . . . . . . . . . . . . 22
Preview . . . . . . . . . . . . . . . . . . . . . . . . . . . . . . . . . . . . . . . . . . . . . . . . . . . . . . . . . . .22
Press Burn button to create a DVD (Step: 3/3) . . . . . . . . . . . . . . . . . . . . . . . . . . . . .23
The Burning Options dialog box . . . . . . . . . . . . . . . . . . . . . . . . . . . . . . . . . . . . . . . . . . . . . . . . 25
Straight Capture to Disc . . . . . . . . . . . . . . . . . . . . . . . . . . . . . . . . . . . . . . . . . . . . . .26
Straight Capture to BD . . . . . . . . . . . . . . . . . . . . . . . . . . . . . . . . . . . . . . . . . . . . . . .27
Settings and tools . . . . . . . . . . . . . . . . . . . . . . . . . . . . . . . . . . . . . . . . . . . . . . . . . . .27
16:9 DVD . . . . . . . . . . . . . . . . . . . . . . . . . . . . . . . . . . . . . . . . . . . . . . . . . . . . . . . . . . . . . . . . . . 28
Slideshow Disc . . . . . . . . . . . . . . . . . . . . . . . . . . . . . . . . . . . . . . . . . . . . . . . . 28
Adding photo slideshows . . . . . . . . . . . . . . . . . . . . . . . . . . . . . . . . . . . . . . . . . . . . .28
Editing a slideshow . . . . . . . . . . . . . . . . . . . . . . . . . . . . . . . . . . . . . . . . . . . . . . . . . .29
Audio/Data Disc . . . . . . . . . . . . . . . . . . . . . . . . . . . . . . . . . . . . . . . . . . . . . . . 30
Import . . . . . . . . . . . . . . . . . . . . . . . . . . . . . . . . . . . . . . . . . . . . . . . . . . . . . . . 30
Capture from devices . . . . . . . . . . . . . . . . . . . . . . . . . . . . . . . . . . . . . . . . . . . . . . . .30

4 ULEAD DVD MOVIEFACTORY USER GUIDE
Capturing DV video . . . . . . . . . . . . . . . . . . . . . . . . . . . . . . . . . . . . . . . . . . . . . . . . . . . . . . . . . . 30
Capturing High-Definition video (HDV) . . . . . . . . . . . . . . . . . . . . . . . . . . . . . . . . . . . . . . . . . . . 31
Capturing analog video . . . . . . . . . . . . . . . . . . . . . . . . . . . . . . . . . . . . . . . . . . . . . . . . . . . . . . . 32
Capturing TV footage . . . . . . . . . . . . . . . . . . . . . . . . . . . . . . . . . . . . . . . . . . . . . . . . . . . . . . . . . 32
Capturing still images . . . . . . . . . . . . . . . . . . . . . . . . . . . . . . . . . . . . . . . . . . . . . . . . . . . . . . . . . 33
Capturing video directly to MPEG format . . . . . . . . . . . . . . . . . . . . . . . . . . . . . . . . . . . . . . . . . . 34
Set Auto Capture to DVD . . . . . . . . . . . . . . . . . . . . . . . . . . . . . . . . . . . . . . . . . . . . . . . . . . . . . . 34
Import from DVD . . . . . . . . . . . . . . . . . . . . . . . . . . . . . . . . . . . . . . . . . . . . . . . . . . . 34
Edit Disc . . . . . . . . . . . . . . . . . . . . . . . . . . . . . . . . . . . . . . . . . . . . . . . . . . . . . .36
Copy Disc . . . . . . . . . . . . . . . . . . . . . . . . . . . . . . . . . . . . . . . . . . . . . . . . . . . . .36
Disc Tools . . . . . . . . . . . . . . . . . . . . . . . . . . . . . . . . . . . . . . . . . . . . . . . . . . . . .37
Format Disc . . . . . . . . . . . . . . . . . . . . . . . . . . . . . . . . . . . . . . . . . . . . . . . . . . . . . . . 37
Erase Disc . . . . . . . . . . . . . . . . . . . . . . . . . . . . . . . . . . . . . . . . . . . . . . . . . . . . . . . . 37
Close Disc . . . . . . . . . . . . . . . . . . . . . . . . . . . . . . . . . . . . . . . . . . . . . . . . . . . . . . . . 37
Create Bootable Disc . . . . . . . . . . . . . . . . . . . . . . . . . . . . . . . . . . . . . . . . . . . . . . . . 37
Tools . . . . . . . . . . . . . . . . . . . . . . . . . . . . . . . . . . . . . . . . . . . . . . . . . . . . . . . . .37
Settings and options . . . . . . . . . . . . . . . . . . . . . . . . . . . . . . . . . . . . . . . . . . . . . . . . 37
Open . . . . . . . . . . . . . . . . . . . . . . . . . . . . . . . . . . . . . . . . . . . . . . . . . . . . . . . . . . . . . . . . . . . . . 37
Save . . . . . . . . . . . . . . . . . . . . . . . . . . . . . . . . . . . . . . . . . . . . . . . . . . . . . . . . . . . . . . . . . . . . . . 38
Save As . . . . . . . . . . . . . . . . . . . . . . . . . . . . . . . . . . . . . . . . . . . . . . . . . . . . . . . . . . . . . . . . . . . 38
Preferences . . . . . . . . . . . . . . . . . . . . . . . . . . . . . . . . . . . . . . . . . . . . . . . . . . . . . . . . . . . . . . . . 38
Disc Template Manager . . . . . . . . . . . . . . . . . . . . . . . . . . . . . . . . . . . . . . . . . . . . . . . . . . . . . . . 39
Ulead DVD MovieFactory Help . . . . . . . . . . . . . . . . . . . . . . . . . . . . . . . . . . . . . . . . . . . . . . . . . 39
Product Updates on the Web . . . . . . . . . . . . . . . . . . . . . . . . . . . . . . . . . . . . . . . . . . . . . . . . . . . 40
Online Registration . . . . . . . . . . . . . . . . . . . . . . . . . . . . . . . . . . . . . . . . . . . . . . . . . . . . . . . . . . . 40
About Ulead DVD MovieFactory . . . . . . . . . . . . . . . . . . . . . . . . . . . . . . . . . . . . . . . . . . . . . . . . 40
Exit . . . . . . . . . . . . . . . . . . . . . . . . . . . . . . . . . . . . . . . . . . . . . . . . . . . . . . . . . . . . . . . . . . . . . . . 40
Project settings . . . . . . . . . . . . . . . . . . . . . . . . . . . . . . . . . . . . . . . . . . . . . . . . . . . . 40
Display aspect ratio . . . . . . . . . . . . . . . . . . . . . . . . . . . . . . . . . . . . . . . . . . . . . . . . . 41
Label@Once . . . . . . . . . . . . . . . . . . . . . . . . . . . . . . . . . . . . . . . . . . . . . . . . . . . . . . 41
Label@Once dialog box . . . . . . . . . . . . . . . . . . . . . . . . . . . . . . . . . . . . . . . . . . . . . . . . . . . . . . . 41
Creating custom paper templates . . . . . . . . . . . . . . . . . . . . . . . . . . . . . . . . . . . . . . . . . . . . . . . 43
Designing from scratch . . . . . . . . . . . . . . . . . . . . . . . . . . . . . . . . . . . . . . . . . . . . . . . . . . . . . . . 44
Designing based on an existing project . . . . . . . . . . . . . . . . . . . . . . . . . . . . . . . . . . . . . . . . . . . 45
Designing based on a playlist . . . . . . . . . . . . . . . . . . . . . . . . . . . . . . . . . . . . . . . . . . . . . . . . . . 46
Importing a disc label . . . . . . . . . . . . . . . . . . . . . . . . . . . . . . . . . . . . . . . . . . . . . . . . . . . . . . . . . 46
Saving a disc label . . . . . . . . . . . . . . . . . . . . . . . . . . . . . . . . . . . . . . . . . . . . . . . . . . . . . . . . . . . 46
Printing a disc label . . . . . . . . . . . . . . . . . . . . . . . . . . . . . . . . . . . . . . . . . . . . . . . . . . . . . . . . . . 46
DVDCopy . . . . . . . . . . . . . . . . . . . . . . . . . . . . . . . . . . . . . . . . . . . . . . . . . . . . . . . . . 47
Glossary . . . . . . . . . . . . . . . . . . . . . . . . . . . . . . . . . . . . . . . . . . . . . . . . . . . . . .48
Index . . . . . . . . . . . . . . . . . . . . . . . . . . . . . . . . . . . . . . . . . . . . . . . . . . . . . . . . .50
ULEAD DVD MOVIEFACTORY USER GUIDE 5
DVD MovieFactory
Welcome to Ulead DVD MovieFactory
Ulead DVD MovieFactory provides you with the answer to your disc-authoring
needs. Instantly create Blu-ray, HD DVD, DVD, VCD, and SVCD video or slideshow
discs through a user-friendly, wizard-type process and specific task oriented
features. You can also enhance your video by adding transition effects, text, audio,
interactive menus, and many others, or print disc label or cover to make your discs
more attractive and interesting.
With DVD MovieFactory, creating professional-looking video or slideshow discs has
never been easier.
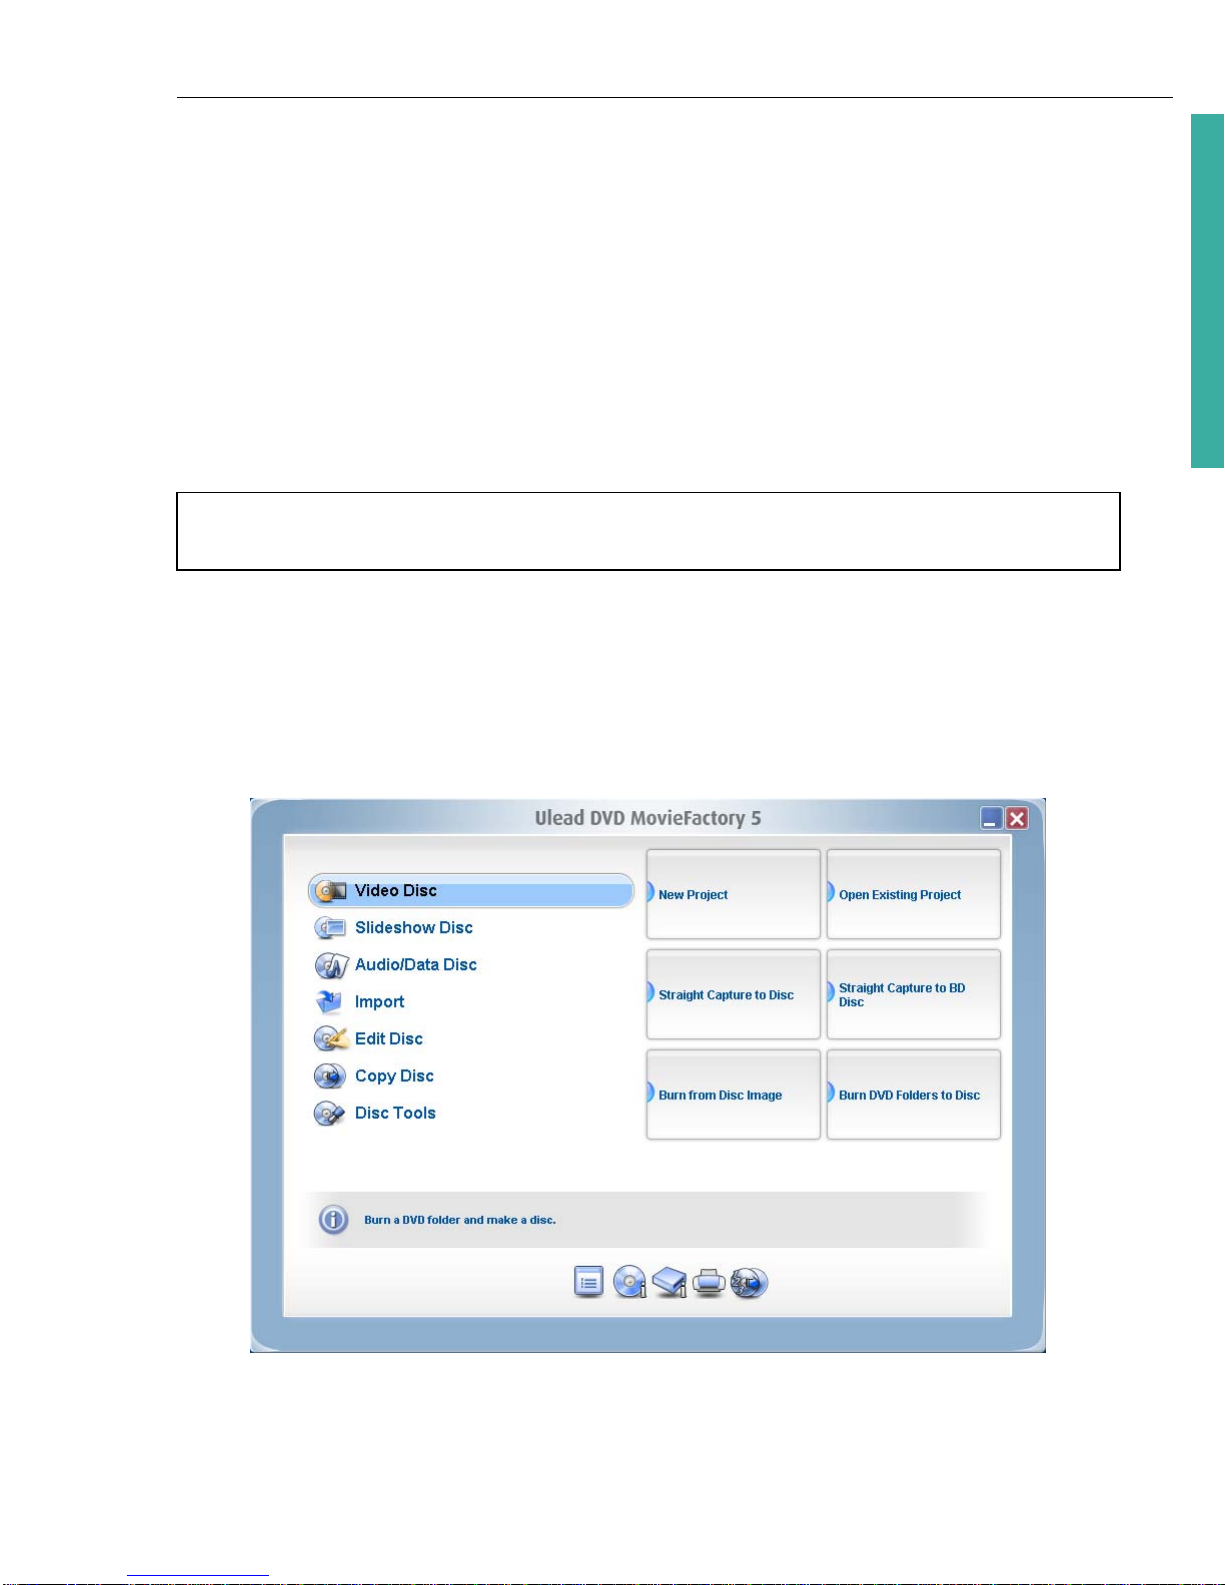
DVD MovieFactory launcher
The DVD MovieFactory launcher (run from the icon on the desktop, Start menu, or
from the program folder) serves as a control panel where you can find the tasks for
disc editing and authoring.
Note: The availability of program modules depends on the DVD MovieFactory version
you have.

6 ULEAD DVD MOVIEFACTORY USER GUIDE
To use the launcher:
1. Select a task by clicking the Video Disc, Slideshow Disc, Audio/Data Disc,
Import, Edit Disc, Copy Disc, or Disc Tools icon.
2. Select an associated task option at the right hand side.
Video Disc
Click to create a new project, open an existing one, or perform other burning tasks.
See “Video Disc” for more details.
Slideshow Disc
Click to create a new slideshow project or open an existing one. See “Slideshow
Disc” for more details.
Audio/Data Disc
Click to create an MP3, Audio CD, DVD-Audio, Music DVD-Video, or data disc. See
“Audio/Data Disc” for more details.
Import
Click to capture content from your camcorder and other devices or import content
from a DVD or CD. See “Import” for more details.
Edit Disc
Click to append data or edit video/MP3 files on a disc. See “Edit Disc” for more
details.
Copy Disc
Click to create a copy of a disc or convert DVD and video formats for use on your
projects. See “Copy Disc” for more details.
Notes:
• You can also click any tool icon located at the lower part to set project preferences,
view disc and burner information, create disc labels, or copy movies using
DVDCopy.
• Opening previously created project files from outside the DVD MovieFactory
launcher will automatically launch the associated program.
ULEAD DVD MOVIEFACTORY USER GUIDE 7
DVD MovieFactory
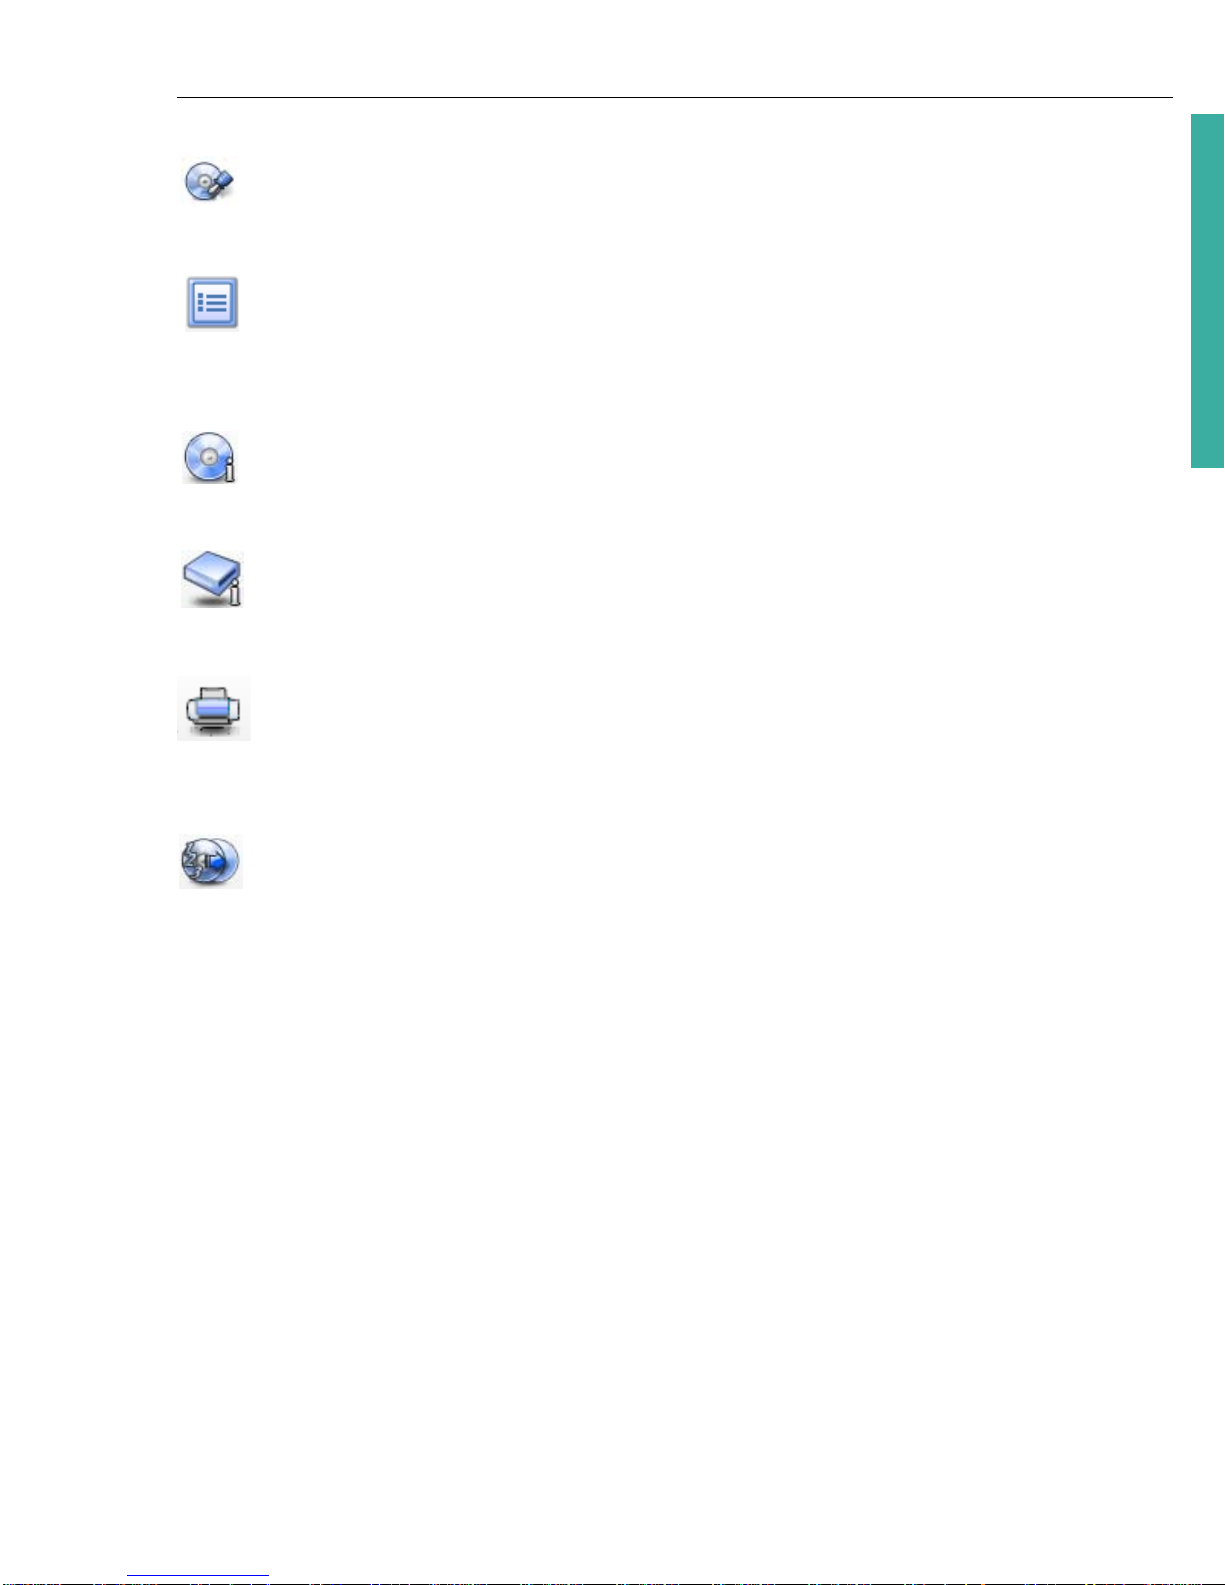
Disc Tools
Click to format, erase, or finalize a disc. See “Disc Tools” for more details.
Preferences
Click to set your working folder, view product updates, register online, or view
program information.
Disc information
Click to view the properties of the disc in your CD or DVD burner.
Drive information
Click to view the properties of your CD or DVD burner.
Label@Once
Click to open Ulead Label@Once and create a label for your CD or DVD disc. See
“Label@Once” for more details.
DVDCopy
Click to open InterVideo DVDCopy and copy movies, backup data discs, and merge
multiple video files to a single disc 3 steps. See “DVDCopy” for more details.

8 ULEAD DVD MOVIEFACTORY USER GUIDE
Video Disc
Ulead DVD MovieFactory's step-by-step interface makes creating movies simple
and easy. To create a video disc, click Video Disc on the Launcher and select an
associated task. To create a new project, click New Project. Select your output
disc type in Create Video Disc and click OK.
• Blu-ray A format that allows recording, rewriting and playback of highdefinition video (HD). A single-layer Blu-ray Disc can hold 25GB and can
record over 2 hours of HDTV or more than 13 hours of standard-definition TV.
There are also dual-layer versions that can hold 50GB.
• HD DVD (High Density Digital Versatile Disc) Developed as a standard
for high-definition DVD, HD DVD is similar to the Blu-ray Disc, which uses a
120 mm diameter optical data storage media and 405 nm wavelength blue
laser.
• DVD Abbreviation for Digital Versatile Disc, a popular format in video
production because of its superb audio and video quality. It also holds several
times more data that VCDs and SVCDs.
• VCD (Video Compact Disc) is a special version of a CD-ROM that uses the
MPEG-1 format. The quality of the exported movie is almost the same, but
usually better than VHS tape-based movies. A VCD can be played back on a
CD-ROM drive, VCD player, and even on a DVD player.
• SVCD Abbreviation for Super Video CD, commonly described as an enhanced
version of a VCD. It is based on MPEG-2 technology with either Variable Bit
Rate (VBR) or Constant Bit Rate (CBR).
• DVD-RAM/RW Like random access memory (RAM), DVD-RAM/RW can be
read, recorded on, and erased repeatedly.
• DVD VR A DVD recording format that allows you to produce a DVD movie
that can be directly edited on the disc. DVD+VR is used on DVD+RW disks.
DVD-VR is used on DVD-RW disks.
To edit an existing project, select Open Existing Project and browse for the
project file. Creating a new project or opening an existing one takes you to Select
source and import (Step: 1/3).
Note: You can select other options to capture your video and burn directly onto a
DVD or BD or burn disc image files and DVD folders.
ULEAD DVD MOVIEFACTORY USER GUIDE 9
DVD MovieFactory
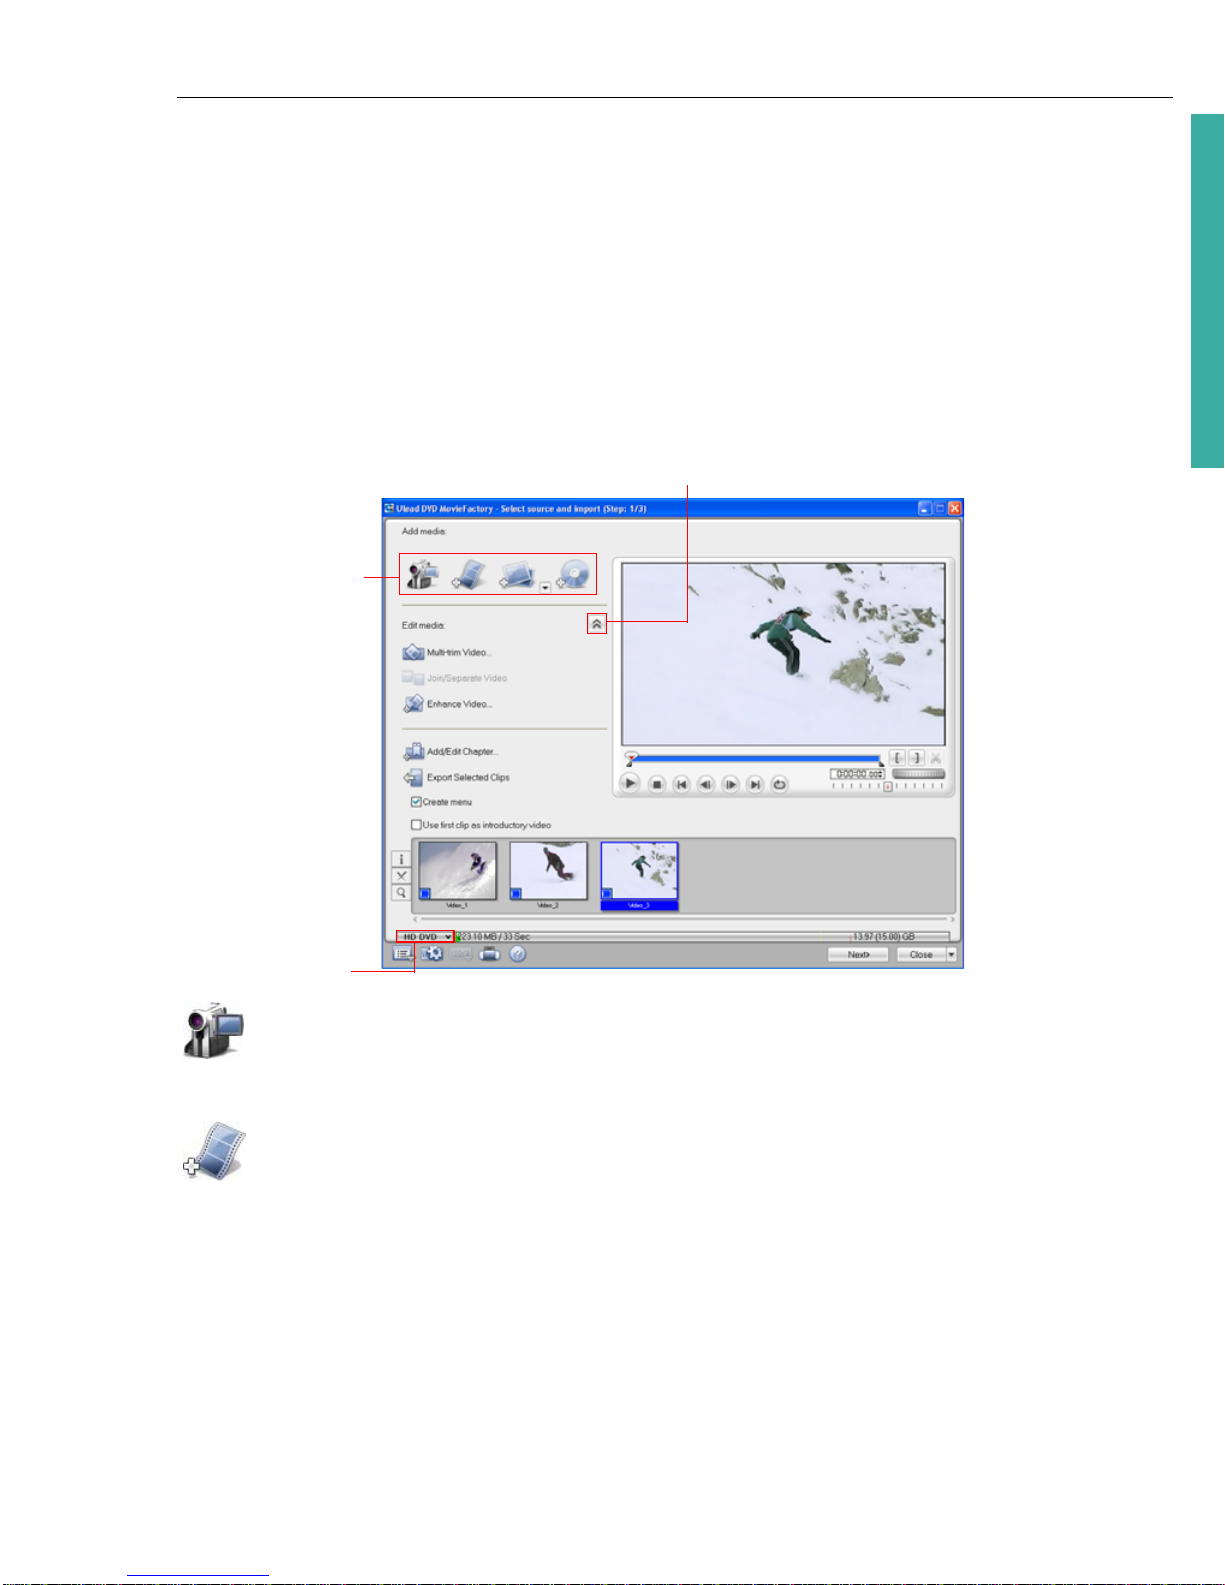
Select source and import (Step: 1/3)
In Select source and import (Step: 1/3), you can add media files, modify them
or enhance their quality, create chapter points, import and export clips, and view
file information among others.
Add Media
You can add content to your movie by capturing videos, adding video files, creating
and adding slideshows, and importing DVD videos.
Capture video
See “Capture from devices” for more details.
Add video files
DVD MovieFactory allows you to add video files of different formats such as AVI,
MPEG, and WMV into your video project. You can also add a VideoStudio project
(.VSP).
Options for
adding media
Current
project type
Toggle between showing and hiding advanced options
10 ULEAD DVD MOVIEFACTORY USER GUIDE
To add a video file to your project:
1. Click Add video files in the Select source and import (Step: 1/3) page to
launch the Open Video File dialog box.
2. Locate the video file(s). You can select and add multiple files under the same
folder. Press [Ctrl] or [Shift] to select multiple files.
3. Repeat the above process to add more video files.
Add photo slideshow
See “Slideshow Disc” for more details.
Import DVD video or DVD-VR files from a disc or hard drive
See “Import from DVD” for more details.
Edit Media
After importing the media files into your project, you can now play and edit the
content using DVD MovieFactory’s playback controls and editing tools.
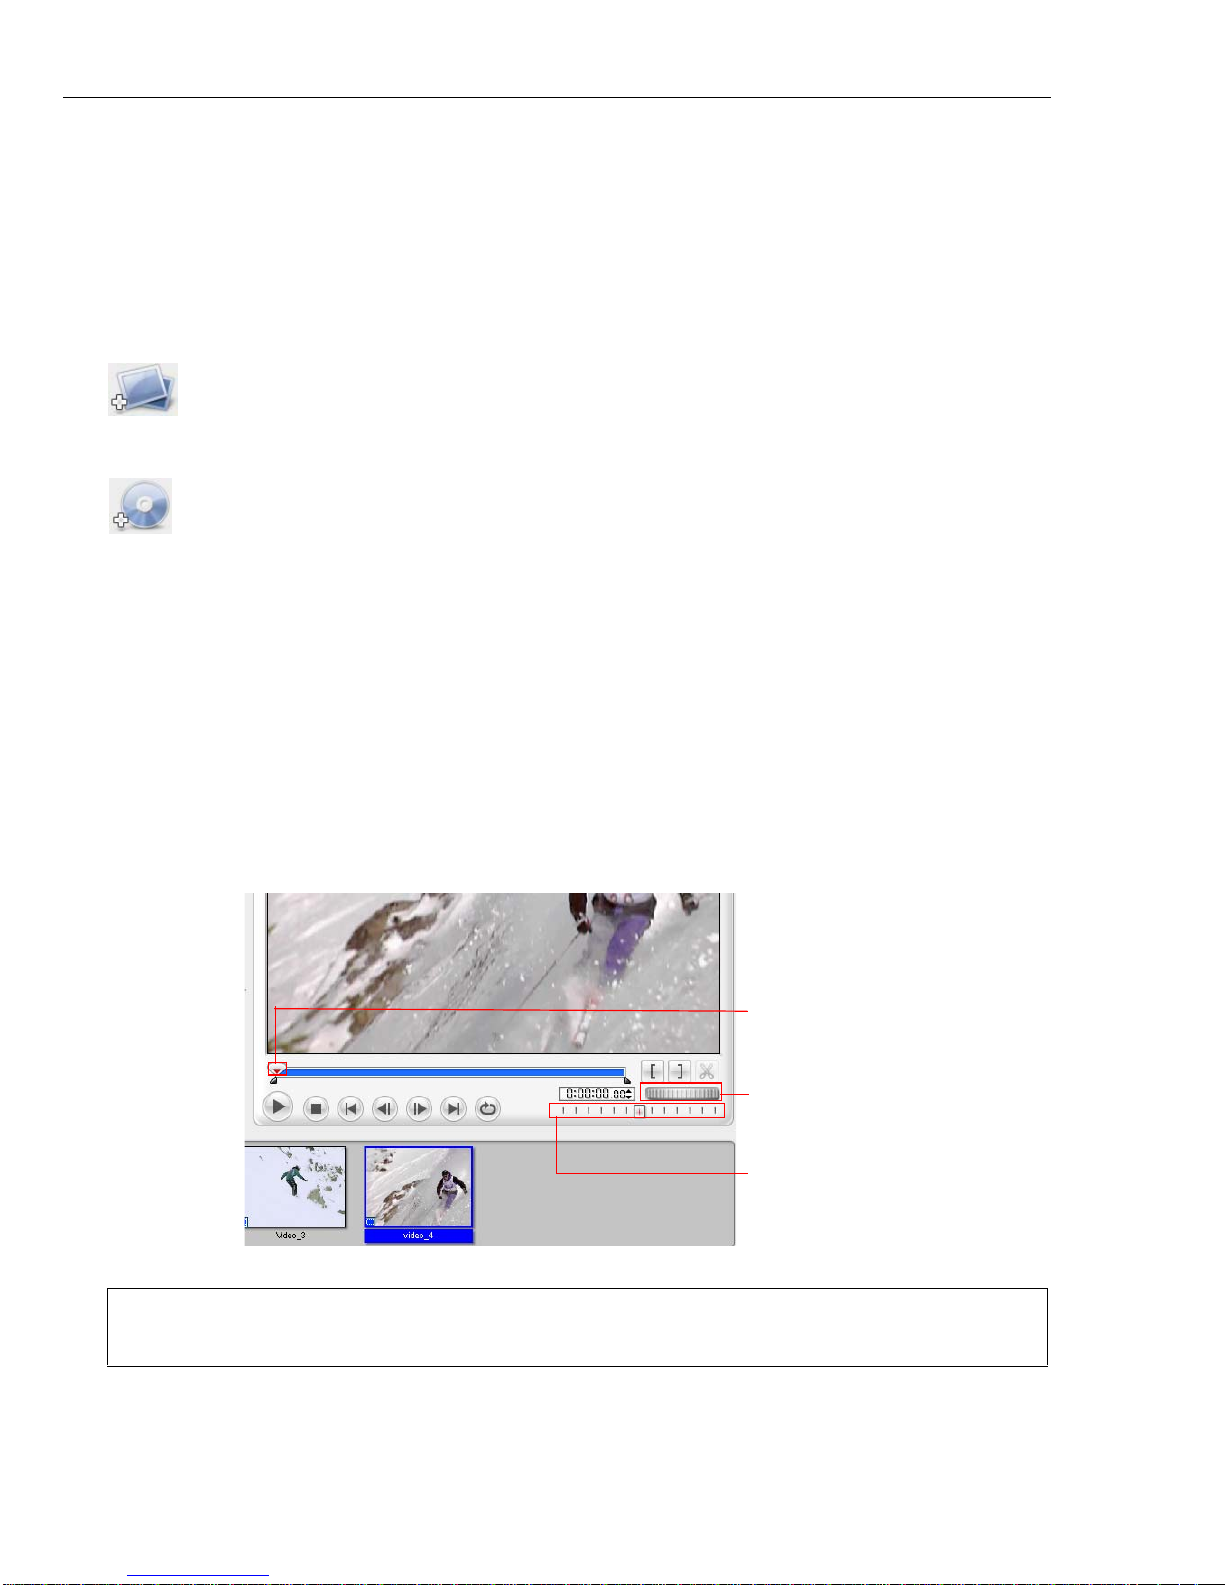
When editing, there are many ways to browse through a video clip. You can use the
navigation control buttons or go to a specific timecode. You can also use the Jog
Wheel, which works the same way as the one found in most VCRs, to browse
through the video more quickly. Or you can use the Shuttle Slider to view the
video clip at a constant playback speed.
Tip: When using the Jog Wheel, you can browse through a video by moving the scroll
wheel on the mouse back and forth.
Jog Slider
Jog Wheel
Shuttle Slider
ULEAD DVD MOVIEFACTORY USER GUIDE 11
DVD MovieFactory
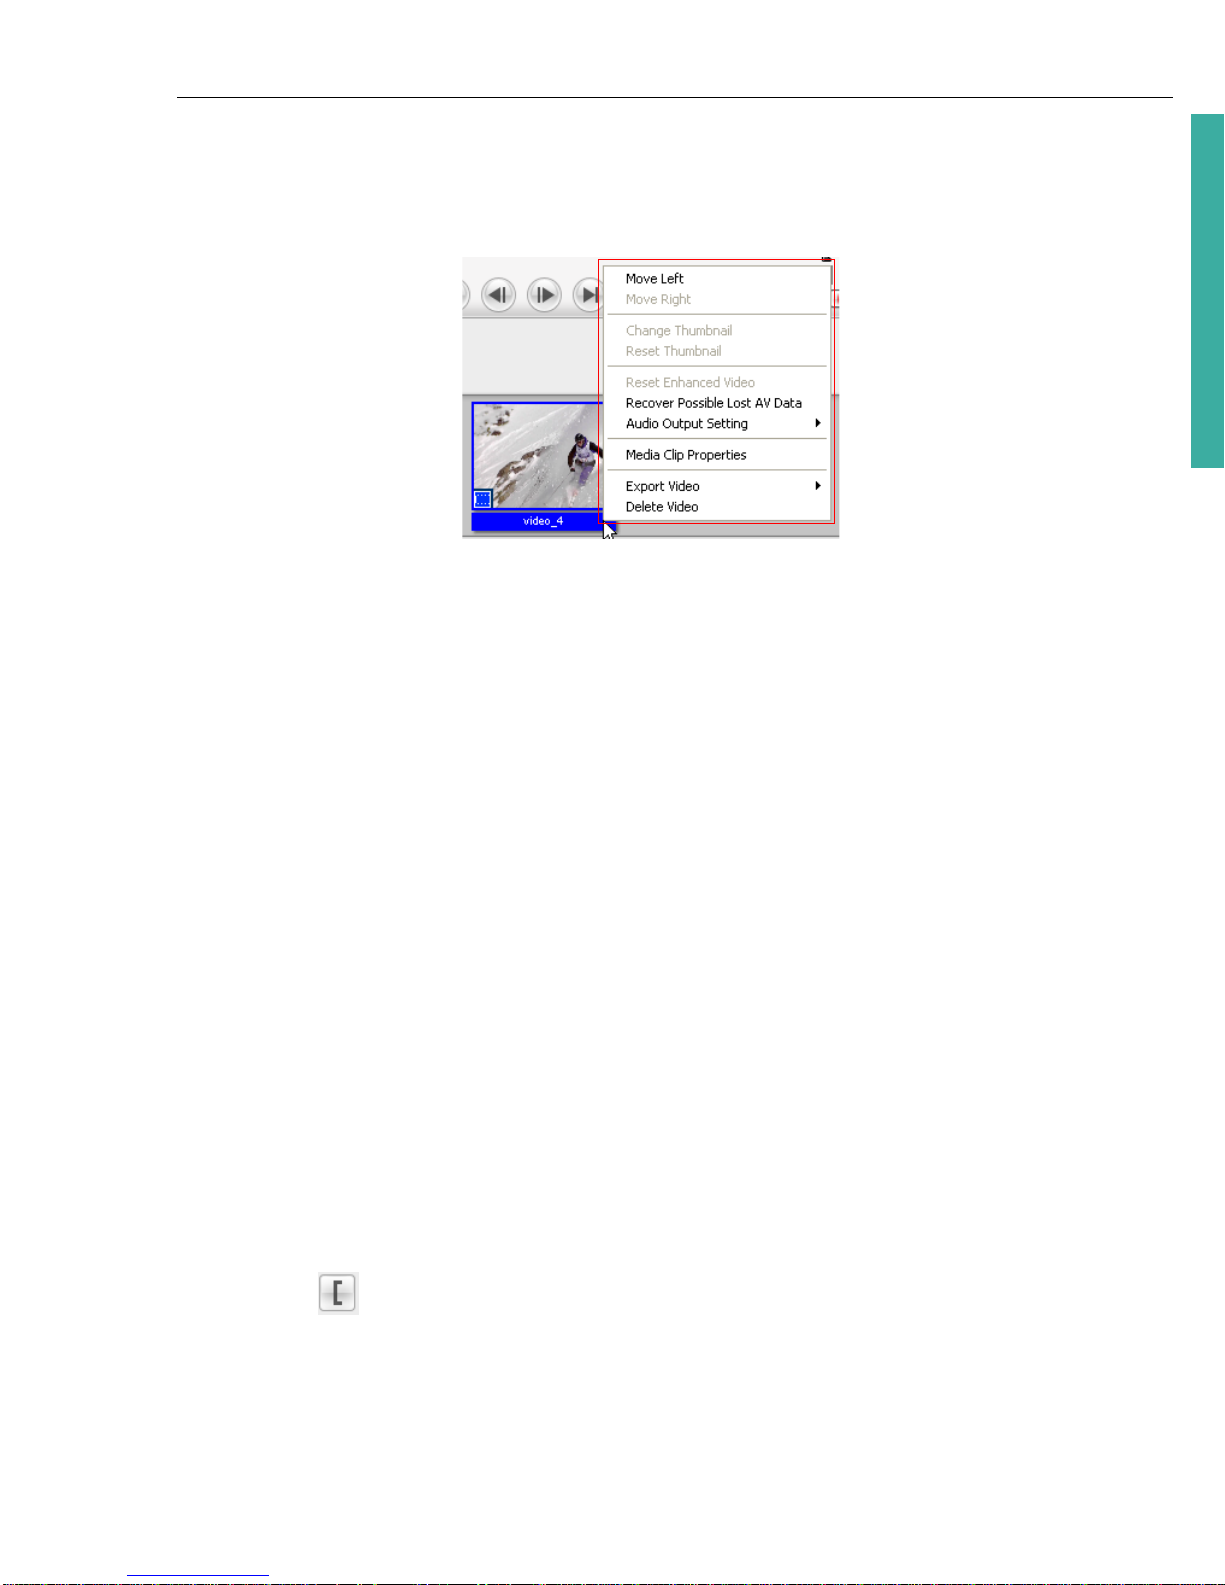
The right-click menu
Right-click a thumbnail in the Media Clip list to display a context menu that gives
you access to more options.
• Move Left/Right Changes the position of the selected clip in the Media Clip
list.
• Change Thumbnail Changes the current thumbnail display.
• Reset Thumbnail Restores the original thumbnail display.
• Reset Enhanced Video Removes all enhancement made in the Enhance
Video dialog box.
• Recover Possible Lost AV Data Retrieves lost data from captured videos.
• Audio Output Setting Includes audio data when exporting video.
• Media Clip Properties Displays the file, video, and audio properties of the
selected media clip.
• Export Video Allows you to save your video into a specific format.
• Delete Video Removes the selected clip from the Media Clip list.
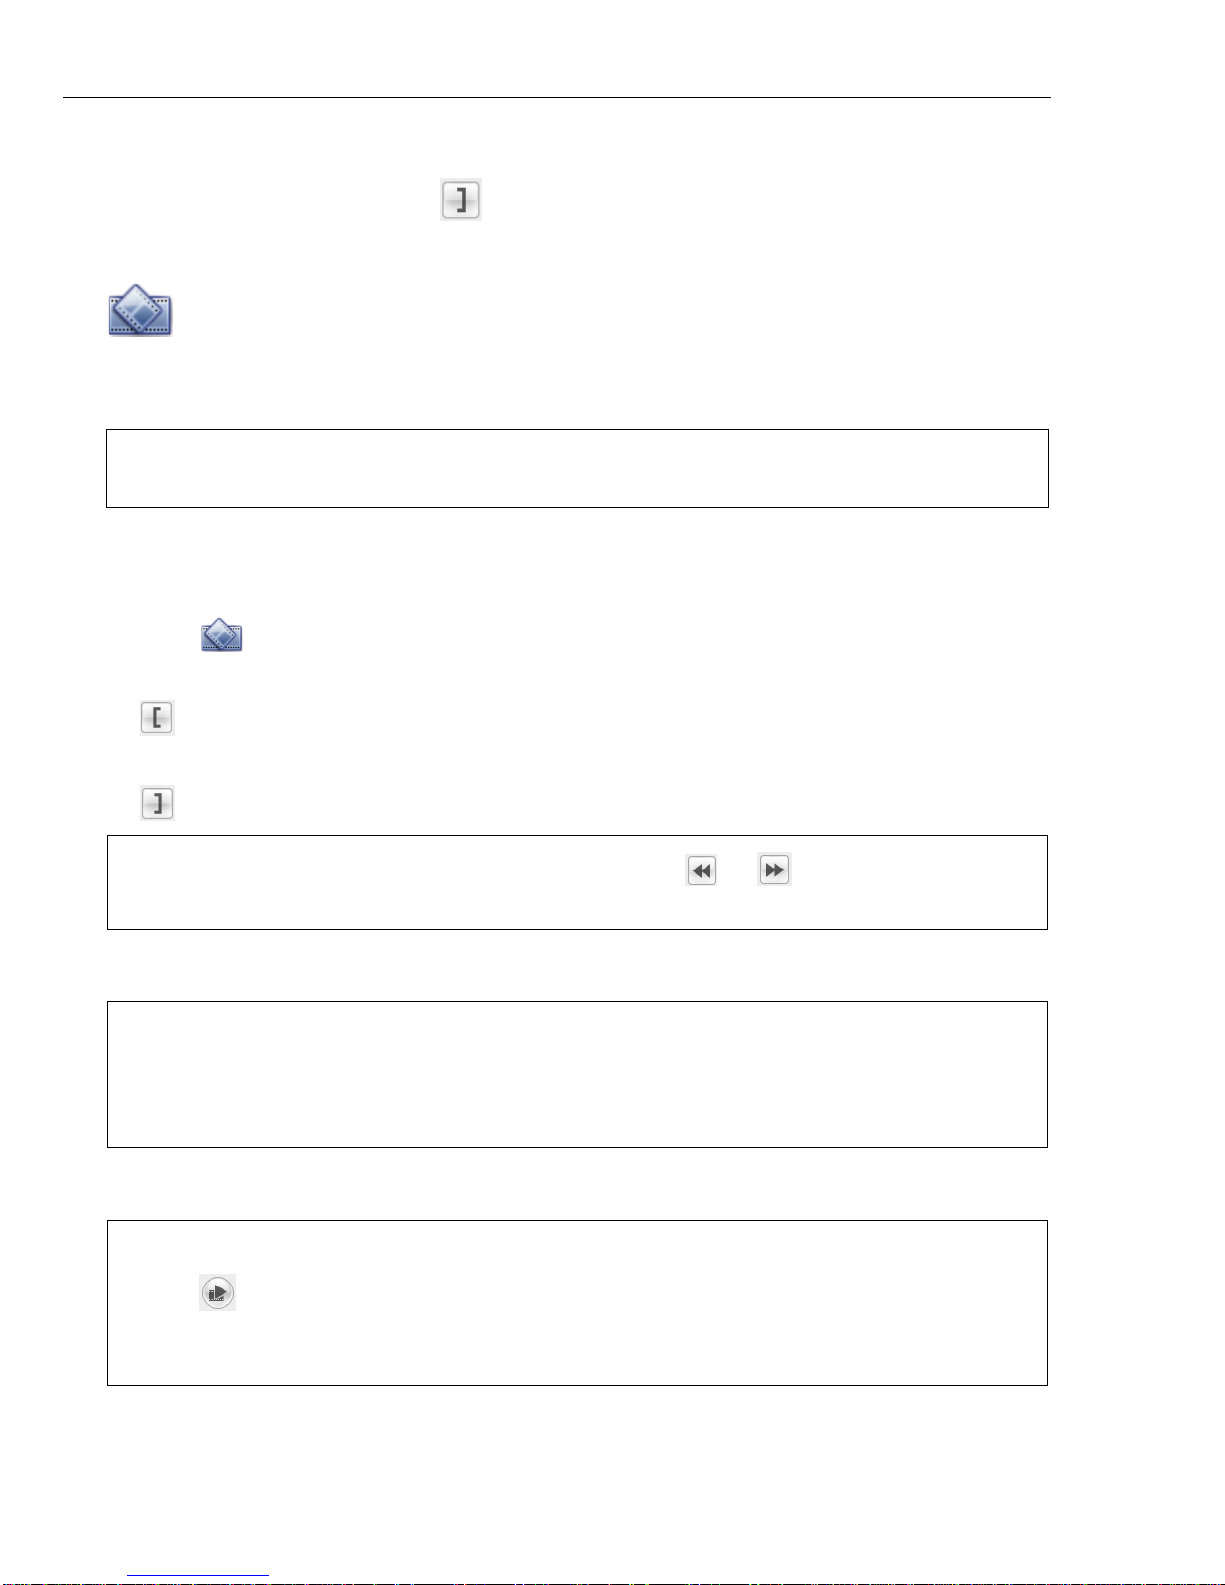
Trimming a video
You can trim a video using the Jog Slider, mark-in/out buttons, navigation
controls, Shuttle Slider, and Jog Wheel. Trimming allows you to modify the
length of the video according to your needs.
To trim video:
1. Select a video thumbnail in the Media Clip list.
2. Use the navigation controls or drag the Jog Slider to where the clip will start
and click or press [F3]. Alternatively, simply drag Mark-in to the starting
point.
12 ULEAD DVD MOVIEFACTORY USER GUIDE
3. Use the navigation controls or drag the Jog Slider to move to the point where
the clip will end then click or press [F4].
4. Click Play (or press [Space]) to view the trimmed video.
Multi-trim Video
Multi-trim Video lets you select multiple segments from a video and extract these
segments to the Media Clip list.
To use Multi-trim:
1. Select the video to be trimmed in the Media Clip list.
2. Click to open the Multi-trim Video dialog box.
3. Drag the Jog Slider to locate the start of the segment to retain, and then click
or press [F3].
4. Drag the Jog Slider to locate the end of the segment to retain, and then click
or press [F4]. The extracted segment will be added to the Media Clip list.
5. To select more segments, repeat steps 3 and 4.
6. Click OK.
Note: If the video is previously edited by Enhance Video, you must first right-click
the video and select Reset Enhanced Video before you can multi-trim the clip.
Tip: To m ove th e Jog Slider at a fixed interval, use or . Set the quick search
interval in Duration.
Tips:
• Quick search interval allows you to set a fixed interval between frames and
browse through the movie using the set value.
• You can also click Invert Selection to select all unmarked segments instead.
Tips:
• Click Play Trimmed Video to view the extracted segments.
• To remove any extracted segment from the list, select it in the Media Clip list and
click Remove selected clips.
ULEAD DVD MOVIEFACTORY USER GUIDE 13
DVD MovieFactory
Ad-Zapper
Ulead DVD MovieFactory lets you search your videos for commercial intervals.
Clicking this feature extracts the commercials to the media list.
Detection sensitivity allows you to control the rate of distinguishing between
commercials.
Merge CF
This feature merges all your extracted clips so that they appear as one thumbnail in
your media list.
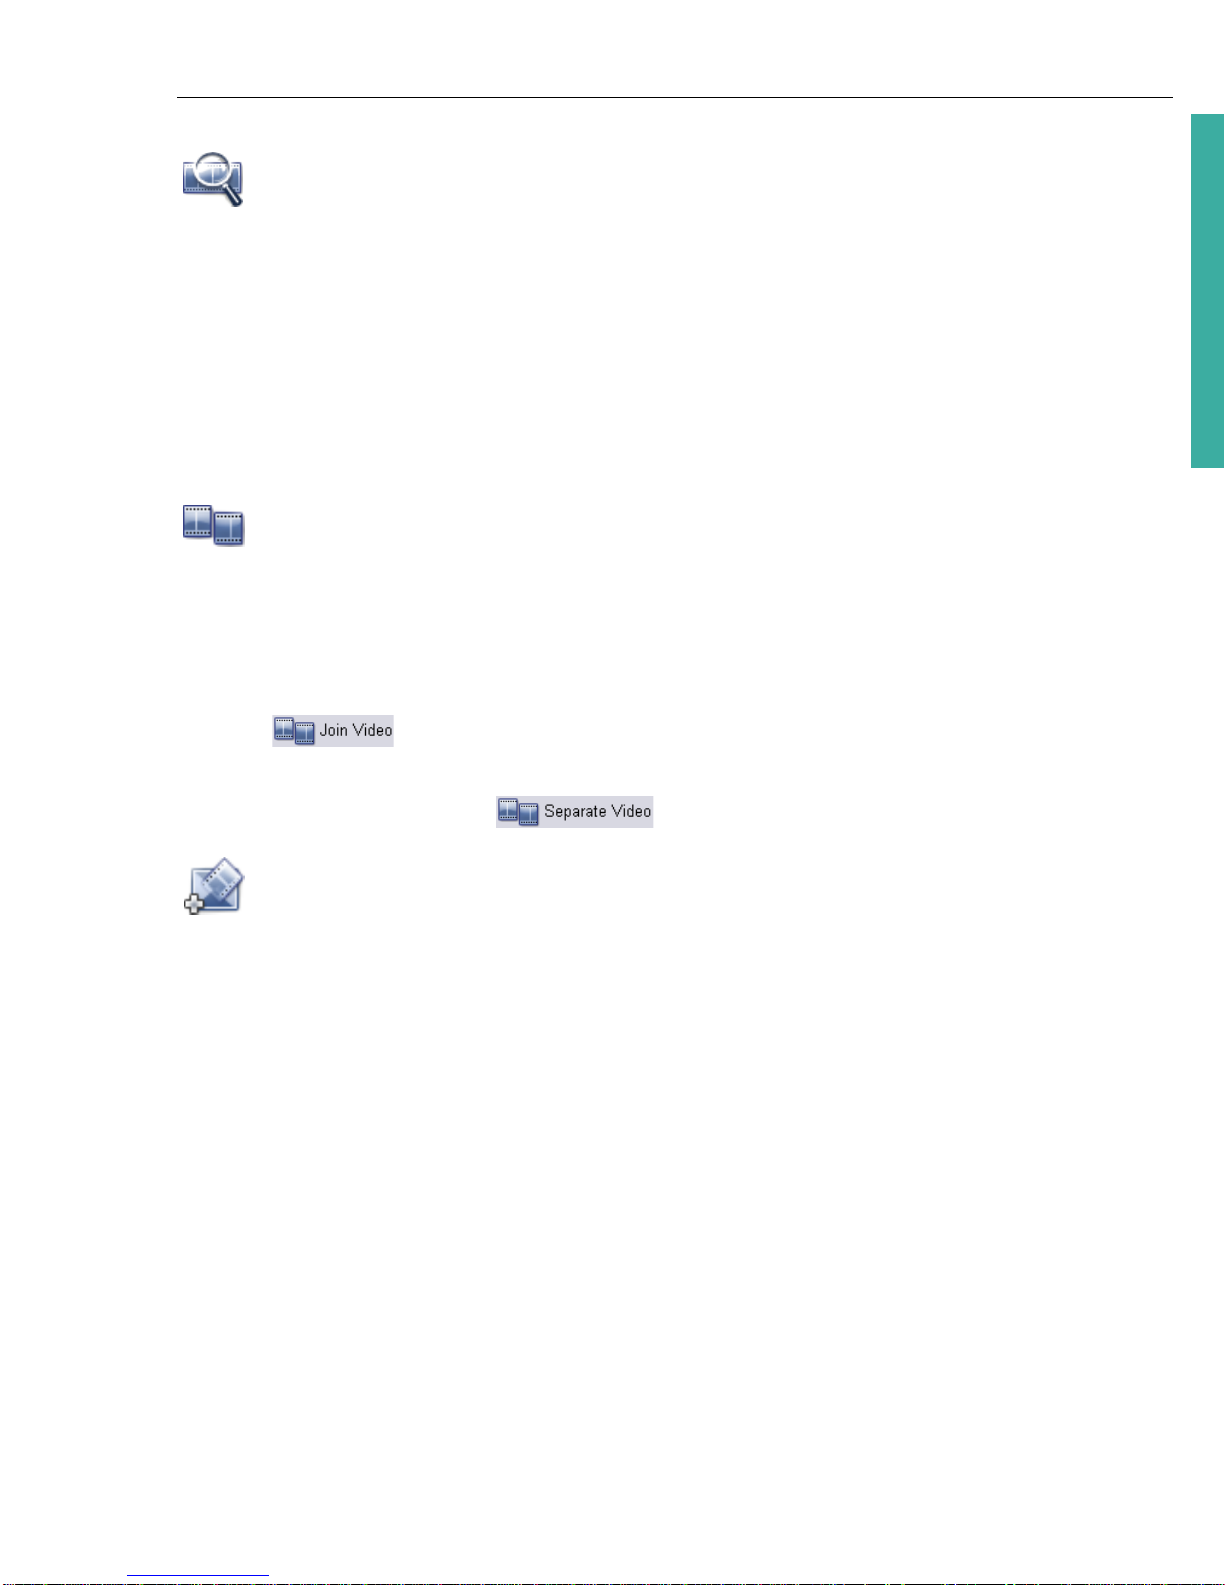
Join/Separate videos
You can combine two or more video clips, or separate previously combined video
clips using the Join/Separate Video feature.
To combine/separate video clips:
1. Press [Ctrl] or [Shift] and click on two or more clips in the Media Clip list.
2. Click to combine the selected clips.
3. To separate the previously combined videos, select the video clip from the
Media Clip list and click .
Enhance Video/Edit Slideshow
Select a video clip and click Enhance Video to add transition effects, audio, and
text to your video.
To manually add transition effects:
1. In the Effect tab, drag the Jog Slider or use the playback controls to move
between frames in the video. Stop when you reach the point where the effect
will be added.
2. Select a transition effect from the list, and enter the duration.
3. Click Add to Current Position.
4. Repeat steps 2 to 3 to add more transition effects. You can use the playback
controls to preview the results.
5. Click OK.

14 ULEAD DVD MOVIEFACTORY USER GUIDE
The Text tab
The Text tab allows you to add and format text.
To add text to your video:
1. In the Text tab, drag the Jog Slider or use the playback controls to move
between frames in the video. Stop when you reach the point where the text will
be added.
2. Double-click the Preview Window to enter the text. Specify the duration, font
type, size, color, and other properties. You can also use the mark-in/out buttons
to set how long the text clip will be displayed on screen. Click Mark-in to mark
the starting point of the clip and Mark-out to mark the ending point.
3. Repeat steps 1 to 2 to add more text. You can use the playback controls to
preview the result. The text will not overlap each other.
4. Click OK.
Options for the Text tab
• Added text list Records all the text strings that have been added. Use this list
to select the text to edit or remove.
• Delete Click to remove the selected text from the video.
• Duration Specify how long the text will be displayed.
• Vertical text Changes the orientation of the text vertically.
• Transparency Enter a value or drag the slider to adjust the transparency of the
text.
• Shadow Applies shadow to your text.
• Show/Hide shadow attributes Toggles between showing and hiding the
settings for the text shadow.
• X-offset Determines the horizontal distance between the text and the
shadow.
• Y-offset Determines the vertical distance between the text and the shadow.
• Transparency Enter a value or drag the slider to adjust the shadow
transparency of the text.
Tip: To modify or delete the added text, select it in the Added text list then apply
preferred settings or click Delete.

ULEAD DVD MOVIEFACTORY USER GUIDE 15
DVD MovieFactory
The Audio tab
The Audio tab allows you to add audio to your video.
To add audio:
1. In the Audio tab, click Add Audio to locate the audio file to add. The added
audio files are displayed on the list below Add Audio.
2. To preview and trim an audio file or apply fade-in/out effects, click Set audio
properties . The duration of all audio files in your project is displayed in
Total duration.
3. To add a voice annotation to your video, drag the Jog Slider or use the playback
controls or the Jog Wheel to move between frames in the video. Stop when you
reach the point where the annotation will be inserted. Click Record Voice
and test your microphone (adjust the volume as needed), then click Record to
start.
4. To remove a previously recorded annotation, select it from the Recorded voice
list then click Delete .
5. Adjust the volume for the original audio track, additional audio file, and recorded
voice annotations respectively. Click Play to preview the result.
6. Click OK.
Options for the Audio tab
• Add Audio Click to locate an audio file to be used as background music for your
video. The added audio files are displayed on the list below it.
• Record Voice Click to record and add voice annotations to your video.
• Mix audio Enter the specific value or move the slider to adjust the volume level
for the Original, Additional, and Voice audio tracks respectively.
• Mute Click to disable a specific audio track.
Note: Even if the audio is trimmed or edited, the actual audio playback duration
remains the same as the video playback duration. Audio playback will loop if the
video duration is longer.

16 ULEAD DVD MOVIEFACTORY USER GUIDE
The Effect tab
The Effect tab displays various options that you can use to apply transition effects
to your video clip. You can also add a transition effect anywhere in the video.
Options for the Effect tab
• Auto Add Effects Click to automatically add transition effects based on the
scene changes or chapters of a video title.
• Only for joined videos Select to automatically insert transition effects in
between videos that are joined together. This option works only with Auto Add
Effects.
• Duration Allows you to specify the length of the selected transition effect.
• Add to Current Position Click to add the selected transition effect to the frame
currently displayed on the Preview Window.
• Added effect list Select an applied transition effect to edit or remove.
• Delete Click to remove the selected transition effect from the video.
• Delete All Click to remove all previously applied transition effects.
• Auto enhancement Applies automatic brightness and contrast adjustments to
your video clip.
Add/Edit Chapters
Through this option, you can create submenus linked to their associated video
clips. See “Select a template to create menu (Step 2/3)” for more details.
Represented as a video thumbnail in a submenu, each chapter is like a bookmark
for a video clip. Viewers can easily select a chapter, then the video clip will
immediately jump to the first scene of that chapter and start the playback.
This feature gives your viewers the freedom to choose a particular part of the
movie to watch. Note that these small video thumbnails only link to its “mother”
video without generating any additional physical video files. So, you don’t need to
worry about the possibility of unexpected file size increase.
Note: Click Auto Add Effects to easily add transition effects. DVD MovieFactory will
scan the video for scene changes and add a transition effect at every point of the
scene change.
 Loading...