

Ubiquiti EDGESWITCH ES-24-250W, EDGESWITCH ES-24-500W, EDGESWITCH ES-48-750W, EDGESWITCH ES-48-500W Command Reference Manual
Page 1
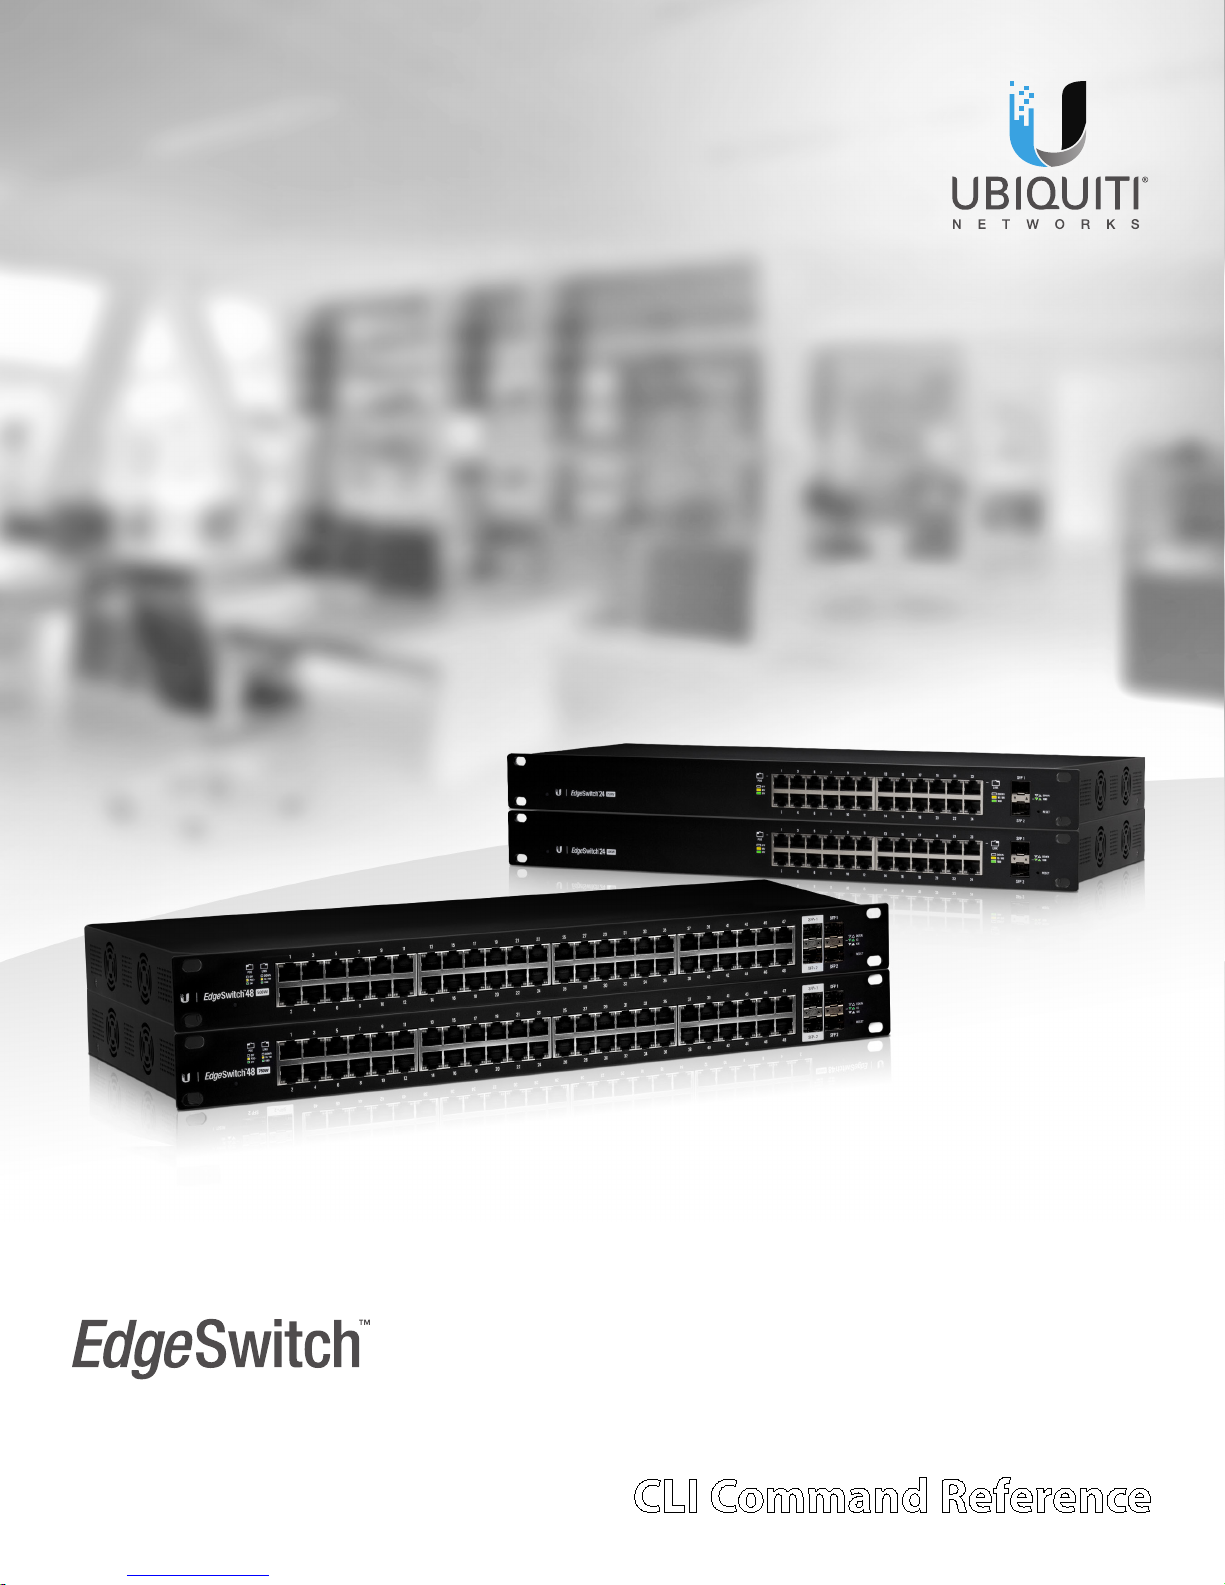
CLI for PoE Switches
Models: ES-24-250W, ES-24-500W,
ES-48-500W, ES-48-750W CLI Command Reference
Page 2

Table of ContentsEdgeSwitch CLI Command Reference
Table of Contents
About This Document ............................................25
Purpose and Audience .............................................................26
Document Organization ...........................................................26
Products and Models ..............................................................26
Related Documents ...............................................................26
Typographical Conventions ........................................................27
Chapter 1: Using the Command Line Interface ......................28
Command Syntax .................................................................29
Command Conventions ...........................................................29
Common Parameter Values ........................................................29
slot/port Naming Convention ......................................................30
Using the “no” Form of a Command ................................................30
Executing “show” Commands ......................................................31
CLI Output Filtering ...............................................................31
EdgeSwitch Modules ..............................................................32
Command Modes .................................................................32
Command Completion and Abbreviation ..........................................34
CLI Error Messages ................................................................34
CLI Line-Editing Conventions ......................................................35
Using CLI Help ....................................................................35
Accessing the CLI ..................................................................36
Chapter 2: Management Commands ...............................37
Network Interface Commands .....................................................38
enable (Privileged EXEC access) .................................................38
do (Privileged EXEC commands) ................................................38
network parms .................................................................38
network protocol ..............................................................38
network protocol dhcp .........................................................39
network mac-address ..........................................................39
network mac-type .............................................................39
network javamode .............................................................39
show network ..................................................................40
Telnet Commands .................................................................42
ip telnet server enable ..........................................................42
transport input telnet ..........................................................42
telnetcon maxsessions .........................................................42
telnetcon timeout ..............................................................43
show telnetcon ................................................................43
Ubiquiti Networks, Inc.
ii
Page 3

Table of ContentsEdgeSwitch CLI Command Reference
Secure Shell Commands ...........................................................44
ip ssh ..........................................................................44
ip ssh protocol .................................................................44
ip ssh server enable ............................................................44
sshcon maxsessions ............................................................44
sshcon timeout ................................................................45
show ip ssh ....................................................................45
Management Security Commands .................................................46
crypto certificate generate .....................................................46
crypto key generate rsa ........................................................46
crypto key generate dsa ........................................................46
Hypertext Transfer Protocol Commands ............................................47
ip http accounting exec, ip https accounting exec ...............................47
ip http authentication ..........................................................47
ip https authentication .........................................................48
ip http server ..................................................................48
ip http secure-server ...........................................................48
ip http session hard-timeout ....................................................49
ip http session maxsessions ....................................................49
ip http session soft-timeout ....................................................49
ip http secure-session hard-timeout ............................................50
ip http secure-session maxsessions .............................................50
ip http secure-session soft-timeout .............................................50
ip http secure-port .............................................................50
ip http secure-protocol .........................................................51
show ip http ...................................................................51
Access Commands ................................................................52
disconnect .....................................................................52
show loginsession ..............................................................52
show loginsession long .........................................................52
User Account Commands ..........................................................53
aaa authentication login ........................................................53
aaa authentication enable ......................................................53
aaa authorization ..............................................................55
show authorization methods ...................................................55
enable authentication ..........................................................56
username (Global Config) ......................................................56
username name nopassword ...................................................57
username name unlock ........................................................57
show users .....................................................................58
show users long ................................................................58
show users accounts ...........................................................58
show users login-history [long] .................................................59
Ubiquiti Networks, Inc.
iii
Page 4

Table of ContentsEdgeSwitch CLI Command Reference
show users login-history [username] ............................................59
login authentication ...........................................................59
password ......................................................................60
password (Line Configuration) ..................................................60
password (User EXEC) ..........................................................61
password (aaa IAS User Config) .................................................61
enable password (Privileged EXEC) .............................................61
passwords min-length ..........................................................62
passwords history ..............................................................62
passwords aging ...............................................................62
passwords lock-out ............................................................63
passwords strength-check ......................................................63
passwords strength maximum consecutive-characters ..........................63
passwords strength maximum repeated-characters .............................63
passwords strength minimum uppercase-letters ................................64
passwords strength minimum lowercase-letters .................................64
passwords strength minimum numeric-characters ..............................64
passwords strength minimum special-characters ................................64
passwords strength minimum character-classes .................................65
passwords strength exclude-keyword ...........................................65
show passwords configuration .................................................65
show passwords result .........................................................66
write memory ..................................................................66
aaa ias-user username ..........................................................66
aaa session-id ..................................................................67
aaa accounting .................................................................67
password (AAA IAS User Configuration) .........................................68
clear aaa ias-users ..............................................................69
show aaa ias-users .............................................................69
accounting. . . . . . . . . . . . . . . . . . . . . . . . . . . . . . . . . . . . . . . . . . . . . . . . . . . . . . . . . . . . . . . . . . . . . 70
show accounting ...............................................................70
show accounting methods .....................................................70
clear accounting statistics ......................................................71
SNMP Commands .................................................................72
snmp-server ...................................................................72
snmp-server community .......................................................72
snmp-server community-group ................................................72
snmp-server enable traps violation .............................................73
snmp-server enable traps ......................................................73
snmp trap link-status ...........................................................73
snmp trap link-status all ........................................................73
snmp-server enable traps linkmode ............................................74
snmp-server enable traps multiusers ............................................74
Ubiquiti Networks, Inc.
iv
Page 5

Table of ContentsEdgeSwitch CLI Command Reference
snmp-server enable traps stpmode .............................................74
snmp-server engineID local ....................................................75
snmp-server filter ..............................................................75
snmp-server group .............................................................75
snmp-server host ..............................................................76
snmp-server user ..............................................................77
snmp-server view ..............................................................77
snmp-server v3-host ...........................................................78
snmptrap source-interface .....................................................78
show snmp ....................................................................79
show snmp engineID ..........................................................79
show snmp filters ..............................................................79
show snmp group ..............................................................80
show snmp source-interface ....................................................80
show snmp user. . . . . . . . . . . . . . . . . . . . . . . . . . . . . . . . . . . . . . . . . . . . . . . . . . . . . . . . . . . . . . . . 80
show snmp views ..............................................................80
show trapflags .................................................................81
RADIUS Commands ...............................................................82
radius accounting mode ........................................................82
radius server attribute 4 ........................................................82
radius server host ..............................................................82
radius server key ...............................................................83
radius server msgauth ..........................................................84
radius server primary ...........................................................84
radius server retransmit ........................................................84
radius source-interface .........................................................85
radius server timeout ...........................................................85
show radius ....................................................................86
show radius servers ............................................................86
show radius accounting ........................................................88
show radius accounting statistics ...............................................88
show radius source-interface ...................................................90
show radius statistics ...........................................................90
TACACS+ Commands ..............................................................92
tacacs-server host ..............................................................92
tacacs-server key ...............................................................92
tacacs-server keystring .........................................................93
tacacs-server source-interface ..................................................93
tacacs-server timeout ..........................................................93
key ............................................................................94
keystring .......................................................................94
port ...........................................................................94
priority (TACACS Config) ........................................................94
Ubiquiti Networks, Inc.
v
Page 6

Table of ContentsEdgeSwitch CLI Command Reference
timeout ........................................................................95
show tacacs ....................................................................95
show tacacs source-interface ...................................................95
Configuration Scripting Commands ................................................96
script apply ....................................................................96
script delete ...................................................................96
script list .......................................................................97
script show ....................................................................97
script validate ..................................................................97
Prelogin Banner, System Prompt, and Host Name Commands .......................98
copy (pre-login banner) ........................................................98
set prompt .....................................................................98
hostname ......................................................................98
show clibanner .................................................................98
set clibanner ...................................................................99
Chapter 3: Utility Commands .....................................100
AutoInstall Commands ...........................................................101
boot autoinstall ...............................................................101
boot host retrycount ..........................................................101
boot host dhcp ...............................................................101
boot host autosave ............................................................102
boot host autoreboot .........................................................102
erase startup-config ...........................................................102
erase factory-defaults .........................................................102
show autoinstall ..............................................................103
CLI Output Filtering Commands ..................................................104
show xxx | include "string" .....................................................104
show xxx | include "string" exclude "string2" ...................................104
show xxx | exclude "string" ....................................................104
show xxx | begin "string" ......................................................105
show xxx | section "string" .....................................................105
show xxx | section "string" "string2" ............................................105
show xxx | section "string" include "string2" ....................................105
Dual Image Commands ...........................................................106
delete ........................................................................106
boot system ..................................................................106
show bootvar .................................................................106
filedescr ......................................................................106
update bootcode .............................................................106
System Information and Statistics Commands .....................................107
show arp switch ...............................................................107
show eventlog ................................................................107
Ubiquiti Networks, Inc.
vi
Page 7

Table of ContentsEdgeSwitch CLI Command Reference
show hardware ...............................................................107
show version ..................................................................108
show platform vpd ............................................................108
show interface ................................................................108
show interfaces status .........................................................109
show interfaces traffic .........................................................109
show interface counters .......................................................110
show interface ethernet .......................................................111
show interface ethernet switchport ............................................114
show interface lag .............................................................114
show fiber-ports optical-transceiver ...........................................114
show fiber-ports optical-transceiver-info .......................................115
show mac-addr-table ..........................................................116
process cpu threshold .........................................................117
show process app-list .........................................................117
show process app-resource-list ................................................118
show process cpu .............................................................118
show process proc-list .........................................................118
show running-config ..........................................................119
show running-config interface .................................................120
show .........................................................................120
dir ............................................................................122
show sysinfo ..................................................................123
show tech-support ............................................................123
length ........................................................................123
terminal length ...............................................................124
show terminal length .........................................................124
memory free low-watermark processor ........................................124
Box Services Commands ..........................................................125
show version bootloader ......................................................125
environment temprange ......................................................125
environment trap .............................................................125
Logging Commands ..............................................................126
logging buffered ..............................................................126
logging buffered wrap ........................................................126
logging cli-command .........................................................126
logging host ..................................................................126
logging host reconfigure ......................................................127
logging host remove ..........................................................127
logging port ..................................................................127
logging syslog ................................................................127
logging syslog port ...........................................................128
logging syslog source-interface ................................................128
Ubiquiti Networks, Inc.
vii
Page 8

Table of ContentsEdgeSwitch CLI Command Reference
show logging .................................................................128
show logging buffered ........................................................129
show logging hosts ...........................................................129
show logging persistent .......................................................130
show logging traplogs ........................................................130
clear logging buffered .........................................................130
Email Alerting and Mail Server Commands ........................................131
logging email .................................................................131
logging email urgent ..........................................................131
logging email message-type to-addr ..........................................131
logging email from-addr ......................................................132
logging email message-type subject ...........................................132
logging email logtime .........................................................132
logging traps .................................................................132
logging email test message-type ..............................................133
show logging email config ....................................................133
show logging email statistics ..................................................133
clear logging email statistics ...................................................133
mail-server ....................................................................134
security .......................................................................134
port ..........................................................................134
username (Mail Server Config) .................................................134
password .....................................................................134
show mail-server config .......................................................134
System Utility and Clear Commands ..............................................136
traceroute ....................................................................136
clear config ...................................................................138
clear counters .................................................................138
clear igmpsnooping ..........................................................138
clear pass .....................................................................138
clear traplog ..................................................................138
clear vlan .....................................................................138
logout ........................................................................139
ping ..........................................................................139
quit ...........................................................................140
reload ........................................................................140
copy ..........................................................................140
file verify ......................................................................143
Simple Network Time Protocol Commands ........................................144
sntp broadcast client poll-interval .............................................144
sntp client mode ..............................................................144
sntp client port. . . . . . . . . . . . . . . . . . . . . . . . . . . . . . . . . . . . . . . . . . . . . . . . . . . . . . . . . . . . . . . . 144
sntp unicast client poll-interval ................................................144
Ubiquiti Networks, Inc.
viii
Page 9

Table of ContentsEdgeSwitch CLI Command Reference
sntp unicast client poll-timeout ................................................145
sntp unicast client poll-retry ...................................................145
sntp server ....................................................................145
sntp source-interface ..........................................................146
show sntp ....................................................................146
show sntp client ..............................................................146
show sntp server ..............................................................147
show sntp source-interface ....................................................147
Time Zone Commands ...........................................................148
clock set ......................................................................148
clock summer-time date .......................................................148
clock summer-time recurring ..................................................149
clock timezone ................................................................149
show clock ...................................................................150
show clock detail ..............................................................150
DHCP Server Commands .........................................................151
ip dhcp pool ..................................................................151
client-identifier. . . . . . . . . . . . . . . . . . . . . . . . . . . . . . . . . . . . . . . . . . . . . . . . . . . . . . . . . . . . . . . .151
client-name ...................................................................151
default-router .................................................................152
dns-server ....................................................................152
hardware-address .............................................................152
host ..........................................................................152
lease ..........................................................................153
network (DHCP Pool Config) ...................................................153
bootfile .......................................................................153
domain-name .................................................................153
domain-name enable .........................................................154
netbios-name-server ..........................................................154
netbios-node-type ............................................................154
next-server ...................................................................155
option ........................................................................155
ip dhcp excluded-address .....................................................155
ip dhcp ping packets ..........................................................156
service dhcp ..................................................................156
ip dhcp bootp automatic ......................................................156
ip dhcp conflict logging .......................................................156
clear ip dhcp binding ..........................................................157
clear ip dhcp server statistics ..................................................157
clear ip dhcp conflict ..........................................................157
show ip dhcp binding .........................................................157
show ip dhcp global configuration .............................................157
show ip dhcp pool configuration ..............................................158
Ubiquiti Networks, Inc.
ix
Page 10

Table of ContentsEdgeSwitch CLI Command Reference
show ip dhcp server statistics ..................................................158
show ip dhcp conflict .........................................................159
DNS Client Commands ...........................................................160
ip domain lookup .............................................................160
ip domain name ..............................................................160
ip domain list .................................................................160
ip name-server ................................................................161
ip name source-interface ......................................................161
ip host ........................................................................161
ipv6 host ......................................................................162
ip domain retry ...............................................................162
ip domain timeout ............................................................162
clear host .....................................................................162
show hosts ....................................................................163
show ip name source-interface ................................................163
IP Address Conflict Commands ...................................................164
ip address-conflict-detect run .................................................164
show ip address-conflict .......................................................164
clear ip address-conflict-detect ................................................164
Serviceability Packet Tracing Commands ..........................................165
capture start ..................................................................165
capture stop ..................................................................165
capture file|remote|line ........................................................165
capture remote port ...........................................................166
capture file size ...............................................................166
capture line wrap .............................................................166
show capture packets .........................................................166
debug aaa accounting ........................................................166
debug aaa authorization ......................................................166
debug arp ....................................................................167
debug authentication .........................................................167
debug auto-voip ..............................................................167
debug clear ...................................................................168
debug crashlog ...............................................................168
debug debug-config ..........................................................168
debug dhcp packet ...........................................................169
debug dot1x packet ...........................................................169
debug igmpsnooping packet ..................................................169
debug igmpsnooping packet transmit .........................................169
debug igmpsnooping packet receive ..........................................170
debug ip acl ..................................................................171
debug ipv6 dhcp ..............................................................171
debug lacp packet ............................................................171
Ubiquiti Networks, Inc.
x
Page 11

Table of ContentsEdgeSwitch CLI Command Reference
debug ping packet ............................................................172
debug spanning-tree bpdu ....................................................172
debug spanning-tree bpdu receive ............................................172
debug spanning-tree bpdu transmit ...........................................173
debug tacacs .................................................................173
debug transfer ................................................................174
show debugging ..............................................................174
exception protocol ............................................................174
exception dump tftp-server ...................................................175
exception dump nfs ...........................................................175
exception dump filepath ......................................................175
exception core-file ............................................................175
exception switch-chip-register .................................................176
write core .....................................................................176
show exception ...............................................................176
logging persistent .............................................................177
mbuf .........................................................................177
show mbuf. . . . . . . . . . . . . . . . . . . . . . . . . . . . . . . . . . . . . . . . . . . . . . . . . . . . . . . . . . . . . . . . . . . . 177
show mbuf total ..............................................................178
Cable Test Command .............................................................179
cablestatus ...................................................................179
Remote Monitoring Commands. . . . . . . . . . . . . . . . . . . . . . . . . . . . . . . . . . . . . . . . . . . . . . . . . . . 180
rmon alarm ...................................................................180
rmon hcalarm .................................................................180
rmon event ...................................................................182
rmon collection history ........................................................182
show rmon ...................................................................183
show rmon collection history ..................................................184
show rmon events ............................................................185
show rmon history ............................................................185
show rmon log ................................................................187
show rmon statistics interfaces ................................................188
show rmon hcalarms ..........................................................189
Statistics Application Commands .................................................191
stats group ....................................................................191
stats flow-based ...............................................................192
stats flow-based reporting .....................................................192
stats group ....................................................................193
stats flow-based ...............................................................193
show stats group ..............................................................194
show stats flow-based .........................................................194
Ubiquiti Networks, Inc.
xi
Page 12

Table of ContentsEdgeSwitch CLI Command Reference
Chapter 4: Switching Commands ..................................196
Port Configuration Commands ....................................................197
interface ......................................................................197
auto-negotiate ................................................................197
auto-negotiate all .............................................................197
description ...................................................................197
media-type ...................................................................198
mtu ...........................................................................198
shutdown .....................................................................199
shutdown all ..................................................................199
speed ........................................................................199
speed all ......................................................................199
show interface media-type ....................................................200
show port .....................................................................200
show port advertise ...........................................................201
show port description .........................................................202
Spanning Tree Protocol Commands ...............................................203
spanning-tree .................................................................203
spanning-tree auto-edge ......................................................203
spanning-tree bpdumigrationcheck ...........................................203
spanning-tree configuration name .............................................203
spanning-tree configuration revision ..........................................204
spanning-tree cost ............................................................204
spanning-tree edgeport .......................................................204
spanning-tree forceversion ....................................................205
spanning-tree forward-time ...................................................205
spanning-tree max-age ........................................................205
spanning-tree max-hops ......................................................205
spanning-tree mst ............................................................206
spanning-tree mst instance ....................................................206
spanning-tree mst priority .....................................................207
spanning-tree mst vlan ........................................................207
spanning-tree port mode ......................................................208
spanning-tree port mode all ...................................................208
spanning-tree tcnguard .......................................................208
spanning-tree transmit ........................................................208
show spanning-tree ...........................................................209
show spanning-tree brief ......................................................210
show spanning-tree interface ..................................................210
show spanning-tree mst detailed ..............................................211
show spanning-tree mst port detailed .........................................212
show spanning-tree mst port summary ........................................214
show spanning-tree mst port summary active ..................................215
Ubiquiti Networks, Inc.
xii
Page 13

Table of ContentsEdgeSwitch CLI Command Reference
show spanning-tree mst summary .............................................215
show spanning-tree summary .................................................216
show spanning-tree vlan ......................................................216
VLAN Commands. . . . . . . . . . . . . . . . . . . . . . . . . . . . . . . . . . . . . . . . . . . . . . . . . . . . . . . . . . . . . . . . . 217
vlan database .................................................................217
network mgmt_vlan ..........................................................217
vlan. . . . . . . . . . . . . . . . . . . . . . . . . . . . . . . . . . . . . . . . . . . . . . . . . . . . . . . . . . . . . . . . . . . . . . . . . . . 217
vlan acceptframe ..............................................................217
vlan ingressfilter ..............................................................218
vlan internal allocation ........................................................218
vlan makestatic ...............................................................218
vlan name ....................................................................218
vlan participation .............................................................219
vlan participation all ..........................................................219
vlan port acceptframe all ......................................................219
vlan port ingressfilter all .......................................................220
vlan port pvid all ..............................................................220
vlan port tagging all ...........................................................220
vlan pvid ......................................................................220
vlan tagging ..................................................................221
vlan association mac ..........................................................221
show vlan ....................................................................221
show vlan internal usage ......................................................222
show vlan brief ................................................................222
show vlan port ................................................................222
Private VLAN Commands .........................................................224
switchport private-vlan ........................................................224
switchport mode private-vlan .................................................224
private-vlan ...................................................................225
Voice VLAN Commands ...........................................................226
voice vlan (Global Config) .....................................................226
voice vlan (Interface Config) ...................................................226
voice vlan data priority ........................................................226
show voice vlan ...............................................................227
Provisioning (IEEE 802.1p) Commands ............................................228
vlan port priority all ...........................................................228
vlan priority ...................................................................228
Protected Ports Commands .......................................................229
switchport protected (Global Config) ..........................................229
switchport protected (Interface Config) ........................................229
show switchport protected ...................................................230
show interfaces switchport ....................................................230
Ubiquiti Networks, Inc.
xiii
Page 14

Table of ContentsEdgeSwitch CLI Command Reference
GARP Commands ................................................................231
set garp timer join ............................................................231
set garp timer leave ...........................................................231
set garp timer leaveall .........................................................231
show garp ....................................................................232
GVRP Commands .................................................................233
set gvrp adminmode .........................................................233
set gvrp interfacemode .......................................................233
show gvrp configuration ......................................................233
GMRP Commands ................................................................235
set gmrp adminmode .........................................................235
set gmrp interfacemode .......................................................235
show gmrp configuration .....................................................235
show mac-address-table gmrp ................................................236
Port-Based Network Access Control Commands ...................................237
aaa authentication dot1x default ..............................................237
clear dot1x statistics ...........................................................237
clear dot1x authentication-history ............................................237
clear radius statistics ..........................................................237
dot1x eapolflood ..............................................................237
dot1x guest-vlan ..............................................................238
dot1x initialize ................................................................238
dot1x max-req ................................................................238
dot1x max-users ..............................................................238
dot1x port-control ............................................................239
dot1x port-control all .........................................................239
dot1x mac-auth-bypass .......................................................239
dot1x re-authenticate .........................................................240
dot1x re-authentication .......................................................240
dot1x system-auth-control ....................................................240
dot1x system-auth-control monitor ............................................240
dot1x timeout ................................................................241
dot1x unauthenticated-vlan ...................................................241
dot1x user ....................................................................242
show authentication methods .................................................242
show dot1x ...................................................................243
show dot1x authentication-history ............................................246
show dot1x clients ............................................................246
show dot1x users .............................................................247
802.1X Supplicant Commands ....................................................248
dot1x pae .....................................................................248
dot1x supplicant port-control .................................................248
dot1x supplicant max-start ....................................................248
Ubiquiti Networks, Inc.
xiv
Page 15

Table of ContentsEdgeSwitch CLI Command Reference
dot1x supplicant timeout start-period .........................................248
dot1x supplicant timeout held-period .........................................249
dot1x supplicant timeout auth-period .........................................249
dot1x supplicant user .........................................................249
show dot1x statistics ..........................................................249
Storm-Control Commands ........................................................251
storm-control broadcast .......................................................251
storm-control broadcast level .................................................251
storm-control broadcast rate ..................................................252
storm-control multicast .......................................................252
storm-control multicast level ..................................................253
storm-control multicast rate ...................................................253
storm-control unicast .........................................................253
storm-control unicast level ....................................................254
storm-control unicast rate .....................................................254
show storm-control ...........................................................255
Port-Channel/LAG (802.3ad) Commands ..........................................256
port-channel ..................................................................256
addport .......................................................................256
deleteport (Interface Config) ..................................................256
deleteport (Global Config) .....................................................257
lacp admin key ................................................................257
lacp collector max-delay .......................................................257
lacp actor admin key ..........................................................257
lacp actor admin state individual ..............................................258
lacp actor admin state longtimeout ............................................258
lacp actor admin state passive .................................................258
lacp actor admin state .........................................................259
lacp actor port priority ........................................................259
lacp partner admin key .......................................................259
lacp partner admin state individual ............................................260
lacp partner admin state longtimeout .........................................260
lacp partner admin state passive ...............................................260
lacp partner port id ...........................................................261
lacp partner port priority ......................................................261
lacp partner system-id. . . . . . . . . . . . . . . . . . . . . . . . . . . . . . . . . . . . . . . . . . . . . . . . . . . . . . . . . 261
lacp partner system priority ...................................................262
interface lag ..................................................................262
port-channel static ............................................................262
port lacpmode ................................................................262
port lacpmode enable all .....................................................263
port lacptimeout (Interface Config) ............................................263
port lacptimeout (Global Config) ..............................................263
Ubiquiti Networks, Inc.
xv
Page 16

Table of ContentsEdgeSwitch CLI Command Reference
port-channel adminmode ....................................................264
port-channel linktrap ..........................................................264
port-channel load-balance ....................................................264
port-channel local-preference .................................................265
port-channel min-links ........................................................265
port-channel name ............................................................265
port-channel system priority ..................................................265
show lacp actor ...............................................................266
show lacp partner .............................................................266
show port-channel brief .......................................................266
show port-channel ...........................................................267
show port-channel system priority .............................................267
show port-channel counters ...................................................268
clear port-channel counters ...................................................268
clear port-channel all counters ................................................268
Port Mirroring Commands ........................................................269
monitor session ...............................................................269
no monitor. . . . . . . . . . . . . . . . . . . . . . . . . . . . . . . . . . . . . . . . . . . . . . . . . . . . . . . . . . . . . . . . . . . . 270
show monitor session .........................................................270
show vlan remote-span .......................................................270
Static MAC Filtering Commands ...................................................271
macfilter ......................................................................271
macfilter adddest .............................................................271
macfilter adddest all. . . . . . . . . . . . . . . . . . . . . . . . . . . . . . . . . . . . . . . . . . . . . . . . . . . . . . . . . . . 272
macfilter addsrc ...............................................................272
macfilter addsrc all ............................................................272
show mac-address-table static ................................................273
show mac-address-table staticfiltering .........................................273
DHCP Client Commands ..........................................................274
dhcp client vendor-id-option ..................................................274
dhcp client vendor-id-option-string ...........................................274
show dhcp client vendor-id-option ............................................274
DHCP Snooping Configuration Commands ........................................275
ip dhcp snooping .............................................................275
ip dhcp snooping vlan .........................................................275
ip dhcp snooping verify mac-address ..........................................275
ip dhcp snooping database ....................................................275
ip dhcp snooping database write-delay ........................................276
ip dhcp snooping binding .....................................................276
ip dhcp filtering trust ..........................................................276
ip dhcp snooping limit ........................................................276
ip dhcp snooping log-invalid ..................................................277
ip dhcp snooping trust ........................................................277
Ubiquiti Networks, Inc.
xvi
Page 17

Table of ContentsEdgeSwitch CLI Command Reference
show ip dhcp snooping .......................................................277
show ip dhcp snooping binding ...............................................278
show ip dhcp snooping database ..............................................278
show ip dhcp snooping interfaces .............................................278
show ip dhcp snooping statistics ..............................................279
clear ip dhcp snooping binding ...............................................280
clear ip dhcp snooping statistics ...............................................280
IGMP Snooping Configuration Commands ........................................281
set igmp ......................................................................281
set igmp interfacemode ......................................................281
set igmp fast-leave ............................................................282
set igmp groupmembership-interval ..........................................282
set igmp maxresponse ........................................................282
set igmp mcrtrexpiretime .....................................................283
set igmp mrouter .............................................................283
set igmp mrouter interface ....................................................283
set igmp report-suppression ...................................................284
show igmpsnooping ..........................................................284
show igmpsnooping mrouter interface ........................................285
show igmpsnooping mrouter vlan .............................................285
show igmpsnooping ssm ......................................................286
show mac-address-table igmpsnooping .......................................286
IGMP Snooping Querier Commands. . . . . . . . . . . . . . . . . . . . . . . . . . . . . . . . . . . . . . . . . . . . . . . 287
set igmp querier ..............................................................287
set igmp querier query-interval ................................................287
set igmp querier timer expiry ..................................................288
set igmp querier version .......................................................288
set igmp querier election participate. . . . . . . . . . . . . . . . . . . . . . . . . . . . . . . . . . . . . . . . . . . 288
show igmpsnooping querier. . . . . . . . . . . . . . . . . . . . . . . . . . . . . . . . . . . . . . . . . . . . . . . . . . . 288
Port Security Commands .........................................................290
port-security ..................................................................290
port-security max-dynamic ....................................................290
port-security max-static .......................................................290
port-security mac-address .....................................................291
port-security mac-address move ...............................................291
port-security mac-address sticky ...............................................291
show port-security ............................................................291
show port-security dynamic ...................................................292
show port-security static ......................................................292
show port-security violation ...................................................293
LLDP (802.1AB) Commands .......................................................294
lldp transmit ..................................................................294
lldp receive ...................................................................294
Ubiquiti Networks, Inc.
xvii
Page 18

Table of ContentsEdgeSwitch CLI Command Reference
lldp timers ....................................................................294
lldp transmit-tlv ...............................................................295
lldp transmit-mgmt ...........................................................295
lldp notification ...............................................................295
lldp notification-interval .......................................................295
clear lldp statistics .............................................................296
clear lldp remote-data .........................................................296
show lldp .....................................................................296
show lldp interface ............................................................296
show lldp statistics ............................................................297
show lldp remote-device ......................................................297
show lldp remote-device detail ................................................298
show lldp local-device .........................................................299
show lldp local-device detail. . . . . . . . . . . . . . . . . . . . . . . . . . . . . . . . . . . . . . . . . . . . . . . . . . . 299
LLDP-MED Commands. . . . . . . . . . . . . . . . . . . . . . . . . . . . . . . . . . . . . . . . . . . . . . . . . . . . . . . . . . . .300
lldp med ......................................................................300
lldp med confignotification ...................................................300
lldp med transmit-tlv ..........................................................300
lldp med all ...................................................................301
lldp med confignotification all .................................................301
lldp med faststartrepeatcount .................................................301
lldp med transmit-tlv all .......................................................301
show lldp med ................................................................302
show lldp med interface .......................................................302
show lldp med local-device detail .............................................303
show lldp med remote-device .................................................304
show lldp med remote-device detail ...........................................304
Denial of Service Commands .....................................................306
dos-control all ................................................................306
dos-control sipdip .............................................................306
dos-control firstfrag ...........................................................307
dos-control tcpfrag ............................................................307
dos-control tcpflag ............................................................307
dos-control l4port .............................................................308
dos-control smacdmac ........................................................308
dos-control tcpport ...........................................................308
dos-control udpport ..........................................................309
dos-control tcpflagseq ........................................................309
dos-control tcpoffset ..........................................................309
dos-control tcpsyn ............................................................310
dos-control tcpsynfin ..........................................................310
dos-control tcpfinurgpsh ......................................................310
dos-control icmpv4 ...........................................................310
Ubiquiti Networks, Inc.
xviii
Page 19

Table of ContentsEdgeSwitch CLI Command Reference
dos-control icmpv6 ...........................................................311
dos-control icmpfrag ..........................................................311
show dos-control .............................................................311
MAC Database Commands .......................................................313
bridge aging-time .............................................................313
show forwardingdb agetime ..................................................313
show mac-address-table multicast .............................................313
show mac-address-table stats .................................................314
Chapter 5: Routing Commands ...................................315
Address Resolution Protocol Commands ..........................................316
arp ...........................................................................316
arp cachesize .................................................................316
arp dynamicrenew ............................................................316
arp purge .....................................................................317
arp resptime ..................................................................317
arp retries .....................................................................317
arp timeout ...................................................................317
clear arp-cache ................................................................318
clear arp-switch ...............................................................318
show arp ......................................................................318
show arp brief ................................................................319
show arp switch ...............................................................319
IP Routing Commands ............................................................320
routing .......................................................................320
ip routing ....................................................................320
ip address .....................................................................320
ip address dhcp ...............................................................321
ip default-gateway ............................................................321
release dhcp ..................................................................322
renew dhcp ...................................................................322
renew dhcp network-port .....................................................322
renew dhcp service-port ......................................................322
ip route .......................................................................322
ip route default ...............................................................323
ip route distance ..............................................................323
ip netdirbcast ................................................................324
ip mtu ........................................................................324
encapsulation ................................................................324
show dhcp lease ..............................................................325
show ip brief ..................................................................325
show ip interface .............................................................326
show ip interface brief .........................................................327
Ubiquiti Networks, Inc.
xix
Page 20

Table of ContentsEdgeSwitch CLI Command Reference
show ip route .................................................................327
show ip route ecmp-groups ...................................................329
show ip route summary .......................................................329
clear ip route counters ........................................................331
show ip route preferences ....................................................331
show ip stats ..................................................................332
show routing heap summary ..................................................332
Routing Policy Commands ........................................................333
ip policy route-map ...........................................................333
ip prefix-list ...................................................................333
ip prefix-list description .......................................................334
route-map ....................................................................334
match ip address ..............................................................335
match ip address access-list-number | access-list-name .........................335
match length .................................................................337
match mac-list ................................................................338
set interface ..................................................................339
set ip next-hop ................................................................339
set ip default next-hop ........................................................339
set ip precedence .............................................................340
show ip policy ................................................................340
show ip prefix-list .............................................................341
show route-map ..............................................................342
clear ip prefix-list ..............................................................342
Router Discovery Protocol Commands ............................................343
ip irdp ........................................................................343
ip irdp address ................................................................343
ip irdp holdtime ..............................................................343
ip irdp maxadvertinterval .....................................................343
ip irdp minadvertinterval .....................................................344
ip irdp multicast ...............................................................344
ip irdp preference .............................................................344
show ip irdp ..................................................................345
Virtual LAN Routing Commands ..................................................346
vlan routing ..................................................................346
interface vlan .................................................................348
show ip vlan ..................................................................348
DHCP and BOOTP Relay Commands ...............................................349
bootpdhcprelay cidoptmode ..................................................349
bootpdhcprelay maxhopcount ................................................349
bootpdhcprelay minwaittime ..................................................349
bootpdhcprelay serverip ......................................................350
bootpdhcprelay enable .......................................................350
Ubiquiti Networks, Inc.
xx
Page 21

Table of ContentsEdgeSwitch CLI Command Reference
show bootpdhcprelay .........................................................350
show ip bootpdhcprelay ......................................................350
IP Helper Commands .............................................................352
clear ip helper statistics ........................................................353
ip helper-address (Global Config) ..............................................353
ip helper-address (Interface Config) ............................................354
ip helper enable ...............................................................355
show ip helper-address ........................................................356
show ip helper statistics .......................................................356
ICMP Throttling Commands .......................................................358
ip unreachables ...............................................................358
ip redirects ....................................................................358
ip icmp echo-reply ............................................................358
ip icmp error-interval ..........................................................359
Chapter 6: IPv6 Management Commands .........................360
IPv6 Management Commands ....................................................361
network ipv6 enable ..........................................................361
network ipv6 address .........................................................361
network ipv6 gateway .........................................................362
network ipv6 neighbor ........................................................362
show network ipv6 neighbors .................................................362
ping ipv6 .....................................................................363
ping ipv6 interface ............................................................363
Loopback Interface Commands ...................................................364
interface loopback ............................................................364
show interface loopback ......................................................364
Chapter 7: Quality of Service Commands ..........................365
Class of Service Commands .......................................................366
classofservice dot1p-mapping .................................................366
classofservice ip-dscp-mapping ...............................................366
classofservice ip-precedence-mapping ........................................366
classofservice trust ............................................................367
cos-queue max-bandwidth ....................................................367
cos-queue min-bandwidth ....................................................367
cos-queue random-detect .....................................................367
cos-queue strict ...............................................................368
random-detect ................................................................368
random-detect exponential weighting-constant ...............................368
random-detect queue-parms ..................................................369
traffic-shape ..................................................................369
show classofservice dot1p-mapping ...........................................369
Ubiquiti Networks, Inc.
xxi
Page 22

Table of ContentsEdgeSwitch CLI Command Reference
show classofservice ip-dscp-mapping .........................................370
show classofservice ip-precedence-mapping ...................................370
show classofservice trust ......................................................370
show interfaces cos-queue ....................................................370
show interfaces random-detect ................................................371
show interfaces tail-drop-threshold ............................................371
Differentiated Services Commands ................................................372
diffserv .......................................................................372
DiffServ Class Commands .........................................................373
class-map .....................................................................373
class-map rename .............................................................373
match ethertype ..............................................................374
match any ....................................................................374
match class-map ..............................................................374
match cos .....................................................................375
match secondary-cos ..........................................................375
match destination-address mac ...............................................375
match dstip ...................................................................375
match dstl4port ..............................................................375
match ip dscp .................................................................376
match ip precedence ..........................................................376
match ip tos ..................................................................376
match protocol ...............................................................377
match signature ...............................................................377
match source-address mac ....................................................377
match srcip ...................................................................377
match srcl4port ...............................................................377
match src port ................................................................378
match vlan ....................................................................378
match secondary-vlan .........................................................378
DiffServ Policy Commands ........................................................379
assign-queue .................................................................379
drop ..........................................................................379
mirror. . . . . . . . . . . . . . . . . . . . . . . . . . . . . . . . . . . . . . . . . . . . . . . . . . . . . . . . . . . . . . . . . . . . . . . . . 379
redirect .......................................................................379
conform-color ................................................................380
class ..........................................................................380
mark cos ......................................................................380
mark secondary-cos ...........................................................380
mark cos-as-sec-cos ...........................................................381
mark ip-dscp ..................................................................381
mark ip-precedence ...........................................................381
police-simple .................................................................381
Ubiquiti Networks, Inc.
xxii
Page 23

Table of ContentsEdgeSwitch CLI Command Reference
police-single-rate .............................................................382
police-two-rate ...............................................................382
policy-map ...................................................................382
policy-map rename ...........................................................383
DiffServ Service Commands ......................................................384
service-policy .................................................................384
DiffServ Show Commands ........................................................385
show class-map ...............................................................385
show diffserv .................................................................385
show policy-map ..............................................................386
show diffserv service ..........................................................387
show diffserv service brief .....................................................388
show policy-map interface ....................................................388
show service-policy ...........................................................389
MAC Access Control List Commands ..............................................390
mac access-list extended ......................................................390
mac access-list extended rename .............................................390
{deny | permit} (MAC ACL) .....................................................390
mac access-group ............................................................392
show mac access-lists .........................................................392
IP Access Control List Commands .................................................394
access-list .....................................................................394
no access-list ................................................................ .396
ip access-list ..................................................................396
ip access-list rename ..........................................................396
{deny | permit} (IP ACL) ........................................................397
ip access-group ...............................................................399
acl-trapflags ..................................................................400
show ip access-lists ............................................................400
show access-lists ..............................................................401
show access-lists vlan .........................................................402
IPv6 Access Control List Commands ...............................................403
ipv6 access-list ................................................................403
ipv6 access-list rename ........................................................403
{deny | permit} (IPv6) ..........................................................403
ipv6 traffic-filter ...............................................................406
show ipv6 access-lists .........................................................407
Time Range Commands for Time-Based ACLs ......................................408
time-range ....................................................................408
absolute ......................................................................408
periodic. . . . . . . . . . . . . . . . . . . . . . . . . . . . . . . . . . . . . . . . . . . . . . . . . . . . . . . . . . . . . . . . . . . . . . . 409
show time-range ..............................................................409
Ubiquiti Networks, Inc.
xxiii
Page 24

Table of ContentsEdgeSwitch CLI Command Reference
Auto-Voice over IP Commands ....................................................410
auto-voip .....................................................................410
auto-voip oui .................................................................410
auto-voip oui-based priority ...................................................411
auto-voip protocol-based .....................................................411
auto-voip vlan ................................................................411
show auto-voip ...............................................................412
show auto-voip oui-table ......................................................413
Chapter 8: Power over Ethernet (PoE) Commands ..................414
PoE Management Commands ....................................................415
show poe counters ............................................................415
clear poe counters ............................................................415
show poe port ................................................................415
show poe status ...............................................................416
poe opmode ..................................................................416
Appendix A: Log Messages .......................................417
Core .............................................................................418
Utilities ..........................................................................420
Management .....................................................................423
Switching ........................................................................425
QoS ..............................................................................431
Technologies .....................................................................432
O/S Support ......................................................................434
Appendix B: Contact Information .................................435
Ubiquiti Networks Support .......................................................435
Online Resources ..............................................................435
Ubiquiti Networks, Inc.
xxiv
Page 25

About This Document
This section contains the following information about this document:
• “Purpose and Audience” on page 26
• “Document Organization” on page 26
• “Document Organization” on page 26
• “Products and Models” on page 26
• “Related Documents” on page 26
• “Typographical Conventions” on page 27
About This DocumentEdgeSwitch CLI Command Reference
Ubiquiti Networks, Inc.
25
Page 26

About This DocumentEdgeSwitch CLI Command Reference
Purpose and Audience
This reference lists the commands to configure the EdgeSwitch software features using the EdgeSwitch
command line interface (CLI). The information in this reference is intended for system administrators who are
responsible for configuring and operating a network using EdgeSwitch devices.
To obtain the greatest benefit from this reference, you should have an understanding of the base software
and should have read the specification for your networking device platform. You should also have basic
knowledge of Ethernet and networking concepts.
Document Organization
This guide contains the following sections:
• “Chapter 1: Using the Command Line Interface” on page 28
• “Chapter 2: Management Commands” on page 37
• “Chapter 3: Utility Commands” on page 100
• “Chapter 4: Switching Commands” on page 196
• “Chapter 5: Routing Commands” on page 315
• “Chapter 6: IPv6 Management Commands” on page 360
• “Chapter 7: Quality of Service Commands” on page 365
• “Chapter 8: Power over Ethernet (PoE) Commands” on page 414
• “Appendix A: Log Messages” on page 417
• “Appendix B: Contact Information” on page 435
Products and Models
This document covers the following Ubiquiti products and models:
Table 1. Affected Products
Name Description Part Number
EdgeSwitch 48-port 750W Managed PoE+ Gigabit Switch with SFP+ ES-48-750W
EdgeSwitch 48-port 500W Managed PoE+ Gigabit Switch with SFP+ ES-48-500W
EdgeSwitch 24-port 500W Managed PoE+ Gigabit Switch with SFP ES-24-500W
EdgeSwitch 24-port 250W Managed PoE+ Gigabit Switch with SFP ES-24-250W
Related Documents
Related documents for EdgeSwitch products include the following:
• EdgeSwitch Administration Guide
• EdgeSwitch ES-24 Quick Start Guide
• EdgeSwitch ES-48 Quick Start Guide
To download EdgeSwitch documents:
1. Go to the Downloads page on the Ubiquiti website: http://www.ubnt.com/download/
2. Select EdgeMAX from the Platform drop-down box.
3. Select EdgeSwitch from the Product Group drop-down box.
4. Select your EdgeSwitch model from the Model drop-down box.
5. Scroll down to Documentation PDFs and click the document to download.
For additional information, refer to the EdgeSwitch community web site: community.ubnt.com/edgemax
Ubiquiti Networks, Inc.
26
Page 27
About This DocumentEdgeSwitch CLI Command Reference
Typographical Conventions
Table 2 lists typographical conventions used throughout this document.
Table 2. Typographical Conventions
Convention Indicates Example
Bold User selection
User-entered text
Italic Name of a field
Name of UI page, dialog box, window, etc.
> Order of navigation selections to access a page To access the Session page, click System > Users > Session
Courier font
CLI commands and their output
Select VLAN 2 from the VLAN ID list; Click Submit
enter 3 to assign VLAN 3 as the default VLAN
delete the existing name in the Username field
Use the IP Address Conflict Detection page
show network
Ubiquiti Networks, Inc.
27
Page 28

Using the Command Line InterfaceEdgeSwitch CLI Command Reference
Chapter 1: Using the Command Line Interface
The command line interface (CLI) is a text-based way to manage and monitor the system. You can access the
CLI by using a direct serial connection or by using a remote logical connection with telnet or SSH.
This chapter describes the CLI syntax, conventions, and modes. It contains the following sections:
• “Command Syntax” on page 29
• “Command Conventions” on page 29
• “Common Parameter Values” on page 29
• “slot/port Naming Convention” on page 30
• “Using the “no” Form of a Command” on page 30
• “Executing “show” Commands” on page 31
• “CLI Output Filtering” on page 31
• “EdgeSwitch Modules” on page 32
• “Command Modes” on page 32
• “Command Completion and Abbreviation” on page 34
• “CLI Error Messages” on page 34
• “CLI Line-Editing Conventions” on page 35
• “Using CLI Help” on page 35
• “Accessing the CLI” on page 36
Ubiquiti Networks, Inc.
28
Page 29

Using the Command Line InterfaceEdgeSwitch CLI Command Reference
Command Syntax
A command is one or more words that might be followed by one or more parameters. Parameters can be
required or optional values.
Some commands, such as show network or clear vlan, do not require parameters. Other commands, such as
network parms, require that you supply a value after the command. You must type the parameter values in
a specific order, and optional parameters follow required parameters. The following example describes the
network parms command syntax:
network parms ipaddr netmask [gateway]
• network parms is the command name.
• ipaddr and netmask are parameters and represent required values that you must enter after you
type the command keywords.
• [gateway] is an optional parameter; you are not required to enter a value in place of the parameter.
The CLI Command Reference lists each command by the command name and provides a brief description of
the command. Each command reference also contains the following information:
• Format shows the command keywords and the required and optional parameters.
• Mode identifies the command mode you must be in to access the command.
• Default shows the default value, if any, of a configurable setting on the device.
The show commands also contain a description of the information that the command shows.
Command Conventions
The parameters for a command might include mandatory values, optional values, or keyword choices.
Parameters are order-dependent. Table 3 describes the conventions this document uses to distinguish
between value types.
Table 3. Parameter Conventions
Symbol Example Description
[ ] square brackets
italic font value or [value] Indicates a variable value. Specify an appropriate value (name or number).
{ } curly braces
| vertical bar
[ { } ] braces within
square brackets
[value]
{choice1 | choice2}
choice1 | choice2
[{choice1 | choice2}]
Indicates an optional parameter
Indicates that you must select a parameter from the list of choices
Separates mutually exclusive choices
Indicates a choice within an optional element
Common Parameter Values
Parameter values might be names (strings) or numbers. To use spaces as part of a name parameter, enclose
the name value in double quotes. For example, the expression “System Name with Spaces” forces the
system to accept the spaces. Empty strings (““) are not valid user-defined strings. Table 4 describes common
parameter values and value formatting.
Table 4. Parameter Descriptions
Parameter Description
ipaddr This parameter is a valid IP address. You can enter the IP address in the following formats:
a (32 bits)
a.b (8.24 bits)
a.b.c (8.8.16 bits)
a.b.c.d (8.8.8.8 bits)
In addition to these formats, the CLI accepts decimal, hexadecimal and octal formats through the following
input formats (where n is any valid hexadecimal, octal or decimal number):
0xn (CLI assumes hexadecimal format)
0n (CLI assumes octal format with leading zeros)
n (CLI assumes decimal format)
Ubiquiti Networks, Inc.
29
Page 30
Using the Command Line InterfaceEdgeSwitch CLI Command Reference
Table 4. Parameter Descriptions (Continued)
Parameter Description
ipv6-address FE80:0000:0000:0000:020F:24FF:FEBF:DBCB, or
Interface or slot/port Valid slot and port number separated by a forward slash. For example, 0/1 represents slot 0 and port 1.
Logical Interface Represents a logical slot and port number. This is applicable in the case of a port-channel (LAG). You can use
Character strings Use double quotation marks to identify character strings, for example, “System Name with Spaces”. An
FE80:0:0:0:20F:24FF:FEBF:DBCB, or
FE80::20F24FF:FEBF:DBCB, or
FE80:0:0:0:20F:24FF:128:141:49:32
For additional information, refer to RFC 3513.
the logical slot/port to configure the port-channel.
empty string (“”) is not valid.
slot/port Naming Convention
The EdgeSwitch software references physical entities such as cards and ports using a slot/port naming
convention. The software also uses this convention to identify certain logical entities, such as Port-Channel
interfaces.
The slot number has two uses. In the case of physical ports, it identifies the card containing the ports. In the
case of logical and CPU ports it also identifies the type of interface or port.
Table 5. Types of Slots
Parameter Description
Physical slot numbers Physical slot numbers begin with zero, and are allocated up to the maximum number of physical slots.
Logical slot numbers
CPU slot numbers The CPU slots immediately follow the logical slots.
Logical Interface Represents a logical slot and port number. This is applicable in the case of a port-channel (LAG). You can use
Character strings Use double quotation marks to identify character strings, for example, “System Name with Spaces”. An
Logical slots immediately follow physical slots and identify port-channel (LAG) or router interfaces. The value
of logical slot numbers depend on the type of logical interface and can vary from platform to platform.
the logical slot/port to configure the port-channel.
empty string (“”) is not valid.
The port identifies the specific physical port or logical interface being managed on a given slot.
Table 6. Types of Ports
Parameter Description
Physical Ports The physical ports for each slot are numbered sequentially starting from one.
For example, port 1 on slot 0 (an internal port) for a standalone switch is 0/1, port 2 is 0/2, port 3 is 0/3, etc.
Logical Interfaces
CPU ports CPU ports are handled by the driver as one or more physical entities located on physical slots.
Port-channel or Link Aggregation Group (LAG) interfaces are logical interfaces only used for bridging functions.
• VLAN routing interfaces are only used for routing functions.
• Loopback interfaces are logical interfaces that are always up.
• Tunnel interfaces are logical point-to-point links that carry encapsulated packets.
Note: In the CLI, loopback and tunnel interfaces do not use the slot/port format. To specify a loopback
interface, you use the loopback ID. To specify a tunnel interface, you use the tunnel ID.
Using the “no” Form of a Command
The no keyword is a specific form of an existing command and does not represent a new or distinct
command. Only configuration commands have an available no form. Almost every configuration command
has a no form. In general, use the no form to reverse the action of a command or reset a value back to its
default. For example, the no shutdown configuration command reverses the shutdown of an interface.
Use the command without no to re-enable a disabled feature or to enable a feature that is disabled by default.
Ubiquiti Networks, Inc.
30
Page 31

Using the Command Line InterfaceEdgeSwitch CLI Command Reference
Executing “show” Commands
All show commands can be issued from any configuration mode (Global Configuration, Interface
Configuration, VLAN Configuration, etc.). The show commands provide information about system and
feature-specific configuration, status, and statistics. Previously, show commands could be issued only in
User EXEC or Privileged EXEC modes.
CLI Output Filtering
Many CLI show commands include considerable content to display to the user. This can make output
confusing and cumbersome to parse through to find the information of desired importance. The CLI
Output Filtering feature allows the user, when executing CLI show display commands, to optionally specify
arguments to filter the CLI output to display only desired information. The result is to simplify the display and
make it easier for the user to find the information the user is interested in.
The main functions of the CLI Output Filtering feature are:
• Pagination Control
• Supports enabling/disabling paginated output for all show CLI commands. When disabled, output
is displayed in its entirety. When enabled, output is displayed page-by-page such that content does
not scroll off the terminal screen until the user presses a key to continue. --More-- or (q)uit is
displayed at the end of each page.
• When pagination is enabled, press the return key to advance a single line, press q or Q to stop
pagination, or press any other key to advance a whole page. These keys are not configurable.
Note: Although some EdgeSwitch show commands already support pagination, the implementation
is unique per command and not generic to all commands.
• Output Filtering
• “Grep”-like control for modifying the displayed output to only show the user-desired content.
• Filter-displayed output to only include lines containing a specified string match.
• Filter-displayed output to exclude lines containing a specified string match.
• Filter-displayed output to only include lines including and following a specified string match.
• Filter-displayed output to only include a specified section of the content (e.g. “interface 0/1”) with a
configurable end-of-section delimiter.
• String matching should be case-insensitive.
• Pagination, when enabled, also applies to filtered output.
Example: The following shows an example of the extensions made to the CLI show commands for the
Output Filtering feature.
(UBNT EdgeSwitch) #show running-config ?
<cr> Press enter to execute the command.
| Output filter options.
<scriptname> Script file name for writing active configuration.
all Show all the running configuration on the switch.
interface Display the running configuration for specificed interface on the
switch.
(UBNT EdgeSwitch) #show running-config | ?
begin Begin with the line that matches
exclude Exclude lines that matches
include Include lines that matches
section Display portion of lines
Ubiquiti Networks, Inc.
31
Page 32
Using the Command Line InterfaceEdgeSwitch CLI Command Reference
EdgeSwitch Modules
The EdgeSwitch software consists of flexible modules that can be applied in various combinations to
develop advanced products for Layer 2 and above. The commands and command modes available on your
switch depend on the installed modules. Additionally, for some show commands, the output fields might
change based on the modules included in the EdgeSwitch software.
The EdgeSwitch software suite includes the following modules:
• Switching (Layer 2)
• Routing (Layer 3)
Note: Only static routing is available. Dynamic routing protocols are not available in the EdgeSwitch
software.
• Quality of Service
• Management (CLI, browser-based UI, and SNMP)
• IPv6 Management—Allows management of the EdgeSwitch device through an IPv6 through an IPv6
address without requiring the IPv6 Routing package in the system. The management address can be
associated with the network port (front-panel switch ports), a routine interface (port or VLAN) and the
Service port.
• Secure Management
Not all modules are available for all platforms or software releases.
Command Modes
The CLI groups commands into modes according to the command function. Each of the command modes
supports specific EdgeSwitch software commands. The commands in one mode are not available until you
switch to that particular mode, with the exception of the User EXEC mode commands. You can execute the
User EXEC mode commands in the Privileged EXEC mode.
The command prompt changes in each command mode to help you identify the current mode. Table 7
describes the command modes and the prompts visible in that mode.
Note: The command modes available on your switch depend on the software modules that are
installed.
Table 7. CLI Command Modes
Command Mode Prompt Mode Description
User EXEC
Privileged EXEC
Global Config
VLAN Config
Interface Config
Switch>
Switch#
Switch (Config)#
Switch (Vlan)#
Switch (Interface slot/port)#
Switch (Interface Loopback id)#
Switch (Interface Tunnel id)#
Switch (Interface slot/port-slot/port#
Switch (Interface lag lag-intf-num)#
Switch (Interface vlan vlan-id)#
Contains a limited set of commands to view basic
system information.
Allows you to issue any EXEC command, enter the
VLAN mode, or enter the Global Configuration mode.
Groups general setup commands and permits you to
make modifications to the running configuration.
Groups all the VLAN commands.
Manages the operation of an interface and provides
access to the router interface configuration commands.
Use this mode to set up a physical port for a specific
logical connection operation.
Use this mode to manage a range of interfaces. For
example: Switch (Interface 0/1-0/4) #
Enters LAG Interface configuration mode for the
specified LAG.
Enters VLAN routing interface configuration mode for
the specified VLAN ID.
Ubiquiti Networks, Inc.
32
Page 33

Table 7. CLI Command Modes (Continued)
Symbol Example Description
Line SSH
Line Telnet
AAA IAS User
Config
Mail Server Config
Policy Map Config
Policy Class
Config
Class Map Config
MAC Access-list
Config
TACACS Config
DHCP Pool Config
Support Mode
Switch (config-ssh)#
Switch (config-telnet)#
Switch (Config-IAS-User)#
Switch (Mail-Server)#
Switch (Config-policy-map)#
Switch (Config-policy-class-map)#
Switch (Config-class-map)#
Switch (Config-mac-access-list)#
Switch (Tacacs)#
Switch (Config dhcp-pool)#
Switch (Support)#
Contains commands to configure SSH login/enable
authentication.
Contains commands to configure telnet login/enable
authentication.
Allows password configuration for a user in the IAS
database.
Allows configuration of the email server.
Contains the QoS Policy-Map configuration
commands.
Consists of class creation, deletion, and matching
commands. The class match commands specify Layer
2, Layer 3, and general match criteria.
Contains the QoS class map configuration commands.
Allows you to create a MAC Access-List and to enter
the mode containing MAC Access-List configuration
commands.
Contains commands to configure properties for the
TACACS servers.
Contains the DHCP server IP address pool
configuration commands.
Allows access to the support commands, which should
only be used by the manufacturer’s technical support
personnel as improper use could cause unexpected
system behavior and/or invalidate product warranty.
Using the Command Line InterfaceEdgeSwitch CLI Command Reference
Table 8 explains how to enter or exit each mode.
Table 8. CLI Mode Access and Exit
Command Mode Access Method Exit or Access Previous Mode
User EXEC This is the first level of access. To exit, enter logout.
Privileged EXEC From User EXEC mode, enter:
enable
Global Config From Privileged EXEC mode, enter:
configure
VLAN Config From Privileged EXEC mode, enter:
vlan database
Interface Config From Global Config mode, enter one of the
Line SSH From Global Config mode, enter:
Line Telnet From Global Config mode, enter:
AAA IAS User
Config
Mail Server Config From Global Config mode, enter:
following:
interface slot/port
interface loopback id
interface tunnel id
interface slot/port-slot/port
interface lag lag-intf-num
interface vlan vlan-id
line ssh
line telnet
From Global Config mode, enter:
aaa ias-user username name
mail-server address
To exit to User EXEC mode, enter exit or press Ctrl-Z.
To exit to Privileged EXEC mode, enter exit or press Ctrl-Z.
To exit to Privileged EXEC mode, enter exit or press Ctrl-Z.
To exit to Global Config mode, enter exit.
To return to Privileged EXEC mode, enter Ctrl-Z.
To exit to Global Config mode, enter exit.
To return to Privileged EXEC mode, enter Ctrl-Z.
To exit to Global Config mode, enter exit.
To return to the Privileged EXEC mode, enter Ctrl-Z.
To exit to Global Config mode, enter exit.
To return to Privileged EXEC mode, enter Ctrl-Z.
To exit to Global Config mode, enter exit.
To return to Privileged EXEC mode, enter Ctrl-Z.
Ubiquiti Networks, Inc.
33
Page 34

Using the Command Line InterfaceEdgeSwitch CLI Command Reference
Table 8. CLI Mode Access and Exit (Continued)
Command Mode Access Method Exit or Return to Previous Mode
Policy-Map Config From Global Config mode, enter:
policy-map
Policy-Class-Map
Config
Class-Map Config From Global Config mode, enter:
MAC Access-list
Config
TACACS Config From Global Config mode, enter:
DHCP Pool Config From Global Config mode, enter:
Support From Privileged EXEC mode, enter:
From Policy Map Config mode enter:
class
class-map
(see “class-map” on page 373)
From Global Config mode, enter:
mac access-list extended name
tacacs-server host ip-addr
where ip-addr is the IP address of the TACACS
server on your network.
ip dhcp pool pool-name
support
Note: The support command is available only
if the techsupport enable command has
been issued.
To exit to Global Config mode, enter exit.
To return to Privileged EXEC mode, enter Ctrl-Z.
To exit to Policy Map Config mode, enter exit.
To return to Privileged EXEC mode, enter Ctrl-Z.
To exit to Global Config mode, enter exit.
To return to Privileged EXEC mode, enter Ctrl-Z.
To exit to Global Config mode, enter exit.
To return to Privileged EXEC mode, enter Ctrl-Z.
To exit to Global Config mode, enter exit.
To return to Privileged EXEC mode, enter Ctrl-Z.
To exit to Global Config mode, enter exit.
To return to Privileged EXEC mode, enter Ctrl-Z.
To exit to Privileged EXEC mode, enter exit or press Ctrl-Z.
Command Completion and Abbreviation
Command completion finishes spelling the command when you type enough letters of a command to
uniquely identify the command keyword. Once you have entered enough letters, press the SPACEBAR or TAB
key to complete the word.
Command abbreviation allows you to execute a command when you have entered there are enough letters
to uniquely identify the command. You must enter all of the required keywords and parameters before you
enter the command.
CLI Error Messages
If you enter a command and the system is unable to execute it, an error message appears. Table 9 describes
the most common CLI error messages.
Table 9. CLI Error Messages
Message Text Description
% Invalid input detected at ‘^’ marker.
Command not found /
Incomplete command. Use ? to list commands.
Ambiguous command
Indicates that you entered an incorrect or unavailable command. The carat
(^) shows where the invalid text is detected. This message also appears if
any of the parameters or values are not recognized.
Indicates that you did not enter the required keywords or values.
Indicates that you did not enter enough letters to uniquely identify the
command.
Ubiquiti Networks, Inc.
34
Page 35

Using the Command Line InterfaceEdgeSwitch CLI Command Reference
CLI Line-Editing Conventions
Table 10 describes the key combinations you can use to edit commands or increase the speed of command
entry. You can access this list from the CLI by entering help from the User or Privileged EXEC modes.
Table 10. CLI Editing Conventions
Key Sequence Description
DEL or backspace Delete previous character
Ctrl-A Go to beginning of line
Ctrl-E Go to end of line
Ctrl-F Go forward one character
Ctrl-B Go backward one character
Ctrl-D Delete current character
Ctrl-U, X Delete to beginning of line
Ctrl-K Delete to end of line
Ctrl-W Delete previous word.
Ctrl-T Transpose previous character.
Ctrl-P Go to previous line in history buffer.
Ctrl-R Rewrites or pastes the line.
Ctrl-N Go to next line in history buffer.
Ctrl-Y Prints last deleted character.
Ctrl-Q Enables serial flow.
Ctrl-S Disables serial flow.
Ctrl-Z Return to root command prompt.
Tab, <SPACE> Command-line completion.
Exit Go to next lower command prompt.
? List available commands, keywords, or parameters.
Using CLI Help
Enter a question mark (?) at the command prompt to display the commands available in the current mode.
(UBNT EdgeSwitch) >?
enable Enter into user privilege mode.
help Display help for various special keys.
logout Exit this session. Any unsaved changes are lost.
password Change an existing user’s password.
ping Send ICMP echo packets to a specified IP address.
quit Exit this session. Any unsaved changes are lost.
show Display Switch Options and Settings.
telnet Telnet to a remote host.
Enter a question mark (?) after each word you enter to display available command keywords or parameters.
(UBNT EdgeSwitch) #network ?
ipv6 Configure IPv6 parameters for system network.
javamode Enable/Disable.
mac-address Configure MAC Address.
mac-type Select the locally administered or burned-in MAC address.
mgmt_vlan Configure the Management VLAN ID of the switch.
parms Configure Network Parameters of the device.
protocol Select DHCP, BootP, or None as the network config protocol.
Ubiquiti Networks, Inc.
35
Page 36

Using the Command Line InterfaceEdgeSwitch CLI Command Reference
If the help output shows a parameter in angle brackets, you must replace the parameter with a value.
(UBNT EdgeSwitch) #network parms ?
<ipaddr> Enter the IP Address.
none Reset IP address and gateway on management interface
If there are no additional command keywords or parameters, or if additional parameters are optional, the
following message appears in the output:
<cr> Press Enter to execute the command
You can also enter a question mark (?) after typing one or more characters of a word to list the available
command or parameters that begin with the letters, as shown in the following example:
(UBNT EdgeSwitch) #show m?
mac mac-addr-table mac-address-table
mail-server mbuf monitor
Accessing the CLI
After you have connected the EdgeSwitch to your network, you can access the CLI using a telnet or SSH
connection from a remote management host.
For on how to connect the switch to your network, refer to the Quick Start Guide that came with the
EdgeSwitch.
Ubiquiti Networks, Inc.
36
Page 37

Chapter 2: Management Commands
This chapter describes the management commands available in the EdgeSwitch CLI.
The chapter contains the following sections:
• “Network Interface Commands” on page 38
• “Telnet Commands” on page 42
• “Secure Shell Commands” on page 44
• “Management Security Commands” on page 46
• “Hypertext Transfer Protocol Commands” on page 47
• “Access Commands” on page 52
• “User Account Commands” on page 53
• “SNMP Commands” on page 72
• “RADIUS Commands” on page 82
• “TACACS+ Commands” on page 92
• “Configuration Scripting Commands” on page 96
• “Prelogin Banner, System Prompt, and Host Name Commands” on page 98
Management CommandsEdgeSwitch CLI Command Reference
Note: The commands in this chapter consist of three functional groups:
• Show commands display switch settings, statistics, and other information.
• Configuration commands configure features and options of the switch. For every configuration
command, there is a show command that displays the configuration setting.
• Clear commands clear some or all of the settings to factory defaults.
Ubiquiti Networks, Inc.
37
Page 38

Management CommandsEdgeSwitch CLI Command Reference
Network Interface Commands
Note: Only static routing is available. Dynamic routing protocols are not available in the EdgeSwitch
software.
This section describes the commands you use to configure a logical interface for management access. To
configure the management VLAN, see “network mgmt_vlan” on page 217.
enable (Privileged EXEC access)
This command gives you access to the Privileged EXEC mode. From the Privileged EXEC mode, you can configure
the network interface.
Format
Mode User EXEC
enable
do (Privileged EXEC commands)
This command executes Privileged EXEC mode commands from any of the configuration modes.
Format do Priv Exec Mode Command
Mode • Global Config
• Interface Config
• VLAN Config
• Routing Config
Example: The following is an example of the do command that executes the Privileged Exec command script
list in Global Config Mode.
(UBNT EdgeSwitch) #configure
(UBNT EdgeSwitch)(config)#do script list
Configuration Script Name Size(Bytes)
-------------------------------- ----------backup-config 2105
running-config 4483
startup-config 445
3 configuration script(s) found.
2041 Kbytes free.
Routing(config)#
network parms
This command sets the device’s IP address, subnet mask, and gateway. The IP address and gateway must be
on the same subnet. If you specify the none option, the IP address and subnet mask are set to the factory
defaults.
Format
Mode Privileged EXEC
network parms {ipaddr netmask [gateway] | none}
network protocol
This command specifies the network configuration protocol to be used. If you modify this value, change is
effective immediately. If you use the bootp parameter, the switch periodically sends requests to a BootP
server until a response is received. If you use the dhcp parameter, the switch periodically sends requests to
a DHCP server until a response is received. If you use the none parameter, you must configure the network
information for the switch manually.
Default none
Format
Mode Privileged EXEC
Ubiquiti Networks, Inc.
network protocol {none | bootp | dhcp}
38
Page 39

Management CommandsEdgeSwitch CLI Command Reference
network protocol dhcp
This command enables the DHCPv4 client on a Network port. If the client-id optional parameter is given,
the DHCP client messages are sent with the client identifier option.
Default none
Format
Mode Global Config
network protocol dhcp [client-id]
There is no support for the no form of the command network protocol dhcp client-id. To remove
the client-id option from the DHCP client messages, issue the command network protocol dhcp
without the client-id option. The command network protocol none can be used to disable the
DHCP client and client-id option on the interface.
Example: The following shows an example of the command.
(UBNT EdgeSwitch) # network protocol dhcp client-id
network mac-address
This command sets locally administered MAC addresses. The following rules apply:
• Bit 6 of byte 0 (called the U/L bit) indicates whether the address is universally administered (b’0’) or locally
administered (b’1’).
• Bit 7 of byte 0 (called the I/G bit) indicates whether the destination address is an individual address (b’0’) or a
group address (b’1’).
• The second character, of the twelve character macaddr, must be 2, 6, A or E.
A locally administered address must have bit 6 On (b’1’) and bit 7 Off (b’0’).
Format
Mode Privileged EXEC
network mac-address macaddr
network mac-type
This command specifies whether the switch uses the burned-in or the locally administered MAC address.
Default burnedin
Format
Mode Privileged EXEC
network mac-type {local | burnedin}
no network mac-type
This command resets the value of MAC address to its default.
Format
Mode Privileged EXEC
no network mac-type
network javamode
This command specifies whether or not the switch should allow access to the Java applet in the header frame of
the web interface. When access is enabled, the Java applet can be viewed from the web interface. When access is
disabled, the user cannot view the Java applet.
Default enabled
Format
Mode Privileged EXEC
network javamode
Ubiquiti Networks, Inc.
39
Page 40

Management CommandsEdgeSwitch CLI Command Reference
no network javamode
This command disallows access to the Java applet in the header frame of the web interface. When access is
disabled, the user cannot view the Java applet.
Format
Mode Privileged EXEC
no network javamode
show network
This command displays configuration settings associated with the switch’s network interface. The network
interface is the logical interface used for in-band connectivity with the switch via any of the switch’s front
panel ports. The configuration parameters associated with the switch’s network interface do not affect the
configuration of the front panel ports through which traffic is switched or routed. The network interface is always
considered to be up, whether or not any member ports are up; therefore, the show network command will
always show Interface Status as Up.
Format
Modes • Privileged EXEC
Term Definition
Interface Status The network interface status; it is always considered to be “Up”.
IP Address The IP address of the interface. The factory default value is 0.0.0.0.
Subnet Mask The IP subnet mask for this interface. The factory default value is 0.0.0.0.
Default Gateway The default gateway for this IP interface. The factory default value is 0.0.0.0.
IPv6 Administrative Mode Whether enabled or disabled.
IPv6 Address/Length The IPv6 address and length.
IPv6 Default Router The IPv6 default router address.
Burned In MAC Address The burned in MAC address used for in-band connectivity.
Locally Administered MAC
Address
MAC Address Type The MAC address which should be used for in-band connectivity. The choices are the burned in or the
Configured IPv4 Protocol The IPv4 network protocol being used. The options are bootp | dhcp | none.
Configured IPv6 Protocol The IPv6 network protocol being used. The options are dhcp | none.
DHCPv6 Client DUID The DHCPv6 client’s unique client identifier. This row is displayed only when the configured IPv6
IPv6 Autoconfig Mode Whether IPv6 Stateless address autoconfiguration is enabled or disabled.
DHCP Client Identifier The client identifier is displayed in the output of the command only if DHCP is enabled with the client-
show network
• User EXEC
If desired, a locally administered MAC address can be configured for in-band connectivity. To take
effect, ‘MAC Address Type’ must be set to ‘Locally Administered’. Enter the address as 12 hexadecimal
digits (6 bytes) with a colon between each byte. Bit 1 of byte 0 must be set to a 1 and bit 0 to a 0,
i.e. byte 0 should have the mask ‘xxxx xx10’. The MAC address used by this bridge when it must be
referred to in a unique fashion. It is recommended that this be the numerically smallest MAC address
of all ports that belong to this bridge. However it is only required to be unique. When concatenated
with dot1dStpPriority a unique Bridge Identifier is formed which is used in the Spanning Tree Protocol.
Locally Administered address. The factory default is to use the burned in MAC address.
protocol is dhcp.
id option on the network port. See “network protocol dhcp” on page 39.
Example: The following shows example CLI display output for the network port.
(admin) #show network
Interface Status............................... Always Up
IP Address..................................... 10.250.3.1
Subnet Mask.................................... 255.255.255.0
Default Gateway................................ 10.250.3.3
IPv6 Administrative Mode....................... Enabled
IPv6 Prefix is ................................ fe80::210:18ff:fe82:64c/64
IPv6 Prefix is ................................ 2003::1/128
Ubiquiti Networks, Inc.
40
Page 41

Management CommandsEdgeSwitch CLI Command Reference
IPv6 Default Router is ........................ fe80::204:76ff:fe73:423a
Burned In MAC Address.......................... 00:10:18:82:06:4C
Locally Administered MAC address............... 00:00:00:00:00:00
MAC Address Type............................... Burned In
Configured IPv4 Protocol ...................... None
Configured IPv6 Protocol ...................... DHCP
DHCPv6 Client DUID ............................ 00:03:00:06:00:10:18:82:06:4C
IPv6 Autoconfig Mode........................... Disabled
Management VLAN ID............................. 1
Ubiquiti Networks, Inc.
41
Page 42

Management CommandsEdgeSwitch CLI Command Reference
Telnet Commands
This section describes the commands you use to configure and view Telnet settings. You can use Telnet to
manage the device from a remote management host.
ip telnet server enable
Use this command to enable Telnet connections to the system and to enable the Telnet Server Admin Mode. This
command opens the Telnet listening port.
Default enabled
Format
Mode Privileged EXEC
no ip telnet server enable
Use this command to disable Telnet access to the system and to disable the Telnet Server Admin Mode. This
command closes the Telnet listening port and disconnects all open Telnet sessions.
ip telnet server enable
Format
Mode Privileged EXEC
no ip telnet server enable
transport input telnet
This command regulates new Telnet sessions. If enabled, new Telnet sessions can be established until there are
no more sessions available. An established session remains active until the session is ended or an abnormal
network error ends the session.
Note: If the Telnet Server Admin Mode is disabled, Telnet sessions cannot be established. Use the ip
telnet server enable command to enable Telnet Server Admin Mode.
Default enabled
Format
Mode Line Config
transport input telnet
no transport input telnet
Use this command to prevent new Telnet sessions from being established.
Format
Mode Line Config
no transport input telnet
telnetcon maxsessions
This command specifies the maximum number of Telnet connection sessions that can be established. A value of
0 indicates that no Telnet connection can be established. The range is 0-5.
Default 5
Format
Mode Privileged EXEC
telnetcon maxsessions 0-5
no telnetcon maxsessions
This command sets the maximum number of Telnet connection sessions that can be established to the default
value.
Format
Mode Privileged EXEC
Ubiquiti Networks, Inc.
no telnetcon maxsessions
42
Page 43
Management CommandsEdgeSwitch CLI Command Reference
telnetcon timeout
This command sets the Telnet connection session timeout value, in minutes. A session is active as long as the
session has not been idle for the value set. The time is a decimal value from 1 to 160.
Note: When you change the timeout value, the new value is applied to all active and inactive sessions
immediately. Any sessions that have been idle longer than the new timeout value are disconnected
immediately.
Default 5
Format
Mode Privileged EXEC
no telnetcon timeout
This command sets the Telnet connection session timeout value to the default.
Note: Changing the timeout value for active sessions does not become effective until the session is
accessed again. Also, any keystroke activates the new timeout duration.
telnetcon timeout 1-160
Format
Mode Privileged EXEC
no telnetcon timeout
show telnetcon
This command displays the current inbound Telnet settings. In other words, these settings apply to Telnet
connections initiated from a remote system to the switch.
Format
Mode • Privileged EXEC
Term Definition
Remote Connection Login
Timeout (minutes)
Maximum Number of
Remote Connection Sessions
Allow New Telnet Sessions New Telnet sessions will not be allowed when this field is set to no. The factory default value is yes.
show telnetcon
• User EXEC
This object indicates the number of minutes a remote connection session is allowed to remain inactive
before being logged off. May be specified as a number from 1 to 160. The factory default is 5.
This object indicates the number of simultaneous remote connection sessions allowed. The factory
default is 5.
Ubiquiti Networks, Inc.
43
Page 44

Management CommandsEdgeSwitch CLI Command Reference
Secure Shell Commands
This section describes the commands you use to configure Secure Shell (SSH) access to the switch. Use SSH to
access the switch from a remote management host.
Note: The system allows a maximum of 5 SSH sessions.
ip ssh
Use this command to enable SSH access to the system. (This command is the short form of the ip ssh
server enable command.)
Default disabled
Format
Mode Privileged EXEC
ip ssh protocol
This command is used to set or remove protocol levels (or versions) for SSH. Either SSH1 (1), SSH2 (2), or both
SSH 1 and SSH 2 (1 and 2) can be set.
Default 2
Format
Mode Privileged EXEC
ip ssh
ip ssh protocol [1] [2]
ip ssh server enable
This command enables the IP secure shell server. No new SSH connections are allowed, but the existing SSH
connections continue to work until timed-out or logged-out.
Default enabled
Format
Mode Privileged EXEC
ip ssh server enable
no ip ssh server enable
This command disables the IP secure shell server.
Format
Mode Privileged EXEC
no ip ssh server enable
sshcon maxsessions
This command specifies the maximum number of SSH connection sessions that can be established. A value of 0
indicates that no SSH connection can be established. The range is 0 to 5.
Default 5
Format
Mode Privileged EXEC
no sshcon maxsessions
This command sets the maximum number of allowed SSH connection sessions to the default value.
sshcon maxsessions 0-5
Format
Mode Privileged EXEC
no sshcon maxsessions
Ubiquiti Networks, Inc.
44
Page 45

Management CommandsEdgeSwitch CLI Command Reference
sshcon timeout
This command sets the SSH connection session timeout value, in minutes. A session is active as long as the
session has been idle for the value set. The time is a decimal value from 1 to 160.
Changing the timeout value for active sessions does not become effective until the session is re accessed. Also,
any keystroke activates the new timeout duration.
Default 5
Format
Mode Privileged EXEC
no sshcon timeout
This command sets the SSH connection session timeout value, in minutes, to the default.
Changing the timeout value for active sessions does not become effective until the session is re-accessed. Also,
any keystroke activates the new timeout duration.
sshcon timeout 1-160
Format
Mode Privileged EXEC
no sshcon timeout
show ip ssh
This command displays the SSH settings.
Format
Mode Privileged EXEC
Term Definition
Administrative Mode This field indicates whether the administrative mode of SSH is enabled or disabled.
Protocol Level The protocol level may have the values of version 1, version 2 or both versions 1 and version 2.
SSH Sessions Currently
Active
Max SSH Sessions Allowed The maximum number of SSH sessions allowed.
SSH Timeout The SSH timeout value in minutes.
Keys Present Indicates whether the SSH RSA and DSA key files are present on the device.
Key Generation in Progress Indicates whether RSA or DSA key files generation is currently in progress.
show ip ssh
The number of SSH sessions currently active.
Ubiquiti Networks, Inc.
45
Page 46

Management CommandsEdgeSwitch CLI Command Reference
Management Security Commands
This section describes commands you use to generate keys and certificates, which you can do in addition to
loading them as before.
crypto certificate generate
Use this command to generate a self-signed certificate for HTTPS. The generated RSA key for SSL has a length of
1024 bits. The resulting certificate is generated with a common name equal to the lowest IP address of the device
and a duration of 365 days.
Format
Mode Global Config
crypto certificate generate
no crypto certificate generate
Use this command to delete the HTTPS certificate files from the device, regardless of whether they are selfsigned or downloaded from an outside source.
Format
Mode Global Config
no crypto certificate generate
crypto key generate rsa
Use this command to generate an RSA key pair for SSH. The new key files will overwrite any existing generated or
downloaded RSA key files.
Format
Mode Global Config
crypto key generate rsa
no crypto key generate rsa
Use this command to delete the RSA key files from the device.
Format
Mode Global Config
no crypto key generate rsa
crypto key generate dsa
Use this command to generate a DSA key pair for SSH. The new key files will overwrite any existing generated or
downloaded DSA key files.
Format
Mode Global Config
crypto key generate dsa
no crypto key generate dsa
Use this command to delete the DSA key files from the device.
Format
Mode Global Config
Ubiquiti Networks, Inc.
no crypto key generate dsa
46
Page 47

Management CommandsEdgeSwitch CLI Command Reference
Hypertext Transfer Protocol Commands
This section describes the commands you use to configure Hypertext Transfer Protocol (HTTP) and secure HTTP
access to the switch. Access to the switch by using a web browser is enabled by default. Everything you can view
and configure by using the CLI is also available by using the web.
ip http accounting exec, ip https accounting exec
This command applies user exec (start-stop/stop-only) accounting list to the line methods HTTP and HTTPS.
The user exec accounting list should be created using the command “aaa accounting” on page 67.
Format
Mode Global Config
Parameter Description
http/https
default
listname
ip {http|https} accounting exec {default|listname}
The line method for which the list needs to be applied.
The default list of methods for authorization services.
An alphanumeric character string used to name the list of accounting methods.
no ip http/https accounting exec
This command deletes the authorization method list.
Format
Mode Global Config
no ip {http|https} accounting exec {default|listname}
ip http authentication
Use this command to specify authentication methods for http server users. The default configuration is the
local user database is checked. This action has the same effect as the command ip http authentication
local. The additional methods of authentication are used only if the previous method returns an error, not if
it fails. To ensure that the authentication succeeds even if all methods return an error, specify none as the final
method in the command line. For example, if none is specified as an authentication method after RADIUS, no
authentication is used if the RADIUS server is down.
Default local
Format
Mode Global Config
ip http authentication method1 [method2...]
The following table lists the possible values for the method parameter.
Parameter Value Description
local
none
radius
tacacs
Uses the local username database for authentication.
Uses no authentication.
Uses the list of all RADIUS servers for authentication.
Uses the list of all TACACS+ servers for authentication.
Example: The following example configures the http authentication.
(UBNT EdgeSwitch)(config)# ip http authentication radius local
no ip http authentication
Use this command to return to the default.
Format
Mode Global Config
Ubiquiti Networks, Inc.
no ip http authentication
47
Page 48
Management CommandsEdgeSwitch CLI Command Reference
ip https authentication
Use this command to specify authentication methods for https server users. The default configuration is the local
user database is checked. This action has the same effect as the command ip https authentication
local. The additional methods of authentication are used only if the previous method returns an error, not if
it fails. To ensure that the authentication succeeds even if all methods return an error, specify none as the final
method in the command line. For example, if none is specified as an authentication method after RADIUS, no
authentication is used if the RADIUS server is down.
Default local
Format
Mode Global Config
The following table lists the possible values for the method parameter.
Parameter Value Description
local
none
radius
tacacs
ip https authentication method1 [method2...]
Uses the local username database for authentication.
Uses no authentication.
Uses the list of all RADIUS servers for authentication.
Uses the list of all TACACS+ servers for authentication.
Example: The following example configures https authentication.
(UBNT EdgeSwitch)(config)# ip https authentication radius local
no ip https authentication
Use this command to return to the default.
Format
Mode Global Config
no ip https authentication
ip http server
This command enables access to the switch through the web interface. When access is enabled, the user can
login to the switch from the web interface. When access is disabled, the user cannot login to the switch’s web
server. Disabling the web interface takes effect immediately. All interfaces are affected.
Default enabled
Format
Mode Privileged EXEC
no ip http server
This command disables access to the switch through the web interface. When access is disabled, the user cannot
login to the switch’s web server.
Format
Mode Privileged EXEC
ip http server
no ip http server
ip http secure-server
This command is used to enable the secure socket layer for secure HTTP.
Default disabled
Format
Mode Privileged EXEC
Ubiquiti Networks, Inc.
ip http secure-server
48
Page 49

no ip http secure-server
This command is used to disable the secure socket layer for secure HTTP.
Management CommandsEdgeSwitch CLI Command Reference
Format
Mode Privileged EXEC
no ip http secure-server
ip http session hard-timeout
This command configures the hard timeout for un-secure HTTP sessions in hours. Configuring this value to zero
will give an infinite hard-timeout. When this timeout expires, the user will be forced to reauthenticate. This timer
begins on initiation of the web session and is unaffected by the activity level of the connection.
Default 24
Format
Mode Privileged EXEC
ip http session hard-timeout 1-168
no ip http session hard-timeout
This command restores the hard timeout for un-secure HTTP sessions to the default value.
Format
Mode Privileged EXEC
no ip http session hard-timeout
ip http session maxsessions
This command limits the number of allowable un-secure HTTP sessions. Zero is the configurable minimum.
Default 16
Format
Mode Privileged EXEC
ip http session maxsessions 0-16
no ip http session maxsessions
This command restores the number of allowable un-secure HTTP sessions to the default value.
Format
Mode Privileged EXEC
no ip http session maxsessions
ip http session soft-timeout
This command configures the soft timeout for un-secure HTTP sessions in minutes. Configuring this value to zero
will give an infinite soft-timeout. When this timeout expires the user will be forced to reauthenticate. This timer
begins on initiation of the web session and is restarted with each access to the switch.
Default 5
Format
Mode Privileged EXEC
no ip http session soft-timeout
This command resets the soft timeout for un-secure HTTP sessions to the default value.
Format
Mode Privileged EXEC
ip http session soft-timeout 1-60
no ip http session soft-timeout
Ubiquiti Networks, Inc.
49
Page 50

Management CommandsEdgeSwitch CLI Command Reference
ip http secure-session hard-timeout
This command configures the hard timeout for secure HTTP sessions in hours. When this timeout expires, the
user is forced to reauthenticate. This timer begins on initiation of the web session and is unaffected by the
activity level of the connection. The secure-session hard-timeout can not be set to zero (infinite).
Default 24
Format
Mode Privileged EXEC
no ip http secure-session hard-timeout
This command resets the hard timeout for secure HTTP sessions to the default value.
ip http secure-session hard-timeout 1-168
Format
Mode Privileged EXEC
no ip http secure-session hard-timeout
ip http secure-session maxsessions
This command limits the number of secure HTTP sessions. Zero is the configurable minimum.
Default 16
Format
Mode Privileged EXEC
ip http secure-session maxsessions 0-16
no ip http secure-session maxsessions
This command restores the number of allowable secure HTTP sessions to the default value.
Format
Mode Privileged EXEC
no ip http secure-session maxsessions
ip http secure-session soft-timeout
This command configures the soft timeout for secure HTTP sessions in minutes. Configuring this value to zero
will give an infinite soft-timeout. When this timeout expires, you are forced to reauthenticate. This timer begins
on initiation of the web session and is restarted with each access to the switch. The secure-session soft-timeout
cannot be set to zero (infinite).
Default 5
Format
Mode Privileged EXEC
ip http secure-session soft-timeout 1-60
no ip http secure-session soft-timeout
This command restores the soft timeout for secure HTTP sessions to the default value.
Format
Mode Privileged EXEC
no ip http secure-session soft-timeout
ip http secure-port
This command is used to set the SSL port where port can be 1025-65535 and the default is port 443.
Default 443
Format
Mode Privileged EXEC
Ubiquiti Networks, Inc.
ip http secure-port portid
50
Page 51

no ip http secure-port
This command is used to reset the SSL port to the default value.
Management CommandsEdgeSwitch CLI Command Reference
Format
Mode Privileged EXEC
no ip http secure-port
ip http secure-protocol
This command is used to set protocol levels (versions). The protocol level can be set to TLS1, SSL3 or to both TLS1
and SSL3.
Default SSL3 and TLS1
Format
Mode Privileged EXEC
ip http secure-protocol [SSL3] [TLS1]
show ip http
This command displays the http settings for the switch.
Format
Mode Privileged EXEC
Term Definition
HTTP Mode (Unsecure) The unsecure HTTP server administrative mode.
Java Mode The java applet administrative mode which applies to both secure and un-secure web connections.
Maximum Allowable HTTP
Sessions
HTTP Session Hard Timeout The hard timeout for un-secure http sessions in hours.
HTTP Session Soft Timeout The soft timeout for un-secure http sessions in minutes.
HTTP Mode (Secure) The secure HTTP server administrative mode.
Secure Port The secure HTTP server port number.
Secure Protocol Level(s) The protocol level may have the values of SSL3, TSL1, or both SSL3 and TSL1.
Maximum Allowable HTTPS
Sessions
HTTPS Session Hard Timeout The hard timeout for secure http sessions in hours.
HTTPS Session Soft Timeout The soft timeout for secure http sessions in minutes.
Certificate Present Indicates whether the secure-server certificate files are present on the device.
Certificate Generation in
Progress
show ip http
The number of allowable un-secure http sessions.
The number of allowable secure http sessions.
Indicates whether certificate generation is currently in progress.
Ubiquiti Networks, Inc.
51
Page 52

Management CommandsEdgeSwitch CLI Command Reference
Access Commands
Use the commands in this section to close remote connections or to view information about connections to
thesystem.
disconnect
Use the disconnect command to close HTTP, HTTPS, Telnet or SSH sessions. Use all to close all active sessions, or
use session-id to specify the session ID to close. To view the possible values for session-id, use the
show loginsession command.
Format
Mode Privileged EXEC
disconnect {session_id | all}
show loginsession
This command displays current Telnet, SSH and serial port connections to the switch. This command displays
truncated user names. Use the show loginsession long command to display the complete usernames.
Format
Mode Privileged EXEC
Term Definition
ID Login Session ID.
User Name The name the user entered to log on to the system.
Connection From IP address of the remote client machine or EIA-232 for the serial port connection.
Idle Time Time this session has been idle.
Session Time Total time this session has been connected.
Session Type Shows the type of session, which can be HTTP, HTTPS, telnet, serial, or SSH.
show loginsession
show loginsession long
This command displays the complete user names of the users currently logged in to the switch.
Format
Mode Privileged EXEC
show loginsession long
Example: The following shows an example of the command.
(UBNT EdgeSwitch) #show loginsession long
User Name
-----------admin
test1111test1111test1111test1111test1111test1111test1111test1111
Ubiquiti Networks, Inc.
52
Page 53
Management CommandsEdgeSwitch CLI Command Reference
User Account Commands
This section describes the commands you use to add, manage, and delete system users. The EdgeSwitch
software has one default user account: ubnt. The ubnt user can view and configure system settings.
Note: You cannot delete the default read/write user account (ubnt). You can configure up to five additional
user accounts on the system. Additional user accounts can be read-only or read/write.
aaa authentication login
Use this command to set authentication at login. The default and optional list names created with the
command are used with the aaa authentication login command. Create a list by entering the aaa
authentication login list-name method command, where list-name is any character string
used to name this list. The method argument identifies the list of methods that the authentication algorithm
tries, in the given sequence.
The additional methods of authentication are used only if the previous method returns an error, not if there is
an authentication failure. To ensure that the authentication succeeds even if all methods return an error, specify
none as the fInal method in the command line. For example, if none is specified as an authentication method
after RADIUS, no authentication is used if the RADIUS server is down.
Default networkList. Used by telnet and SSH and only contains the method local.
Format
Mode Global Config
aaa authentication login {default | list-name} method1 [method2...]
Parameter Definition
default
list-name
method1
[method2...]
Uses the listed authentication methods that follow this argument as the default list of methods when a
user logs in.
Character string of up to 15 characters used to name the list of authentication methods activated
when a user logs in.
At least one from the following:
• enable Uses the enable password for authentication.
• local Uses the local username database for authentication.
• none Uses no authentication.
• radius Uses the list of all RADIUS servers for authentication.
• tacacs Uses the list of all TACACS servers for authentication.
Example: The following shows an example of the command.
(UBNT EdgeSwitch)(config)# aaa authentication login default radius local enable none
no aaa authentication login
This command returns to the default.
Format
Mode Global Config
aaa authentication login {default | list-name}
aaa authentication enable
Use this command to set authentication for accessing higher privilege levels. The default enable list is
enableList. It is used by telnet and SSH, and contains the method as enable followed by none.
T
he default and optional list names created with the aaa authentication enable command are used with
the enable authentication command. Create a list by entering the aaa authentication enable
list-name method command where list-name is any character string used to name this list. The method
argument identifies the list of methods that the authentication algorithm tries in the given sequence.
The user manager returns ERROR (not PASS or FAIL) for enable and line methods if no password is configured,
and moves to the next configured method in the authentication list. The method none reflects that there is no
authentication needed.
Ubiquiti Networks, Inc.
53
Page 54

Management CommandsEdgeSwitch CLI Command Reference
The user will only be prompted for an enable password if one is required. The following authentication methods
do not require passwords:
• none
• deny
• enable (if no enable password is configured)
• line (if no line password is configured)
Example: See the examples below.
a. aaa authentication enable default enable none
b. aaa authentication enable default line none
c. aaa authentication enable default enable radius none
d. aaa authentication enable default line tacacs none
Examples a and b do not prompt for a password, however because examples c and d contain the RADIUS and
TACACS methods, the password prompt is displayed.
If the login methods include only enable, and there is no enable password configured, then the EdgeSwitch
software does not prompt for a username. In such cases, the EdgeSwitch software only prompts for a password.
the EdgeSwitch software supports configuring methods after the local method in authentication and
authorization lists. If the user is not present in the local database, then the next configured method is tried.
The additional methods of authentication are used only if the previous method returns an error, not if it fails. To
ensure that the authentication succeeds even if all methods return an error, specify none as the final method
in the command line.
Use the command “show authorization methods” on page 55 to display information about the
authentication methods.
Note: Requests sent by the switch to a RADIUS server include the username $enabx$, where x is the
requested privilege level. For enable to be authenticated on RADIUS servers, add $enabx$ users to
them. The login user ID is now sent to TACACS+ servers for enable authentication.
Default default
Format
Mode Global Config
Parameter Definition
default
list-name
method1
[method2...]
aaa authentication enable {default | list-name} method1 [method2...]
Uses the listed authentication methods that follow this argument as the default list of methods, when
using higher privilege levels.
Character string (15 characters max.) used to name the list of authentication methods activated when a
user logs in.
Specify at least one from the following:
• deny Used to deny access.
• enable Uses the enable password for authentication.
• line Uses the line password for authentication.
• none Uses no authentication.
• radius Uses the list of all RADIUS servers for authentication.
• tacacs Uses the list of all TACACS servers for authentication.
Example: The following example sets authentication when accessing higher privilege levels.
(UBNT EdgeSwitch)(config)# aaa authentication enable default enable
Ubiquiti Networks, Inc.
54
Page 55
no aaa authentication enable
Use this command to return to the default configuration.
Management CommandsEdgeSwitch CLI Command Reference
Format
Mode Global Config
no aaa authentication enable {default | list-name}
aaa authorization
Use this command to configure command and exec authorization method lists. This list is identified by default
or a user-specified list-name. If tacacs is specified as the authorization method, authorization commands
are notified to a TACACS+ server. If none is specified as the authorization method, command authorization is
not applicable. A maximum of five authorization method lists can be created for the commands type.
Note: Local method is not supported for command authorization. Command authorization with RADIUS
will work if, and only if, the applied authentication method is also RADIUS.
Format
Mode Global Config
Parameter Description
commands Provides authorization for all user-executed commands.
exec Provides exec authorization.
default The default list of methods for authorization services.
list-name Alphanumeric character string used to name the list of authorization methods.
method TACACS+/RADIUS/Local and none are supported.
Example: The following shows an example of the command.
aaa authorization {commands|exec} {default|list-name} method1[method2]
(UBNT EdgeSwitch) #
(UBNT EdgeSwitch) #configure
(UBNT EdgeSwitch) (Config)#aaa authorization exec default tacacs+ none
(UBNT EdgeSwitch) (Config)#aaa authorization commands default tacacs+ none
show authorization methods
This command displays the configured authorization method lists.
Format
Mode Privileged EXEC
Example: The following shows example CLI display output for the command.
(UBNT EdgeSwitch) #show authorization methods
Command Authorization List Method
-------------------------- -------------------------------------dfltCmdAuthList tacacs none
list2 none undefined
list4 tacacs undefined
Line Command Method List
------------ -----------------------------Telnet dfltCmdAuthList
SSH dfltCmdAuthList
Exec Authorization List Method
----------------------- -------------------------------------dfltExecAuthList tacacs none
list2 none undefined
list4 tacacs undefined
show authorization methods
Ubiquiti Networks, Inc.
55
Page 56

Management CommandsEdgeSwitch CLI Command Reference
Line Exec Method List
------------ -----------------------------Telnet dfltExecAuthList
SSH dfltExecAuthList
enable authentication
Use this command to specify the authentication method list when accessing a higher privilege level from a
remote telnet.
Format
Mode Line Config
Parameter Description
default Uses the default list created with the aaa authentication enable command.
list-name Uses the indicated list created with the aaa authentication enable command.
enable authentication {default | list-name}
Example: The following example specifies the default authentication method when accessing a higher privilege
level telnet.
(UBNT EdgeSwitch) (config)#line telnet
(UBNT EdgeSwitch) (config-telnet)#enable authentication default
no enable authentication
Use this command to return to the default specified by the enable authentication command.
Format
Mode Line Config
no enable authentication
username (Global Config)
Use the username command in Global Config mode to add a new user to the local user database. The default
privilege level is 1. Using the encrypted keyword allows the administrator to transfer local user passwords
between devices without having to know the passwords. When the password parameter is used along with
encrypted parameter, the password must be exactly 128 hexadecimal characters in length. If the password
strength feature is enabled, this command checks for password strength and returns an appropriate error if it
fails to meet the password strength criteria. Giving the optional parameter override-complexity-check
disables the validation of the password strength.
Format
Mode Global Config
Parameter Description
name
password
level
encrypted
override-complexitycheck
username name {password password [encrypted [override-complexity-check] | level
level [encrypted [override-complexity-check]] | override-complexity-check]} |
{level level [override-complexity-check] password}
The name of the user. Range: 1-64 characters.
The authentication password for the user. Range 8-64 characters. This value can be zero if the no
passwords min-length command has been executed. The special characters allowed in the
password include: ! # $ % & ‘ ( ) * + , - . / : ; < = > @ [ \ ] ^ _ ` { | } ~.
The user level. Level 0 can be assigned by a level 15 user to another user to suspend that user’s access.
Range 0-15. Enter access level 1 for Read Access or 15 for Read/Write Access. If not specified where it is
optional, the privilege level is 1.
Encrypted password entered, copied from another switch configuration.
Disables the validation of the password strength.
Example: The following example configures user bob with password xxxyyymmmm and user level 15.
(UBNT EdgeSwitch)(config)# username bob password xxxyyymmmm level 15
Ubiquiti Networks, Inc.
56
Page 57

Management CommandsEdgeSwitch CLI Command Reference
Example: The following example configures user test with password testPassword and assigns a user level of 1
(read-only). The password strength will not be validated.
(UBNT EdgeSwitch)(config)# username test password testPassword level 1 override-complexity-check
Example: A third example.
(UBNT EdgeSwitch) (Config)#username test password testtest
Example: A fourth example.
(UBNT EdgeSwitch) (Config)# username test password e8d63677741431114f9e39a853a15e8fd35ad059e2e1b
49816c243d7e08152b052eafbf23b528d348cdba1b1b7ab91be842278e5e970dbfc62d16dcd13c0b864 level 1 encr
ypted override-complexity-check
(UBNT EdgeSwitch) (Config)# username test level 15 password
Enter new password:********
Confirm new password:********
Example: A fifth example.
(UBNT EdgeSwitch) (Config)# username test level 15 override-complexity-check password
Enter new password:********
Confirm new password:********
no username
Use this command to remove a user name.
Format
Mode Global Config
no username name
username name nopassword
Use this command to remove an existing user’s password (NULL password).
Format
Mode Global Config
Parameter Description
name The name of the user. Range: 1-32 characters.
password The authentication password for the user. Range 8-64 characters.
level The user level. Level 0 can be assigned by a level 15 user to another user to suspend that user’s access.
username name nopassword [level level]
Range 0-15.
username name unlock
Use this command to allow a locked user account to be unlocked. Only a user with read/write access can
reactivate a locked user account.
Format
Mode Global Config
username name unlock
Ubiquiti Networks, Inc.
57
Page 58

Management CommandsEdgeSwitch CLI Command Reference
show users
This command displays the configured user names and their settings. The show users command displays
truncated user names. Use the show users long command to display the complete user names. The
show users command is only available for users with Read/Write privileges. The SNMPv3 fields will only be
displayed if SNMP is available on the system.
Format
Mode Privileged EXEC
Term Definition
User Name The name the user enters to login using the serial port, telnet or web.
Access Mode Shows whether the user is able to change parameters on the switch (Read/Write) or is only able to
SNMPv3 Access Mode
SNMPv3 Authentication The authentication protocol to be used for the specified login user.
SNMPv3 Encryption The encryption protocol to be used for the specified login user.
show users
view them (Read Only). As a factory default, the “ubnt” user has Read/Write access.
The SNMPv3 Access Mode. If the value is set to ReadWrite, the SNMPv3 user is able to set and retrieve
parameters on the system. If the value is set to ReadOnly, the SNMPv3 user is only able to retrieve
parameter information. The SNMPv3 access mode may be different than the CLI and web access mode.
show users long
This command displays the complete usernames of the configured users on the switch.
Format
Mode Privileged EXEC
Example: The following shows an example of the command.
(UBNT EdgeSwitch) #show users long
User Name
-----------ubnt
test1111test1111test1111test1111
show users long
show users accounts
This command displays local user status with respect to user account lockout and password aging. Displayed
user names are truncated. Use the show users long command to show the complete user names.
Format
Mode Privileged EXEC
Term Definition
User Name The local user account’s user name.
Access Level The user’s access level (1 for read-only or 15 for read/write).
Password Aging Number of days, since the password was configured, until the password expires.
Password Expiry Date The current password expiration date in date format.
Lockout Indicates whether the user account is locked out (true or false).
If the detail keyword is included, the following additional fields are displayed.
Term Definition
Password Override
Complexity Check
Password Strength Displays the user password’s strength (Strong or Weak). This field is displayed only if the Password
show users accounts [detail]
Displays the user’s Password override complexity check status. By default it is disabled.
Strength feature is enabled.
Ubiquiti Networks, Inc.
58
Page 59

Example: The following example displays information about the local user database.
(UBNT EdgeSwitch)#show users accounts
UserName Privilege Password Password Lockout
Aging Expiry date
------------------- --------- -------- ------------ ------ubnt 15 --- --- False
(UBNT EdgeSwitch) #show users accounts detail
UserName....................................... admin
Privilege...................................... 15
Password Aging................................. ---
Password Expiry................................ ---
Lockout........................................ False
Override Complexity Check...................... Disable
Password Strength.............................. ---
show users login-history [long]
Use this command to display information about the login history of users.
Management CommandsEdgeSwitch CLI Command Reference
Format
Mode Privileged EXEC
show users login-history [long]
show users login-history [username]
Use this command to display information about the login history of users.
Format
Mode Privileged EXEC
Parameter Description
name
show users login-history [username name]
Name of the user. Range: 1-20 characters.
Example: The following example shows user login history outputs.
(UBNT EdgeSwitch) #show users login-history
Login Time Username Protocol Location
-------------------- --------- --------- --------------Jan 19 2005 08:23:48 Bob Serial
Jan 19 2005 08:29:29 Robert HTTP 172.16.0.8
Jan 19 2005 08:42:31 John SSH 172.16.0.1
Jan 19 2005 08:49:52 Betty Telnet 172.16.1.7
login authentication
Use this command to specify the login authentication method list for a line (telnet or SSH). The default
configuration uses the default set with the command aaa authentication login.
Format
Mode Line Configuration
Parameter Definition
default
list-name
login authentication {default | list-name}
Uses the default list created with the aaa authentication login command.
Uses the indicated list created with the aaa authentication login command.
Example: The following example specifies the default authentication method for telnet.
(UBNT EdgeSwitch) (config)#line telnet
(UBNT EdgeSwitch) (config-telnet)#login authentication default
Ubiquiti Networks, Inc.
59
Page 60

Management CommandsEdgeSwitch CLI Command Reference
no login authentication
Use this command to return to the default specified by the authentication login command.
password
This command allows the currently logged in user to change his or her password without having read/write
privileges.
Format
Mode User EXEC
password
Example: The following is an example of the command.
(UBNT EdgeSwitch) #password
Enter old password:********
Enter new password:********
Confirm new password:********
password (Line Configuration)
Use the password command in Line Configuration mode to specify a password on a line. The default
configuration is no password is specified.
Format
Mode Line Config
Parameter Definition
password
encrypted
Example: The following example specifies a password mcmxxyyy on a line.
password [password [encrypted]]
Password for this level. Range: 8-64 characters
Encrypted password to be entered, copied from another switch configuration. The encrypted password
should be 128 characters long because the assumption is that this password is already encrypted with AES.
(UBNT EdgeSwitch)(config-line)# password mcmxxyyy
Example: The following is another example of the command.
(UBNT EdgeSwitch)(Config-line)# password testtest
(UBNT EdgeSwitch) (Config-line)# password e8d63677741431114f9e39a853a15e8fd35ad059e2 e1b49816c24
3d7e08152b052eafbf23b528d348cdba1b1b7ab91be842278e5e970dbfc62d16dcd13c0b864 encrypted
(UBNT EdgeSwitch) (Config-line)# password
Enter new password:********
Confirm new password:********
no password (Line Configuration)
Use this command to remove the password on a line.
Format
Mode Line Config
no password
Ubiquiti Networks, Inc.
60
Page 61

Management CommandsEdgeSwitch CLI Command Reference
password (User EXEC)
Use this command to allow a user to change the password for only that user. This command should be used after
the password has aged. The user is prompted to enter the old password and the new password.
Format
Mode User EXEC
password
Example: The following example shows the prompt sequence for executing the password command.
(UBNT EdgeSwitch)>password
Enter old password:********
Enter new password:********
Confirm new password:********
password (aaa IAS User Config)
This command is used to configure a password for a user. An optional parameter [encrypted] is provided to
indicate that the password given to the command is already preencrypted.
Format
Mode aaa IAS User Config
no password (aaa IAS User Config)
This command is used to clear the password of a user.
Format
Mode aaa IAS User Config
Example: The following shows an example of the command.
(UBNT EdgeSwitch) #
(UBNT EdgeSwitch) #configure
(UBNT EdgeSwitch) (Config)#aaa ias-user username client-1
(UBNT EdgeSwitch) (Config-aaa-ias-User)#password client123
(UBNT EdgeSwitch) (Config-aaa-ias-User)#no password
password password [encrypted]
no password
Example: The following is an example of adding a MAB Client to the Internal user database.
(UBNT EdgeSwitch) #
(UBNT EdgeSwitch) #configure
(UBNT EdgeSwitch) (Config)#aaa ias-user username 1f3ccb1157
(UBNT EdgeSwitch) (Config-aaa-ias-User)#password 1f3ccb1157
(UBNT EdgeSwitch) (Config-aaa-ias-User)#exit
(UBNT EdgeSwitch) (Config)#
enable password (Privileged EXEC)
Use the enable password configuration command to set a local password to control access to the
privileged EXEC mode.
Format
Mode Privileged EXEC
Parameter Definition
password
encrypted
enable password [password [encrypted]]
Password string. Range: 8-64 characters.
Encrypted password you entered, copied from another switch configuration. The encrypted password
should be 128 characters long because the assumption is that this password is already encrypted with AES.
Ubiquiti Networks, Inc.
61
Page 62

Management CommandsEdgeSwitch CLI Command Reference
Example: The following shows an example of the command.
(UBNT EdgeSwitch) #enable password testtest
(UBNT EdgeSwitch) #enable password e8d63677741431114f9e39a853a15e8fd35ad059e2e1b49816c243d7e0815
2b052eafbf23b528d348cdba1b1b7ab91be842278e5e970dbfc62d16dcd13c0b864 encrypted
(UBNT EdgeSwitch) #enable password
Enter old password:********
Enter new password:********
Confirm new password:********
no enable password (Privileged EXEC)
Use the no enable password command to remove the password requirement.
Format
Mode Privileged EXEC
no enable password
passwords min-length
Use this command to enforce a minimum password length for local users. The value also applies to the enable
password. The valid range is 8-64.
Default 8
Format
Mode Global Config
passwords min-length 8-64
no passwords min-length
Use this command to set the minimum password length to the default value.
Format
Mode Global Config
no passwords min-length
passwords history
Use this command to set the number of previous passwords that shall be stored for each user account. When
a local user changes his or her password, the user will not be able to reuse any password stored in password
history. This ensures that users don’t reuse their passwords often. The valid range is 0-10.
Default 0
Format
Mode Global Config
passwords history 0-10
no passwords history
Use this command to set the password history to the default value.
Format
Mode Global Config
no passwords history
passwords aging
Use this command to implement aging on passwords for local users. When a user’s password expires, the user is
prompted to change it before logging in again. The valid range is 1-365. The default is 0, or no aging.
Default 0
Format
Mode Global Config
Ubiquiti Networks, Inc.
passwords aging 1-365
62
Page 63

no passwords aging
Use this command to set the password aging to the default value.
Management CommandsEdgeSwitch CLI Command Reference
Format
Mode Global Config
no passwords aging
passwords lock-out
Use this command to strengthen the security of the switch by locking user accounts that have failed login due to
wrong passwords. When a lockout count is configured, a user that is logged in must enter the correct password
within that count. Otherwise the user will be locked out from further switch access. Only a user with read/write
access can reactivate a locked user account. The valid range is 1-5. The default is 0, or no lockout count enforced.
Default 0
Format
Mode Global Config
passwords lock-out 1-5
no passwords lock-out
Use this command to set the password lock-out count to the default value.
Format
Mode Global Config
no passwords lock-out
passwords strength-check
Use this command to enable the password strength feature. It is used to verify the strength of a password during
configuration.
Default Disable
Format
Mode Global Config
passwords strength-check
no passwords strength-check
Use this command to set the password strength checking to the default value.
Format
Mode Global Config
no passwords strength-check
passwords strength maximum consecutive-characters
Use this command to set the maximum number of consecutive characters to be used in password strength. The
valid range is 0-15. The default is 0. Minimum of 0 means no restriction on that set of characters.
Default 0
Format
Mode Global Config
passwords strength maximum consecutive-characters 0-15
passwords strength maximum repeated-characters
Use this command to set the maximum number of repeated characters to be used in password strength. The
valid range is 0-15. The default is 0. Minimum of 0 means no restriction on that set of characters.
Default 0
Format
Mode Global Config
passwords strength maximum consecutive-characters 0-15
Ubiquiti Networks, Inc.
63
Page 64

Management CommandsEdgeSwitch CLI Command Reference
passwords strength minimum uppercase-letters
Use this command to enforce a minimum number of uppercase letters that a password should contain. The valid
range is 0-16. The default is 2. Minimum of 0 means no restriction on that set of characters.
Default 2
Format
Mode Global Config
no passwords strength minimum uppercase-letters
Use this command to reset the minimum uppercase letters required in a password to the default value.
passwords strength minimum uppercase-letters
Format
Mode Global Config
no passwords strength minimum uppercase-letter
passwords strength minimum lowercase-letters
Use this command to enforce a minimum number of lowercase letters that a password should contain. The valid
range is 0-16. The default is 2. Minimum of 0 means no restriction on that set of characters.
Default 2
Format
Mode Global Config
passwords strength minimum lowercase-letters
no passwords strength minimum lowercase-letters
Use this command to reset the minimum lower letters required in a password to the default value.
Format
Mode Global Config
no passwords strength minimum lowercase-letter
passwords strength minimum numeric-characters
Use this command to enforce a minimum number of numeric characters that a password should contain. The
valid range is 0-16. The default is 2. Minimum of 0 means no restriction on that set of characters.
Default 2
Format
Mode Global Config
passwords strength minimum numeric-characters
no passwords strength minimum numeric-characters
Use this command to reset the minimum numeric characters required in a password to the default value.
Format
Mode Global Config
no passwords strength minimum numeric-characters
passwords strength minimum special-characters
Use this command to enforce a minimum number of special characters that a password should contain. The valid
range is 0-16. The default is 2. Minimum of 0 means no restriction on that set of characters.
Default 2
Format
Mode Global Config
Ubiquiti Networks, Inc.
passwords strength minimum special-characters
64
Page 65

Management CommandsEdgeSwitch CLI Command Reference
no passwords strength minimum special-characters
Use this command to reset the minimum special characters required in a password to the default value.
Format
Mode Global Config
no passwords strength minimum special-characters
passwords strength minimum character-classes
Use this command to enforce a minimum number of characters classes that a password should contain.
Character classes are uppercase letters, lowercase letters, numeric characters and special characters. The valid
range is 0-4. The default is 4.
Default 4
Format
Mode Global Config
passwords strength minimum character-classes
no passwords strength minimum character-classes
Use this command to reset the minimum number of character classes required in a password to the default
value.
Format
Mode Global Config
no passwords strength minimum character-classes
passwords strength exclude-keyword
Use this command to exclude the specified keyword while configuring the password. The password does not
accept the keyword in any form (in between the string, case in-sensitive and reverse) as a substring. User can
configure up to a maximum of 3 keywords.
Format
Mode Global Config
passwords strength exclude-keyword keyword
no passwords strength exclude-keyword
Use this command to reset the restriction for the specified keyword or all the keywords configured.
Format
Mode Global Config
no passwords strength exclude-keyword [keyword]
show passwords configuration
Use this command to display the configured password management settings.
Format
Mode Privileged EXEC
Term Definition
Minimum Password Length Minimum number of characters required when changing passwords.
Password History Number of passwords to store for reuse prevention.
Password Aging Length in days that a password is valid.
Lockout Attempts Number of failed password login attempts before lockout.
Minimum Password
Uppercase Letters
Minimum Password
Lowercase Letters
Minimum Password Numeric
Characters
show passwords configuration
Minimum number of uppercase characters required in a password.
Minimum number of lowercase characters required in a password.
Minimum number of numeric characters required in a password.
Ubiquiti Networks, Inc.
65
Page 66
Management CommandsEdgeSwitch CLI Command Reference
Term Definition
Maximum Password
Consecutive Characters
Maximum Password
Repeated Characters
Minimum Password
Character Classes
Password Exclude-Keywords The set of keywords to be excluded from the configured password when strength checking is enabled.
Maximum number of consecutive characters allowed in a password.
Maximum number of repeated characters allowed in a password.
Minimum number of character classes (uppercase, lowercase, numeric and special) required when
configuring passwords.
show passwords result
Use this command to display the last password set result information.
Format
Mode Privileged EXEC
Term Definition
Last User Whose Password
Is Set
Password Strength Check Shows whether password strength checking is enabled.
Last Password Set Result Shows if the attempt to set a password succeeded; if not, the reason for the failure is included.
show passwords result
Shows the name of the user with the most recently set password.
write memory
Use this command to save running configuration changes to NVRAM so that changes you make will persist
across a reboot. This command is the same as copy system:running-config nvram:startup-
config. Use the confirm keyword to directly save the configuration to NVRAM without prompting for
confirmation.
Format
Mode Privileged EXEC
write memory [confirm]
aaa ias-user username
The Internal Authentication Server (IAS) database is a dedicated internal database used for local authentication
of users for network access through the IEEE 802.1X feature. Use the aaa ias-user username command
in Global Config mode to add the specified user to the internal user database. This command also changes the
mode to AAA User Config mode.
Format
Mode Global Config
aaa ias-user username user
no aaa ias-user username
Use this command to remove the specified user from the internal user database.
Format
Mode Global Config
Example: The following shows an example of the command.
(UBNT EdgeSwitch) #
(UBNT EdgeSwitch) #configure
(UBNT EdgeSwitch) (Config)#aaa ias-user username client-1
(UBNT EdgeSwitch) (Config-aaa-ias-User)#exit
(UBNT EdgeSwitch) (Config)#no aaa ias-user username client-1
(UBNT EdgeSwitch) (Config)#
Ubiquiti Networks, Inc.
no aaa ias-user username user
66
Page 67
Management CommandsEdgeSwitch CLI Command Reference
aaa session-id
Use this command in Global Config mode to specify if the same session-id is used for Authentication,
Authorization and Accounting service type within a session.
Default common
Format
Mode Global Config
Parameter Definition
common
unique
no aaa session-id
Use this command in Global Config mode to reset the aaa session-id behavior to the default.
aaa session-id [common | unique]
Use the same session-id for all AAA Service types.
Use a unique session-id for all AAA Service types.
Format
Mode Global Config
no aaa session-id [unique]
aaa accounting
Use this command in Global Config mode to create an accounting method list for user EXEC sessions, userexecuted commands, or 802.1X. This list is identified by default or a user-specified list_name.
Accounting records, when enabled for a line-mode, can be sent at both the beginning and at the end (start-
stop) or only at the end (stop-only). If none is specified, then accounting is disabled for the specified list.
If tacacs is specified as the accounting method, accounting records are notified to a TACACS+ server.
If radius is the specified accounting method, accounting records are notified to a RADIUS server.
Note: Please note the following:
• A maximum of five Accounting Method lists can be created for each exec and commands type.
• Only the default Accounting Method list can be created for 802.1X. There is no provision to create more.
• The same list-name can be used for both exec and commands accounting type
• AAA Accounting for commands with RADIUS as the accounting method is not supported.
• Start-stop or None are the only supported record types for 802.1X accounting. Start-stop enables
accounting and None disables accounting.
• RADIUS is the only accounting method type supported for 802.1X accounting.
Format
Mode Global Config
aaa accounting {exec | commands | dot1x} {default | list_name}
{start-stop | stop-only |none} method1 [method2...]
Parameter Definition
exec
commands
dot1x
default
list-name
start-stop
stop-only
none
method
Provides accounting for a user EXEC terminal sessions.
Provides accounting for all user executed commands.
Provides accounting for 802.1X user commands.
The default list of methods for accounting services.
Character string used to name the list of accounting methods.
Sends a start accounting notice at the beginning of a process and a stop accounting notice at the
beginning of a process and a stop accounting notice at the end of a process.
Sends a stop accounting notice at the end of the requested user process.
Disables accounting services on this line.
Use either tacacs or radius server for accounting purposes.
Ubiquiti Networks, Inc.
67
Page 68

Management CommandsEdgeSwitch CLI Command Reference
Example: The following shows an example of the command.
(UBNT EdgeSwitch) #
(UBNT EdgeSwitch) #configure
(UBNT EdgeSwitch) #aaa accounting commands default stop-only tacacs
(UBNT EdgeSwitch) #aaa accounting exec default start-stop radius
(UBNT EdgeSwitch) #aaa accounting dot1x default start-stop radius
(UBNT EdgeSwitch) #aaa accounting dot1x default none
(UBNT EdgeSwitch) #exit
For the same set of accounting type and list name, the administrator can change the record type, or the methods
list, without having to first delete the previous configuration.
(UBNT EdgeSwitch) #
(UBNT EdgeSwitch) #configure
(UBNT EdgeSwitch) #aaa accounting exec ExecList stop-only tacacs
(UBNT EdgeSwitch) #aaa accounting exec ExecList start-stop tacacs
(UBNT EdgeSwitch) #aaa accounting exec ExecList start-stop tacacs radius
The first aaa command creates a method list for exec sessions with the name ExecList, with record-
type as stop-only and the method as tacacs (TACACS+). The second command changes the
record-type to start-stop from stop-only for the same method list. The third command, for the
same list changes the methods list to {tacacs, radius} from {tacacs}.
no aaa accounting
This command deletes the accounting method list.
Default none
Format
Mode Global Config
no aaa accounting {exec | commands | dot1x} {default | list_name default}
The following shows an example of the command.
(UBNT EdgeSwitch) #
(UBNT EdgeSwitch) #configure
(UBNT EdgeSwitch) #aaa accounting commands userCmdAudit stop-only tacacs radius
(UBNT EdgeSwitch) #no aaa accounting commands userCmdAudit
(UBNT EdgeSwitch) #exit
password (AAA IAS User Configuration)
Use this command to specify a password for a user in the IAS database. An optional parameter encrypted is
provided to indicate that the password given to the command is already preencrypted.
Format
Mode AAA IAS User Config
Parameter Definition
password
encrypted
password password [encrypted]
Password for this level. Range: 8-64 characters
Encrypted password to be entered, copied from another switch configuration.
Ubiquiti Networks, Inc.
68
Page 69

no password (AAA IAS User Configuration)
Use this command to clear the password of a user.
Management CommandsEdgeSwitch CLI Command Reference
Format
Mode AAA IAS User Config
no password
Example: The following shows an example of the command.
(UBNT EdgeSwitch) #
(UBNT EdgeSwitch) #configure
(UBNT EdgeSwitch) (Config)#aaa ias-user username client-1
(UBNT EdgeSwitch) (Config-aaa-ias-User)#password client123
(UBNT EdgeSwitch) (Config-aaa-ias-User)#no password
Example: The following is an example of adding a MAB Client to the Internal user database.
(UBNT EdgeSwitch) #
(UBNT EdgeSwitch) #configure
(UBNT EdgeSwitch) (Config)#aaa ias-user username 1f3ccb1157
(UBNT EdgeSwitch) (Config-aaa-ias-User)#password 1f3ccb1157
(UBNT EdgeSwitch) (Config-aaa-ias-User)#exit
clear aaa ias-users
Use this command to remove all users from the IAS database.
Format
Mode Privileged Exec
The following is an example of the command.
(UBNT EdgeSwitch) #
(UBNT EdgeSwitch) #clear aaa ias-users
(UBNT EdgeSwitch) #
clear aaa ias-users
show aaa ias-users
Use this command to display configured IAS users and their attributes. Passwords configured are not shown in
the show command output.
Format
Mode Privileged EXEC
Example: The following is an example of the command.
(UBNT EdgeSwitch) #
(UBNT EdgeSwitch) #show aaa ias-users
UserName
-------------------
Client-1
Client-2
Example: Following are the IAS configuration commands shown in the output of show running-config
command. Passwords shown in the command output are always encrypted.
aaa ias-user username client-1
password a45c74fdf50a558a2b5cf05573cd633bac2c6c598d54497ad4c46104918f2c encrypted
exit
show aaa ias-users [username]
Ubiquiti Networks, Inc.
69
Page 70
Management CommandsEdgeSwitch CLI Command Reference
accounting
Use this command in Line Configuration mode to apply the accounting method list to a line config (telnet/ssh).
Format
Mode Line Configuration
Parameter Definition
exec
commands
default
listname
accounting {exec | commands } {default | listname}
Causes accounting for an EXEC session.
This causes accounting for each command execution attempt. If a user is enabling accounting for exec
mode for the current line-configuration type, the user will be logged out.
The default Accounting List.
Enter a string of not more than 15 characters.
Example: The following is a example of the command.
(UBNT EdgeSwitch) #
(UBNT EdgeSwitch) #configure
(UBNT EdgeSwitch) (Config)#line telnet
(UBNT EdgeSwitch)(Config-line)# accounting exec default
(UBNT EdgeSwitch) #exit
no accounting
Use this command to remove accounting from a Line Configuration mode.
Format
Mode Line Configuration
no accounting {exec|commands]
show accounting
Use this command to display ordered methods for accounting lists.
Format
Mode Privileged EXEC
show accounting
Example: The following shows example CLI display output for the command.
(UBNT EdgeSwitch) #show accounting
Number of Accounting Notifications sent at beginning of an EXEC session: 0
Errors when sending Accounting Notifications beginning of an EXEC session: 0
Number of Accounting Notifications at end of an EXEC session: 0
Errors when sending Accounting Notifications at end of an EXEC session: 0
Number of Accounting Notifications sent at beginning of a command execution: 0
Errors when sending Accounting Notifications at beginning of a command execution: 0
Number of Accounting Notifications sent at end of a command execution: 0
Errors when sending Accounting Notifications at end of a command execution: 0
show accounting methods
Use this command to display configured accounting method lists.
Format
Mode Privileged EXEC
Example: The following shows example CLI display output for the command.
(UBNT EdgeSwitch) #
(UBNT EdgeSwitch) #show accounting methods
Acct Type Method Name Record Type Method Type
---------- ------------ ------------ ------------
show accounting methods
Ubiquiti Networks, Inc.
70
Page 71

Exec dfltExecList start-stop TACACS
Commands dfltCmdsList stop-only TACACS
Commands UserCmd Audit start-stop TACACS
DOT1X dfltDot1xList start-stop radius
Line EXEC Method List Command Method List
------ --------------------------------------Telnet dfltExecList dfltCmdsList
SSH dfltExecList UserCmdAudit
clear accounting statistics
This command clears the accounting statistics.
Management CommandsEdgeSwitch CLI Command Reference
Format
Mode Privileged EXEC
clear accounting statistics
Ubiquiti Networks, Inc.
71
Page 72
Management CommandsEdgeSwitch CLI Command Reference
SNMP Commands
This section describes the commands you use to configure Simple Network Management Protocol (SNMP) on the
switch. You can configure the switch to act as an SNMP agent so that it can communicate with SNMP managers
on your network.
snmp-server
This command sets the name and the physical location of the switch, and the organization responsible for the
network. The parameters name, loc, and con can be up to 255 characters in length.
Default none
Format
Mode Global Config
snmp-server community
This command adds (and names) a new SNMP community, and optionally sets the access mode, allowed IP
address, and create a view for the community.
Note:
using the same community name, the first entry is kept and processed and all duplicate entries are ignored.
Default • Public and private, which you can rename.
Format
Mode Global Config
snmp-server {sysname name | location loc | contact con}
Community names in the SNMP Community Table must be unique. When making multiple entries
• Default values for the remaining four community names are blank.
snmp-server community community-name [{ro | rw |su }] [ipaddress ip-address]
[view view-name]
Parameter Definition
community-name
ro | rw | su
ip-address
view-name
A name associated with the switch and with a set of SNMP managers that manage it with a specified
privileged level. The length of community-name can be up to 16 case-sensitive characters.
The access mode of the SNMP community, which can be public (Read-Only/RO), private (Read-Write/
RW), or Super User (SU).
The associated community SNMP packet sending address and is used along with the client IP mask
value to denote a range of IP addresses from which SNMP clients may use that community to access
the device. A value of 0.0.0.0 allows access from any IP address. Otherwise, this value is ANDed with the
mask to determine the range of allowed client IP addresses.
The name of the view to create or update.
no snmp-server community
This command removes this community name from the table. The name is the community name to be deleted.
Format
Mode Global Config
no snmp-server community community-name
snmp-server community-group
This command configures a community access string to permit access via the SNMPv1 and SNMPv2 protocols.
Format
Mode Global Config
Parameter Definition
community-string
group-name
ipaddress
snmp-server community-group community-string group-name [ipaddress ipaddress]
The community which is created and then associated with the group. The range is 1 to 20 characters.
The name of the group that the community is associated with. The range is 1 to 30 characters.
Optionally, the IPv4 address that the community may be accessed from.
Ubiquiti Networks, Inc.
72
Page 73

Management CommandsEdgeSwitch CLI Command Reference
snmp-server enable traps violation
The Port MAC locking component interprets this command and configures violation action to send an SNMP trap
with default trap frequency of 30 seconds. The Global command configures the trap violation mode across all
interfaces valid for port-security (for other port security commands, see “Port Security Commands” on page
290). There is no global trap mode as such.
Default disabled
Format
Mode • Global Config
no snmp-server enable traps violation
This command disables the sending of new violation traps.
snmp-server enable traps violation
• Interface Config
Format
Mode Interface Config
no snmp-server enable traps violation
snmp-server enable traps
This command enables the Authentication Flag.
Default enabled
Format
Mode Global Config
snmp-server enable traps
no snmp-server enable traps
This command disables the Authentication Flag.
Format
Mode Global Config
no snmp-server enable traps
snmp trap link-status
This command enables link status traps on an interface or range of interfaces.
Note: This command is valid only when the Link Up/Down Flag is enabled.
Format
Mode Interface Config
no snmp trap link-status
This command disables link status traps by interface.
snmp trap link-status
Note: This command is valid only when the Link Up/Down Flag is enabled.
Format
Mode Interface Config
no snmp trap link-status
snmp trap link-status all
This command enables link status traps for all interfaces.
Note: This command is valid only when the Link Up/Down Flag is enabled.
Format
Mode Global Config
Ubiquiti Networks, Inc.
snmp trap link-status all
73
Page 74

no snmp trap link-status all
This command disables link status traps for all interfaces.
Note: This command is valid only when the Link Up/Down Flag is enabled.
Management CommandsEdgeSwitch CLI Command Reference
Format
Mode Global Config
no snmp trap link-status all
snmp-server enable traps linkmode
Note: This command may not be available on all platforms.
This command enables Link Up/Down traps for the entire switch. When enabled, link traps are sent only if the
Link Trap flag setting associated with the port is enabled. See “show snmp” on page 79.
Default enabled
Format
Mode Global Config
snmp-server enable traps linkmode
no snmp-server enable traps linkmode
This command disables Link Up/Down traps for the entire switch.
Format
Mode Global Config
no snmp-server enable traps linkmode
snmp-server enable traps multiusers
This command enables Multiple User traps. When the traps are enabled, a Multiple User Trap is sent when a user
logs in to the terminal interface (EIA 232 or Telnet) and there is an existing terminal interface session.
Default enabled
Format
Mode Global Config
snmp-server enable traps multiusers
no snmp-server enable traps multiusers
This command disables Multiple User traps.
Format
Mode Global Config
no snmp-server enable traps multiusers
snmp-server enable traps stpmode
This command enables the sending of new root traps and topology change notification traps.
Default enabled
Format
Mode Global Config
no snmp-server enable traps stpmode
This command disables the sending of new root traps and topology change notification traps.
Format
Mode Global Config
Ubiquiti Networks, Inc.
snmp-server enable traps stpmode
no snmp-server enable traps stpmode
74
Page 75
Management CommandsEdgeSwitch CLI Command Reference
snmp-server engineID local
This command configures the SNMP engine ID on the local device.
Default The engineID is configured automatically, based on the device MAC address.
Format
Mode Global Config
Parameter Definition
engineid-string
default
CAUTION: Changing the engine ID will invalidate all SNMP configuration that exists on the box.
no snmp-server engineID local
This command removes the specified engine ID.
Default The engineID is configured automatically, based on the device MAC address.
Format
Mode Global Config
snmp-server engineID local {engineid-string|default}
A hexadecimal string identifying the engine ID, used for localizing configuration. The engine ID must
be an even length in the range of 6 to 32 hexadecimal characters.
Sets the engine ID to the default string, based on the device MAC address.
no snmp-server engineID local
snmp-server filter
This command creates a filter entry for use in limiting which traps will be sent to a host.
Default No filters are created by default.
Format
Mode Global Config
Parameter Definition
filtername
oid-tree
included
excluded
snmp-server filter filtername oid-tree {included|excluded}
The label for the filter being created. The range is 1 to 30 characters.
The OID subtree to include or exclude from the filter. Subtrees may be specified numerically (1.3.6.2.4)
or by keywords (system), and asterisks may be used to specify a subtree family (1.3.*.4).
The tree is included in the filter.
The tree is excluded from the filter.
no snmp-server filter
This command removes the specified filter.
Default No filters are created by default.
Format
Mode Global Config
snmp-server filter filtername [oid-tree]
snmp-server group
This command creates an SNMP access group.
Default Generic groups are created for all versions and privileges using the default views.
Format
Mode Global Config
snmp-server group group-name {v1 | v2 | v3 {noauth | auth | priv}} [context
context-name] [read read-view] [write write-view] [notify notify-view]
Ubiquiti Networks, Inc.
75
Page 76

Parameter Definition
group-name
v1
v2
v3
noauth
auth
priv
context-name
read-view
write-view
notify-view
The group name to be used when configuring communities or users. The range is 1 to 30 characters.
This group can only access via SNMPv1.
This group can only access via SNMPv2.
This group can only access via SNMPv3.
This group can be accessed only when not using Authentication or Encryption. Applicable only if
SNMPv3 is selected.
This group can be accessed only when using Authentication but not Encryption. Applicable only if
SNMPv3 is selected.
This group can be accessed only when using both Authentication and Encryption. Applicable only if
SNMPv3 is selected.
The SNMPv3 context used during access. Applicable only if SNMPv3 is selected.
The view this group will use during GET requests. The range is 1 to 30 characters.
The view this group will use during SET requests. The range is 1 to 30 characters.
The view this group will use when sending out traps. The range is 1 to 30 characters.
no snmp-server group
This command removes the specified group.
Management CommandsEdgeSwitch CLI Command Reference
Format
Mode Global Config
no snmp-server group group-name {v1|v2 | 3 {noauth|auth|priv}} [context context-name]
snmp-server host
This command configures traps to be sent to the specified host.
Default No default hosts are configured.
Format
Mode Global Config
Parameter Definition
host-addr
informs
seconds
retries
traps
version 1
version 2
community-string
port
filter-name
snmp-server host host-addr {informs [timeout seconds] [retries retries] |
traps version {1|2}} community-string [udp-port port] [filter filter-name]
The IPv4 or IPv6 address of the host to send the trap or inform to.
Send SNMPv2 informs to the host.
The number of seconds to wait for an acknowledgement before resending the Inform. The default is
15 seconds. The range is 1 to 300 seconds.
The number of times to resend an Inform. The default is 3 attempts. The range is 0 to 255 retries.
Send SNMP traps to the host. This option is selected by default.
Sends SNMPv1 traps. This option is not available if informs is selected.
Sends SNMPv2 traps. This option is not available if informs is selected. This option is selected by default.
Community string sent as part of the notification. The range is 1 to 20 characters.
The SNMP Trap receiver port. The default is port 162.
The filter name to associate with this host. Filters can be used to specify which traps are sent to this
host. The range is 1 to 30 characters.
no snmp-server host
This command removes the specified host entry.
Format
Mode Global Config
Ubiquiti Networks, Inc.
no snmp-server host host-addr [traps|informs]
76
Page 77

snmp-server user
This command creates an SNMPv3 user for access to the system.
Default No default users are created.
Format
Mode Global Config
Parameter Definition
username
group-name
engineid-string
password
md5-key
sha-key
des-key
snmp-server user username groupname [remote engineid-string] [ {auth-md5
password | auth-sha password | auth-md5-key md5-key | auth-sha-key sha-key}
[priv-des password | priv-des-key des-key]
The username the SNMPv3 user will connect to the switch as. The range is 1 to 30 characters.
The name of the group the user belongs to. The range is 1 to 30 characters.
The engine-id of the remote management station that this user will be connecting from. The range is
5 to 32 characters.
The password the user will use for the authentication or encryption mechanism. The range is 1 to 32
characters.
A pregenerated MD5 authentication key. The length is 32 characters.
A pregenerated SHA authentication key. The length is 48 characters.
A pregenerated DES encryption key. The length is 32 characters if MD5 is selected, 48 characters if SHA
is selected.
Management CommandsEdgeSwitch CLI Command Reference
no snmp-server user
This command removes the specified SNMPv3 user.
Format
Mode Global Config
no snmp-server user username
snmp-server view
This command creates or modifies an existing view entry that is used by groups to determine which objects can
be accessed by a community or user.
Default Views are created by default to provide access to the default groups.
Format
Mode Global Config
Parameter Definition
viewname The label for the view being created. The range is 1 to 30 characters.
oid-tree The OID subtree to include or exclude from the view. Subtrees may be specified by numerical
included The tree is included in the view.
excluded The tree is excluded from the view.
no snmp-server view
This command removes the specified view.
snmp-server viewname oid-tree {included|excluded}
(1.3.6.2.4) or keywords (system), and asterisks may be used to specify a subtree family (1.3.*.4).
Format
Mode Global Config
no snmp-server view viewname [oid-tree]
Ubiquiti Networks, Inc.
77
Page 78

snmp-server v3-host
This command configures traps to be sent to the specified host.
Default No default hosts are configured.
Format
Mode Global Config
Parameter Definition
host-addr
username
traps
informs
seconds
retries
auth
noauth
priv
port
filter-name
snmp-server v3-host host-addr username [traps | informs [timeout seconds]
[retries retries]] [auth | noauth | priv] [udpport port] [filter filter-name]
The IPv4 or IPv6 address of the host to send the trap or inform to.
User used to send a Trap or Inform message. This user must be associated with a group that supports
the version and access method. The range is 1 to 30 characters.
Send SNMP traps to the host. This is the default option.
Send SNMP informs to the host.
Number of seconds to wait for an acknowledgement before resending the Inform. The default is 15
seconds. The range is 1 to 300 seconds.
Number of times to resend an Inform. The default is 3 attempts. The range is 0 to 255 retries.
Enables authentication but not encryption.
No authentication or encryption. This is the default.
Enables authentication and encryption.
The SNMP Trap receiver port. This value defaults to port 162.
The filter name to associate with this host. Filters can be used to specify which traps are sent to this
host. The range is 1 to 30 characters.
Management CommandsEdgeSwitch CLI Command Reference
snmptrap source-interface
Use this command in Global Configuration mode to configure the global source-interface (Source IP address) for
all SNMP communication between the SNMP client and the server.
Format
Mode Global Configuration
Parameter Definition
slot/port
loopback-id
tunnel-id
vlan-id
no snmptrap source-interface
Use this command in Global Configuration mode to remove the global source-interface (Source IP selection) for
all SNMP communication between the SNMP client and the server.
Format
Mode Global Configuration
snmptrap source-interface {slot/port | loopback loopback-id|tunnel tunnelid|vlan vlan-id}
The unit identifier assigned to the switch.
Configures the loopback interface. The range of the loopback ID is 0 to 7.
Configures the IPv6 tunnel interface. The range of the tunnel ID is 0 to 7.
Configures the VLAN interface to use as the source IP address. The range of the VLAN ID is 1 to 4093.
no snmptrap source-interface
Ubiquiti Networks, Inc.
78
Page 79

show snmp
This command displays the current SNMP configuration.
Management CommandsEdgeSwitch CLI Command Reference
Format
Mode Privileged EXEC
Term Definition
Community Table:
Community-String The community string for the entry. This is used by SNMPv1 and SNMPv2 protocols to access the
Community-Access The type of access the community has:
View Name The view this community has access to.
IP Address Access to this community is limited to this IP address.
Community Group Table:
Community-String The community this maping configures
Group Name The group this community is assigned to.
IP Address The IP address this community is limited to.
Host Table:
Target Address The address of the host that traps will be sent to.
Type The type of message that will be sent, either traps or informs.
Community The community traps will be sent to.
Version The version of SNMP the trap will be sent as.
UDP Port The UDP port the trap or inform will be sent to.
Filter name The filter the traps will be limited by for this host.
TO Sec The number of seconds before informs will time out when sending to this host.
Retries The number of times informs will be sent after timing out.
show snmp
switch.
• Read only
• Read write
• su
show snmp engineID
This command displays the currently configured SNMP engineID.
Format
Mode Privileged EXEC
Term Definition
Local SNMP EnginID The current configuration of the displayed SNMP engineID.
show snmp engineID
show snmp filters
This command displays the configured filters used when sending traps.
Format
Mode Privileged EXEC
Term Definition
Name The filter name for this entry.
OID Tree The OID tree this entry will include or exclude.
Type Indicates if this entry includes or excludes the OID Tree.
show snmp filters [filtername]
Ubiquiti Networks, Inc.
79
Page 80

show snmp group
This command displays the configured groups.
Management CommandsEdgeSwitch CLI Command Reference
Format
Mode Privileged EXEC
Term Definition
Name The name of the group.
Security Model Indicates which protocol can access the system via this group.
Security Level Indicates the security level allowed for this group.
Read View The view this group provides read access to.
Write View The view this group provides write access to.
Notify View The view this group provides trap access to.
show snmp group [groupname]
show snmp source-interface
Use this command in Privileged EXEC mode to display the configured global source-interface (Source IP address)
details used for an SNMP client.
Format
Mode Privileged Exec
show snmp source-interface
Example: The following shows example CLI display output for the command.
(UBNT EdgeSwitch)# show snmp source-interface
SNMP trap Client Source Interface.............. (not configured)
show snmp user
This command displays the currently configured SNMPv3 users.
Format
Mode Privileged EXEC
Term Definition
Name The name of the user.
Group Name The group that defines the SNMPv3 access parameters.
Auth Method The authentication algorithm configured for this user.
Privilege Method The encryption algorithm configured for this user.
Remote Engine ID The engineID for the user defined on the client machine.
show snmp user [username]
show snmp views
This command displays the currently configured views.
Format
Mode Privileged EXEC
Parameter Definition
Name The view name for this entry.
OID Tree The OID tree that this entry will include or exclude.
Type Indicates if this entry includes or excludes the OID tree.
show snmp views [viewname]
Ubiquiti Networks, Inc.
80
Page 81
Management CommandsEdgeSwitch CLI Command Reference
show trapflags
This command displays trap conditions. The command’s display shows all the enabled OSPFv2 and OSPFv3
trapflags. Configure which traps the switch should generate by enabling or disabling the trap condition. If a trap
condition is enabled and the condition is detected, the SNMP agent on the switch sends the trap to all enabled
trap receivers. You do not have to reset the switch to implement the changes. Cold and warm start traps are
always generated and cannot be disabled.
Format
Mode Privileged EXEC
Term Definition
Authentication Flag Can be enabled or disabled. The factory default is enabled. Indicates whether authentication failure
Link Up/Down Flag Can be enabled or disabled. The factory default is enabled. Indicates whether link status traps will
Multiple Users Flag Can be enabled or disabled. The factory default is enabled. Indicates whether a trap will be sent when
Spanning Tree Flag Can be enabled or disabled. The factory default is enabled. Indicates whether spanning tree traps
show trapflags
traps will be sent.
besent.
the same user ID is logged into the switch more than once at the same time (either through Telnet or
the serial port).
aresent.
Ubiquiti Networks, Inc.
81
Page 82

Management CommandsEdgeSwitch CLI Command Reference
RADIUS Commands
This section describes the commands you use to configure the switch to use a Remote Authentication Dial-In
User Service (RADIUS) server on your network for authentication and accounting.
radius accounting mode
This command is used to enable the RADIUS accounting function.
Default disable
Format
Mode Global Config
no radius accounting mode
This command is used to set the RADIUS accounting function to the default value - i.e. the RADIUS accounting
function is disabled.
radius accounting mode
Format
Mode Global Config
no radius accounting mode
radius server attribute 4
This command specifies the RADIUS client to use the NAS-IP Address attribute in the RADIUS requests. If the
specific IP address is configured while enabling this attribute, the RADIUS client uses that IP address while
sending NAS-IP-Address attribute in RADIUS communication.
Format
Mode Global Config
Parameter Definition
4
ipaddr
no radius server attribute 4
The no version of this command disables the NAS-IP-Address attribute global parameter for RADIUS client. When
this parameter is disabled, the RADIUS client does not send the NAS-IP-Address attribute in RADIUS requests.
Format
Mode Global Config
Example: The following shows an example of the command.
(UBNT EdgeSwitch) (Config) #radius server attribute 4 192.168.37.60
(UBNT EdgeSwitch) (Config) #radius server attribute 4
radius server attribute 4 [ipaddr]
NAS-IP-Address attribute to be used in RADIUS requests.
The IP address of the server.
no radius server attribute 4 [ipaddr]
radius server host
This command configures the IP address or DNS name to use for communicating with the RADIUS server of a
selected server type. While configuring the IP address or DNS name for the authenticating or accounting servers,
you can also configure the port number and server name. If the authenticating and accounting servers are
configured without a name, the command uses the Default_RADIUS_Auth_Server and Default_RADIUS_Acct_
Server as the default names, respectively. The same name can be configured for more than one authenticating
servers and the name should be unique for accounting servers. The RADIUS client allows the configuration of a
maximum of 32 authenticating and accounting servers.
If you use the auth parameter, the command configures the IP address or hostname to use to connect to a
RADIUS authentication server. You can configure up to 3 servers per RADIUS client. If the maximum number of
configured servers is reached, the command fails until you remove one of the servers by issuing the no form of
Ubiquiti Networks, Inc.
82
Page 83
Management CommandsEdgeSwitch CLI Command Reference
the command. If you use the optional port parameter, the command configures the UDP port number to use
when connecting to the configured RADIUS server. The port number range is 1-65535, with a default of 1812.
Note: To reconfigure a RADIUS authentication server to use the default UDP port, set the port
parameter to 1812.
If you use the acct parameter, the command configures the IP address or hostname to use for the RADIUS
accounting server. You can only configure one accounting server. If an accounting server is currently configured,
use the no form of the command to remove it from the configuration. The IP address or hostname you specify
must match that of a previously configured accounting server. If you use the optional port parameter, the
command configures the UDP port to use when connecting to the RADIUS accounting server. If a port is already
configured for the accounting server, the new port replaces the previously configured port. The port value
must be in the range 0-65535, with a default of 1813.
Note: To reconfigure a RADIUS accounting server to use the default UDP port, set the port parameter
to1813.
Format
Mode Global Config
Parameter Definition
ipaddr
dnsname
0-65535
servername
radius server host {auth | acct} {ipaddr|dnsname} [name servername] [port 0-65535]
The IP address of the server.
The DNS name of the server.
The port number to use to connect to the specified RADIUS server.
The alias name to identify the server.
no radius server host
The no form of this command deletes the configured server entry from the list of configured RADIUS servers.
If the RADIUS authenticating server being removed is the active server in the servers that are identified by the
same server name, then the RADIUS client selects another server for making RADIUS transactions. If auth is
used, the previously configured RADIUS authentication server is removed from the configuration. Similarly,
if acct is used, the previously configured RADIUS accounting server is removed from the configuration. The
ipaddr|dnsname parameter must match the IP address or DNS name of the previously configured RADIUS
authentication/accounting server.
Format
Mode Global Config
Example: The following shows an example of the command.
(UBNT EdgeSwitch) (Config) #radius server host acct 192.168.37.60
(UBNT EdgeSwitch) (Config) #radius server host acct 192.168.37.60 port 1813
(UBNT EdgeSwitch) (Config) #radius server host auth 192.168.37.60 name Network1_RS port 1813
(UBNT EdgeSwitch) (Config) #radius server host acct 192.168.37.60 name Network2_RS
(UBNT EdgeSwitch) (Config) #no radius server host acct 192.168.37.60
no radius server host {auth | acct} {ipaddr|dnsname}
radius server key
This command configures the key to be used in RADIUS client communication with the specified server.
Depending on whether the auth or acct keyword is used, the shared secret is configured for the RADIUS
authentication or RADIUS accounting server. The IP address or hostname provided must match a previously
configured server. When this command is executed, the secret is prompted.
Text-based configuration supports RADIUS server’s secrets in encrypted and non-encrypted format. When you save
the configuration, these secret keys are stored in encrypted format only. If you want to enter the key in encrypted
format, enter the key along with the encrypted keyword. In the show running-config command’s display,
these secret keys are displayed in encrypted format. You cannot show these keys in plain text format.
Ubiquiti Networks, Inc.
83
Page 84
Note: The secret must be an alphanumeric value not exceeding 16 characters.
Management CommandsEdgeSwitch CLI Command Reference
Format
Mode Global Config
Parameter Definition
ipaddr
dnsname
password
radius server key {auth | acct} {ipaddr|dnsname} encrypted password
The IP address of the server.
The DNS name of the server.
The password in encrypted format.
Example: The following shows an example of the CLI command.
radius server key acct 10.240.4.10 encrypted encrypt-string
radius server msgauth
This command enables the message authenticator attribute to be used for the specified RADIUS Authenticating
server.
Format
Mode Global Config
Parameter Definition
ip addr
dnsname
no radius server msgauth
The no version of this command disables the message authenticator attribute to be used for the specified
RADIUS Authenticating server.
radius server msgauth ipaddr|dnsname
The IP address of the server.
The DNS name of the server.
Format
Mode Global Config
no radius server msgauth ipaddr|dnsname
radius server primary
This command specifies a configured server that should be the primary server in the group of servers which
have the same server name. Multiple primary servers can be configured for each number of servers that have
the same name. When the RADIUS client has to perform transactions with an authenticating RADIUS server of
specified name, the client uses the primary server that has the specified server name by default. If the RADIUS
client fails to communicate with the primary server for any reason, the client uses the backup servers configured
with the same server name. These backup servers are identified as the Secondary type.
Format
Mode Global Config
Parameter Definition
ip addr
dnsname
radius server primary {ipaddr|dnsname}
The IP address of the RADIUS Authenticating server.
The DNS name of the server.
radius server retransmit
This command configures the RADIUS client global parameter that specifies the maximum number of message
transmissions before using the fall back server upon unsuccessful communication with the current RADIUS
authenticating server. When the maximum number of retries is reached for the RADIUS accounting server and no
response is received, the client does not communicate with any other server.
Ubiquiti Networks, Inc.
84
Page 85

Management CommandsEdgeSwitch CLI Command Reference
Default 4
Format
Mode Global Config
Parameter Definition
retries
radius server retransmit retries
The maximum number of transmission attempts in the range of 1 to 15.
no radius server retransmit
The no form of this command sets the value of this global parameter to the default value.
Format
Mode Global Config
no radius server retransmit
radius source-interface
Use this command to specify the physical or logical interface to use as the RADIUS client source interface (source
IP address). If configured, the address of source-interface is used for all RADIUS communications
between the RADIUS server and the RADIUS client. The selected source-interface IP address is used for
filling the IP header of RADIUS management protocol packets. This allows security devices (firewalls) to identify
the source packets coming from the specific switch.
If a source-interface is not specified, the primary IP address of the originating (outbound) interface is
used as the source address. If the configured interface is down, the RADIUS client falls back to its default behavior.
Format
Mode Global Config
Parameter Definition
slot/port
loopback-id
vlan-id
no radius source-interface
Use this command to reset the RADIUS source interface to the default settings.
Format
Mode Global Config
radius source-interface {slot/port | loopback loopback-id | vlan vlan-id}
The unit identifier assigned to the switch.
Configures the loopback interface. The range of the loopback ID is 0 to 7.
Configures the VLAN interface to use as the source IP address. The range of the VLAN ID is 1 to 4093.
no radius source-interface
radius server timeout
This command configures the RADIUS client global parameter that specifies the timeout value (in seconds) after
which a request must be retransmitted to the RADIUS server if no response is received. The timeout value is an
integer in the range of 1 to 30.
Default 5
Format
Mode Global Config
Parameter Definition
seconds
Ubiquiti Networks, Inc.
radius server timeout seconds
Timeout value in seconds in the range 1–30.
85
Page 86

no radius server timeout
The no version of this command sets the timeout global parameter to the default value.
Management CommandsEdgeSwitch CLI Command Reference
Format
Mode Global Config
no radius server timeout
show radius
This command displays the values configured for the global parameters of the RADIUS client.
Format
Mode Privileged EXEC
Term Definition
Number of Configured
Authentication Servers
Number of Configured
Accounting Servers
Number of Named
Authentication Server
Groups
Number of Named
Accounting Server Groups
Number of Retransmits The configured value of the maximum number of times a request packet is retransmitted.
Time Duration The configured timeout value, in seconds, for request retransmissions.
RADIUS Accounting Mode A global parameter to indicate whether the accounting mode for all the servers is enabled or not.
RADIUS Attribute 4 Mode A global parameter to indicate whether the NAS-IP-Address attribute has been enabled to use in
RADIUS Attribute 4 Value A global parameter that specifies the IP address to be used in the NAS-IP-Address attribute to be used
show radius
The number of RADIUS Authentication servers that have been configured.
The number of RADIUS Accounting servers that have been configured.
The number of configured named RADIUS server groups.
The number of configured named RADIUS server groups.
RADIUS requests.
in RADIUS requests.
The following shows example CLI display output for the command.
(UBNT EdgeSwitch) #show radius
Number of Configured Authentication Servers............. 32
Number of Configured Accounting Servers................. 32
Number of Named Authentication Server Groups............ 15
Number of Named Accounting Server Groups................ 3
Number of Retransmits................................... 4
Time Duration........................................... 10
RADIUS Accounting Mode.................................. Disable
RADIUS Attribute 4 Mode................................. Enable
RADIUS Attribute 4 Value ............................... 192.168.37.60
show radius servers
This command displays the summary and details of the RADIUS authenticating servers configured for the
RADIUS client.
Format
Mode Privileged EXEC
Parameter Definition
ipaddr
dnsname
servername
show radius servers [{ipaddr|dnsname | name [servername]}]
The IP address of the authenticating server.
The DNS name of the authenticating server.
The alias name to identify the server.
Ubiquiti Networks, Inc.
86
Page 87

Management CommandsEdgeSwitch CLI Command Reference
Term Definition
Current The * symbol preceding the server host address specifies that the server is currently active.
Host Address The IP address of the host.
Server Name The name of the authenticating server.
Port The port used for communication with the authenticating server.
Type Specifies whether this server is a primary or secondary type.
Current Host Address The IP address of the currently active authenticating server.
Secret Configured Yes or No Boolean value that indicates whether this server is configured with a secret.
Number of Retransmits The configured value of the maximum number of times a request packet is retransmitted.
Message Authenticator Global parameter that indicates whether the Message Authenticator attribute is enabled or disabled.
Time Duration The configured timeout value, in seconds, for request retransmissions.
RADIUS Accounting Mode Global parameter that indicates whether the accounting mode for all the servers is enabled or not.
RADIUS Attribute 4 Mode Global parameter that indicates whether the NAS-IP-Address attribute has been enabled to use in
RADIUS Attribute 4 Value
RADIUS requests.
Global parameter that specifies the IP address to use in NAS-IP-Address attribute used in RADIUS requests.
Example: The following shows example CLI display output for the command.
(UBNT EdgeSwitch) #show radius servers
Cur Host Address Server Name Port Type
rent
---- ------------------------ --------------------------------- ----- --------- * 192.168.37.200 Network1_RADIUS_Server 1813 Primary
192.168.37.201 Network2_RADIUS_Server 1813 Secondary
192.168.37.202 Network3_RADIUS_Server 1813 Primary
192.168.37.203 Network4_RADIUS_Server 1813 Secondary
(UBNT EdgeSwitch) #show radius servers name
Current Host Address Server Name Type
------------------------ --------------------------------- ----------
192.168.37.200 Network1_RADIUS_Server Secondary
192.168.37.201 Network2_RADIUS_Server Primary
192.168.37.202 Network3_RADIUS_Server Secondary
192.168.37.203 Network4_RADIUS_Server Primary
(UBNT EdgeSwitch) #show radius servers name Default_RADIUS_Server
Server Name............................ Default_RADIUS_Server
Host Address........................... 192.168.37.58
Secret Configured...................... No
Message Authenticator ................. Enable
Number of Retransmits.................. 4
Time Duration.......................... 10
RADIUS Accounting Mode................. Disable
RADIUS Attribute 4 Mode................ Enable
RADIUS Attribute 4 Value .............. 192.168.37.60
(UBNT EdgeSwitch) #show radius servers 192.168.37.58
Server Name............................ Default_RADIUS_Server
Host Address........................... 192.168.37.58
Secret Configured...................... No
Message Authenticator ................. Enable
Number of Retransmits.................. 4
Time Duration.......................... 10
RADIUS Accounting Mode................. Disable
RADIUS Attribute 4 Mode................ Enable
RADIUS Attribute 4 Value .............. 192.168.37.60
Ubiquiti Networks, Inc.
87
Page 88
show radius accounting
This command displays a summary of configured RADIUS accounting servers.
Management CommandsEdgeSwitch CLI Command Reference
Format
Mode Privileged EXEC
Parameter/Term Definition
servername
RADIUS Accounting Mode A global parameter to indicate whether the accounting mode for all the servers is enabled or not.
show radius accounting name [servername]
An alias name to identify the server.
If you do not specify any parameters, then only the accounting mode and the RADIUS accounting server details
are displayed.
Term Definition
Host Address The IP address of the host.
Server Name The name of the accounting server.
Port The port used for communication with the accounting server.
Secret Configured Yes or No Boolean value indicating whether this server is configured with a secret.
Example: The following shows example CLI display output for the command.
(UBNT EdgeSwitch) #show radius accounting name
Host Address Server Name Port Secret
Configured
----------------------- --------------------------------- -------- -----------
192.168.37.200 Network1_RADIUS_Server 1813 Yes
192.168.37.201 Network2_RADIUS_Server 1813 No
192.168.37.202 Network3_RADIUS_Server 1813 Yes
192.168.37.203 Network4_RADIUS_Server 1813 No
(UBNT EdgeSwitch) #show radius accounting name Default_RADIUS_Server
Server Name............................ Default_RADIUS_Server
Host Address........................... 192.168.37.200
RADIUS Accounting Mode................. Disable
Port .................................. 1813
Secret Configured ..................... Yes
show radius accounting statistics
This command displays a summary of statistics for the configured RADIUS accounting servers.
Format
Mode Privileged EXEC
Parameter Definition
ipaddr
dnsname
servername
Ubiquiti Networks, Inc.
show radius accounting statistics {ipaddr|dnsname | name servername}
The IP address of the server.
The DNS name of the server.
The alias name to identify the server.
88
Page 89

Management CommandsEdgeSwitch CLI Command Reference
Term Definition
RADIUS Accounting Server
Name
Server Host Address The IP address of the host.
Round Trip Time The time interval, in hundredths of a second, between the most recent Accounting-Response and the
Requests The number of RADIUS Accounting-Request packets sent to this server. This number does not include
Retransmission The number of RADIUS Accounting-Request packets retransmitted to this RADIUS accounting server.
Responses The number of RADIUS packets received on the accounting port from this server.
Malformed Responses The number of malformed RADIUS Accounting-Response packets received from this server.
Bad Authenticators The number of RADIUS Accounting-Response packets containing invalid authenticators received from
Pending Requests The number of RADIUS Accounting-Request packets sent to this server that have not yet timed out or
Timeouts The number of accounting timeouts to this server.
Unknown Types The number of RADIUS packets of unknown types, which were received from this server on the
Packets Dropped The number of RADIUS packets received from this server on the accounting port and dropped for
The name of the accounting server.
Accounting-Request that matched it from this RADIUS accounting server.
retransmissions.
Malformed packets include packets with an invalid length. Bad authenticators or signature attributes
or unknown types are not included as malformed accounting responses.
this accounting server.
received a response.
accounting port.
some other reason.
Example: The following shows example CLI display output for the command.
(UBNT EdgeSwitch) #show radius accounting statistics 192.168.37.200
RADIUS Accounting Server Name................. Default_RADIUS_Server
Host Address.................................. 192.168.37.200
Round Trip Time............................... 0.00
Requests...................................... 0
Retransmissions............................... 0
Responses..................................... 0
Malformed Responses........................... 0
Bad Authenticators............................ 0
Pending Requests.............................. 0
Timeouts...................................... 0
Unknown Types................................. 0
Packets Dropped............................... 0
(UBNT EdgeSwitch) #show radius accounting statistics name Default_RADIUS_Server
RADIUS Accounting Server Name................. Default_RADIUS_Server
Host Address.................................. 192.168.37.200
Round Trip Time............................... 0.00
Requests...................................... 0
Retransmissions............................... 0
Responses..................................... 0
Malformed Responses........................... 0
Bad Authenticators............................ 0
Pending Requests.............................. 0
Timeouts...................................... 0
Unknown Types................................. 0
Packets Dropped............................... 0
Ubiquiti Networks, Inc.
89
Page 90

Management CommandsEdgeSwitch CLI Command Reference
show radius source-interface
Use this command in Privileged EXEC mode to display the configured RADIUS client source-interface (Source IP
address) information.
Format
Mode Privileged Exec
show radius source-interface
Example: The following shows example CLI display output for the command.
(UBNT EdgeSwitch)# show radius source-interface
RADIUS Client Source Interface.............. (not configured)
show radius statistics
This command displays the summary statistics of configured RADIUS Authenticating servers.
Format
Mode Privileged EXEC
Parameter Definition
ipaddr
dnsname
servername
Term Definition
RADIUS Server Name The name of the authenticating server.
Server Host Address The IP address of the host.
Access Requests The number of RADIUS Access-Request packets sent to this server. This number does not include
Access Retransmissions The number of RADIUS Access-Request packets retransmitted to this RADIUS authentication server.
Access Accepts The number of RADIUS Access-Accept packets, including both valid and invalid packets, that were
Access Rejects The number of RADIUS Access-Reject packets, including both valid and invalid packets, that were
Access Challenges The number of RADIUS Access-Challenge packets, including both valid and invalid packets, that were
Malformed Access
Responses
Bad Authenticators The number of RADIUS Access-Response packets containing invalid authenticators or signature
Pending Requests The number of RADIUS Access-Request packets destined for this server that have not yet timed out or
Timeouts The number of authentication timeouts to this server.
Unknown Types The number of packets of unknown type that were received from this server on the authentication
Packets Dropped The number of RADIUS packets received from this server on the authentication port and dropped for
show radius statistics {ipaddr|dnsname | name servername}
The IP address of the server.
The DNS name of the server.
The alias name to identify the server.
retransmissions.
received from this server.
received from this server.
received from this server.
The number of malformed RADIUS Access-Response packets received from this server. Malformed
packets include packets with an invalid length. Bad authenticators or signature attributes or unknown
types are not included as malformed access responses.
attributes received from this server.
received a response.
port.
some other reason.
Ubiquiti Networks, Inc.
90
Page 91

Example: The following shows example CLI display output for the command.
(UBNT EdgeSwitch) #show radius statistics 192.168.37.200
RADIUS Server Name............................ Default_RADIUS_Server
Server Host Address........................... 192.168.37.200
Access Requests............................... 0.00
Access Retransmissions........................ 0
Access Accepts................................ 0
Access Rejects................................ 0
Access Challenges............................. 0
Malformed Access Responses.................... 0
Bad Authenticators............................ 0
Pending Requests.............................. 0
Timeouts...................................... 0
Unknown Types................................. 0
Packets Dropped............................... 0
(UBNT EdgeSwitch) #show radius statistics name Default_RADIUS_Server
RADIUS Server Name............................ Default_RADIUS_Server
Server Host Address........................... 192.168.37.200
Access Requests............................... 0.00
Access Retransmissions........................ 0
Access Accepts................................ 0
Access Rejects................................ 0
Access Challenges............................. 0
Malformed Access Responses.................... 0
Bad Authenticators............................ 0
Pending Requests.............................. 0
Timeouts...................................... 0
Unknown Types................................. 0
Packets Dropped............................... 0
Management CommandsEdgeSwitch CLI Command Reference
Ubiquiti Networks, Inc.
91
Page 92

Management CommandsEdgeSwitch CLI Command Reference
TACACS+ Commands
TACACS+ provides access control for networked devices via one or more centralized servers. Similar to RADIUS,
this protocol simplifies authentication by making use of a single database that can be shared by many clients
on a large network. TACACS+ is based on the TACACS protocol (described in RFC1492) but additionally provides
for separate authentication, authorization, and accounting services. The original protocol was UDP based with
messages passed in clear text over the network; TACACS+ uses TCP to ensure reliable delivery and a shared key
configured on the client and daemon server to encrypt all messages.
tacacs-server host
Use the tacacs-server host command in Global Configuration mode to configure a TACACS+ server.
This command enters into the TACACS+ configuration mode. The ip-address|hostname parameter is the
IP address or hostname of the TACACS+ server. To specify multiple hosts, multiple tacacs-server host
commands can be used.
Format
Mode Global Config
tacacs-server host ip-address|hostname
no tacacs-server host
Use the no tacacs-server host command to delete the specified hostname or IP address. The ipaddress|hostname parameter is the IP address of the TACACS+ server.
Format
Mode Global Config
no tacacs-server host ip-address|hostname
tacacs-server key
Use the tacacs-server key command to set the authentication and encryption key for all TACACS+
communications between the switch and the TACACS+ daemon. The key-string parameter has a range of
0-128 characters and specifies the authentication and encryption key for all TACACS communications between
the switch and the TACACS+ server. This key must match the key used on the TACACS+ daemon.
Text-based configuration supports TACACS server’s secrets in encrypted and non-encrypted format. When you
save the configuration, these secret keys are stored in encrypted format only. If you want to enter the key in
encrypted format, enter the key along with the encrypted keyword. The show running-config command
displays these secret keys in encrypted format. You cannot show these keys in plain text format.
Format
Mode Global Config
no tacacs-server key
Use the no tacacs-server key command to disable the authentication and encryption key for all TACACS+
communications between the switch and the TACACS+ daemon. The key-string parameter has a range of
0-128 characters This key must match the key used on the TACACS+ daemon.
tacacs-server key [key-string | encrypted key-string]
Format
Mode Global Config
no tacacs-server key key-string
Ubiquiti Networks, Inc.
92
Page 93

Management CommandsEdgeSwitch CLI Command Reference
tacacs-server keystring
Use the tacacs-server keystring command to set the global authentication encryption key used for all TACACS+
communications between the TACACS+ server and the client.
Format
Mode Global Config
tacacs-server keystring
Example: The following shows an example of the CLI command.
(UBNT EdgeSwitch)(Config)#tacacs-server keystring
Enter tacacs key:********
Re-enter tacacs key:********
tacacs-server source-interface
Use this command in Global Configuration mode to configure the source interface (Source IP address) for
TACACS+ server configuration. The selected source-interface IP address is used for filling the IP header of
management protocol packets. This allows security devices (firewalls) to identify the source packets coming from
the specific switch.
If a source-interface is not specified, the primary IP address of the originating (outbound) interface is used as the
source address.
Format
Mode Global Config
Parameter Definition
slot/port
loopback-id
vlan-id
tacacs-server source-interface {slot/port|loopback loopback-id| vlan vlan-id}
The unit identifier assigned to the switch, in slot/port format.
The loopback interface. The range of the loopback ID is 0 to 7.
Configures the VLAN interface to use as the source IP address. The range of the VLAN ID is 1 to 4093.
Example: The following shows an example of the command.
(Config)#tacacs-server source-interface loopback 0
(Config)#tacacs-server source-interface 0/1
(Config)#no tacacs-server source-interface
no tacacs-server source-interface
Use this command in Global Configuration mode to remove the global source interface (Source IP selection) for
all TACACS+ communications between the TACACS+ client and the server.
Format
Mode Global Config
no tacacs-server source-interface
tacacs-server timeout
Use the tacacs-server timeout command to set the timeout value for communication with the
TACACS+ servers. The timeout parameter has a range of 1-30 and is the timeout value in seconds.
Default 5
Format
Mode Global Config
tacacs-server timeout timeout
Ubiquiti Networks, Inc.
93
Page 94

Management CommandsEdgeSwitch CLI Command Reference
no tacacs-server timeout
Use the no tacacs-server timeout command to restore the default timeout value for all TACACS
servers.
Format
Mode Global Config
no tacacs-server timeout
key
Use the key command in TACACS Configuration mode to specify the authentication and encryption key for all
TACACS communications between the device and the TACACS server. This key must match the key used on the
TACACS daemon. The key-string parameter specifies the key name. For an empty string use “ ”. The range is
0-128 characters.
Text-based configuration supports TACACS server’s secrets in encrypted and non-encrypted format. When you
save the configuration, these secret keys are stored in encrypted format only. If you want to enter the key in
encrypted format, enter the key along with the encrypted keyword. In the show running-config command’s
display, these secret keys are displayed in encrypted format. You cannot show these keys in plain text format.
Format
Mode TACACS Config
key [key-string | encrypted key-string]
keystring
Use the keystring command in TACACS Server Configuration mode to set the TACACS+ server-specific
authentication encryption key used for all TACACS+ communications between the TACACS+ server and the client
Format
Mode TACACS Server Config
Example: The following shows an example of the command.
keystring
.
(UBNT EdgeSwitch)(Config)#tacacs-server host 1.1.1.1
(UBNT EdgeSwitch)(Tacacs)#keystring
Enter tacacs key:********
Re-enter tacacs key:********
port
Use the port command in TACACS Configuration mode to specify a server port number. The server port-
number range is 0 - 65535.
Default 49
Format
Mode TACACS Config
port port-number
priority (TACACS Config)
Use the priority command in TACACS Configuration mode to specify the order in which servers are used,
where 0 (zero) is the highest priority. The priority parameter specifies the priority for servers. The highest priority
is 0 (zero), and the range is 0 - 65535.
Default 0
Format
Mode TACACS Config
priority priority
Ubiquiti Networks, Inc.
94
Page 95

Management CommandsEdgeSwitch CLI Command Reference
timeout
Use the timeout command in TACACS Configuration mode to specify the timeout value in seconds. If no
timeout value is specified, the global value is used. The timeout parameter has a range of 1-30 and is the
timeout value in seconds.
Format
Mode TACACS Config
timeout timeout
show tacacs
Use the show tacacs command to display the configuration, statistics, and source interface details of the
TACACS+ client.
Format
Mode Privileged EXEC
Parameter/Term Definition
Host address The IP address or hostname of the configured TACACS+ server.
Port The configured TACACS+ server port number.
TimeOut The timeout in seconds for establishing a TCP conection.
Priority The preference order in which TACACS+ servers are contacted. If a server connection fails, the next
client
server
show tacacs [ip-address|hostname|client|server]
highest priority server is contacted.
Display SNTP client information.
Display SNTP server information.
show tacacs source-interface
Use the show tacacs source-interface command in Global Config mode to display the configured global source
interface details used for a TACACS+ client. The IP address of the selected interface is used as source IP for all
communications with the server.
Format
Mode Privileged EXEC
show tacacs source-interface
Example: The following shows example CLI display output for the command.
(Config)# show tacacs source-interface
TACACS Client Source Interface : loopback 0
TACACS Client Source IPv4 Address : 1.1.1.1 [UP]
Ubiquiti Networks, Inc.
95
Page 96

Management CommandsEdgeSwitch CLI Command Reference
Configuration Scripting Commands
Configuration Scripting allows you to generate text-formatted script files representing the current configuration
of a system. You can upload these configuration script files to a PC or UNIX system and edit them. Then, you can
download the edited files to the system and apply the new configuration. You can apply configuration scripts to
one or more switches with no or minor modifications.
Use the show running-config command (see “show running-config” on page 119) to capture the
running configuration into a script. Use the copy command (see “copy” on page 140) to transfer the
configuration script to or from the switch.
You should use scripts on systems with default configuration; however, you are not prevented from applying
scripts on systems with non-default configurations.
Scripts must conform to the following rules:
• The file extension must be “.scr”.
• A maximum of ten scripts are allowed on the switch.
• The combined size of all script files on the switch shall not exceed 2048 KB.
• The maximum number of configuration file command lines is 2000.
You can type single-line annotations at the command prompt to use when you write test or configuration
scripts to improve script readability. The exclamation point (!) character flags the beginning of a comment. The
comment flag character can begin a word anywhere on the command line, and all input following this character
is ignored. Any command line that begins with ”!” is recognized as a comment line and ignored by the parser.
The following lines show an example of a script:
! Script file for displaying management access
show telnet !Displays the information about remote connections
! Display information about direct connections
show serial
! End of the script file!
Note: To specify a blank password for a user in the configuration script, you must specify it as a space
within quotes. For example, to change the password for user jane from a blank password to hello, the
script entry is as follows:
users passwd jane
“ “
hello
hello
script apply
This command applies the commands in the script to the switch. The scriptname parameter is the name of
the script to apply.
Format
Mode Privileged EXEC
script apply scriptname
script delete
This command deletes a specified script where the scriptname parameter is the name of the script to
delete. The all option deletes all the scripts present on the switch.
Format
Mode Privileged EXEC
script delete {scriptname | all}
Ubiquiti Networks, Inc.
96
Page 97

Management CommandsEdgeSwitch CLI Command Reference
script list
This command lists all scripts present on the switch as well as the remaining available space.
Format
Mode Privileged EXEC
Term Definition
Configuration Script Name of the script.
Size Privileged EXEC
script list
script show
This command displays the contents of a script file, which is named scriptname.
Format
Mode Privileged EXEC
Term Definition
Output Format line number: line contents
script show scriptname
script validate
This command validates a script file by parsing each line in the script file where scriptname is the name
of the script to validate.The validate option is intended to be used as a tool for script development. Validation
identifies potential problems. It might not identify all problems with a given script on any given device.
Format
Mode Privileged EXEC
script validate scriptname
Ubiquiti Networks, Inc.
97
Page 98

Management CommandsEdgeSwitch CLI Command Reference
Prelogin Banner, System Prompt, and Host Name Commands
This section describes the commands you use to configure the prelogin banner and the system prompt. The
prelogin banner is the text that displays before you login at the User: prompt.
copy (pre-login banner)
The copy command includes the option to upload or download the CLI Banner to or from the switch. You can
specify local URLs by using TFTP, SFTP, SCP, or Xmodem.
Note: The parameter ipaddr is either an IPv4 address, or an IPv6 address for routing packages that
support IPv6.
Default none
Format Copy banner to the switch:
Mode Privileged EXEC
set prompt
This command changes the name of the prompt. The length of name may be up to 64 alphanumeric characters.
copy tftp://ipaddr/filepath/filename nvram:clibanner
Copy banner from the switch:
copy nvram:clibanner tftp://ipaddr/filepath/filename
Format
Mode Privileged EXEC
set prompt prompt_string
hostname
This command sets the system hostname. It also changes the prompt. The length of name may be up to 64
alphanumeric, case-sensitive characters.
Format
Mode Privileged EXEC
hostname hostname
show clibanner
Use this command to display the configured prelogin CLI banner. The prelogin banner is the text that displays
before displaying the CLI prompt.
Default No contents to display before displaying the login prompt.
Format
Mode Privileged Exec
Example: The following shows example CLI display output for the command.
(UBNT EdgeSwitch) #show clibanner
Banner Message configured :
=========================
------------------------- TEST
--------------------------
show clibanner
Ubiquiti Networks, Inc.
98
Page 99

Management CommandsEdgeSwitch CLI Command Reference
set clibanner
Use this command to configure the prelogin CLI banner before displaying the login prompt.
Format
Mode Global Config
Parameter Definition
line
set clibanner line
Banner text where ““ (double quote) is a delimiting character. The banner message can be up to 2000
characters.
no set clibanner
Use this command to unconfigure the prelogin CLI banner.
Format
Mode Global Config
no set clibanner
Ubiquiti Networks, Inc.
99
Page 100

Chapter 3: Utility Commands
This chapter describes the utility commands available in the EdgeSwitch CLI.
The chapter contains the following sections:
• “AutoInstall Commands” on page 101
• “CLI Output Filtering Commands” on page 104
• “Dual Image Commands” on page 106
• “System Information and Statistics Commands” on page 107
• “Box Services Commands” on page 125
• “Logging Commands” on page 126
• “Email Alerting and Mail Server Commands” on page 131
• “System Utility and Clear Commands” on page 136
• “Simple Network Time Protocol Commands” on page 144
• “Time Zone Commands” on page 148
• “DHCP Server Commands” on page 151
• “DNS Client Commands” on page 160
• “IP Address Conflict Commands” on page 164
• “Serviceability Packet Tracing Commands” on page 165
• “Cable Test Command” on page 179
• “Remote Monitoring Commands” on page 180
• “Statistics Application Commands” on page 191
Utility CommandsEdgeSwitch CLI Command Reference
Note: The commands in this chapter consist of four functional groups:
• Show commands display switch settings, statistics, and other information.
• Configuration commands configure features and options of the switch. For every configuration
command, there is a show command that displays the configuration setting.
• Copy commands transfer or save configuration and informational files to and from the switch.
• Clear commands clear some or all of the settings to factory defaults.
Ubiquiti Networks, Inc.
100
 Loading...