

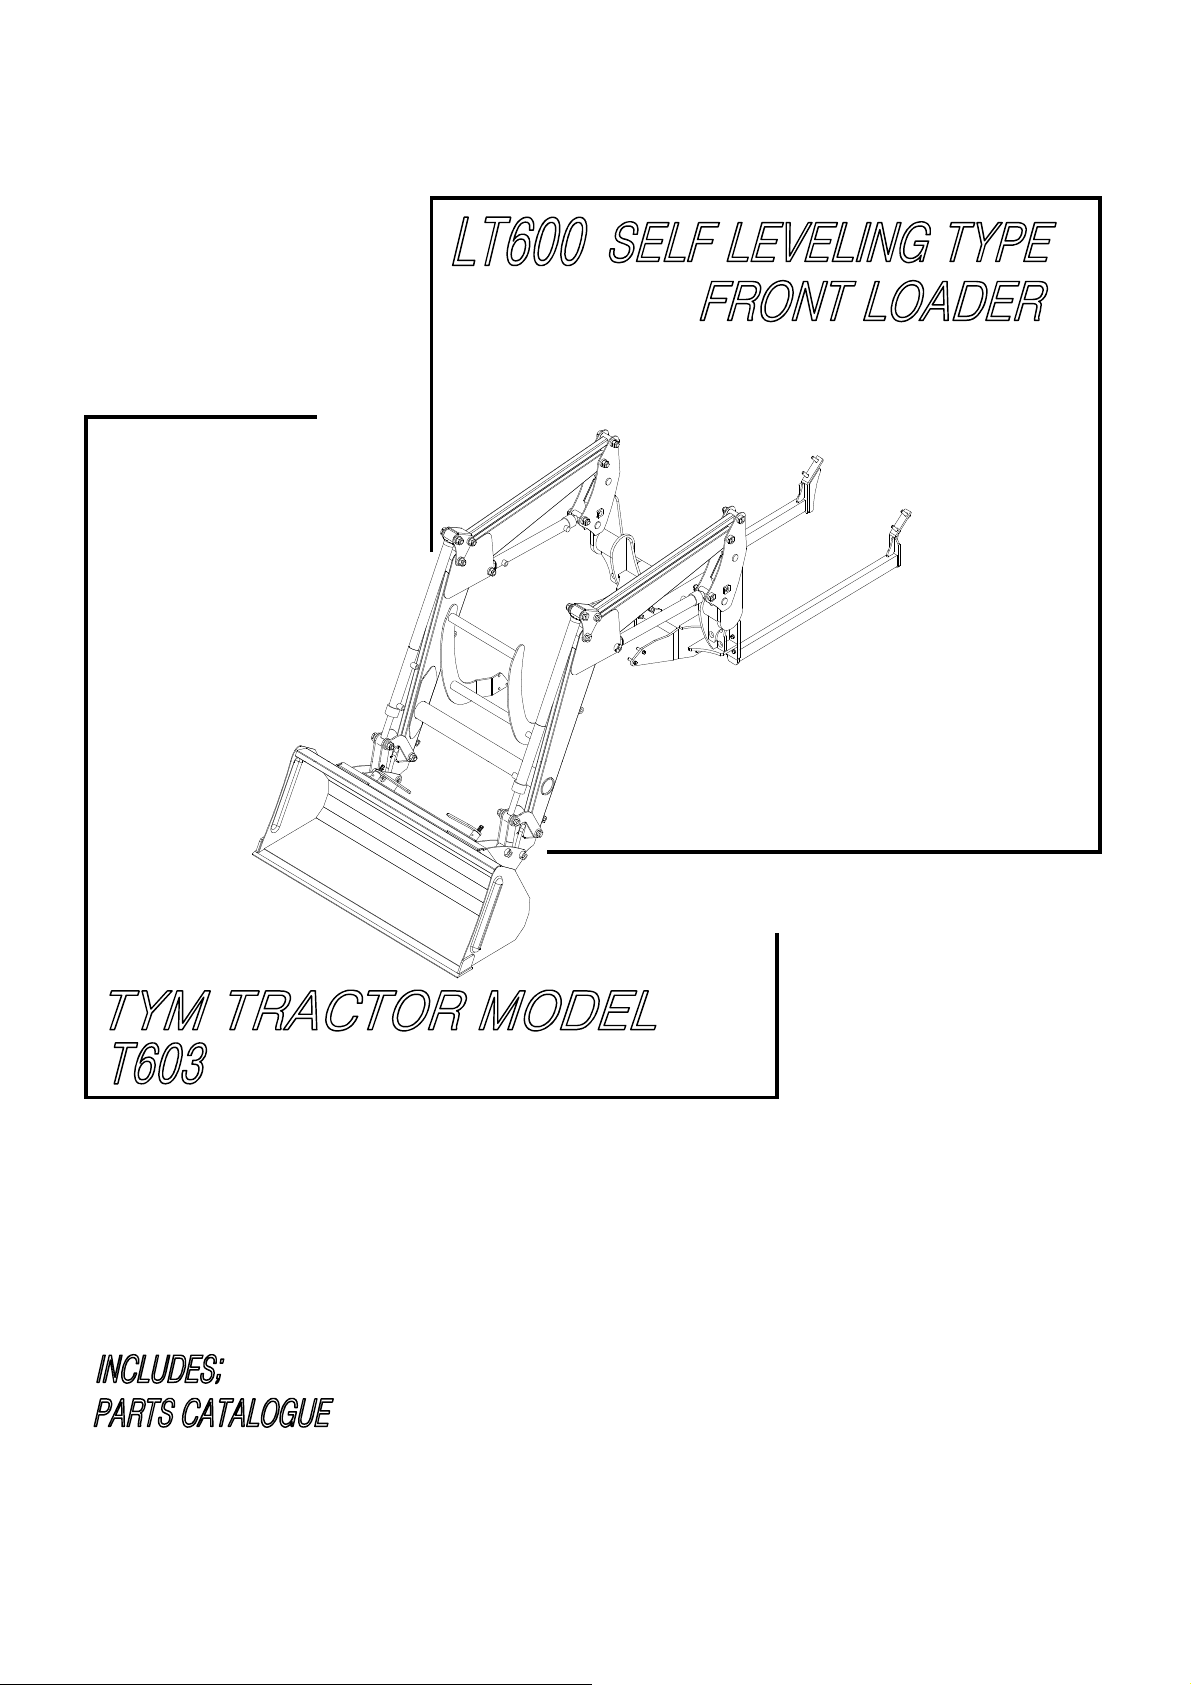
TYM T603 Parts Catalogue
ISSUE DATE : 03 / 31 / 2009 P/NO. LTS19-A160LISSUE DATE : 03 / 31 / 2009 P/NO. LTS19-A160L

WARRANTY CONDITIONS
Warranty Coverage :
Warranty Coverage :
Warranty Coverage :Warranty Coverage :
TYM
Tractor Division, herein referred to as
TYM
workmanship.
This Warranty is valid for a period of 1 year from the date of the original retail sale. Parts
replaced or repaired under the terms of this Warranty are guaranteed only until the original
warranty expires. Warranty only applies to the original purchaser.
It is further understood and agreed that the defect should be immediately reported to the Selling
Dealer. The Selling Dealer will generally perform Warranty repairs or replacements and the
Purchaser shall deliver the
loader where damage has been proven to be caused by defects in material or
TYM
Loader to the Dealer's place of business or repair.
TYM
, undertakes to replace or repair any part of a
The obligation of
replacement of defective parts by an authorized
accordance with this Warranty shall constitute fulfillment of all liabilities of
Dealer in respect to
There are no warranties beyond those which expressly appear herein. Any implied warranty of
merchantability or fitness for a particular purpose is specifically exclude here from.
Warranty Provisions :
Warranty Provisions :
Warranty Provisions :Warranty Provisions :
TYM
's liability under this warranty is subject to the observance by the Purchaser of the following
provisions:
− The purchaser shall at all times in the operation of any
and grades of lubricating oils, lubricants or fuel and spare parts officially approved by
− The
Operator's Manual. This Warranty does not extend to damage resulting from misapplication,
abuse, misuse, failure to preform maintenance, negligence, fire, accidents or changes or faulty
mounting carried out by the Purchaser. When making a Warranty exchange of parts, the
Purchaser shall compensate
exposed to extreme wear.
− Compensation is not paid for physical harm, deadlock, resulting damages or other losses.
− To obtain warranty service, the Purchaser must (1) report the product defect to an
authorized
evidence of purchase.
TYM
Loaders shall have been used in accordance with the procedures specified in the
TYM
TYM
TYM
dealer and request repair within the applicable warranty term and (2) present
to the Purchaser under this Warranty is limited to the repair or
Loaders.
TYM
TYM
for the time that the parts have been used if they have been
dealer. Repair or replacement in
TYM
and the Selling
TYM
Product, use those brands
TYM
.
− The Warranty shall be void if the
TYM
customer shall also pay any premium for overtime labor requested by the customer.
− Temporary repairs or additional costs due to the work being performed after normal
working hours will not be compensated.
− The above warranty is in lieu of all other warranties on
assumes any other liability in connection with
Right To Make Design and Product Changes :
Right To Make Design and Product Changes :
Right To Make Design and Product Changes :Right To Make Design and Product Changes :
TYM
any time without incurring any obligation with respect to any product previously ordered, sold or
shipped.
dealership or travel of dealer personnel to customer location for Warranty repair. The
reserves the right to make changes in the design and other changes in its
TYM
Loader has been altered or repaired outside of a
TYM
's behalf and neither party
TYM
's Products.
TYM
- 1 -
Products at

PLEASE NOTE :
Make sure all potential operators of the this equipment review this manual and all safety
messages contained within
This safety symbol indicates important safety messages in this manual. When you see
this symbol, carefully read the message that followes and be alert to the possibility of
personal injury or death.
- 2 -
- 2 -

Table of Contents
Hydraulic System Schematic
21
Hydraulic System Schematic
21
Safety Precautions 4
Safety Decals 6
Loader Specifications 7
Introduction 8
Tractor Preparation 9
Loader Operation 10
Loader Removal 13
Loader Mounting 14
Lubrication and Maintenance 15
Trouble Shooting 17
Torque Tightening Chart 22
Parts IIlustrations 23
General Information 23
Bucket Assembly 24
Mounting Frame Assembly 25
Boom Assembly 26
Hydraulic piping 28
Quick Attachment 31
Hydraulic Connecting 32
Boom Cylinder 33
Bucket Cylinder 34
Decals 36
Loader Installation 37
- 3 -
- 3 -

SAFETY
lock or neutral position.
for your protection. See your tractor operator's
Understand that your safety and the safety of
other persons is measured by how you service
and operate this loader. Know the position
and operations of all controls before you they
to operate. Make
in all safe area before starting.
in all safe area before starting.
in all safe area before starting.in all safe area before starting.
The safety information given in this manual
does not replace any safety codes, insurance
needs, federal, state and local laws. Make
sure your machine has the correct equipment
required by your local laws and regulations.
This safety alert symbol indicates important safety messages in this manual.
This safety alert symbol indicates important safety messages in this manual.
This safety alert symbol indicates important safety messages in this manual. This safety alert symbol indicates important safety messages in this manual.
When you see this symbol, carefully read the message that follows and
When you see this symbol, carefully read the message that follows and
When you see this symbol, carefully read the message that follows and When you see this symbol, carefully read the message that follows and
be alert to the possibility of personal injury or death.
be alert to the possibility of personal injury or death.
be alert to the possibility of personal injury or death. be alert to the possibility of personal injury or death.
Before starting the engine of your tractor,
make sure all operation controls are in park
Make sure
MakeMake
sure you
suresure
you check
check all
youyou
checkcheck
all controls
controls
allall
controlscontrols
SAFETY PRECAUTIONS
SAFETY PRECAUTIONS
SAFETY PRECAUTIONSSAFETY PRECAUTIONS
Read
Read this
ReadRead
and make sure you understand all controls. All
equipment has a limit. Make sure you are aware
of the stability and load characteristics of this
loader before you begin operation.
Stop the loader arms gradually when lowering or
lifting loads.
this manual
manual completely
thisthis
manualmanual
completely and
completelycompletely
and thoroughly
andand
thoroughly
thoroughlythoroughly
Operate controls only when seated in the
operator's seat.
Equip your tractor with a ROPS cab or frame
manual for correct seat belt usage.
A frequent cause of personal injury or death is
persons falling off and being run over. Do not
permit others to ride on your tractor. Only one
person, the operator, should be on the
machine when it is in operation.
Before leaving the tractor, stop the engine,
put all controls in neutral, engage the parking
brake and remove the key from the ignition.
When using remote hydraulic tractor valves on
some tractors, the loader lift and dump
cylinders will continue moving unless the
control levers are manually returned to neutral,
or until relief pressure is reached at the ends
of piston strokes. Observe the bucket
movement and maintain control with the
control levers.
Stay off of slopes too steep for safe operation.
Shift down before you start up or down a hill
with a heavy load. Avoid "free wheeling"
Travel speed should be such that complete
control and machine stability is maintained at all
times. Where possible, avoid operation near
ditches, embankments and holes. Reduce
speed when turning, crossing slopes, and on
rough, slick or muddy surfaces.
Never use your hand to check for suspected
leaks under pressure. Use a piece of cardbord
or wood for this purpose. Escaping hydraulic oil
or diesel fuel leaking under pressure can have
have sufficient force to penetrate the skin and
cause infection or other injured by leaking fluid,
seek medical attention immediately.
To prevent personal injury, relieve all pressure
before disconnecting fluid lines.
Before applying hydraulic pressure, make sure
all hydraulic connections are tight and
components are in good condition.
- 4 -
- 4 -

SAFETY
drop,
or
attachment
to
dump,
causing
severe
drop,
or
attachment
to
dump,
causing
severe
Contact with overhead power lines can cause
severe electrical burn or death from
electrocution.
Make sure there is enough clearance between
raised equipment and overhead power lines.
Add recommended rear tire liquid weight or
rear wheel weights for increased stability.
A loader attachment should be transported in
a low position at slow ground speeds. Make
turns slowly and use the tractor brakes
cautiously. A loaded attachment in the raised
position alters the center of gravity location of
the machine and increases the possibility of
mishaps.
Do not stand, walk or work under a raised
loader or attachment unless it is securely
blocked or held in position. Accidental
movement of a control lever or leak in the
hydraulic system could cause the loader to
Make sure all parked loaders on stands are on a
hard level surface with all safety devices
engaged to prevent loader from falling and
being damaged or injuring someone.
When using a loader, be alert of bucket position
at all times. Loader in raised position with
bucket rolled back can dump material on tractor
causing damage or injury to tractor and / or
operator.
Always park loader with bucket attached to
loader.
injury.
- 5 -
- 5 -

SAFETY DECALS
left hand Mid-Mount and Warning Decal CK12-3002,
Safety Decal Loacations
Safety Decal Loacations
Safety Decal LoacationsSafety Decal Loacations
Important:
Important:
Important: Important:
Warning decal CK12-3001, located on the
CK12-3003 located on the loader right hand Mid-Mount are visible when getting on tractor.
Care of Safety Decals.
Care of Safety Decals.
Care of Safety Decals.Care of Safety Decals.
1. Keep safety decals clean and free of obstructing material.
2. Clean safety decals with soap and water and dry with a soft cloth.
3. If a component with a safety decal(s) affixed is replaced with a new
part, make sure new safety decal(s) are attached in the same location(s)
as the replaced components.
4. Mount new safety decals by applying on a clean dry surface and
pressing air bubbles to outside edges.
Warning CK12-3001
TYM00-20051
Warning CK12-3003
Warning CK12-3002
3101E-00301
3101E-00308
- 6 -

LOADER SPECIFICATIONS
with out self leveling type
Specifications and
design are subject
to change without
prior notice.
Loader Model : LT600
Tractor Model : T603
A. Maximum Lift Height 2,851 mm 112.2 "
B. Clearance with Attachment Level 2,564 mm 101.0 "
C. Clearance with Attachment Dumped(45°) 2,083 mm 82.0 "
D. Reach at Maximum Height(45°) 478 mm 18.8 "
E. Maximum Dump Angle 68 ° 68 °
F. Reach with Attachment on Ground 1,942 mm 76.5 "
G. Attachment Rollback Angle 46 ° 46 °
H. Digging Depth Below Grade 204 mm 8.0 "
J. Overall Height in Carry Position 1,656 mm 65.2 "
L. Depth of Attachment (to back of inner shell) 592 mm 23.3 "
M. Height of Attachment 581 mm 22.9 "
N. Depth of Attachment (to pivot pin) 800 mm 31.5 "
Loader Total Weight (1+2+3) 700 ㎏ 1,543 lb
1. Weight of Boom & Quick Atta. 293.5 ㎏ 647 lb
2. Weight of Mounting Frame 272.5 ㎏ 601 lb
3. Weight of Bucket 134 ㎏ 295 lb
Lift Capacity to Full Height at Pivot Pins 1,403.4 ㎏f 3,094 lb
Breakout Force at Ground Level, Pivot Pins 2,210 ㎏f 4,872 lb
Relief Valve Setting (Loader Contol Valve) 172 ㎏/㎠ 2,489 psi
Rated Flow (Tractor System) 39 ℓ/min. 10.4 gpm
Lift Cylinder Ø60x555 mm Ø2.36X21.8 "
Bucket Cylinder Ø60x365 mm Ø2.36X14.3 "
Attachment used for specification 1,982 mm 78.0 "
Bucket Capacity 0.357 ㎥ 12.6 ft³
Hydraulic System Tractor pump w/loader control valve
-Standard : Bucket Level indicator
- 7 -
- 7 -

INTRODUCTION
located
on
the
LH(left
hand)
inside
of
front
located
on
the
LH(left
hand)
inside
of
front
The purpose of this manual is to assist you in
maintaining and operating your loader. Read it
carefully, it furnishes information and
instructions that will help you achieve years of
dependable performance. Some information
may be general in nature due to unknown and
varying conditions. However, through
experience and these instructions, you should
be able to develop operating procedures
suitable to your particular situation.
"Right" and "Left" as used throughout this
manual are determined by facing the direction
the machine will travel when in use.
The photos, illustrations and data used in this
manual are current at the time of printing, but
due to possible in-line production changes,
your machine may vary slightly in detail. The
manufacturer reserves the right to redesign the
machine as may be necessary without
notification.
Important:
Important:
Important:Important:
Illustrations used in this manual may not show
all safety equipment that is recommended to
ensure safe operation of tractor and loader.
Refer to the Safety Precautions section of this
manual for information concerning safety.
consult your dealer for further information.
Warranty Registration
Warranty Registration
Warranty RegistrationWarranty Registration
The Delivery and Warranty Registration forms
must be filled out and signed to validate your
warranty protection. The items on the form
under "I hereby Acknowledge" should be read
and understood. The terms and conditions of
the warranty on this machine are specified in
the front of this manual.
Serial Number and Location
Serial Number and Location
Serial Number and LocationSerial Number and Location
The serial number is important information
about the machine and it may be necessary to
know it before obtaining the correct
replacement part. The serial number plate is
area of boom. The serial number should be
recorded on the Delivery and Registration form
and also below for your reference.
Loader Serial Number Information
Loader Serial Number Information
Loader Serial Number Information
Loader Serial Number Information
Loader Serial Number InformationLoader Serial Number Information
Loader Serial Number InformationLoader Serial Number Information
Date Purchased
Date Purchased
Loader Serial Number
Loader Serial Number
Dealer Name and Telephone Number
Dealer Name and Telephone Number
- 8 -
- 8 -

TRACTOR PREPARATION
Rear Counterweight
Rear Counterweight
Rear CounterweightRear Counterweight
CAUTION:
CAUTION: CAUTION:
CAUTION: CAUTION:
Add recommended rear tire liquid
weight, rear wheel or rear ballast for
increased stability.
CAUTION:
CAUTION:
CAUTION: CAUTION:
Do not exceed the manufacturer's rating
for maximum gross vehicle weight. Refer
to Operator's Manual or ROPS serial
plate provided with tractor.
The use of adequate counterweight to counter
balance for maximum loader capacity is
required for safe loader operation.
Weight added to rear of the tractor provides
better traction and easier, more efficient loader
operation. The tractor can be counter weighted
by filling rear tires with liquid calcium solution
and/or by the installation of rear wheel weights.
with loader attachments and equipment
applications. Additional weight can be added by
installation of Three Point Hitch mounted
ballast.
CAUTION:
CAUTION: CAUTION:
Certain specific conditions may not
permit safe use of loader at loader
rating or may require more careful
restricted operation at the rated load.
Refer to Tractor Operator's Manual for
specific recommendations on counterweight
ROPS System
ROPS System
ROPS SystemROPS System
The tractor must be equipped with an
approved ROPS System to ensure adequate
operator's protection.
Tractor Hydraulic System
Tractor Hydraulic System
Tractor Hydraulic SystemTractor Hydraulic System
Tractor operation in a loader application
significantly increase demands on the tractor
Hydraulic System. Check the tractor Hydraulic
system fluid level daily. Refer to your tractor
Operator's Manual maintenance section for
instructions regarding tractor hydraulic system
maintenance.Additional counterweight requirements will vary
Adhere to recommendation in your Tractor
Operator's Manual concerning hydraulic fluid
and filter specifications, and change intervals.
CAUTION:
CAUTION:
CAUTION:CAUTION:
The tractor/loader must only be operated with all safety equipment properly installed.
TRACTOR TIRES
TRACTOR TIRES Wheel Tread Settings
TRACTOR TIRESTRACTOR TIRES
Selection of tires(size, profile, tread type)
should be restricted to tire recommendations as
specified by
Tire Inflation
Tire Inflation
Tire InflationTire Inflation
Front tires must be maintained at the maximum
recommended inflation to maintain normal tire
profile with the added weight of loader/material.
Rear tires must be maintained at equal pressure
within the recommended tire inflation range.
Unequal rear tire inflation can prevent loader
attachment from contacting the ground across
its full width.
TYM.
Wheel Tread Settings
Wheel Tread SettingsWheel Tread Settings
Tractor front wheel tread setting must be
restricted to wheel tread spacing
recommended in the tractor Operator's
Manual.
Front Counterweight
Front Counterweight
Front CounterweightFront Counterweight
Use of front counterweight is not
recommended when tractor is being used in a
loader application. Front counterweight adds
unnecessary front axle load in loader
applications.
- 9 -
- 9 -

LOADER OPERATION
ground is not recommended.
mainframe
to
drop
suddenly,
causing
damage
may cause unnecessary damage to the loader or
ground is not recommended.
mainframe
to
drop
suddenly,
causing
damage
CAUTION:
CAUTION: 5. Don't hurry the learning process or take the
CAUTION:CAUTION:
The tractor/loader should only be
operated with all safety equipment
properly installed.
Precautionary Notes
Precautionary Notes ease it downward slowly. Never drop a
Precautionary NotesPrecautionary Notes
Do not lower the edge of the bucket too low
for loading. Keep the bottom of the bucket
level with the ground when loading.
Important:
Important: Do not use the bucket for
Important:Important:
pushing down material with bucket cylinders
partially extended. Damage to the cylinders
may result.
Important:
Important:
Important:Important:
Do not tip bucket cutting edge down(fully
extended bucket cylinders) during backfilling/
backgrading operations.
Important:
Important: the fittings are leaking or if the hoses are
Important:Important:
Operation with front tractor wheels off the
unit for granted. Ease into it and become
familiar with your new loader and tractor.
CAUTION:
CAUTION: When lowering a heavy load,
CAUTION: CAUTION:
loaded attachment and "catch it hydraulically".
Stopping a load after it has gained downward
momentum places undue strain on the unit and
tractor or even worse, personal injury.
CAUTION:
CAUTION: Before disconnecting hydraulic
CAUTION: CAUTION:
lines, relieve all hydraulic pressure.
Escaping hydraulic oil under pressure can have
sufficient force to penetrate the skin causing
serious personal injury. If injured by escaping
hydraulic oil seek medical attention immediately.
CAUTION:
CAUTION: Do not operate the loader if
CAUTION:CAUTION:
damaged. A sudden line burst would cause the
to the tractor or loader or injury to personnel.
Position vehicle to be loaded as near the pile
Initial Loader Operation
as possible and in such a direction as to
minimize the amount of tractor turning
required to dump.
Do not lower the loader with the tractor
engine shut off.
Keep the unit clean and perform regular
service. Observe safety messages whenever
cleaning, servicing, or lubricating.
We urge you to follow this advice:
1. Read and understand this manual as well
as the Tractor Operator's Manual.
2. Remember and observe the Safety
Precautions brought to your attention in this
manual, the tractor manual and on the
machinery itself.
3. Use good common sense in the everyday
operation of this unit.
Safety recommendations can never be all- Cold Weather Operation
inclusive and you are responsible for
watching out for and avoiding unsafe
conditions.
4. Never exceed the limits of a piece of
machinery. If its ability to do a job or to do
so safely is in question, don't try it.
Initial Loader Operation
Initial Loader OperationInitial Loader Operation
Before operating the loader, fully raise and lower
the boom two or three times. Then raise the
bucket approximately four(4) feet above the
ground and cycle the bucket cylinders three
times. Lower the bucket to the ground. Check
the tractor hydraulic oil and the correct oil level.
CAUTION:
CAUTION:
CAUTION: CAUTION:
Before leaving the machine, stop the engine,
remove the key, place all controls in neutral, and
either set the parking brake or place tractor in
park as equipped.
Always keep cylinders in a retracted position
when the loader is not in use to guard against
rust and contamination which may cause
damage to the cylinder rods or hydraulic system.
Cold Weather Operation
Cold Weather OperationCold Weather Operation
For smooth operation in cold weather, let the
tractor warm up. Slowly cycle the lift and bucket
cylinders several times to warm the oil in the
hydraulic system. The loader may operate
erratically until the hydraulic oil has warmed to
operating temperatures.
- 10 -
- 10 -

LOADER OPERATION
When
scraping,
the
Boom
lever
must
be
used
to
needed
to
dump
the
bucket.
Make
sure
to
When
scraping,
the
Boom
lever
must
be
used
to
needed
to
dump
the
bucket.
Make
sure
to
CAUTION:
CAUTION:
CAUTION: CAUTION:
Operate controls only when seated in
the operator's seat.
Loading Bucket
Loading Bucket
Loading BucketLoading Bucket
For the most efficient loading, slowly drive
the tractor straight into the material to be
loaded and increase speed only after contact
has been made. Roll the attachment back a
small amount and slowly lift to break away
the material. As the load increase, continue
rolling the attachment back so as to get the
maximum load. Remove the top levels first
when loading from large piles of material.
When bucket is full, raise loader so the
bucket is clear of material and slowly back
out of the pile.
Dumping Bucket
Dumping Bucket
Dumping BucketDumping Bucket
When in the dump area slowly drive the
tractor forward and raise the loader at the
same time. Raise the loader to the height
CAUTION:
CAUTION:
CAUTION: CAUTION:
Stop the loader arms gradually when lowering or
lifting.
WARNING:
WARNING:
WARNING:WARNING:
A loaded Bucket should be transported in a low
position at low ground speeds. Make turns
slowly and use the tractor brakes cautiously. A
full bucket in the raised position alters the center
of gravity location of the machine and increases
the possibility of accidents.
CAUTION:
CAUTION:
CAUTION:CAUTION:
Do not stand, walk or work under a raised loader
unless it is securely blocked or held in position.
Accidental movement of a control lever or leak
in th hydraulic system could cause the loader to
drop, or attachment to dump, resulting in
serious injury or death.
Scraping
Scraping
ScrapingScraping
keep a level bucket position to prevent spilling
from the bucket. Dump the bucket, and keep
all movements smooth.
Transporting a Loaded Bucket
Transporting a Loaded Bucket Backfilling/Backgrading
Transporting a Loaded BucketTransporting a Loaded Bucket
Transport material with the bucket as low as
possible to prevent spilling and keep
maximum stability. The loader must be in a
position that will not block the operators'
vision. a loaded bucket must not be
transported in the upright position or at
excessive speed.
Observe the following safety warning when
transporting a loaded bucket.
CAUTION:
CAUTION:
CAUTION: CAUTION:
When using a loader, be aware of bucket
location at all times. When raising a loader
with bucket rolled back, material can dump
onto tractor causing damage to tractor or
injury to operator.
keep the bucket on the ground horizontally. The
bucket must be kept level to the ground during
scraping operations.
Backfilling/Backgrading
Backfilling/BackgradingBackfilling/Backgrading
When "Backfilling" or "Backgrading", position
the bucket so it is level on the ground. Do not
dump material from bucket following each pass,
as additional weight of material in bucket will
assist in "Backgrading" and increases loader
efficiency during "Backfilling".
Controlled Rate of Loader Functions
Controlled Rate of Loader Functions
Controlled Rate of Loader FunctionsControlled Rate of Loader Functions
By "feathering" the control lever, reduced
operational speeds can be controlled. This
action controls the position of the valve spool in
the valve body and regulates flow of oil to/from
cylinders. It is important utilize this operational
practice when lowering loader boom when the
bucket is loaded with material.
WARNING:
WARNING:
WARNING:WARNING:
Contact with overhead power lines can cause
severe electrical burns or death from
electrocution. Make sure there is clearance
between raised equipment and over head
power lines.
- 11 -
- 11 -
 Loading...