


Juice Box- Fuel Controller
V.A.L.E.
Two Brothers Racing
V A R I A B L E A X I S L O C K I N G E X H A U S T
Juice Box™ - Fuel Controller
2008-09 Kawasaki Concours14 Installation & Operation Manual
Part # 0 08-192
Thank you for purchasing a genuine Two Brothers Racing
JUICE BOX™. This product represents a radical step
forward in tuning fuel-injected motorcycles and ATVs for
optimal performance using “load-based” technology.
We at Two Brothers Racing hope that you will find this
development as exciting and useful as we do. And
remember: Proper Fuel = Maximum Power!
1. Make sure the vehicle is completely cool before starting
TM
the installation. Also, make sure the vehicle is secure and
will not roll around.
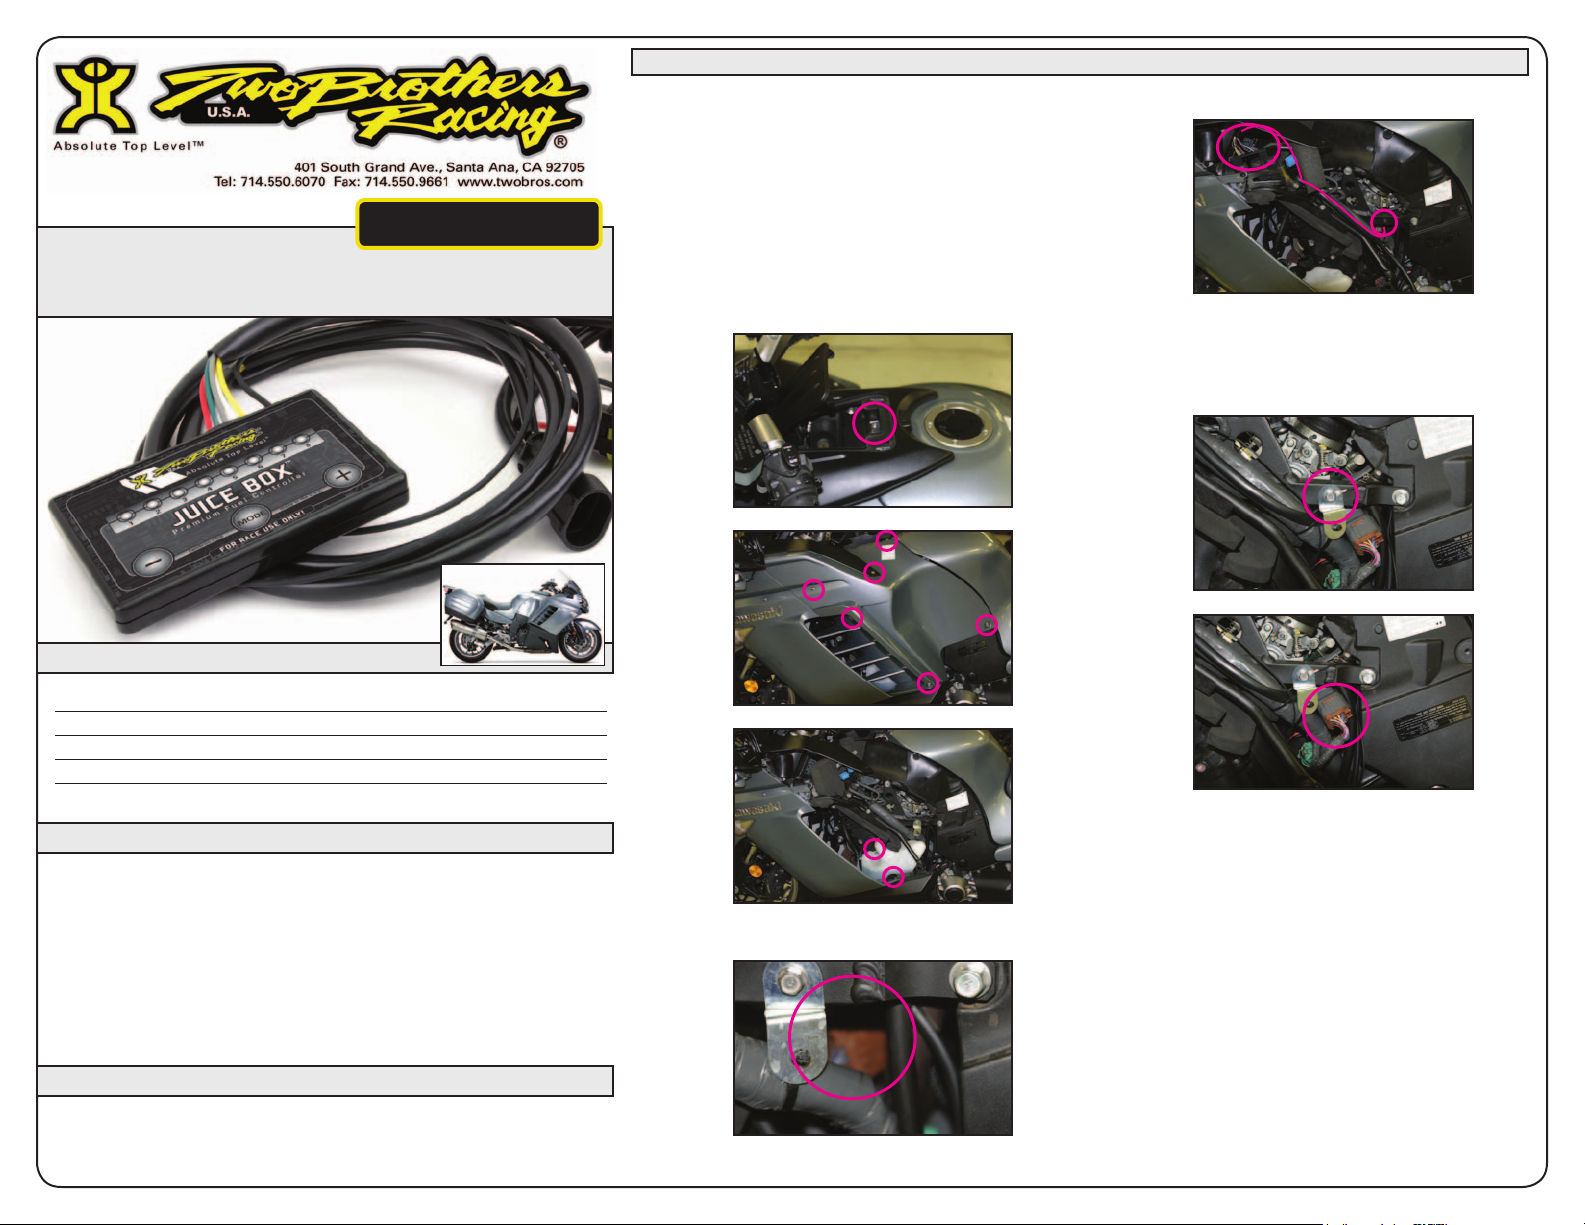
2. Remove the seat assembly.
3. Remove storage compartment cover. (Fig.1)
Fig 1
Installation Instructions
7. Route JUICE BOX™ wires down main wire harness on left
side of motorcycle. (Fig.5)
Fig 5
8. We attached the JUICE BOX™ using the supplied velcro
tabs to the relay cluster located under left side upper
fairing cover.
9. Remove this bracket to make JUICE BOX™ installation
easier and plug JUICE BOX™ into harness as shown.
(Fig.6)
Fig 6
Parts Incuded
Qty. Description Part Number
1 Juice Box™ Fuel Control Kit 008-192 (#9140098)
3 Zip Ties
1 Adhesive Velcro Square
IMPORTANT - PLEASE READ CAREFULLY
We recommend that this performance part be installed by a qualied motorcycle
technician. If you have any doubts as to your ability to install this performance
part, please consult with your local motorcycle dealer. Read all instructions
rst before starting installation. Make sure the vehicle and exhaust system are
completely cool before starting the installation. Also, make sure the vehicle is
secure during installation. Be sure to save all stock components for possible use
later.
The Juice Box™ is legal ONLY for closed course race vehicles. The Juice Box™ is
not applicable, nor inteded for use on EMISSIONS CONTROLLED street, highway
or off-road vehicles. The Juice Box™ is not applicable, nor inteded for use on
aircraft.
Warranty
Two Brothe rs Racing w arrants tha t this produ ct carries a warranty for 2 years from date of purchase against or iginal
defects in materia ls and work manship. S hould this product fai l to perfor m for eithe r of the ab ove reasons , Two Brothers
Racing will repair or replace it with an equivalent product at no charge, except for postage, to the origin al retail pu rchaser.
To obtain t he benefits of this wa rranty, the r etail purch aser must r eturn the pr oduct and p roof of pur chase to th e place of
origina l purchase.
4. Remove left side fairing. (Fig.2)
Fig 2
5. Remove resivoir tank. (Fig.3)
Fig 3
6. Locate BROWN gain plug connector under throttle bodies
and unplug. This is where you will plug the JUICE BOX™
into the main harness. (Fig.4)
Fig 4
10. Re-attach bracket with the ground wire attached. (Fig.7)
Fig 7
11. Make sure all wires are secured.
NOTE: Re check your wire routing and JUICE BOX™ location
and make certain that in no way the wires can come into
contact with any moving parts or high heat source and that
the JUICE BOX™ is mounted in a way as to not cause a
handling problem with the machine.
12. Re-install reservoir tank and fairing.
13. Start the bike. The green LED should now be scrolling for
about 3-5 seconds and then go to 1 or more steady green
LED’s or a single slow flashing green LED. If the number
1 green and number 8 red LED continue flashing after
startup, an injector wiring error is indicated. Re-check
the wires from the JUICE BOX™ and make sure they
are connected to the proper wires of your bike’s stock
harness. MAKE SURE you have the correct connectors
selected in the stock harness. DO NOT PROCEED UNLESS
ABOVE CONDITIONS ARE MET.
Continued on page 2
 Loading...