

Page 1
Installation Instructions
V.A.L.E.
2011 Suzuki
V A R I A B L E A X I S L O C K I N G E X H A U S T
GSX-R600 / 750
V.A.L.E .™ Slip- on Exhau st System with M-2 Exhaust Canister
Part # 0 05-30404 06V, 005- 3040407V, 005-3 040408V
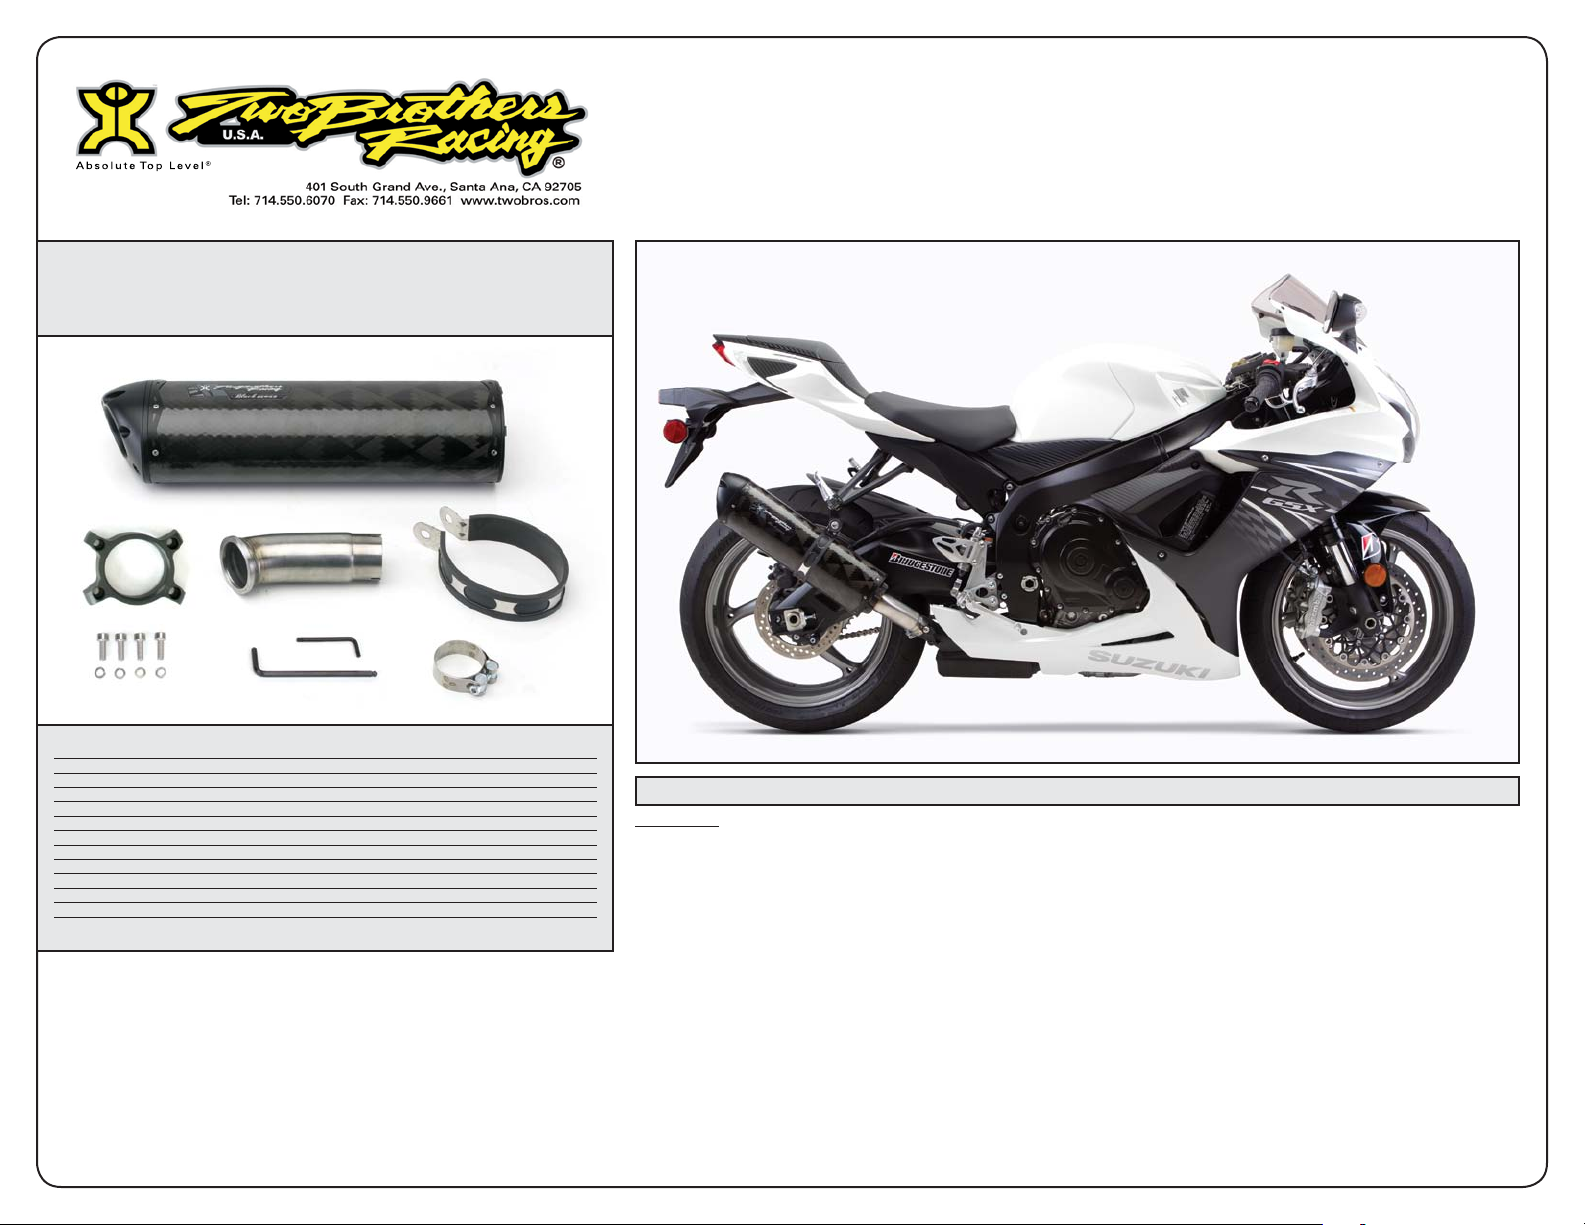
Parts List
Qty. Description Part Number
1 M-2 Muffler Canister Varies
1 Canister Clamp with Rubber Liner Varies
1 Header Kit 005-30404S
1 HARDWARE KIT 005-304-3
2 X-Ring (half) 005-7-2-2
1 66mm Barrel Clamp 005-27-61MSH
4 6x20mm Socket Head Cap Screws 005-SH620
4 6mm Split Lock Washer 005-WL6
1 T20 Torx Hex Key 005-9-15820
1 5mm Ball End Hex Key 005-9-18610
1 TBR Sticker Kit 015-10212
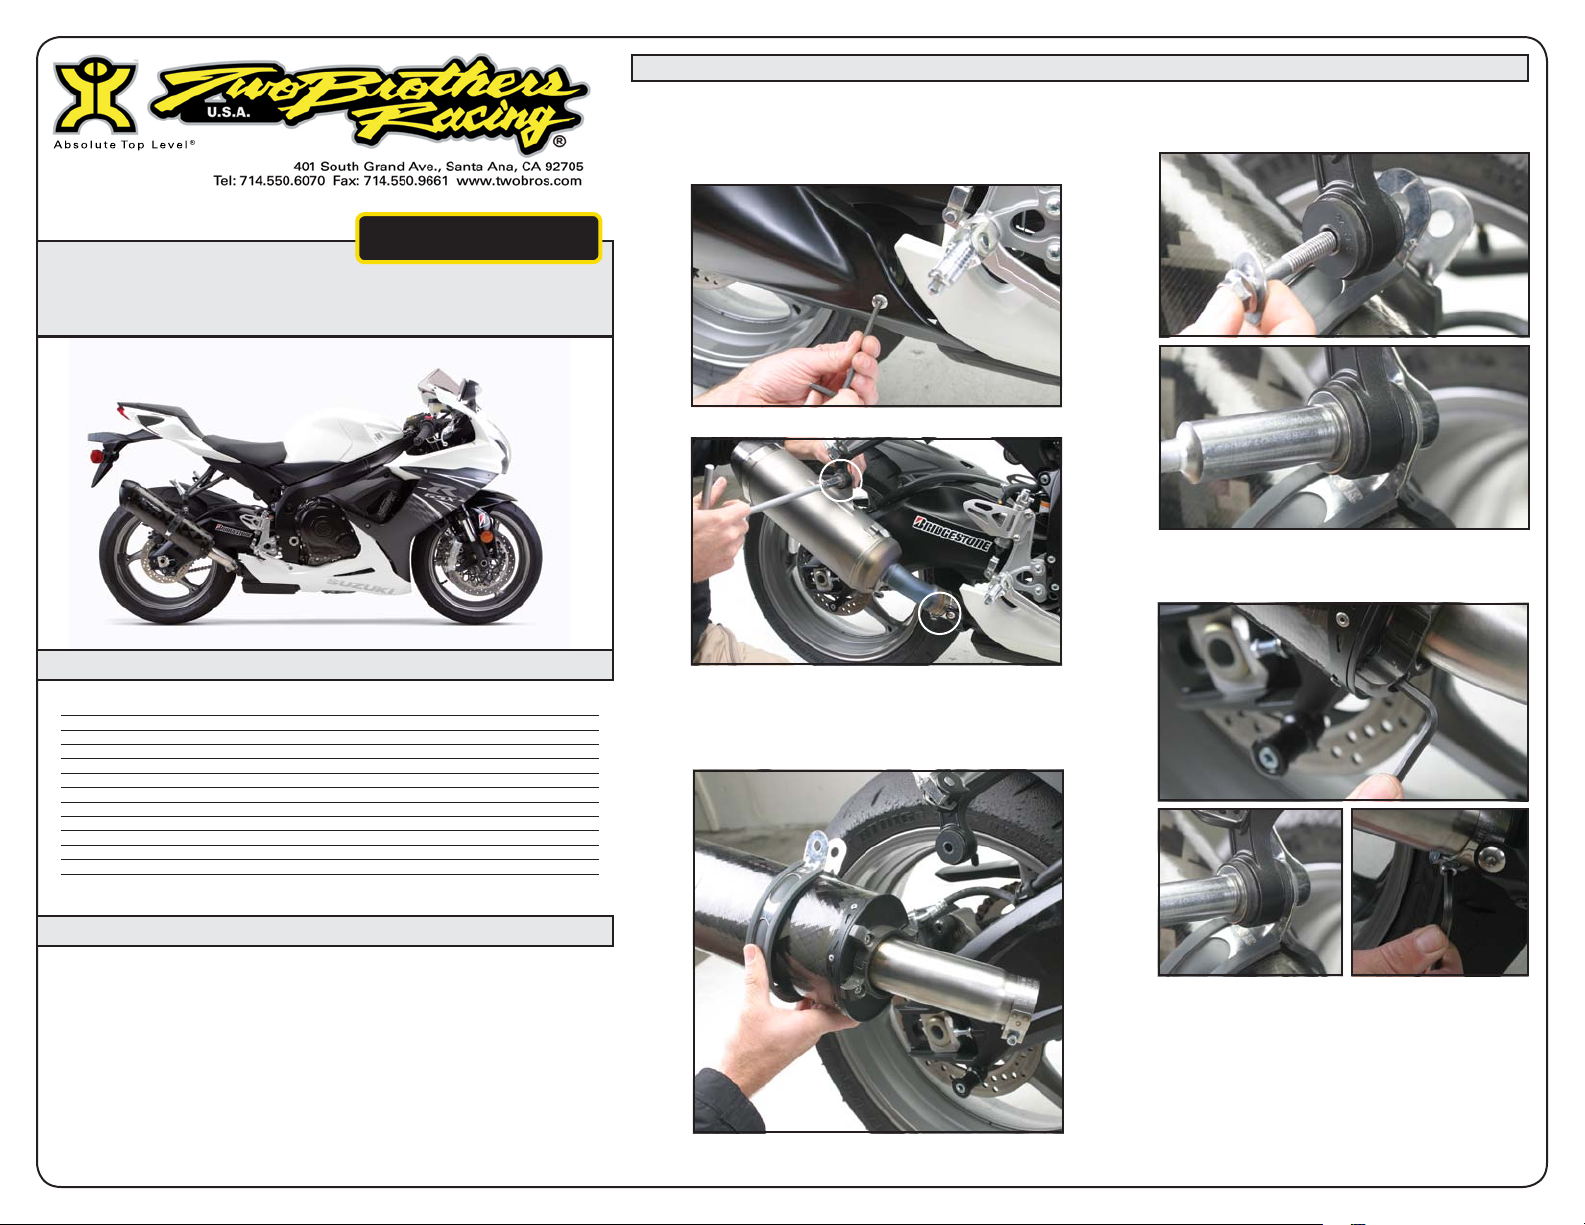
1. Make sure the bike is completely cool before
starting the installation. Make sure the bike is
secure on a centerstand or ideally a service lift.
5. Loosely attach muffler to bike using the OEM bolt
and nut and install muffler clamp to inside of
passenger footpeg.
2. Remove OEM muffler heatshield.
TM
3. Remove OEM muffler assembly.
6. Check for clearance and alignment, then tighten all
the bolts in this order: X-ring bolts, muffler mount,
and finally barrel clamp.
4. Attach muffler to TBR slip system using the supplied
X-ring, 6x20mm socket head cap screws and lock
washers that are provided, leave loose for now.
Slide rubber lined muffler clamp and barrel clamp
on and install to bike.
IMPORTANT - PLEASE READ CAREFULLY
We recommend that this performance part be installed by a qualied
motorcycle technician. If you have any doubts as to your ability to install this
performance part, please consult with your local motorcycle dealer. Read all
instructions rst before starting installation. Make sure the motorcycle and
exhaust system are completely cool before starting the installation. Also,
make sure the bike is secure on a centerstand or ideally a service lift during
installation. Be sure to save all stock components for possible use later.
Warr ant y I nfor mat ion
Two Brot hers Rac ing prod uct s are int end ed fo r cl osed cou rse comp eti tion pur pose s on ly, a nd t here for e are
sol d “a s is” wit hout war rant y. Two Brot hers Rac ing s pec ific ally dis clai ms a ny wa rran tie s of m erc hant abil ity
or fitn ess f or a part icu lar p urpo se a nd di scl aims all resp onsi bili ty f or co nse quen tial and inci den tal d amag es
or any othe r lo sse s ari sin g fro m th e us e of thes e pr oduc ts o r pa rts. Not tes ted for use with OEM or
aft erm arke t ac ces sori es.
7. Before you run the bike, clean off all fingerprints
and dirt, as any oily residue will etch the metal and
become somewhat permanent when the system
gets hot. Run the bike and enjoy. It is normal for
some white smoke to appear the first time you start
the bike. This is packing/manufacturing oil from
inside the pipe burning off. Check for gaps or leaks.
If you find a leak, a little high temperature silicon
sealant should fix it. After 50 to 100 miles, recheck
all fasteners for tightness.
Page 2
2011 Suzuki
GSX-R600 / 750
V.A.L.E .™ Slip- on Exhau st System with M-2 Exhaust Canister
Part # 0 05-30404 06V, 005- 3040407V, 005-3 040408V
Qty. Description Part Number
1 M-2 Muffler Canister Varies
1 Canister Clamp with Rubber Liner Varies
1 Header Kit 005-30404S
1 HARDWARE KIT 005-304-3
2 X-Ring (half) 005-7-2-2
1 66mm Barrel Clamp 005-27-61MSH
4 6x20mm Socket Head Cap Screws 005-SH620
4 6mm Split Lock Washer 005-WL6
1 T20 Torx Hex Key 005-9-15820
1 5mm Ball End Hex Key 005-9-18610
1 TBR Sticker Kit 015-10212
Care & Cleaning / Warranty Information
Care & Cleaning
Keep system free of dirt and moisture. Store in a cool, dry place. Make sure vehicle is completely cool before maintenance.
Stainless Header System: Polished stainless steel pipes will turn a light golden hue after a few heat cycles, this is a normal characteristic of high quality stainless steel. Clean using
a mild water based spray cleaner. Always apply cleaner or polish with a soft, clean cloth.
Titanium Header System: Polished titanium pipes will experience color shift ranging from deep blue/purple through amber after a few heat cycles. This is a normal characteristic of
high quality titanium. Clean using a mild water based spray cleaner. Always apply cleaner or polish with a soft, clean cloth.
Polished Aluminum Canisters: Use an aluminum or mag wheel polish to restore the bright finish to factory spec.
Brushed Aluminum Canisters: Clean using a mild water based spray cleaner. Always apply cleaner or polish with a soft, clean cloth.
Carbon Fiber Canisters: Clean using a mild water based spray cleaner. Always apply cleaner or polish with a soft, clean cloth. Always make sure the fiberglass packing inside is in
good condition and not burned out, as exhaust heat inside an empty canister will deteriorate the carbon fiber sleeve.
TBR sells repack kits (Road - #005-10038, Offroad - #005-10038MX) that include everything you need to easily do it yourself.
Titanium Mufflers: For cleaning use a mild water based spray cleaner. Always apply cleaner or polish with a soft, clean cloth. Always make sure the fiberglass packing inside is in
good condition and not burned out, as exhaust heat inside an empty canister will deteriorate the carbon fiber sleeve.
TBR sells repack kits (Road - #005-10038, Offroad - #005-10038MX) that include everything you need to easily do it yourself.
Repack all road canisters every 3,000 miles. Part #005-10038
Repack all offroad canisters after every 10 hours of use. Part #005-10038MX
NEVER dyno test your bike with carbon fiber or titanium canisters installed - the intense heat and lack of cooling air can quickly burn through the canister material. Two Brothers
Racing does not provide a warranty for burned canisters.
 Loading...