

Page 1
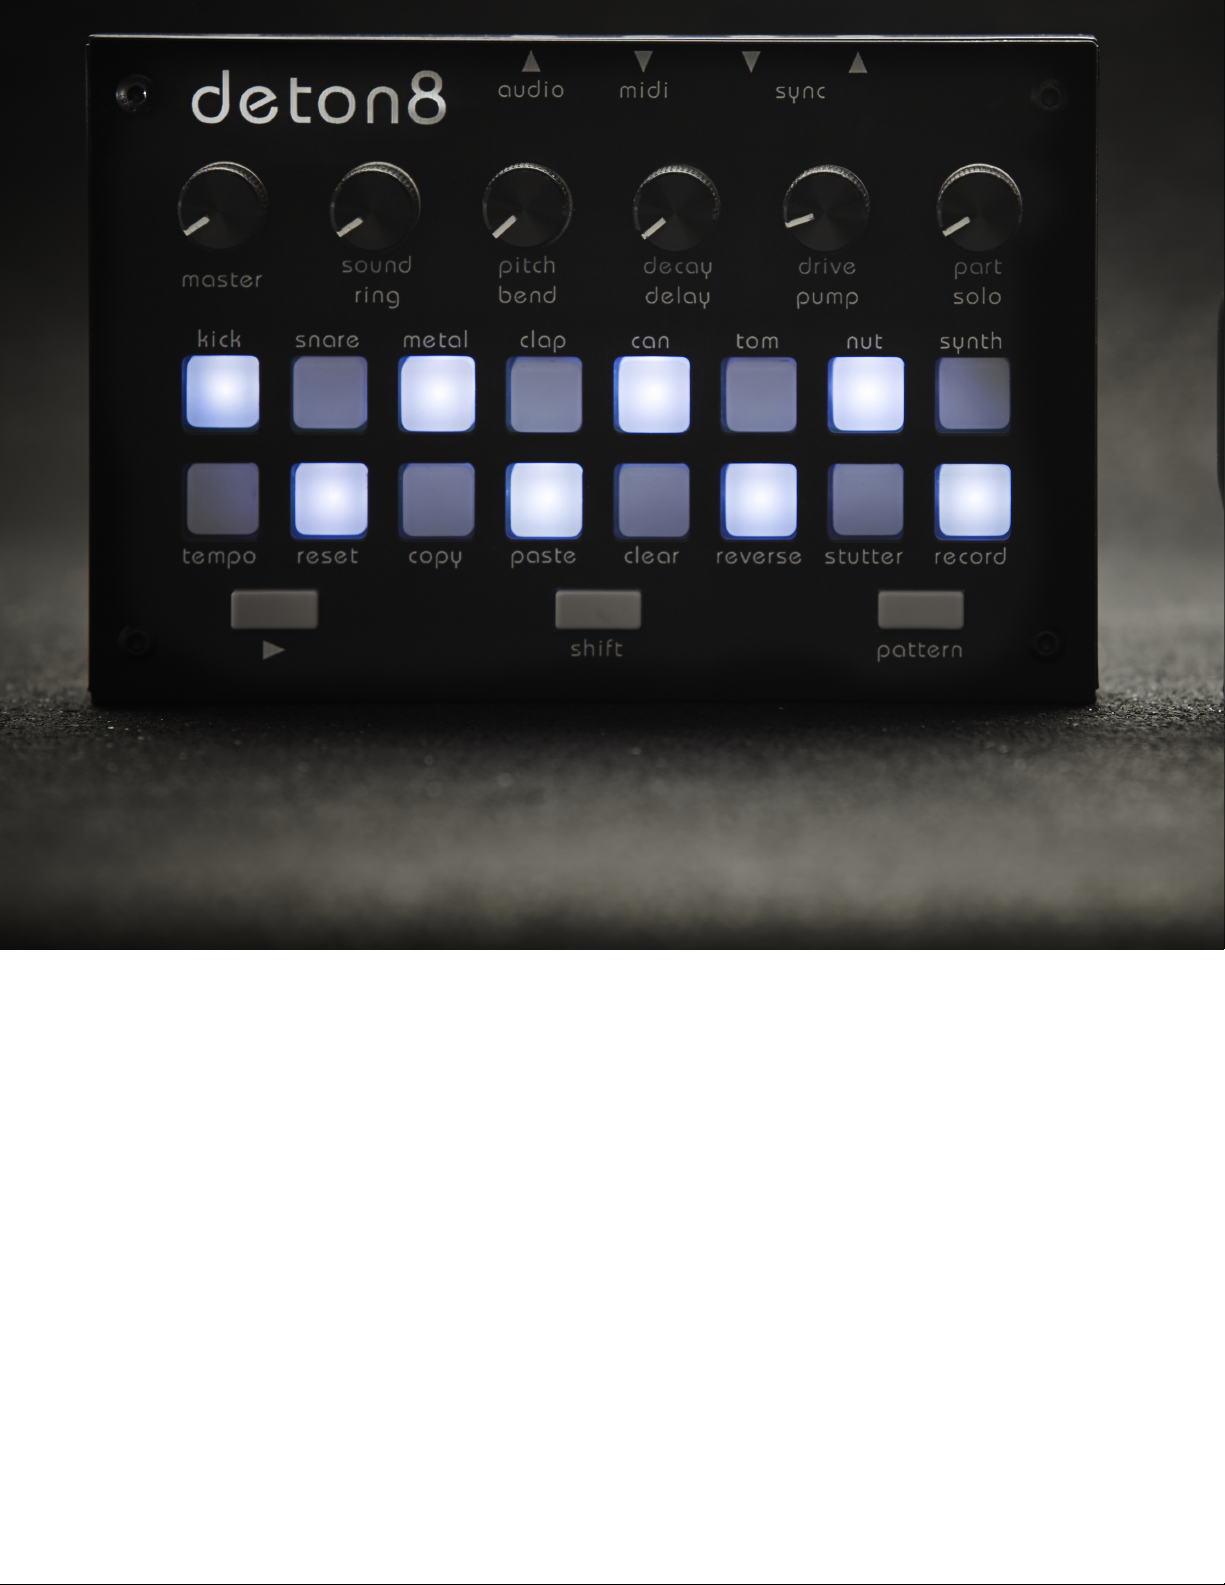
DETON8 USER MANUAL!
7 June 2019!
Thanks for adapting deton8!!
Page 2

1 Quick Start
watch the walkthrough video here!
In this quick start guide we will cover the basics from selecting a voice to creating a
pattern, step by step and real time. We will then add some bass Melodies by modulating
it’s pitch and decay.
1-1 Create a pattern
Let’s start from scratch, you can edit your pattern while the sequencer is running which
is more fun!
-First start deton8 by pressing play
-go to pattern1 by holding pattern and pressing pad1
-clear the pattern by holding shift and pressing clear twice (first time clears the selected
voice, second time clears the entire pattern
lets start with a kick drum
-turn the part knob fully left to select the kick voice.
-press some pads to add some steps
lets add some hi-hats
-turn the part knob right to select metal
-Press some pads to add some hats
Finally lets add some snare
-Turn the part knob slightly left to select snare
-Press some pads to add some snare
You can adjust the volume of the selected part to the desired level by turning the drive
knob.
Let’s add some claps but in real time
Hold shift and press record. Now you can trigger the voice by pressing the top row of
pads.
-when you are ready to record some claps, press record to arm the sequencer (top row
of pads is now flashing)
Tap the clap pad to add some claps to your pattern
Note: Deton8 automatically quantizes the pattern that you are recording.
Now lets add some bass.
-with the recorder still running, tap the SYNTH pad a few time to add notes.
you can now modulate (change over time) the pitch by turning the pitch knob. You can
also do the same for the decay knob.
-Wiggle the pitch and decay knobs until you are happy with your melody.
-Press shift to stop recording mode.
Page 3

2 Patterns
You can create patterns in real time or step by step!
Patterns are automatically saved to memory shortly after the sequencer has been stopped!
Please do not unpower the device immediately after use as you could loose your latest
work!!!!
2-1 Pattern Editing
Select a voice by turning the part knob, and add steps to your pattern by pressing the pads.!
You can clear the steps by pressing shift and clear. !
To clear the entire pattern (all voices) hold shift and press clear twice.!
To randomize the pattern of the selected voice, hold shift and press clear 3 times!
To randomize the pattern of all voices, hold shift and press clear 4 times!
You can copy the selected pattern to any of the 15 other pattern slots using the copy and
paste pads. Hold shift and press copy to copy the selected pattern to memory.!
hold shift and press paste, followed by the pads where you wish to paste the pattern.!
2-2 Pattern Recording (real time)
You can record patterns in real time when the sequencer is running.!
Hold shift and press record to enter record mode.!
Use the flashing tempo pad to turn a metronome on or off.!
In record mode you can preview the parts by pressing the top pads. Nothing is recorded until
the sequencer is armed.!
When you are ready to record the pattern press record to arm the sequencer (the top pads will
flash)!
Now press the top pads to record your pattern.!
You can press the flashing clear pad at any time to start over.!
Page 4

2-3 Modulating Pitch and Decay
You can record the pitch and decay knob movements in real time when the sequencer is
running and armed.!
Hold shift and press record to enter record mode, and press record again to arm the
sequencer.!
(the top row of pads flash when the sequencer is armed). You can now move the pitch and
decay knobs to record their movement. Use the part knob at any time to modulate another
voice.!
2-4 Switching and Chaining Patterns
You can switch to another pattern at any time by holding pattern and pressing any pad. The
pattern will change after the sequencer reaches the last step of the pattern.!
To chain patterns hold pattern and press a sequence of pads without releasing pattern.!
You can chain up to 16 patterns theoretically allowing a pattern of up to 256 steps!
2-5 Shortening Patterns
You can set each pattern to any length between 2 and 16 steps by causing a step to reset the
sequencer.!
Hold shift and press reset to enter reset mode, then without releasing shift press any pad from
2 to 16 to make it reset. To return to a 16 step pattern hold shift and press reset then press the
lit pad. It cancels the reset.!
Page 5

3 Tempo and Sync (master and slave)
3-1 Slave
You can slave deton8 to another sequencer either by MIDI CLOCK (hardware MIDI or MIDI
USB) or by 5V analog sync pulses (1 pulse for 2 beats) on the sync input jack (mono TS).!
3-2 Master
Deton8 transmits a 5V pulse on every 2 beats !
Via the sync output Jack (mono TS).!
3-3 Tempo
When in master mode, you can tap the tempo at any time by holding shift and pressing tempo
multiple times.!
3-4 Swing
Add swing by holding shift and tempo and turning the decay knob. The swing increases as
you turn the knob clockwise.!
Page 6

4 Sound & Effects
You can vary the sounds of some of the voices and add trigger real time effects.!
4-1 Sound knob
You can use the sound knob to:!
-add sub sine wave to the kick!
-add noise to the Snare!
-change the texture of the metal (hi hats) below 50% the kit’s sample is used,!
Above 50%the metal is synthesized by a noise wavetable. You can change the texture of this
wavetable with the pitch knob!
4-2 Ring Modulator
Hold shift and the sound knob activates a master ring modulator. Turn the sound knob to
adjust the frequency of the modulation!
4-3 Pitch (tune)
Use the pitch knob to change the pitch(tune) of the selected voice, you can record the
movements in the record mode (see section 2-3)!
When you hold shift, the pitch knob affects all the voices at once (except for the synth)!
4-4 Decay
Use the pitch knob to change volume decay of the selected voice. This can be used to make
the drum hit longer of shorter. you can record the movements in the record mode (see section
2-3)!
Page 7

4-5 Decay
When you hold shift, the decay knob activates delay on the selected voice when above 50%!
You can change the delay repeat speed by holding shift+play and turning the decay knob!
You can add pitch decay to the delay by holding shift+play and turning the pitch knob.!
At 50% the pitch is unaffected, beyond 50% the pitch rises and below 50% it falls.!
4-6 Drive
Use the drive knob to set the volume of the selected voice.!
Towards the upper limit of the drive knob’s travel deton8 will saturate the selected voice via
bitrate reduction causing it to crunch!
4-7 Pump (side chain compressor)
You can make the selected voice “duck” the other voices resulting in the pump effect like a
side chain compressor. Hold shift and turn the drive knob to increase the effect.!
The more pump you add to the voice, the more it will duck the others!
The other voices are ducked longer as you increase the decay!
4-8 Reverse
A voice can trigger the sample backwards if the reverse is set.!
Hold shift and press reverse to activate this feature.!
Page 8

4-9 Stutter
Deton8 continuously records a portion of audio to its playback buffer.!
The stutter effect plays around with this portion of audio.!
There are 8 stutter modes that can be activated by holding shift and stutter.!
When shift and stutter are held, use the top 8 pads to change modes:!
-Mode 1: beat repeat
The same step is repeated forever. You can change the repeat rate with the decay knob!
You can use the part knob to only repeat a single voice.!
-Mode 2: Grain/Buzz
A portion of audio is looped from the buffer.!
Use the pitch knob to change the pitch of the grain!
Use the decay knob to change the size of the grain!
-Mode 3: Grain/Buzz reversed
A portion of audio is looped backwards from the buffer.!
Use the pitch knob to change the pitch of the grain!
Use the decay knob to change the size of the grain!
-Mode 4: Grain/Buzz ping/pong or scratch
A portion of audio is looped forwards then backwards from the buffer simulating a back and
fourth record scratch.#!
Use the pitch knob to change the pitch of the grain!
Use the decay knob to change the size of the grain!
-Mode 5: Variable Grain
A portion of the audio buffer is looped !
Use the pitch knob to change the pitch of the grain!
Use the decay knob to change the index of the grain in the buffer!
-Mode 6: Falling buzz
A portion of audio is looped and the pitch falls over time.!
Use the pitch knob to change the speed of the falling!
-Mode 7: Rising buzz
A portion of audio is looped and the pitch rises over time!
Use the pitch knob to change the speed of the rising!
Page 9

4-10 Filter
Deton8 has a resonant low pass filter !
Hold shift and pattern to activate the filter!
Use the sound knob to change the cutoff frequency.!
Hold shift+pattern+play and use the sound knob to set the resonance!
5-1 Sample Editor Driver Setup (Windows Only)
You can create and upload kits to your deton8 using the sample editor.!
1-1 Setup!
No drivers should be needed on windows10 but on previous versions please use the included
drivers. For Mac users no drivers are required.!
Here is a video demonstrating the driver setup.!
We need to tell windows to use deton8 as a virtual com port.!
First we install the appropriate driver:!
Example:!
VCP_V1.5.0_Setup_W7_x86_32bits (windows 7, 32bits)!
VCP_V1.5.0_Setup_W8_x64_64bits (windows 8, 64bits)!
Install the driver in a location that you will be able to find easily later.!
Once installed, we go to the device manager.!
Locate and right click deton8 in “Other devices” , choose “update driver software”!
Click “Browse my computer for driver software”!
Click “Let me pick from a list of drivers on my computer”!
Choose “Ports(COM and LPT)” from the list of devices and click “Next”!
Click “Have Disk”!
Browse to the file we installed called “stmcdc”!
Click “Next", “Yes” and close window.!
Now you can use the Editor.!
Page 10
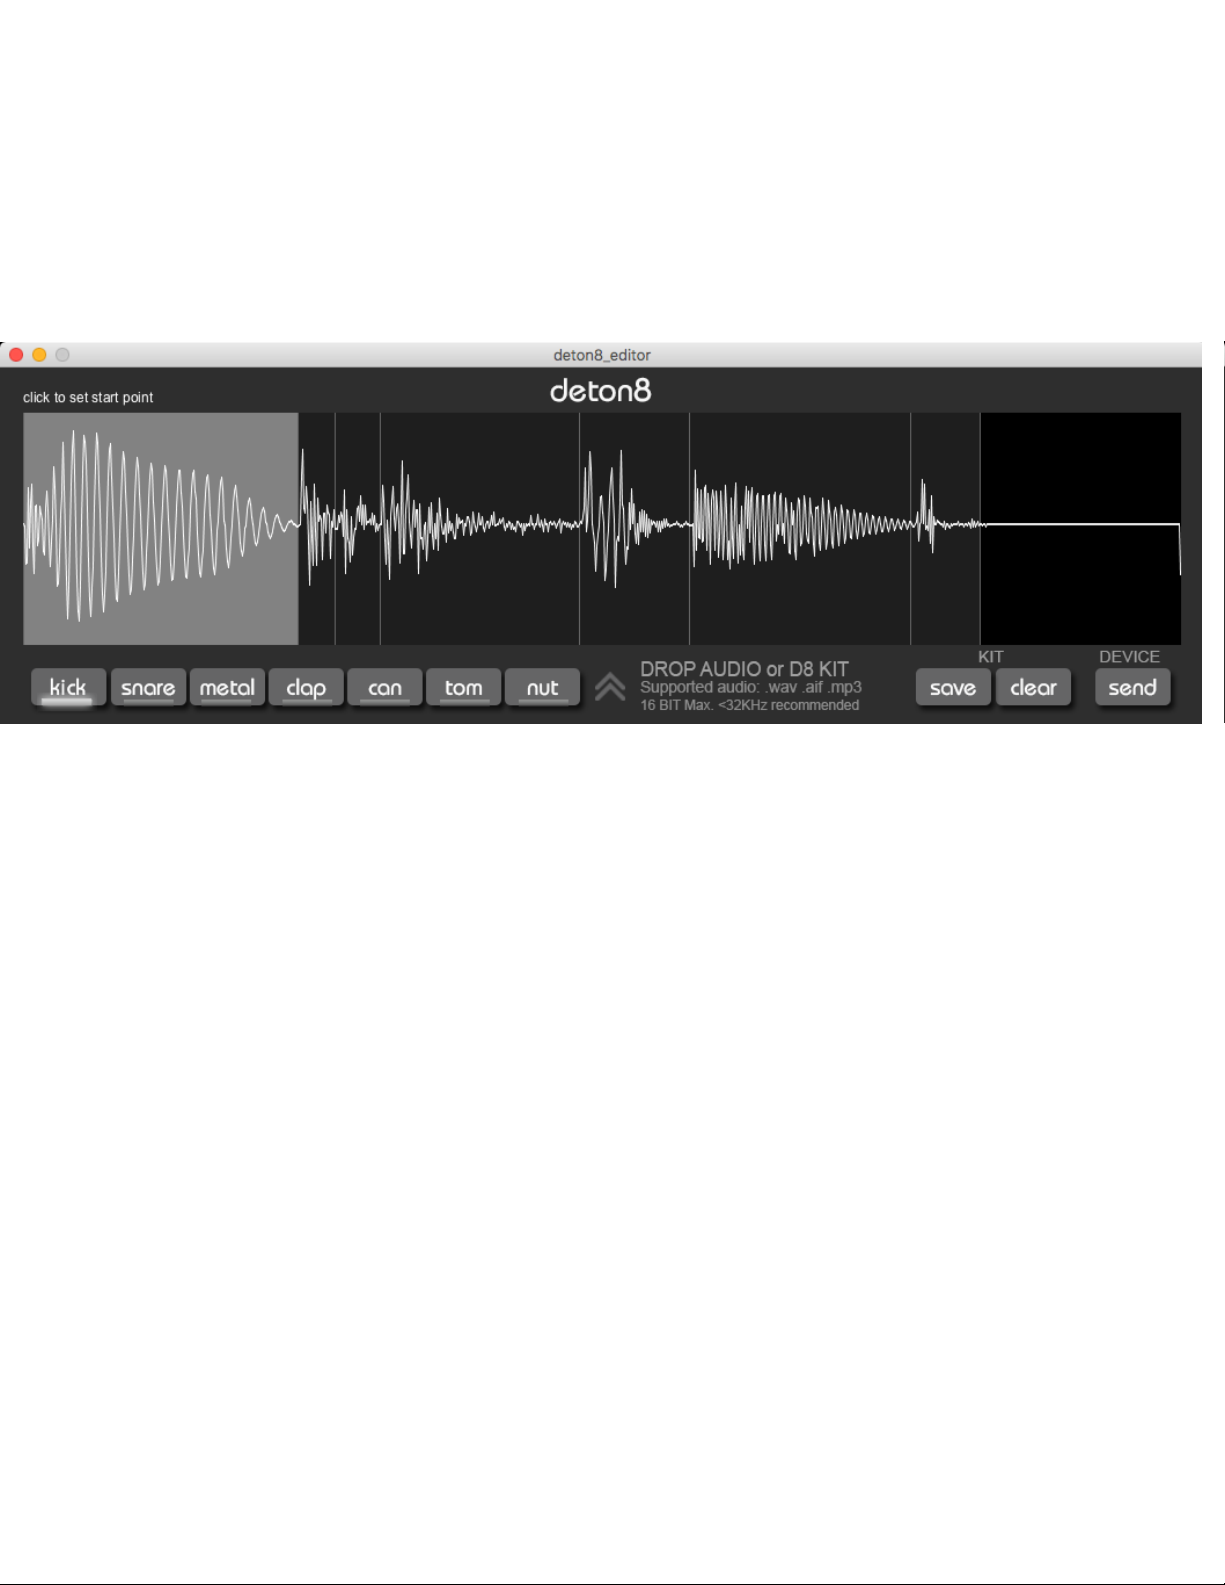
5-2 Using the Sample Editor
!
Simply drag the D8 kit files onto the editor window to load them.!
Use the bottom left 7 buttons to select and preview a sample,!
You can redefine the in and out locations of the selected sample simply by dragging the cursor
over the waveform from left to right.!
Sample locators can overlap (a single voice can contain multiple waveforms)!
5-3 Recommended Audio Format
The editor can import WAV or AIF files, of up to 16BIT but it is recommended to use
8BIT WAV 32HZ files.
Higher resolutions and sample rates will automatically be converted down to 8bit.
Deton8 has a limited amount of space (56K), please keep your samples short.
If the sample is loo large, the sample rate will be reduced to fit the audio
which will result in quality loss and pitch raising.
Page 11

6 Midi Implementation
You can use MIDI CC to change the parameters of deton8 according o the following chart:!
PARAMETER
MIDI CC NUMBER
MASTER VOLUME
7
VOLUME VOICE 1
10
VOLUME VOICE 2
11
VOLUME VOICE 3
12
VOLUME VOICE 4
13
VOLUME VOICE 5
14
VOLUME VOICE 6
15
VOLUME VOICE 7
16
VOLUME VOICE8
17
PITCH VOICE 1
30
PITCH VOICE 2
31
PITCH VOICE 3
32
PITCH VOICE 4
33
PITCH VOICE 5
34
PITCH VOICE 6
35
PITCH VOICE 7
36
PITCH VOICE 8
37
DECAY VOICE 1
20
DECAY VOICE 2
21
DECAY VOICE 3
22
DECAY VOICE 4
23
DECAY VOICE 5
24
DECAY VOICE 6
25
Page 12

7 Firmware updates
While we strive to deliver a bug-free product, it is likely that firmware updates will become
available over time.!
Please follow the instructions on this web page for a detailed walkthrough:!
www.twisted-electrons.com/update!
If you have ideas for new features or If you find bugs, feel free to report them and we will work
on them ASAP.!
PARAMETER
MIDI CC NUMBER
DECAY VOICE 7
26
DECAY VOICE 8
27
STUTTER ON/OFF
40
STUTTER RATE
41
STUTTER PITCH
42
FILTER ON/OFF
43
FILTER CUTOFF FREQUENCY
44
FILTER RESONANCE
45
RINGMOD ON/OFF
46
RINGMOD X
47
 Loading...