

Twinhead 7260NG User Manual
EN-1

Table of Contents
BEFORE YOU START ...................................................................................... 4
ACKAGE CONTENTS ..................................................................................... 4
P
P
RODUCT OVERVIEW .................................................................................... 5
Front View ............................................................................................................. 5
Back View .............................................................................................................. 6
Bottom View .......................................................................................................... 7
Left View ............................................................................................................... 7
Right View ............................................................................................................. 8
STATUS INDICATORS ..................................................................................... 8
GETTING STARTED .................................................................. 9
INSTALLING THE BATTERY ............................................................................... 9
Charging the Battery ............................................................................................... 9
When to replace the Battery Pack ........................................................................... 10
Removing the Battery ........................................................................................... 10
CONNECTING THE POWER ............................................................................. 11
Connecting the AC Adapter .................................................................................... 11
Using Battery Power .............................................................................................. 11
STARTING YOUR TABLET PC .......................................................................... 12
Turning On Your Device ......................................................................................... 12
Turning Off Your Device ......................................................................................... 12
OPERATING YOUR TABLET PC .................................................... 13
SWITCHING THE SCREEN PANEL (WINDOWS 8 ONLY) ............................................. 13
Start screen ......................................................................................................... 13
Desktop ............................................................................................................... 14
Apps view ............................................................................................................ 16
USING THE QUICK MENU.............................................................................. 17
Quick Menu Overview ............................................................................................ 17
Configuring the SETUP Menu Settings ..................................................................... 20
USING THE CAMERA.................................................................................... 25
Built-in Camera Application (Windows 8 only) .......................................................... 25
Durabook Camera Scan Application (Windows 7 only) ............................................... 26
MAKING CONNECTIONS ........................................................ 30
INSTALLING THE MEMORY CARD...................................................................... 30
I
NSTALLING THE SIM CARD .......................................................................... 31
ONNECTING THE MICROPHONE/HEADSET ................................................................. 31
C
C
ONNECTING USB DEVICES .......................................................................... 32
C
ONNECTING TO WIRELESS CONNECTIONS ......................................................... 33
EN-2

USING THE BIOS SETUP UTILITY .......................................... 37
BIOS SETUP MENU.................................................................................... 37
AIN MENU ............................................................................................. 39
M
A
DVANCED MENU ...................................................................................... 40
B
OOT MENU............................................................................................. 41
S
ECURITY MENU........................................................................................ 42
S
AVE &EXIT MENU .................................................................................... 43
SPECIFICATIONS .................................................................. 44
APPENDIX ............................................................................. 49
COPYRIGHT.............................................................................................. 49
R
EGULATORY STATEMENT.............................................................................. 49
Federal Communications Commission Statement ...................................................... 49
Declaration of Conformity ...................................................................................... 49
RF exposure warning ............................................................................................. 50
Canada, Industry Canada (IC) Notices ..................................................................... 50
Battery Disposal ................................................................................................... 51
CLASS 1 LASER PRODUCT ..................................................................................... 51
SAFETY INSTRUCTIONS ................................................................................ 53
EN-3
Before You Start
Before You Start
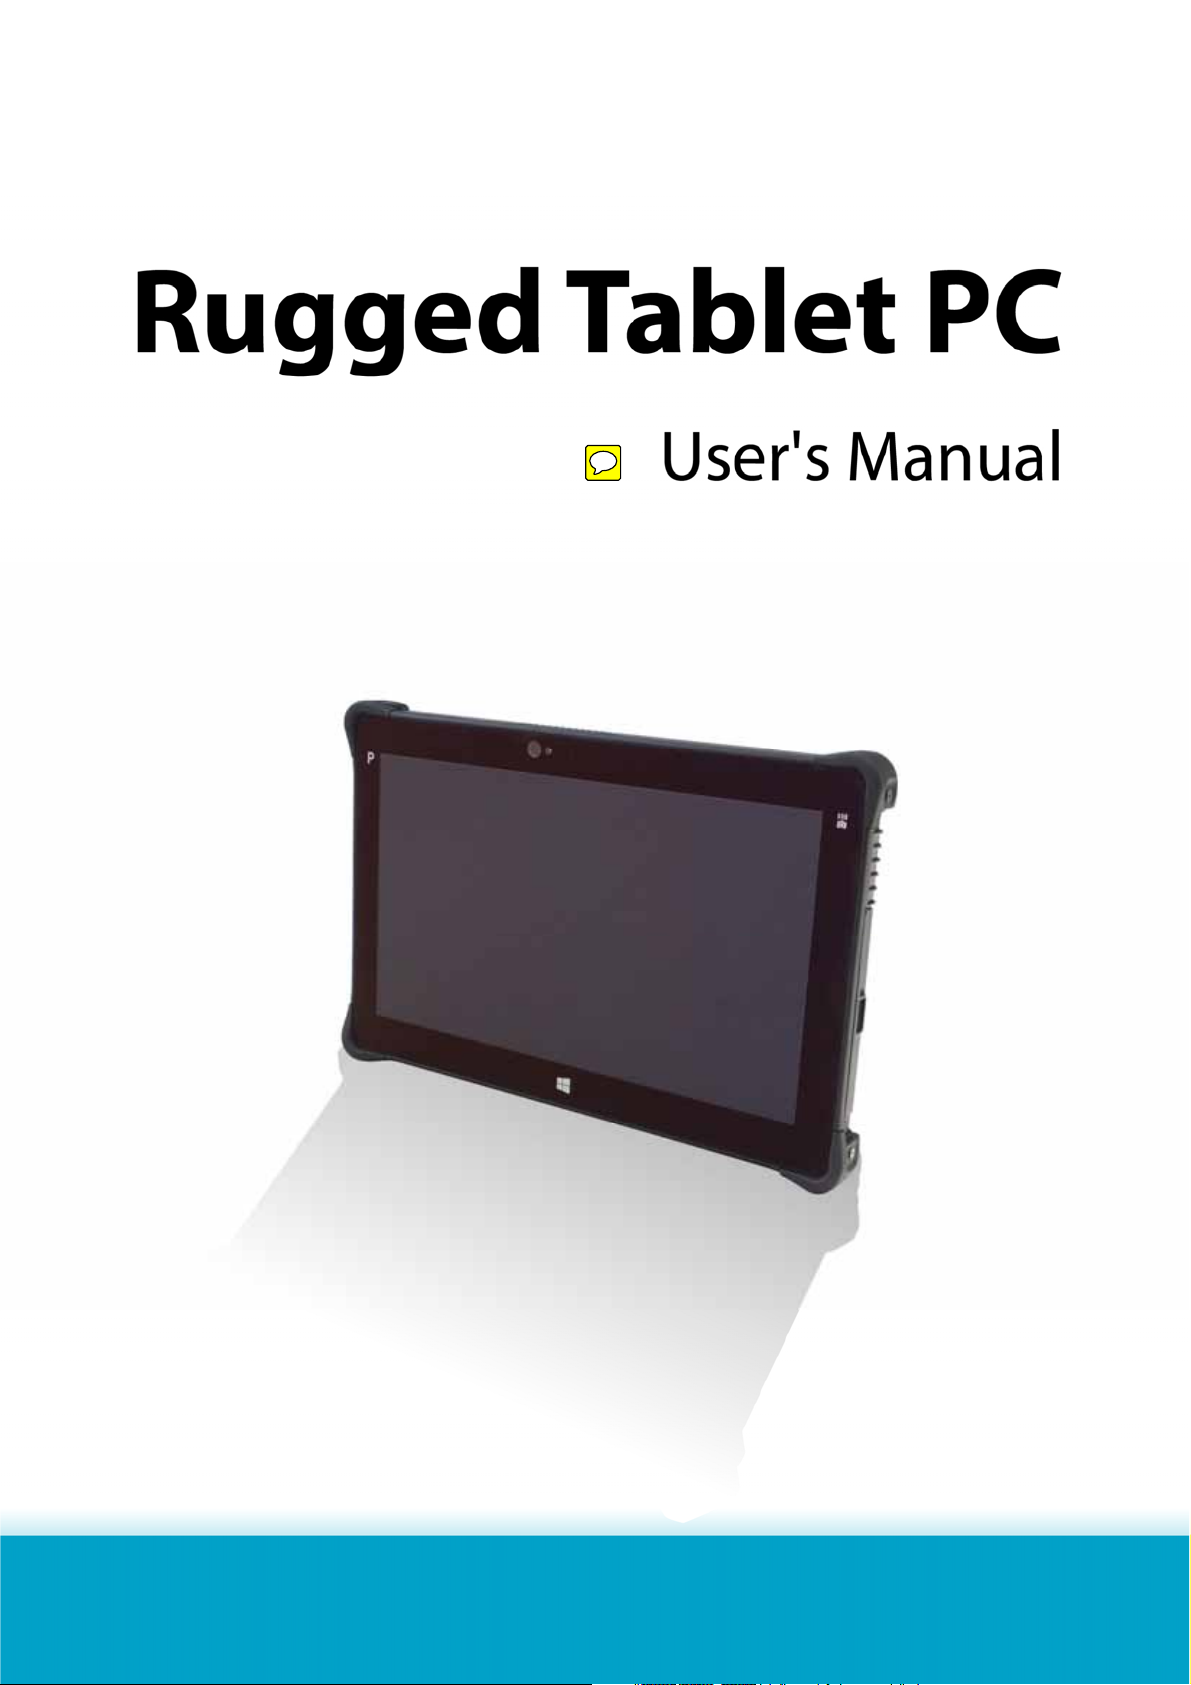
Congratulations on your purchase of this tablet PC.
This rugged tablet PC is portable and provides users with maximum mobile
computing experience in a wide range of working environments. Before you
begin using your tablet PC, read this chapter to familiarize yourself with the main
components installed in the system.
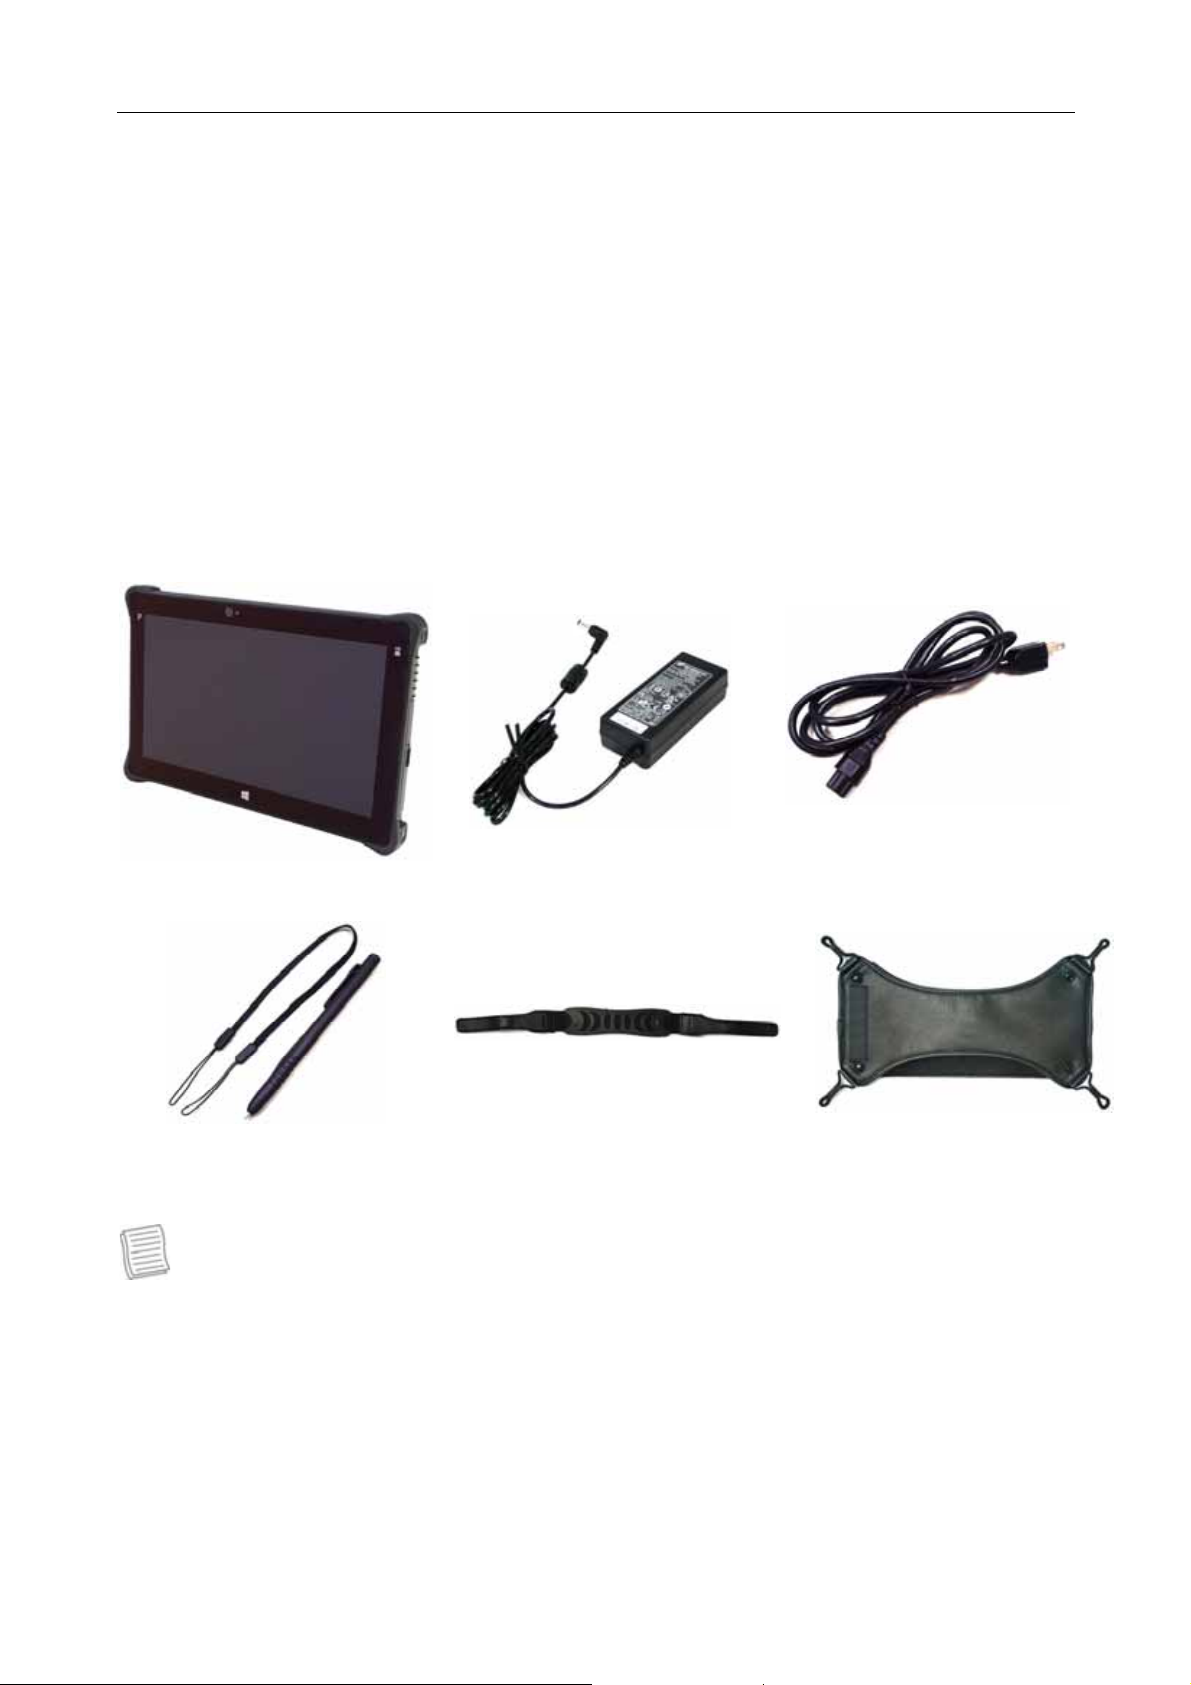
Package Contents
If any of following items is damaged, please contact your retailer.
Tablet PC AC adapter Power cord
Stylus Pen Hand strap X-strap
NOTE
• The pictures are for reference only, actual items may slightly differ.
EN-4
Product Overview
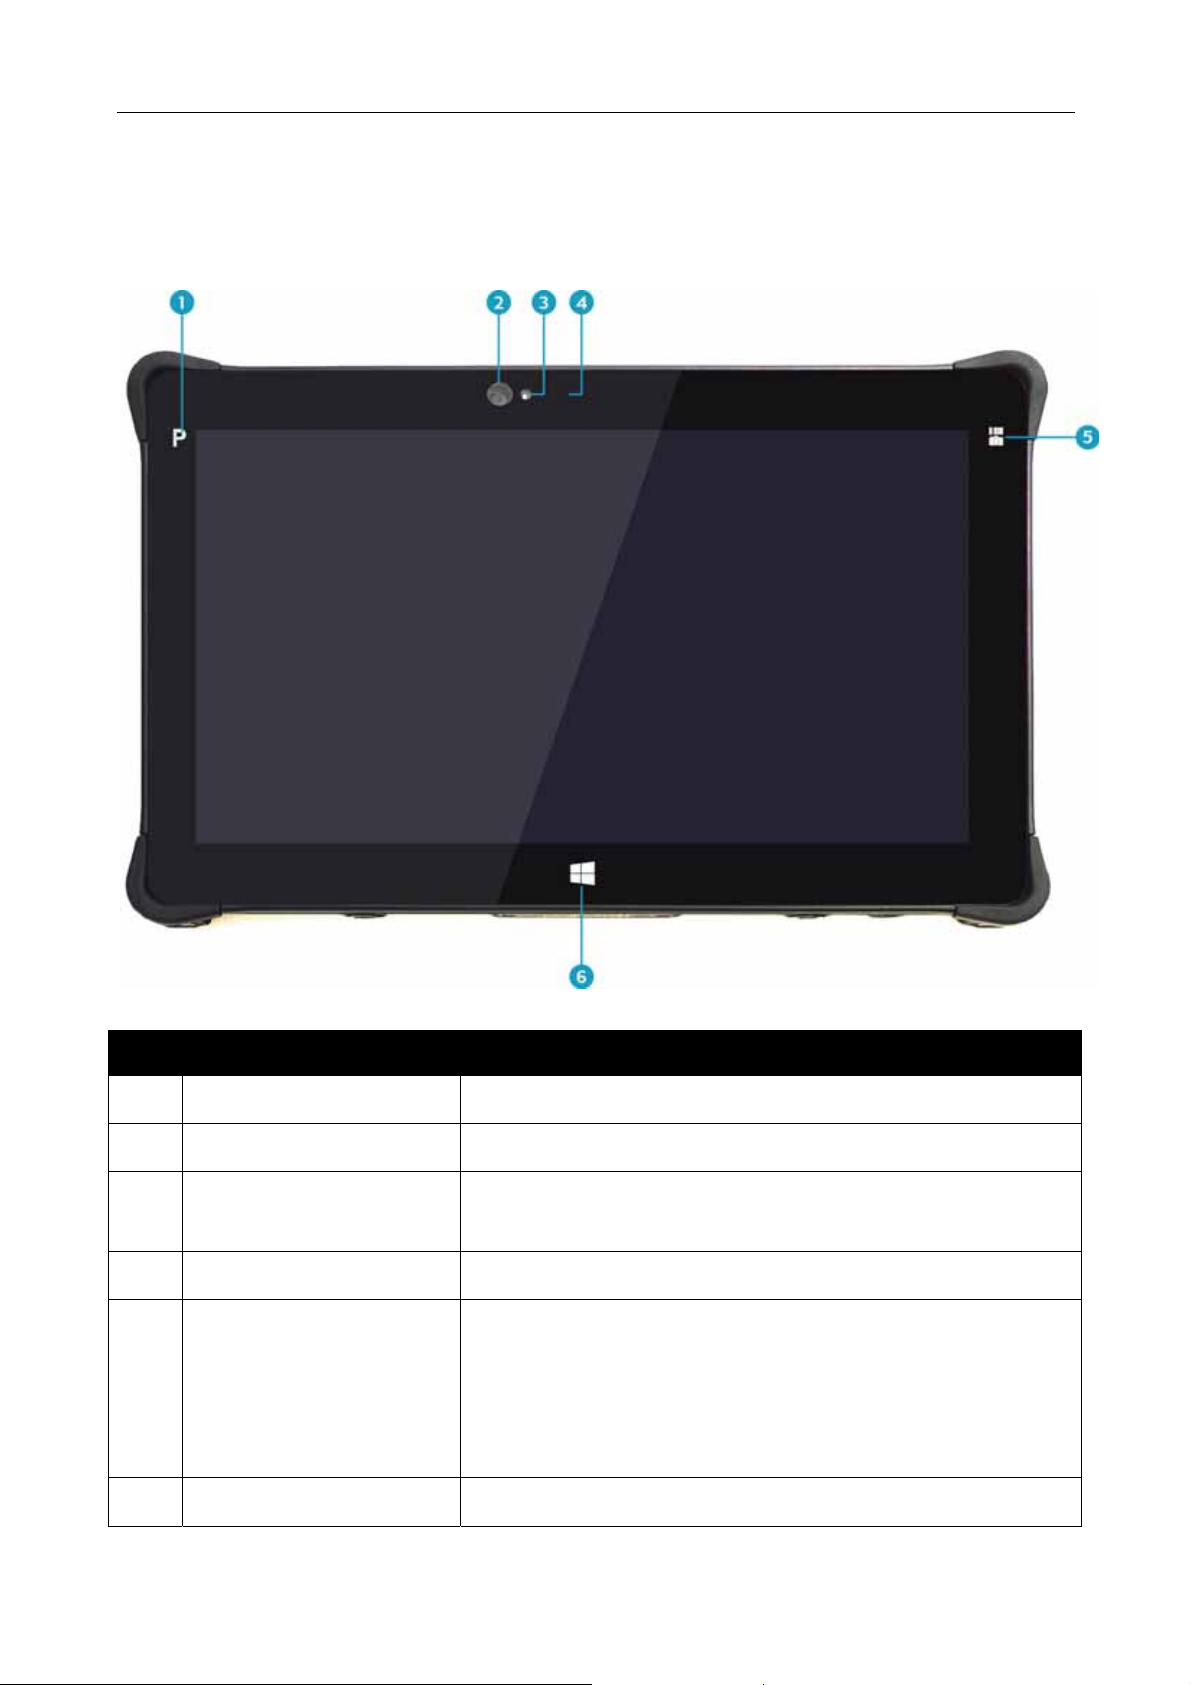
Front View
Before You Start
No. Item Description
1 Program button Tap to enter the chosen program. (user definition)
2 Front camera Use for video conference.
3 Ambient light sensor Use to detect the current level of visible light in the
surrounding environment.
4 Microphone Record the surrounding sound.
5 Function button The button functionality can be assigned via Quick
Menu.
• Scanner button: Press to trigger the Barcode
scan function if the barcode scanner is enabled.
• Camera button: Press to take a picture.
6 Home key Tap to return to the Start screen (Windows 8 only).
EN-5

Before You Start
4
Speaker
Back View
No. Item Description
1 Barcode scanner Scan barcodes.
2 Camera LED flash Provide additional lighting when taking pictures
under low light environment.
3 Rear camera Use to take pictures.
4 Speaker Emit sound.
5 Battery compartment Contain the battery.
6 Battery latch release
button
Press and hold the button to slide the battery
latch to the unlock position.
EN-6

Before You Start
Bottom View
No. Item Description
1
Audio Combo jack Connect a headphone or an external speakers or
microphone.
2 USB 3.0 ports (x2) Connect USB 3.0 peripheral devices.
3 Memory card slot Use to insert memory cards to transfer pictures,
music, and data between your Tablet PC and flash
compatible devices. The card reader supports SD
(Secure Digital), SDXC, SDHC, Mini-SD (with
adapter), Micro-SD (with adapter).
4 SIM card slot Use to insert a SIM card for WWAN, Gobi 3000, or
LTE module connection.
Left View
No. Item Description
1
Power button Press to turn your tablet PC on or off.
2 Volume buttons Press to adjust the volume level.
3 Kensington lock slot Connect a Kensington-compatible tablet PC
security lock.
EN-7
Before You Start
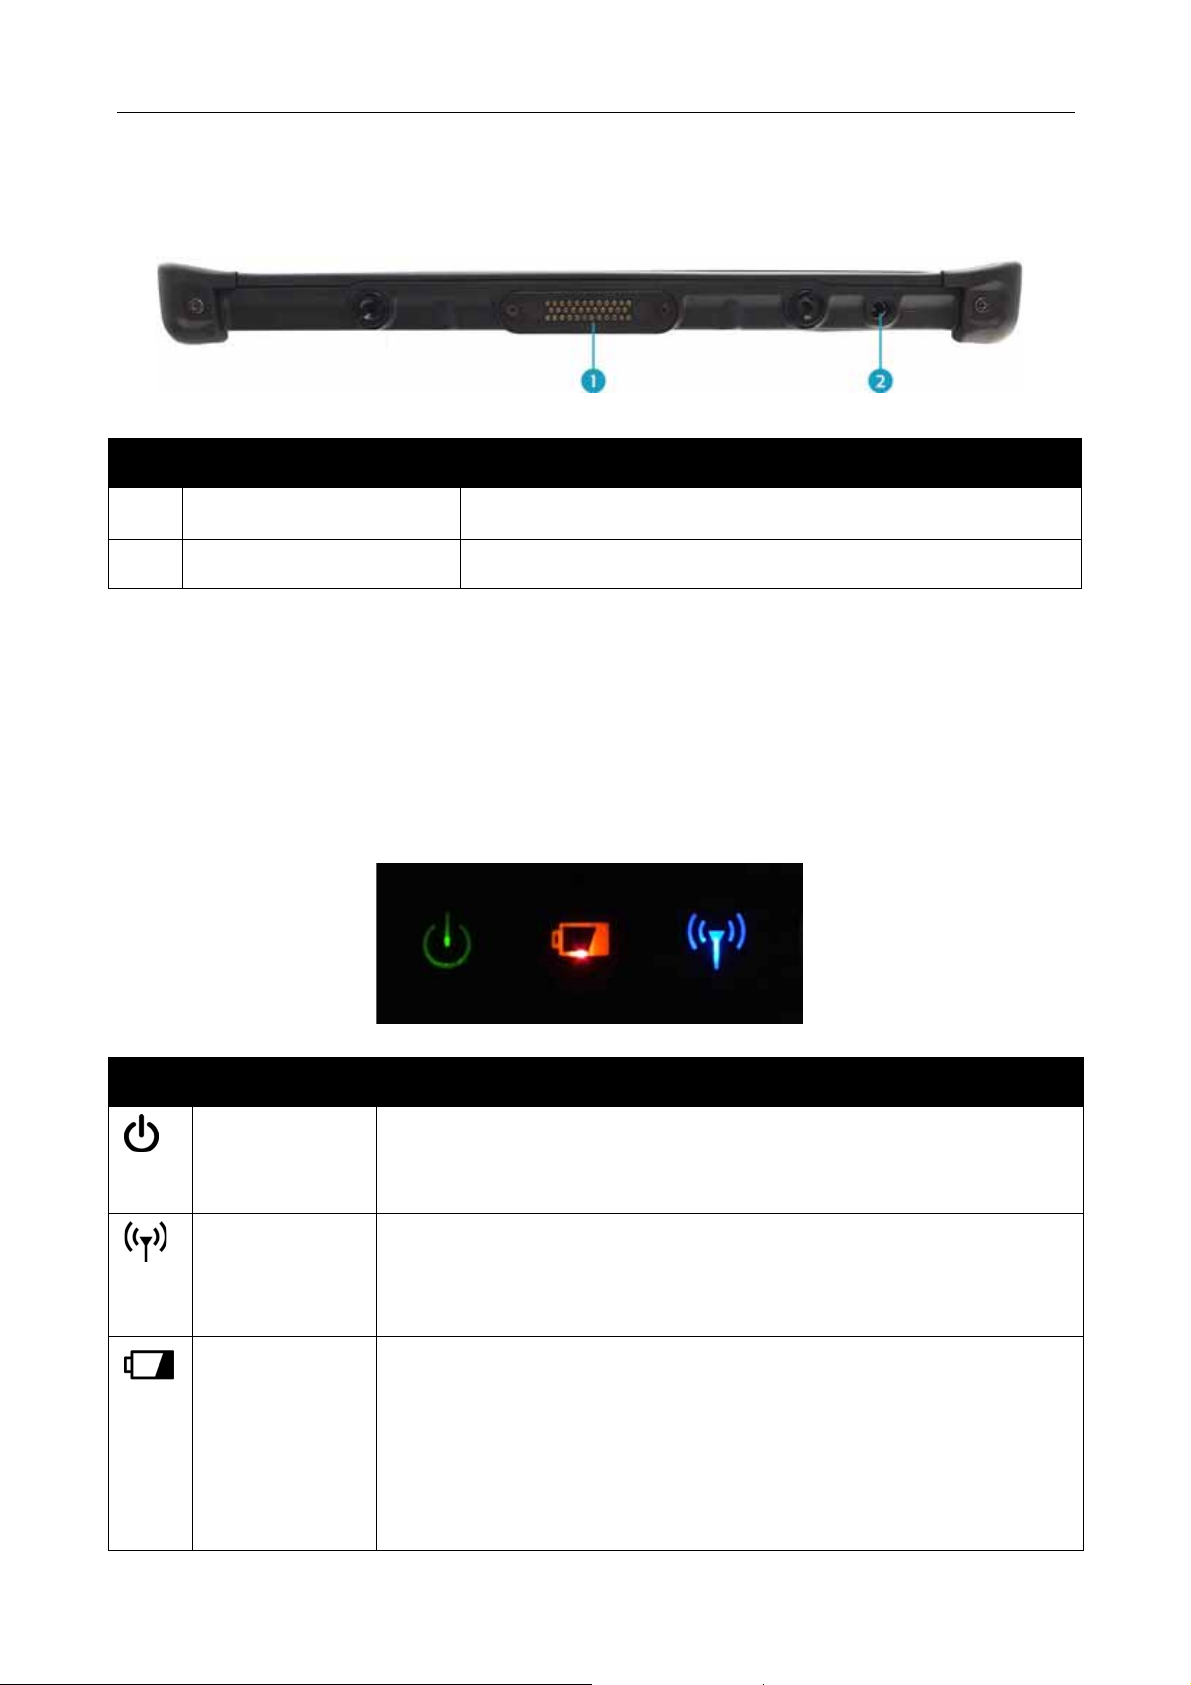
Right View
No. Item Description
1
Docking connector Connect the tablet PC to a docking station.
2 DC-in jack Connect the power adapter.
Status Indicators
The status indicators in the upper side of the tablet PC light up when a particular
function of the tablet PC is active.
Icon Item Description
Power The LED always lights on (green) when the system is
running. When the system is in sleep mode, the LED
blinks.
RF
Indicate the status of RF (WLAN, WWAN, or Bluetooth)
communication. The LED always lights on (blue) when
the function is enabled.
Battery Indicate the battery status:
• Green: when battery is fully charged (95% or above)
• Orange: when battery is charging
• Flashing orange: charging error
• Red: when battery capacity is lower than 10%
• Off: when discharged
EN-8
Getting Started
This chapter will help you get started using the device.
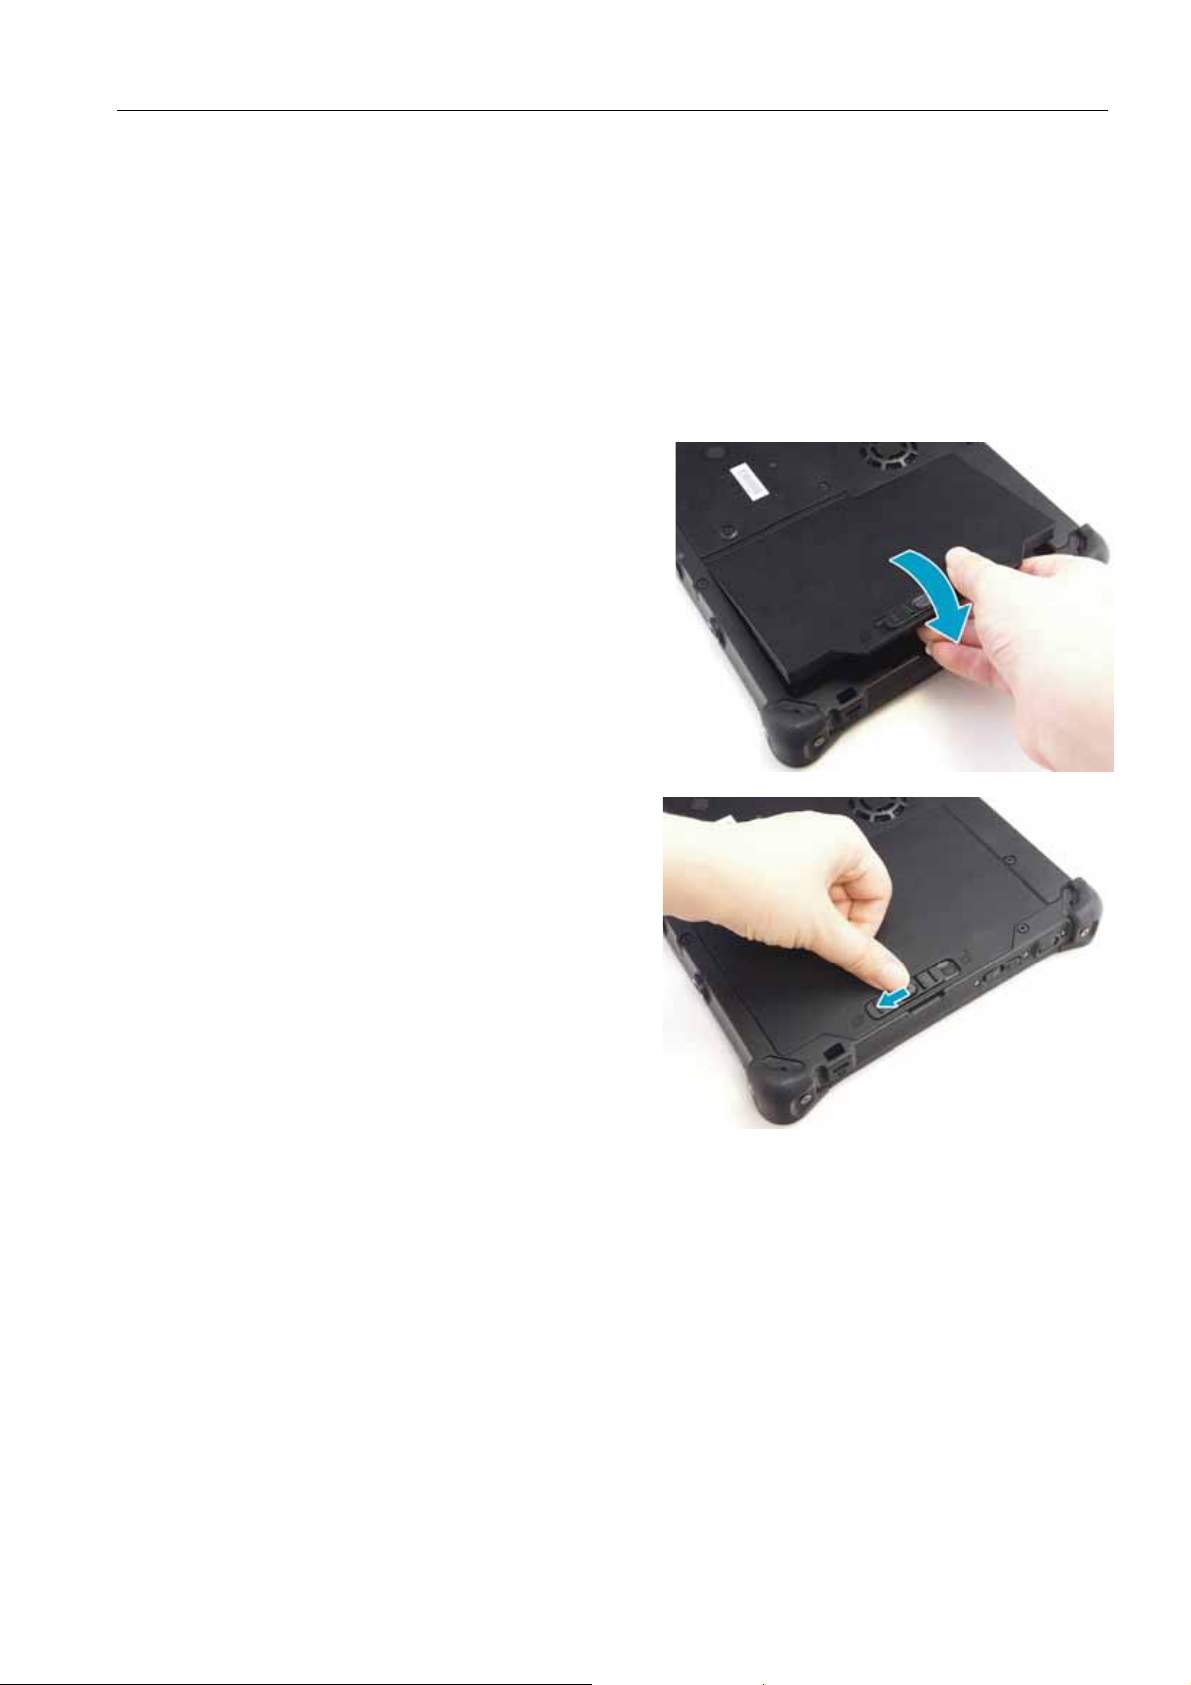
Installing the Battery
To install the battery, follow the steps below:
1. Align and insert the battery to the
battery compartment.
2. Push completely until the battery locks
into place.
Getting Started
3. Slide the battery latch to the lock
position to secure the battery.
Charging the Battery
The Lithium-ion battery is not fully-charged upon purchase.
To charge the battery, follow the steps below:
1. Install the battery to your tablet PC. See procedures above.
2. Connect the AC adapter to the DC-in jack of your tablet PC.
3. Connect the AC adapter to the power cord.
4. Plug the power cord to an electrical outlet.
EN-9
Getting Started
When to replace the Battery Pack
The battery performance gradually decreases over time and usage. We recommend
you to replace your battery pack after 18 to 24 months of usage.
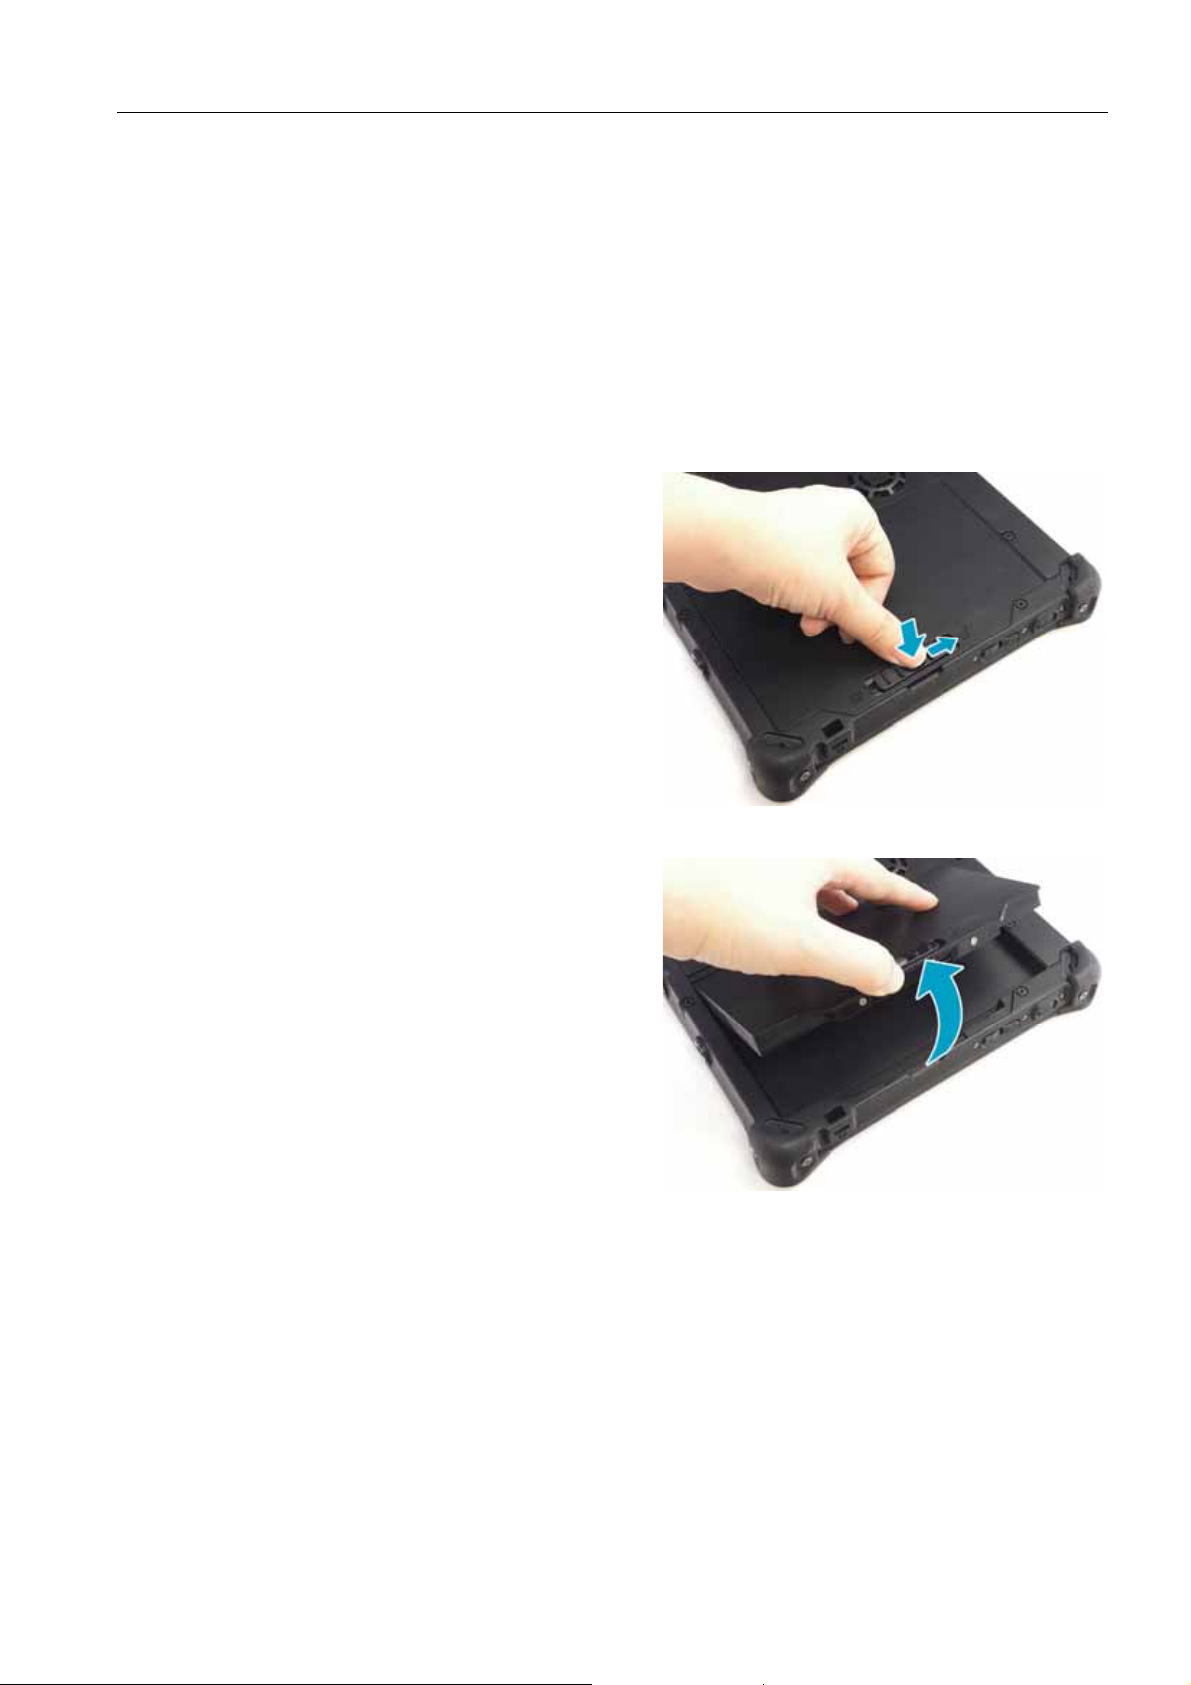
Removing the Battery
To remove the battery, follow the steps below:
1. Press and hold the battery latch release
button to slide the battery latch to the
unlock position.
2. Remove the battery out of the battery
compartment.
EN-10
Getting Started
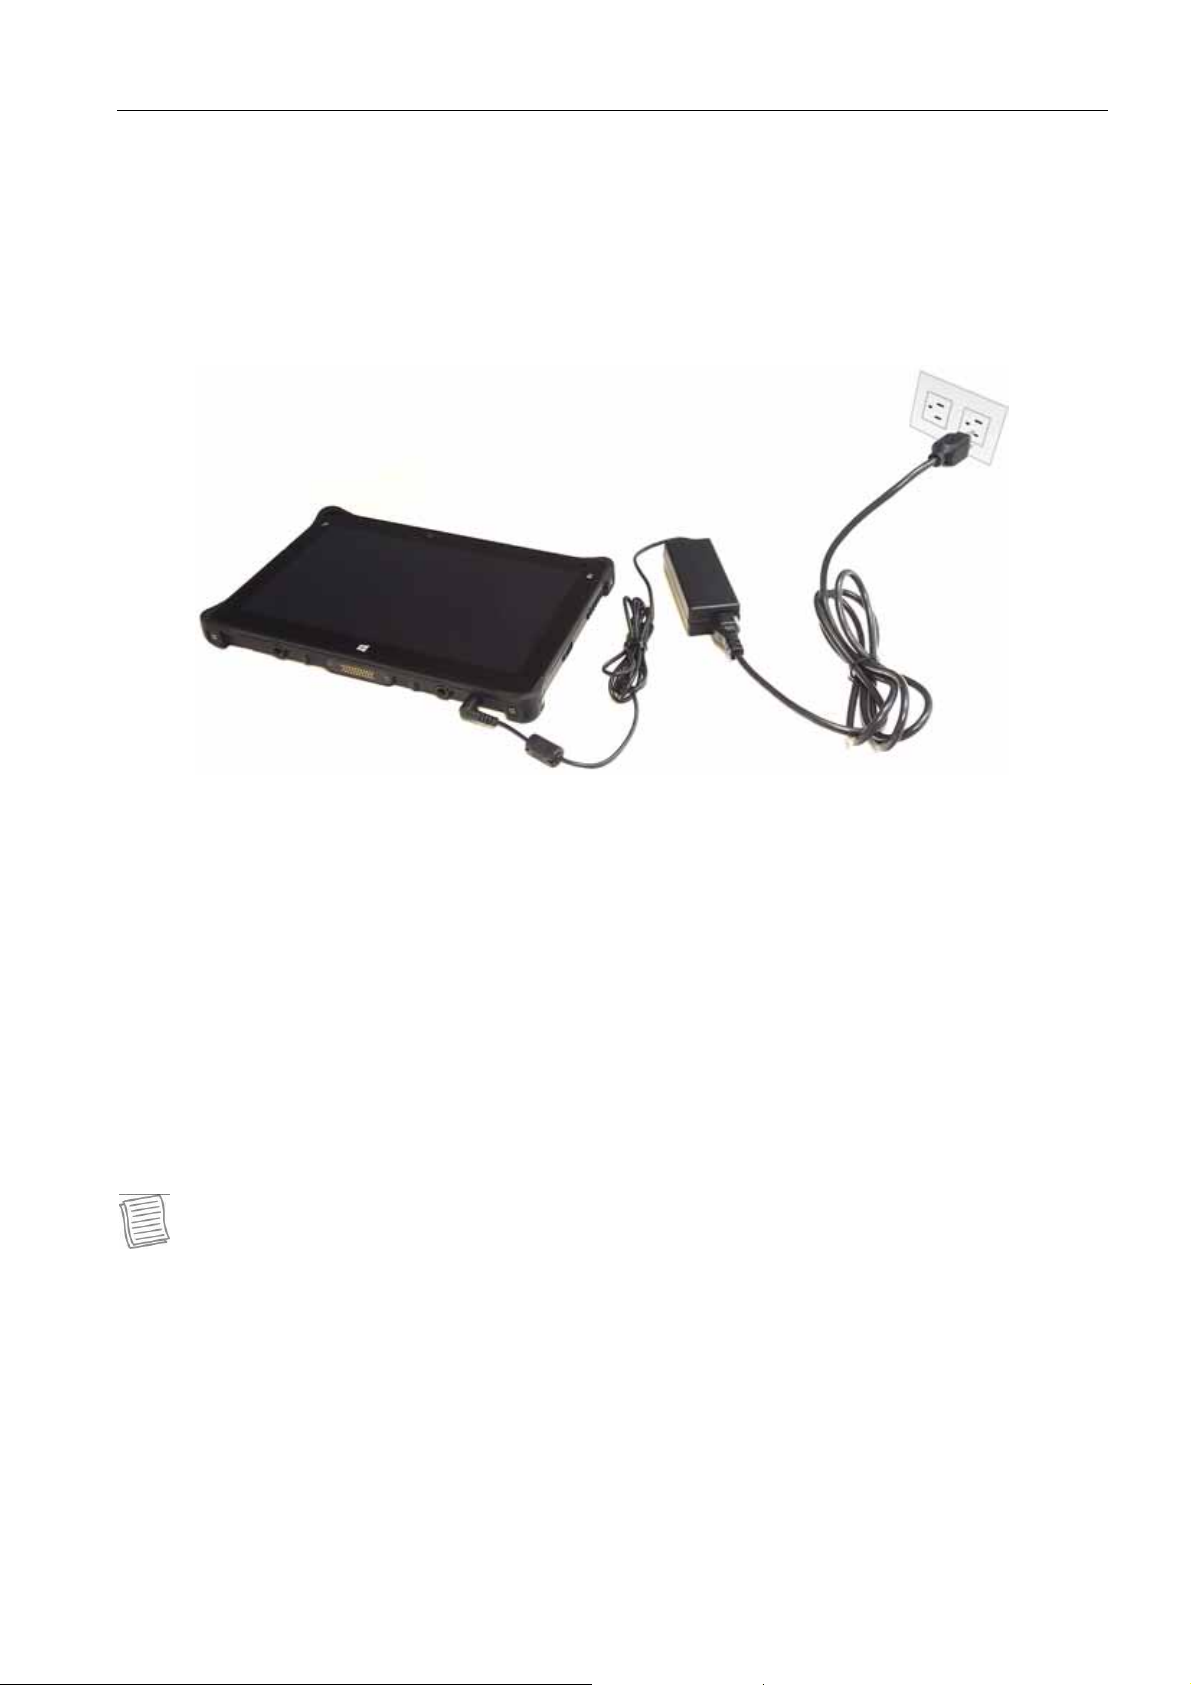
Connecting the Power
Your tablet PC can be powered up using the AC adapter or the Lithium-ion battery.
Connecting the AC Adapter
The AC adapter powers up your tablet PC and charges the battery.
1. Connect the AC adapter to the DC-in jack of your tablet PC.
2. Connect the AC adapter to the power cord.
3. Plug the power cord to an electrical outlet.
Using Battery Power
1. Install a charged battery in the battery compartment.
2. Remove the AC adapter (if plugged). Your tablet PC will automatically use the
battery power.
NOTE
• If your tablet PC is connected to an electrical outlet and the battery is installed,
your tablet PC uses power from the electrical outlet.
EN-11
Getting Started
Starting Your Tablet PC
Turning On Your Device
Press the button until the Power LED lights up.
Turning Off Your Device
It is important to properly shut down your tablet PC to avoid the loss of unsaved
data. To shut down your tablet PC, do the following:
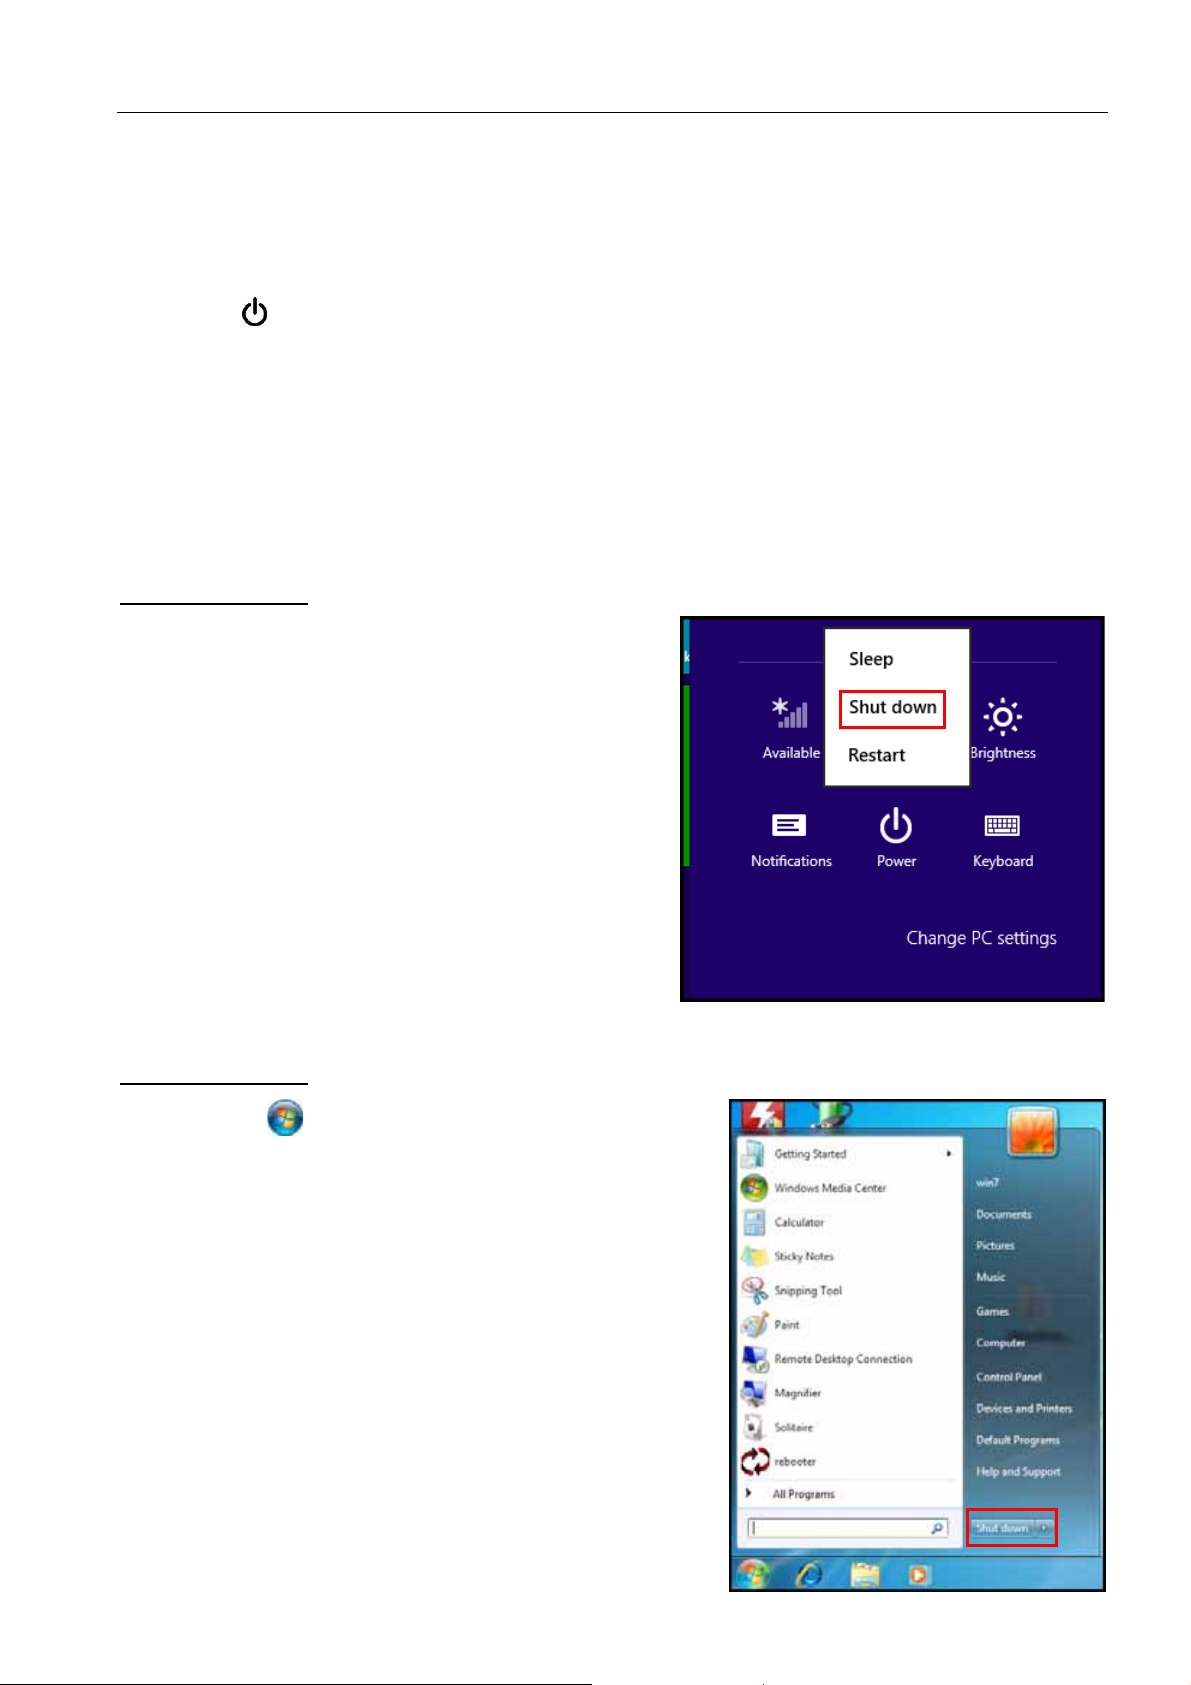
On Windows 8
1. On the Start screen, swipe in from the
right edge of the screen, then tap
Settings.
2. Tap Power > Shut down.
On Windows 7
Click Start ( ) > Shut down.
Wait for your tablet PC to turn off power
completely before removing the power source (if
necessary).
EN-12
Operating Your Tablet PC
Operating Your Tablet PC
This chapter will guide you on how to use your Tablet PC.
Switching the Screen Panel
(Windows 8 only)
On Windows 8, there are three major user interfaces (UI) that you need be
familiar with:
• Start Screen • Desktop • Apps View
Start screen
The Start screen is where you can quick access to your favorite applications,
people, website, and etc.
• Tap the desired app icon to launch the application.
• Swipe your finger to left or right to switch panels.
• Swipe in from the right edge of the screen to access the Start screen task bar
and select the desired option.
EN-13
Operating Your Tablet PC
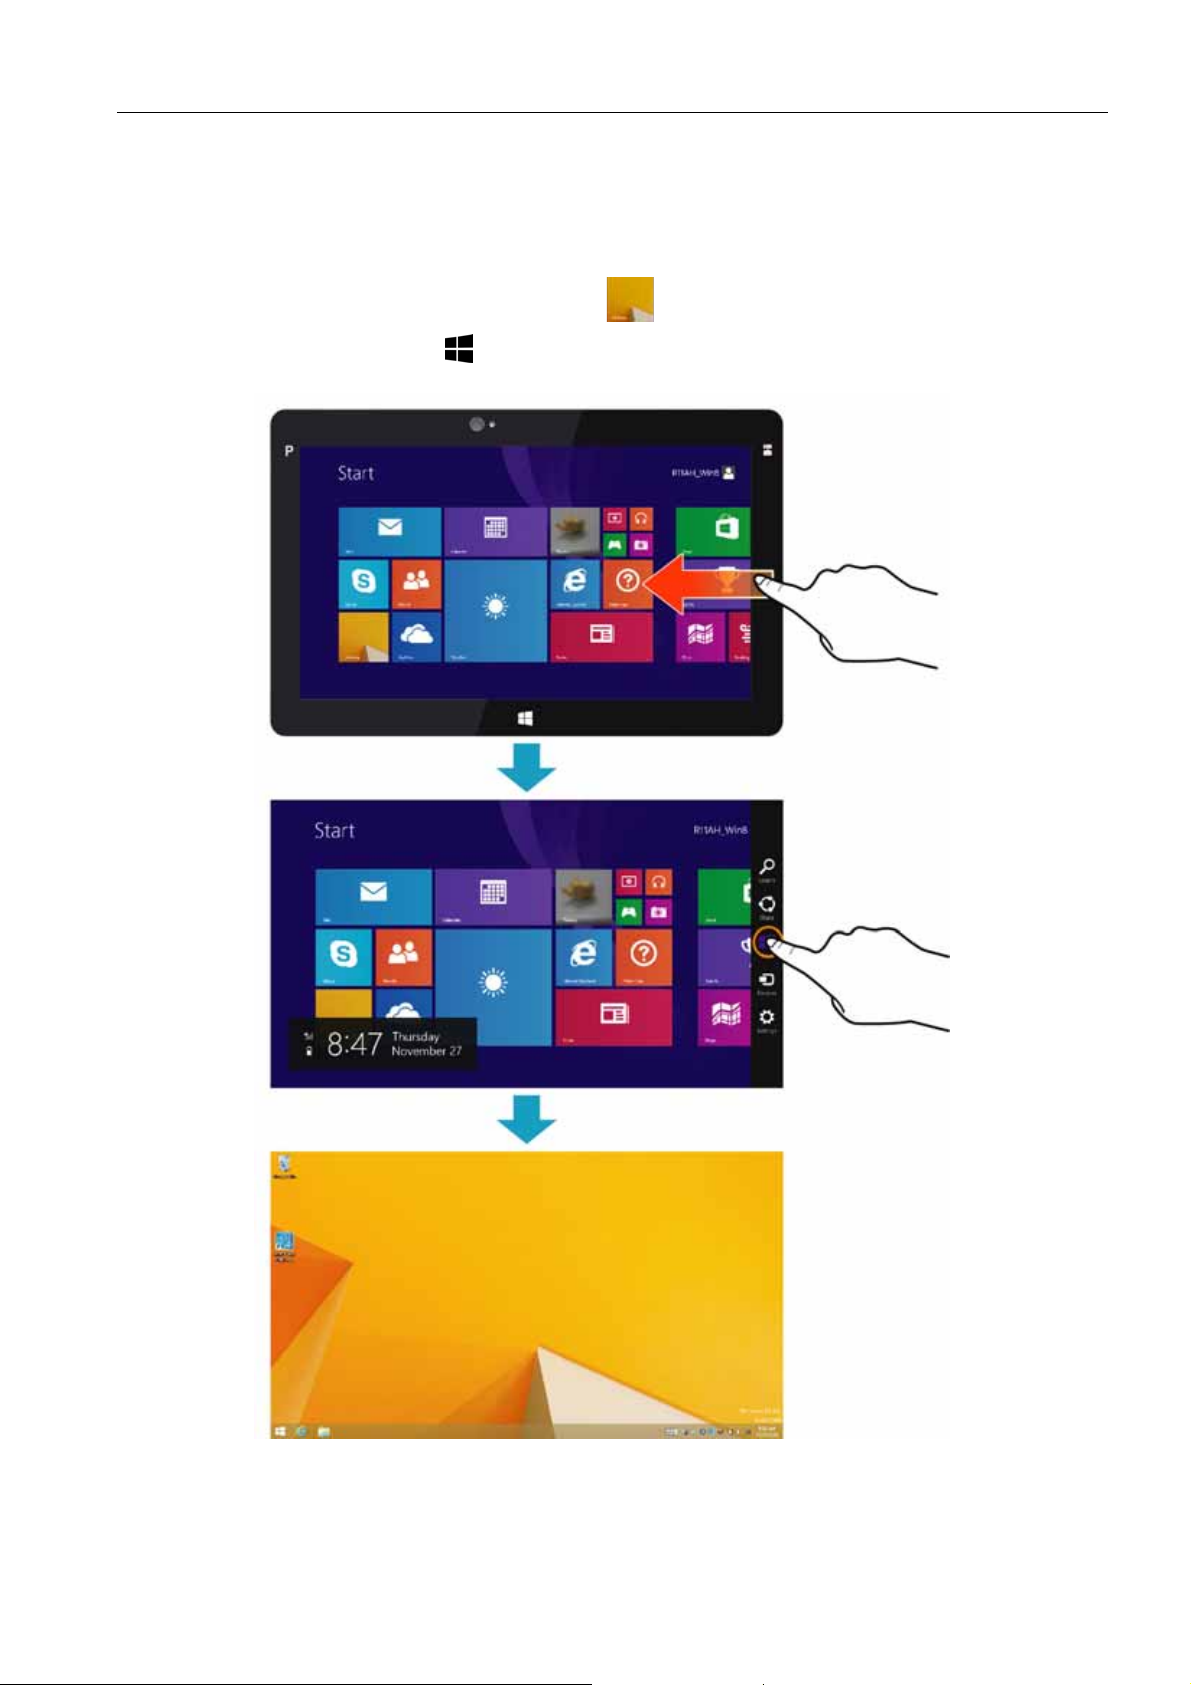
Desktop
The desktop view is similar as other Windows operating system. You can
customize the desktop wallpaper and pin your favorite application on the task bar.
To switch to Desktop view, tap Desktop (
the screen, then tap Start (
).
) or swipe in from the right edge of
EN-14
Operating Your Tablet PC
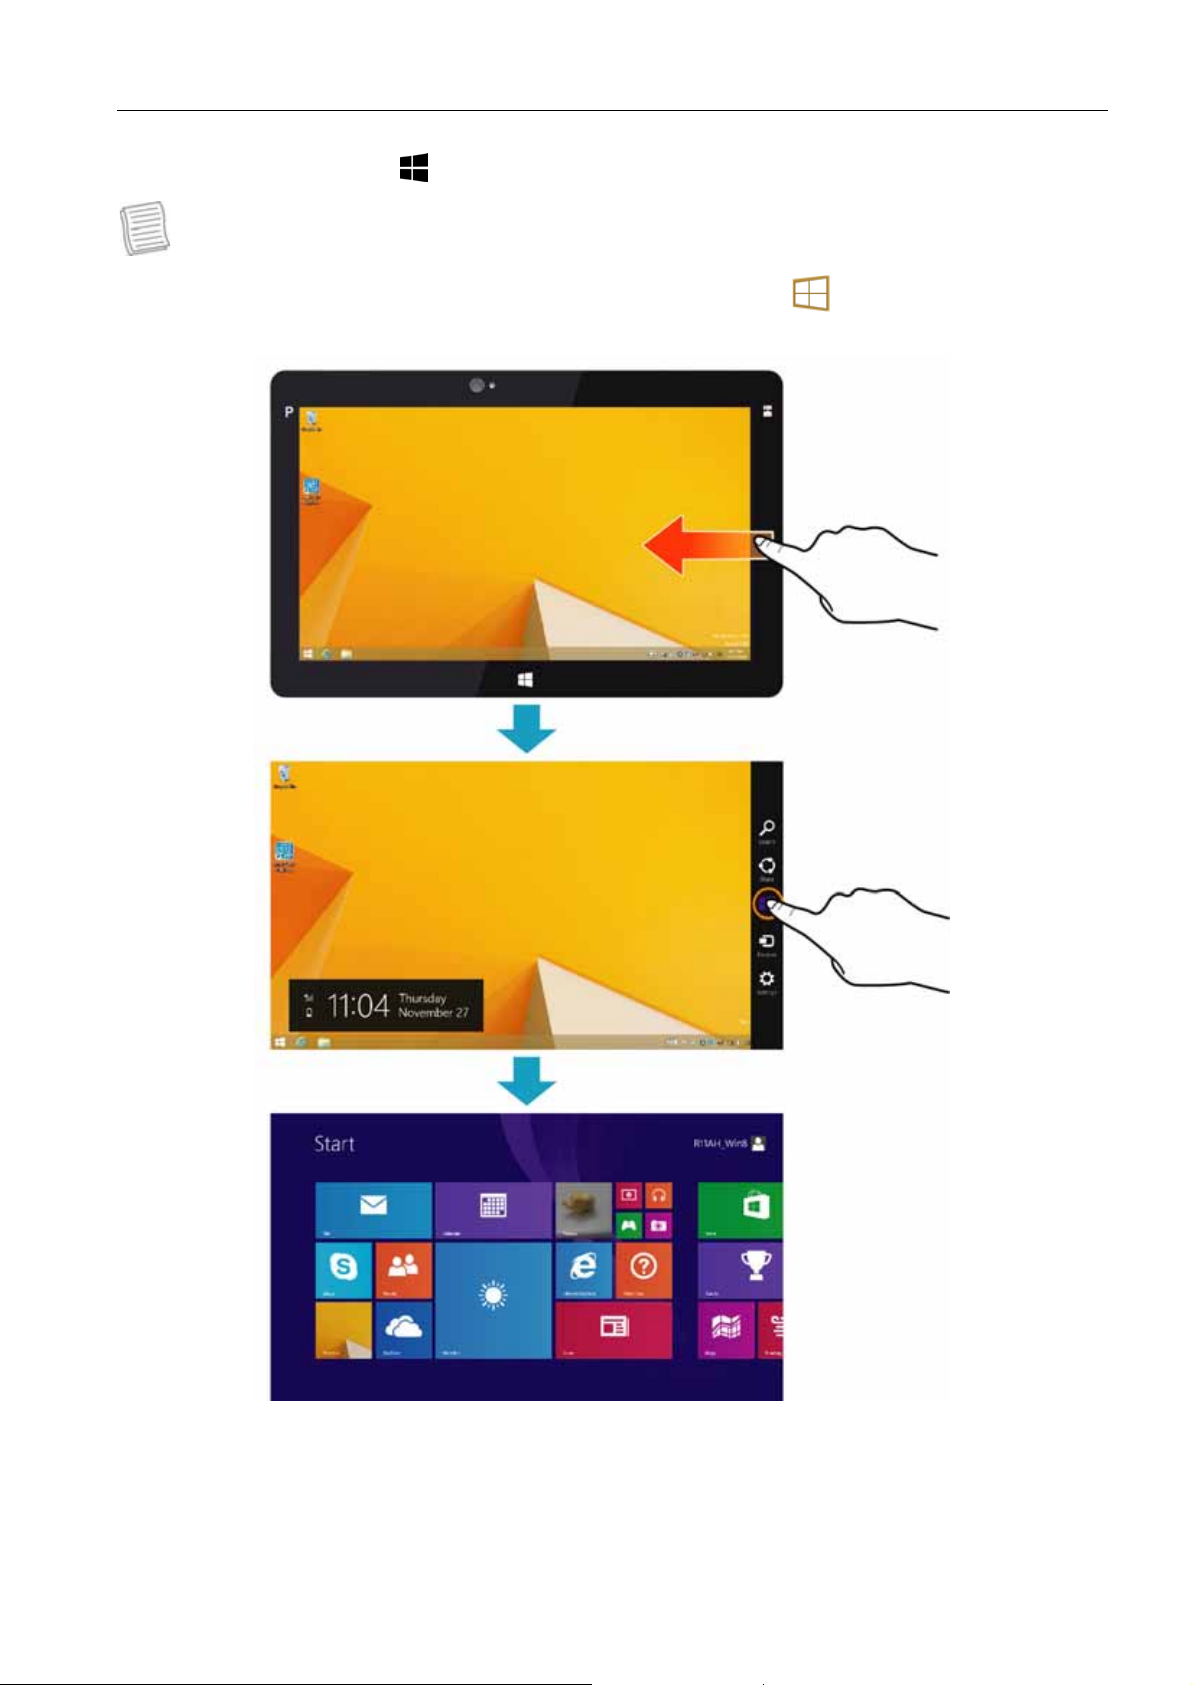
To switch to Start screen, do the following: swipe in from the right edge of the
screen, then tap Start (
).
NOTE
• You can also directly switch to Start screen by tapping
on the task bar.
EN-15

Operating Your Tablet PC
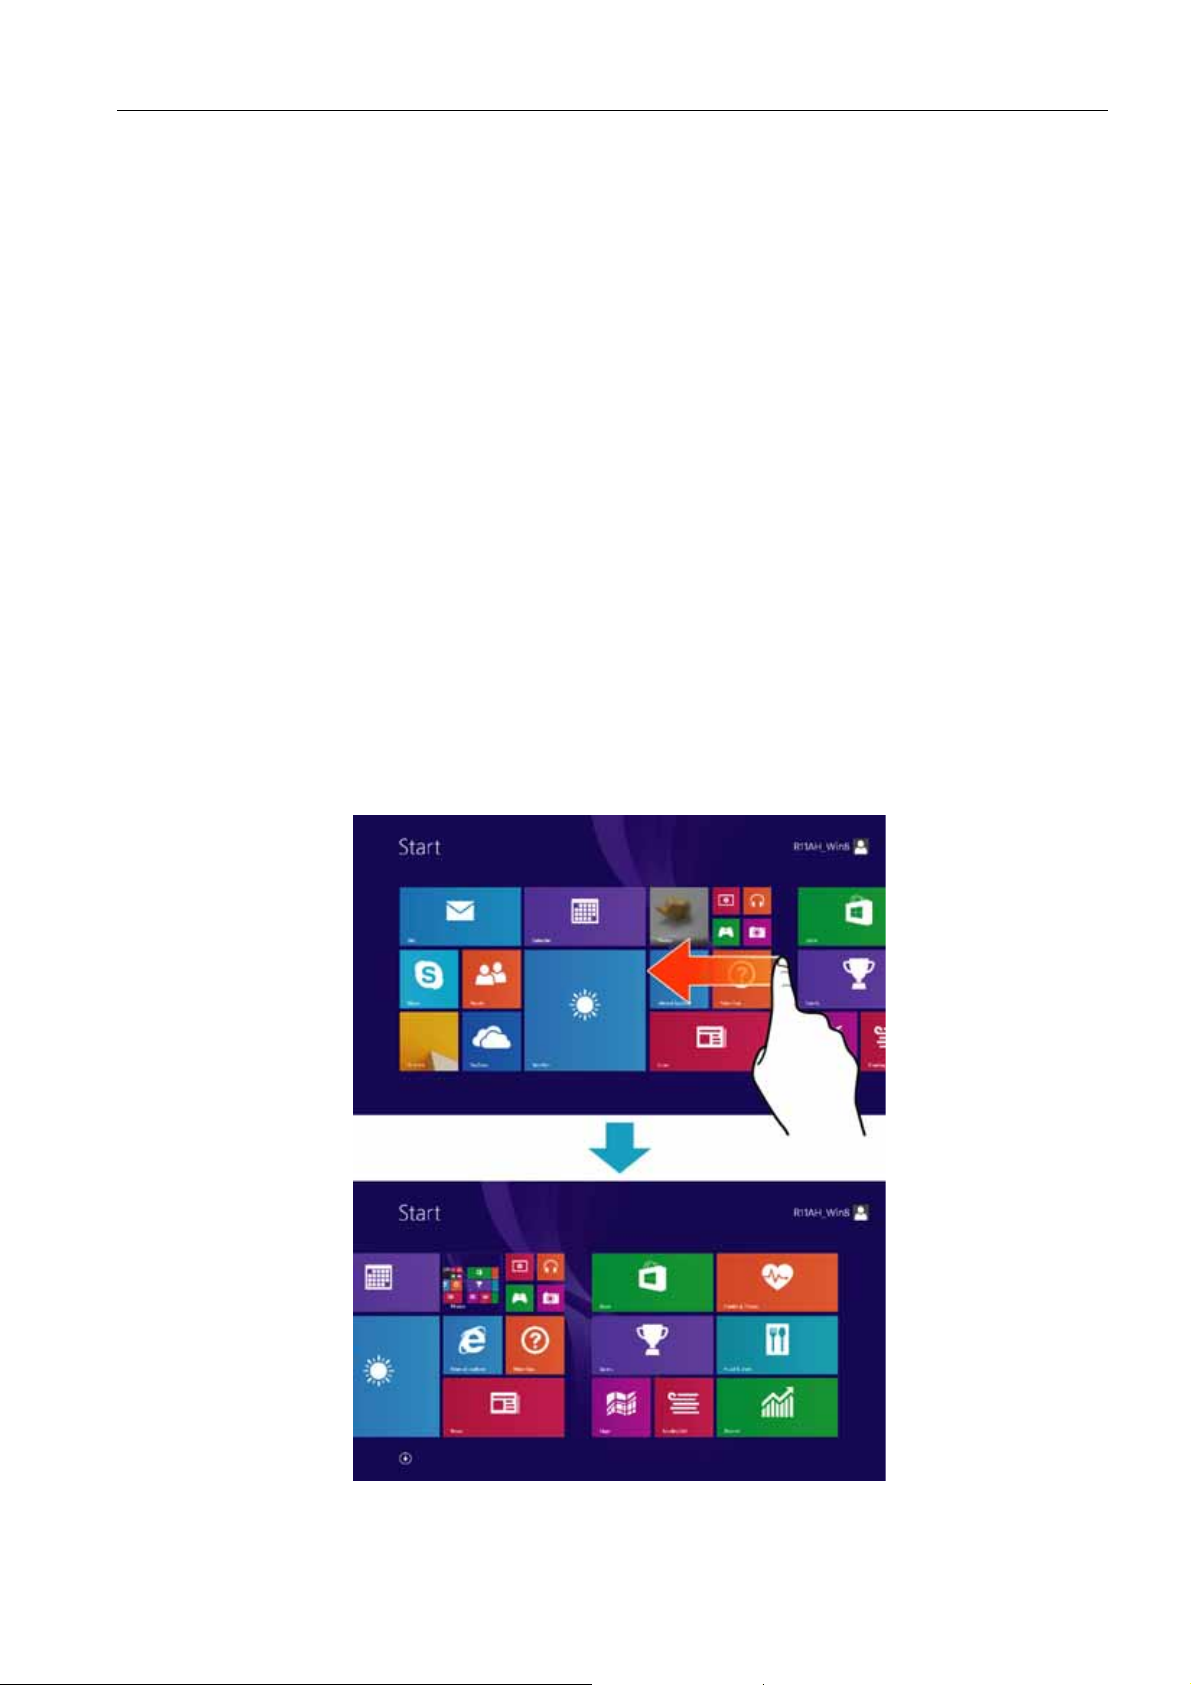
Apps view
In Apps view, you can open an application, pin the desired application to Start or
the Desktop task bar.
To switch to Apps view, do one of the following:
• slide up from the middle of the Start
screen.
• click the arrow icon ( ) on the left
corner of the Start screen.
NOTE
• For more information on Windows 8
basic operations, please visit
http://windows.microsoft.com/enus/windows-8/getting-around-tutorial.
EN-16
 Loading...