


DTR-Z500

Watch and record Digital TV, minus the contract
Digital TV Recorder User Guide

Important Safety Information
Thank you for choosing this
TVonics Freeview+ box.
Before using the Freeview+ box, please take a minute to read the following important safety
information.
Only use the supplied power adaptor.•
Do not place any objects on the unit.•
Do not cut o the supplied power adaptor’s plug.•
Leave a space of at least 10cm around the unit to allow for adequate ventilation.•
Place the unit on a stable surface.•
Do not place any magnetic objects (including speakers) on or near the unit.•
Do not allow the unit to get wet.•
Do not use the unit in hot, humid or excessively dusty places.•
Do not expose the unit to rain or moisture.•
Do not obstruct the fan on the rear of the unit.•
Do not expose the unit to shocks or vibrations as this could cause disk failure.•
To clean the unit, use a lightly dampened, soft cloth. Do not use any kind of abrasive cloth, •
sponge or cleaner.
To help prevent Screen burn on Plasma and LCD screens, use the Screen Saver feature •
whenever possible.
Do not attempt to open the unit. Refer all servicing to qualied service personnel.•
Environmental Information
This symbol on the product or in the instructions means that your electrical and
electronic equipment should be disposed at the end of its life separately from your
household waste. There are separate collection systems for recycling in the EU.
For more information, please contact the local authority or your retailer where you
purchased the product.
2

Table of contents
Important Safety Information .....................................................................................................................................2
Environmental Information .........................................................................................................................................2
Package Contents ............................................................................................................................................................4
Getting Started
Overview of the Freeview+ box .................................................................................................................................5
Overview of the Remote Control ...............................................................................................................................6
Inserting the Batteries into the Remote Control ..................................................................................................8
Connecting your Freeview+ box ............................................................................................................................... 9
Automatically Tuning .................................................................................................................................................. 10
Using your Freeview+ box
Everyday Use .................................................................................................................................................................. 12
The Electronic Programme Guide (EPG) ..............................................................................................................13
The Channel List ........................................................................................................................................................... 14
The Info Display ............................................................................................................................................................ 15
Picture In Picture (PIP) ................................................................................................................................................ 16
Recording Programmes ............................................................................................................................................. 17
Pause Live TV.................................................................................................................................................................. 19
The Timers Screen ........................................................................................................................................................ 20
The Library Menu ......................................................................................................................................................... 22
Common Symbols ........................................................................................................................................................ 24
Navigating the Menu .................................................................................................................................................. 25
Main Menu Options ..................................................................................................................................................... 26
Programming the Remote Control ........................................................................................................................ 28
Automatically Programming the Remote Control ........................................................................................... 28
Finding the Remote Control’s Current Codes .................................................................................................... 29
Controlling a TV or DVD player ................................................................................................................................30
Specications ................................................................................................................................................................. 31
Troubleshooting ........................................................................................................................................................... 32
Remote Control Brand Codes .................................................................................................................................. 34
End User License ........................................................................................................................................................... 35
3
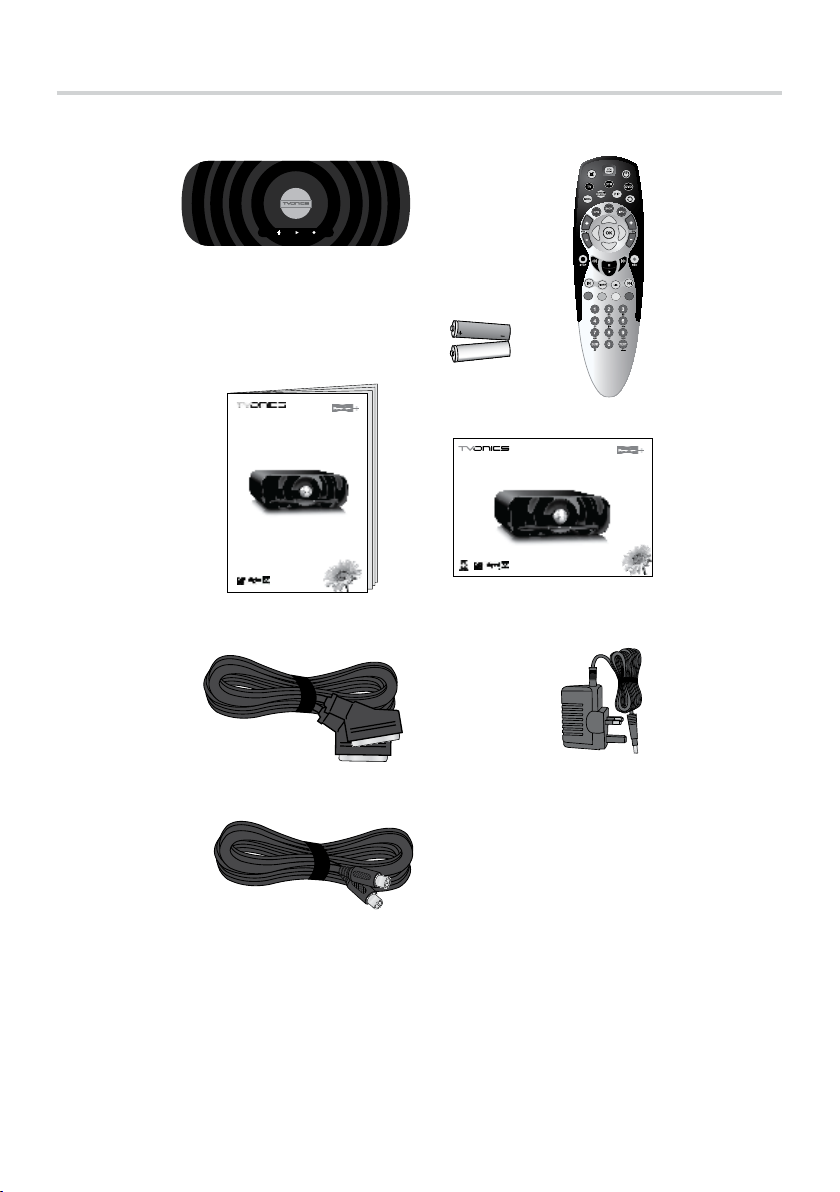
Package Contents
Watch and record Digital TV, minus the contract
Digital TV Recorder User Guide
Quick Start Guide
Watch and record Digital TV, minus the contract
Freeview+ box
1
Remote Control
3
Quick Start Guide
5
Power Adaptor
7
AA Batteries (2)
2
User Guide
4
SCART Lead
6
RF Lead
8
4

Front
Overview of the Freeview+ Box
Record Indicator
1
(Red = Recording in progress)
Power Indicator
2
(Green = On, Red = Standby)
Rear
Aerial In (from aerial)
1
SPDIF/Digital Audio Output
3
SCART (to VCR)
5
Play Indicator
3
(Green = A recording is being played back)
Aerial Out (to TV)
2
SCART (to TV)
4
DC Jack Input
6
5
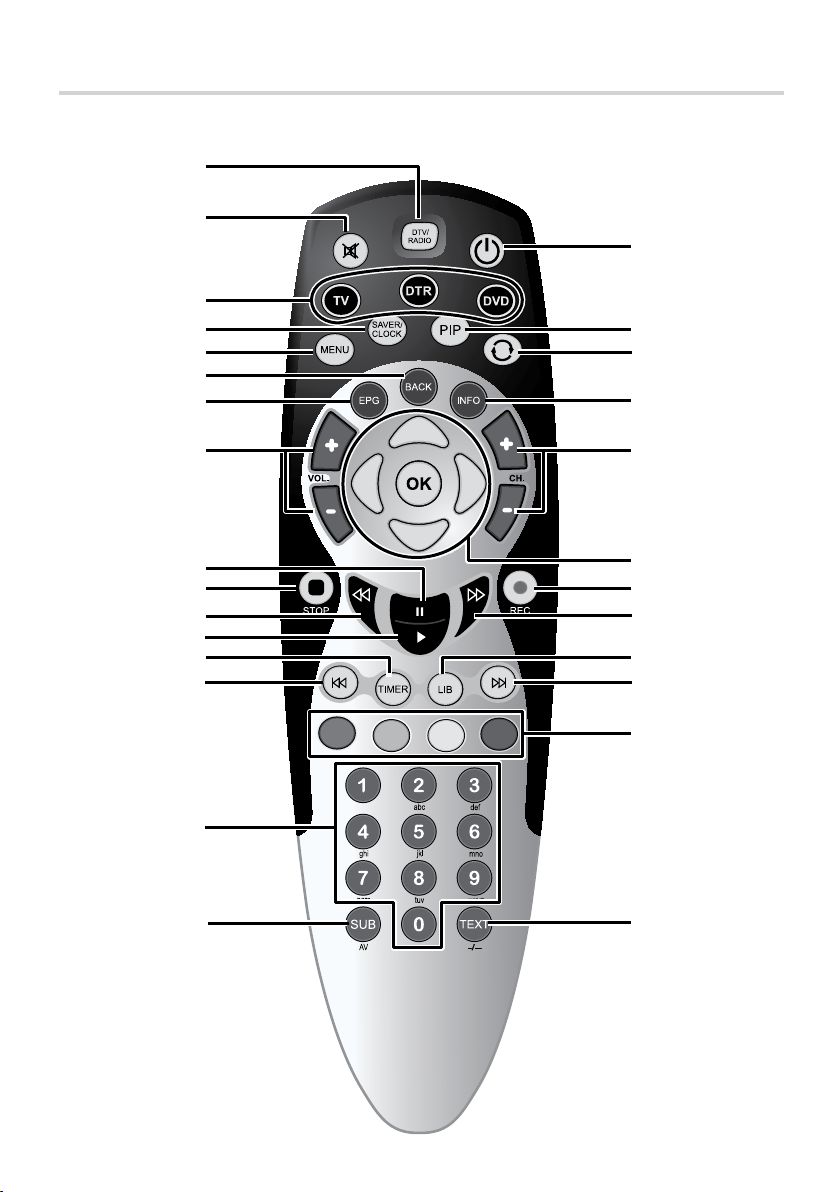
Overview of the Remote Control
1
2
3
4
5
6
7
wk
wj
wh
wg
8
9
q;
qa
qs
qd
qf
qg
qh
wf
wd
ws
wa
w;
ql
qk
qj
6

DTR/RADIO - Switches between Digital TV channels and Digital Radio channels.
1
2
% - Turns the TV’s sound on/o*.
MODE buttons - Sets the remote control to operate the Freeview+ box, a TV or DVD*.
3
4
SAVER/CLOCK - Displays the Clock for 4 seconds. With the Clock displayed, press again to
display the Screen Saver.
MENU - Displays/exits the menu.
5
BACK - Returns to the previous level in the menu. Exits EPG, Info and Menu (rst level).
6
EPG - Switches the Electronic Programme Guide (EPG) on/o.
7
VOL. +/− - Adjusts the TV’s volume*.
8
9
X - Pauses live TV and recordings.
q;
x STOP - Stops playback when viewing recordings.
qa
j - Rewinds live TV and recordings. Press repeatedly to increase the rewind speed.
qs
B - Plays recording and resumes paused live TV and recordings.
TIMER - Displays the Timers screen.
qd
qf
l - Skips back 30 seconds when watching live TV or a recording. Press and hold to
skip to the start when viewing a recording or skip to the start of the pause buer when
watching live TV.
0-9 - Selects channels, enter PIN, use Help pages.
qg
SUB/AV - Displays subtitles (if available). In TV mode, changes the Video Input on the TV*.
qh
qj
TEXT/−/−− - Displays digital text (if available). In TV mode, selects double digit channel
numbers*.
qk
Coloured buttons - Selects options in digital text/EPG/Channel List/menu (Red/Green/
Yellow/Blue).
ql
L - Skips forward 30 seconds when viewing a recording. Press and hold to skip to the
end when viewing a recording.
LIB - Displays the Library of recorded programmes.
w;
wa
J - Fast forwards recordings. Press repeatedly to increase the fast forward speed. When
pausing live TV or recordings, press to watch in slow motion.
ws
z REC - Records live TV. Sets highlighted programmes to timer record in the EPG.
wd
OK/UP/DOWN/LEFT/RIGHT - Displays the Channel List/conrms a selection (OK button).
Navigate the EPG/menu/Channel List/Info menu (UP/DOWN/LEFT/RIGHT buttons).
CH. +/ − - Selects the next/previous channel.
wf
INFO - Displays programme and recording information
wg
wh
- Returns to the previous channel watched. Switches between 4 and 24 hours advance in
EPG.
wj
PIP - Enters Picture In Picture mode. For more information refer to page 15.
wk
1 - Switches the Freeview+ box, TV* or DVD* on/into standby.
*Once the remote control has been programmed to operate your equipment. Refer to page 28.
7
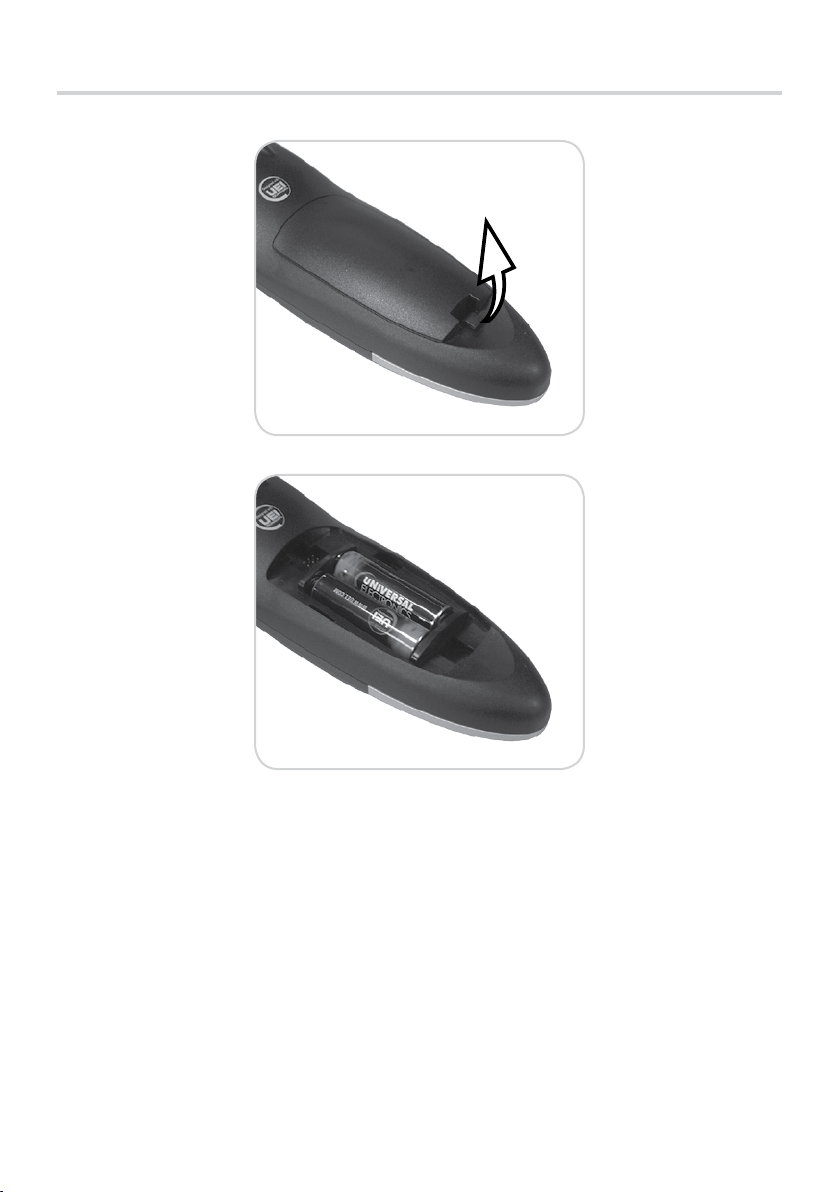
Inserting the Batteries into the Remote Control
Always check the positive/negative symbols on the batteries to ensure they are inserted •
correctly.
Don’t forget to dispose of old batteries in an environmentally friendly way. •
8
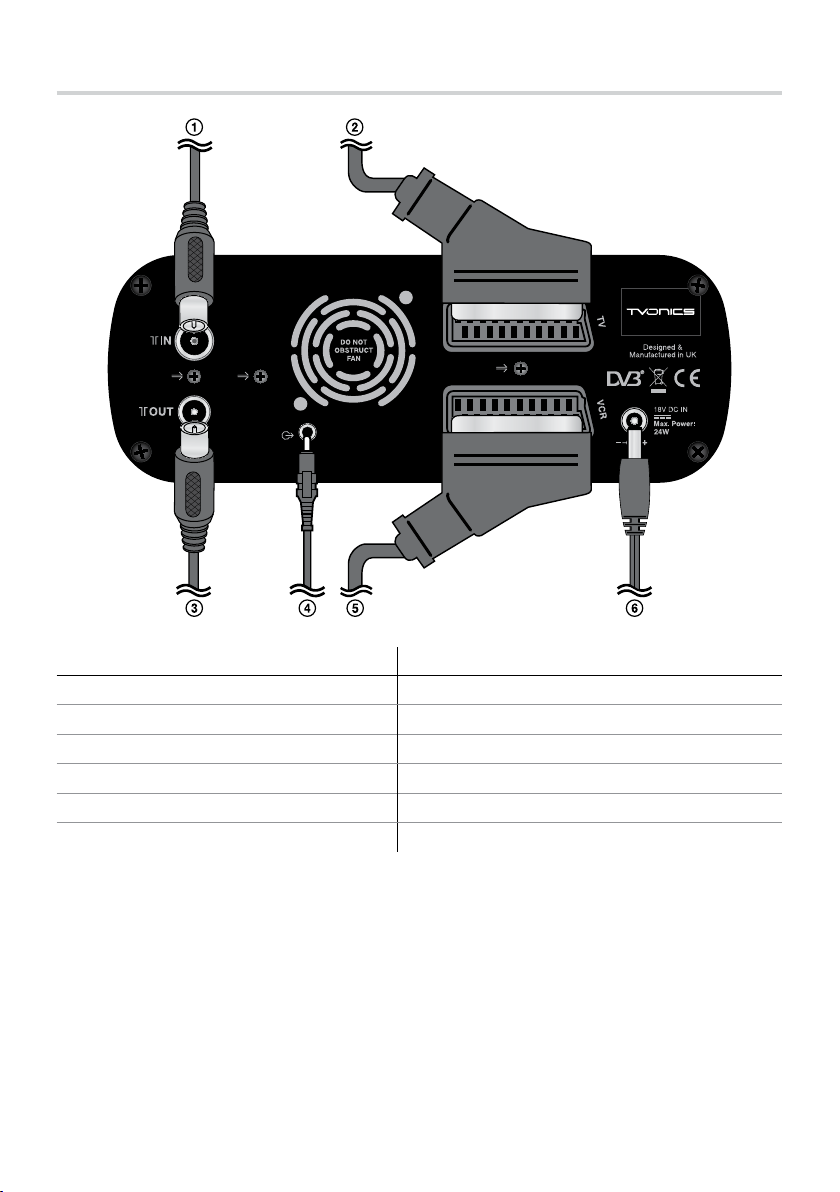
Connecting your Freeview+ Box
Connection Lead Required
From your aerial. Aerial Lead (not supplied).
1
To your TV. SCART Lead (supplied).
2
To your TV, VCR or DVD Recorder. RF Lead (supplied).
3
To your Hi-Fi/Surround Sound System. 3.5mm jack plug lead/optical lead (not supplied).
4
To your VCR/DVD Recorder. SCART Lead (not supplied).
5
To the mains power outlet. Power Adaptor (supplied).
6
For safety reasons, DO NOT cut o the supplied power adaptor’s plug.
9
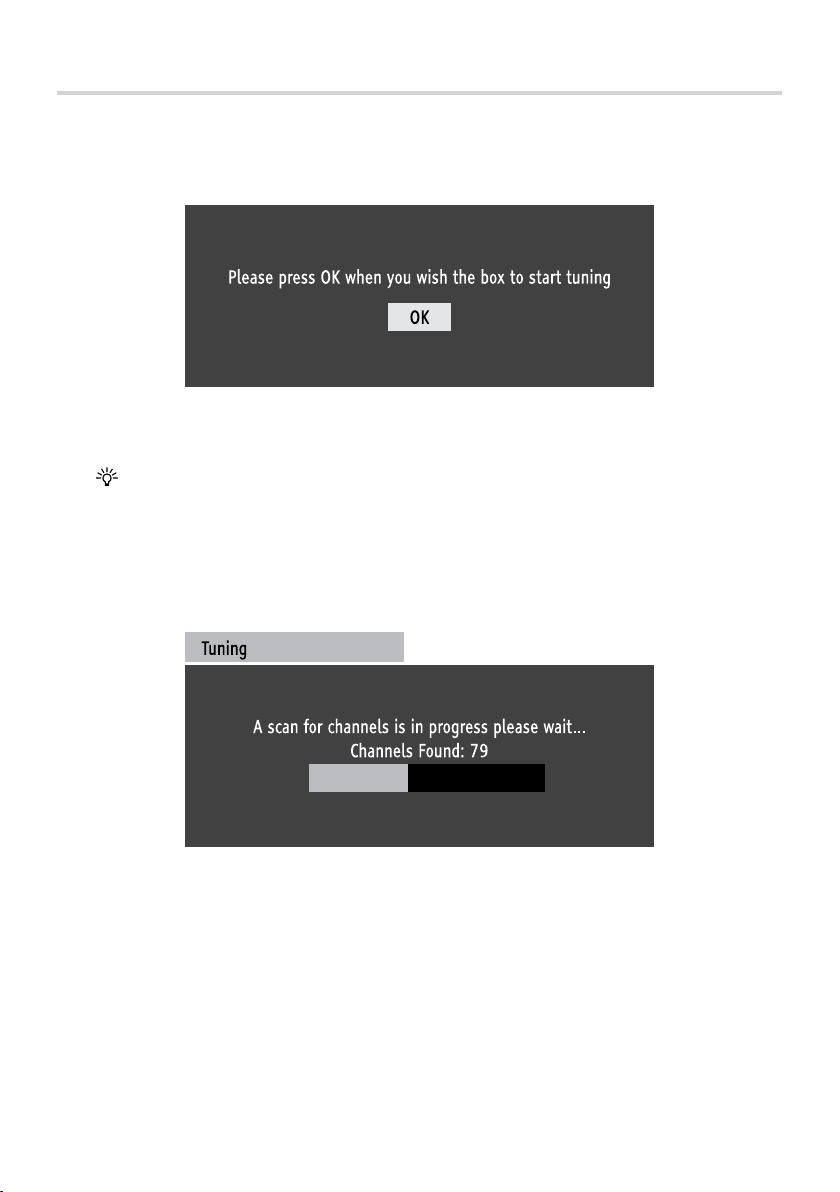
Automatically Tuning
Switch on your TV, then connect the Freeview+ box to the mains. The TV should automatically 1.
switch to the correct AV channel and display the ‘Start up’ screen below:
Start up screen
Press the [OK] button on the remote control to begin automatic tuning.
If the remote control does not work, press the [DTR] button and try again.
The Freeview+ box will now scan and store all available channels. Depending on the quality of 2.
your reception, this may take several minutes. Please be patient and do not press any buttons.
10
Tuning progress screen

Automatically Tuning
3. When the automatic tuning has nished, a summary screen is displayed. The number of
channels found may vary according to your location and reception.
Automatic tuning summary screen
Press the [OK] button on the remote control remove the summary screen and start watching
digital TV.
11
 Loading...