

Page 1
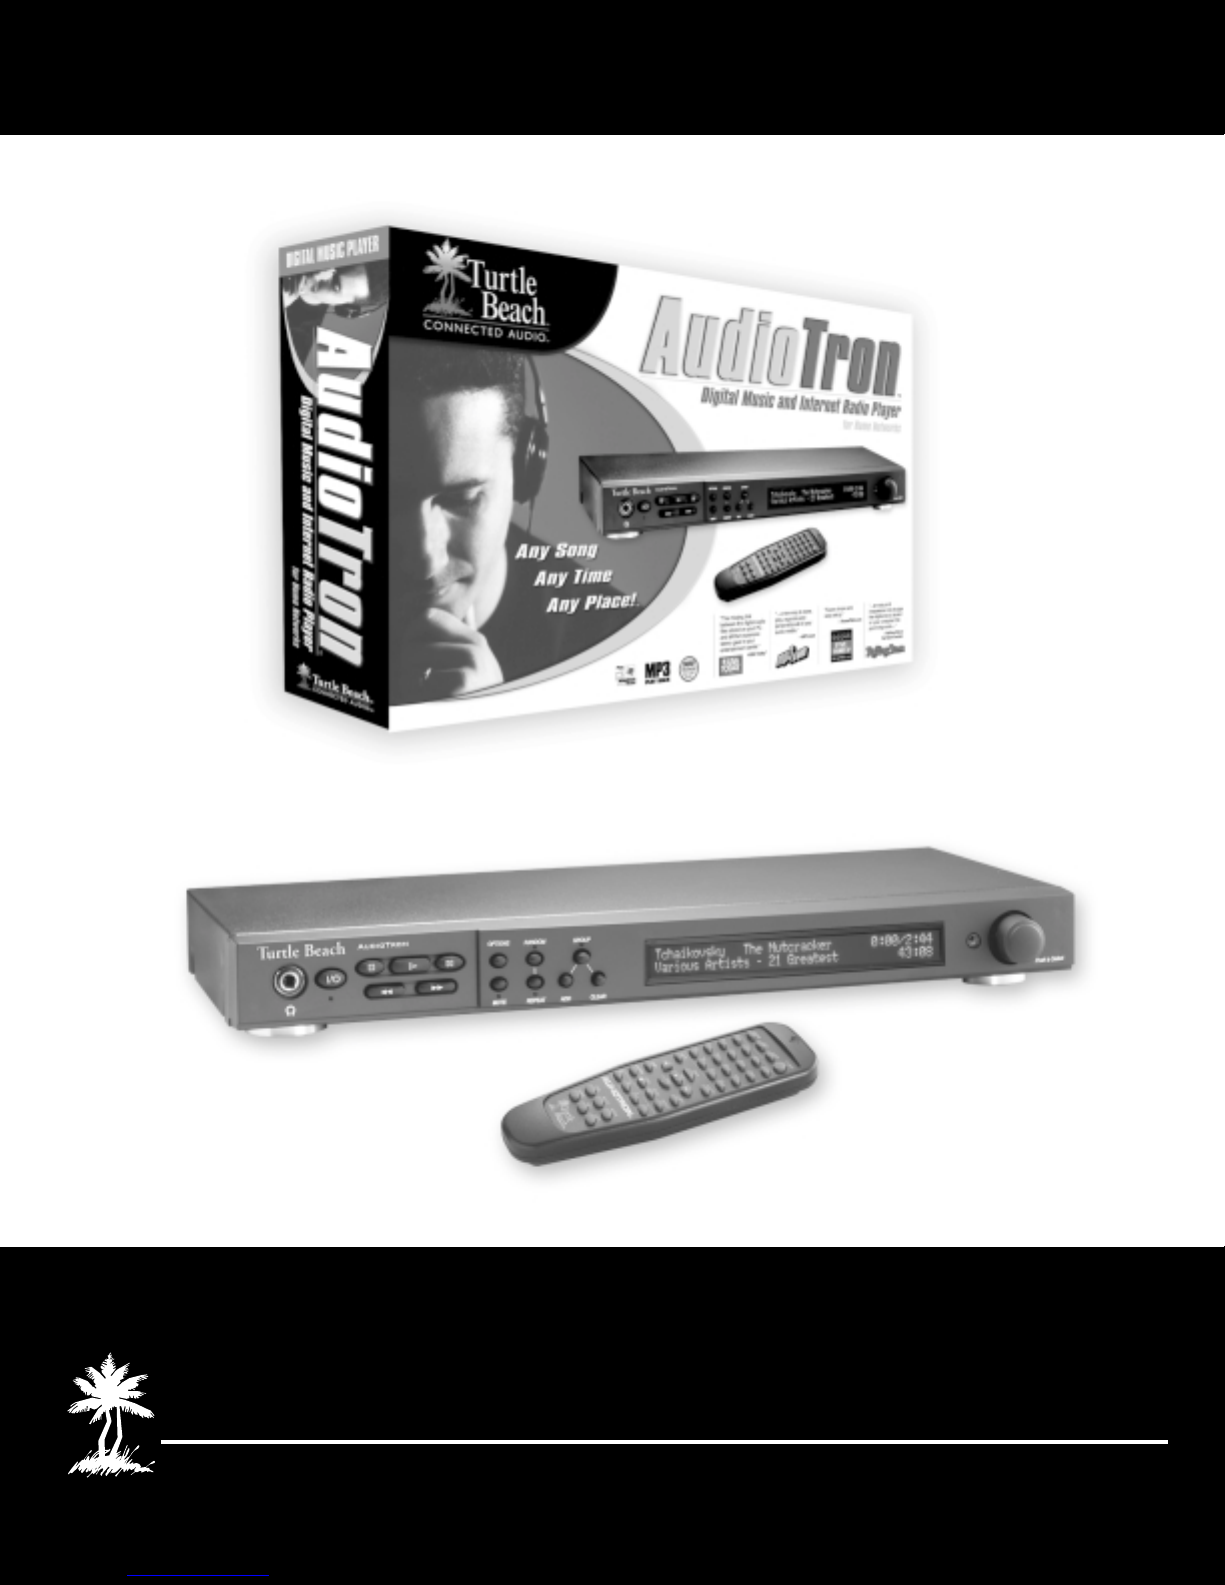
Digital Music Player for Home Networks
Turtle Beach
CONNECTED AUDIO
TM
TM
AudioTron
TM
Setup Guide
Page 2

AudioTron™ Setup Guide - Table of Contents
Notices ....................................................................................................................................................... 1
Important Safety Information...................................................................................................................................... 1
Introducing AudioTron................................................................................................................................ 2
Getting Started ........................................................................................................................................... 3
Package Contents...................................................................................................................................................... 3
AudioTron Options ..................................................................................................................................................... 3
System Requirements................................................................................................................................................ 4
AudioTron Accessory Software Applications ............................................................................................................. 4
Controlling AudioTron ................................................................................................................................ 5
Front Panel, Rear Panel and Remote Control ........................................................................................................... 5
Web Server ................................................................................................................................................................ 5
AudioTron Setup Procedure Overview....................................................................................................... 7
Step 1: Installing the CD and Connecting AudioTron................................................................................. 8
Installing the AudioTron CD ....................................................................................................................................... 8
Connecting AudioTron to the Network....................................................................................................................... 8
Connecting AudioTron’s Audio Outputs..................................................................................................................... 9
Turning on AudioTron’s Power ................................................................................................................................ 10
Step 2: Configuring AudioTron with the Setup Utility ............................................................................... 11
Setup Utility Advanced Options ............................................................................................................................... 15
Step 3: Configuring AudioTron to Play Internet Radio ............................................................................. 16
About Internet Radio Broadcasts ............................................................................................................................. 16
Accessing the Internet on a Network ....................................................................................................................... 17
Using the Setup Utility and Web Server to configure Internet Radio....................................................................... 18
Listening to your Music Library ................................................................................................................ 21
Main Menu Display .................................................................................................................................................. 21
Song Playback Display ............................................................................................................................................ 21
Song Position Display .............................................................................................................................................. 22
Playback Volume Display ........................................................................................................................................ 22
Play Queue .............................................................................................................................................................. 22
Group List ................................................................................................................................................................ 23
Managing Your Music Library with AudioStation ..................................................................................................... 23
Front Panel Menu Modes......................................................................................................................... 24
AudioTron Digital Music System Configurations ...................................................................................... 25
Operation Tips.......................................................................................................................................... 29
Network Troubleshooting Tips ................................................................................................................. 31
General Network Troubleshooting Tips ................................................................................................................... 31
Checklist for Ethernet networks ............................................................................................................................... 31
Checklist for HPNA 2.0 networks............................................................................................................................. 32
Product Specifications.............................................................................................................................. 33
Regulatory Compliance Information......................................................................................................... 34
Contacting Turtle Beach........................................................................................................................... 35
Technical Support .................................................................................................................................................... 35
Software Product ID Number
The software
number when you install the software, if you phone for technical support and to register your
AudioTron.
Please copy this number below and keep it in a safe place so you will have it for future
reference. (Note: The number may have either three or four digits in the last group):
Product ID Number
can be found on the software CD sleeve. You will need this
Page 3

AudioTron Setup Guide
Notices
AudioTron Setup Guide, Version 3.0; May 2002
Copyright © 2002 Voyetra Turtle Beach, Inc. All rights reserved.
No part of this publication may be reproduced or transmitted by any means or in any form, without prior written consent from Voyetra Turtle Beach, Inc. (“VTB”).
In no event will VTB be liable for direct, indirect, special, exemplary, incidental, or consequential damages resulting from any defect or omission in this manual,
even if advised of the possibility of such damages. In the interest of continued product development, VTB reserves the right to make improvements to this
manual and the products it describes at any time, without notices or obligation.
Turtle Beach, the Turtle Beach Logo and AudioTron are trademarks of Voyetra Turtle Beach, Inc. AudioStation, the Voyetra logo and Voyetra
are registered trademarks of Voyetra Turtle Beach, Inc. CDDB-Enabled, CDDB, and the CDDB logo are trademarks of Gracenote,
Microsoft, Windows and Windows Media are trademarks or registered trademarks of Microsoft Corporation. All other trademarks are the
property of their respective holders and are hereby acknowledged.
MPEG Layer-3 audio coding technology licensed from Fraunhofer IIS and THOMSON Multimedia. Supply of the MP3 functionality in this
product only conveys a license for private, non-commercial use and does not convey a license nor imply any right to use this product in real
time broadcasting (terrestrial, satellite, cable and/or any other media) or broadcasting via Internet and/or other networks, including, but not
limited to, intranets or in pay-audio or audio-on-demand applications. An independent license for such use is required. For details, please visit
http://www.mp3licensing.com.
Important Safety Information
Your Turtle Beach™ AudioTron is designed and tested to meet the latest standards for safety of digital music
technology equipment. However, to ensure safe use of this product, it is important that the safety instructions
marked on the product and in the documentation are followed. Always follow these instructions to help guard
against personal injury and damage to your product:
• Read and follow all instructions marked on the product and in the documentation before you operate your
system. Retain all safety and operating instructions for future use. Do not use this product near water or a
heat source such as a radiator. Set up the system on a stable work surface. The product should be
operated only from the type of power source indicated on the rating label.
• Openings in the product case are provided for ventilation. Do not block or cover these openings. Make
sure you provide adequate space, at least 6 inches (15 cm), around the system for ventilation when you
set up your work area. Never insert objects of any kind into the ventilation openings.
• This product is equipped with a three-conductor power cord to make sure that the product is properly
grounded when in use. The plug on this cord fits only into a grounding-type outlet. This is a safety feature.
If you are unable to insert the plug into an outlet, contact an electrician to install the appropriate outlet. If
you use an extension cord with this product, make sure that the total ampere rating on the products
plugged into the extension cord does not exceed the extension cord ampere rating. Do not walk on the
power cord or allow anything to rest on it.
• Do not spill anything on the product. The best way to avoid spills is to avoid eating and drinking near the
product. To avoid electrical shock, always unplug all cables from product before cleaning the product.
• When the product is turned off, a small amount of electrical current still flows through it. The power cord
should be unplugged from the wall outlet when the device is not used for extended periods of time.
• This equipment contains no user serviceable parts. Please refer all servicing to trained, qualified service
personnel.
• Unplug the product from the wall outlet and refer servicing to qualified personnel if: (1.) The power cord or
plug is damaged. (2.) Liquid has been spilled into the product. (3.) The product does not operate properly
when the operating instructions are followed. (4.) The product was dropped or the cabinet is damaged. (5.)
The product performance changes.
Caution
Do not use this product in areas classified as hazardous locations. Such areas include patient care areas of
medical and dental facilities, oxygen-laden environments, or industrial facilities.
To reduce the risk of fire, use only No. 26 AWG or larger telecommunications line cord. Replace fuse only with
a 5 x 20mm Slo-Blo® UL/CSA Cartridge Type Fuse matching the original equipment specifications.
Page 1
Page 4
www.Turtle-Beach.com
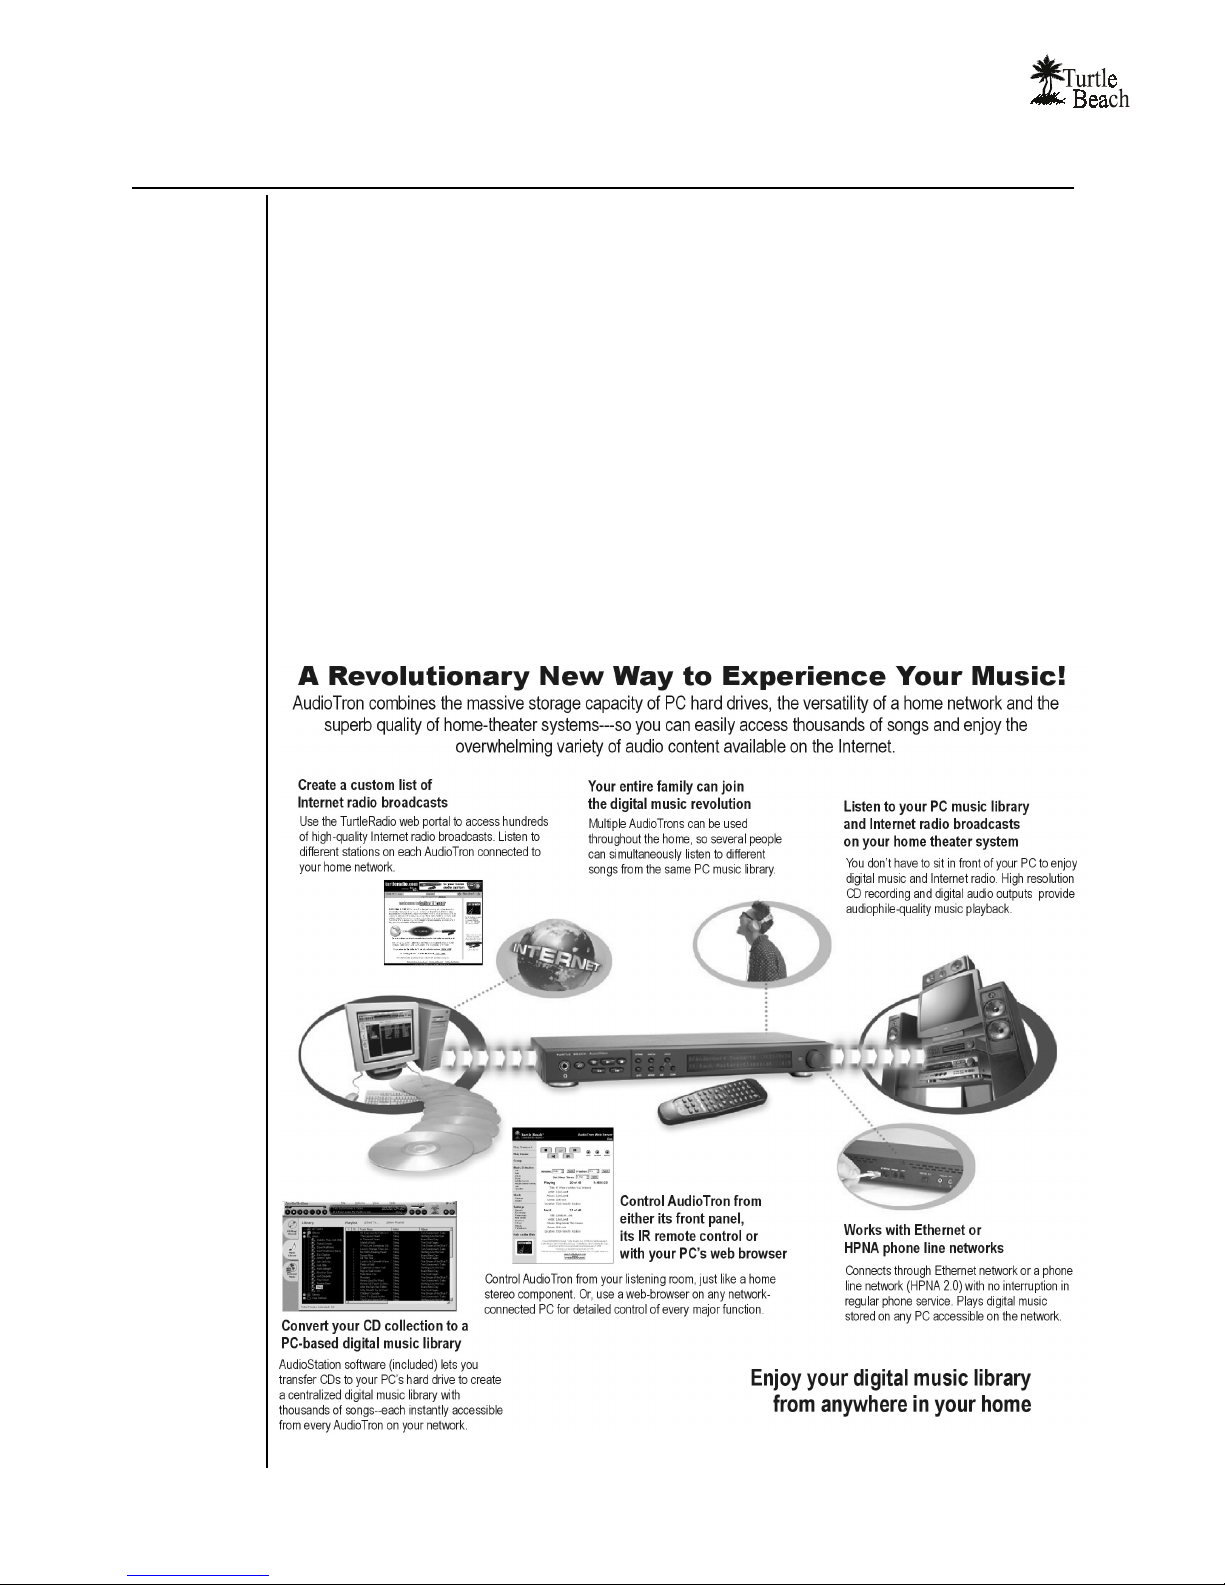
Introducing AudioTron
Your Turtle Beach AudioTron represents a new generation of home entertainment devices—a "smart
stereo component" that takes full advantage of the power and convenience of home networking, yet fits
right in with the rest of your home entertainment system.
AudioTron uses a network connection to play digital music files stored on your PC hard drive and
music streamed over the Internet—so you don’t have to be in front of your PC to enjoy the benefits
of a digital music library and Internet radio. Your PC hard drive can store thousands of songs in
digital format, which you can obtain by transferring CDs to the hard drive or by downloading music
from the Internet. Internet radio is available from hundreds of different sources, providing a wide
variety of content and styles of music.
Storing a digital music library on your PC lets you easily manage your music collection, create custom
playlists, create custom CDs, transfer music to a portable digital player, and select songs without
having to search through a pile of CDs—effectively transforming your PC into a powerful jukebox.
You can enjoy instant playback of any song at any time, from anywhere in your home. Best of all, by
installing multiple AudioTrons throughout your home, several users can simultaneously listen to
different Internet radio stations or to different songs from the same song library—making your entire
music collection and the versatility of the Internet accessible to the entire family.
Page 2
Page 5
Getting Started
This Setup Guide provides the basic steps for setting up your AudioTron. For detailed information on
AudioTron features, configuration suggestions, and troubleshooting tips, please refer to the
AudioTron Reference Manual provided in PDF format on the AudioTron CD. After installing the
CD, you may view the Reference Manual by selecting Start ÆÆÆÆ Turtle Beach AudioTron ÆÆÆÆ
AudioTron Reference Manual.
Package Contents
Turtle Beach AudioTron
This Setup Guide
AC Power cord
IR remote control with AAA batteries
RCA-to-RCA stereo audio cable (to connect to your home stereo or powered speakers)
Telephone cable with RJ-11 connectors (for use with HPNA phone line network)
AudioTron Setup Guide
Ethernet Category-5 (“Cat-5”) cable with RJ-45 connectors (for use with Ethernet network)
AudioTron CD, which includes the following:
AudioTron Setup Utility
AudioStation®
Sample Music Files
SoundCheck™
Demo Programs
Adobe® Acrobat® Reader
AudioTron and
AudioStation Reference
Manuals
Product Literature
AudioTron Options
The following items may be purchased from the Turtle Beach web site (www.Turtle-Beach.com):
This program is used to properly configure your AudioTron on the network. It
also serves as a useful diagnostic tool if you ever experience problems with
your system configuration.
This feature-rich program lets you create and manage your music library, as
well as play audio CDs, burn custom CDs from your digital music library files
and print labels for your CDs and CD jewel case.
These digital music files are used to test AudioTron and AudioStation
playback functions.
An audio diagnostic utility useful for troubleshooting PC audio problems.
Demo versions of Voyetra music programs.
A limited version for viewing and printing the PDF manuals.
These PDF manuals describe AudioTron and AudioStation in detail. The
manuals may be viewed and printed with the Adobe Acrobat Reader
program included on the CD.
A PDF version of Voyetra Turtle Beach product literature.
AudioTron Rack Ears
Fiber Optic Cable
RCA-to-1/8” Cable
Additional
AudioTrons
Additional AudioTron
Remote Control
Page 3
Use these to mount AudioTron in a 19” rack system.
Connects AudioTron’s digital optical output to compatible audio equipment.
Connects AudioTron’s RCA outputs to speaker systems with 1/8” line input jacks.
Listen to digital music everywhere in your home with multiple AudioTron units.
AudioTron Remote Controls are available for replacing or augmenting the existing
remote control included with AudioTron.
Page 6

www.Turtle-Beach.com
System Requirements
AudioTron requires the following in order to operate properly:
One or more networked PCs
Windows File Sharing
An HPNA 2.0 or Ethernet
10/100BaseT network
running TCP/IP
Powered speakers or a
stereo system with line level
inputs
An Internet Connection
A PC “jukebox” program to
convert your CDs to digital
audio files
Recommended Minimum PC System:
64MB RAM, CD drive with digital audio extraction, 16 bit color video card,
Internet connection and web browser. The PC should have sufficient hard
disk space for storage of your digital music files. (A four-minute song uses
approximately 3 to 5 MB of hard disk space in MP3 or WMA compressed
format.)
Although AudioTron will work with any network accessible share, Turtle
Beach technical support provides support for Windows 98/ ME/ XP Home/
XP Pro/ 2000 Pro.
AudioTron includes a phone cable for the HPNA connection and a Cat-5
cable for the Ethernet connection. Note that WAV file playback requires an
Ethernet connection.
AudioTron includes a stereo RCA-to-RCA cable for connecting the analog
audio outputs to powered speakers or a stereo receiver. A fiber optic
cable for the digital audio output may be purchased at the Turtle Beach
web site.
Internet access is required for the Internet radio feature and to download
song titles when converting CDs to the PC hard drive.
The AudioTron CD includes the AudioStation jukebox software to perform
this function. AudioTron also operates with jukebox programs compatible
with music files in the MP3, WMA and WAV formats and ID3 tags in the
Version 1.0, 1.1 or 2.3 format.
AudioTron Accessory Software Applications
The following software applications will be used when operating and setting up AudioTron:
Pentium 233MHz processor,
AudioTron Web Server
AudioTron’s web server (run from Internet Explorer, Netscape or other browser used to access
Internet Web sites) lets you configure AudioTron’s settings and play songs from the music library.
AudioTron Setup Utility
The Setup Utility (installed from the AudioTron CD) helps you set up AudioTron and troubleshoot
problems and network issues. The Setup Utility can also configure directories with the proper shares
and names so you can easily move your music files into these directories after setting up your system.
AudioStation
AudioStation (installed from the AudioTron CD) lets you create and manage your music library, play
audio CDs, burn custom CDs and manage TurtleRadio custom station lists. A comprehensive
AudioStation reference manual is included on the AudioTron CD in PDF format.
Page 4
Page 7

Controlling AudioTron
Front Panel, Rear Panel and Remote Control
AudioTron’s main controls are illustrated below. For details on the Front Panel, Rear Panel and
Remote Control functions, see the Reference Manual on the AudioTron CD.
AudioTron Setup Guide
AudioTron front and rear panels with Remote Control
Web Server
AudioTron’s extensive list of features cannot all be controlled
from the limited number of buttons on the remote control and
front panel. Instead, we’ve provided an integrated “web server”
that can be accessed from your PC’s web browser. Once your
AudioTron is configured, any PC on your network can be used to
access the web server by simply launching your web browser (e.g.
Internet Explorer or Netscape) and entering the IP address of your
AudioTron, enabling you to communicate with the AudioTron
from the PC.
After you’ve become accustomed to AudioTron’s powerful set of
features, you’ll appreciate the convenience of using the AudioTron
web server to control your song library and AudioTron settings.
The Reference Manual includes a comprehensive description of all
the web server features. This section provides an overview of what
it can do.
Menu Selections
The gray area on the left side of the screen lists all of the web server screens. To access a screen, click
the name in the menu list. Clicking on the Turtle Beach logo at the top of the screen will access the
Turtle Beach web site. Clicking on the TurtleRadio logo at the bottom of the left menu will access
the TurtleRadio web site. Clicking on the Help on the Web menu item will access the relevant help
sections at the Turtle Beach web site.
Page 5
Page 8
www.Turtle-Beach.com
Playing Songs from the Web Server
The Home, Play Queue and Group List screens work together with the Music Selection screens
to let you select and play music. Because the web server runs on a PC screen and is therefore not
limited by the characters on the front panel display, song selection and playback is more intuitive and
versatile. So, it’s easier to perform tasks such as assigning songs to the “Favorites” buttons on the
remote control.
Home
This is the web server’s main screen, which emulates the controls on the front panel. From here you
can set volume, song position, mute, random, and repeat. You can also see what song is currently
playing and what song is coming up next in the “Play Queue”. The Sleep Timer setting on this
screen lets you automatically stop the music after a preset time, such as when you’re listening to music
before falling asleep.
Play Queue
Click on this menu item to see the list of songs selected for playback. From here you can jump to any
song in the queue. Note that the song currently playing will be noted by a “Å Now Playing” symbol
next to the song, which corresponds to the “Playing” song shown on the Home screen. The next
song in the list corresponds to the “Next…” song on the Home screen.
Group List
Click on the Group List menu item to see the songs entered into the Group List. Songs are added to
the group by pressing the Add to Group button at the bottom of the song selection pages, or by
pressing the Add button on the front panel. The Group List works just like a playlist created with
AudioStation or other music management program—except you can create the Group List from the
AudioTron front panel or web server. You can play the Group List either by pressing the Play Group
button at the bottom of the screen, or by selecting the Group List from the Lists menu item, just as
you would select any other playlist.
Music Selection Menu Items
The menu items under the heading “Music Selection” correspond to the main menu display options
on the AudioTron front panel—Title, Artist, Album, Genre, Net and Lists. These menu items let you
select songs from your music library, just as you would from the front panel—but with much more
control over song selection. For example, click on Title to see all of the songs in your library listed by
title, or click Artist to select songs by Artist name, etc. You can even assign songs to the “Favorites”
button on the remote control by clicking on the Favorites menu item.
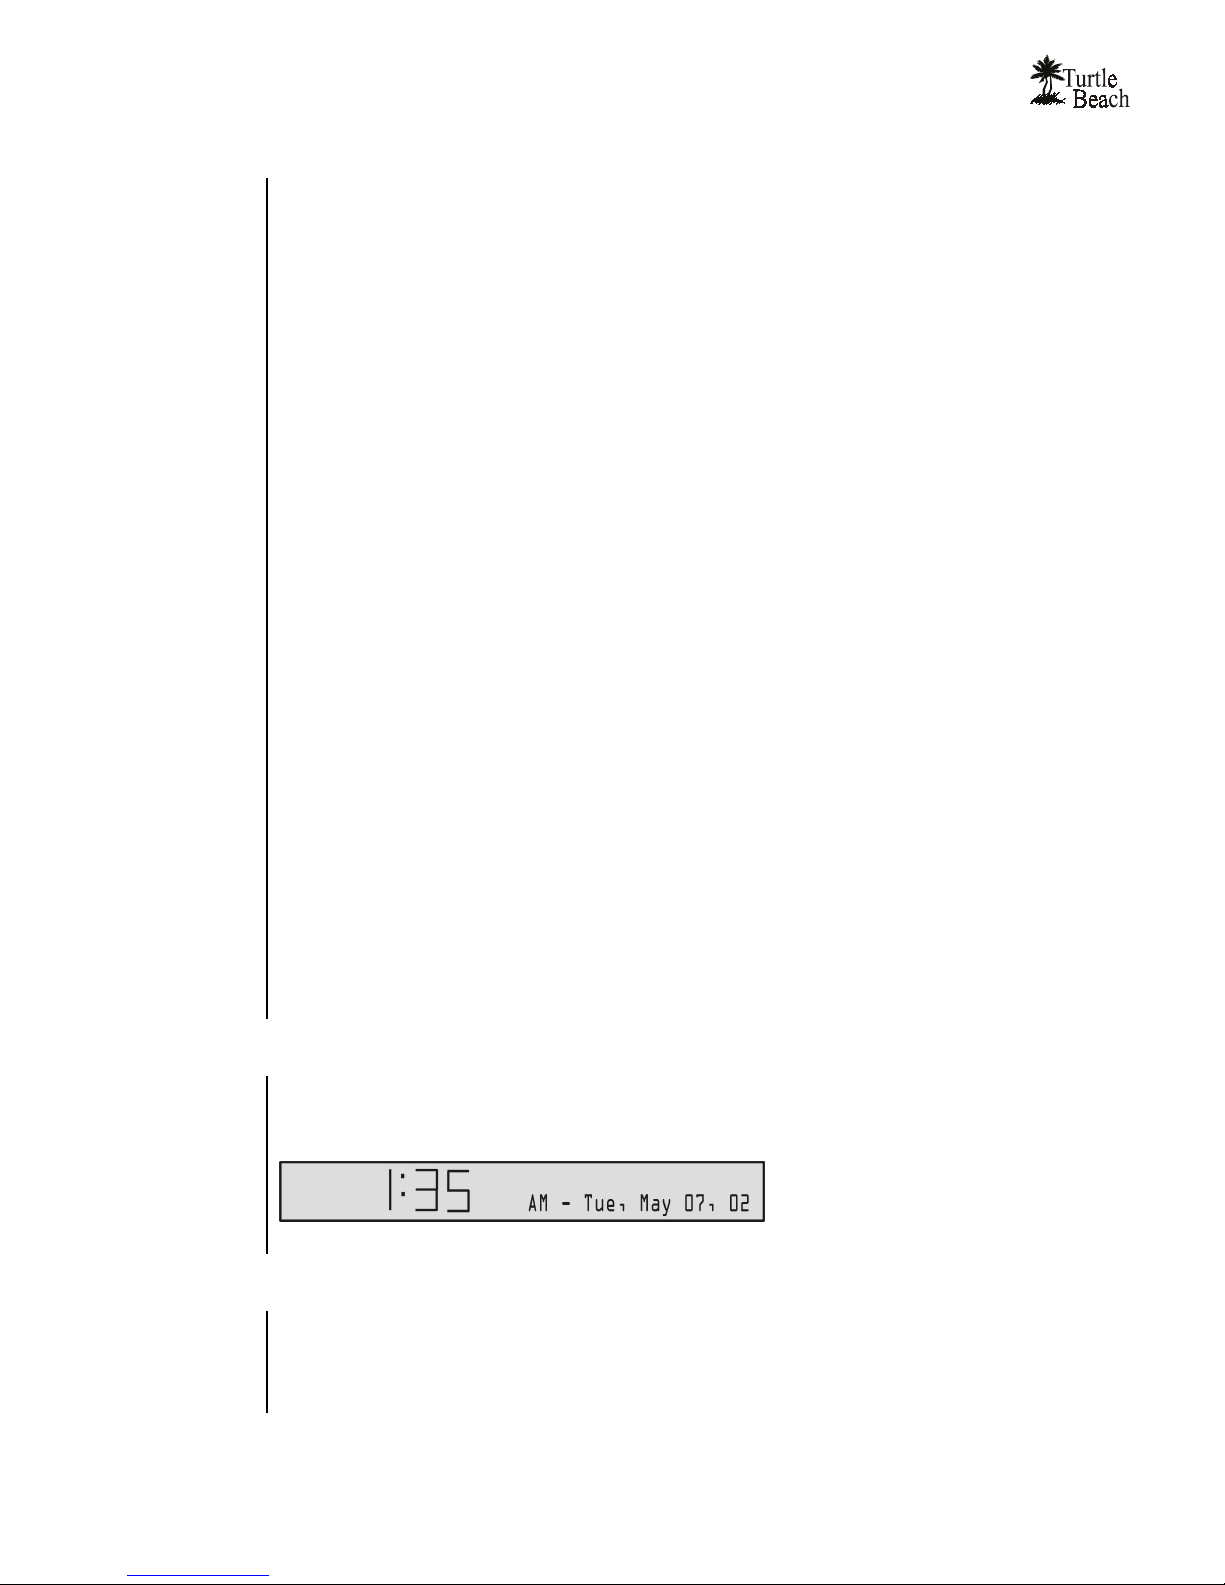
Using the AudioTron Clock Feature
AudioTron can also be set to display the time and date as well as act as an alarm clock, complete with
a “snooze” feature! Click on the Clock Settings menu item to set the clock options and click on the
Alarms menu item to set the alarm functions.
AudioTron Front Panel Clock Display
Editing Configuration Settings
The menu items under the Settings heading let you configure the way AudioTron operates, search
for songs in your music library, update AudioTron’s firmware, search for Internet radio stations and
more. Click on each menu item to see the available options and refer to the detailed descriptions in
the Web Server section in the Reference Manual.
Page 6
Page 9

AudioTron Setup Procedure Overview
Setting up AudioTron involves three major steps, as outlined below. Refer to the sections in this manual
with the corresponding STEP headings for detailed descriptions of each step.
Â
If you don’t have a broadband Internet connection (e.g. DSL or cable modem), you may want to
skip Step 3. Internet radio may not function adequately on a dial-up modem connection.
STEP 1: Install the CD and connect AudioTron
AudioTron Setup Guide
Install the Setup Utility,
AudioStation and
reference manuals from
the AudioTron CD
Connect AudioTron to
your network.
Connect AudioTron to
your audio system.
Power-on AudioTron
The Setup Utility is used to set up AudioTron.
9
AudioStation lets you manage your music library.
9
AudioTron and AudioStation reference manuals provide detailed feature descriptions.
9
Be sure your HPNA or Ethernet network is operating properly before setting up
9
AudioTron.
Use either the analog line outputs or S/PDIF digital optical output.
9
Turn on the rear panel power switch, then press, hold and release the standby button.
9
STEP 2: Configure AudioTron with the Setup Utility
Establish that AudioTron
is communicating on the
network
Establish that AudioTron
can access the files in the
music library
Establish that AudioTron
can play songs from the
music library
The Setup Utility will check if AudioTron is accessible on your network.
9
If AudioTron is accessible, use the AudioTron web server to configure its settings.
9
The Setup Utility will set up directories that conform with AudioTron's requirements and
9
install a sample music file for the playback test.
Once AudioTron can play the sample music file, you're all set! Now you can move your
9
existing music library to the new directories and add more music by recording your CDs
to the PC hard drive using AudioStation.
STEP 3 (optional): Configure AudioTron's Internet radio feature
Enable the Internet Radio
feature from AudioTron's
web server
Check that AudioTron can
access the Internet and
the TurtleRadio web site
Set up a TurtleRadio
account, then enter your
TurtleRadio Player ID into
AudioTron's web server
Load TurtleRadio Internet
radio stations from
AudioTron's web server
Page 7
You may not want to install the Internet radio feature if you don't have a broadband
9
connection (e.g. DSL or cable modem.)
Use AudioTron's web server to enable and set up the Internet radio feature.
9
The Setup Utility checks if AudioTron can access the Internet and www.TurtleRadio.com.
9
Access the TurtleRadio web site and follow the instructions to register your personal
9
radio station list for AudioTron.
Once you've set up TurtleRadio, you're ready to listen to Internet radio stations with
9
AudioTron!
Page 10
www.Turtle-Beach.com
g
Step 1: Installing the CD and Connecting AudioTron
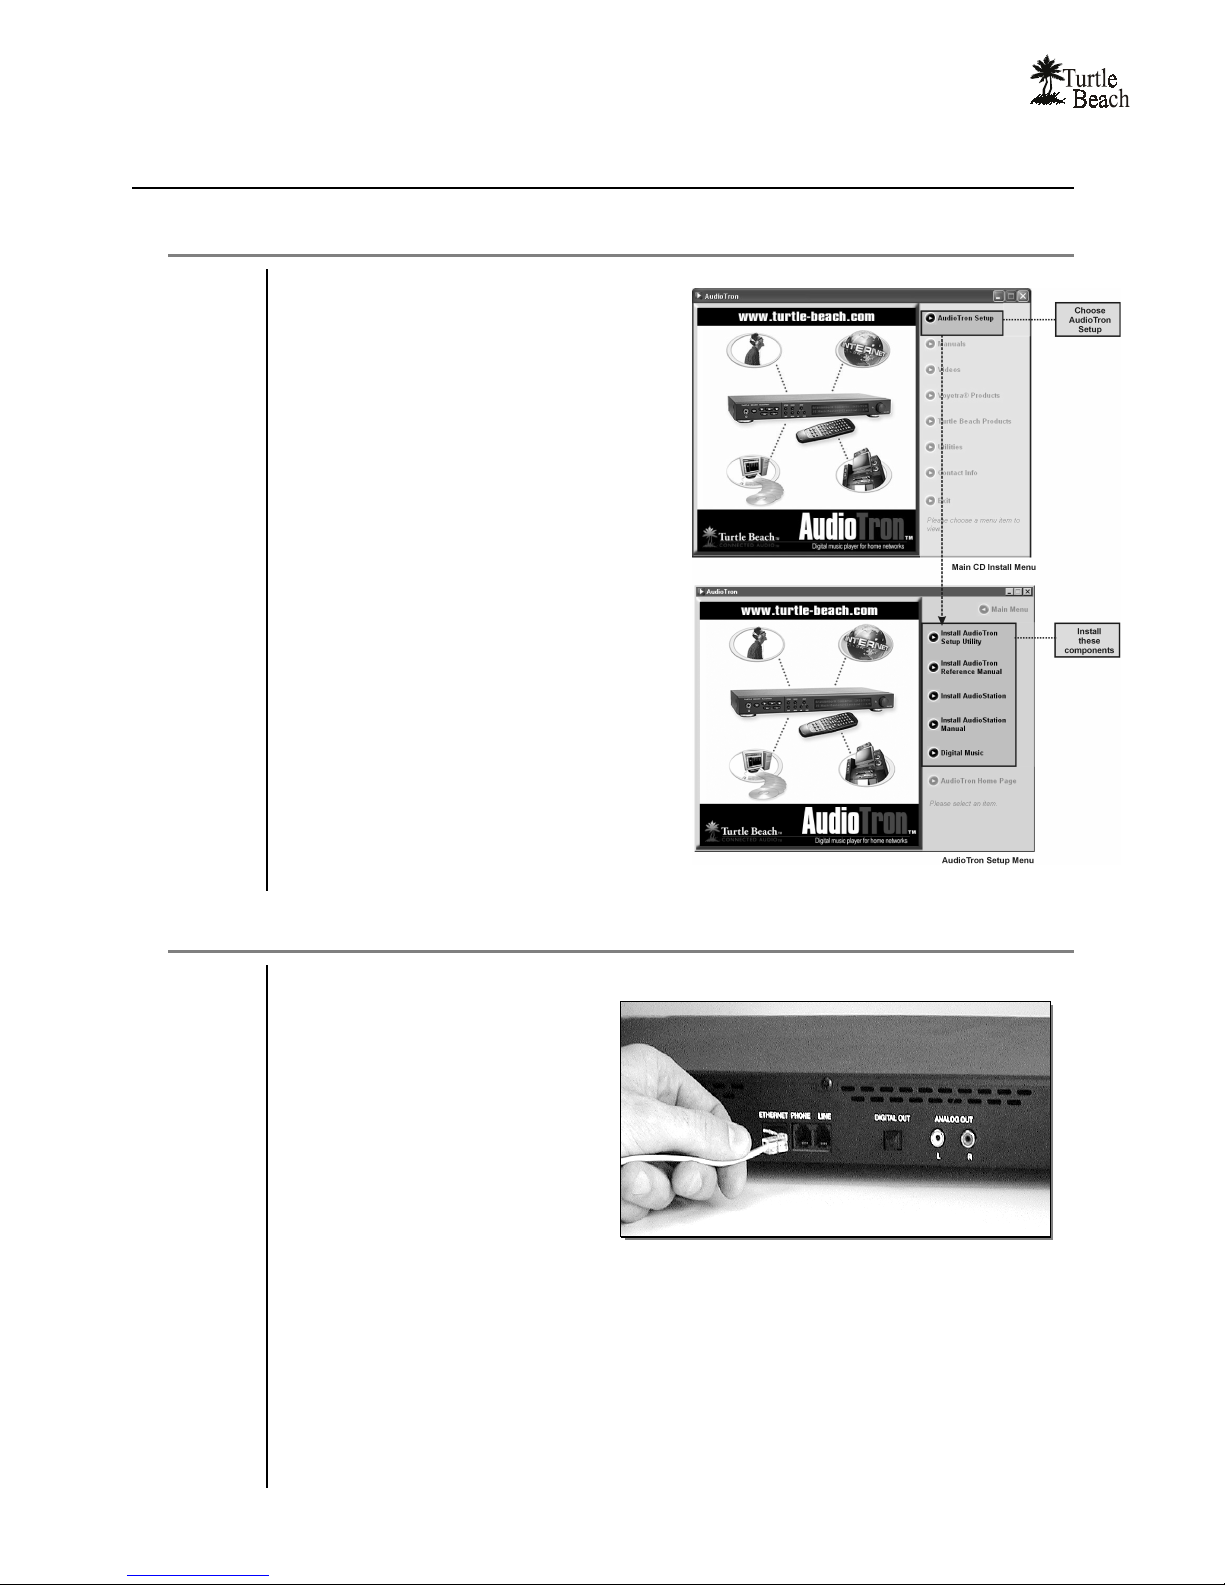
Installing the AudioTron CD
1. Place the AudioTron CD in your PC’s CD
ROM tray. If the AudioTron Installation
program doesn’t run automatically, click
Start Æ Run, then click on the Browse button
and select the CD-ROM drive letter. Doubleclick on Setup.exe. Then click on OK to start
the installation program. The opening screen
with the CD install main menu will appear, as
shown.
2. Click on AudioTron Setup to activate the
AudioTron Setup Menu. From the Setup
Menu, install the AudioTron Setup Utility,
AudioTron Reference Manual,
AudioStation, AudioStation Reference
Manual, and Digital Music.
3. When you run AudioStation for the first time,
you’ll be asked for the Product ID number.
This is located on the label attached to the
CD envelope.
Â
If we update AudioTron’s firmware or the
AudioStation software, we won’t be able to
let you know if we don’t know who you are!
So when you install the AudioTron CD,
please be sure to take a minute to register.
You can also return to the on-line
registration form later on by accessing Help
ÆÆÆÆ
menu
Register in AudioStation.
Connecting AudioTron to the Network
AudioTron includes both HPNA and
Ethernet network connections. You
need only connect one or the other,
depending on the type of network
you’re using. This installation
procedure assumes you have already
installed your network and it is
functioning properly.
For instructions on how to install and
check your network, refer to the
documentation included with your
network hardware. The AudioTron
Reference Manual on the CD also
includes information on AudioTron
network configurations.
Connect AudioTron to HPNA or Ethernet on the rear panel
the included cables.
usin
To connect AudioTron to an HPNA network…
1. Insert the phone cable (included with AudioTron) into the LINE connector on the rear panel.
2. Insert the other end of the cable into your HPNA phone jack.
3. If you had a phone connected to the phone jack, you can insert the phone line into the
connector labeled PHONE.
Page 8
Page 11
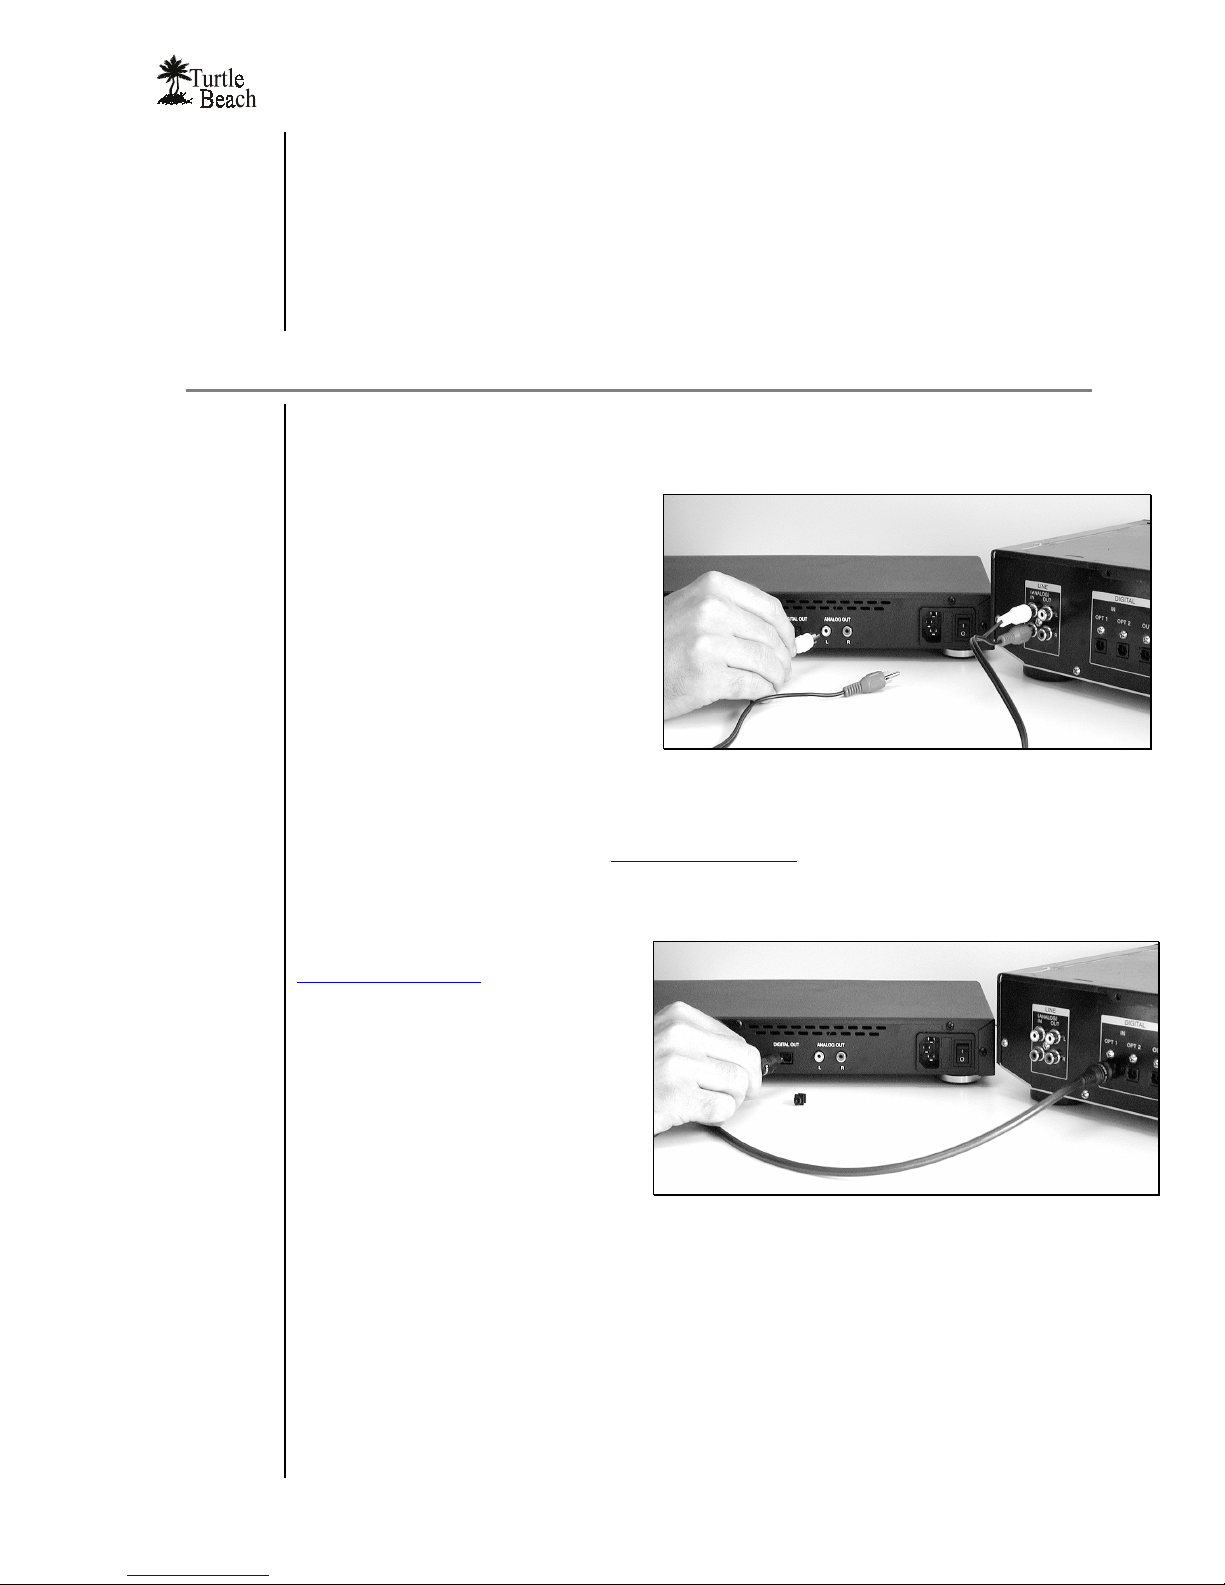
To connect AudioTron to an Ethernet network…
1. Insert the Cat-5 Ethernet RJ-45 cable (included with your AudioTron) into the connector
labeled ETHERNET on the AudioTron rear panel.
2. Insert the other end of the cable into your Ethernet hub, which in turn connects to a network
interface card in your PC.
Â
When connecting the cable make sure it “clicks” when inserted.
Connecting AudioTron’s Audio Outputs
AudioTron includes both analog and digital audio (S/PDIF) outputs. You need only connect one or
the other, depending on the type of audio equipment you’re using.
Analog Audio Outputs
AudioTron’s analog Left/Right outputs
are compatible with most stereo receivers
and powered speaker systems. The front
panel headphone jack is compatible with
most 8 ohm – 32 ohm headphones. Note
that when headphones are plugged in, the
rear panel analog audio is muted.
AudioTron Setup Guide
To Connect the analog outputs…
1. Use the stereo “RCA to RCA” audio
cable included with AudioTron to
connect the AudioTron RCA jacks to
the line input jacks on your stereo receiver (which may be labeled AUX, CD or LINE IN.)
2. If you’re connecting AudioTron to powered speakers with an 1/8” input jack, you’ll need a 1/8”
to RCA adapter cable, available at www.Turtle-Beach.com.
Use the included RCA-to-RCA cable to connect the Analog outputs
Digital Audio Output
The optical digital output connection
(requires a fiber optic cable available at
www.Turtle-Beach.com) provides a
digital signal compatible with high-end
stereo receivers and home theater
systems. This output operates differently
than the analog audio outputs in the
following ways:
The digital output supports a fixed
number of sample rates that adhere
to the S/PDIF standard. Thus,
music files that are formatted in
non-S/PDIF sample rates will not
play out of the digital output. For a
list of supported sample rates, see the Reference Manual.
Connecting the digital output requires an optional fiber optic cable.
The volume control will not affect the digital output.
On most audio systems, the digital output may have a higher volume than the analog output.
To connect the digital output…
1. Remove the plastic cover from the DIGITAL OUT connector on the AudioTron rear panel.
2. Connect one end of the optional fiber optic cable (not included with AudioTron) to the stereo
component's Digital Input and the other end to the Digital Out on the AudioTron back panel.
Page 9
Page 12

www.Turtle-Beach.com
Turning on AudioTron’s Power
AudioTron has two power switches: The rear panel power switch turns on the main AC power to
the unit. The front panel Standby button places AudioTron in a “sleep” state whereby the main
power is still on, but the unit is in a “partial shutdown” mode that retains its temporary settings.
To Power-on AudioTron…
1. Insert the AC cable into AudioTron’s rear panel AC receptacle. Plug the other end of the cable
into an AC outlet.
2. Turn on the rear panel AC switch. Wait a few seconds, then press the front panel Standby
button.
3. If AudioTron is properly connected to the network, it will search the network for PC hosts with
song files. After finding the PC hosts, it scans for songs and catalogs the song names in its
internal memory so they can be quickly accessed.
4. Once AudioTron is powered on, it should be turned on and off with the Standby button. This
bypasses the network search process initiated by turning on the rear panel power switch.
Â
If you will not be using AudioTron for an extended period of time, the AC power switch on the
rear panel should be turned off.
One or more of the following messages may appear while AudioTron is powering on:
Version x.x – Enet DHCP
Connecting to
TurtleRadio
Searching for Hosts
– xx% Complete
Searching host x of x
Searching for Music
Found xxxx Songs
xxx Stations
Waiting for network: xx
secs
No Song Titles Found
No Hosts Found
Indicates the firmware version number and the type of network connection
detected. For details on how to upgrade the firmware version, see the
Reference Manual Appendix called “
If you connected an Ethernet cable and AudioTron’s display indicates HPNA,
check the network cable connection to AudioTron and check the network for
proper operation.
Indicates that AudioTron is searching for an Internet connection to download
radio station URL locations from the TurtleRadio web site. The internet radio
feature is disabled by default and may be enabled from the AudioTron web
TurtleRadio
server “
Indicates that AudioTron has found the network connection and is searching
for PCs on the network.
Indicates the number of PCs detected on the network.
Indicates the number of songs and Internet Radio Stations found on the PCs
in the network. After the song search is completed, the main menu is
displayed and AudioTron is ready to play music.
(DHCP Mode Only) Indicates that AudioTron is trying to connect to the
network. If a network connection can’t be established after 120 seconds,
AudioTron stops searching and displays “No Hosts Found” followed by “No
Song Titles Found”. Use the Setup Utility to help troubleshoot this problem.
Indicates that no songs were found on the host, or that no host was found.
Use the Setup Utility to help troubleshoot this problem, or check for the
proper directory names and shares, as described in the Reference Manual.
Indicates that no PCs were found on the network. Reconnect the network
cable into AudioTron’s rear panel to make sure it “clicks” when inserted, or
try another network cable. Use the Setup Utility to help troubleshoot this
problem.
” page.
Updating AudioTron’s Firmware
”.
“Re-setting” AudioTron
AudioTron may be “reset” by turning the rear panel power switch off and on, waiting a few seconds,
then pressing the Standby button. This would be necessary, for example, if AudioTron is behaving
erratically, or if you have loaded new firmware (see the AudioTron Reference Manual). Note that
this may also reset some of AudioTron’s configuration settings to their default values.
Page 10
Page 13

AudioTron Setup Guide
Step 2: Configuring AudioTron with the Setup Utility
After installing the CD and setting up AudioTron’s audio and
network connections, the next step is to use the AudioTron
Setup Utility (installed from the AudioTron CD in Step 1) to
check AudioTron’s network connections and set up your music
directories. The AudioTron web server, accessed from your PC’s
web browser, will also be used to configure AudioTron. For a
detailed description of the web server features, see the
AudioTron Reference Manual on the CD.
Before proceeding, check the following…
1. You should have either an HPNA 2.0 or Ethernet 10/100
network installed and running properly.
2. AudioTron should be connected to the network and to
your audio system. Both AudioTron and your audio
system should be powered on.
3. You should have installed the AudioTron CD on a PC
connected to the network, per the instructions in the
previous section.
4. The PC used in this setup procedure should be set to use
“File and Printer Sharing” per the information in the
Windows documentation for the version of Windows
running on the PC. The Setup Utility will notify you if it
detects that File and Printer Sharing is not set.
5. Disable any virus protection, firewall, Internet “adblocking” or “cookie blocking” software running on the PC.
These programs may interfere with the normal operation
of the Setup Utility.
Setup Utility Welcome Screen
Main Menu Screen
Run the AudioTron Setup Utility
Run the Setup Utility by clicking Start ÆÆÆÆ Programs ÆÆÆÆ Turtle
Beach AudioTron ÆÆÆÆ AudioTron Setup Utility. The
“Welcome” screen will appear, as shown.
Press Next and the Setup Utility will check your PC’s network
adapter. If the test passes, the Setup Utility Main Menu screen
will appear.
Press Next to start the test called “Check AudioTron
Network Connection”.
Â
If a network adapter error occurs, the “Adapter Error”
screen will appear. In the device list, highlight the network
adapter used to connect AudioTron (e.g. if you’re using
an Ethernet network, it will be listed as an Ethernet
Adapter) then press “Next” and follow the on-screen
instructions for advice on how to correct the problem.
Searching for AudioTrons on the network
In the Check AudioTron Network Connection screen, select
the number of AudioTrons on your network and press Next.
The Setup Utility will scan each node on the network to see if it
can detect an AudioTron. The test will stop after it detects the
number of AudioTrons listed, or after all network nodes have
been checked.
Adapter Error screen
Check AudioTron network connection
screen
Page 11
Page 14

www.Turtle-Beach.com
Search Results
After scanning the network, the Search Result screen will
show the number of AudioTrons detected. If the number is
the same as the number of AudioTrons on your network,
check Yes. Then press Next to enter the Search Results
List screen, which shows the network information and
firmware version for each AudioTron detected.
Â
If the number of AudioTrons shown is less than the
number you’ve connected, first press the Back button
to check if the number you entered in the Check
AudioTron network connection screen is correct. If
that’s not the problem, check each AudioTron to make
sure the power is turned on and that they’re properly
connected to the network. If neither of these corrects
the problem, check No in the Search Results screen
and follow the screen instructions.
Search Result screen
Set AudioTron Location Name
Click “Next” on the “Search Results List” screen to enter
the “Location Name” screen. From here, follow the screen
directions to assign a name to each AudioTron. This name
will be displayed on the home screen of the AudioTron web
server.
Create an AudioTron Web Server Shortcut
Click Next to enter the Launch Web Server screen.
Click on Create desktop shortcut to place an icon on your
desktop that can easily launch the AudioTron web server. If
you have more than one AudioTron, a menu will let you
select an icon for each one.
Launch AudioTron’s web server
Click on the “Launch AudioTron web server” button to
launch the AudioTron web server. The web server runs from
the same browser used to access Internet web sites (e.g.
Internet Explorer, Netscape, etc.). When the web browser
asks for a password, enter the default password “admin”
into both boxes.
The AudioTron web server makes it easy to configure
AudioTron’s options settings, as well as search for and play
songs from your PC. It also provides links to access the
TurtleRadio web site and the AudioTron Knowledge Base
at the Turtle Beach web site. For complete details on the
web server, see the AudioTron Reference Manual.
Search Results List screen
Location Name screen
Launch Web Server screen
Now that you know how to launch the web server, let’s
return to the setup process. After AudioTron is set-up, you
can return to the web server and explore the features.
Web server Home screen
Page 12
Page 15

Check AudioTron Playback
Click Next to enter the Main Menu. Click Next again to run the
Check AudioTron music file playback test, which creates a
shared directory called \AudioTron\My Music and copies a
music demo file from the AudioTron CD to this directory.
Â
AudioTron has special requirements for music directories,
which are explained in the Reference Manual. This test
configures the directories to conform with these
requirements.
AudioTron Setup Guide
Check for demo music file
Press the Options button on the AudioTron front panel to
activate the Check for new music option. Press the knob, which
causes AudioTron to search the network for the music file
installed by the Setup Utility.
Play demo music file
Press the Options button again to return to the main menu on
the AudioTron display. Press the front panel Play button twice
and you should hear music play.
Playback Test Results
Now that we’ve checked music playback on AudioTron, return to
the Setup Utility Playback Test Results screen and check one of
the following options:
• The files are playing and I can hear them: Check this if
you heard music play.
• The files appear to be playing but I cannot hear them:
Check this if AudioTron’s front panel indicates playback
activity, but you can’t hear music. This could mean that your
audio system is not set up properly. If you can’t correct the
problem, check the section “Audio Troubleshooting Tips”
in the Reference Manual.
Main Menu screen
Front panel Check for New Music display
Playback Test Results screen
• Nothing is playing: Check this if AudioTron’s front panel
shows no playback activity. This indicates there is no
communication between the PC and AudioTron. This could
be caused by a network error that is preventing AudioTron
from communicating with the PC.
Remove or keep the new directories
Press Next to enter the Playback Test Completed screen,
where you can choose to either remove or retain the
\AudioTron\My Music directory created in the previous test.
If you do not already have a music library, check “Leave the
demo file and shared folder” so you can copy your new music
to this folder as you record your CDs with AudioStation.
If you already have a music library on your PC, you can either
copy the library to this new directory, or delete the directory and
have the Setup Utility set up the share properties of your existing
directory to conform with AudioTron’s requirements.
Page 13
Playback Test Completed screen
Page 16

www.Turtle-Beach.com
Search local PC for music files
Now it’s time to search for music files on your “local” PC (i.e. the
PC running the Setup Utility). Click Next to return to the Main
Menu screen. Click Check Local PC for Music Files, then click
Next until the Search Local PC screen appears, as shown.
Click the Settings button to set the File Search Options. Then
click Next to begin the song file search.
Â
To search other PCs on your network for music files, use the
main menu test called Search remote PCs for music files,
described in the next section.
File Search Results
After the search is completed, the Local PC Search Results
screen will list the directories with icons to indicate their status. A
“Play” icon is placed next to directories with music files, playlist
files or firmware update files accessible to AudioTron. In the
illustration, the directory My Music contains files accessible to
AudioTron. The other directories are inaccessible to AudioTron.
Â
Only music files in directories marked with a icon can be
played by AudioTron.
Main Menu screen
Search Local PC screen
Viewing the Directory Contents
Highlighting a directory in the Search Results screen shows its
status at the top of the box. In this example, the status message
shows that the contents of directory My Music are accessible to
AudioTron.
• “Legend” button: Click this button to see a list of the icons
used to mark the directory test results.
• “Fix it” Button: If you have music in a folder not marked with
a icon, clicking this button will make the folder accessible to
AudioTron by placing a special “tag” file in the folder. After
running this “Fix-it” feature, re-scan for music files by pressing
the Options button on the AudioTron display to activate “Check
for New Music”.
• “Show Files” button: Click this button to display the files in
the highlighted directory, as shown in the “Directory
Contents” screen illustration.
• Nested Shares: If music directories are shared multiple times,
AudioTron will list the music in those directories twice. If a
dialog box indicates this situation, click on OK to correct this
condition.
AudioTron is now ready to play your music library!
At this point, AudioTron is ready to access music files from PCs on
your network.
Local PC Search Results screen
Directory Contents screen
Â
If you do not want to set up the Internet Radio feature, you
can skip Step 3 and move on to the section called “Listening
to Your Music Library”.
Nested Shares screen
Page 14
Page 17

Setup Utility Advanced Options
Check a remote PC for music files
If you have other networked PCs with music files you’d like to add
to the music library, run the option Search remote PC for music
files from the Main Menu screen. This search is identical to
Search local PC for music files, except it can be run on any PC
connected to the network.
Highlight the remote PC you’d like to search by clicking on the PC
name in the Select a Remote PC directory tree, then click Next
to begin the search.
AudioTron Setup Guide
Note that some network configurations may require you to run the
Setup Utility on the remote PC in order to use the “Fix it” feature
described in the Search Results screen earlier in this section.
Â
If you have a large network with many files, this test can
take several minutes to run.
Just as with the Search local PC for music files option, after
this search is completed, you must load the music file locations
into AudioTron’s internal database by pressing the Options
button on the front panel, then pressing the knob to activate
Search for new music.
Viewing the Setup Utility Test Results
If you’d like to see the Setup Utility test results, click on View
Test Results on the Main Menu, then click Next to display the
View Test Results screen. Press the Test Details button to view
the test results for the Network Adapters, AudioTron, Local
PC, Remote PC and Internet Connection.
Â
Note that the Internet Connection selection will show the
network settings for your network gateway and DNS server,
which may be required during the setup of your network
Internet connection.
Running Advanced Options
Main Menu screen
Select a Remote PC screen
View Test Results screen
The Advanced Options screen is accessed by selecting
Advanced Options on the Setup main menu screen, then
pressing Next.
The option labeled Remove Log Files and History will delete
the Setup Utility data after you press Finish. Deleting this data
lets you run the Setup Utility as if it were run for the first time on a
new setup.
The option labeled Remove Index Files from Local Computer
will remove the special files inserted in the music directories to
override the AudioTron directory restrictions.
The Launch AudioTron Web Server and Create Desktop
Shortcut buttons are identical to the buttons described in the
Launch Web Server screen earlier in this section.
Page 15
Advanced Options screen
Page 18

www.Turtle-Beach.com
Step 3: Configuring AudioTron to Play Internet Radio
Â
We recommended that you use the Internet radio feature with a broadband Internet
connection, such as DSL or a cable modem. Although Internet radio will work with a standard
phone line modem connection (i.e. a “dial up” connection), this type of connection is not
adequate for providing a consistent and reliable stream of data for Internet streaming audio.
AudioTron’s Internet radio function is turned off by default and must be enabled from the web server
Settings ÆÆÆÆ TurtleRadio menu item, as described in this section. Once activated, Internet radio
stations can be accessed from the Net main menu item on the front panel display, or the Net (by
Category) and Net (by Station Name) menu items in the web server. Internet radio stations are
provided by the TurtleRadio web site (www.TurtleRadio.com.)
TurtleRadio Web Site
Rather than burden you with having to search for
Internet radio stations compatible with AudioTron,
we at Turtle Beach have created the TurtleRadio
web site (located at www.TurtleRadio.com) which
lists a wide variety of Internet broadcasts compatible
with AudioTron. You can also add stations that are
not listed at the TurtleRadio site by using
AudioStation. This section explains the process of
setting up AudioTron to play Internet radio stations,
which involves these key steps:
1. Enable the Internet radio feature from the
Settings ÆÆÆÆ TurtleRadio web server screen.
2. Test if AudioTron can play audio from the
TurtleRadio site by activating the sample
broadcast from the Music Selection ÆÆÆÆ Net (by Category) web server screen.
3. Register at the TurtleRadio web site to receive a TurtleRadio Player ID for your AudioTron,
which you then enter into the Settings ÆÆÆÆ TurtleRadio web server screen.
4. Set up your station list at the TurtleRadio site and scan your stations into AudioTron’s music
database by using “Check for new stations” in the Settings ÆÆÆÆ TurtleRadio web server screen.
5. Play the stations from the Net (by Category) or Net (by Station Name) web server screens, or
from the front panel display’s “Net” menu item.
About Internet Radio Broadcasts
Internet radio stations use a technology called “streaming audio” to broadcast over the Internet.
Unlike the files in your PC music library, the streaming audio from an Internet radio station travels
through your Internet connection to AudioTron in sequential pieces that are stored temporarily by
AudioTron in a memory “buffer”. As the buffered part of the streaming file is played by AudioTron,
another part is loaded right behind it—so it’s ready to play after the preceding part is erased. Thus, the
entire streaming audio file from the Internet station never fully resides on your PC or in AudioTron.
Buffering the audio stream lets AudioTron ignore most Internet interruptions that may delay the file
transfer from the station, in much the same way your car CD player can handle going over a bump in
the road. However, if interruptions of the streaming audio exceed the buffer size, it could create a
break in playback and result in “stuttering” or erratic playback of Internet radio stations.
TurtleRadio Web Site Home page
Â
AudioTron can play Internet radio stations that broadcast in streaming MP3 format (e.g.
SHOUTcast, IceCast and Nanocaster) and Windows Media Format. For more information
about Icecast visit www.Icecast.org. For more information about SHOUTcast visit
www.SHOUTcast.com. For more information on Windows Media Format, visit
www.windowsmedia.com.
Page 16
Page 19

Connection Speeds and Internet Radio Quality
The speed at which an Internet radio station sends streaming data over the Internet is measured in
“kilobits” per second, or simply “k”. For example, an Internet radio station streaming data at 56k
means it is sending an average of 56,000 bits per second to AudioTron’s buffer. High quality stations
use high bitrates that can approach CD fidelity, which require a broadband Internet connection such
as DSL or a cable modem. Lower quality stations, which transmit at bitrates less than 33k, can be
received on low-bandwidth dial-up Internet connections but do not have the same fidelity as the
higher bitrate stations.
For instance, a 56k dial-up modem (which typically provides a bitrate of 33k) is capable of supporting
Internet radio streams of 33k or lower. However, this bitrate capability will vary based on the quality
of the modem phone line connection and the server streaming the Internet radio station. In addition,
the Internet connection will not be able to sustain additional data required by another use of the
Internet, such as web browsing while listening to Internet radio. For this reason, it is not advisable to
use a dial-up modem connection for listening to Internet radio broadcasts.
After you’ve created an account at the TurtleRadio web site, you can set your custom preferences to
receive only streams with a bitrate appropriate for your Internet connection.
Accessing the Internet on a Network
When more than one PC has access to the Internet on a network, most likely, the Internet connection
will either be distributed through a gateway/hub device or one of the PCs on your network will ‘share’
its Internet connection on the network. Two possible configuration scenarios are illustrated below:
AudioTron Setup Guide
AudioTron Internet connection scenarios
In Scenario 1, a PC with a dial-up, DSL or cable modem connection is used to access the Internet. In
order to allow other PCs and AudioTrons on the network to access this connection, the PC must be
configured for “Internet Connection Sharing”. Although this is beyond the scope of this manual, you
can get information on how to do this by looking in a good book that describes Windows
configuration settings, or referring to Windows Help.
In Scenario 2, a dedicated hub or router connected to a dial up, DSL or cable modem provides
Internet access to the PCs and AudioTrons on the network. For configuration information, see the
setup guide included with the router/hub.
Â
In either scenario, if a PC can’t access the Internet from the network connection, neither will
AudioTron. So, you must first make sure that Internet access is properly set up on your
network before proceeding with the AudioTron Internet radio installation.
Page 17
Page 20

www.Turtle-Beach.com
Using the Setup Utility and Web Server to configure Internet Radio
After you’ve checked that your network is configured for Internet access, use the Setup Utility to set
up AudioTron’s Internet radio feature as follows:
Check AudioTron’s network Internet Connection
From the Setup Utility Main Menu, click the Check
AudioTron Internet Connection option, then click Next.
In this test, the Setup Utility will attempt to access an
Internet Connection from the network. If it can’t, it will
attempt to access an Internet connection from the local PC.
Based on these tests, it will diagnose the Internet access
configuration and suggest if any changes are required for
AudioTron Internet access.
Evaluate the test results
After the tests are completed, the Internet Connection Test
Results screen will show the test results.
If there are green “checks” next to all of the tests (as
shown in the sample screen) press Next.
If an “X” is displayed in any of the tests, examine the list
at the bottom to see what part of the test failed.
Note that the first row in the list shows the test results for the
device providing Internet access to the network. The other
rows show the test results for the AudioTron(s) found on the
network.
If any problems are listed, see the Reference Manual for
troubleshooting tips.
Activate AudioTron’s Internet radio feature
AudioTron’s Internet radio feature is turned off by default
from the factory. To enable this feature, activate the
AudioTron web server by double-clicking the desktop icon
created in the previous section (“Configuring AudioTron with
the Setup Utility”) or by typing in the IP address of the
AudioTron into your web browser.
On the AudioTron web server screen, click on TurtleRadio
under the Settings category of the left menu to activate the
TurtleRadio Settings screen.
Select the check box to enable Internet Radio and click
Save TurtleRadio Settings.
Click the Search button next to “Check for new stations”.
Main Menu screen
Internet Connection Test Results screen
Web server TurtleRadio Settings screen
Page 18
Page 21

Test Internet radio
Click the Net (by Category) menu item at the left. Here,
we’ll check if AudioTron can play an audio stream from
the TurtleRadio web site to make sure everything is
properly set up for playing Internet radio stations.
Press the Play button next to the message “Click Play
for a TurtleRadio introductory message”. After a few
moments you should hear the message .
Â
This message is in streaming audio format and is
not playing from a file on your PC hard drive. It’s
an audio stream broadcast over the Internet to
your AudioTron from the TurtleRadio web site!
If AudioTron displays an error message indicating that it
cannot find stations or that no Internet radio was found,
check that the Internet radio feature is enabled in the
web server TurtleRadio Settings screen, as described in
the previous steps.
If you heard the TurtleRadio message, the TurtleRadio
feature is working properly and you’re ready to set up
your station list at the TurtleRadio web site.
AudioTron Setup Guide
Web Server Net (by Category) screen prior to
loading station list from TurtleRadio
Set up your TurtleRadio Account
Click on the TurtleRadio icon at the bottom left of the
web server screen to connect your web browser to the
TurtleRadio web site www.TurtleRadio.com. Follow the
instructions at the TurtleRadio site to learn how to set
up an account and receive a TurtleRadio Player ID for
your AudioTron.
Set up your custom station list
While you’re at the TurtleRadio site, you can set up your
custom radio station list, which will be used by
AudioTron to play Internet radio stations. Or, if you
prefer, you can return at a later time and instead use all
of the preconfigured stations from TurtleRadio.
Configure the broadcast settings
From the “My Stations List” page on the TurtleRadio
web site, use the Change Settings option to set the
bandwidth appropriate for your Internet connection, so
radio stations using incompatible baud rates won’t
appear on your AudioTron station list.
Â
If you’re using the AudioTron S/PDIF output, you
should choose radio stations using sample rates
compatible with the S/PDIF output (see the
Product Specifications section for a list of
supported S/PDIF sample rates.) As an
alternative, you may connect both the analog and
S/PDIF outputs to your audio system and switch to
analog when listening to stations that are
incompatible with the S/PDIF output.
TurtleRadio Home page.
TurtleRadio Custom Stations web page
Page 19
Page 22

www.Turtle-Beach.com
Enter your TurtleRadio Player ID
From the AudioTron web server, click on the
TurtleRadio menu item under the Settings section to
activate the TurtleRadio Settings screen.
Enter the TurtleRadio Player ID you received when
you registered at the TurtleRadio web site. Then click
Save TurtleRadio Settings to load the TurtleRadio
Player ID into AudioTron.
Click on the Search button to load the station list from
the TurtleRadio web site into AudioTron’s database,
enabling you to access those stations from the
AudioTron web server and front panel display.
After the station search is completed, you should see
the number of radio stations listed at the top. Repeat
this procedure any time you change your station list at
the TurtleRadio site, so the changes will be loaded into
AudioTron.
If no stations were found, check the previous steps to
make sure the AudioTron Internet radio feature has
been properly configured and that no errors were found
on the Internet Connection test.
AudioTron web server TurtleRadio Settings screen.
Â
You can check AudioTron’s Internet connection by
clicking the “Check Internet Connectivity” button
on the web server Network Settings page.
Play your TurtleRadio stations
Once the web server downloads the stations from the
TurtleRadio web site, you can select them by category
or by station name by clicking on the Net (by Category)
and Net (by Station Name) menu items.
To load a list of stations from a category, from the Net
(by Category) screen, click Play next to the category
name. The stations for that category can then be
selected from the Net (by Stations) screen.
To play a station, from the Net (by Stations) screen,
click on Play next to the station name.
To play Internet radio stations from the AudioTron front
panel, turn the knob to highlight the Net menu item,
then press and turn the knob to see the list of station
categories. Press again to load the station list from the
displayed category. Turn and press the knob to play a
station from the list, just as you would play songs in
your music library.
Â
Remember to use the web server “Check
Stations” feature each time you add or change
stations at TurtleRadio so AudioTron will load the
station changes into its internal database.
Web server Net (by Category) screen with station
categories listed
Web server Net (by Station Name) screen with
Internet radio stations listed
AudioTron front panel display Net menu item lets you
select Internet Radio stations
Page 20
Page 23

Listening to your Music Library
Main Menu Display
AudioTron’s Main Menu display (shown below) lets you find songs by Title (individual song titles),
Artist (creator of the song), Album (the name of the CD the song came from), Genre (type of
music), and Lists (User-defined Playlists). The Net menu item lets you select Internet radio stations if
AudioTron is configured for Internet radio via the web server Settings ÆÆÆÆ TurtleRadio page. The
stations in the Net category are configured at the TurtleRadio web site, as described in the section
“Configuring AudioTron to play Internet Radio.”
The categories Title, Artist, Album and Genre are part of the “song tag” created by AudioStation or
other PC jukebox program used to transfer the song from a CD to the hard drive. When an entry
from these categories is selected, AudioTron searches the music library for a song that matches the
tag. If a song was entered without tag data, its file name (rather than song title) will be displayed when
the Title category is selected and the file name will not appear when Artist, Album, or Genre are
selected. For more information on Song Tags, see the section called “Managing your Music
Library with AudioStation”.
AudioTron Setup Guide
To select a category…
1. Turn the knob until the desired category flashes. Press the knob to select the category.
2. While making a selection, pressing STOP at any point will return to the main menu.
3. Pressing the
the Play Queue. If no selections are made within a fixed timeout period, the song status display will return.
Play
button while a song is playing will activate the main menu so you can add more songs to
Song Playback Display
Pressing the Play button starts song playback and displays the following information:
Song Title
cccc
Play time/status
dddd
Tags
eeee
Play Queue Status
ffff
The song title appears in this field. If there is no Title embedded in the music file's
tags, the song's file name will be displayed.
Displays how long the song has been playing and the total time of the song. If the
song is not playing, displays the current status:
PAUSED
Press Pause or Play to resume playback.
BUFFERING xx%
network into its internal song buffer.
MUTED
"Tags" are data embedded in the audio files that provide information about the song
(e.g. title, artist, album name, genre.) If no tags have been entered for the song, the
file name for the song will be displayed. If the song tags contain more information
than can be displayed at one time, the display can be set to scroll as a "marquee".
See web server “
information on controlling the display settings from the web server.
Displays the current song number and total number of songs in the Play Queue (e.g.
the first song in an album that contains 5 songs will display as "1/5")
– Indicates that the Pause button has been pushed and the song is paused.
- Indicates that AudioTron is transferring song data from the
- If the MUTE button is pressed, the word MUTED will flash.
Settings-Preferences
” section in the Reference Manual for
Page 21
Page 24

www.Turtle-Beach.com
Song Position Display
To set the song position while a song is playing, press the remote control JUMP + or JUMP - buttons
or press and turn the knob on the front panel. The display will indicate the song position and the song
will continue to play while you move the cursor. After the cursor stops moving, the song will jump to
the new position.
Note that the song position feature will show a percentage instead of the time with MP3 files encoded
in VBR (Variable Bit Rate) format.
Â
The web server “Settings
Position mode on power up, rather than default to the Volume function. See the Reference
Manual for details.
Playback Volume Display
Turning the knob while a song is playing or pressing the remote control volume buttons will
momentarily display the volume setting. The volume control will only affect the rear panel analog
outputs and headphones output. The S/PDIF digital output volume will not be affected by the
volume control.
The volume setting indicates the “attenuation” of the maximum signal level. A setting of 0dB ("zero
decibels") indicates that there is no attenuation (i.e. "full volume"). Turning the knob
counterclockwise will attenuate the signal by -1dB steps. The volume setting is saved when the
Standby button is turned off. When turned back on, the volume will return to the saved setting.
Â
The Volume Control should be left at the 0dB (maximum) setting unless AudioTron is used
with headphones or powered speakers that do not have a volume control. For best fidelity, the
volume control on your stereo system or powered speakers should be used to control the
playback level.
Play Queue
ÆÆÆÆ
Preferences screen lets you set the knob to default in the Song
Songs selected from the menu display are added to the “Play Queue”, which is a list of songs to be
played. By navigating through the song selection menu, you can add songs to the Play Queue while
listening to other songs.
Â
Contents of the Play Queue can be viewed with the AudioTron web server.
The currently playing song is at the beginning of the Play Queue. For example, if a song is playing and
three songs are selected from the display menu, the Play Queue will contain four songs—the currently
playing song and the three songs added to the queue. When the current song is over (or if the Next
Track button is pressed before the song is over) the second song in the queue begins to play,
followed by the third and then the fourth, until the queue is completed.
Pressing the Random button will cause the songs in the Play Queue to play in a random order.
Pressing the Repeat button will cause the Play Queue list to start over after the last song has finished
playing.
The Play Queue cannot be edited from the front panel and the contents are erased when the Stop
button is pressed. To stop a song without erasing the Play Queue, press the Pause button.
Page 22
Page 25

Group List
A more permanent and editable play list can be created with the Group List. Pressing the Add button
will add the displayed song to the end of the Group List. Selecting <Group> in the Lists menu plays
the songs in the Group List. Songs may be added while a song is playing or while searching for songs
in the display menu.
Â
Â
To clear the Group List
1. Press Stop to activate the display menu.
2. To delete all of the songs from the Group List, press the Clear button.
3. To delete specific songs from the Group List, press the Group button (LED turns on), turn the
To add songs to the Group List
1. To clear out the entire Group List or specific songs in the Group List, see above. Adding songs
2. To add a song while it is playing, press the Add button on the front panel.
3. To add a song while searching for songs, press Add while the song title is on the display.
4. To add all of the songs from an album, by an artist, in a genre, or in a playlist to the Group List,
5. To add multiple songs, repeat the steps above. For example, to add three songs from the
AudioTron Setup Guide
The Group List may also be viewed and edited via the AudioTron web server.
If you do not clear the Group before adding songs to your custom play list, the songs will be
added to those already in the Group.
knob to select the song, then press the Clear button to delete only the song in the display.
without first clearing the Group List will add the songs to those already in the list.
press Add while the Album name, Artist name, Genre Name or Playlist Name is displayed.
same album to the Group List, press Add ÆÆÆÆ scroll Æ Add ÆÆÆÆ scroll Æ Add. Or to add all of the
songs in the album, select ALL rather than the individual titles.
To play the Group List
1. Press Stop to activate the menu display. Turn the knob to select Lists and press either the
knob or the Play button to select.
2. Turn the knob to display <Group>, then press either the knob or Play button to load all of the
Group List songs into the Play Queue. The Group List can also be edited with the web server.
Â
Turning off the AC power to AudioTron will delete the Group contents. Placing AudioTron in
“Standby mode” will not delete the Group.
Managing Your Music Library with AudioStation
The AudioStation program installed from the
AudioTron CD lets you manage and play your
music library using “selection lists” that are similar
to AudioTron’s main menu display. AudioStation
can also play CDs, record CD tracks to your music
library, play songs from your music library, play
Internet radio from your TurtleRadio station list
and burn custom CDs.
The AudioTron CD includes an AudioStation
reference manual that explains all of the features
in detail. AudioStation also includes
comprehensive online help.
AudioStation
Page 23
Page 26

www.Turtle-Beach.com
Front Panel Menu Modes
AudioTron’s main menu display operates in either Simple or Advanced Modes, described in detail
in the Reference Manual.
Simple Menu Mode (Factory Default)
TURN to HIGHLIGHT
TURN to SCROLL
PLAY or PUSH
to play song(s)
Title Arti st Net ListsAlbum Genre
All Songs
Title 1
...
Title n
Simple Menu Tree
When shipped from the factory, AudioTron defaults to Simple Menu Mode, enabling you to select a
group of songs within a category menu item. The flow chart shows the “tree” structure of Simple
Menu Mode. The top of the tree shows the main menu selections (Title, Artist, Album, Genre, Net
and Lists) while the boxes below each menu item show the corresponding menu categories. For
example, selecting Album would let you find an album by name and play all of the songs on the
album. Or, selecting Artist would let you play all of the songs by an artist.
Advanced Menu Mode
Advanced Menu Mode is enabled from the web server Settings ÆÆÆÆ Preferences screen. This mode
provides detailed control via a sophisticated menu tree that lets you find songs by following a path
beginning with the main menu category at the top and ending with a list of songs “filtered” along the
path to the bottom. For example, a song on an album can be found by following one of two paths:
Artist ÆÆÆÆ Album ÆÆÆÆ Title or Album ÆÆÆÆ Title. Similarly, finding a song in a particular genre by an
artist could be found by Artist ÆÆÆÆ Genre ÆÆÆÆ Title or by Genre ÆÆÆÆ Artist ÆÆÆÆ Title.
TURN to HIGHLIGHT
PLAY or PUSH to SELECT
TURN to SCROLL
PLAY or PUSH to SELECT
Press PLAY to activate menu
while a song is playing.
Press STOP to return to top of menu.
Artist 1
...
Artist n
Album 1
...
Album n
Genre 1
...
Genre n
Category 1
...
Category n
ALL
Station 1
...
Station n
<All Songs>
<Group List>
List 1
...
List n
Play selected title(s)
Press PLAY to activate menu while a song is playing.
Press STOP to return to top of menu.
Title Arti st Net ListsAlbum Genre
Artist 1
...
Artist n
Album 1
...
Album n
Genre 1
...
Genre n
Category 1
...
Category n
TURN to HIGHLIGHT
PLAY or PUSH to SELECT
TURN to SCROLL
PLAY or PUSH to SELECT
TURN to HIGHLIGHT
PLAY or PUSH to SELECT
TURN to SCROLL
PLAY or PUSH to SELECT
TURN to HIGHLIGHT
PLAY or PUSH to SELECT
TURN to SCROLL
PLAY or PUSH
to play song(s)
Advanced Menu Tree
ALL
Title 1
...
Title n
Title Album GenreAll
Title 1
...
Title n
Album 1
...
Album n
All Title
Title 1
...
Title n
Genre 1
...
Genre n
Title AlbumAll
Title 1
...
Title n
Album 1
...
Album n
All Title
Title 1
...
Title n
Title Album Ar tistAll
All Title
Title 1
...
Title n
Title 1
...
Title n
Play selected title(s)
Album 1
...
Album n
All Title
Title 1
...
Title n
Artist 1
...
Artist n
Title AlbumAll
Title 1
...
Title n
Album 1
...
Album n
All Title
Title 1
...
Title n
ALL
Station 1
...
Station n
ALL
GROUP
List 1
...
List n
Page 24
Page 27

AudioTron Setup Guide
AudioTron Digital Music System Configurations
An AudioTron digital music system consists of the following key components:
One or more AudioTrons connected to powered speakers or stereo systems.
An HPNA or Ethernet network.
A PC or Network Attached Storage (NAS) device with a fairly large hard drive for storing digital
music.
An Internet connection for listening to Internet streaming audio sources and downloading song
tag data when converting CDs to the PC hard drive.
AudioTron uses your PC and a network to distribute music throughout your home.
The above example illustrates a digital music system where AudioTrons are used in the bedroom and
living room. In this setup, the PC “Music Server” or “Host” provides several functions:
The PC hard drive stores a digital music library in MP3, WMA or WAV formats, obtained by
transferring audio CDs to the hard drive with a PC “jukebox” program, such as AudioStation®
(included with AudioTron).
An Internet connection lets you download music files from the Internet and listen to Internet
radio broadcasts.
The TurtleRadio™ web site lets you configure a list of custom radio stations for listening to
Internet radio with AudioTron and AudioStation.
Music from the digital music library can be transferred to a portable digital audio player (using
software supplied with the player.)
If the PC is equipped with a CD-R drive, AudioStation lets you create custom audio CDs from
the songs in the PC music library. The custom CDs can be played in a portable CD player or car
CD player that supports playback of CD-R audio discs.
The music library can also be enjoyed at the PC location in the computer room by playing the
music with AudioStation.
The two AudioTrons and AudioStation running on the PC can each play different songs from
the music library simultaneously.
Page 25
Page 28

www.Turtle-Beach.com
Basic AudioTron Digital Music System
The simplest AudioTron digital music system consists of one PC connected to an AudioTron with
either an HPNA or Ethernet network adapter. Music is stored on the PC’s hard drive and is available
both at the PC and the AudioTron locations.
A basic setup can be achieved with a simple HPNA or Ethernet connection.
Medium AudioTron Digital Music System
In a more sophisticated setup, the network contains several PCs, each with music files. In the example
below, two PCs provide a music library of 1700 songs for AudioTron.
Â
AudioTron can access a library of up to 30,000 songs, depending on the “tag” data embedded
in the songs, directory structure and other database information.
Once AudioTron scans the network, the location of the songs is transparent, so you won’t have to
switch between PCs when accessing the music.
AudioTron can access music stored on all of the PCs in your network.
Page 26
Page 29

Advanced AudioTron Digital Music System
In a high-performance digital music system, a dedicated PC or Network Attached Storage Device
(NAS) with massive hard drive storage (e.g. 60GB or more) is used for storing the music library and is
left on so the music is always accessible.
AudioTron provides all the processing power required to play back digital music—the PC “Music
Server” is only used for storage and file access. Any reasonably capable PC may be used as a music
server, as long as it can be connected to an HPNA or Ethernet network and has enough hard disk
space to store your music library. For example, a 233MHz PC with a large hard drive should be
adequate as a music server (which might be a good application for an older PC you put aside when
you upgraded to a faster system!)
In this example, multiple AudioTrons and multiple PCs (networked via HPNA or Ethernet) can each
play different music at the same time from the music library on the PC Music Server. With the music
library stored in a single location on the PC Music Server, family members can each play their favorite
digital music whenever and wherever they want.
Music can also be played on the networked PCs with the AudioStation software (or other jukebox
program).
AudioTron Setup Guide
A dedicated PC music server provides optimum performance in a high-end configuration. AudioStation software
can be used to play music on the PCs.
Page 27
Page 30

www.Turtle-Beach.com
High-performance AudioTron Digital Music System
A typical high-performance system, illustrated below, uses a PocketPC to control multiple
AudioTrons via an RF 802.11 link. A Network Attached Storage device is used for storing the music
library so that the PCs do not have to remain on in order to use the AudioTrons. All of the PCs and
AudioTrons access the same library and can play the same songs simultaneously. The cable modem
broadband Internet connection is shared by all of the PCs and AudioTrons, so that Internet radio is
available at all locations.
AudioTron High-performance set up uses NAS storage, broadband Internet connection and RF remote control
via PocketPC running the AudioTron thin client web server.
Page 28
Page 31

Operation Tips
Learning to use AudioTron
Be sure to read the AudioTron Reference Manual on the CD
This Setup Guide only covers a small portion of what AudioTron can do. The Reference Manual on
the CD is a comprehensive guide that describes all of the features in detail so you can get the most
from this amazing device. You can browse the manual on your PC screen, print out sections of
interest or print the entire manual as a handy guide.
Check for AudioTron firmware updates at www.Turtle-Beach.com.
The firmware version of your AudioTron is displayed when you power the unit from the back panel.
You can also check the version number by pressing the options button on the display and or by
looking at the Settings ÆÆÆÆ Firmware page on the web server. Once you know the version number in
your AudioTron, check our web site to see if there’s a newer version. If so, you can download the
new firmware file and load it into AudioTron following the directions in the Reference Manual.
Check the AudioTron knowledge base for the latest information and user tips
The knowledge base at www.Turtle-Beach.com is constantly updated by our technical staff and
contains valuable information that can help you solve problems or provide tips on using AudioTron.
AudioTron Setup Guide
Join the AudioTron User Group
AudioTron users can join the AudioTron user group to share helpful tips and get valuable assistance
from other users. For details on how to join, visit our web site at www.Turtle-Beach.com.
If you’re a programmer, check out the AudioTron API (Applications Programming Interface)
You can control many of AudioTron’s features from your own program using the API commands
that are part of AudioTron’s operating environment. For details on the API commands, see our web
site link at: http://www.turtlebeach.com/audiotron/api_download.htm.
Use the Web Server
Use the web server to configure AudioTron’s settings
The web server lets you control all of AudioTron’s settings and makes it easy to navigate your music
library. Don’t overlook this useful tool!
Name your AT when using the web server
The web server lets you insert a name for the AudioTron you’re controlling, which is useful if you
have more than one on your network. Use the Web Server link under the Settings menu and enter
the name in the AudioTron Location box.
Don’t overlook these useful features
“More songs like this” feature
This feature is enabled via the web server Preferences screen. When enabled, the remote control
ARTIST, ALBUM, or GENRE buttons will no longer operate as menu selection buttons. Instead,
they will clear the play queue and load all songs of the corresponding category. For instance, if you’re
listening to a Jazz song and want to hear only Jazz from that point on, pressing Genre will clear the
play queue and load every Jazz song in your music library so you can enjoy them all.
Clock Display and Alarms
From the web server, you can set the display to show the current time and date, just like a digital
clock. You can also set the music to play at predefined times, just like an alarm clock.
Page 29
Page 32

www.Turtle-Beach.com
Set up your preferences
Remote Control Favorites
The 16 Favorites and 4 Preset buttons on the remote control make it easy to find your favorite
Internet radio stations or play your favorite songs. If you want to see what favorites are assigned to
the remote control, use the web server.
Set the front panel LED intensity to suit your tastes
You can adjust the intensity of AudioTron’s front panel LEDs from the front panel Options display.
Press the Options button, turn the knob to display “Set LED Intensity”, then press the knob and
turn to set the intensity from 10% (dim) to 100% (bright).
Set the Knob default to volume or song position
From the web server Settings ÆÆÆÆ Preferences page, you can set the knob to default to either volume
or song position. When you press then knob, it controls the non-default function (i.e. if it’s set to
default as volume, pressing it will control position). If you’re using AudioTron’s digital output, the
volume control won’t do anything anyway, so you should set the knob to default to song position.
Set the Display to suit your tastes
You can control many aspects of how the front panel display operates by using the web server
Settings ÆÆÆÆ Preferences page. For example, you can set the top and bottom lines of the display to
scroll once, continuously or not at all when long song names are displayed. Or, you can set the display
to show the name of the artist when searching through albums, and more!
Use Advanced Menu Mode for the most versatile way to navigate your song library
Although it’s a bit more to learn, Advanced menu mode is far more versatile than Simple menu mode.
Don’t forget to check it out by enabling it in the Settings ÆÆÆÆ Preferences web server page.
If you’re not using Internet radio, turn it off
The Internet radio function is turned off by default. However, if you’ve turned it on and decided not
to use it, turn it off in the web server Settings ÆÆÆÆTurtleRadio page. That way, AudioTron won’t scan
for stations when it reboots from the main power. Internet radio is best used with a DSL, cable
modem or other broadband connection. Trying to use a dial up connection with Internet radio can be
frustrating because it doesn’t have enough bandwidth to sustain an acceptable audio sample rate.
Take good care of your music library
Properly maintain your music library song tags
If the tags in your music library are not consistent, it’s going to make it more difficult to search for
songs. Use AudioStation to clean up tag irregularities (like “The Beatles” vs. “Beatles”) so you can
easily find songs when you’re searching. Also, be sure not to mix up ID3v1 tags and ID3v2 tags. Use
one or the other. See the AudioStation Reference Manual for instructions on cleaning up tags in your
songs.
Back-up your music library
Hard drives can crash and it’s not fun to try and reassemble thousands of songs—especially after
you’ve gotten all of the tagging and sorting right! So, be sure to back up your music library to protect
it against loss.
Page 30
Page 33

Network Troubleshooting Tips
General Network Troubleshooting Tips
TCP/IP… Regardless of whether you’re using HPNA or Ethernet, AudioTron requires a
network that is running the TCP/IP protocol. If your AudioTron isn’t working, yet your network
is running fine, it may be that the network is not set to use the TCP/IP protocol. For more
information on this, see the AudioTron Reference Manual on the CD.
If your network has a DHCP (“Dynamic Host Control Protocol”) Server… An IP address
can either be assigned to AudioTron automatically by one of the devices in the network (called a
“DHCP Server”), or you can “hard code” an address into AudioTron (called “Static IP”
addressing.) If your network has a DHCP server, AudioTron defaults to a setting whereby it will
automatically accept an assigned IP address from a DHCP server.
If you’re using a DSL or cable modem with a Router/Hub… Many Router/Hubs (e.g. the
Etherfast Cable/DSL Router from Linksys) also act as DHCP servers. Check with the
manufacturer of the device to see if this is the case for your Router/Hub device. You should also
check with the manufacturer to see if there’s an update for the device’s firmware.
File sharing… AudioTron has special requirements for the directories in which your digital
music files are stored. These directories must be called Music, Audio\My Music or My
Documents\My Music and must be located under a shared directory. Simply sharing these
directories will not allow AudioTron to find the music files. For a comprehensive description of
AudioTron’s directory restrictions, see the AudioTron Reference Manual on the CD.
AudioTron Setup Guide
Checklist for Ethernet networks
Connecting PCs and AudioTrons to an Ethernet network requires an Ethernet Hub.
Ethernet devices must be connected with an Ethernet “Hub”… A hub distributes the
Ethernet signal between multiple devices and controls the network “traffic”. There are many
types of hubs available, and some have enhanced features, such as built-in switches that
intelligently route data in the network to optimize transfer speeds.
If you’re connecting the AudioTron directly to an Ethernet-equipped PC… you’ll need
either a hub or a special Ethernet “cross-over cable” (which is not the same as the standard
Ethernet cable included with your AudioTron.) Since a basic hub is not expensive and the
“crossover” cable may be difficult to find, it is suggested that a hub be used for making the direct
connection to your PC.
Page 31
Page 34

www.Turtle-Beach.com
Checklist for HPNA 2.0 networks
In a multi-PC HPNA network, each device in the network can be connected directly to the phone line. The
normal operation of your telephone is not interrupted by the network activity.
If you have more than one phone line… Make sure AudioTron is connected to the same
phone line as your HPNA network. To check this, unplug the AudioTron and PC from the
phone jacks, then plug a phone into the jack used to connect AudioTron and another phone into
the jack used to connect the HPNA interface on your PC. If you can’t talk between the two
phones, then the jacks are connected to different phone lines and there will be no HPNA
network communication between the PC and AudioTron.
If you have DSL service… Typically, when a DSL modem is installed, the phone company also
installs phone line filters between your phone jacks and phones in order to filter out the DSL
signal from your phone signal. These filters can interfere with your HPNA network, so do not
connect a filter between the PC’s HPNA card and the phone jack or between AudioTron’s
HPNA connector and the phone jack.
If you have a digital phone system… Some multi-line phone systems use a digital transmission
system on standard phone lines. These types of phone lines are not compatible with AudioTron
or with HPNA networks.
Do not use a transient surge filter between
AudioTron’s HPNA jack and the phone jack…
Transient surge filters protect your phone against power
spikes on the phone lines. This protection is built into
the AudioTron HPNA inputs, so a surge protector is
not necessary and in fact may interfere with the
operation of the HPNA connection.
If your PC has a separate modem and HPNA
Network Interface… Connect the modem and HPNA
cards to the phone jack with separate cables and a
splitter, as shown in the illustration.
Page 32
Page 35

Product Specifications
AudioTron Setup Guide
Ethernet Network Support Ethernet 10BaseT (10 Mb/s Ethernet) or 10/100BaseT running TCP/IP. Not
HPNA (Phoneline) Network Support HPNA 2.0 running TCP/IP
Analog Outputs (line level) Stereo RCA jacks on rear panel
Analog Outputs (headphone) Stereo 1/4" phone jack on front panel (rear panel analog outputs are muted when
Signal to Noise Ratio 91dBA
THD+N 0.02%
Crosstalk -66dB @ 1 kHz
Analog Line-Level Output Impedance <1000 ohm
Headphone Output Impedance <10 ohm
Frequency Response 20 Hz - 20 kHz
D/A sampling rates 8 kHz, 11.025 kHz, 16 kHz, 22.05 kHz, 32 kHz, 44.1 kHz
Volume Control Variable from -96dB to 0dB in 1dB increments
S/PDIF (Digital Output) TOSlink Fiber Optic connector for Sony/Philips Digital Interface
S/PDIF sampling rates supported 32 kHz, 44.1 kHz
Maximum number of song titles in
database
Dimensions 17 x 1.75 x 10 inches (430 x 44 x 250 mm)
Weight 5.2 lbs. (2.4 Kg)
Power Requirements 90VAC – 135VAC 50/60Hz 250mA max
Remote Control Requires 2 AAA batteries
File Tags
Playlist Formats PLS & M3U
compatible with networks which support only Fast Ethernet 100BaseTX (100 Mb/s).
headphones are inserted)
Volume, Bass Boost and Treble Boost controls have no effect on S/PDIF output.
More than 30,000 depending upon the of amount of data associated with each song,
(e.g. tag data and directory location.)
ID3 tags version 1.1 and Version 2.3 formats/ WMA tags/ WAV tags created with
AudioStation 4.1 or higher.
Supported Digital Music File Formats
Format Network Bit/Data Rates Sampling Rates (kHz)
MP3 HPNA & Ethernet All bitrates up to 320 kbps 44.1/ 32/ 22.05/ 16/ 11.025/ 8 khz
Unsecure Microsoft
WMA
(all formats listed are
stereo, except where
noted)
WAV PCM
(uncompressed)
HPNA & Ethernet 32 kbps
36 kbps
40 kbps
44 kbps
48 kbps
64 kbps
80 kbps
96 kbps
128 kbps
160 kbps
192 kbps
Ethernet 16-bit stereo
22.05 / 32 / 44.1 kHz (mono)
32 kHz
32 kHz
32 kHz
32 / 44.1 kHz
32 / 44.1 kHz
44.1 kHz
44.1 kHz
44.1 kHz
44.1 kHz
44.1 kHz
32 / 44.1 kHz (analog and digital outputs)
8 / 11.025 / 16 / 22.05 kHz (analog outputs only)
Note: The S/PDIF digital output will only play the 32 kHz and 44.1 kHz sample rates. The analog audio
outputs can play uncompressed WAV PCM digital audio files recorded at sampling rates of 8 kHz,
11.025 kHz, 16 kHz, 22.05 kHz, 24 kHz, 32 kHz, and 44.1 kHz. AudioTron cannot play uncompressed
WAV digital audio files recorded with a sampling rate of 48 kHz.
Page 33
Page 36

www.Turtle-Beach.com
Regulatory Compliance Information
For United States users: FCC Part 15
This device has been tested and found to comply with the limits for a Class B digital device, pursuant to Part 15 of the FCC rules. These limits are designed to
provide reasonable protection against harmful interference in a residential installation. This equipment generates, uses, and can radiate radio frequency energy
and, if not installed and used in accordance with the instructions, may cause harmful interference to radio or television reception. However, there is no guarantee
that interference will not occur in a particular installation. If this equipment does cause interference to radio and television reception, which can be determined by
turning the equipment off and on, the user is encouraged to try to correct the interference by one or more of the following measures:
Re-orient or relocate the receiving antenna
Increase the separation between the equipment and receiver
Connect the equipment into an outlet on a circuit different from that to which the receiver is connected
Consult the dealer or an experienced radio/TV technician for help.
Declaration of conformity
Responsible party: Voyetra Turtle Beach, Inc. 5 Odell Plaza, Yonkers, NY 10701 (914) 966-0600 Fax: (914) 966-1102 www.turtle-beach.com
Product: AudioTron Digital Music Player
This device complies with Part 15 of the FCC Rules. Operation of this product is subject to the following two conditions: (1) this device may not cause harmful
interference, and (2) this device must accept any interference received, including interference that may cause undesired operation.
Caution
Changes or modifications not expressly approved by Voyetra Turtle Beach could void the FCC compliance and negate your authority to operate the product.
For United States users: FCC part 68
The AudioTron HPNA interface complies with Part 68 of the Federal Communications Commission (FCC) rules. On the HPNA interface card is a label that
contains the FCC registration number and Ringer Equivalence Number (REN) for this device. If requested, this information must be provided to the telephone
company. An FCC-compliant telephone line cord with a modular plug is required for use with this device. The HPNA interface is designed to be connected to the
telephone network or premises wiring using a compatible modular jack which is Part 68-compliant. See installation instructions for details.
The Ringer Equivalence Number (REN) is used to determine the number of devices which may be connected to the telephone line. Excessive RENs on a
telephone line may result in the devices not ringing in response to an incoming call. In most areas, the sum of RENs should not exceed five (5). To be certain of
the number of devices that may be connected to a line, as determined by the total RENs, contact the local telephone company. If this device causes harm to the
telephone network, the telephone company will notify you in advance that temporary discontinuance of service may be required. The telephone company may
request that you disconnect the equipment until the problem is resolved. The telephone company may make changes in its facilities, equipment, operations, or
procedures that could affect the operation of this equipment. If this happens the telephone company will provide advance notice in order for you to make
necessary modifications to maintain uninterrupted service.
Connection of the phone line interface to a party line service is subject to state tariffs. Contact the appropriate state public utility commission, public service
commission or corporation commission for information.
For Canadian users: ICES-003
This digital apparatus does not exceed the Class B limits for radio noise emissions from digital apparatus as set out in the radio interference regulations of
Industry Canada.
Le présent appareil numérique n’émet pas de bruits radioélectriques dépassant les limites applicables aux appareils numériques de Classe B prescrites dans le
règlement sur le brouillage radioélectrique édicté par Industrie Canada.
DOC notice (for products fitted with an IC-compliant modem)
The Industry Canada label identifies certified equipment. This certification means that the equipment meets certain telecommunications network protective,
operation, and safety requirements. The Department does not guarantee the equipment will operate to the users’ satisfaction. Before installing this equipment,
users should make sure that it is permissible to be connected to the facilities of the local telecommunications company. The equipment must also be installed
using an acceptable method of connection. In some cases, the inside wiring associated with a single-line individual service may be extended by means of a
certified connector assembly. The customer should be aware that compliance with the above conditions may not prevent degradation of service in some
situations.
Repairs to certified equipment should be made by an authorized Canadian maintenance facility designated by the supplier. Any repairs or alterations made by
the user to this equipment, or equipment malfunctions, may give the telecommunications company cause to request the user to disconnect the equipment. Users
should make sure for their own protection that the electrical ground connections of the power utility, telephone lines, and internal metallic water pie system, if
present, are connected together. This precaution may be particularly important in rural areas. The Ringer Equivalence Number (REN) assigned to each terminal
device provides an indication of the maximum number of terminals allowed to be connected to a telephone interface. The termination on an interface may consist
of any combination of devices subject only to the requirement that the sum of the Ringer Equivalence Numbers of all the devices does not exceed five (5).
Warning!
To avoid electrical shock or equipment malfunction do not attempt to make electrical ground connections by yourself. Contact the appropriate inspection
authority or an electrician, as appropriate.
To reduce the risk of fire, use only No. 26 AWG or larger telecommunications line cord.
Page 34
Page 37

Contacting Turtle Beach
AudioTron is a product of: Voyetra Turtle Beach, Inc. 5 Odell Plaza Yonkers, NY 10701 USA
Technical Support: Tel: (914) 966-2150 Fax: (914) 966-1093
Main: Tel: (914) 966-0600 Fax: (914) 966-1102
Web Site: www.turtle-beach.com
Technical Support
Â
If you experience trouble with the operation of AudioTron, first look in the AudioTron
Reference Manual or visit our on-line Knowledge Base.
AudioTron User group
Turtle Beach monitors and maintains user groups which can be found by following the “Users Forum and
Archives” link at http://www.turtle-beach.com/site/support/forums.asp. Here AudioTron customers discuss how
they use their AudioTrons, request feature updates, and help each other with configurations.
Web-based technical support
The Turtle Beach web site provides AudioTron firmware updates, Frequently Asked Questions (FAQ) and a
comprehensive Knowledge Base that includes the latest product information and troubleshooting tips.
AudioTron FAQ and Knowledge Base: The Knowledge Base is in the Support area of our web site. Go to the
Turtle Beach web site (www.turtle-beach.com) and click on “Support”, then “Knowledge Base”. Under the "A"
section, click on “AudioTron”. This will bring up the list of articles.
AudioTron Firmware & Software Updates: Go to the Turtle Beach web site (www.turtle-beach.com) and click
on “Support”, then “FTP Files”. Under the "A" section, click on AudioTron. This will bring up the list of files
available for download (including firmware updates and other support files). Note that there is an icon at the top
of the product page that lets you switch between the Knowledge Base (which is where you find the articles) and
the FTP site (which is where you can download files).
AudioTron Setup Guide
Other Technical Support
Â
Please include your Product ID, firmware version number and AudioTron Serial number in all
correspondence with Technical Support. Note that all Technical Support correspondence
is conducted in English.
If you can’t solve the problem by visiting our web site, contact Turtle Beach Technical Support as follows:
E-mail Tech Support: support@turtle-beach.com. Please allow at least 2-3 business days for a response.
Fax Tech Support: (914) 966-1093 Att: Tech Support. Fax a description of your problem to this number.
Phone Tech Support: (914) 966-2150 M-F, 9 a.m. to 5 p.m. EST (except public holidays.) Please note that all
calls will be answered on a first-come, first-served basis. Because we cannot guarantee the length of time you
will be on hold, we highly recommend you only use this option as a last resort. Times are subject to change
without notice.
Â
Because networks can be set up in so many different ways, Turtle Beach technical support
cannot provide assistance on network troubleshooting. Please contact the manufacturer of
your network hardware for assistance on getting the network running per the requirements in
this manual.
Page 35
Page 38

Setup Guide
Warranty and End User License
Voyetra Turtle Beach, Inc. (“VTB”) warrants to the original end-user purchaser (“Purchaser”) that the Turtle Beach AudioTron (“Product”) will be free of
defects in materials and workmanship for a period of one (1) year from the date of purchase by Purchaser (“Warranty Period”). If a defect should occur
during the Warranty Period, Purchaser must obtain a Return Merchandise Authorization (“RMA”) from VTB. Purchaser will be responsible for all costs
incurred in returning the defective Product to and from an authorized VTB service center, or to the repair facility located at VTB’s corporate headquarters.
The RMA number must be clearly indicated on the outside of the package. Packages without an RMA number may be refused by VTB or its
representatives and returned to Sender. The Product must be returned in the original packaging. A copy of the dated proof of purchase must be included
with the defective Product.
In the event of a defect, Purchaser’s sole and exclusive remedy, and VTB’s sole liability, is expressly limited to the correction of the defect by adjustment,
repair, or replacement of the Product at VTB’s sole option and expense. This warranty does not cover, and VTB is not responsible for, damage caused by
shipping, accident, problems with electrical power, misuse, neglect, fire, acts of God, useage not in accordance with product instructions, unauthorized
modification or service of the Product or damage resulting from the use of the Product with hardware, software or other products not provided or
specifically recommended by VTB.
VTB owns all products it has replaced and all parts removed from repaired products. VTB uses new and reconditioned parts made by various
manufacturers in performing warranty repairs and building replacement products. If VTB repairs or replaces a product, the original limited warranty term
is not extended.
VTB’s responsibility for malfunctions and defects in the Product is limited to repair and replacement as set forth in this limited warranty statement.
Except as specifically provided herein, there are no other warranties expressed or implied, including, but not limited to, any implied warranties of
merchantability or fitness for a particular purpose. In no event shall VTB be liable for indirect, incidental, consequential, or other damages including
personal injury, lost profits and damages to property arising out of any breach of this warranty or otherwise.
The Product, including operating systems or applications programs, is provided on an “As Is” basis. Some states do not allow the exclusion or limitation
of incidental or consequential damages, so the above exclusion or limitation may not apply to you. This warranty gives you specific legal rights. You may
also have other rights, which vary from state to state.
VTB Software End-User License Agreement
By installing the software included with the Product (“Software”), you acknowledge that you have read, understood and agree to abide by the terms and
conditions of this End-User License Agreement (“Agreement”). If you do not agree with the terms of this Agreement, promptly contact the seller of this
Software to arrange an appropriate remedy.
SOFTWARE LICENSE: This is a legal Agreement between you (either an individual or an entity) and VTB that sets forth the license terms and conditions for
using the enclosed Software and updates of the Software. In this Agreement, the term “Use” means loading the Software into RAM, as well as installing
it onto a hard disk or other storage device.
The Software is owned by VTB and is protected under United States copyright laws as well as international treaty provisions. You must treat the Software
as you would any other copyrighted material. VTB retains title and ownership of the Software. The purchase price for the Product grants you a nonexclusive license to use one copy of the Software on a single computer. You may make copies of the Software solely for archival purposes. You may not
make copies of any written material accompanying the Software. You may not allow third parties to use the Software by time-sharing, networking or any
other form of multi-user participation. You may not rent, sell, lease, sub-license, time-share or lend the Software to a third party or otherwise transfer
this License without written permission from VTB. You may not decompile, disassemble, reverse-engineer or modify the Software.
This Agreement is effective until terminated by the destruction of the Software — all of the CD-ROMs and/or diskettes — and documentation provided in
this package, together with all copies, tangible or intangible. If you fail to comply with any of the terms and conditions of this Agreement, this License
will be terminated and you will be required to immediately return the Software to VTB— CD-ROMs and/or diskettes — and documentation provided in
this package, together with all back-up copies. The provisions of this Agreement which protect the proprietary rights of VTB will continue in force after
termination.
LIMITED LIABILITYLIMITED LIABILITY
LIMITED LIABILITY
LIMITED LIABILITYLIMITED LIABILITY
obtained from the Software. VTB MAKES NO REPRESENTATIONS OR WARRANTIES WITH REGARD TO THE PRODUCT, SOFTWARE OR DOCUMENTATION,
INCLUDING BUT NOT LIMITED TO THE IMPLIED WARRANTIES OF MERCHANTABILITY AND FITNESS FOR A PARTICULAR PURPOSE.
VTB shall not be liable for errors or omissions contained in the Software or manuals, any interruption of service, loss of business or anticipatory profits
and/or for incidental or consequential damages in connection with the furnishing, performance or use of these materials. The Software and
documentation are sold AS IS.
This Limited Warranty gives you specific legal rights and you may also have other rights that may vary from state to state. Some states do not allow the
limitation or exclusion of implied warranties or of consequential damages, so the above limitations or exclusions may not apply to you. You agree that
this is the complete and exclusive statement of the Agreement between you and VTB which supersedes any proposal or prior agreement, oral or written,
and any other communications between us regarding the subject matter of this Agreement. This Agreement shall be construed, interpreted and
governed by the laws of the State of New York, except the federal laws governing copyrights and registered trademarks. If any provision of this
Agreement is found unenforceable, it will not affect the validity of the balance of this Agreement, which shall remain valid and enforceable according to
its terms. ©2001-2002 Voyetra Turtle Beach, Inc. All rights reserved. Voyetra is a registered trademark of Voyetra Turtle Beach, Inc. AudioTron, Turtle
Beach, the Turtle Beach logo, TurtleRadio, the TurtleRadio logo and Connected Audio are trademarks of Voyetra Turtle Beach, Inc.
::
: You assume responsibility for the selection of the Software to achieve your intended results, and for the installation, use and results
::
Turtle Beach
CONNECTED AUDIO
TM
TM
wwwwww
www
wwwwww
Voyetra Turtle Beach, Inc., 5 Odell Plaza, Yonkers, NY 10701-1406
.Turtle-Beach.com.Turtle-Beach.com
.Turtle-Beach.com
.Turtle-Beach.com.Turtle-Beach.com
Phone: (914) 966.0600 Fax: (914) 966.1102 1.800.233.9377
Part#: TB810-0910-05
 Loading...