

TruXedo Toyota Tundra Stepside User Manual
TRUXEDO® LO PRO TUNDRA STEP SIDE CLAMP/ADAPTER PAN INSTRUCTIONS
Read your owner’s manual and these instructions before installing
your Toyota Tundra Truxedo
Follow these instructions to install your TruXedo
®
Lo Pro kit.
®
Lo Pro side rail
clamps and adapter pan. Side rails are notched and pre-bent to
conform to your pickup bed.
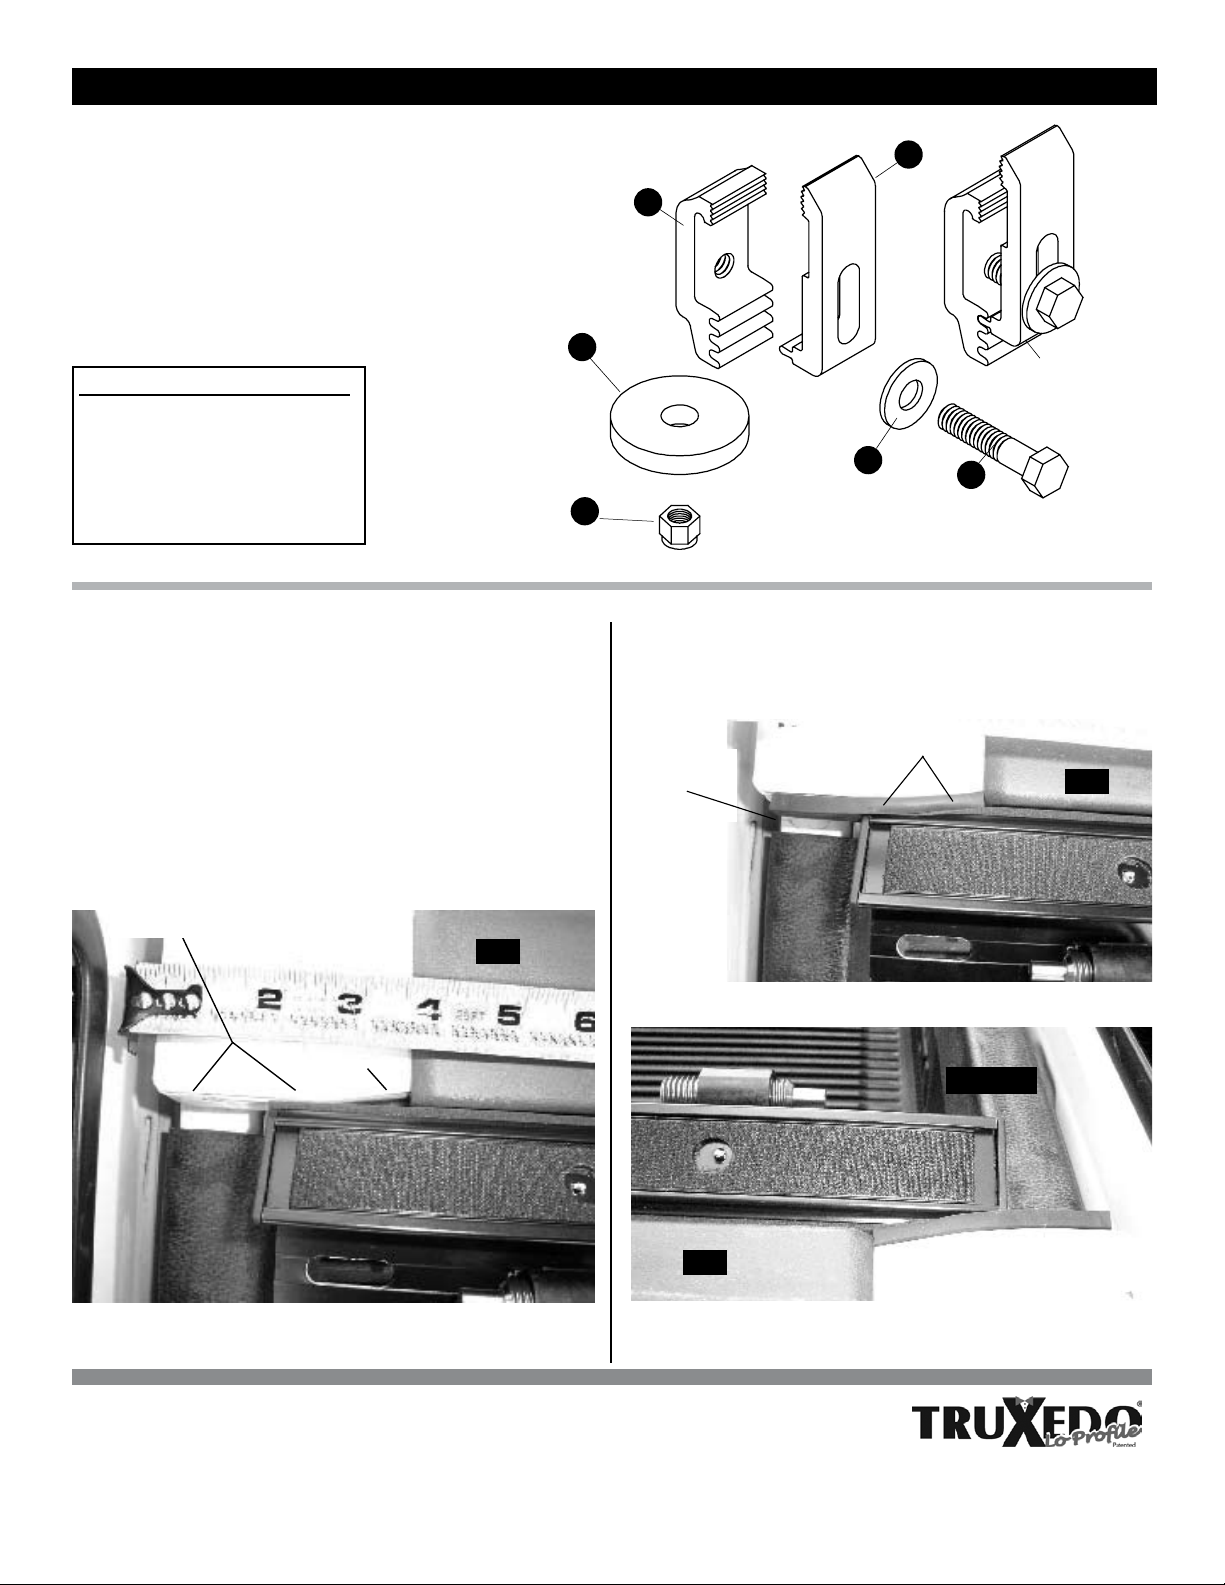
5
Item Part# Description
1 1703482 Clamp w/Slot, Male
2 1115184 Clamp, Female, Lo Pro
3 1700429 Flat Washer, 3/8”
4 1700369 Cap Screw, 3/8” x 1 3/4”
5 1115745 Plastic Washer, 1/4” x 1 1/2”
6 1701580 Nylon Lock Nut, 3/8”
6
STEP1: A 1/4” x 6” piece of seal is provided to ll the gaps near
the bulkhead. This seal should be applied BEFORE
the side rails are attached. The following pictures
are shown with the side rails attached to illustrate the
proper placement of the seal. Cut seal to t (approx.
4”) and place along the area marked by x’s in the photo
below.
1
2
clamp assembly
3
4
STEP2: Cut another piece of seal and afx it to area marked
by x’s in the photo below.
t o p v i e w
Add seal to
areas marked
by x’s
xxxxxxxx
1/4” seal added
r a i l
t o p v i e w
Add seal to areas
marked by x’s
r a i l
g a p
xxxxxxxx
xxxxxxxxxxx
b u l k h e a d
TruXedo, Inc.
P.O. Box 1078, 2209 Kellen Gross Dr., Yankton, South Dakota 57078
Call Toll Free: 1-877-TRUXEDO (1-877-878-9336) Fax: (605) 664-9304
Visit Us Online: http://www.truxedo
b u l k h e a d
s i d e v i e w
b u l k h e a d
r a i l
P/N 1115452 Rev. D
___ 1 ___

TRUXEDO® LO PRO TUNDRA STEP SIDE CLAMP/ADAPTER PAN CONTINUED
STEP3: Position clamps 9” and 36” from front of box; and 8”
and 17” from tailgate (four clamps per side rail).
assemble & install
adjustable clamp as
shown
front of
box
STEP4: Clamp side rails to
pickup bed at locations shown.
36”
9”
STEP6: Center pan adapter on front header. Fasten 3/8” x
3/4” stove bolts through holes in pan adapter and
into square nuts inside header slot. Tighten bolts.
safety strap
front header
cover
clamp adapter pan
stove bolt, 3/8” x 3/4”
square nut,
3/8”
17”
8”
clamp
tailgate
STEP5: Align side rails 1/2” from tailgate, ush with bed rail and
level with each other. Tighten clamp assemblies (see
Owner’s Manual).
1/2”
tailgate
side rail
bed rail
STEP7: Frontheader: Back spring plunger out. Set cover
assembly across cab end of side rails. Insert screws
in front header through slots in side rails. Secure with
plastic washers and lock nuts, but do not over tighten.
Header must be free to slide.
front header & cover
assembly (cover not
shown for clarity)
screw in front
header
spring
plunger
slot in side rail
plastic washer
lock nut, 3/8”
NOTE: Refer to Owner’s manual for cover installation.
TruXedo, Inc.
P.O. Box 1078, 2209 Kellen Gross Dr., Yankton, South Dakota 57078
Call Toll Free: 1-877-TRUXEDO (1-877-878-9336) Fax: (605) 664-9304
Visit Us Online: http://www.truxedo.com
___ 2 ___
P/N 1115452 Rev. D
 Loading...