

Page 1
Installation Configuration
Left Button
Right Button
Wheel Button
Forward Button
Backward Button
Combo Key Binding
Close Current Window
Page Up
Page Down
Copy
Cut
Paste
Volume +
Volume Mute
Macro
NO FUNCTION
Record Start
DPI
1700
Configuration
2
3
a b c
DVD RW Drive (D:) Tr.....V.
b
USB
a
2x
Your device is ready to use
Device driver software installed successfully.
b
Install Driver
Online support
www.trust.com
41
a b
5
a b
6
c
Ctrl + V
7
a b
Page 2
Mouse Layout
www.trust.com/18249/faq
a
d
e
c
b
f
g
h
Page 3
GXT 31 Gaming Mouse - USER’S MANUAL
T
Index
Language page
English 2
Deutsch 4
Français 6
Italiano 8
Español 10
Português 12
Nederlands 14
Dansk 16
Suomi 18
Norsk 20
Svenska 22
Polski 24
Česky 26
Slovenčina 28
Magyar 30
Română 32
Български 34
Русский 36
Ελληνικά 38
Hrvatski 42
Slovenski 44
Srpski 46
ürkçe 40
1
Page 4

GXT 31 Gaming Mouse - USER’S MANUAL
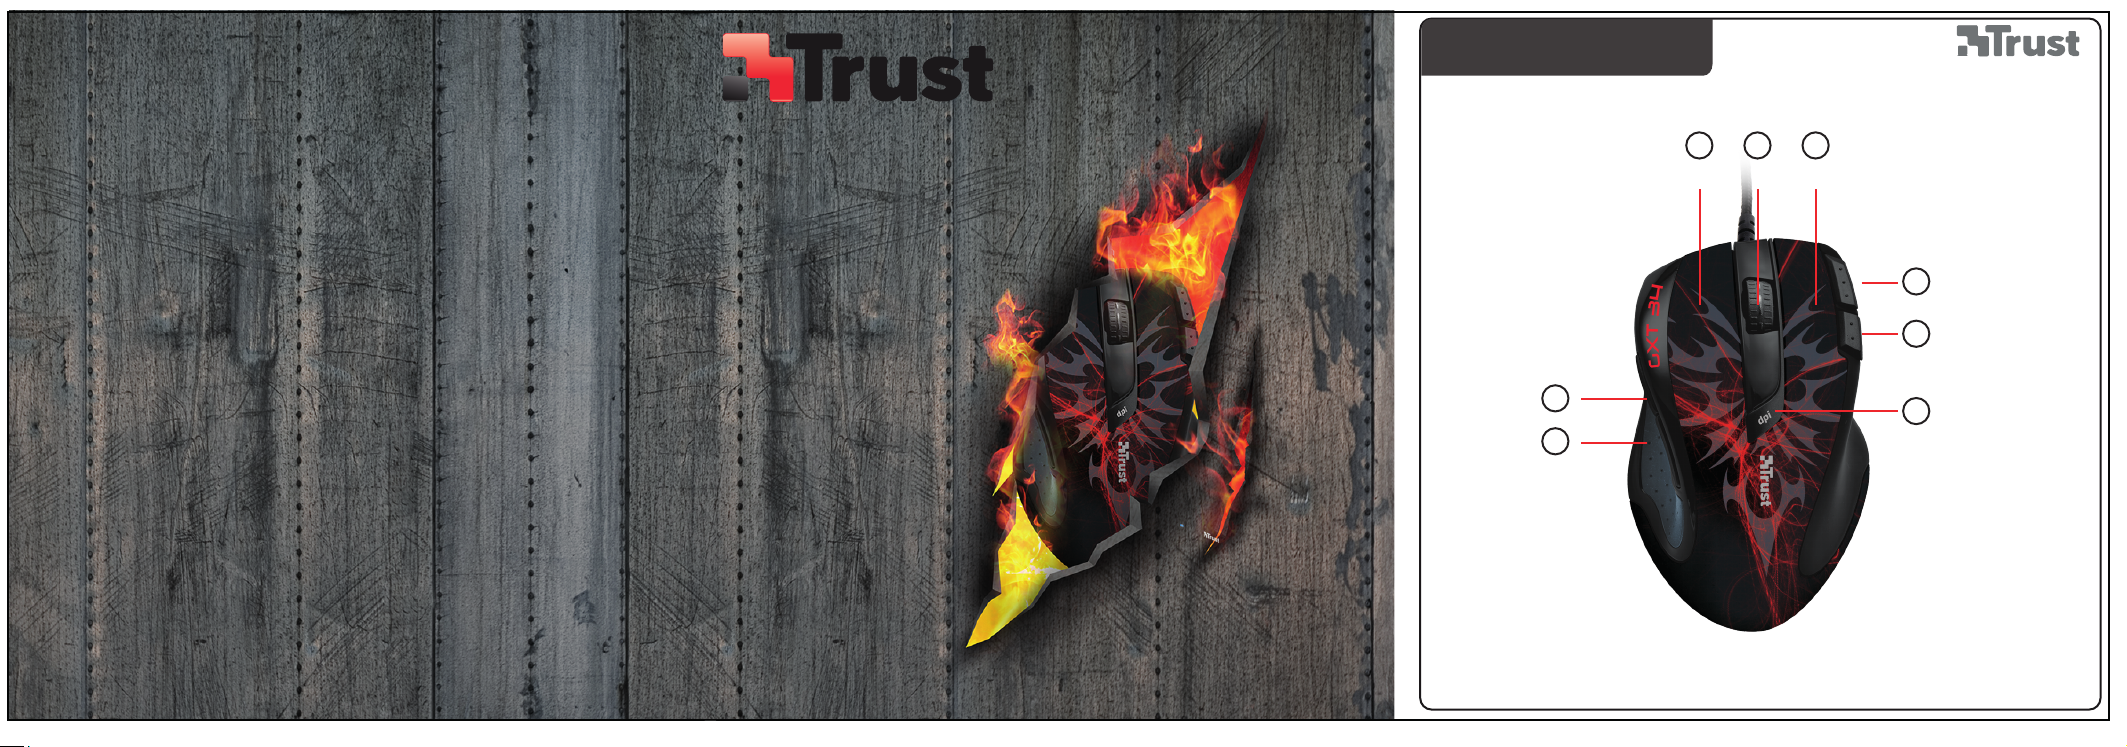
Mouse layout
- Left mouse button, not programmable
- Wheel button (default function = middle click)
- Right button (default function = right mouse click)
- Forward buttons (default function = page forward)
- Backward (default function = page backward)
- RU button (default function = no function)
- RD button (default function = no function)
- DPI button (click to switch between 4 DPI settings)
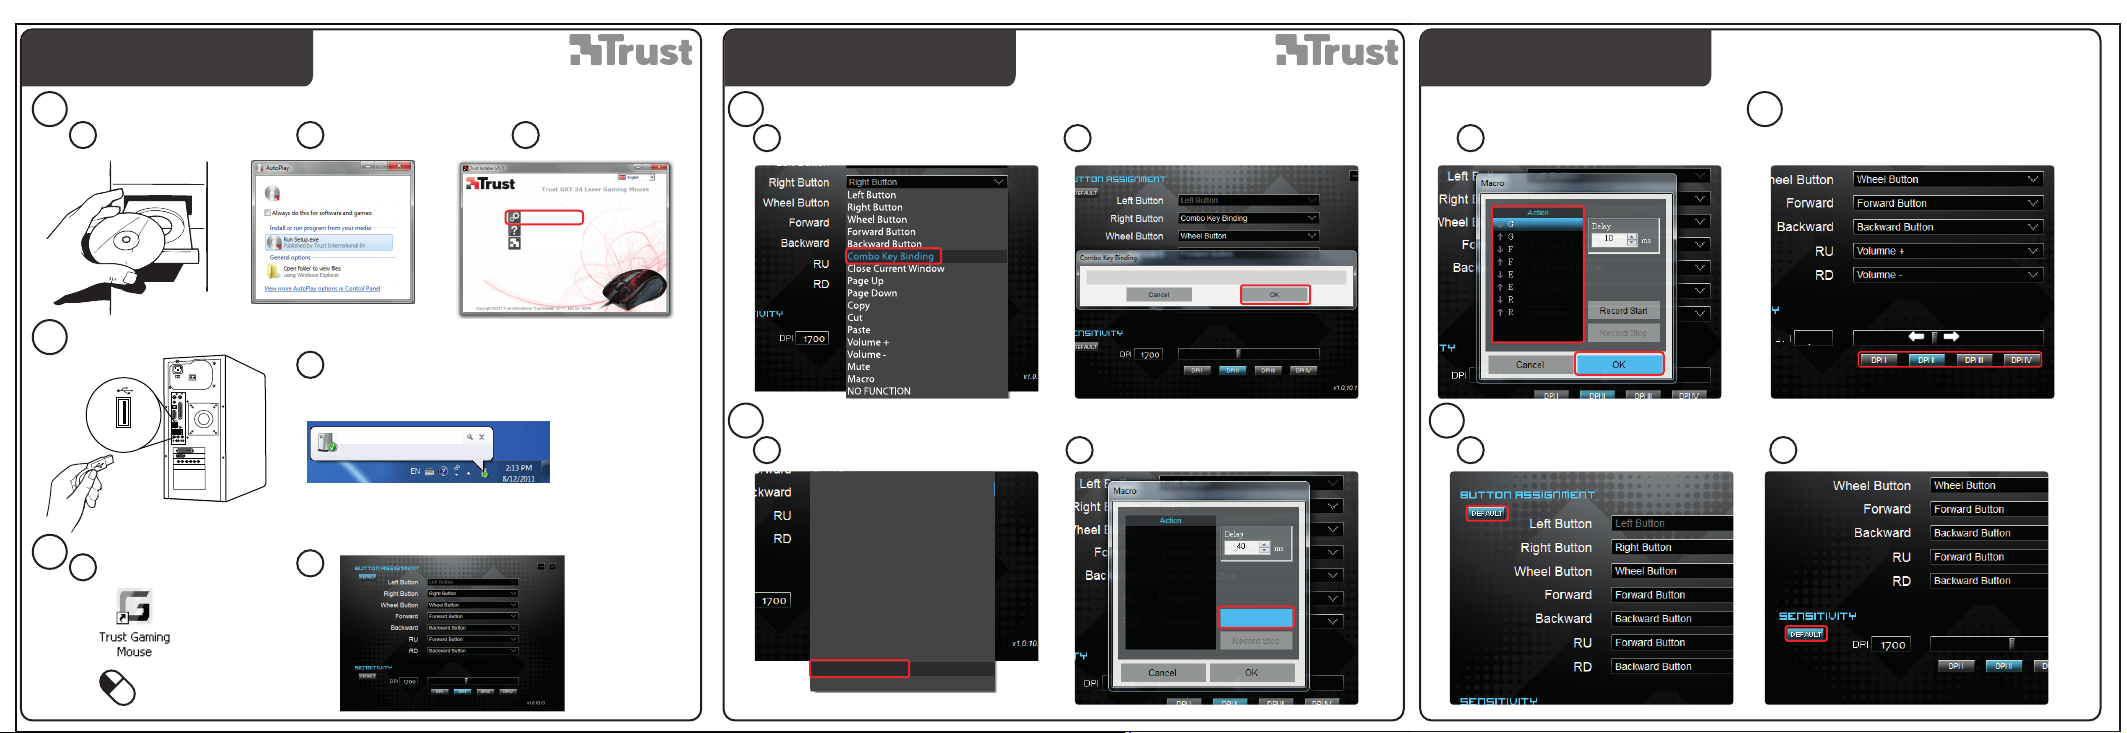
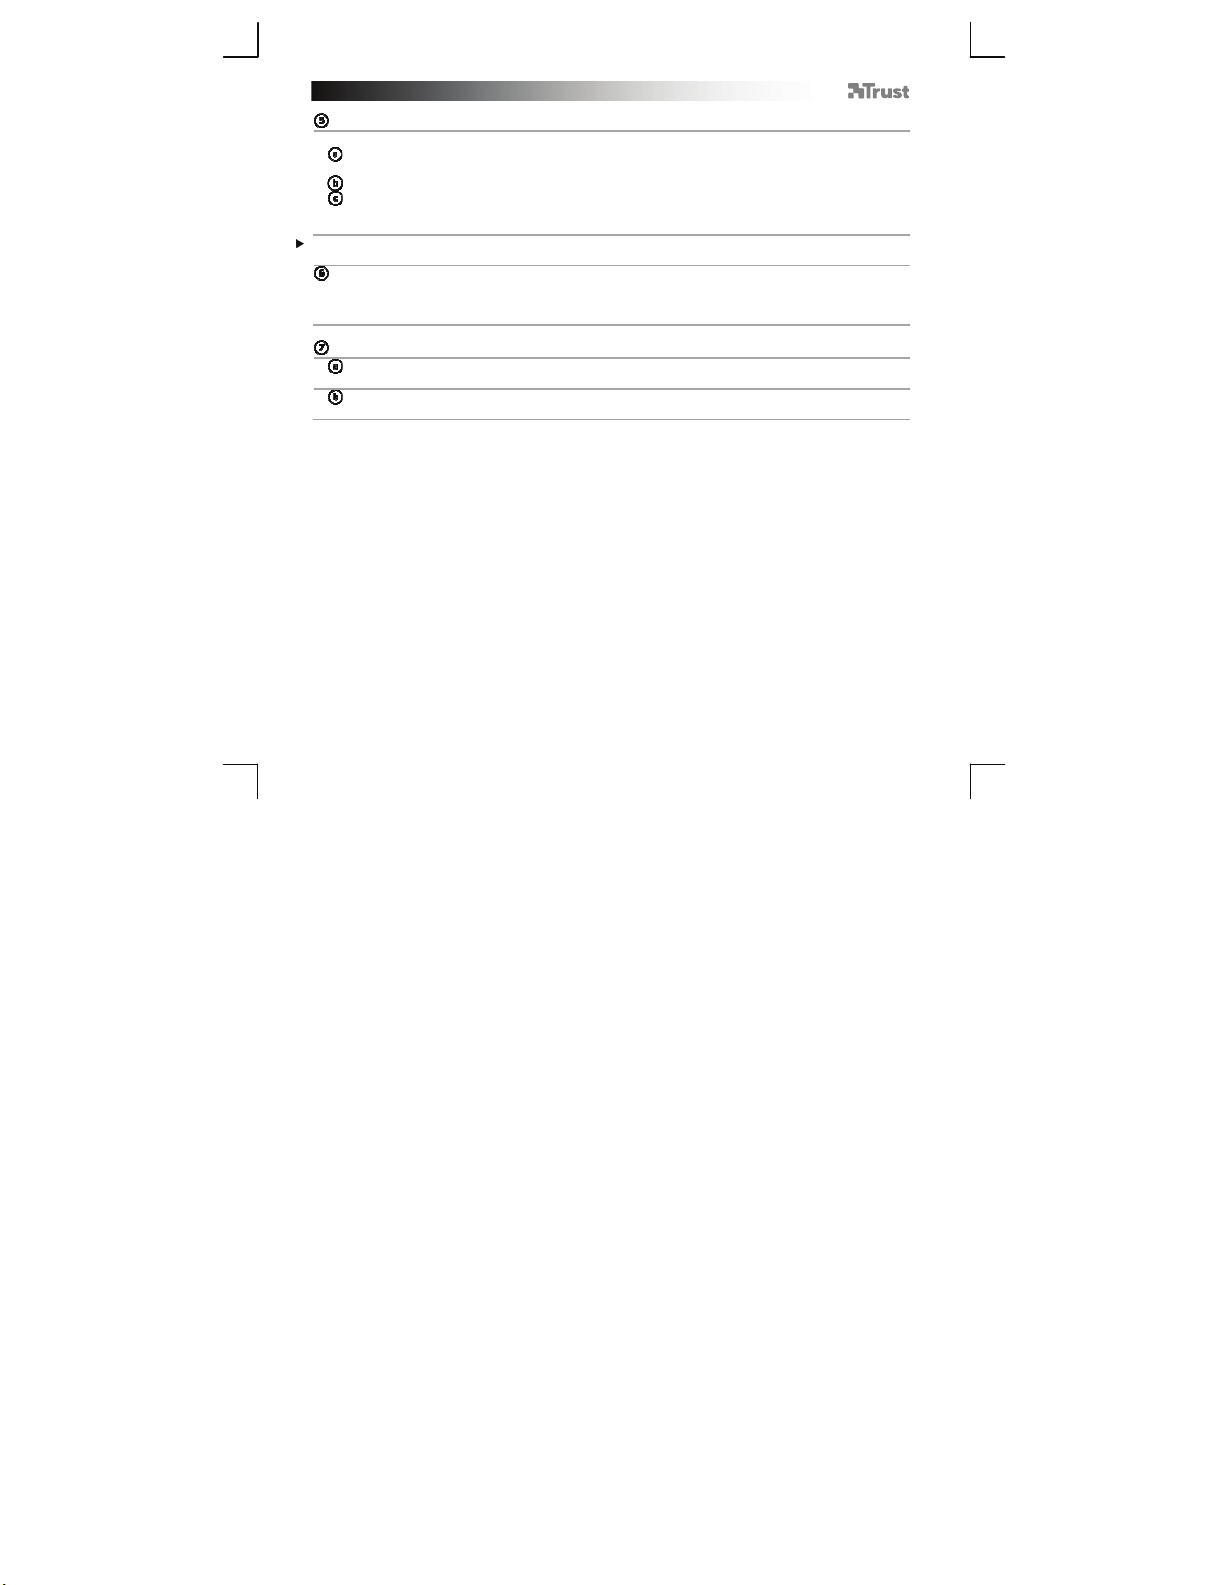
Installation
- Insert the Trust CD-ROM into your CD drive.
- Click “Run Setup.exe – Published by Trust International BV”.
- Click “Install driver”.
- Click ‘Finished’ when the installation is finished (this can take some time).
- Connect the mouse to the USB port of the PC.
- Wait until the message ‘Your device is ready to use’ appears.
- Start the mouse configuration software (located in the taskbar).
All changes will be directly uploaded to the mouse.
- You can now start to configure the mouse.
Configuration
Assign a function.
- Click on the button which you want to re-assign.
- Hover over the function type you want to assign (left button, right button, volume, etc.).
- Click on the function that you want to assign.
Assign a Keyboard function.
- Click on the button which you want to re-assign.
- Click on ‘Combo Key Binding’ (as shown in step ‘4a’).
- Press the keyboard key that you whish to assign.
- To make a combo like ‘Ctrl+V’ press both the keys on the keyboard.
- Click on ‘OK’.
2
Page 5

GXT 31 Gaming Mouse - USER’S MANUAL
Advanced Mouse configuration
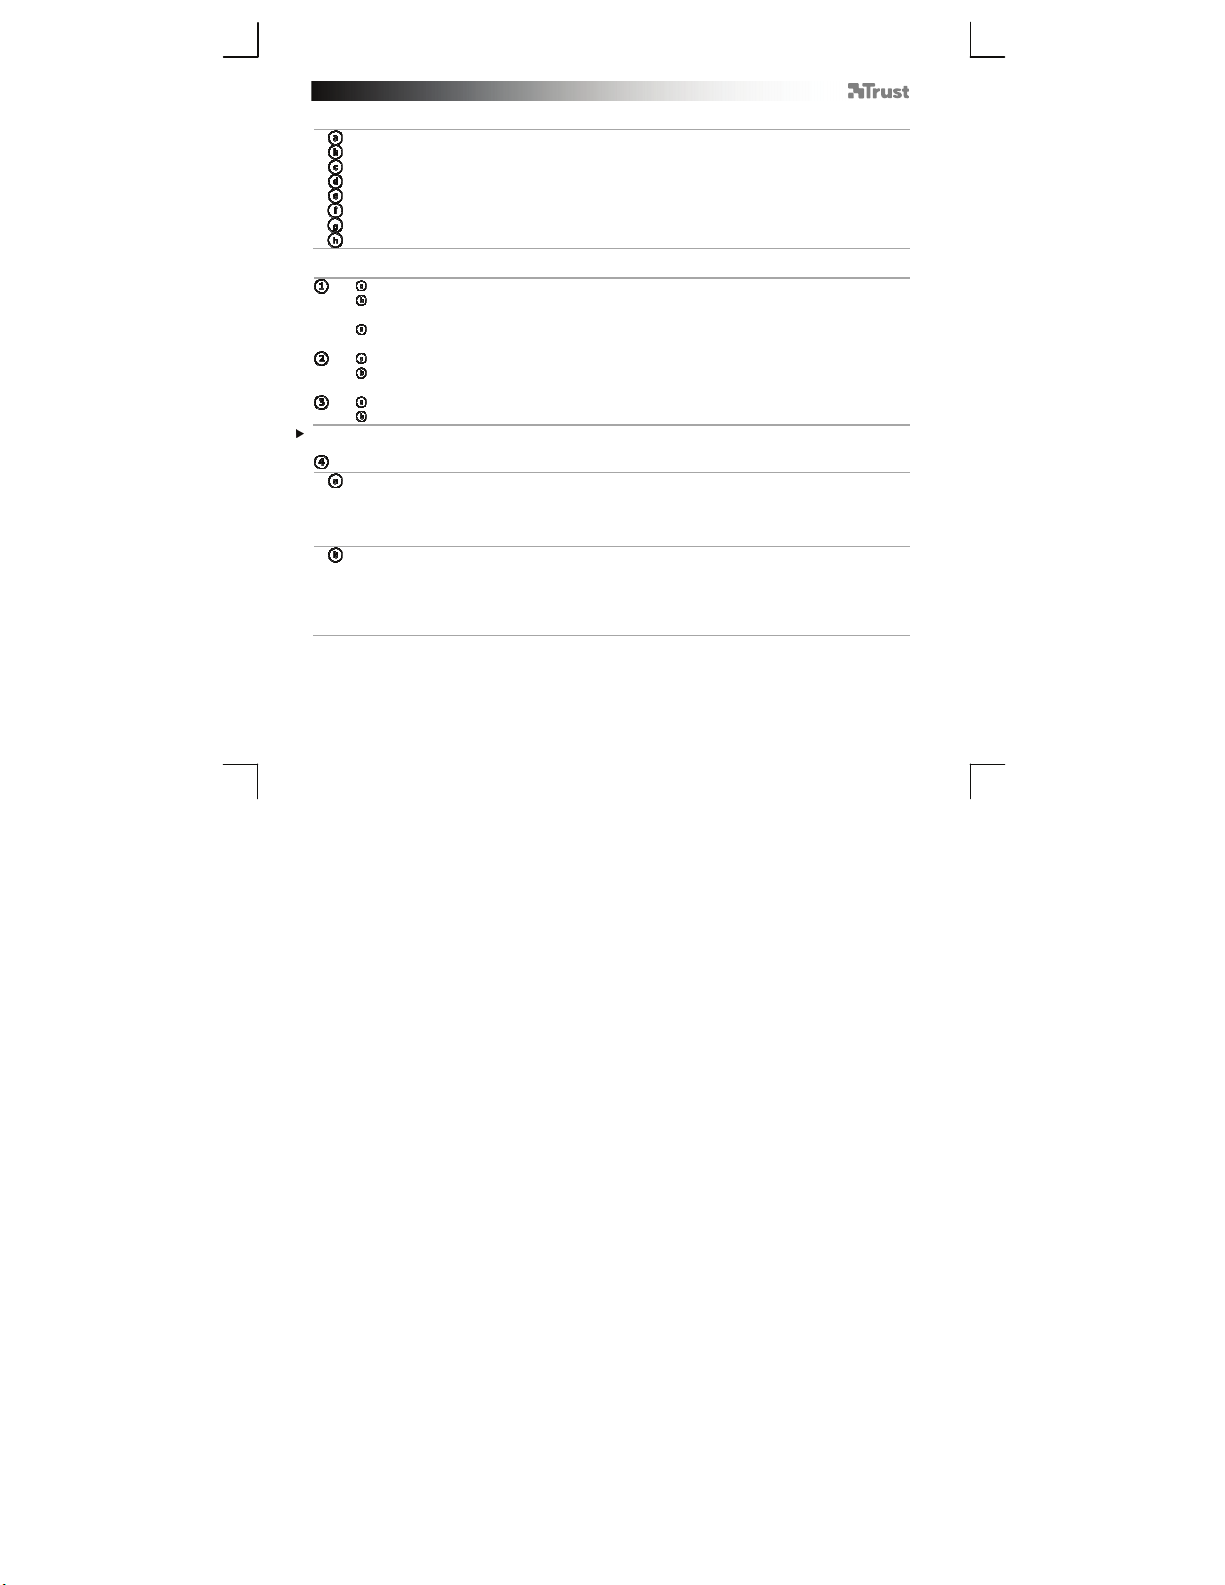
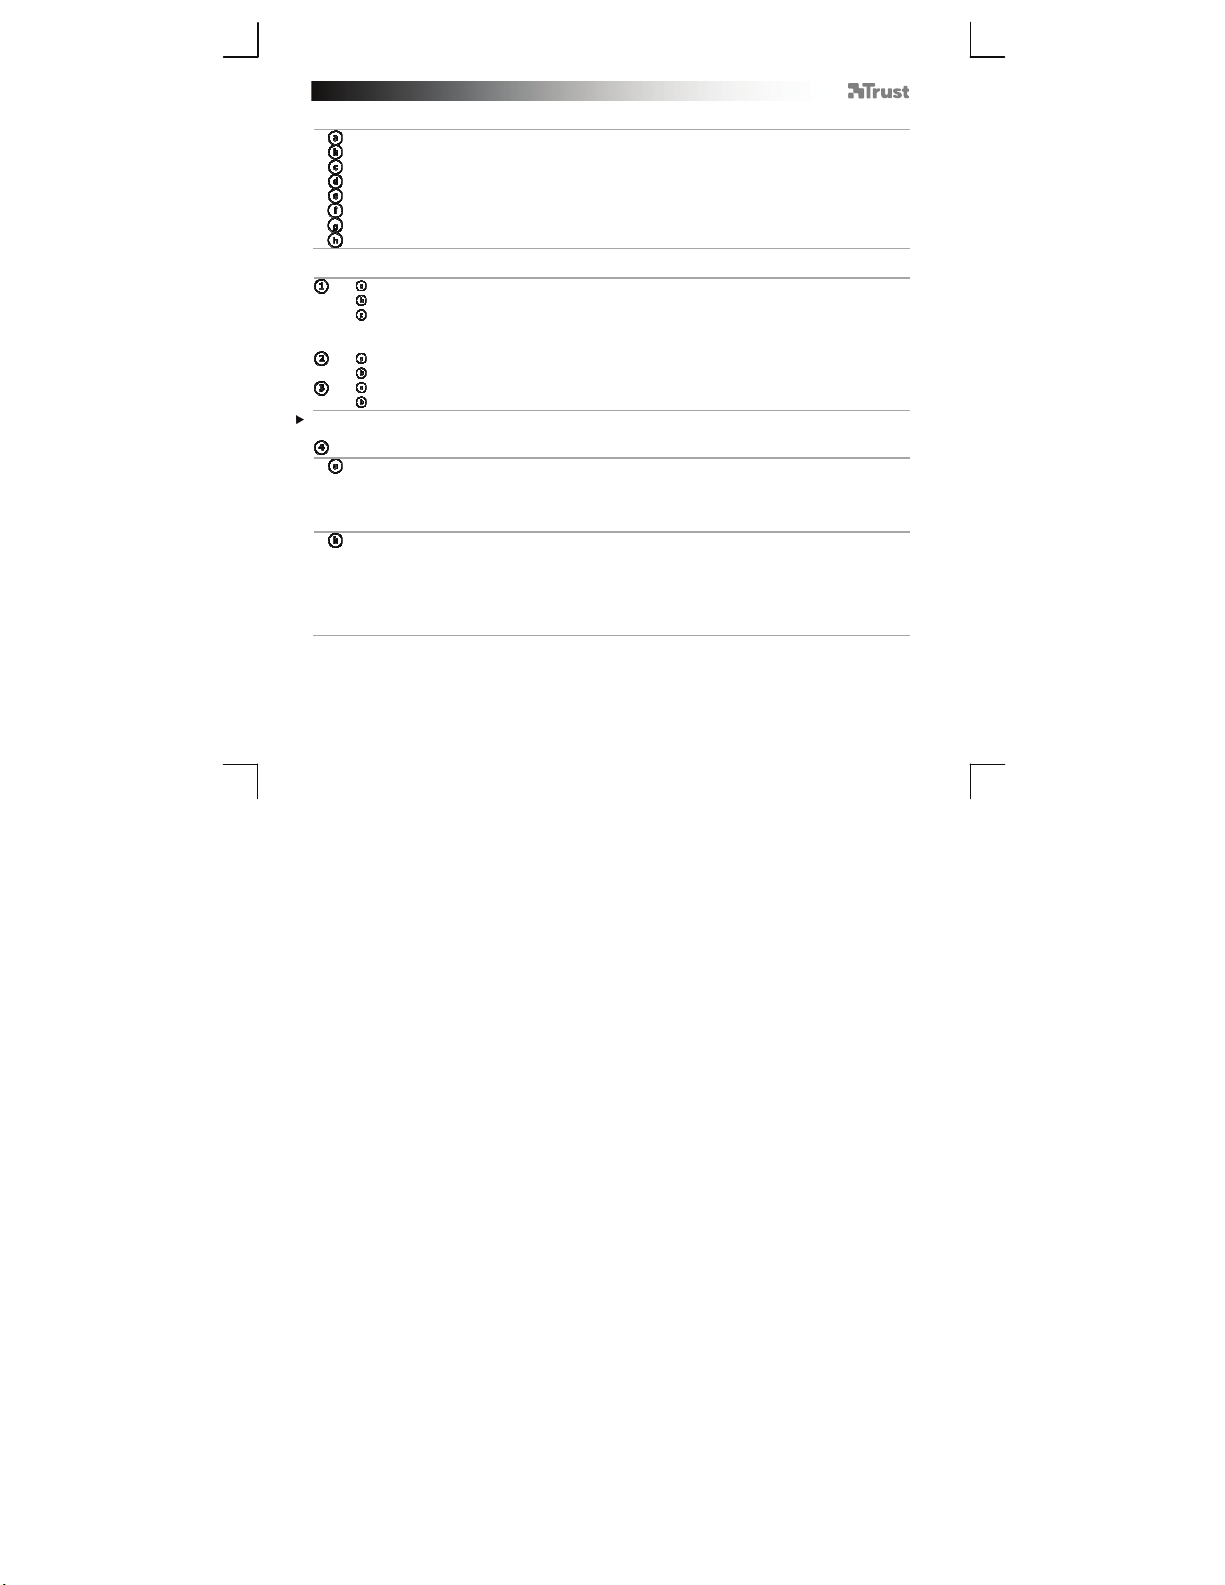
Create a macro function
- Click on the button which you want to re-assign.
- Click on ‘Macro’.
- Click on ‘Record Start’.
- Input a maximum of 4 keys using your actual keyboard.
- When you’re finished creating your macro, click ‘Record Stop’.
- Click on ‘OK’.
When you input 4 keys the record will automatically stop recording.
Change the DPI settings
- Click on the DPI setting that you wish to adjust.
- Move the slider to adjust the DPI setting (400 – 3400).
(Store a sequence of 4 keys in the software)
(use the DPI switch on the mouse to instantly switch DPI speeds)
Restore Default settings
Restore default button assignment
- Click on ‘Default’.
Restore default DPI settings
- Click on ‘Default’.
3
Page 6
GXT 31 Gaming Mouse - USER’S MANUAL
Tastenbelegung der Maus
– Linke Maustaste, nicht programmierbar
– Mausradtaste (Standardfunktion = mittlerer Mausklick)
– Rechte Maustaste (Standardfunktion = rechter Mausklick)
– Vorwärts-Taste (Standardfunktion = nächste Seite)
– Rückwärts-Taste (Standardfunktion = vorherige Seite)
– RU-Taste, rechts oben (Standardfunktion = nicht belegt)
– RD-Taste, rechts unten (Standardfunktion = nicht belegt)
– DPI-Taste (Wechsel zwischen 4 DPI-Einstellungen)
Installation
– Legen Sie die Trust-CD in das CD-ROM-Laufwerk ein.
– Klicken Sie auf „Run Setup.exe – Published by Trust International BV“ [Setup.exe ausführen –
Published by Trust International BV].
– Klicken Sie auf „Install driver“ [Treiber installieren].
– Klicken Sie auf „Finished“ [Abgeschlossen], wenn die Installation abgeschlossen ist (dies kann
einige Zeit dauern).
– Schließen Sie die Maus an den USB-Anschluss des PCs an.
– Warten Sie, bis die Meldung „Your device is ready to use“ [Das Gerät kann jetzt verwendet werden]
angezeigt wird.
– Starten Sie die Konfigurationssoftware für die Maus (in der Taskleiste).
Alle Änderungen werden direkt von der Maus übernommen.
– Sie können nun mit der Konfiguration der Maus beginnen.
Konfiguration
Zuweisen einer Funktion
– Klicken Sie auf die Taste, deren Belegung geändert werden soll.
– Halten Sie den Mauszeiger über die Funktion, die Sie zuweisen möchten (linke Maustaste, rechte
Maustaste, Lautstärke usw.).
– Klicken Sie auf die Funktion, die zugewiesen werden soll.
Zuweisen einer Tastaturfunktion
– Klicken Sie auf die Taste, deren Belegung geändert werden soll.
– Klicken Sie auf „Combo Key Binding“ [Tastenkombination] (siehe Schritt „4a“).
– Drücken Sie auf der Tastatur auf die Taste, die zugewiesen werden soll.
– Drücken Sie für eine Tastenkombination wie z. B. „Strg+V“ beide Tasten auf der Tastatur.
– Klicken Sie auf „OK“.
4
Page 7

GXT 31 Gaming Mouse - USER’S MANUAL
Erweiterte Mauskonfiguration
Erstellen einer Makrofunktion
– Klicken Sie auf die Taste, deren Belegung geändert werden soll.
– Klicken Sie auf „Macro“ [Makro].
– Klicken Sie auf „Record Start“ [Aufzeichnung beginnen].
– Geben Sie über die Tastatur maximal 4 Tasten ein.
– Nachdem die Makro-Erstellung abgeschlossen ist, klicken Sie auf „Record Stop“ [Aufzeichnung
beenden].
– Klicken Sie auf „OK“.
Nach der Eingabe von 4 Tasten wird die Aufzeichnung automatisch beendet.
Ändern der DPI-Einstellungen
Abtastraten wechseln)
– Klicken Sie auf die DPI-Einstellung, die angepasst werden soll.
– Bewegen Sie den Regler zum gewünschten DPI-Wert (400 - 3400).
(Speichern einer Folge von 4 Tasten in der Software)
(mit der DPI-Taste der Maus können Sie direkt zwischen den DPI-
Wiederherstellen der Standardeinstellungen
Wiederherstellen der Standard-Tastenbelegung
– Klicken Sie auf „Default“ [Standard].
Wiederherstellen der DPI-Standardeinstellungen
– Klicken Sie auf „Default“ [Standard].
5
Page 8

GXT 31 Gaming Mouse - USER’S MANUAL
Fonctions de la souris
- Bouton gauche de la souris, non programmable
- Bouton à molette (fonction par défaut = clic milieu)
- Bouton droit (fonction par défaut = clic souris droit)
- Avance (fonction par défaut = page suivante)
- Retour (fonction par défaut = page précédente)
- Bouton RU (fonction par défaut = aucune fonction)
- Bouton RD (fonction par défaut = aucune fonction)
- Bouton DPI (cliquez pour choisir entre 4 paramètres DPI)
Installation
- Insérez le CD-ROM Trust dans votre lecteur CD.
- Cliquez sur «Run Setup.exe – Published by Trust International BV. » [lancer Setup.exe]
- Cliquez sur « Install driver » [installer le pilote].
- Cliquez sur « Finished » [Fini] à la fin de l'installation (cela peut prendre un certain temps).
- Raccordez la souris au port USB de votre ordinateur.
- Attendez qu'apparaisse le message « Your device is ready to use » [Votre appareil est prêt à
l'utilisation].
- Lancez le logiciel de configuration de la souris (situé dans la barre des tâches).
Toute modification sera directement téléchargée vers la souris.
- Vous pouvez maintenant configurer la souris.
Configuration
Attribuer une fonction
- Cliquez sur le bouton que vous souhaitez réattribuer.
- Sélectionnez le type de fonction que vous souhaitez attribuer (bouton de gauche, bouton de droite,
volume, etc.).
- Cliquez sur la fonction que vous souhaitez attribuer.
Attribuer une fonction clavier
- Cliquez sur le bouton que vous souhaitez réattribuer.
- Cliquez sur « Combo Key Binding » [raccourci clavier combiné] (cf. étape 4a).
- Appuyez sur la touche de clavier que souhaitez attribuer.
- Pour effectuer une combinaison telle que 'Ctrl+V', appuyez sur les deux touches du clavier.
- Cliquez sur « ok ».
6
Page 9
GXT 31 Gaming Mouse - USER’S MANUAL
Configuration avancée de la souris
Créer une fonction macro
- Cliquez sur le bouton que vous souhaitez réattribuer.
- Cliquez sur « Macro » [macro].
- Cliquez sur « Record Start » [lancer l'enregistrement].
- Entrez un maximum de 4 touches à l'aide de votre clavier physique.
- Lorsque vous avez fini de créer votre macro, cliquez sur « Record Stop » [arrêter l'enregistrement].
- Cliquez sur « ok ».
Lorsque vous entrez 4 touches, l'enregistrement s'arrêtera automatiquement.
Modifiez les paramètres DPI
vitesse)
- Cliquez sur le paramètre DPI que vous souhaitez modifier.
- Déplacez le curseur afin de régler la vitesse DPI (400 – 3 400).
(enregistrer une série de 4 touches dans le logiciel)
(utilisez la touche DPI sur la souris pour changer instantanément de
Restaurer les paramètres par défaut
Restaurer l'attribution de bouton par défaut
- Cliquez sur « Default » [défaut].
Restaurer les paramètres DPI par défaut
- Cliquez sur « Default » [défaut].
7
Page 10
GXT 31 Gaming Mouse - USER’S MANUAL
T
Struttura del mouse
- Pulsante sinistro del mouse, non programmabile
- Pulsante rotella (funzione predefinita = clic centrale)
- Pulsante destro (funzione predefinita = clic destro del mouse)
- Pulsanti avanti (funzione predefinita = avanzamento pagina)
- Indietro (funzione predefinita = pagina precedente)
- Pulsante RU (funzione predefinita = nessuna funzione)
- Pulsante RD (funzione predefinita = nessuna funzione)
- Pulsante DPI (fare clic per passare dall'una all'altra di 4 impostazioni DPI)
Installazione
- Inserire il CD-ROM di installazione fornito da Trust nell'unità CD-ROM.
- Fare clic su “Run Setup.exe – Published by Trust International BV” [“Esegui Setup.exe - Autore
rust International BV"].
- Fare clic su “Install driver” [Installa driver].
- Fare clic su ‘Finished’ [Fine] al termine dell'installazione (potrà essere necessario un certo tempo).
- Collegare il mouse alla porta USB del PC.
- Attendere finché non appare il messaggio ‘ Your device is ready to use' [Dispositivo pronto per
l'uso].
- Avviare il software di configurazione del mouse (situato nella barra delle applicazioni).
Tutte le modifiche verranno applicate direttamente al mouse.
- Ora è possibile iniziare a configurare il mouse.
Configurazione
Assegnazopne di una funzione.
- Fare clic sul pulsante che si desidera riassegnare.
- Passare sopra il tipo di funzione che si desidera assegnare (pulsante sinistro, pulsante destro, volume,
ecc.).
- Fare clic sulla funzione che si desidera assegnare.
Assegnazione di una funzione da tastiera
- Fare clic sul pulsante che si desidera riassegnare.
- Fare clic su ‘Combo Key Binding’ [Combinazione di tasti] (come mostrato al punto ‘4a’).
- Premere il tasto della tastiera che si desidera assegnare.
- Per creare una combinazione quale ad es. ‘Ctrl+V’, premere entrambi i tasti sulla tastiera.
- Fare clic su ‘ok’.
8
Page 11

GXT 31 Gaming Mouse - USER’S MANUAL
Configurazioni avanzate del mouse
Creazione di una funzione macro
- Fare clic sul pulsante che si desidera riassegnare.
- Fare clic su ‘Macro’.
- Fare clic su ‘Record Start’ [Avvia registrazione].
- Immettere un massimo di 4 tasti con la tastiera in uso.
- Al termine della creazione della macro, fare clic su ‘Record Stop’ [Aresta registrazione].
- Fare clic su ‘ok’.
Dopo aver immesso 4 tasti, la registrazione si arresta automaticamente.
Modifica delle impostazioni DPI
velocità DPI)
- Fare clic sull'impostazione DPI che si desidera modificare.
- Spostare il cursore per regolare l'impostazione DPI desiderata (da 400 a 3400).
(memorizzazione di una sequenza di 4 tasti all'interno del software)
(usare l'interruttore DPI del mouse per commutare istantaneamente le
Ripristino delle impostazioni di default
Ripristino delle assegnazioni di default dei pulsanti
- Fare clic su ‘Default’ [Predefinite].
Ripristino delle impostazioni di default per DPI
- Fare clic su ‘Default’ [Predefinite].
9
Page 12
GXT 31 Gaming Mouse - USER’S MANUAL
Distribución del ratón
- Botón izquierdo del ratón, no programable
- Botón de rueda (función predeterminada = clic central)
- Botón derecho (función predeterminada = clic derecho del ratón)
- Botones de avance (función predeterminada = avance de página)
- Botón de retroceso (función predeterminada = retroceder página)
- Botón RU (función predeterminada = sin función)
- Botón RD (función predeterminada = sin función)
- Botón PPP (haga clic para cambiar entre los 4 ajustes de PPP)
Instalación
- Inserte el CD-ROM de Trust en la unidad de CD.
- Haga clic en “Run Setup.exe – Published by Trust International BV”.
- Haga clic en "Install driver" [Instalar controlador].
- Haga clic en "Finished" [Finalizado] cuando concluya el proceso de instalación (puede tardar cierto
tiempo).
- Conecte el ratón a uno de los puertos USB del ordenador.
- Espere hasta que aparezca el mensaje "El dispositivo está listo para usarse".
- Inicie el software de configuración del ratón (situado en la barra de tareas).
Todos los cambios se actualizarán directamente en el ratón.
- Ahora podrá comenzar a configurar el ratón.
Configuración
Asignación de una función.
- Haga clic en el botón que desee reasignar.
- Pase el cursor del ratón sobre el tipo de función que desee asignar (botón izquierdo, botón derecho,
volumen, etc.).
- Haga clic en la función que desee asignar.
Asignación de una función de teclado.
- Haga clic en el botón que desee reasignar.
- Haga clic en "Combo Key Binding" [Vinculación de tecla combinada] (tal y como se muestra en el paso
"4a").
- Pulse la tecla del teclado que desee asignar.
- Para crear una función combinada, como por ejemplo "Ctrl+V", pulse ambas teclas en el teclado.
- Haga clic en "ok" [Aceptar].
10
Page 13

GXT 31 Gaming Mouse - USER’S MANUAL
Configuración avanzada del ratón
Creación de una función de macro
- Haga clic en el botón que desee reasignar.
- Haga clic en "Macro" [Macro].
- Haga clic en "Record Start" [Iniciar grabación].
- Introduzca un máximo de 4 teclas con el teclado real.
- Cuando haya terminado de crear la macro, haga clic en "Record Stop" [Detener grabación].
- Haga clic en "ok" [Aceptar].
Cuando introduzca 4 teclas la grabación se detendrá de forma automática.
Cambio de la configuración de PPP
instantánea la velocidad de PPP)
- Haga clic en el ajuste de PPP que desee ajustar.
- Mueva el deslizador para modificar el ajuste de PPP (400 – 3400).
(guardar una secuencia de 4 teclas en el software)
(utilice el interruptor de PPP del ratón para cambiar de forma
Restaurar configuración predeterminada
Restaurar asignación predeterminada del botón
- Haga clic en "Default" [Predeterminado].
Restaurar configuración de PPP predeterminada
- Haga clic en "Default" [Predeterminado].
11
Page 14

GXT 31 Gaming Mouse - USER’S MANUAL
Esquema do rato
- Botão esquerdo do rato, não programável
- Botão da roda (função predefinida = clique como botão intermédio do rato)
- Botão direito (função predefinida = clique como botão direito do rato)
- Botões Seguinte (função predefinida = avançar página)
- Retroceder (função predefinida = retroceder página)
- Botão RU (função predefinida = nenhuma função)
- Botão RD (função predefinida = nenhuma função)
- Botão DPI (clicar para alternar entre 4 definições de DPI)
Instalação
- Insira o CD-ROM Trust na unidade de CD.
- Clique em “Run Setup.exe – Published by Trust International BV” [“Executar Setup.exe – Published
by Trust International BV”].
- Clique em “Instalar controlador”.
- Clique em ‘Finished’ [‘Concluído’] quando a instalação estiver concluída (este processo pode
demorar algum tempo).
- Ligue o rato à porta USB do PC.
- Aguarde até surgir a mensagem 'O seu dispositivo está pronto a usar' [‘Your device is ready to
use’].
- Inicie o software de configuração do rato (localizado na barra de tarefas).
Todas as alterações serão carregadas directamente no rato.
- Pode agora iniciar a configuração do rato.
Configuração
Atribuir uma função.
- Clique no botão a que pretende atribuir uma nova função.
- Faça pairar o cursor sobre o tipo de função que pretende atribuir (botão esquerdo, botão direito,
volume, etc.).
- Clique na função que pretende atribuir.
Atribuir uma função de Teclado.
- Clique no botão a que pretende atribuir uma nova função.
- Clique em ‘Combo Key Binding’ [‘Juntar combinação de teclas’] (conforme indicado no passo ‘4a’).
- Prima a tecla do teclado que pretende atribuir.
- Para criar uma combinação, como ‘Ctrl+V’, prima em ambas as teclas no teclado.
- Clique em ‘ok’ [‘ok’].
12
Page 15

GXT 31 Gaming Mouse - USER’S MANUAL
Configuração avançada do Rato
Criar uma função macro
- Clique no botão a que pretende atribuir uma nova função.
- Clique em ‘Macro’ [‘Macro’].
- Clique em ‘Record Start’ [‘Iniciar gravação’].
- Introduza um máximo de 4 teclas utilizando o seu teclado.
- Após concluir a criação da sua macro, clique em ‘Record Stop’ [‘Parar gravação’].
- Clique em ‘ok’ [‘ok’].
Ao introduzir 4 teclas, a gravação será automaticamente interrompida.
Alterar as definições de DPI
de DPI)
- Clique na definição de DPI que deseja ajustar.
- Desloque o cursor de deslocamento para ajustar a definição de DPI (400 – 3400).
(Guardar uma sequência de 4 teclas no software)
(utilize o interruptor de DPI do rato para alterar de imediato as velocidades
Restaurar as predefinições
Restaurar a atribuição de botões predefinida
- Clique em ‘Default’ [‘Predefinição’].
Restaurar as predefinições de DPI
- Clique em ‘Default’ [‘Predefinição’].
13
Page 16

GXT 31 Gaming Mouse - USER’S MANUAL
Bedieningsknoppen
- Linkermuisknop, niet programmeerbaar
- Wiel (standaardfunctie = klikken met middelste muisknop)
- Rechterknop (standaardfunctie = klikken met rechtermuisknop)
- Volgende (standaardfunctie = volgende pagina)
- Vorige (standaardfunctie = vorige pagina)
- RU-knop (standaardfunctie = geen functie)
- RD-knop (standaardfunctie = geen functie)
- DPI-knop (klikken om te schakelen tussen 4 DPI-instellingen)
Installatie
- Plaats de Trust cd-rom in de cd-rom drive.
- Klik op “Run Setup.exe – Published by Trust International BV” (Setup.exe uitvoeren).
- Klik op “Install driver” (Stuurprogramma installeren).
- Klik op ‘Finished’ (Voltooid) wanneer de installatie is voltooid (dit kan enige tijd duren).
- Sluit de muis aan op de USB-poort van uw pc.
- Wacht tot de melding ‘Your device is ready to use’ (Het apparaat is gereed voor gebruik) verschijnt.
- Start de configuratiesoftware van de muis op (in de taakbalk).
Alle wijzigingen worden rechstreeks in de muis opgeslagen.
- U kunt de muis nu configureren.
Configuratie
Een functie toewijzen
- Klik op de knop waaraan u een nieuwe functie wilt toewijzen.
- Beweeg over het functietype dat u wilt toewijzen (linkerknop, rechterknop, volume, enz.).
- Klik op de functie die u wilt toewijzen.
Een toetsenbordfunctie toewijzen
- Klik op de knop waaraan u een nieuwe functie wilt toewijzen.
- Klik op ‘Combo Key Binding’ (toetsencombinatie instellen) (zie stap ‘4a’).
- Druk op de toets waaraan u een functie wilt toewijzen.
- Om een toetsencombinatie te maken zoals ‘Ctrl+V’, houd dan beide toetsen op het toetsenbord
ingedrukt.
- Klik op ‘ok’.
14
Page 17

GXT 31 Gaming Mouse - USER’S MANUAL
Geavanceerde muisconfiguratie
Een macrofunctie aanmaken
- Klik op de knop waaraan u een nieuwe functie wilt toewijzen.
- Klik op ‘Macro’.
- Klik op ‘Record Start’ (opname starten).
- Voer een maximum van 4 toetsen in met behulp van uw toetsenbord.
- Zodra u de macro hebt aangemaakt, drukt u op ‘Record Stop’ (opname stoppen).
- Klik op ‘ok’.
Wanneer u 4 toetsen invoert, wordt de opname automatisch gestopt.
De DPI-instellingen wijzigen
snelheden)
- Klik op de DPI-instelling die u wilt wijzigen.
- Beweeg de schuif om de DPI-instelling aan te passen (400 – 3400).
(een toetsenreeks in de software opslaan)
(gebruik de DPI-knop op de muis om direct te schakelen tussen DPI-
Standaardinstellingen herstellen
Standaard knoptoewijzingen herstellen
- Klik op ‘Default’ (Standaard).
Standaard DPI-instellingen herstellen
- Klik op ‘Default’ (Standaard).
15
Page 18

GXT 31 Gaming Mouse - USER’S MANUAL
Muselayout
- Venstre museknap, ikke programmerbar
- Hjulknap (standardfunktion = midterklik)
- Højre knap (standardfunktion = højre museklik)
- Fremknapper (standard = side frem)
- Tilbage (standardfunktion = side tilbage)
- RU-knap (standardfunktion = ingen funktion)
- RD-knap (standardfunktion = ingen funktion)
- DPI-knap (klik for at skifte mellem 4 DPI-indstillinger)
Installation
- Indsæt Trust cd-rom'en i cd-drevet.
- Klik på “Run Setup.exe – Published by Trust International BV” [Kør Setup.exe - Udgivet af Trust
International BV].
- Klik på “Install driver” [Installer driver].
- Klik på ‘Finished’ [Udført], når installationen er udført (dette kan tage et stykke tid).
- Slut musen til USB-porten på pc'en.
- Vent, indtil meddelelsen ‘Your device is ready to use' [Enheden er klar til brug] vises.
- Start musekonfigurationssoftwaren (findes i proceslinjen).
Alle ændringer sendes direkte til musen.
- Du kan nu begynde at konfigurere musen.
Konfiguration
Tildel en funktion.
- Klik på knappen, som du vil gentildele.
- Kør hen over funktionstypen, som du vil tildele (venstre knap, højre knap, lydstyrke osv.).
- Klik på funktionen, som du vil tildele.
Tildel en tastaturfunktion.
- Klik på knappen, som du vil gentildele.
- Klik på 'Combo Key Binding' [Kombi-tast] (som vist i trin ‘4a’).
-Tryk på tastaturtasten, som du vil tildele.
- Hvis du vil lave en kombination som ‘Ctrl+V’, skal du trykke på begge taster på tastaturet.
- Klik på ‘OK’ [OK].
16
Page 19

GXT 31 Gaming Mouse - USER’S MANUAL
Avanceret musekonfiguration
Opret en makrofunktion
- Klik på knappen, som du vil gentildele.
- Klik på ‘Macro’ [Makro].
- Klik på 'Record Start' [Start optagelse].
- Tryk på maksimalt 4 taster på dit faktiske tastatur.
- Når du er færdig med oprettelsen af makroen, skal du klikke på ‘Record Stop’ [Stop optagelse].
- Klik på ‘OK’ [OK].
Når du har trykket på 4 taster, stoppes optagelsen automatisk.
Skift DPI-indstillinger
- Klik på DPI-indstillingen, som du vil justere.
- Flyt skyderen for at justere DPI-indstillingen (400 – 3400).
(gem en sekvens af 4 taster i softwaren)
(brug DPI-knappen på musen til øjeblikkeligt at ændre DPI-hastigheder)
Gendan standardindstillinger
Gendan standardknaptildeling
- Klik på ‘Default’ [Standard].
Gendan standard-DPI-indstillinger
- Klik på ‘Default’ [Standard].
17
Page 20

GXT 31 Gaming Mouse - USER’S MANUAL
Hiiren painikkeet
- Hiiren ykköspainike, ei ohjelmoitavissa
- Pyöräpainike (oletustoiminto = keskimmäisen painikkeen napsautus)
- Hiiren kakkospainike (oletustoiminto = hiiren oikean painikkeen napsautus)
- Eteenpäin (oletustoiminto = seuraavalle sivulle siirtyminen)
- Taaksepäin (oletustoiminto = edelliselle sivulle siirtyminen)
- RU-painike (oletustoiminto = ei toimintoa)
- RD-painike (oletustoiminto = ei toimintoa)
- DPI-painike (napsauta 4 DPI-asetuksen vaihtamiseksi)
Asennus
- Laita Trust CD-ROM -levy CD-asemaan.
- Napsauta “Suorita Setup.exe – Published by Trust International BV”.
- Valitse "Install driver" [Asenna ohjain].
- Napsauta ‘Loppu’, kun asennus on suoritettu loppuun (tämä voi kestää jonkin aikaa).
- Kiinnitä hiiri tietokoneen USB-porttiin.
- Odota kunnes viesti "Laite on valmis käytettäväksi" tulee näkyviin.
- Käynnistä hiiren kokoonpano-ohjelmisto (sijaitsee tehtäväpalkissa).
Kaikki muutokset ladataan suoraan hiireen.
- Nyt voit aloittaa hiiren määrittämisen.
Määritykset
Toiminnon asettaminen.
- Napsauta painiketta, johon haluat asettaa toiminnon.
- Siirrä hiiri sen toimintolajin päälle, jonka haluat asettaa (ykköspainike, kakkospainike,
äänenvoimakkuus, jne.).
- Napsauta toimintoa, jonka haluat asettaa.
Näppäimistötoiminnon asettaminen.
- Napsauta painiketta, johon haluat asettaa toiminnon.
- Napsauta ‘Combo Key Binding’ [Yhdistelmänäppäinsidonta] (kuten vaiheessa ‘4a’).
- Paina sitä näppäimistön painiketta, johon haluat toiminnon asettaa.
- Jotta yhdistelmästä tulisi esimerkiksi ‘Ctrl+V’, paina molempia näppäimistön painikkeita.
- Valitse "ok".
18
Page 21

GXT 31 Gaming Mouse - USER’S MANUAL
Hiiren lisätoimintojen konfiguroiminen
Makrotoiminnon luominen
- Napsauta painiketta, johon haluat asettaa toiminnon.
- Napsauta ‘Macro’ [Makro].
- Napsauta ‘Record Start’ [Aloita tallennus].
- Syötä enintään 4 näppäintä tietokoneen näppäimistöllä.
- Kun olet luonut makron, napsauta ‘Record Stop’ [Lopeta tallennus].
- Valitse "ok".
Kun syötät 4 näppäintä, tallennus päättyy automaattisesti.
DPI-asetuksien muuttaminen
- Napsauta DPI-asetusta, jota haluat muuttaa.
- Siirrä liukupalkkia säätääksesi DPI-asetusta (400 – 3400).
(Tallenna 4 näppäimen sarja ohjelmistoon)
(käytä hiiren DPI-kytkintä DPI-nopeuksien välitöntä muuttamista varten)
Oletusasetuksien palauttaminen
Painikkeen oletustoiminnon palauttaminen
- Napsauta ‘Default’ [Oletus].
DPI-oletusasetuksien palauttaminen
- Napsauta ‘Default’ [Oletus].
19
Page 22

GXT 31 Gaming Mouse - USER’S MANUAL
Oversikt mus
- Venstre museknapp, ikke programmerbar
- Musehjul (standardfunksjon = klikk på midten)
- Høyre knapp (standardfunksjon) = høyre museklikk)
- Fremoverknapp (standardfunksjon = neste side)
- Bakoverknapp (standard funksjon = forrige side)
- RU-knapp (standardfunksjon = ingen funksjon)
- RU-knapp (standardfunksjon = ingen funksjon)
- DPI-knapp (klikk for å bytte mellom 4 DPI-innstillinger)
Installasjon
- Sett inn Trust CD-ROM i CD-stasjonen din.
- Klikk på “Run Setup.exe – Published by Trust International BV”.
- Klikk på “Installer driver”.
- Klikk på ‘Finished’ når installasjonen er ferdig (dette kan ta litt tid).
- Koble til musen til datamaskinens USB-port.
- Vent til meldingen ‘Apparatet ditt er klart til å brukes’ kommer.
- Start musens konfigurasjonsprogramvare (finnes i oppgavemenyen).
Alle endringer vil bli direkte oppdatert til musen.
- Nå kan du starte å konfigurere musen.
Konfigurasjon
Tilordne en funksjon
- Klikk på den knappen du vil koble til igjen.
- Sveip over funksjonstypen du vil tilordne (venstre knapp, høyre knapp, volum etc.).
- Klikk på funksjonen du vil legge til.
Tilordne en tastaturfunksjon
- Klikk på den knappen du vil koble til igjen.
- Klikk på ‘Combo Key Binding’ (som vist i trinn ‘4a’).
- Trykk på tastaturtasten du vil tilordne.
- For å lage en kombinasjon som ‘Ctrl+V’, trykk på begge tastene på tastaturet.
- Klikk på "OK".
20
Page 23

GXT 31 Gaming Mouse - USER’S MANUAL
Avansert konfigurasjon av musen
Opprette en makro-funksjon
- Klikk på den knappen du vil koble til igjen.
- Klikk på "Macro".
- Klikk på ‘Record Start’.
- Legg inn maks. fire taster fra tastaturet du bruker.
- Når du er ferdig med å opprette makroen, klikker du på ‘Record Stop’.
- Klikk på "OK".
Når du har lagt inn 4 taster, vil oppføringen stanse automatisk.
Endre DPI-innstillinger
- Klikk på den DPI-innstillingen du ønsker å tilpasse.
- Beveg glidebryteren for å justere DPI-innstillingene (400 – 3400).
(Lagre en sekvens av 4 taster i programvaren)
(bruk DPI-bryteren på musen for å skifte DPI-hastigheter direkte)
Gjenopprette standardinnstillinger
Gjenopprette standardtildeling av knappefunksjoner
- Klikk på "Default".
Gjenopprette standard DPI-innstillinger
- Klikk på "Default".
21
Page 24

GXT 31 Gaming Mouse - USER’S MANUAL
Mus-layout
- Vänster knapp, oprogrambar
- Hjulknapp (Standardfunktion = mittenklicka)
- Högerknap (Standarfunktion = högerklicka)
- Framåtknappar (Standarfunktion = nästa sida)
- Bakåt (Standardfunktion = förra sidan)
- RU-knapp (Standardfunktion = ingen)
- RD-knapp (Standardfunktion = ingen)
- DPI-knapp ( klicka för att byta mellan 4 DPI-inställningar)
Installation
-Sätt in din Trust CD-ROM i CD-läsaren.
- Klicka på “Run Setup.exe [Kör Setup.exe] – Published by Trust International BV”.
- Klicka på “Install driver" ["Installera drivrutin"].
- Klicka på 'Finished'[‘Klar’] när installationen är klar (det kan ta lite tid).
- Anslut musen till USB-porten på PC:n
- Vänta tills meddelandet ‘Enheten är klar att användas‘ visas.
- Starta musens konfigurationsmjukvara (finns i aktivitetsfältet).
Alla ändringar kommer att laddas upp direkt till musen.
- Du kan nu börja konfigurera musen
Konfiguration
Tilldela en funktion.
- Klicka på knappen som du vill tilldela om.
- Hovra över funktionstypen som du vill tilldela (vänster knapp, höger knapp, volym o.s.v.).
- Klicka på funktionen som du vill tilldela om.
Tilldela en tangentbordsfunktion.
- Klicka på knappen som du vill tilldela om.
- Klicka på ’Combo Key Binding' ['Kombinationstangentbindning’](som visas i steg ‘4a’).
- Tryck på tangentbordstangenten som du önskar tilldela.
- För att göra en kombination som ‘Ctrl+V’ tryck på båda tangenterna på tangentbordet.
- Klicka på ‘OK’.
22
Page 25

GXT 31 Gaming Mouse - USER’S MANUAL
Avancerad muskonfiguration
Skapa en makrofunktion
- Klicka på knappen som du vill tilldela om.
- Klicka på ‘Macro'['Makro’].
- Klicka på 'Record Start'['Registrera start’].
- Mata in ett maximum av 4 knappar genom att använda ditt faktiska tangentbord.
- Klicka på ‘Record Stop'['Registrera stopp‘] när du skapat klart ditt makro.
- Klicka på ‘OK'.
När du matar in 4 knappar kommer registreringen att avslutas automatiskt.
Ändra DPI-inställningar
- Klicka på DPI-inställningen du vill justera.
- Flytta skjutreglaget för att justera DPI-inställningen (400 – 3400).
(Lagra en 4-knappssekvens i mjukvaran)
(använd DPI-knappen på musen för att omedelbart växla DPI-hastigheter)
Återställ standardinställningar
Återställ standardtilldelning av knapparna
- Klicka på 'Default'[‘Standardinställningar’].
Återställ DPI-standardinställningar
- Klicka på 'Default'[‘Standardinställningar’].
23
Page 26

GXT 31 Gaming Mouse - USER’S MANUAL
T
Opis myszy
- Lewy przycisk myszy, nieprogramowalny
- Pokrętło (funkcja domyślna = kliknięcie środkowym przyciskiem myszy)
- Prawy przycisk myszy (funkcja domyślna = kliknięcie prawym przyciskiem myszy)
- Przycisk do przodu (funkcja domyślna = strona do przodu)
- Przycisk do tyłu (funkcja domyślna = strona do tyłu)
- Prawy górny przycisk (funkcja domyślna = brak funkcji)
- Prawy dolny przycisk (funkcja domyślna = brak funkcji)
- Przycisk DPI (przełączanie między 4 ustawieniami DPI)
Instalacja
- Włóż płytę Trust CD do napędu CD.
- Kliknij „Run Setup.exe – Published by Trust International BV” [„Uruchom Setup.exe – Published by
rust International BV”].
- Kliknij „Install driver” [„Zainstaluj sterownik”].
- Kliknij „Finished” [„Koniec”], gdy instalacja zostanie zakończona (może to potrwać dłuższą chwilę).
- Podłącz mysz do portu USB komputera.
- Odczekaj, aż wyświetlony zostanie komunikat „Your device is ready to use” [„Urządzenie jest
gotowe do użycia”].
- Uruchom oprogramowanie konfiguracyjne myszy (skrót znajduje się na pasku zadań).
Wszystkie zmiany ustawień myszy zostaną bezpośrednio zaktualizowane.
- Można teraz rozpocząć konfigurację myszy.
Konfiguracja
Przypisanie funkcji.
- Kliknij przycisk, który chcesz ponownie przypisać.
- Wybierz typ funkcji, który chcesz przypisać (lewy przycisk, prawy przycisk, poziom głośności itp.).
- Kliknij funkcję, którą chcesz przypisać.
Przypisanie funkcji klawiatury.
- Kliknij przycisk, który chcesz ponownie przypisać.
- Kliknij „Combo Key Binding” [„Przypisywanie kombinacji”] (jak zostało to opisane w kroku „4a”).
- Naciśnij klawisz na klawiaturze, który chcesz przypisać.
- Aby stworzyć kombinację, np. „Ctrl+V”, naciśnij oba klawisze na klawiaturze.
- Kliknij „OK”.
24
Page 27

GXT 31 Gaming Mouse - USER’S MANUAL
Zaawansowana konfiguracja myszy
Tworzenie funkcji makro
- Kliknij przycisk, który chcesz ponownie przypisać.
- Kliknij „Macro” [„Makro”].
- Kliknij „Record Start” [„Rozpoczęcie zapisu”].
- Wprowadź maksymalnie 4 klawisze, korzystając z podłączonej klawiatury.
- Po skończeniu tworzenia makro, kliknij „Record Stop” [„Zakończenie zapisu”].
- Kliknij „OK”.
Po wprowadzeniu 4 klawiszy zapis zostanie zakończony automatycznie.
Zmiana ustawień DPI
rozdzielczości DPI)
- Kliknij ustawienie DPI, które chcesz zmienić.
- Przesuń suwak, aby zmieć ustawienie DPI (400 – 3400).
(zapisanie kombinacji 4 klawiszy w oprogramowaniu)
(korzystanie z przełącznika DPI myszy w celu natychmiastowej zmiany
Przywracanie ustawień domyślnych
Przywracanie domyślnego przypisania przycisków
- Kliknij „Default” [„Domyślnie”].
Przywracania domyślnych ustawień DPI
- Kliknij „Default” [„Domyślnie”].
25
Page 28

GXT 31 Gaming Mouse - USER’S MANUAL
Vzhled myši
- Levé tlačítko myši, neprogramovatelné
- Rolovací tlačítka (výchozí funkce = prostřední kliknutí)
- Pravé tlačítko myši (výchozí funkce = kliknutí pravým tlačítkem myši)
- Tlačítko vpřed (výchozí funkce = o stránku vpřed)
- Tlačítko zpět (výchozí funkce = o stránku zpět)
- Pravé horní tlačítko (výchozí funkce = žádná)
- Pravé dolní tlačítko (výchozí funkce = žádná)
- DPI tlačítko (kliknutím přepínání mezi 4 nastaveními DPI)
Instalace
- Vložte CD-ROM společnosti Trust do jednotky CD-ROM.
- Klikněte na „Run Setup.exe – Published by Trust International BV“ [„Spustit Setup.exe – Published
by Trust International BV“].
- Klikněte na „Install driver“ [„Nainstalovat ovladač“].
- Po dokončení instalace klikněte na „Finished” [„Dokončeno“] (může trvat nějakou dobu).
- Myš připojte do USB portu počítače.
- Vyčkejte, dokud se nezobrazí zpráva „Your device is ready to use“ [„Zařízení je připraveno k
použití“].
- Spusťte konfigurační software myši (umístěný na hlavním panelu).
Všechny změny se načtou přímo do myši.
- Nyní můžete spustit konfiguraci.
Konfigurace
Přiřazení funkce.
- Klikněte na tlačítko, ke kterému si přejete funkci přiřadit.
- Umístěte ukazatel na typ funkce, který si přejete přiřadit (levé tlačítko, pravé tlačítko, hlasitost atd.).
- Klikněte na funkci, kterou si přejete přiřadit.
Přiřazení funkce klávesnice.
- Klikněte na tlačítko, ke kterému si přejete funkci přiřadit.
- Klikněte na „Combo Key Binding“ [„Propojení klávesových zkratek“] (jak je uvedeno v kroku „4a“).
- Stiskněte tu klávesu na klávesnici, kterou si přejete přiřadit.
- Pokud si přejete použít zkratku, např. „Ctrl+V“, stiskněte na klávesnici obě klávesy.
- Klepněte na „OK“.
26
Page 29

GXT 31 Gaming Mouse - USER’S MANUAL
V
Pokročilá konfigurace myši
ytvoření funkce makra
- Klikněte na tlačítko, ke kterému si přejete funkci přiřadit.
- Klikněte na „Macro“ [„Makro“].
- Klikněte na „Record Start“ [„Spustit záznam“].
- Zadejte maximálně 4 klávesy na klávesnici.
- Po dokončení makra klikněte na „Record Stop“ [„Zastavit záznam“].
- Klepněte na „OK“.
Po zadání 4 kláves se záznam automaticky zastaví.
Změna DPI nastavení
- Klikněte na nastavení DPI, které si přejete upravit.
- Pohybem posuvníku upravíte nastavení DPI (400 – 3400).
(uloží do softwaru řadu 4 kláves)
(k okamžitému přepnutí DPI rychlosti použijte DPI spínač)
Obnovení výchozích nastavení
Obnovení výchozích přiřazení k tlačítku
- Klikněte na „Default“ [„Výchozí“].
Obnovení výchozích nastavení DPI
- Klikněte na „Default“ [„Výchozí“].
27
Page 30

GXT 31 Gaming Mouse - USER’S MANUAL
Usporiadanie myši
- Ľavé tlačidlo myši, nie je programovateľné
- Koliesko (východisková funkcia = kliknutie stredným tlačidlom)
- Pravé tlačidlo myši (východisková funkcia = kliknutie pravým tlačidlom myši)
- Tlačidlo dopredu (východisková funkcia = o stranu dopredu)
- Tlačidlo dozadu (východisková funkcia = o stranu dozadu)
- Tlačidlo vpravo hore (východisková funkcia = žiadna funkcia)
- Tlačidlo vpravo dole (východisková funkcia = žiadna funkcia)
- Tlačidlo DPI (kliknutím prepínate medzi 4 DPI nastaveniami)
Inštalácia
- Do CD mechaniky vložte disk CD-ROM Trust.
- Kliknite na „Run Setup.exe – Published by Trust International BV“ [„Spustiť Setup.exe – Published
by Trust International BV“].
- Kliknite na „Install driver“ [„Inštalovať ovládač“].
- Po dokončení inštalácie kliknite na „Finished“ [„Dokončené“] (toto môže chvíľu trvať).
- Pripojte myš k USB portu počítača.
- Počkajte, kým sa nezobrazí správa „Your device is ready to use“ [„Zariadenie je pripravené na
použitie“].
- Spustite softvér na konfiguráciu myši (umiestnený na paneli úloh).
Všetky zmeny budú priamo stiahnuté do myši.
- Teraz môžete začať konfigurovať myš.
Konfigurácia
Priradenie funkcie.
- Kliknite na tlačidlo, ktoré chcete opätovne priradiť.
- Prejdite nad funkciou, ktorú chcete priradiť (ľavé tlačidlo, pravé tlačidlo, hlasitosť, atď.).
- Kliknite na funkciu, ktorú chcete prideliť.
Priradenie funkcie klávesnice.
- Kliknite na tlačidlo, ktoré chcete opätovne priradiť.
- Kliknite na „Combo Key Binding“ [„Spojenie s Combo tlačidlom“] (tak, ako je to zobrazení v kroku
„4a“).
- Stlačte tlačidlo klávesnice, ktoré chcete priradiť.
- Ak chcete dosiahnuť spojenie ako „Ctrl+V“, stlačte obidve tlačidlá na klávesnici.
- Kliknite na „OK“.
28
Page 31

GXT 31 Gaming Mouse - USER’S MANUAL
V
Pokročilá konfigurácia myši
ytvorenie funkcie makro
- Kliknite na tlačidlo, ktoré chcete opätovne priradiť.
- Kliknite na „Macro“ [„Makro“].
- Kliknite na „Record Start“ [„Spustiť nahrávanie“].
- Pomocou svojej aktuálnej klávesnice zadajte maximálne 4 tlačidlá.
- Po dokončení vytvárania vášho makra kliknite na „Record Stop“ [„Zastaviť nahrávanie“].
- Kliknite na „OK“.
Po zadaní 4 tlačidiel sa nahrávanie automaticky zastaví.
Zmena DPI nastavení
- Kliknite na DPI nastavenie, ktoré chcete upraviť.
- Posuňte posúvač a upravte DPI nastavenie (400 – 3400).
(uloženie série 4 tlačidiel v softvéri)
(na okamžité prepínanie DPI rýchlostí použite DPI spínač na myši)
Obnovenie východiskových nastavení
Obnovenie východiskového priradenia tlačidla
- Kliknite na „Default“ [„Východiskové“].
Obnovenie východiskových DPI nastavení
- Kliknite na „Default“ [„Východiskové“].
29
Page 32

GXT 31 Gaming Mouse - USER’S MANUAL
T
Az egér felépítése
- Bal egérgomb, nem programozható
- Kerék gomb (alapértelmezett funkció = középső kattintás)
- Jobb egérgomb (alapértelmezett funkció = jobb kattintás)
- Előre gomb (alapértelmezett funkció = egy oldallal előre lépés)
- Hátra gomb (alapértelmezett funkció = egy oldallal hátra lépés)
- Jobb felső gomb (alapértelmezett funkció = nincs funkció)
- Jobb alsó gomb (alapértelmezett funkció = nincs funkció)
- DPI gomb (kattintással vált a 4 DPI beállítások között)
Telepítés
- Helyezze be a Trust CD-ROM telepítőlemezt a CD meghajtóba.
- Kattintson erre: „Run Setup.exe – Published by Trust International BV” [„Setup.exe – Published by
rust International BV” futtatása].
- Kattintson az „Install Driver” [„Illesztőprogram telepítése”] opcióra.
- Kattintson a „Finished” [„Befejezve”] gombra, amikor a telepítés befejeződött (ez eltarthat egy
darabig).
- Csatlakoztassa az egeret a számítógépe USB portjához.
- Várjon, míg a „Your device is ready to use” [„A készüléke használatra kész”] üzenet megjelenik.
- Indítsa el az egér konfiguráció szoftvert (a feladatsávban található).
Minden módosítás közvetlenül feltöltésre kerül az egérre.
- Most elkezdheti az egér konfigurálását.
Konfiguráció
Funkció hozzárendelése.
- Kattintson a gombra, melyet szeretne újra hozzárendelni.
- Húzza az egeret a hozzárendelni kívánt funkcióra (bal gomb, jobb gomb, hangerő stb.).
- Kattintson a hozzárendelni kívánt funkcióra.
Billentyűzet funkció hozzárendelése.
- Kattintson a gombra, melyet szeretne újra hozzárendelni.
- Kattintson a „Combo Key Binding” [„Billentyűkombináció rögzítése”] lehetőségre (amint az a „4a”
lépésben látható).
- Nyomja meg a billentyűzet gombot, amit szeretne hozzárendelni.
- Kombinációt, pl. „Ctrl+V” létrehozásához mindkét gombot nyomja meg a billentyűzeten.
- Kattintson az „OK” gombra.
30
Page 33

GXT 31 Gaming Mouse - USER’S MANUAL
Speciális egér konfiguráció
Makró funkció létrehozása
- Kattintson a gombra, melyet szeretne újra hozzárendelni.
- Kattintson a „Macro” [„Makro”] gombra.
- Kattintson a „Record Start” [„Rögzítés megkezdése”] gombra.
- Adjon meg maximum 4 billentyűt a tényleges billentyűzeten.
- Ha elkészült a makro rögzítésével, kattintson a „Record stop” [„Rögzítése leállítása”] gombra.
- Kattintson az „OK” gombra.
4 billentyű megadása után a rögzítés automatikusan leáll.
A DPI beállítások módosítása
sebességét)
- Kattintson a módosítani kívánt DPI beállításra.
- Húzza a csúszkát a kívánt DPI beállításra (400 – 3400).
(4 billentyűből álló sorozatok tárolása a szoftveren)
(használja az egér DPI kapcsolóját, hogy azonnal módosítsa a DPI
Alapértelmezett beállítások visszaállítása
Az alapértelmezett gomb-hozzárendelés helyreállítása
- Kattintson a „Default” [„Alapértelmezett”] gombra.
Alapértelmezett DPI beállítások visszaállítása
- Kattintson a „Default” [„Alapértelmezett”] gombra.
31
Page 34

GXT 31 Gaming Mouse - USER’S MANUAL
Prezentare mouse
- Buton mouse stânga, neprogramabil
- Rotiţă derulare (funcţie implicită = clic pe mijloc)
- Buton mouse dreapta (funcţie implicită = clic-dreapta mouse)
- Buton derulare înainte (funcţie implicită = pagină înainte)
- Buton derulare înapoi (funcţie implicită = pagină înapoi)
- Buton superior dreapta (funcţie implicită = nici o funcţie)
- Buton inferior dreapta (funcţie implicită = nici o funcţie)
- Buton DPI (clic pentru a comuta între 4 setări DPI)
Instalare
- Introduceţi CD-ul Trust în unitatea CD.
- Daţi clic pe „Run Setup.exe – Published by Trust International BV” [„Executaţi Setup.exe –
Published by Trust International BV”].
- Daţi clic pe „Install driver” [„Instalare driver”].
- Daţi clic pe „Finished” [„Terminat”] când instalarea s-a încheiat (poate dura ceva timp).
- Conectaţi mouse-ul la portul USB port al PC-ului.
- Aşteptaţi până la apariţia mesajului „Your device is ready to us” [„Dispozitivul dumneavoastră este
gata de utilizare”].
- Activaţi software-ul de configurare al mouse-ului (aflat pe bara de activităţi).
Toate modificările vor fi încărcate direct la mouse.
- Acum puteţi începe să configuraţi mouse-ul.
Configurare
Alocarea unei funcţii.
- Daţi clic pe butonul pe care doriţi să îl reatribuiţi.
- Fixaţi cursorul pe tipul funcţiei pe care doriţi să o atribuiţi (buton stânga, buton dreapta, volum etc.).
- Daţi clic pe funcţia pe care doriţi să o atribuiţi.
Atribuirea funcţiei de tastatură.
- Daţi clic pe butonul pe care doriţi să îl reatribuiţi.
- Daţi clic pe „Combo Key Binding” [„Creare secvenţă de taste]” (conform indicaţiilor de la pasul „4a”).
- Apăsaţi pe tasta pe care doriţi să o atribuiţi.
- Pentru a obţine o asociere de tip „Ctrl+V”, apăsaţi ambele taste.
- Faceţi clic pe „OK”.
32
Page 35

GXT 31 Gaming Mouse - USER’S MANUAL
Configurarea avansată a mouse-ului
Crearea unei macrofuncţii
- Daţi clic pe butonul pe care doriţi să îl reatribuiţi.
- Daţi clic pe „Macro”.
- Daţi clic pe „ Record Start” [„Start înregistrare”].
- Introduceţi maximum 4 taste folosindu-vă de tastatură.
- După ce aţi creat un macro, daţi clic pe „Record Stop” [„Stop înregistrare”].
- Faceţi clic pe „OK”.
După introducerea celor 4 taste, înregistrarea va înceta imediat.
Modificarea setărilor DPI
- Daţi clic pe setarea DPI pe care doriţi să o modificaţi.
- Mişcaţi cursorul pentru a regla setările DPI (400 – 3400).
(stocarea unei secvenţe de 4 taste în software)
(utilizaţi comutatorul DPI de pe mouse pentru a comuta între vitezele DPI)
Restabilirea setărilor implicite
Restabilirea atribuirii butonului implicit
- Daţi clic pe „Default” [„Implicit”].
Restabilirea setărilor DPI implicite
- Daţi clic pe „Default” [„Implicit”].
33
Page 36

GXT 31 Gaming Mouse - USER’S MANUAL
Изглед на мишката
- Ляв бутон на мишката, непрограмируем
- Бутон колелце (функция по подразбиране = щракване със среден бутон)
- Десен бутон на мишката (функция по подразбиране = щракване с десен бутон)
- Бутон напред (функция по подразбиране = страница напред)
- Бутон назад (функция по подразбиране = страница назад)
- Десен горен бутон (функция по подразбиране = няма функция)
- Десен долен бутон (функция по подразбиране = няма функция)
- DPI бутон (щракнете, за да превключите между 4 DPI настройки)
Инсталиране
- Поставете компактдиска на Trust в CD устройството.
- Щракнете „Run Setup.exe – Published by Trust International BV” [„Стартирай Setup.exe –
Published by Trust International BV”].
- Щракнете „Install driver” [„Инсталирай драйвер”].
- Щракнете „Finished” [„Приключено”], когато инсталацията приключи (това може да отнеме
известно време).
- Свържете мишката към USB порта на вашия компютър.
- Изчакайте докато се появи съобщението „Your device is ready to use” [„Вашият драйвер е готов
за употреба”].
- Стартирайте софтуерът за конфигурация на мишката (от лентата със задачи).
Всички промени ще бъдат актуализирани директно на мишката.
- Сега можете да започнете конфигурация на мишката.
Конфигурация
Назначаване на функция.
- Щракнете на бутон, който искате да преназначите.
- Поставете курсора на типа функция, която искате да назначите (ляв бутон, десен бутон, сила на
звука и пр.).
- Щракнете на функцията, която искате да назначите.
Назначаване функция на клавиатурата.
- Щракнете на бутон, който искате да преназначите.
- Щракнете „Combo Key Binding” [„Свързване на комбинация на клавиши”] (както е показано в
стъпка „4a”).
- Натиснете клавиш на клавиатурата, който искате да назначите.
- За да направите комбинация като „Ctrl+V”, натиснете и двата клавиша на клавиатурата.
- Щракнете „OK”.
34
Page 37

GXT 31 Gaming Mouse - USER’S MANUAL
Разширена конфигурация на мишката
Създаване на макро функция
- Щракнете на бутон, който искате да преназначите.
- Щракнете на „Macro” [„Макро”].
- Щракнете на „Record Start” [„Старт запис”].
- Въведете максимум 4 клавиша като използвате своята реална клавиатура.
- Когато приключите със създаването на своя макрос, щракнете „Record Stop” [„Стоп запис”].
- Щракнете „OK”.
Когато въведете 4 клавиша, записът ще спре автоматично.
Смяна на DPI настройки
незабавно DPI скорости)
- Щракнете върху DPI настройките, които искате да регулирате.
- Преместете плъзгача, за да регулирате DPI настройките (400 – 3400).
(съхранете последователност на 4 клавиша в софтуера)
(използвайте DPI превключвателя на мишката, за да превключите
Възстановяване на настройки по подразбиране
Възстановяване на назначенията на бутони по подразбиране
- Щракнете „Default” [„По подразбиране”].
Зануляване на DPI настройки по подразбиране
- Щракнете „Default” [„По подразбиране”].
35
Page 38

GXT 31 Gaming Mouse - USER’S MANUAL
Назначение кнопок мыши
- Левая кнопка мыши, непрограммируемая
- Колесо мыши (функция по умолчанию = щелчок средней кнопкой мыши)
- Правая кнопка мыши (функция по умолчанию = щелчок правой кнопкой мыши)
- Кнопка «Вперед» (функция по умолчанию = страница вперед)
- Кнопка «Назад» (функция по умолчанию = страница назад)
- Правая верхняя кнопка (функция по умолчанию = отсутствует)
- Правая нижняя кнопка (функция по умолчанию = отсутствует)
- Кнопка DPI (щелкните для переключения между 4 настройками DPI)
Установка
- Вставьте диск Trust в привод для компакт-дисков.
- Щелкните «Run Setup.exe – Published by Trust International BV» [«Запустить файл Setup.exe –
Published by Trust International BV»].
- Щелкните «Install driver» [«Установить драйвер»].
- Щелкните «Finished» [«Готово»] после окончания установки (это может занять некоторое
время).
- Подключите мышь к USB-порту ПК.
- Подождите, пока появится сообщение «Your device is ready to use» [«Устройство готово к
использованию»].
- Запустите программу настройки мыши (которая находится на панели задач).
Все изменения загружаются непосредственно в мышь.
- Теперь можно начать настройку мыши.
Настройка
Назначение функции.
- Щелкните кнопку, которую необходимо переназначить.
- Наведите на тип функции, которую необходимо назначить (левая кнопка, правая кнопка,
громкость и т.д.).
- Щелкните функцию, которую необходимо назначить.
Назначение функции клавиатуры.
- Щелкните кнопку, которую необходимо переназначить.
- Щелкните «Combo Key Binding» [«Привязка сочетания клавиш»] (как указано на шаге «4a»).
- Нажмите клавишу клавиатуры, которую необходимо назначить.
- Для создания сочетания клавиш, например, «Ctrl+V», нажмите обе клавиши на клавиатуре.
- Щелкнуть «OK» [«ОК»].
36
Page 39

GXT 31 Gaming Mouse - USER’S MANUAL
Дополнительные настройки мыши
Функция создания макроса
- Щелкните кнопку, которую необходимо переназначить.
- Щелкните «Macro» [«Макрос»].
- Щелкните «Record Start» [«Начать запись»].
- Укажите не более 4 клавиш, используя существующую клавиатуру.
- Щелкните «Record Stop» [«Остановить запись»] после окончания создания макроса.
- Щелкнуть «OK» [«ОК»].
После введения 4 клавиш запись будет остановлена автоматически.
Изменение настроек DPI
скорости DPI)
- Щелкните настройки DPI, которые необходимо изменить.
- Перемещайте ползунок для изменения настроек DPI (400-3400).
(сохранение последовательности из 4 клавиш для ПО)
(используйте DPI-переключатель мыши для мгновенного переключения
Восстановление настроек по умолчанию
Восстановление назначения кнопки по умолчанию
- Щелкните «Default» [«По умолчанию»].
Восстановление значений DPI по умолчанию
- Щелкните «Default» [«По умолчанию»].
37
Page 40

GXT 31 Gaming Mouse - USER’S MANUAL
‘
Διάταξη του ποντικιού
- Αριστερό πλήκτρο ποντικιού, μη προγραμματιζόμενο
- Πλήκτρο τροχού (προεπιλεγμένη λειτουργία = μεσαίο κλικ)
- ∆εξιό πλήκτρο (προεπιλεγμένη λειτουργία = δεξιό κλικ με το ποντίκι)
- Πλήκτρα εμπρός (προεπιλεγμένη λειτουργία = επόμενη σελίδα)
- Πίσω (προεπιλεγμένη λειτουργία = προηγούμενη σελίδα)
- Πλήκτρο RU (προεπιλεγμένη λειτουργία = καμία)
- Πλήκτρο RD (προεπιλεγμένη λειτουργία = καμία)
- Πλήκτρο DPI (πιέστε κλικ για εναλλαγή μεταξύ 4 ρυθμίσεων DPI)
Εγκατάσταση
- Εισάγετε το Trust CD-ROM στη μονάδα CD του υπολογιστή.
- Κάντε κλικ στο “Run [Εκτέλεση του] Setup.exe – Published by Trust International BV”.
- Κάντε κλικ στο “Install driver” [Εγκατάσταση προγράμματος οδήγησης].
- Όταν ολοκληρωθεί η εγκατάσταση, κάντε κλικ στο ‘Finished’ [Τέλος] (μπορεί να απαιτηθεί λίγος
χρόνος).
- Συνδέστε το ποντίκι στη θύρα USB του PC.
- Περιμένετε μέχρι να εμφανιστεί το μήνυμα ‘Your device is ready to use’ [Η συσκευή σας είναι έτοιμη
για χρήση].
- Εκκινήστε το λογισμικό διαμόρφωσης του ποντικιού (βρίσκεται στη γραμμή εργασιών).
Όλες οι αλλαγές αποστέλλονται απευθείας στο ποντίκι.
- Μπορείτε τώρα να ξεκινήσετε τη διαμόρφωση του ποντικιού.
Διαμόρφωση
Αντιστοίχιση μιας λειτουργίας.
- Κάντε κλικ στο πλήκτρο του οποίου θέλετε να αλλάξετε την αντιστοίχιση.
- Τοποθετήστε το δείκτη του ποντικιού επάνω από τον τύπο της λειτουργίας που θέλετε να
αντιστοιχίσετε (left button [αριστερό πλήκτρο], right button [δεξιό πλήκτρο], volume [ένταση ήχου]
κ.λπ.).
- Κάντε κλικ στη λειτουργία που θέλετε να αντιστοιχίσετε.
Αντιστοίχιση μιας λειτουργίας Πληκτρολογίου.
- Κάντε κλικ στο πλήκτρο του οποίου θέλετε να αλλάξετε την αντιστοίχιση.
- Κάντε κλικ στο ‘Combo Key Binding’ [Αντιστοίχιση συνδυασμού πλήκτρων] (όπως βλέπετε στο βήμα
4a’).
- Πατήστε το πλήκτρο του πληκτρολογίου που θέλετε να αντιστοιχίσετε.
- Για να αντιστοιχίσετε έναν συνδυασμό πλήκτρων, όπως το ‘Ctrl+V’, πατήστε και τα δύο πλήκτρα στο
πληκτρολόγιο.
- Κάντε κλικ στο ‘OK’.
38
Page 41

GXT 31 Gaming Mouse - USER’S MANUAL
ρ
Διαμόρφωση του ποντικιού για προχωρημένους
Δημιουργία μιας λειτουργίας μακροεντολής
- Κάντε κλικ στο πλήκτρο του οποίου θέλετε να αλλάξετε την αντιστοίχιση.
- Κάντε κλικ στο ‘Macro’ [Μακροεντολή].
- Κάντε κλικ στο ‘Record Start’ [Έναρξη εγγραφής].
- Εισάγετε έως 4 το πολύ πλήκτρα χρησιμοποιώντας το πραγματικό πληκτρολόγιο του υπολογιστή.
- Όταν ολοκληρώσετε τη δημιουργία της μακροεντολής, κάντε κλικ στο ‘Record Stop’ (Τερματισμός
εγγραφής).
- Κάντε κλικ στο ‘OK’.
Όταν εισάγετε 4 πλήκτρα, η εγγραφή τερματίζεται αυτόματα.
Αλλαγή των ρυθμίσεων DPI
υθμίσεων ταχύτητας DPI)
- Κάντε κλικ στη ρύθμιση DPI που θέλετε να προσαρμόσετε.
- Μετακινήστε το ρυθμιστικό για να προσαρμόσετε τη ρύθμιση DPI (400 – 3400).
(χρήση του διακόπτη DPI στο ποντίκι για άμεση εναλλαγή μεταξύ των
(αποθήκευση μιας ακολουθίας 4 πλήκτρων στο λογισμικό)
Επαναφορά των προεπιλεγμένων ρυθμίσεων
Επαναφορά των προεπιλεγμένων αντιστοιχίσεων πλήκτρων
- Κάντε κλικ στο ‘Default’ [Προεπιλογή].
Επαναφορά των προεπιλεγμένων ρυθμίσεων DPI
- Κάντε κλικ στο ‘Default’ [Προεπιλογή].
39
Page 42

GXT 31 Gaming Mouse - USER’S MANUAL
Fare atamaları
- Sol fare düğmesi, programlanamaz
- Tekerlek düğmesi (varsayılan işlev = orta tıklatma)
- Sağ fare düğmesi (varsayılan işlev = sağ fare tıklatması)
- İleri düğmesi (varsayılan işlev = sayfa ileri)
- Geri düğmesi (varsayılan işlev = sayfa geri)
- Sağ üst düğmesi (varsayılan işlev = bir işlev atanmamış)
- Sağ alt düğmesi (varsayılan işlev = bir işlev atanmamış)
- DPI düğmesi (4 DPI ayarı arasında değiştirmek için tıklatın)
Kurulum
- Trust CD-ROM’unu CD sürücünüze yerleştirin.
- “Run Setup.exe – Published by Trust International BV” [“Setup.exe – Published by Trust
International BV’yi çalıştır”] öğesini tıklatın.
- “Install driver” [“Sürücüyü yükle”] seçeneğini tıklatın.
- Kurulum bittikten sonra “Finished” [“Bitti”] öğesini tıklatın (bu biraz zaman alabilir).
- Fareyi PC’nin USB bağlantı noktasına takın.
- “Your device is ready to use” [“Aygıtınız kullanıma hazır”] iletisi görüntülenene kadar bekleyin.
- Fare yapılandırma yazılımını başlatın (görev çubuğunda yer alır).
Tüm değişiklikler doğrudan fareye yüklenecektir.
- Şimdi fareyi yapılandırmaya başlayabilirsiniz.
Yapılandırm
Bir fonksiyon atayın.
- Yeniden atama yapmak istediğiniz düğmeyi tıklatın.
- Atamak istediğiniz fonksiyon türünün üzerinde kalın (sol düğme, sağ düğme, ses, vb.).
- Atamak istediğiniz fonksiyonu tıklatın.
Bir Klavye fonksiyonu atayın.
- Yeniden atama yapmak istediğiniz düğmeyi tıklatın.
- “Combo Key Binding” [“Bileşik Tuş Bağlama”] öğesini tıklatın (adım “4a” da gösterildiği gibi).
- Atamak istediğiniz klavye tuşuna basın.
- Örneğin “Ctrl+V” gibi bir bileşik tuş tanımlamak için klavyede her iki tuşa birden basın.
- “OK” öğesini tıklayın.
40
Page 43

GXT 31 Gaming Mouse - USER’S MANUAL
V
V
Gelişmiş Fare yapılandırması
Bir makro fonksiyonu oluşturma
- Yeniden atama yapmak istediğiniz düğmeyi tıklatın.
- “Macro” [“Makro”] öğesini tıklatın.
- “Record Start” [“Kaydı Başlat”] öğesini tıklatın.
- Geçerli klavyenizi kullanarak maksimum 4 tuş girin.
- Makronuzu oluşturmayı tamamladığınızda “Record Stop” [“Kaydı Durdur”] öğesini tıklatın.
- “OK” öğesini tıklayın.
4 tuş girdiğinizde kayıt otomatik olarak duracaktır.
DPI ayarlarını değiştirme
- Ayarlamak istediğiniz DPI ayarını tıklatın.
- DPI ayarını (400 – 3400) yapmak için kaydırıcıyı hareket ettirin.
(Yazılımda 4 tuşluk bir dizi saklama)
(DPI hızları arasında anında geçiş yapmak için farenin DPI düğmesini kullanın)
Varsayılan ayarları geri yükleme
arsayılan düğme atamalarına geri yükleme
- “Default” [“Varsayılan”] öğesini seçin.
arsayılan DPI ayarlarını geri yükleme
- “Default” [“Varsayılan”] öğesini seçin.
41
Page 44

GXT 31 Gaming Mouse - USER’S MANUAL
Raspored tipki
- Lijeva tipka miša, ne može se programirati
- Kotačić (zadana funkcija = srednji klik)
- Desna tipka miša (zadana funkcija = desni klik mišem)
- Tipke za premotavanje unaprijed (zadana funkcija = stranica naprijed)
- Tipke za premotavanje unazad (zadana funkcija = stranica nazad)
- Gornja desna tipka (zadana funkcija = bez funkcije)
- Donja desna tipka (zadana funkcija = bez funkcije)
- DPI tipka (kliknite za prebacivanje između 4 DPI postavki)
Instalacija
- Umetnite Trust CD-ROM u CD pogon.
- Kliknite na „Run Setup.exe – Published by Trust International BV“ [„Pokreni Setup.exe – Published
by Trust International BV ”].
- Kliknite na „Install driver“ [„Instaliraj upravljački program“].
- Kliknite na „Finished“ [„Završeno“] kada instalacija bude završena (to može potrajati neko vrijeme).
- Priključite miša na USB priključak na računalu.
- Pričekajte dok se ne pojavi poruka „Your device is ready to use“ [„Vaš uređaj je spreman za
uporabu“].
- Pokrenite program za konfiguraciju miša (nalazi se na traci sa zadacima).
Sve promjene će biti izravno učitane na miša.
- Sada možete započeti s konfiguriranjem miša.
Konfiguracija
Zadavanje funkcije.
- Kliknite na tipku kojoj želite promijeniti funkciju.
- Zadržite pokazivač iznad vrste funkcije koju želite dodijeliti (lijeva tipka, desna tipka, glasnoća itd).
- Kliknite na funkciju koju želite zadati.
Zadavanje funkcije na tipkovnici.
- Kliknite na tipku kojoj želite promijeniti funkciju.
- Kliknite na „Combo Key Binding“ [„Povjezivanje multifunkcijske tipke“] (kako je prikazano u koraku
„4a“).
- Pritisnite na tipkovnici tipku koju žele dodijeliti.
- Da biste, na primjer napravili kombinaciju „Ctrl+V“, pritisnite obje tipke na tipkovnici.
- Kliknite „OK“ [„U redu“].
42
Page 45

GXT 31 Gaming Mouse - USER’S MANUAL
V
V
Napredna konfiguracija miša
Kreiranje makro funkcije
- Kliknite na tipku kojoj želite promijeniti funkciju.
- Kliknite na „Macro“ [„Makro“].
- Kliknite na „Record Start“ [„Počni snimanje“].
- Unesite najviše 4 tipke koristeći stvarnu tipkovnicu.
- Kada završite sa izradom makroa, kliknite na „Record Stop“ [„Završi snimanje“].
- Kliknite „OK“ [„U redu“].
Kada unesete 4 tipke, snimanje će automatski biti završeno.
Promjena DPI postavki
- Kliknite na DPI postavku koju želite prilagoditi.
- Pomaknite klizač za podešavanje DPI postavke (400 – 3400).
(pohranjivanje niza od 4 tipke u programu)
(koristite DPI prekidač na mišu da odmah mijenjate DPI brzine)
Vraćanje tvorničkih postavki
raćanje zadane funkcije tipke
- Kliknite na „Default“ [„Zadano“].
raćanje zadanih DPI postavki
- Kliknite na „Default“ [„Zadano“].
43
Page 46

GXT 31 Gaming Mouse - USER’S MANUAL
T
Razporeditev miške
- Levi gumb na miški, ni programljiv
- Kolešček (privzeta funkcija = sredinski klik)
- Desni gumb na miški (privzeta funkcija = desni klik na miški)
- Gumb za naprej (privzeta funkcija = stran naprej)
- Gumb za nazaj (privzeta funkcija = stran nazaj)
- Desni zgornji gumb (privzeta funkcija = nima funkcije)
- Desni spodnji gumb (privzeta funkcija = nima funkcije)
- Gumb DPI (kliknite, da zamenjate med štirimi nastavitvami DPI)
Namestitev
- V CD pogon vstavite Trust CD-ROM.
- Kliknite »Run Setup.exe – Published by Trust International BV« [»Zaženi Setup.exe – Published by
rust International BV«].
- Kliknite na ukaz »Install driver« [»Namestitev gonilnika«].
- Ko se namestitev konča (to lahko traja nekaj časa), kliknite »Finished« [»Končano«].
- Miško priključite na USB vrata vašega PC-ja.
- Počakajte, da se prikaže sporočilo »Your device is ready to use« [»Vaša naprava je pripravljena za
uporabo«].
- Zaženite programsko opremo za konfiguriranje miške (nahaja se v opravilni vrstici).
Vse spremembe se bodo prenesle neposredno na miško.
- Sedaj lahko pričnete s konfiguriranjem miške.
Konfiguracija
Določite funkcijo.
- Kliknite na gumb, ki ga želite ponovno določiti.
- Postavite se nad tip funkcije, ki ga želite določiti (levi gumb, desni gumb, jakost itd.).
- Kliknite na funkcijo, ki jo želite določiti.
Določite funkcijo tipkovnice.
- Kliknite na gumb, ki ga želite ponovno določiti.
- Kliknite na »Combo Key Binding« [»Kombinirane bližnjice«] (kot je prikazano pri koraku »4a«).
- Pritisnite tipko na tipkovnici, ki jo želite določiti.
- Če želite kombinirati, pritisnite skupaj »Ctrl+V« na tipkovnici.
- Kliknite na »OK« [»V redu«].
44
Page 47

GXT 31 Gaming Mouse - USER’S MANUAL
Napredna konfiguracija miške
Ustvarite makro funkcijo
- Kliknite na gumb, ki ga želite ponovno določiti.
- Kliknite na »Macro« [»Makro«].
- Kliknite na »Record Start« [»Začni zapisovanje«]
- Z uporabo vaše dejanske tipkovnice vnesite najmanj štiri tipke.
- Ko končate z ustvarjanjem vašega makra, kliknite na »Record Stop« [»Ustavi zapisovanje«].
- Kliknite na »OK« [»V redu«].
Ko vnesete štiri tipke, se zapisovanje samodejno ustavi.
Spremenite nastavitve DPI
- Kliknite na nastavitev DPI, ki jo želite prilagoditi.
- Premaknite drsnik in prilagodite nastavitev DPI (400 – 3400).
(shranite zaporedje 4 tipk v programski opremi)
(uporabite stikalo DPI na miški in takoj zamenjajte hitrosti DPI)
Obnovi privzete nastavitve
Obnovite privzete določene gumbe
- Kliknite na »Default« [»Privzeto«]
Obnovi privzete nastavitve DPI
- Kliknite na »Default« [»Privzeto«]
45
Page 48

GXT 31 Gaming Mouse - USER’S MANUAL
T
Izgled miša
- Levi taster miša, ne može da se programira
- Točkić (unapred određena funkcija = srednji klik)
- Desni taster miša (unapred određena funkcija = desni klik mišem)
- Taster za premotavanje unapred (unapred određena funkcija = stranica napred)
- Taster za premotavanje unazad (unapred određena funkcija = stranica nazad)
- Gornji desni taster (unapred određena funkcija = bez funkcije)
- Donji desni taster (unapred određena funkcija = bez funkcije)
- DPI taster (kliknite za izbor neke od 4 DPI postavke)
Instalacija
- Stavite Trust CD-ROM u CD drajv.
- Kliknite „Run Setup.exe – Published by Trust International BV“ [„Pokreni Setup.exe – Published by
rust International BV“].
- Kliknite „Install driver“ [„Instaliraj drajver“].
- Kliknite na „Finished“ [„Završeno“] kada instalacija bude završena (to može potrajati izvesno
vreme).
- Priključite miš na USB priključak računara.
- Sačekajte dok se ne pojavi poruka „Your device is ready to use“ [„Vaš uređaj je spreman za
upotrebu“].
- Pokrenite softver za podešavanje miša (nalazi se na paleti sa zadacima).
Sve promene biće direktno učitane u miš.
- Sada možete početi s podešavanjem miša.
Podešavanje
Dodeljivanje funkcije.
- Kliknite na taster čiju funkciju hoćete da promenite.
- Kursorom miša pređite preko vrste funkcije koju želite da dodelite (levi taster, desni taster, jačina
zvuka itd).
- Kliknite na funkciju koju želite da dodelite.
Dodeljivanje funkcije tastature.
- Kliknite na taster čiju funkciju hoćete da promenite.
- Kliknite na „Combo Key Binding“ [„Određivanje multifunkcijskog tastera“] (kako je prikazano u koraku
„4a“).
- Na tastaturi pritisnite taster koji želite da dodelite.
- Da biste napravili kombinaciju, na primer „Ctrl+V“, pritisnite oba tastera na tastaturi.
- Kliknite na „ok“.
46
Page 49

GXT 31 Gaming Mouse - USER’S MANUAL
V
V
Napredno podešavanje miša
Izrada makro funkcije
- Kliknite na taster čiju funkciju hoćete da promenite.
- Kliknite na „Macro“ [„Makro“].
- Kliknite na „Record Start“ [„Počni snimanje“].
- Pomoću stvarne tastature unesite najviše 4 tastera.
- Kada završite sa izradom makroa kliknite na „Record Stop“ [„Završi snimanje“].
- Kliknite na „ok“.
Kada unesete 4 tastera, snimanje će automatski biti zaustavljeno.
Promena DPI postavki
- Kliknite na DPI postavku koju želite da promenite.
- Pomerite klizač da biste podesili DPI postavku (400 – 3400).
(smestite niz od 4 tastera u softver)
(pomoću DPI tastera na mišu možete trenutno da menjate DPI brzine)
Vraćanje unapred određenih postavki
raćanje unapred određene funkcije tastera
- Kliknite na „Default“ [„Unapred određena funkcija“].
raćanje unapred određenih DPI postavki
- Kliknite na „Default“ [„Unapred određena funkcija“].
47
 Loading...