

Page 1

782AV LCD POWER VIDEO
UK
DE
FR
IT
ES
User’s manual
Version 1.0
PL
NL
PT
L I F E I S M O R E ! T R U S T U S T R U S T . C O M
T R U S T . C O M
T R U S T . C O M T R U S T . C O M
Page 2

782AV LCD POWER VIDEO
Thank you for yo ur purchase. Register your prod uct via our Internet site at
www.trust.com/register, so that you will be eligible for opti mal guarantee and service
support. You will also be aut omatically informed of the development of your and other Trust
products.
UK
DE
FR
IT
ES
PL
NL
PT
L I F E I S M O R E ! T R U S T U S T R U S T . C O M
T R U S T . C O M
T R U S T . C O M T R U S T . C O M
Page 3
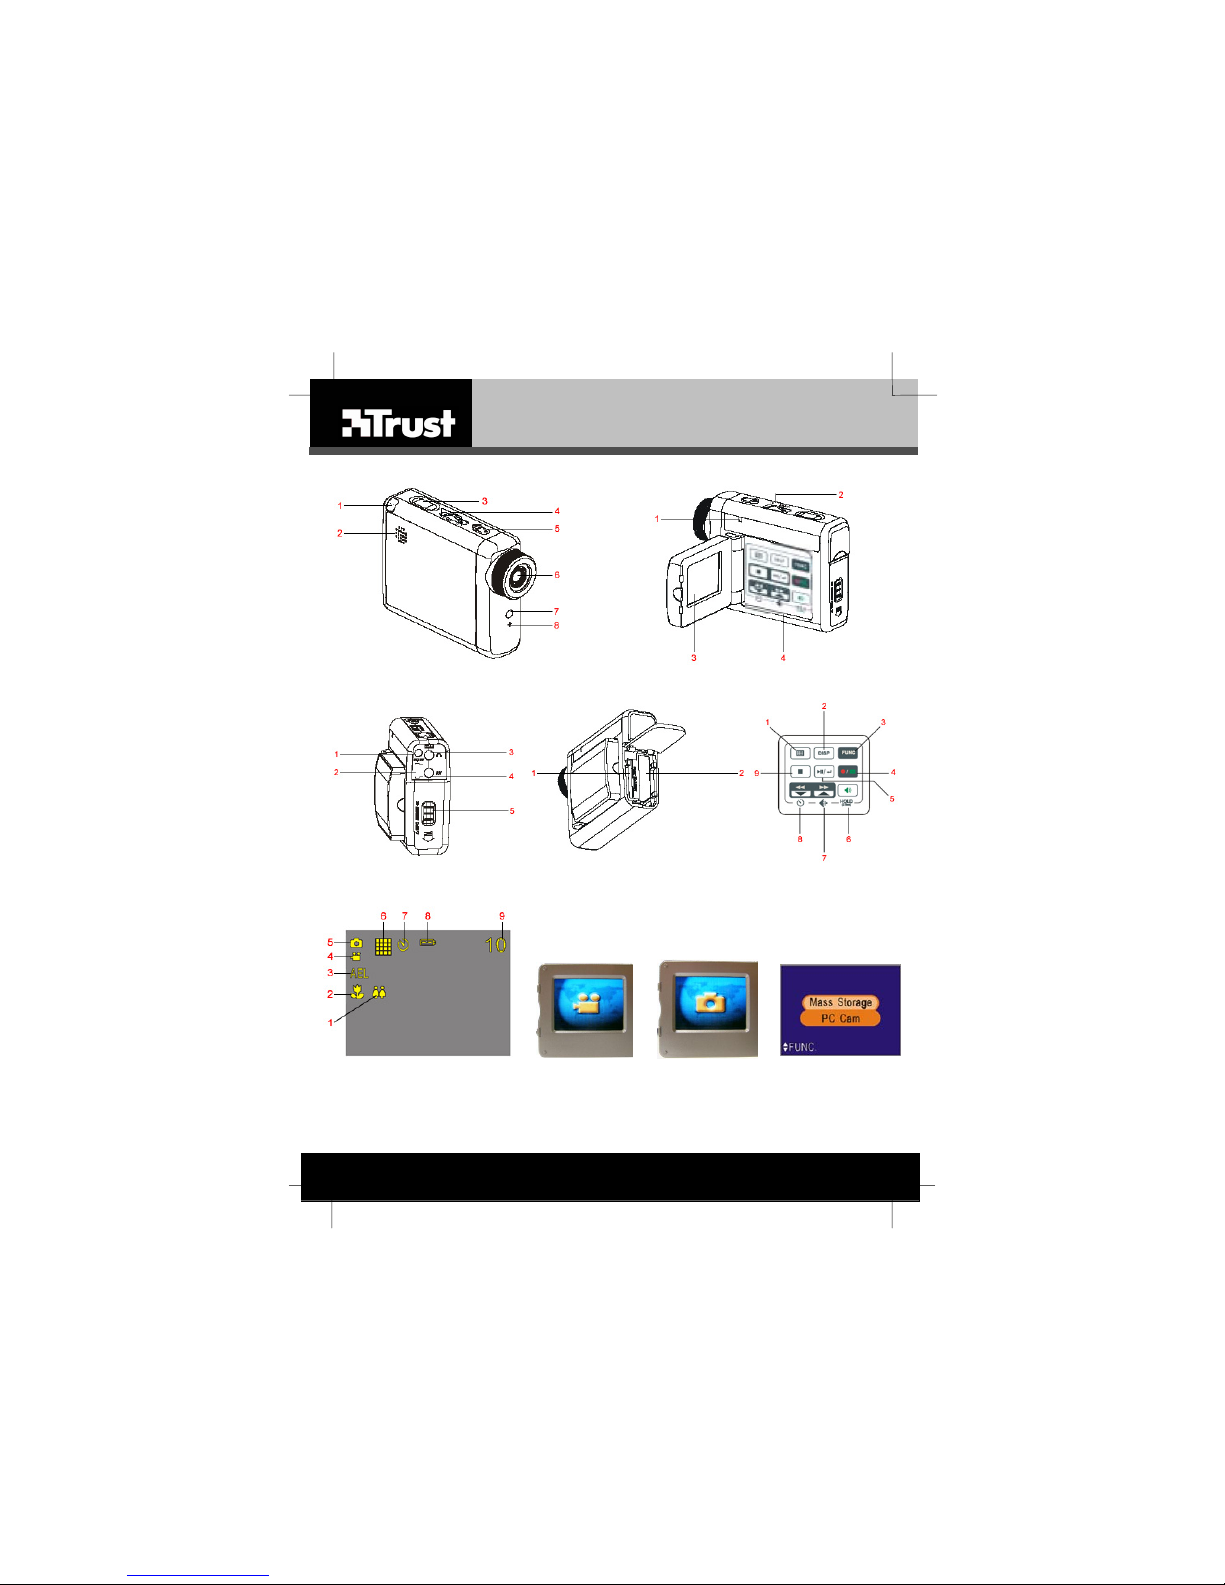
782AV LCD POWER VIDEO
Fig. 1 Fig. 2
Fig. 3 Fig. 4
Fig. 6 Fig. 7 Fig. 8
L I F E I S M O R E ! T R U S T U S T R U S T . C O M
T R U S T . C O M
T R U S T . C O M T R U S T . C O M
Fig. 5
Fig. 9
Page 4
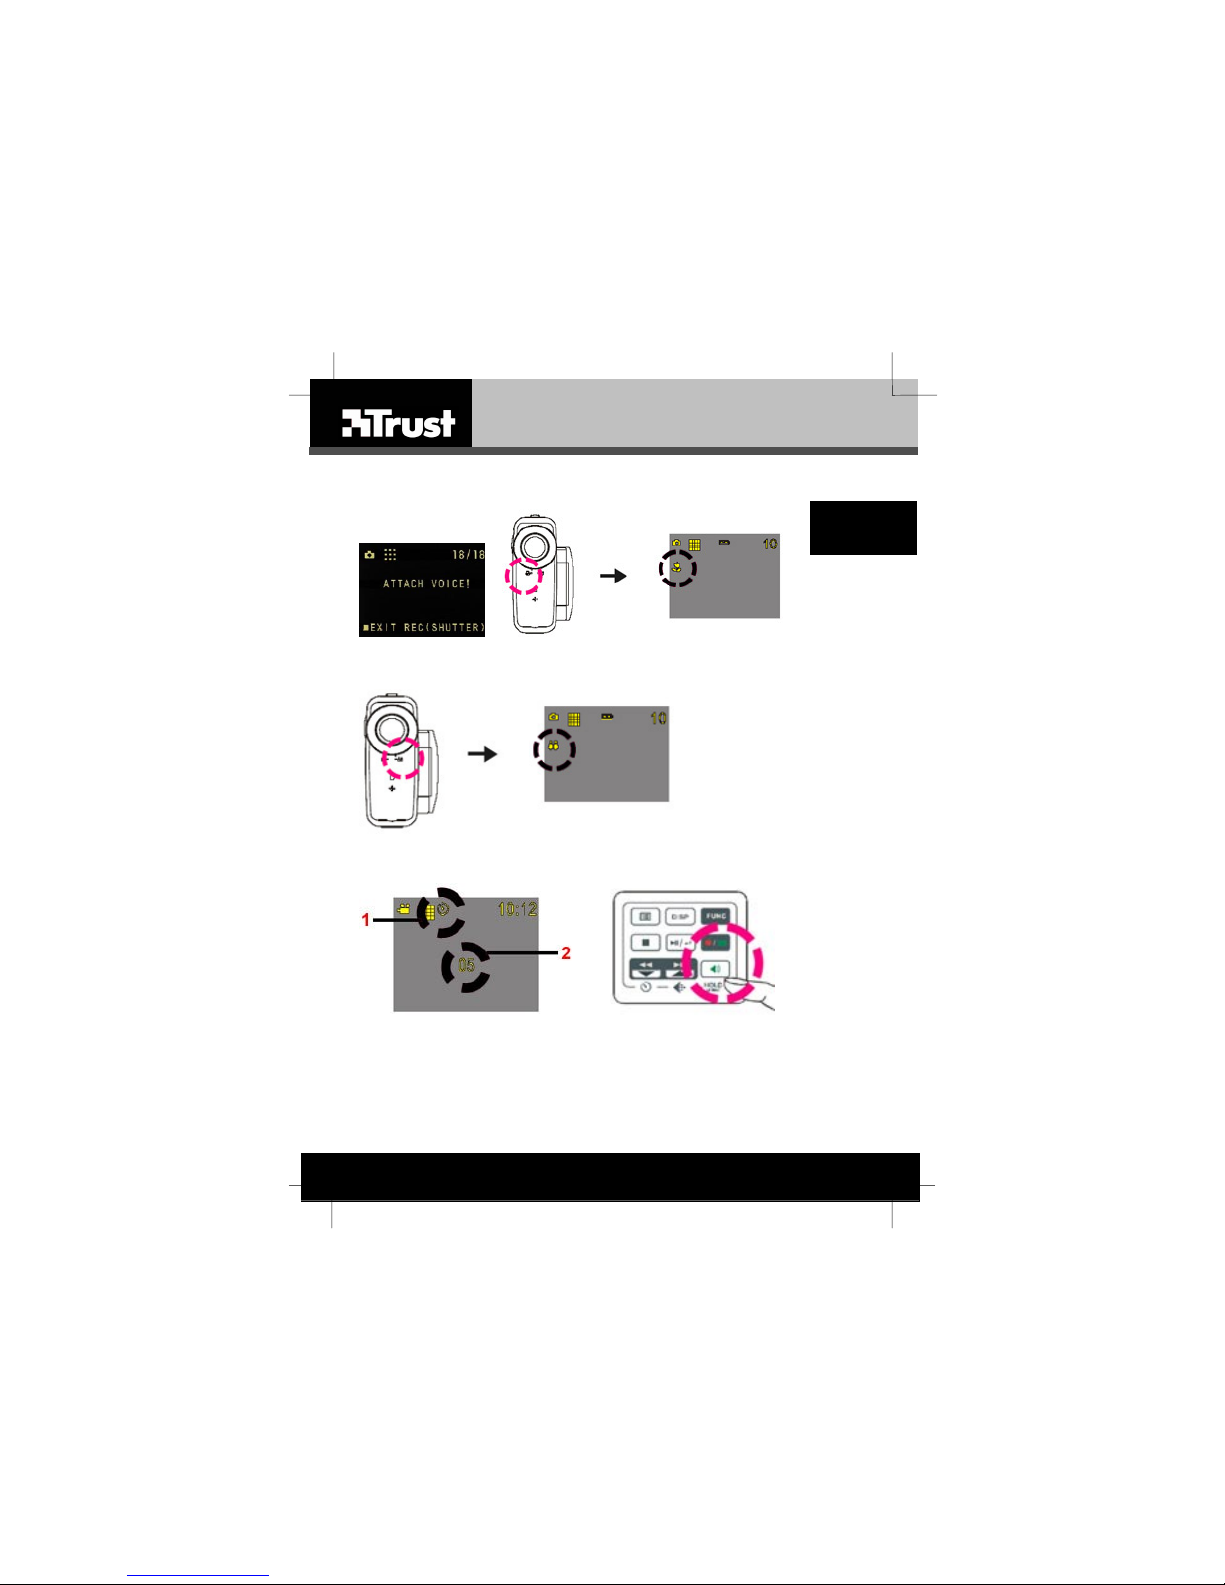
782AV LCD POWER VIDEO
Fig. 12
UK
DE
Fig. 10 Fig. 11
FR
IT
ES
Fig. 12
PL
NL
Fig. 13 Fig. 14
L I F E I S M O R E ! T R U S T U S T R U S T . C O M
T R U S T . C O M
T R U S T . C O M T R U S T . C O M
PT
Page 5

TRUST 782AV LCD POWER VIDEO
Use the Quick Installation Gui de when using the came ra for the first time. Thi s guide
contains the basic instruc tions you will need to kn ow in order to be able to use this
camera.
1 Introduction
This instruction manual is fo r users of the TRUST 782AV LCD POWER VIDEO. The
TRUST 782AV LCD POW ER VIDEO can be used to ta ke photographs, to record live
video images, to record vo ice memos, to play MP3 files or as a webcam for videoconferencing on the Internet.
The applications suppl ied with the camera have a wide range of op tions for browsing
photographs and editing video clips. W hen the Trust TRUST 782A V LCD POWER
VIDEO is connected to your computer, it can be accessed directly as a removable
disk. You can then op en the photograph s and video clips, edit them, send them via
e-mail, save them on your computer, etc.
The camera also works with Mac OS 9 .x and Mac OS 10.1 or late r releases as a
mass stor age de vice.
1.1 General comments regarding photography
Test photogra ph
Before you start ph otographing a unique event, it is a good idea to first take a
number of test ph otographs. This will help to en sure that the camera wo rks as
required.
No compensation for unsuccessful photographs
No compensation may be claimed for unsuccessf ul photographs as a re sult of a
faulty camera, faulty software, etc.
Exchanging ph otographs and video clips
No guarantees are g iven that photographs and video clips produc ed with this
camera can be displayed on other devices or that photographs and v ideo clips
produced with othe r devices can be displayed u sing this camera.
Sunlight
Do not aim the camera direct ly at the sun for a lon g period of time. Th is may damage
the sensor.
Shaking/knocks
Do not shake the ca mera or knock it against any thing, because this may ca use a
fault, unsuccessfu l photographs, memory in compatibility or the loss of ph otographs
from the memory.
LCD screen
There may sometimes be small black or clear dots visible on the LCD s creen. This is
normal and does not a ffect the ph otographs. There is no rea son to exchange the
camera if there are 1 0 dots or less.
Exposing the LCD screen to direct sunlight for a long period of time may ca use
faults.
Lens
Keep the glass of the lens clean. Use a c otton bud to clean the lens. If necessary,
use special cleaning fluid for camera lenses. Camera cleaning fluid can be
purchased from pho tography shops. Do not use a differen t type of cleaning product.
UK
1
Page 6
TRUST 782AV LCD POW ER VIDEO
2 Safety
2.1 General information
Carefully read the following instructions before use.
• The TRUST 782AV LCD POW ER VIDEO does not requ ire any special
maintenance. Use a slightly da mp, soft cloth to cle an the camera.
• Do not use aggressive substances, such as white spirit, to clean the device.
These may harm the material.
• Do not submerge the de vice in liquid. This may be dang erous and will damage
the device. Do not use the device near water.
• Do not repair the device yourself.
2.2 Batteries
• Do not insert the batt ery backwards.
• Do not disassemble the battery.
• Do not expose the battery to flame or excessive heat.
• Do not immerse the battery in (o r expose to) water..
3 Approval
This device meets the essent ial requirements and other rele vant conditions of th e
applicable European direct ives. The Declaration of Conf ormity (DoC) is available at
www.trust.com/13849/ce.
4 Description of the camera
4.1 Front view
Use table 1 in combination with figure 1.
Item Description Function
1 W rist strap hook Hook for connectin g the wrist strap.
2 Lou d speaker
3 Shu tter button
4 Zoom wheel
5 Power switch On/Off switch.
6 Len s Image recording sensor.
7 Stat us LED indicator Camera status led.
8 Microphone Records sound.
Table 1: Front view
When playing a video clip or audio f ile the
sound can be hea rd from this part.
Button for taking ph otographs and recording
video clips.
Zooms or widen a subject wh en taking
pictures or video clips.
2
Page 7
TRUST 782AV LCD POWER VIDEO
4.2 Side view
Use table 2 in combinati on with figure 2.
Item Description Function
1 Came ra indicator
2 AE-lock
3 LCD s creen
4 Pane l Control panel of the c amera.
Table 2: Side view
Green = the camera is turne d on.
Red = the battery is charging.
Yellow = camera is turned on in MSD mod e.
AE lock (Automatic Exposure lock) locks the
exposure while taking a vide o clip or picture
when pressed.
Operates as:
1) Viewfinder for the camera .
2) Displaying photographs and video clips.
3) Displaying menus.
4.3 Back view
Use table 3 in combinati on with figure 3.
Item Description Function
1 DC in ja ck
2 USB conn ection For connecting the camera to a computer.
3 Head phone connection Audio via headphones .
4 Video outp ut For connecting the camera to a TV.
Battery / memory card
5
cover
Table 3: Back view
Connection for an optional external power
adapter. (Input:100-240V ~ 50-60Hz 0.2A
Output: 5V 0.5A)
Covers batte ry and memo ry card.
4.4 Battery compartment
Use table 4 in combinati on with figure 4.
Item Description
1 SD/ MMC card slot
2 Batte ry slot
Table 4: Battery compartment
4.5 Panel
Use table 5 in combinati on with figure 5.
Item Description Function
1 Menu Enter to the menu optio ns
2 Display Turn on / off LCD screen
3 Mode switch (FUNC)
Record / Playback
4
button
Switches between the following modes:
- Video clip
- Picture taking
- Audio record ing
- MP3
Go to review mode
UK
3
Page 8

TRUST 782AV LCD POW ER VIDEO
Item Description Function
Play / Pause / Enter
5
button
6 Volume / Hold button
Next / Up / Resolution
7
button
Previous / Down / Self-
8
timer button
9 Stop button Stop button
Table 5: Panel
- Play / Pa use button
- In menu mod e -> Enter button
- Activate volume control
- Pushing this button for 2 seconds will
lock/unlock the control panel
- Next button
- In menu mode -> Up button
- In vide o-clip mode -> Resolution
- In picture and audio recording mod e
-> Quality
- Previous button
- In menu mode -> Down button
- In video a nd picture mode -> Self -
timer
5 Setting the camera for the first time
5.1 Attach the wrist strap
A wrist strap is supplied with the c amera. Carry out the fol lowing to attach it to the
camera.
1. Insert the thin end of t he wrist strap through the eye (1, fig. 1).
2. Make a loop from the pa rt of the wrist strap which ha s been inserted throu gh
the eye.
3. Pick up the other end o f the wrist strap and pu sh it through the lo op.
4. Pull the wrist strap until it is stead y.
5.2 Insert battery and memory card
This camera is supplied with a 32 MB MMC memory card. You can also purchase
bigger memory cards. This will allow you to increase the number of photographs or
video clips that can be sav ed on the camera. You can use either a Secure Digita l
Memory Card (SD) or a Multi Media Card (MMC).
To install the battery and/o r a memory card see point 1 + 2 of the Quick Installation
Guide.
Note: If you use an SD memory card and wish to save vid eo clips and
photographs on it , you must remove the write pro tection by moving the
slide to the un lock position.
Note: After takin g a photograph, wa it at least 5 secon ds before openin g the
battery compartment. If the camera i s still writing data to the card wh en
the battery is removed, a ll the photograph s on the card may be de leted.
4
Page 9
TRUST 782AV LCD POWER VIDEO
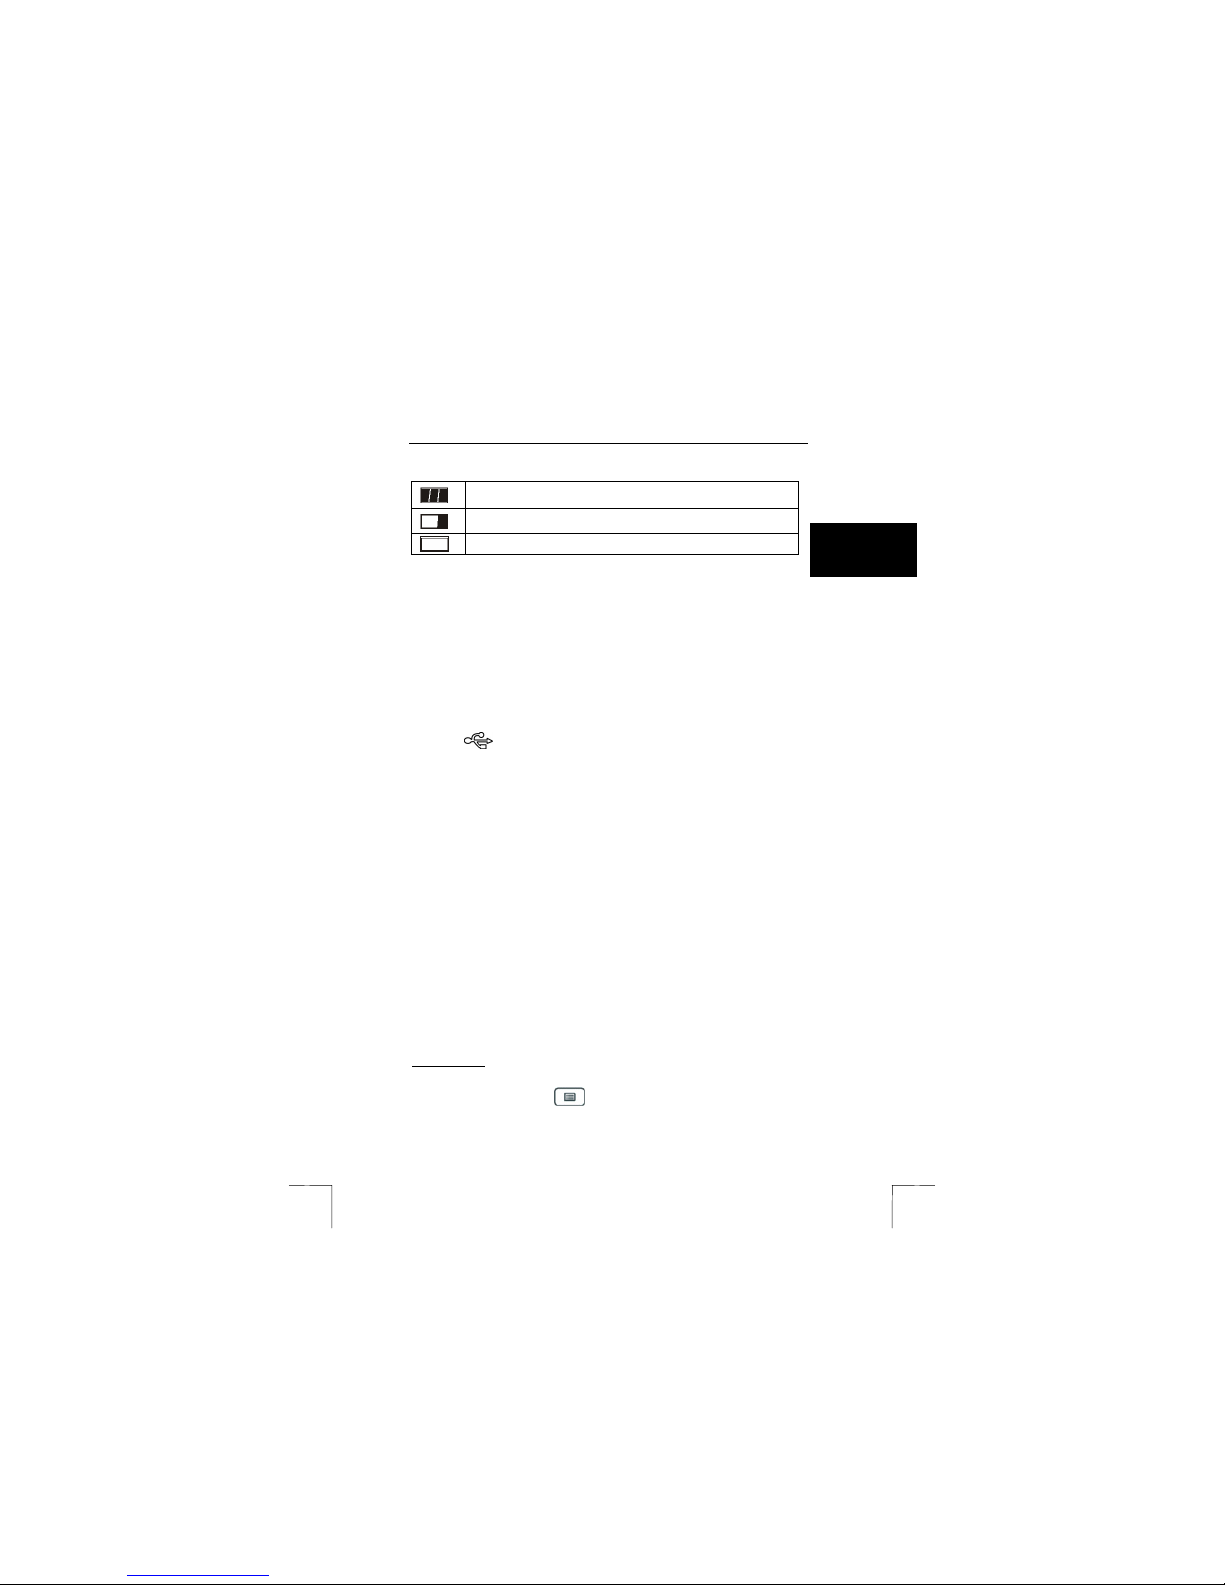
The battery condition is shown on the LCD screen (8, fig. 6) as f ollows:
Table 6: Battery conditions
5.3 Recharging the battery
Before using the c amera for the first time, f irst recharge the battery. To recharge the
battery:
Note: The camera has to be turned off bef ore charging the bat tery.
1. Connect the small conne ctor of the USB cable t o the USB port of t he camera
2. Connect the large hea d of the USB cab le to an empty USB port o n your
3. Turn on your computer. The camera will receive the power f rom the USB port
4. During charging the camera indicator (1, fig. 2) will light red.
5. When read y charging the camera indicato r will turn off. Remove th e USB
6. The camera is ready for use.
Note: Charging the b attery will take ab out 2 – 3 hours.
5.4 Turning the camera on
See step 2 of th e Quick Installation Guide.
Note: The LCD screen will turn to black after 1 minute of inactivi ty. After 2 minutes
5.5 Setting the date and time
When you transfer a photo or video clip to a computer, the date and time will be
show when it was taken. W hen using the camera for the firs t time the date and time
has to be set.
To set the date:
1. Turn on the camera (see c hapter 5.4)
2. Press the Menu button
The battery is full.
The battery capacity is lo w. Only a few more phot ographs can be
taken.
The battery is empty.
(2, fig. 3).
computer. To locate USB slots on your computer, look for the USB
.
icon
of the computer.
cable from the camera.
of inactivity the c amera will automatic ally switch off.
(1, fig. 5). Camera opt ions appears.
UK
5
Page 10
TRUST 782AV LCD POW ER VIDEO
3. Use the Down button (8, fig. 5) to move the selection bar do wn until
you reach the date op tion:
Note: The date format is shown as: <year>.<month>.<day>.
4. Press the enter key
5. Use Up
the date values. Press the enter key
the last field (day) has been set you’ll automa tically return to the main menu.
To set the time:
6. Use the Down
you reach the time option:
Note: The time format is shown a s: <hour>:<minutes>:<second s>.
7. Press the enter key
8. Use Up
the time values. Press the en ter key
the last field (seconds) ha s been set you’ll au tomatically return to the main
menu.
6 Using the camera
button (7. fig. 5 ) and Down button (8, fig. 5) to c hange
button (7. fig. 5 ) and Down button (8, fig. 5) to c hange
03.10.03
to change the se ttings.
to move to the next f ield. When
button (8, fig. 5) to move the selection bar down until
15:17:52
to change the se ttings.
to move to the next field. When
6.1 Taking video clips and pictures
6.1.1 How to record video clips
Note: To save the bat tery, the camera will tu rn off automaticall y after a couple of
minutes depending on the settings.
See point 3 of the Quick Installation Guide.
6.1.2 How to take pictu res
See point 4 of the Quick Installation Guide.
Note: Keep the glass of the l ens clean. Use a l ens tissue to clea n the lens.
6
If necessary, use specia l cleaning li quid for camera lenses. Do not
use a different clea ning product.
Page 11
TRUST 782AV LCD POWER VIDEO
Tip: The quality of the photograph d epends on the surroun ding light. More
6.1.3 Taking picture with voice mem o
To add voice memos while pi cture-taking:
1. Turn on the camera (see c hapter 5.4).
2. Press the FUNC but ton
3. Press the MENU button
4. Use Down
5. Press enter key
6. Press the MENU button
7. Take your picture as described in 3 – 6 of chapter 6.1.2.
8. After taking the pi cture fig. 10 will appear.
9. Press Shutter button (3 , fig. 1) to start recording voice memo.
10. Press Shutter button again to sto p recording.
light will result in a better picture.
A preview will be displayed.
mode.
button (8, fig. 5) to move the selection bar down until you
reach the Voice Memo option.
to set this option to: ON.
(3, fig. 5) until you’ re in picture mode (fig. 8 ).
to go to the men u options of the picture
to leave the menu options.
6.2 Reviewing video clips and pictures
To view the pictures or video c lips you’ve taken, press th e Playback button
(4, fig. 5).
6.2.1 Full-screen review
The default Playback method is to show each individual picture one at a time at fullscreen size.
See table 7 for the functions in full-screen review:
Up Button
Down Button
Display
button
Menu button
Table 7: Fu nctions full-screen review
Go to next picture / v ideo-clip.
Go to previous picture / video-clip .
Press once to hide the picture / video clip information.
Press once again to switch o ver to thumbnail review.
Go to review menu option s.
UK
7
Page 12
TRUST 782AV LCD POW ER VIDEO
6.2.2 Thumbn ail review
The thumbnail review gives an overview of max. 6 pictures / video clips per screen.
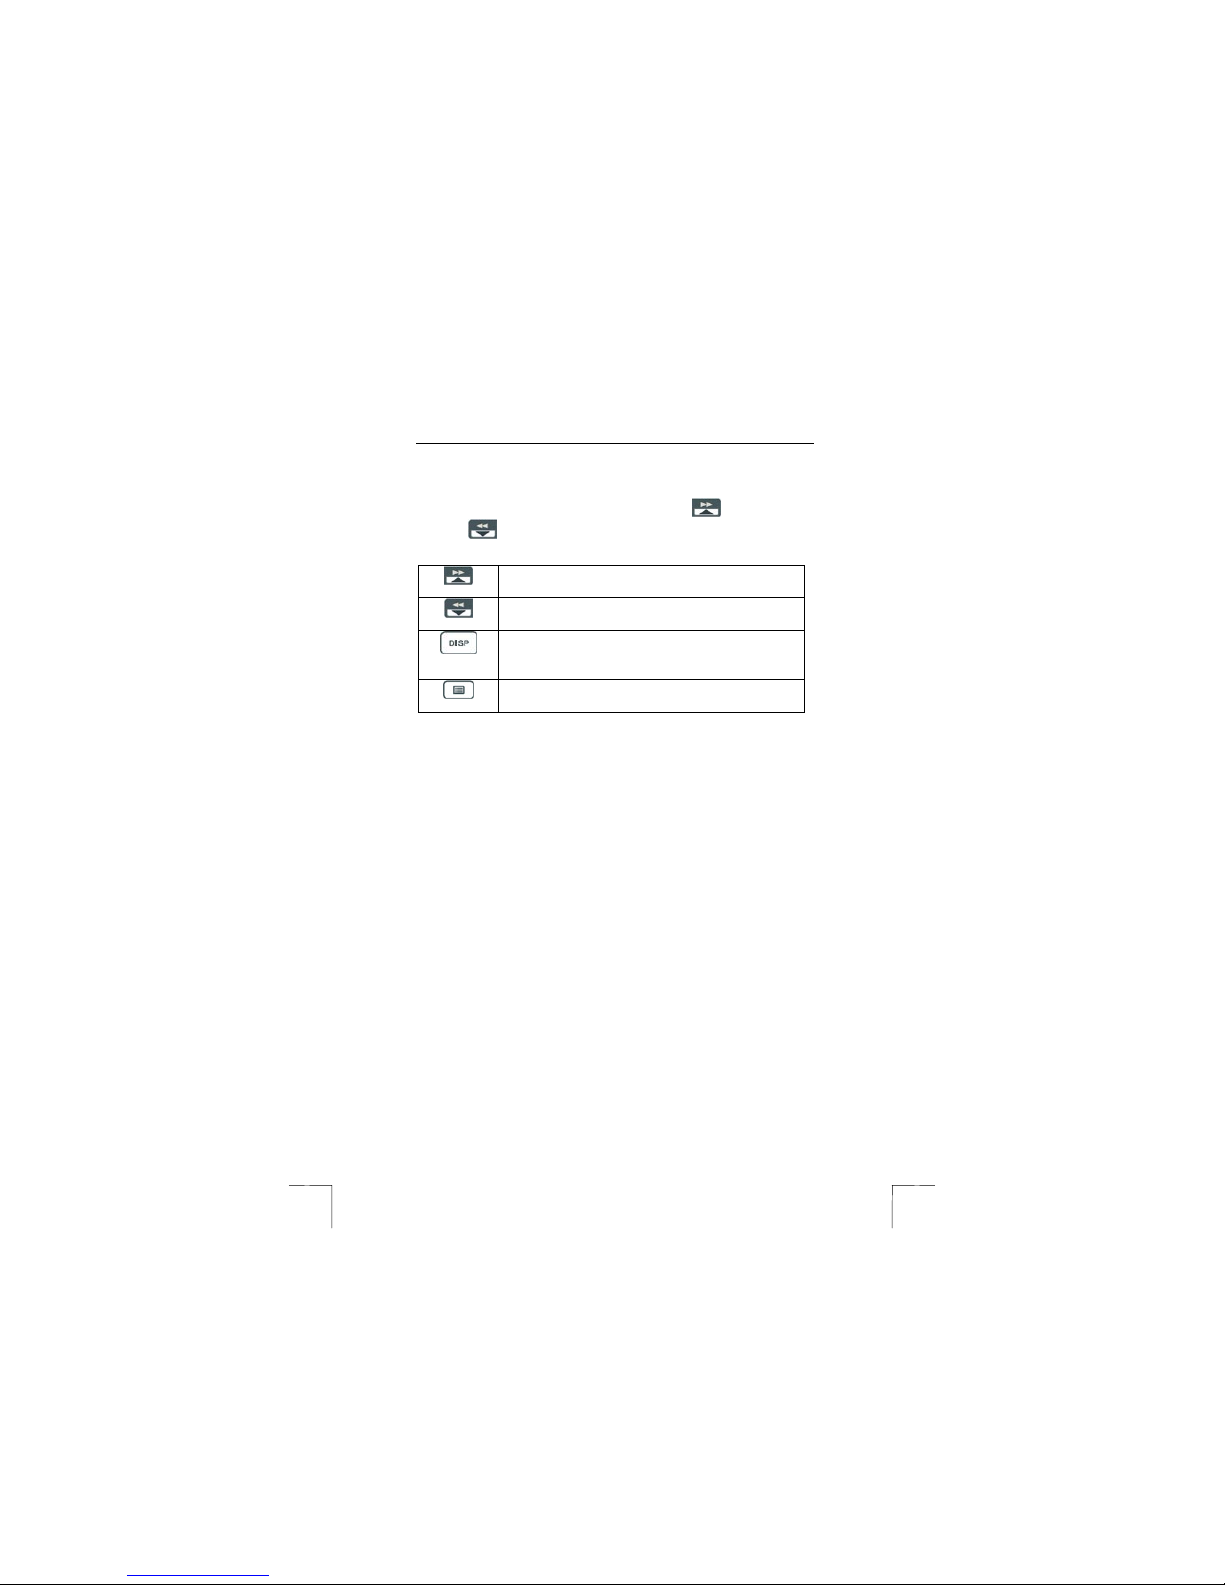
You can browse through the se thumbnails by using the Up
Display
button
button (8, fig. 5).
Move cursor rig ht.
Move cursor left.
Go to full-screen review.
Go to review menu options.
and Down
See table 8 for the button functions i n thumbnail review.
Up Button
Down Button
Menu button
Table 8: Functions full-screen review
button (7. fig. 5)
7 Install drivers (Windows)
This chapter explains how to connect your digital camera to a computer for either
downloading pictures to a PC or Mac or for using as a PC Came ra.
Note: There’re no drivers needed to be installed on Mac OS 9.x / OS X.
Caution: Install the drivers first before connec ting your camera to the PC!
7.1 Driver Installation Windows 98SE/ME/2000/XP
1. Insert the installation sof tware CD into your CD-ROM drive. Don’t connect the
2. The installation program should start automatically. If not, d ouble click the My
3. Select ‘Install driver’ in the se t-up-menu.
4. Follow the on-screen instructions.
5. The drivers will be installed now.
6. Restart your computer afte r installing
Note: During installing on Windows ME, y our Windows ME CD w ill be
8
Please continue to chapter 8.2.2.
camera to the PC.
Computer icon on your de sktop, open the CD-ROM drive, a nd then run the
'setup.exe' found on the installation CD-ROM.
requested. Windo ws needs this to i nstall additi onal system files.
Page 13

TRUST 782AV LCD POWER VIDEO
8 Connecting to a computer
8.1 Activating Mass Storage Device (MSD)
MSD allows you to use the camera just like a standard storage device where you
can copy, delete and move files to and from the camera just as a normal disk drive.
To activate MSD on your computer see point 11 – 13 Quick Installation Guide.
8.2 Copy photos/video-clips to the computer
When con nected to your computer, th e digital camera behaves ex actly like any
another disk drive attac hed to your computer. This make s copying the images to
your hard drive as easy as copying files from a floppy disk, zip drive or CD-ROM.
8.2.1 Windows 98SE / ME / 2000 / XP
See point 13 Quick Installation Guide.
Note: Format the memory card using the ca mera. Do not use a card read er.
Note: Make a backup of th e files before usin g Windows Explorer in Windows
8.2.2 MAC
1. Make sure your computer is turned on.
2. Connect the camera t o your MAC.
3. An extra folder will be ad ded to your desktop. Your pictures are stored in this
4. Open this folde r to access your pictures and vid eo clips.
5. In MAC OS X, the image capture will be activated automatical ly to easily
Note You might need addi tional software to edit your picture s as the
Note Use a recent version of Apple’s QuickTime to pl ay video clip files.
The camera cannot proce ss the FAT32 or NTFS formats.
XP. This program may alter your phot ographs and this can not be
undone.
folder.
import your pictures into the ‘ Pictures’ folder o n your system.
software includ ed with the camera i s designed for a PC wi th
Windows.
UK
9
Page 14
TRUST 782AV LCD POW ER VIDEO
9 Install application software (PC only)
Two applications are supplied with the camera. These applications do not have to be
installed to use the camera. However, it is recommended to install these programs in
order to use all the extra options available with the camera.
Note: Make sure all other applications are closed during the installation.
9.1 Photo Explorer
Ulead Photo Explorer 7 is a program which you can use to organise your
photographs. Simple process es can be carried out, suc h as rotating, printing an d
viewing the photograph s. Photo Explorer is usefu l if you wish to download
photographs and save them on your computer. Fo llow the instructions below to
install Photo Explorer 7.0.
1. Start the Trust Software Instal ler.
2. Select ‘Install Software’.
3. Select ‘Ulead Photo Explore r 7.0 SE’.
4. Select the language you wish to use.
5. Follow the on-screen instructions.
9.2 Video Studio
Ulead Video Studio 6 is a p rogram which you can edit your video clips. Follow the
instructions below to install Video Studio 6:
1. Start the Trust Software Instal ler.
2. Select ‘Install Software’.
3. Select ‘Ulead Video Stud io 6’.
4. Select the language you wish to use.
5. Follow the on-screen instructions.
For more information how to use Video Studio 6, see the manual of Video Studio 6
which is also included on th e Trust CD.
10 Advanced camera settings
10.1 Menu button
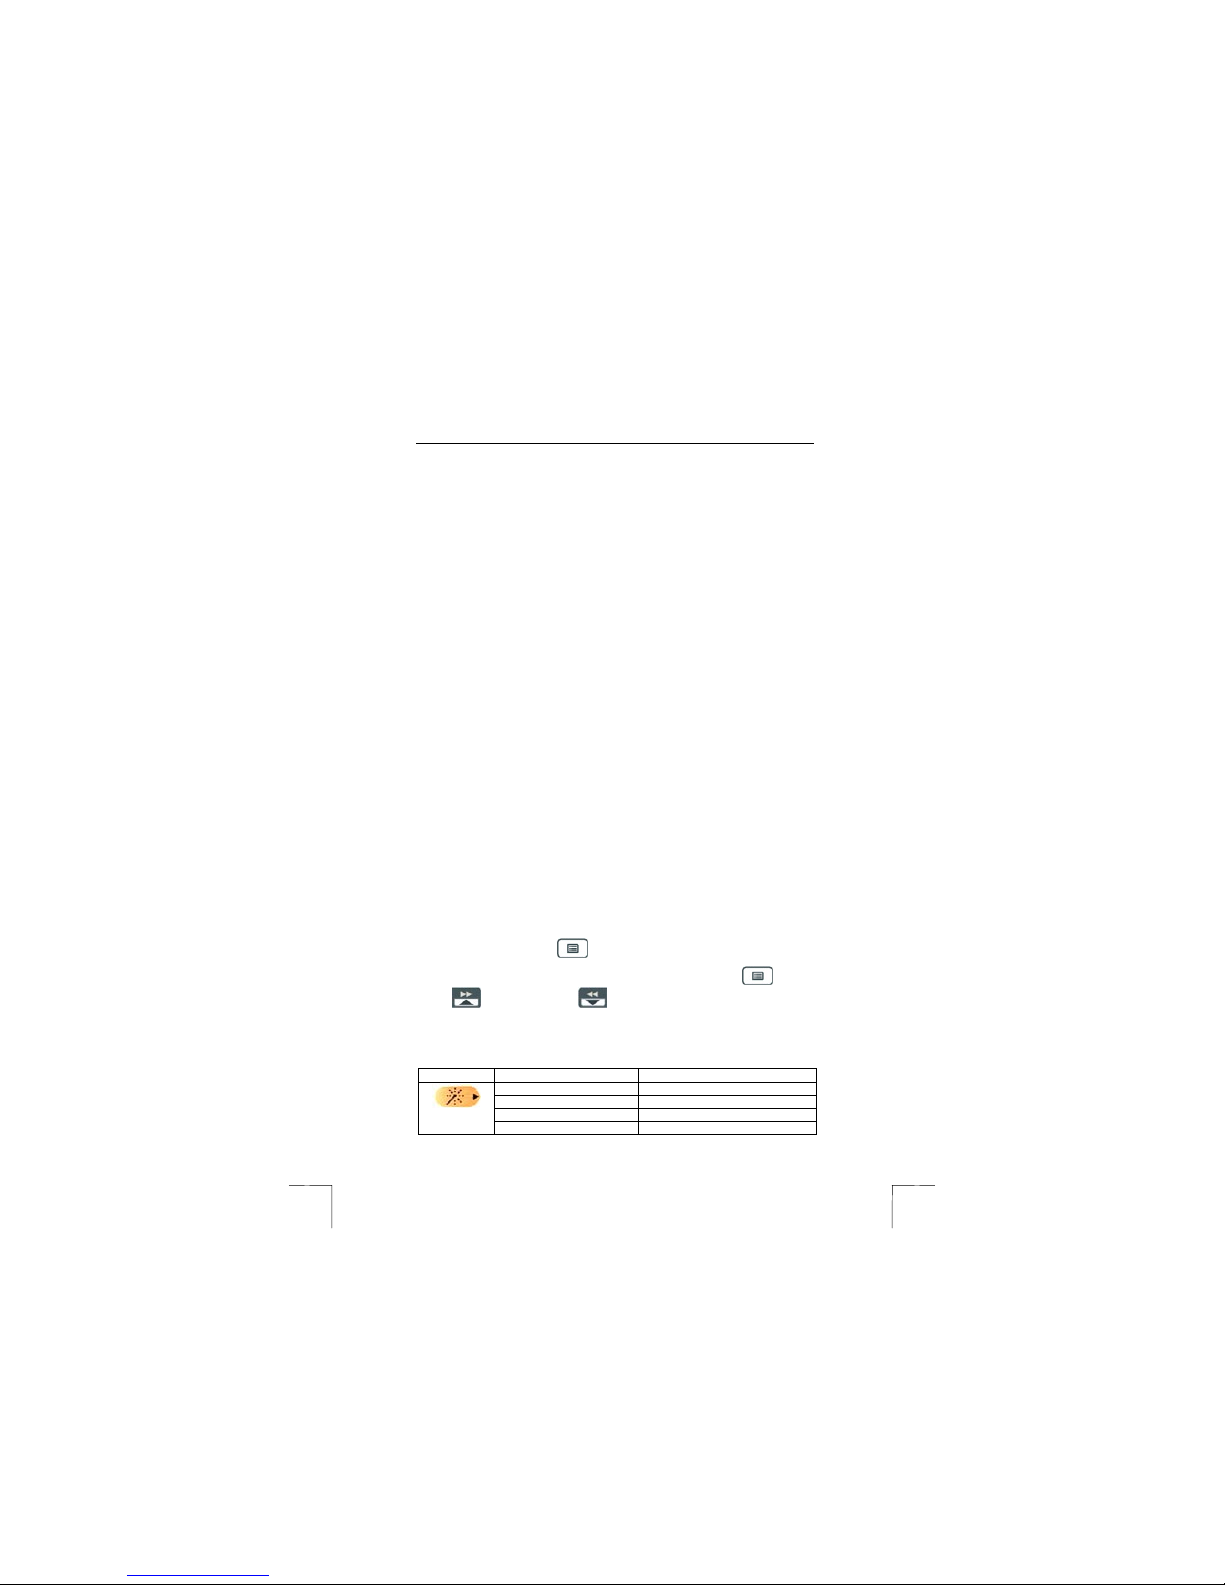
To go to the menu o ptions of the each mode, press the MENU button . Use
the Up
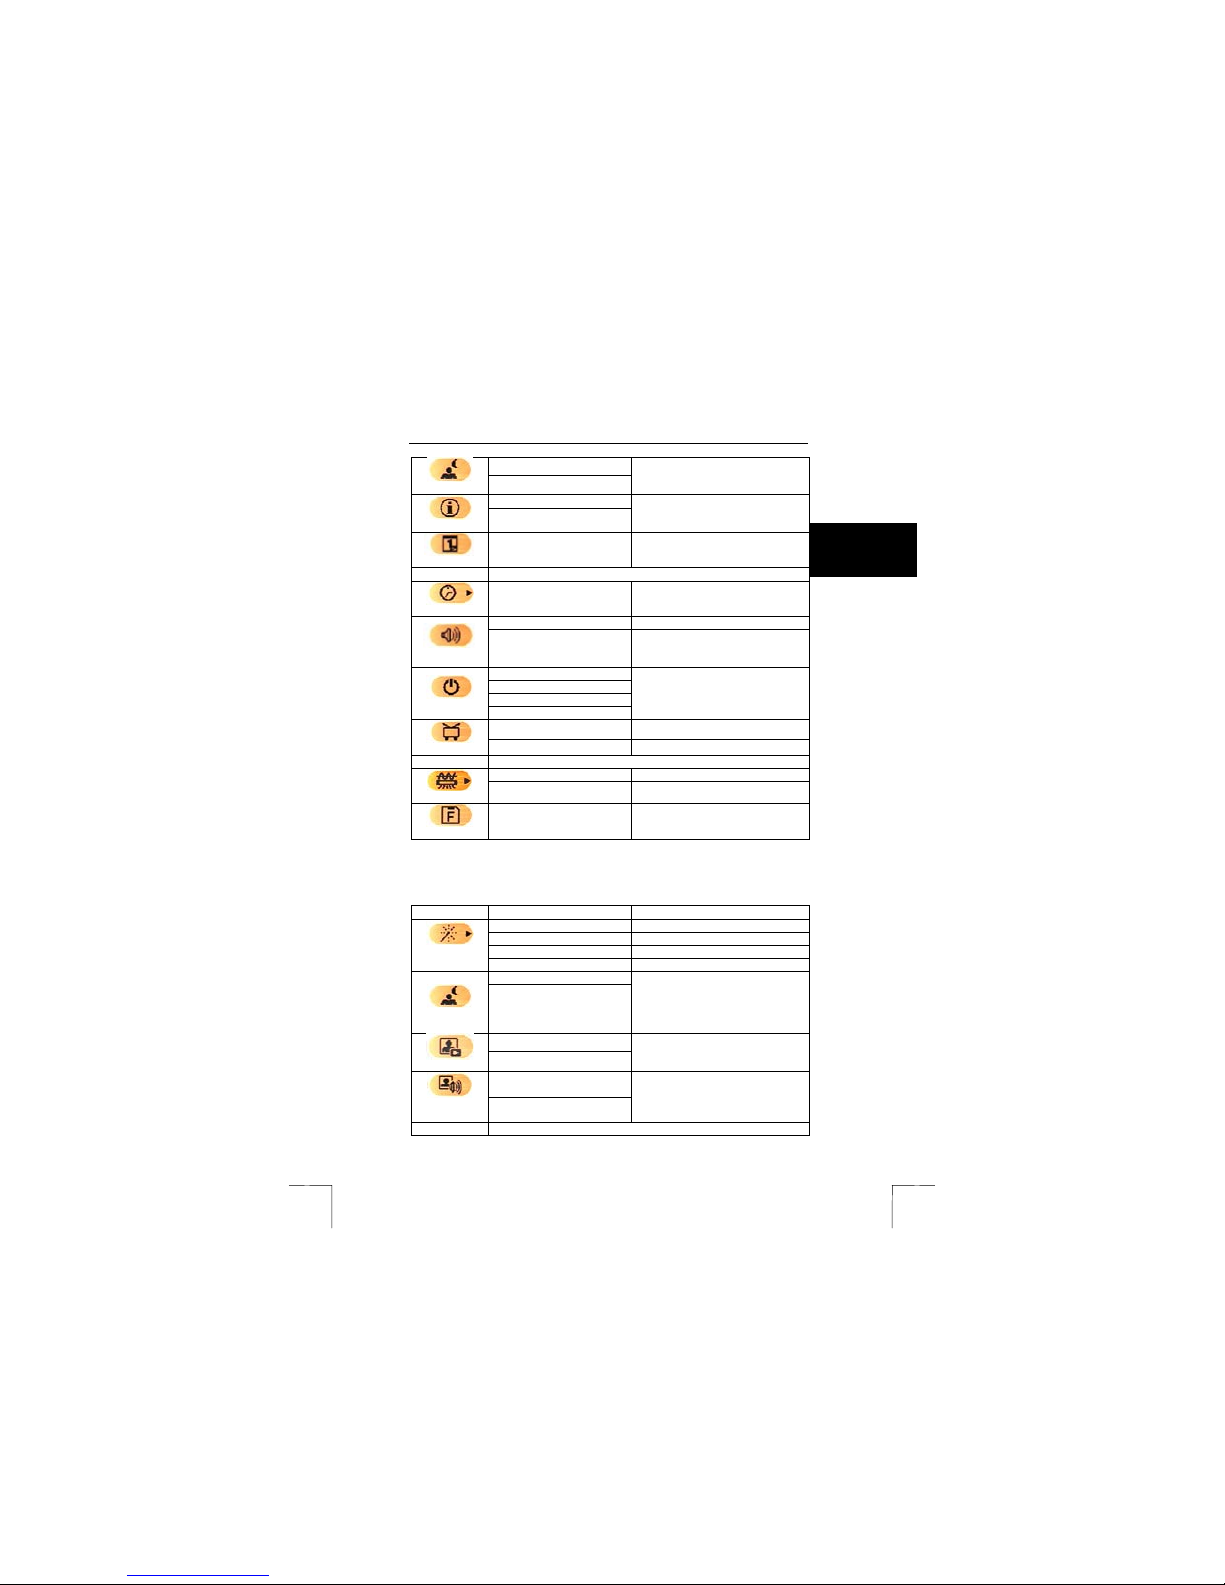
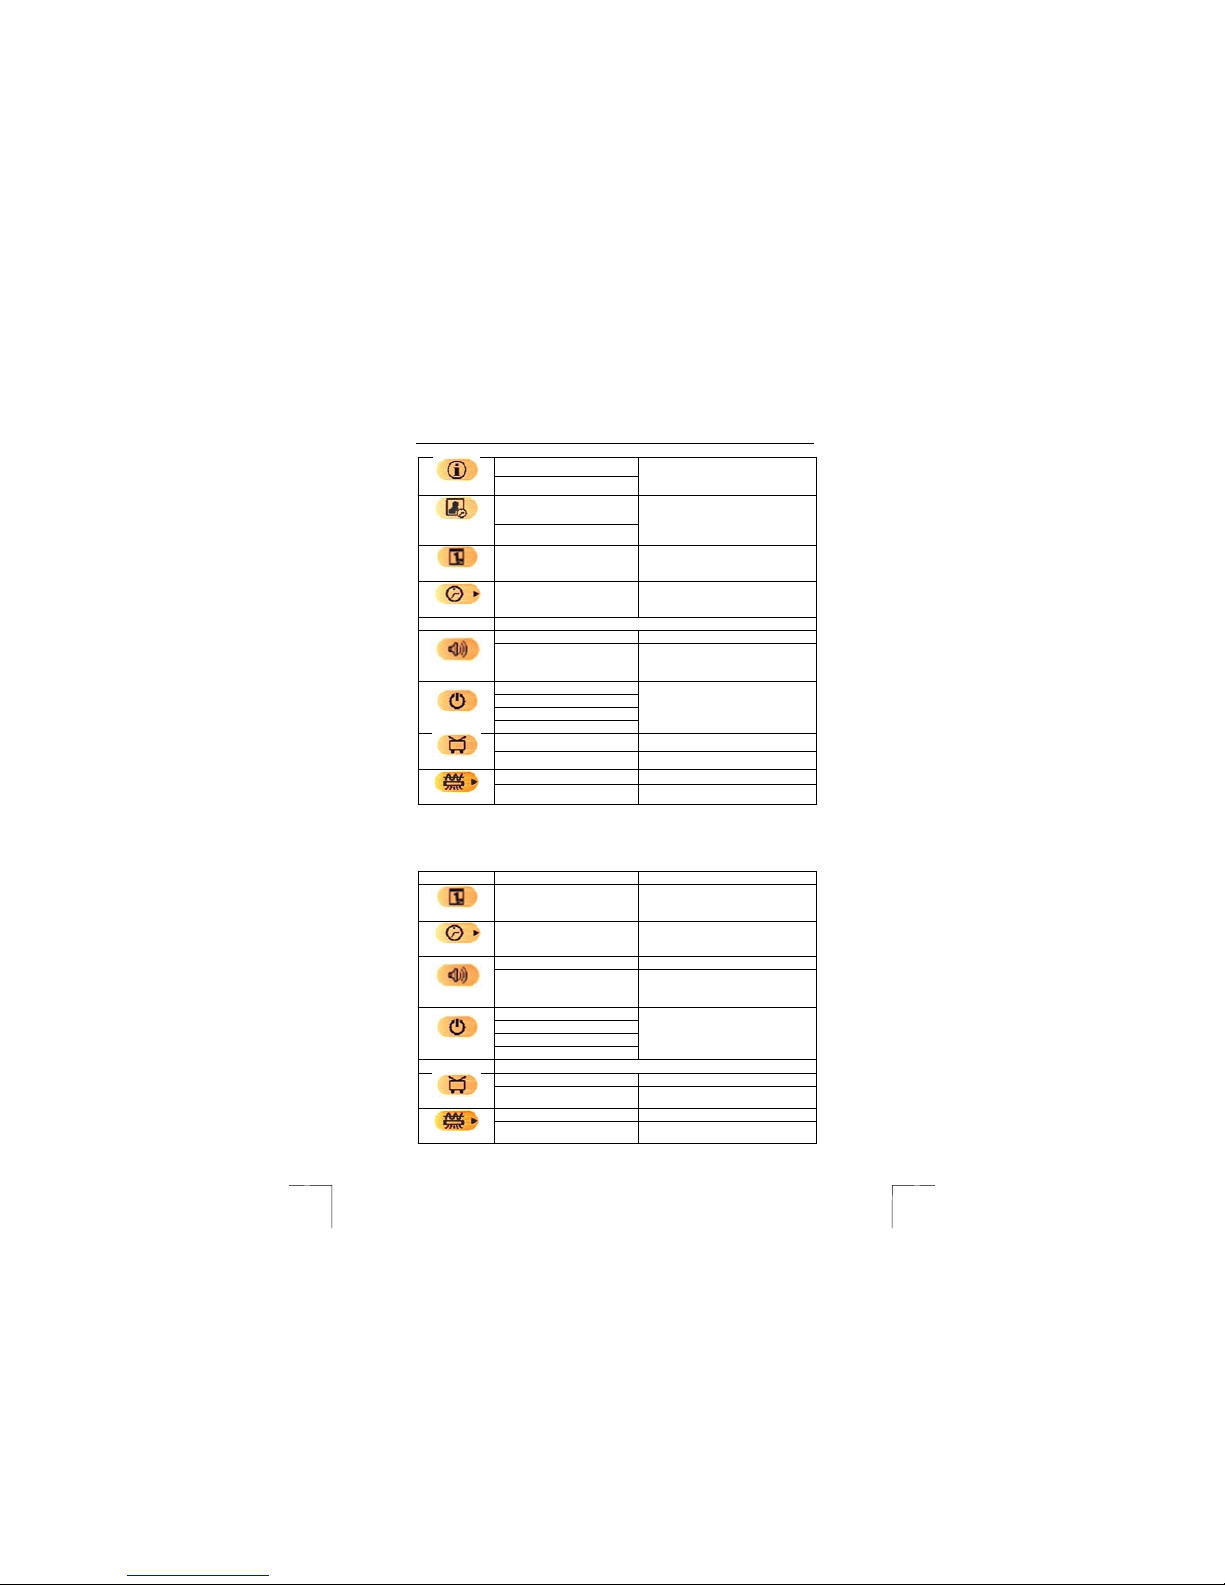
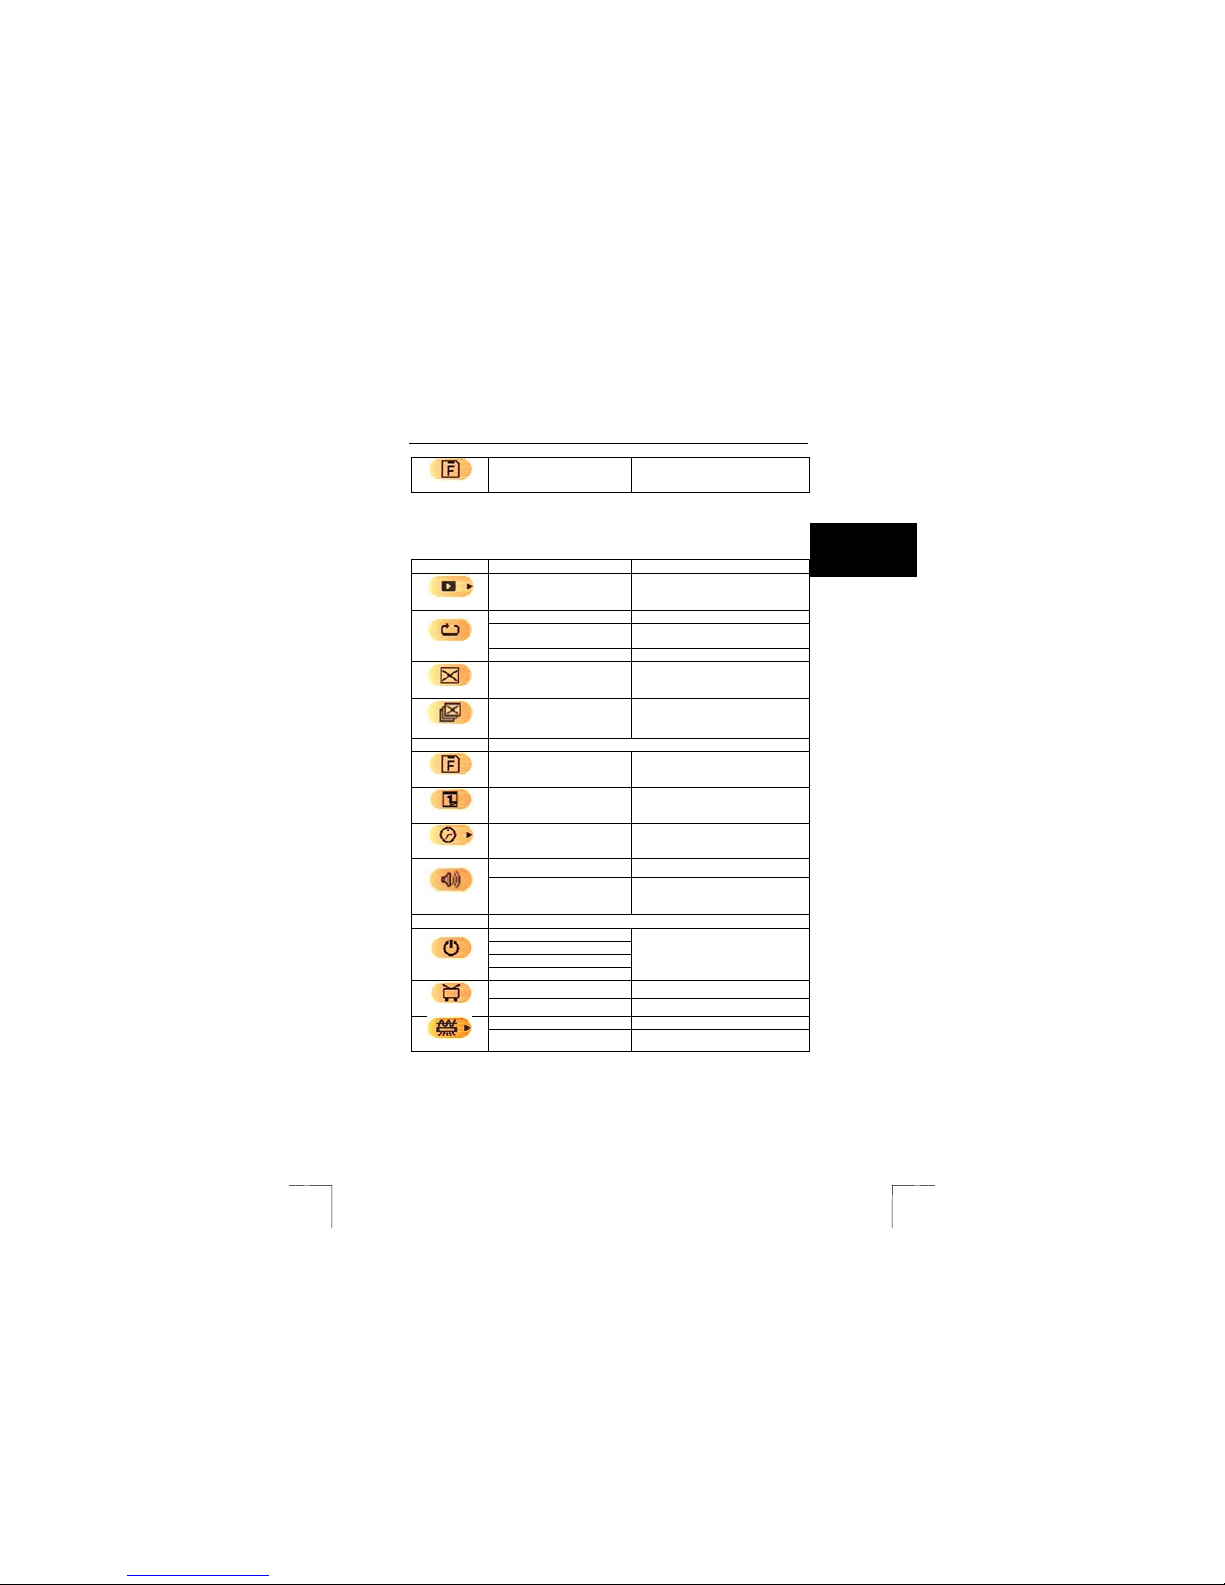
See chapter 10.1.1 - 10.1.5 for descriptions of all menu functions per mode.
10.1.1 Video clip mode (DV)
10
(7, fig. 5) and Down button (8, fig. 5) to move the selec tion bar.
Menu 1/3 Options Description
Effe cts
Off (*) No effe cts
Sepia Sepia
Digital
B & W Black & white
Mosaic Mosa ic
Page 15
TRUST 782AV LCD POWER VIDEO
Off (*)
Night Shot
Info rmation
Set Date
Menu 2/3
Set Time
Sound
Powersave
NTSC / PAL
Menu 3/3
50 / 60 Hz
Format
(* = default)
Table 9: Men u options in video clip mode
10.1.2 Picture mode (DSC)
Menu 1/3 Options Descr iption
Effects
Night Shot
Quick review
Attach voice
Menu 2/3
On
Off (*)
On
Date format: Y / M / D
Time format: H:M:S Set the time
Off (*) No sound
On
Off (*)
1 min.
2 min.
5 min.
NTSC Use this for North America
PAL (*)
60 Hz Use this fo r North America
50 Hz (*) Use this for Eu rope
Format memory card
Off (*) No effects
Sepia Sepia
Digital
B & W Black & white
Mosaic Mosaic
Off (*)
On
Off (*)
On
Off (*)
On
memo
Night shot is a long time exposure
to let you take a video clip or
picture at night or in dim light .
Show detailed informat ion on LCD
screen
Set the date
Every time when pushing a ny
button on the camera , there will be
a beep sound.
To save the battery, the camera
will turn off automa tically after a
couple of minutes depending on
the settings.
Use this for Europe
Erases all data on your memory
card
Night shot is a long time exposure
to let you take a video clip or
picture at night or in dim light . It is
recommended to use a tripod when
taking night-shots.
Quick review picture afte r every
picture-taking
Attach voice memo after every
taken picture. (see also chapter
6.1.3)
UK
11
Page 16
TRUST 782AV LCD POW ER VIDEO
Off (*)
Information
Attach
Set Date
Set Time
Menu 3/3
Sound
Powersave
NTSC / PAL
50 / 60 Hz
(* = default)
Table 10: Menu options in picture mode
10.1.3 Voice mem o mode (DVR)
Menu ½ Options De scription
Sound
Powersave
Menu 2/2
NTSC / PAL
50 / 60 Hz
12
On
Off (*)
On
Date
Date format: Y / M / D Set the date
Time format: H:M:S Set the time
Off (*) No sound
On
Off (*)
1 min.
2 min.
5 min.
NTSC Us e this for North America
PAL (*) Use this for Euro pe
60 Hz Use this for North America
50 Hz (*) Use this f or Europe
Date format: Y / M / D Set the date
Date
Time format: H:M:S Set the time
Time
Off (*) No sound
On
Off (*)
1 min.
2 min.
5 min.
NTSC Us e this for North America
PAL (*) Use this for Euro pe
60 Hz Use this for North America
50 Hz (*) Use this f or Europe
Show detailed infor mation on LCD
screen
Print the date on th e left corner of
the picture after picture-taking
Every time when pushing any
button on the camer a, there will be
a beep sound.
To save the battery, th e camera
will turn off auto matically after a
couple of minutes depending on
the settings.
Every time when pushing any
button on the camer a, there will be
a beep sound.
To save the battery, th e camera
will turn off auto matically after a
couple of minutes depending on
the settings.
Page 17
TRUST 782AV LCD POWER VIDEO
Format memory card
Format
(* = default)
Table 11: Menu options in voice memo mode
10.1.4 MP3 mode
Menu 1/3 Options Descr iption
Slide
Slide
Off (*) Repeat function off
One
Repeat
Del. One
Del. All
Menu 2/3
Format
Sound
Menu 3/3
Powersave
NTSC / PAL
50 / 60 Hz
(* = default)
Table 12: MP3 mode
All Whole tracks will play rep eatedly
Delete one Delete selected MP3 file
Delete a ll Delet e all MP3 f iles
Format memory card
Date format: Y / M / D Se t the date
Date
Time format: H:M:S Set the time
Time
Off (*) No sound
On
Off (*)
1 min.
2 min.
5 min.
NTSC Use this for North America
PAL (*) Use t his for Eu rope
60 Hz Use this fo r North America
50 Hz (*) Use this for Eu rope
Erases all data on your memory
card
Playbacks your MP3 files in a slide
show. The slide show playba ck
time is 5 seconds.
The selected track will playback
repeatedly
Erases all data on your memory
card
Every time when pushing a ny
button on the camera , there will be
a beep sound.
To save the battery, the camera
will turn off automa tically after a
couple of minutes depending on
the settings.
UK
13
Page 18
TRUST 782AV LCD POW ER VIDEO
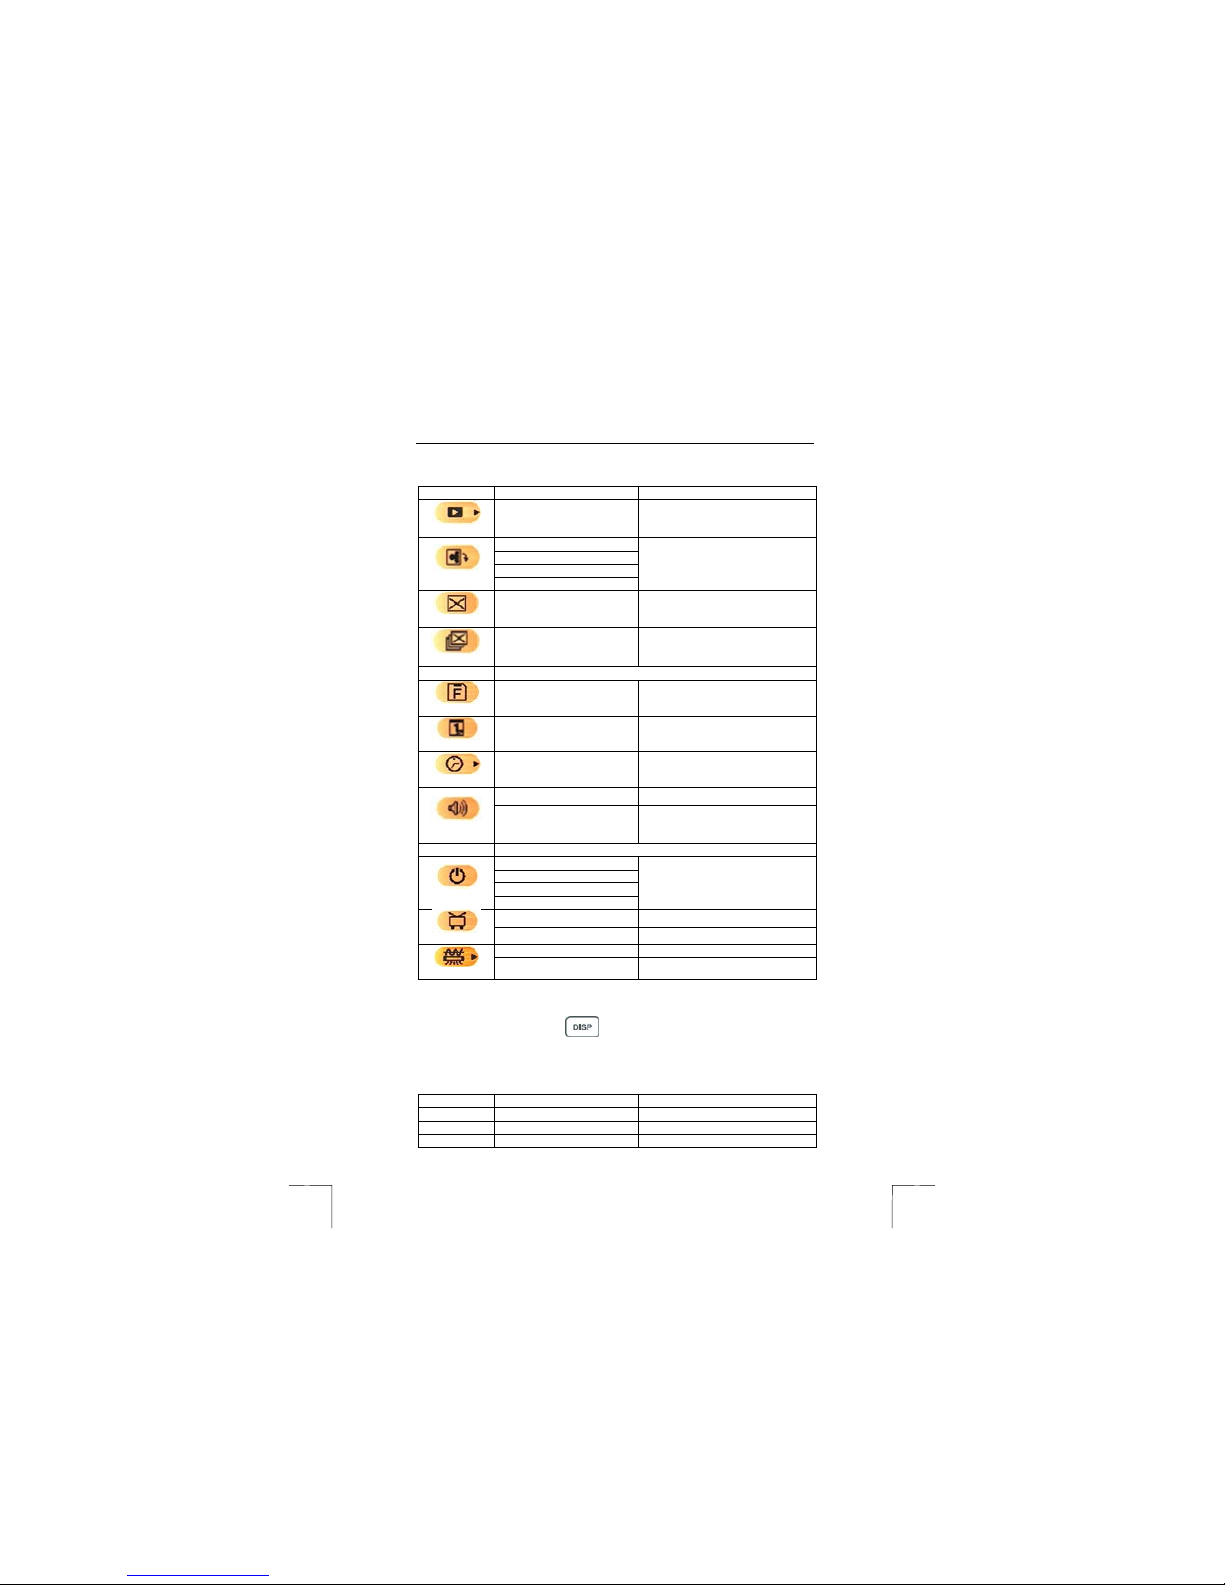
10.1.5 Review m ode
Menu 1/3 Options Description
Slide
Slide
0 (*)
90
Rotate
Del. one
Del. all
Menu 2/3
Format
Sound
Menu 3/3
Powersave
NTSC / PAL
50 / 60 Hz
(* = default)
Table 13: Review mode
180
270
Delete one Delete selected video clip / picture
Delete all Delete all video clips and pictures
Format memory c ard
Date format: Y / M / D Set the date
Date
Time format: H:M:S Set the time
Time
Off (*) No sound
On
Off (*)
1 min.
2 min.
5 min.
NTSC Us e this for North America
PAL (*) Use this for Euro pe
60 Hz Use this for North America
50 Hz (*) Use this f or Europe
Playbacks your video clips and
pictures in a slide show. The s lide
show playback time is 5 seconds.
Rotate picture in every 90 degree
counter-c lock direct ion
Erases all data on your memory
card
Every time when pushing any
button on the camer a, there will be
a beep sound.
To save the battery, th e camera
will turn off auto matically after a
couple of minutes depending on
the settings.
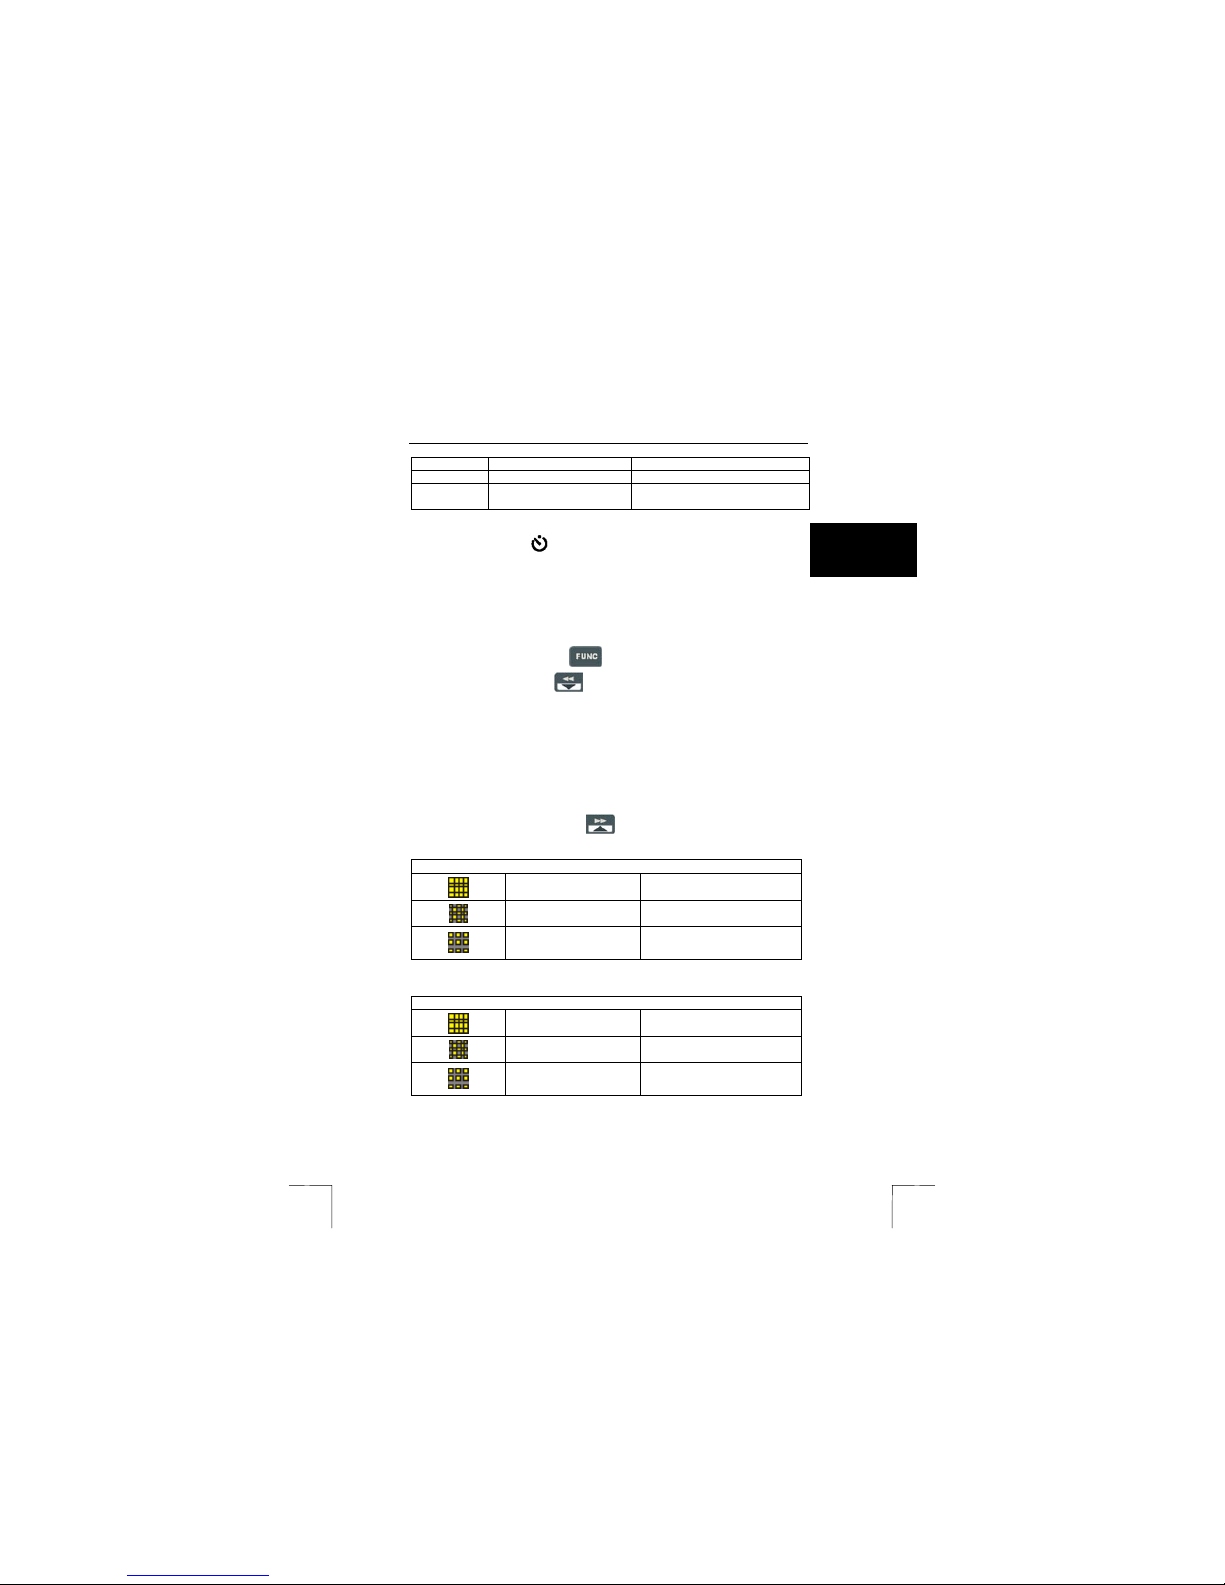
10.2 Display button
The LCD screen can be t urned off to save the battery-life. The LCD button (12, f ig.
2) has different f unctions dependin g of the mode you a re. See below fo r the
functions:
Mode Press Display 1x Press Display 2x
Video clip Show guide line LCD off
Picture Show guide line LCD off
Voice memo LCD off LCD on
14
Page 19
TRUST 782AV LCD POWER VIDEO
Mode Press Display 1x Press Display 2x
MP3
Review
(full-screen )
Table 14: Functions Display Button
LCD off LCD on
Hide picture/ video clip
informa tion
Go to thumbnail review
10.3 Self-timer
For taking pictures or recording video-clips using the self-timer do the following
steps:
1. Position the camera on a stable surface (such as a n optical tripod) and f rame
the shot.
2. Turn the camera on.
3. Set the camera to the video clip mode (fig. 7) o r picture mode (fig. 8) by
pressing the FUNC butto n
4. Press the Down button
icon will appear on the LCD screen (1, fig. 13 ).
5. Press the Shutter Button. The 10-second countdown begins immediately (2,
fig. 13).
6. As soon as the delay ends, the camera takes the picture or start recording.
When recording press the Shutter butto n again to stop record ing.
(3, fig. 5)
button (8, fig. 5) to activate the timer. Timer
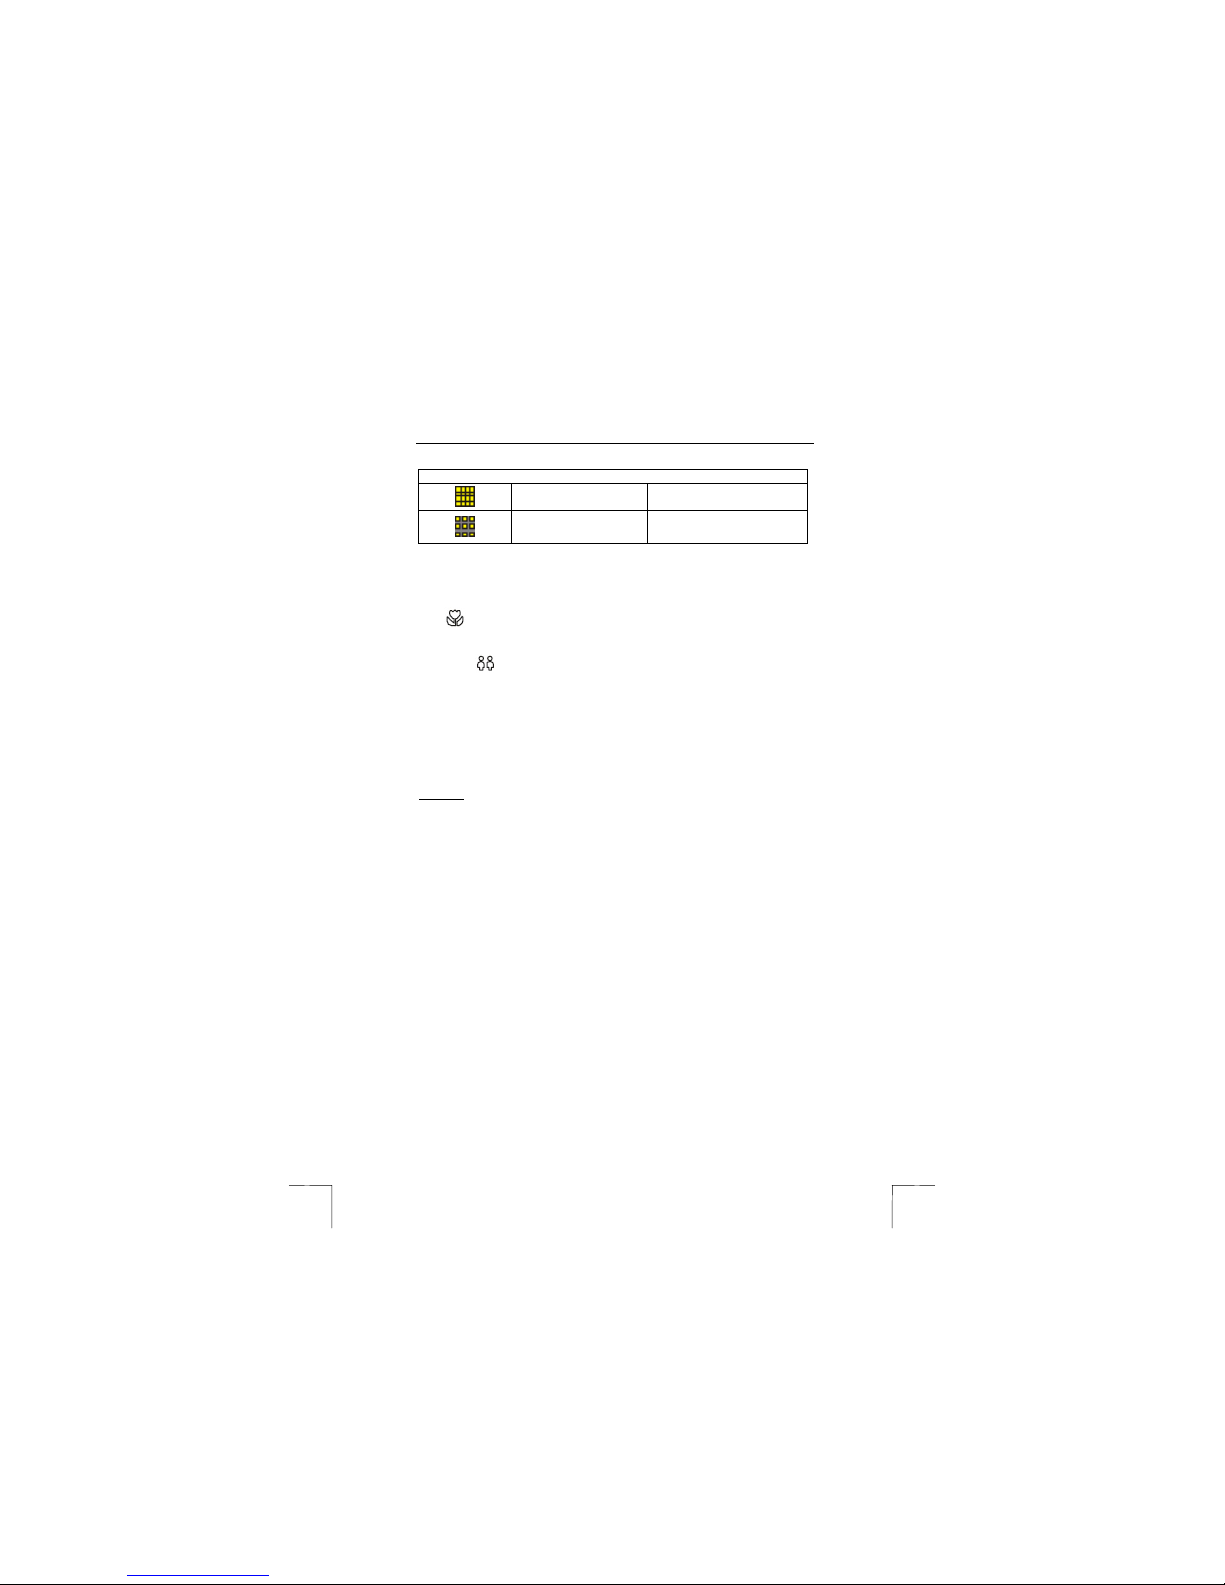
10.4 Quality settings
During taking pictures, vide o-clips or recording audio you can change the qu ality
anytime you want by p ressing the Up
17 for the qu ality-settings.
Table 15: Quality settings in video-clip mode
Table 16: Quality settings in picture mode
button (7. fig. 5). See table 15,16 and
Video Resolution
Fine 640 x 48 0
Normal 352 x 288
Low 320 x 240
Picture Resolution
Fine 2304 x 1728
Normal 1600 x 1200
Low 640 x 480
UK
15
Page 20
TRUST 782AV LCD POW ER VIDEO
Table 17: Quality settings in voice memo mode
Recording-time (based on empty 32 MB memory card)
High sound quality Up to 21 min. Recording time
Standard sound qua lity Up to 43 min. Recording time
10.5 Macro select dial
To take short-distance pictures or movies, rotate the Macro select d ial to the Macro
. See fig. 11.
mode
To take normal-distance pictures o r movies, rotate the Maco select dial to the Normal
focus mode
. See fig. 12.
10.6 Zoom wheel & AE lock
Rotating the zoom whee l (2, fig. 2) allows you to zoom into or widen a sub ject. The
zoom indicator will appear at the right of the LCD screen.
Note: The use of the digital zoom function when taking photographs or
AE-Lock:
Press the zoom wheel (2, fig. 2) to use the AE lock (Automatic Exp osure lock) to lock
the exposure while taking a video clip or picture. This is ef fective when the c ontrast
is too strong between t he subject and backgro und or when subject is b acklit.
To use AE-Lock:
1. Move the camera to the subjec t you want to picture an d try to get the best
2. Press the AE-Lock button to lo ck the exposure.
3. Frame the subject with the b ackground and press Shu tter button to take th e
4. Unlock the exposure by pre ssing AE-Lock button aga in.
recording video cl ips will sli ghtly reduce the qu ality.
exposure.
picture.
10.7 Lock buttons
Hold the Volume/Hold key (f ig. 14) for 2 secon ds to lock all the buttons on the
camera. Hold the Volume/Hold k ey again for 2 second s to release all buttons. T his is
usefull to avoid acciden tally touching the shut ter button while playing MP3 f iles.
(Shutter button = Stop playing)
10.8 Connecting the camera to a TV
The camera can be connec ted to a TV to view your pictures and / or video-clips. The
LCD screen will be turned of f. A standard RCA video cable is supplied with the
camera.
16
Page 21
TRUST 782AV LCD POWER VIDEO
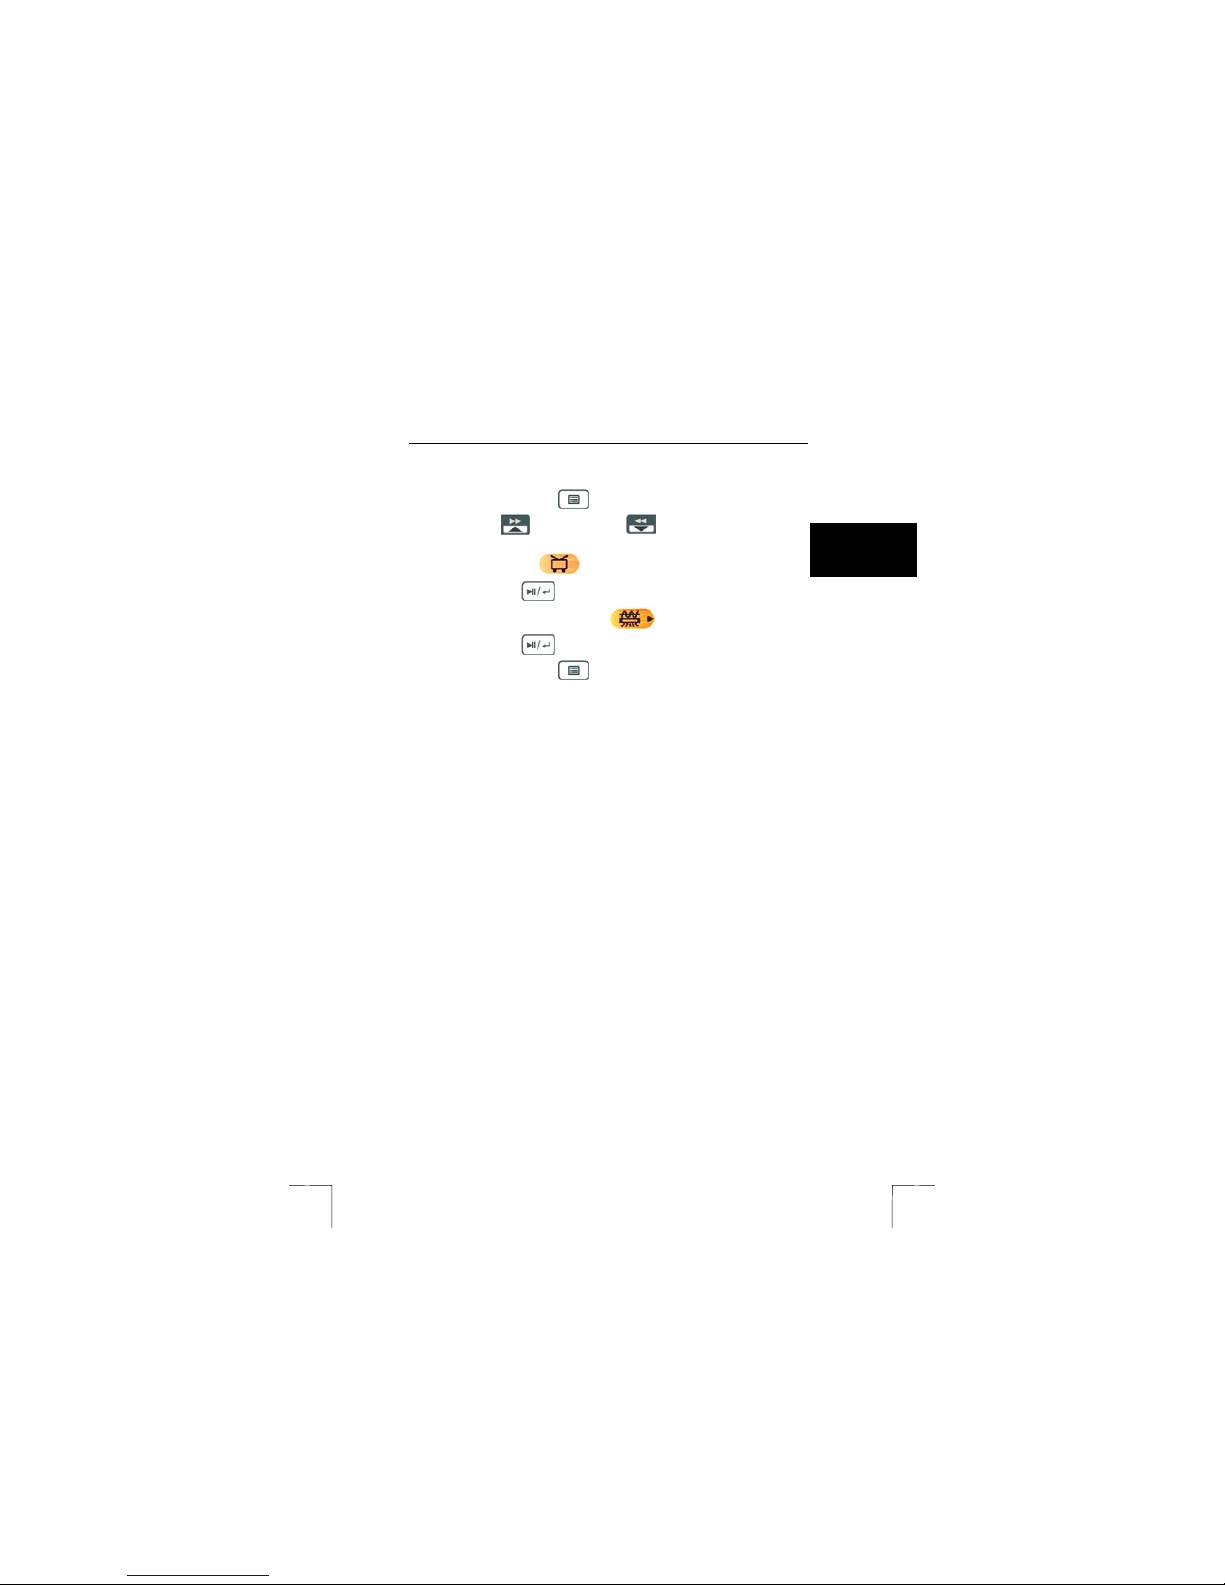
Set the Vide o Out option:
1. Turn on the camera.
2. Press the MENU button
3. Use the Up
selection bar.
4. Select NTSC / PAL
5. Press enter key
6. Move the selection bar to 5 0 / 60Hz
7. Press enter key
8. Press the MENU button
Connect camera to a TV:
1. Connect one end o f the AV cable t o the camera into the video output located
above the USB conn ector.
2. Connect the other e nd of the AV cable to your TV. Your TV must have a n
input for video signals (yellow RCA plug). The yellow plug is for the image
signal. You will need an adapter if your TV only has a SCART plug. This can
be purchased from most TV and radio shops.
3. Set your TV to display the video input.
4. Turn the camera on. The camera image will now be visible on your TV.
Note: Make sure to se t this to PAL for use in Europe. Setting t o the
Note: The c amera’s AV output is not sui table for connecting to the
Note: If you do not see an image and hear a loud humming sound
wrong standard makes the screen fuzzy and everything will be
displayed in bl ack and white.
aerial connection on your TV. Your TV must have a video input.
through the speakers, the n you may have connect ed the image
plugs to the wrong connection. Che ck the connections an d try
again.
.
(7, fig. 5) and Dow n button (8, fig. 5) to move the
option.
to change the s etting to PAL (for Europ e).
option.
to change the s etting to 50 Hz (for E urope).
to leave the menu options.
10.9 Webcam install
Note: Before installi ng PC CAM mode, install MASS STORAGE
Note: Webcam function is not supporte d on a Mac!
This camera can be used as Webcam for video conferencing over the internet such
as Netmeeting. To install th e webcam function:
1. Install the drivers first as de scribed in chapter 7.1.
2. Connect the small conne ctor of the USB cable t o the USB port of t he camera
MODE first ! (see chapter 8.1)
(2, fig. 3).
UK
17
Page 22

TRUST 782AV LCD POW ER VIDEO
3. Connect the large head of the USB cable to an empty USB port on your
computer. To locate USB po rt on your computer, look fo r the USB icon .
4. Turn on your camera.
5. Fig. 9 will appear on the L CD screen of your ca mera.
6. Switch to PC CAM mode by pressin g the FUNC button
7. The Windows Add Hardware Wizard will a utomatically detect the camera and
lead you through the i nstallation procedures f or the corresponding mode .
8. After installation your camera is re ady for being used as Webcam.
(3, fig. 5)
11 Install Trust photo site
11.1 Install Trust photo site
Trust offers you the possibility to publish your phot ographs on the Internet at
www.trustphotosite.com. There are a number of conditions attached to the use of
this site. The conditions can be found at www.trustpho tosite.com.
This software can be u sed to upload your ph otographs to the Trust Photo Site.
Note: The latest version of the Trust Photo Upl oad software can al ways be
1. Start the Trust Software Instal ler.
2. Select ‘Install software’.
3. Select ‘Trust Photo Upload Software’.
4. Follow the on-screen instructions to complete the installation.
11.2 Using Trust photo site
You must first register with Trust bef ore you can upload photographs to the Trust
Photo Site.
11.2.1 Register first
1. Go to Trust website (www.trust.com) to register yourself and your camera.
2. Sign in using the confirmation code which is sent to you.
3. Next, follow the instructio ns below to create you r own account.
11.2.2 After registered
1. Go to the Trust Customer Care section of the we bsite
2. Enter the item number of your digital camera and click on ‘ Search’ to go to
3. To create an account, click on ‘Create account’ on the right-hand side of the
4. Click on the ‘Create trustp hotosite.com account’ bu tton. It may take a while
18
downloaded fro m the Trust website.
After registering, you will receive a confirmation e-mail.
(www.trust.com/customercare). Register using your e-mail address and
password (the password for the Trust website).
the support page f or your camera
Trustphotosite.com banner.
before the next wi ndow appears.
Page 23
TRUST 782AV LCD POWER VIDEO
5. Click on ‘Continue’. In the window that appears, you can download software
for uploading your photographs to the Trust Photo Site. You can download
the latest version of the software here . (The Trust Photo Upload software is
also included on the CD-ROM supplied with the camera.)
11.3 Using Trust photo upload software
1. Start Trust Photo Upload from the Windo ws Start menu (Start – Programs –
Trust – Trust Photo Upload).
2. Use the ‘Explorer’ to select the photogra phs you wish to uploa d. You can use
the buttons on the right-hand side of the Explorer to select photo graphs,
unselect photographs, view photographs, etc.
3. Click on ‘Upload’ .
4. Enter your e-mail address and t he password for your Tru st registration (not
the password for y our e-mail account).
5. Click on ‘Next’. Your login information will be checked. This may take some
time.
6. Select the photo a lbum where you wish to uplo ad the photographs to or
create a new album.
7. Click on ‘Next’. The photographs will now be up loaded. The progress will be
displayed on your monitor. This may take a long time if y ou use an analogu e
modem.
8. Click on ‘Close’ to clos e the window.
9. Go to the website www.tru stphotosite.com and s ign in.
You can now view your phot ographs, arrange the m, etc. See the Help section on the
website f or more informatio n.
12 Technical specifications
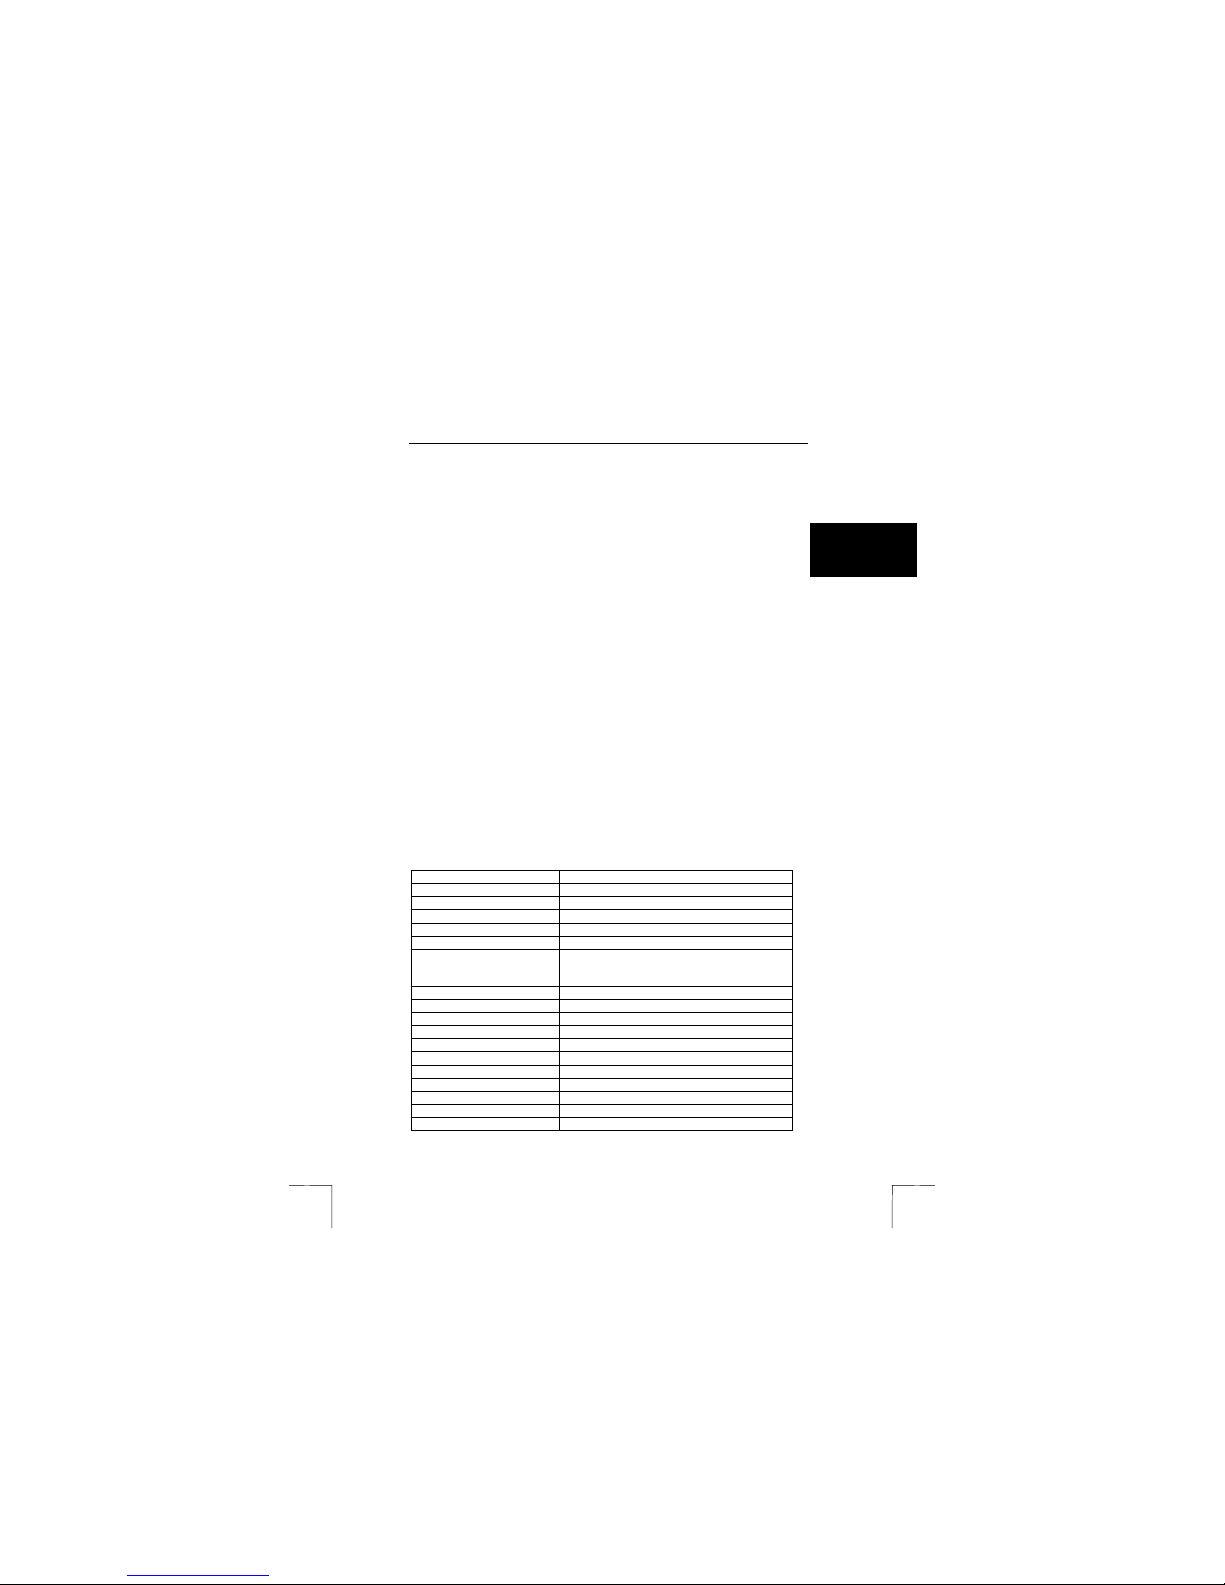
Camera resolution 2304 x 1728 (4 MPixel)
Hardware sens or resolutio n 1600 x 120 0 (2 MPixel)
Internal memory No flash memory
External memory Built-in SD/ MMC slot (maximum: 512 MB)
32 MB MMC ca rd incl ude d
Digital stil l camera JPEG f ormat
2304 x 1728 (4 Mpixel),
Digital video camcorder ASF fo rmat
QVGA (320 x 240 pixels) / up to 30 fps
LCD screen 4 cm colour TFT LCD 280 x 220 pixels
Digital zoom 4x
Image effects 3 modes (sepia, black & white, mosaic)
Lens F = 2.8, 8.5mm
Interface USB 1.1 (USB 2.0 compa tible)
Energy saving Auto power-off
Built-in microphone Yes
Built-in speaker Yes
Battery 3.7 Volt Li-Lon
Table 18: Specifications
1600 x 1200 (2 Mpixel),
640 x 480
UK
19
Page 24

TRUST 782AV LCD POW ER VIDEO
13 Troubleshooting
Method
1. Read the solutio ns given below.
2. Check for up-to-dat e FAQ’s, driver s and instruc tion
manuals on the internet: www.trust.c om/13849
13.1 Uninstall old drivers and products
The most common cause of f aults during installation is the presence of a d river for a
similar, old device. The best solution is to first remove all drivers related to old
devices before installing the new driver. Make sure you only delete programs for old,
unused (similar) devices.
1. Enter the Windows ‘Safe Mode’. (Press F8 when starting W indows before
the Windows st art screen is displayed and se lect ‘Safe Mode’.)
2. Click on ‘Start – Settings – Control Panel’ and d ouble-click on the
‘Add/Remove Programs’ icon.
3. Find all the programs for similar, old devices and remove these b y clicking on
the ‘Add/Remove’ bu tton. When in the ‘Safe Mode’ , it is possible for some
programs to appear twice. In tha t case, remove all the prog rams which
appear twice.
4. Restart the computer.
13.2 Checking after installation
After the installation of the drivers and applications, the following devices have been
added to your system and can be checked:
Start – Settings – Control panel – System – Device manager
In Mass Storage mode:
Win 98SE: Disk drives – DV USB device
Win ME: Disk drives – DV USB device
Storage Device – USB Mass Storage Device
Universal Serial Bus Controllers – USB Mass Storage Device
Win XP/2000: Disk drives – DV USB device
Storage volumes – Generic Volume
Universal Serial Bus Controllers – USB Mass Storage Device
Start – Settings – Control panel – System – Device manager
In PC-Camera mode (for Windows XP, 2000, 98, ME)
Imaging device – TRUST 782AV LCD P .V. Video Capture
Imaging device – TRUST 782AV LCD P .V. WDM device
Start – Settings – Control panel – Add or Remove Programs
Trust 782AV LCD P.V.
Trust Photo Upload
Ulead Photo explorer 7.0, Ul ead Photo studio 6.0
20
Page 25
TRUST 782AV LCD POWER VIDEO
Note: The information given above will v ary when the install ation has been
altered by the user (for example, not everything has been installed or
locations othe r than the defaul t locations have b een selected).
Note: Deviations may also occur as a result of using new drivers avai lable on
the Internet.
Note: The location or name may vary in the ‘Control Panel’ for di fferent
operating systems.
13.3 Removing camera driver
To remove the camera driver f rom your computer do the f ollowing steps:
Windows XP:
1. Open control panel (Sta rt – Control Panel)
2. Select “Add or Remo ve Programs ”
3. Select “Trust 782AV LCD P. V.”
4. Select “Change/Remove”. Follo w the instructions on the scre en until the
5. Select “Remove”.
6. Following the instructions on the screen.
Windows 98SE/ ME/2000:
1. Open control panel (Sta rt – Settings – Control Pane l)
2. Select “Add/Remove Programs”
3. Select “Trust 782AV LCD P. V.”
4. Select “Remove”. Follow the instructio ns on the screen until t he following
5. Select “Remove”.
6. Following the instructions on the screen.
following options will app ear: “Modify”, “Repair” and “Remove”.
options will appear: “Modify”, “Repair” and “Remove”.
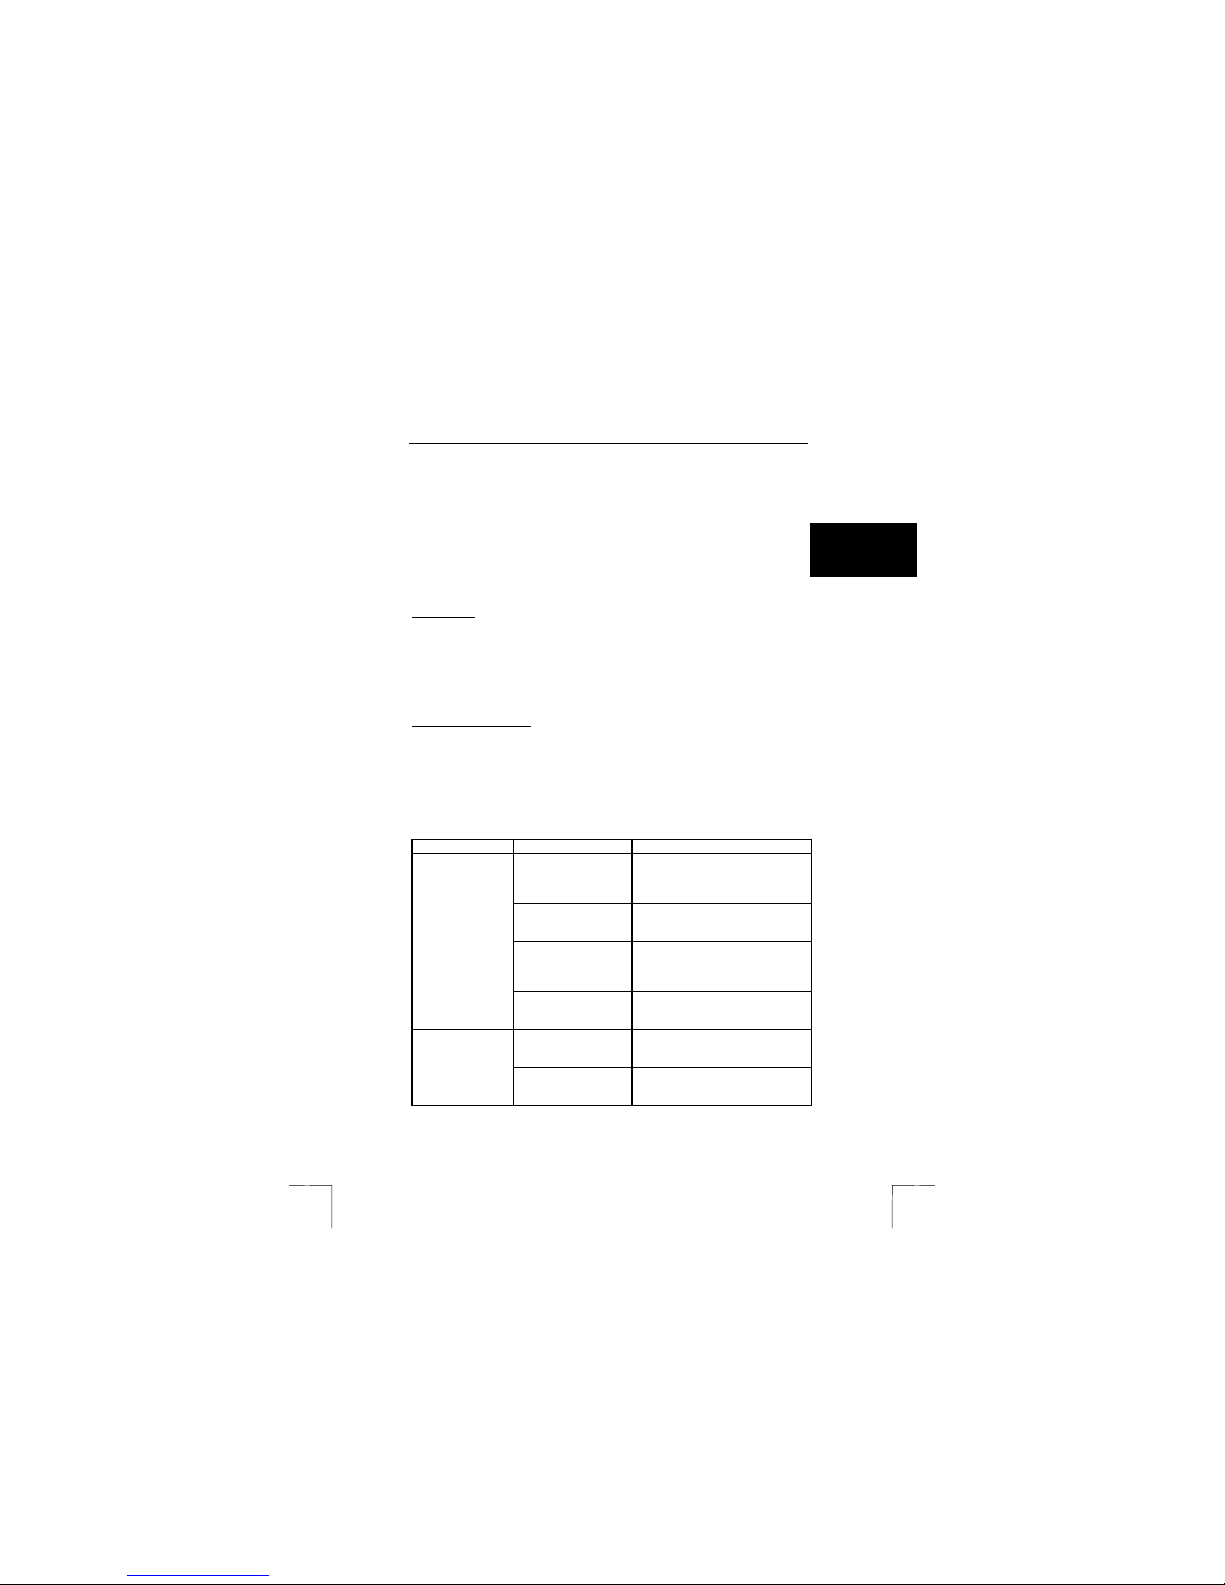
Problem Cause Possible solution
Windows does
not detect a new
device after
connecting the
camera.
The camera is
marked with an
exclamation mark
‘!’ in the Device
Manager.
The computer's USB
port does not work.
The camera has not
been connected to a
USB port.
The camera has been
connected to a USB
hub which does not
have a power supply.
The drivers have not
been installed
correctly.
The drivers have not
been installed
correctly.
The USB port does
not work correctly.
Check th e settin gs of y our USB
port. For m ore inform ation, see
www.trust.com/customercare/help/ u
sb.
Connect the camera to a USB port.
Connect the camera to a USB hub
which has a power supply or to a
USB port on your computer.
Uninsta ll the driv ers, remove the
USB cable and reinstall the drivers.
Install the drivers before co nnecting
the camera.
Test the USB port using a different
device or see the USB
troubleshooter a t www.trust.com.
UK
21
Page 26
TRUST 782AV LCD POW ER VIDEO
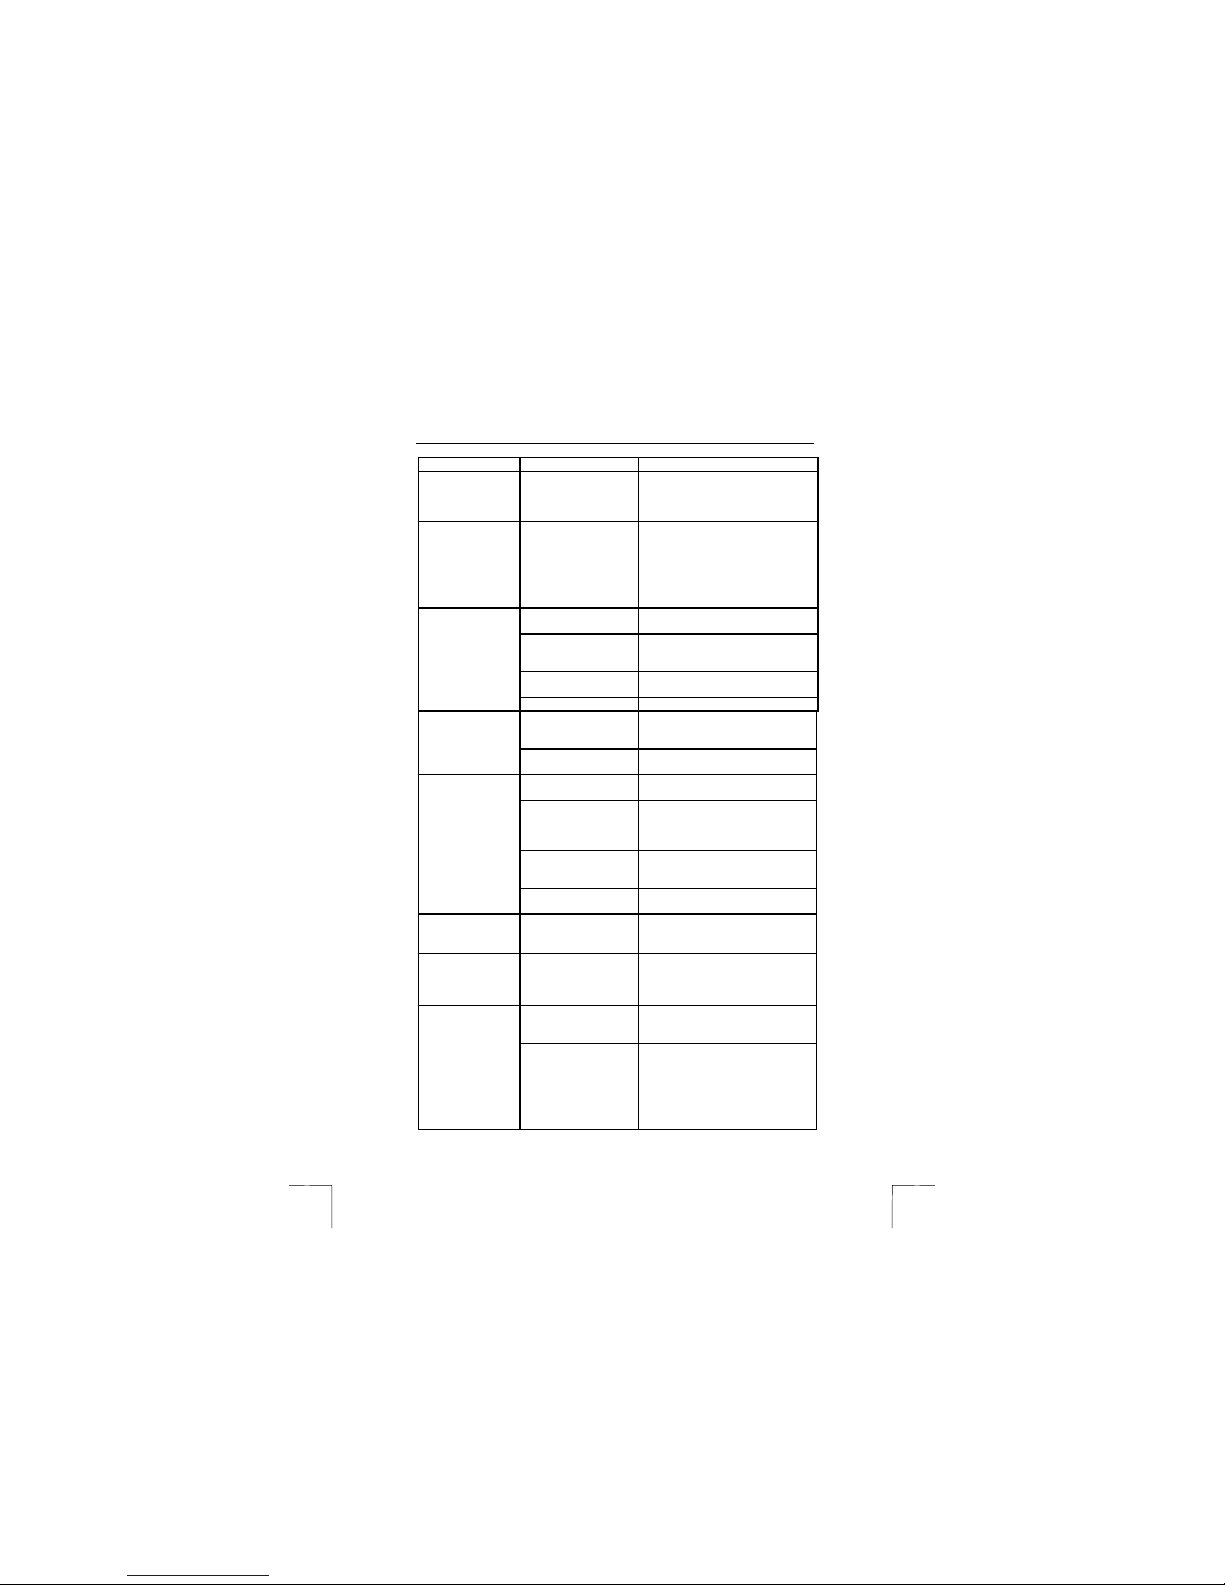
Problem Cause Po ssible solution
The camera’s
webcam mode
does not work.
The PC has a TV
capture card.
The camera does
not do anything.
The camera
suddenly turns
itself off.
The recordings
are not clear
(hazy).
There is no
connection with
the computer.
The camera does
not give an image
in the app lication
(webcam).
Photographs are
discoloured on
the monitor or
when printed.
22
The camera has been
connected to a USB
hub which does not
have a power supply.
There is a conflict
between the camera
and the TV card.
The battery has been
inserted i ncorrectly .
The camera is still
connected to your
computer .
The camera is turned
off.
The battery is empty. Recharge the battery.
The camera has shut
down aut omatically by
power save .
The battery power is
low.
The camera wa s
moved.
The macro setting is
still selected while the
distance to the object
is too far.
The distance to the
subject is too small.
There is in sufficient
light.
The camera has been
connected incorrectly.
Another application is
open and is using th e
camera image.
The background
lighting is not white.
The monitor has not
been set correctly.
Connect the camera to a USB hub
which has a power su pply or to a
USB port on your computer.
Carry out the following :
1) Remove the TV cap ture card.
2) Reinst all the c amera.
3) Reinstall the TV capture card.
If this does not solve th e problem,
try to reinstall the drivers fo r the TV
capture card.
Reinsert the battery (see chapter
5.2).
Disconnect the USB cable. T he
camera cannot be operated when it
is connected to a co mputer.
Turn the camera on.
Turn the camera on again.
Recharge the battery.
Try to hold the camera still or us e
the stand.
Rotate the Macro select d ial to
normal-distance setting (see
chapter 10.5).
Increase the distance to the object
to be photographed or select the
macro setting.
Improve the lighting.
Reconnect the cable s
Close the other ap plication first
before starting the program.
Change the lighting. If this does
not help, use Photo Express to edit
the colour.
Compare the photograph to other
photographs (for example, on the
Internet) where you know t he
colour is correct. Adjust your
monitor correctly (see the
instruction manual provided with
your monitor).
Page 27
TRUST 782AV LCD POWER VIDEO
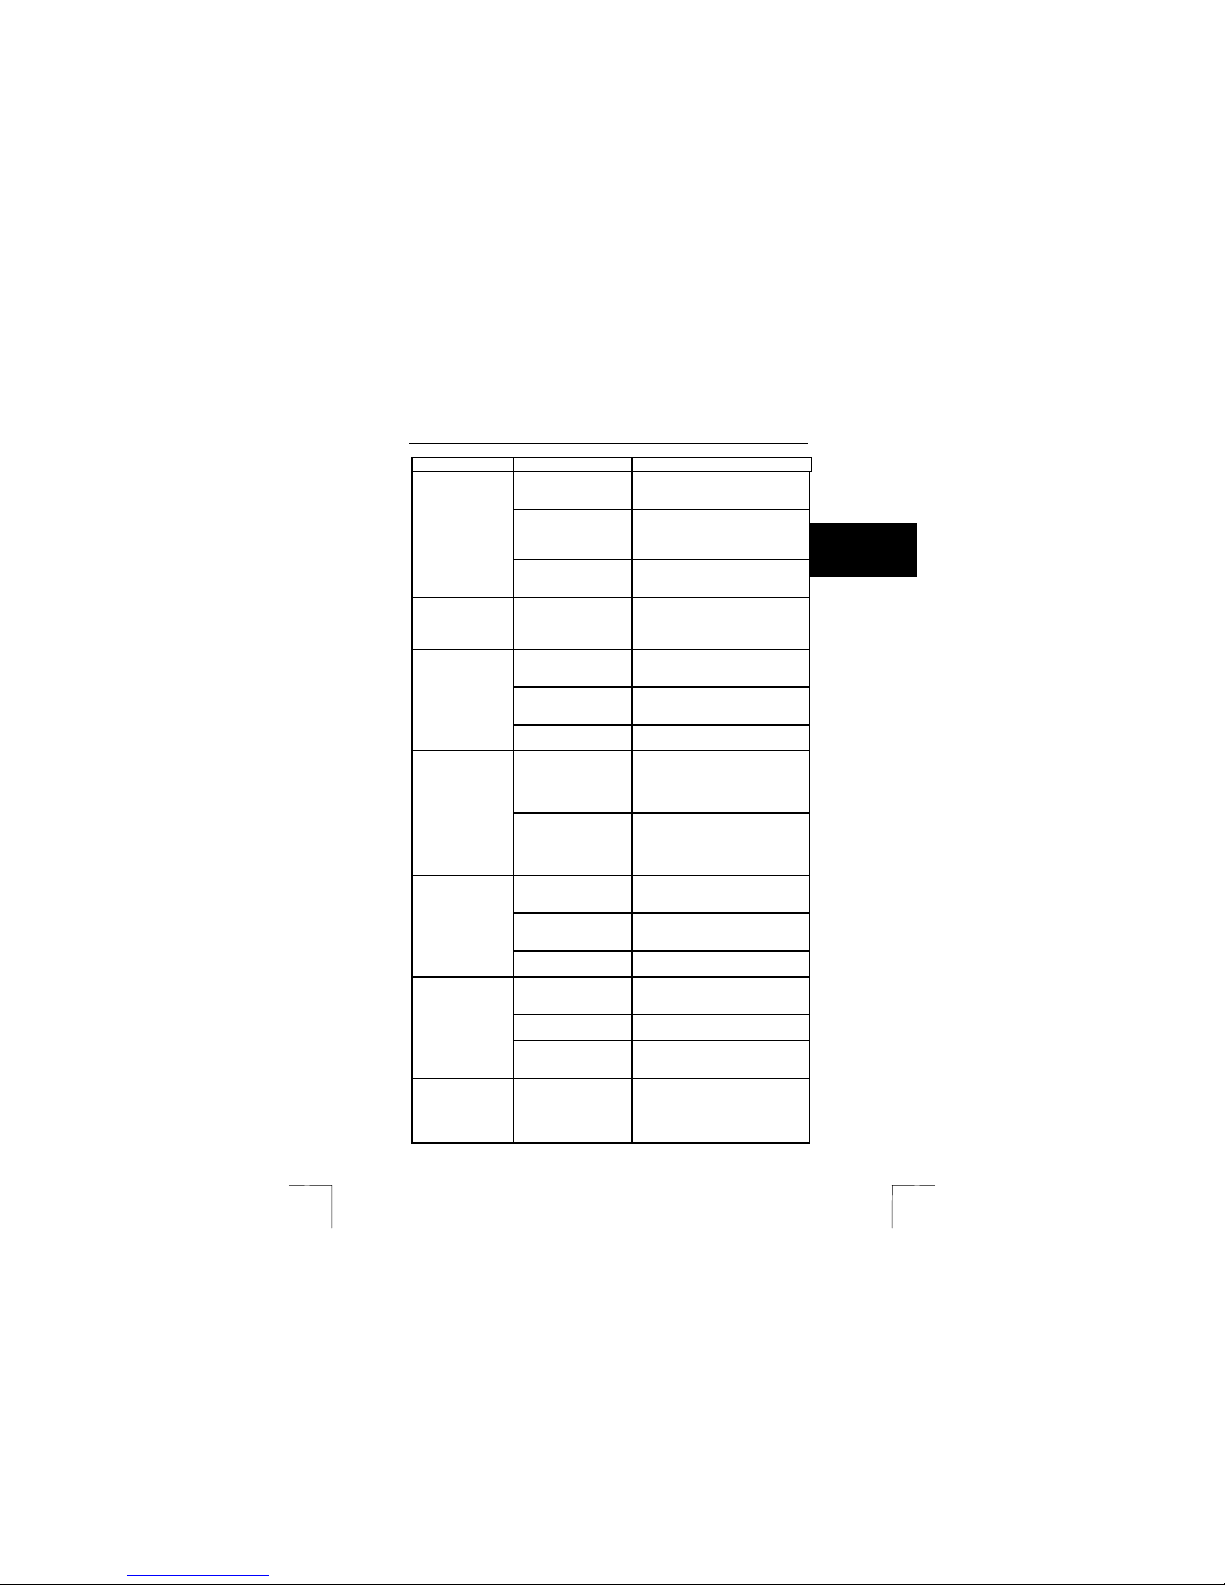
Problem Cause Possible solu tion
The video
recordings
contain a lot of
noise (snow).
The so und is ve ry
soft.
Fewer recordings
can be saved o n
the me mory ca rd
than expected.
The me mory card
cannot be used.
The TV
connection does
not work.
There is noise in
the photographs
or the
photographs are
too dark.
The printer has been
set incorre ctly.
An inkjet printer has a
blocked ink cartridge.
The paper used is
unsuitable for printing
photographs.
There is insufficient
light.
The distance to the
sound source is too
great.
The volume of the
computer speakers is
set very low.
The microphone is
blocked.
The card was not
empty. The memory
card contains
recordings made with
other camera s.
The recordi ngs
contain a lot of det ail
or noise.
The memory card has
been formatted in th e
wrong format.
The memory card has
not been inserted
correctly
The card is faulty. Try to u se the card in a diff erent
The cables have not
been connected
correctly.
The camera is turned
off.
The camera has been
connected to the
computer .
The photographs are
taken in dark
surroundings.
If the photograph s look good on
your monitor, check your printer
settings.
See the instruction manua l
provided with your printer f or
instructions on how to test the
printer and solve any problems.
Use original paper from you r printer
manufacturer for the most reliable
result.
Improve the lighting or select a
different location .
Move closer.
Increase the volume of th e
speakers.
Make sure your fingers does n ot
cover the microphone (8, fig. 1).
Format the memory card to make
sure it is 100% empty.
In the case of noise, select a
location with more light. If th ere is
too much detail, it is normal tha t
less photographs or video clips can
be saved.
Format the memory card in the
camera.
Press the memory card firmly into
the slot. The card must no t
protrude from the camera.
camera or use a diffe rent card.
Connect the cables cor rectly:
yellow is for the image signal.
Turn the camera on.
Disconnect the camera from the
computer.
Make sure there is sufficient light.
UK
23
Page 28

TRUST 782AV LCD POW ER VIDEO
Problem Cause Po ssible solution
The photograph s
are overexposed.
The problem is
not listed here.
If you still have problems after trying these solutions, please contact one of the Trust
Customer Care Centres. You can find more information at the back of this instruction
manual. Please have the following information av ailable:
• The item number. This is 13849.
• A good description of wh at does not work.
• A good description of wh en the problem occurs.
The contrast in the
subject is too great.
The photographs were
taken in bright
sunlight.
Check the Internet fo r
the latest update o f
the camera
Troubleshooter.
Change the lighting or take the
photographs closer by or further
away.
Take photographs in shadow.
Go to www.trust.com
14 Warranty conditions
- Our products have a two-year manu facturer's warranty which is e ffective from the
date of purchase.
- If there is a fault, return the product to your dealer. Includ e an explanation of the
fault, the proof of purchase and all the accessories.
- During the warranty period, you will receive a similar model, if one is availab le. If
no similar product is available, your product will be repaired.
- Please contact our help desk for missing components, such as the instruction
manual, software or oth er components.
- The warranty becomes invalid if the d evice has been ope ned, if there is
mechanical damage, if t he device has been misused, if alterations have been
made to the device, if the device has been repaired by a third pa rty, in the case of
negligence or if the device has been used for a purpose other than that originally
intended.
- Excluded from the warranty:
• Damag e caused by accidents o r disasters, such as fire, flood, earthquakes,
war, vandalism or theft.
• Incompatibility with other hardware/software which is not stated in the
minimum system requirements.
• Access ories, such as batteries, f uses (if applicable).
- Under no circumstances will the manufa cturer be held responsible for any
incidental or consequential damage, including the loss of income or other
commercial losses resulting from the u se of this product.
24
Page 29
CUSTOMER CARE CENTERS
24 HOURS free service: www.trust.com
Residents in the UK and Ireland should contact:
Mon - Fri
From 8:00 - 16:00
I residenti in Italia possono co ntattare:
lun - ven
9:00 - 13:00 /
14:00 -18:00
Les habitants de la France et de l’Afrique du Nord peuvent contacter :
Lundi-vendred i
De 9:00 à 17:00
Kontakt adresse für Einwo hner Deuts chlands:
Mo – Fr
9:00 - 17:00
Los habitantes de España pueden ponerse en contacto con:
lun – viernes
De las 9:00 a las
17:00 horas
Osoby mieszkające na terytori um Polski powinny sk ontakto wać się:
Od pon. do pt.
w godz 09:00-17:00
Inwoners van Nederland kunnen contact opnemen met:
ma – v r
9:00 - 17:00 uur
All other countries / Alle anderen Länder / T ous les autres pays
Tutti gli altri paesi / Todos los demás países / Alle andere landen
Mon - Fri
From 9:00 - 17:00
UK Office
Phone +44-(0)845- 6090036
Fax +31-(0)78- 6543299
Ufficio italiano
Telefono +39-051-66359 47
Fax +39-0 51-6635843
Bureau français
Téléphone +33-(0)825 -083080
Fax +31-(0) 78-6543299
Deutsche Geschäftsstelle
Telefon 0800-00TRUST (0800-0087878)
Fax +31-( 0)78-6543299
Oficina española
Teléfono +34-(0)902- 160937
Fax +31-( 0)78-6543299
Biuro w Polska
Tel +48-(0)22-87398 12
Fax +31-( 0)78-6543299
Kantoor Nederland
Telefoon 0800-BELTRUST (0800 -23587878)
Fax +31-( 0)78-6543299
European Head Office
Phone +31-(0)78-6 549999
Fax +31-( 0)78-6543299
L I F E I S M O R E ! T R U S T U S T R U S T . C O M
T R U S T . C O M
T R U S T . C O M T R U S T . C O M
 Loading...