

Page 1
TRUST 610 LCD POWERC@M ZOOM
1
UK
Instructions when using for the first time Chapter
1. Inserting the batteries (4.2)
2. Camera settings when using for the first time (4.3)
3. Taking a photograph (4.6)
4. Viewing photographs (4.7)
5. Installing the driver (5.2)
6. Connecting the camera (5.3)
7. Installing the applications (6.)
8. Viewing and transferring photographs (7.3)
1 Introduction
This instruction manual is for users of the TRUST 610 LCD POWERC@M ZOOM.
This camera is able to take a maximum of 108 photographs in the low resolution, 35
photographs in the standard resolution and 16 photographs in the maximum
resolution. The highest photograph resolution is 1600 x 1200 pixels (2.1 Mpixel). The
camera has an 8 MB internal flash memory, a webcam function, an automatic
exposure, a lens with a fixed focal length, a digital zoom and a flash function. The
camera’s memory can be increased up to a maximum of 128 Mbyte using an
optional Smart Media Card.
2 Safety
2.1 General information
Carefully read the following instructions before use.
- The TRUST 610 LCD POWERC@M ZOOM does not require any special
maintenance. Use a slightly damp, soft cloth to clean the camera.
- Do not use aggressive substances, such as petrol or white spirit, to clean the
device. These may harm the material.
- Do not submerge the device in liquid. This may be dangerous and will damage
the device. Do not use this device near water.
- Do not repair the device yourself. The flash uses a high voltage and there is a
danger or receiving an electric shock.
- Do not look through the viewfinder if it is aimed directly at the sun, because this
may damage your eyes.
- Do not use the flash within a distance of 1 metre from somebody’s eyes. This is
particularly important when photographing babies and young children.
2.2 Batteries
1. The batteries supplied with the camera are not rechargeable. Do not try to
recharge them, The batteries may explode.
2. Never throw the batteries onto an open fire. The batteries may explode.
3. Never drill holes int o the batteries.
4. Keep the batteries out of the reach of small children.
5. Only use AA alkaline or rechargeable AA NiMh/1600 mA batteries with this
camera.
6. When the batteries are empty, ask your local authority where you can
dispose of them.
Note: Do not use old and new batteries at the same time, because the old
batteries may leak and cause damage.
Note: The batteries should be removed if the camera is not going to be used
for some time. This will save the battery capacity.
Page 2

TRUST 610 LCD POWERC@M ZOOM
2
3 Description of the camera
3.1 Front of the camera
Use table 1 in combination with figure 1.
Item Description Function
1
Exposure button Takes a photograph. If this button is pushed
half way in, the camera prepares itself to take
a photograph. This greatly reduces the time
required to take a photograph. This is
particularly useful for action photographs.
2
Flash For taking photographs when there is
insufficient light. The flash has a maximum
effective range of 2 metres.
3
Light meter This is used by the camera to determine the
intensity of the surrounding light. Do not cover
this part of the camera. The photograph will
not be lit sufficiently if you accidentally cover it
with your finger.
4
Viewfinder For viewing the image to record. You can also
view the subject by looking at the built-in LCD
screen.
5
Additional sensor Do not cover this part of the camera. The
photograph will not be light suff iciently if you
accidentally cover it with your finger.
6
Lens Records the image to be taken. Keep your
fingers off of the lens.
7
Lens protector Protects the lens. You can cover the lens
when the camera is not used.
Table 1: Functions of the front of the camera
Page 3
TRUST 610 LCD POWERC@M ZOOM
3
UK
3.2 Rear of the camera
Use table 2 in combination with figure 2.
Item Description Function
1
Viewfinder For viewing the image to record. You can also
view the subject by looking at the built-in LCD
screen. The viewfinder is useful in bright light
if the LCD screen is difficult to see.
2
Status indicator Indicates whether the camera is ready to take
a photograph. Flashing: camera is busy. Lit
continuously: camera is ready.
3
On/Off button Turns the camera on. Press the button again
to turn the camera off.
4 + 5
Zoom button When recording, pressing the button zooms in
on the image, although the image will not be
as sharp. When viewing a photograph, you
can increase the size of parts of the
photograph. The size of the original
photograph will not be altered.
6
Mode switch Use this to select a mode for the camera:
display, record, change settings, automatic
exposure or special effects.
7
Exposure button Takes a photograph. If this button is pushed
half way in, the camera prepares itself to take
a photograph. This greatly reduces the time
required to take a photograph. This is
particularly useful for action photographs.
8
USB connection Connect the USB cable here.
9
Wrist strap attachment Attach the wrist strap here.
10
Up button When viewing a photograph, this button is
used to view the previous photograph. In
menus, this button is used to move up a
selection.
11
Down button When viewing a photograph, this button is
used to view the next photograph. In menus,
this button is used to move down a selection.
12
Flash on-off/make copy When taking a photograph, this button turns
the flash off, sets it to automatic or to red-eye
reduction. When viewing photographs, you
can use this button to make a copy of a
photograph.
13
White balance/delete W hen taking a photograph, this button
switches the white balance setting between:
automatic – inside – office – outside. This is
used to ensure that white subjects are white
on the photograph. When viewing
photographs, this button is used to delete the
photograph which is visible on the LCD screen
from the memory .
14
LCD screen button Turns the LCD screen on and off. The LCD
screen has many useful functions, but
reduces the life span of the batteries.
15
LCD screen For looking to see what the photographs will
look like. Also used to view the photographs
which have been taken and, if desired, to
Page 4
TRUST 610 LCD POWERC@M ZOOM
4
Item Description Function
delete them.
Table 2: Functions of the rear of the ca mera
3.3 Bottom of the camera
Use table 3 in combination with figure 3.
Item Description Function
1
Screw point for stand Here, you can attach the stand provided with
the camera or a larger, more professional,
stand.
This is useful for the webcam function and for
producing a sharper picture when taking a
photograph in insufficient light.
2
Battery and memory card
flap
Open this to replace the batteries and the
memory card.
3
Place for th e memory
card
Accepts Smart Media Cards from 8 MB to 128
MB. You can take many more photographs
using this optional card.
4
Battery holder For two AA batteries. You can also use
rechargeable NiMH batteries.
Table 3: Bottom of the camera
3.4 Mode switch
Use table 4 in combination with figure 4.
Item Description Function
1
Preset Access to a selection of optimal settings for
photographing difficult subjects such as cities
at night.
2
Photograph with a time
delay
Works the same as the Photo mode, but the
camera waits 10 seconds after the exposure
button has been pressed before taking the
photograph.
3
Photograph mode You can take photographs in this mode.
4
Display In this mode, you can view and, if desired,
delete the photographs which have been
taken.
5
Setup In this mode, you can alter the camera’s
settings.
Use this mode to use the camera as a
webcam.
Table 4: Mode switch positions
3.5 LCD screen
Use table 5 in combination with figure 8.
Item Description Function
1
Flash Flash setting.
2
Photo or display mode The photo mode is shown. Photographs can
be taken in this mode.
3
Quality One to three stars. The standard quality is
shown.
4
Remaining photographs Indicates how many photographs can still be
taken (this is an approximation).
5
White balance Symbol for white balance. The automatic
setting is shown.
Page 5
TRUST 610 LCD POWERC@M ZOOM
5
UK
Item Description Function
6
Zoom Indicator for the digital zoom. 1.0x = off.
7
Battery indicator Indicates the condition of the batteries.
8
Image Displays photographs in colour.
Table 5: LCD screen
4 Using the camera
4.1 Inserting an optional Smart Media Card
A Smart Media Card is not supplied with the camera. You can purchase these cards
separately to increase the number of photograph that the camera can save (see
figure 5).
1. Open the battery compartment on the bottom of the camera.
2. Hold the camera in front of you with the lens of the camera facing
downwards.
3. Insert the Smart Media Card into the camera with the copper section facing
upwards.
4. Press the card firmly into place.
Note: External card reader: Use the camera, not the card reader, to format the
card. The camera cannot process the FAT32 or NTFS formats.
Note: Make a backup before using Windows Explorer in Windows XP. This
program may alter your photographs and this cannot be undone.
Note: After taking a photograph, wait at least 10 seconds before opening the
battery compartment . If the camera is still writing data to the card when
the batteries are remove, all the photographs on the card may be
deleted.
Note: Hold the Smart Media Card by the edges. Avoid touching the gold
contacts. If you touch the gold contacts, clean them using a dry cloth to
remove any fingerprints.
4.2 Inserting the batteries
See figure 6.
1. Open the battery flap.
2. Insert the two AA batteries into the camera as shown above the battery
holder.
3. Close the battery flap again by pushing it sideways slightly and sliding it
closed.
4. The TRUST 610 LCD POWERC@M ZOOM is now ready for use.
Note: Only use non-rechargeable alkaline batteries or NiMH 1600 mA, or
higher, rechargeable batteries. Other types of batteries do not work
correctly in this came ra.
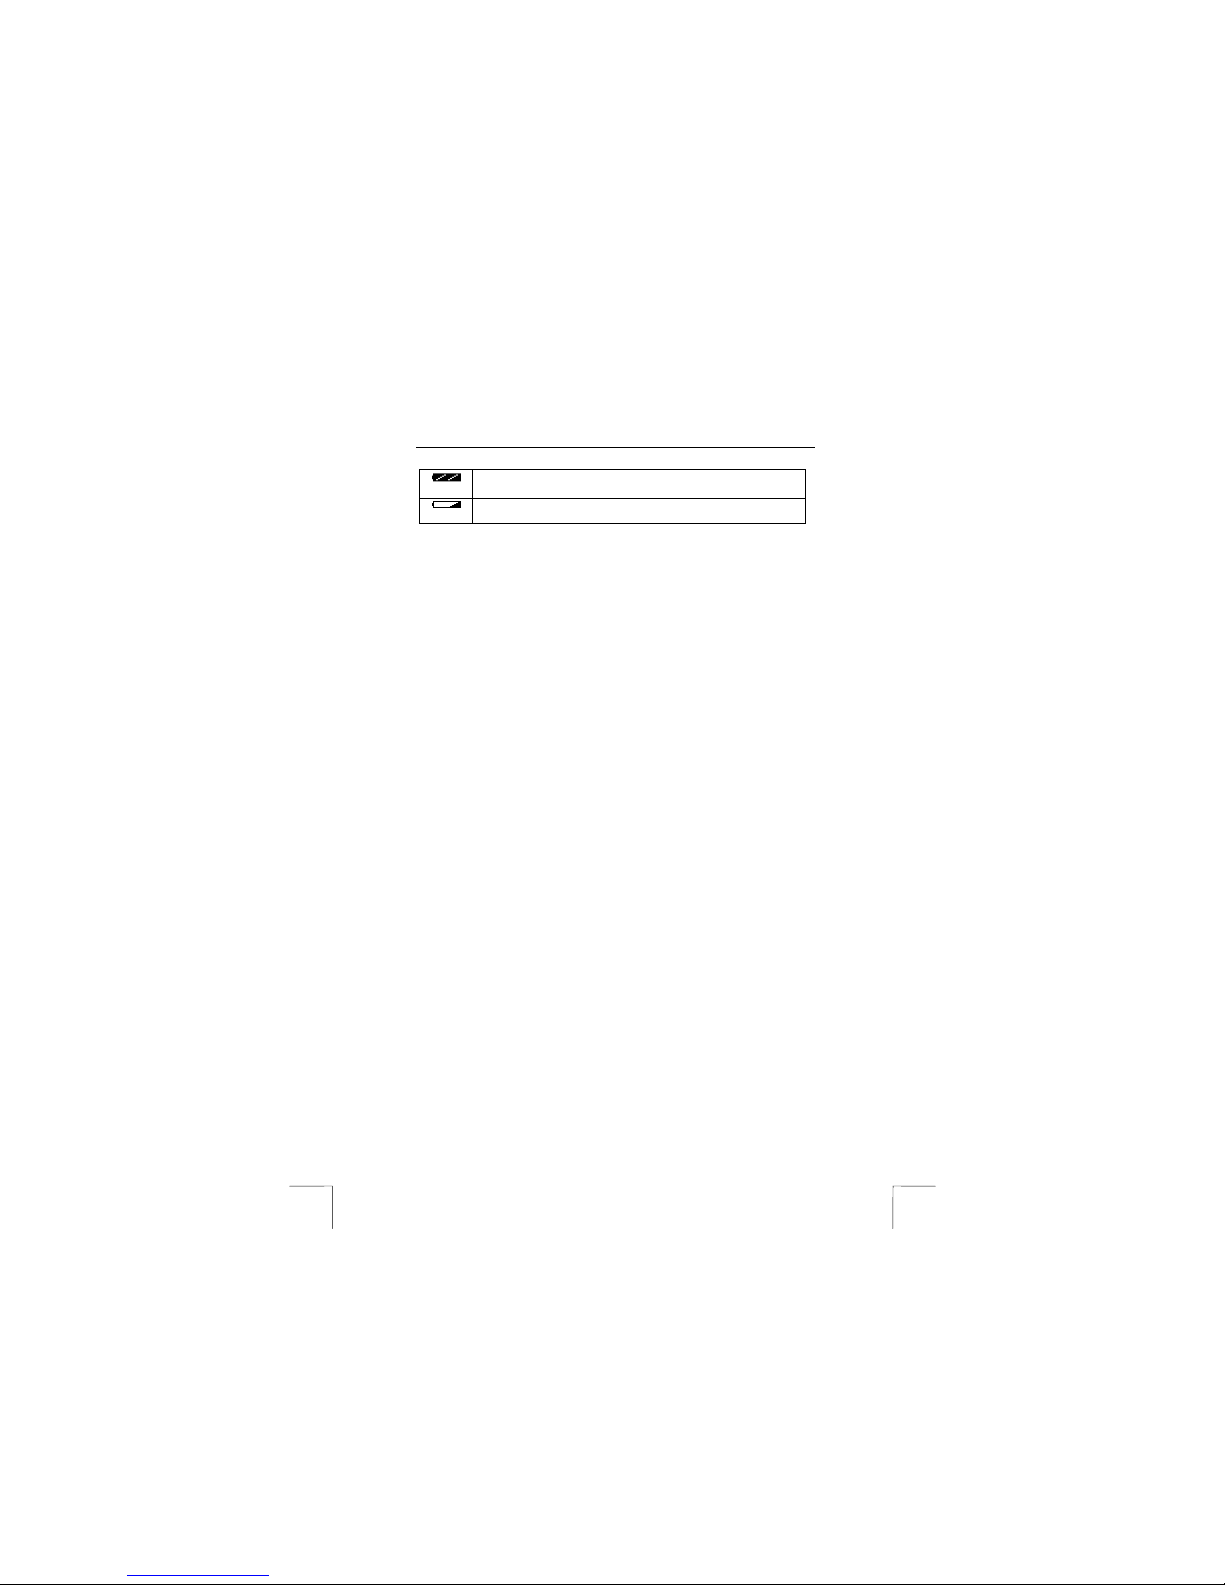
The battery condition is shown on the LCD screen (bottom left-hand corner) as
follows.
Page 6
TRUST 610 LCD POWERC@M ZOOM
6
The batteries are full.
The battery capacity is low. Only a few more photographs can be
taken.
Table 6: Battery conditions
4.3 Camera settings when using for the first time
4.3.1 Op ening the Set-up menu
See figure 2 on the first page of this instruction manual for this explanation. Most
settings are available on the LCD screen via the set-up menu. Open the menu as
follows.
1. Turn the camera on using button 3.
2. Turn the MODE switch (6) clockwise until it can no longer be turned. The
menu on the LCD screen (15) will be visible (see figure 7).
3. Press the DOWN button (11) or the UP button (10) until the setting you wish
to alter is selected.
4. Press the EXPOSURE button (7). The submenu for your selection will now
be visible.
5. If you accidentally select the wrong submenu, press the WB/DELETE button
(13) to return to the main menu.
6. Follow the on-screen instructions and the instructions given later in this
instruction manual to complete the settings.
7. Turn the MODE switch (5) to exit the menu.
4.3.2 Language
The menu can be displayed in various different languages. You can alter the
language as required.
1. Select ‘Language’ from the set-up menu (see 4.3.1). A list of possible
languages will be displayed.
2. Use the UP and DOWN buttons to scroll through the list until the desired
language is selected. You can choose from English, French, Spanish and
German (other languages may be available in the future).
3. Press the EXPOSURE button to confirm the selection. The menu will now be
displayed in the selected language.
Comment: Although the language can be altered, it has been assumed in this
instruction manual that the menu is displayed in English.
4.3.3 Internal clock
The camera has an internal clock. This clock is used to give the photograph files a
date, so that it can be worked out when the photograph was taken. Although the
clock continues to run when the camera is turned off, it may be necessary to reset
the time if the batteries are replaced. It is not necessary to set the clock in order to
take photographs.
1. Select ‘Date/Time’ from the set-up menu (see 4.3.1). The date and time will
be displayed.
2. Use the UP and DOWN buttons until the selected item has been set
correctly. In the 24-hour format, 3 o’clock in the afternoon is 15:00.
3. Press the EXPOSURE button to go to the next item.
4. Repeat points 2-3 until all the information is correct.
Page 7
TRUST 610 LCD POWERC@M ZOOM
7
UK
5. Press the LCD button (14, figure 2) to save the clock settings and exit the
submenu. The time has now been set.
4.4 Most used settings
4.4.1 LCD screen
The LCD screen can be turned off to save the batteries. You can also turn off the
menu items to have a better view of the image. The functions of the LCD button in
the DISPLAY mode are different to the functions in the PHOTO mode. The LCD
button is 14 in figure 2.
DISPLAY mode:
Press once to turn off the icons.
Press twice to turn off the icons and the background lighting for a longer battery life
span.
Press three times to return to the beginning. The icons and background lighting are
turned back on.
PHOTO mode:
The LCD screen is turned off when the camera is turned on in this mode.
Press once to turn the LCD screen on. The icons and background lighting are turned
on.
Press twice to turn off the icons.
Press three times to turn off the icons and the background lighting for a longer
battery life span.
Press four times to return to the beginning. The LCD screen is turned off to save the
batteries. Use the optical viewfinder to direct the camera.
4.4.2 Flash
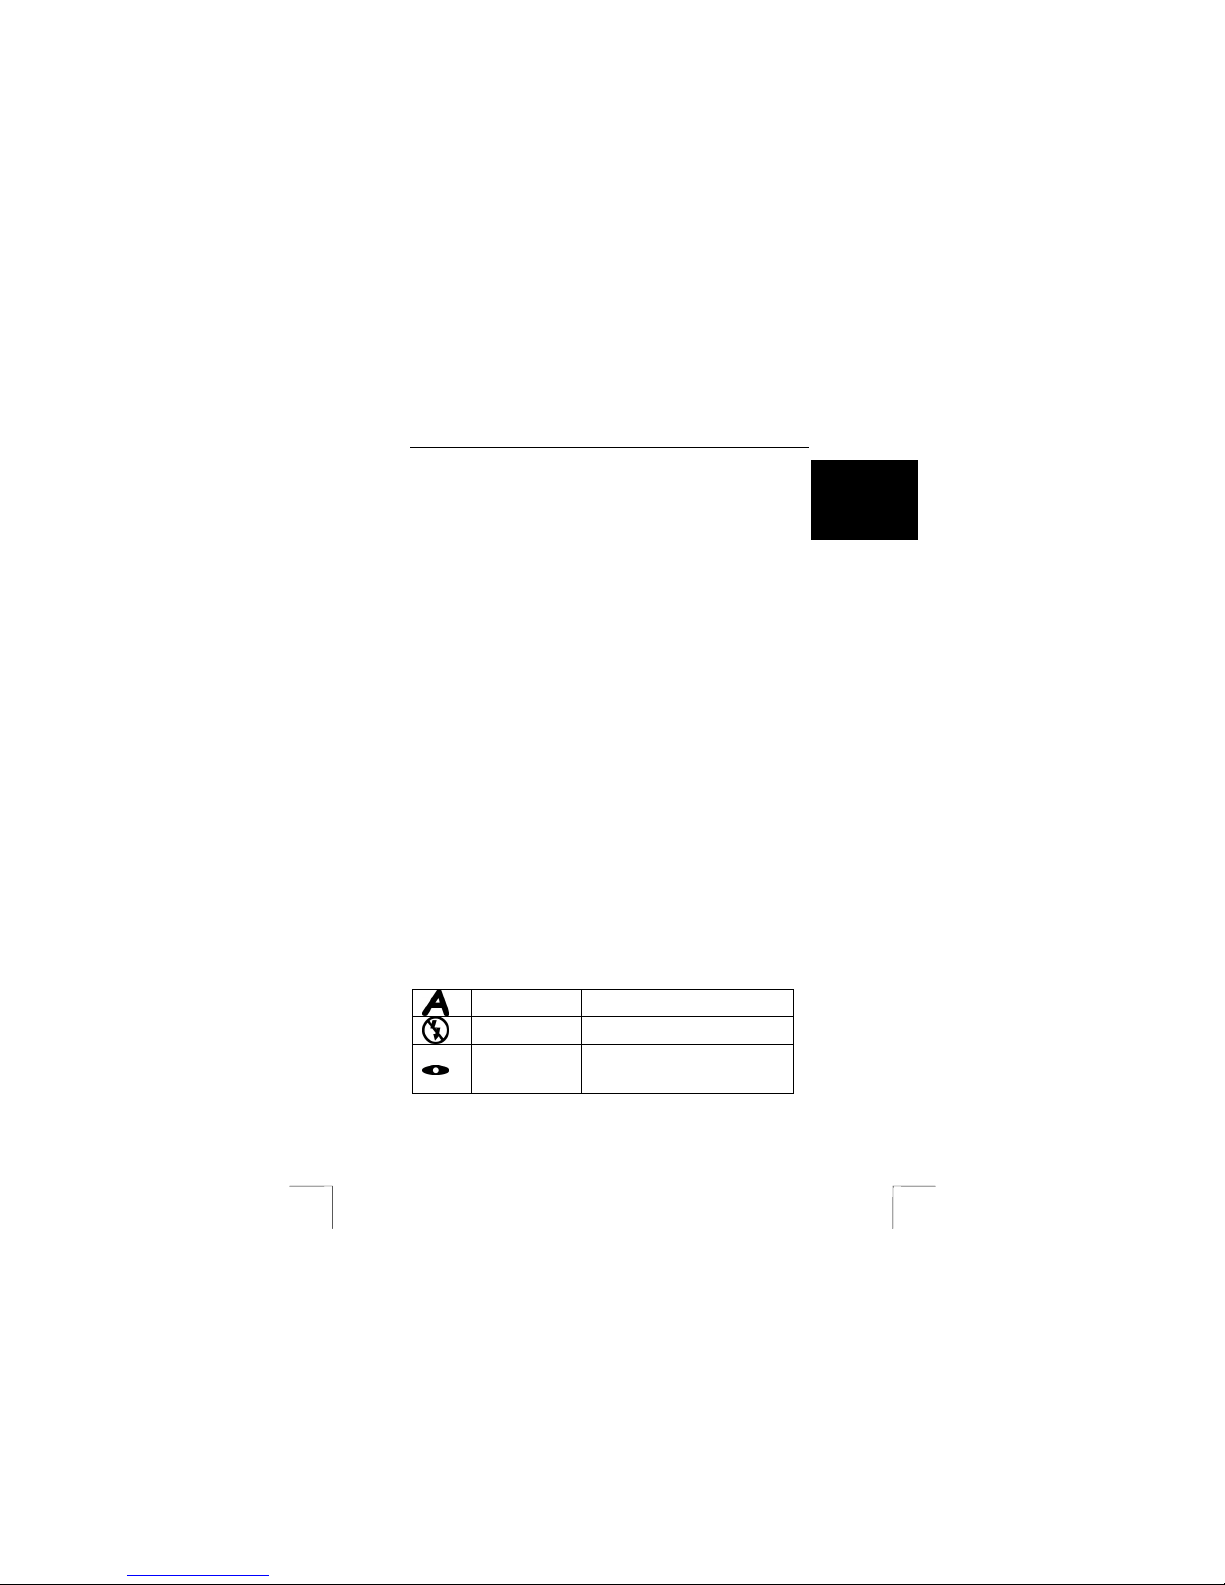
See figure 2 for this explanation. The flash settings are automatic, automatic + redeye reduction or off. Carry out the following to set the flash to automatic when there
is insufficient light to take a good photograph.
1. Turn the MODE switch (5) to the PHOTO position (red symbol).
2. Press the STROBE/COPY (12) button (12). The LCD screen (15) will be
temporarily turned off and the LED (2) will be lit orange to indicate that the
flash is being charged. It is not possible to take photographs whilst the flash
is being charged.
3. Wait until the LED becomes green. The camera is now ready for use.
4. Press the FLASH/COPY button again to turn on the red-eye reduction
function. In this position, the flash flashes three times to reduce the red-eye
effect. The flash setting can be seen in the LCD screen (see table 7).
5. Press the FLASH/COPY button again to turn the flash off.
Automatic flash The flash flashes once at maximum
intensity. This gives the best reach.
Never flash This is the default setting when the
camera is turned on.
Automatic flash
with red-eye
reduction
The flash flashes a number of times with
a weak intensity and then once at full
intensity. This reduces the chance of
people having red eyes in photographs.
Table 7: The different flash settings
Page 8

TRUST 610 LCD POWERC@M ZOOM
8
Tip: Using the flash will cause the batte ries to become empty more quickly,
because the flash uses a lot of energy. It is also possible that the
charging time will take longer the more the flash is used.
Tip: The flash is effective up to a distance of 3 metres from the camera. If
the subject is further away than 4 metres, the result is usually better if
the flash is switched off.
Tip: If the flash is set to automatic, you can check to see whether the flash
will go off. Aim the camera at the subject and press the exposure
button half way. If the LED is green, there is sufficient light and the
flash will not go o ff. The flash will go off if the LED is o range.
4.4.3 Digital Zoom
See figure 2. This function allows you to zoom up to 2 x on a subject in 5 steps when
taking a photograph. In the DISPLAY mode, you can zoom in on parts of a
photograph or display a number of photographs on the screen at once.
Zoom in: Press the right-hand side of the ZOOM button (4). The enlargement will
appear next to the magnifying glass symbol at the bottom of the LCD screen. The
following enlargements are possible: 1.0x (normal), 1.2x, 1.4x, 1.6x, 1.8x, and 2.0x
(maximum).
Zoom out: Press the left-hand side of the ZOOM button (4). If this button is pressed
first in the DISPLAY mode, then 4 photographs will be displayed. This is useful to
quickly scroll through the photographs.
Use the zoom in and zoom out buttons alternately to get a good view of the
photograph.
Note: The use of this function when taking photographs will slightly reduce the
quality.
Note: The effect is only visible on the LCD screen. The optical viewfinder can only
be used if the zoom is set to 1.0x.
4.5 Advanced settings and instructions
4.5.1 White balance
See figure 2. Not all light has the same colour. The light in a living room, for
example, is more yellow than daylight. The human eye automatically adjusts to this.
The camera has also been designed to do this. You can adjust the white balance
when this does not work (your photographs appear coloured). The white balance is
set to AUTO when the camera is turned on. This is usually the best setting. The
white balance is set manual as follows.
1. Check whether the camera is in the PHOTO mode (button 5, red symbol) and
the LCD screen has been turned on using the LCD button (14).
2. Press the WB/DELETE button (13) a number of times. The white balance
icon will be displayed at the bottom of the LCD screen.
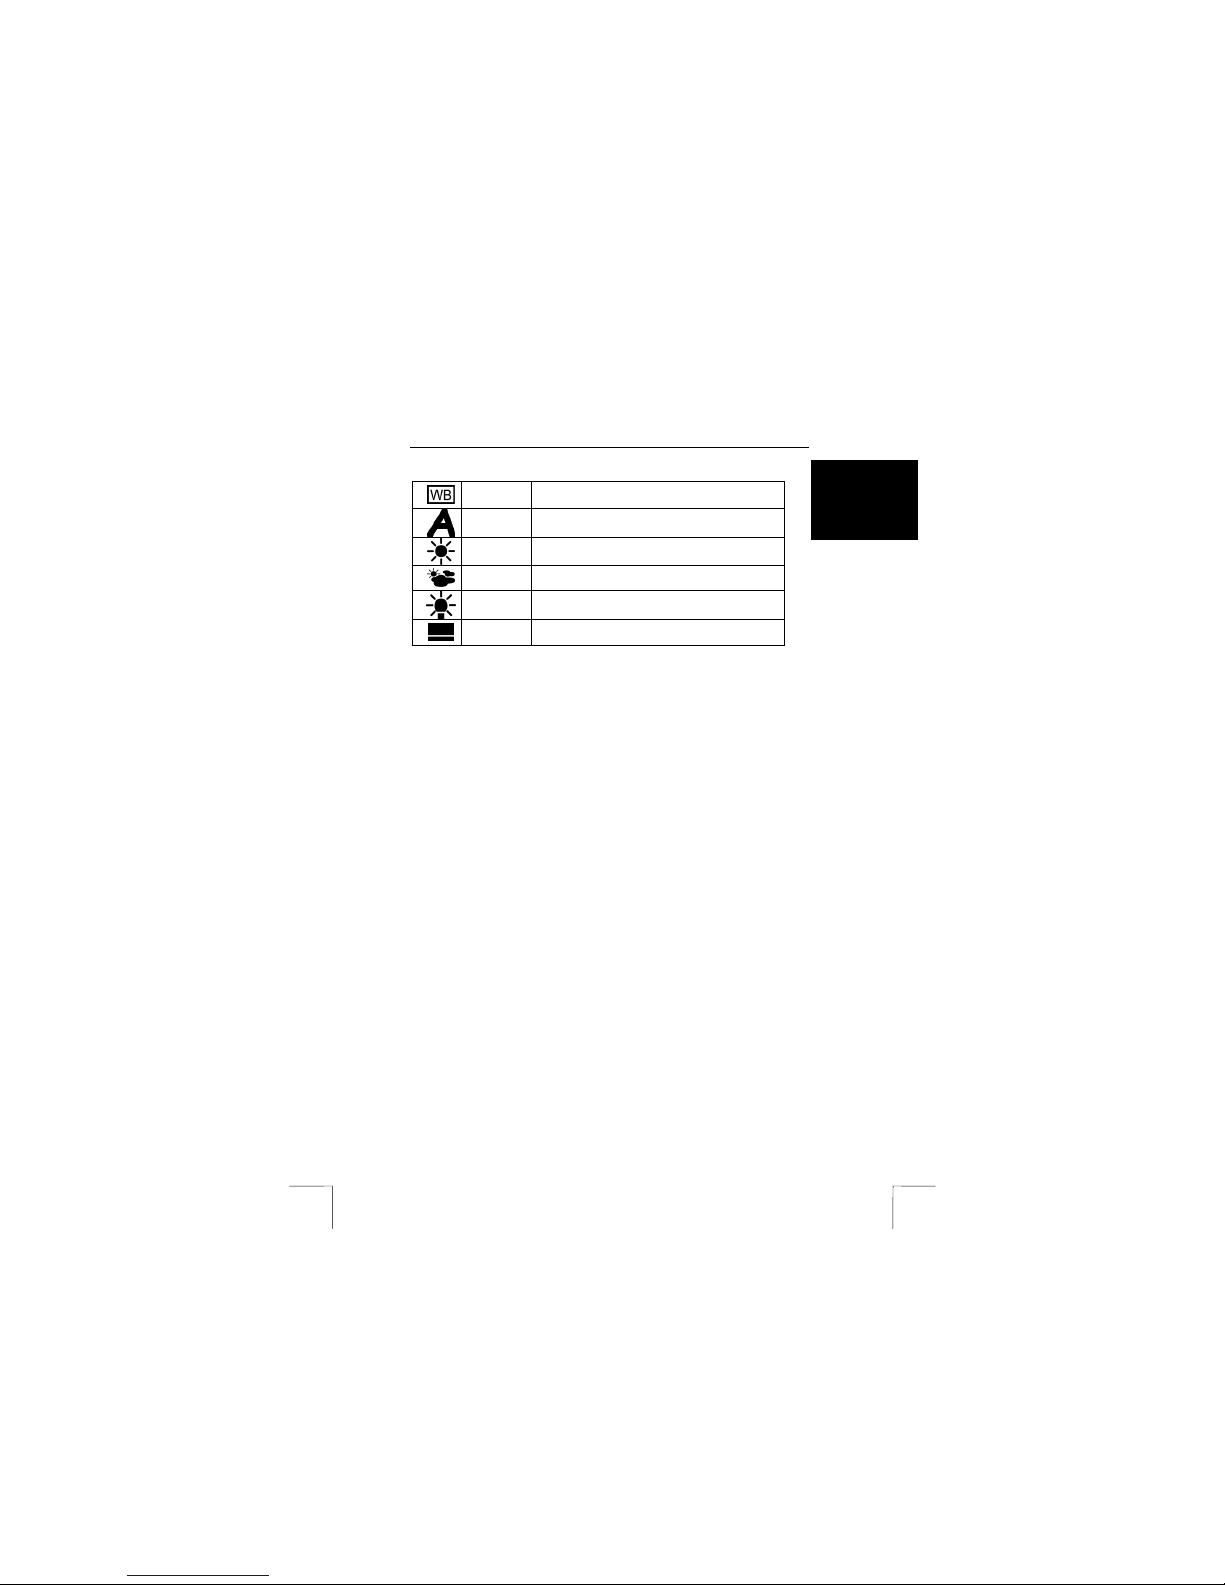
3. Select one of the options from table 8 depending on the surroundings in
which the photographs will be taken.
Page 9
TRUST 610 LCD POWERC@M ZOOM
9
UK
White
balance
Symbol for white balance. One of the symbols
below will be displayed ne xt to this symbol.
Automatic
Automatic. This is usually the best setting.
Daylight
Optimal for sunlight. Photographs are taken a bit
darker.
Shadow
For photographs in shadow. Photographs are
automatically made a bit lighter.
Indoor
lighting
For taking photographs indoors.
Fluorescen
t lighting
For taking photographs in fluorescent lighting, such
as in an office.
Table 8: The different white balance settings
Tip: The wrong setting will also lead to coloured photographs. The LCD screen
will only show an approximation of the result. You can correct coloured
photographs using Photo Express which is supplied with the camera.
Note: You can only use these settings in the PHOTO mode. When in the
DISPLAY mode, the WB button is the delete function!
4.5.2 Memory card or inte rnal memory
With the TRUST 610 LCD POWERC@M ZOOM, you can save photographs in the
internal memory or on an optional Smart Media Card. When it is turned on, the
camera will select to save photographs on the Smart Media Card, if one is available.
You can use the internal memory if the card is full. Choose between the internal
memory and the Smart Media Card from the menu as follows.
1. Open the ‘Storage Media’ item from the set-up menu (see 4.3.1). You can
choose from two different options: ‘Internal’ and ‘External’.
2. Press the DOWN button until the ‘Internal’ option is selected.
3. Press the EXPOSURE button to confirm your choice. The screen will flash
and you will return to the main menu. The selection has now been made.
You can choose to save photographs on the card in a similar way. To do so, select
‘External’ in point 2.
Note: This selection also alters the memory that the computer reads when you
connect the camera to a computer. Do not forget to delete ALL the
photographs from the camera when you are finished.
Tip: Instead of carrying out the instructions given above, you can also remove
the memory card from th e camera. This will result in the camera hav ing to
save photographs in the internal memory.
4.5.3 Resolution
You can take photographs in three different resolutions using the TRUST 610 LCD
POWERC@M ZOOM, namely 1600 x 1200, 1280 x 960 and 640 x 480. The default
resolution when the camera is turned on is 1280 x 960 (1.3M). Approximately 37
photographs can be taken in this resolution. Carry out the following if you wish to set
the camera to a higher or lower resolution.
1. Select ‘Quality’ from the set-up menu (see 4.3.1). A list of the possible
resolutions will be displa yed.
Page 10
TRUST 610 LCD POWERC@M ZOOM
10
2. Use the UP and DOWN buttons to scroll through the list until the desired
resolution is selected. Select a higher resolution for a better print result.
Select a lower resolution to increase the number of photographs which can
be saved in the camera.
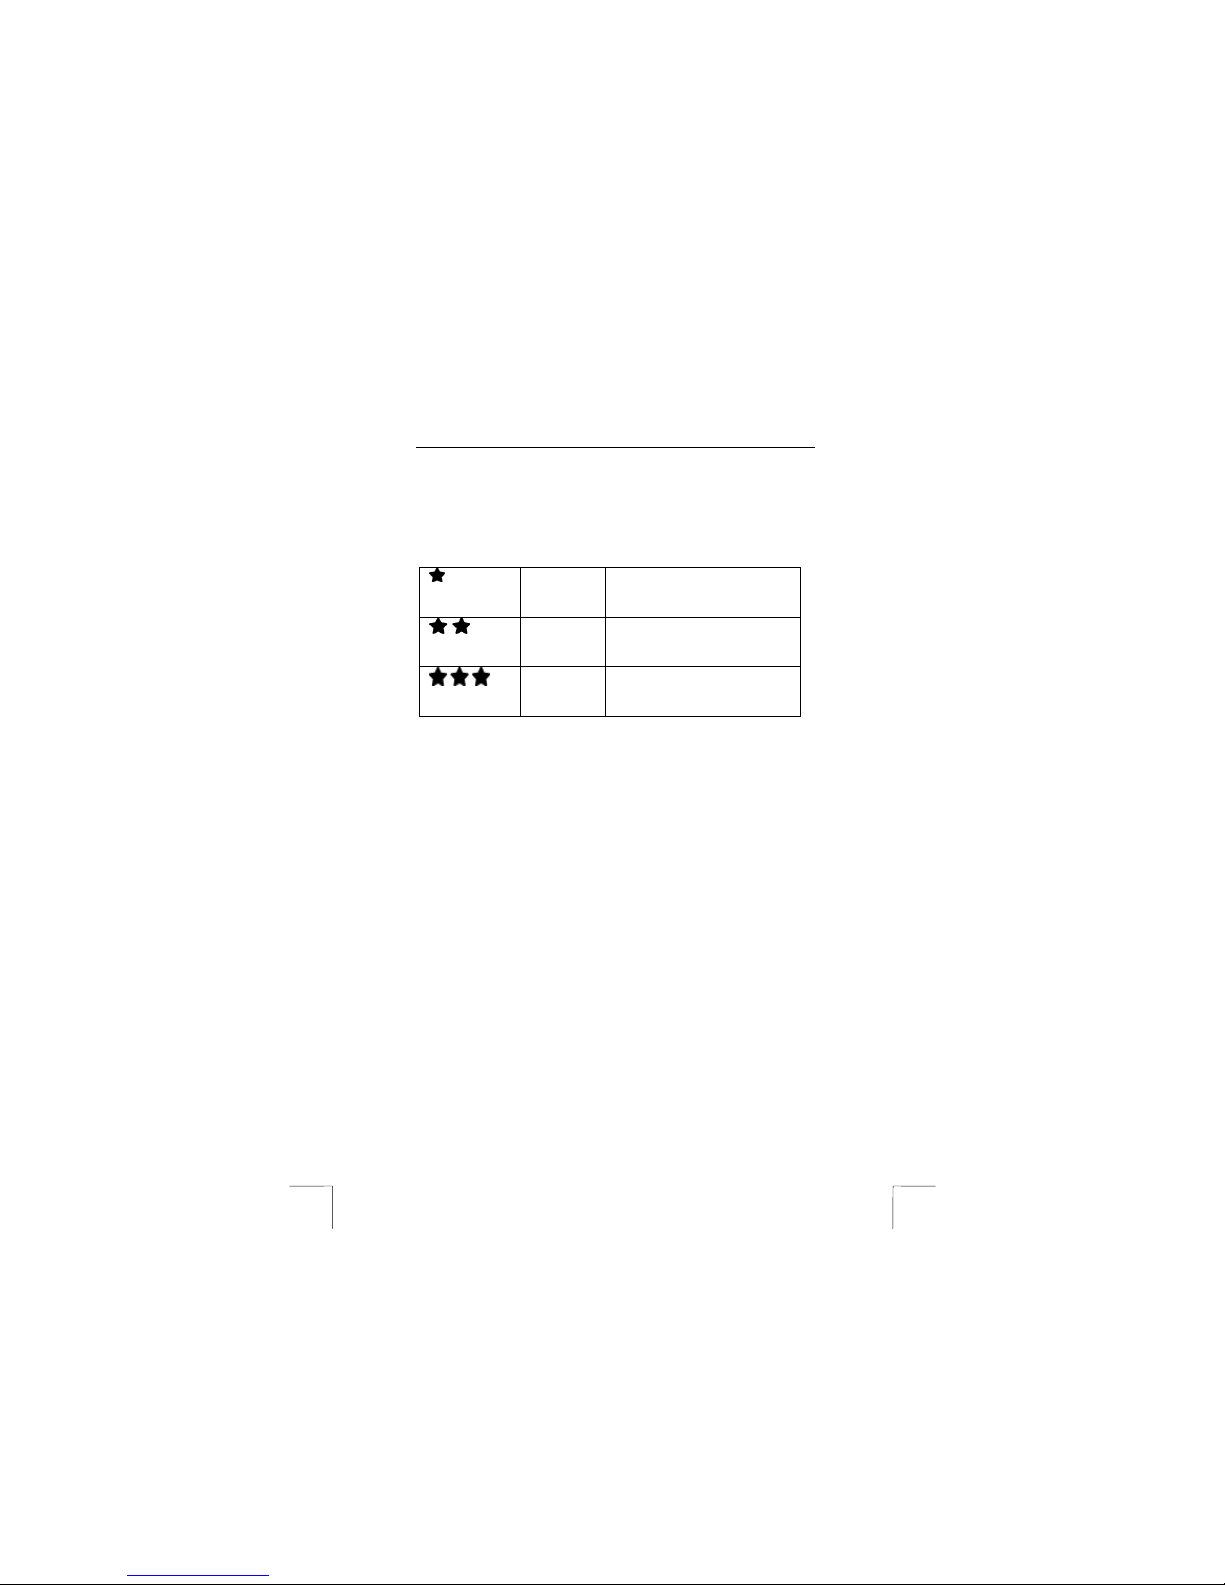
3. Press the EXPOSURE button to confirm the selection of the resolution. You
will return to the ma in menu. The resolution has now been selected and is
visible in the LCD screen (see table 9).
Low Resolution is 640 x 480 (VGA). The
maximum number of photographs
that can be taken is approximately
108.
Normal Resolution is 1152 x 864 (1M pixel).
The maximum number of
photographs that can be taken is
approximately 35.
Maximum Resolution is 1600 x 1200 (2.1M
pixel). The maximum number of
photographs that can be taken is
approximately 16.
Table 9: Summary of the symbols used for the quality of the photograph on the
LCD screen
4.5.4 Printing using DPOF
A DPOF compatible printer can read the memory card. You can, therefore, print
photographs without the use of a computer. This requires the use of a Smart Media
Card. This system works by adding extra information on the card, which is
recognized by the printer as instructions for printing the photographs.
1. Select ‘DPOF’ from the set-up menu (see 4.3.1). A list of the possible
resolutions will be displa yed.
2. Select ‘All images’ to give the instruction to print all the photographs. Select
‘Select Images’ to indicate for each photograph whether it should be printed.
3. Indicate how many copies of each photograph you wish to have printed. The
camera will attach an (in visible) identifying mark to the photographs, so that
the printer knows what must be printed.
4. Turn the ca mera off.
5. Remove th e memory card from the camera
6. Insert the memory card into your DPOF compatible printer (see the instruction
manual provided with your printer for more information).
Tip: Use the ‘Copy’ function from the Set-up menu to transfer photographs in the
camera’s internal me mory to the Smart Media Card.
4.6 Taking photographs
4.6.1 First photograph
Comment: To save the b atteries, the camera will turn off aut omatically when it
has not been used for 3 minutes
See figure 2.
1. Turn the camera on using the ON/OFF button 3.
2. Open the protective lens cover using the button (7, figure 1) on the front of
the camera.
Page 11

TRUST 610 LCD POWERC@M ZOOM
11
UK
3. Place the MODE switch (6) in the PHOTO position. The LCD screen (15) will
still be turned off.
4. You can turn on the LCD screen by pressing the LCD button (14) or you can
use the viewfinder (1). If the LCD screen is used, all the settings will also be
visible. See figure 8 for their meaning.
5. Look through the viewfinder or look at the LCD screen to get a good image of
the subject.
6. Press the EXPOSURE button (7) half way and keep it in this position. The
camera will adjust itself to the surrounding light conditions and then beep.
7. Fully press the EXPOSURE button. The photograph will now be taken. The
image on the LCD screen will disappear for a short period and the LED (2)
will flash.
8. The next photograph can be taken when the LED no longer flashes. The
photograph has been saved in the camera’s memory.
Note: Keep the glass of the lens clean. Use a cotton bud to clean the lens. If
necessary, use special cleaning liquid for camera lenses. Do not use
a different cleaning product.
Tip: The quality of the photograph depends on the surrounding light. More
light will result in a b etter picture.
Tip: The number of photographs that can be taken depends on the
number of details of the object to be photographed. The photograph
indicator on the LCD screen is an approximation.
Tip: The image viewed through the viewfinder may be slightly different to
what is recorded through the lens. You can use the LCD for greater
accuracy.
4.6.2 T aking photographs using the automatic exposure function
See figure 2.
1. You can take a photograph of yourself using the automatic exposure
function. You can also use it to take photographs at night without affecting
the sharpness of the image as a result of moving the camera.
2. Place the camera on the stand.
3. Turn the camera on using the ON/OFF button (3).
4. Open the protective lens cover (7, figure 1).
5. Select the AUTOMATIC EXPOSURE function using the MODE switch.
6. Direct the camera at the subject. If necessary, use the LCD screen.
7. Press the EXPOSURE button (3, figure 1) to activate the automatic
exposure. The came ra will make a slow beeping noise. The camera will start
to beep more quickly just before the photograph is taken. The photograph
has been taken when the camera no longer beeps.
4.6.3 T aking photographs with special effects
Many different special effects can be used using the software supplied with the
camera. Since the use of this software requires a certain amount of skill and time,
the camera has two special effects itself.
1. Check whether the camera has been turned on and the protective lens cover
has been removed.
2. Turn the MODE switch to the PRESET position (position 1, figure 4). The
LCD screen will be turned on. A menu will be displayed.
3. Press the UP or DOWN buttons until the desired special effect is visible.
Page 12

TRUST 610 LCD POWERC@M ZOOM
12
4. Press the EXPOSURE button to select the special effect. You will see the
special effect on the LCD screen and you can now take photographs. There
are two special effects. Monochrome: takes photographs in black-and-white.
Sepia: Takes photographs without colour with a brown tint. This gives the
effect of very old photographs.
5. Turn the MODE switch to the PHOTO position if you wish to turn off the
special effect and continue taking normal photographs.
4.7 Viewing and deleting photographs
4.7.1 Deleting selected photographs
1. Make sure the camera is turned on.
2. Turn the MODE switch to the DISPLAY position. The LCD screen will be
turned on and the last photograph taken will be displayed.
3. Press the W B/DELETE button to select the DELE TE function. ‘Delete Pic’ will
be visible at the top of the LCD screen. The photograph displayed on the
LCD screen is now ready to be deleted. Be careful: deleted photographs
cannot be retrieved.
4. Press the UP or DOWN button until the photograph you wish to delete is
displayed.
5. Press the EXPOSURE button to delete the photograph. The camera will be
busy for a number of seconds whilst it deletes the photograph. The next
photograph will then be visible.
6. Press the EXPOSURE button again to delete this photograph.
7. Press the WB/DELETE button when you have finished deleting the
photographs you wish to delete. You will now return to the DISPLAY mode.
8. You have now completed deleting photographs. You can turn the camera off
or continue using the camera.
4.7.2 Deleting all the photographs
Note: Deleted photographs cannot be retrieved. You photographs will be
deleted for good after carrying out the instructions given below.
1. Select ‘Format/Delete’ from the set-up menu (see 4.3.1).
2. Use the UP or DOW N button to select ‘Delete All’.
3. Press the EXPOSURE button. A warning will be displayed.
4. Use the UP or DOWN button to select ‘Yes’.
5. Press the EXPOSURE button. The camera will be busy for a number of
seconds. All the photographs will now be deleted.
6. You have now completed deleting photographs. You can turn the camera off
or continue using the camera.
Tip: You can also select ‘Format’ instead of ‘Delete All’. The result will be
the same, i.e. all the photographs will be deleted. It takes longer to
format the memory. Formatting is recommended when using a new
memory card or if the memory card can no longer be used.
Page 13

TRUST 610 LCD POWERC@M ZOOM
13
UK
5 Installing the software
5.1 Removing old drivers and devices
The most common cause of faults during installation is the presence of a driver for a
similar, old device. The best solution is to first remove all drivers related to old
devices before installing the new driver. Make sure you only delete programs for old,
unused (similar) devices.
1. Enter the Windows ‘Safe Mode’ (press F8 when starting Windows and then select
‘Safe Mode’ from the menu which will be displayed).
2. Click on ‘Start – Settings – Control Panel’ and double-click on the ‘Add/Remove
Programs’ icon.
3. Find all the programs for similar, old devices and remove these by clicking on the
‘Add/Remove’ button. When in the ‘Safe Mode’, it is possible for some programs
to appear twice. In that case, remove all the programs which appear twice.
4. Restart the computer.
5.2 Installing the driver in Windows 98SE / Windows ME /
Windows 2000 / Windows XP
Tip: The latest driver can be downloaded from www.trust.com/13288. Check
whether a new driver is available and use this for the installation. The
current version of the driver is included on the Trust Installation CD-ROM.
Tip: For Windows ME, Windows 200 and Windows XP (also for MAC OS 9.1
and later releases), you do not need any extra drivers to view
photographs on your computer. The storage system in the camera will be
visible in Windows as a ‘Removable Disk’. You will require drivers,
however, for the webcam function. The webcam function is not available
for MAC systems.
Note: Make sure all other programs are closed during the installation.
Note: During installation in Windows XP, you may receive a message saying
that the driver has not been signed. This does not cause a problem for
the functionality.
Note: In the example, ‘D:\’ is used to indicate the CD-ROM drive. This may be
different for your computer.
1. Insert the CD-ROM into your computer’s CD-ROM drive. The installation
program will start automatica lly. If it does not start automatically, carry out
the following:
a) Select ‘Run’ from the Start menu.
b) Type [D:\SETUP.EXE] and click on 'OK' to start the Trust Software
Installer.
2. The Trust Software Installer window will appear (see figure 9).
3. Select the language you wish to use for the installation.
4. Click on ‘TRUST 610 LCD POWERC@M ZOOM‘ to start the installation of
the camera.
5. Follow the on-screen instructions.
The installation of the driver and software for the TRUST 610 LCD POWERC@M
ZOOM has now been completed. The installation of the other programs is described
later in this instruction manual.
5.3 Connecting the camera
1. Make sure your computer is turned on.
2. Turn the MODE switch to DISPLAY.
3. Connect the USB cable to the camera’s USB port (8, figure 2). Connect the
other end of the USB cable to your computer. Windows will detect and install
Page 14

TRUST 610 LCD POWERC@M ZOOM
14
the camera. Follow the on-screen instructions. The camera has been
connected correctly once all the windows are closed.
4. Remove the USB cable from the camera.
5. Turn the MODE switch to SETUP.
6. Reconnect the USB cable to the camera.
7. Windows will detect and install the webcam component of the camera. Follow
the on-screen instructions. The camera has been connected correctly once
all the windows are closed. It is now possible to download photographs from
the camera onto your computer and to use the camera as a webcam. See
chapter 8.1.1 for more information.
Tip: The above will also w ork without any batteries being inserted into the
camera.
5.4 Checking after the installation
After installing the device and the driver, the following are installed on your computer
and can be checked (connect the camera and turn it on).
‘Start – Settings – Control Panel’. Double-click on the ‘System’ icon and select the
‘Device Manager’ tab.
If used as a webcam:
- Imaging device – TRUST 610 LCD Powercam Zoom, Dummy driver
– TRUST 610 LCD Powercam Zoom, WDM Bulk Driver
– TRUST 610 LCD Powercam Zoom, WDM Video Capture
If used to download photographs:
- Disk drives – Sunplus SPCA 533 / TRUST 610 LCD
Note: The information given above will vary when the installation has been
altered by the user (for example, not everything has been installed or
locations other than the default locations have been selected). Deviations
may also occur as a result of using new drivers available on the Internet.
Page 15

TRUST 610 LCD POWERC@M ZOOM
15
UK
6 Installing the application software
A number of different applications are supplied with the camera. These applications
do not have to be installed to use the camera. However, it is recommended to install
these programs in order to use all the extra options available with the camera.
Note: Make sure all other applications are closed during the installation.
6.1 Photo Express
Photo Express 4.0 is an application that can be used to load and edit the
photographs on your PC which you have taken using your TRUST 610 LCD
POWERC@M ZOOM. This program requires 500 MB free hard disk space. Follow
the instructions below to install Photo Express 4.0. This installation can take longer
than 10 minutes.
1. Start the Trust Software Installer (see figure 9).
2. Select ‘Photo Express’.
3. Select the language you wish to use.
4. Follow the on-screen instructions.
6.2 Photo Explorer
Ulead Photo Explorer 7 is a program which you can use to organize your
photographs. Simple processes can be carried out, such as rotating, printing and
viewing the photographs. Photo Explorer is useful if you wish to download
photographs and save them on your computer. Follow the instructions below to
install Photo Explorer 7.0.
1. Start the Trust Software Installer (see figure 9).
2. Select ‘Photo Explorer’.
3. Select the language you wish to use.
4. Follow the on-screen instructions.
6.3 COOL 360
COOL 360 is an image editing program that can be used to change the photographs
you have taken using the TRUST 610 LCD POWERC@M ZOOM into panoramic
photographs. Follow the instructions below to install COOL 360.
1. Start the Trust Software Installer (see figure 9).
2. Select ‘Cool 360’.
3. Follow the on-screen instructions.
6.4 DVD Picture Show
This program should only be installed if your computer has a CD-writer or a DVDwriter. DVD Picture Show allows you to transform your photographs into a slideshow
which can easily be played using a DVD player. In order to enjoy maximum use of
this application, you require a CD-RW or DVD-writer and a DVD player. Not all DVD
players are able to read DVD’s or CD-R disks which you have made yourself. If in
doubt, see the instruction manual provided with your DVD player.
1. Start the Trust Software Installer (see figure 9).
2. Select ‘DVD Picture Show’.
3. Select the language you wish to use.
4. Follow the on-screen instructions.
Page 16

TRUST 610 LCD POWERC@M ZOOM
16
7 Using the software
7.1 Obtaining images from the camera
7.1.1 Downloading photographs from the camera
The TRUST 610 LCD POWERC@M ZOOM is visible in Windows (and also MAC
OS) as an extra removable disk. Its use is as easy as moving a file. In contrast to
other cameras, this camera, therefore, does not require a separate (TWAIN) driver.
Download photographs using ‘File – Open’ or copy them to your hard disk.
Tip: You can use Photo Explorer to make it easier to download and
organize your photographs.
1. Take some photographs.
2. Turn the MODE switch to the DISPLAY position.
3. Connect the camera to your computer’s USB port using the USB cable
provided.
4. Wait a couple of seconds. The computer will detect the camera and the LCD
screen will be turned off.
5. Open ‘My Computer’.
6. Search for ‘Removable Disk’ and open it. A folder entitled ‘DCIM’ will be
visible. If not, find a second ‘Removable Disk’ and open it.
7. Double-click on the ‘DCIM’ folder. A folder entitled ‘100pmdsc’ will now be
visible.
8. Double-click on the ‘100pmdsc’ folder. The photograph files will now be
visible.
9. Copy all the photographs to a suitable location on your hard disk (for
example C:\My Pictures).
10. You can now edit these photographs as required.
7.1.2 Webcam function
This function is intended for recording live images and making short video clips with
the aid of a computer.
1. Turn the camera on, but do not connect it to the computer.
2. Turn the MODE switch to the SETUP position. The set-up menu will be
displayed. Once this menu is displayed, the camera will also be in the
webcam mode.
3. Connect the camera to your computer’s USB port using the USB cable. The
LCD screen will be turned off.
4. Start a video capture program. You can also use NetMeeting.
5. Open the ‘Video Source’ component. In this window, you can indicate that
the image must be read from the ‘Trust 610 LCD, WDM Video Capture’.
6. Once you have made the desired settings, click on ‘OK’. The moving video
image will now be visible.
7. You can now use the video image.
7.2 Ulead Photo Express
You can use this application to solve problems with the pictures, such as the red-eye
effect, coloured photographs, photographs which are too bright or too dark, remove
undesirable objects from the background, etc. You can also use this application to
design calendars and cards.
Follow the instructions given below:
1. Copy your photographs to your hard disk as described in chapter 7.1.1 or
7.3.
Page 17

TRUST 610 LCD POWERC@M ZOOM
17
UK
2. Click on ‘Start – Programs – Ulead Photo Express 4.0 SE – Ulead Photo
Express 4.0 SE’. Figure 1 0 will appear. You will be in the ‘Browse’ mode.
3. Find the folder containing your photographs in the left-hand side of the
window.
4. Click on this folder to view the contents. Your photographs will be visible in
the main window as thumbnails.
5. Select a photograph that you wish to edit and double-click on it. After a
couple of seconds, the photograph will become visible in the main window.
You can now edit the photograph.
6. Click on ‘Edit’ at the top of the window and select an option. The most
common options are included here.
7. Click on ‘Save’ after editing the photograph to save the finished result.
See this program’s instruction manual and Help function for more information.
Note: The photographs are saved in JPEG format to save space. JPEG
reduces the size of the file by removing small details from the
photograph. If you wish to edit the photographs during different sessions,
use a different file format to JPEG (for example, TIFF) to prevent the loss
of quality as a result of constant loading and saving in the JPEG format.
Note: Since editing cannot be undone, it is recommended to make a copy of
the photographs and to only edit the copies. You can then always return
to the original photographs. It is strongly recommended to make a back
up on a CD-ROM using a CD-writer for protection against computer
faults.
7.3 Ulead Photo Explorer
You can use Ulead Photo Explorer 7.0 to easily download photographs onto your
computer. A short description of how to use Photo Explorer is given below. For a
detailed description of Photo Explorer, see the program's Help function. Follow the
instructions below to use the Trust 610 LCD POWERC@M ZOOM in Photo Explorer.
1. Turn the MODE switch to the DISPLAY position (green symbol).
2. Connect the camera to the computer using the USB cable.
3. Start Ulead Photo Explorer.
4. The main window will appear. The 'Set-up Internet Connection' window may
also appear. Click on the 'Skip for now' button to close this window if it
appears. The Trust camera will be visible as a ‘Removable disk’ in the list on
the left-hand side of the window.
5. Double-click on this. The ‘DCIM’ folder will be visible.
6. Double-click on this. The ‘100pmdsc’ folder will be visible. This folder
contains your photographs.
7. Double-click on this. Your photographs will slowly become visible. The
window will now look like figure 11.
8. Click on one of the thumbnails in the main window to edit, print, etc. the
photograph. Note: you will edit the original photograph and changes cannot
be undone.
9. Use the ‘Digita l Camera Wizard’ (8
th
option from the left, camera symbol) to
transfer your photographs to your computer. You will have to use the
‘Configure..’ button once to indicate where the photographs must be saved
and whether these must be renumbered.
10. See the program’s Help function for more information.
Note: For more detailed information about Ulead Photo Explorer, see this
program’s detailed instruction manual. You can open this from
D:\Software\UleadPE7\Manual.
Page 18

TRUST 610 LCD POWERC@M ZOOM
18
Note: The program has the option to publish the photographs on the Internet (if
you have a connection to the Internet). This is useful if you wish to show
your photographs to friends. Remember that anybody will then be able to
see your photographs and the company that administers the site has the
right to use your photographs in advertisements. This is also often the
case with other photograph sharing websites and is partly the reason
that they are free. Read the conditions for use. Photograph share sites
such as www.pbase.com and www.photo.net do not use your
photographs for advertisements or other uses.
7.4 DVD Picture Show
You can use DVD Picture Show to easily transform your photographs into a
slideshow. This slideshow can then be viewed on your television. You need a CDwriter or a DVD-writer in order t o make the CD-ROM’s. You will also need a DVD
player.
1. Start the program (Start – Programs - DVD Picture Show Basic SE - DVD
Picture Show Basic SE).
2. A window will appear once in which you must input the country you are
located in or the video system. Select the bottom option and then select
‘PAL’.
3. Click on 'OK'
4. In the following window, select ‘Next’. A choice menu for the slideshow will
now be displayed. This window will be empty the first time you use the
program.
5. Click on ‘New Slide Show’ to create your first presentation. A new window will
appear in which you can select the photographs and background that you
wish to use for the presentation (see figure 12).
6. Follow the on-screen instructions and, if necessary, use the Help function
(F1). Pay attention to the size of the file: the maximum size for a CD-ROM is
approximately 600 MB.
7. Once you have finished, you can save the slideshow on a CD-ROM or DVD
using the program Disc Image Recorder (Start - DVD Picture Show Basic SEDisc Image Recorder).
7.5 COOL 360
Use this program if you wish to join several photographs together to make a
panoramic photograph. For instructions on how to use COOL 360, please refer to
the instruction manual
included on the CD-ROM. The manual can be found at the following location:
D:\Software\Cool360\Manual\C360.pdf
Acrobat Reader must be installed on your computer to be able to read this manual.
7.6 Using the camera as a webcam (NetMeeting)
NetMeeting is not provided with the camera. This is included with your version of
Windows. You can download the latest version of NetMeeting by going to
www.microsoft.com and searching under the headwords ‘download netmeeting’.
1. Make sure you have an Internet account installed and your speakers and
microphone are connected before starting NetMeeting.
2. Start NetMeeting (Start -> Programs -> Accessories -> Internet Tools ->
NetMeeting).
3. Two windows will be opened, namely NetMeeting and your Dial-up
connection.
Page 19

TRUST 610 LCD POWERC@M ZOOM
19
UK
4. Fill in your user na me and password and click on 'Connect' to connect to the
Internet. A ‘Dial Up Connection’ window will appear if you use an external
gateway, a cable modem or ADSL.
5. Once a connection has been made with the Internet, only the NetMeeting
window will remain visible. The ‘Dial-up Connection’ window will disappear.
6. A number of settings should be made only once.
Go to ‘Tools -> O
ptions…’ and click on the ‘Video’ tab.
7. To prevent a mirror image of your camera, do not select
‘Show mirror image in preview video window’. Image settings, such as the
image size and quality, can also be changed in this window. Click on 'OK' to
save the new settings and return to the start window of NetMeeting. The
once-only settings have now been completed.
8. Click on 'View' in the NetMeeting window and select the 'My Video (New
Window)' option. An extra window ('My Video') will now be opened.
9. Click on the ‘Play’ button (
) to turn on your current video image. This
image will also be seen by the person you make a NetMeeting connection
with.
10. You are now ready to make a NetMeeting connection. Click on NetMeeting’s
telephone book icon. A new window will appear.
11. In the address bar, type an ‘ils server name’ (for example, ils.worldonline.nl)
and click on ‘Enter’.
12. Double-click on a person in the list. A NetMeeting connection will be made.
The person may not wish to make a connection with you, because this person may
be communicating with somebody else. If this is the case, select somebody else
from the list. You can f ind other ‘ils servers’ on the Internet. An e xample is
http://www.netme etinghq.com. For more information or solutions to problems, click
on ‘Help’ in NetMeeting’s start window. This contains a description of all the
functions available with NetMeeting.
Note: When using NetMeeting, you may contact people who have different
options to yourself. Do not allow children to use NetMeeting
unsupervised.
7.7 Webcam & Internet
The Trust 610 LCD POWERC@M ZOOM can also be used as a webcam, for
example, on your Internet page.
A number of informative sites about webcams are given below:
http://www.camarades.com
http://www.teveo.com
At these sites, you can download software that you can use to send live video
images over the Internet.
Please refer to the sites concerned for information on how to install and use the
software.
Page 20
TRUST 610 LCD POWERC@M ZOOM
20
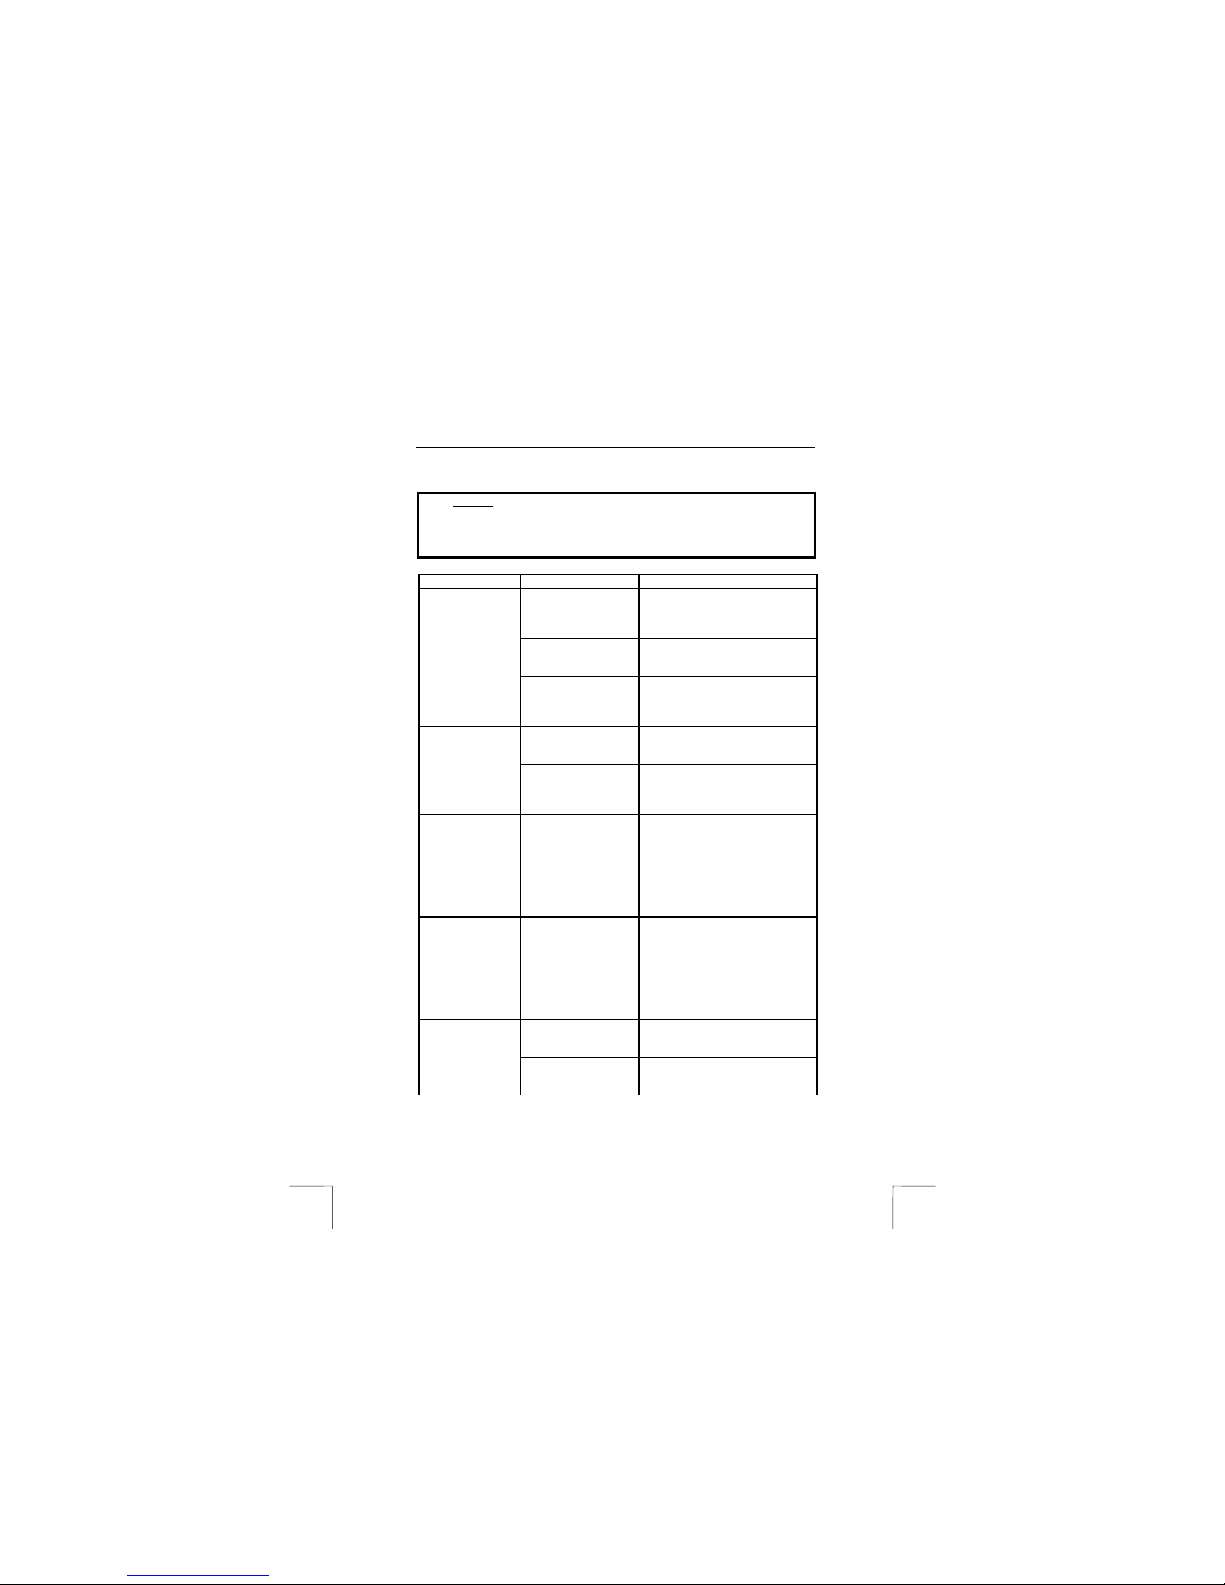
8 Troubleshooting
Method
1. Read the solutions given below.
2. Check for up-to-date FAQ’s, drivers and instruction
manuals on the Internet (www.trust.com/13288)
Problem Cause Possible solution
The computer's USB
port does not work.
Check the settings of your USB
port. For more inf ormation, see
www.trust.com/customercare/help/
usb.
The camera has not
been connected to a
USB port.
Connect the camera to a USB port.
Windows does
not detect a new
device after
connecting the
camera.
The camera has been
connected to a USB
hub which does not
have a power supply.
Connect the camera to a USB hub
which has a power supply or to a
USB port on your computer.
The camera has not
been connected to a
USB port.
Connect the camera to a USB port.
Error message
‘Capture device
was not detected’
is displayed.
The camera has been
connected to a USB
hub which does not
have a power supply.
Connect the camera to a USB hub
which has a power supply or to a
USB port on your computer.
The TRUST 610
LCD
POWERC@M
ZOOM is marked
with an
exclamation mark
‘!’ in the Device
Manager.
The camera has been
connected to a USB
hub which does not
have a power supply.
Connect the camera to a USB hub
which has a power supply or to a
USB port on your computer.
The TRUST 610
LCD
POWERC@M
ZOOM does not
work in
combination with
the TV/capture
card.
There is a conflict
between the camera
and the TV card.
Carry out the following:
1) Remove the TV Capture card.
2) Install the TRUST 610 LCD
POWERC@M ZOOM.
3) Install the TV capture card.
The batteries have
been inserted
incorrectly.
Reinsert the batteries (see chapter
4.2).
The camera does
not do anything.
Camera is still
connected to your
computer.
Disconnect the USB cable. The
camera cannot be operated when it
is connected to a computer.
Page 21
TRUST 610 LCD POWERC@M ZOOM
21
UK
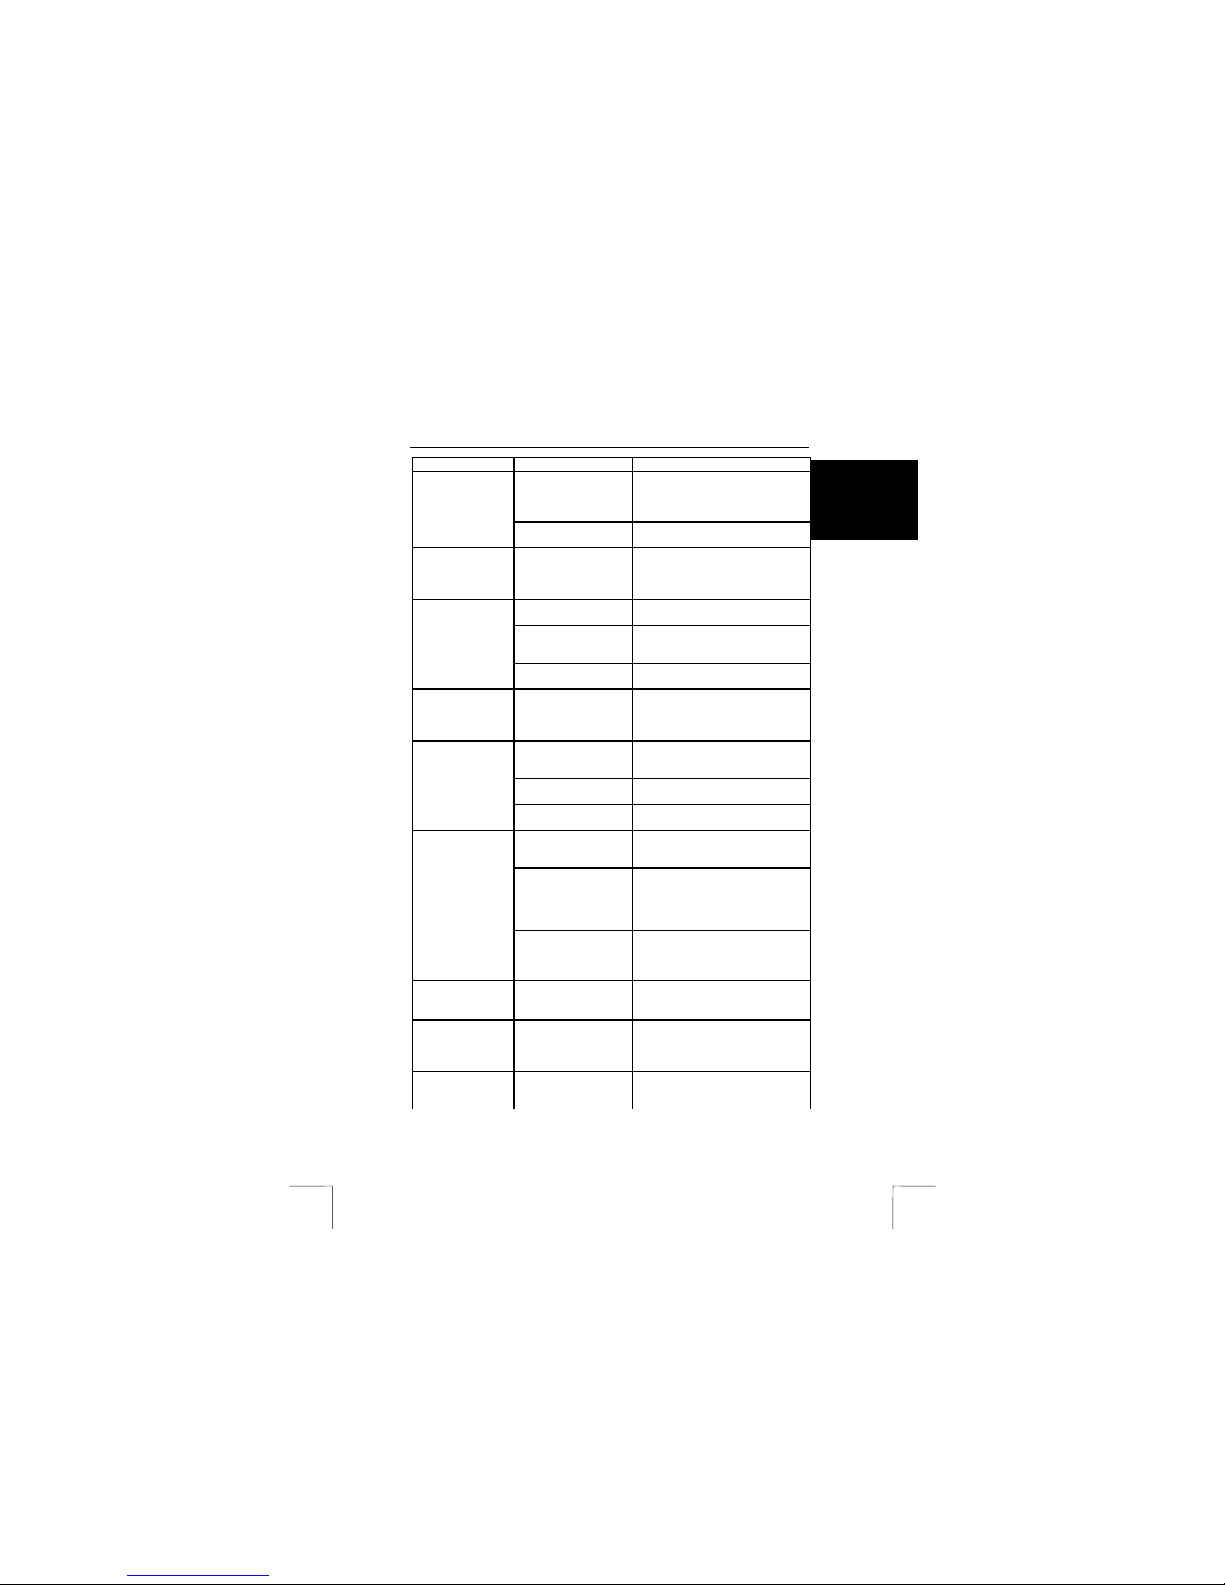
Problem Cause Possible solution
The camera is turned
off or is in the sleep
mode.
Turn the camera on or take it out of
the sleep mode by pressing the
MODE switch for a couple of
seconds.
The batteries are
empty.
Replace the batteries (see chapter
4.2).
The camera does
not react,
although the
batteries are full.
The camera must b e
reset.
Disconnect the USB cable and
remove the batteries from the
camera. Reinsert the batteries after
approximately 10 minutes.
NiCd batteries are
used.
Use Alkaline or rechargeable NiMH
batteries.
The camera has not
been used for more
than 3 minutes.
Turn the camera on again.
The camera
suddenly turns
itself off.
The power in the
batteries is low.
Replace the batteries.
The camera
cannot be turned
on or turns off
immediately.
The batteries are
empty.
Replace the batteries.
The camera was
moved when taking a
picture.
Try to hold the camera still or use
the stand.
The distance to the
subject is too small.
Increase the distance to the object
to be photographed.
The recordings
are not clear
(hazy).
There is insufficient
light.
Improve the lighting.
The automatic
exposure is still turned
on.
Turn the automatic exposure off.
The memory is full.
The photograph
indicator will flash ‘0 ’.
Transfer photographs to your
computer and delete the memory.
You can take many more
photographs using a Smart Media
Card. Ask your dealer.
No photograph is
taken when the
exposure button
is pressed.
The camera is still
busy saving the
previous photograph.
The LED flashes.
Wait until the LED stops flashing.
There is no
connection with
the computer.
The camera has been
connected incorrectly.
Reconnect the cables
The camera does
not give an image
in the application
(webcam).
Another application is
open and is using the
camera image.
Close the other application first
before starting the test program.
A live recording
gives a displaced
image and the
wrong colours.
An old version of
DirectX is installed.
Download the latest version of
DirectX from www.microsof t.com.
Page 22
TRUST 610 LCD POWERC@M ZOOM
22
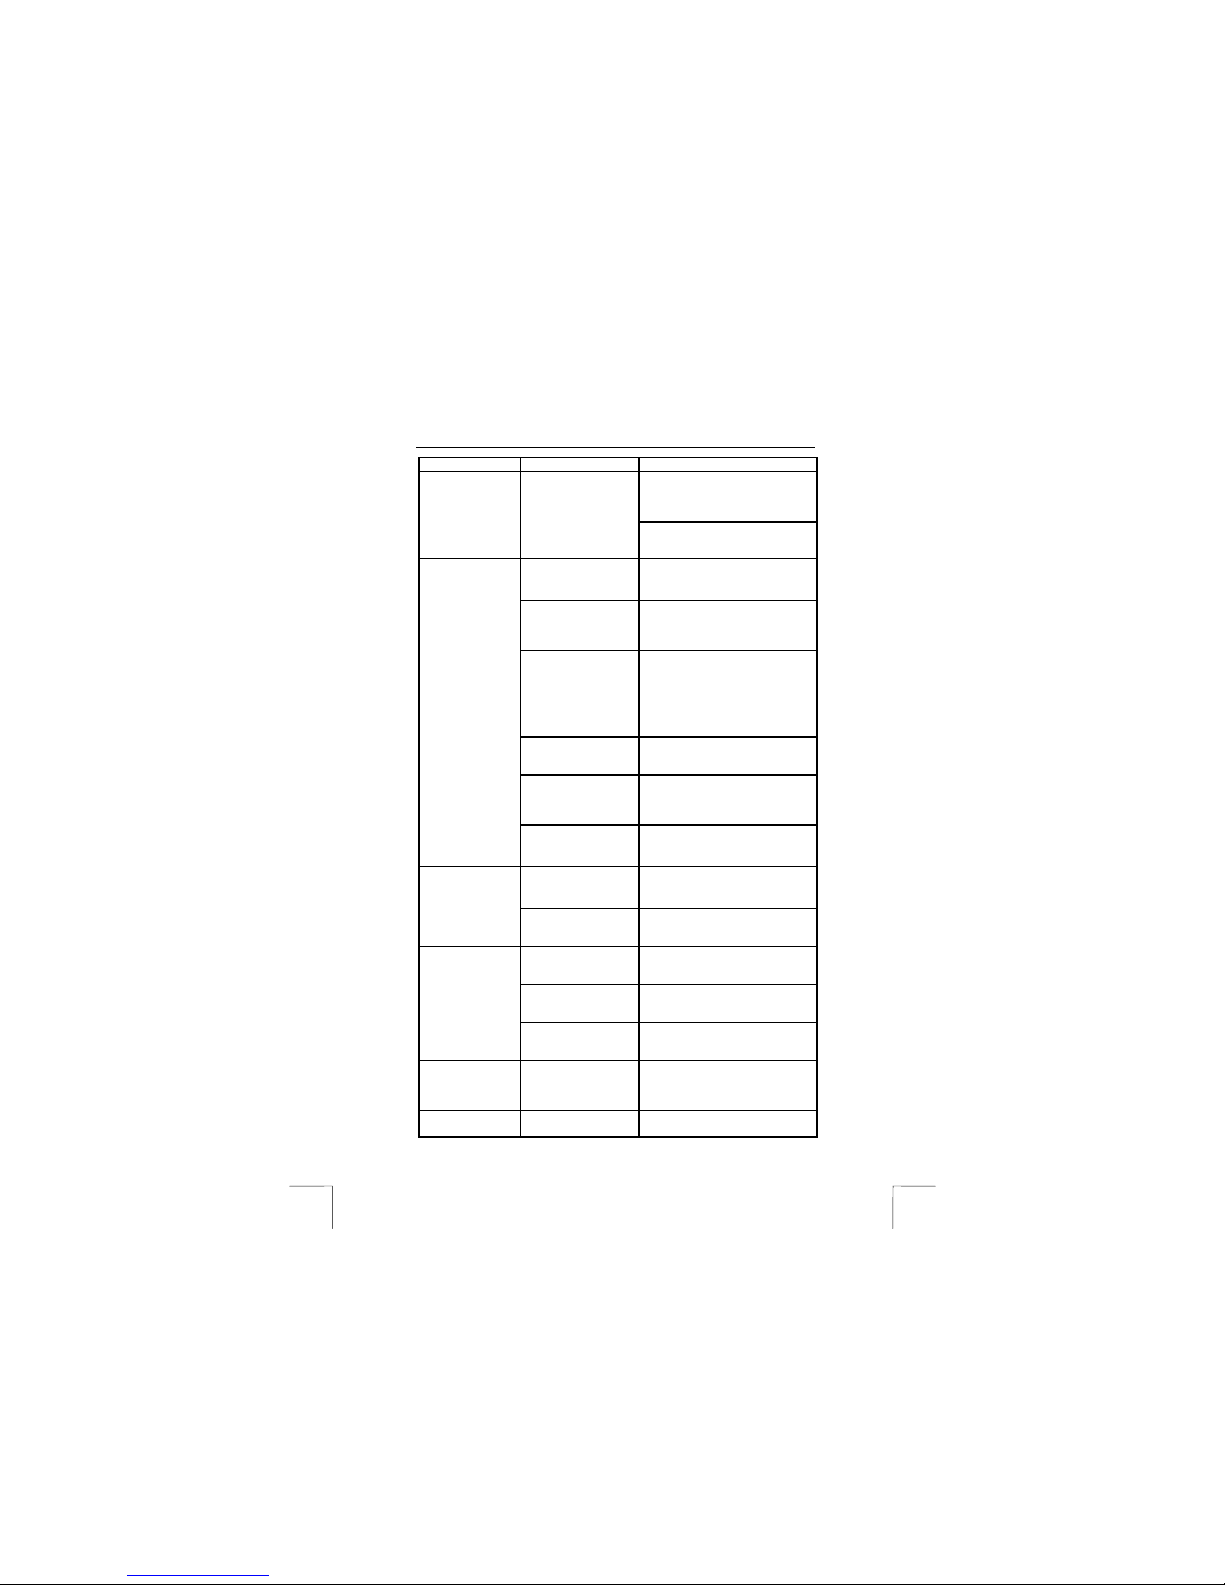
Problem Cause Possible solution
Set your VGA card to a lower
resolution and colour depth (for
example, 800 x 600 / 16 bits
colours).
If a too high VGA
resolution is used (for
example, 1600 x
1200), it is possible
that there is
insufficien t memory
for the video overlay.
Updating your VGA driver may also
solve the problem.
The white balance has
been incorrectly set on
the camera.
Set the white balance correctly
(see chapter 4.5.1).
The background
lighting is not white.
Alter the white balance (see
chapter 4.5.1). If this does not
help, use Photo Express to edit the
colour.
The monitor has not
been set correctly.
Compare the photograph to other
photographs (for example, on the
Internet) where you known the
colour is correct. Adjust your
monitor correctly (se e the
instruction manual provided with
your monitor).
The printer has been
set incorrectly.
If the photographs look good on
your monitor, check your printer
settings.
An inkjet printer has a
blocked ink cartridge.
See the instruction manual
provided with your printer for
instructions on how to test the
printer and solve any problems.
The photographs
are coloured.
The paper used is
unsuitable for printing
photographs.
Use original paper from your printer
manufacturer for the most reliable
result.
The photographs are
taken in dark
surroundings.
Make sure there is sufficient light
or use the flash.
There is noise in
the photographs
or the
photographs are
too dark.
The flash has been
used, but the distance
is too great.
Use the flash up to a distance of 4
metres. The flash cannot be used
for greater distances.
The flash has been
used in bright daylight.
The flash is not suitable for
providing additional lighting. Do not
use it in daylight.
The contrast in the
subject is too great.
Change the lighting or take the
photograph closer by or further
away.
The photographs
are overexposed.
The photographs were
taken in bright
sunlight.
Take photographs in the shadow or
try to adjust the white balance (see
chapter 4.5.1).
No more
photographs can
be taken.
The camera’s memory
is full. The recordin g
counter in the LCD
screen flashes.
Download the photographs onto
your computer and then delete
them all from the camera’s
memory.
The problem is
not listed here.
Check the Internet for
the latest update of
Go to
www.trust.com/customercare/help/
Page 23
TRUST 610 LCD POWERC@M ZOOM
23
UK
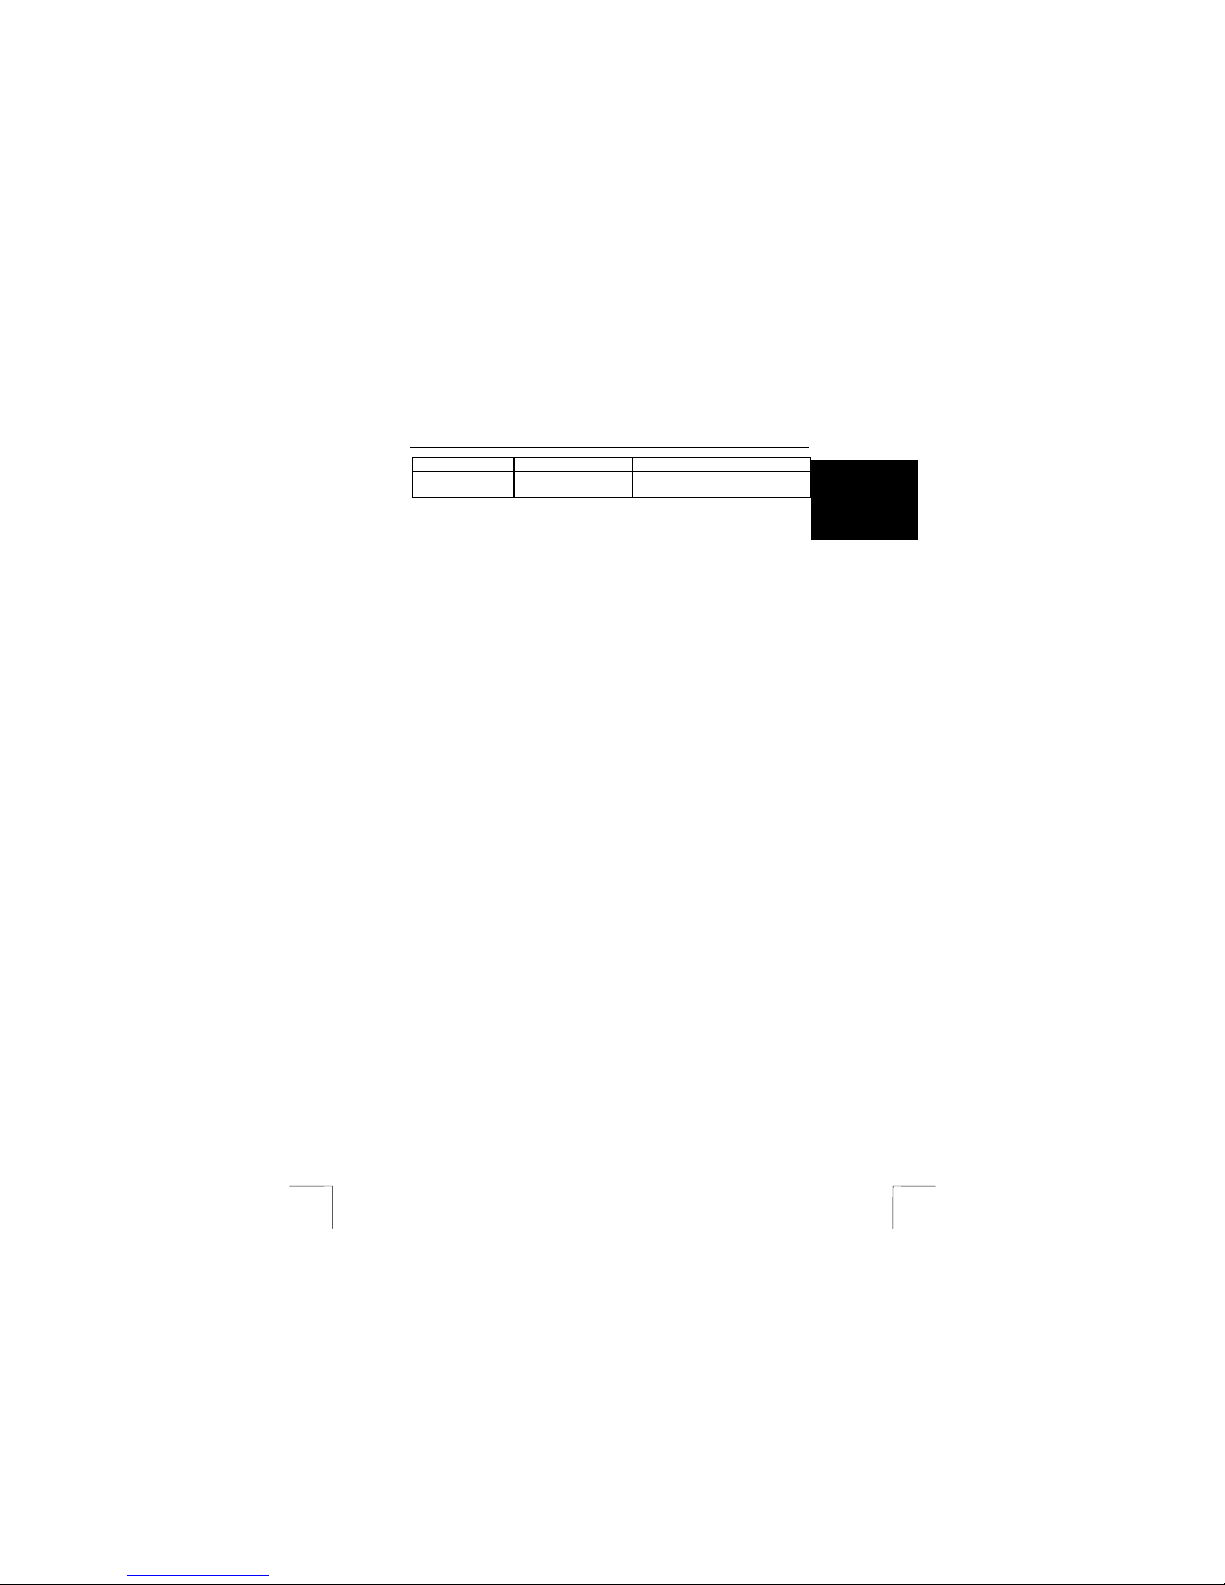
Problem Cause Possible solution
the camera
Troubleshooter.
camera
If you still have problems a fter trying these solutions, please con tact one of the Trust
Customer Care Centers. You can find more information at the back of this instruction
manual. Please have the following information available:
• The article number. This is 13288.
• A good description of what does not work.
• A good description of when the problem occurs.
• Information about your computer: the Windows version and the language.
• Information about other devices which have been installed or were previously
installed, such as scanners, other cameras, webcams, TV cards, video editing
devices, etc.
 Loading...