

Page 1
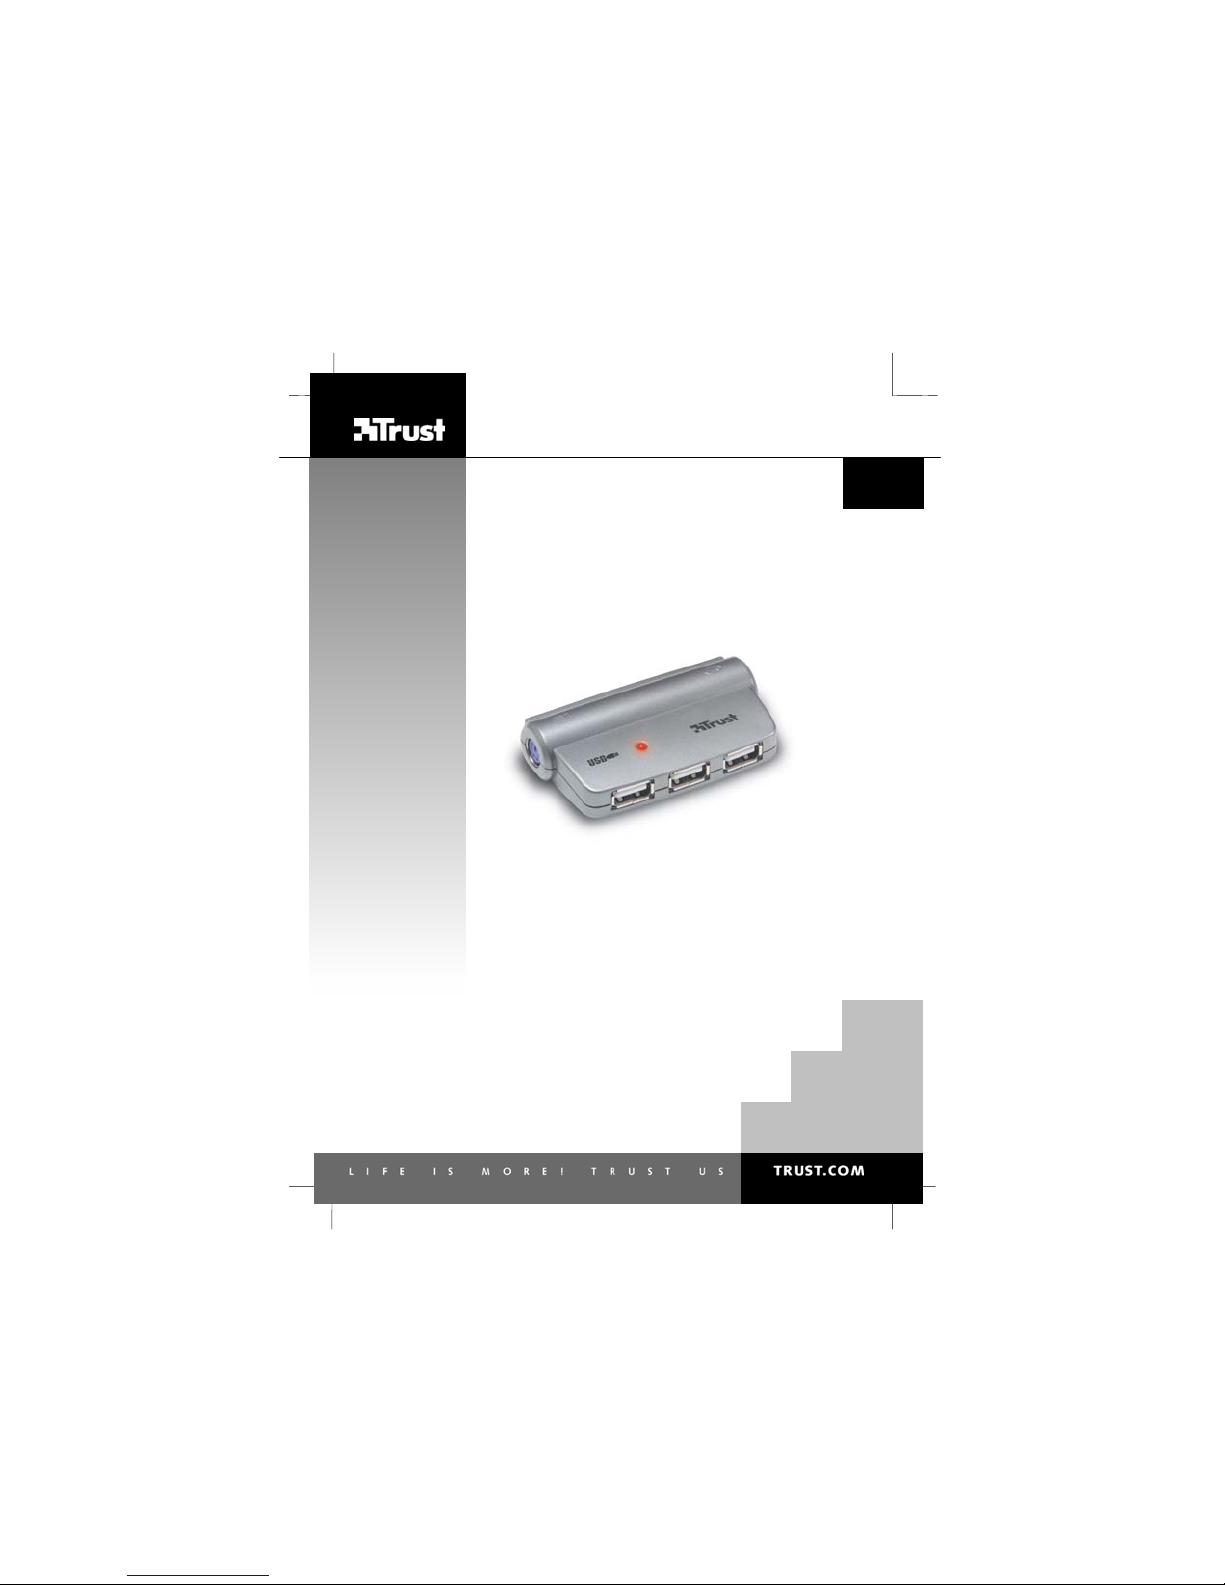
510DS MINI NOTEBOOK DOCKING STATION
V
520DS USB2 MINI NOTEBOOK DOCKING STATION
User’s manual
UK
DE
FR
IT
ES
PL
NL
PT
1.0
Page 2
510DS MINI NOTEBOOK DOCKING STATION
Thank you for your purchase. Register your product via our Internet site at www.trust. com/reg ister, s o
that you will be eligible for optimal guarantee and service support. You will also be automatically inform ed
of the development of your and other Trust products.
520DS USB2 MINI NOTEBOOK DOCKING STATION
UK
DE
FR
IT
ES
PL
NL
PT
Page 3

510DS MINI NOTEBOOK DOCKING STATION
520DS USB2 MINI NOTEBOOK DOCKING STATION
1 Introduction
This manual is intended for users of the 510DS MINI NO TEBOOK DOCKING
STATION and/or the 520DS USB2 MINI NOTEBOOK DOCKING STATION. The
product is intended for use as a docking station. I t makes connecting peripherals
such as a mouse, keyboard, USB printer, USB scanner and so forth to your notebook
easier.
2 Security
Read the following instructions carefully before use:
The device does not require any special maintenance.
•
Do not use aggressive substances such as petrol or white spirit to clean the
•
device. These may harm the material.
Never submerge the device in liquid. This may be dangerous and will damage
•
the device.
Make sure nothing is placed on the cable. Do not use this device in an area
•
where the cable can become worn or damaged as a result of people walking
over it.
Do not repair this device yourself.
•
3 Approval
This device meets the essential requirements and other relevant conditions of the
applicable European directives. The Declaration of Conformity (DoC) is available at
www.trust.com/13961/ce or www.trust .com/13962/ce.
4 Installation
4.1 Connecting
Turn your computer off (for connecting the device up, see the Quick Installation
Guide that is included).
1. Follow the steps given in the Quick Installation Guide (included)
2. Use the Velcro tape for secure attachment to your desk or peripherals
3. Use the desk-clip provided for fixing the USB cable provided in place. This
prevents your USB cable from falling behind your desk when disconnecting
your laptop
4. Connect your keyboard up to the docking station's purple connector (on the
left-hand side)
5. Connect your mouse up to the docking station's green connector (on the
right-hand side)
6. Connect the mini-USB connector of the USB cable provided up to the
docking station
7. Connect the USB connector of the USB cable provided up to the your
notebook
8. Connect your USB peripherals up to the docking station's USB ports
UK
1
Page 4

510DS MINI NOTEBOOK DOCKING STATION
520DS USB2 MINI NOTEBOOK DOCKING STATION
Note: it is possible that you will find a USB cable with one black and one red
connector in the box. The black connector is a normal USB connection. If
you use peripherals that require a lot of power via USB, then you can
connect the red connector up to a second USB connection on your
notebook. This then doubles the power provided for your USB peripherals.
Note: the red connector on any such cable is not a normal USB connection. This
cable provides extra power for your peripherals. However, this r ed connector
does not communicate with your peripherals. Use the black USB connector
for USB communications.
Note: when using a normal desktop computer, you should make the following
change in the BIOS: change the "halt on" or "error on" function to"all but
keyboard". This must be done, since you will otherwise get the following
message: "no ps/2 keyboard connected"
4.2 Installation under Windows 98
1 Turn your computer on
2 Wait until your computer has started up
3 Follow the on-screen instructions
4 Insert your Windows 98 CD-ROM when asked to do so
5 Reboot your computer manually
6 The docking station's red LED will be illuminated
7 Your docking station is now ready for use
4.3 Installation under Windows ME / Windows 2000 /
Windows XP
1 Turn your computer on
2 Wait until your computer has started up completely
3 Wait until your computer has detected the new hardware
4 Wait until your computer has installed the new hardware
5 The docking station's red LED will be illuminated
6 Your docking station is now ready for use
Note: it is possible that you will be unable to use the docking station when in DOS
mode. This may be caused by your computer's BIOS settings. It is also
possible that your notebook may not support USB devices when it is in DOS
mode. Contact your computer supplier about this.
Note: the docking station has been tested with various keyboards and mice that
have their own drivers. It is possible that some special functions of your
keyboard/mouse will not be supported when connected to the docking
station.
5 Checks after installation
After installing the device and the driver, the following will have been installed on your
computer and can be checked:
Start - Settings - Control Panel – System - Device Manager
- Human Interface Device – USB Human Interface Device
2
Page 5
510DS MINI NOTEBOOK DOCKING STATION
520DS USB2 MINI NOTEBOOK DOCKING STATION
Note: The information given above will vary when the installation has been
altered by the user (for example, if not everything has been installed or
locations other than the default locations have been selected).
Note: Differences may also occur as a result of using new drivers that become
available on the Internet.
Note: The location or name may vary in the Windows Control Panel for different
operating systems.
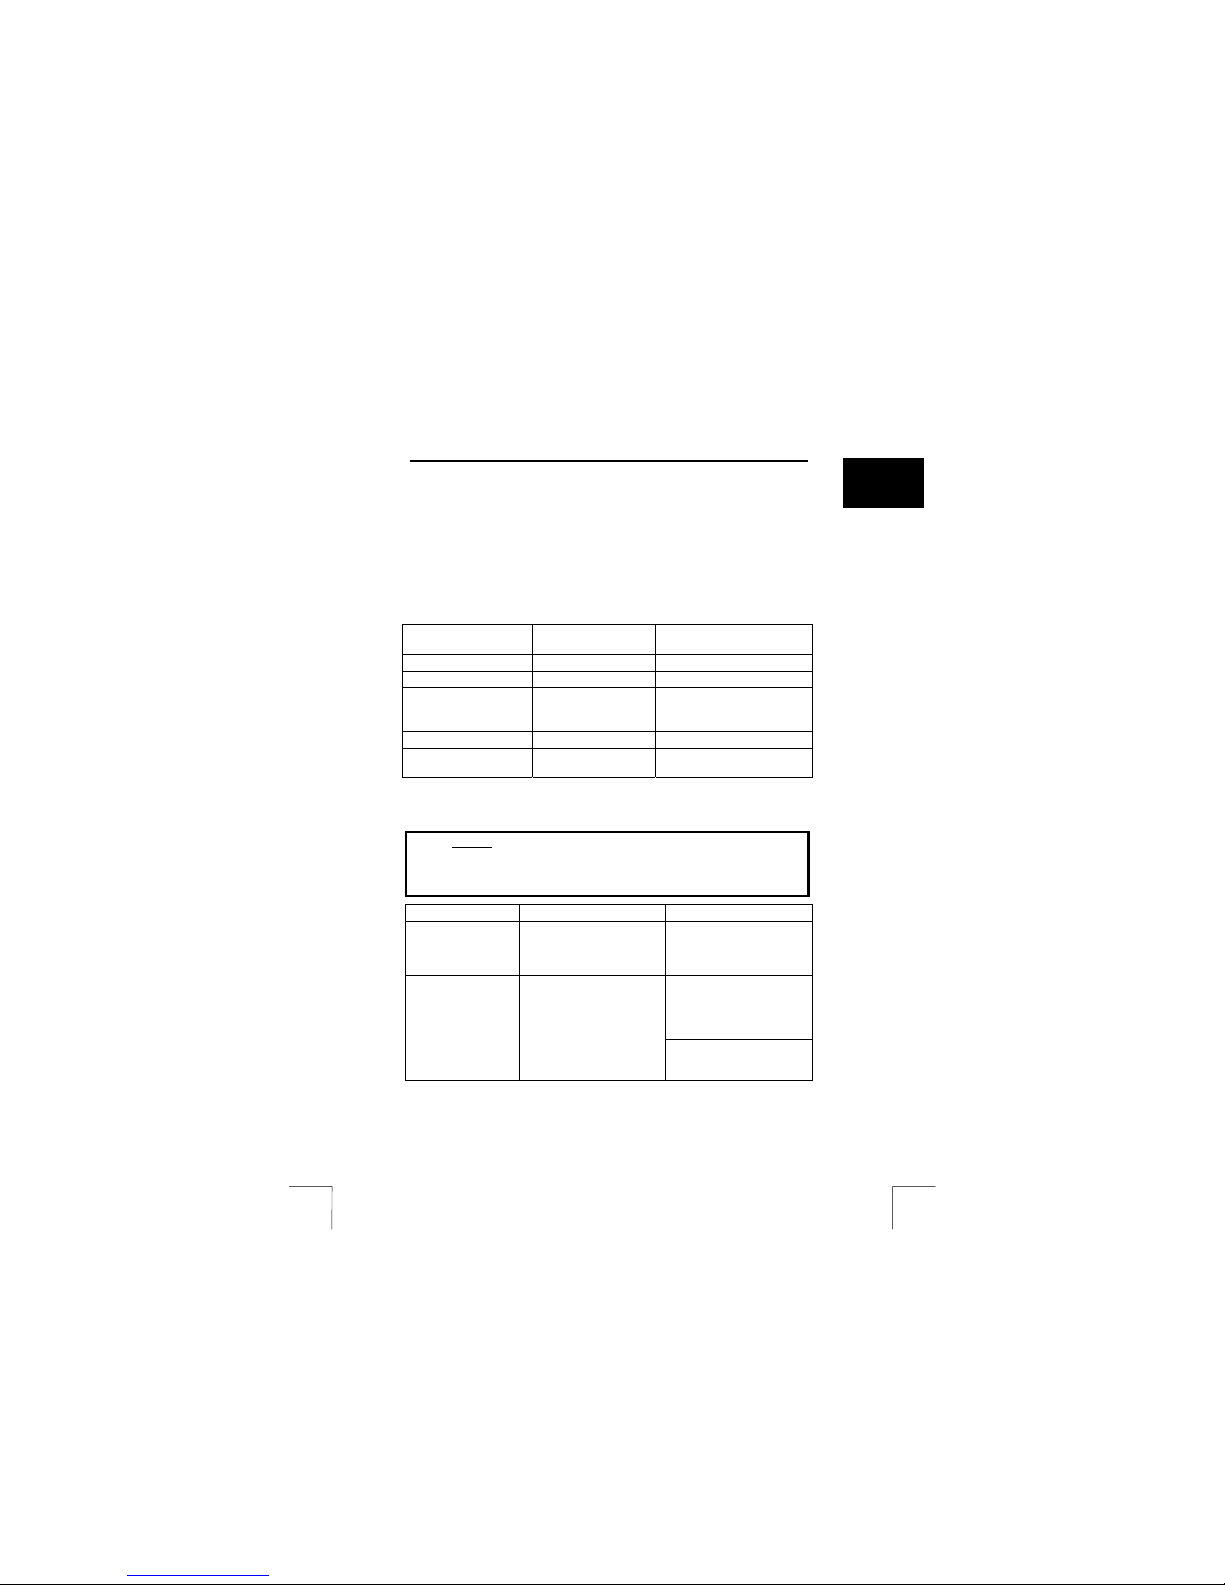
6 Technical specifications
USB version 1.1 2.0
Supported speeds 1.5, 12.0 Mbps 1.5, 12.0, 480 Mbps
Supported OS Windows
Hub ports 3-port USB1.1 3-port USB 2.0
Connection point for
supply adapter
510DS Mini Docking
Station
98/ME/2000/XP
Mac OS 9.x and X
5V / 2.5A DC 5V / 2.5A DC
520DS USB2 Mini Docking
Station
Windows 98/ME/2000/XP
Mac OS 9.x and X
7 Troubleshooting
Method
1. Read the solutions given below.
2. Check for up-to-date FAQs, drivers and manuals
on the Internet (www.trust.com/13961 or 13962).
Problem Cause Possible solution
Message appears
saying "no ps/2
keyboard
connected".
A message is
displayed stating
that not enough
power can be given
to the connected
devices.
Incorrect BIOS settings. Change your "halt on" or
Too many devices are
connected and they are
using too much power.
"error on" BIOS settings to
"all but keyboard".
Take the red connector of
the cable (where provided)
and connect it to the second
USB connection on your
computer.
Remove one or more
devices until you have
enough power.
UK
3
Page 6

510DS MINI NOTEBOOK DOCKING STATION
520DS USB2 MINI NOTEBOOK DOCKING STATION
A device connected
to the USB 2.0 card
does not work or
does not work
correctly.
The problem is not
listed here.
Keyboard and/or
mouse do not work.
If you still have problems after trying these solutions, please contact one of the Trust
Customer Care Centres. You can find more information at the back of this instruction
manual. Please have the following information available:
the item number. This is 13961 or 13962;
•
a good description of exactly what is not working;
•
a good description of exactly when the problem occurs.
•
The device has not been
installed or has not been
installed correctly.
The most recent FAQs are
available on the Internet.
Keyboard/mouse have their
own drivers.
Only the red connector of
the special USB cable has
been connected up.
BIOS is not configured for
USB keyboard support.
Connect an adapter to the
power supply connection
(can be obtained in almost
all electronics shops).
Adapter specifications:
5V/2.5A
Disconnect the device from
the USB 2.0 card and
uninstall the drivers. Install
the device as described in
the instruction manual
provided with it.
Go to
http:// www.trust.com/13961
or 13962 or
http:// www.trust.com/us b for
the FAQs about USB.
Re-install the drivers for your
keyboard/mouse.
Connect up your black USB
connector.
Check your BIOS settings
using the manual for your
computer or motherboard.
Contact your computer
supplier to get the correct
BIOS settings.
4
Page 7

510DS MINI NOTEBOOK DOCKING STATION
520DS USB2 MINI NOTEBOOK DOCKING STATION
8 Warranty conditions
- Our products have a two-year manufacturer's warranty, which is effective from the
date of purchase.
- If there is a fault, return the product to your dealer. Include an explanation of the
fault, the proof of purchase and all the accessories.
- During the warranty period, you will be given a similar model, if one is available. If
no similar product is available, your product will be repaired.
- Please contact our help desk for missing component s, such as the instruction
manual, software or other components.
- The warranty becomes invalid if the product has been opened up, if there is
mechanical damage, if the product has been misused, if alterations have been
made to the product, if the product has been repaired by a third party, in the case
of negligence or if the product has been used for a purpose other than that
originally intended.
- Warranty exclusions:
Damage caused by accidents or disasters, such as fire, flood, earthquakes,
•
war, vandalism or theft
Incompatibility with other hardware/software which is not stated in the minimum
•
system requirements
Accessories such as batteries and fuses (if applicable)
•
- Under no circumstances will the manufacturer be held responsible for any
incidental or consequential damage, including the loss of income or other
commercial losses resulting from the use of this product.
Reproducing this manual or any part of it without permission from
Copyright disclaimer
Trust International B.V. is forbidden
UK
5
Page 8
CUSTOMER CARE CENTERS
24 HOURS free service: www.trust.com
Residents in the UK and Ireland should contact:
Mon - Fri
From 8:00 - 16:00
I residenti in Italia possono contattare :
lun - ven
9:00 - 13:00 /
14:00 -18:00
Les habitants de la France et de l’Afrique du Nord peuvent contacter :
Lundi-vendredi
De 9:00 à 17:00
Kontaktadresse für Einwohner Deutschlands:
Mo – Fr
9:00 - 17:00
Los habitantes de España pueden ponerse en contacto con:
lun – viernes
De las 9:00 a las 17:00
horas
Osoby mieszkające na terytorium Polski powinny skontaktować się:
Od pon. do pt.
w godz 09:00-17:00
Inwoners van Nederland kunnen contact opnemen met:
ma – vr
9:00 - 17:00 uur
All other countries / Alle anderen Länder / Tous les autres pays
Tutti gli altri paesi / Tod os los demás países / Alle an dere landen
Mon - Fri
From 9:00 - 17:00
UK Office
Phone +44-(0)845-6090036
Fax +31-(0)78-6543299
Ufficio italiano
Telefono +39-051-6635947
Fax +39-051-6635843
Bureau français
Téléphone +33-(0)825-083080
Fax +31-(0)78-6543299
Deutsche Geschäftsstelle
Telefon 0800-00TRUST (0800-0087878)
Fax +31-(0)78-6543299
Oficina española
Teléfono +34-(0)902-160937
Fax +31-(0)78-6543299
Biuro w Polska
Tel +48-(0)22-8739812
Fax +31-(0)78-6543299
Kantoor Nederland
Via vaste telefoon 0800-BELTRUST (0800-23587878)
Via mobiele telefoon +31 (0)7 8-6543387
Fax +31 -(0)78-6543299
European Head Office
Phone +31-(0)78-6549999
Fax +31-(0)78-6543299
 Loading...