

Page 1

305KS WIRELESS OPTICAL DESKSET
UK
User’s manual
L I F E I S M O R E ! T R U S T U S T R U S T L I F E I S M O R E ! T R U S T U S T R U S T . C O M
L I F E I S M O R E ! T R U S T U S T R U S T . C O M
Page 2

305KS WIRELESS OPTICAL DESKSET
Thank you for your purchase. Register your product via our Inter net site at
www.trust.com/register, so that you will be eligible for optimal guarantee and service support.
You will also be automatically informed of the development of your and other Trust products.
UK
L I F E I S M O R E ! T R U S T U S T R U S T . C O M
Page 3

305KS WIRELESS OPTICAL DESKSET
Fig. 1 Fig. 2
Fig. 3 Fig. 4 Fig.5
Fig. 6 Fig.7
Fig. 8 Fig.9 Fig.10
L I F E I S M O R E ! T R U S T U S T R U S T . C O M
Page 4

TRUST 305KS WIRELESS OPTICAL DESKSET
Instructions when usin g for the first time Chapt er
1. Uninstalling old drivers and devices (4.1)
2. Inserting the batteries (4.2)
3. Connecting (4.3)
4. Making a wireless connection (4.4)
5. Installation in Windows (4.5)
Thank you very much for your purchase. Register your purchase via our
Internet site at www.trust.com, so that you can receive optimal warranty and
service support. You will be automatically informed of developments to your
product and other Trust devices.
product and other Trust devices.
1 Introduction 1 Introduction
This instruction manual is for users of the TRUST 305KS WIRELESS OPTICAL
This instruction manual is for users of the TRUST 305KS WIRELESS OPTICAL
DESKSET. The TRUST 305KS WIRELESS OPTICAL DESKSET has 19 multimedia
DESKSET. The TRUST 305KS WIRELESS OPTICAL DESKSET has 19 multimedia
buttons. This wireless set works at a frequency of 27 MHz. The channel has 256
buttons. This wireless set works at a frequency of 27 MHz. The channel has 256
different ID codes.
different ID codes.
2 Safety 2 Safety
Carefully read the following instructions before use: Carefully read the following instructions before use:
- The device does not require any special maintenance. Use a slightly damp, soft
- The device does not require any special maintenance. Use a slightly damp, soft
cloth to clean the device.
cloth to clean the device.
- Do not use aggressive substances, such as white spirit, to clean the device. These
- Do not use aggressive substances, such as white spirit, to clean the device. These
may harm the material.
may harm the material.
-
-
Do not submerge the device in liquid. This may be dangerous and will damage the
Do not submerge the device in liquid. This may be dangerous and will damage the
device. Do not use this device near water.
device. Do not use this device near water.
- Do not repair this device yourself. - Do not repair this device yourself.
- Nowadays, there are an increasing number of wireless products (video, audio,
- Nowadays, there are an increasing number of wireless products (video, audio,
convenience, computer, etc.) which work in the same frequency range as this
convenience, computer, etc.) which work in the same frequency range as this
device. It may, therefore, be possible that the functionality of this device is limited
device. It may, therefore, be possible that the functionality of this device is limited
by or is limiting for other wireless devices. This c an only be avoided by paying
by or is limiting for other wireless devices. This c an only be avoided by paying
attention to the distance between devices and, where possible, by changing
attention to the distance between devices and, where possible, by changing
channels.
channels.
- Be careful when using wireless devices if you have a pacemaker or are dependent
- Be careful when using wireless devices if you have a pacemaker or are dependent
on other life-saving, sensitive electronic equipment, because this product transm its
on other life-saving, sensitive electronic equipment, because this product transm its
radio signals.
radio signals.
3 Approval 3 Approval
- This device meets the essential requirements and other relevant conditions of the
applicable European directives. The Declaration of Conformity (DoC) is available
at www.trust.com/12738/ce.
- This wireless device works at a frequency of 27 MHz. It meets the es sential
requirements and other relevant conditions of R&TTE Directive 1999/5/EC and
can be used in all EU countries. There are no restrictions for its use within the EU.
- There may be restrictions for the use of this device outside of the EU. If this device
is used outside of the EU, check whether this device meets local regulations.
Frequency: 27.095 MHz (keyboard), 27.195 MHz (mouse), Bandwidth: 4.5 kHz,
Power: 1.2 mW.
UK
1
Page 5

TRUST 305KS WIRELESS OPTICAL DESKSET
4 Installation
4.1 Uninstalling old drivers and devices
The most common cause of faults during installation is the presence of a driver for a
similar, old device. The best solution is to first remove all drivers related to old
devices before installing the new driver.
1. Enter the Windows Safe Mode (press F8 when starting Windows and then
select ‘Safe Mode’ from the menu which is displayed).
2. Click on ‘Start – Settings – Control Panel’ and double-click on the
‘Add/Remove Programs’ icon.
3. Find all the programs for similar, old devices and remove these by clicking on
the ‘Add/Remove’ button. When in the Safe Mode, it is possible for some
programs to appear twice. In that case, remove all the programs which appear
twice.
4. Restart the computer.
4.2 Inserting the batteries
1. Open the cover of the battery compartment on the bottom of the mouse.
2. Insert the two rechargeable AA batteries into the mouse as indicated inside
the battery compartment.
3. Close the mouse battery compartment.
4. Open the keyboard battery compartment.
5. Insert two AA batteries into the keyboard as indicated inside the battery
compartment.
6. Close the keyboard battery compartment.
Note: Do not recharge the keyboard’s batteries. They are NOT rechargeable.
Note: Inserting the batteries incorrectly may cause damage.
4.3 Connecting to the computer
Note: Make sure the computer is turned off.
1. Connect the receiver’s green plug to the PS/2 mouse connection on your
computer.
2. Connect the receiver’s purple plug to the PS/2 keyboard connection on your
computer.
4.4 Making a wireless connection
Make sure your computer is turned on.
•
Make sure the devices are no more 1 meter apart and there are no objects (or
•
metal surfaces) between them, since this will reduce the quality of the
connection.
Make sure the batteries have been inserted and they have enough power (see
•
chapter 4.2).
The receiver has two different coloured indicators (J, figure 1). The red indicator is for
the keyboard and the green indicator is for the mouse.
2
Page 6

TRUST 305KS WIRELESS OPTICAL DESKSET
1. Press the ID button (I, figure 1) on top of the receiver. The indicators will flash
simultaneously.
2. Open the keyboard’s right-hand foot. Use a pointed object to press the round
ID button (V, figure 2).
The red indicator on the receiver will stop flashing when the keyboard has
made a connection with the receiver.
3. Press the round ID button (G, figure 1) on the bottom of the mouse. The
green indicator will also stop flashing. The indicator will remain constantly lit
orange (due to the combination of red and green).
The keyboard and mouse have now made a connection with the receiver. The
keyboard and mouse will work as a standard keyboard and mouse. Install the
software if you wish to use the extra functions (see chapter 4.5).
Note: If one of the indicators does not light up, this means that the mouse or
keyboard is not connected or has not been connected correctly.
1. Turn on your computer and start Windows.
2. The receiver will be automatically detected and installed as a standard PS/2
mouse and keyboard.
4.5 Installation in Windows 98 / Windows ME / Windows
2000 / Windows XP
Note: The latest driver can be downloaded from www.trust.com/12738. Check
whether a new driver is available and use this for the installation.
Note: Make sure all other programs are closed during the installation.
Note: In the example, ‘D:\’ is used to indicate the CD-ROM drive. This may be
different for your computer.
1. Insert the CD-ROM into your computer’s CD-ROM drive. The installation
program will start automatically. If it does not start automatically, carry out the
following:
a) Select ‘Run’ from the Start menu.
b) Type [D:\SETUP.EXE] and click on 'OK' to start the Trust Installer.
2. Figure 3 will appear.
3. Click on the language you wish to use for the installation.
4. Click on ‘305KS Keyboard‘ to start the installation of the keyboard.
5. Follow the on-screen instructions.
6. Click on ‘305KS Mouse‘ to start the installation of the mouse.
7. Follow the on-screen instructions.
The installation of the software for the mouse and the keyboard has now been
completed. Close the Trust Installer and restart the computer.
UK
3
Page 7

TRUST 305KS WIRELESS OPTICAL DESKSET
5 Checking after the installation
After installing the device and the driver, the following are installed on your computer
and can be checked
Taskbar
- The icon shown in figure 4 should be visible in the right-hand corner of your taskbar.
‘Start - Settings - Control Panel’ Double-click on the System icon and select the
‘Device Manager’ tab.
- Keyboard - Standard 101/102 Key or Microsoft Natural Keyboard
- Mouse - PS/2 Compatible Mouse
‘Start - Settings - Control Panel’ and then double-click on the ‘Add/Remove
Programs’ icon.
- Trust 305KS Wireless Optical Deskset 2. 1
Start - Programs - Trust - …
- Trust 305KS – Keyboard –
* Trust 305KS Wireless Optical Deskset Keyboard
* Uninstall Trust 305KS Wireless Optical Desk set Keyboard
- Trust 305KS – Mouse –
* Trust 305KS Wireless Optical Deskset Mouse
* Uninstall Trust 305KS Wireless Optical Desk set Mouse
Note: The information given above will vary when the installation has been
altered by the user (for example, not everything has been installed or
locations other than the default locations have been selected).
Note: Deviations may also occur as a result of using new drivers available on
the Internet.
The location or name may vary in the Control Panel for different operating
Note:
systems.
6 Use
6.1 Keyboard
When you start your computer, the program which you can use to configure and use
the multimedia keys will start automatically.
The software indicates in the taskbar the status of the Caps Lock, Scroll Lock and
Num Lock keys.
If you wish to disable this software, right-click on the keyboard icon (see figure 4) and
select ‘Exit’. If you use Windows 2000 or a later release of Windows, the keys will
now work as standard keys.
6.1.1 Keys
Besides the standard keys, the keyboard also has nineteen multimedia keys and an
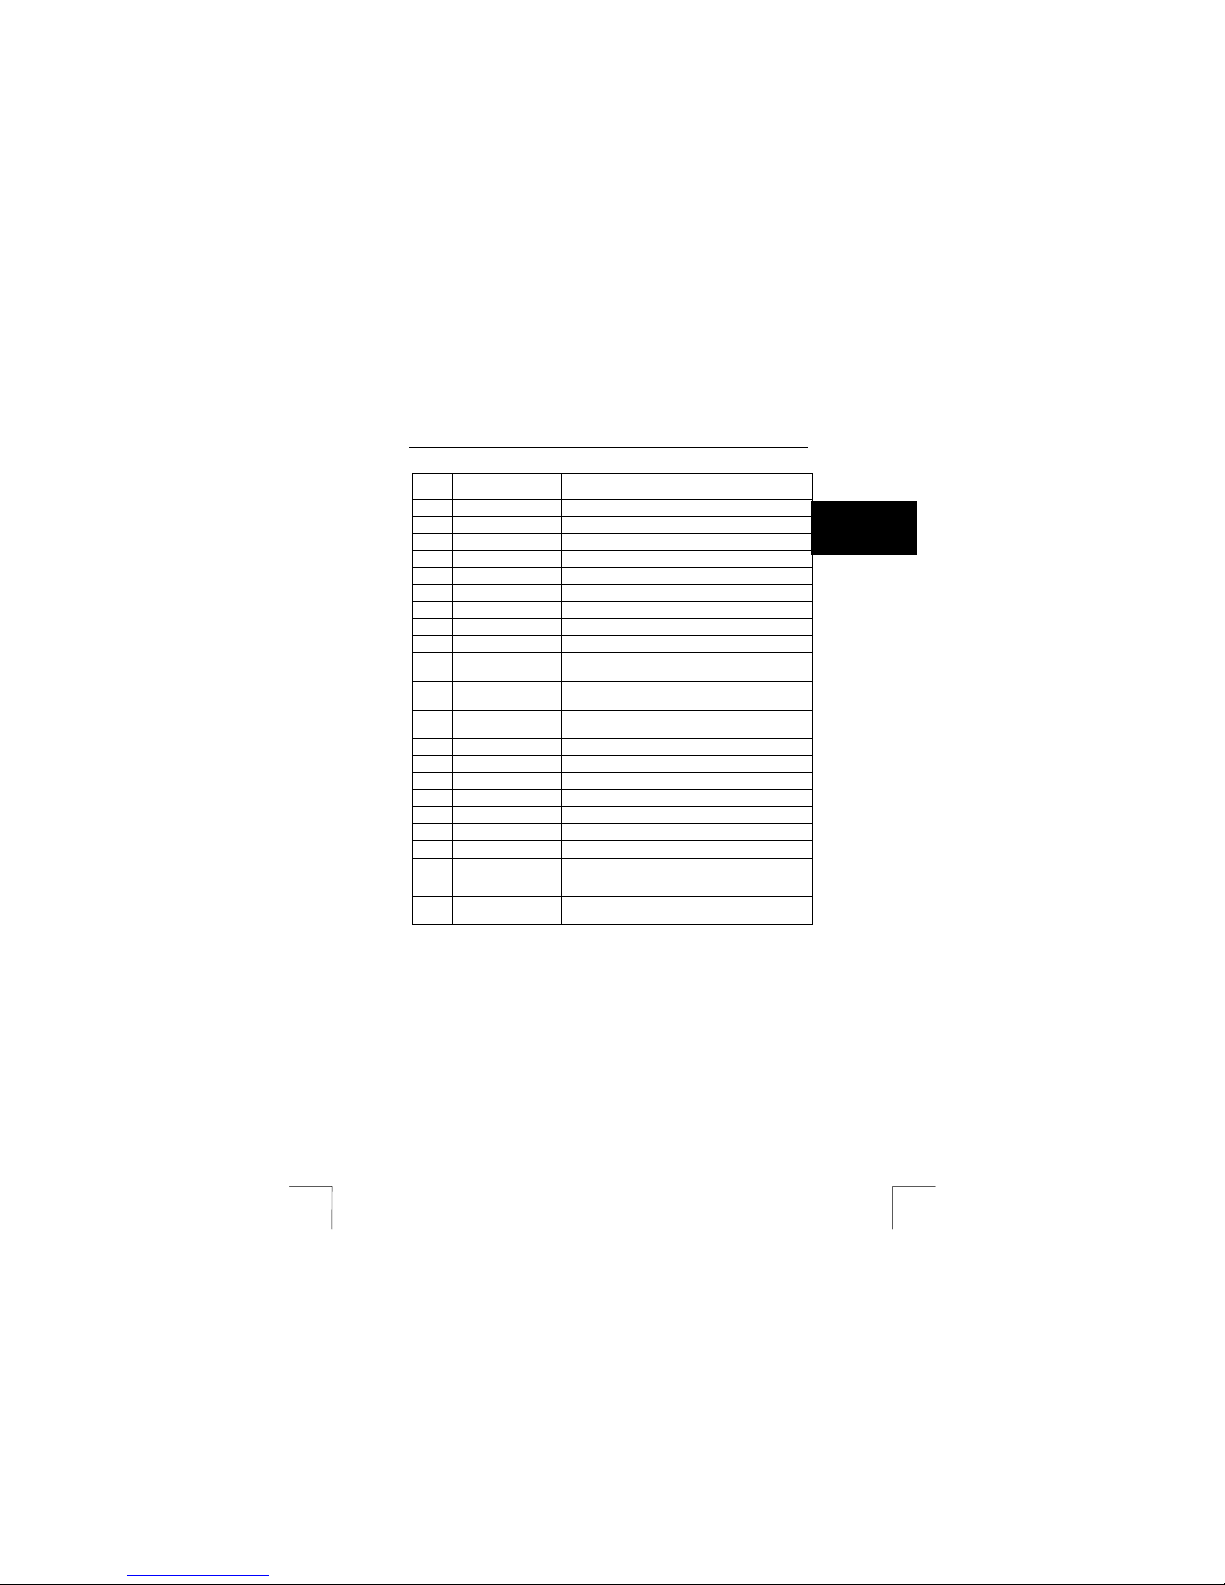
ID button. If you have installed the software, then the multimedia keys will have preprogrammed functions. Use table 1 in combination with figure 2.
4
Page 8
TRUST 305KS WIRELESS OPTICAL DESKSET
Item Name Standard function
Back To the previous Internet page.
A
Forward To the next Internet page.
B
Stop Stop loading an Internet page.
C
Refresh Refresh the Internet page.
D
Search Search for an Internet page.
E
Favourites Favourite Internet pages.
F
Start page Internet start page.
G
E-mail To the e-mail program.
H
Mute Mute the sound.
I
Sleep setting Power button to place the computer in the sleep
J
Decrease the
K
volume.
Increase the
L
volume.
Play/Pause Play/pause a CD.
M
Stop Stop playing a CD.
N
Back Previous CD track.
O
Forward Next CD track.
P
Media player Open Windows Media Player.
Q
My computer Shortcut to My Computer.
R
Calculator Shortcut to the Windows calculator.
S
Empty battery
T
indicator
ID button Button for making a connection between the
V
Table 1: Description of the multimedia keys
6.1.2 Software
The multimedia keys can be programmed using the keyboard software. Carry out the
following:
1. Double-click on the keyboard icon (see figure 4) in the right-hand corner of
the taskbar. Figure 5 will appear. The multimedia keys will be displayed in a
line. By default, the first key from the left is selected.
2. Three choices are given in the ‘
multimedia keys window. From top to bottom, these are:
1) The pre-programmed function.
•
2) Special function. Select this to assign a standard Windows
•
command from the list to the key concerned.
3) Custom. Select this to have the key act as a shortcut to a folder or
•
file of your choice.
setting.
Decrease the volume.
Increase the volume.
This is lit when the batteries for the keyboard are
almost empty.
keyboard and the receiver.
’ tab which is displayed under the
Keys
UK
5
Page 9

TRUST 305KS WIRELESS OPTICAL DESKSET
The first and second options are self-explanatory. If you select t he third
option, carry out the following:
a) Click on ‘Set …’. Figure 6 will appear.
b) You can select a file by dragging and dropping it onto ‘Drag here’ or
by clicking on ‘Browse’ and selecting a folder or file.
c) Click on ‘Next’. Figure 7 will appear.
d) Give the multimedia key a name. This name will appear temporarily
when the multimedia key is used.
e) Click on ‘Next’ and then click on ‘Finish’ when you have entered all
the desired information. If you see that you have entered something
3. In the ‘
4. In the ‘Key Status’ tab, you can choose to have the status of the ‘Scroll Lock’,
5. After you have made the desired settings, click on ‘Apply’ to confirm your
6.1.3 Euro symbol
Every keyboard with a Euro symbol works correctly. No separate driver is necessary
for the keyboard. The symbol can be displayed by pressing the ALT + Euro key.
It is important to know that:
•
•
•
•
•
incorrectly, click on ‘Back’ and enter the information again.
’ tab, it is possible to alter the colour settings of the OSD menu
OSD
that appears when using the multimedia keys.
You can change the colour of the window, frame and text.
In this tab, you can also indicate how long the OSD menu must remain visible
after you have released the multimedia keys (1 – 10 seconds).
‘Num Lock’ or ‘Caps Lock’ keys displayed in the right-hand corner of your
Windows taskbar.
settings.
Windows must first be fully compatible with the Euro symbol, otherwise the ALT
+ Euro key combination will not work. Go to the Microsoft website to see the
options available for your version of Windows. Microsoft website:
www.micros oft.com.
The font used (for example, Arial) must also support the Euro symbol.
The program which is used must support the Euro symbol (check the
instruction manual or the supplier’s website).
The printer must support the Euro symbol or the combination of font/Euro
symbol (check the instruction manual or the supplier’s website).
It is often possible to display the Euro symbol in a document. T his can be
achieved using ALT + 0128 (type 0128 on the numeric keyboard whilst pressing
the ALT key). You can also see which fonts are able to display the Euro symbol
by clicking on ‘Start – Programs – Accessories –Character Map’ and, if
necessary, copying and pasting it. Note: this only works if the Charac ter Map
program has been installed.
6.1.4 ID channels
This receiver has 256 channels for making a connection with the keyboard and the
mouse. If you notice that someone nearby is working on the same channel as you,
simply make a new connection by following the procedure given in chapter 4.4.
6.1.5 Battery indicator
The keyboard has a battery indicator (T, figure 2). The batteries are almost empty if
this is lit when one of the keys is pressed. Replace the batteries with the same type of
batteries (two alkaline AA batteries).
6
Page 10

TRUST 305KS WIRELESS OPTICAL DESKSET
Comment: The batteries last for approximately 6 months with normal use and for
approximately 120 hours with continuous use.
6.2 Mouse
6.2.1 Recharging
Note: It is recommended to first charge the batteries for 8 hours before using
Connect the black recharge cable to connection F on the mouse (see figure 1).
Connect the other end to connection K (see figure 1).
The red indicator E (see figure 1) will be lit whilst the batteries are being recharged.
Note: The computer must be connected to the mains supply in order to
Note: The batteries last for approximately 7 days after they have first been
Table clip
You can connect the table clip to your table using double-sided sticky tape. When the
charging cable is not in use, you can secure the cable to the clip so that it does not
fall behind your table.
6.2.2 Battery indicator
The batteries are almost empty if the red indicator (E) is lit when one of the mouse
buttons is pressed.
The battery indicator remains constantly lit when the mouse is connected for
recharging.
6.2.3 Explanation of the buttons
The mouse has five buttons and a scroll wheel. The functions of these components
and those of the receiver are given in table 2. Use this table together with figure 1.
6.2.4 Software
1. Double-click on the Trust icon (see figure 4) in the right-hand corner of the
2. The configuration window for the mouse will appear (see figure 8).
3. The scroll wheel mode can be selected in the ‘Wheel’ tab.
4. There are two options:
the mouse.
recharge the mouse batteries.
charged for 8 hours.
Item Name Function
A Button 1 Left mouse button function.
B Button 2 Right mouse button function.
C Button 3 Program mable third mouse button + scroll
D Buttons 4 + 5 Programmable fourth and fifth mouse buttons
G ID button Button f or making a wireless connection.
Table 2: Explanation of the mouse
taskbar.
wheel.
on the left-hand and right-hand sides of the
mouse.
UK
7
Page 11
TRUST 305KS WIRELESS OPTICAL DESKSET
a) ‘Enhanced scroll mode’; has all the advantages of the MS-
Intellimouse and scrolls in Windows 98, Windows ME, Windows 2000
and Windows XP. and Windows XP.
b) ‘Intell-Mouse mode’; works as an MS-Intellimouse. b) ‘Intell-Mouse mode’; works as an MS-Intellimouse.
5. Select the scroll wheel speed. 5. Select the scroll wheel speed.
6. Buttons 3, 4 and 5 can be programm ed in the ‘Button’ tab (see figure 9). 6. Buttons 3, 4 and 5 can be programm ed in the ‘Button’ tab (see figure 9).
7. Select a button and click on the arrow on the right-hand side. A drop-down
7. Select a button and click on the arrow on the right-hand side. A drop-down
menu will appear (see figure 10).
menu will appear (see figure 10).
8. Select the function you wish to use. 8. Select the function you wish to use.
9. Click on ‘Apply’. 9. Click on ‘Apply’.
The mouse has now been programmed. The mouse has now been programmed.
7 Troubleshooting 7 Troubleshooting
MethodMethod
1. Read the solutions given below.
2. Check for up-to-date FAQ’s, drivers and instruction
manuals on the Internet (www.trust.com/12738).
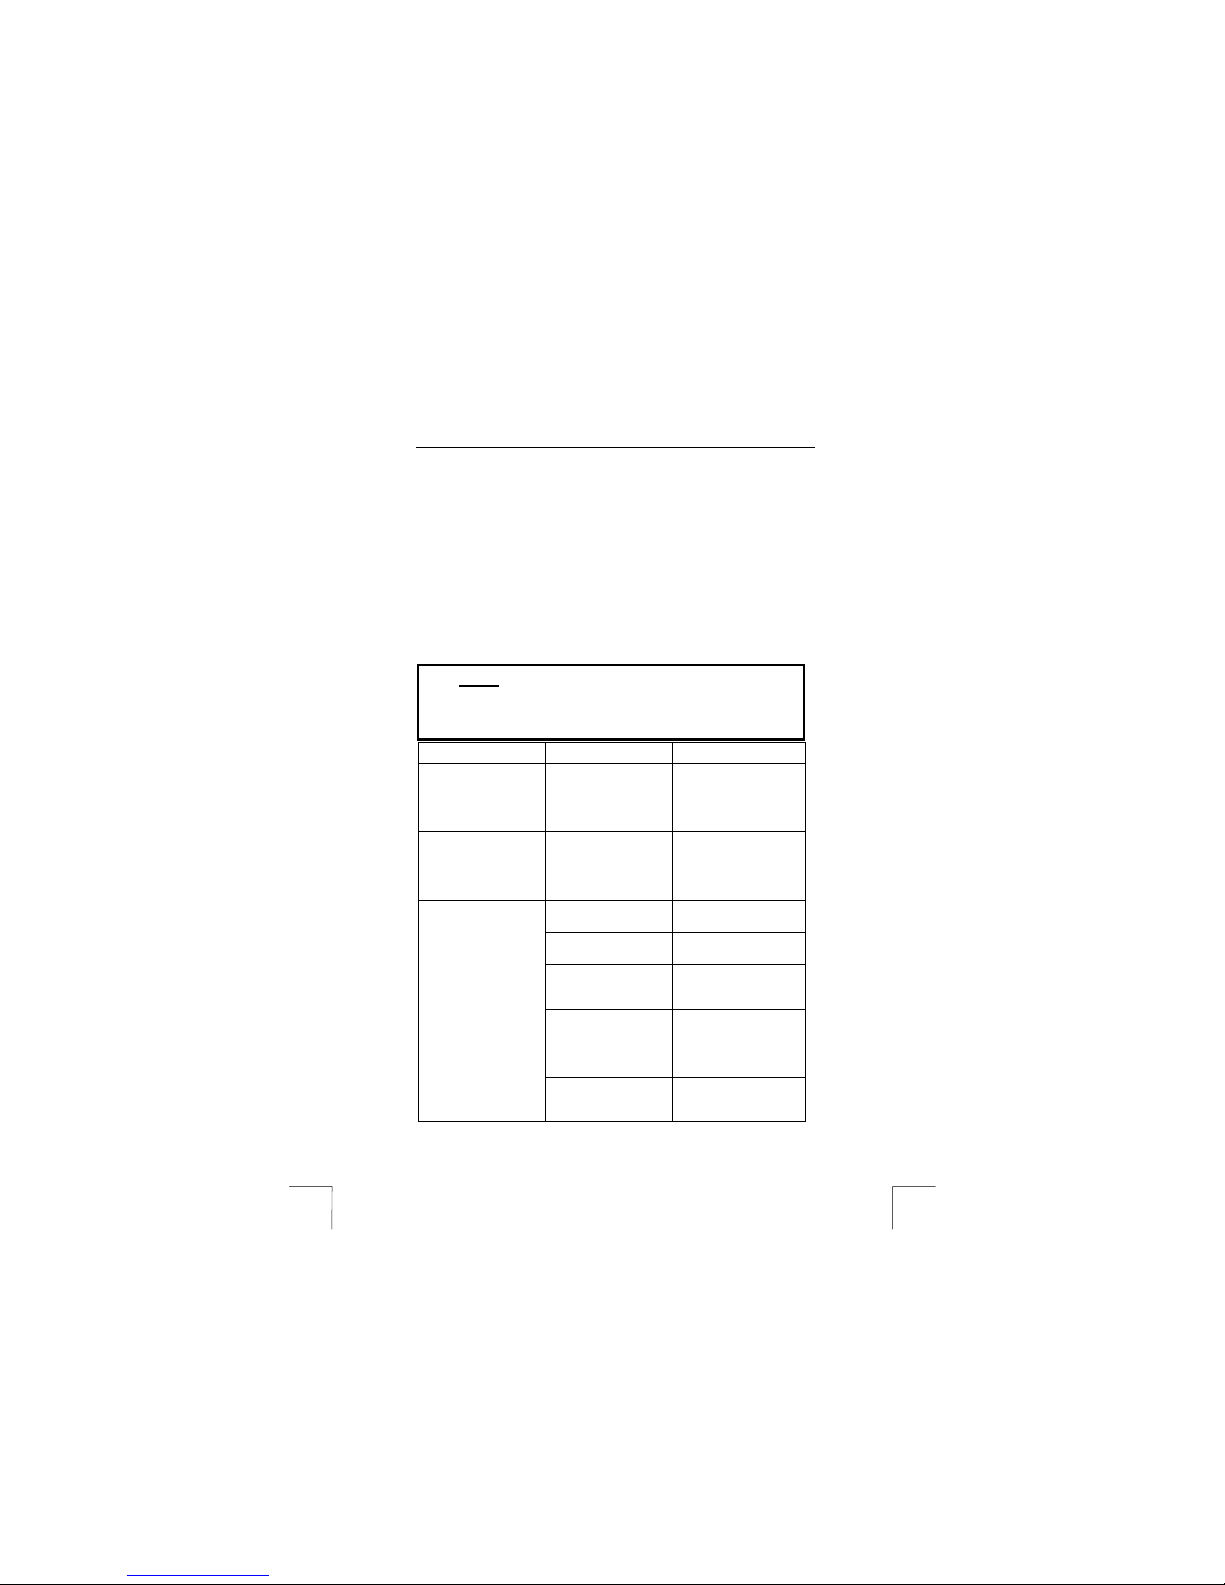
Problem Cause Possible solution
The red indicat or on
the receiver does not
light up.
The green indicator on
the receiver does not
light up.
The keyboard and/or
the mouse do not
react.
The keyboard has not
been connected
correctly.
The mouse has not
been connected
correctly.
No batteries have been
inserted.
The batteries for the
keyboard are empty.
The receiver has not
been connected
correctly.
There is no wireless
connection between the
mouse, keyboard and
receiver.
The mouse batteries are
empty or are almost
empty.
Connect the purple PS/2
keyboard plug to the
correct port on your
computer. Check whether
the port works correctly.
Connect the green PS/2
mouse plug to the correct
port on your computer.
Check whether the port
works correctly.
Insert the batteries.
Replace the batteries.
Connect the receiver
correctly.
Make a wir eless
connection between the
keyboard and/or the
mouse and the receiver
(see chapter 4.4).
Use the recharge cable to
recharge the batteries in
the mouse
8
Page 12
TRUST 305KS WIRELESS OPTICAL DESKSET
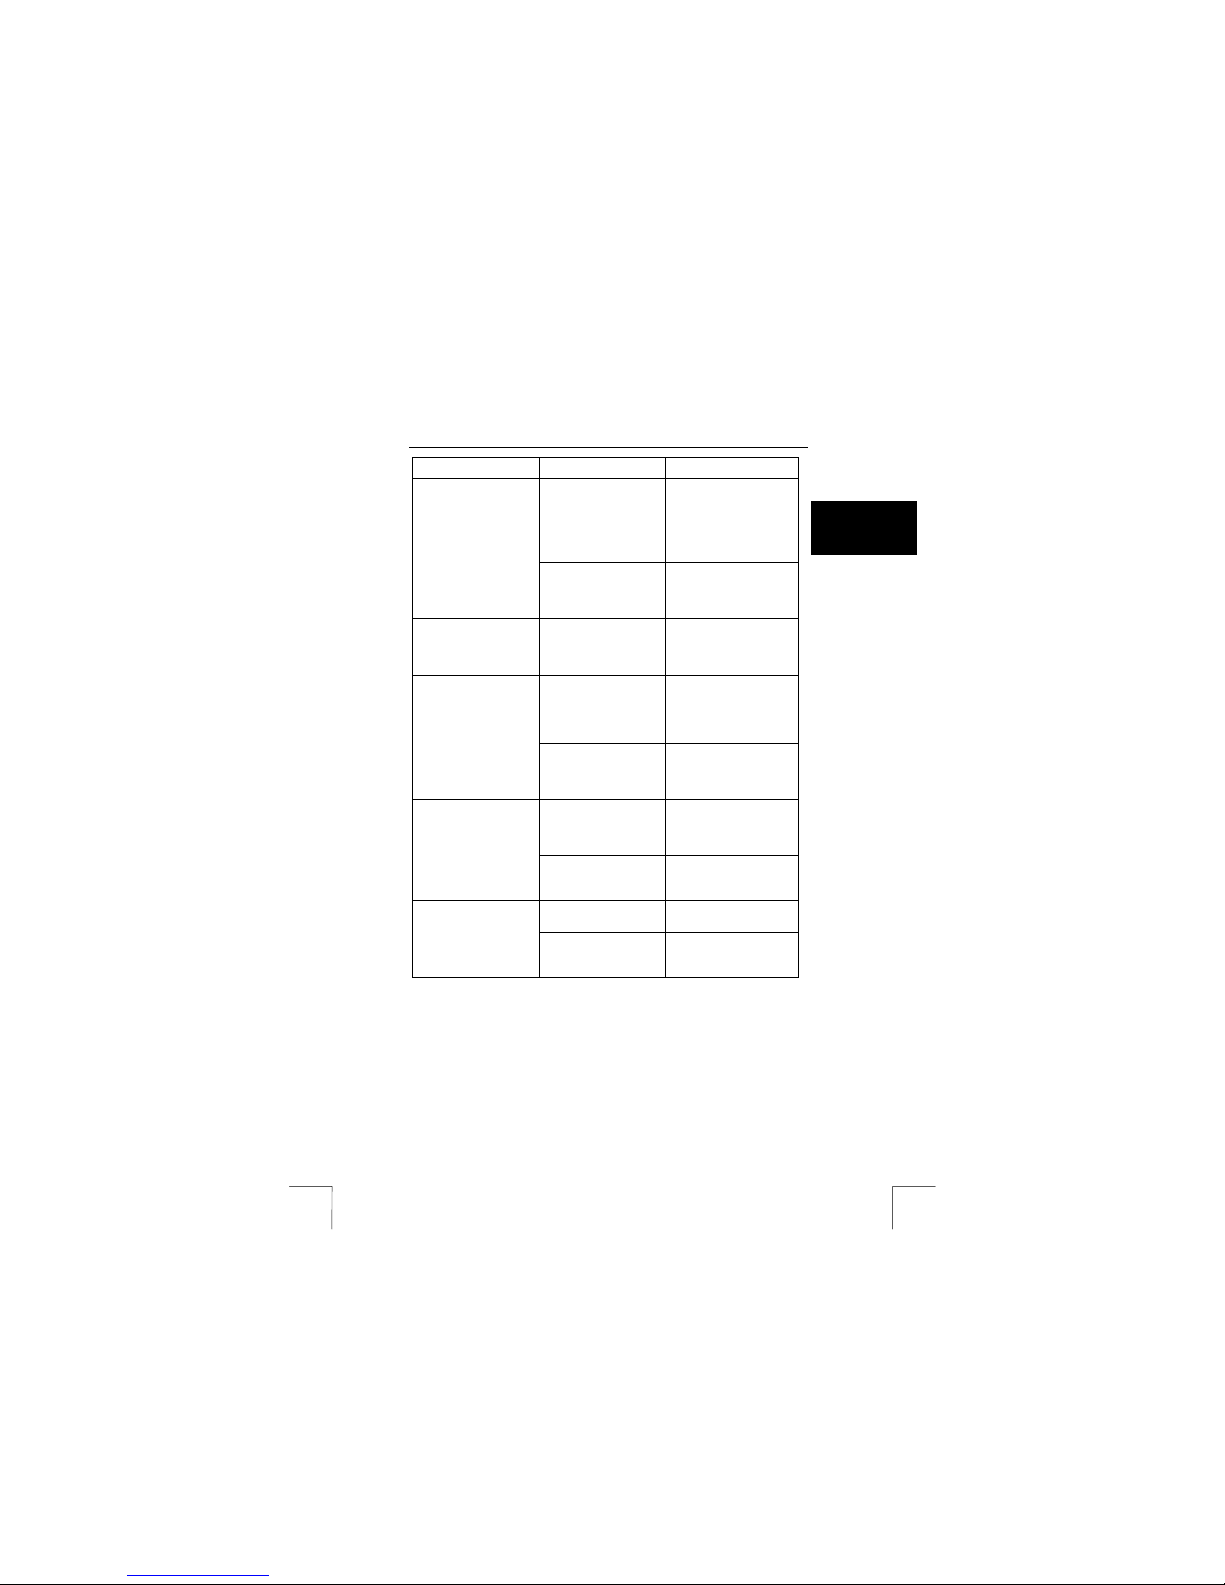
Problem Cause Possible solution
The mouse arrow
moves erratically on
the monitor.
Windows displays an
error message
concerning the
keyboard or mouse
when the computer is
started.
The multimedia keys
do not react.
The scroll functi on
does not work.
If you still have problems after trying these solutions, please contact one of the Trust
Customer Care Centers. You can find more inform ation at the back of this instruction
manual. Please have the following information available:
The article number. This is US/NL 12738.
•
A good description of what does not work.
•
A good description of when the problem occurs.
•
The distance between
the receiver and the
keyboard or the mouse
is too great.
Another device close by
is using the same
frequency as the
keyboard.
The ball or the mouse
compartment may be
dirty.
The software for your
previous mouse is still
active.
The mouse has not
been connected or has
not been connected
correctly.
The software has not
been (correctly)
installed.
The software for your
old keyboard is still
active.
The software has not
been installed.
The software has not
been configured
correctly.
Place the keyboard closer
to the wireless receiver.
The maximum distance is
3 metres.
Do not place the receiver
on a metal surface.
Change your ID. You can
do this by making a new
wireless connection.
Clean the ball and
remove any dirt from
inside the ball
compartment.
Remove the software for
your previous mouse
before installing the Trust
software (see chapter
4.1).
Connect the mouse
correctly and restart the
computer.
Remove all the drivers
(see chapter 4.1) and
reinstall them (see
chapter 4.5).
Remove the old software
(see chapter 4.1).
Install the mouse
software.
Configure the software
correctly.
UK
9
Page 13

TRUST 305KS WIRELESS OPTICAL DESKSET
8 Warranty conditions
- Our products have a two-year manufacturer's warranty which is eff ective from the
date of purchase.
- If there is a fault, return the product to your dealer and include a description of the
fault, the proof of purchase and all the access ories.
- During the warranty period, you will receive a similar model, if one is available. If
no similar product is available, your product will be repaired.
- Please contact our help desk for missing components, such as the instruction
manual, software or other components.
- The warranty becomes invalid if the product has been opened, if there is
mechanical damage, if the product has been misused, if alterations have been
made to the product, if the product has been repaired by a third party, in the case
of negligence or if the product has been used for a purpose other than that
originally intended.
- Excluded from the warranty:
Damage caused by accidents or disasters, such as fire, f lood, earthquakes,
•
war, vandalism or theft.
Incompatibility with hardware/software which is not stated in the minimum
•
system requirements.
Accessories, such as batteries and fuses (if applicable).
•
- Under no circumst ances will the manufacturer be held responsible for any
incidental or consequential damage, including the loss of income or other
commercial losses resulting from the use of this product.
10
Page 14
CUSTOMER CARE CENTERS
24 HOURS free service: www.trust.com
Residents in the UK and Ireland should contact:
Mon - Fri
From 8:00 - 16:00
I residenti in Italia possono contattare:
lun - ven
9:00 - 13:00 /
14:00 -18:00
Les habitants de la France et de l’Afrique du Nord peuvent contacter :
Lundi-vendredi
De 9:00 à 17:00
Kontaktadresse für Einwohner Deutschlands:
Mo – Fr
9:00 - 17:00
Los habitantes de Espa ña pueden ponerse en con tacto con:
lun – viernes
De las 9:00 a las
17:00 horas
Osoby mieszkające na terytorium Polski powinny skontaktować si ę:
Od pon. do pt.
w godz 09:00-17:00
Inwoners van Nederland kunnen contact opnemen met:
ma – vr
9:00 - 17:00 uur
All other countries / Alle anderen Länder / Tous les autre s pays
Tutti gli altri paesi / Todos lo s demás países / Alle andere l anden
Mon - Fri
From 9:00 - 17:00
UK Office
Phone +44-(0)845-6090036
Fax +31-(0)78-6543299
Ufficio italiano
Telefono +39-051-6635947
Fax +39-051-6635843
Bureau français
Téléphone +33-(0)825-083080
Fax +31-(0)78-6543299
Deutsche Geschäftsstelle
Telefon 0800-00TRUST (0800-0087878)
Fax +31-(0)78-6543299
Oficina española
Teléfono +34-(0)902-160937
Fax +31-(0)78-6543299
Biuro w Polska
Tel +48-(0)22-8739812
Fax +31-(0)78-6543299
Kantoor Nederland
Telefoon 0800-BELTRUST (0800-23587878)
Fax +31-(0)78-6543299
European Head Office
Phone +31-(0)78-6549999
Fax +31-(0)78-6543299
L I F E I S M O R E ! T R U S T U S T R U S T . C O M
 Loading...