

Page 1
3
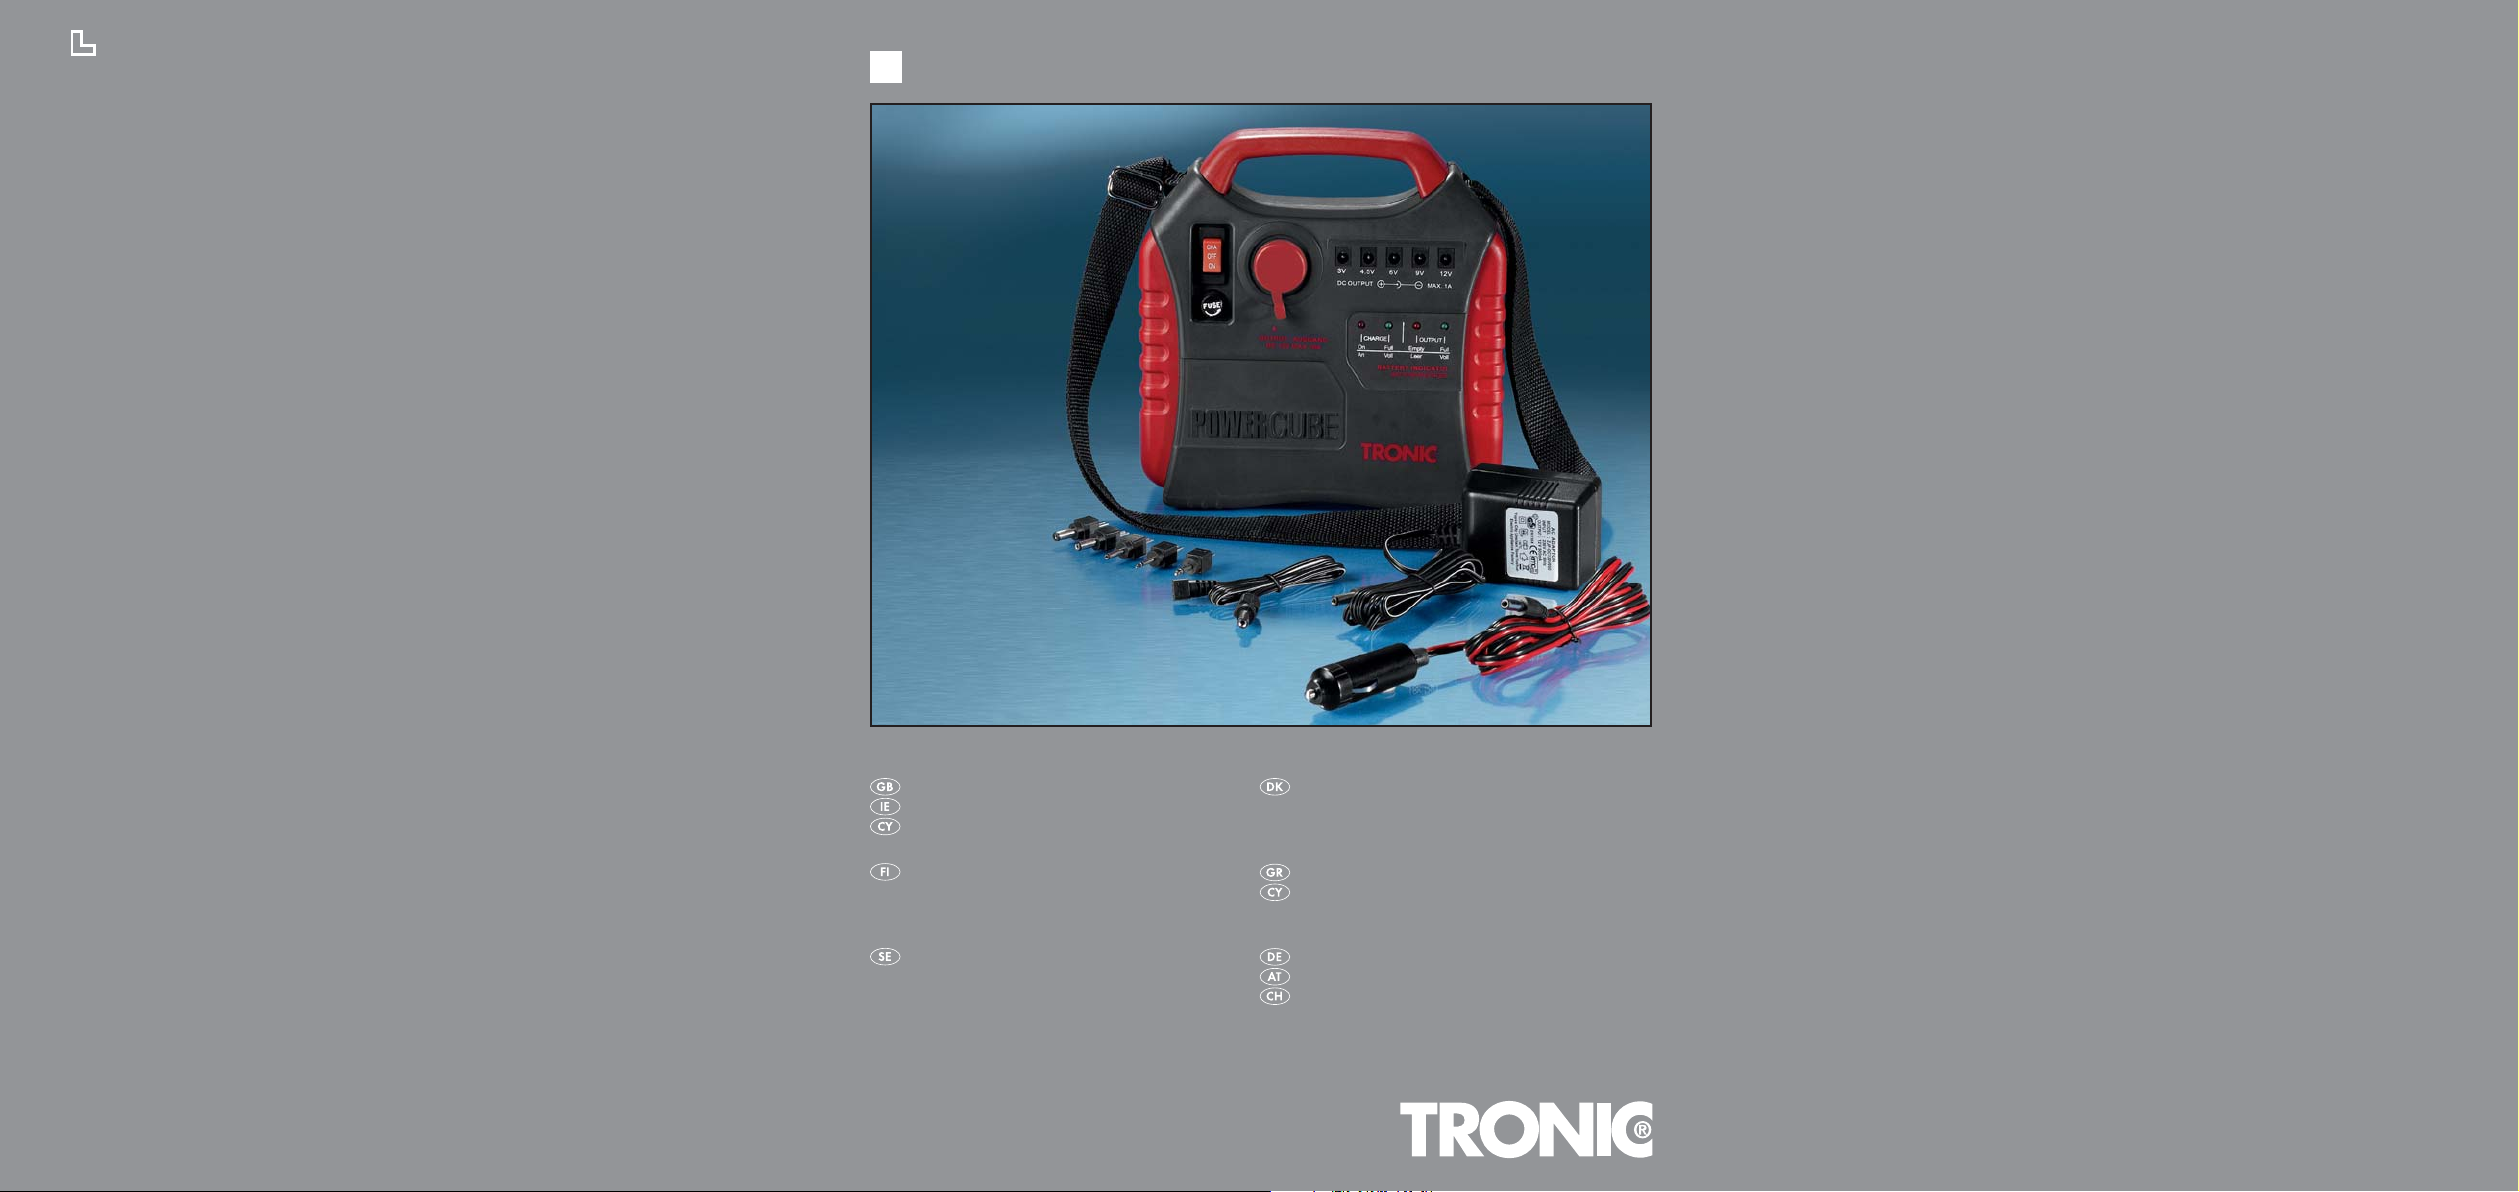
MOBILE POWER SUPPLY
KOMPERNASS GMBH · BURGSTRASSE 21 · D-44867 BOCHUM
www.kompernass.com
ID-Nr.: KH3002-06/09-V2
KH 3002
MOBILE POWER SUPPLY
Operating instructions
ENERGIA-ASEMA
Käyttöohje
ENERGISTATION
Bruksanvisning
ENERGISTATION
Betjeningsvejledning
ΦΟΡΗΤΗ ΠΗΓΗ ΕΝΕΡΓΕΙΑΣ
Οδηγίες χρήσης
ENERGIESTATION
Bedienungsanleitung
Page 2
KH 3002
qAw er
C
D
f
gh
jk
u
F
t
E
y
B
s
i
d
o
a
Page 3

CONTENT PAGE
Intended Use 2
Preparation 2
Technical Data 2
Description of the appliance 2
Safety instructions 3
Start-up 4
Charging with the mains power plug.............................................................................................4
Charging with the vehicle adapter.................................................................................................4
Power supply over the low voltage socket (max. 1 A) 5
Carrying out connections ................................................................................................................5
Providing electrical power...............................................................................................................6
Ending the supply of electricity .......................................................................................................6
Possible faults in the event of non-functionality..............................................................................6
Power supply over the 10 amp socket (Vehicle power plug) 6
Carrying out connections ................................................................................................................7
Switching the power supply on.......................................................................................................7
Ending the supply of electricity .......................................................................................................7
Possible faults in the event of non-functionality..............................................................................8
Power supply over the screw connections 8
Carrying out connections using the banana plugs .......................................................................8
Carrying out connections with the bare ends of fixed appliance cables...................................8
Carrying out connections over a loose cable ..............................................................................8
Fuses 9
Changing a round fuse....................................................................................................................9
Changing a flat fuse.........................................................................................................................9
Changing a cable fuse ...................................................................................................................9
Cleaning and care 9
Storage 10
Disposal 10
Warranty & Service 11
Importer 11
Read these operating instructions carefully before using the appliance for the first time and preserve this
booklet for later reference. Pass this booklet on to whoever might acquire the appliance at a future date.
- 1 -
Page 4
MOBILE POWER SUPPLY
KH 3002
Intended Use
This Energy Station is intended for mobile power
supply to low-voltage appliances of up to 10 A
power consumption. This appliance is intended only
for domestic use, it is not intended for use in commercial or industrial applications.
Do NOT use this appliance for applications where
a power failure could result in damage, e.g. medical
equipment, aviation or space programme etc.
Preparation
Technical Data
Energie Station
Rechargeable gel battery: 12 V / 7 Ah
Low voltage sockets: 3 V / 4,5 V
6 V/ 9 V/
12 V
unstabilised / 1 A
Vehicle socket: 12 V / 10 A
Screw connections: 12 V / 10 A
for max. 2 mins.
Connector power pack
Power supply : 230 V ~/ 50 Hz
Output voltage: 12 V / 500 mA
Protection class: II /
Model: ZJF-DC120V050
Unpacking
1. Remove the Energy Station and its accessories
from the packaging.
2. Remove all adhesive tapes, foils and transport
restraints.
Attention!
Do not permit small children to play with the plastic
packaging. There is a risk of suffocation!
Check the items supplied
Before taking the appliance into use, check that all
items are present and free of visible damage.
1 Energy Station KH 3002
1 Carrying strap
1 Power supply unit
1 Vehicle adapter
1 Adapter cable
5 Adapter plugs
Description of the appliance
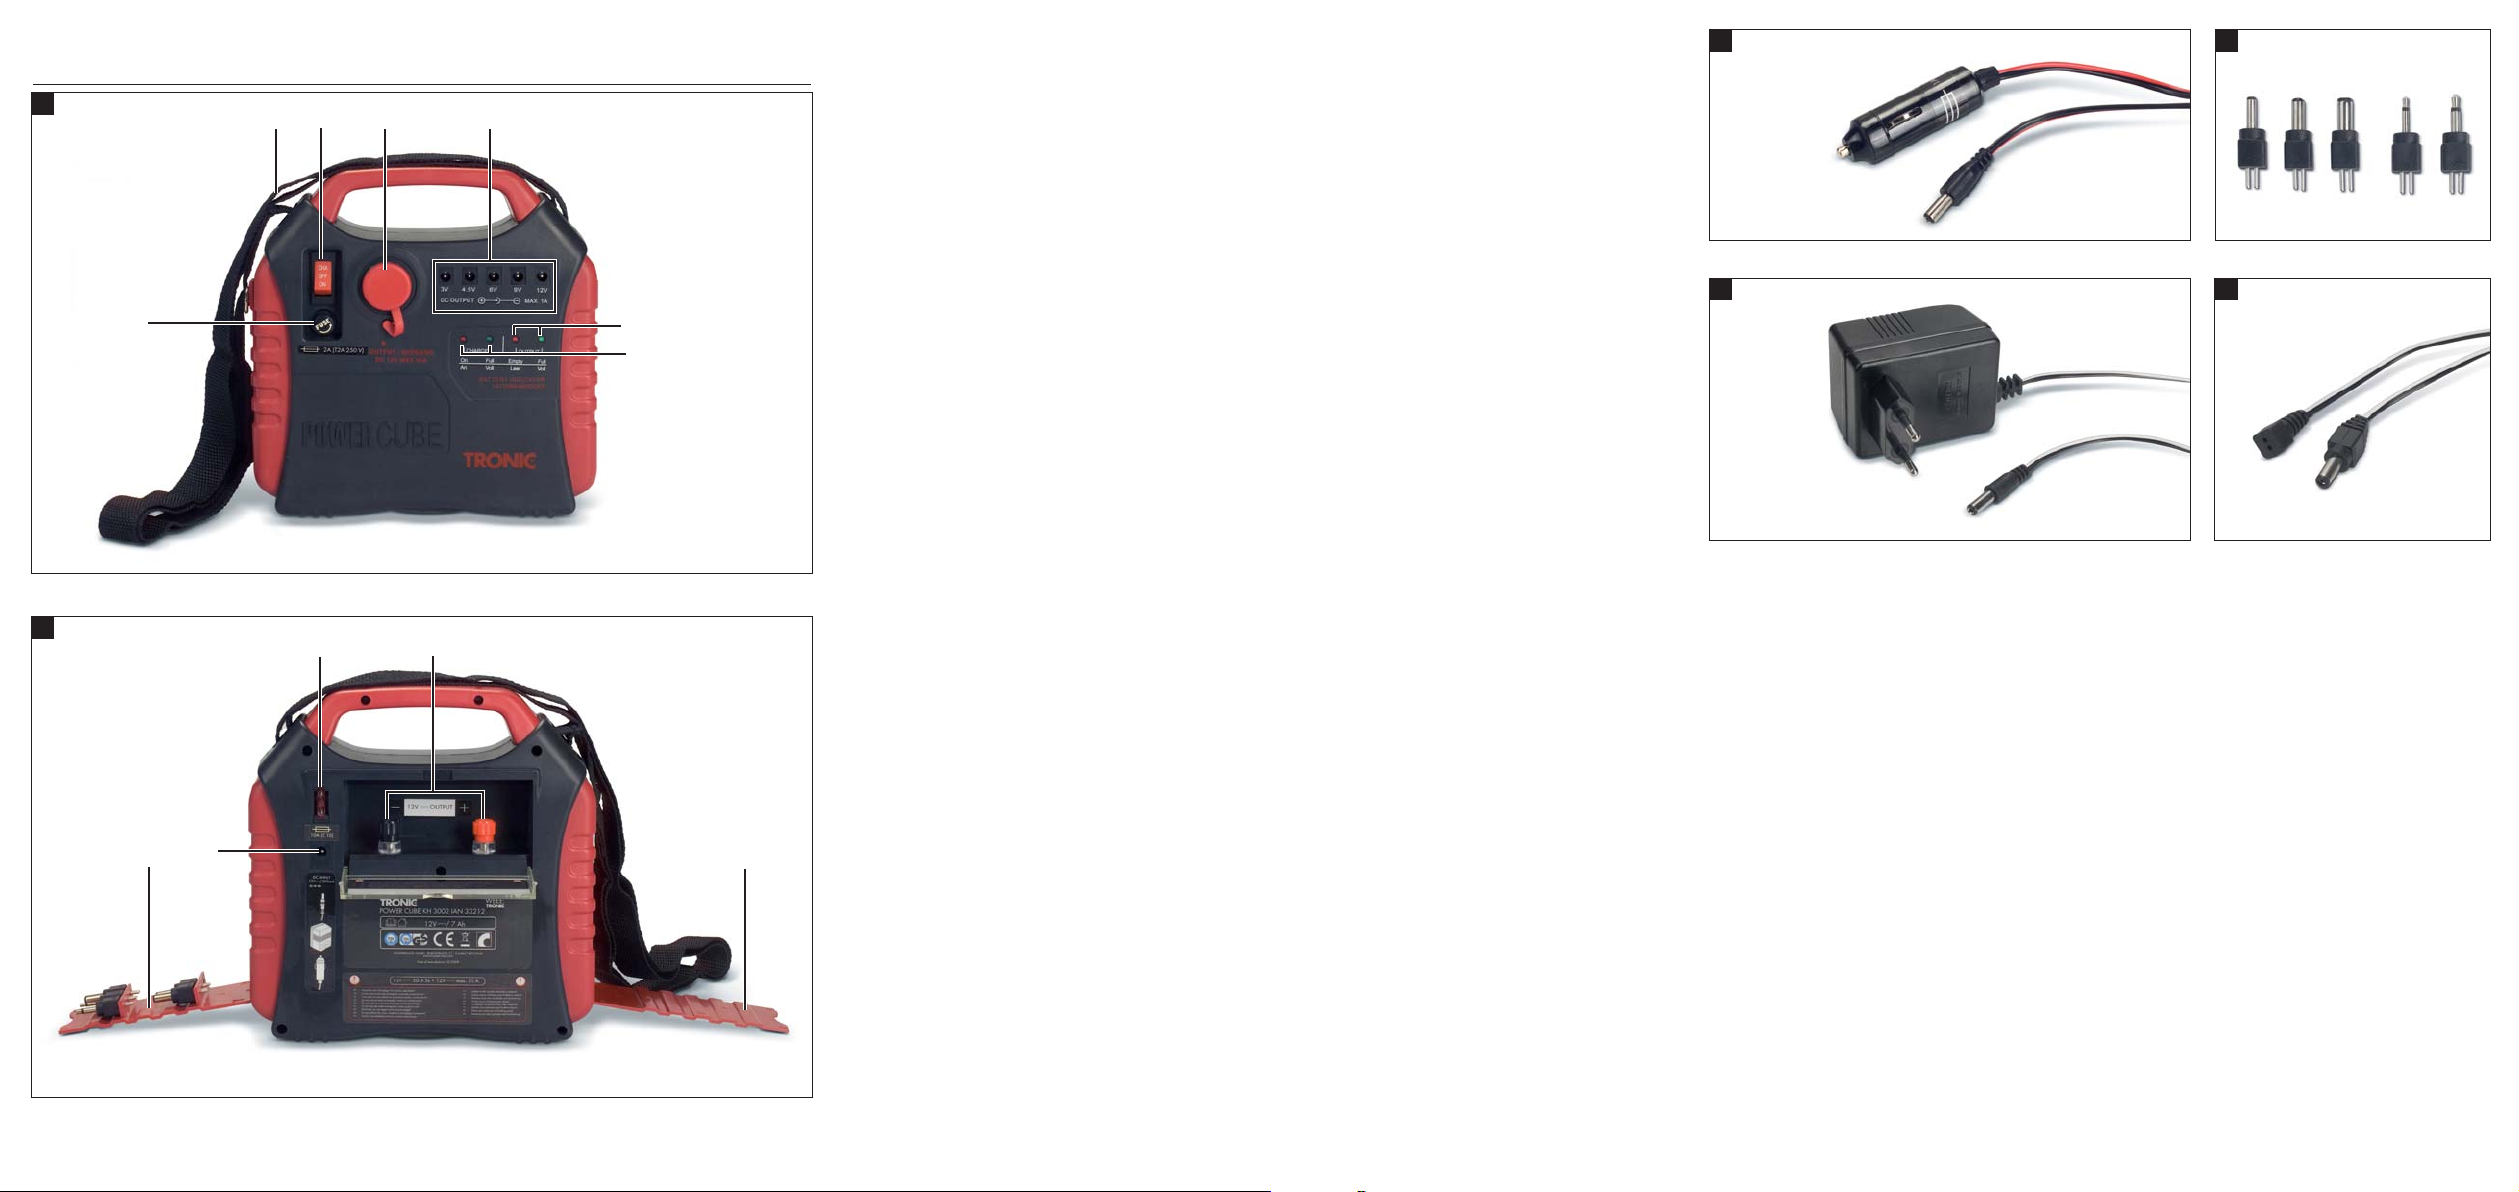
Front
Carrying strap
1
Mains switch (CHA/OFF/ON)
2
12 V/10 A Output
3
Low voltage sockets (3 V/4,5 V/6 V/9 V/12 V)
4
Indicator lamps for OUTPUT
5
(Red LED "Empty"/Green LED "Full")
Indicator lamps for CHARGE
6
(Red LED "On"/Green LED "Full")
Round fuse 2 A (T2A 250 V)
7
Rear
Flat fuse 10 A (C10)
8
Screw connections 12 V / 10 A
9
Storage compartment for adapter cables
0
Storage compartment for adapter plugs
q
Charging socket DC-INPUT
w
- 2 -
Page 5
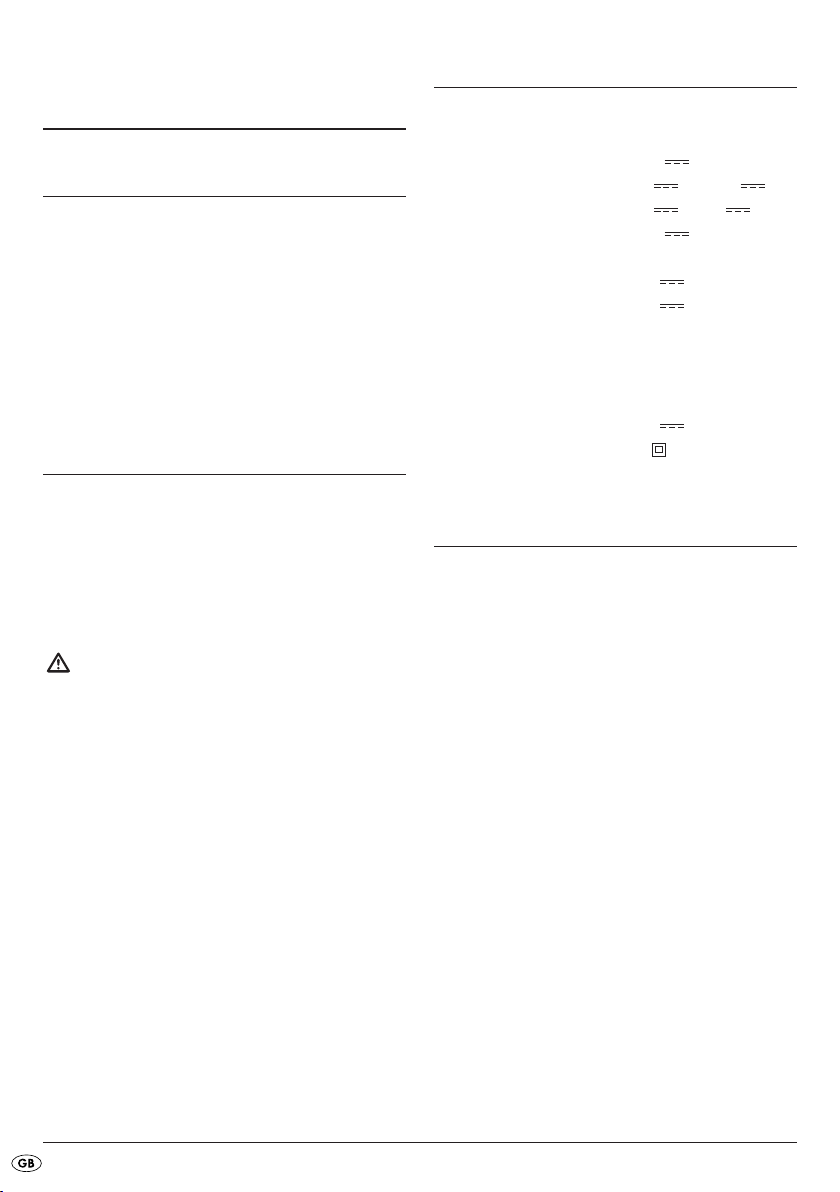
Vehicle adapter
Adapter plugs
3.5 mm Barrel connector
e
5 mm Barrel connector
r
5.5 mm Barrel connector
t
2.5 mm Jack plug
z
3.5 mm Jack plug
u
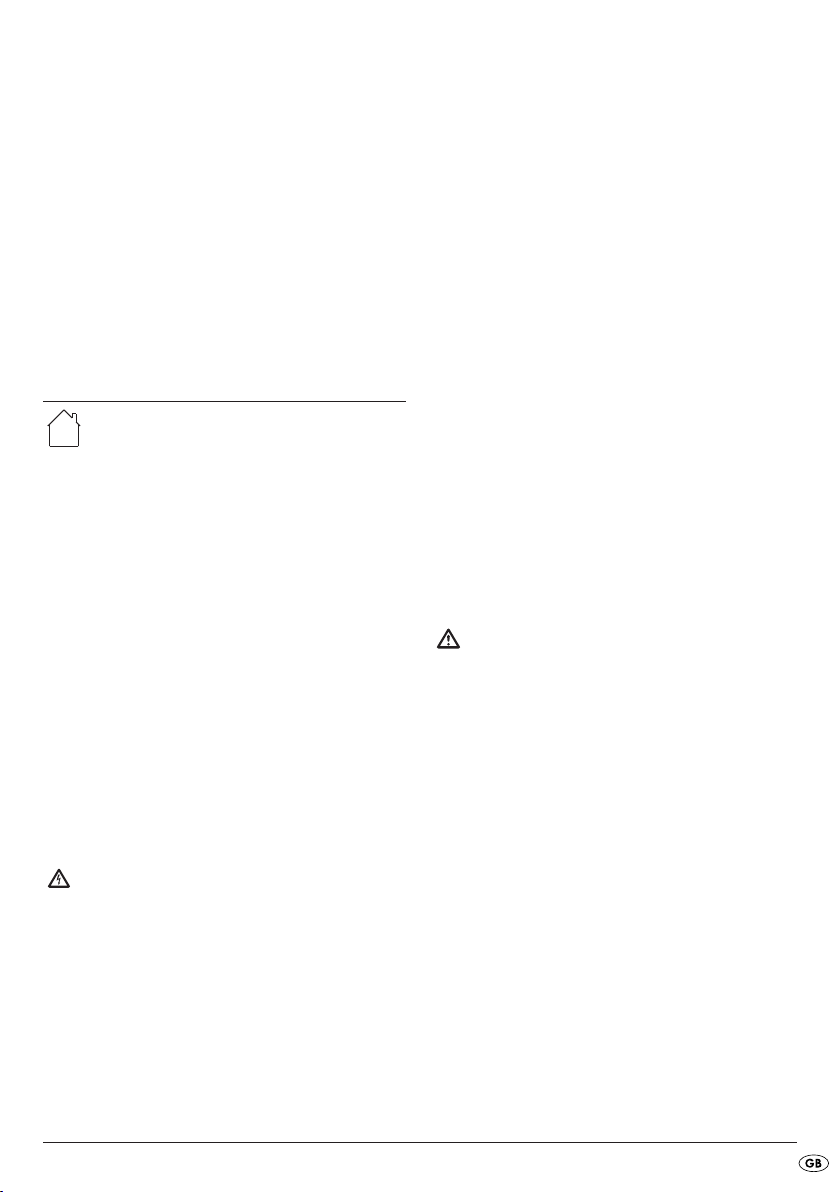
Adapter cable
Power supply unit
Safety instructions
This appliance is suitable for use ONLY
indoors.
• This appliance is not intended for use by individuals
(including children) with restricted physical, physiological or intellectual abilities or deficiences in
experience and/or knowledge unless they are
supervised by a person responsible for their safety
or receive from this person instruction in how the
appliance is to be used.
• Children should be supervised to ensure that
they do not play with the appliance.
• Check the appliance and all parts for visible
damages. The safety concept can work only if
the appliance is in a faultless condition.
• The plug must always be easily accessible,
so that the appliance can be quickly separated
from the mains power supply in the event of an
emergency.
To avoid potentially fatal electric
shocks:
• Connect the power supply unit only to correctly
installed and earthed mains sockets. The mains
voltage must conform with the specifications on
the ratings plate of the power supply unit.
• Only use the supplied power supply unit.
If you replace the power supply unit, only replace
it with one of the same model.
• To avoid risks, arrange for defective power plugs
and/ or cables to be replaced at once by
qualified technicians or our Customer Service
Department.
• Never submerge the appliance or the power
supply unit in water. Wipe it only with a slightly
damp cloth.
• Do not expose the appliance to rain and never
use it in a humid or wet environment.
• Ensure that the power cable never becomes wet
during operation.
• Do not open the casing or attempt to repair the
appliance yourself. Should you do so, appliance
safety can no longer be assured and the warranty
will become void.
• Protect the appliance against drip and spray
water. Do not place any water-filled vessels
(e.g. flower vases) on the appliance.
• Should water permeate into the Energy Station
or the power supply unit, or if they fall into water,
irreparable damage can occur and there also
exists the risk of receiving an electric shock!
To avoid the risk of fire caused by
short circuits:
• Ensure that the screw connectors can never be
short-circuited, for example, by a loose cable.
For operational reasons these connections are not
protected – this means that very high currents
can flow (over 15 A).
• Do not use the appliance in the vicinity of hot
surfaces.
• Do not retain the appliance in places exposed to
direct sunlight, Otherwise, it may overheat and
become irreparably damaged.
• Do not leave the appliance unattended when
in use.
- 3 -
Page 6
• Do not operate the Energy Station in the immediate vicinity of sources of heat, such as an oven,
hot air blowers (in a vehicle: close to heating
vents) and similar appliances! Heat effects could
lead to the equipment overheating and to the
melting of plastic parts, whereby the Energy
Station could be irreparably damaged!
If it is overheated, the Energy Station could
be irreparably damaged and the risk of
a fire exists!
• This appliance must not be placed in the immediate vicinity of flammable materials,
for example curtains, inflammable liquids etc.
• Do not place any open sources of fire,
like candles, on the appliance.
Injury hazard!
• Keep children away from the connecting cable
and the appliance. Children frequently underestimate the dangers of electrical appliances.
• Ensure that the appliance stands with a safe and
secure positioning.
• Do not operate the appliance if it has sustained
a fall or is damaged. Arrange for the appliance
to be checked and, if necessary, repaired by
qualified technicians.
Start-up
The Energy Station is supplied with a low-level precharged battery. Prior to initial usage it must therefore
be charged.
Attention!
The battery can lose considerable capacity should
you use the Energy Station without fully charging it
beforehand!
• Before taking the appliance into use, check to
ensure that the Energy Station, the connection
cables
and the power supply unit are in
a defect-free condition.
Danger!
NEVER use a damaged connection cable. Risk of
short circuit!
Charging with the mains power plug
Attention: Explosive Gas
Avoid flames and sparks. During charging, ensure
that there is sufficient ventilation.
1. Insert the appliance plug of the power supply
unit
in the charging socket DC-INPUT w at
the back of the appliance.
2. Connect the power supply unit
power socket. The mains voltage must conform
with the specifications on the ratings plate of the
power supply unit.
3. Place the main switch 2 at the front of the appli-
ance to the “CHA” position. The Energy Station is
now being charged.
4. While the Energy Station is charging, the red LED
“On” 6 in the field CHARGE will be illuminated.
5. When the battery is nearly fully charged, the
green LED “Full” 6 will start to be faintly illuminated. As soon as it is fully illuminated you can
remove the power supply unit
"On" 6 continues to glow until you place the
main switch 2 in the position "OFF".
to a mains
. The red LED
Charging with the vehicle adapter
You can also charge the Energy Station by connecting the supplied vehicle adapter
12V on-board voltage system of a motor vehicle or
sports boat:
1. First insert the appliance plug of the 12V vehicle
adapter
of the appliance.
in the charging socket w at the rear
to the
- 4 -
Page 7
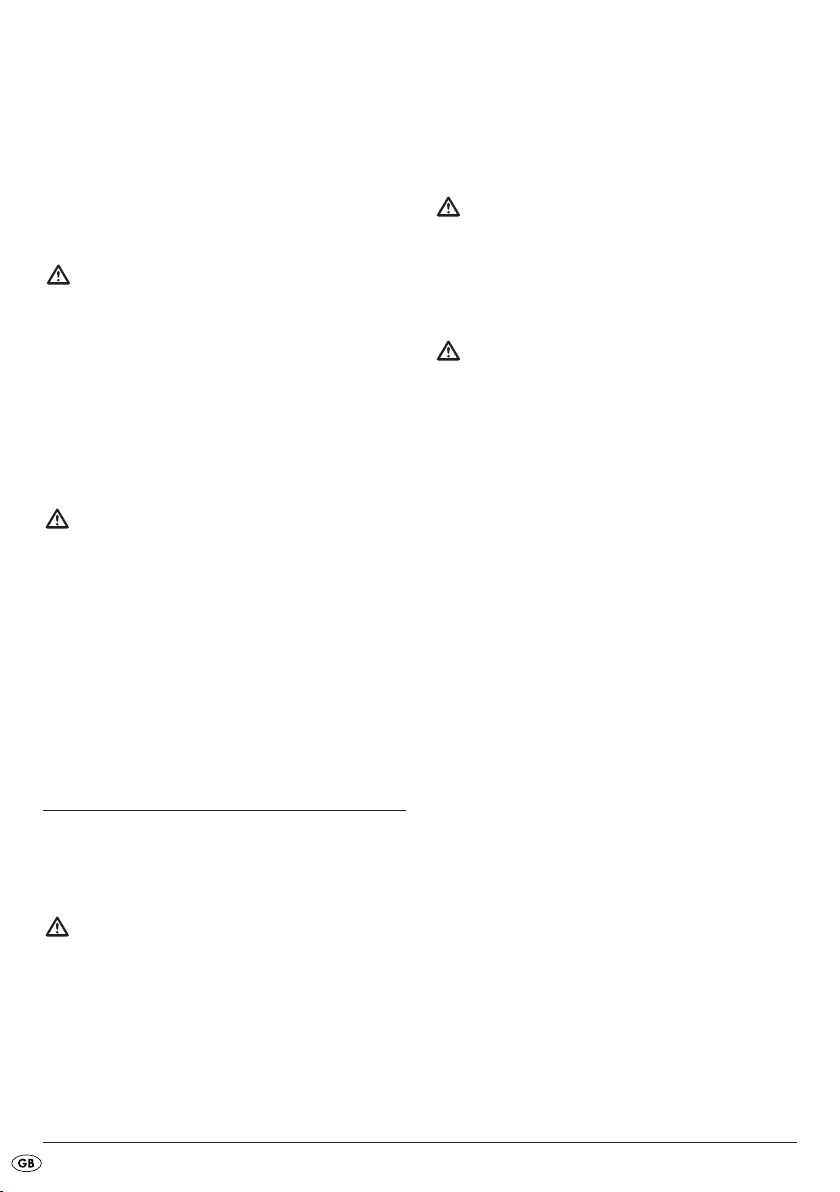
2. Then insert the 12 V plug of the vehicle adapter
-
+
in the 12-V plug resp. in the cigar lighter of
the vehicle.
Danger!
The above sequence is important, as it avoids a short
circuit due to inadvertent contact of the appliance
plug with the vehicle chassis.
3. Place the main switch 2 at the front of the appli-
ance to the “CHA” position. The Energy Station is
now being charged.
4. While the Energy Station is charging, the red LED
“On” 6 in the field CHARGE will be illuminated.
5. When the battery is nearly fully charged, the
green LED “Full” 6 will start to be faintly illuminated. As soon as it is fully illuminated you can
remove the vehicle adapter . The red LED "On"
6 continues to glow until you place the main
switch 2 in the position "OFF".
Carrying out connections
A total of 5 low voltage connection sockets 4,
from 3 - 12 V, are available for the supply of power
to appliances with a maximum power consumption
of 1 A:
1. Insert the adapter cable in the low voltage
connection socket 4 corresponding to the voltage
required for the appliance to be supplied.
2. Select the suitable adapter connector for the
input to the appliance being supplied.
Caution!
Ensure that “Positive” and “Negative” have not
been switched. Otherwise your appliance could
be damaged!
3. Connect the selected adapter plug and the
adapter cable together so that positive and
negative correspond to the markings on the
sockets of your appliance.
Notice!
A charging process is only established if the charging
voltage is higher than that of the battery. With a stationary vehicle this is frequently not the case. Generally speaking, charging is therefore only possible
with the engine running.
Power supply over the low
voltage socket (max. 1 A)
Caution!
Before performing any connections, always check
to ensure that both the appliance to be supplied
and the Energy Station are switched off. Place the
main switch 2 in the “OFF” position (centre position).
In this way you can avoid damage through connection faults.
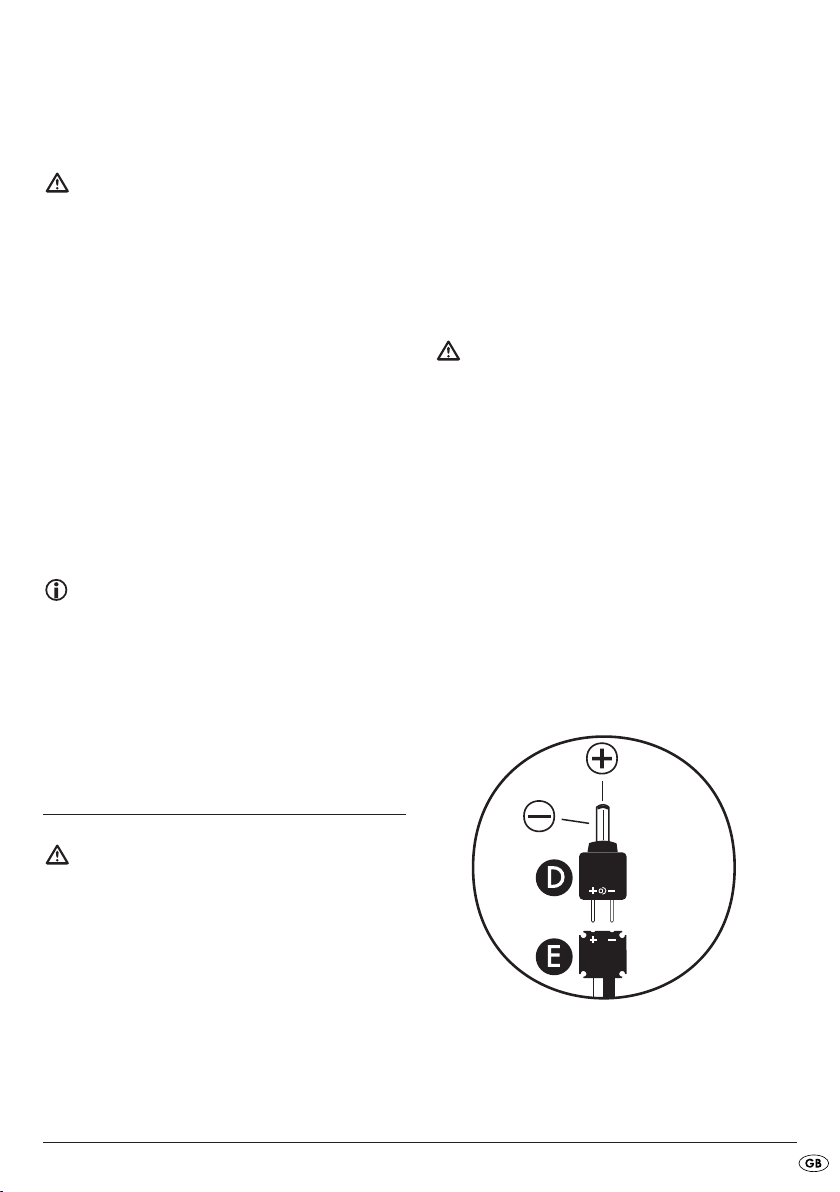
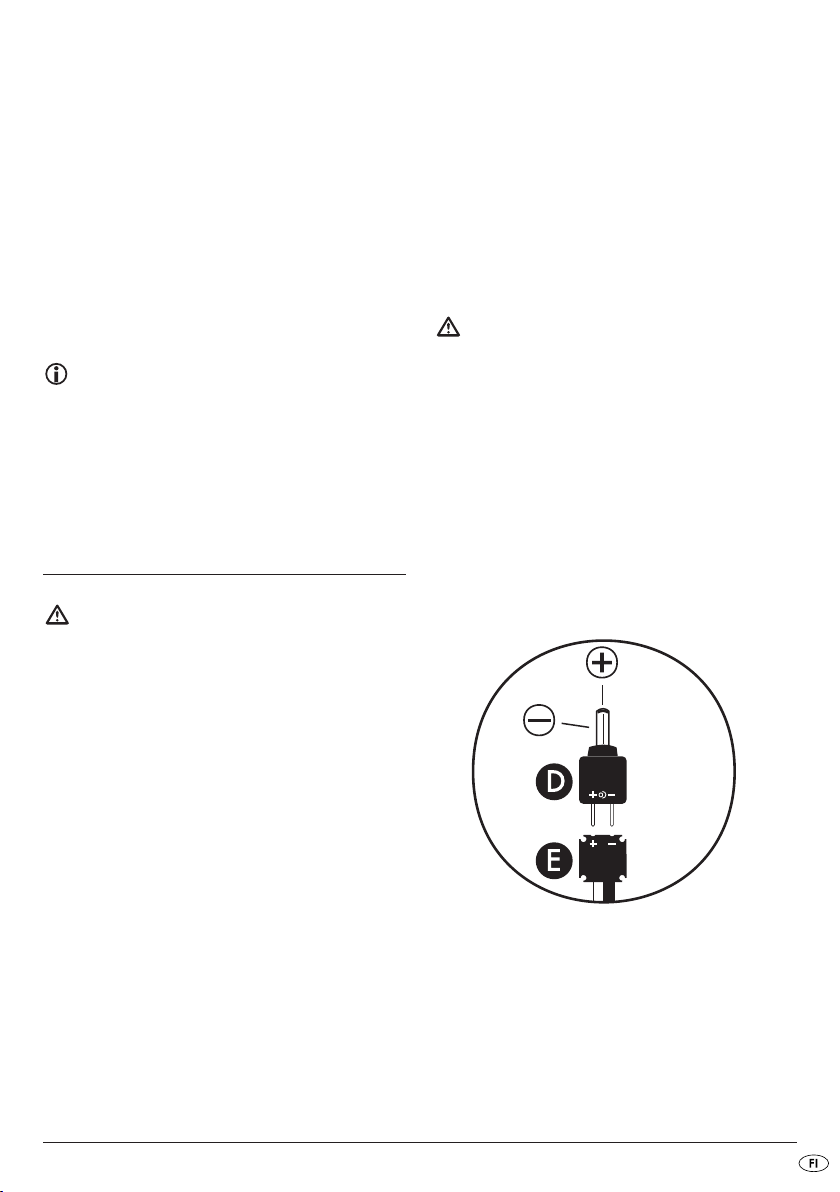
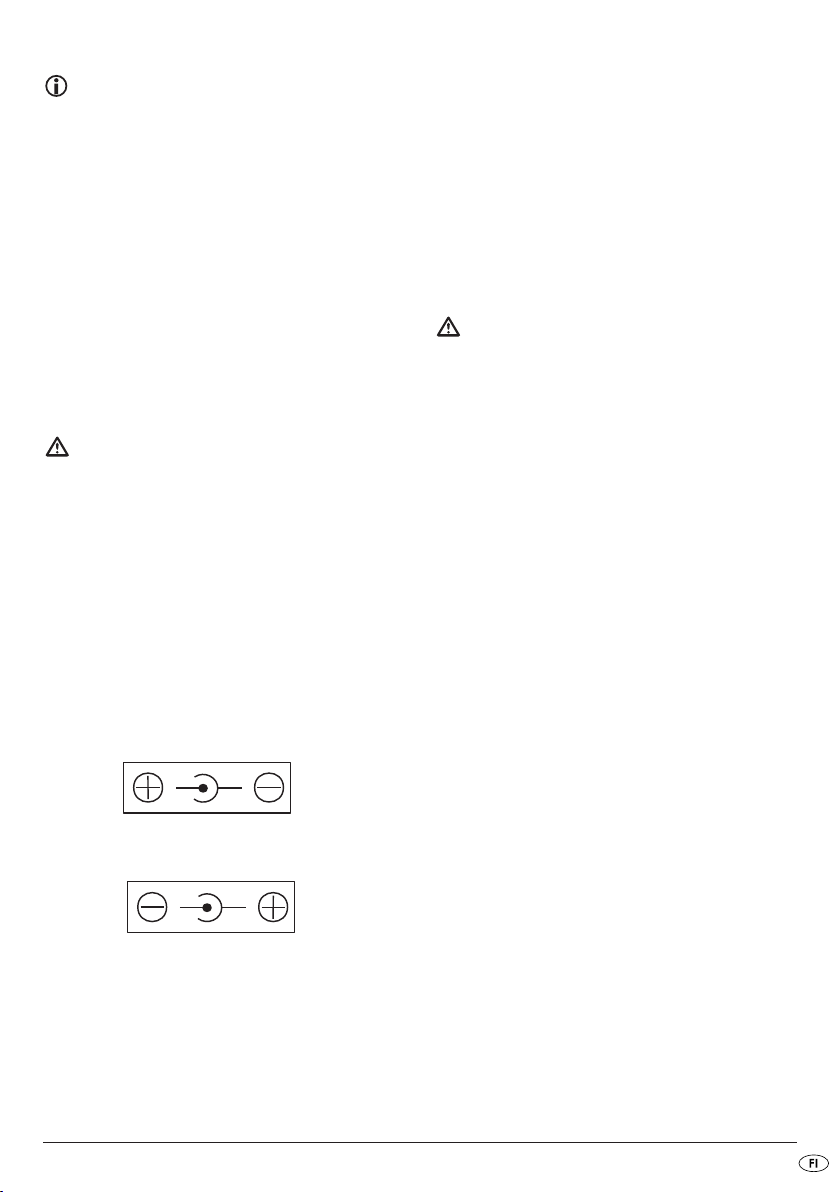
Polarity of the adapter plug:
• Should the adapter plugs be connected with
positive to positive and negative to negative on
the adapter cable , then on the adapter plugs
positive is above resp. inside and negative is
below resp. outside.
- 5 -
Page 8
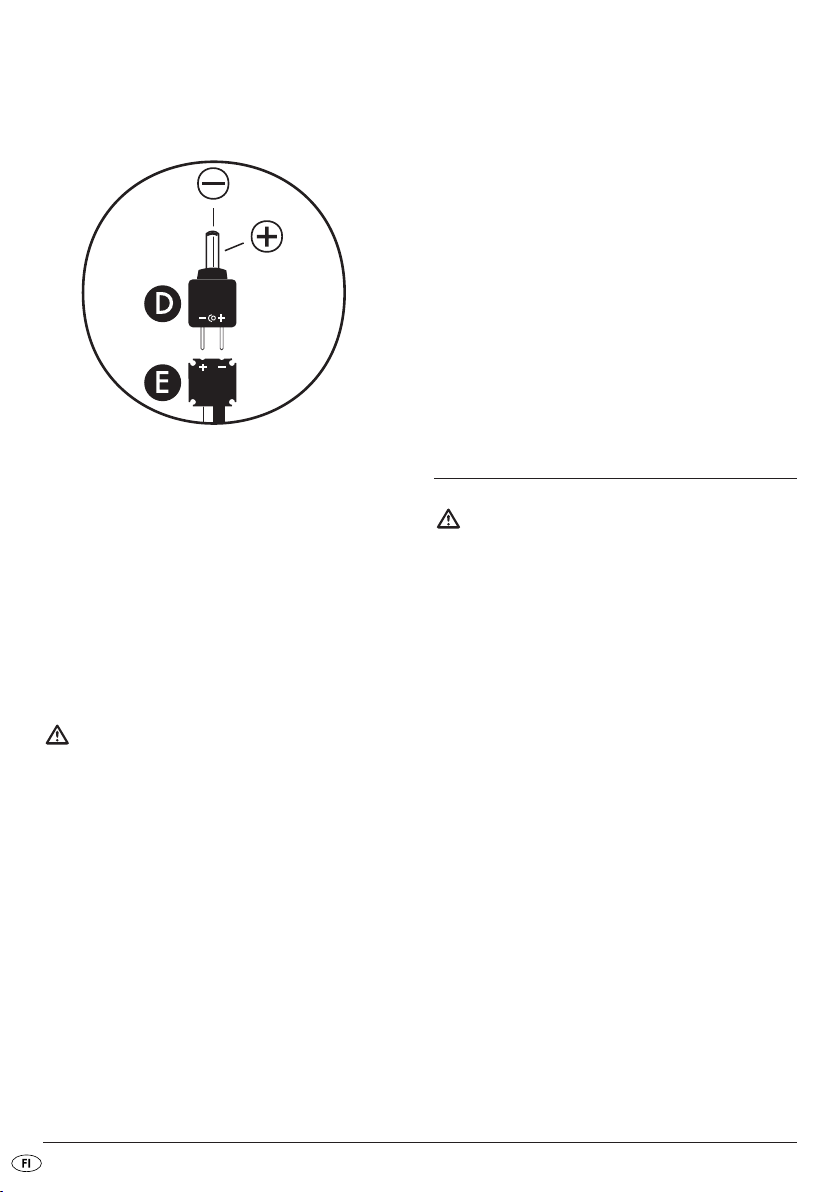
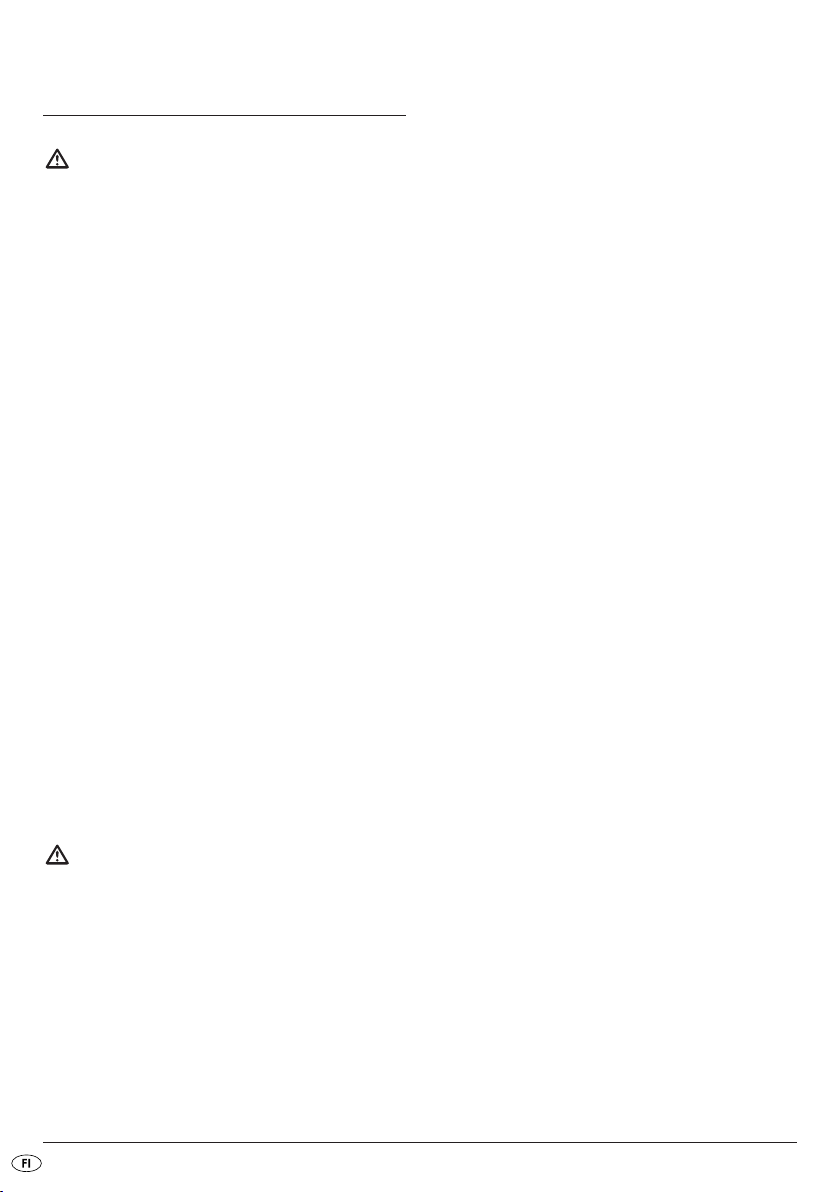
• Should the adapter plugs be connected with
-
+
opposite markings (+ and -) on the adapter cable
, then on the adapter plugs positive is outside
and negative is inside.
Providing electrical power
1. Place the main switch 2 to "ON" – the appliance
connected via the adapter cable is supplied
with electricity.
2. For as long as sufficient energy is available for
the appliance being supplied, the green LED
“Full” 5 is illuminated in the OUTPUT field.
3. When there no longer sufficient energy available
for the appliance being supplied, the red LED
"Empty" 5 is illuminated in the OUTPUT field.
Caution!
You must first recharge the battery when the red LED
“Empty” 5 is illuminated. Otherwise the battery will
be depleted, usually resulting in a considerable loss
of charging capacity.
Ending the supply of electricity
1. Switch the appliance off that is being supplied
with power.
2. Place the main switch 2 of the Energy Station at
"OFF" (centre position).
In this way you prevent current flowing while the
connector is being withdrawn. Sensitive appliances
sometimes malfunction as a consequence.
3. Now you can withdraw the adapter cable plugs
from both the appliance and the Energy
Station.
Possible faults in the event of
non-functionality
• If neither of the two LEDs, 5 and 6, light up
after switching on, then the 10 amp fuse 8 on
the Energy Station might have blown. Changing
fuses is described in more detail in the section
"Fuses".
• Should an LED light up on the Energy Station
after switching on, but the appliance fails to work,
immediately switch the Energy Station off. Check
to ensure that the cable is correctly connected –
and “Positive” and “Negative“ have not been switched. If required, also check the fuse in your
appliance, as described in its operating
instructions.
Power supply over the 10 amp
socket (Vehicle power plug)
Caution!
Before performing any connections, always check
to ensure that both the appliance to be supplied
and the Energy Station are switched off. Place the
main switch 2 in the “OFF” position (centre position).
In this way you can avoid damage through connection faults.
The 12 V/10 A socket 3 is available for the supply
of electricity to appliances consuming up to a max.
of 10 A. Here you can connect the so-called “cigarette lighter connectors” for various appliances.
These could be for example...
- cooler boxes,
- car vacuum cleaners,
- small portable TV sets etc. ...
- 6 -
Page 9
Note:
Please bear in mind that with a 10 A load the battery
will be exhausted after not more than 45 minutes –
subject to the battery charge condition, even earlier.
Cooler boxes have a typical power consumption of
3 - 4 A per hour. With a battery capacity of 7 Ah,
this corresponds to just under 2 hours of operating
time. You can roughly estimate the operating time
for your appliance using this calculation example.
In this way you can avoid damage caused by
connection errors.
Carrying out connections
Caution!
Ensure that “Positive” and “Negative” are not switched
before connecting your appliance to the Energy
Station. Otherwise your appliance could be
damaged.
You could use the supplied vehicle adapter for
supplying power, should its plug fit in the socket of
the appliance.
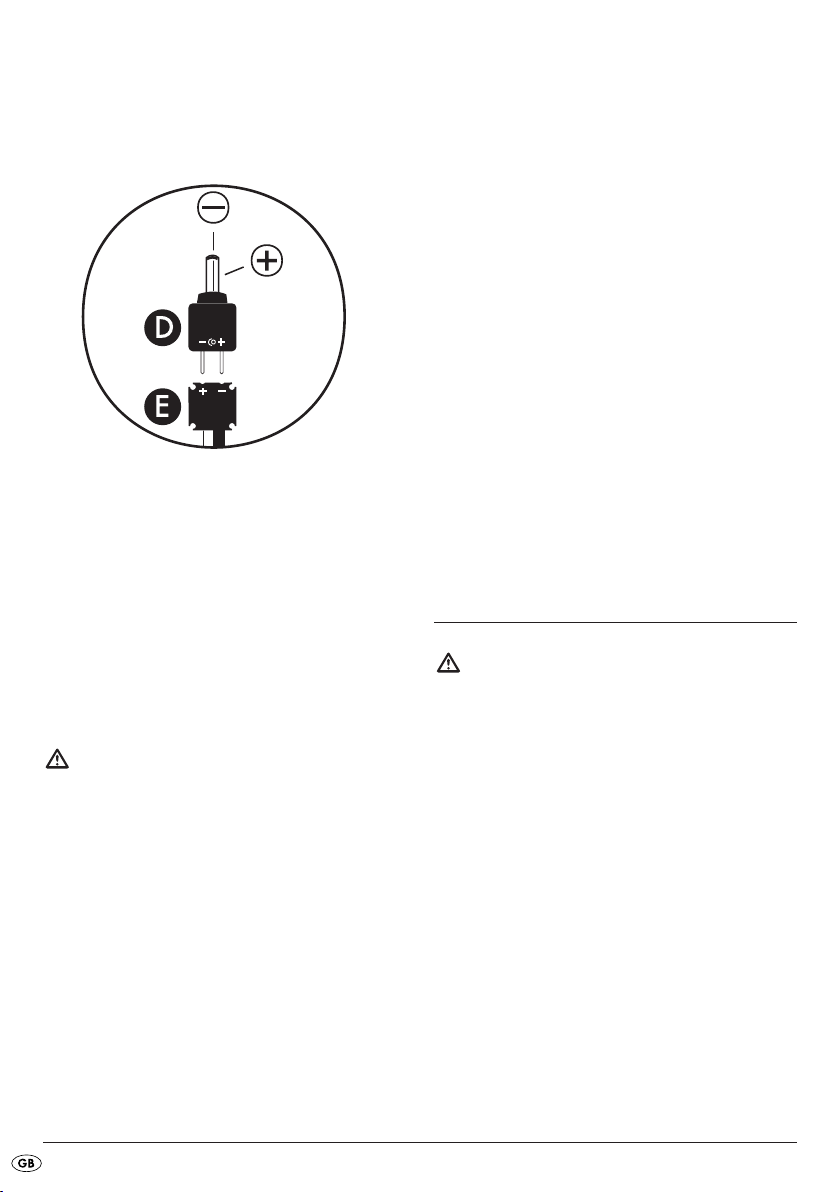
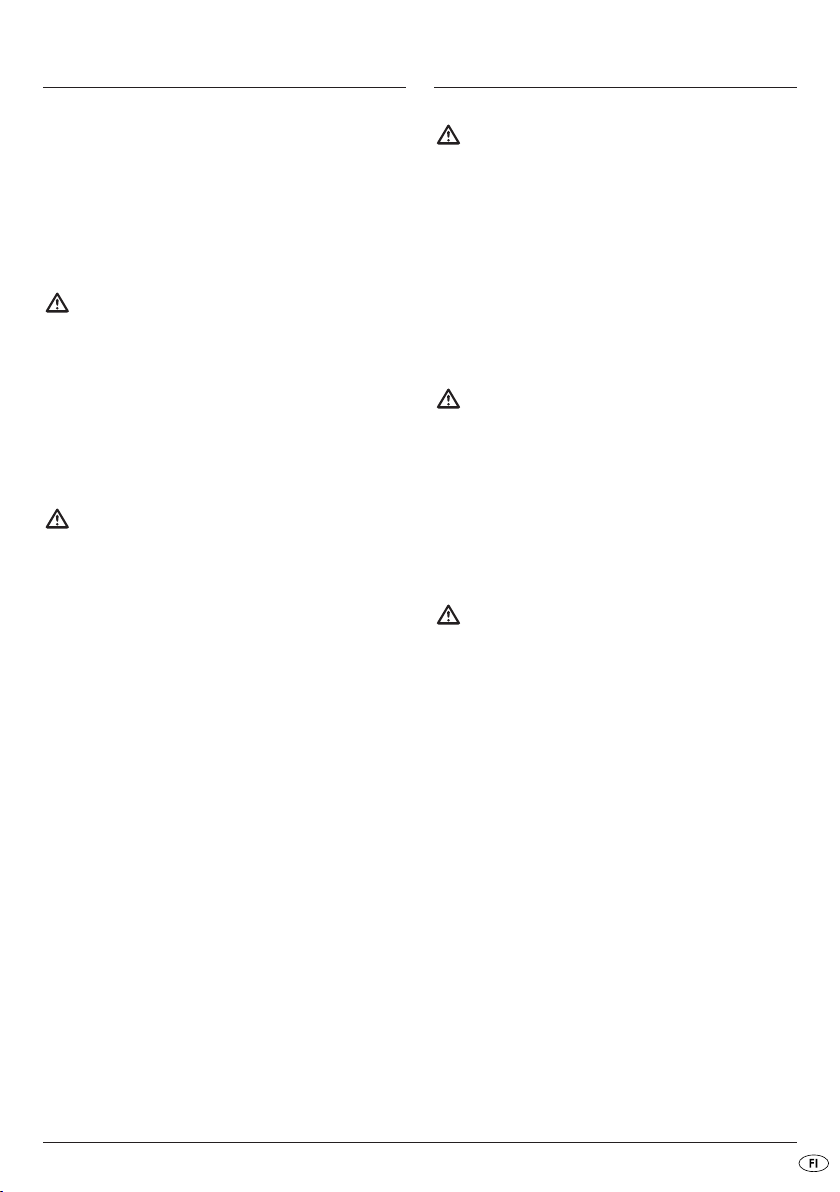
With the supplied vehicle adapter cable the
appliance plug is connected so that Positive is on
the inside and Negative on the outside, as shown.
• You can use the vehicle adapter cable if the
socket on the appliance being powered is marked
thus:
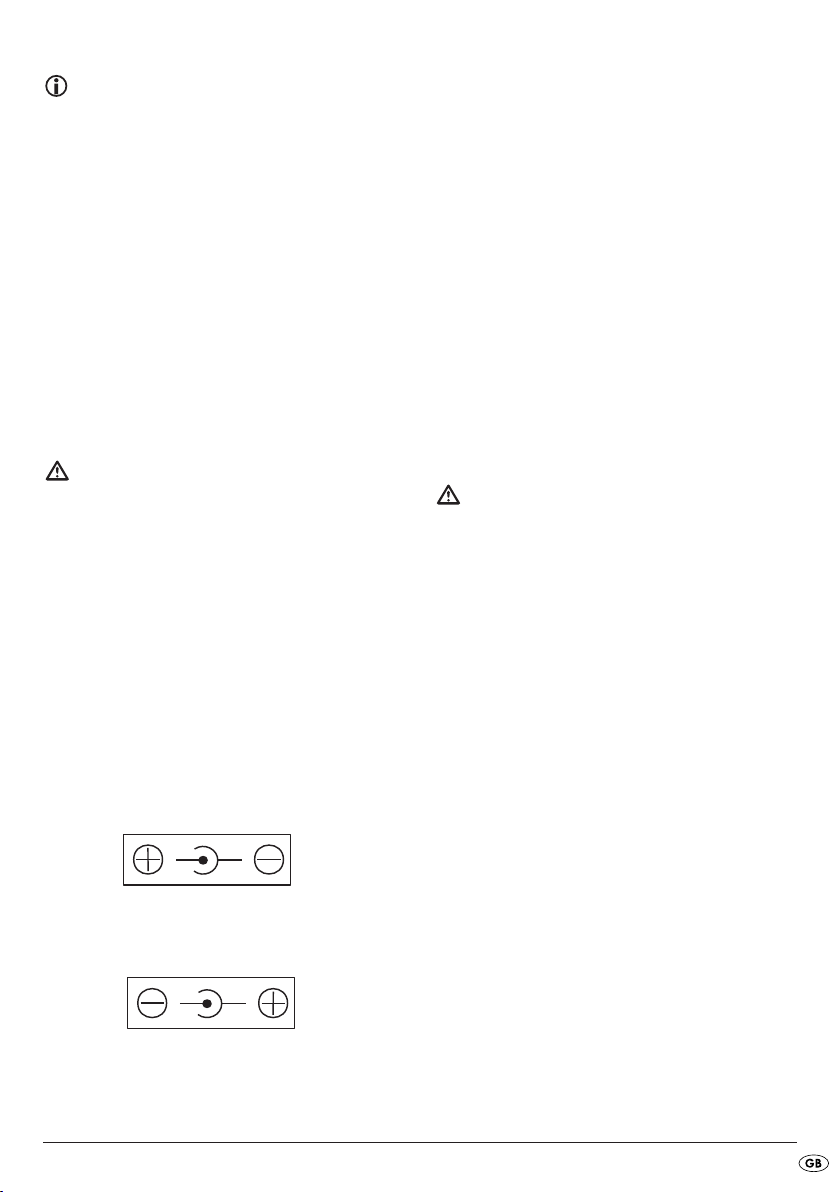
• Do not use the vehicle adapter cable if the
socket on the appliance being powered is marked
thus:
1. Insert the appliance connector of the supplied
vehicle adapter cable in the socket on your
appliance.
2. Insert the 12-V plug of the vehicle adapter ,
resp. the appliance being powered, in the
12 V/10 A socket 3 on the Energy Station.
Switching the power supply on
1. Place the main switch 2 at "ON" – your appliance will now be supplied with power.
2. For as long as sufficient energy is available for
the appliance being supplied, the green LED
“Full” 5 is illuminated in the OUTPUT field.
3. When there no longer sufficient energy available
for the appliance being supplied, the red LED
"Empty" 5 is illuminated in the OUTPUT field.
Caution!
You must first recharge the battery when the red LED
“Empty” 5 is illuminated. Otherwise the battery will
be depleted, usually resulting in a considerable loss
of charging capacity.
Ending the supply of electricity
1. Switch the appliance off that is being supplied
with power.
2. Place the main switch 2 of the Energy Station at
"OFF" (centre position).
In this way you prevent current flowing while the
connector is being withdrawn. Sensitive appliances
sometimes malfunction as a consequence.
3. Withdraw the 12-V plug from the 12 V/10 A
socket 3 on the Energy Station and, if need be,
the appliance plug of the vehicle adapter
from the appliance that was being powered.
On appliances with a permanently connected cable
and 12 V plug, “Positive” and “Negative“ have
the correct polarity.
- 7 -
Page 10
Possible faults in the event of
non-functionality
• If neither of the two LEDs, 5 and 6, light up after
switching on, then the 10 amp fuse 7 on the
Energy Station might have blown. Changing fuses
is described in more detail in the section "Fuses".
• Should an LED light up on the Energy Station after
switching on, but the appliance fails to work, immediately switch the Energy Station off. Check to
ensure that the cable is correctly connected –
and that “Positive” and “Negative“ have not
been switched. If required, also check the fuse in
your appliance, as described in its operating
instructions.
Power supply over the screw
connections
Caution!
Before performing any connections, always check
to ensure that both the appliance to be supplied
and the Energy Station are switched off. Place the
main switch 2 in the “OFF” position (centre position).
In this way you can avoid damage through connection faults.
Use the screw connections 9 at the rear of the appliance for 12V appliances requiring a high starting
current for switching on, but which do not otherwise
consume more than 10 A per hour.
Appliances with a high starting current could be for
instance ...
- 12 V vacuum cleaners
- 12 V drilling machines
- 12 V television sets etc.
Although these may not require more than 10 A
in operation, the fuse will immediately blow when
they are switched on. In this case such appliances
cannot be operated on the 12 V/10 A socket 3.
Operate these appliance only by way of the screw
connections 9, as described here.
Carrying out connections using the
banana plugs
1. The screw connections 9 are hollow, to accom-
modate so-called “banana plugs”. If such are
provided on your appliance cable, you can insert
these in the screw connections 9 from the top,
instead of screw-connecting.
Danger!
Extremely high current flows are possible here, ones
that are even capable of heating thick cables to red
hot! Before connecting, check to ensure that the
connecting cable for the appliance to be powered
is suitable for such a connection, so as to avoid
electric shock and the risk of fire.
These high currents are required for the starting of
some appliances. The screw connections 9 are
therefore neither routed by way of a fuse and nor
by way of the main switch 2, i.e. voltage is
continuously present!
For this reason it is imperative to ensure that a shortcircuit cannot be created at the screw terminals,
not under any circumstances!
Carrying out connections with the
bare ends of fixed appliance cables
1. If the cable is permanently connected with the
appliance to be powered, you can simply connect the bare “Positive“ wire (usually red) to the
red screw connector 9.
2. Connect the bare "Negative" wire (usually black
or blue) to the black screw terminal 9.
To do so, unscrew the plastic caps on the screw
terminals 9. Clamp the bare wires underneath
when retightening.
Carrying out connections over a loose
cable
1. If the cable is not permanently connected to the
appliance being powered, but has a bare ap-pliance plug available, first insert the appliance
plug in the socket on the appliance.
- 8 -
Page 11
2. Then connect the wires to the screw connectors 9.
With this sequence you avoid short-circuit risks,
should the bare connector inadvertently come into
contact with metallically conductive objects during
the connection work.
Fuses
If neither of the two LEDs, 5 and 6, light up after
switching on, then the 10 amp fuse 7 on the Energy
Station might have blown.
If an LED is illuminated after switching on, but no
current is flowing via the vehicle adapter , the
cable fuse in the 12 V plug of the vehicle adapter
may have burnt out.
Danger!
First, place the main switch 2 to “OFF”. Disconnect
ALL cables from the Energy Station before changing
ANY fuses.
In this way you will avoid having the new fuse melting
in your fingers on insertion if the defect persists –
risk of injury!
Changing a cable fuse
• Unscrew the cable fuse cap on the 12 V plug
of the vehicle adapter . Insert a new “1 A
(T1A 250 V)” fuse.
If the fuse blows again immediately after the appliance is connected, the appliance is burdening the
Energy Station with excessive power consumption –
or it is defective.
Cleaning and care
Danger!
Never open the housing of this appliance. There
are no user-serviceable elements inside. An open
housing can pose a fire hazard through short-circuit
currents.
• Place the main switch 2 to the position “OFF”.
• Disconnect all cable connections between the
Energy Station and any appliances that might be
connected to it.
• If you wish to clean the power supply unit ,
disconnect it from both the mains power socket
and the charging socket w.
Danger!
Fuses are important protective measures to help
prevent damage. Never render them ineffective.
Always replace fuses with fuses of the same rating,
never with “higher” ratings. Never bypass fuses.
Risk of fire!
Changing a round fuse
• Unscrew the cap at the front of the round fuse 7.
Fit a new fuse with a rating of “2 A“ (T2A 250 V).
Changing a flat fuse
• Pull out the flat fuse 8 at the rear of your ap-
pliance (e.g. with long-nose pliers). Insert a new
“10 A (C10)” fuse.
Danger!
Never submerse any parts of the appliance in water
or other liquids! This can severely damage the Energy
Station – and there is also the risk of a potentially
fatal electric shock from the power supply unit.
• All surfaces and cables are best cleaned with
a slightly moistened washing-up cloth. Dry the
appliance well before re-using it.
Danger!
Do not use detergents or solvents. These could cause
damage to the appliance, especially to the lettering.
- 9 -
Page 12
Storage
Because of the natural self-discharge of batteries,
the Energy Station should be fully charged once
more before putting it into storage for several days
or weeks.
If you wish to store the appliance for an extended
period of time without usage, to prevent a full depletion of the battery it should be recharged before
the expiry of 6 months.
• Place the main switch 2 to the position “OFF”.
• Disconnect all cable connections between the
Energy Station and any appliances that might be
connected to it.
• Pack all cables and connectors away in the
storage compartments 0 and q on the
appliance.
• And finally, close all lids.
• Store the appliance in a dry place.
Disposal
Do not dispose of the appliance in your
normal domestic waste.
This product is subject to the provisions
of European Directive 2002/96/EC.
Dispose of this appliance through an approved waste
disposal centre or at your community waste facility.
Observe the currently applicable regulations.
In case of doubt, please contact your waste disposal
centre.
Disposal of batteries/cells
Used batteries/cells may not be disposed of in household waste. All consumers are statutorily required to
dispose of batteries or cells at a collection point in
their community or at a retail company.
The purpose of this obligation is to ensure that batteries are disposed of in a non-polluting manner. Only
dispose of batteries when they are fully dis-charged.
Dispose of all packaging materials in an
environmentally friendly manner.
- 10 -
Page 13
Warranty & Service
Importer
The warranty for this appliance is for 3 years from
the date of purchase. The appliance has been
manu-factured with care and meticulously examined
before delivery. Please retain your receipt as proof
of purchase. In the case of a warranty claim, please
make contact by telephone with our service department. Only in this way can a post-free despatch for
your goods be assured.
The warranty covers only claims for material and
maufacturing defects, not for wearing parts or for
damage to fragile components. This product is for private use only and is not intended for commercial use.
The warranty is void in the case of abusive and
improper handling, use of force and internal tampering not carried out by our authorized service
branch. Your statutory rights are not restricted in
any way by this warranty.
DES Ltd
Tel.: 0870/787-6177
Fax: 0870/787-6168
e-mail: support.uk@kompernass.com
Kompernass Service Ireland
Tel: 1850 930 412
Standard call rates apply. Mobile operators may vary.
e-mail: support.ie@kompernass.com
(0,082 EUR/Min.)
KOMPERNASS GMBH
BURGSTRASSE 21
44867 BOCHUM, GERMANY
www.kompernass.com
- 11 -
Page 14

- 12 -
Page 15

SISÄLLYSLUETTELO SIVU
Käyttötarkoitus 14
Valmistelu 14
Tekniset tiedot 14
Laitteen kuvaus 14
Turvaohjeet 15
Käyttöönotto 16
Lataaminen pistokeverkkolaitteella...............................................................................................16
Lataaminen autoadapterilla..........................................................................................................16
Virransyöttö pienjänniteholkkien kautta (kork. 1 A) 17
Liitäntöjen suorittaminen ................................................................................................................17
Virransyöttön kytkeminen...............................................................................................................18
Virransyötön lopettaminen ............................................................................................................18
Mahdolliset viat toimintahäiriöiden sattuessa .............................................................................18
Virransyöttö 10 A:n holkin kautta (autopistorasia) 18
Liitäntöjen suorittaminen ................................................................................................................19
Virransyötön kytkeminen päälle....................................................................................................19
Virransyötön lopettaminen ............................................................................................................19
Mahdolliset viat toimintahäiriöiden sattuessa .............................................................................19
Virransyöttö kierreliitäntöjen avulla 20
Liitäntöjen suorittaminen banaanipistokkeen avulla ...................................................................20
Liitäntöjen suorittaminen kiinteän laitejohdon paljaiden päiden kautta ...................................20
Liitäntöjen suorittaminen irtojohdon avulla ..................................................................................20
Sulakkeet 21
Pyöreän sulakkeen vaihtaminen ...................................................................................................21
Lattasulakkeen vaihtaminen...........................................................................................................21
Johtosulakkeen vaihtaminen..........................................................................................................21
Puhdistus ja hoito 21
Säilytys 22
Hävittäminen 22
Takuu & huolto 23
Maahantuoja 23
Lue käyttöohje ennen ensimmäistä käyttökertaa huolellisesti läpi ja pidä sitä lähettyvillä myös
myöhemmissä käytöissä. Jos myyt laitteen, anna ohje myös seuraavalle omistajalle.
- 13 -
Page 16
ENERGIA-ASEMA
KH 3002
Käyttötarkoitus
Energia-asema on tarkoitettu liikkuvaan virransyöttöön
pienjännitelaitteille, joiden tehonotto on korkeintaan
10 A. Laite on tarkoitettu vain yksityiskäyttöön, eikä
sitä ole tarkoitettu käytettäväksi kaupallisilla tai teollisilla alueilla.
Älä käytä laitetta käyttötarkoituksiin, joissa sähkökatkos voi aiheuttaa vahinkoja, esim. sairaalalaitteisiin,
ilmailuun tai avaruuslennoilla jne.
Valmistelu
Tekniset tiedot
Energia-asema
Hyytelöakku: 12 V / 7 Ah
Pienjänniteliitännät: 3 V / 4,5 V /
6 V/ 9 V/
12 V epävakaa / 1 A
Autopistorasia: 12 V / 10 A
Kierreliitännät: 12 V / 10 A - kork. 2 min
Pistokeverkkolaite
Virransyöttö: 230 V ~/ 50 Hz
Lähtöjännite: 12 V / 500 mA
Suojausluokka: II /
Malli: ZJF-DC120V050
Laitteen kuvaus
Purkaminen pakkauksesta
1. Ota energia-asema ja lisävarusteet pakkauksesta.
2. Poista kaikki teipit, kalvot ja kuljetusvarmistukset.
Huomio!
Älä anna pikkulasten leikkiä muoveilla.
On olemassa tukehtumisvaara!
Tarkista toimituksen täydellisyys
Tarkasta ennen käyttöönottoa toimituksen täydellisyys
ja mahdolliset vauriot.
1 energia-asema KH 3002
1 kantohihna
1 pistokeverkkolaite
1 autoadapteri
1 sovitinjohto
5 sovittimen pistoketta
Etupuoli
Kantohihna
1
Pääkytkin (CHA/OFF/ON)
2
12 V/10 A:n anto
3
Pienjänniteliitännät (3 V/4,5 V/6 V/9 V/12 V)
4
Lähdön merkkivalot OUTPUT
5
(punainen LED "Tyhjä" / vihreä LED "Täynnä")
Latauksen merkkivalot CHARGE
6
(punainen LED "Päällä" / vihreä LED "Täynnä")
Pyöreä sulake 2 A (T2A 250 V)
7
Taustapuoli
Lattasulake 10 A (C10)
8
Kierreliitännät 12 V / 10 A
9
Adapterijohdon säilytyslokero
0
Adapteripistokkeen säilytyslokero
q
Latausholkki DC-INPUT
w
- 14 -
Page 17
Autoadapteri
Adapteripistoke
3,5 mm:n-holkkipistoke
e
5 mm:n-holkkipistoke
r
5,5 mm:n-holkkipistoke
t
2,5 mm:n-jakkipistoke
z
3,5 mm:n-jakkipistoke
u
Adapterijohto
Pistokeverkkolaite
Turvaohjeet
Laite soveltuu ainoastaan sisätiloissa käytettäväksi.
• Tätä laitetta ei ole tarkoitettu sellaisten henkilöiden
(mukaan lukien lapset) käyttöön, joiden rajoitetut,
fyysiset, aistilliset tai henkiset kyvyt tai kokemuksen
ja/tai tiedon puute estävät käytön, lukuun ottamatta
tilanteita, joissa heitä valvoo turvallisuudesta
vastaava henkilö tai joissa he ovat saaneet tältä
ohjeita laitteen käytöstä.
• Lapsia on valvottava ja on varmistettava, että
he eivät leiki laitteella.
• Tarkista laite ja kaikki osat näkyvien vaurioiden
varalta. Laitteen turvallisuus on taattu vain, kun
laite on virheettömässä kunnossa.
• Pistokeverkkolaitteen tulee sijaita helppopääsyisessä
paikassa, jotta laite voidaan hätätapauksessa
irrottaa nopeasti sähköverkosta.
Hengenvaarallisen sähköiskun
välttämiseksi:
• Liitä pistokeverkkolaite ainoastaan määräysten
mukaisesti asennettuun ja maadoitettuun pistorasiaan. Verkkojännitteen on vastattava pistokeverkkolaitteen tyyppikilven tietoja.
• Käytä ainoastaan mukana toimitettua pistokeverkkolaitetta.
Jos vaihdat pistokeverkkolaitteen, vaihda se
ainoastaan samanmalliseen laitteeseen.
• Anna viallinen pistokeverkkolaite tai liitäntäjohto
heti valtuutetun ammattihenkilöstön tai huoltopalvelun
vaihdettavaksi vaarojen välttämiseksi.
• Älä koskaan upota laitetta tai pistokeverkkolaitetta
veteen. Pyyhi laite ainoastaan kevyesti kosteutetulla
liinalla.
• Älä jätä laitetta sateeseen tai käytä sitä koskaan
kosteassa tai märässä ympäristössä.
• Varmista, ettei virtajohto koskaan kastu tai kostu
käytön aikana.
• Laitteen koteloa ei saa avata tai korjata itse.
Jos laitteen kotelo avataan itse, turvallisuus ei ole
taattu ja takuu raukeaa.
• Suojaa laitetta pisarointi- ja roiskevedeltä.
Älä siksi aseta mitään vedellä täytettyjä esineitä
(esim. kukkamaljakoita) laitteen päälle.
• Jos energia-asemaan tai pistokeverkkolaitteeseen
pääsee vettä tai ne putoavat veteen, seurauksena
voi olla peruuttamattomia vaurioita ja on olemassa
sähköiskun vaara!
Sähköisen oikosulun aiheuttaman
palovaaran välttämiseksi:
• Varmista, ettei kierreliitoksia koskaan voida oikosulkea, esim. irtojohdolla. Niiden toiminnasta
johtuen näitä liitäntöjä ei ole varmistettu – virtaavat
virrat voivat siis olla erittäin voimakkaita (yli 15 A).
• Älä aseta laitetta lämmönlähteiden lähelle.
• Älä sijoita laitetta paikkaan, jossa se altistuu
suoralle auringonvalolle. Muutoin laite saattaa
ylikuumentua ja vaurioitua käyttökelvottomaksi.
• Älä jätä laitetta käytön aikana ilman valvontaa.
• Älä käytä energia-asemaa uunien, kuumailmapuhaltimien (autossa: ilmastoinnin puhaltimien) ja
vastaavien lämpölähteiden läheisyydessä! Lämpövaikutus saattaa johtaa laitteen ylikuumenemiseen ja muoviosien sulamiseen, mikä saattaa vaurioittaa energia-aseman korjauskelvottomaan
kuntoon!
Ylikuumentuminen saattaa vaurioittaa energiaaseman korjauskelvottomaan kuntoon, ja on
olemassa tulipalon vaara!
- 15 -
Page 18

• Laitetta ei saa asettaa syttyvien materiaalien, kuten
esim. verhojen, palavien nesteiden jne., välittömään
läheisyyteen.
• Älä sijoita laitetta palolähteiden, kuten esimerkiksi
kynttilöiden, lähelle.
Lataaminen pistokeverkkolaitteella
Huomio: Räjähtäviä kaasuja
Vältä avotulta ja kipinöitä. Huolehdi riittävästä
ilmanvaihdosta latauksen aikana.
Loukkaantumisvaara!
• Pidä lapset loitolla verkkojohdosta ja laitteesta.
Lapset aliarvioivat usein sähkölaitteiden vaaran.
• Huolehti siitä, että laite on turvallisessa kunnossa.
• Jos laite putoaa tai vahingoittuu, sitä ei saa ottaa
käyttöön. Jätä laite pätevän ammattihenkilön
tarkastettavaksi ja tarvittaessa korjattavaksi.
Käyttöönotto
Energia-asema toimitetaan akku ainoastaan hieman
ladattuna. Se on ladattava ennen ensimmäistä käyttöä.
Huomio!
Akun kapasiteetti saattaa huomattavasti laskea, jos
käytät energia-asemaa lataamatta sitä ensin täyteen!
• Varmista ennen käyttöä, että sekä energia-asema
että adapterijohto
ovat moitteettomassa kunnossa.
Vaara!
Älä käytä vaurioitunutta liitäntäjohtoa. Oikosulun
vaara!
ja pistokeverkkolaite
1. Liitä pistokeverkkolaitteen laitepistoke laitteen
taustapuolella sijaitsevaan DC-INPUT -latausholkkiin w.
2. Liitä pistokeverkkolaite
Verkkojännitteen on vastattava pistokeverkkolaitteen
tyyppikilven tietoja.
3. Kytke laitteen etupuolella sijaitseva pääkytkin 2
asentoon "CHA". Energia-asema ladataan.
4. Lataustapahtuman aikana palaa CHARGE-kentässä
punainen LED "Päällä" 6.
5. Kun energia-asema saavuttaa täyden lataustilan,
CHARGE-kentän vihreä LED "Täynnä" 6 alkaa
palaa himmeästi.
Heti kun tämä palaa kirkkaasti, voit jälleen irrottaa
pistokeverkkolaitteen
palaa edelleen, kunnes pääkytkin 2 asetetaan
asentoon "OFF".
verkkopistorasiaan.
. Punainen LED "Päällä" 6
Lataaminen autoadapterilla
Voit ladata energia-aseman mukana tulevan autoadapterin
12 V:n sähköjärjestelmästä:
1. Liitä autoadapterin
2. Liitä sen jälkeen autoadapterin
avulla myös auton tai urheiluveneen
laitepistoke laitteen
taustapuolella sijaitsevaan latausholkkiin w.
12 V:n pistoke
auton 12 V:n pistorasiaan tai savukkeensytyttimeen.
Vaara!
Yllä esitetty järjestys on tärkeää, jotta estettäisiin
oikosulku laitepistokkeen koskettaessa vahingossa
ajoneuvon maadoitusta.
- 16 -
Page 19
3. Kytke laitteen etupuolella sijaitseva pääkytkin 2
-
+
asentoon "CHA". Energia-asema ladataan.
4. Lataustapahtuman aikana palaa CHARGE-kentässä
punainen LED "Päällä" 6.
5. Kun energia-asema saavuttaa täyden lataustilan,
CHARGE-kentän vihreä LED "Täynnä" 6 alkaa
palaa himmeästi.
Heti kun se palaa kirkkaasti, voit jälleen irrottaa
autoadapterin . Punainen LED "Päällä" 6
palaa edelleen, kunnes pääkytkin 2 asetetaan
asentoon "OFF".
Ohje!
Lataustapahtuma onnistuu vain, kun latausjännite on
korkeampi kuin akun latausjännite. Ajoneuvon seistessä näin ei usein ole. Siksi latauksen voi suorittaa vain
moottorin käydessä.
Liitäntöjen suorittaminen
Korkeintaan 1 A:n tehonotolla varustettujen laitteiden
virtalähteeksi on käytettävissä yhteensä 5 pienjänniteholkkia 4 3 - 12 V:
1. Liitä adapterijohto siihen pienjänniteholkkiin 4,
joka vastaa syötettävän laitteen tarvitsemaa
jännitettä.
2. Valitse sopiva adapteripistoke syötettävän laitteen tuloa varten.
Varo!
Varmista, etteivät "Plus" ja "Miinus" pääse vaihtumaan
keskenään. Muutoin laitteesi voi vahingoittua!
3. Liitä valittu adapteripistoke ja adapterijohto
yhteen niin, että plus ja miinus vastaavat laitteesi
liitännässä olevia merkintöjä.
Virransyöttö pienjänniteholkkien
kautta (kork. 1 A)
Varo!
Varmista, että sekä syötettävä laite että energia-asema
ovat poissa päältä, ennen kuin suoritat liitännät.
Aseta tätä varten pääkytkin 2 asentoon "OFF"
(keskiasento). Näin vältytään liitäntävirheen
aiheuttamilta vahingoilta.
Adapteripistokkeen napaisuus
• Jos adapteripistoke liitetään adapterijohtoon
plus plussaan ja miinus miinukseen, on adapteripistokkeissa plus ylhäällä/sisällä ja miinus
alhaalla/ulkona.
- 17 -
Page 20
• Jos adapteripistoke liitetään adapterijohtoon
-
+
vastakkaisin merkinnöin (+ ja - yhteen), adapteripistokkeissa on plus ulkona ja miinus sisällä.
Virransyöttön kytkeminen
1. Aseta pääkytkin 2 asentoon "ON" – Adapteri-
johdon avulla liitettyyn laitteeseen syötetään
virtaa.
2. Niin kauan kun syötettävälle laitteelle on käytettävissä riittävästi energiaa, OUTPUT-kentässä
palaa vihreä LED "Täynnä" 5.
3. Jos syötettävälle laitteelle ei ole enää käytettävissä
riittävästi energiaa, OUTPUT-kentässä palaa
punainen LED "Tyhjä" 5
Varo!
Lataa akku vasta sitten, kun punainen LED "Tyhjä" 5
palaa. Muutoin tapahtuu syväpurkautuminen, joka
heikentää huomattavasti akun latauskapasiteettia.
Virransyötön lopettaminen
1. Sammuta syötettävä laite.
2. Aseta energia-aseman pääkytkin 2 asentoon
"OFF" (keskiasento).
Mahdolliset viat toimintahäiriöiden
sattuessa
• Jos päälle kytkemisen jälkeen kumpikaan merkkivaloista 5 ja 6 pala, on energia-aseman 10 A:n
sulake 8 luultavasti viallinen. Sulakkeiden
vaihtaminen on kuvattu luvussa "Sulakkeet".
• Jos päälle kytkemisen jälkeen yksi energia-aseman
merkkivaloista palaa, mutta laite ei toimi, sammuta
energia-asema välittömästi. Tarkista, että johto
on liitetty oikein ja ettei "Plus"- ja "Miinus"-napoja
ole sekoitettu keskenään. Tarvittaessa on myös
laitteesi sulakkeet tarkistettava sen ohjeessa
kuvatulla tavalla.
Virransyöttö 10 A:n holkin
kautta (autopistorasia)
Varo!
Varmista, että sekä syötettävä laite että energia-asema
ovat poissa päältä, ennen kuin suoritat liitännät.
Aseta tätä varten pääkytkin 2 asentoon "OFF"
(keskiasento). Näin vältytään liitäntävirheen
aiheuttamilta vahingoilta.
Korkeintaan 10 A:n laitteiden virransyöttöön on
käytettävissä 12 V / 10 A:n holkki 3. Tähän voidaan
liittää erilaisten laitteiden niin kutsuttu "savukkeen-sytytinpistoke".
Tällaisia voivat olla esimerkiksi...
- kylmälaukut
- autoimurit
- pienet kannettavat televisiot jne. ...
Näin estät virran virtauksen jatkumisen pistoketta
irrotettaessa. Tämä aiheuttaa joskus herkissä laitteissa
häiriöitä.
3. Irrota adapterijohdon pistoke sekä laitteesta
että energia-asemasta.
- 18 -
Page 21
Ohje:
Huomaa, että 10 A:n kuormituksella akku on tyhjä
viimeistään 45 minuutin kuluttua, aina lataustilan
mukaan myös jo aikaisemmin.
Kylmälaukkujen tehonotto on tavallisesti 3 - 4 A tunnissa.
Tämä vastaa akun 7 Ah:n kapasiteetilla hieman
alle 2 tunnin käyttöaikaa. Tämän laskuesimerkin
pohjalta voit suunnilleen arvioida laitteesi käyttöajan.
Virransyötön kytkeminen päälle
1. Kytke pääkytkin 2 asentoon "ON" – Liitettyyn
laitteeseen syötetään virtaa.
2. Niin kauan kun syötettävälle laitteelle on käytettävissä riittävästi energiaa, OUTPUT-kentässä palaa vihreä LED "Täynnä" 5.
3. Jos syötettävälle laitteelle ei ole enää käytettävissä
riittävästi energiaa, OUTPUT-kentässä palaa
punainen LED "Tyhjä" 5
Näin voit estää sen, että liitäntävirheet aiheuttavat
vahinkoja.
Liitäntöjen suorittaminen
Varo!
Varmista, ettei "Plus"- ja "Miinus"-napoja ole sekoitettu
keskenään, ennen kuin liität syötettävän laitteen
energia-asemaan. Muuten tämä laite voi vahingoittua.
Voit käyttää virransyöttöön myös mukana toimitettua
autoadapteria , sikäli mikäli sen laitepistoke sopii
syötettävään laitteeseen.
Autoadapterissa laitepistoke on navoitettu niin,
että plus sijaitsee sisällä ja miinus ulkona, kuvan
mukaan.
• Käytä autoadapteria , kun syötettävän laitteen
holkissa on seuraavanlainen merkintä:
• Älä käytä autoadapteria , kun syötettävän laitteen holkissa on seuraavanlainen merkintä:
Laitteilla, joiden johto on liitetty kiinteästi ja joissa on
12 V:n pistoke, "Plus"- ja "Miinus" on navoitettu oikein.
1. Liitä autoadapterin laitepistoke laitteesi liitäntään.
2. Liitä autoadapterin tai syötettävän laitteen
12 V:n pistoke energia-aseman 12 V / 10 A:n
holkkiin 3.
Varo!
Lataa akku vasta sitten, kun punainen LED "Tyhjä" 5
palaa. Muutoin tapahtuu syväpurkautuminen, joka
heikentää huomattavasti akun latauskapasiteettia.
Virransyötön lopettaminen
1. Sammuta syötettävä laite.
2. Aseta energia-aseman pääkytkin 2 asentoon
"OFF" (keskiasento).
Näin estät virran virtauksen jatkumisen pistoketta
irrotettaessa. Tämä aiheuttaa joskus herkissä laitteissa
häiriöitä.
3. Vedä 12 V:n pistoke irti energia-aseman 12 V /
10 A:n holkista 3 ja tarvittaessa autoadapterin
laitepistoke syötettävästä laitteesta.
Mahdolliset viat toimintahäiriöiden
sattuessa
• Jos päälle kytkemisen jälkeen kumpikaan merkkivaloista 5 ja 6 pala, on energia-aseman 10 A:n
sulake 7 luultavasti viallinen. Sulakkeiden vaihtaminen on kuvattu luvussa "Sulakkeet".
• Jos päälle kytkemisen jälkeen yksi energia-aseman
merkkivaloista palaa, mutta laite ei toimi, sammuta
energia-asema välittömästi. Tarkista, että johto
on liitetty oikein ja ettei "Plus"- ja "Miinus"-napoja
ole sekoitettu keskenään. Tarvittaessa on myös
laitteesi sulakkeet tarkistettava sen ohjeessa
kuvatulla tavalla.
- 19 -
Page 22
Virransyöttö kierreliitäntöjen
avulla
Varo!
Varmista, että sekä syötettävä laite että energia-asema
ovat poissa päältä, ennen kuin suoritat liitännät.
Aseta tätä varten pääkytkin 2 asentoon "OFF"
(keskiasento). Näin vältytään liitäntävirheen aiheuttamilta vahingoilta.
Jos 12 V:n laite tarvitsee päälle kytkettäessä suuren
käynnistysvirran, mutta muuten korkeintaan 10 A
tunnissa, käytä laitteen taustapuolella olevia kierreliitäntöjä 9.
Suuren käynnistysvirran tarvitsevia laitteita voivat
olla esimerkiksi ...
- 12 V:n pölynimuri
- 12 V:n porakoneet
- 12 V:n televisiolaitteet jne.
Nämä eivät tarvitse käytössä kuin korkeintaan 10 A,
mutta käynnistettäessä sulake laukeaa välittömästi.
Tässä tapauksessa ei tällaisia laitteita voida käyttää
10 A:n sulakkeella varustetussa 12 V / 10 A:n holkissa
3. Käytä näitä laitteita ainoastaan tässä kuvatuissa
kierreliitännöissä 9.
Liitäntöjen suorittaminen kiinteän
laitejohdon paljaiden päiden kautta
1. Jos laitejohto on liitetty kiinteästi syötettävään laitteeseen, liitä "Plus"-johtimen (yleensä punainen) paljas pää punaiseen kierreliitäntään 9.
2. Liitä "Miinus"-johtimen (yleensä musta tai sininen)
paljas pää mustaan kierreliitäntään 9.
Avaa tätä varten kierreliitäntöjen 9 muovikansi
kiertämällä. Purista paljaat johtimet kannen alle
kiinni kiertäessäsi.
Liitäntöjen suorittaminen irtojohdon
avulla
1. Jos johtoa ei ole liitetty syötettävään laitteeseen
kiinteästi, vaan siinä on kirkas laitepistoke, liitä
ensin laitepistoke laitteessa olevaan liitäntään.
2. Liitä sitten johtimet kierreliitäntöihin 9.
Suorittamalla liitännän yllä olevassa järjestyksessä
vältät oikosulun vaaran, jos kirkas laitepistoke
koskee liitäntätöiden aikana vahingossa metallisiin
johtaviin esineisiin.
Liitäntöjen suorittaminen
banaanipistokkeen avulla
1. Kierreliitännät 9 ovat sisältä onttoja, jotta niihin
voitaisiin liittää nk. "banaanipistoke".
Jos laitejohdossa on tällaisia pistokkeita, liitä ne
ylhäältä kierreliitäntöihin 9.
Vaara!
Täällä virtaavat sähkövirrat voivat olla äärimmäisen
korkeita ja saada jopa paksut johdot hehkumaan!
Varmista ennen liittämistä, että laitteen liitäntäjohto
soveltuu tällaiseen liitäntätapaan. Näin vältytään
sähköiskulta ja palovaaralta.
Näitä korkeita sähkövirtoja tarvitaan, jotta eräät
laitteet voitaisiin käynnistää. Kierreliitäntöjä 9 ei
ole siksi liitetty sulakkeeseen tai pääkatkaisijaan 2,
eli siinä on jatkuvasti jännite!
Varmistu siksi siitä, ettei kierreliitoksissa pääse koskaan
syntymään oikosulkua!
- 20 -
Page 23
Sulakkeet
Jos päälle kytkemisen jälkeen kumpikaan merkkivaloista 5 ja 6 pala, on energia-aseman 10 A:n
sulake 7 luultavasti viallinen.
Jos päälle kytkemisen jälkeen yksi merkkivalo palaa,
mutta autoadapterin kautta ei saada virtaa, on
autoadapterin 12 V:n pistokkeen johtosulake
luultavasti palanut.
Vaara!
Kytke ensin pääkytkin 2 asentoon "OFF".
Vedä kaikki johdot energia-asemasta, ennen kuin
vaihdat yhtään sulaketta.
Näin estetään se, että virheen sattuessa uusi sulake
hehkuu sormien välissä sitä paikoilleen asetettaessa
– Loukkaantumisvaara!
Vaara!
Sulakkeet ovat tärkeitä turvalaitteita vahinkojen
välttämiseksi. Älä koskaan tee niitä tehottomaksi.
Vaihda sulakkeet aina vain samanarvoisiin sulakkeisiin,
älä koskaan "suurempiin".
Älä koskaan silloita sulakkeita. - Tulipalon vaara!
Pyöreän sulakkeen vaihtaminen
• Kierrä edessä pyöreän sulakkeen 7 kansi auki.
Aseta paikoilleen uusi sulake, "2 A hidas"
(T2A 250 V).
Puhdistus ja hoito
Vaara!
Älä milloinkaan avaa laitteen koteloa. Sisällä ei ole
minkäänlaisia hallintalaitteita. Kotelon ollessa auki
voivat korkeat oikosulkusähkövirrat aiheuttaa tulipalon
vaaran.
• Kytke pääkytkin 2 asentoon "OFF".
• Irrota kaikki johtoliitännät energia-aseman ja
mahdollisesti siihen liitettyjen laitteiden välillä.
• Jos haluat puhdistaa pistokeverkkolaitteen ,
vedä myös se ensin pistorasiasta ja latausholkista w.
Vaara!
Älä missään tapauksessa upota laitteen osia veteen
tai muihin nesteisiin! Tämä voi vaurioittaa energiaasemaa vaikeasti – pistokeverkkolaitteessa on olemassa
sähköiskun aiheuttama hengenvaara.
• Puhdista kaikki pinnat ja johdot parhaiten kevyesti
kostutetulla liinalla. Kuivaa laite hyvin, ennen
kuin käytät sitä uudelleen.
Vaara!
Älä käytä puhdistusaineita äläkä liuottimia.
Nämä saattavat vahingoittaa laitetta, erityisesti sen
merkintöjä.
Lattasulakkeen vaihtaminen
• Vedä laitteen takaa lattasulake 8 ulos (esim.
kärkipihdeillä). Aseta paikoilleen uusi sulake,
"10 A" (C10).
Johtosulakkeen vaihtaminen
• Kierrä autoadapterin 12 V:n pistokkeessa
johtosulakkeen kansi auki.
Aseta paikoilleen uusi sulake "1 A hidas"
(T1A 250 V).
Jos sulake palaa jälleen heti laitteen ollessa liitettynä,
syötettävä laite kuormittaa energia-asemaa liian
korkealla tehonotolla tai syötettävä laite on viallinen.
- 21 -
Page 24

Säilytys
Akkujen luonnollisen itsepurkautumisen vuoksi
energia-asema tulisi ladata uudelleen täyteen,
ennen kuin asetat sen pois useammaksi päiväksi
tai viikoiksi.
Jos haluat varastoida laitteen pidempään sitä
käyttämättä, se tulisi ladata viimeistään 6 kuukauden
jälkeen uudelleen, jotta akun syväpurkautuminen
estettäisiin.
• Kytke pääkytkin 2 asentoon "OFF".
• Irrota kaikki johtoliitännät energia-aseman ja
mahdollisesti siihen liitettyjen laitteiden välillä.
• Säilytä johtoja ja pistokkeita laitteessa olevissa
säilytyslokeroissa 0 ja q.
• Sulje lopuksi kaikki kannet.
• Varastoi laite aina kuivassa paikassa.
Hävittäminen
Älä missään tapauksessa heitä laitetta
tavallisen talousjätteen sekaan.
Tämä tuote on eurooppalaisen
direktiivin 2002/96/EC mukainen.
Hävitä laite hyväksytyn jätteenhuoltoyrityksen tai
kunnallisen jätehuollon kautta.
Noudata ajankohtaisia voimassa olevia määräyksiä.
Ota epävarmoissa tapauksissa yhteyttä jätelaitokseesi.
Paristojen/akkujen hävittäminen
Paristoja/akkuja ei saa hävittää kotitalousjätteiden
seassa. Jokaisella käyttäjällä on lakisääteinen
velvollisuus luovuttaa paristot/akut kuntansa/
kaupunginosansa tai kaupan keräilypisteeseen.
Tämän velvoitteen tarkoituksena on varmistaa pa ristojen
ja akkujen ympäristöystävällinen hävittäminen.
Palauta paristot/akut ainoastaan lataus purettuna.
Hävitä kaikki pakkausmateriaalit ympäristöystävällisellä tavalla.
- 22 -
Page 25

Takuu & huolto
Maahantuoja
Laitteen takuu on 3 vuotta ostopäivästä. Laite on
valmistettu huolellisesti ja tarkistettu tarkasti ennen
toimitusta. Säilytä ostokuitti todisteeksi takuun
voimassaolosta. Ota takuutapauksessa puhelimitse
yhteyttä huoltopisteeseesi. Vain näin voidaan taata
tuotteesi maksuton lähettäminen huoltoon.
Takuu koskee ainoastaan materiaali- ja
valmistusvirheitä, ei kuitenkaan kuluvia osia tai
herkästi vaurioituvien osien, esim. kytkinten tai
akkujen vaurioita. Tuote on tarkoitettu ainoastaan
yksityiseen, ei kaupalliseen käyttöön.
Väärä tai asiaton käyttö, väkivallan käyttö ja muiden kuin valtuutetun huoltopisteen suorittamat korjaukset aiheuttavat takuun raukeamisen. Tämä takuu
ei rajoita kuluttajan lakisääteisiä oikeuksia.
Kompernass Service Suomi
Tel.: 010 30 935 80
(Soittamisen hinta lankaliittymästä: 8,21 snt/puh + 5,9 snt/min /
Matkapuhelimesta: 8,21 snt/puh + 16,90 snt/min)
e-mail: support.fi@kompernass.com
KOMPERNASS GMBH
BURGSTRASSE 21
44867 BOCHUM, GERMANY
www.kompernass.com
- 23 -
Page 26

- 24 -
Page 27

INNEHÅLLSFÖRTECKNING SIDAN
Föreskriven användning 26
Förberedelser 26
Tekniska data 26
Beskrivning 26
Säkerhetsanvisningar 27
Ta i drift 28
Uppladdning med kontaktnätdel..................................................................................................28
Uppladdning med fordonsadapter..............................................................................................28
Strömförsörjning genom klenspänningsuttag (max. 1 A) 29
Göra anslutningar..........................................................................................................................29
Koppla ström till apparaten..........................................................................................................30
Stänga av strömförsörjning...........................................................................................................30
Möjliga orsaker till att utrustningen inte fungerar.......................................................................30
Strömförsörjning genom 10 A-uttag (i ett fordon) 30
Göra anslutningar..........................................................................................................................31
Koppla på strömförsörjning ..........................................................................................................31
Stänga av strömförsörjning...........................................................................................................31
Möjliga orsaker till att utrustningen inte fungerar.......................................................................31
Strömförsörjning genom skruvanslutningar 32
Ansluta med banankontakt ...........................................................................................................32
Ansluta med den blanka änden av en apparatkabel................................................................32
Ansluta med en lös kabel..............................................................................................................32
Säkringar 33
Byta rund säkring...........................................................................................................................33
Byta platt säkring ...........................................................................................................................33
Byta kabelsäkring...........................................................................................................................33
Rengöring och skötsel 33
Förvaring 34
Kassering 34
Garanti & Service 35
Importör 35
Läs igenom bruksanvisningen noga innan du börjar använda apparaten och spara den för senare bruk.
Lämna över den tillsammans med apparaten till en ev. ny användare.
- 25 -
Page 28

ENERGISTATION
KH 3002
Föreskriven användning
Energistationen ska användas för mobil strömförsörjning till klenspänningsapparater med en strömförbrukning på upp till 10 A. Apparaten är endast
avsedd för privat bruk och ska inte användas
yrkesmässigt eller industriellt.
Använd inte apparaten där ett strömavbrott skulle
kunna orsaka stora skador, t ex till medicinteknisk
utrustning, luft- eller rymdfart.
Förberedelser
Tekniska data
Energistation
Uppladdningsbart
gelbatteri: 12 V / 7 Ah
Klenspänningsuttag: 3 V / 4,5 V /
6 V/ 9 V/
12 V ostabilisierad / 1A
Fordonsuttag: 12 V / 10 A
Skruvanslutningar: 12 V / 10 A för max. 2 min.
Nätdel med kontakt
Strömförsörjning: 230 V ~/ 50 Hz
Utspänning: 12 V / 500 mA
Skyddsklass: II /
Modell: ZJF-DC120V050
Uppackning
1. Ta upp energistationen och alla tillbehör ur
förpackningen.
2. Ta bort all tejp och folie och alla transportskydd.
Akta!
Låt inte småbarn leka med plastfolie.
Risk för kvävningsolyckor!
Kontrollera leveransens innehåll
Kontrollera att leveransen är komplett och inte har
några skador innan du börjar använda apparaten:
1 energistation KH 3002
1 bärrem
1 kontaktnätdel
1 fordonsadapter
1 adapterkabel
5 adapterkontakter
Beskrivning
Framsida
Bärrem
1
Huvudströmbrytare (CHA/OFF/ON)
2
12 V/10 A utgång
3
Klenspänningsuttag (3 V/4,5 V/6 V/9 V/12 V)
4
Indikatorlampor OUTPUT (röd indikator "Urladdat"/
5
grön indikator "Fulladdat")
Indikatorlampor CHARGE (röd indikator "Laddning
6
pågår"/grön indikator "Fulladdat")
Rund säkring 2 A (T2A 250 V)
7
Baksida
Platt säkring 10 A (C10)
8
Skruvanslutningar 12 V / 10 A
9
Förvaringsfack för adapterkabel
0
Förvaringsfack för adapterkontakt
q
Laddningsuttag DC-INPUT
w
- 26 -
Page 29

Fordonsadapter
Adapterkontakt
3,5 mm honkontakt
e
5 mm honkontakt
r
5,5 mm honkontakt
t
2,5 mm teleplugg
z
3,5 mm teleplugg
u
Adapterkabel
Kontaktnätdel
Säkerhetsanvisningar
Apparaten ska endast användas inomhus.
• Den här apparaten ska inte användas av personer
(inklusive barn) med begränsad fysisk, sensorisk
eller mental förmåga eller bristande erfarenhet
och kunskap om de inte först övervakats eller
instruerats av någon ansvarig person.
• Håll uppsikt över barnen så att de inte leker med
apparaten.
• Kontrollera om apparaten har några synliga skador. Säkerheten kan bara garanteras om alla delar är i felfritt skick.
• Kontaktnätdelen måste alltid vara lättåtkomlig så
att det går snabbt att bryta strömtillförseln
till apparaten vid nödsituationer.
För att undvika livsfarliga elchocker:
• Anslut endast kontaktnätdelen till ett godkänt
och jordat eluttag. Nätspänningen måste överensstämma med angivelserna på nätdelens typskylt.
• Använd endast medföljande kontaktnätdel.
Om du byter kontaktnätdel får du bara ersätta
den med en annan kontaktnätdel av samma
modell.
• Lämna genast in en skadad kontaktnätdel eller
anslutningskabel till auktoriserad fackpersonal
eller vår kundtjänst för utbyte för att undvika
olyckor.
• Doppa aldrig ner apparaten eller kontaktnätdelen
i vatten. Torka bara av dem med en lätt fuktad
trasa
• Utsätt aldrig apparaten för regn och använd
den aldrig i fuktiga eller våta utrymmen.
• Akta så att anslutningsledningen inte blir våt
eller fuktig när apparaten används.
• Du får aldrig försöka öppna eller reparera höljet.
Gör du det kan vi inte garantera säkerheten och
garantin förlorar sin giltighet.
• Skydda apparaten från dropp och stänkvatten.
Ställ därför inga vätskefyllda kärl på apparaten
(t ex blomvaser).
• Om det kommer in vatten i energistationen eller
kontaktnätdelen eller om de faller ner i vatten
kan de bli totalförstörda och det finns risk för
elchocker!
För att undvika brand på grund av
elektrisk kortslutning:
• Försäkra dig om att skruvanslutningarna aldrig
kan kortslutas, t ex av lösa kablar. På grund av
apparatens funktion är dessa anslutningar inte
säkrade - där kan alltså förekomma höga
strömstyrkor (över 15 A).
• Använd inte apparaten i närheten av heta ytor.
• Ställ inte apparaten i direkt solljus. Då kan den
överhettas och bli totalförstörd.
• Lämna aldrig apparaten helt utan uppsikt när
den används.
• Använd inte energistationen i närheten av värmekällor som t ex spisar, värmefläktar (i bilen:
i närheten av ventilationsfläktar), och liknande
apparater! Värmen kan göra så att apparaten
överhettas och leda till att plastdelar smälter,
vilket i sin tur kan totalförstöra energistationen!
Om den överhettas kan energistationen bli
totalförstörd och det kan börja brinna!
- 27 -
Page 30

• Apparaten får inte ställas alldeles i närheten av
antändliga material som t ex förhängen, brännbara
vätskor etc.
• Ställ inga öppna lågor, t ex stearinljus,
på apparaten.
Uppladdning med kontaktnätdel
Akta: Explosiva gaser
Se till så att det inte kan uppstå lågor och gnistor.
Sörj för tillräcklig ventilation när du laddar.
Risk för personskador!
• Håll barnen på avstånd från anslutningsledning
och apparat. Barn underskattar ofta riskerna
med elektriska apparater.
• Se till så att apparaten står stadigt.
• Om apparaten faller i golvet eller skadas på annat
sätt får du inte använda den längre.
Låt kvalificerad fackpersonal kontrollera och
reparera den om det behövs.
Ta i drift
När energistationen levereras är batteriet bara lite
uppladdat. Det måste laddas upp ordentligt innan
apparaten används första gången.
Akta!
Batteriet kan förlora en stor del av sin kapacitet om
det inte laddas upp helt innan energistationen används!
• Innan du använder utrustningen ska du övertyga
dig om att apparaten, adapterkabeln
kontaktnätdelen
är i felfritt skick.
Fara!
Använd aldrig skadade adapterkablar. Risk för
kortslutning!
och
1. Sätt kontaktnätdelens kontakt i laddningsuttaget
DC-INPUT w på apparatens baksida.
2. Sätt kontaktnätdelen
måste överensstämma med angivelserna på
nätdelens typskylt.
3. Flytta huvudströmbrytaren 2 på apparatens
framsida till läge CHA. Nu laddas energistationen
upp.
4. Under laddningen lyser den röda indikatorlampan
"Laddning pågår"6 i fältet CHARGE.
5. När energistationen börjar bli fulladdad börjar
den gröna indikatorlampan "Fulladdat" 6 i fältet
CHARGE att lysa svagt.
Så snart den lyser starkare kan du ta bort kontaktnätdelen
"Laddning pågår" 6 fortsätter att lysa tills du
flyttar huvudströmbrytaren 2 till läge OFF.
igen. Den röda indikatorlampan
i ett eluttag. Nätspänningen
Uppladdning med fordonsadapter
Energistationen kan även laddas genom ett 12V-uttag
i en bil eller fritidsbåt med medföljande fordonsadapter
:
1. Sätt fordonsadapterns
ningsuttaget w på energistationens baksida.
2. Sätt sedan fordonsadapterns
i ett 12-V-uttag eller i bilens cigarettändare.
apparatkontakt i ladd-
12V-kontakt
Fara!
Det är viktigt att göra allt i den ordningsföljd som
beskrivs ovan för att undvika kortslutning om apparatkontakten kommer i kontakt med fordonets jordning av
misstag.
- 28 -
Page 31

3. Flytta huvudströmbrytaren 2 på apparatens
-
+
framsida till läge CHA. Nu laddas energistationen
upp.
4. Under laddningen lyser den röda indikatorlampan
"Laddning pågår"6 i fältet CHARGE.
5. När energistationen börjar bli fulladdad börjar
den gröna indikatorlampan "Fulladdat" 6 i fältet
CHARGE att lysa svagt.
Så snart den lyser starkare kan du ta bort fordonsadaptern igen. Den röda indikatorlampan
"Laddning pågår" 6 fortsätter att lysa tills du
flyttar huvudströmbrytaren 2 till läge OFF.
Observera!
Det går bara att ladda om laddspänningen är högre
än batteriets spänning. Det är ofta inte fallet om
fordonet står parkerat. I regel går det bara att ladda
när motorn är igång.
Strömförsörjning genom
klenspänningsuttag (max. 1 A)
Akta!
Försäkra dig om att både den apparat som ska försörjas med ström och energistationen är avstängda
innan du gör några anslutningar.
Sätt huvudströmbrytaren 2 på OFF (läget i mitten).
Då undviker du skador på grund av anslutningsfel.
Göra anslutningar
För strömförsörjning till apparater med en strömförbrukning på max. 1 A finns sammanlagt 5 klenspänningsuttag 4 med 3 - 12 V:
1. Koppla adapterkabeln till klenspänningsutta-
get 4 med den spänning som krävs för den
apparat som ska försörjas med ström.
2. Välj den adapterkontakt som passar till ingången
på den apparat som ska försörjas med ström.
Akta!
Försäkra dig om att plus- och minuspol inte har bytt
plats. Annars kan apparaten skadas!
3. Koppla ihop adapterkontakt och adapterkabel
så att plus och minus överensstämmer med märkningen på uttaget på motsvarande apparat.
Adapterkontakternas polaritet:
• Om adapterkontakten kopplas till adapter-
kabeln med plus till plus och minus till minus
sitter pluspolen upptill resp. invändigt och minuspolen nedtill resp. utvändigt på adapterkontakterna .
- 29 -
Page 32

• Om adapterkontakten kopplas till adapter-
-
+
kabeln på motsatt sätt (+ och -) ligger pluspolen
på utsidan och minuspolen på insidan av adapterkontakten .
3. Dra ut adapterkabelns kontakter, både på
apparaten och på energistationen.
Möjliga orsaker till att utrustningen
inte fungerar
• Om ingen av de två indikatorlamporna 5 och 6
lyser när utrustningen kopplats på kan energistationens 10 A-säkring 8 vara defekt. I kapitel
"Säkringar" beskrivs hur man byter säkring.
• Om en av energistationens indikatorlampor lyser
men apparaten ändå inte fungerar när utrustningen
kopplas på ska du genast stänga av energistationen. Kontrollera om kabeln är rätt ansluten
och att plus- och minuspol inte kastats om. I vissa
fall bör man även kontrollera säkringen, så som
beskrivs i den här anvisningen.
Koppla ström till apparaten
1. Sätt huvudströmbrytaren 2 på läge ON – den
apparat som anslutits med adapterkabeln försörjs
nu med ström.
2. Så länge det finns tillräckligt med energi för att
apparaten ska kunna drivas lyser den gröna
indikatorlampan "Fulladdat" 5 i fältet OUTPUT.
3. När det inte längre finns tillräckligt mycket energi
för att försörja apparaten med ström tänds den
röda indikatorlampan "Urladdat" 5 i fältet
OUTPUT.
Akta!
Ladda inte upp batteriet förrän den röda indikatorlampan "Urladdat" 5 börjar lysa. Annars kan
batteriet djupurladdas och förlora en stor del av sin
kapacitet.
Stänga av strömförsörjning
1. Stäng av den apparat som försörjts med ström.
2. Sätt energistationens huvudströmbrytare 2 på
OFF (läget i mitten).
Då kan det inte komma någon ström när kontakten
dras ut. Känsliga apparater kan annars ibland reagera
med störningar.
Strömförsörjning genom
10 A-uttag (i ett fordon)
Akta!
Försäkra dig om att både den apparat som ska försörjas med ström och energistationen är avstängda
innan du gör några anslutningar. Sätt då huvudströmbrytaren 2 på OFF (läget i mitten).
Då undviker du skador på grund av anslutningsfel.
För att försörja apparater med max 10 A kan man
använda 12 V/10 A uttaget 3. Här kan så kallade
cigarettändarkontakter anslutas till olika apparater.
Det kan till exempel vara...
- kylboxar,
- bildammsugare,
- små bärbara TV-apparater, osv. ...
- 30 -
Page 33

Observera:
Kom ihåg att batteriet töms på kapacitet efter senast
45 minuter om det belastas med 10 A – beroende
på laddningsnivån kan det inträffa ännu tidigare.
Kylboxar har vanligtvis en strömförbrukning på 3 - 4 A
i timmen. Om batteriet har en kapacitet på 7 Ah
motsvarar det alltså knappt 2 timmars drifttid. Med
det här räkneexemplet kan du uppskatta drifttiden
för apparaterna någorlunda.
Så förebygger du skador på grund av anslutningsfel.
Göra anslutningar
Akta!
Försäkra dig om att plus- och minuspol inte kastats
om innan du kopplar den apparat som ska försörjas
med ström till energistationen.
Annars kan apparaten skadas.
Du kan även använda medföljande fordonsadapter
för att försörja en apparat med ström, såvida apparatkontakten passar till motsvarande apparat.
På fordonsadapterns apparatkontakt ligger pluspolen invändigt och minuspolen utvändigt, så som
framgår av ritningen.
• Du kan använda fordonsadpatern om uttaget
på den apparat som ska försörjas med ström är
märkt på följande sätt:
• Du kan inte använda fordonsadaptern om
uttaget på den apparat som ska försörjas är
märkt på följande sätt:
På apparater med fast ansluten kabel och 12-V-kontakt ligger plus- och minuspolerna rätt.
1. Sätt fordonsadapterns apparatkontakt i uttaget
på den apparat som ska försörjas med ström.
2. Sätt 12 V-kontakten till fordonsadaptern resp.
den apparat som ska försörjas med ström i 12 V/
10 A uttaget 3 på energistationen.
Koppla på strömförsörjning
1. Sätt huvudströmbrytaren 2 på läge ON – nu
försörjs den anslutna apparaten med ström.
2. Så länge det finns tillräckligt med energi för att
driva apparaten lyser den gröna indikatorlampan
"Fulladdat" 5 i fältet OUTPUT.
3. När det inte längre finns tillräckligt mycket energi
för att apparaten ska kunna försörjas med ström
lyser den röda indikatorlampan "Urladdat" 5
i fältet OUTPUT.
Akta!
Ladda inte upp batteriet förrän den röda indikatorlampan "Urladdat" 5 börjar lysa. Annars kan batteriet
djupurladdas och förlora en stor del av sin kapacitet.
Stänga av strömförsörjning
1. Stäng av den apparat som försörjs med ström.
2. Sätt energistationens huvudströmbrytare 2 på
OFF (läget i mitten).
Då kan det inte komma någon ström när kontakten
dras ut. Känsliga apparater kan annars ibland reagera
med störningar.
3. Dra ut 12-V-kontakten ur 12 V/10 A uttaget
3 på energistationen och ev. också fordonsadapterns apparatkontakt ur uttaget på den
apparat som får ström.
Möjliga orsaker till att utrustningen
inte fungerar
• Om ingen av de två indikatorlamporna 5 och 6
lyser när utrustningen kopplats på kan energistationens 10 A-säkring 7 vara defekt. I kapitel
"Säkringar" beskrivs hur man byter säkring.
- 31 -
Page 34

• Om en av energistationens indikatorlampor lyser
men apparaten ändå inte fungerar när utrustningen
kopplats på ska du genast stänga av energistationen. Kontrollera om kabeln är rätt ansluten –
och att plus- och minuspol inte kastats om.
I vissa fall bör man även kontrollera säkringen,
så som beskrivs i den här anvisningen.
Strömförsörjning genom
skruvanslutningar
Akta!
Försäkra dig om att både den apparat som ska försörjas med ström och energistationen är avstängda
innan du gör några anslutningar. Sätt huvudströmbrytaren 2 på OFF (läget i mitten). Då undviker du
skador på grund av anslutningsfel.
För att ge ström till 12V-apparater som kräver hög
startström när de kopplas på men annars inte förbrukar
mer än 10 A i timmen använder du skruvanslutningarna 9 på apparatens baksida.
Apparater med hög startström kan till exempel vara
...
- 12 V-dammsugare
- 12 V-borrmaskiner
- 12 V-TV-apparater, osv.
När de används förbrukar de inte mer än 10 A – men
när de kopplas på går säkringen direkt. I så fall kan
de inte drivas genom 12 V/10 A uttaget 3 som
har en säkring på 10 A. Den här typen av apparater
ska kopplas till skruvanslutningarna 9 på följande
sätt.
Ansluta med banankontakt
1. Skruvanslutningarna 9 är ihåliga för att man
ska kunna sticka in så kallade banankontakter
i dem. Om det sitter sådana kontakter på din apparats kabel sticker du in dem uppifrån
i skruvanslutningarna 9.
Fara!
Här kan strömstyrkan bli extremt hög så att till och
med tjocka kablar börjar glöda! Försäkra dig om
att apparatens anslutningskabel tål den här typen
av anslutning innan du ansluter den för att undvika elchocker och eldsvådor.
Det krävs så här höga strömstyrkor för att starta vissa
apparater. Därför har skruvanslutningarna 9 varken
kopplats via en säkring eller huvudströmbrytaren 2,
dvs. det finns alltid spänning i dem!
Se därför till att det aldrig kan bli kortslutning
i skruvanslutningarna!
Ansluta med den blanka änden av en
apparatkabel
1. Om kabeln är fast förbunden med den apparat
som ska försörjas med ström ansluter du den
blanka änden av plustråden (för det mesta röd)
till den röda skruvanslutningen 9.
2. Anslut sedan den blanka änden av minustråden
(för det mesta svart eller blå) till den svarta
skruvanslutningen 9.
Skruva först loss plastskyddet över skruvanslutningarna 9. Kläm fast de blanka trådarna under
skyddet när du skruvar åt det igen.
Ansluta med en lös kabel
1. Om kabeln inte är fast förbunden med den apparat
som ska försörjas med ström utan är utrustad med
en blank apparatkontakt sätter du den i uttaget
på apparaten.
2. Anslut sedan trådarna till skruvanslutningarna 9.
Om anslutningen görs i den här ordningsföljden
minskar risken för kortslutning om den blanka kontakten
kommer i kontakt med ledande metall av misstag.
- 32 -
Page 35

Säkringar
Om ingen av de två indikatorlamporna 5 och 6
lyser när utrustningen kopplats på kan energistationens
10 A-säkring 7 vara defekt.
Om en av indikatorlamporna lyser men det ändå
inte kommer någon ström genom fordonsadaptern
kan det bero på att kabelsäkringen har gått
i fordonsadapterns 12V-kontakt.
Fara!
Sätt först huvudströmbrytaren 2 på läge OFF.
Koppla bort alla kablar från energistationen innan
du byter några säkringar.
Rengöring och skötsel
Fara!
Öppna aldrig apparatens hölje. Det finns inga som
helst kontrollelement inuti apparaten. Om höljet
öppnas kan det börja brinna på grund av hög kortslutningsström.
• Sätt huvudströmbrytaren 2 på läge OFF.
• Koppla bort alla kablar mellan energistationen
och de apparater som anslutits till den.
• Om du ska rengöra kontaktnätdelen också
drar du först ut den ur eluttaget och ur laddningsuttaget w.
Annars kan den nya säkringen börja glöda mellan
dina fingrar om något går fel när du sätter in den –
risk för personskador!
Fara!
Säkringar är viktiga skyddsanordningar som ska förhindra skador. Sätt dem aldrig ur funktion.
Byt alltid till säkringar med samma värde, använd
aldrig starkare säkringar.
Överbrygg aldrig säkringar. Brandrisk!
Byta rund säkring
• Skruva upp skyddet på den runda säkringen 7
på framsidan. Sätt in en ny 2 A trög säkring
(T2A 250 V).
Byta platt säkring
• Dra ut den platta säkringen 8 baktill på apparaten (t ex med en spetstång). Sätt in en ny 10 A
säkring (C10).
Byta kabelsäkring
• Skruva upp skyddet på kabelsäkringen som sitter
på fordonsadapterns 12V-kontakt.
Sätt in en ny 1 A trög säkring (T1A 250 V).
Om säkringen går direkt när apparaten ansluts igen
förbrukar apparaten mer ström än energistationen kan
leverera eller också är utrustningen defekt.
Fara!
Apparatens delar får absolut inte doppas ner i vatten
eller andra vätskor! Då kan energistationen få allvarliga skador - och kontaktnätdelen kan ge livsfarliga elchocker.
• Rengör apparatens utsida och kabeln med en
något fuktig trasa. Torka av apparaten noga
innan du använder den igen.
Fara!
Använd inga rengörings- eller lösningsmedel.
De kan skada apparaten, framförallt märkningen.
- 33 -
Page 36

Förvaring
På grund av att batterier laddar ur sig själva bör du
ladda upp energistationen fullständigt en gång innan
du ställer undan den i några dagar eller veckor.
Om apparaten står oanvänd ännu längre bör du
ladda upp den igen efter senast 6 månader så att
batteriet inte djupurladdas.
• Sätt huvudströmbrytaren 2 på läge OFF.
• Koppla bort alla kablar mellan energistationen
och de apparater som anslutits till den.
• Förvara kabeln och kontakten i apparatens
förvaringsfack 0 och q.
• Stäng slutligen alla lock och kåpor.
• Förvara apparaten på ett torrt ställe.
Kassering
Apparaten får absolut inte kastas bland
hushållssoporna. Produkten faller under
EU-direktiv 2002/96/EC.
Lämna in den till ett företag som har tillstånd att ta
hand om den här typen av uttjänta apparater eller
till din kommunala avfallsanläggning.
Följ gällande föreskrifter.
Kontakta din avfallsanläggning om du har några
frågor.
Kassera batterier
Vanliga batterier och uppladdningsbara batterier får
inte kastas bland hushållssoporna. Den som använder
någon typ av batterier är skyldig enligt lag att lämna
in dem till ett godkänt uppsamlingsställe eller till
återförsäljaren.
Den här bestämmelsen är till för att batterier ska
kunna kasseras utan att skada miljön. Lämna bara
in urladdade batterier för återvinning/destruktion.
Lämna in allt förpackningsmaterial till
miljövänlig återvinning.
- 34 -
Page 37

Garanti & Service
Importör
För den här apparaten lämnar vi tre års garanti
från och med inköpsdatum. Den här apparaten har
tillverkats med omsorg och genomgått en noggrann
kontroll innan leveransen. Var god bevara kassakvittot som köpbevis. Vi ber dig kontakta vår kundtjänst
per telefon vid garantifall. Endast då kan produkten
skickas in fraktfritt.
Garantin gäller endast för material- eller
fabrikationsfel. Den täcker inte förslitningsdelar eller
skador på ömtåliga delar, som t ex knappar och
batterier. Produkten är endast avsedd för privat
bruk och får inte användas yrkesmässigt.
Vid missbruk och felaktig behandling, användande
av våld och vid ingrepp som inte gjorts av vår
auktoriserade servicefilial upphör garantin att
gälla. Den lagstadgade garantin begränsas inte
av denna garanti.
Kompernass Service Sverige
Tel.: 0770 93 00 35
e-mail: support.sv@kompernass.com
Kompernass Service Suomi
Tel.: 010 30 935 80
(Soittamisen hinta lankaliittymästä: 8,21 snt/puh + 5,9 snt/min /
Matkapuhelimesta: 8,21 snt/puh + 16,90 snt/min)
e-mail: support.fi@kompernass.com
KOMPERNASS GMBH
BURGSTRASSE 21
44867 BOCHUM, GERMANY
www.kompernass.com
- 35 -
Page 38

- 36 -
Page 39

INDHOLDSFORTEGNELSE SIDE
Anvendelsesformål 38
Forberedelse 38
Tekniske data 38
Beskrivelse af energistationen 38
Sikkerhedsanvisninger 39
Første brug 40
Opladning med stiknetdelen.........................................................................................................40
Opladning med autoadapter .......................................................................................................40
Strømforsyning via lavspændingsstik (maks. 1 A) 41
Tilslutning.........................................................................................................................................41
Strømforsyning................................................................................................................................42
Sådan afbrydes strømforsyningen................................................................................................42
Mulige fejl ved manglende funktion ............................................................................................42
Strømforsyning via 10 A-stik (bil-stikkontakt) 42
Tilslutning.........................................................................................................................................43
Tilslutning af strømforsyningen......................................................................................................43
Sådan afbrydes strømforsyningen................................................................................................43
Mulige fejl ved manglende funktion ............................................................................................43
Strømforsyning via skruetil-slutningerne 44
Tilslutning med bananstik ..............................................................................................................44
Tilslutning til de uisolerede ender på et fast kabel.....................................................................44
Tilslutning via løst kabel.................................................................................................................44
Sikringer 45
Udskiftning af rund sikring ............................................................................................................45
Udskiftning af fladsikring...............................................................................................................45
Udskiftning af kabelsikring............................................................................................................45
Rengøring og vedligeholdelse 45
Opbevaring 46
Bortskaffelse 46
Garanti & Service 47
Importør 47
Læs betjeningsvejledningen omhyggeligt igennem, før du bruger energistationen første gang, og
gem vejledningen til senere brug. Hvis du giver energistationen videre til andre, skal vejledningen
også følge med.
- 37 -
Page 40

ENERGISTATION
KH 3002
Anvendelsesformål
Energistationen er beregnet til mobil strømforsyning
af lavspændingsapparater med et strømforbrug på
op til 10 A. Den er kun beregnet til privat anvendelse
og ikke til erhvervsmæssigt eller industrielt brug.
Brug ikke apparatet til formål, som kan føre til skader
i tilfælde af en strømafbrydelse - f.eks. inden for
medicinsk teknik, luft- eller rumfart osv.
Forberedelse
Udpakning
1. Tag energistationen og tilbehøret ud af
emballagen.
2. Fjern al tape, alle folier og transportsikringer.
Tekniske data
Energistation
Akku-gel-batteri: 12 V / 7 Ah
Lavspændingsstik: 3 V / 4,5 V
6 V/ 9 V/
12 V
ustabiliseret / 1 A
Bil-stikkontakt: 12 V / 10 A
Skruetilslutninger: 12 V / 10 A til
maks. 2 min.
Stiknetdel
Strømforsyning : 230 V ~/ 50 Hz
Udgangsspænding: 12 V / 500 mA
Beskyttelsesklasse: II /
Model: ZJF-DC120V050
Beskrivelse af energistationen
Forside
Obs!
Lad aldrig små børn lege med folier.
Der er fare for kvælning!
Kontrol af de leverede dele
Kontrollér inden du bruger energistationen første
gang, at alle dele er leveret med og er uden skader:
1 energistation KH 3002
1 bærerem
1 stiknetdel
1 autoadapter
1 adapterkabel
5 adapterstik
Bærerem
1
Hovedafbryder (CHA/OFF/ON)
2
12 V/10 A udgang
3
Lavspændingsstik (3 V/4,5 V/6 V/9 V/12 V)
4
Indikationslamper OUTPUT (rød LED
5
"Tom"/grøn LED "Fuld")
Indikationslamper CHARGE (rød LED
6
"Tændt"/grøn LED "Fuld")
Rund sikring 2 A (T2A 250 V)
7
Bagside
Fladsikring 10 A (C10)
8
Skruetilslutninger 12 V / 10 A
9
Opbevaringsrum til adapterkabel
0
Opbevaringsrum til adapterstik
q
Ladestik DC-INPUT
w
- 38 -
Page 41

Autoadapter
Adapterstik
3,5 mm hulstik
e
5 mm hulstik
r
5,5 mm hulstik
t
2,5 mm-jackstik
z
3,5 mm-jackstik
u
Adapterkabel
Stiknetdel
Sikkerhedsanvisninger
Energistationen er kun beregnet til anvendelse
indendørs.
• Denne energistation må ikke benyttes af personer
(inklusive børn) med begrænsede fysiske, sensoriske eller psykiske evner eller med manglende
erfaringer og/eller manglende viden, medmindre
en ansvarlig person holder opsyn med dem og
giver dem anvisninger til, hvordan energistationen skal benyttes.
• Hold øje med børn, så de ikke leger med energistationen.
• Kontrollér energistationen og alle dele for synlige
skader. Udstyrets sikkerhedskoncept fungerer
kun, hvis udstyret er i fejlfri stand.
• Det skal altid være let at få adgang til stiknetdelen,
så den hurtigt kan trækkes ud i nødsituationer.
Undgå livsfarlige elektriske stød
på følgende måde:
• Slut kun stiknetdelen til en forskriftsmæssigt installeret og jordet stikkontakt. Netspændingen skal
stemme overens med oplysningerne på
netstikdelens typeskilt.
• Brug kun den medfølgende stiknetdel.
Hvis du udskifter stiknetdelen, skal den udskiftes
med en tilsvarende model.
• Lad omgående defekte stiknetdele eller tilslutningskabler udskifte af en autoriseret reparatør,
så farlige situationer undgås.
• Læg aldrig energistationen og stiknetdelen ned i
vand. Tør kun delene af med en let fugtet klud.
• Udsæt ikke energistationen for regn, og brug
den aldrig i fugtige eller våde omgivelser.
• Sørg for, at tilslutningsledningen aldrig bliver våd
eller fugtig, når energistationen er i gang.
• Du må ikke åbne eller reparere energistationens
kabinet. Gør du det, er energistationen ikke sikker,
og garantien bortfalder.
• Beskyt energistationen mod dryp- og sprøjtevand.
Stil derfor ikke genstande, som er fyldt med vand
(f.eks. blomstervaser) på energistationen.
• Hvis der løber vand ind i energistationen eller
stiknetdelen, eller hvis delene falder ned i vand,
kan der opstå skader, som ikke kan repareres,
og der er fare for elektrisk stød!
Gør følgende for at undgå brandfare på grund af elektrisk
kort-slutning:
• Sørg for, at skruetilslutningerne aldrig kan kortsluttes, f.eks. på grund af løse kabler. På grund
af funktionen er disse tilslutninger ikke sikrede –
der kan altså passere meget kraftig strøm (over
15 A).
• Benyt ikke energistationen i nærheden af varme
overflader.
• Stil ikke energistationen på steder, hvor den er
udsat for direkte solstråling. Ellers kan den blive
overophedet og ødelægges, så den ikke kan
repareres igen.
• Hold altid øje med energistationen under brug.
• Brug ikke energistationen lige ved siden af varmekilder som ovne, varmluftapparater (i bilen: i nærheden af ventilationsblæsere) og lignende apparater! Varmepåvirkning kan medføre overophedning af energistationen, så kunststofdelene
smelter, og energistationen kan ødelægges så
meget, at den ikke kan repareres igen!
Ved overophedning kan energistationen blive
så beskadiget, at den ikke kan repareres, og
der er brandfare!
- 39 -
Page 42

• Energistationen må ikke stilles lige ved siden
af antændelige materialer som f.eks. forhæng,
brændbare væsker etc.
• Stil ikke åbne brandkilder som f.eks. lys på
energistationen.
Opladning med stiknetdelen
Obs: Eksplosive gasser
Undgå flammer og gnister. Sørg for tilstrækkelig
udluftning under opladningen.
Fare for kvæstelser!
• Hold børn på afstand af tilslutningsledningen og
energistationen. Børn undervuderer ofte farerne
ved elektriske maskiner.
• Sørg for at holde energistationen i god stand.
• Hvis energistationen har været faldet ned eller er
beskadiget, må den ikke længere tages i brug. Lad
energistationen efterse og reparere af kvalificerede fagfolk.
Første brug
Energistationen udleveres med et svagt opladet batteri. Før energistationen bruges første gang, skal den
lades op.
Obs!
Batteriet kan miste meget kapacitet, hvis du bruger
energistationen uden først at lade den helt op!
• Kontrollér før brug, at energistationen, adapterkablet
og stikaggregatet er i perfekt til-
stand uden defekter.
Pas på!
Brug ikke beskadigede tilslutningskabler.
Fare for kortslutning!
1. Sæt stiknetdelens stik ind i ladestikket DCINPUT w på energistationens bagside.
2. Sæt stiknetdelen
Netspændingen skal stemme overens med oplysningerne på netaggregatets typeskilt.
3. Stil hovedafbryderen 2 på forsiden af energistationen på stillingen "CHA“. Energistationen
lades op.
4. Under opladningen lyser den røde LED
"Tændt“6 i feltet CHARGE.
5. Når energistationen er ladet helt op, begynder
den grønne LED "Fuld“ 6 i feltet CHARGE at
lyse svagt.
Så snart den lyser klart, kan du fjerne stiknetdelen
igen. Den røde LED "Tændt“ 6 lyser
stadig, indtil hovedafbryderen 2 stilles på "OFF“.
ind i en stikkontakt.
Opladning med autoadapter
Du kan også lade energistationen op med den medfølgende autoadapter
12V spændingsnet:
1. Sæt autoadapterens stik
på apparatets bagside.
2. Sæt derefter autoadapterens 12-V-stik
stikkontakten eller i bilens cigarettænder.
via bilens eller bådens
ind i ladestikket w
i 12-V-
Pas på!
Ovennævnte rækkefølge er vigtig for at forhindre
kortslutning ved utilsigtet forbindelse mellem apparatets stik og bilens stel.
- 40 -
Page 43

3. Stil hovedafbryderen 2 på forsiden af energista-
-
+
tionen på stillingen "CHA“. Energistationen
lades op.
4. Under opladningen lyser den røde LED "Tændt“ 6 i
feltet CHARGE.
5. Når energistationen er ladet helt op, begynder
den grønne LED "Fuld“ 6 i feltet CHARGE at
lyse svagt.
Så snart den lyser klart, kan du fjerne autoadapteren igen. Den røde LED "Tændt“ 6 lyser stadig, indtil hovedafbryderen 2 stilles på "OFF“.
Bemærk!
Opladningen gennemføres kun, når ladespændingen
er højere end batteriets spænding. Dette er ofte ikke
tilfældet på en bil, der står stille. Derfor kan der som
regel kun oplades, mens motoren arbejder.
Tilslutning
Der er i alt 5 lavspændingsstik 4 fra 3 - 12 V til
rådighed til strømforsyning af apparater med et
strømforbrug på op til maks. 1 A:
1. Sæt adapterkablet ind i lavspændingsstikket 4,
som svarer til spændingen, der kræves til apparatet.
2. Vælg det rigtige adapterstik til indgangen
på apparatet, der skal forsynes med strøm.
Forsigtig!
Kontrollér, at der ikke er byttet om på "plus" og
"minus". Ellers kan apparatet beskadiges!
3. Sæt det valgte adapterstik og adapterkablet
sammen, så plus og minus svarer til markeringen
på apparatets stik.
Strømforsyning via
lavspændingsstik (maks. 1 A)
Forsigtig!
Sørg for, at apparatet, der skal forsynes med strøm,
og energistationen er frakoblet, før du slutter til.
Stil hovedafbryderen 2 på stillingen "OFF“ (mellemstilling). På denne måde undgår du skader på
grund af tilslutningsfejl.
Adapterstikkenes polaritet:
• Hvis adapterstikket sættes på adapterkablet
med plus til plus og minus til minus, er plus foroven
og indvendig og minus forneden og udvendig
på adapterstikkene .
- 41 -
Page 44

• Hvis adapterstikket sættes i modsat markeringen
-
+
(+ og -) på adapterkablet , er plus udvendigt
og minus indvendigt på adapterstikkene .
Strømforsyning
1. Stil hovedafbryderen 2 på "ON“ – apparatet,
som er tilsluttet via adapterkablet , forsynes
med strøm.
2. Så længe der er energi nok til apparatet, der
skal forsynes, lyser den grønne LED "Fuld“ 5
i feltet OUTPUT.
3. Når der ikke længere er energi nok til apparatet,
der skal forsynes, lyser den røde LED "Tom“ 5
i feltet OUTPUT.
Forsigtig!
Oplad først batteriet, når den røde lysdiode "Tom" 5
lyser. Ellers opstår der en dybdeafladning, som bevirker, at batterier normalt mister en væsentlig del af
ladekapaciteten.
Sådan afbrydes strømforsyningen
1. Sluk for apparatet, der forsynes med strøm.
2 Stil hovedafbryderen 2 på energistationen på
"OFF" (midterposition).
På denne måde forhindrer du, at apparatet stadig
er strømførende, mens stikket trækkes ud. Af og til
reagerer følsomme apparater på dette med fejl.
Mulige fejl ved manglende funktion
• Hvis ingen af LEDerne 5 og 6 lyser, er energistationens 10 A-sikring 8 muligvis defekt. Udskiftning af sikringerne er beskrevet i kapitlet
"Sikringer".
• Hvis der lyser en LED på energistationen efter
tilslutning, men apparatet alligevel ikke fungerer,
skal du straks slukke for energistationen. Kontrollér,
om kablet er sluttet rigtigt til – og at der ikke er
byttet om på "plus" og "minus". Ved behov skal
du også kontrollere sikringen til det pågældende
apparat som beskrevet i vejledningen til apparatet.
Strømforsyning via 10 A-stik
(bil-stikkontakt)
Forsigtig!
Sørg for, at apparatet, der skal forsynes med strøm,
og energistationen er koblet fra, før du slutter til.
Stil hovedafbryderen 2 på stillingen "OFF“ (mellemstilling). Derved undgår du skader på grund af
tilslutningsfejl.
Til strømforsyning af apparater med maks 10 A
anvendes 12 V/10 A-stikket 3. Her kan du slutte forskellige apparater til det såkaldte "cigarettænder-stik“.
Det kan f.eks. være...
- kølebokse,
- bilstøvsugere,
- små bærbare tv-apparater osv.. ...
Bemærk:
Vær opmærksom på, at batteriet ved 10 A belastning
er afladet senest efter 45 min.
Kølebokse har normalt et strømforbrug på 3 - 4 A
pr. time. Dette svarer til en batterikapacitet på 7 Ah
og altså knap 2 timers driftstid. Ud fra dette regneeksempel kan du altså nogenlunde udregne driftstiden
for apparatet.
3. Tag adapterkablets stik ud af apparatet og
energistationen.
På denne måde kan du forebygge, at der opstår
skader ved tilslutningsfejl.
- 42 -
Page 45

Tilslutning
Forsigtig!
Kontrollér, at der ikke er byttet om på "plus" og "minus",
før du slutter apparatet, der skal forsynes med strøm, til
energistationen. Ellers kan apparatet beskadiges.
Du kan også bruge den medfølgende autoadapter
til strømforsyningen, hvis dets stik passer til apparatet, der skal forsynes med strøm.
Autoadapterens stik til apparatet er polet, så
plus sidder indvendig og minus udvendig som vist
på tegningen.
• Brug autoadapteren , når stikket på apparatet,
der skal forsynes med strøm, er markeret på
følgende måde:
Forsigtig!
Oplad først batteriet, når den røde lysdiode "Tom" 5
lyser. Ellers opstår der en dybdeafladning, som bevirker, at batterier normalt mister en væsentlig del af
ladekapaciteten.
Sådan afbrydes strømforsyningen
1. Sluk for apparatet, der forsynes med strøm.
2 Stil hovedafbryderen 2 på energistationen
på "OFF" (midterposition).
På denne måde forhindrer du, at apparatet stadig
er strømførende, når stikket trækkes ud. Af og til reagerer følsomme apparater på dette med fejl.
3. Tag 12-V-stikket ud af 12 V/10 A-stikket 3 på
energistationen, og tag eventuelt apparatstikket
til autoadapteren ud af apparatet, der skal
forsynes.
• Brug ikke autoadapteren , når stikket på apparatet, der skal forsynes med strøm, er markeret på
følgende måde:
På apparater med fast tilsluttet kabel og 12-V-stik
har "plus" og "minus" korrekt polaritet.
1. Sæt autoadapterens apparatstik ind i stikket
på dit apparat.
2. Sæt autoadapterens 12-V-stik eller stikket til
apparatet, der skal forsynes med strøm, ind i
12 V/10 A-stikket 3 på energistationen.
Tilslutning af strømforsyningen
1. Stil hovedafbryderen 2 på "ON“ – det tilsluttede
apparat forsynes med strøm.
2. Så længe der er energi nok til apparatet, der
skal forsynes, lyser den grønne LED "Fuld“ 5
i feltet OUTPUT.
3. Når der ikke længere er energi nok til apparatet,
der skal forsynes, lyser den røde LED "Tom“ 5
i feltet OUTPUT.
Mulige fejl ved manglende funktion
• Hvis ingen af LEDerne 5 og 6 lyser, er energistationens 10 A-sikring 7 muligvis defekt.
I kapitlet "Sikringer" er udskiftning af sikringerne
beskrevet.
• Hvis der lyser en LED på energistationen efter
tilslutning, men apparatet alligevel ikke fungerer,
skal du straks slukke for energistationen. Kontrollér,
om kablet er sluttet rigtigt til – og at der ikke er
byttet om på "plus" og "minus". Ved behov skal
du også kontrollere sikringen på det pågældende
apparat som beskrevet i vejledningen til apparatet.
- 43 -
Page 46

Strømforsyning via skruetilslutningerne
Forsigtig!
Sørg for, at apparatet, der skal forsynes med strøm,
og energistationen er slukkede, før du slutter til.
Stil hovedafbryderen 2 på stillingen "OFF“ (mellemstilling). Derved undgår du skader på grund af
tilslutningsfejl.
Til strømforsyning af 12V-apparater, som behøver
størrer startstrøm, når der tændes, men ellers ikke
bruger mere end 10 A pr. time, kan du bruge skruetilslutningerne 9 på apparatets bagside.
Apparater med høj startstrøm kan f.eks. være ...
- 12 V-støvsugere
- 12 V-boremaskiner
- 12 V-tv-apparater osv.
Disse apparater bruger ganske vist ikke mere end
10 A i drift – men når de tændes, springer sikringen
med det samme. I dette tilfælde kan apparaterne
ikke sluttes til 12 V/10 A-stikket 3, som er sikret
med 10 A. Disse apparater må kun sluttes til skruetilslutningerne 9, som er beskrevet her.
Tilslutning til de uisolerede ender på et
fast kabel
1. Hvis kablet er fast forbundet med apparatet, der
skal forsynes med strøm, skal du slutte "plus"-lederens uisolerede ende (for det meste rød) til
den røde skruetilslutning 9.
2. Slut "minus"-lederens uisolerede ende (for det
meste sort eller blå) til den sorte skruetilslutning 9.
Det gør du ved at skrue plastkappen på skruetilslutningerne 9 løs. Klem de uisolerede ledere fast under
kapperne, når du skruer dem på igen.
Tilslutning via løst kabel
1. Hvis kablet ikke er fast forbundet med apparatet,
der skal forsynes med strøm, men har et uisoleret
apparatstik, sættes apparatstikket først ind i stikket
på apparatet.
2. Slut derefter lederne til skruetilslutningerne 9.
Ved tilslutning i den ovennævnte rækkefølge forhindrer
du faren for kortslutning, hvis det uisolerede stik ved
et uheld kommer til at berøre metallisk ledende genstande under tilslutningen.
Tilslutning med bananstik
1. Skruetilslutningerne 9 er hule indeni, så såkaldte
"bananstik" kan stikkes ind. Hvis kablet til apparatet har denne type stik, skal du stikke dem ind
i skruetilslutningerne 9 fra oven.
Pas på!
Her kan strømmen være meget kraftig og endda få
tykke kabler til at gløde! Kontrollér før tilslutning, om
tilslutningskablet til apparatet, der skal forsynes med
strøm, er egnet til denne tilslutningstype, så strømstød og brandrisiko undgås.
Denne kraftige strøm er nødvendig for at kunne starte nogle apparater. Skruetilslutningerne 9 ledes derfor hverken via sikringen eller hovedafbryderen 2, og
det betyder, at den er permanent spændingsførende!
Sørg for, at der aldrig opstår kortslutning på skruetilslutningerne!
- 44 -
Page 47

Sikringer
Hvis ingen af LEDerne 5 og 6 lyser efter tilslutningen, er energistationens 10 A-sikring 7 muligvis
defekt.
Hvis en LED lyser, uden at der er strøm fra autoadapteren , er kabelsikringen i 12-V-stikket til
autoadapteren muligvis brændt igennem.
Pas på!
Stil først hovedafbryderen 2 på "OFF". Træk alle
kabler ud af energistationen, før du skifter sikringerne.
Derved forhindrer du, at at den nye sikring springer
mellem fingrene på dig, mens du sætter den i, hvis
der er fejl på energistationen – fare for personskade!
Pas på!
Sikringer er vigtige beskyttelsesanordninger, der forhindrer skader. De må aldrig sættes ud af funktion.
Udskift altid sikringerne med andre med samme
værdi, aldrig med "kraftigere" sikringer.
Bypass aldrig sikringerne. - Brandfare!
Udskiftning af rund sikring
• Skru kappen på forsiden af den runde sikring 7
af. Sæt en ny sikring med værdien "2 A træg"
(T2A 250 V) i.
Rengøring og vedligeholdelse
Pas på!
Åbn aldrig energistationens kabinet. Der er ikke betjeningsdele i kabinettet. Når kabinettet er åbnet,
kan der være brandfare på grund af kraftig kortslutningsstrøm.
• Stil hovedafbryderen 2 på positionen "OFF".
• Afbryd alle kabelforbindelser mellem energistationen og eventuelt tilsluttede apparater.
• Hvis du vil rengøre stiknetdelen , skal den
altid først tages ud af stikkontakten og ladebøsningen w.
Pas på!
Energistationens dele må under ingen omstændigheder dyppes i vand eller andre væsker! Derved
kan energistationen beskadiges kraftigt – stiknetdelen
kan endog være livsfarlig på grund af elektrisk stød.
• Det er bedre at rengøre alle flader og kabler
med en fugtig klud. Tør energistationen godt af,
inden du bruger den igen.
Pas på!
Brug ikke rengørings- eller opløsningsmidler. Det
kan medføre skader på energistationen, især på
dens tekst.
Udskiftning af fladsikring
• Tag fladsikringen 8 på bagsiden af energi-
stationen ud (f.eks. med en spidstang). Sæt en ny
sikring med værdien "10 A" (C10) i.
Udskiftning af kabelsikring
• Skru kappen på 12-V-stikket til autoadapteren af
kabelsikringen. Sæt en ny sikring med værdien "1
A træg" (T1A 250 V) i.
Hvis sikringen brænder igennem, så snart apparatet
sluttes til, belaster apparatet energistationen med
for højt strømforbrug, eller apparatet er defekt.
- 45 -
Page 48

Opbevaring
På grund af batteriers naturlige selvafladning skal
du oplade energistationen helt en gang til, før du
stiller den væk i flere dage eller uger.
Hvis du ønsker at opbevare energistationen ubrugt i
længere tid, skal du oplade den igen senest efter 6
måneder for at forhindre dybdeafladning af batteriet.
• Stil hovedafbryderen 2 på positionen "OFF".
• Afbryd alle kabelforbindelser mellem energistationen og eventuelt tilsluttede apparater.
• Opbevar kablet og stikkene i opbevaringsrummene 0 og q på apparatet.
• Luk alle dæksler til sidst.
• Opbevar energistationen på et tørt sted.
Bortskaffelse
Smid aldrig energistationen ud sammen
med det normale husholdningsaffald.
Dette produkt er underkastet det
europæiske direktiv 2002/96/EC.
Bortskaf energistationen via en godkendt bortskaffelsesvirksomhed eller den kommunale genbrugsstation.
Følg de aktuelt gældende regler. Henvend dig i
tvivlstilfælde til det lokale bortskaffelsessted.
Bortskaffelse af batterier/akkuer
Batterier/akkuer må ikke smides ud med husholdningsaffaldet. I henhold til loven er alle forbrugere
forpligtede til at aflevere almindelige og genopladelige batterier på en kommunal genbrugsstation
eller hos en forhandler.
Denne forpligtelse hjælper med til, at batterier /
akkuer kan afleveres til miljøskånsom destruktion.
Levér kun batterier/genopladelige batterier tilbage i
afladet tilstand.
Aflever alle emballagematerialer på et
affaldsdepot, så miljøet skånes.
- 46 -
Page 49

Garanti & Service
Importør
På denne afspiller får du 3 års garanti fra købsdatoen. Apparatet er produceret omhyggeligt og er
inden levering afprøvet samvittighedsfuldt. Opbevar
kassebonen som bevis for købet. I garantitilfælde
bedes du kontakte dit servicested telefonisk. Kun på
den måde kan der garanteres gratis indsendelse
af din vare.
Garantien gælder kun for materiale- eller fabrikationsfejl, men ikke ved sliddele eller beskadigelser
ved skrøbelige dele, f.eks. kontakten eller akkumulatorer. Produktet er kun beregnet til privat og ikke til
erhvervsmæssigt brug.
Ved misbrug og uhensigtsmæssig behandling, anvendelse af vold og ved indgreb, som ikke er foretaget
af vores autoriserede service-afdeling, ophører garantien. Dine juridiske rettigheder indskrænkes ikke
ved denne garanti.
Kompernass Service Danmark
Tel.: +45 4975 8454
Fax: +45 4975 8453
e-mail: support.dk@kompernass.com
KOMPERNASS GMBH
BURGSTRASSE 21
44867 BOCHUM, GERMANY
www.kompernass.com
- 47 -
Page 50

- 48 -
Page 51

Περιεχόμενα Σελίδα
Σκοπός χρήσης 50
Προετοιμασία 50
Τεχνικές πληροφορίες 50
Περιγραφή συσκευής 50
Υποδείξεις ασφαλείας 51
Θέση σε λειτουργία 52
Φόρτιση με το τροφοδοτικό με φις...............................................................................................52
Φόρτιση με τον προσαρμογέα οχήματος....................................................................................52
Παροχή τροφοδοσίας μέσω υποδοχών μικρής τάσης (μέγ. 1 A) 53
Διεξαγωγή συνδέσεων....................................................................................................................53
Δημιουργία παροχής ρεύματος....................................................................................................54
Τερματισμός παροχής ρεύματος...................................................................................................54
Πιθανά σφάλματα σε μη λειτουργία .............................................................................................54
Τάση τροφοδοσίας μέσω της υποδοχής των 10 Α (Φις οχήματος) 54
Διεξαγωγή συνδέσεων....................................................................................................................55
Ενεργοποίηση παροχής ρεύματος ...............................................................................................55
Τερματισμός παροχής ρεύματος...................................................................................................55
Πιθανά σφάλματα σε μη λειτουργία .............................................................................................56
Παροχή ρεύματος μέσω των κοχλιωτών συνδέσεων 56
Διεξαγωγή σύνδεσης μέσω του υποδοχέα βύσματος.................................................................56
Διεξαγωγή συνδέσεων μέσω γυμνών άκρων ενός σταθερού καλωδίου συσκευής.....................56
Διεξαγωγή συνδέσεων μέσω ενός χαλαρού καλωδίου.................................................................57
Ασφάλειες 57
Αντικατάσταση της στρογγυλής ασφάλειας.................................................................................57
Αντικατάσταση επίπεδης ασφάλειας.............................................................................................57
Αντικατάσταση ασφάλειας καλωδίου............................................................................................57
Καθαρισμός και φροντίδα 57
Φύλαξη 58
Απόρριψη 58
Εγγύηση & Σέρβις 59
Εισαγωγέας 59
Διαβάστε το εγχειρίδιο χειρισμού πριν από την πρώτη χρήση προσεκτικά και φυλάξτε το για μια
μελλοντική χρήση. Παραδώστε το εγχειρίδιο σε όποιον παραδοθεί στη συνέχεια η συσκευή.
- 49 -
Page 52

ΦΟΡΗΤΗ ΠΗΓΗ
ΕΝΕΡΓΕΙΑΣ KH 3002
Σκοπός χρήσης
Η συσκευή αυτή προορίζεται για την κινητή τροφοδοσία
ρεύματος σε συσκευές μικρής τάσης με μέχρι και 10 A
απαίτηση ρεύματος. Η συσκευή προορίζεται για την
ιδιωτική χρήση και όχι για τη χρήση σε βιοτεχνικούς
ή βιομηχανικούς τομείς.
Μη χρησιμοποιείτε τη συσκευή για σκοπούς χρήσης
όπου μία πτώση ρεύματος μπορεί να οδηγήσει σε
φθορές π.χ. στον ιατρικό τομέα, στην
αεροναυπηγική ή στην αεροναυτική κ.λπ.
Προετοιμασία
Τεχνικές πληροφορίες
Σταθμός ενέργειας
Συσσωρευτής, μπαταρία
τύπου πηκτώματος: 12 V / 7 Ah
Υποδοχές μικρής τάσης: 3 V / 4,5 V /
6 V/ 9 V/
12 V χωρiς
σταθεροποiηοη / 1 A
Φις οχήματος: 12 V / 10 A
Κοχλιωτές συνδέσεις: 12 V / 10 A
για το μέγ. 2 λεπ.
Τροφοδοτικό με βύσμα
Παροχή ρεύματος: 230 V ~/ 50 Hz
Τάση εξόδου: 12 V / 500 mA
Κατηγορία προστασίας: II /
Μοντέλο ZJF-DC120V050
Αποσυσκευασία
1. Αφαιρέσατε το σταθμό ενέργειας και τα
εξαρτήματα από τη συσκευασία.
2. Αφαιρέσατε όλες τις αυτοκόλλητες ταινίες
και τις ασφάλειες μεταφοράς.
Προσοχή!
Μην αφήνετε τα μικρά παιδιά να παίζουν με μεμβράνες.
Υπάρχει κίνδυνος πνιγμού!
Ελέγξτε το σύνολο αποστολής
Παρακαλούμε ελέγχετε πριν από τη θέση σε λειτουργία
το σύνολο αποστολής για την πληρότητα και για
ενδεχόμενες βλάβες.
1 Σταθμός ενέργειας KH 3002
1 Ζώνη μεταφοράς
1 Τροφοδοτικό με φις
1 Προσαρμογέας οχήματος
1 Καλώδιο προσαρμογέα
5 Βύσμα προσαρμογέα
Περιγραφή συσκευής
Μπροστινή πλευρά
Ιμάντας μεταφοράς
1
Γενικός διακόπτης (CHA/OFF/ON)
2
Έξοδος 12 V/10 A
3
Υποδοχές μικρής τάσης
4
(3 V/4,5 V/6 V/9 V/12 V)
Λυχνίες ένδειξης ΕΞΟΔΟΥ (OUTPUT)
5
(Κόκκινο LED "Άδειο"/Πράσινο LED "Γεμάτο")
Λυχνίες ένδειξης ΦΟΡΤΙΣΗΣ (CHARGE)
6
(Κόκκινο LED "Ενεργό"/Πράσινο LED "Γεμάτο")
Στρογγυλή ασφάλεια 2 A (T2A 250 V)
7
Πίσω πλευρά
Επίπεδη ασφάλεια 10 A (C10)
8
Κοχλιωτές συνδέσεις 12 V / 10 A
9
Θήκη φύλαξης για καλώδιο προσαρμογέα
0
Θήκη φύλαξης για φις προσαρμογέα
q
Υποδοχή φόρτισης ΕΙΣΟΔΟΣ ΣΥΝΕΧΟΥΣ
w
ΡΕΥΜΑΤΟΣ. (DC-INPUT)
- 50 -
Page 53

Προσαρμογέας οχήματος
Φις προσαρμογέα
3,5 χιλ. Κοίλο φις
e
5 χιλ. Κοίλο φις
r
5,5 χιλ. Κοίλο φις
t
2,5 χιλ. Βύσμα
z
3,5 χιλ. Βύσμα
u
Καλώδιο προσαρμογέα
Τροφοδοτικό με φις
Υποδείξεις ασφαλείας
Η συσκευή ενδείκνυται μόνο για τη χρήση σε
εσωτερικούς χώρους.
• Αυτή η συσκευή δεν προορίζεται για χρήση
από άτομα (συμπεριλαμβανομένων παιδιών)
με περιορισμένες φυσικές, αισθητηριακές
ή πνευματικές δυνατότητες ή με έλλειψη εμπειρίας
και/ ή με έλλειψη γνώσεων, εκτός εάν επιτηρούνται
μέσω ενός υπεύθυνου ατόμου για την ασφάλειά
τους ή εάν έχουν λάβει υποδείξεις για το πώς
χρησιμοποιείται η συσκευή.
• Τα παιδιά πρέπει να επιτηρούνται ώστε να
εξασφαλίζεται ότι δεν παίζουν με τη συσκευή.
• Ελέγξτε τη συσκευή και όλα τα εξαρτήματα για
ορατές βλάβες. Ο μηχανισμός ασφαλείας της
συσκευής μπορεί να λειτουργήσει μόνο σε άψογη
κατάσταση.
• Το τροφοδοτικό φις πρέπει να είναι εύκολα
προσβάσιμο έτσι ώστε σε περίπτωση κινδύνου
η συσκευή να μπορεί να αποσυνδεθεί από το
δίκτυο ρεύματος.
Προς αποφυγή κινδύνου ζωής από
ηλεκτροπληξία:
• Συνδέστε το τροφοδοτικό με φις μόνο σε μία
σύμφωνα με τις προδιαγραφές τοποθετημένη
και γειωμένη πρίζα. Η τάση δικτύου πρέπει να
συμφωνεί με τα στοιχεία στην πινακίδα τύπου
του τροφοδοτικού με φις.
• Χρησιμοποιείτε μόνο το απεσταλμένο τροφοδοτικό.
Εάν θέλετε να αντικαταστήσετε το τροφοδοτικό με
φις, τότε αντικαταστήστε το μόνο με ένα ίδιο μοντέλο.
• Επιτρέπετε ένα φθαρμένο τροφοδοτικό ή καλώδιο
σύνδεσης να αντικαθίσταται αμέσως από εξουσιοδοτημένο ειδικό προσωπικό ή από την εξυπηρέτηση
των πελατών για να αποφύγετε κινδύνους.
• Ποτέ μη βυθίζετε τη συσκευή και το τροφοδοτικό
με φις στο νερό. Σκουπίζετε τα μόνο με ένα
ελαφρώς νωπό πανί.
• Μην εκθέτετε τη συσκευή στη βροχή και ποτέ μην
τη χρησιμοποιείτε σε υγρό ή βρεγμένο περιβάλλον.
• Προσέξτε ώστε η γραμμή σύνδεσης να μην
υγραίνεται ή βρέχεται ποτέ κατά τη λειτουργία.
• Δεν επιτρέπεται να ανοίξετε ή να επισκευάσετε
την επικάλυψη συσκευής. Σε αυτή την περίπτωση
δεν υπάρχει ασφάλεια και η εγγύηση ακυρώνεται.
• Προστατεύετε τη συσκευή από νερό που στάζει
και πιτσιλάει. Γι' αυτό μην τοποθετείτε αντικείμενα
γεμάτα με υγρό (π.χ. βάζα λουλουδιών) επάνω
στη συσκευή.
• Εάν εισρεύσει νερό στη συσκευή ή στο τροφοδοτικό
με φις ή εάν αυτά πέσουν στο νερό μπορεί να
συμβούν ανεπανόρθωτες βλάβες και υπάρχει
ο κίνδυνος μίας ηλεκτροπληξίας!
Για να αποφύγετε τον κίνδυνο
πυρκαγιάς από ηλεκτρικό
βραχυκύκλωμα:
• Βεβαιωθείτε ότι οι κοχλιωτές συνδέσεις δεν
μπορούν ποτέ να βραχυκυκλωθούν π.χ. από
χαλαρά καλώδια. Αυτές οι συνδέσεις από το
σχεδιασμό τους δεν είναι ασφαλισμένες –
μπορεί λοιπόν να ρέουν πολύ υψηλά ρεύματα
(πάνω από 15 A).
• Μη χρησιμοποιείτε τη συσκευή κοντά σε καυτές
επιφάνειες.
• Μη τοποθετείτε τη συσκευή σε μέρη τα οποία
εκτίθενται σε άμεση ηλιακή ακτινοβολία.
Σε άλλη περίπτωση ίσως υπερθερμανθεί και πάθει
ανεπανόρθωτη βλάβη.
• Ποτέ μην αφήνετε τη συσκευή κατά τη λειτουργία
χωρίς επιτήρηση.
- 51 -
Page 54

• Μη λειτουργείτε τη συσκευή κοντά σε πηγές
θερμότητας όπως σόμπες, αερόθερμα (στο
αυτοκίνητο: κοντά σε ανεμιστήρες), και
παρόμοιες συσκευές! Η επίδραση της
θερμότητας μπορεί να οδηγήσει σε μία
υπερθέρμανση της συσκευής και σε λιώσιμο
των πλαστικών μερών με αποτέλεσμα η συσκευή
τροφοδοσίας να φθαρεί ανεπανόρθωτα!
• Βεβαιώνεστε πριν από την χρήση ότι ο σταθμός
ενέργειας όπως και το καλώδιο προσαρμογέα
και το τροφοδοτικό με φις βρίσκονται σε μία
απροβλημάτιστη κατάσταση.
Κίνδυνος!
Μη χρησιμοποιείτε ποτέ ένα φθαρμένο καλώδιο
σύνδεσης. Κίνδυνος βραχυκυκλώματος!
Σε υπερθέρμανση μπορεί αυτή η συσκευή να
φθαρεί ανεπανόρθωτα και υπάρχει ο κίνδυνος
μίας πυρκαγιάς!
• Η συσκευή δεν επιτρέπεται να βρίσκεται κοντά σε
εύφλεκτα υλικά όπως π.χ. κουρτίνες, εύφλεκτα
υγρά κ.λπ.
• Μην τοποθετείτε επάνω στη συσκευή ανοιχτές
πηγές φωτιάς, όπως π.χ. κεριά.
Κίνδυνος τραυματισμού!
• Κρατήστε τα παιδιά μακριά από τη γραμμή
σύνδεσης και τη συσκευή. Τα παιδιά υποτιμούν
συχνά τους κινδύνους από τις ηλεκτρικές συσκευές.
• Φροντίστε για μια ασφαλή θέση της συσκευής.
• Στην περίπτωση που η συσκευή έχει πέσει κάτω
ή έχει βλάβη, δεν επιτρέπεται πλέον να την θέτετε
σε λειτουργία. Η συσκευή πρέπει να ελέγχεται και
εάν απαιτείται να επιδιορθώνεται από
εξειδικευμένο προσωπικό.
Θέση σε λειτουργία
Ο σταθμός ενέργειας παραδίδεται μόνο με ελάχιστα
φορτισμένο συσσωρευτή. Πριν από την πρώτη χρήση
πρέπει να τον φορτίσετε.
Φόρτιση με το τροφοδοτικό με φις
Προσοχή: Εκρηκτικά αέρια
Αποφεύγετε φωτιές και σπινθήρες. Φροντίζετε κατά
τη διάρκεια της φόρτισης για επαρκή αερισμό.
1. Εισάγετε το φις συσκευής του τροφοδοτικού με
φις
στην υποδοχή φόρτισης ΕΙΣΟΔΟΥ
ΣΥΝΕΧΟΥΣ ΡΕΥΜΑΤΟΣ (DC-INPUT) w στην
πίσω πλευρά της συσκευής.
2. Εισάγετε το τροφοδοτικό με φις
δικτύου. Η τάση δικτύου πρέπει να συμφωνεί με τα
στοιχεία στην πινακίδα τύπου του τροφοδοτικού.
3. Θέσατε τον γενικό διακόπτη 2 στην μπροστινή
πλευρά της συσκευής στη θέση “CHA“.
Ο σταθμός ενέργειας φορτίζεται.
4. Κατά τη διαδικασία φόρτισης ανάβει στο πεδίο
CHARGE το κόκκινο LED “An” 6.
5. Όταν έχει επιτευχθεί από τη συσκευή η πλήρης
κατάσταση φόρτισης, τότε ξεκινά στο πεδίο
ΦΟΡΤΙΣΗΣ (CHARGE) να φωτίζει αδύναμα το
πράσινο LED "Voll" 6.
Όταν αυτό ανάβει δυνατά, τότε μπορείτε πάλι να
απομακρύνετε το τροφοδοτικό με φις
Το κόκκινο LED “An“ 6 ανάβει περαιτέρω μέχρι
να θέσετε το γενικό διακόπτη 2 στη θέση "ΟFF".
σε μία πρίζα
.
Προσοχή!
Ο συσσωρευτής μπορεί να χάσει αρκετή από την
απόδοσή του, όταν χρησιμοποιείτε το σταθμό
ενέργειας χωρίς προηγουμένως να τον έχετε
φορτίσει πλήρως!
Φόρτιση με τον προσαρμογέα οχήματος
Μπορείτε να φορτίσετε το σταθμό ενέργειας με τον
παραδιδόμενο προσαρμογέα οχήματος
του δικτύου 12V ενός οχήματος ή ενός σκάφους:
1. Εισάγετε το φις συσκευής του προσαρμογέα
οχήματος
πίσω πλευρά της συσκευής.
- 52 -
στην υποδοχή φόρτισης w στην
και μέσω
Page 55

2. Εισάγετε μετά το φις 12-V του προσαρμογέα
-
+
οχήματος
αναπτήρα αυτοκινήτου.
στην υποδοχή 12 V ή στον
Κίνδυνος!
Η παραπάνω σειρά ακολουθίας είναι σημαντική για
να αποφύγετε ένα βραχυκύκλωμα σε μία μη ηθελημένη
επαφή του φις συσκευής με το σώμα του οχήματος.
3. Θέσατε τον γενικό διακόπτη 2 στην μπροστινή
πλευρά της συσκευής στη θέση “CHA“.
Ο σταθμός ενέργειας φορτίζεται.
4. Κατά τη διαδικασία φόρτισης ανάβει στο πεδίο
CHARGE το κόκκινο LED “An” 6.
5. Όταν έχει επιτευχθεί από τη συσκευή η πλήρης
κατάσταση φόρτισης, τότε ξεκινά στο πεδίο
CHARGE να φωτίζει αδύναμα το πράσινο LED
"Voll"6.
Όταν αυτό ανάβει δυνατά, τότε μπορείτε πάλι να
απομακρύνετε τον προσαρμογέα οχήματος .
Το κόκκινο LED “An“ 6 ανάβει περαιτέρω μέχρι
να θέσετε το γενικό διακόπτη 2 στη θέση "ΟFF".
Υπόδειξη!
Μία διαδικασία φόρτισης είναι εφικτή μόνο όταν
η τάση φόρτισης είναι υψηλότερη από αυτή του
συσσωρευτή. Σε ένα ακινητοποιημένο όχημα αυτό
δεν μπορεί να συμβεί. Μπορεί να γίνει φόρτιση
κατά κανόνα μόνο σε κινητήρα που λειτουργεί.
Διεξαγωγή συνδέσεων
Για την τροφοδοσία συσκευών με μία απαίτηση
ρεύματος μέχρι το μέγ. 1 A διατίθενται συνολικά
5 υποδοχές μικρής τάσης 4 των 3 - 12 V:
1. Εισάγετε το καλώδιο προσαρμογέα στην
υποδοχή μικρής τάσης 4, που αντιστοιχεί
στην απαραίτητη τάση για την προς τροφοδοσία
συσκευή.
2. Επιλέξτε το φις προσαρμογέα που ταιριάζει
για την είσοδο της προς τροφοδοσία συσκευής.
Προσοχή!
Βεβαιωθείτε ότι δεν έχουν μπερδευτεί ο "θετικός" και
ο "αρνητικός" πόλος. Αλλιώς μπορεί η συσκευή σας
να πάθει ζημιά!
3. Συνδέστε το επιλεγμένο φις προσαρμογέα και
το καλώδιο προσαρμογέα μαζί έτσι ώστε να
αντιστοιχεί ο θετικός και ο αρνητικός πόλος στην
ένδειξη στην υποδοχή της συσκευής σας.
Πολικότητα του φις προσαρμογέα:
• Εάν το φις προσαρμογέα έχει τοποθετηθεί με
το Συν στο Συν και το Πλην στο Πλην του καλωδίου
προσαρμογέα , τότε βρίσκεται στα φις προσαρμογέων το συν επάνω ή εσωτερικά και το
πλην κάτω ή εξωτερικά.
Παροχή τροφοδοσίας μέσω
υποδοχών μικρής τάσης
(μέγ. 1 A)
Προσοχή!
Βεβαιωθείτε ότι και η συσκευή προς τροφοδοσία
όπως και ο σταθμός ενέργειας έχουν απενεργοποιηθεί
πριν να πραγματοποιήσετε τις συνδέσεις. Για το
λόγο αυτό θέσατε τον γενικό διακόπτη 2 στη θέση
“OFF“ (μεσαία θέση). Έτσι αποφεύγετε τις βλάβες
μέσω σφάλματος σύνδεσης.
- 53 -
Page 56

• Εάν το φις προσαρμογέα τοποθετηθεί με
-
+
την αντίθετη σήμανση (+ και -) στο καλώδιο
προσαρμογέα , τότε το συν βρίσκεται προς
τα έξω και το πλην προς τα μέσα στα φις
προσαρμογέων .
Δημιουργία παροχής ρεύματος
1. Θέσατε τον γενικό διακόπτη 2 στο “ON“ – Η
συσκευή, η οποία συνδέεται μέσω του καλώδιου
προσαρμογέα τροφοδοτείται με ρεύμα.
2. Όσο διατίθεται επαρκής ενέργεια για τη συσκευή
προς τροφοδοσία, στον τομέα ΕΞΟΔΟΥ (OUTPUT) ανάβει το πράσινο LED "Voll" “γεμάτο” 5.
3. Όσο δεν υπάρχει επαρκής ενέργεια για τη
συσκευή προς τροφοδοσία, στον τομέα
ΕΞΟΔΟΥ (OUTPUT) ανάβει το κόκκινο LED
"Leer" (Άδειο) 5.
Προσοχή!
Φορτίζετε τον συσσωρευτή μόνο όταν ανάβει το
κόκκινο LED “Leer“ 5. Σε διαφορετική περίπτωση
μπορεί να υπάρχει μία βαθιά εκφόρτιση, με συνέπεια ο
συσσωρευτής να χάνει σημαντική απόδοση φόρτισης.
Τερματισμός παροχής ρεύματος
1. Απενεργοποιήστε τη συσκευή προς τροφοδοσία.
2. Θέσατε στον ενεργειακό σταθμό τον γενικό
διακόπτη 2 στο “OFF“ (μεσαία θέση).
Με αυτό τον τρόπο αποφεύγετε να ρέει ρεύμα όσο
το φις είναι τραβηγμένο. Ευαίσθητες συσκευές
αντιδρούν μερικές φορές με παρεμβολές σε αυτή την
περίπτωση.
3. Τραβήξτε το φις του καλωδίου προσαρμογέα
τόσο από τη συσκευή όσο και από το σταθμό
ενέργειας.
Πιθανά σφάλματα σε μη λειτουργία
• Εάν μετά την ενεργοποίηση δεν ανάβει κανένα από
τα δύο LED 5 και 6, τότε πιθανόν η ασφάλεια
των 10 A 8 στο σταθμό ενέργειας να είναι
ελαττωματική. Στο κεφάλαιο “Ασφάλειες“
περιγράφεται η αντικατάσταση των ασφαλειών.
• Εάν παρόλα αυτά μετά την ενεργοποίηση ανάβει
ένα LED στο σταθμό ενέργειας – αλλά η συσκευή
σας δε λειτουργεί, τότε απενεργοποιήστε αμέσως
τον ενεργειακό σταθμό. Ελέγξατε εάν το καλώδιο
έχει συνδεθεί σωστά και να μην μπερδεύονται
ο "Θετικός" και ο "Αρνητικός" πόλος.
Σε διαφορετική περίπτωση πρέπει να ελέγξετε την
τάση στη συσκευή σας, όπως περιγράφεται σε
αυτή την οδηγία.
Τάση τροφοδοσίας μέσω της
υποδοχής των 10 Α
(Φις οχήματος)
Προσοχή!
Βεβαιωθείτε ότι τόσο η συσκευή προς τροφοδοσία
όσο και ο σταθμός ενέργειας έχουν απενεργοποιηθεί,
πριν να πραγματοποιήσετε τις συνδέσεις. Για το
λόγο αυτό θέσατε τον γενικό διακόπτη 2 στη θέση
“OFF“ (μεσαία θέση). Έτσι αποφεύγετε τις βλάβες
μέσω σφάλματος σύνδεσης.
Για την τροφοδοσία σε συσκευές μέχρι το μέγ. 10 A
διατίθεται η υποδοχή 12 V/10 A 3. Εδώ μπορείτε
να συνδέσετε το λεγόμενο "φις αναπτήρα" διαφόρων
συσκευών.
Αυτές οι συσκευές μπορεί για παράδειγμα να είναι...
- μικρά ψυγεία,
- σκουπάκια αυτοκινήτου,
- μικρές φορητές συσκευές τηλεόρασης κ.λπ. ...
- 54 -
Page 57

Υπόδειξη:
Λάβετε υπόψη σας ότι ο συσσωρευτής σε φορτίο 10
A το αργότερο μετά από 45 λεπτά έχει εξαντληθεί –
ανάλογα με την κατάσταση φόρτισης και λίγο
περισσότερο.
Τα μικρά ψυγεία έχουν μία απαίτηση ρεύματος
συνήθως 3 - 4 A ανά ώρα. Αυτό αντιστοιχεί σε μία
απόδοση του συσσωρευτή 7 Ah δηλαδή σχεδόν 2
ώρες χρόνο λειτουργίας. Σύμφωνα με αυτό το
παράδειγμα υπολογισμού μπορείτε έτσι να υπολογίσετε
κατά προσέγγιση την περίοδο λειτουργίας της
συσκευής σας.
Έτσι μπορείτε να αποφύγετε, σε σφάλματα σύνδεσης,
να υπάρξουν βλάβες.
Διεξαγωγή συνδέσεων
Προσοχή!
Βεβαιωθείτε ότι δεν έχουν μπερδευτεί ο "Θετικός" και
ο "Αρνητικός" πόλος πριν να συνδέσετε τη συσκευή
προς τροφοδοσία με το σταθμό ενέργειας. Αλλιώς
μπορεί αυτή η συσκευή να φθαρεί.
Μπορείτε να χρησιμοποιήσετε για τροφοδοσία
ρεύματος επίσης και τον παραδιδόμενο προσαρμογέα
οχήματος εφόσον ταιριάζει το φις συσκευής με
την προς τροφοδοσία συσκευή.
Στον προσαρμογέα οχήματος το βύσμα συσκευής
έχει τέτοια θέση ώστε το θετικό να βρίσκεται εσωτερικά
και το αρνητικό εξωτερικά, όπως απεικονίζεται.
• Χρησιμοποιείτε τον προσαρμογέα οχήματος ,
όταν η υποδοχή στην προς τροφοδοσία συσκευή
έχει τον εξής χαρακτηρισμό:
• Μη χρησιμοποιείτε τον προσαρμογέα οχήματος ,
όταν η υποδοχή στην προς τροφοδοσία συσκευή
έχει τον εξής χαρακτηρισμό:
Σε συσκευές με σταθερά συνδεδεμένο καλώδιο και
φις 12-V, οι πόλοι “Συν“ και “Πλην“ είναι σωστά
τοποθετημένοι.
1. Τοποθετήστε το φις συσκευής του προσαρμογέα
οχήματος στην υποδοχή της συσκευής σας.
2. Τοποθετήστε το φις 12-V του προσαρμογέα
οχήματος ή της προς τροφοδοσία συσκευής
στην υποδοχή 12 V/10 A 3 στο σταθμό
ενέργειας.
Ενεργοποίηση παροχής ρεύματος
1. Θέσατε τον γενικό διακόπτη 2 στο “ON“ – Η
συνδεδεμένη συσκευή τροφοδοτείται με ρεύμα.
2. Όσο υπάρχει επαρκής ενέργεια για τη συσκευή
προς τροφοδοσία, στον τομέα ΕΞΟΔΟΥ ανάβει
το πράσινο LED "Voll" (γεμάτο) 5.
3. Όσο δεν υπάρχει επαρκής ενέργεια για τη
συσκευή προς τροφοδοσία, στον τομέα ΕΞΟΔΟΥ
ανάβει το κόκκινο LED "Leer" (άδειο) 5.
Προσοχή!
Φορτίζετε τον συσσωρευτή όταν ανάβει το κόκκινο
LED “Leer“ 5. Σε διαφορετική περίπτωση μπορεί να
υπάρχει μία βαθιά εκφόρτιση, με συνέπεια
ο συσσωρευτής να χάσει αρκετή απόδοση φόρτισης.
Τερματισμός παροχής ρεύματος
1. Απενεργοποιήστε τη συσκευή προς τροφοδοσία.
2. Θέσατε στον ενεργειακό σταθμό τον γενικό
διακόπτη 2 στο “OFF“ (μεσαία θέση).
Με αυτό τον τρόπο αποφεύγετε να ρέει ρεύμα όσο το
φις είναι τραβηγμένο. Ευαίσθητες συσκευές
αντιδρούν μερικές φορές με βλάβες σε αυτή την
περίπτωση.
3. Τραβήξτε το φις 12-V από την υποδοχή 12 V/
10 A 3 του σταθμού ενέργειας και εάν απαιτηθεί το
φις συσκευής του προσαρμογέα οχήματος από
την προς τροφοδοσία συσκευή.
- 55 -
Page 58

Πιθανά σφάλματα σε μη λειτουργία
• Εάν μετά από την ενεργοποίηση δεν ανάβει κανένα
από τα δύο LED 5 και 6, τότε πιθανόν η ασφάλεια
των 10 A 7 του σταθμού ενέργειας να είναι
ελαττωματική. Στο κεφάλαιο “Ασφάλειες“ περιγράφεται η αντικατάσταση των ασφαλειών.
• Εάν μετά την ενεργοποίηση ανάβει ένα LED στον
ενεργειακό σταθμό – αλλά η συσκευή σας δε
λειτουργεί, τότε απενεργοποιήστε τον ενεργειακό
σταθμό αμέσως. Ελέγξατε εάν το καλώδιο έχει
συνδεθεί σωστά και τα "Συν" και "Πλην" δεν
έχουν μπερδευτεί. Σε διαφορετική περίπτωση
πρέπει να ελέγξετε την τάση στη συσκευή σας,
όπως περιγράφεται σε αυτή την οδηγία.
Παροχή ρεύματος μέσω των
κοχλιωτών συνδέσεων
Προσοχή!
Βεβαιωθείτε ότι και η συσκευή προς τροφοδοσία
όπως και σταθμός ενέργειας έχουν απενεργοποιηθεί
πριν να πραγματοποιήσετε τις συνδέσεις. Για το
λόγο αυτό θέσατε τον γενικό διακόπτη 2 στη θέση
“OFF“ (μεσαία θέση). Έτσι αποφεύγετε τις βλάβες
μέσω σφάλματος σύνδεσης.
Για την τροφοδοσία ρεύματος συσκευών 12V που
απαιτούν κατά την ενεργοποίηση υψηλό ρεύμα
εκκίνησης αλλά δεν καταναλώνουν περισσότερο
από 10 A ανά ώρα χρησιμοποιείτε τις κοχλιωτές
συνδέσεις 9 στο πίσω μέρος της συσκευής.
Συσκευές με υψηλό ρεύμα εκκίνησης μπορούν για
παράδειγμα να είναι ...
- σκουπάκια 12 V
- τρυπάνια 12 V
- συσκευές τηλεόρασης 12 V κ.λπ.
Αυτές οι συσκευές δεν απαιτούν κατά τη λειτουργία
περισσότερο από 10 A – εν τούτοις κατά την
ενεργοποίηση πέφτει αμέσως η ασφάλεια. Σε αυτή
την περίπτωση τέτοιες συσκευές δεν μπορούν να
λειτουργήσουν στην υποδοχή 12 V/10 A 3 με την
ασφάλεια των 10 Α. Λειτουργείτε αυτές τις συσκευές
μέσω των περιγραφόμενων σε αυτή την οδηγία
κοχλιωτών συνδέσεων 9.
Διεξαγωγή σύνδεσης μέσω του
υποδοχέα βύσματος
1. Οι κοχλιωτές συνδέσεις 9 είναι από μέσα κενές
για να μπορείτε να εισάγετε εκεί τους λεγόμενους
"υποδοχείς βυσμάτων". Εάν υπάρχουν τέτοια
φις στο καλώδιο συσκευής, τότε εισάγετε τα από
επάνω στις κοχλιωτές συνδέσεις 9.
Κίνδυνος!
Εδώ μπορεί να ρεύσουν υπερβολικά υψηλά ρεύματα,
τα οποία μπορεί να οδηγήσουν ακόμα και χοντρά
καλώδια σε πυράκτωση! Βεβαιωθείτε πριν από τη
σύνδεση ότι το καλώδιο σύνδεσης της προς τροφοδοσία συσκευής ενδείκνυται για αυτό το είδος
σύνδεσης για να αποφύγετε τον κίνδυνο ηλεκτροπληξίας και πυρκαγιάς.
Αυτά τα υψηλά ρεύματα απαιτούνται για να μπορούν να
εκκινήσουν μερικές συσκευές. Οι κοχλιωτές
συνδέσεις 9 δεν οδηγούνται ούτε μέσω μιας
ασφάλειας ούτε μέσω του γενικού διακόπτη 2,
αυτό σημαίνει ότι υπάρχει διαρκής τάση!
Βεβαιωθείτε ότι στις κοχλιωτές συνδέσεις δεν
υπάρχει ποτέ κίνδυνος βραχυκυκλώματος!
Διεξαγωγή συνδέσεων μέσω γυμνών
άκρων ενός σταθερού καλωδίου
συσκευής
1. Όταν το καλώδιο συσκευής έχει συνδεθεί σταθερά
με τη συσκευή προς τροφοδοσία, τότε συνδέστε
τη γυμνή άκρη του "Θετικού" πόλου (τις περισσότερες
φορές κόκκινο) στην κόκκινη κοχλιωτή σύνδεση 9.
2. Συνδέστε τη γυμνή άκρη του "Αρνητικού" πόλου
(συνήθως μαύρη ή μπλε) στη μαύρη κοχλιωτή
σύνδεση 9.
- 56 -
Page 59

Στρέψατε για αυτό το πλαστικό καπάκι στις κοχλιωτές
συνδέσεις 9 μέχρι να χαλαρώσει. Συσφίξτε κατά τη
συστροφή τους γυμνούς πόλους εκεί κάτω.
Διεξαγωγή συνδέσεων μέσω ενός
χαλαρού καλωδίου
1. Όταν το καλώδιο δεν έχει συνδεθεί σταθερά με τη
συσκευή προς τροφοδοσία, αλλά μέσω ενός
γυμνού φις συσκευής, τότε πρώτα τοποθετήστε το
φις συσκευής στην υποδοχή στη συσκευή.
2. Συνδέστε μετά τους πόλους στις κοχλιωτές
συνδέσεις 9.
Κατά τη σύνδεση σύμφωνα με την ανωτέρω σειρά
ακολουθίας αποφεύγετε τον κίνδυνο ενός βραχυκυκλώματος στην περίπτωση που το γυμνό φις έρθει
κατά λάθος σε επαφή με μεταλλικά αγώγιμα
αντικείμενα κατά τις εργασίες σύνδεσης.
Ασφάλειες
Κίνδυνος!
Οι ασφάλειες είναι σημαντικές διατάξεις
προστασίας, ώστε να αποφεύγετε βλάβες.
Ποτέ μην τις καταστρέφετε.
Αντικαθιστάτε τις ασφάλειες πάντα μόνο με αυτές
του ίδιου τύπου, ποτέ με "δυνατότερες".
Ποτέ μην υπεργεφυρώνετε τις ασφάλειες. Κίνδυνος
πυρκαγιάς!
Αντικατάσταση της στρογγυλής
ασφάλειας
• Στρέψατε μπροστά το καπάκι από την στρογγυλή
ασφάλεια 7 . Τοποθετήστε μία νέα ασφάλεια με
"επιβράδυνση 2 Α" (T2A 250 V).
Αντικατάσταση επίπεδης ασφάλειας
• Τραβήξτε στη συσκευή πίσω την επίπεδη ασφάλεια 8
προς τα έξω (π.χ. με ένα μυτοτσίμπιδο).
Τοποθετήστε μία νέα ασφάλεια με “10 A“ (C10).
Εάν μετά από την ενεργοποίηση δεν ανάβει κανένα
από τα δύο LED 5 και 6, τότε πιθανόν η ασφάλεια
των 10 A 7του σταθμού ενέργειας να είναι ελαττωματική.
Εάν μετά την ενεργοποίηση ανάβει ένα LED, αλλά
μέσω του προσαρμογέα οχήματος δε ρέει ρεύμα,
τότε πιθανόν η ασφάλεια καλωδίου στο φις των 12-V
του προσαρμογέα οχήματος να έχει καεί.
Κίνδυνος!
Πρώτα θέσατε το γενικό διακόπτη 2 στο “OFF“.
Τραβήξτε όλα τα καλώδια από τον ενεργειακό
σταθμό, προτού αντικαταστήσετε οποιεσδήποτε
ασφάλειες.
Με αυτό τον τρόπο αποφεύγετε σε περίπτωση
σφάλματος να πυρακτωθεί η νέα ασφάλεια μεταξύ
των δακτύλων κατά την τοποθέτηση - Κίνδυνος
τραυματισμού!
Αντικατάσταση ασφάλειας καλωδίου
• Στρέψατε στο φις 12-V του προσαρμογέα
οχήματος το καπάκι από την ασφάλεια
του καλωδίου.
Τοποθετήστε μια νέα ασφάλεια με "επιβράδυνση
1 Α" (Τ1Α 250 V).
Εάν σε συνδεδεμένη συσκευή η ασφάλεια καεί πάλι
αμέσως, η συσκευή προς τροφοδοσία υπερφορτίζει
το σταθμό ενέργειας με μια πολύ υψηλή απαίτηση
ρεύματος ή η συσκευή σας είναι ελαττωματική.
Καθαρισμός και φροντίδα
Κίνδυνος!
Ποτέ μην ανοίγετε την επικάλυψη της συσκευής. Δεν
υπάρχουν στοιχεία χειρισμού εκεί μέσα. Σε ανοικτό
περίβλημα μπορεί να υπάρξει κίνδυνος πυρκαγιάς
μέσω υψηλών ρευμάτων βραχυκυκλώματος.
• Θέσατε τον γενικό διακόπτη 2 στη θέση “OFF“.
• Αποσυνδέστε όλες τις συνδέσεις καλωδίων μεταξύ
του σταθμού ενέργειας και των πιθανόν εκεί
συνδεδεμένων συσκευών.
- 57 -
Page 60

• Όταν θέλετε να καθαρίσετε το τροφοδοτικό με
φις , τότε αποσυνδέστε το επίσης πρώτα από
την πρίζα και από την υποδοχή φόρτισης w.
Κίνδυνος!
Σε καμία περίπτωση δεν επιτρέπεται τα τμήματα της
συσκευής να βυθίζονται στο νερό ή σε άλλα υγρά!
Έτσι μπορεί ο σταθμός ενέργειας να πάθε σοβαρή
βλάβη – στο τροφοδοτικό με φις υπάρχει κίνδυνος
ζωής από ηλεκτροπληξία.
• Καθαρίζετε όλες τις επιφάνειες και τα καλώδια
καλύτερα με ένα ελαφρά υγρό πανί
καθαρισμού.Στεγνώνετε τη συσκευή καλά πριν
να τη χρησιμοποιήσετε εκ νέου.
Κίνδυνος!
Μην χρησιμοποιείτε απορρυπαντικά ή διαλύτες.
Αυτά μπορούν να οδηγήσουν σε βλάβες στη
συσκευή και ειδικά στο πινακίδιο.
Φύλαξη
Εξαιτίας της φυσικής αυτοεκφόρτισης των συσσωρευτών
πρέπει να φορτίσετε πλήρως τον ενεργειακό σταθμό
ακόμα μία φορά προτού τον αποθηκεύσετε για
περισσότερες μέρες ή εβδομάδες.
Όταν θέλετε να αποθηκεύσετε τη συσκευή για
περισσότερο χρόνο χωρίς να τη χρησιμοποιείτε,
τότε πρέπει να την φορτίσετε εκ νέου μετά από 6
μήνες για να αποφύγετε μία βαθειά εκφόρτιση του
συσσωρευτή.
• Θέσατε τον γενικό διακόπτη 2 στη θέση “OFF“.
• Αποσυνδέετε όλες τις συνδέσεις καλωδίων μεταξύ
του σταθμού ενέργειας και των πιθανόν εκεί
συνδεδεμένων συσκευών.
• Αποθηκεύετε τα καλώδια και φις στις θήκες
φύλαξης 0 και q στη συσκευή.
• Κλείνετε στο τέλος όλα τα καπάκια.
• Φυλάτε τη συσκευή σε ένα στεγνό χώρο.
Απόρριψη
Σε καμία περίπτωση μην πετάτε τη
συσκευή στα οικιακά απορρίμματα.
Αυτό το προϊόν υπόκειται στην
Ευρωπαϊκή Οδηγία 2002/96/EC.
Απομακρύνετε τη συσκευή μέσω μιας εγκεκριμένης
επιχείρησης απόρριψης ή μέσω της κοινοτικής
επιχείρησης απόρριψης.
Να τηρείτε τους ισχύοντες κανονισμούς.
Σε περίπτωση αμφιβολιών ελάτε σε επαφή με την
επιχείρηση απόρριψης.
Απόρριψη μπαταριών/ συσσωρευτών
Οι μπαταρίες/ συσσωρευτές δεν επιτρέπεται να
απορρίπτονται με τα οικιακά απορρίμματα.
Κάθε καταναλωτής είναι νομικά υποχρεωμένος να
παραδίδει μπαταρίες/ συσσωρευτές σε ένα σημείο
συλλογής της κοινότητας/ της περιοχής του ή στο
κατάστημα αγοράς.
Αυτή η υποχρέωση εξυπηρετεί στο να απορρίπτονται
οι μπαταρίες / συσσωρευτές με έναν φιλικό προς το
περιβάλλον τρόπο. Επιστρέφετε τις μπαταρίες / του
συσσωρευτές μόνο σε αποφορτισμένη κατάσταση.
Απομακρύνετε όλα τα υλικά συσκευασιών φιλικά προς το περιβάλλον.
- 58 -
Page 61

Εγγύηση & Σέρβις
Εισαγωγέας
Έχετε για αυτή τη συσκευή 3 χρόνια εγγύηση από
την ημερομηνία αγοράς. Η συσκευή κατασκευάστηκε
και ελέγχθηκε προσεκτικά πριν από την αποστολή.
Παρακαλούμε φυλάξτε την απόδειξη ταμείου ως
απόδειξη για την αγορά. Σε περίπτωση εγγύησης
ελάτε σε επικοινωνία με το τμήμα του σέρβις
τηλεφωνικά. Μόνο έτσι μπορεί να εξασφαλιστεί μια
δωρεάν αποστολή του εμπορεύματός σας.
Η απόδοση εγγύησης ισχύει μόνο για σφάλματα
υλικού ή κατασκευής, όχι όμως για εξαρτήματα
φθοράς ή για βλάβες σε εύθραυστα εξαρτήματα,
π.χ. διακόπτες ή συσσωρευτές. Το προϊόν
προορίζεται μόνο για την ιδιωτική και όχι για την
επαγγελματική χρήση.
Σε περίπτωση κακής μεταχείρισης και ακατάλληλης
χρήσης, σε χρήση βίας και σε παρεμβάσεις οι
οποίες δεν διεξήχθησαν από το εξουσιοδοτημένο
μας τμήμα σέρβις, η εγγύηση παύει να ισχύει. Τα νομικά σας δικαιώματα δεν περιορίζονται μέσω αυτής
της εγγύησης.
Kompernass Service Eλλάδα
Tel.: 210 2790865
Fax: 210 2796982
e-mail: support.gr@kompernass.com
KOMPERNASS GMBH
BURGSTRASSE 21
44867 BOCHUM, GERMANY
www.kompernass.com
- 59 -
Page 62

- 60 -
Page 63

INHALTSVERZEICHNIS SEITE
Verwendungszweck 62
Vorbereitung 62
Technische Daten 62
Gerätebeschreibung 62
Sicherheitshinweise 63
Inbetriebnahme 64
Aufladen mit dem Steckernetzteil.................................................................................................64
Aufladen mit dem Kfz-Adapter .....................................................................................................64
Stromversorgung über Kleinspannungsbuchsen (max. 1 A) 65
Anschlüsse vornehmen...................................................................................................................65
Stromversorgung herstellen...........................................................................................................66
Stromversorgung beenden............................................................................................................66
Mögliche Fehler bei Nichtfunktion...............................................................................................66
Stromversorgung über die 10 A-Buchse (Kfz-Steckdose) 66
Anschlüsse vornehmen...................................................................................................................67
Stromversorgung einschalten........................................................................................................67
Stromversorgung beenden............................................................................................................67
Mögliche Fehler bei Nichtfunktion...............................................................................................67
Stromversorgung über die Schraubanschlüsse 68
Anschlüsse über Bananenstecker vornehmen .............................................................................68
Anschlüsse über blanke Enden eines festen Gerätekabels vornehmen....................................68
Anschlüsse über ein loses Kabel vornehmen ..............................................................................68
Sicherungen 69
Rund-Sicherung wechseln..............................................................................................................69
Flach-Sicherung wechseln .............................................................................................................69
Kabel-Sicherung wechseln............................................................................................................69
Reinigen und Pflegen 69
Aufbewahren 70
Entsorgen 70
Garantie und Service 71
Importeur 71
Lesen Sie die Bedienungsanleitung vor der ersten Verwendung aufmerksam durch und heben Sie
diese für den späteren Gebrauch auf. Händigen Sie bei Weitergabe des Gerätes an Dritte auch
die Anleitung aus.
- 61 -
Page 64

ENERGIESTATION
KH 3002
Verwendungszweck
Die Energiestation ist zur mobilen Stromversorgung
von Kleinspannungsgeräten mit bis zu 10 A Stromaufnahme bestimmt. Das Gerät ist nur für den
privaten Gebrauch und nicht zur Verwendung in
gewerblichen oder industriellen Bereichen
vorgesehen.
Verwenden Sie das Gerät nicht für Einsatzzwecke,
bei denen ein Stromausfall zu Schäden führen kann,
z. B. in der Medizintechnik, Luft- oder
Raumfahrt usw..
Vorbereitung
Technische Daten
Energiestation
Akku Gel-Batterie: 12 V / 7 Ah
Kleinspannbuchsen: 3 V / 4,5 V
6 V/ 9 V/
12 V
unstabilisiert / 1 A
KFZ-Steckdose: 12 V / 10 A
Schraubanschlüsse: 12 V / 10 A
für max. 2 min.
Steckernetzteil
Stromversorgung: 230 V ~/ 50 Hz
Ausgangsspannung: 12 V / 500 mA
Schutzklasse: II /
Modell: ZJF-DC120V050
Gerätebeschreibung
Auspacken
1. Entnehmen Sie die Energiestation und das
Zubehör aus der Verpackung.
2. Entfernen Sie alle Klebebänder, Folien und
Transportsicherungen.
Achtung!
Lassen Sie kleine Kinder nicht mit Folien spielen.
Es besteht Erstickungsgefahr!
Lieferumfang prüfen
Bitte überprüfen Sie vor der Inbetriebnahme den
Lieferumfang auf Vollständigkeit und eventuelle
Beschädigungen:
1 Energiestation KH 3002
1 Tragegurt
1 Steckernetzteil
1 Kfz-Adapter
1 Adapterkabel
5 Adapterstecker
Vorderseite
Tragegurt
1
Hauptschalter (CHA/OFF/ON)
2
12 V/10 A Ausgang
3
Kleinspannungsbuchsen
4
(3 V/4,5 V/6 V/9 V/12 V)
Indikationsleuchten OUTPUT
5
(Rote LED "Leer"/Grüne LED "Voll")
Indikationsleuchten CHARGE
6
(Rote LED "An"/Grüne LED "Voll")
Rund-Sicherung 2 A (T2A 250 V)
7
Rückseite
Flach-Sicherung 10 A (C10)
8
Schraubanschlüsse 12 V / 10 A
9
Aufbewahrungsfach für Adapterkabel
0
Aufbewahrungsfach für Adapterstecker
q
Ladebuchse DC-INPUT
w
Page 65

Kfz-Adapter
Adapterstecker
3,5 mm Hohlstecker
e
5 mm Hohlstecker
r
5,5 mm Hohlstecker
t
2,5 mm Klinkenstecker
z
3,5 mm Klinkenstecker
u
Adapterkabel
Steckernetzteil
Sicherheitshinweise
Das Gerät ist nur für die Verwendung in
Innenräumen geeignet.
• Dieses Gerät ist nicht dafür bestimmt, durch
Personen (einschließlich Kinder) mit eingeschränkten physischen, sensorischen oder
geistigen Fähigkeiten oder mangels Erfahrung
und/oder mangels Wissen benutzt zu werden,
es sei denn, sie werden durch eine für ihre
Sicherheit zuständige Person beaufsichtigt oder
erhielten von ihr Anweisungen, wie das Gerät
zu benutzen ist.
• Kinder sollten beaufsichtigt werden, um sicherzustellen, dass sie nicht mit dem Gerät spielen.
• Prüfen Sie das Gerät und alle Teile auf sichtbare
Schäden. Nur in einwandfreiem Zustand kann
das Sicherheitskonzept des Gerätes
funktionieren.
• Das Steckernetzteil muss immer leicht zugänglich
sein, so dass im Notfall das Gerät schnell vom
Stromnetz getrennt werden kann.
Um Lebensgefahr durch
elektrischen Schlag zu vermeiden:
• Schließen Sie das Steckernetzteil nur an eine
vorschriftsmäßig installierte und geerdete Netzsteckdose an. Die Netzspannung muss mit den
Angaben auf dem Typenschild des Steckernetzteils übereinstimmen.
• Verwenden Sie nur das mitgelieferte Steckernetzteil.
• Wenn Sie das Steckernetzteil austauschen,
ersetzen Sie es nur durch ein gleiches Modell.
• Lassen Sie ein beschädigtes Steckernetzteil oder
Anschlusskabel sofort von autorisiertem Fachpersonal oder dem Kundenservice austauschen, um
Gefährdungen zu vermeiden.
• Tauchen Sie das Gerät und das Steckernetzteil
niemals in Wasser ein. Wischen Sie es nur mit
einem leicht feuchten Tuch ab.
• Setzen Sie das Gerät nicht dem Regen aus und
benutzen Sie es auch niemals in feuchter oder
nasser Umgebung.
• Achten Sie darauf, dass die Anschlussleitung
während des Betriebs niemals nass oder
feucht wird.
• Sie dürfen das Gerätegehäuse nicht öffnen oder
reparieren. In diesem Falle ist die Sicherheit nicht
gegeben und die Gewährleistung
erlischt.
• Schützen Sie das Gerät vor Tropf- und Spritzwasser. Stellen Sie deshalb keine mit Flüssigkeit gefüllten Gegenstände (z. B. Blumenvasen) auf das
Gerät.
• Läuft Wasser in Energiestation oder Steckernetzteil oder fallen sie ins Wasser, können irreparable Schäden auftreten und es besteht die
Gefahr eines elektrischen Schlages!
Um Brandgefahr durch elektrischen
Kurzschluss zu vermeiden:
• Stellen Sie sicher, dass die Schraubanschlüsse
niemals kurzgeschlossen werden können, z. B.
durch lose Kabel. Funktionsbedingt sind diese
Anschlüsse nicht abgesichert – es können also
sehr hohe Ströme fließen (über 15 A).
• Benutzen Sie das Gerät nicht in der Nähe von
heißen Oberflächen.
• Stellen Sie das Gerät nicht an Orten auf,
die direkter Sonnenstrahlung ausgesetzt sind.
Andernfalls kann es überhitzen und irreparabel
beschädigt werden.
• Lassen Sie das Gerät während des Betriebs
niemals unbeaufsichtigt.
- 63 -
Page 66

• Betreiben Sie die Energiestation nicht in unmittelbarer Nähe von Hitzequellen wie Öfen, Heizlüftern (im Auto: in der Nähe von Lüftungsgebläsen),
und ähnlichen Geräten! Hitzeeinwirkung kann
zu einer Überhitzung des Gerätes und zum
Schmelzen von Kunststoffteilen führen, wodurch
die Energiestation irreparabel beschädigt
werden kann!
• Überzeugen Sie sich vor Gebrauch davon,
dass sowohl die Energiestation, als auch das
Adapterkabel
einem einwandfreiem Zustand sind.
und das Steckernetzteil in
Gefahr!
Verwenden Sie kein beschädigtes Anschlusskabel.
Kurzschlussgefahr!
Bei Überhitzung kann die Energiestation
irreparabel beschädigt werden und es
besteht die Gefahr eines Brandes!
• Das Gerät darf nicht in unmittelbarer Nähe von
entflammbaren Materialien, wie z. B. Vorhängen,
brennbaren Flüssigkeiten etc. aufgestellt werden.
• Stellen Sie keine offenen Brandquellen,
wie z. B. Kerzen auf das Gerät.
Verletzungsgefahr!
• Halten Sie Kinder von Anschlussleitung und
Gerät fern. Kinder unterschätzen häufig die
Gefahren von Elektrogeräten.
• Sorgen Sie für einen sicheren Stand des
Gerätes.
• Falls das Gerät heruntergefallen oder beschädigt ist, dürfen Sie es nicht mehr in Betrieb nehmen. Lassen Sie das Gerät von qualifiziertem
Fachpersonal überprüfen und gegebenenfalls reparieren.
Inbetriebnahme
Die Energiestation wird mit nur gering geladenem
Akku ausgeliefert. Vor dem ersten Gebrauch muss
dieser aufgeladen werden.
Achtung!
Der Akku kann erheblich an Kapazität verlieren,
wenn Sie die Energiestation verwenden, ohne sie
zuvor vollständig aufzuladen!
Aufladen mit dem Steckernetzteil
Achtung: Explosive Gase
Flammen und Funken vermeiden. Während des
Ladens für ausreichende Belüftung sorgen.
1. Stecken Sie den Gerätestecker des Steckernetzteils
in die Ladebuchse DC-INPUT w an der
Geräterückseite.
2. Stecken Sie das Steckernetzteil
steckdose. Die Netzspannung muss mit den Angaben auf dem Typenschild des Steckernetzteils
übereinstimmen.
3. Schalten Sie den Hauptschalter 2 an der
Vorderseite des Geräts in die Stellung „CHA“.
Die Energiestation wird aufgeladen.
4. Während des Ladevorgangs, leuchtet im Feld
CHARGE die rote LED „An“6.
5. Wenn die Energiestation den vollen Ladezustand
erreicht, beginnt im Feld CHARGE die
grüne LED „Voll“ 6 schwach aufzuleuchten.
Sobald diese hell leuchtet, können Sie das
Steckernetzteil
„An“ 6 leuchtet weiterhin, bis Sie den Hauptschalter 2 in die Stellung „OFF“ stellen.
wieder entfernen. Die rote LED
in eine Netz-
Aufladen mit dem Kfz-Adapter
Sie können die Energiestation mit dem mitgelieferten Kfz-Adapter
nungsnetz eines Autos oder Sportboots aufladen:
1. Stecken Sie den Gerätestecker des Kfz-Adapters
in die Ladebuchse w an der Geräterückseite.
auch über das 12 V Bordspan-
- 64 -
Page 67

2. Stecken Sie danach den 12-V-Stecker des Kfz-
-
+
Adapters
Zigarettenanzünder des Autos.
in die 12-V-Steckdose bzw. in den
Gefahr!
Die obige Reihenfolge ist wichtig, um einen Kurzschluss bei versehentlichen Berühren des Gerätesteckers mit der Fahrzeugmasse zu verhindern.
3. Schalten Sie den Hauptschalter 2 an der
Vorderseite des Geräts in die Stellung „CHA“.
Die Energiestation wird aufgeladen.
4. Während des Ladevorgangs, leuchtet im Feld
CHARGE die rote LED „An“ 6.
5. Wenn die Energiestation den vollen Ladezustand
erreicht, beginnt im Feld CHARGE die
grüne LED „Voll“ 6 schwach aufzuleuchten.
Sobald diese hell leuchtet, können Sie den KfzAdapter wieder entfernen. Die rote LED „An“
6 leuchtet weiterhin, bis Sie den Hauptschalter
2 in die Stellung „OFF“ stellen.
Anschlüsse vornehmen
Für die Stromversorgung von Geräten mit einer
Stromaufnahme bis max. 1 A stehen insgesamt
5 Kleinspannungsbuchsen 4 von 3 - 12 V zur
Verfügung:
1. Stecken Sie das Adapterkabel in die Klein-
spannungsbuchse 4, welche der benötigten
Spannung für das zu versorgende Gerät
entspricht.
2. Wählen Sie den passenden Adapterstecker
für den Eingang des zu versorgenden Geräts.
Vorsicht!
Stellen Sie sicher, dass „Plus“ und „Minus“ nicht vertauscht sind. Sonst kann Ihr Gerät beschädigt werden!
3. Stecken Sie den gewählten Adapterstecker
und das Adapterkabel so zusammen, dass
Plus und Minus der Kennzeichnung an der
Buchse Ihres Geräts entsprechen.
Hinweis!
Ein Ladevorgang kommt nur zustande, wenn die
Ladespannung höher ist, als die des Akkus. Bei
einem stehenden Fahrzeug ist das oft nicht der
Fall. Geladen werden kann daher in der Regel
nur bei laufendem Motor.
Stromversorgung über
Kleinspannungsbuchsen
(max. 1 A)
Vorsicht!
Stellen Sie sicher, dass sowohl das zu versorgende
Gerät, als auch die Energiestation ausgeschaltet
sind, bevor Sie die Anschlüsse vornehmen. Stellen
Sie dazu den Hauptschalter 2 in die Stellung
„OFF“ (Mittelstellung). So vermeiden Sie Schäden
durch Anschlussfehler.
Polarität der Adapterstecker:
• Wird der Adapterstecker mit Plus an Plus und
Minus an Minus auf das Adapterkabel gesteckt,
befindet sich an den Adaptersteckern Plus
oben bzw. innen und Minus unten bzw. außen.
- 65 -
Page 68

• Wird der Adapterstecker mit entgegengesetz-
-
+
ter Markierung (+ und -) auf das Adapterkabel
gesteckt, befindet sich an den Adaptersteckern Plus außen und Minus innen.
Stromversorgung herstellen
1. Stellen Sie den Hauptschalter 2 auf „ON“ –
Das über das Adapterkabel angeschlossene
Gerät wird mit Strom versorgt.
2. Solange ausreichend Energie für das zu versorgende Gerät zur Verfügung steht, leuchtet im
Feld OUTPUT die grüne LED „Voll“ 5.
3. Wenn nicht mehr ausreichend Energie für das zu
versorgende Gerät zur Verfügung steht, leuchtet
im Feld OUTPUT die rote LED „Leer“ 5
Vorsicht!
Laden Sie den Akku erst auf, wenn die rote LED
„Leer“ 5 leuchtet. Andernfalls kommt es zu einer
Tiefentladung, wodurch der Akku erheblich an
Ladekapazität verliert.
Stromversorgung beenden
1. Schalten Sie das zu versorgende Gerät aus.
2. Stellen Sie an der Energiestation den Haupt-
schalter 2 auf „OFF“ (Mittelstellung).
Damit verhindern Sie, dass noch Strom fließt,
während der Stecker gezogen wird. Empfindliche
Geräte reagieren darauf manchmal mit Störungen.
3. Ziehen Sie die Stecker des Adapterkabels sowohl am Gerät als auch an der
Energiestation.
Mögliche Fehler bei Nichtfunktion
• Wenn nach dem Einschalten keine der beiden
LEDs 5 und 6 leuchtet, ist eventuell die
10 A-Sicherung 8 der Energiestation defekt.
Im Kapitel „Sicherungen“ ist das Auswechseln
der Sicherungen beschrieben.
• Wenn nach dem Einschalten zwar eine LED an
der Energiestation leuchtet – Ihr Gerät aber
nicht funktioniert, schalten Sie die Energiestation
sofort aus. Überprüfen Sie, ob das Kabel richtig
angeschlossen ist – und „Plus“ und
„Minus“ nicht vertauscht sind. Gegebenenfalls
sollten Sie auch die Sicherung an Ihrem Gerät
überprüfen, wie in dessen Anleitung
beschrieben.
Stromversorgung über die
10 A-Buchse (Kfz-Steckdose)
Vorsicht!
Stellen Sie sicher, dass sowohl das zu versorgende
Gerät, als auch die Energiestation ausgeschaltet
sind, bevor Sie die Anschlüsse vornehmen. Stellen
Sie dazu den Hauptschalter 2 in die Stellung
„OFF“ (Mittelstellung). So vermeiden Sie Schäden
durch Anschlussfehler.
Für die Stromversorgung von Geräten bis max. 10
A steht die 12 V/10 A Buchse 3 zur Verfügung.
Hier können Sie den sogenannten „Zigarettenanzünder-Stecker“ verschiedener Geräte anschließen.
Dies können beispielsweise sein...
- Kühlboxen,
- Autostaubsauger,
- kleine tragbare TV-Geräte usw. ...
- 66 -
Page 69

Hinweis:
Berücksichtigen Sie, dass der Akku bei 10 A Last
nach spätestens 45 min. erschöpft ist – je nach
Ladezustand auch bereits eher.
Kühlboxen haben eine Stromaufnahme von üblicherweise 3 - 4 A pro Stunde. Dies entspricht bei einer
Kapazität des Akkus von 7 Ah also knapp 2 Stunden
Betriebszeit. Nach diesem Rechenbeispiel können
Sie somit die Betriebszeit für Ihr Gerät in etwa
abschätzen.
So können Sie vorbeugen, dass bei Anschlussfehlern Schäden entstehen.
Anschlüsse vornehmen
1. Stecken Sie den Geräte-Stecker des Kfz-Adapters in die Buchse an Ihrem Gerät.
2. Stecken Sie den 12-V-Stecker des Kfz-Adapters
bzw. des zu versorgenden Geräts in die
12 V/10 A Buchse 3 an der Energiestation.
Stromversorgung einschalten
1. Stellen Sie den Hauptschalter 2 auf „ON“ –
Das angeschlossene Gerät wird mit Strom
versorgt.
2. Solange ausreichend Energie für das zu versorgende Gerät zur Verfügung steht, leuchtet im
Feld OUTPUT die grüne LED „Voll“ 5.
3. Wenn nicht mehr ausreichend Energie für das zu
versorgende Gerät zur Verfügung steht, leuchtet
im Feld OUTPUT die rote LED „Leer“ 5.
Vorsicht!
Stellen Sie sicher, dass „Plus“ und „Minus“ nicht vertauscht sind, bevor Sie das zu versorgende
Gerät an die Energiestation anschließen. Sonst
kann dieses Gerät beschädigt werden.
Sie können zur Stromversorgung auch den mitgelieferten Kfz-Adapter verwenden, sofern dessen
Gerätestecker auf das zu versorgende Gerät passt.
Beim Kfz-Adapter ist der Geräte-Stecker so gepolt,
dass Plus innen und Minus außen anliegt,
wie gezeichnet.
• Verwenden Sie den Kfz-Adapter , wenn die
Buchse am zu versorgenden Gerät wie folgt
gekennzeichnet ist:
• Verwenden Sie den Kfz-Adapter nicht, wenn
die Buchse am zu versorgenden Gerät wie folgt
gekennzeichnet ist:
Bei Geräten mit fest angeschlossenem Kabel und
12-V-Stecker sind „Plus“ und „Minus“ richtig gepolt.
Vorsicht!
Laden Sie den Akku erst auf, wenn die rote LED
„Leer“ 5 leuchtet. Andernfalls kommt es zu einer
Tiefentladung, wodurch der Akku erheblich an
Ladekapazität verliert.
Stromversorgung beenden
1. Schalten Sie das zu versorgende Gerät aus.
2. Stellen Sie an der Energiestation den Hauptschalter 2 auf „OFF“ (Mittelstellung).
Damit verhindern Sie, dass noch Strom fließt, während der Stecker gezogen wird. Empfindliche
Geräte reagieren darauf manchmal mit Störungen.
3. Ziehen Sie den 12-V-Stecker aus der 12 V/10 A
Buchse 3 der Energiestation und gegebenenfalls den Gerätestecker des Kfz-Adapters aus
dem zu versorgenden Gerät.
Mögliche Fehler bei Nichtfunktion
• Wenn nach dem Einschalten keine der beiden
LEDs 5 und 6 leuchtet, ist eventuell die 10 ASicherung 7 der Energiestation defekt. Im Kapitel „Sicherungen“ ist das Auswechseln der
Sicherungen beschrieben.
- 67 -
Page 70

• Wenn nach dem Einschalten zwar eine LED an
der Energiestation leuchtet – Ihr Gerät aber
nicht funktioniert, schalten Sie die Energiestation
sofort aus. Überprüfen Sie, ob das Kabel richtig
angeschlossen ist – und „Plus“ und „Minus“
nicht vertauscht sind. Gegebenenfalls sollten Sie
auch die Sicherung an Ihrem Gerät überprüfen,
wie in dessen Anleitung beschrieben.
Stromversorgung über die
Schraubanschlüsse
Vorsicht!
Stellen Sie sicher, dass sowohl das zu versorgende
Gerät, als auch die Energiestation ausgeschaltet
sind, bevor Sie die Anschlüsse vornehmen. Stellen
Sie dazu den Hauptschalter 2 in die Stellung
„OFF“ (Mittelstellung). So vermeiden Sie Schäden
durch Anschlussfehler.
Für die Stromversorgung von 12 V-Geräten, die
beim Einschalten einen hohen Anlaufstrom benötigen,
ansonsten aber nicht mehr als 10 A pro Stunde verbrauchen, verwenden Sie die Schraubanschlüsse
9 an der Geräterückseite.
Geräte mit einem hohen Anlaufstrom können
beispielsweise sein ...
- 12 V-Staubsauger
- 12 V-Bohrmaschinen
- 12 V-Fernsehgeräte usw.
Diese benötigen zwar im Betrieb nicht mehr als
10 A – jedoch löst beim Einschalten sofort die
Sicherung aus. In diesem Fall können solche Geräte
nicht an der mit 10 A abgesicherten 12 V/10 A
Buchse 3 betrieben werden. Betreiben Sie diese
Geräte nur über die hier beschriebenen
Schraubanschlüsse 9.
Anschlüsse über Bananenstecker
vornehmen
1. Die Schraubanschlüsse 9 sind von innen hohl,
um dort sog. „Bananenstecker“ hinein stecken zu
können. Sind solche Stecker an Ihrem Gerätekabel vorhanden, stecken Sie diese von oben in
die Schraubanschlüsse 9 hinein.
Gefahr!
Hier können extrem hohe Ströme fließen, die sogar
dicke Kabel zum Glühen bringen können!
Vergewissern Sie vor dem Anschließen davon,
ob die Anschlusskabel des zu versorgenden Gerätes für diese Anschlussart geeignet sind, um Stromschlag und Feuergefahr zu vermeiden.
Diese hohen Ströme sind erforderlich, um manche
Geräte starten zu können. Die Schraubanschlüsse
9 sind daher weder über eine Sicherung noch
über den Hauptschalter 2 geführt, d. h. es liegt
dauernd Spannung an!
Stellen Sie daher sicher, dass an den Schraubanschlüssen niemals ein Kurzschluss entsteht!
Anschlüsse über blanke Enden eines
festen Gerätekabels vornehmen
1. Wenn das Gerätekabel fest mit dem zu versorgenden Gerät verbunden ist, schließen Sie das
blanke Ende der „Plus“-Ader (meistens rot) an
den roten Schraubanschluss 9 an.
2. Schließen Sie das blanke Ende der „Minus“Ader (meistens schwarz oder blau) an den
schwarzen Schraubanschluss 9 an.
Drehen Sie hierzu die Kunststoff-Kappe an den
Schraubanschlüssen 9 lose. Klemmen Sie beim
Zudrehen die blanken Adern darunter ein.
Anschlüsse über ein loses Kabel
vornehmen
1. Wenn das Kabel nicht fest mit dem zu versorgenden Gerät verbunden, sondern über einen blanken Geräte-Stecker verfügt, stecken Sie erst den
Geräte-Stecker in die Buchse am Gerät.
- 68 -
Page 71

2. Schließen Sie dann die Adern an die Schraubanschlüsse 9 an.
Beim Anschließen in der obigen Reihenfolge verhindern Sie die Gefahr eines Kurzschlusses, falls der
blanke Stecker versehentlich metallisch leitende
Gegenstände bei den Anschlussarbeiten berührt.
Sicherungen
Wenn nach dem Einschalten keine der beiden LEDs
5 und 6 leuchtet, ist eventuell die 10 A-Sicherung
7 der Energiestation defekt.
Wenn nach dem Einschalten zwar eine LED leuchtet,
über den Kfz-Adapter aber kein Strom fließt,
ist eventuell die Kabel-Sicherung im 12-V-Stecker
des Kfz-Adapters durchgebrannt.
Gefahr!
Schalten Sie erst den Hauptschalter 2 auf „OFF“.
Ziehen Sie alle Kabel von der Energiestation, bevor
Sie irgendwelche Sicherungen wechseln.
Damit verhindern Sie, dass Ihnen im Fehlerfall die
neue Sicherung beim Einsetzen zwischen den
Fingern verglüht – Verletzungsgefahr!
Gefahr!
Sicherungen sind wichtige Schutzeinrichtungen,
um Schäden zu verhindern. Machen Sie diese
niemals unwirksam.
Ersetzen Sie Sicherungen immer nur durch den
selben Wert, niemals durch „stärkere“.
Überbrücken Sie niemals die Sicherungen. –
Brandgefahr!
Rund-Sicherung wechseln
• Drehen Sie vorne die Kappe von der Rund-Sicherung 7 auf. Setzen Sie eine neue Sicherung mit
„2 A träge“ (T2A 250 V) ein.
Flach-Sicherung wechseln
• Ziehen Sie am Gerät hinten die Flach-Sicherung
8 heraus (z. B. mit einer Spitzzange). Setzen
Sie eine neue Sicherung mit „10 A“ (C10) ein.
Kabel-Sicherung wechseln
• Drehen Sie am 12-V-Stecker des Kfz-Adapters
die Kappe von der Kabel-Sicherung auf.
Setzen Sie eine neue Sicherung mit „1 A träge“
(T1A 250 V) ein.
Wenn bei angeschlossenem Gerät die Sicherung
gleich wieder durchbrennt, belastet das zu versorgende Gerät die Energiestation mit einer zu hohen
Stromaufnahme oder Ihr Gerät ist defekt.
Reinigen und Pflegen
Gefahr!
Öffnen Sie niemals das Gehäuse vom Gerät.
Es befinden sich keinerlei Bedienelemente darin. Bei
geöffnetem Gehäuse kann Brandgefahr bestehen
durch hohe Kurzschluss-Ströme.
• Schalten Sie den Hauptschalter 2 in die
Stellung „OFF“.
• Ziehen Sie alle Kabelverbindungen zwischen
Energiestation und eventuell daran
angeschlossenen Geräten.
• Wenn Sie das Steckernetzteil reinigen
wollen, ziehen Sie dieses ebenfalls erst aus
der Steckdose und aus der Ladebuchse w.
Gefahr!
Auf keinen Fall dürfen die Geräteteile in Wasser
oder andere Flüssigkeiten getaucht werden! Hierdurch kann die Energiestation schwer beschädigt
werden – beim Steckernetzteil besteht Lebensgefahr
durch elektrischen Schlag.
• Reinigen Sie alle Flächen und Kabel besser mit
einem leicht angefeuchteten Spültuch. Trocknen
Sie das Gerät gut ab, bevor Sie es erneut
verwenden.
Gefahr!
Verwenden Sie keine Reinigungs- oder Lösemittel.
Diese können zu Schäden am Gerät führen,
insbesondere an der Beschriftung.
- 69 -
Page 72

Aufbewahren
Wegen der natürlichen Selbstentladung von Akkus
sollten Sie die Energiestation noch einmal vollständig
aufladen, bevor Sie diese für mehrere Tage oder
Wochen wegstellen.
Wenn Sie das Gerät über längere Zeit unbenutzt
lagern wollen, sollten Sie es spätestens nach
6 Monaten erneut wieder aufladen, um eine Tiefentladung des Akkus zu verhindern.
• Schalten Sie den Hauptschalter 2 in die
Stellung „OFF“.
• Ziehen Sie alle Kabelverbindungen zwischen
Energiestation und eventuell daran angeschlossenen Geräten.
• Verstauen Sie die Kabel und Stecker in den
Aufbewahrungsfächern 0 und q am Gerät.
• Schließen Sie zum Schluss alle Deckel.
• Lagern Sie das Gerät an einem trockenen Ort.
Entsorgen
Werfen Sie das Gerät keinesfalls in den
normalen Hausmüll.
Dieses Produkt unterliegt der
europäischen Richtlinie 2002/96/EC.
Entsorgen Sie das Gerät über einen zugelassenen
Entsorgungsbetrieb oder über Ihre kommunale
Entsorgungseinrichtung.
Beachten Sie die aktuell geltenden Vorschriften.
Setzen Sie sich im Zweifelsfall mit Ihrer Entsorgungseinrichtung in Verbindung.
Batterien / Akkus entsorgen
Batterien / Akkus dürfen nicht im Hausmüll entsorgt
werden. Jeder Verbraucher ist gesetzlich verpflichtet, Batterien / Akkus bei einer Sammelstelle seiner
Gemeinde / seines Stadtteils oder im Handel
abzugeben.
Diese Verpflichtung dient dazu, dass Batterien /
Akkus einer umweltschonenden Entsorgung zugeführt werden können. Geben Sie Batterien / Akkus
nur im entladenen Zustand zurück.
- 70 -
Führen Sie alle Verpackungsmaterialien
einer umweltgerechten Entsorgung zu.
Page 73

Garantie und Service
Importeur
Sie erhalten auf dieses Gerät 3 Jahre Garantie ab
Kaufdatum. Das Gerät wurde sorgfältig produziert
und vor Anlieferung gewissenhaft geprüft. Bitte bewahren Sie den Kassenbon als Nachweis für den
Kauf auf. Bitte setzen Sie sich im Garantiefall mit
Ihrer Servicestelle telefonisch in Verbindung.
Nur so kann eine kostenlose Einsendung Ihrer
Ware gewährleistet werden.
Die Garantieleistung gilt nur für Material- oder
Fabrikationsfehler, nicht aber für Verschleißteile
oder für Beschädigungen an zerbrechlichen Teilen,
z. B. Schalter oder Akkus. Das Produkt ist lediglich
für den privaten und nicht für den gewerblichen
Gebrauch bestimmt.
Bei missbräuchlicher und unsachgemäßer Behandlung, Gewaltanwendung und bei Eingriffen, die
nicht von unserer autorisierten Service-Niederlassung
vorgenommen wurden, erlischt die Garantie.
Ihre gesetzlichen Rechte werden durch diese
Garantie nicht eingeschränkt.
Schraven
Service- und Dienstleistungs GmbH
Gewerbering 14
47623 Kevelaer, Germany
Tel.: +49 (0) 180 5 008107
(14 Ct/Min. aus dem dt. Festnetz ggf. abweichende Preise
aus den Mobilfunknetzen)
Fax: +49 (0) 2832 3532
e-mail: support.de@kompernass.com
KOMPERNASS GMBH
BURGSTRASSE 21
44867 BOCHUM, GERMANY
www.kompernass.com
Kompernaß Service Österreich
Tel.: 0820 899 913 (
e-mail: support.at@kompernass.com
Kompernaß Service Switzerland
Tel.: 0848 000 525 (
e-mail: support.ch@kompernass.com
0,20 EUR/Min.)
max. 0,0807 CHF/Min.)
- 71 -
Page 74

 Loading...