

Trion Cb300s Owner's Manual
Comfort
BREEZE
TM
READ AND SAVE THESE INSTRUCTIONS
CB300/CB300S
Flow-Through Evaporative Humidier
Trion® | www.trioniaq.com

Installation, Operation, & Maintenance Manual
READ AND SAVE THESE INSTRUCTIONS
LIRE ET CONSERVER CES INSTRUCTIONS
TABLE OF CONTENTS
1. Warranty Statement .................................................................................................................................3
2. Safety Warnings .......................................................................................................................................3
3. Introduction ..............................................................................................................................................4
3.1 Basic Operation .............................................................................................................................. 4
3.2 Specications Table ........................................................................................................................4
3.3 What’s in the Box ...........................................................................................................................4
4. Installation ................................................................................................................................................ 4
4.1 Clearances ..................................................................................................................................... 4
4.2 Mounting......................................................................................................................................... 4
4.3. Plumbing ........................................................................................................................................6
4.4. Electrical/Wiring ..............................................................................................................................7
4.4.1 Wiring CB300 (without water saving controls)....................................................................7
4.4.2 Wiring CB300S (with ComfortSmart Technology) .............................................................. 7
5. Operation .................................................................................................................................................7
5.1 Preliminary Checkout .....................................................................................................................7
5.2 Starting and Stopping the humidier ..............................................................................................7
5.3 End Of Season Decommissioning..................................................................................................8
6. Maintenance/Troubleshooting .................................................................................................................. 8
6.1 Pad Replacement ........................................................................................................................... 8
6.2 Control Board Faults & Reset.........................................................................................................8
6.3 Troubleshooting Chart .................................................................................................................... 9
6.4 Exploded View/Parts List ................................................................................................................10
2 www.trioniaq.com
Comfort
BREEZE
TM
Model CB300
Installation, Operation, & Maintenance Manual
1. Warranty
Humidier 5-Year Limited Warranty
This limited warranty covers Trion Residential Type Humidiers, exclud-
ing duct work, wiring and installation. Trion warrants that all new Trion
humidiers are free from defects in material and workmanship under
normal, non-commercial use and service. Trion will remedy any covered defects if they appear within 60 months from the date of original
installation & subject to the terms and conditions of this Limited 5-Year
Warranty stated below:
1. THIS LIMITED 5-YEAR WARRANTY is granted by Trion Customer
Service, 101 McNeill Road, Sanford, NC 27330.
2. This warranty shall extend only to any non-commercial owner who
has purchased the residential humidier other than for purposes
of resale.
3. All components are covered by this limited warranty except ex-
pendable items, such as evaporative pads, media lter pads and
nozzles.
4. If, within the warranty period, any Trion residential humidier unit or
component requires service it must be performed by a competent
heating and/or air conditioning contractor (preferably the installing
contractor). Trion will not pay shipping charges, or labor charges to
remove or replace such defective parts or components. If the part
or component is found by inspection to contain such defective material and workmanship it will be either repaired or exchanged free
of charge at Trion’s option, and returned freight collect.
5. In order to obtain the benets of this limited 5-year warranty, the
owner must notify the dealer or distributor of any defect within 30
days of its discovery. If after reasonable time you have not received
an adequate response from the dealer or distributor, notify in writ-
ing to Trion Customer Service 101 McNeill Road, Sanford, NC
27330, or call 1-800-884-0002 or email customerservice@trioniaq.
com Humidiers which have been installed or become part of real
estate cannot be returned. Trion will receive, freight prepaid, only
removable parts or components of such defective humidiers.
6. This limited warranty does not apply to any part or component that
is damaged in transit or in handling, has been subject to misuse,
neglect or accident; has not been installed, operated and serviced
according to Trion’s instructions; has been operated beyond the
factory rated capacity; or altered in any such way that its performance is affected. There is no warranty due to neglect, alteration
or ordinary wear and tear. Trion’s liability is limited to replacement
of defective parts or components and does not include the payment of the cost of labor charges to remove or replace such defective components or parts.
7. Trion will not be responsible for loss of use of any product; loss
of time, inconvenience, or any other indirect, incidental or consequential damages with respect to person or property, whether as a
result of breach of warranty, neglect or otherwise. SOME STATES
DO NOT ALLOW THE EXCLUSION OR LIMITATION OF INCIDENTAL OR CONSEQUENTIAL DAMAGES, SO THE LIMITA-
TION OR EXCLUSION IN THE PRECEDING SENTENCE MAY
NOT APPLY TO YOU.
8. THIS WARRANTY GIVES YOU SPECIFIC RIGHTS, AND YOU
MAY ALSO HAVE OTHER RIGHTS WHICH VARY FROM STATE
TO STATE.
9. Any warranty by Trion of merchantability, tness for use or any oth-
er warranty (express, implied or statutory), representation or guarantee other than those set forth herein, shall expire at the expiration date of this express limited warranty. SOME STATES DO NOT
ALLOW LIMITATIONS ON HOW LONG AN IMPLIED WARRANTY
LASTS, SO THE LIMITATION IN THE PRECEDING SENTENCE
MAY NOT APPLY TO YOU.
10. Trion reserves the right to make changes in the design and material
of its products without incurring any obligation to incorporate such
changes in units completed on the effective date of such change.
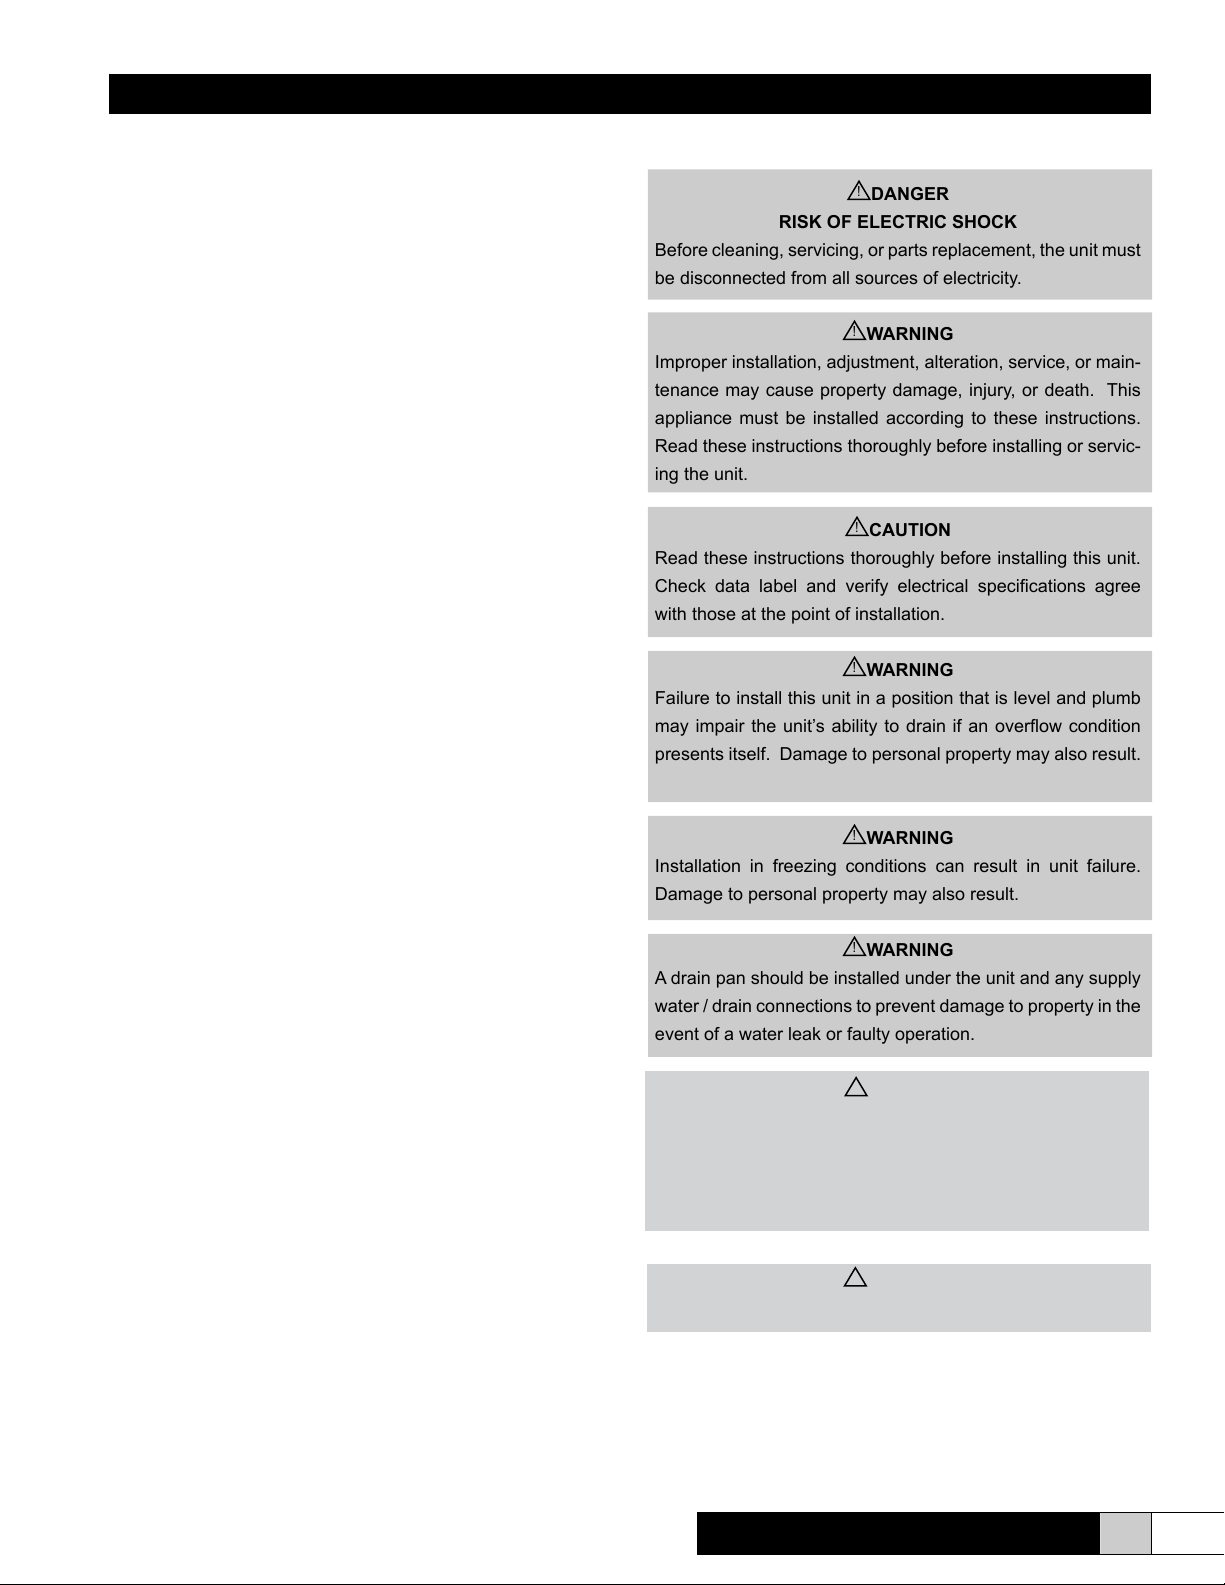
2. Safety & Warnings
!
DANGER
RISK OF ELECTRIC SHOCK
Before cleaning, servicing, or parts replacement, the unit must
be disconnected from all sources of electricity.
!
WARNING
Improper installation, adjustment, alteration, service, or main-
tenance may cause property damage, injury, or death. This
appliance must be installed according to these instructions.
Read these instructions thoroughly before installing or servic-
ing the unit.
!
CAUTION
Read these instructions thoroughly before installing this unit.
Check data label and verify electrical specications agree
with those at the point of installation.
!
WARNING
Failure to install this unit in a position that is level and plumb
may impair the unit’s ability to drain if an overow condition
presents itself. Damage to personal property may also result.
!
WARNING
Installation in freezing conditions can result in unit failure.
Damage to personal property may also result.
!
WARNING
A drain pan should be installed under the unit and any supply
water / drain connections to prevent damage to property in the
event of a water leak or faulty operation.
!
CAUTION
Trion recommends that this humidier be installed by a
trained HVAC professional. Do not connect the unit to the
power source until the installation is complete. A thorough
checkout of the unit installation should be completed before
operating the unit. Failure to follow these directions may void
the manufacturer’s original warranty.
!
WARNING
Electrical power to the furnace must be disconnected before
proceeding. Serious injury or death may result.
Comfort
BREEZE
TM
Model CB300
www.trioniaq.com
3
Installation, Operation, & Maintenance Manual
3. Introduction
The benets of a properly humidied environment (35-50%
Relative Humidity) are many. They include both personal com-
fort as well as the preservation of furniture, draperies, carpets,
wooden oors and cabinets, paintings, pianos, etc. Your home
can be more comfortable at a lower temperature (i.e.: 68° F)
at 30-40% Relative Humidity (RH) than at 71° to 72° F with-
out controlled humidity. Since every degree of temperature
setback represents about 3% of your heating costs, this can
possibly represent a signicant annual savings. During the heating season, cold air inltrates the home and must be heated.
When heated, this air dries out and greatly increases its
capacity to hold more moisture. By using a humidier, a
source of water is provided to satisfy this increased mois-
ture holding capability, rather than having it drawn from our
body surface and the surrounding furnishings in the home.
3.1 Basic Operation
Your Comfort
operates on the principles of evaporation. Water is introduced
to an evaporator pad as warm air from the duct is circuilated
through the pad. The warm air evaporates the water and the relative humidity of the air increases. Any excess water is passed
to the drain. CB300S units are equipped with a ComfortSmart
controller which acts to minimize the amount of water that may
ow to the drain by adjusting the total water ow to the humidier.
Setting the humidistat in the recommended range of 30-40%
relative humidity assures automatic humidity control during the
heating season. A lower setting may be necessary to prevent
condensation on windows during the coldest part of the winter.
An electronic humidistat is supplied with CB300S units that can
automatically adjust the setpoint as the outdoor temperature
falls.
Minimal action is needed to turn the humidier off for the summer months. Simply rotate the damper to the closed position
and lower the humidistat setpoint.
BREEZE
TM
ow-through evaporative humidier
Voltage(Amps) 24 VAC(0.8A)
Unit Dimensions 14.13"W x 10"D x 19"H
Water Supply Connection 1/4” OD Tubing
Drain Water Connection 1/2” ID Tubing
Duct Opening 9.75”W x 13.13”H
Shipping Weight 11.25 Lbs.
Operating Weight 8.5 Lbs.
Approvals ETL
4. Installation
Prior to installing this product:
• Read the instructions carefully and completely to ensure
safe operation. Failure to follow the instructions could lead
to damage to the product or cause a hazardous condition.
• Check the ratings given on the product to make sure it is
suitable for your application.
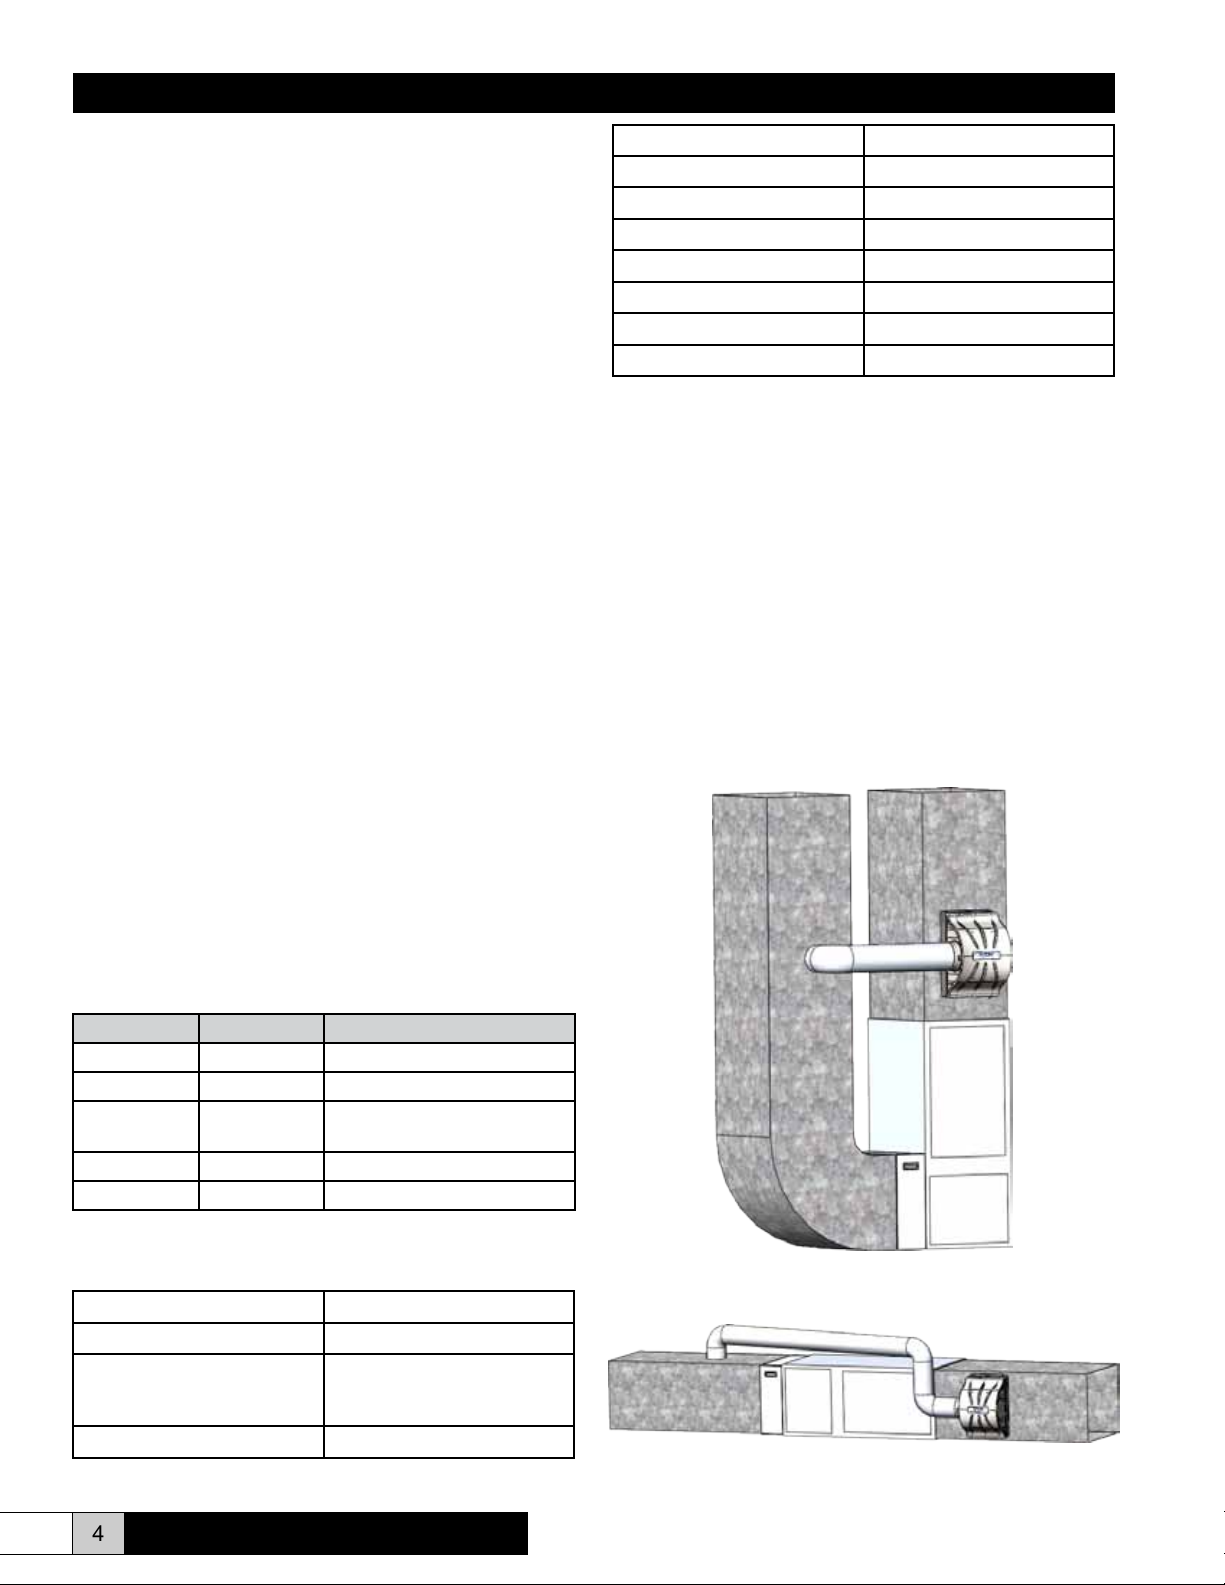
Remember to select a location that is readily accessible for periodic inspection, cleaning, and service. The following table on
page 5 indicates the minimum allowable installation clearances.
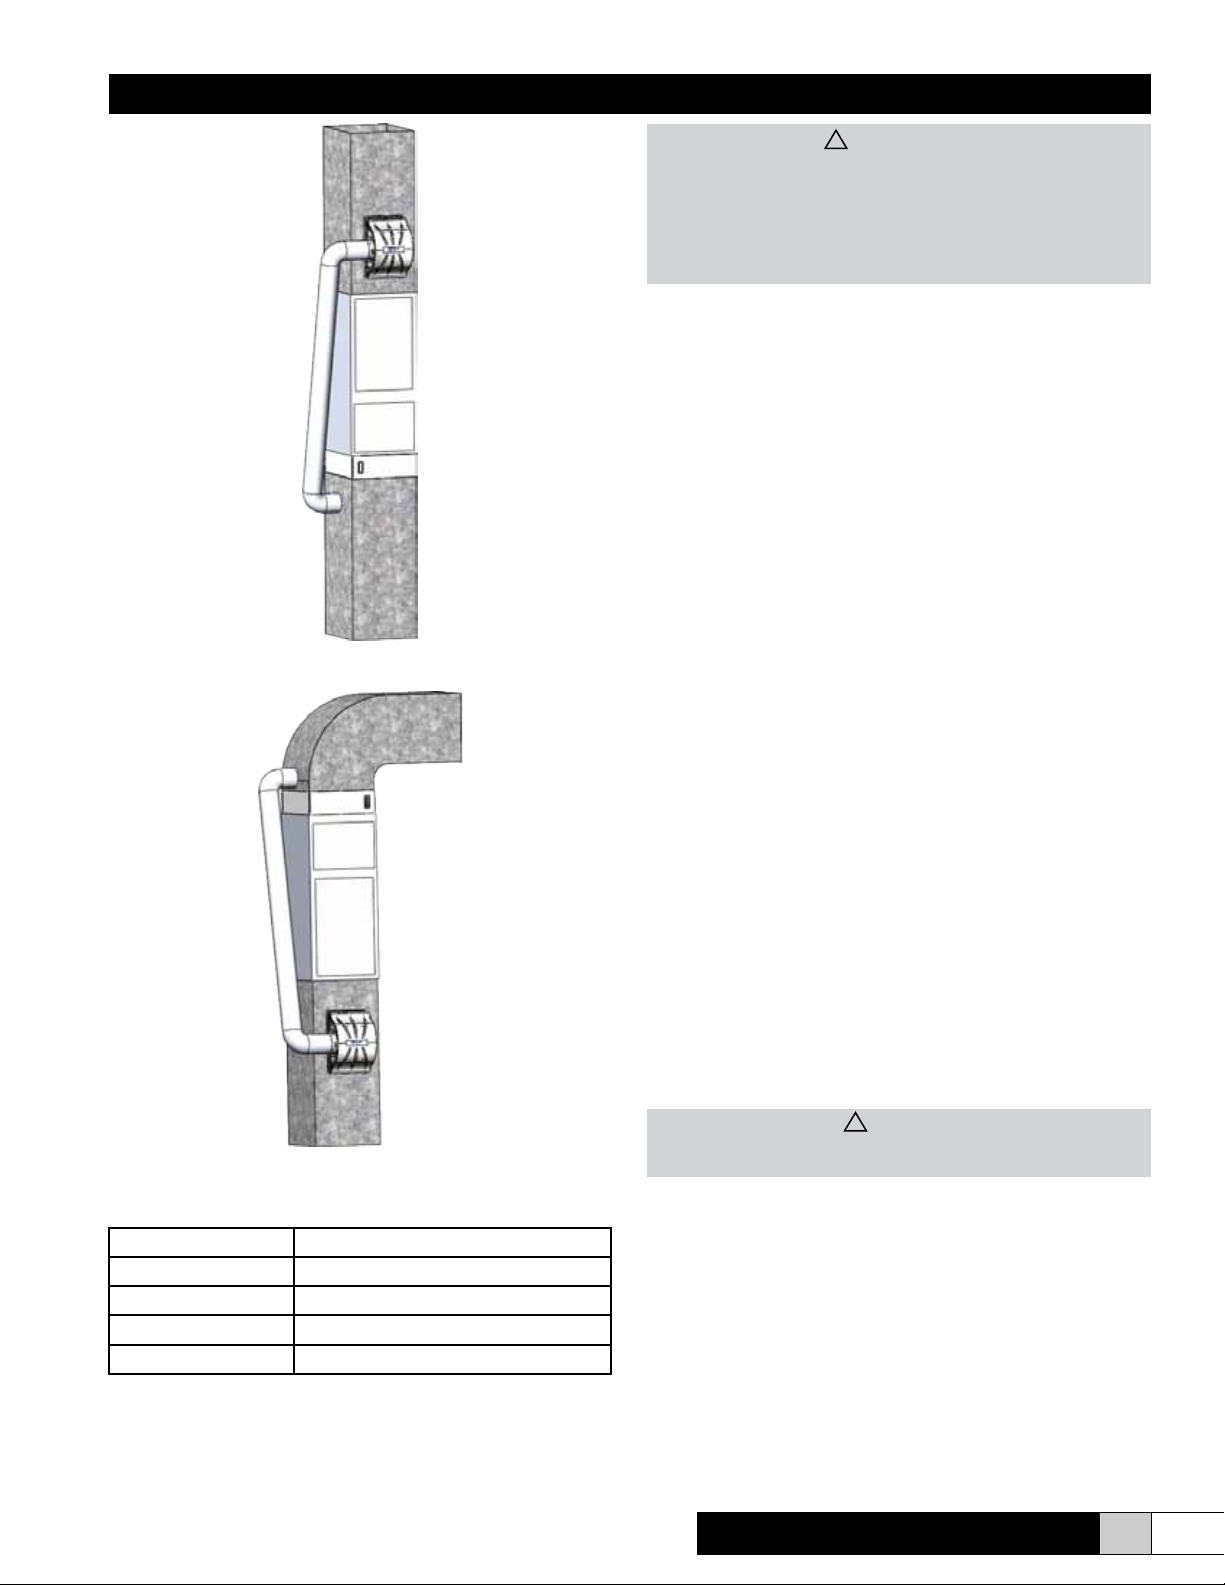
The following illustrations show some of the possible installation congurations and where the humider should be installed.
This humidier may be installed on the supply or return side of
the furnace. Operation with the warmest possible air will maxi-
mize output capacity. Installation on the supply duct after the
furnace discharge is recommended.
3.2 “What’s In The Box?”
CB300 CB300S Description
X X Humidier
X Mech. Humidistat (CB300)
X
X Transformer (CB300 only)
X X Parts Bag
Electronic Humidistat
(CB300S)
3.3 Unit Specications
Type of Unit Bypass Evaporative
Mounting Warm Air Supply/Return Duct
Capacity (GPD) 22.0 GPD @ 140 °F
17.0 GPD @ 120 °F
14.5 GPD @ 100 °F
Water Supply 20-100 PSI
4 www.trioniaq.com
Upow - Side Return
Comfort
Horizontal Flow
BREEZE
TM
Model CB300
Installation, Operation, & Maintenance Manual
!
CAUTION
Trion recommends that this humidier be installed by a
trained HVAC professional. Do not connect the unit to the
power source until the installation is complete. A thorough
checkout of the unit installation should be completed before
operating the unit. Failure to follow these directions may void
the manufacturer’s original warranty.
4.2 Mounting
The ComfortBREEZE CB300/CB300S humidier may be
mounted directly to the warm air supply duct or the return duct
of your HVAC system. Certain conditions must be met to ensure proper unit operation. Refer to the following list.
• Ensure that the duct surface is reinforced, if necessary, to
allow the unit to remain level and plumb.
• Ensure that the humidier has adequate clearance to allow
for the removal and replacement of the evaporator pad.
• When installing the humidier in an attic or above a ceiling,
a drain tray must be installed under the unit as a precau-
tionary measure to prevent water damage from occuring if
a leak develops.
• The recommended humidistat range is 30-40% relative humidity. If condensation occurs on windows, the humidistat
Upow - Bottom Return
setting must be lowered to prevent condensation damage.
• DO NOT install the humidier where freezing temperatures
may occur.
• DO NOT install the humidier where it interferes with the
furnace access panels.
• DO NOT install the humidier close to a ue pipe. Intense
heat may damage the humidier.
• DO NOT mount the humidier in the jacket of a cased
coil. It is preferable to mount the humidier immediately
downstream of the cased coil, if present. Ensure that the
humidier does not interfere with the coil ends.
• DO NOT mount the humidier in a furnace jacket.
• DO NOT install on gravity hot air systems.
• DO NOT connect a hot water supply to ComfortBreeze
humidiers that are equipped with water saving controls.
(ComfortSmart Technology).
Down-ow
4.1 Recommended Minimum Installation Clearance
Left 3 inches
Right 3 inches
Top 2 inches
Bottom 6 inches
Back 12 inches
Side Clearance (Left or Right) must be sufcient to accomodate the by-pass duct connection. Evaluate installation location as needed to ensure there is space available.
Comfort
BREEZE
TM
Model CB300
1. Tape the mounting template to the duct so that it is at and
the top edge is level.
2. Carefully remove the center of the template by tearing
along the perforated lines. Use a marker to trace on the
duct along the cutout opening.
!
WARNING
Electrical power to the furnace must be disconnected before
proceeding. Serious injury or death may result.
3. Drill the holes marked on the template. Remove the
template from the duct and carefully cut the duct along
the outside edge of the rectangle that was traced by the
marker. Remove any burrs from the cut edge of the sheet
metal taking care not to injure yourself.
4. Apply the gasket material found in the accessory bag to
the duct around the rectangular cutout.
5. Lift the humidifer into the rectangular opening so that the
plastic tabs engage the lower edge of the rectangular
opening. The tabs should be on the inside of the duct. Tilt
the upper edge of the humidier against the duct so that
the mounting holes line up with the drilled holes on the
duct. Secure the humidier with two #8 X 3/4” self-drilling-
www.trioniaq.com
5
 Loading...