

Page 1
ASSEMBLY INSTRUCTIONS
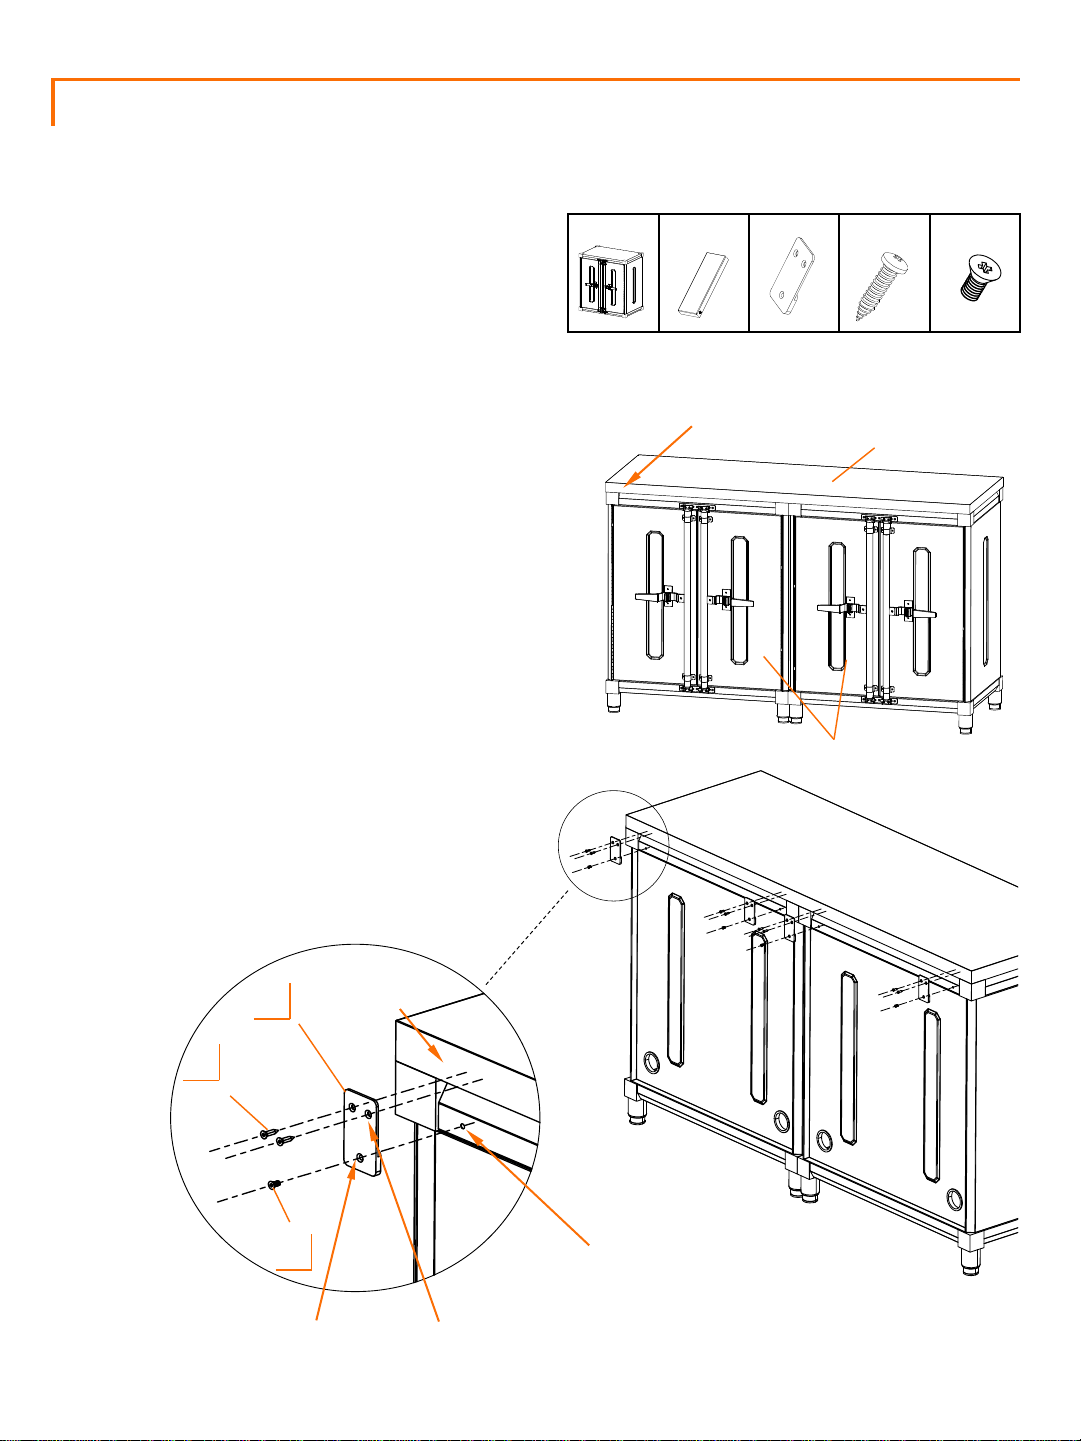
Option 1 (Installed on 2 Base Cabinets)
Stand two assembled Base Cabinets side by side and
close to final location of where cabinets will be
placed.
Position a 56”x 19” WOOD TOP on
top of aligned base cabinets. Make sure logo on
Wood Top edge is upright and front facing on
cabinets.
Align Wood Top edges to Base Cabinets top
edges. Place WOOD TOP BRACKET (A) on back
corner of each cabinet. Align bottom hole on
WOOD TOP BRACKET (A) to each pre-installed
nut on back corner of cabinet. Insert CABINET
SCREW (C) into each bottom hole and tighten
them fully to cabinet with a Philips screwdriver.
Base
Cabinet (2)
LOGO on front side of cabinet
Wood
Top (1)
A (4)
B (8) C (4)
Wood Top
Insert WOOD SCREW (B) into each top hole and
tighten them fully to Wood Top edge with a
Philips screwdriver.
With 2 people, carefully slide entire assembly
into final location. Do NOT lift assembly by
Wood Top.
Wood Top
A
Back Edge
B
C
Base Cabinets
Back of cabinets
Pre-installed nut on back
corner of base cabinet
Bottom Hole
Top Hole
3
Page 2
ASSEMBLY INSTRUCTIONS
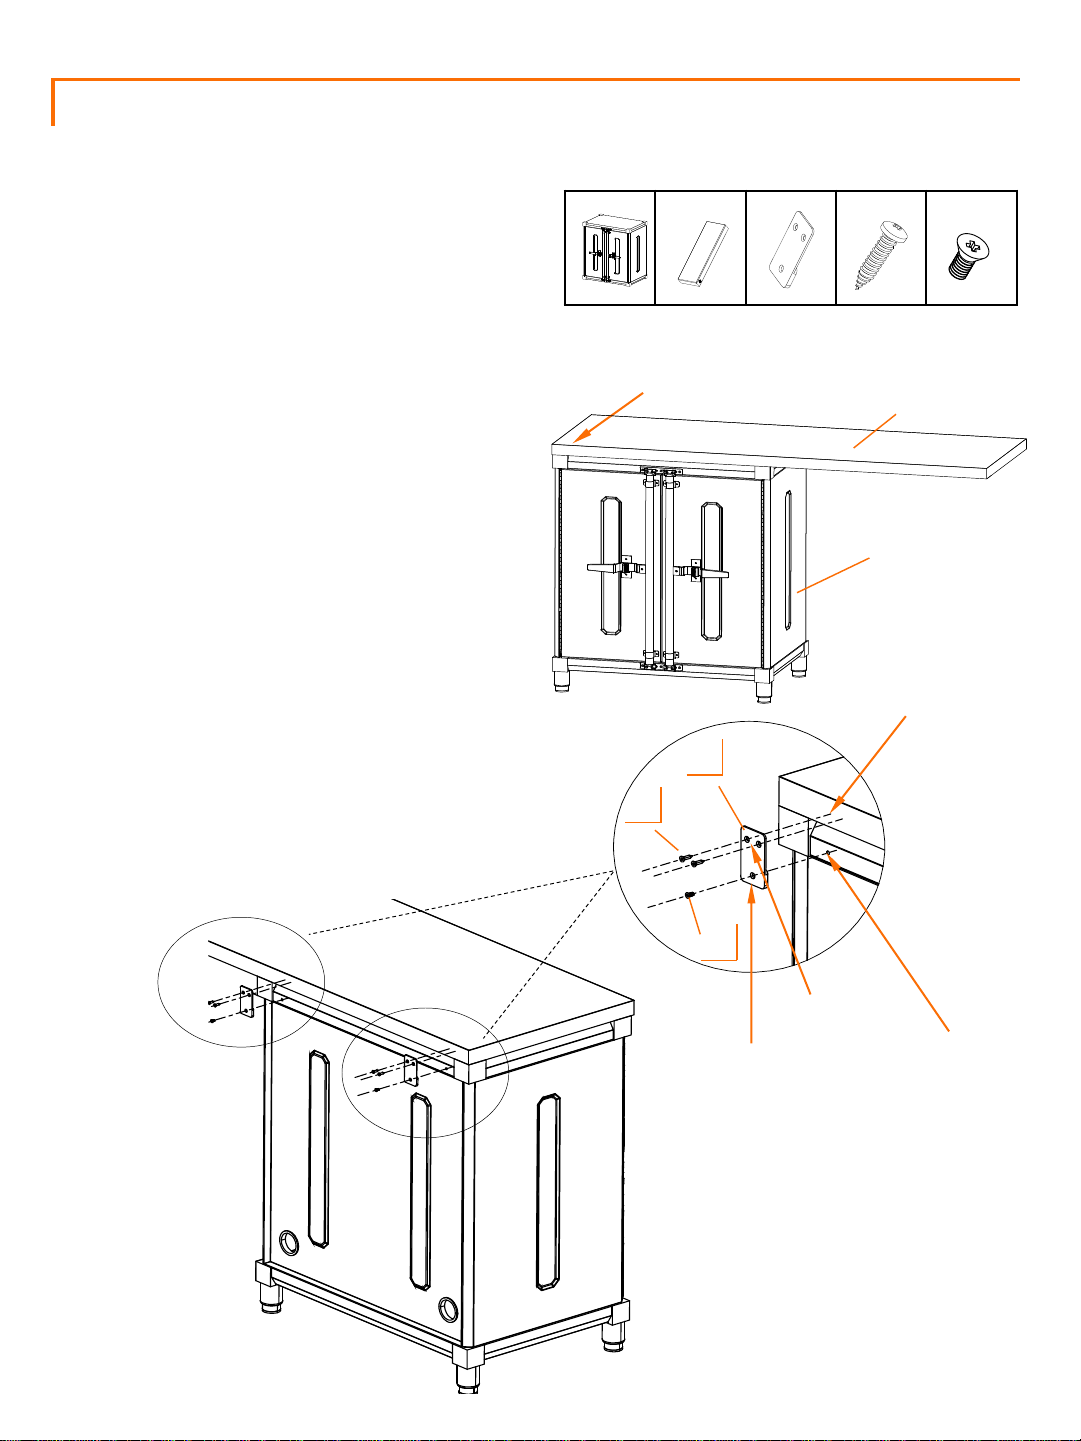
Option 2 (Installed on 1 Base Cabinet)
Move Base Cabinet close to final location where it
will be placed. With 2 people, position a 56”x 19”
WOOD TOP on top of an assembled base cabinet as
shown. Make sure logo on wood top edge is upright
and front facing on cabinet.
Place WOOD TOP BRACKET (A) on back corner of
cabinet. Align bottom hole on WOOD TOP BRACKET
(A) to each pre-installed nut on back corner of
cabinet. Insert CABINET SCREW (C) into each
bottom hole and tighten them fully to cabinet with
a Philips screwdriver.
Insert WOOD SCREW (B) into each top hole and
tighten them fully to wood top edge with a Philips
screwdriver.
Base
Cabinet (1)
logo on front side of cabinet
Wood
Top (1)
A (2)
B (4)
Wood Top
Base Cabinet
C (2)
Note: 4-piece Set does not include Wall Mounting
Hardware. If you desire set up in this configuration
you will need to buy a Wall Mounting Hardware Kit
(PBK-02-011-0014) which is available for purchase
through our website or our customer service
number.
B
A
C
Top Hole
Bottom Hole
Wood Top Back Edge
Pre-installed nut on back
corner of base cabinet
4
Page 3
ASSEMBLY INSTRUCTIONS
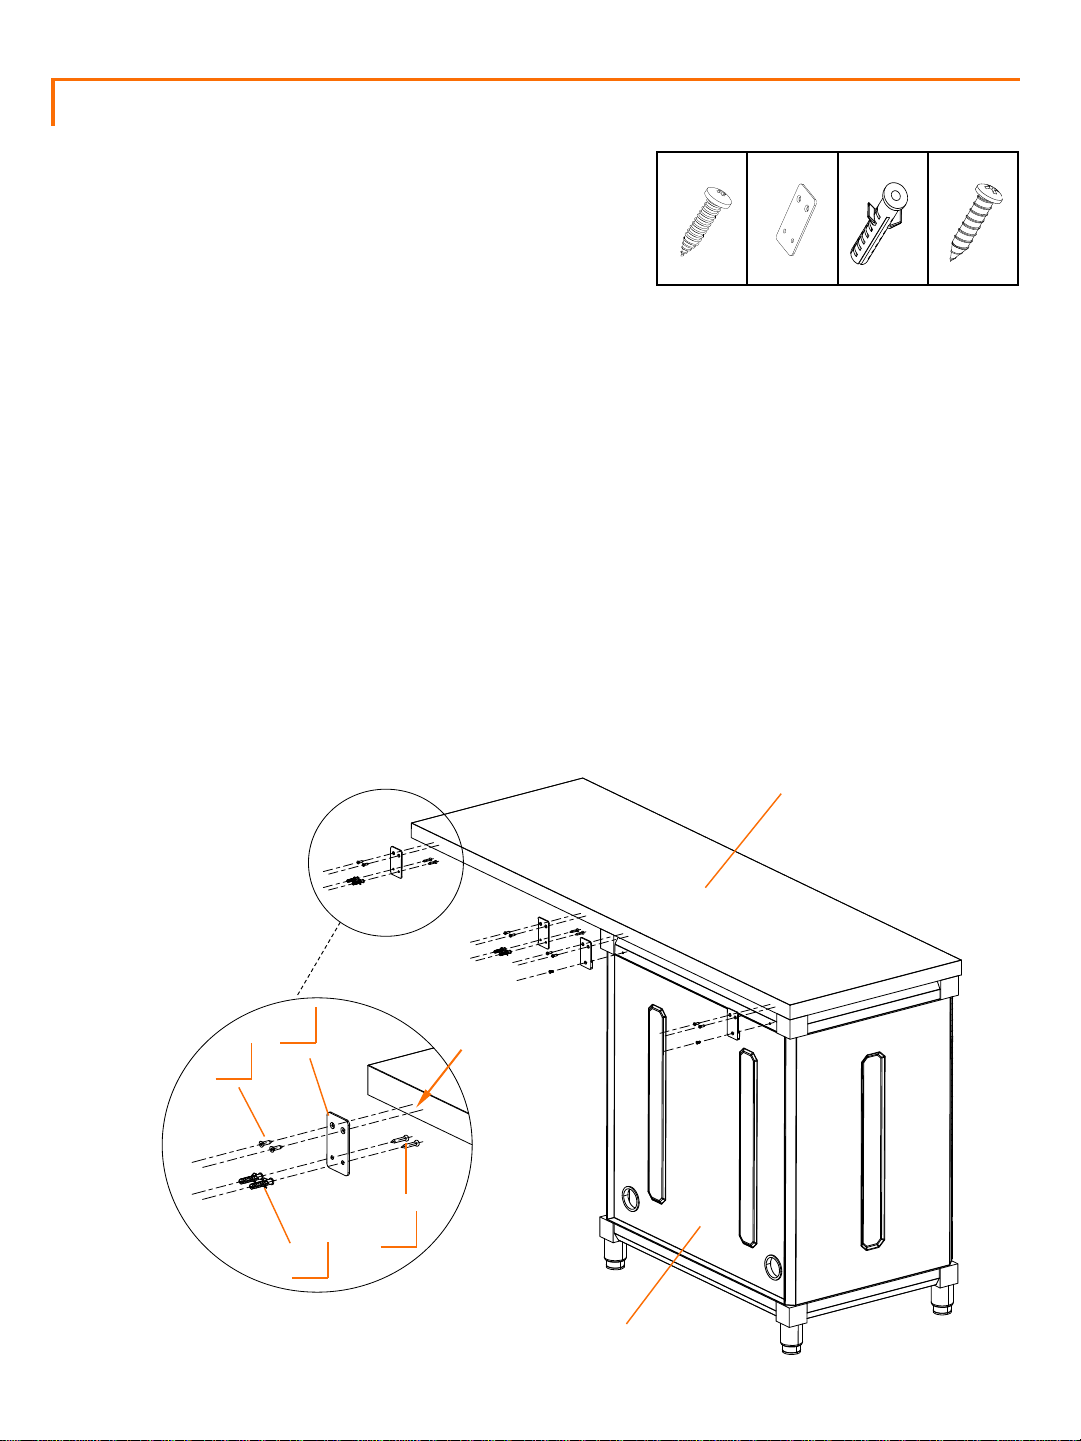
Option 2 (Installed on 1 Base Cabinet)
Place two WALL BRACKETS (D) to other end of back edge of
Wood Top as shown. Make sure one bracket is as close as
possible to end of unsupported end of wood top.
Insert WOOD SCREW (B) into each top hole and tighten them
fully to wood top edge with a Philips screwdriver.
With 2 people, carefully slide assembled unit to wall at desired
location. Do NOT lift assembly by wood top.
Mark off mounting location on wall through bottom holes on
WALL BRACKET (D). If WALL ANACHORS (E) are required, drill
holes in marked locations. Insert WALL ANCHOR (E) completely
into each drilled hole.
Fasten WALL SCREWS (F) through bottom holes on WALL
BRACKET (D) into the wall or anchors tightly with a Philips
screwdriver.
B (4)
D (2) E (4) F (4)
Note: Please consult a local contractor if you are unsure if
your wall is able to bear the load of the Wood Top.
D
Wood Top
Back Edge
B
F
E
Wood Top
Base Cabinet
5
 Loading...