

Page 1

USER GUIDE
Trimble® TMX-2050™Display
Version 1.075
Revision C
October 2014
1
Page 2

Corporate Office
Trimble Navigation Limited
935 StewartDrive
Sunnyvale, CA 94085
USA
www.trimble.com
Heavy Highway business area
10368 Westmoor Drive
Westminster,Colorado80021
USA
800-361-1249 (tollfree in USA)
+1-937-245-5154 Phone
+1-937-233-9441 Fax
www.trimble.com
Email: [email protected]
Copyright and Trademarks
© 2014 Trimble Navigation Limited. All rights reserved.
Trimble, the Globe & Triangle logo, EZ-Boom, EZ-Pilot, EZ-Steer,
FarmWorks Software,OmniSTAR and Tru CountAirClutch are
trademarks of Trimble NavigationLimited,registered in the United
States and in other countries.
AutoBase, Autopilot,AutoSense, CenterPoint, ConnectedFarm, Field-IQ,
LiquiBlock, RangePoint,RTX,VRS, VRS Now,TM X-2050 and Zephyr are
trademarks of Trimble NavigationLimited.
For STL support,the software uses the MoscowCenter for SPARC
Technology adaptationof the SGI Standard Template Library. Copyright
© 1994 Hewlett-Packard Company, Copyright© 1996, 97 Silicon
Graphics Computer Systems, Inc., Copyright © 1997 Moscow Centerfor
SPARC Technology.
Portions Copyright © 2009 Nokia Corporationand/orits subsidiary(-ies).
Portions Copyright © 2003, Bitstream I nc.
All other trademarks are the property of their respective owners.
Release Notice
This is the October 2014 release (Revision C ) of the TMX-2050 display
documentation. It applies to v ersion1.075 of the display software.
Legal Notices
The following limited warranties give y ou specificlegal rights. Youmay
have others,which vary from state/jurisdictionto state/jurisdiction.
Product Li mited Warranty
Trimble warrants that this Trimble productand its internal components
(the 'Product") shall be free from defects in materials and workmanship
and will substantially conform to Trimble's applicable published
specifications for the Productfora period of one (1) year, starting from
the earlierof (i) the date of installation,or (ii) six (6) months from the
date of original Product shipment from Trimble. This warranty applies
only to the Product if installed by Trimble or a dealerauthorized by
Trimble to perform Productinstallation services.
Software Components
All Product software components (sometimes hereinafter also referred
to as "Software")are licensed solely for use as an integral part of the
Productand are not sold. Any software accompanied by a separate end
user license agreement ("EULA") shallbe governed by the terms,
conditions,restrictions and limitedwarranty terms ofsuch EULA
notwithstanding the preceding paragraph.
During the limited warranty periodyou will be entitled to receive such
Fixes to the Product software that Trimble releases and makes
commercially available and for which it does not charge separately,
subject to the procedures for delivery topurchasers of Trimble products
generally. If y ou have purchased the Productfrom an authorized
Trimble dealer rather than from Trimble directly, Trimble may , at its
option,forward the software Fix to the Trimble dealer for final
distribution to you. MinorUpdates, Major Upgrades, new products,or
substantially new software releases, as identified by Trimble, are
expressly excludedfrom this update process and limitedwarranty.
Receipt of software Fixes or otherenhancements shall not serve to
extendthe limited warranty period.
For purposes ofthis warranty the following definitions shall apply: (1)
"Fix(es)' means an errorcorrection or other update createdto fix a
previous software version that does not substantially conformto its
Trimble specifications; (2) "MinorUpdate" occurs when enhancements
are made to currentfeatures in a software program; and (3) "Major
Upgrade"occurs when significant new features are addedto software,
or when a new productcontaining newfeatures replaces the further
developmentof a current product line. Trimble reserves the right to
determine,in its sole discretion,what constitutes a Fix,MinorUpdate, or
Major Upgrade.
Gson components licensed under the Apache 2.0 License. The source is
available from http://code.google.com/p/google-gson/. Google
MVELcomponents licensedunderthe Apache2.0 Llicense. The source is
available from http://code.google.com/p/mvel.codehause.org. Google
Guava components listed underthe Apache 2. 0 License. The source is
available from http://code.google.com/p/guava-libraries. MapQuest
content licensed under the Open Data Commons Database License
(DbCL). The source is available from http://developer.mapquest.com.
APACELICENSE(Version 2.0, January 2004)
http://www.apache.org/licenses/
TERMSANDCONDITIONSFO RUSE,
REPRODUCTION,ANDDISTRIBUTION
1. Definitions
"License" shallmean the terms andconditions for use, reproduction, and
distribution as defined by Sections 1 through Section 9 of this document.
""Licensor " shallmean the copyright owner or entity authorized by the
copyright owner that is g ranting the License.
"Legal Entity" shallmean the unionof the acting entity and all other
entities that control,are controlled by, or are undercommoncontrol with
that entity. For the purposes of this definition, "control" means (i) the
power, direct or indirect,to cause the directionor management of such
entity, whetherby contract or otherwise,or(ii) ownership of fifty percent
(50%) or more of the outstanding shares, or (iii) beneficial ownership of
such entity.
"You" (or "Your") shall mean an individualorLegal Entity exercising
permissions granted by this License.
"Source" form shall mean the preferredform for making modifications,
including but not limited to software source code,documentation source,
and configurationfiles.
"Object" form shall mean any form resulting from mechanical
transformation or translationof a Source form,including but not limited
to compiled objectcode, generated documentation, and conversions to
othermedia types.
"Work" shall mean the work of authorship,whether in Source or Object
form,made available underthe License, as indicated by a copyright
notice that is included in or attached to the work (an example is provided
in the Appendix below).
"Derivative Works" shall mean any work, whether in Source or Object
form,that is based on (or derived from) the Work and for which the
editorial revisions, annotations,elaborations, or othermodifications
represent,as a whole,an originalwork of authorship. For the purposes
of this License, Derivative Works shall not include works that remain
separable from,or merely link (or bind by name) to the interfaces of, the
Work and Derivative Works thereof.
"Contribution" shallmean any work of authorship, including the original
version of the Work andany modifications or additions to that Work or
Derivative Works thereof,that is intentionally submitted to Licensor for
inclusionin the Work by the copyrightowneror by an individual or Legal
Entity authorized to submit on behalf of the copyrightowner. Forthe
purposes of this definition, "submitted" means any form of electronic,
verbal, or written communication sent to the Licensororits
representatives, including but not limited to communication on electronic
mailing lists, source code control systems, and issue tracking sy stems
that are managed by, oron behalf of, the Licensorforthe purpose of
discussing and improving the Work, but excluding communication that is
conspicuously marked or otherwise designated in writing by the
copyright owner as "Not a Contribution."
"Contributor" shall mean Licensorand any individual or Legal Entity on
behalf of whom a Contribution has been received by Licensorand
subsequently incorporated within the Work.
2. Grant of Copyright License. Subject to the terms and conditions of this
License, each Contributorhereby grants to Youa perpetual,worldwide,
non-exclusive, no-charge,royalty-free,irrevocable copyright license to
reproduce, prepare Derivative Works of,publicly display, publicly
perform,sublicense,and distribute the Work and such Derivative Works
in Source or Object form.
3. Grant of Patent License. Subject to the terms and conditions of this
License, each Contributorhereby grants to Youa perpetual,worldwide,
non-exclusive, no-charge,royalty-free,irrevocable (exceptas statedin
this section) patent license to mak e, have made, use, offer to sell, sell,
import,and otherwise transferthe Work, where such license applies only
to those patent claims licensable by suchContributorthatare necessarily
2 TMX-2050 Display User Guide Version 1.075, Revision C
Page 3

infringed by their Contribution(s) alone or by combination of their
Contribution(s) with the Work to which such Contribution(s) was
submitted. If You institute patent litigation against any entity (including
a cross-claim or counterclaim in a lawsuit) alleging that the Work or a
Contributionincorporated withinthe Work constitutes director
contributory patent infringement,thenany patent licenses granted to
You under this License for that Work shallterminate as of the date such
litigationis filed.
4. Redistribution. Youmay reproduce and distribute copies of the Work
or Derivative Works thereof in any medium,with or without
modifications,and in S ource or Object form,provided that You meetthe
following conditions:
You must give any other recipients of the Work or Derivative Works a
copy of this License; and
You must cause any modified files to carry prominentnotices stating
that You changed the files; and
You must retain, in the Source form of any Derivative Works thatYou
distribute,all copyright, patent,trademark, and attribution notices from
the Source form of the Work, excluding those notices that do not pertain
to any partof the Derivative Works; and
If the Work includes a "NOTICE" text file as part of its distribution,then
any Derivative Works thatYou distribute must include a readable copy
of the attribution notices containedwithin such NOTICE file,excluding
those notices that do not pertainto any partof the Derivative Works, in
at least one of the following places: within a NOTICE text file distributed
as part of the Derivative Works; within the Source form or
documentation,if provided along with the Derivative Works; or,within a
display generated by the Derivative Works, if and wherever such thirdparty notices normally appear. The contents of the NOTI CE file are for
informational purposes only and do not modify the License. You may
add Your own attribution notices within Derivative Works that You
distribute,alongside or as an addendum to the NOTI CE text from the
Work, provided that such additional attributionnotices cannot be
construedas modifying the License.
You may add Your own copyrightstatementto Your modifications and
may provide additional or differentlicense terms and conditions for use,
reproduction,ordistribution of Your modifications,or for any such
Derivative Works as a whole, provided Your use, reproduction,and
distribution of the Work otherwise complies with the conditions stated in
this License.
5. Submission of Contributions. Unless Youexplicitly state otherwise, any
Contributionintentionally submitted for inclusion in the Work by You to
the Licensorshall be underthe terms and conditions of this License,
withoutany additional terms or conditions. Notwithstanding the above,
nothing herein shall supersede or modify the terms of any separate
license agreement you may have executedwith Licensorregarding such
Contributions.
6. Trademarks. This License does notg rantpermission to use the trade
names, trademarks, service marks, or productnames of the Licensor,
exceptas requiredforreasonable and customary use indescribing the
origin of the Work and reproducing the contentof the NOTI CE file.
7. Disclaimer of Warranty. Unless required by applicable law or agreed
to in writing, Licensorprovides the Work (and each Contributorprovides
its Contributions) on an "AS IS" BASIS, WITHOUT WARRANTIES OR
CONDITIONS OF ANY KIND, eitherexpress or implied,including, without
limitation, any warranties orconditions of TI TLE, NON-INFRINGEMENT,
MERCHANTABILITY, or F ITNESS FO R A PARTICULARPURPOSE. You are
solely responsible for determining the appropriateness of using or
redistributing the Work and assume any risks associated with Your
exercise of permissions under this License.
8. Limitation of Liability. In no event and underno legal theory, whether
in tort(including negligence), contract,orotherwise, unless required by
applicable law (such as deliberate and grossly negligentacts) or agreed
to in writing, shall any Contributor be liable to Youfordamages, including
any direct, indirect,special, incidental,or consequential damages of any
character arising as a resultof this License or out of the use orinability to
use the Work (including but not limited to damages forloss of goodwill,
work stoppage, computerfailure or malfunction,or any and all other
commercial damages or losses), even if such Contributorhas been
advised of the possibility of such damages.
LWGL LICENSE
ODC DATABASE CONTENTS LICENSE
SGI FREE SOFTWARE LICENSE B (Version 2.0, Sept. 18, 2008)
Copyright © 2013 Silicon Graphics, Inc. All Rights Reserved.
Permission is hereby granted, free of charge, to any personobtaining a
copy of this software and associateddocumentationfiles (the
"Software"),to deal in the Software without restriction,including without
limitation the rights to use, copy, modify, merge, publish,distribute,
sublicense,and/orsell copies of the Software, and to permit persons to
whom the Software is furnishedto do so, subjectto the following
conditions:
The above copyright notice including the dates of first publication and
eitherthis permissionnotice or a reference to
http://oss.sgi.com/projects/FreeB/ shall be includedin all copies or
substantial portions of the Software.
THE S OFTWARE I S PROVIDED "AS I S", WITHOUT WARRANTY OF ANY
KIND, EXPRESS OR IM PLIED, INCLUDINGBUT NOT LIMITED TO THE
WARRANTIES OF MERCHANTABILITY, FITNESS FOR A PARTICULAR
PURPOSE AND NONINFRINGEMENT. IN NO EVENT SHALL SILICON
GRAPHICS, INC. BE LIABLE FOR ANY CLAIM, DAMAGES OR OTHER
LIABILITY, WHETHER I N AN ACTION OF CONTRACT, TORT OR
OTHERWISE, ARISING FROM , OUT OF OR IN CONNECTION WI TH THE
SOF TWARE OR THE USE OR OTHER DEALINGS IN THE SOFTWARE.
Exceptas contained in this notice,the name of Silicon Graphics, Inc. shall
notbe used inadvertising or otherwise to promote the sale,use or other
dealings in this Software without priorwrittenauthorizationfrom S ilicon
Graphics,Inc.
MAPQUEST PLATFORM TERMS OF USE (Last Updated: November 1,
2011)
Community EditionLicense Agreement
INTRODUCTION. MapQuest has been helping people find places and
get maps and directions for over 40 years. We mak e the MapQuest
APIs, our Open Services (as describedat
http://open.mapquestapi.com/), Community Accounts and other
developerservices (in short,the "MapQuest Services"),along with the
maps, driving directions and othercontent deliveredthrough the
MapQuest Services (the "MapQuest Content"), available without
charge to encourage developers to use these services and content in
developing theirapplications and websites. We want y ou to be creative
and build awesome applications and websites that thrill your users. All
we ask is that you comply with the terms that are included in these
Terms of Use.
We will provide the developer community at-large with supportin
various forms,such as forums, blog posts or FAQs. Since we're providing
the MapQuest Services forfree, we don't provide individual technical
support or warranties for the Community Services, but if you want to
receive technicalsupportand warranties, we have a productforyou.
Please check outourM apQuest Platform Services Enterprise Edition and
learn more about the services we willprovide for reasonable fees.
If you choose to use any of the MapQuest Services orif you set upa
Community Account,y ou are agreeing to abide by these Terms of Use
and are forming an agreementbetweenyourselfand MapQuest,Inc.
("MapQuest"). If you do not want toabideby these Terms of Use, then
don't use the M apQuest Services.
LICENSES FROM MAPQUEST TO YOU.
2.1. MapQuest Services License. MapQuest grants you a non-exclusive,
non-assignable, non-sublicensable,revocable limited license to use the
MapQuest Services during the Term of these Terms of Use as provided
by MapQuest in the mannerpermittedin these Terms of Use.
2.2. MapQuest ContentLicense. MapQuest grants y ou a non-exclusive,
non-assignable, non-sublicensable,revocable limited license access, use,
publicly perform and publicly display the MapQuest Contentas the
MapQuest Content is providedthrough the MapQuest Services and in
the manner permitted by these Terms of Use.
GENERAL RESTRICTIONS, ADDITIONAL LEGAL NOTICE, RESERVATION
OF RIGHTS.
3.1. Restrictions. Except as expressly authorized by MapQuest, You
must not:
decompile,disassemble,reverse engineer, or otherwise attempt to
derive any source code from the MapQuest Services orMapQuest
Content,other than the Open Services;
interfere or disrupt MapQuest servers or networks, or disobey any
network access or security requirements,policies,procedures or
regulations of M apQuest (including the enabling of any viruses, Trojan
horses, trap doors,back doors, worms,time bombs,cancelbots, adware,
spyware or other computer programming routines designed or intended
to damage, detrimentally interfere with,surreptitiously intercept or
expropriate any system, data orpersonal information);
use the MapQuest Services as a means to engage inconductthat
reflects poorly upon,disparages ordevalues MapQuest's reputationor
goodwill,as determinedin MapQuest's sole discretion;
use the MapQuest Services,other than the O pen Services, in
conjunction with any commercial application notpublicly available
withoutcharge (other than mobile applications for which users pay a fee
to download/install the application). I f y ourapplication does not fit this
Version 1.075, Revision C TMX-2050 Display User Guide 3
Page 4

criteria and you wouldlike to discuss additional options for using the
MapQuest Services please [email protected];
use the MapQuest Services,other than the O pen Services, to process or
generate data forany third party (otherthan for end users as expressly
permittedhereunder);
use the MapQuest Services with any contentorproduct that falsely
expresses orimplies that such content or productis sponsored or
endorsed by MapQuest;
use the MapQuest Services in conjunction witha site or application
which contains or displays adult contentor promotes illegal activities,
gambling, or the sale of tobaccooralcohol to persons undertwenty-one
(21) years of age;
3.2. Additional Legal Requirements. In addition to the restrictions set
forth in Section 3.1, youruse of the M apQuest Services and MapQuest
Content is subject to the Additional Legal Requirements which are
incorporatedand made a part of these Terms of Use. Please read the
AdditionalLegal Requirements carefully as they include usage limits and
additionalrestrictions that may impact yourplans fordevelopment.
3.3. Reservationof Rights. MapQuest reserves all rights not expressly
granted in these Terms of Use and you may not use the MapQuest
Services or MapQuest Content in any mannernotexpressly authorized
in these Terms of Use.
LICENSE FROM YOU TO MAPQUEST. If you upload any data, feedback,
ideas, suggestions,content,points of interest (including any points of
interest that include Trademarks) orother material to MapQuest
(collectively "YourContent"), you hereby grantMapQuest a perpetual,
worldwide, non-exclusive, royalty-free license to access, archive,
reproduce, publicly display, translate,modify the format or the display
of, distribute,transmit,stream, cache, overlay, seam, perform,
sublicense,and otherwise use YourContentwithorwithoutattribution
and without financial obligation,in whole or in part, via any method for
any purpose. MapQuest makes no assertionof ownership over Your
Content,and you retain all intellectual property rights to Your Content,
subject to the license y ou grant to MapQuest above.
MODI FICATIONS TO THESE TERMS OF USE AND THE SERVI CES.
MapQuest reserves the right to change ormodify these Terms ofUse,
the MapQuest Services and/or the MapQuest Content. Please check
these Terms ofUse, including the Additional Legal Requirements
periodically for changes. Your continued use of the M apQuest Services
or MapQuest Content following the posting ofany changes to the Terms
of Use constitutes acceptance of those changes.
TERMINATI ON. MapQuest may terminate these Terms of Use and/or
the provision of the MapQuest Services or MapQuest Content at any
time,forany reason, withorwithoutnotice.
PRIVACY POLICY ANDEND USER TERMS.
7.1. Privacy Policy. MapQuest's collection and use of personally
identifiable information is governedby the AO L Network Privacy Policy,
available at http://about.aol.com/aolnetwork/aol_pp.
7.2. End User Terms. End users shallonly be entitled to use the
MapQuest Services and MapQuest Content if they accept the then
currentend user Terms ofUse located at
http://info.mapquest.com/terms-of-use/. MapQuest reserves the right
to amend and/orreplace these terms and the form and manner of
presentation. Youmust provide a hypertextlink at the bottom of each
page inyour website or applicationwhere the MapQuest Services or
MapQuest Content can be viewed or accessed,orwithinthe terms of
use of yourapplication or website, to the end userterms ofuse.
ACCESS AND USAGE DATA.
8.1. Credentials. MapQuest, at its discretion,may require you to create
an account and obtain an access key and otherrelated credentials
(collectively "Credentials") to use the MapQuest Services orcertain
aspects of the MapQuest Services. You are responsible for maintaining
the confidentiality of yourCredentials and forany usag e or abuse ofthe
MapQuest Services or MapQuest Content by anyone using your
Credentials.
8.2. Usage Data. M apQuest's servers recordinformation when you visit
MapQuest websites or when applications and/or Credentials call or
invoke the MapQuest Services. This information may include,without
limitation, the URL,I P address, browsertype,Credential and access times
and dates. MapQuest may use this informationtopromote,operate,
and improve MapQuest services, products and properties.
PROPRIETARY RIGHTS. You acknowledge and agree the M apQuest
Services and MapQuest Content are works forpurposes of copyright
law, and embody valuable,confidential,trade secret information of
MapQuest, the development of which required the expenditure of
substantial time and money. As betweenMapQuest and You,
MapQuest retains exclusive ownership of any and all rights,title and
interest (including allintellectual property rights) in the M apQuest
Services and MapQuest Content,and you shallnot acquire any rights,
express or implied, in the foregoing by virtue of these Terms of Use other
than otherwise expressly set forth. For purposes of these Terms of Use,
the term "Trademarks" means all trademarks, trade names, service
marks, logos, domain names, along with any otherdistinctive brand
features of MapQuest or its suppliers. All use by You of Trademarks
shall inure to the benefit of M apQuest. Further,You shallnot(a) display
a Trademark as the mostprominentelement on any page of Your
website, application or paper map; (b) display a Trademark ina manner
that is misleading, defamatory, infringing,libelous,disparaging, obscene
or otherwise objectionable to MapQuest as determinedby MapQuest in
its sole discretion; or (c) remove, distort or alter any element of a
Trademark.
DISCLAIMER OF WARRANTIES. THE MAPQUEST SERVICES AND
MAPQUEST CONTENT ARE PROVIDED ON AN "AS IS" AND "AS
AVAI LABLE" BASIS. MAPQUEST DI SCLAIMS ANY AND ALL
WARRANTIES, WHETHER EXPRESS OR IMPLIED, I NCLUDING BUT NOT
LIMI TED TO ANY WARRANTIES OF MERCHANTABILITY, F ITNESS FO R A
PARTICULARPURPOSE, ACCURACY O R NON-INFRINGEMENT.
MAPQUEST DOES NOT REPRESENT OR WARRANT THAT THE
MAPQUEST SERVICES OR CONTENT, OR ANY PORTION THEREOF, IS OR
WILL BE FREE OF DEFECTS O R ERRORS (OR THAT ANY SUCH DEFECTS
OR ERRORS WILL BE CORRECTED),VIRUS FREE, ABLE TO OPERATE ON
AN UNINTERRUPTED BASIS, M EET YOUR REQUIREMENTS, OR CAPABLE
OF BEING INTEGRATED INTO O R WITH YO UR COMPUTER SYSTEM,
APPLICATIONS OR NETWORK. FURTHER, MAPQUEST DOES NOT
WARRANT OR MAKE ANY REPRESENTATIONS REGARDING THE USE OR
THE RESULTS OF THE USE OF THE MAPQUEST SERVICES, OR ANY
PORTION THEREOF, IN TERMS OF ITS CORRECTNESS, ACCURACY,
QUALITY, RELIABILITY, OR OTHERWISE. THIS DIS CLAIMER
CONSTITUTES AN ESSENTIAL PART OF THESE TERMS OF USE. IF THIS
EXCLUSIO N IS HELD UNENFORCEABLE, THEN ALL EXPRESS AND
IMPLIED WARRANTIES SHALL BE LIMITED IN DURATION TO A PERIOD
OF FIFTEEN (15) DAYS AFTER THE EFFECTIVE DATE, AND NO
WARRANTIES SHALL APPLY AFTER THAT PERIOD.
LIMI TATION ON LIABILITY. NEITHER MAPQUEST NOR ITS AFFILIATES
NOR ANY OF THEIR SUPPLIERS SHALL BE LIABLE TO YOU OR ANY
OTHER THIRD PARTY FOR ANY DIRECT, INDIRECT, SPECIAL,INCIDENTAL
OR CONSEQUENTIAL DAM AGES OF ANY NATURE ARISING OUT OF THE
POSSESSI ON O F, ACCESS TO, USE OF, O R INABILITY TO ACCESS OR
USE THE MAPQUEST SERVICES OR MAPQUEST CONTENT,O R ANY
PORTION, I NCLUDING, WITHOUT LIMITATION, LOST PROFI TS, DATA
LOSS, COST OF PROCUREMENT F OR S UBSTITUTE GOODS, OR
COMPUTER FAILURE OR MALFUNCTION, EVEN IF MAPQUEST HAS
BEEN ADVISED OF THE POSSIBILITY OF SUCHDAMAGES, AND
REGARDLESS OF WHETHER THE CLAIM OR LIABILITY IS BASED UPON
ANY CONTRACT, TORT,BREACH OF WARRANTY O R OTHER LEGAL OR
EQUITABLE THEORY. IN NO EVENT SHALL MAPQUEST'S TOTAL
AGGREGATE LIABILITY UNDER THESE TERMS OF USE EXCEED THE
LESSER OF (A) THE TOTAL AMOUNT OF FEES PAID BY YOU TO
MAPQUEST UNDER THESE TERMS OF USEFOR THE TWELVE (12)
MONTHS PRECEDINGTHE DATE OF THE EVENT GIVING RISE TO SUCH
CLAIM; OR (B) FIVE HUNDRED DOLLARS ($500).
YOU EXPRESSLY ACKNOWLEDGE AND AGREE THAT THE
PARTICIPATION I N AND USE OF THE MAPQUEST SERVICES AND
MAPQUEST CONTENT IS DONE AT YOUR OWN RISK AND THAT YOU
ARE S OLELY RESPONSI BLE AND LIABLE FO R ANY DAMAGE SUSTAINED
TO YOUR COMPUTER SYSTEM, NETWORK OR DATA RESULTING FROM
SUCH PARTICIPATI ON OR USE.
SOM E JURISDICTIONS DO NOT ALLOW THE EXCLUSION O F CERTAIN
WARRANTIES OR THE LIMITATIO N OR EXCLUSION OF LIABILITY FOR
INCIDENTAL OR CONSEQUENTIAL DAMAGES.
INDEMNITY. You agree to indemnify, defend and hold MapQuest and
its affiliates,and each oftheir officers, directors, employees, agents,cobranders or otherpartners (as wellas each of their suppliers),successors
and permitted assigns ("Indemnified Parties") harmless from and
against any third party claim or action,including any liability, cost,losses,
damages, expenses, and attorney's fees, arising from or in any way
relatedtoYouraccess, use or participation in the M apQuest Services
(including claims related to Your Content and any use of the MapQuest
Services with software, data, content,systems, or other technology not
provided by MapQuest), any violationof these Terms of Use, or any
alleged infringement of a patent,copyright,trademark, trade secret,or
otherintellectual property right. M apQuest shall use good faith efforts
to provide you with promptnotice of any suchclaim or action; provided
however,you agree that,uponM apQuest's written request,MapQuest
shall controlthe defense or settlement of any such claim or action and
you shall provide reasonable cooperation to MapQuest. Youmay not
4 TMX-2050 Display User Guide Version 1.075, Revision C
Page 5

settle an indemnifiable claim withoutobtain MapQuest's prior written
consent.
EXPORT RESTRICTIONS. You ag ree to comply with all exportand import
laws and restrictions and regulations of the UnitedStates or any foreign
agency orauthority, and not to exportorre-export MapQuest Services
or any direct productthereof in violationof any such restrictions,laws or
regulations,or without all necessary approvals.
NOTICES AND TRANSACTING ELECTRONICALLY. Youunderstandand
agree that MapQuest is an online service and that you are transacting
withMapQuest electronically. MapQuest shallprovide electronic
notices by posting them onthis website and/or by sending an email to
any account associated with your Credentials.
GENERAL PROVISI ONS.
15.1. Entire Agreement. These Terms of Use constitute the entire
agreement between MapQuest and You with respect to the subject
matterof these Terms of Use, and supersedes all prioragreements,
understandings and communications between MapQuest and You with
respectto suchsubject matter. No modification or amendment to these
Terms of Use shall be effective unless inwriting by MapQuest.
15.2. Choice of Law; Jurisdiction. These Terms of Use are made under
and shall be governed by and construed in accordance with the laws of
the Commonwealth of Virginia (except for its conflicts of laws principles)
and specifically excluding f the United Nations Conventionon Contracts
for the International Sale of Goods. MapQuest and Youexpressly agree
that exclusive jurisdictionforany claim or dispute relating toor arising
outof these Terms of Use resides in the state courts in Loudoun County,
Virginia andthe federal courts of the Eastern District of Virginia
(Alexandria Division) and furtheragree and expressly consent to the
exercise of personal jurisdiction in such state and federal courts of
Virginia inconnection with any such dispute.
15.3. Severability; Waiver. If any provision in these Terms of Use should
be held illegal or unenforceable by a courthaving jurisdiction, such
provision shall be modifiedto the extent necessary to renderit
enforceable without losing its intent,or severed from these Terms of Use
if no such modificationis possible,and otherprovisions of these Terms of
Use shall remain in full force and effect. A waiver by either MapQuest or
You (as applicable) of any term or conditionof these Terms of Use or any
breachthereof,in any one instance, shall not waive such term or
condition or any subsequent breach thereof.
15.4. Public Statements. You acknowledge and agree that MapQuest
may make any publicstatements regarding the existence of these
Terms of Use or the relationshipdescribedherein, withoutYourconsent.
15.5. Survival. Any term or condition of these Terms of Use that by its
nature would logically survive termination or expirationof these Terms
of Use, including but not limitedto protections of proprietary rights,
indemnifications, and limitations of liability, shall survive such
termination or expiration.
15.6. IndependentContractors. The parties to these Terms of Use are
independentcontractors. Neitherparty is an agent,representative or
partner of the otherparty. Neither party shall hav e any right,poweror
authority toenterinto any agreement for or on behalf of, or incurany
obligation or liability of, or otherwise to bind, the otherparty.
15.7. Equitable Remedies. Youacknowledge and agree that monetary
damages may be insufficient to compensate MapQuest foran actual or
anticipatedbreachof these Terms of Use by you. You agree that in such
circumstances M apQuest shall be entitled to seek equitable remedies
(including preliminary andpermanent injunctions),in addition to any
otherremedies available to MapQuest at law or hereunder.
15.8. Statute of Limitations. Youagree that regardless of any statute or
law to the contrary, any claim or cause of actionarising out of orrelated
to use of the MapQuest Services or these Terms of Use must be filed by
you within one (1) year after suchclaim or cause of action arose or be
forever barred.
15.9. Consent to FurtherContacts. You agree that MapQuest may
contact You with respect to these Terms of Use, any otherMapQuest
products and services,and in relationto any marketing relatedpurposes.
ODC Open Database License (ODbL)
The Open Database License (ODbL) is a license agreementintended to
allow users to freely share,modify, and use this Database while
maintaining this same freedom for others. Many databases are covered
by copyright, and therefore this document licenses these rights. Some
jurisdictions,mainly in the European Union, have specific rights that
cover databases, and so the ODbL addresses these rights, too. Finally,
the ODbL is also an agreement in contract for users of this Database to
act in certain ways in return for accessing this Database.
Databases cancontain a wide v ariety of types of content (images,
audiovisualmaterial, and sounds all in the same database, for example),
and so the O DbL only governs the rights over the Database, and notthe
contents of the Database individually. Licensors shoulduse the ODbL
togetherwith anotherlicense for the contents, if the contents have a
single set of rights that uniformly covers all of the contents. If the
contents have multiple sets of differentrights, Licensors shoulddescribe
what rights govern what contents together in the individual record or in
some other way that clarifies what rights apply.
Sometimes the contents of a database, or the database itself, can be
covered by other rights not addressed here (such as private contracts,
trade mark over the name, or privacy rights / data protectionrights over
information in the contents),and so you are advised that you may have
to consult otherdocuments or clear otherrights before doing activities
notcovered by this License.
The Licensor(as defined below) and You (as defined below) agree as
follows:
1.0 Definitions of Capitalised Words
"Collective Database" – Means this Database in unmodifiedform as part
of a collection of independent databases in themselves that together are
assembled into a collective whole. A work that constitutes a Collective
Database will not be considered a Derivative Database.
"Convey" – As a verb,means Using the Database, a Derivative
Database, or the Database as part of a Collective Database in any way
that enables a Personto make or receive copies of the Database ora
Derivative Database. Conveying does not include interaction with a user
through a computernetwork, or creating andUsing a Produced Work,
where no transferof a copy of the Database ora Derivative Database
occurs.
"Contents" – The contents of this Database, which includes the
information,independent works, or other materialcollectedinto the
Database. For example, the contents of the Database could be factual
data or works suchas images, audiovisual material,text, or sounds.
"Database" – A collectionof material (the Contents) arranged in a
systematic or methodical way and individually accessible by electronic
or othermeans offered underthe terms of this License.
"Database Directive" – Means Directive 96/9/EC of the European
Parliament and ofthe Council of 11 March 1996 on the legal protection
of databases, as amended or succeeded.
"Database Right" – Means rights resulting from the ChapterIII
("suigeneris") rights in the Database Directive (as amended and as
transposed by member states), whichincludes the Extraction and Reutilisation of the whole or a Substantial part of the Contents, as wellas
any similar rights available in the relevant jurisdictionunder Section
10.4.
"Derivative Database" – Means a database based upon the Database,
and includes any translation,adaptation, arrangement,modification,or
any other alteration of the Database or of a Substantial part of the
Contents. This includes, but is not limited to,Extracting orRe-utilising the
whole or a Substantial part of the Contents in a new Database.
"Extraction" – Means the permanent or temporary transferof all or a
Substantial part of the Contents to anothermediumby any means or in
any form.
"License" – Means this license agreement and is botha license of rights
such as copyright and Database Rights and an agreementin contract.
"Licensor" – Means the Person that offers the Database underthe terms
of this License.
"Person" – Means a natural or legal person or a body of persons
corporate or incorporate.
"ProducedWork" – a work (suchas an image, audiovisual material,text,
or sounds) resulting from using the whole or a Substantial part of the
Contents (via a searchorother query) from this Database, a Derivative
Database, or this Database as part of a Collective Database.
"Publicly" – means to Persons otherthan Youor underYourcontrol by
eithermore than 50% ownershipor by the power to directtheir activities
(such as contracting with an independent consultant).
"Re-utilisation" – means any form of making available to the public all or
a Substantial part of the Contents by the distribution of copies, by
renting,by online or other forms of transmission.
"Substantial" – Means substantial in terms of quantity orquality or a
combination of both. The repeated and systematicExtraction or Reutilisation of insubstantial parts of the Contents may amountto the
Extraction or Re-utilisation of a Substantial part of the Contents.
"Use" – As a verb, means doing any act that is restricted by copyrightor
Database Rights whether in the original medium or any other; and
includes without limitationdistributing, copying, publicly performing,
publicly displaying, and preparing derivative works of the Database, as
well as modifying the Database as may be technically necessary touse
it in a different mode or format.
Version 1.075, Revision C TMX-2050 Display User Guide 5
Page 6

"You" – Means a Person exercising rights under this License who has not
previously violated the terms of this License with respect to the
Database, or who has received express permission from the Licensor to
exercise rights under this License despitea previous violation.
Words in the singular include the plural and vice versa.
2.0 What this License covers
2.1. Legal effectof this document. This License is:
a. A license of applicable copyright and neighbouring rights;
b. A license of the Database Right; and
c. An agreement in contract between You and the Licensor.
2.2 Legal rights covered. This License covers the legal rights in the
Database, including:
a. Copyright. Any copyright or neighbouring rights in the Database. The
copyright licensed includes any individual elements of the Database, but
does not cover the copyrightover the Contents independentof this
Database. See Section 2.4 for details. Copyright law v aries between
jurisdictions,butis likely to cover: the Database model or schema, which
is the structure, arrangement,and organizationof the Database, and can
also include the Database tables and table indexes; the data entry and
output sheets; and the Field names of Contents stored in the Database;
b. Database Rights. Database Rights only extend to the Extractionand
Re-utilisationof the whole or a Substantialpartof the Contents.
Database Rights can apply even when there is nocopyright over the
Database. Database Rights can also apply when the Contents are
removed from the Database and are elected and arranged in a way that
would not infringe any applicable copyright; and
c. Contract. This is an agreementbetweenYou and the Licensorfor
access to the Database. In return you agree to certain conditions of use
on this access as outlined in this License.
2.3 Rights not covered.
a. This License does not apply to computerprograms used inthe making
or operationof the Database;
b. This License does not cover any patents over the Contents or the
Database; and
c. This License does not cover any trademarks associated with the
Database.
2.4 Relationshipto Contents in the Database. The individual items of the
Contents contained in this Database may be covered by otherrights,
including copyright,patent, data protection, privacy, or personality rights,
and this License does not cover any rights (other than Database Rights
or in contract) in individual Contents contained in the Database. For
example,if used on a Database of images (the Contents),this License
would not apply tocopyright over individual images, whichcould have
theirown separate licenses, or one single license covering all of the
rights over the images.
3.0 Rights granted
3.1 Subject to the terms and conditions of this License, the Licensor
grants to You a worldwide,royalty-free, non-exclusive, terminable (but
only under Section 9) license to Use the Database for the duration of any
applicable copyrightand Database Rights. These rights explicitly include
commercial use, and donotexclude any fieldof endeavour. To the
extentpossible in the relevant jurisdiction,these rights may be exercised
in all media and formats whethernowknown or created in the future.
The rights granted cover, for example:
a. Extraction and Re-utilisation of the whole or a Substantial part of the
Contents;
b. Creation of Derivative Databases;
c. Creation of Collective Databases;
d. Creation of temporary orpermanent reproductions by any means and
in any form,in whole or in part, including ofany Derivative Databases or
as a part of Collective Databases; and
e. Distribution,communication,display, lending, making available, or
performance to the publicby any means and in any form, in whole or in
part,including of any Derivative Database or as a part of Collective
Databases.
3.2 Compulsory license schemes. For the avoidance of doubt:
a. Non-waivable compulsory license schemes. In those jurisdictions in
which the right to collect royalties through any statutory or compulsory
licensing scheme cannot be waived,the Licensorreserves the exclusive
rightto collect such royalties for any exercise by You of the rights
granted underthis License;
b. Waivable compulsory license schemes. In those jurisdictions in which
the right to collect royalties through any statutory or compulsory
licensing scheme can be waived,the Licensor waives the exclusive right
to collect such royalties for any exercise by You of the rights granted
underthis License; and,
c. Voluntary license schemes. The Licensorwaives the right to collect
royalties, whetherindividually or, in the ev ent that the Licensoris a
member of a collecting society that administers v oluntary licensing
schemes, via thatsociety, from any exercise by You of the rights granted
underthis License.
3.3 The right to release the Database under different terms,orto stop
distributing or making available the Database, is reserved. Note that this
Database may be multiple-licensed,and so You may have the choice of
using alternative licenses for this Database. Subject to Section 10.4, all
otherrights not expressly granted by Licensor are reserved.
4.0 Conditions of Use
4.1 The rights granted in Section 3 above are expressly made subject to
Yourcomplying with the following conditions of use. These are
importantconditions of this License, and if You fail to follow them,You
willbe in material breach of its terms.
4.2 Notices. If YouPublicly Convey this Database, any Derivative
Database, or the Database as part of a Collective Database, then You
must:
a. Do so only under the terms of this License or anotherlicense
permittedunder Section 4.4;
b. Include a copy of this License (or, as applicable, a license permitted
underS ection 4.4) or its Uniform Resource Identifier(URI) with the
Database or Derivative Database, including both in the Database or
Derivative Database and in any relevant documentation; and
c. Keep intact any copyrightorDatabase Right notices andnotices that
referto this License.
d. If it is not possible to put the required notices in a particular file due to
its structure, then You must include the notices in a location (such as a
relevant directory) where users would be likely tolook forit.
4.3 Notice for using output(Contents). Creating and Using a Produced
Work does not require the notice in Section 4.2. However, if you Publicly
Use a ProducedWork, You must include a notice associated withthe
ProducedWork reasonably calculated to mak e any Person that uses,
views, accesses, interacts with,oris otherwise exposed to the Produced
Work aware that Content was obtained from the Database, Derivative
Database, or the Database as part of a Collective Database, and that it is
available under this License.
a. Example notice. The following text will satisfy notice under
Section4.3: Contains information from DATABASE NAME, which is
made available here under the Open Database License (ODbL).
DATABASE NAME should be replaced with the name of the Database
and a hyperlink to the URI of the Database. "Open Database License"
should containa hyperlink tothe URI of the text of this License. If
hyperlinks are not possible, You should include the plain text of the
requiredURI's with the above notice.
4.4 Share alike.
a. Any Derivative Database that You Publicly Use must be only under
the terms of:
i. This License;
ii. A later version of this License similar in spiritto this License; or
iii. A compatible license.
If You license the Derivative Database under one of the licenses
mentioned in (iii),You must comply with the terms of that license.
b. For the avoidance of doubt, ExtractionorRe-utilisationof the whole or
a Substantial part of the Contents intoa new database is a Derivative
Database and must comply with Section 4.4.
c. Derivative Databases and Produced Works. A Derivative Database is
Publicly Used and so must comply with Section 4.4. if a Produced Work
createdfrom the Derivative Database is Publicly Used.
d. Share Alike and additional Contents. For the avoidance of doubt, You
must not add Contents to Derivative Databases under Section4.4 a that
are incompatible withthe rights granted underthis License.
e. Compatible licenses. Licensors may authorise a proxy todetermine
compatible licenses under Section4.4 a iii. If they do so, the authorised
proxy's public statement of acceptance of a compatible license grants
You permission to use the compatible license.
4.5 Limits of S hare Alike. The requirements ofSection4.4 donotapply
in the following:
a. For the avoidance of doubt,You are not requiredto license Collective
Databases underthis License if You incorporate this Database ora
Derivative Database in the collection,but this License still applies to this
Database or a Derivative Database as a part of the Collective Database;
b. Using this Database, a Derivative Database,orthis Database as part
of a Collective Database to create a Produced Work does not create a
Derivative Database for purposes of S ection 4.4; and
c. Use of a Derivative Database internally withinan organisation is notto
the public and therefore does not fall under the requirements of Section
4.4.
4.6 Access to Derivative Databases. If You Publicly Use a
DerivativeDatabase ora Produced Work from a Derivative Database,
6 TMX-2050 Display User Guide Version 1.075, Revision C
Page 7

You must also offer to recipients of the Derivative Database or Produced
Work a copy in a machine readable form of:
a. The entire Derivative Database; or
b. A file containing all of the alterations made tothe Database or the
methodof making the alterations to the Database (such as an
algorithm),including any additional Contents,that make up all the
differences between the Database and the Derivative Database. The
Derivative Database (under a.) or alteration file (under b.) must be
available at no more than a reasonable production cost for physical
distributions and free of charge ifdistributedover the internet.
4.7 Technological measures andadditional terms
a. This License does not allow You to impose (except subjectto Section
4.7 b.) any terms or any technologicalmeasures on the Database,a
Derivative Database, or the whole or a Substantial part of the Contents
that alter or restrictthe terms of this License, or any rights g rantedunder
it,or have the effector intentof restricting the ability of any person to
exercise those rights.
b. Parallel distribution. Youmay impose terms or technological
measures on the Database,a Derivative Database, or the whole or a
Substantial part of the Contents (a "RestrictedDatabase") in
contravention of Section 4.74 a. only if You also make a copy of the
Database or a Derivative Database available to the recipientof the
Restricted Database:
i. That is av ailable without additional fee;
ii. That is available in a medium that does not alteror restrict the terms
of this License, or any rights granted under it,orhave the effect orintent
of restricting the ability of any person to exercise those rights (an
"UnrestrictedDatabase"); and
iii. The Unrestricted Database is at least as accessible to the recipient as
a practical matter as the RestrictedDatabase.
c. For the avoidance of doubt, You may place this Database or a
Derivative Database in an authenticatedenvironment,behind a
password, or within a similaraccess control scheme provided that You do
notalteror restrictthe terms of this License or any rights granted underit
or have the effect or intentof restricting the ability of any person to
exercise those rights.
4.8 Licensing of others. You may not sublicense the Database. Each time
You communicate the Database, the whole or Substantial part of the
Contents,or any Derivative Database to anyone else in any way, the
Licensor offers to the recipient a license to the Database on the same
terms and conditions as this License. You are not responsible for
enforcing compliance by third parties with this License, but You may
enforce any rights that You have over a Derivative Database. Youare
solely responsible for any modifications of a Derivative Database made
by Youor anotherPerson at Yourdirection. You may not impose any
furtherrestrictions on the exercise of the rights granted or affirmed
underthis License.
5.0 Moral rights
5.1 Moral rights. This sectioncovers moral rights,including any rights to
be identified as the authorof the Database or to objectto treatment that
would otherwise prejudice the author's honourand reputation, or any
otherderogatory treatment:
a. For jurisdictions allowing waiver of moral rights, Licensorwaives all
moral rights that Licensor may have in the Database tothe fullestextent
possible by the law ofthe relevant jurisdictionunder Section 10.4;
b. If waiver of moral rights under Section 5.1 a in the relevant jurisdiction
is not possible,Licensoragrees not to assertany moral rights over the
Database and waives all claims in moral rights to the fullest extent
possible by the law ofthe relevant jurisdictionunder Section 10.4; and
c. For jurisdictions not allowing waiver or an agreementnotto assert
moral rights under Section 5.1 a andb, the authormay retain theirmoral
rights over certain aspects ofthe Database. Please note that some
jurisdictions do not allow for the waiver of moral rights, and so moral
rights may still subsist over the Database in some jurisdictions.
6.0 Fair dealing, Database exceptions,and otherrights not affected
6.1 This License does not affect any rights that You oranyone else may
independently hav e underany applicablelaw to make any use ofthis
Database, including without limitation:
a. Exceptions to the Database Rightincluding: Extractionof Contents
from non-electronic Databases forprivate purposes, Extractionfor
purposes of illustration for teaching orscientific research,and Extraction
or Re-utilisationforpublic security or an administrative or judicial
procedure.
b. Fair dealing, fair use, or any otherlegally recognised limitationor
exceptionto infringementof copyright or otherapplicable laws.
6.2 This License does not affect any rights of lawful users to Extractand
Re-utilise insubstantial parts of the Contents, evaluatedquantitatively or
qualitatively, for any purposes whatsoever, including creating a
Derivative Database (subject to otherrights over the Contents,see
Section2.4). The repeated and systematic Extraction or Re-utilisation of
insubstantial parts of theContents may however amount to the
Extraction or Re-utilisation of a Substantial part of the Contents.
7.0 Warranties and Disclaimer7.1 The Database is licensed by the
Licensor "as is" and withoutany warranty of any k ind,either express,
implied,or arising by statute,custom, course of dealing, or trade usage.
Licensor specifically disclaims any and allimplied warranties or
conditions of title,non-infringement, accuracy or completeness,the
presence or absence of errors, fitness for a particular purpose,
merchantability, or otherwise.
Some jurisdictions do not allow the exclusionof impliedwarranties,so
this exclusion may notapply to You.
8.0 Limitation of liability
8.1 Subject to any liability that may not be excludedorlimited by law,
the Licensoris notliable for, and expressly excludes, all liability for loss or
damage however and whenever caused toanyone by any use under
this License, whetherby Youorby anyone else, and whethercaused by
any faulton the part of the Licensorornot. This exclusion of liability
includes,butis not limitedto,any special, incidental,consequential,
punitive, or exemplary damages suchas loss of revenue,data,
anticipatedprofits,and lost business. This exclusion applies even if the
Licensor has beenadvised of the possibility ofsuch damages.
8.2 If liability may not be excludedby law, it is limited to actual and
direct financial loss tothe extentit is caused by proved negligence on the
partof the Licensor.
9.0 Termination of Your rights underthis License
9.1 Any breach by You of the terms and conditions of this License
automatically terminates this License withimmediate effect and without
notice to You. For the avoidance of doubt,Persons who hav e received
the Database, the whole or a Substantial part of the Contents, Derivative
Databases, or the Database as partof a Collective Database from You
underthis License will not have their licenses terminated providedtheir
use is in full compliance with this License or a license granted under
Section4.8 of this License. Sections 1, 2, 7, 8,9 and 10 will survive any
termination of this License.
9.2 If Youare not in breach of the terms of this License, the Licensorwill
notterminate Your rights underit.
9.3 Unless terminatedunder Section 9.1, this License is granted to You
for the duration of applicable rights in the Database.
9.4 Reinstatement of rights. If y ou cease any breach of the terms and
conditions of this License, then your full rights under this License will be
reinstated:
a. Provisionally and subjectto permanent terminationuntil the 60th day
after cessation of breach;
b. Permanently onthe 60th day after cessation of breach unless
otherwise reasonably notifiedby the Licensor; or
c. Permanently if reasonably notified by the Licensorof the v iolation,this
is the first time You have received notice of violation of this License from
the Licensor,and You cure the violation priorto 30 days after your
receipt of the notice.
Persons subject to permanent termination of rights are not eligible to be
a recipient and receive a license under Section4.8.
9.5 Notwithstanding the above, Licensorreserves the righttorelease the
Database under differentlicense terms or to stop distributing or making
available the Database. Releasing the Database under different license
terms or stopping the distributionof the Database will not withdraw this
License (or any otherlicense that has been, or is required to be, granted
underthe terms of this License),and this License will continue in full force
and effect unless terminated as stated above.
10.0 General
10.1 If any provision of this License is held to be invalidor
unenforceable, that must not affect the validity or enforceability ofthe
remainder of the terms and conditions of this License and each
remaining provision of this License shall be v alid and enforced to the
fullestextent permitted by law.
10.2 This License is the entire agreement betweenthe parties with
respectto the rights granted here over the Database. It replaces any
earlierunderstandings, agreements or representations with respect to
the Database.
10.3 If You are in breach of the terms of this License,You will not be
entitled to rely on the terms of this License or to complainof any breach
by the Licensor.
10.4 Choice of law. This License takes effect in and will be governedby
the laws ofthe relevant jurisdictionin whichthe License terms are
sought to be enforced. If the standard suite of rights granted under
applicable copyrightlaw and Database Rights in the relevant jurisdiction
includes additional rights not granted underthis License, these additional
Version 1.075, Revision C TMX-2050 Display User Guide 7
Page 8

rights are granted in this License in order to meet the terms of this
License.
Warranty Remedies
Trimble's sole liability and your exclusive remedy under the warranties
set forth above shallbe,at Trimble's option,to repairor replace any
Productthatfails to conform to such warranty ('Nonconforming
Product"), and/or issue a cash refund up to the purchase price paid by
you for any such Nonconforming Product,excluding costs of installation,
uponyour return of the Nonconforming Productto Trimble in accordance
withTrimble's productreturnprocedures than in effect. Such remedy
may include reimbursementof the cost of repairs for damage to thirdparty equipmentonto which the Product is installed,if suchdamage is
foundtobe directly causedby the Product as reasonably determined by
Trimble following a rootcause analysis.
Warranty Exclusions and Disclaimer
These warranties shall be applied only in the ev ent and to the extent
that (a) the Products and Software are properly and correctly installed,
configured,interfaced, maintained,stored,and operatedin accordance
withTrimble's relevant operator's manual and specifications, and; (b)
the Products and Software are not modifiedor misused. The preceding
warranties shall not apply to,and Trimble shall not be responsible for
defects or performance problems resulting from (i) the combination or
utilization of the Product or Software with hardware or software
products, information, data, systems, interfaces or devices not made,
supplied or specifiedby Trimble; (ii) the operationof the Product or
Software underany specification otherthan, or in addition to, Trimble's
standardspecifications for its products; (iii) the unauthorized, installation,
modification,oruse of the Productor S oftware; (iv) damage caused by
accident,lightning or otherelectrical discharge, fresh or salt water
immersion or spray (outside of Product specifications); or (v) normal
wear and tear on consumable parts (e. g., batteries). Trimble does not
warrant or guarantee the results obtained through the use of the Product
or that software components willoperate errorfree.
THE WARRANTIES ABOVE STATE TRIMBLE'S ENTIRE LIABILITY, AND
YOUR EXCLUSIVE REMEDIES , RELATING TO THE PRODUCTS AND
SOF TWARE. EXCEPT AS OTHERWISE EXPRESSLY PROVIDED HEREIN,
THE PRODUCTS, SOFTWARE, AND ACCOMPANYINGDOCUMENTATION
AND MATERIALS ARE PROVI DED "AS IS" AND WITHOUT EXPRESS OR
IMPLIED WARRANTY O F ANY KIND BY EITHER TRIM BLE NAVIGATION
LIMI TED OR ANYONE WHO HAS BEEN INVOLVED IN ITS CREATIO N,
PRODUCTION, I NSTALLATION,OR DISTRIBUTION INCLUDING, BUT NOT
LIMI TED TO, THE IMPLIED WARRANTIES OF MERCHANTABILITY AND
FITNESS FOR A PARTICULAR PURPOSE, TITLE, AND
NONINFRINGEMENT. THE STATED EXPRESS WARRANTIES ARE I N LIEU
OF ALL OBLIGATIONS OR LIABILITIES ON THE PART OF TRIMBLE
ARISI NG OUT OF, OR IN CONNECTION WI TH, ANY PRODUCTS O R
SOF TWARE. BECAUSE SO ME STATES ANDJURISDICTIONS DO NOT
ALLOW LIMITATIONS ON DURATION O R THE EXCLUSION OF AN
IMPLIED WARRANTY, THE ABOVE LIMITATION MAY NOT APPLY OR
FULLY APPLY TO YOU.
NOTICE REGARDING PRODUCTS EQUIPPED WITH TECHNOLOGY
CAPABLE OF TRACKING SATELLITE SIGNALS FROM SATELLITE BASED
AUGMENTATION SYSTEMS (SBAS) (WAAS/EGNOS , AND MS AS),
OMNISTAR, GPS, MODERNIZED GPS OR GLONASS SATELLITES, OR
FROM IALA BEACON SOURCES: TRIMBLE IS NOT RESPONSIBLE
FOR THE OPERATION OR FAILURE OF OPERATION OF ANY
SATELLITE BASED POSITIONING SYSTEM OR THE AVAILABILITY
OF ANY SATELLITE BASED POSITIONING SIGNALS.
Lim itation or Liability
TRIMBLE'S ENTIRE LIABILITY UNDER ANY PROVISI ON HEREIN SHALL BE
LIMI TED TO THE AMOUNT PAID BY YOU FO R THE PRODUCT OR
SOF TWARE LICENSE. TO THE MAXIMUM EXTENT PERMI TTED BY
APPLICABLE LAW, I N NO EVENT S HALL TRIM BLE OR ITS SUPPLIERS BE
LIABLE F OR ANY INDIRECT, SPECIAL, INCIDENTAL OR CONSEQUENTIAL
DAMAGES WHATSOEVER UNDERANY CIRCUMSTANCE O R LEGAL
THEORY RELATING I N ANY WAY TO THE PRODUCTS, SOFTWARE AND
ACCOMPANYING DOCUMENTATION AND MATERIALS, (INCLUDING,
WITHOUT LIMITATION, DAMAGES FOR LOSS OF BUSINESS PROFITS,
BUSINESS INTERRUPTION, LOSS OF BUSINESS INFORMATION, OR ANY
OTHER PECUNIARY LOSS), REGARDLESS WHETHERTRIMBLE HAS BEEN
ADVISED OF THE POSSIBILITY OF ANY SUCH LOSS AND REGARDLESS
OF THE COURSE O F DEALING WHICH DEVELOPS OR HAS DEVELOPED
BETWEEN YOU AND TRIMBLE. BECAUSE SOME STATES AND
JURISDICTIONS DO NOT ALLOW THE EXCLUSION OR LIMITATI ON OF
LIABILITY F OR CONSEQUENTIAL OR INCIDENTAL DAMAGES, THE
ABOVE LIMITATION MAY NOT APPLY OR FULLY APPLY TO YOU.
PLEASE NOTE: THE ABOVE TRIMBLE LIMITED WARRANTY
PROVISIONS WILL NOT APPLY TO PRODUCTS PURCHASED IN
THOSE JURISDICTIONS (E.G., MEMBER STATES OF THE
EUROPEAN ECONOMIC AREA) IN WHICH PRODUCT
WARRANTIES ARE THE RESPONSIBILITY OF THE LOCAL DEALER
FROM WHOM THE PRODUCTS ARE ACQUIRED. IN SUCH A
CASE, PLEASE CONTACT YOUR TRIMBLE DEALER FOR
APPLIC ABLE WARRANTY INFORMATION.
Official Language
THE O FFI CIAL LANGUAGE OF THESE TERMS AND CONDITI ONS IS
ENGLISH. IN THE EVENT O F A CONFLICT BETWEEN ENGLISH AND
OTHER LANGUAGE VERSIONS, THE ENGLISH LANGUAGE SHALL
CONTROL.
Registration
To receive informationregarding updates and new products,please
contact your local dealer or v isit the Trimble website at
www.trimble.com/register. Upon registrationyou may select the
newsletter,upgrade or new product informationyou desire.
Notices
This equipmenthas been tested and found to comply with the limits for
a Class A digital device, pursuantto Part 15 of the FCC rules. These limits
are designed to provide reasonable protection against harmful
interference when the equipmentis operated in a commercial
environment. This equipmentgenerates,uses, and can radiate radio
frequency energy and, if not installed and used inaccordance withthe
instructionmanual,may cause harmful interference to radio
communications. O peration of this equipmentin a residential area is
likely to cause harmful interference, in which case the user will be
requiredto correctthe interference at his own expense.
Properly shielded and groundedcables and connectors must be used in
order to meet FCC emission limits. TRIMBLE is notresponsible for any
radioortelevision interference caused by using other than
recommended cables and connectors or by unauthorized changes or
modifications to this equipment. Unauthorized changes ormodifications
could voidthe user's authority tooperate the equipment.
This device complies withPart 15 of the F CC rules. Operationis subject
to the following two conditions: (1) this device may notcause harmful
interference,and (2) this device mustaccept any interference received,
including interference that may cause undesired operation. Responsible
Party:
Trimble Navigation
935 StewartDrive
Sunnyvale CA 94085
Telephone: 1-408481 8000
Canada
This Class A digital apparatus complies withCanadian ICES-003.
Cet appareilnumérique de la classe A estconforme à la norme NMB-003
du Canada.
This apparatus complies withCanadian RSS-GEN.
Cet appareilest conforme à la norme CNR-GEN du Canada.
Europe
This product has beentestedand found to comply
withthe requirements for a Class A device pursuant
to European CouncilDirective 2006/42/EC and
1999/5/EC, thereby satisfying the requirements for
CE Marking and sale within the European Economic
Area (EEA). Contains a radio module. These requirements are designed
to provide reasonable protectionagainst harmful interference when the
equipment is operated in a residential or commercial environment.
Australia and New Zealand
This product conforms with the regulatory requirements of
the AustralianCommunications and Media Authority
(ACMA) EMC framework, thus satisfying the
requirements for C-Tick Marking and sale within Australia
and New Zealand.
8 TMX-2050 Display User Guide Version 1.075, Revision C
Page 9

Waste Electrical and Electronic Equipment (WEEE)
For product recycling instructions and more information,please
go to www.trimble.com/ev.sht ml.
Recycling in Europe: To recycle Trimble WEEE (Waste Electrical
and Electronic Equipment,products that run on electrical power.), Call
+31 497 53 24 30,and ask for the “WEEE Associate”. Or,mail a request
for recycling instructions to:
Trimble Europe BV
c/o MenloWorldwide Logistics
Meerheide 45
5521 DZ Eersel,NL
Version 1.075, Revision C TMX-2050 Display User Guide 9
Page 10

Safety Information
Safety Information
Always follow the instructions that accompany a Warning or Caution. The information it provides is
intended to minimize the risk of personal injury and/or damage to property. In particular, observe
safety instructions that are presented in the following format:
WARNING - This alert warns of a potential hazard which, if not avoided, could result in severe injury or even
death.
CAUTION - This alert warns of a potential hazard or unsafe practice which, if not avoided, could result in injury or
property damage or irretrievable data loss.
Note – An absence of specific alerts does not mean that there are no safety risks involved.
Warnings
Auto guidance
WARNING – Auto guidance systems cannot avoid items in the field such as obstacles. Make sure you are
adequately trained to operate the auto guidance system.
WARNING – Many large and sudden changes in satellite geometry caused by blocked satellites can cause
significant position shifts. If operating under these conditions, auto-guidance systems can react abruptly. To avoid
possible personal injury or damage to property under these conditions, disable the auto-guidance system and take
manual control of the vehicle until conditions have cleared.
Calibration
WARNING – Incorrect adjustment of Manual Override Sensitivity could cause this critical safety feature to fail,
resulting in personal injury or damage to the vehicle. Do not to choose a setting that is either too sensitive or not
sensitive enough. It is vital to avoid setting the sensitivity so low that the system will not detect any steering
wheel motion.
WARNING – During the Deadzone calibration, the system moves the vehicle’s steering wheel. To avoid injury, be
prepared for sudden vehicle movement.
WARNING – During flow calibration, the machine will become operational. Take all necessary precautions to
ensure user safety. Failure to do so may result in serious injury or death.
WARNING – Material will be dispensed during calibration. Make sure that the implement is safe to operate.
10 TMX-2050 Display User Guide Version 1.075, Revision C
Page 11

Safety Information
Display
WARNING – When the temperature of the display case reaches 65° C (149 ° F) the display shows the following:
WARNING!HOTSURFACE, DONOTTOUCH. The display will dim the screen until the temperature returns to
normal. Use caution when touching the display when this warning is visible.
Implement master switch
WARNING – When the implement is down and the master switch is in the On position, the machine is fully
operational. Take all necessary precautions to ensure user safety. Failure to do so could result in injury or death.
Cautions
Calibration
CAUTION – Obstacles in the field can cause collisions, which may injure you and damage the vehicle. If an
obstacle in the field makes it unsafe to continue the Automated Deadzone calibration, stop the vehicle and turn
the steering wheel to disengage the system.
1) Wait until the display prompts you that the phase is ready to begin.
2) Look at the screen to determine whether the next phase will require a left or right turn.
3) Reposition the vehicle so that the turn will use the space that you have available.
4) Tap the button to begin the next phase.
CAUTION – The wheels can move abruptly during the Steering Proportional Gain procedure while the Autopilot
system tests the hydraulic response to its steering commands. To avoid injury, be prepared for vehicle movement.
Display
CAUTION – If you leave the display powered on after shutting off the vehicle's ignition, the display power can
drain the battery.
CAUTION – Do not press on the screen with a sharp item, such as a pencil. You may damage the surface of the
screen.
CAUTION – Do not apply glass cleaner directly to the touchscreen.
Version 1.075, Revision C TMX-2050 Display User Guide 11
Page 12

Safety Information
GNSS interference
CAUTION – The GNSS antenna may experience interference if you operate the vehicle within 100 m (300 ft) of
any power line, radar dish, or cell phone tower.
Installation
CAUTION – Do not mount the DCM-300 modem in direct sunlight or in areas of high heat. This will cause
degraded performance.
CAUTION – Do not attempt to power the display without the TM-200 Module.
CAUTION – If the vehicle has a master electrical disconnect, make sure the power cable ground connections are
not directly attached to the battery terminal. Attach the ground connections of the power cable to the chassis
side of the main disconnect so that it is as close as possible to the battery, but still gets disconnected when the
master disconnect is turned off. Failure to connect the power cable ground will cause damage to the display.
CAUTION – Make sure the vehicle power is off when you are connecting system components.
CAUTION – Wireless, cellular, radio and GNSSsignals can interfere with each other. For best performance,
mount antennas at least 1 meter away from each other.
Vehicle setup
CAUTION – If you select a Vehicle Profile that is not suitable for your vehicle, you may experience degraded
system performance.
CAUTION – If you delete a vehicle, all information about the vehicle will be erased.
USB socket
CAUTION – Do not remove the USB drive from the socket while the display is writing to or from the drive. This
will corrupt the data.
CAUTION – Do not use a USB drive in each USB socket at the same time. If you are attempting to upgrade
firmware using a USB drive and another USB drive is already in one of the sockets, the firmware upgrade will
fail.
12 TMX-2050 Display User Guide Version 1.075, Revision C
Page 13

Data Sheet
l TMX-2050 display, 13
l TM-200 Module
l AG-815 integrated radio
TMX-2050 display
Technical
Power 24-28 volts, 3 amps (supplied by the TM-200 Module).
CAUTION – Do not attempt to power the display without the TM-200
Module.
Processor 1 GHz quad core
Storage Primary embedded memory - 32 GByte
Data Sheet
Mechanical
Dimensions 312 mm x 214 mm x 45 mm (plus connectors) (1 ft 8/32 in x 8 1/4 in x
1 49/64 in)
Weight 2.5 kg (5.5 lb)
Mount 4 M6 screws on 75 mm centers (3 inch). VESA MIS-D 75.
Housing
Material Magnesium
Environmental Rating IP55
Temperature
Operation 0 °C to 65 °C (32 °F to 149 °F)
Storage -40 °C to 85 °C (-40 °F to 185 °F)
LCD display
Size 307 mm (1 ft 3/32 in)
Touch screen Capacitive touch
Resolution 1280 x 800
Version 1.075, Revision C TMX-2050 Display User Guide 13
Page 14

Data Sheet
Front-facing camera
Type Low light level, color
Resolution 1.3 M pixels
Connections
USB USB side (side of display), USBrear (back of display)
Ethernet RJ45 connector. Power input for TMX-2050 display only.
TM-200 Module
Technical
Power 9 to 16 volts, 25 amps
Storage 64 megabytes (Flash)
Mechanical
Dimensions 209 mm x 184 mm x 57 mm (plus connectors) (8 15/64 in x 7 1/4 in x 2
1/4 in)
Weight 2.54 kg (5.6 lb)
Mount 4 M6 (or #12) screws on 165 mm centers (6.5 inch).
Housing
Material
Aluminum
Environmental Rating IP55
Temperature
Operation -40 °C to 65 °C (-40 °F to 149 °F)
Storage -40 °C to 85 °C (-40 °F to 185 °F)
GNSS
Internal 220 channel GNSS receiver, L1 / L2 / GLONASS capable
14 TMX-2050 Display User Guide Version 1.075, Revision C
Page 15

Connections
Data Sheet
Power
(14-pin Ampseal connector)
I / O
(12-pin DEUTSCHconnector)
Display Ethernet
(White 8-pin Ampseal
connector)
Power input
CAN
2x Digital In / Out
12 volt power output (non-regulated, fused)
Ignition Sense
CAN
RS232
Digital In
Digital Out
Video In (640 x 480 resolution) NTSC&PAL
12 volt power output
Display power
28 volt, 2 amp output
Display Ethernet Communications
Video Out
Ignition Sense
Secondary Ethernet
(Black 8-pin Ampseal
Ethernet Communications
12 volt power output
connector)
Video In
GPS / GNSS
(TNC connector)
GPS / GNSSantenna
5 volt
AG-815 integrated radio
Technical
Power Via TM-200 module
Mechanical
Dimensions 144 mm x 81 mm x 52.5 mm (plus connectors) (5 43/64 in x 3 3/16 in x
2 1/16in)
Version 1.075, Revision C TMX-2050 Display User Guide 15
Page 16

Data Sheet
Mechanical
Weight 0.55 kg (1.22 lb)
Mount The AG-815 module attaches directly to the TM-200 module with
four M3 x 16 mm (5/8 in) screws
Housing
Material Aluminum
Environmental rating IP55
Temperature
Operation -40 °C to 65 °C (-40 °F to 149 °F)
Storage -40 °C to 85 °C (-40 °F to 185 °F)
GNSS
Internal 220 channel GNSS receiver, L1/L2/GLONASS capable
Radio options 450 MHz radio 900 MHz radio
Range 13 km (8 miles); varies with terrain
and operating conditions
Frequency range
430 to 450 MHz, 450 to 470 MHz
13 km (8 miles); varies with terrain
and operating conditions
902 to 928 MHz
(region-dependent)
Networks 20 user-selectable networks 40 user-selectable networks
Wireless data rates
128 Kbps
128 Kbps
Modes Rover (receive only) Rover (receive only)
Connections
Radio (TNC connector)
Radio antenna
16 TMX-2050 Display User Guide Version 1.075, Revision C
Page 17

Contents
Safety Information 10
Warnings 10
Cautions 11
Data Sheet 13
TMX-2050 display 13
TM-200 Module 14
AG-815 integrated radio 15
Contents
Auto guidance 10
Calibration 10
Display 11
Implement master switch 11
Calibration 11
Display 11
GNSS interference 12
Installation 12
Vehicle setup 12
USB socket 12
1 Introduction 31
TMX-2050 display overview 32
Hardware 32
Compatibility 32
About this guide 33
Availability of optional features 33
Your comments 33
Additional Trimble resources 33
Technical assistance 33
Purchase and activation process 34
Purchase in the store 34
Assign a service to the display in the store 34
Assign a license to the display in the reseller portal 35
Deliver services and licenses to the display in the reseller portal 36
Purchase / Activation Flow Diagram 37
Troubleshooting activation 38
I am logged into the store and cannot find the sales order
number/service/license. 38
I am logged into the reseller portal and cannot find the licenses and services
that I want to activate. 38
I ordered a new license/service, but Igot all my QRcodes again as well as the
QRcode for the new license/service. 38
2 Display basics 39
Version 1.075, Revision C TMX-2050 Display User Guide 17
Page 18

Contents
Powering on or off 40
Automatic power on 40
Manual power on 40
Automatic power off 40
Manual power off 40
Getting help 41
Help from the web 41
Touch screen basics 41
Interactive controls 41
Cleaning the touch screen 44
Common controls 44
Lists 44
Menu lists 44
Selection lists 45
On / Off buttons 45
Adjusters 46
Example: Slider bars 46
Example: Increase/decrease adjusters 46
Setup panels 46
On-screen keyboard 47
On-screen number pad 48
Main views 49
Home screen 49
Run screen 49
Field Manager 49
Connected Farm Dashboard 50
Display bar 51
Emergency button 51
Left-side navigation 51
Right-side icons and notification list 51
GNSSnotification button 52
Main menu 53
Home screen 54
Field management buttons - left side 54
Setup buttons - right side 55
Run screen 56
Field operation buttons - left side 57
Feature operation buttons - right side 59
Field Manager 61
Access Field Manager 61
Field overview buttons 62
Guidance pattern buttons 62
Boundary buttons 63
Landmark buttons 64
18 TMX-2050 Display User Guide Version 1.075, Revision C
Page 19

Contents
Task history buttons 65
Prescriptions Manager 66
Connected Farm Dashboard 66
Data transfer 67
USBupgrades 67
USB data transfer 68
USB VDB transfer 69
Office Sync data transfer 69
From CFX-750 display or FmX display to TMX-2050 display 70
From TMX-2050 display to CFX-750 display or FmX display 70
From TMX-2050 display to CFX-750 display or FmX display 71
From TMX-2050 display to Farm Works 71
From TMX-2050 display to TMX-2050 display 73
USB socket 74
Insert a USBdrive 75
Remove USBDrive 75
Screen shots 75
3 Display settings 77
Display settings 78
Languages and units settings 78
Access 78
Date and time settings 78
Access 79
Users and passwords 79
Add a user 79
Take a photo of a user 79
Access 80
Firmware upgrades - wireless 80
Settings for wireless upgrades 80
Check for updates 81
Feature unlocks 81
Manual code entry 82
QRcode scan 82
Check for unlocks 82
Display settings 82
Access 82
Mapping settings 83
Patterns settings 83
Curve Features 83
Headlands 84
Boundaries 84
Access 84
Steering and guidance settings 85
Version 1.075, Revision C TMX-2050 Display User Guide 19
Page 20

Contents
Access 85
ISOBUS settings 87
Task Controller 87
Virtual Terminal 87
Access 87
Wi-Fi settings 87
Access 88
Modem services settings 88
Access 88
Modem settings 88
Network settings 89
Network (CDMA) 89
Network (GSM) 89
Office Sync settings 90
Remote Assistant settings 90
Access 90
Restore defaults 91
AdminUser Options 91
Restricted User Options 91
Access 91
System information 92
Access 92
4 Installation 93
Components 94
TMX-2050 display 95
Front view 95
Rear view 96
TM-200 Module 97
DCM-300 modem 98
AG-815 integrated radio 99
Installation overview 100
Install the display and mount 100
Installation and GNSS set up 102
Connect the AG-815 radio to the TM-200 Module 103
Connect the display and TM-200 Module 104
Master disconnect 105
Regular after-market installation 107
Connection for existing OEMharness 109
Connect the DCM-300 modem 111
Connect the AG-25 GNSS antenna 111
Connect additional components 113
5 Connectivity 115
20 TMX-2050 Display User Guide Version 1.075, Revision C
Page 21

Contents
GNSS receiver settings 116
SBAS corrections 118
RangePoint RTX corrections 119
OmniSTAR G2/HP/GR corrections setup 120
CenterPoint RTX setup 121
CenterPoint RTX setup 122
Modem corrections 123
Satellite corrections 124
Standard convergence 125
Fast convergence 125
VRS corrections 126
RTK corrections 127
CAN message settings 130
DCM-300 modem initial setup 130
Office Sync setup 130
Requirements 131
Settings 131
Connectivity concepts 133
GNSSand drift 133
xFill technology 133
Automatic guidance systems 133
Accuracy 134
Dependence on satellite 134
Dependence on base station position 134
Base station survey 135
Base station survey with AutoBase™ 135
VRS base station 136
Base station, survey unknown 136
Estimating base station errors 136
When not to use xFill technology 137
VRS 137
Network solution 137
6 Vehicles 139
Vehicle setup 140
Overview of setup 140
Add a vehicle 140
Delete a vehicle 142
Edit a vehicle 143
Save a vehicle 143
Save a complete vehicle profile 144
Save an incomplete vehicle profile 144
Vehicle summary 144
Select a vehicle 145
Version 1.075, Revision C TMX-2050 Display User Guide 21
Page 22

Contents
Manual guidance setup 145
Autopilot system setup 146
Guidance system settings for Autopilot system 146
Controller settings for Autopilot system 147
Sensor settings for Autopilot system 148
Vehicle measurements for Autopilot system 149
OnSwath 151
Autopilot system calibration 152
Calibration for non-tracked vehicles 152
Manual override sensitivity calibration 153
Steering sensor calibration 154
Automated steering deadzone calibration 156
Pre-calibration steps 156
Calibration steps 157
Automated Deadzone error messages 158
Calibration steps 158
Automated Deadzone error messages 159
Proportional steering gain 160
Pre-calibration steps 161
Calibration steps 161
Roll correction calibration 162
Pre-calibration steps 162
Calibration steps 162
Line acquisition 165
Engage aggressiveness 166
EZ-Pilot system setup 167
Guidance selection for the EZ-Pilot system 167
Controller settings for EZ-Pilot system 167
Steering speed settings for EZ-Pilot system 168
Vehicle measurements for EZ-Pilot system 169
EZ-Pilot system calibrations 170
Roll correction for EZ-Pilot system 170
Angle per turn calibration for EZ-Pilot system 171
Online aggressiveness calibration for EZ-Pilot system 171
Line acquisition calibration for EZ-Pilot system 172
EZ-Steer system setup 173
Guidance selection for EZ-Steer system 173
Controller settings for EZ-Steer system 173
Steering and speed settings for EZ-Steer system 173
Vehicle measurements for EZ-Steer system 175
EZ-Steer system calibrations 176
Roll correction for EZ-Steer system 176
Angle per turn calibration for EZ-Steer system 176
22 TMX-2050 Display User Guide Version 1.075, Revision C
Page 23

Contents
7 Fields 179
Field Basics 180
Boundaries 180
Guidance lines and patterns 180
Landmarks 181
Tasks, activities and coverage 181
Add a field 181
Select a field 182
Select a field through the map 182
Select a field from the list 182
Enter a field (Run screen) 183
Choose a field to enter 183
Currently selected field 183
Field not currently selected 183
Run screen 184
Edit a field (Field Manager) 184
8 Implements 187
Implement setup 188
Add an implement 188
Save an implement 188
Save complete implement settings 188
Save incomplete implement settings 188
Select an implement 189
Edit an implement 189
Delete an implement 189
ISOBUS for implements 191
TaskController setup 191
Implement setup for Task Controller 191
Equipment setup 195
Application control 196
Prior to setup 196
Channel setup 196
Setup diagram 196
Add a control channel 197
Section control 198
Modules 199
Width 200
Latencies 200
Overlaps 201
Rate control 202
Valve/Drive 203
Width 204
Version 1.075, Revision C TMX-2050 Display User Guide 23
Page 24

Contents
Adjustments 204
Calibrate application control drives 205
Virtual tank/bin 206
Adjustments 207
Summary 207
Modify a control channel 208
Remove a control channel 208
Boom height control 210
Boom height control setup 210
Sensor location 211
Operation settings 212
Calibrate boom height control 215
Boom height calibration steps 215
Boom height manual control test 216
Inputs 219
Add a sensor 219
Type of sensor 219
Location of sensor 219
Alarms 220
SIM 220
Inputs / Sensors calibration 221
Review implement summary 222
Prescriptions 223
Importing prescriptions 223
Exporting prescriptions 223
9 Materials 225
Managing materials 226
Material list 226
Anhydrous 226
Granular fertilizer 226
Liquid 226
Granular seed 226
Row crop seed 227
Add a material 227
Edit a material 229
Delete a material 229
Assign a material to a channel 229
Calibrate material flow 230
Pre-calibration steps 230
Calibration steps 230
10 Operations 233
24 TMX-2050 Display User Guide Version 1.075, Revision C
Page 25

Contents
Preparing for operation 234
Choose a field to enter 234
Currently selected field 234
Field not currently selected 234
Run screen 235
Fields and guidance 235
Tasks 235
Layers 236
Adjustments during operation 236
Automatic transfer of data 236
Tasks 238
Data stored in each task 238
Create a task 238
Add a task (Run screen) 239
Review existing tasks (Field Manager) 239
Review existing tasks (Field Manager) 239
Edit a task (Field Manager) 240
Coverage logging 241
Manual coverage logging 241
Automatic logging with engage 241
Editing layers 241
Vehicle operation 242
Vehicle position 242
Engage status with auto guidance 242
Steering adjustments 244
Guidance adjustments 244
Guidance patterns 246
Guidance creation buttons 246
Boundary creation (Run screen) 248
Boundary editing (Field Manager) 249
Boundary activation/deactivation (Field Manager) 250
AB guidance line creation (Run screen) 251
A+ guidance line creation (Run screen) 252
Curved line creation (Run screen) 252
Headland and infill pattern creation (Run screen) 253
Infill pattern shift 254
Change the infill pattern 256
Pivot pattern creation (Run screen) 258
Guidance pattern editing (Field Manager) 259
Pattern activation/deactivation (Field Manager) 259
Guidance pattern adjustment (Run screen) 260
Guidance pattern shifting (Field Manager) 261
Landmarks 263
Landmark buttons 263
Version 1.075, Revision C TMX-2050 Display User Guide 25
Page 26

Contents
Landmark point creation (Run screen) 264
Landmark line creation (Run screen) 264
Landmark area creation (Run screen) 265
Landmark editing (Field Manager) 265
Layers 267
View coverage layers 267
Edit a coverage layer 268
Field-IQ system operations 270
Field-IQ system Master Switch Box 270
Field-IQ 12-section switch box 271
Relation to master switch box 271
LEDstatus indicators 272
Section control 273
Buttons and indicators 273
Rate control adjustments 274
Boom height control operation 276
Buttons and indicators 276
Boom height adjustments 278
Prescriptions 280
Assign a prescription 280
Use a prescription 281
ISOBUS 282
Task Controller operation 282
On-screen Task Controller switch 283
Virtual Terminal operation 284
Delete previous data 285
On-screen widgets 286
Access widgets 286
Minimize/maximize, resize 286
Move a widget 286
Remove a widget 287
Area status 287
ISOBUS Task Controller widget 288
Position status 289
On-screen lightbar for auto guidance 289
Position 289
Compass 290
Digital compass 290
Swath number 290
Speed status 290
Virtual Terminal widget 290
Alerts and warnings 292
End of row warning 292
Tight turn warning 292
26 TMX-2050 Display User Guide Version 1.075, Revision C
Page 27

Contents
11 Diagnostics / troubleshooting 293
Diagnostics 294
TMX-2050 display 295
The display does not turn on. 295
The display is not responsive. 295
The map is not visible on the Home screen. 295
Autopilot system diagnostics 296
Steering performance for Autopilot system 296
Sensor performance for Autopilot system 297
NMEA messages 298
Boom Height Diagnostics 300
Sensors 300
Boom Status 300
Valve Module 300
Boom ControlStatus 300
Manual Control 301
DCM-300 modem status 302
EZ-Pilot system diagnostics 303
Steering performance for EZ-Pilot system 303
Sensor performance for EZ-Pilot system 304
DCM-300 modem diagnostics 305
Network Status 305
Device Info 305
Cellular 305
WiFi Network 306
EZ-Steer system diagnostics 307
Steering performance for EZ-Steer system 307
Messages and fault codes 308
Disengaged warning messages 308
System faults 309
Field-IQ diagnostics 311
Operations 311
Adjustments 311
Rate Control 312
Overlaps 312
Latencies 313
Hardware 313
Sensor 313
GNSS and xFill technology status 315
xFill technology status 315
Safety feature 315
xFill technology status buttons 316
GNSS diagnostics 317
Version 1.075, Revision C TMX-2050 Display User Guide 27
Page 28

Contents
Solution Information 317
Skyplot 317
Troubleshooting 318
Poor accuracy (multipath) 319
Intermittent loss of lock on satellite 319
Loss of initialization 319
Not tracking RTK corrections 320
Poor signal / not receiving a clear signal 320
The receiver is not tracking any satellites. 321
Office Sync Diagnostics 321
ISOBUS diagnostics 323
Device tab 323
Recording and saving CANlogs 323
System diagnostics 324
System performance 324
Display 324
Devices 324
Remote Assistant 325
Remote Assistant status 325
TM-200 Module diagnostics 326
LED 1 326
LED 2 326
LED 3 326
LED 3 and 4 combination 326
LED 4 327
12 Glossary 329
330
A 330
B 330
C 330
D 331
E 332
F 332
G 332
H 333
I 333
L 333
M 334
N 334
P 334
R 335
S 335
T 336
28 TMX-2050 Display User Guide Version 1.075, Revision C
Page 29

Contents
V 336
W 336
Version 1.075, Revision C TMX-2050 Display User Guide 29
Page 30

Contents
30 TMX-2050 Display User Guide Version 1.075, Revision C
Page 31

Introduction
In this chapter:
C h a p t e r
1
TMX-2050 display overview 32
About this guide 33
Purchase and activation process 34
Troubleshooting activation 38
The Trimble® TMX-2050™ display is an incab touch screen display that provides
affordable guidance, steering and
precision agriculture functionality.
Version 1.075, Revision C TMX-2050 Display User Guide 31
Page 32

1 Introduction TMX-2050 display overview
TMX-2050 display overview
The TMX-2050 display is an easy-to-use advanced field management system which consists of both
software and hardware.
Hardware
The display's hardware consists of a 30 cm (12") touch-sensitive, color LCD screen.
Compatibility
TMX-2050 display is compatible with the following automated guidance and steering:
l Trimble Autopilot™ automated steering system
l Trimble EZ-Steer® assisted steering system
l Trimble EZ-Pilot® steering system
TMX-2050 display can use an array of additional products to maximize efficiency, including:
l Creating fields and guidance patterns
l Using guidance patterns for automatic guidance systems
l Logging coverage data
l Output of information for analysis in office-based software (for example FarmWorks Software®
solutions)
l Field-IQ™ Boom Height Control and Spraying
l Variable rate control
32 TMX-2050 Display User Guide Version 1.075, Revision C
Page 33

About this guide 1 Introduction
About this guide
This manual describes how to install, configure, troubleshoot and use the TMX-2050 display .
Availability of optional features
All available functions are covered in this manual, however, you may not see all of them on your
display. The TMX-2050 display includes many optional features. Only the features you have
unlocked will be available to you on the display.
Your comments
Your feedback about the supporting documentation helps us to improve it with each revision. Email
your comments to [email protected].
Additional Trimble resources
Sources of related information include the following:
l Product manuals and other publications - Access various publications (including product
manuals, release notes and quick reference guides) about Trimble products at
http://www.trimble.com/Support/Support_AZ.aspx.
l Trimble training courses - Consider a training course to help you use the TMX-2050 display to
its fullest potential. For more information, go to http://www.trimble.com/Support/Index_
Training.aspx.
Technical assistance
If you cannot find the information you need in the product documentation, contact your local
reseller.
Alternatively:
1. Go to http://www.trimble.com/support/index_support.aspx.
2. Select the type of support applicable to you.
If you need to contact Trimble technical support:
1. Go to http://www.trimble.com/global-services/support.aspx.
2. Click Request Technical Support and login to complete a support request.
Version 1.075, Revision C TMX-2050 Display User Guide 33
Page 34
1 Introduction Purchase and activation process
Purchase and activation process
To "activate" the TMX-2050 display, after you purchase the display, services and any licenses, you:
l Assign services to the display
l Assign licenses to the display
l Deliver services and licenses to the display
Purchase in the store
Use the login you received from Trimble to log in to the store and purchase:
l The TMX-2050 display system
l Licenses (such as Base to High Accuracy positioning)
l Services (such as Office Sync)
Assign a service to the display in the store
1.
After you receive the display, find the serial number on the back of the display and make a note
of it. Log into the store and click the Service Activation tab.
34 TMX-2050 Display User Guide Version 1.075, Revision C
Page 35
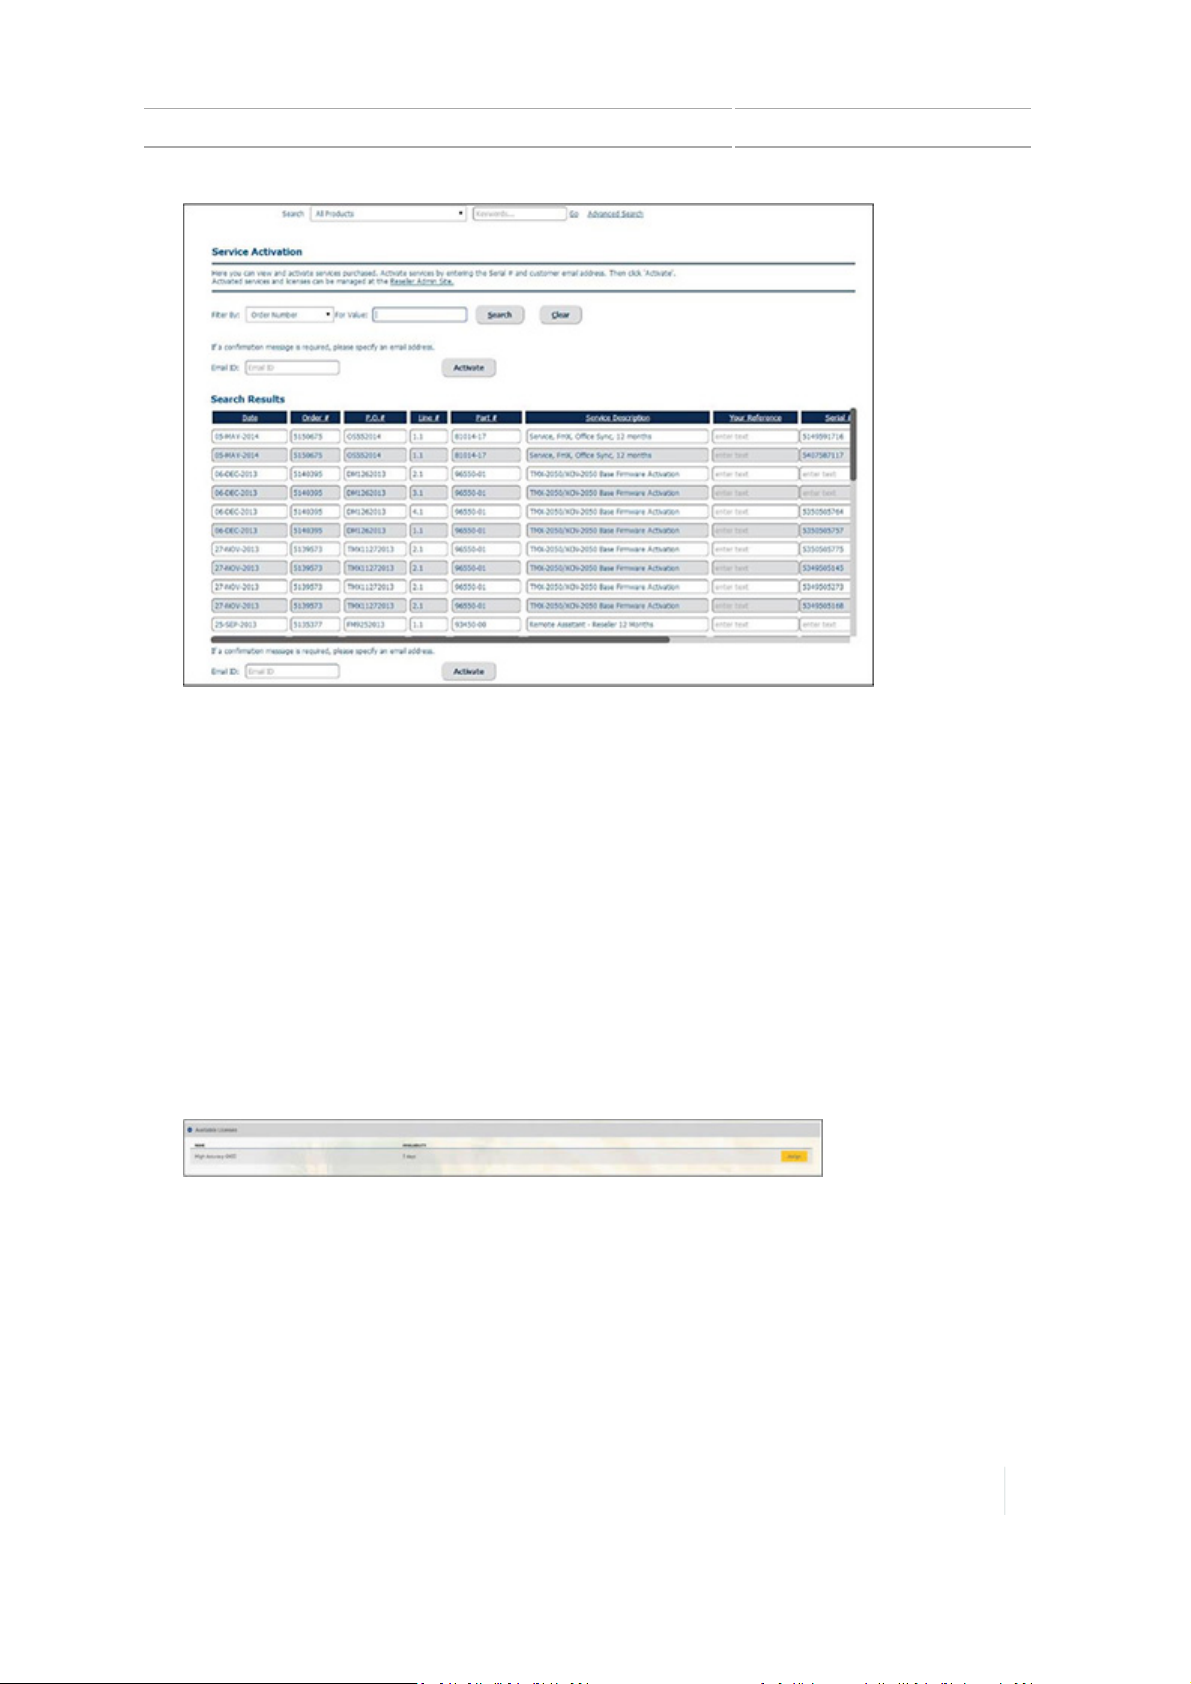
Purchase and activation process 1 Introduction
2. Find the sales order number of the service you have ordered (for example, the base firmware
for the TMX-2050 display).
3. Enter the serial number of the display in the Serial Number column.
4. Enter the email address of the customer who will be receiving the service. This email address
must be associated with an active Connected Farm account.
5. Click the Activate button. This causes the service (such as the base firmware)to be assigned to
the display.
Assign a license to the display in the reseller portal
1. Log in to the reseller portal.
2.
At the Activations tab, go to the Available Licenses list. These are the licenses that have not yet
been assigned to a display.
3. Find the license you want to assign and click the Assign button. A list of display serial numbers
opens.
4. Select the display serial number that you want to assign the license to and click Assign.
Version 1.075, Revision C TMX-2050 Display User Guide 35
Page 36
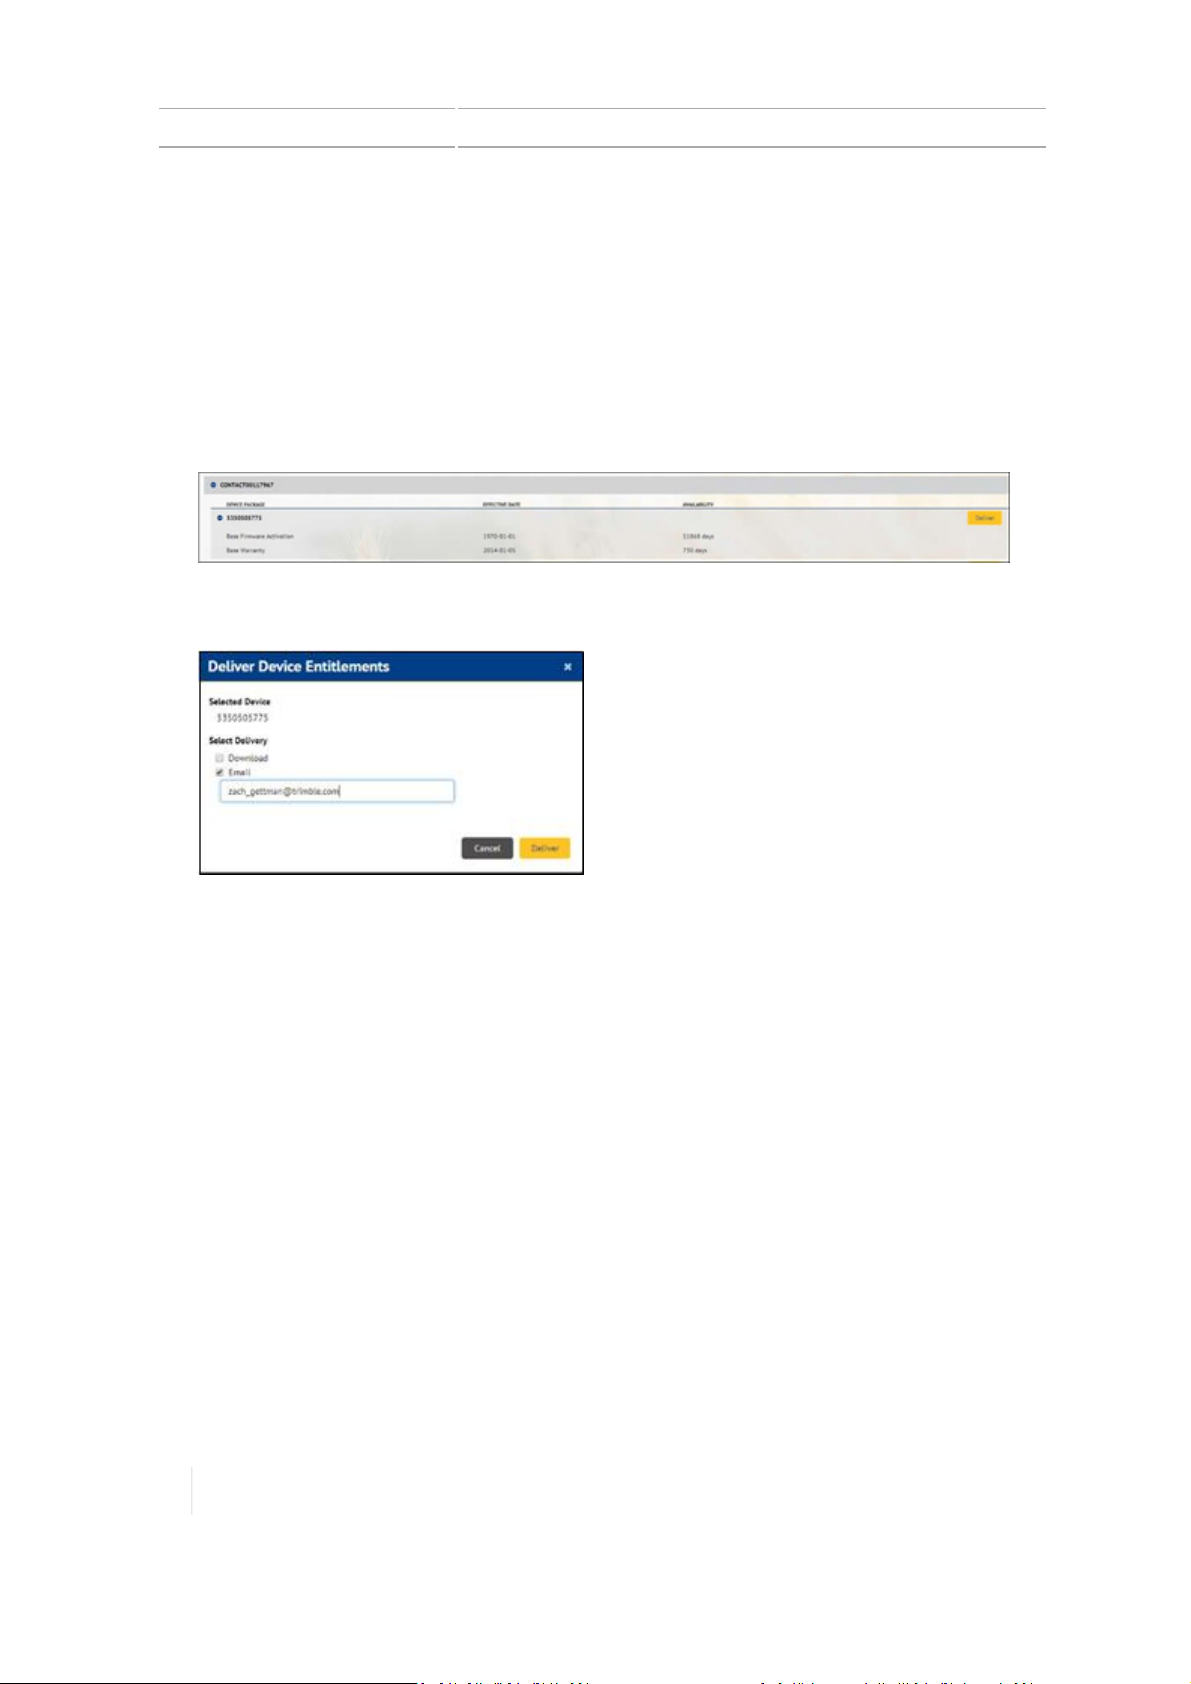
1 Introduction Purchase and activation process
Deliver services and licenses to the display in the reseller portal
1. If you are not already logged in, log in to the reseller portal.
2. At the Activations tab, find the reseller reference number or customer name (depending on
how the customer account was set up) and click it. This expands to show the display serial
numbers this customer has.
3.
Click the display serial number you want. This expands to show all services and licenses
assigned to this display.
4.
Click Deliver. A popup displays.
5. In the popup, choose to either deliver the services/licenses through:
ll Download to a computer. Then you can copy the file to a USB drive and transfer it to the
TMX-2050 display.
l
Email containing QR codes to the customer email you enter. The customer can then scan
the QRcodes into the TMX-2050 display.
36 TMX-2050 Display User Guide Version 1.075, Revision C
Page 37
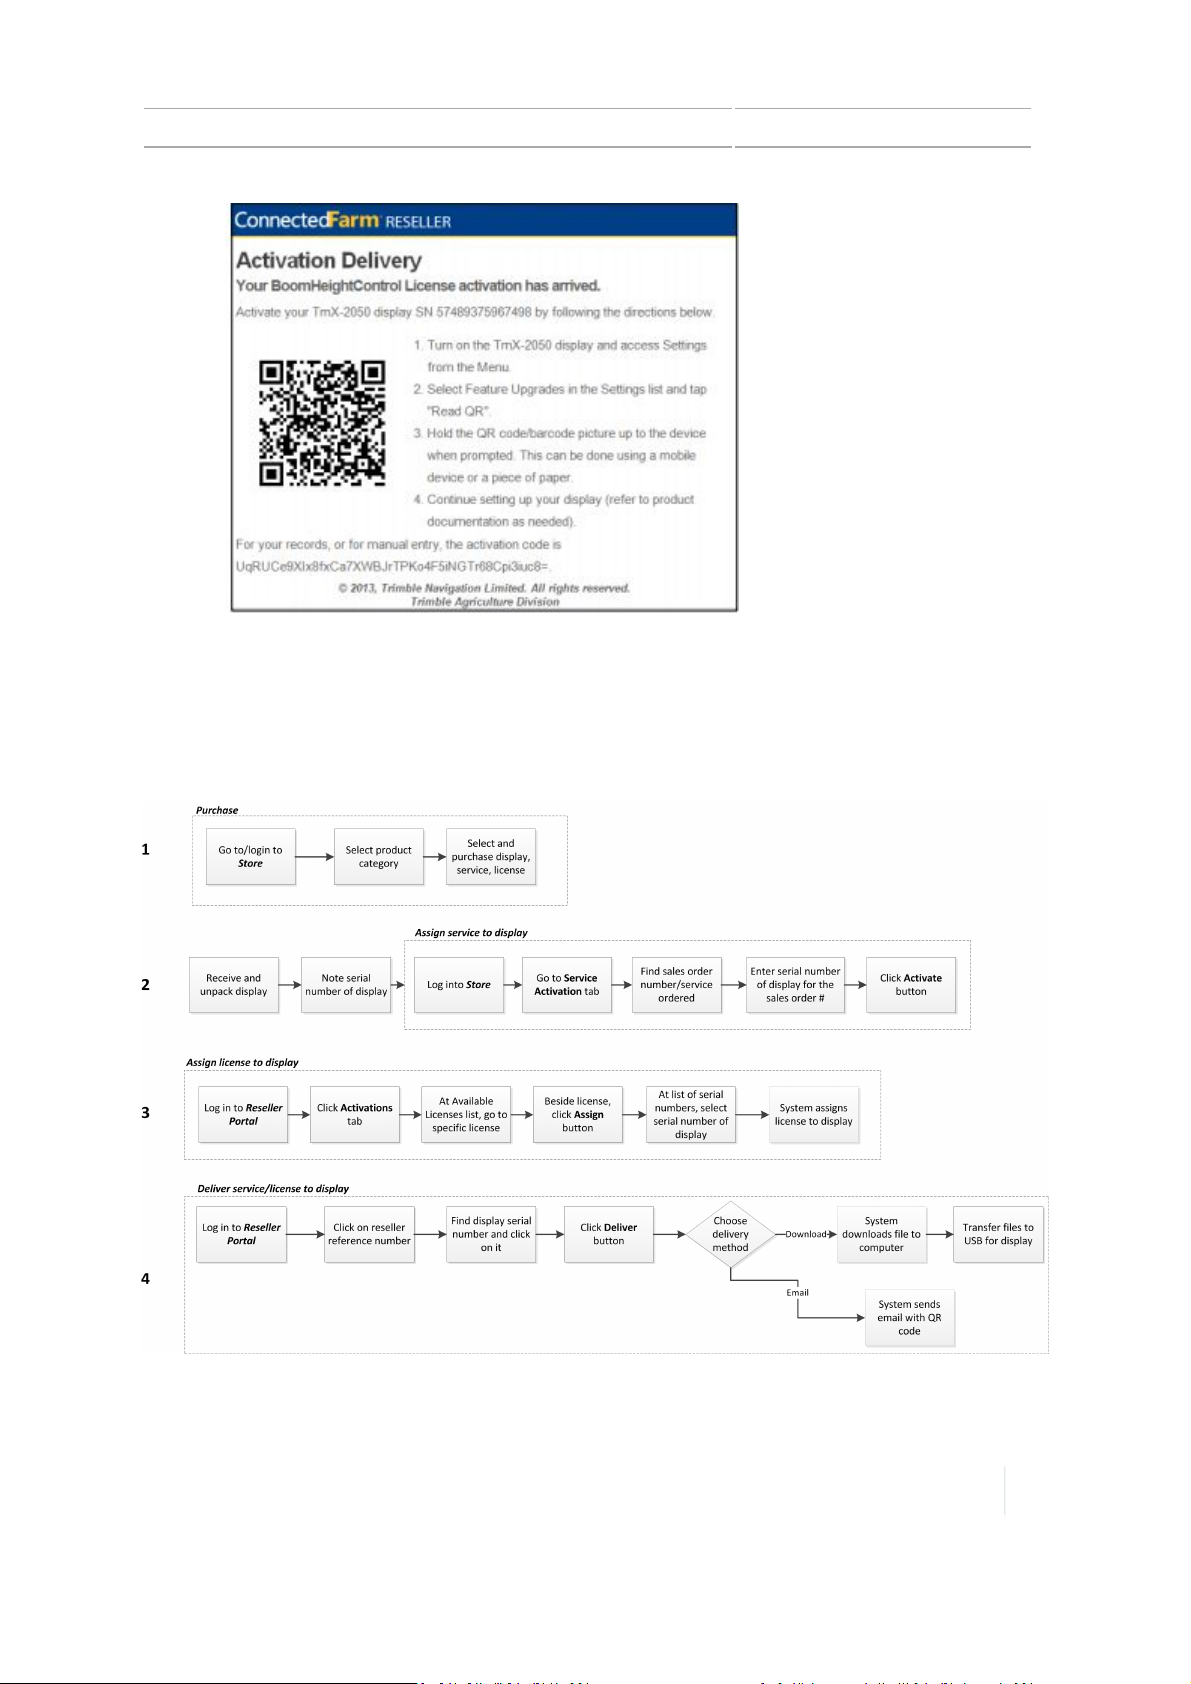
Purchase and activation process 1 Introduction
Note – Be sure to inform your customers that the email will send all QR codes - existing
ones and new ones - in the emails. They only need to scan QR codes for newly purchased
services/licenses.
Purchase / Activation Flow Diagram
Version 1.075, Revision C TMX-2050 Display User Guide 37
Page 38

1 Introduction Troubleshooting activation
Troubleshooting activation
I am logged into the store and cannot find the sales order number/service/license.
When an item is purchased from the store, it is linked to the login of the person who placed the
order. If another person in your company placed the order and you cannot see it, contact technical
support and ask them to associate the appropriate logins with your company. Then those
employees in your company can see all the orders placed, regardless of who placed the order.
I am logged into the reseller portal and cannot find the licenses and services
that I want to activate.
You will not be able to see licenses or services in the reseller portal if your current login:
l Was not the login used to purchase the license and/or service
l Is not linked to the login used to purchase the license and/or service
To have appropriate logins linked, contact technical support.
I ordered a new license/service, but Igot all my QRcodes again as well as
the QRcode for the new license/service.
When you receive an email with a QR code for a new license or service, the system sends all the
codes related to your display. You only need to scan the QR code for the license/service that has not
been activated yet.
38 TMX-2050 Display User Guide Version 1.075, Revision C
Page 39

Display basics
In this chapter:
C h a p t e r
2
Powering on or off 40
Getting help 41
Touch screen basics 41
Common controls 44
Main views 49
Display bar 51
GNSSnotification button 52
Main menu 53
Home screen 54
Run screen 56
Field Manager 61
Prescriptions Manager 66
Connected Farm Dashboard 66
Data transfer 67
USB socket 74
Screen shots 75
The TMX-2050 display is a touch screen
that responds to common touch screen
interactions. The Home and Run screens
as well as the Field Manager are covered
in this chapter.
Version 1.075, Revision C TMX-2050 Display User Guide 39
Page 40

2 Display basics Powering on or off
Powering on or off
Note – The display must be correctly installed before powering on. For more information, see
Installation overview, 100 and TMX-2050 Display Cabling Guide.
Automatic power on
If the display is connected to the ignition source, power on the vehicle. The TM-200 Module sends
power to the display when the vehicle powers on.
Manual power on
To turn on the display manually, hold the power button down briefly (about half a second). For a
photo of the rear viewshowing the power button, see TMX-2050 display, 95.
The display powers on, and after a short pause the Home screen displays.
Automatic power off
If the display is connected to the ignition source, when you switch the ignition off, a
shutdown/reboot dialog displays. If you do nothing the display shuts off in 60 seconds. If you
choose not to shutdown the display, it will remain powered on indefinitely.
CAUTION – If you leave the display powered on after shutting off the vehicle's ignition, the display power can
drain the battery.
Manual power off
To manually turn the power off, hold the power down button for one to two seconds.See the steps
below.
1. Turn off the display manually by holding the power button down for about two seconds.
2. Choose one of the following options:
ll Shutdown:Powers down the display
l Reboot:Restarts the display
l Cancel: Cancels the power off process
Note – Sometimes after you press the power button and tap Shutdown, the display does not
immediately turnoff. This is because the display is saving settings. The display will power off after
all settings are saved.
If these steps do not cause the power to go off, you can force a shut down of the display by holding
the power button for 5 seconds.
40 TMX-2050 Display User Guide Version 1.075, Revision C
Page 41
Getting help 2 Display basics
Getting help
You can access helpful information about each screen and about the entire TMX-2050 display.
To access... Tap... Explanation
Help about a
screen
Help from the
menu
Search
to launch the menu.
Search box
Tap the question mark button. The User
Guide displays at the appropriate section.
At the menu, tap .The User Guide
displays with navigation on the left-hand
side.
In the search box, you can enter:
l One or more words. The search results
will list information that contain that
one or more of the words or variations
of them, with the most relevant at the
top.
l An exact phrase with quotation marks
(for example, "add a field"). The search
results will list only the information that
contain the exact phrase inside the
quotation marks.
Help from the web
To obtain the User Guide from the web, go to http://www.trimble.com/Support/Support_AZ.aspx.
Touch screen basics
If you are unfamiliar with using a touch screen, this section contains the basics of using a touch
screen and how to clean it.
Interactive controls
Use your fingers to interact with buttons, maps, lists and selectors.
CAUTION – Do not press on the screen with a sharp item, such as a pencil. You may damage the surface of the
screen.
Version 1.075, Revision C TMX-2050 Display User Guide 41
Page 42
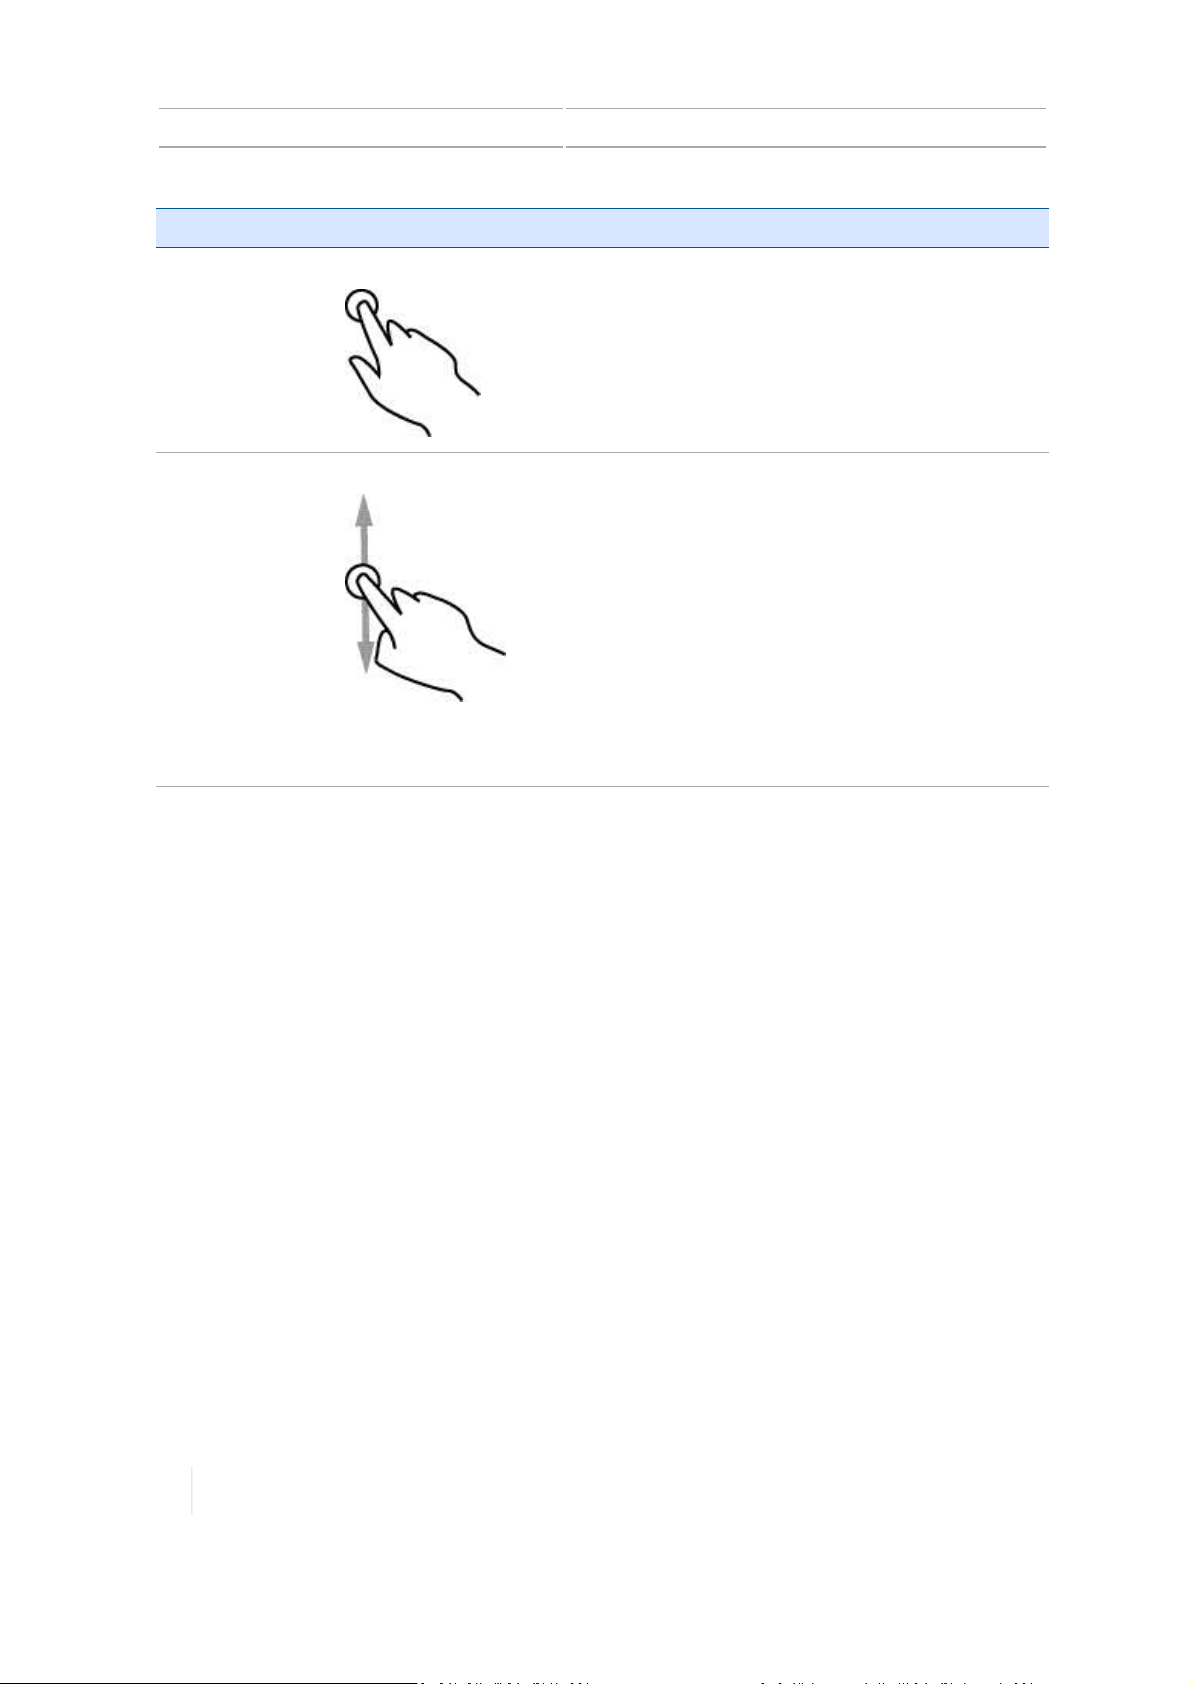
2 Display basics Touch screen basics
Item Action Explanation
Buttons and
selectors
Tapping
Tap
means to touch a point on the screen and
then remove your finger from the screen.
A tap is a single touch. You do not move your
finger while touching the screen. You tap
buttons, items in lists, points on a range, and
so on.
Lists Scrolling When a list has more items than fit on a screen
or in a box, you can move the list to see all items
by scrolling up, down, or side to side. To scroll:
1. Touch anywhere in the list and hold your
finger on the screen.
2. Move your finger in the direction that you
want to move the list - left, right, up or
down.
3. Remove your finger when you are satisfied
with the position of the list.
For examples of lists, see Lists, 44.
42 TMX-2050 Display User Guide Version 1.075, Revision C
Page 43
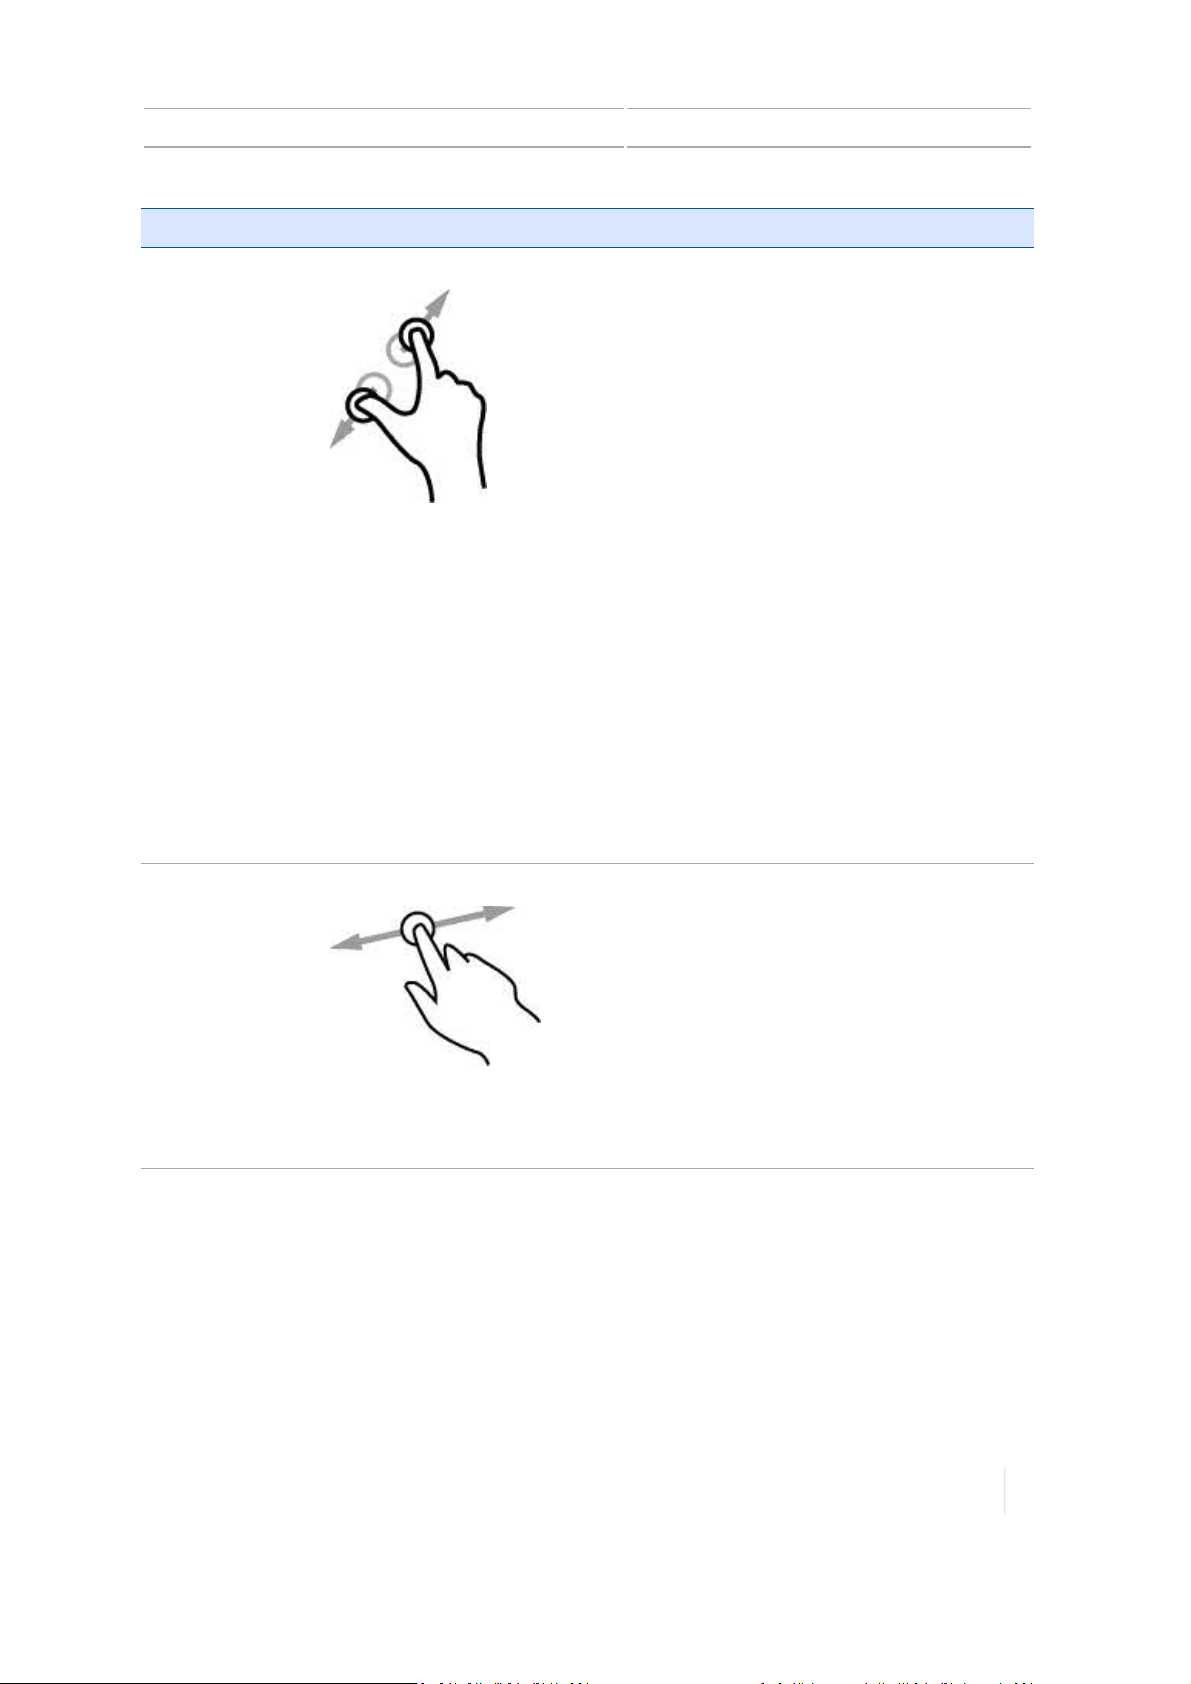
Touch screen basics 2 Display basics
Item Action Explanation
Home
and
Run
screens, Field
Manager
Zooming in and out You can enlarge the view to see more detail
(zoom in) or reduce the view to see less detail
but more area (zoom out).To zoom in:
1. Touch the screen where you want to see
more detail with your thumb and a finger
close together (or you can use two
fingertips).
2. Move your fingers apart while still touching
the screen.
3. Remove your fingers from the screen when
you are satisfied with the zoom level.
To zoom out:
1. Touch the screen where you want to reduce
the level of detail with your thumb and a
finger an inch or more apart (or you can use
two fingertips)
2. Move your fingers together while still
touching the screen.
3. Remove your fingers from the screen when
you are satisfied with the zoom level.
On the
screen
Home
Panning Panning in a map on the
map left or right.
Panning means you can shift the viewto show
information that is not in view on the screen.
1. Touch anywhere on the screen with your
finger and hold it on the screen.
2. Move your finger in the direction that you
want to move the map.
3. Remove your finger when you are satisfied
with the position of the map.
Run
screen moves the
Version 1.075, Revision C TMX-2050 Display User Guide 43
Page 44

2 Display basics Common controls
Cleaning the touch screen
CAUTION – Do not press on the screen with a sharp item, such as a pencil. You may damage the surface of the
screen.
Use the following supplies to clean the touch screen of the display:
l Ammonia-free glass cleaner
l Soft, lint-free cotton cloth
l 50% isopropyl alcohol
CAUTION – Do not apply glass cleaner directly to the touchscreen.
1. Apply a small amount of ammonia-free glass cleaner to the cloth.
2. Gently rub the touchscreen with the cloth.
3. To remove stains or smudges, use a cotton cloth dampened with 50% isopropyl alcohol.
Tip – Clean the touch screen while it is powered down. It is easier to see dirt and fingerprints when the touch
screen is dark.
Common controls
Common controls provide a way for you to:
l Complete settings and configuration with Setup panels, 46
l Enter information using an On-screen keyboard, 47 and On-screen number pad, 48
l Work with Lists, 44
l Turn an option on or off with On / Off buttons, 45
l Choose values within a range using Adjusters, 46
Lists
Lists vary depending on their function.
Menu lists
Menu lists contain a list of items that lead to additional information or areas.
44 TMX-2050 Display User Guide Version 1.075, Revision C
Page 45
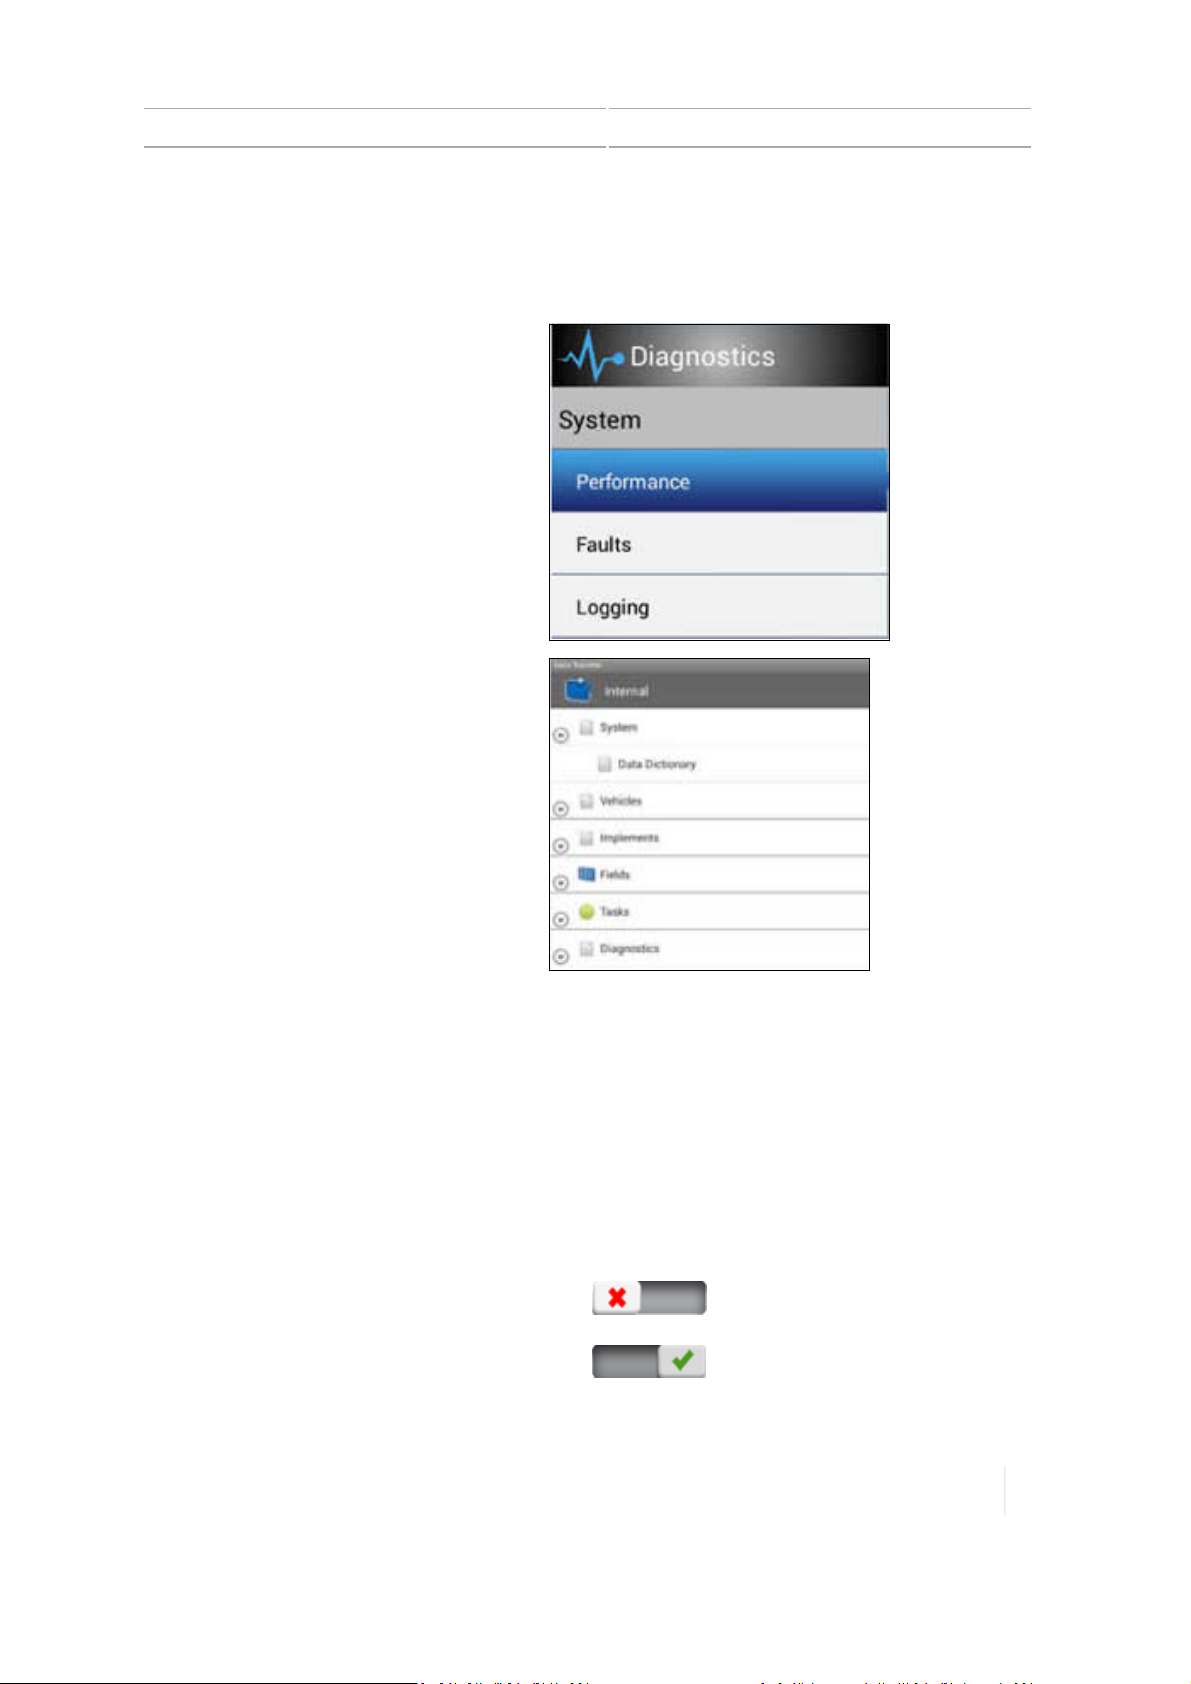
Common controls 2 Display basics
l Tap a list item to reveal additional information or choices to the right of the menu.
l Some lists have expand/collapse capabilities. Tap the up or down arrow to expand and collapse
sections.
Tap a list item to reveal additional
information or choices to the right of the
menu.
Some lists have expand/collapse
capabilities. Tap the up or down arrow to
expand and collapse sections.
Selection lists
Some lists contain items for you to select. If the list is longer than what is in your view, a scroll bar
displays to the right of list items. You can use this to scroll up and down the list. After you tap your
selection on the list, the list closes.
On / Off buttons
On/off buttons enable you to turn items on and off.
The red X indicates this item is turned off. Tap to
turn the item on.
The green check mark indicates this item is
turned on. Tap to turn the item off.
Version 1.075, Revision C TMX-2050 Display User Guide 45
Page 46
2 Display basics Common controls
Adjusters
With adjusters, you can select a value from an available range.
Example: Slider bars
The pointer (rectangular button on the slider bar) indicates the value.
To use the slider bar, you can:
l Change the value by increments - Tap on the plus/minus signs at each end of the slider bar, in
the direction that you want to move the pointer.
l Move to a value:
a. Touch the pointer on the slider bar.
b. Move the pointer toward the minus or plus sign.
c. Remove your finger when you are satisfied with the position of the pointer.
l Enter an exact number - If the screen also has a button showing the value, tap it. Then use the
on-screen number pad to enter the number.
Example: Increase/decrease adjusters
Adjusters with plus and minus buttons enable you to increase or decrease the number by tapping
the plus/minus buttons. You can also tap on the number and enter the number using the on-screen
keyboard/number pad.
Setup panels
Panels display so that you can setup or configure items. Panels include a set of controls specifically
for that setup or configuration.
46 TMX-2050 Display User Guide Version 1.075, Revision C
Page 47
Common controls 2 Display basics
Button Explanation
Next
Back
Sections of setup Tap various buttons at the top of the panel to go to section out of sequence
Tap to go to the next section. (Displayed within the setup panel.)
Tap to go to the previous section. (Displayed within the settings panel.)
after initial setup.
Within the setup panel at the Summary section, tap to save the settings you
currently entered and end the setup process.
Tap Home on the display bar at the bottom of the screen to exit the setup
process without saving any currently entered settings. (See Display bar, 51.)
On-screen keyboard
The on-screen keyboard displays when you tap a field for entering information. You can enter text
or numbers.
To: Tap...
Enter number(s) The number on the on-screen
keyboard
Enter letter(s)
Delete letters or numbers
Remove all the letters or numbers you have entered
Version 1.075, Revision C TMX-2050 Display User Guide 47
The letter on the on-screen keyboard
and hold down
Page 48
2 Display basics Common controls
To: Tap...
Cause the keyboard to no longer display
On-screen number pad
The on-screen number pad displays when you tap a field for entering a number.
To: Tap...
Enter a number The number
Delete number(s)
Remove all the numbers you have entered
Cause the keyboard to no longer display
and hold down
48 TMX-2050 Display User Guide Version 1.075, Revision C
Page 49
Main views 2 Display basics
Main views
The TMX-2050 display has different screens for your work.
Home screen
The Home screen, 54 is primarily for setting up, including:
l Adding fields
l
Creating, setting up and calibrating vehicles, implements and materials
Run screen
At the Run screen, 56, you:
l Perform field activities
l Create guidance mapping elements (boundaries, guidance patterns, and landmarks)
l Make adjustments to steering guidance, and rate and section control
l
Log coverage
Field Manager
At the Field Manager™ (Field Manager, 61), you:
l Activate the guidance mapping elements you want to follow
l Edit and refine guidance mapping elements
Version 1.075, Revision C TMX-2050 Display User Guide 49
Page 50
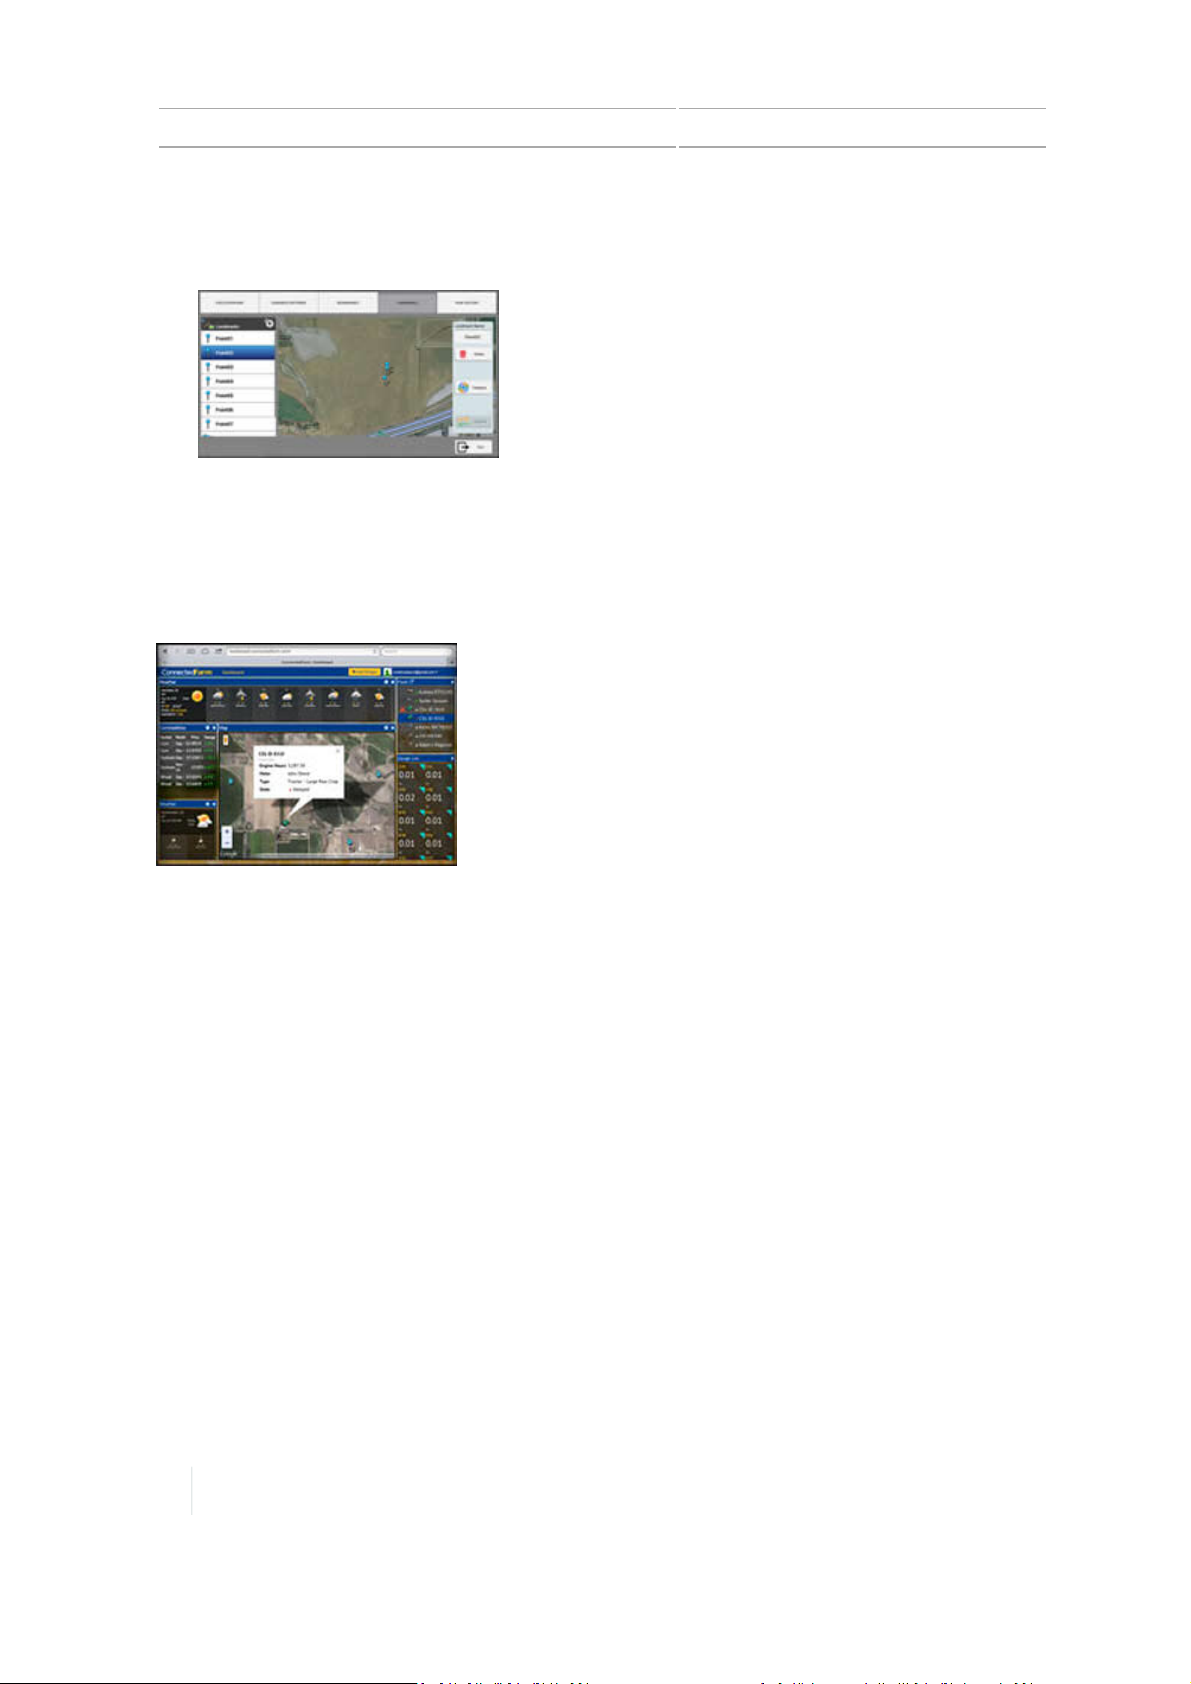
2 Display basics Main views
l Associate fields to clients and farms
l
Continue a task or begin a new task
Connected Farm Dashboard
The Connected Farm Dashboard, 66 allows you access your fields and data with an Internet
connection (including wireless). (Requires subscriptions and DCM-300 modem.)
50 TMX-2050 Display User Guide Version 1.075, Revision C
Page 51
Display bar 2 Display basics
Display bar
CAUTION – Do not press on the screen with a sharp item, such as a pencil. You may damage the surface of the
screen.
The display bar is always displayed at the bottom of the screen on the TMX-2050 display.
Emergency button
In the middle of the bar, the Emergency button is displayed at all times. To cancel all functions
controlled by the display, tap .
Note – Tapping this button does not turn the vehicle off. It only cancels display-controlled
functions such as automatic steering systems.
Left-side navigation
The left side of the bar contains navigation buttons.
Navigation Button Tap to...
Return to the previous screen.
Go to the
View your most recent views and go to the one of your choice.
Home
screen.
Right-side icons and notification list
The right side of the bar contains icons to indicate status, display the time of day, and features being
used.
Version 1.075, Revision C TMX-2050 Display User Guide 51
Page 52
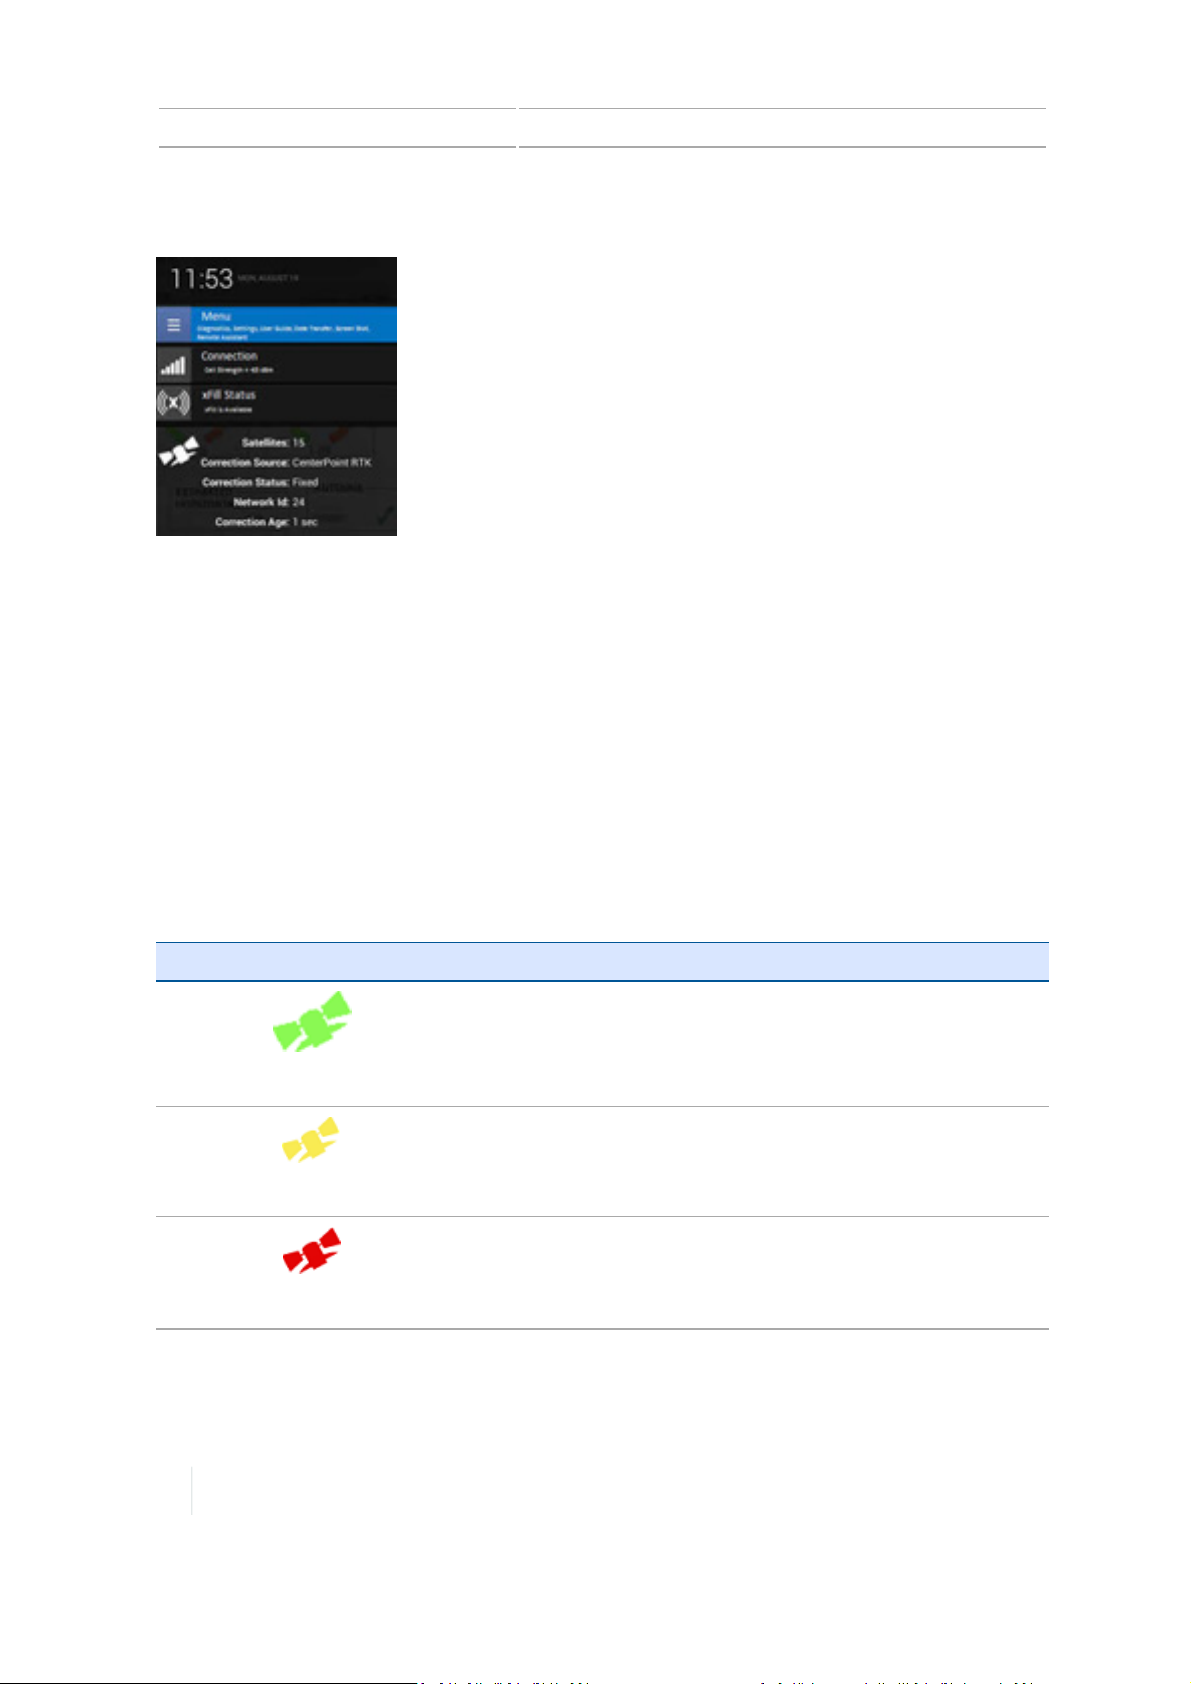
2 Display basics GNSSnotification button
Tap on the right side of the bar to access a list that slides up containing notifications. To close this
list, tap anywhere on the screen other than the list.
Tap specific buttons in the notification list to immediately access:
l The main menu
l Details about the status of GNSS, xFill technology, satellites and cellular connection
l Other status items
Also see GNSSnotification button, 52.
GNSSnotification button
A GNSS notification button displays on the display bar to indicate the status of your GNSS
connection. When you tap the button, the system takes you to the Diagnostics screen for any
troubleshooting you want to do.
Notification Button Indicates...
GNSSconnection is normal.
Green
GNSSconnection is converging.
Yellow
No GNSS connection is available.
Red
52 TMX-2050 Display User Guide Version 1.075, Revision C
Page 53
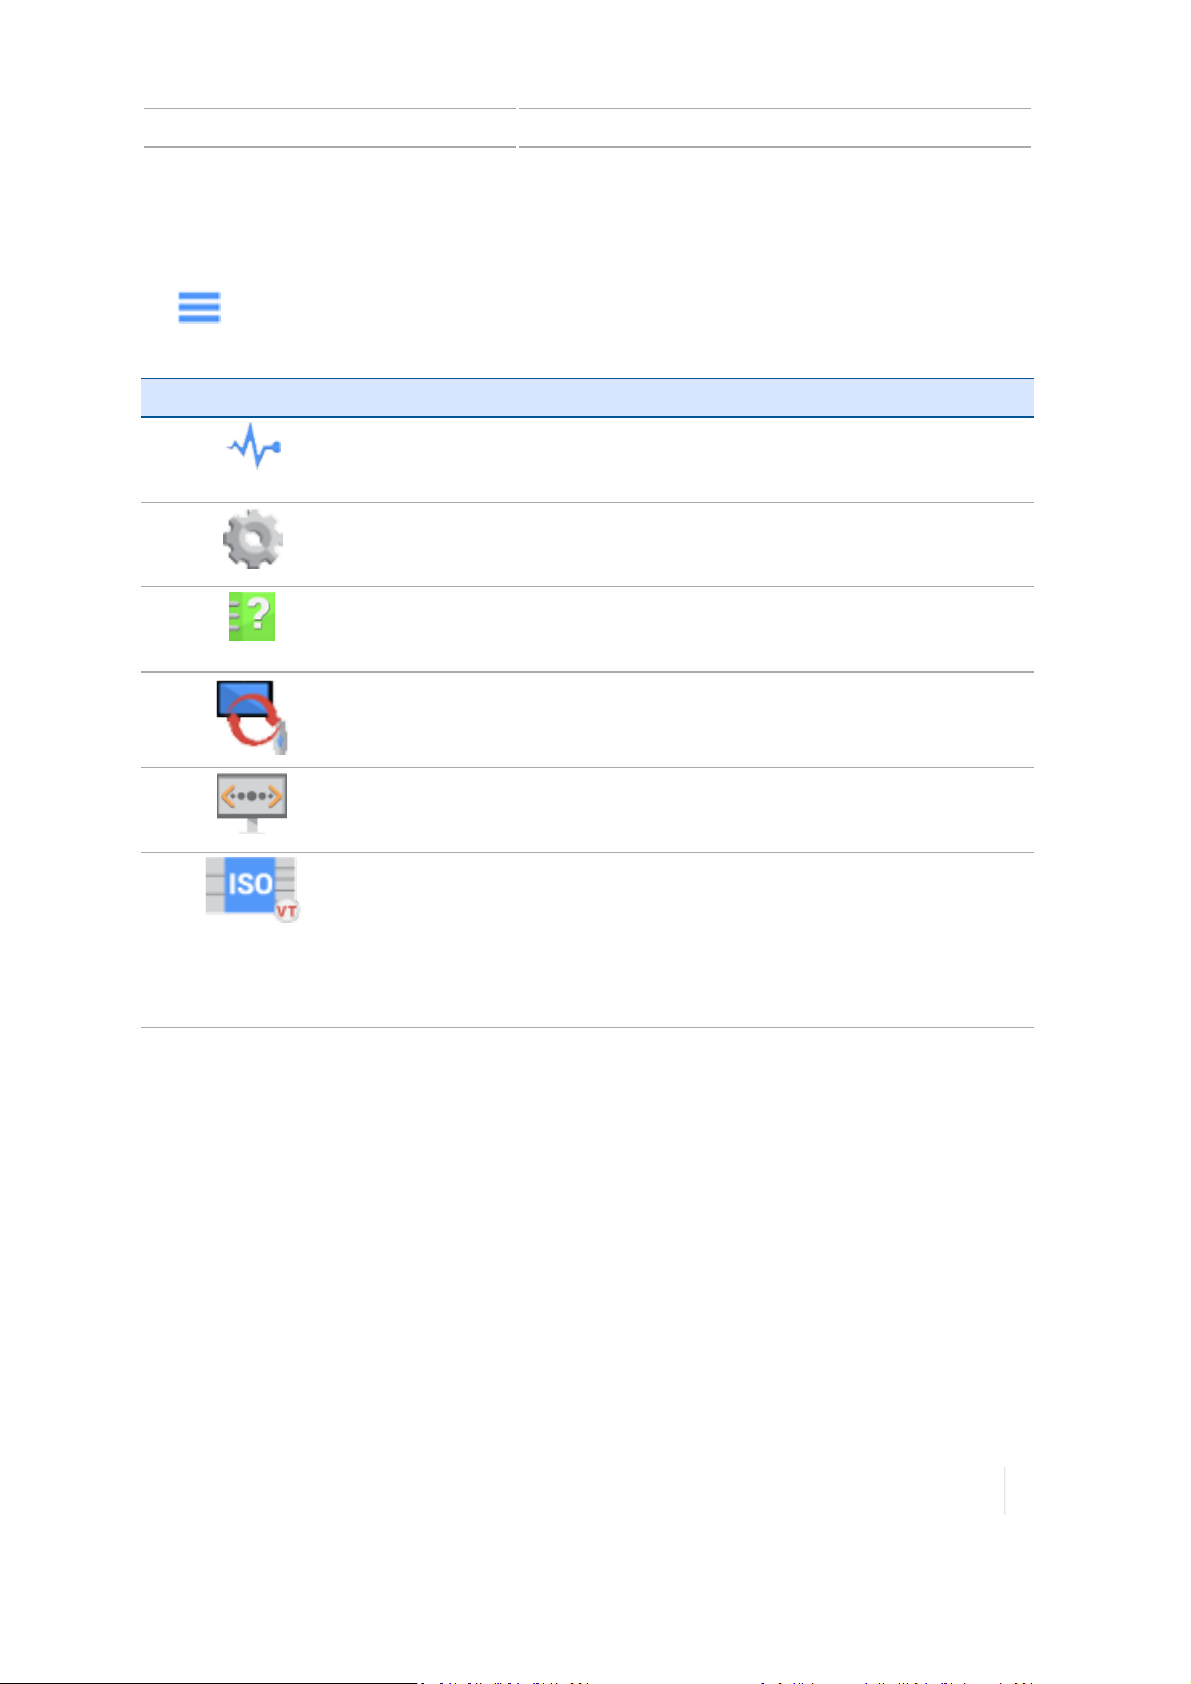
Main menu 2 Display basics
Main menu
Tap on the Home and Run screens and on the notification list to access the main menu. A
panel of buttons displays that you can tap to access the following areas.
Button Tap to...
Display the Diagnostics screen.
See Diagnostics, 294.
Open the display settings screen.
See System information, 92.
Display the User Guide.
See Getting help, 41.
Display the Data Transfer panel.
See Data transfer, 67.
Open the Remote Assistant.
See Remote Assistant, 325.
Open the Virtual Terminal to set up ISO-certified equipment for Task
Controller.
This button does not display on the main menu unless you have turned
on Virtual Terminal in Settings (see ISOBUS settings, 87).
See Equipment setup, 195.
Version 1.075, Revision C TMX-2050 Display User Guide 53
Page 54
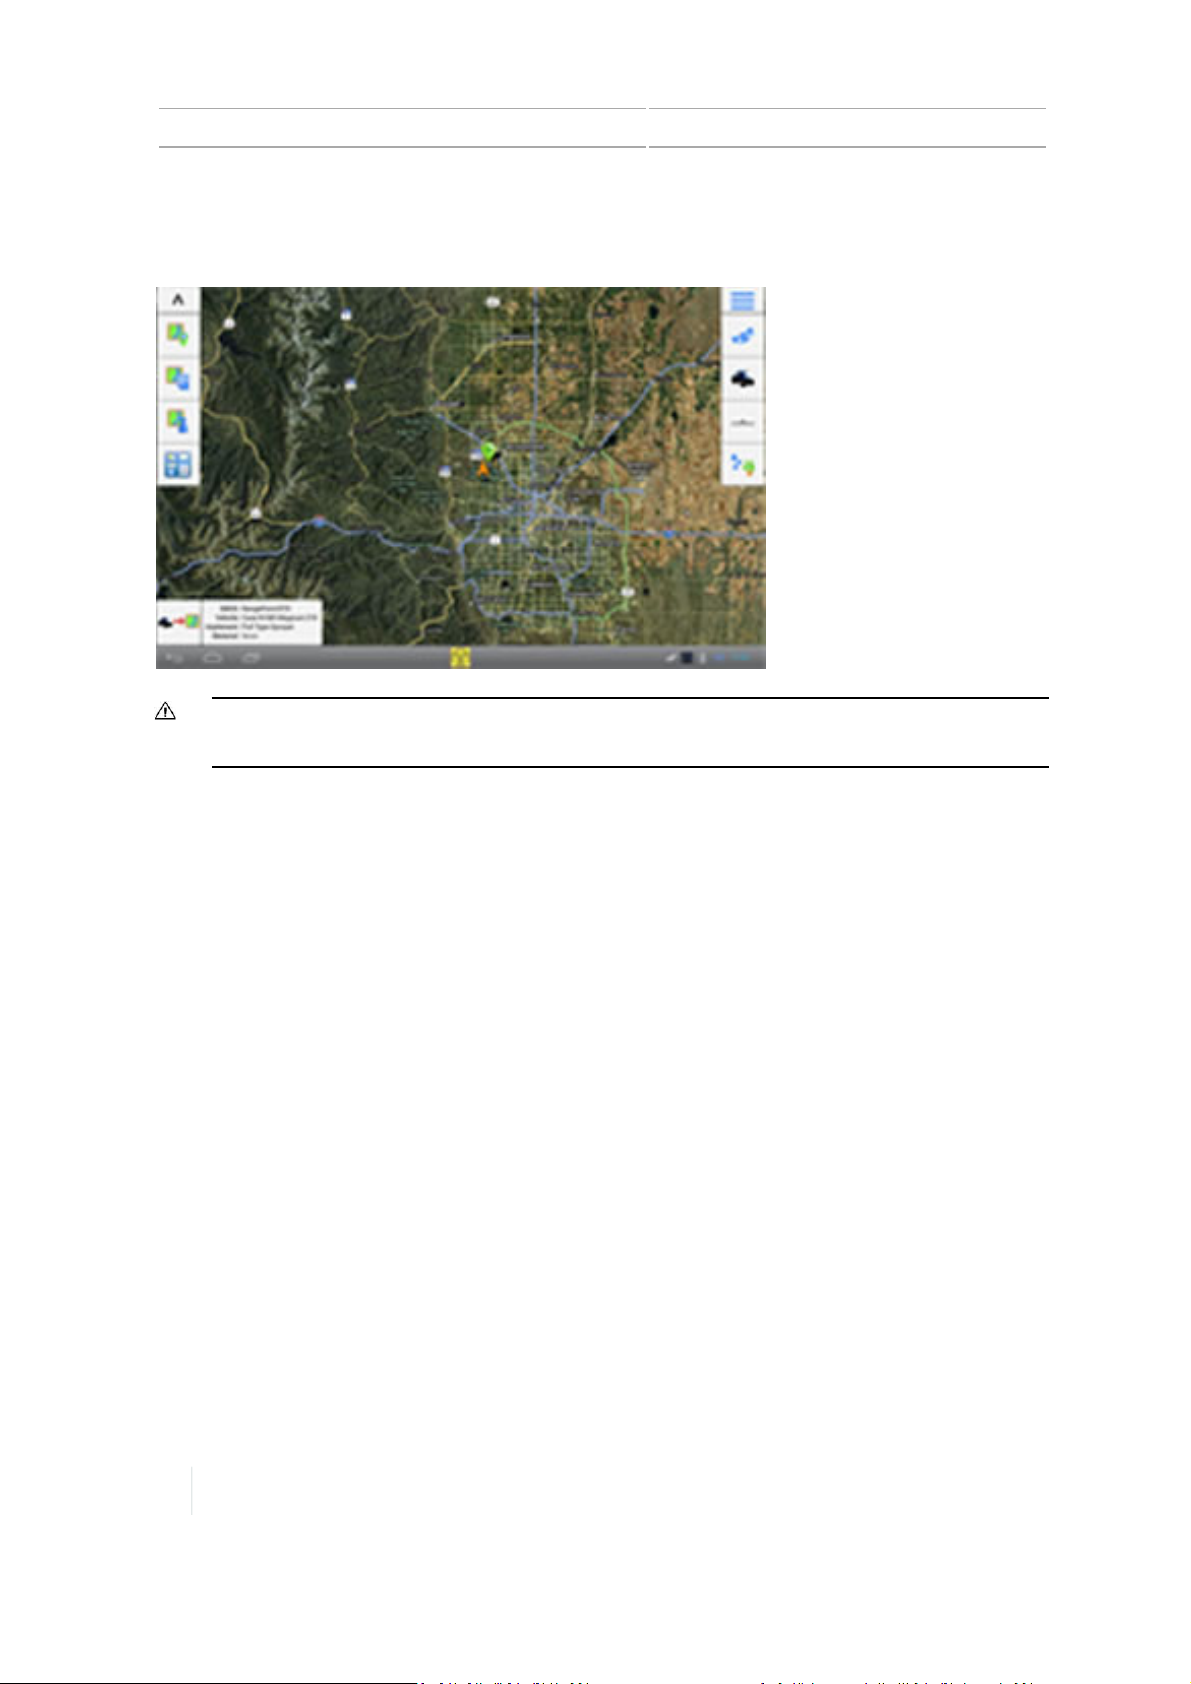
2 Display basics Home screen
Home screen
CAUTION – Do not press on the screen with a sharp item, such as a pencil. You may damage the surface of the
screen.
When you turn on the TMX-2050 display, the Home screen displays, showing a background of one
of the following:
l With a functioning DCM-300 modem and a GNSS/GPS fix:A satellite image of the area.
l Without a functioning DCM-300 modem: A blank screen.
At the Home screen, you can complete tasks for setup and for managing fields, including:
l Set up and select vehicles, implements and materials
l Set up GNSS
l View the Connected Farm dashboard
l Create fields
l Enter the Field Manager to edit and refine fields and guidance boundaries and patterns
l Enter the Run screen to perform field activities
Buttons on the Home screen include:
l Field management buttons - left side, 54 on the left side of the screen
l Setup buttons - right side, 55 on the right side of the screen
Field management buttons - left side
Buttons on the left side of the Home screen are for field management.
54 TMX-2050 Display User Guide Version 1.075, Revision C
Page 55
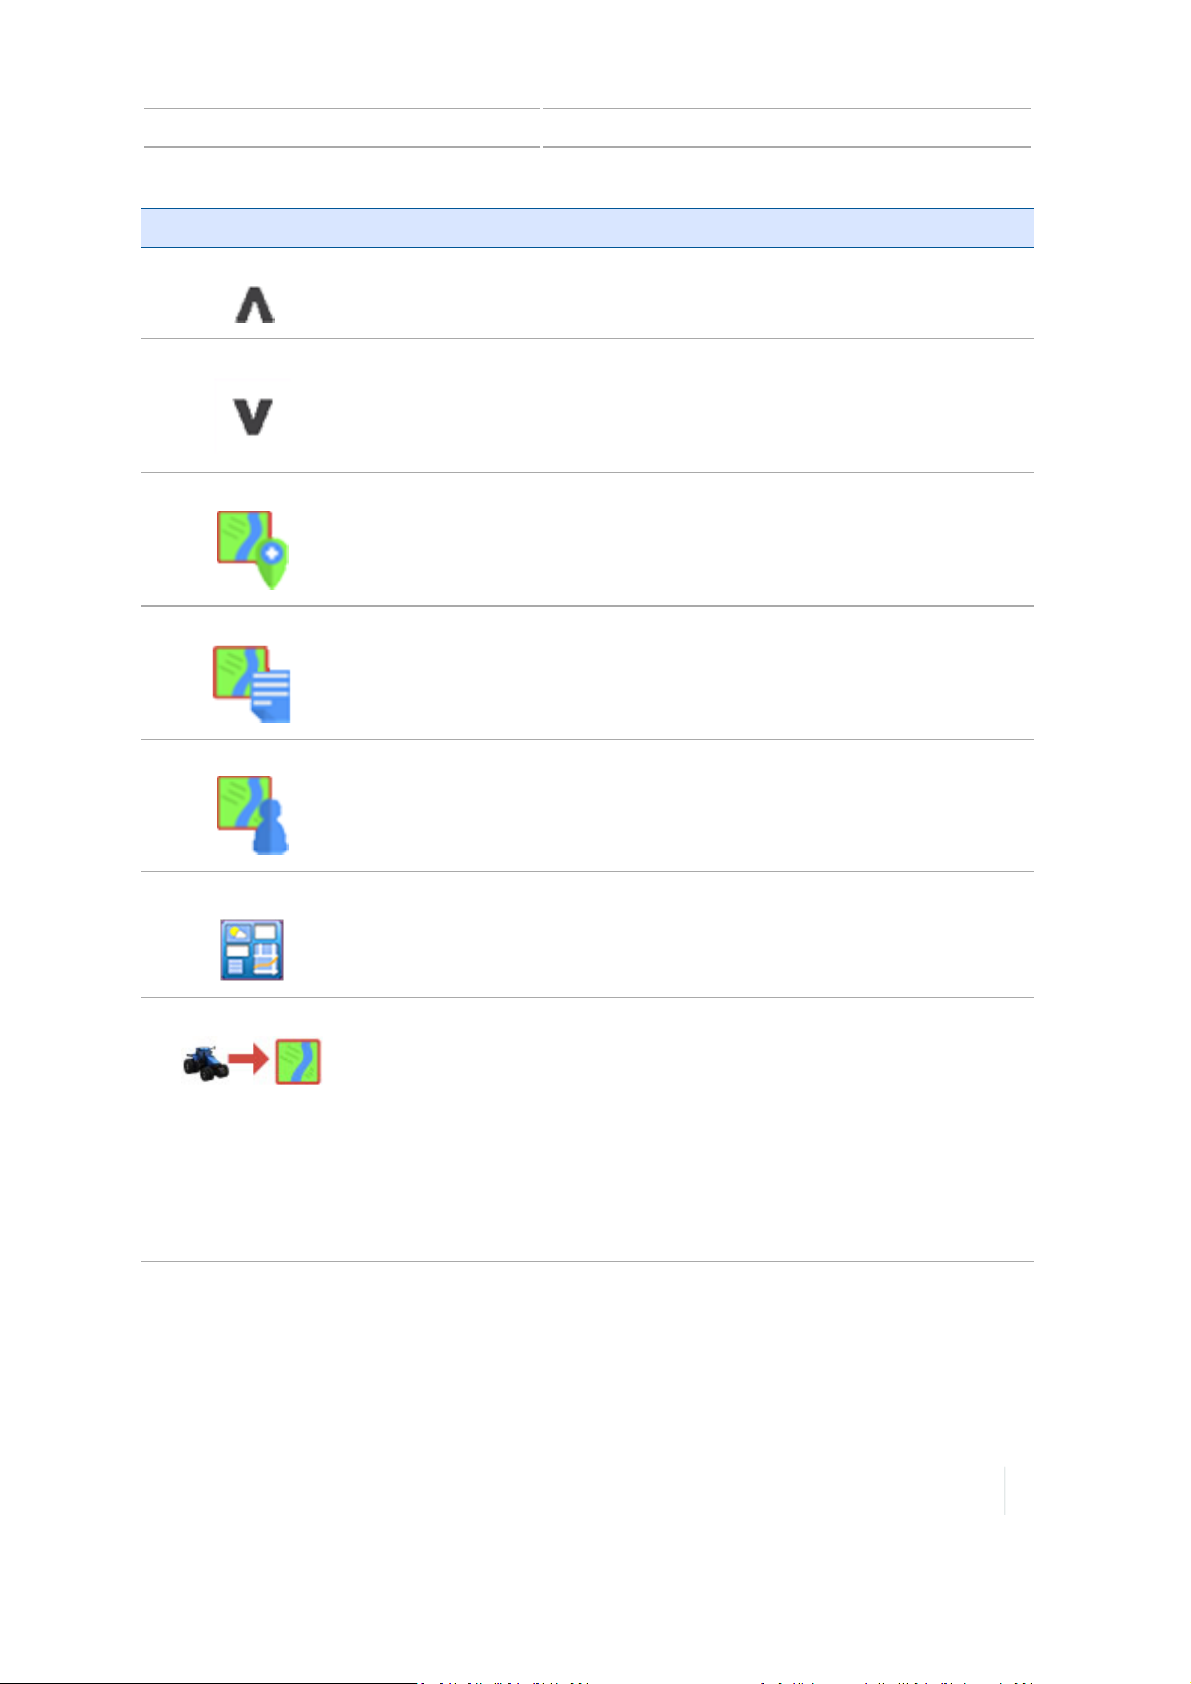
Home screen 2 Display basics
Button Tap to...
Hide
Show
Add field
List fields
Field Manager
Hide field operation buttons on the left side of the screen.
Show field operation buttons on the left side of the screen
Add a new field.
See Add a field, 181.
Show a list of existing fields. Tap the name of the field to select it. Tap
again to hide the list of fields.
See Select a field, 182.
Open Field Manager for the selected field.
See Field Manager, 61.
Connected Farm
Open the Connected Farm™ dashboard. (Requires a connected DCM300 modem.)
See Connected Farm Dashboard, 66.
Enter Field
Begin field activities by entering the
Run
screen. (You must select a
vehicle, implement, and field first.)
The Run screen displays, where you can perform field activities,
including:
l Engage guidance
l Log coverage for current operations
l Create boundaries, guidance patterns, landmarks, and so on
See Run screen, 56.
Setup buttons - right side
Buttons on the right side of the Home screen are primarily for setup.
Version 1.075, Revision C TMX-2050 Display User Guide 55
Page 56
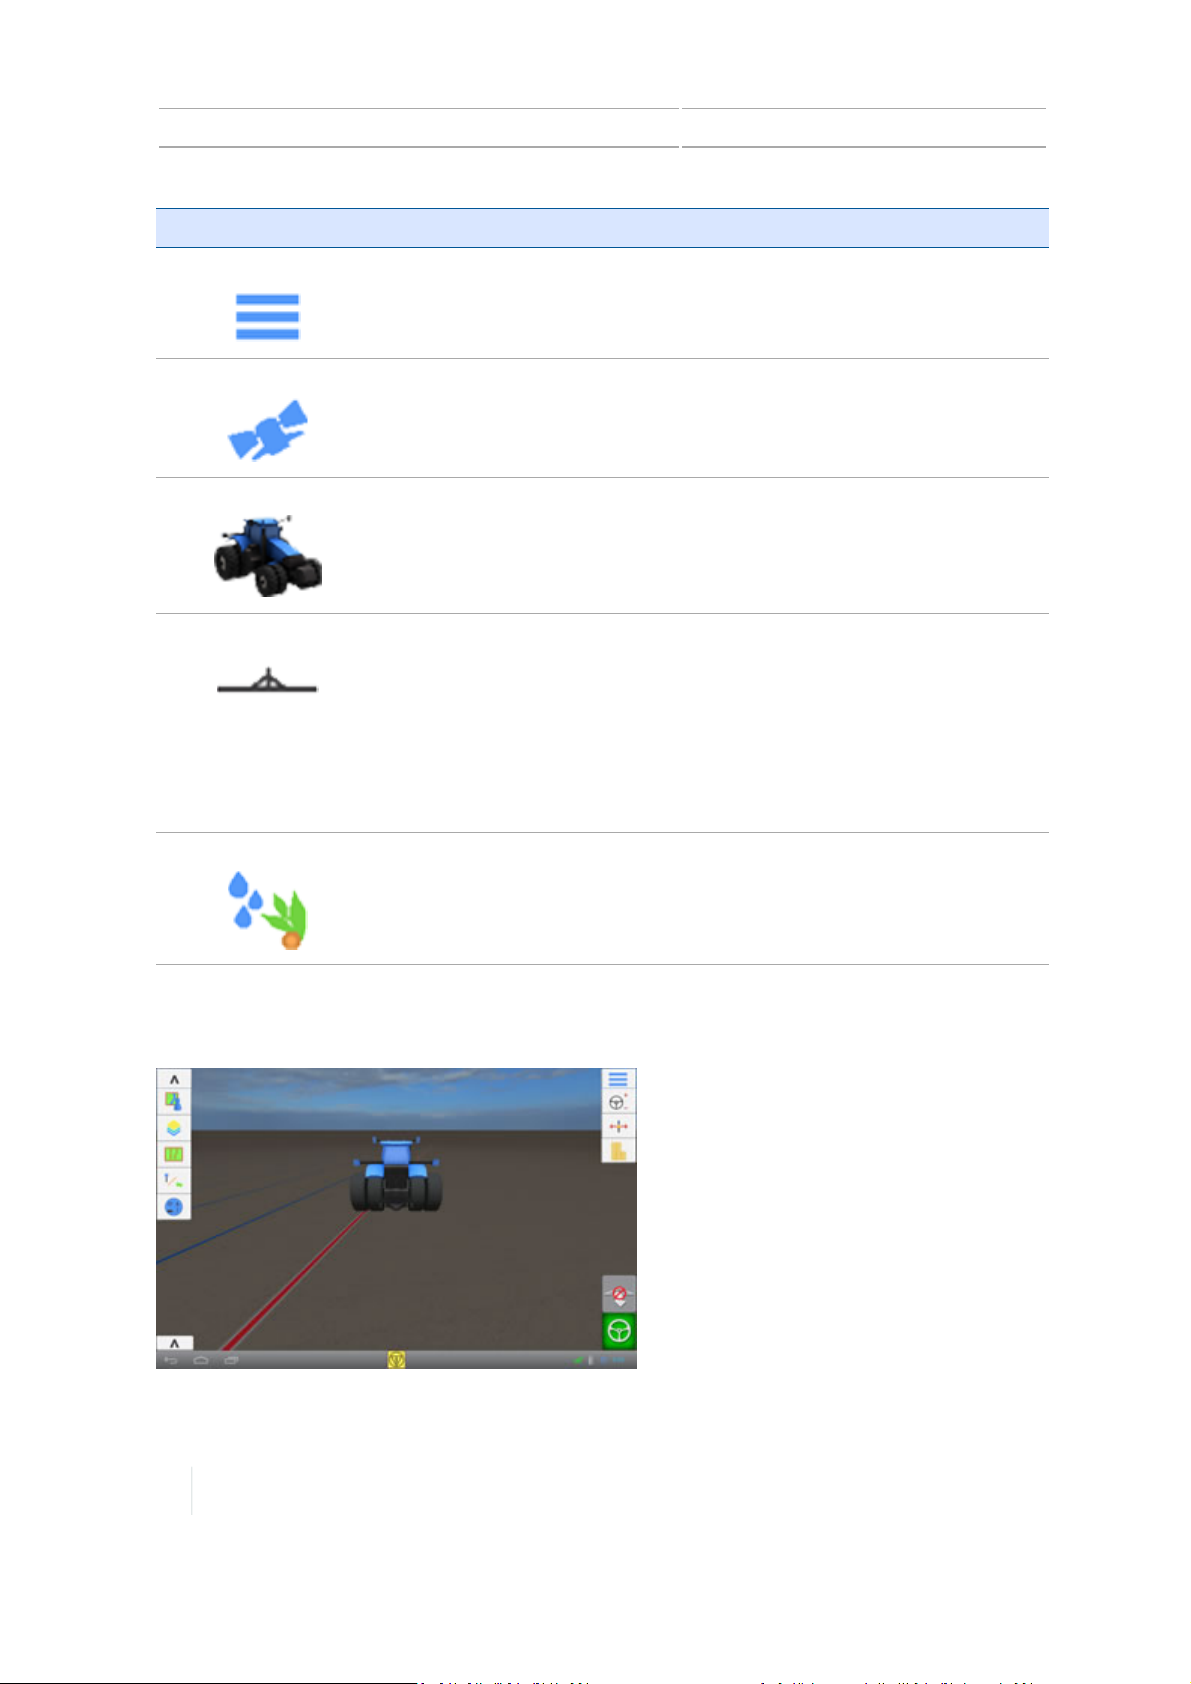
2 Display basics Run screen
Button Tap to...
Menu
GNSS
Vehicle
Implement
Access the main menu.
See Main menu, 53.
Set up GNSS.
See GNSS receiver settings, 116.
Add, edit or select a vehicle, as well as set up and calibrate an assisted
guidance system such as the Autopilot, EZ-Pilot, or EZ-Steer system.
See Add a vehicle, 140.
Add, edit or select an implement.
Set up and calibrate features for implements such as:
l The Field-IQ system Rate and Section Control
l The Field-IQ systemBoom Height Control
l Implement lift switches and sensors
See Implement setup, 188.
Material
Run screen
Add, edit, and select materials.
See Managing materials, 226.
56 TMX-2050 Display User Guide Version 1.075, Revision C
Page 57

Run screen 2 Display basics
CAUTION – Do not press on the screen with a sharp item, such as a pencil. You may damage the surface of the
screen.
The Run screen enables you to perform field operations such as:
l Creating guidance boundaries and patterns
l Accessing Field Manager to edit and refine guidance boundaries and patterns
l Using auto guidance (with Autopilot, EZ-Pilot or EZ-Steer)
l Controlling sections automatically or manually (with Field-IQ)
l Controlling rate application for liquids (with Field-IQ)
l Controlling boom height automatically (with Field-IQ)
l Planting and nutrient pest management (in a future release)
l Harvesting (in a future release)
l Monitoring seeding (in a future release)
l Row guidance and implement control (in a future release)
l Water management (in a future release)
Before you can enter the Run screen to perform field activities, you must:
l Select a vehicle (see Select a vehicle, 145)
l Select an implement (see Select an implement, 189)
l Select a field (see Select a field, 182)
l Have a GNSSconnection(see GNSS receiver settings, 116)
For more information on selecting a vehicle, field and implement, see Preparing for operation, 234.
Buttons on the Run screen include:
l Field operation buttons - left side, 57 on the left side of the screen
l Feature operation buttons - right side, 59 on the right side of the screen
Field operation buttons - left side
Buttons for field operation enable you to create guidance and landmark elements, viewmap layers,
show or hide status widgets and access Field Manager.
Version 1.075, Revision C TMX-2050 Display User Guide 57
Page 58
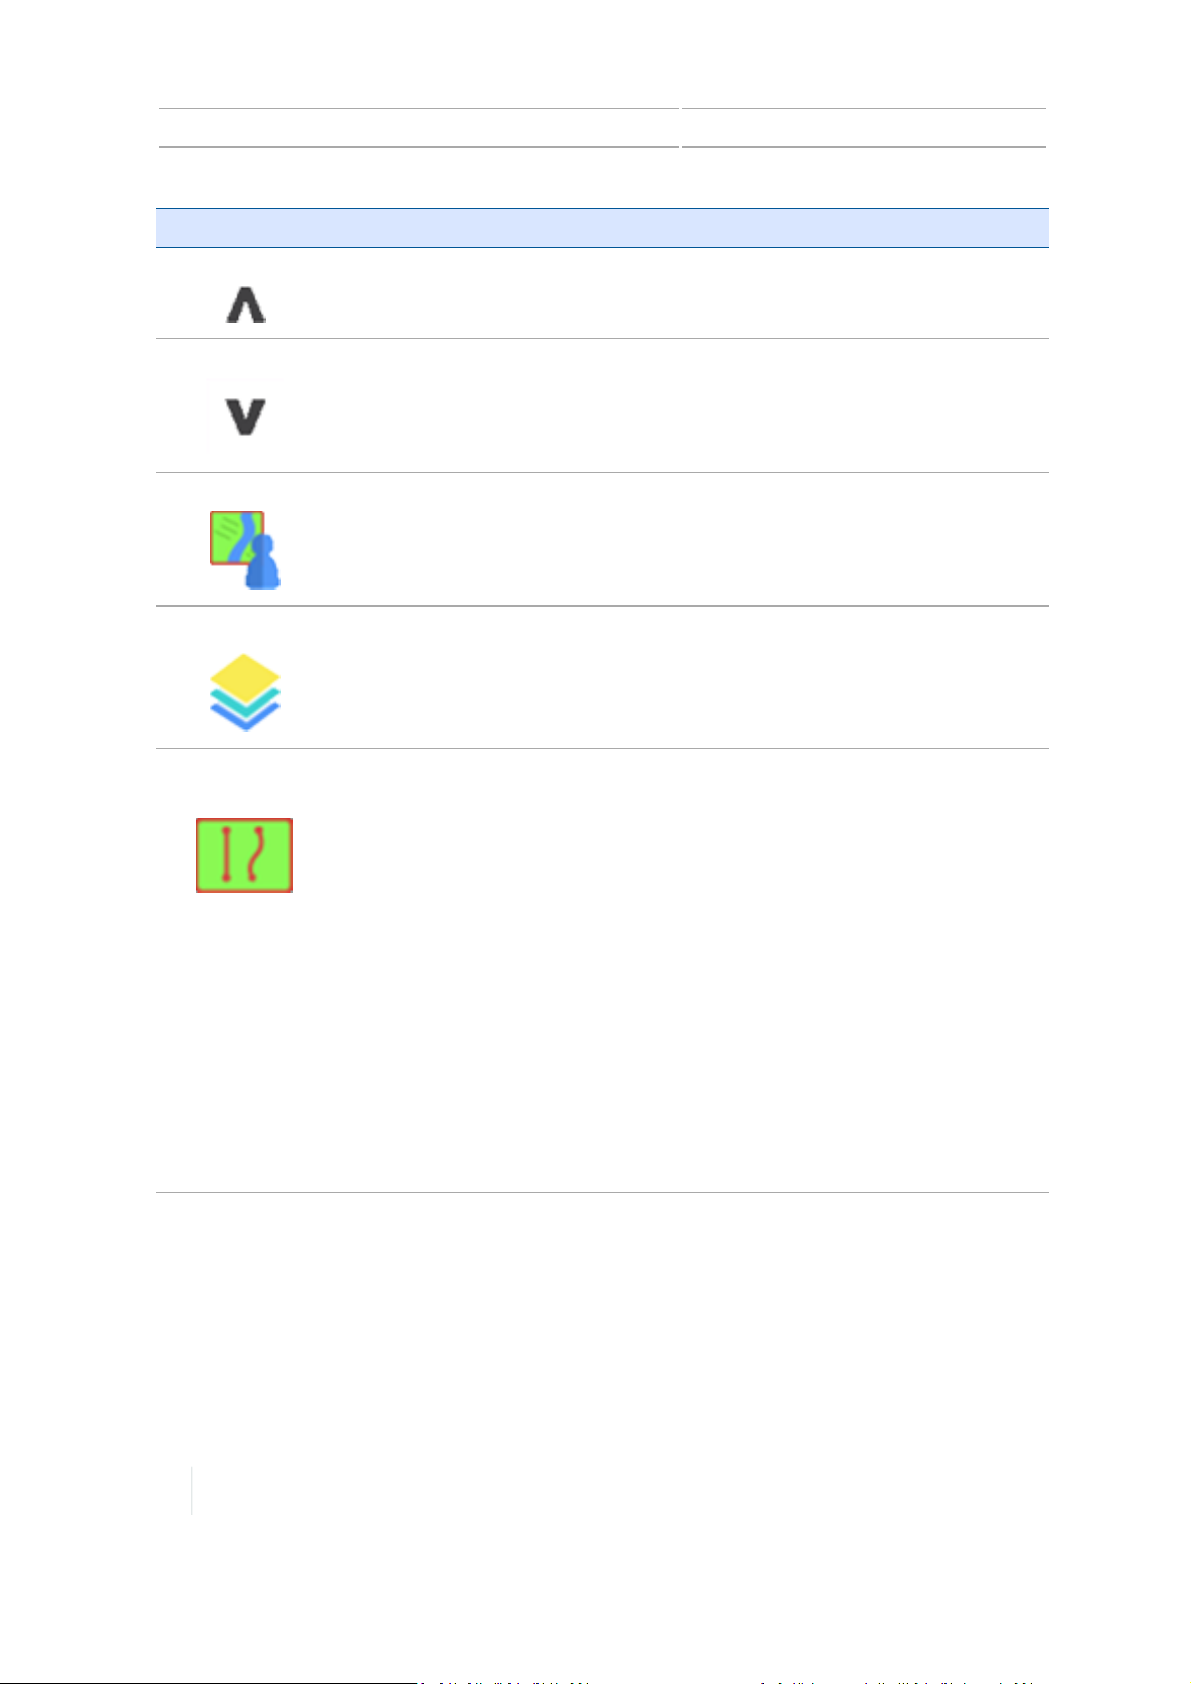
2 Display basics Run screen
Button Tap to...
Hide
Show
Field Manager
Layers
Guidance Lines
and Patterns
Hide field operation buttons on the left side of the screen.
Show field operation buttons on the left side of the screen.
Open Field Manager for the selected field.
See Field Manager, 61.
View various map layers. Layers represent activities that have occurred. For
example, a layer can show the coverage completed so far or the speed
traveled over an area.
Layers, 267
See
.
Open the guidance buttons to create:
l
Boundaries
See Boundary creation (Run screen), 248.
l Guidance lines. See:
l
l A+ guidance line creation (Run screen), 252
l AB guidance line creation (Run screen), 251
l Curved line creation (Run screen), 252
l
Pivot patterns
See Pivot pattern creation (Run screen), 258.
l
Headlands
See Headland and infill pattern creation (Run screen), 253.
Also see Pattern activation/deactivation (Field Manager), 259.
58 TMX-2050 Display User Guide Version 1.075, Revision C
Page 59
Run screen 2 Display basics
Button Tap to...
Landmarks
Prescriptions
Widgets
View options to create:
l
Line
See Landmark line creation (Run screen), 264.
l
Areas
See Landmark area creation (Run screen), 265.
l
Points
See Landmark point creation (Run screen), 264.
Open the Prescriptions Manager.
See:
l Prescriptions Manager, 66
l Prescriptions, 223
l Assign a prescription, 280
Open the widget menu to add individual widgets, add all widgets or remove
all widgets.
See On-screen widgets, 286.
Feature operation buttons - right side
Using feature operation buttons, you can make adjustments to various features while performing
field activities. With the exception of the Menu button, these buttons are specific to applications
and depend on which features you are using.
Button Tap to...
Menu
Adjust Steering
Access the main menu.
See Main menu, 53.
View options:
l Adjust vehicle aggressiveness
l Enable or disable autosteering
See Steering and guidance settings, 85.
Version 1.075, Revision C TMX-2050 Display User Guide 59
Page 60
2 Display basics Run screen
Button Tap to...
Adjust Guidance
Adjust Rate
Control
Adjust Boom
Height
Logging
View options to adjust:
l Nudge
l Re-mark
l Implement Draft Correction
See Guidance pattern adjustment (Run screen), 260.
View options to adjust:
l Actual and Target Rate
l Status of Rate Channel
l Sensor Status
See Rate control adjustments, 274.
View options to adjust the boom height:
l Target Height
l System Aggressiveness
l Ground or Canopy
l Sensors
See Boom height adjustments, 278.
Begin logging your field activity, such as coverage.
and Mapping settings, 83
See
.
Engage Auto
Engage your auto guidance system.
Guidance
See Vehicle operation, 242.
Engage Boom
Engage your boom height system.
Height
See Boom height control operation, 276.
60 TMX-2050 Display User Guide Version 1.075, Revision C
Page 61
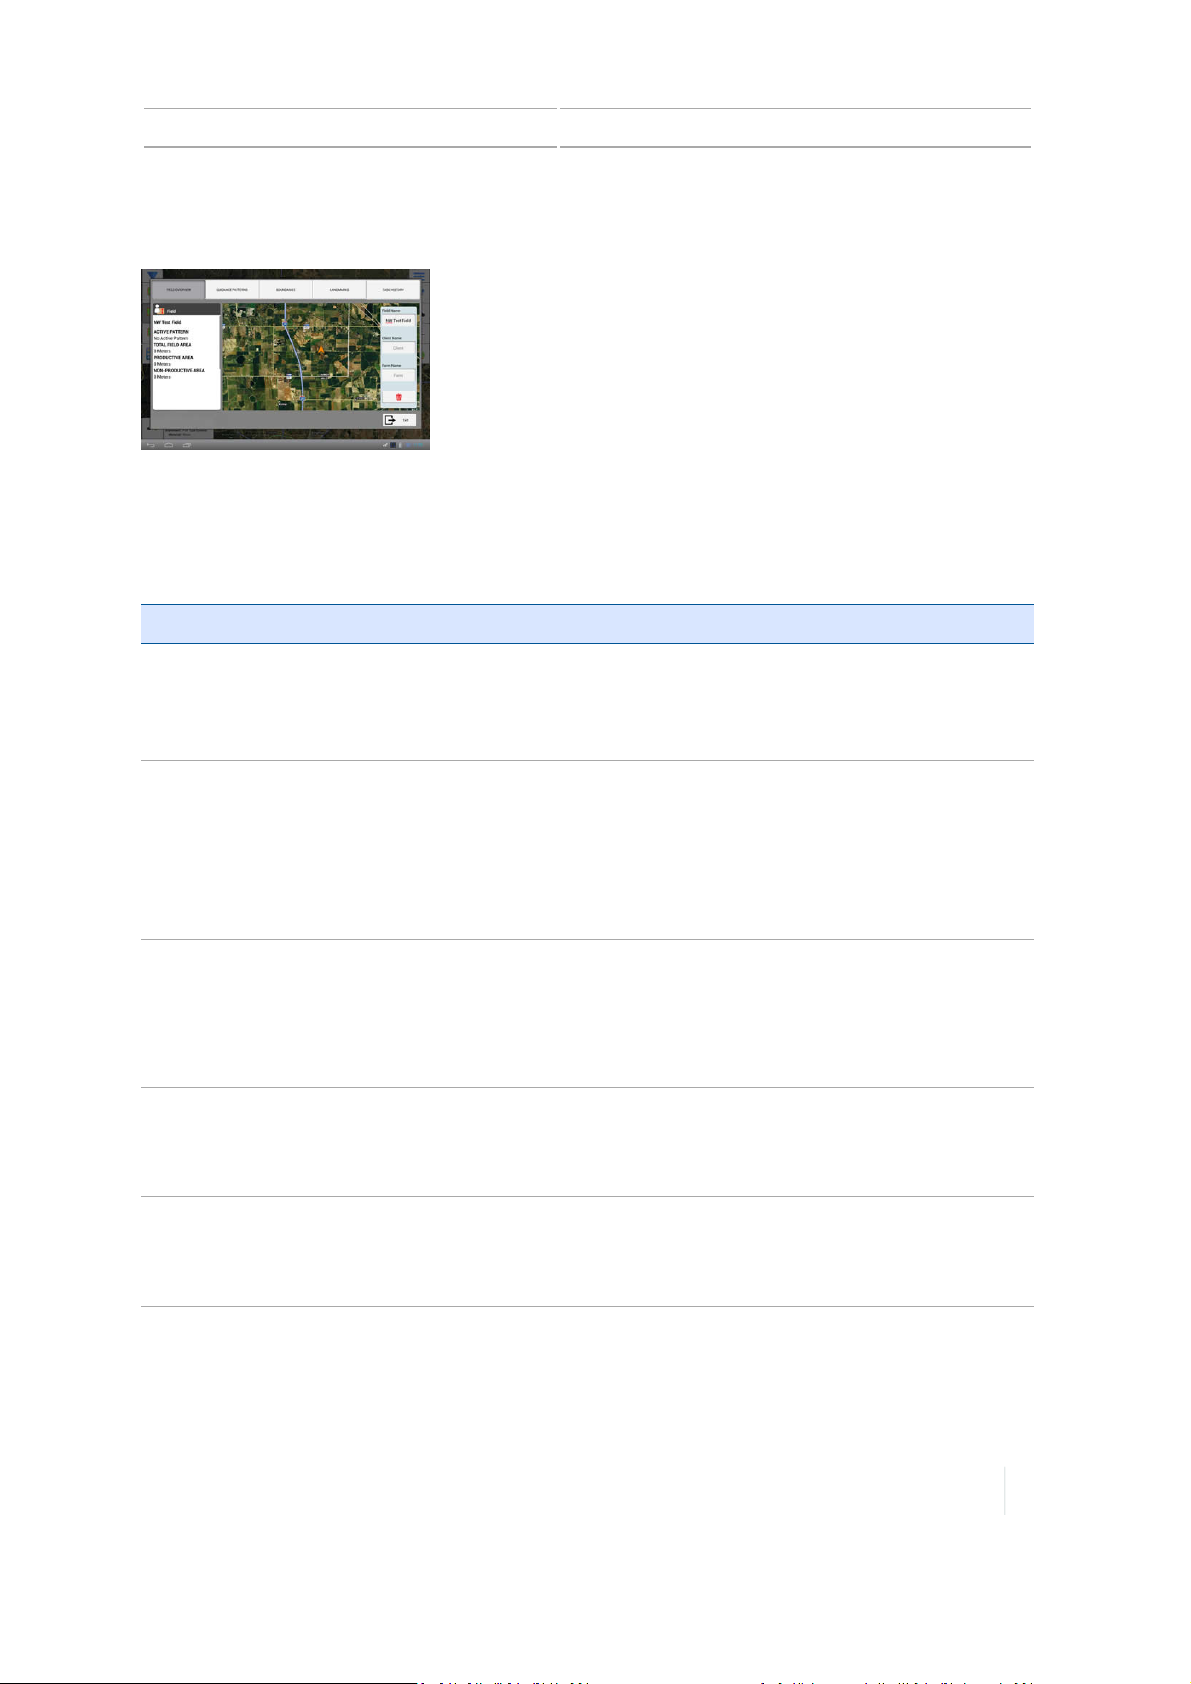
Field Manager 2 Display basics
Field Manager
At the Field Manager, you edit and refine elements in and associated with each field.
The Field Manager shows information directly associated with the field you have selected and
enables you to perform functions listed in the following table.
Note – Add and select a field before entering Field Manager. See Add a field, 181 and Select a field,
182.
Section Functions Available
Field Overview
See Field overview buttons,
62.
Guidance Patterns
See Guidance pattern
buttons, 62.
Boundaries
See Boundary buttons, 63.
Landmarks
See Landmark buttons, 64.
Task History
See Task history buttons,
65.
l Rename the field, client and farm.
l
Delete the field.
See Edit a field (Field Manager), 184.
l Activate or deactivate lines and patterns.
l Shift a line.
l Adjust the radius of a pattern.
l
Resize a shape (other than pivot shape).
See Guidance patterns, 246.
l Activate or deactivate a boundary.
l Resize a boundary.
l
Rename a boundary.
See Boundary editing (Field Manager), 249.
l Edit, delete or rename a landmark.
l Change the category that a landmark is assigned to.
l
See Landmark editing (Field Manager), 265.
l Start a new task.
l Rename a task.
l
See Tasks, 238.
Access Field Manager
You can access the Field Manager from either the Home or Run screen.
Version 1.075, Revision C TMX-2050 Display User Guide 61
Page 62
2 Display basics Field Manager
l
At the Home screen, select a field (see Select a field, 182). Tap .
l
At the Run screen,tap . The Field Manager opens the field you are currently in.
Field overview buttons
Button or Entry Box Tap to...
Exit
Exit Field Manager.
Delete an item
Field name Edit the field name.
Client name Enter the name of the client (optional).
Farm name Enter the name of the farm (optional).
Guidance pattern buttons
Button or Entry Box Tap to...
Deactivate
Deactivate a line.
For more information, seePattern activation/deactivation (Field Manager),
259.
(Black)
Activate
Activate a line.
SeePattern activation/deactivation (Field Manager), 259.
(Red)
62 TMX-2050 Display User Guide Version 1.075, Revision C
Page 63
Field Manager 2 Display basics
Button or Entry Box Tap to...
Deactivate Shape
(Black)
Activate Shape
(Red)
Deactivate a pattern (headland, boundary, pivot).
SeePattern activation/deactivation (Field Manager), 259.
Activate a pattern (headland, boundary, pivot).
For more information, seePattern activation/deactivation (Field Manager),
259.
Adjust the radius of a pivot shape.
For more information, see Guidance pattern editing (Field Manager), 259.
Resize a shape other than a pivot shape.
See Guidance pattern editing (Field Manager), 259.
Shift a line.
See Guidance pattern editing (Field Manager), 259.
Delete a selected line or pattern.
Name of Pattern Change the name of the line or pattern.
Boundary buttons
Button or Entry Box Tap to...
Deactivate Shape
(Black)
Deactivate a pattern (headland, boundary, pivot).
SeePattern activation/deactivation (Field Manager), 259.
Version 1.075, Revision C TMX-2050 Display User Guide 63
Page 64
2 Display basics Field Manager
Button or Entry Box Tap to...
Activate Shape
(Red)
Activate a pattern (headland, boundary, pivot).
SeePattern activation/deactivation (Field Manager), 259.
Adjust the radius of a pivot shape.
For more information, see Guidance pattern editing (Field Manager), 259.
Resize a shape other than a pivot shape.
See Guidance pattern editing (Field Manager), 259.
Shift a line.
See Guidance pattern editing (Field Manager), 259.
Delete a selected boundary.
Boundary Name Change the name of the highlighted boundary.
Landmark buttons
Button or Entry Box Tap to...
Category
Convert
Assign a category to a landmark point, line or area.
For more information, see Pattern activation/deactivation (Field Manager),
259.
Convert a selected:
l Productive area to a non-productive one
l Non-productive area to a productive one
See Pattern activation/deactivation (Field Manager), 259.
64 TMX-2050 Display User Guide Version 1.075, Revision C
Page 65
Field Manager 2 Display basics
Button or Entry Box Tap to...
Delete a selected landmark.
Landmark Name Change the name of the highlighted landmark.
Task history buttons
Button or Entry Box Tap to...
Continue Task
Continue the task you have selected in the list on the right-hand side.
See Tasks, 238.
Start New Task Begin a new task.
Task Name Change the name of the highlighted task.
Version 1.075, Revision C TMX-2050 Display User Guide 65
Page 66
2 Display basics Prescriptions Manager
Prescriptions Manager
At the Prescriptions Manager, you assign a prescription to a channel and determine additional
settings related to the prescription. You can access the Prescriptions Manager from the Run screen,
tap . The Prescriptions Manager displays.
Item Tap to...
Enabled Channels list Select the channel you want to assign a prescription to.
Prescription File Name Show a list of prescription files associated with the field
you have selected.
Column Name Show the columns that are a part of the prescription file.
Column Units Show the unit type you will be using for the prescription.
Lead Time Enter the lead time before the application begins.
When Outside Prescription Choose what happens when you are outside of the
prescription boundary. Close (default), Default Rate or Last
Rate.
Finish Let the system know your entries are complete.
Next Go to the next settings for prescription assignment.
Back Go to the previous settings for prescription assignment.
Save your settings and exit the Prescriptions Manager.
Remove any edits to the settings and exit the Prescription
Manager.
Connected Farm Dashboard
The Connected Farm dashboard enables you to access your fields from a wired connection, or
wireless Internet connection using a DCM-300 modem.
66 TMX-2050 Display User Guide Version 1.075, Revision C
Page 67
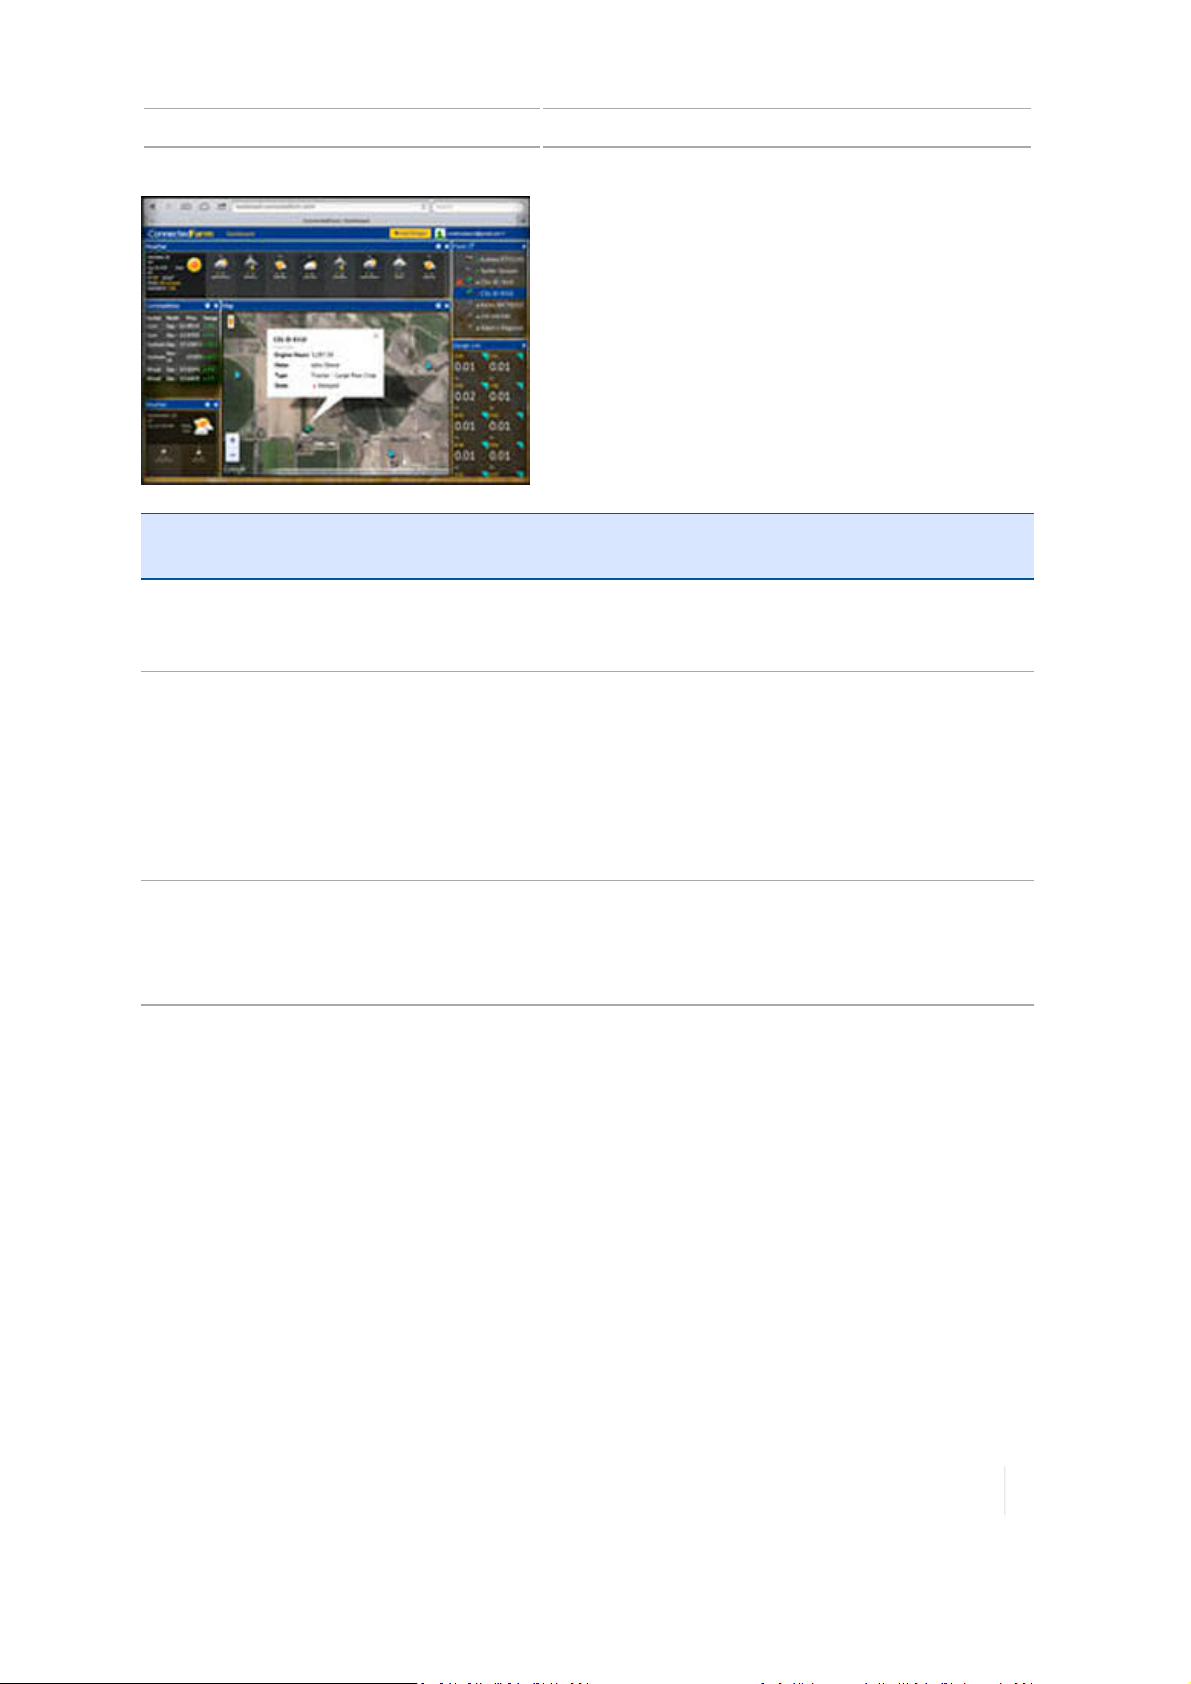
Data transfer 2 Display basics
Feature Description Requirements and
Restrictions
Rainfall Check rainfall totals for a location for the past 24
hours without the use of physical rain gauges.
Updates every 10 minutes.
Weather
l Add a single or multiple locations to view
current temperature, wind speed, wind
direction, humidity, and chance of
precipitation.
l View the weather forecast for each location.
l Set up a Doppler radar map to show
upcoming weather patterns.
Commodities
l Create your own commodity list and
rearrange it to your preference.
l View the previous day’s closing price for
each commodity.
Data transfer
You can transfer data:
l Using a USBdrive
Requires subscription to
RainWave.
Doppler radar map available
in the United States and
Canada only
US only
l Wirelessly with Office Sync
l To another display
USBupgrades
To upgrade firmware with a USBdrive, follow the next steps.
Version 1.075, Revision C TMX-2050 Display User Guide 67
Page 68
2 Display basics Data transfer
1. Turn off the display manually by holding the power button down for about two seconds.
2. Tap Shutdown. The display powers off and saves a backup of the database.
3. Power on the display by holding down the power button briefly (about one half of a second).
4. Insert the USB drive into one of the USB sockets on the display.
5.
Tap on the Home or Run screen.
6.
Tap .
7. The display notifies you that an upgrade is available.
8. Choose the version you want to upgrade to.
9. Tap the checkmark to continue the firmware upgrade.
USB data transfer
The following steps explain how to transfer your data from a TMX-2050 display to a USB drive.
Note – Make sure your USB drive has the AgGPS folder on the root.
1. Insert the USB drive into one of the USB sockets on the display.
2.
Tap on the Home or Run screen, or on the notification list. (For instructions on how to
display the notification list, see Display bar, 51.) The USB menu displays:
3.
Tap . The Data Transfer panel displays.
4. To expand an item on either list, tap a category name.
5. To select all files in a category, tap the box beside the category name. A check mark displays.
6. To deselect all files in a category, tap the box beside the name.
7. To select an individual file, tap the box beside the file name.
8.
Tap to move the item to the USB drive.
9.
To delete an item, tap the box next to the item in either list and tap .
Note – You cannot delete an item that is actively selected or currently being transferred.
68 TMX-2050 Display User Guide Version 1.075, Revision C
Page 69
Data transfer 2 Display basics
For information on: See also:
USB socket
USB socket, 74
USB VDB transfer
When you transfer data, saved vehicles do not include the vehicle configuration file (.vdb)for
Autopilot. To transfer this configuration data:
1. Connect a laptop that has APToolbox software to the serial port of the NavController II that
contains the vehicle config file you want.
2. Using APToolbox, save the config (.cfg) file to the laptop.
3. Transfer the saved config file from the laptop to a USBdrive in the folder AgData/Profiles.
4. Insert the USB drive containing the config file in the USB socket of the TMX-2050 display.
Office Sync data transfer
With a DCM-300 modem, and a subscription to Office Sync, information can wirelessly transfer from
the display to the office or Connected Farm, including wireless upgrades. This requires:
l A Connected Farm account
l Unlock for Office Sync
l DCM-300 modem
l A data plan or access to WiFi
As part of Office Sync setup, you decide:
l How often you want the display to check the server for data transfer
l How often data is sent from the display to the office
l Whether to send the data automatically or after you have confirmed to send data
When Office Sync is transferring data, displays in the display bar.
For information on: See:
Settings for Office
Modem services settings, 88
Sync
Diagnostics
Data transfer, 67
Version 1.075, Revision C TMX-2050 Display User Guide 69
Page 70
2 Display basics Data transfer
From CFX-750 display or FmX display to TMX-2050 display
To move files from the CFX-750 display or FmX display to the TMX-2050 display, follow the steps
below.
Note – Make sure your USB drive has the AgGPS folder on the root.
1.
Insert the USBdrive into the CFX-750 display or FmX display.
If files were created on the CFX-750 display, change the file extension from .CFG to .cfg before
transferring them to the TMX-2050 display.
2. Transfer the files from the display to the USB drive.
3. Remove the USB drive from the CFX-750 display or FmX display.
4.
Insert theUSBdrive into one of the USB sockets on the TMX-2050 display.
(See USB socket, 74.
5.
Tap on the Home or Run screen, or on the notification list launched from the display bar.
The USBmenu displays.
6.
Tap . The Data Transfer panel displays.
Note – Whether you are transferring data from the CFX-750 display or FmX display, the item
in the USB list will show the data as FmX displaydata.
7. Tap an item to expand it on the USB list.
8. Tap the item(s) you want to transfer.
9.
Tap to move the item(s) to the internal list.
10.
To delete an item, tap the item in either list and tap .
From TMX-2050 display to CFX-750 display or FmX display
To transfer from TMX-2050 display to the CFX-750 display or FmX display using USB or Office Sync,
the same steps as the previous examples apply, except: All data transferred from the TMX-2050
display must be "decoded" by Farm Works software before it can be used by these legacy displays.
Data can then be transferred by USB drive from the desktop (using Farm Works) to the CFX-750
display or FmX display.
Note – Make sure your USB drive has the AgGPS folder on the root.
70 TMX-2050 Display User Guide Version 1.075, Revision C
Page 71
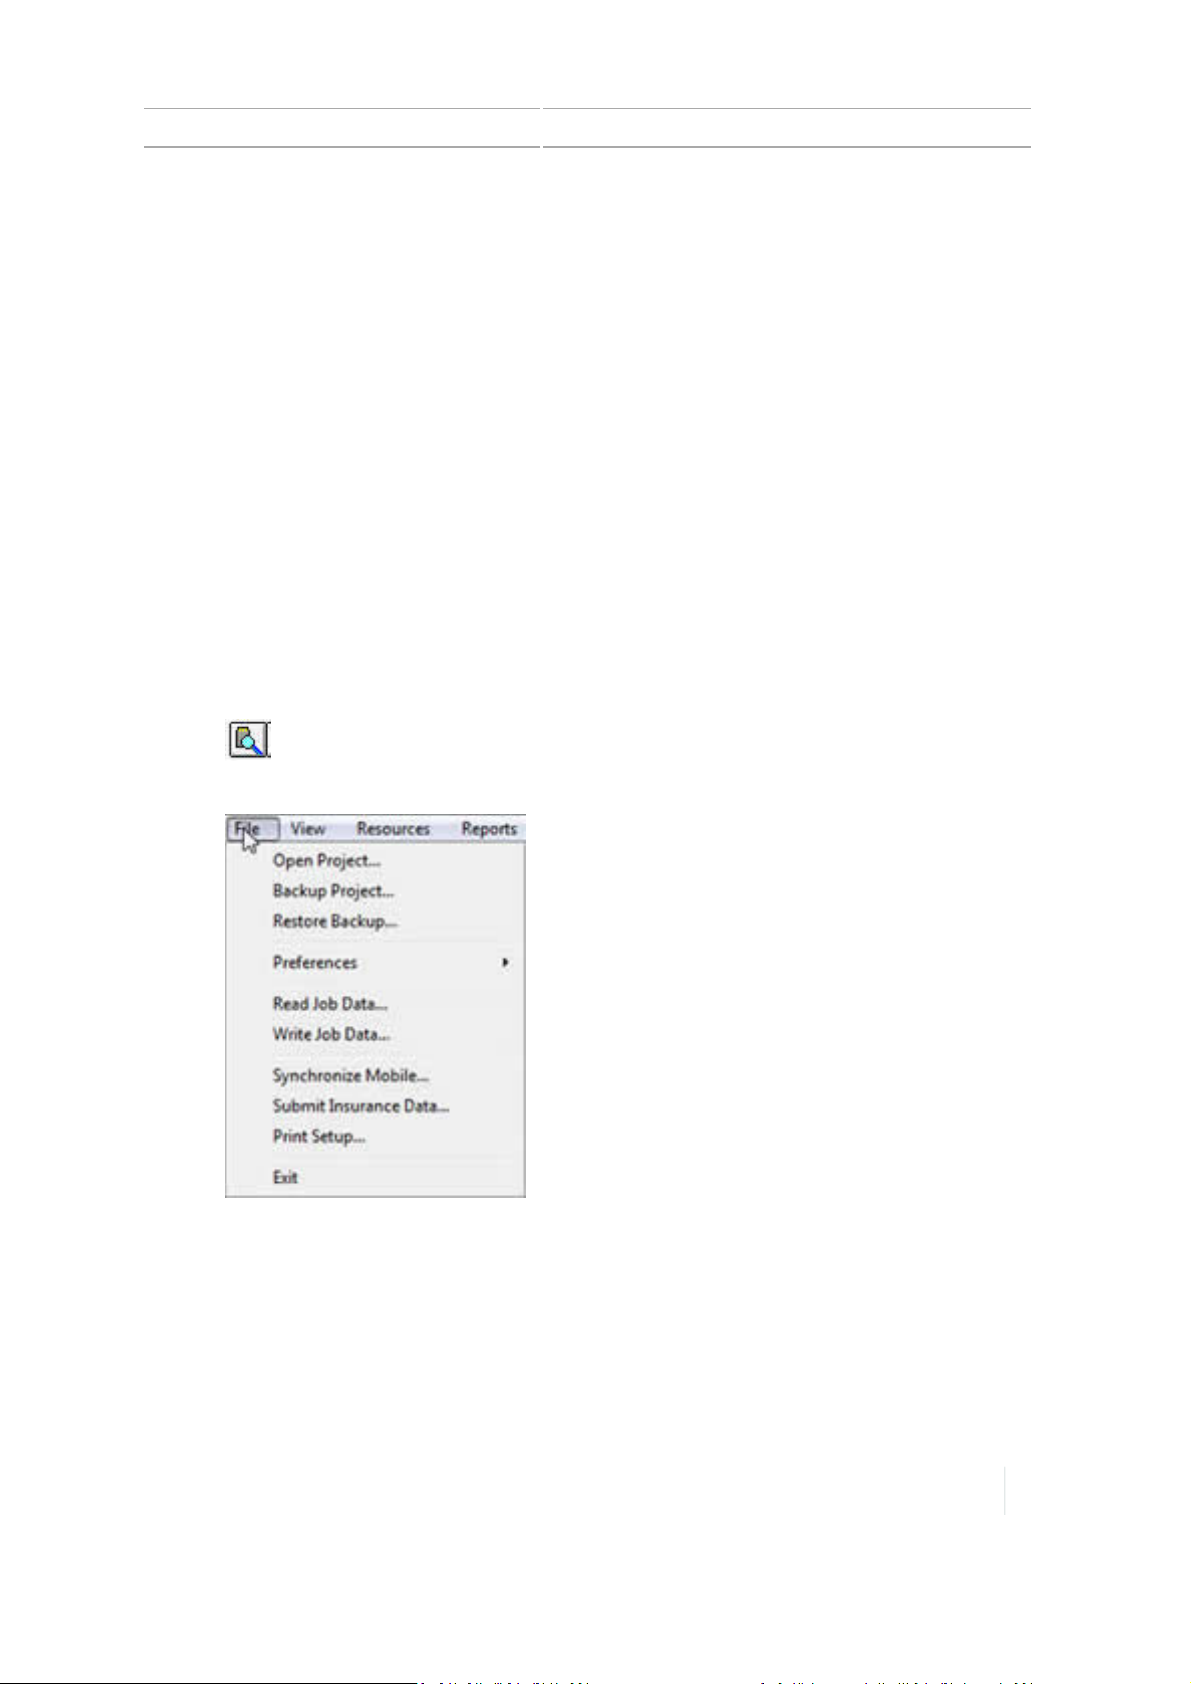
Data transfer 2 Display basics
From TMX-2050 display to CFX-750 display or FmX display
To transfer from TMX-2050 display to the CFX-750 display or FmX display using USB or Office Sync,
the same steps as the previous examples apply, except: All data transferred from the TMX-2050
display must be "decoded" by Farm Works software before it can be used by these legacy displays.
Data can then be transferred by USB drive from the desktop (using Farm Works) to the CFX-750
display or FmX display.
Note – Make sure your USB drive has the AgGPS folder on the root.
From TMX-2050 display to Farm Works
To transfer files from the TMX-2050 display to FarmWorks, follow the steps below.
Note – Make sure your USB drive has the AgGPS folder on the root.
1. If you are transferring using a USB drive, insert the drive into your computer and open
FarmWorks. If you have transferred the data using Office Sync, open Farm Works.
2.
Open the Read Job Data dialog by clicking either of these:
ll
l
(Read Job Data icon)
File menu and select Read Job Data from the menu
Version 1.075, Revision C TMX-2050 Display User Guide 71
Page 72
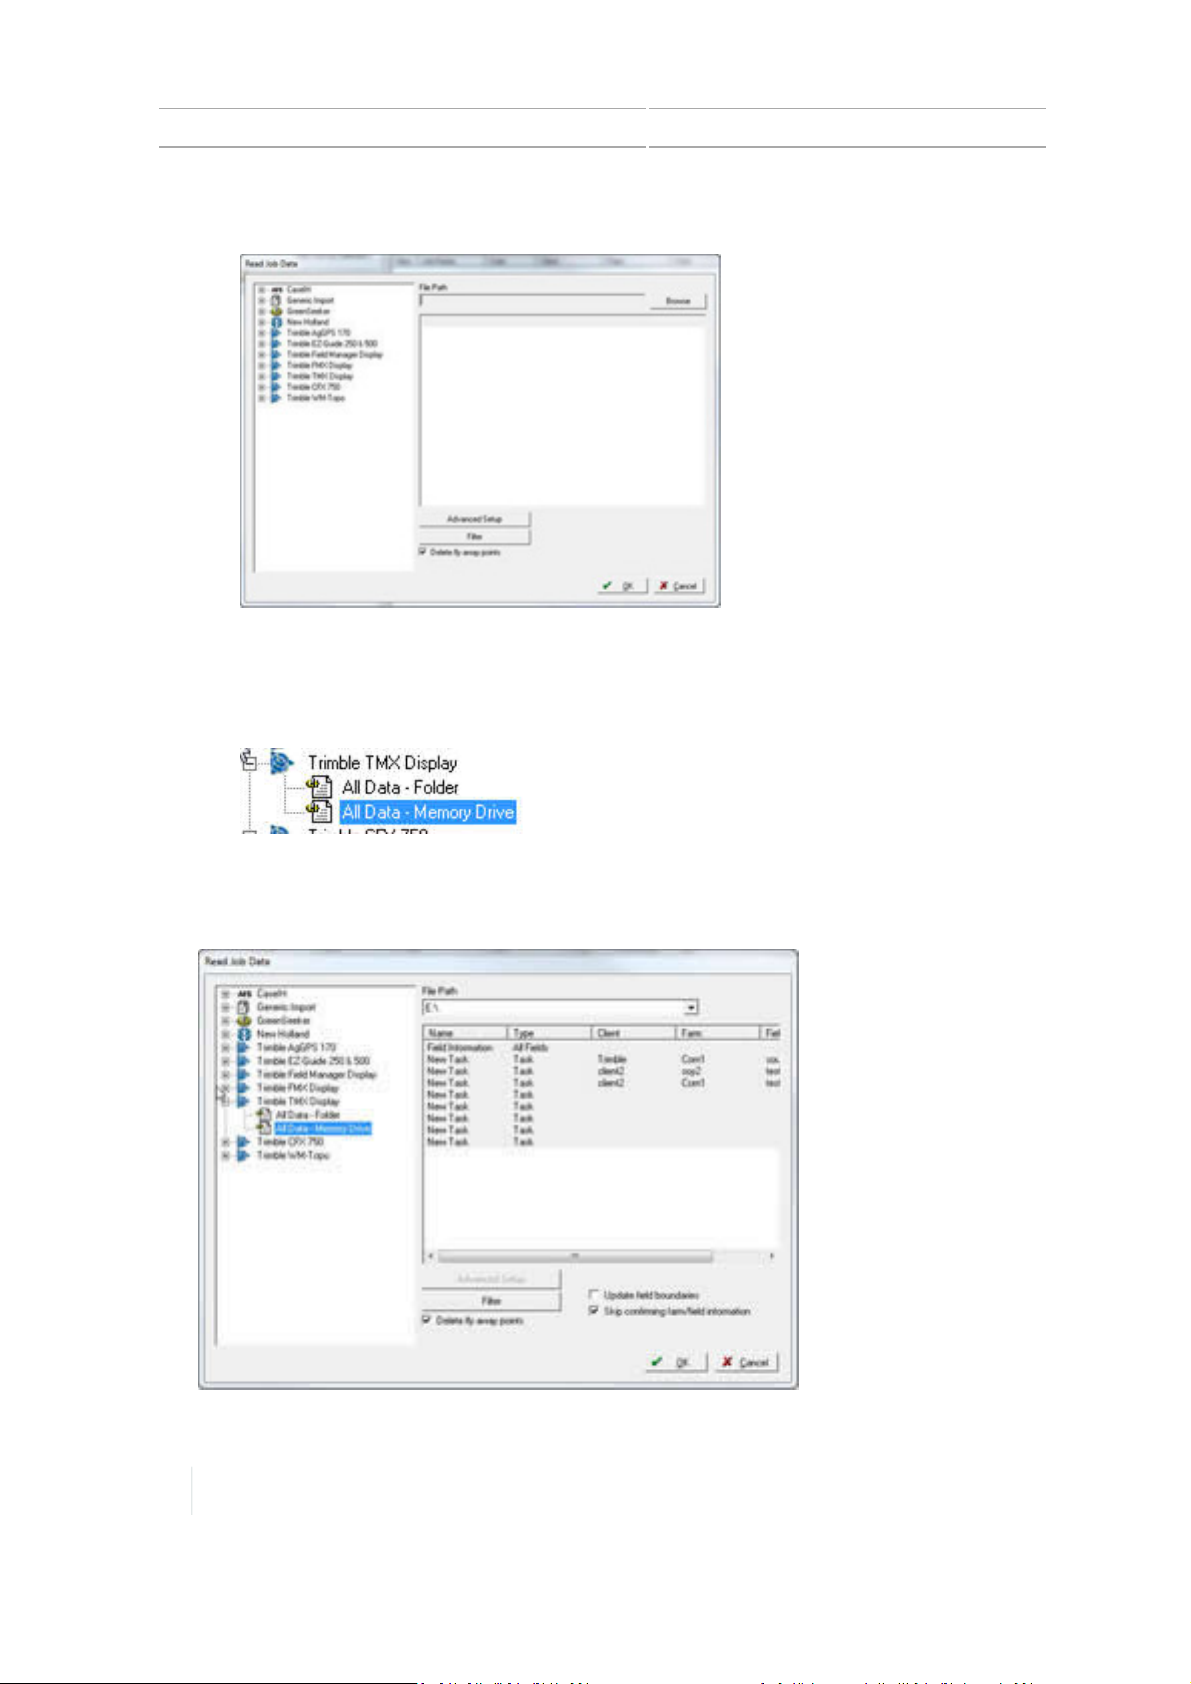
2 Display basics Data transfer
The system displays the Read Job Data window.
3.
In the left column of the Read Job Data window, click + next to Trimble TMX Display.
4.
Under Trimble TMX Display, select where the data is stored that you want to transfer.
ll
For data transferred into Farm Works using a USB drive, select All Data - Memory Drive.
l For data transferred into Farm Works using Office Sync, select All Data - Folder.
5.
Under File Path, click Browse to find the drive or folder where the data is located. After this is
complete, your data will be listed in the right-hand column.
72 TMX-2050 Display User Guide Version 1.075, Revision C
Page 73
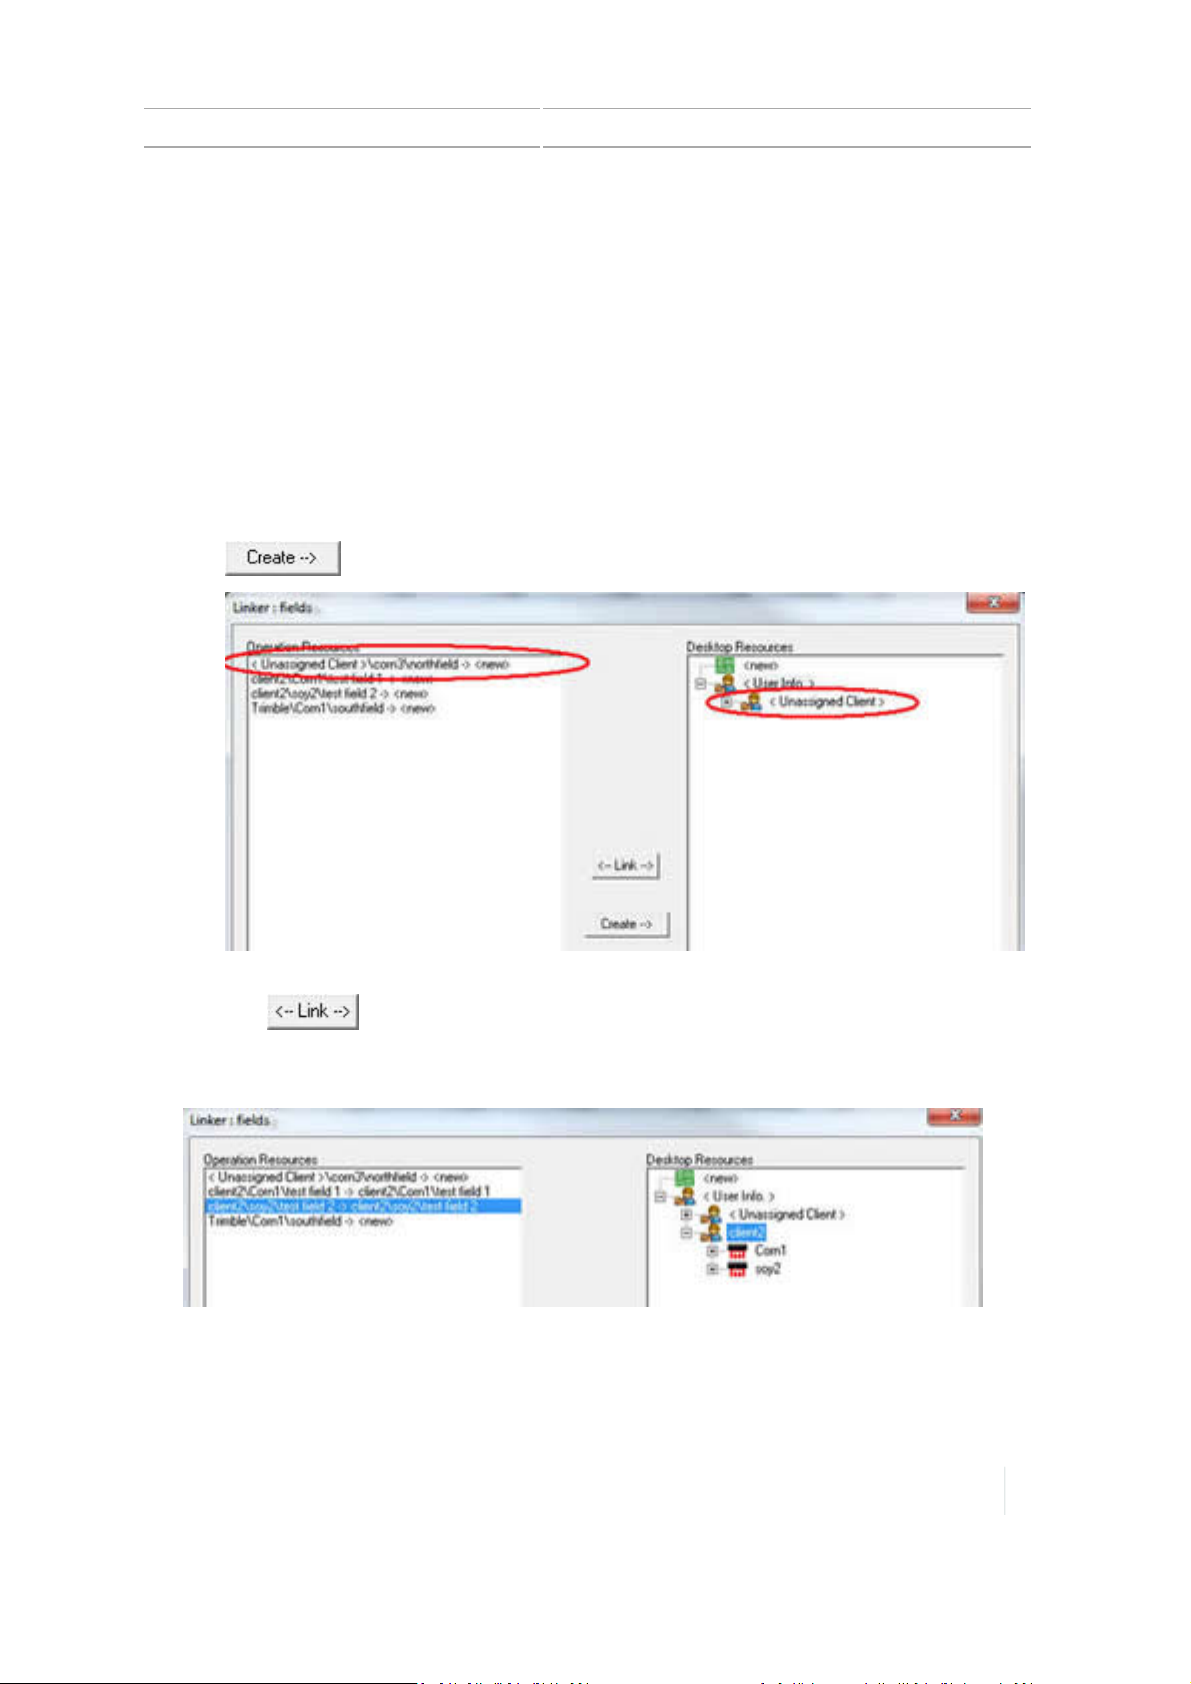
Data transfer 2 Display basics
Note – If you wish to filter the files before transfer, see the online help for Farm Works for
filtering instructions
6. In the left-hand column, select the job(s) to import.
7.
Click OK. The import progress shows as files are importing. After import is complete, the system
Linker window displays.
The left-hand column titled Operation Resources shows the files created on the TMX-2050
display. The right-hand column titled Desktop Resources shows files currently in Farm Works.
8. Select an item from the Operation Resources list.
a.
If there is no counterpart to the item you selected in the Desktop Resources list, click the
checkbox Show Retired. The system displays any additional files that were marked as
Retired. If there is still no counterpart to this item in the Desktop Resources list, click
. The system creates a new container on the desktop for the item and links it.
b. If there is a counterpart to this item in the Desktop Resources list, highlight the item and
click . The information is now moved to that location on the desktop.
9.
After all items have been linked or created, click OK. All files are stored inFarmWorks at the
correct location.
From TMX-2050 display to TMX-2050 display
From TMX-2050 display to the office or another TMX-2050 display, use the following table:
Version 1.075, Revision C TMX-2050 Display User Guide 73
Page 74
2 Display basics USB socket
Type of transfer (without
Farm Works)
USB
Instructions
To transfer data through a USB drive, see From TMX-2050 display to
TMX-2050 display, 73 in this section.
Wireless (Office Sync)
To transfer data using Office Sync:
l Ensure you meet the requirements for transferring using Office
Sync. See From TMX-2050 display to TMX-2050 display, 73 in
this section.
l Set up Office Sync. See Modem services settings, 88.
USB socket
The display has two USBsockets: one on the side of the display and one on the back of the TMX2050 display. (See TMX-2050 display, 95 for photo showing the locations of the two USB sockets.)
You can use a USBdrive to transfer data to and from your TMX-2050 display.
CAUTION – Do not use a USB drive in each USB socket at the same time. If you are attempting to upgrade
firmware using a USB drive and another USB drive is already in one of the sockets, the firmware upgrade will
fail.
The display senses when a USB drive is inserted into either the side or rear socket, and shows the
icon on the display bar.
To use the USB drive:
1. Tap the bottom right corner of the display bar.
2.
When the notification list displays, tap . The USB menu displays.
3. At the USB menu, you can:
ll
Tap to display the data transfer panel. See Data transfer, 67.)
l
Tap to take a screen shot and store it on the USB drive. See Screen shots, 75.
l
Tap to upgrade firmware from the USB drive. See Firmware upgrades - wireless, 80.
74 TMX-2050 Display User Guide Version 1.075, Revision C
Page 75
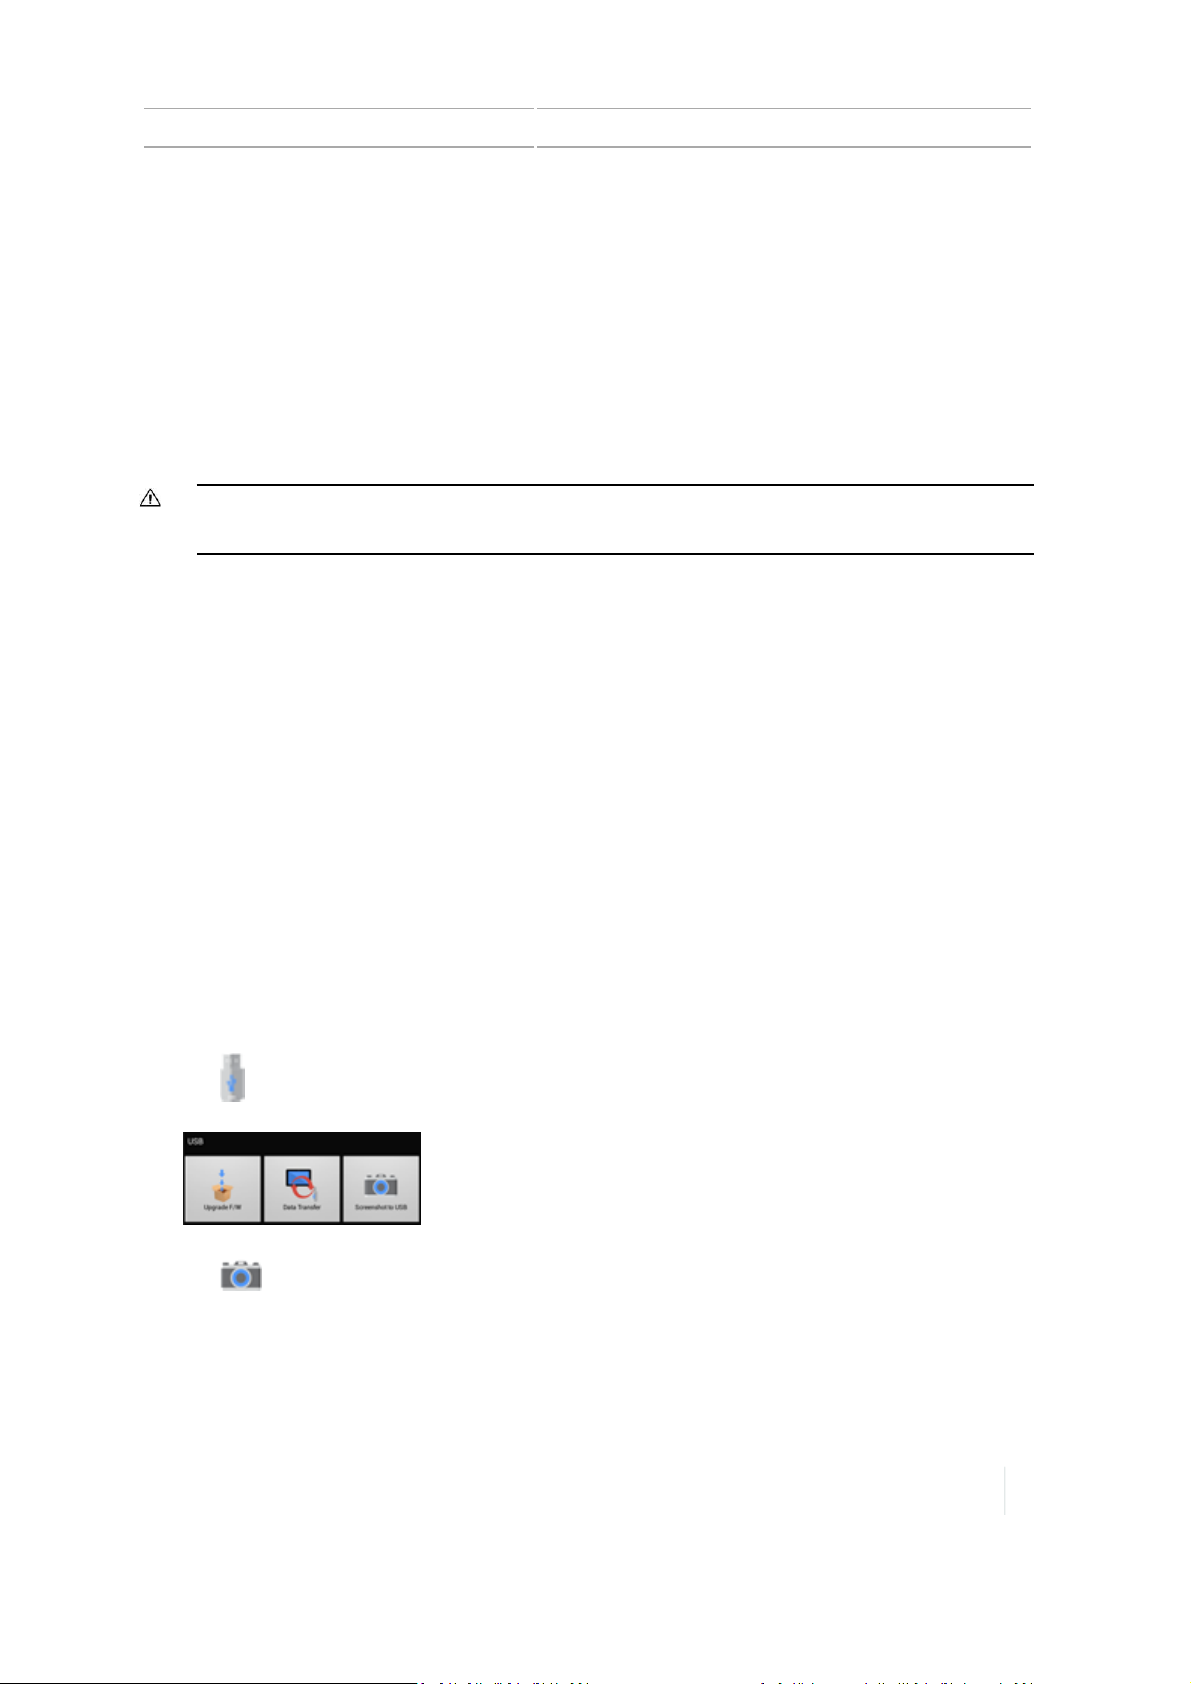
Screen shots 2 Display basics
Insert a USBdrive
1. Move the display so you that can see the USBsocket on the side or back of the display.
2. Pull the rubber cover off the USBsocket.
3.
Insert the USB drive into the USB socket. On the display bar, a USB icon is displayed.
Remove USBDrive
CAUTION – Do not remove the USB drive from the socket while the display is writing to or from the drive. This
will corrupt the data.
1. Move the display so you that can see the USBsocket.
2. Make sure the LED light of the USB drive is not blinking (indicating data transfer is occurring).
3. Pull the USB drive out of the USB socket.
4. Press the rubber cover back onto the USBsocket.
Screen shots
Occasionally, you may want to save an image of the touch screen, for example to provide
information for troubleshooting purposes. When you take a screen shot, the display saves a .jpg file
to a Pictures folder on the USB drive.
To take a screen shot:
1. Insert a USBdrive in one of the USBports on the display. (See USB socket, 74.) The display bar
will show a USB icon.
2. Tap the right side of the bar at the bottom of the display. The notification list slides up.
3.
Tap . The USB menu displays.
4.
Tap to take a capture of the screen.
5. The display stores your screen shot on the USB drive.
Version 1.075, Revision C TMX-2050 Display User Guide 75
Page 76

2 Display basics Screen shots
CAUTION – Do not remove the USB drive from the socket while the display is writing to or from the drive. This
will corrupt the data.
76 TMX-2050 Display User Guide Version 1.075, Revision C
Page 77

Display settings
In this chapter:
C h a p t e r
3
Display settings 78
Languages and units settings 78
Date and time settings 78
Users and passwords 79
Firmware upgrades - wireless 80
Feature unlocks 81
Display settings 82
Mapping settings 83
Patterns settings 83
Steering and guidance settings 85
ISOBUS settings 87
Wi-Fi settings 87
Modem services settings 88
Remote Assistant settings 90
Restore defaults 91
System information 92
At the Settings panel, you can customize
settings and add user profiles.
Version 1.075, Revision C TMX-2050 Display User Guide 77
Page 78
3 Display settings Display settings
Display settings
At the TMX-2050 display, you can customize and set up many options, including but not limited to:
l Changing the language and units of measure and set the time zone
l Setting preferences for:
l
l Steering and guidance
l The point at which to begin mapping and logging
l Creating, editing and deleting user profiles
l Viewing modem settings and resetting them
l Setting up Office Sync
Languages and units settings
At this settings page, you can set:
l The language shown on the display
l The type of units of measure shown on the display
l Whether the password entry is always obscured or delayed from being obscured
Setting Tap to view or choose...
Languages The language for the display. Scroll the list and tap the language you
want on the TMX-2050 display.
Display Units The type of units you want on the display:English or Metric
Number Format Either commas or periods.
Access
To access the Language and Units settings:
1.
Tap .
2.
Tap .
3.
Tap Language and Units.
Date and time settings
The display automatically obtains time and date from the GNSS receiver in the TM-200 Module.
78 TMX-2050 Display User Guide Version 1.075, Revision C
Page 79
Users and passwords 3 Display settings
Setting Tap to...
Select time zone Choose time zone. Scroll the list of time zones and tap the time zone
that applies to you.
You must set the time zone. The system does not automatically set
this.
Use 24-hour format Turn on or off.
Select date format Choose the date format you want to see on the display.Options are:
MM/dd/YYYY, dd/MM, YYYY/MM/dd.
Access
To access the Date and Time setup:
1.
Tap .
2.
Tap .
3.
Tap Date and Time.
Users and passwords
Setting Tap to...
Add User Add a user
(Existing user name) Edit the user profile
Add a user
1. Tap Add User.
2. Enter the Operator ID.
3. Enter and confirm the user's password.
4. Tap Create User.
Take a photo of a user
You can capture a photo of the user, which will display:
Version 1.075, Revision C TMX-2050 Display User Guide 79
Page 80
3 Display settings Firmware upgrades - wireless
l Next to the user's information in the Users and passwords section of Settings
l On the display bar when the user is logged in
1. At the Users and passwords section, Tap the user icon on the right of the user information.
2. The camera activates and displays a frame on the screen. Make sure the user's face is contained
within this frame.
3. To capture the photo, tap Capture. The photo displays on the lower right. You can continue to
tapCapture until you are satisfied with the photo.
4. When you are ready to save the photo, tap Done.
Access
To access the Users and Passwords settings:
1.
Tap .
2.
Tap .
3.
Tap Users and Passwords.
Firmware upgrades - wireless
For upgrading firmware using a USB drive, see Data transfer, 67.
To upgrade the firmware wirelessly for the TMX-2050 display, you can use one of the methods in
this section.
Note – Wireless upgrades require a DCM-300 modem, a subscription to Office Sync and a data
plan or access to WiFi.
For information on: See:
Upgrading through USB
WiFi settings
Settings for wireless upgrades
You can control how the display checks for upgrades and when to wirelessly download them.
1.
Tap .
Data transfer, 67
Wi-Fi settings, 87
2.
Tap .
80 TMX-2050 Display User Guide Version 1.075, Revision C
Page 81
Feature unlocks 3 Display settings
3. Tap Firmware Upgrades.
4.
Tap Settings.
Setting Explanation
Auto check for new upgrades If you activate this, the system will automatically check for
new upgrades.
Auto download new upgrades
when available
Auto install firmware on power
down
Only download via WiFi This choice is only available if you have chosen to have the
Show support beta releases in
list
This choice is only available if you have chosen to have the
system automatically check for new upgrades. The system
will install the updates as they are available.
This choice is only available if you have chosen to have the
system automatically check for new upgrades. The system
will install the updates before the display powers off.
system automatically check for new upgrades. The system
will download the updates only through a WiFi connection.
The system includes beta releases available for you to
download.
Check for updates
1.
Tap .
2.
Tap .
3. Tap Firmware Upgrades.
4.
Tap Check for Updates. The system checks for updates and begins the upgrade process
immediately unless you have altered when the upgrade occurs in Settings.
Feature unlocks
For some optional features, you must enter the unlock password. If you do not have an unlock
password, contact your local reseller.
1.
Tap .
2.
Tap .
3.
Tap Feature Unlocks. You can unlock features by manually entering the code, having the
display read the QR code of the unlock, or checking for unlocks.
At the bottom of the screen, the list of currently locked features displays.
Version 1.075, Revision C TMX-2050 Display User Guide 81
Page 82

3 Display settings Display settings
Manual code entry
1. Tap the Code text box and enter the code.
2. If the system accepts the code, tap Accept.
3. If the system rejects the code, you can try again or contact your reseller for help.
QRcode scan
1. Tap Read QR.
2. Hold your code image in front of the camera for it to be read.
3.
If the system accepts the code, Tap Accept.
4. If the system rejects the code, you can try again or contact your reseller for help.
Check for unlocks
1. Tap Check for Unlocks.
2. The request will be sent for the display to check for any available service or licenses. It may take
several minutes for the unlocks to be processed.
Display settings
These are basic settings for the display.
Setting Tap to...
Manually Change Brightness Adjust brightness of the TMX-2050 display's backlight.
Volume Adjust the volume of the sound.
Touch Screen Sounds Turn on or off sounds associated with using the display.
Access
To access the Display settings:
1.
Tap .
2.
Tap .
3.
Tap Display.
82 TMX-2050 Display User Guide Version 1.075, Revision C
Page 83
Mapping settings 3 Display settings
Mapping settings
These settings control guidance mapping features available on the Run screen.
Setting Tap to view or change...
Map Background Selection The ground color for the
l Color: Brown, green or grey
l Color with texture
l Color with gridlines
Run
screen. Options are:
Map Color Scheme Day or night mode.
Map Orientation Which point of view displays on the
position of the vehicle. Orientation options:North Up or Vehicle Up.
Record Coverage When
Engaged
The system can switch on coverage when auto guidance is engaged,
and switch off coverage when it is not engaged. Option for this
setting is on or off.
To access the Mapping settings:
1.
Tap .
2.
Tap .
3. Tap Mapping.
Run
screen when following the
Patterns settings
At pattern settings, you can:
l Activate the auto close feature to use when you create boundaries and headlands
l Activate smoothing for curves and turn radius when traveling on guidance lines
l Customize the tight turn warning angle and look-ahead time
Curve Features
Setting Tap to view or change...
Curve Smoothing The feature on or off. When curve smoothing is on, the system
smooths out the guidance curve, making it wider.
Version 1.075, Revision C TMX-2050 Display User Guide 83
Page 84

3 Display settings Patterns settings
Setting Tap to view or change...
Smooth Turn Radius The size of the circle that the system will guide to. The larger the
circle (degrees), the wider the turn.
Tight Turn Warning Angle The number of degrees that will trigger a warning about a tight
turning angle. See
Tight Turn Look Ahead Time The number of seconds before you approach a tight turn angle that
the warning will show on the display. See
Tight turn warning, 292
.
Tight turn warning, 292
.
Headlands
Setting Tap to view or change...
Auto Close
Auto Close Distance
Automatically closes the beginning and end point when you create
boundaries and headlands.
See Headland and infill pattern creation (Run screen), 253.
The distance between your beginning point and ending point for a
headland.
See Headland and infill pattern creation (Run screen), 253.
Boundaries
Setting Tap to view or change....
Auto Close Automatically closes the beginning and end point when you create
boundaries. See
Auto Close Distance The distance between your beginning point and ending point for a
boundary.
Boundary creation (Run screen), 248
.
Access
To access the Patterns settings:
1.
Tap .
2.
Tap .
3.
Tap Patterns.
84 TMX-2050 Display User Guide Version 1.075, Revision C
Page 85

Steering and guidance settings 3 Display settings
Steering and guidance settings
The following settings enable you to customize controls related to steering and guidance.
Setting Tap to view or change...
Operator Timeout The amount of time before the display disengages auto guidance
and stop applications when there is no response to a shutdown
message.
Nudge Increment
Implement DraftIncrement
Aggressiveness Increment
Autosteering Lockout Whether the feature is on or off. When lockout is on, the display
Re-markReset with Import
End of Row Distance
The increment used to nudge the guidance system with each tap.
You can incrementally nudge a pattern in a perpendicular direction
relative to the pattern. Nudging a pattern helps adjust for satellite
drift.
See Guidance pattern adjustment (Run screen), 260 and GNSS and
xFill technology status, 315.
The increment used to nudge the implement to the current
guidance line.
See Guidance pattern adjustment (Run screen), 260.
The increment used to change aggressiveness.
See Steering adjustments, 244.
does not offer an option to use auto guidance.
Remove all re-mark entrees on with an import.
See Guidance pattern adjustment (Run screen), 260.
Distance for the end of row warning to display.
See End of row warning, 292.
NMEA from Autopilot
Diagnostics Port
On: NMEA messages can be sent from the NavController II
Off:No messages are sent
See NMEA messages, 298.
Access
To access the Steering and Guidance settings:
Version 1.075, Revision C TMX-2050 Display User Guide 85
Page 86

3 Display settings Steering and guidance settings
1.
Tap .
2.
Tap .
3.
Tap Steering/Guidance.
86 TMX-2050 Display User Guide Version 1.075, Revision C
Page 87
ISOBUS settings 3 Display settings
ISOBUS settings
Task Controller
To use Task Controller when using ISO-certified equipment, tap to activate this feature.
Note – This feature is optional and requires an unlock.
For information on: See:
Task Controller implement
setup
Setting up equipment for
task controller
Using Task Controller
Implement setup for Task Controller, 191
Equipment setup, 195
Task Controller operation, 282
288
ISOBUS Task Controller widget,
and
Virtual Terminal
To use Virtual Terminal when using ISO-certified equipment, tap to activate this feature.
For information on: See:
Using Virtual Terminal
Virtual Terminal operation, 284
Virtual Terminal widget, 290
and
Access
To access the ISOBUS settings:
1.
Tap .
2.
Tap .
3.
Tap ISOBUSSettings.
Wi-Fi settings
With a DCM-300 modem and additional subscription services, WiFi enables you to transfer data
wirelessly from vehicle to office. You can use WiFi in addition to or instead of the cellular network.
At Wi-Fi network settings, turn on Wi-Fi.
At Available Networks, tap Refresh to scan for additional networks you can connect to.
Version 1.075, Revision C TMX-2050 Display User Guide 87
Page 88

3 Display settings Modem services settings
For content on: See:
Diagnostics
Modem status
DCM-300 modem diagnostics, 305
DCM-300 modem status, 302
Access
To access settings for WiFi:
1.
Tap .
2.
Tap .
3.
Tap WiFi.
Modem services settings
Modem settings include:
l Modem settings, 88
l Network settings, 89
l Office Sync settings, 90
Access
To access Modem Services:
1.
Tap .
2.
Tap .
3.
Tap Modem services.
Modem settings
Setting Tap to view or change...
Device Name
The serial number of the DCM-300 modem.
88 TMX-2050 Display User Guide Version 1.075, Revision C
Page 89

Modem services settings 3 Display settings
Network settings
Network (CDMA)
Setting Tap to...
CDMAReset
Reset the network connection. This will reset the connection
between the modem and the service provider, and will remove all
existing settings.
The following additional settings that are read only and are automatically completed with the DCM300 modem connects to the network:
l Mobile Directory Name (MDN)
l Electronic Serial Number (ESN)
l Mobile Identification Number (MIN)
l Preferred Roaming List (PRL)
For content on: See:
Diagnostics
Data transfer with Office
Office Sync Diagnostics, 321
Data transfer, 67
Sync
Network (GSM)
Setting Tap to...
APN View the access point name.
SIMPIN The PINfor the SIM.
Advanced Launch a popup to enter the GSMUsername and GSMPassword.
The following additional settings that are read only and are automatically completed with the DCM300 modem connects to the network:
l IMEI:International Mobile Equipment Identity
l SIMICCID:IMS Charging Identifier
l SIMStatus:Status of SIM
Version 1.075, Revision C TMX-2050 Display User Guide 89
Page 90
3 Display settings Remote Assistant settings
Office Sync settings
Setting Tap to...
Office Sync Turn the feature on or off.
Check Server Select how often you want the display to check the server to send
data to the office.
Send Data Select how often data is sent from the display to the office.
Auto-send without prompt Turn the feature on or off. When on, the display will send data to the
office without first asking for your confirmation.
If this feature is on, data will be sent without notifying you. This can
result in large files being transferred or the transfer of data you do
not want transferred.
For information on: See:
Initial setup
Diagnostics
Data transfer with Office
Sync
DCM-300 modem initial setup, 130
Office Sync Diagnostics, 321
Office Sync data transfer, 69
Remote Assistant settings
The Remote Assistant feature enables a support person to view your display as you are viewing it.
To set up Remote Assistant:
1. Tap Enroll.
2.
At the Enroll screen, tap in the display bar.
3.
At the Status screen, tap in the display bar.
For information on: See:
Diagnostics
Remote Assistant, 325
Access
To access Remote Assistant:
90 TMX-2050 Display User Guide Version 1.075, Revision C
Page 91
Restore defaults 3 Display settings
1.
Tap .
2.
Tap .
3.
Tap Remote Assistant.
Restore defaults
During troubleshooting, you may be asked by Support to perform a reset.
AdminUser Options
Setting Tap to...
Restore Default user
Preferences
Restore Preferences to
Factory Defaults
FactoryReset
Restore the default preferences for the user currently logged in.
Restore the display to default factory settings. Erases all custom
settings for all user accounts.
Erase all user accounts, system and application data, coverage,
configurations, feature unlocks, minor firmware updates and
downloaded applications.
Note – Only perform a factory reset on the advice of technical
support.
Restricted User Options
Setting Tap to...
Restore Default user
Preferences
Restores the default user preferences.
Access
To accessRestore Defaults:
1.
Tap .
2.
Tap .
3.
Tap Restore Defaults.
Version 1.075, Revision C TMX-2050 Display User Guide 91
Page 92

3 Display settings System information
System information
Information Tap to view...
Software Information The list of software packets for diagnostics.
Current User Information System information on the user currently logged in. See
Users and passwords, 79
Current Preference Information The current settings of the user that is currently logged in.
Device Information Technical information about the display.
Access
To access the System settings:
1.
Tap .
.
2.
Tap .
3.
Tap System.
92 TMX-2050 Display User Guide Version 1.075, Revision C
Page 93

Installation
In this chapter:
C h a p t e r
4
Components 94
Installation overview 100
Installation and GNSS set up 102
Installation includes the display mount
and TMX-2050 display, the TM-200
Module, and other components as they
apply to your system configuration.
Version 1.075, Revision C TMX-2050 Display User Guide 93
Page 94

4 Installation Components
Components
The following components are part of a recommended setup for the TMX-2050 display:
l TMX-2050 display, 95
l Display mount: To mount the TMX-2050 display
l TM-200 Module, 97: To enable quick disconnection and reconnection of the TMX-2050 display.
The TM-200 module contains a built-in GNSS receiver.
l AG-815 integrated radio, 99: For RTK correction services
l DCM-300 modem, 98:Provides access to correction services, wireless data transfer and
cellular/WiFi signals where applicable
94 TMX-2050 Display User Guide Version 1.075, Revision C
Page 95
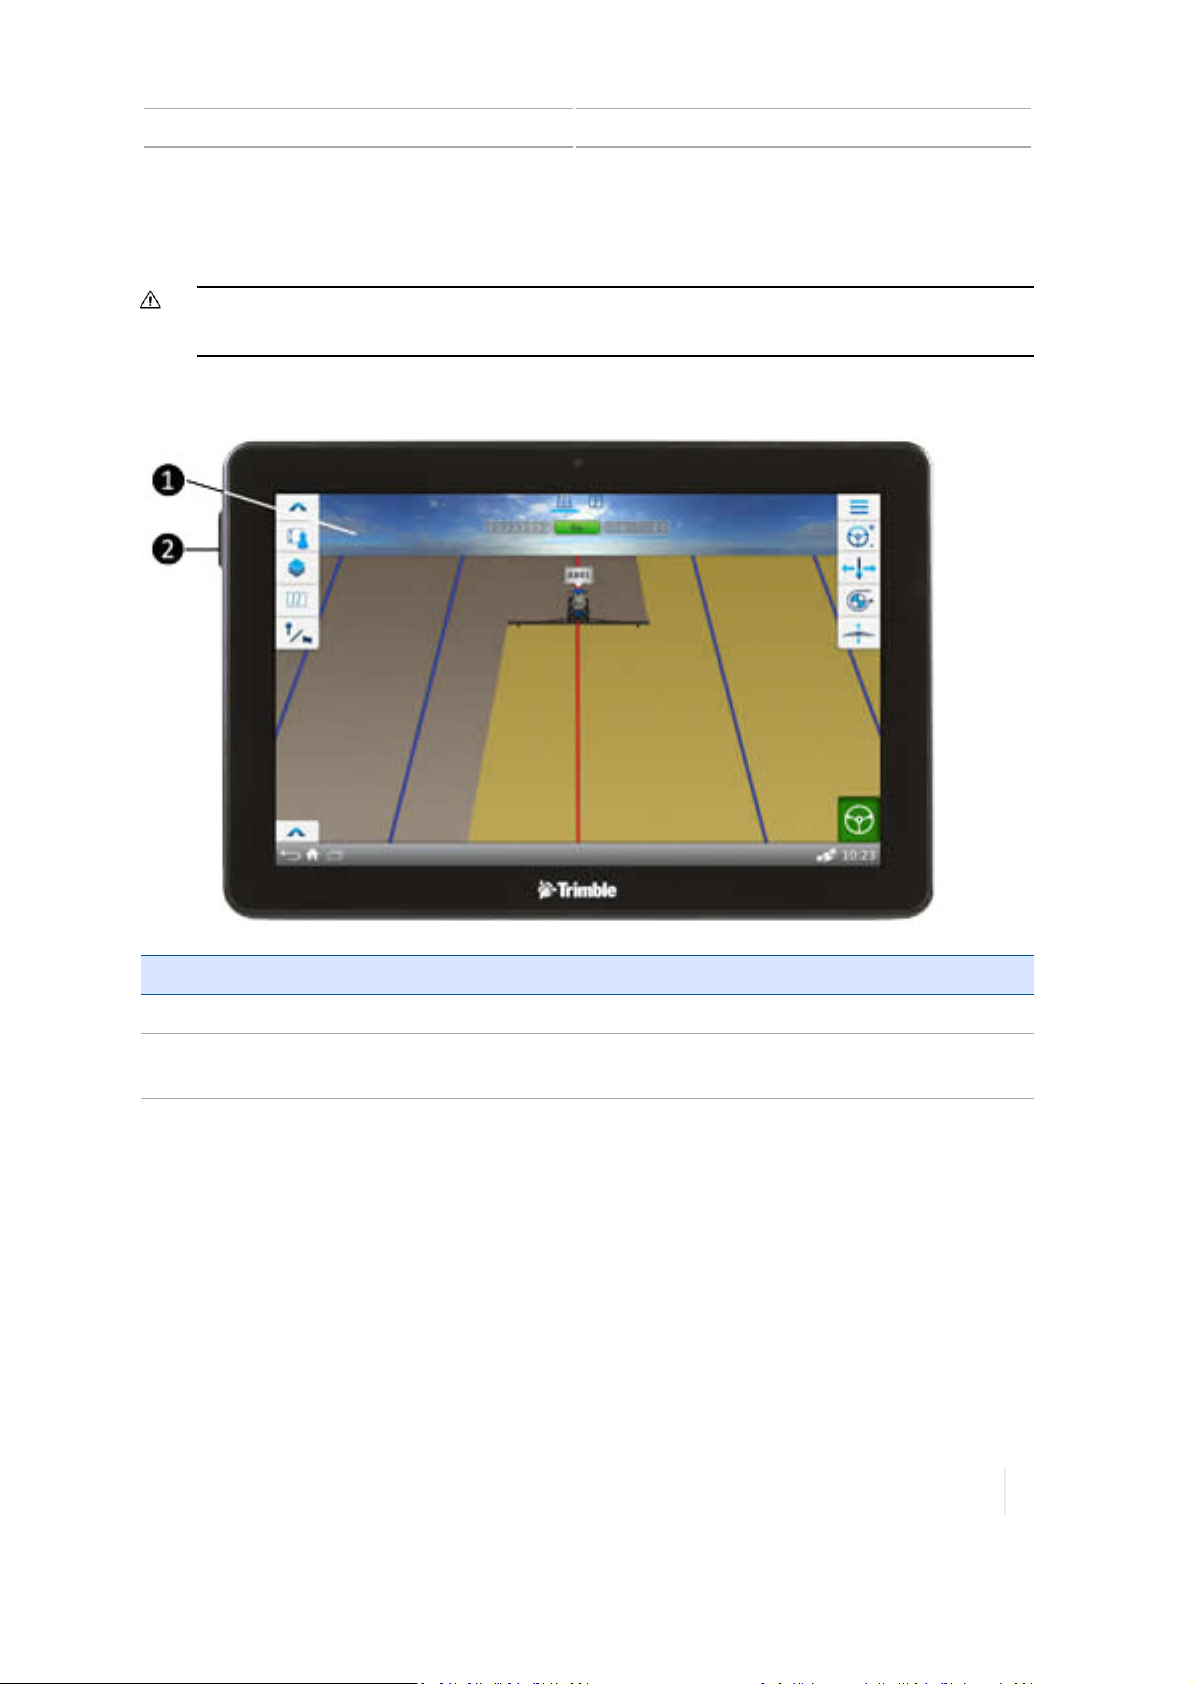
Components 4 Installation
TMX-2050 display
CAUTION – Do not press on the screen with a sharp item, such as a pencil. You may damage the surface of the
screen.
Front view
Item Description
1 12" touch-sensitive screen
2 Port: USB (side with cover). Socket for USB drive to transferring data to and from the
TMX-2050 display. See
Version 1.075, Revision C TMX-2050 Display User Guide 95
Data transfer, 67
USB socket, 74
and
.
Page 96
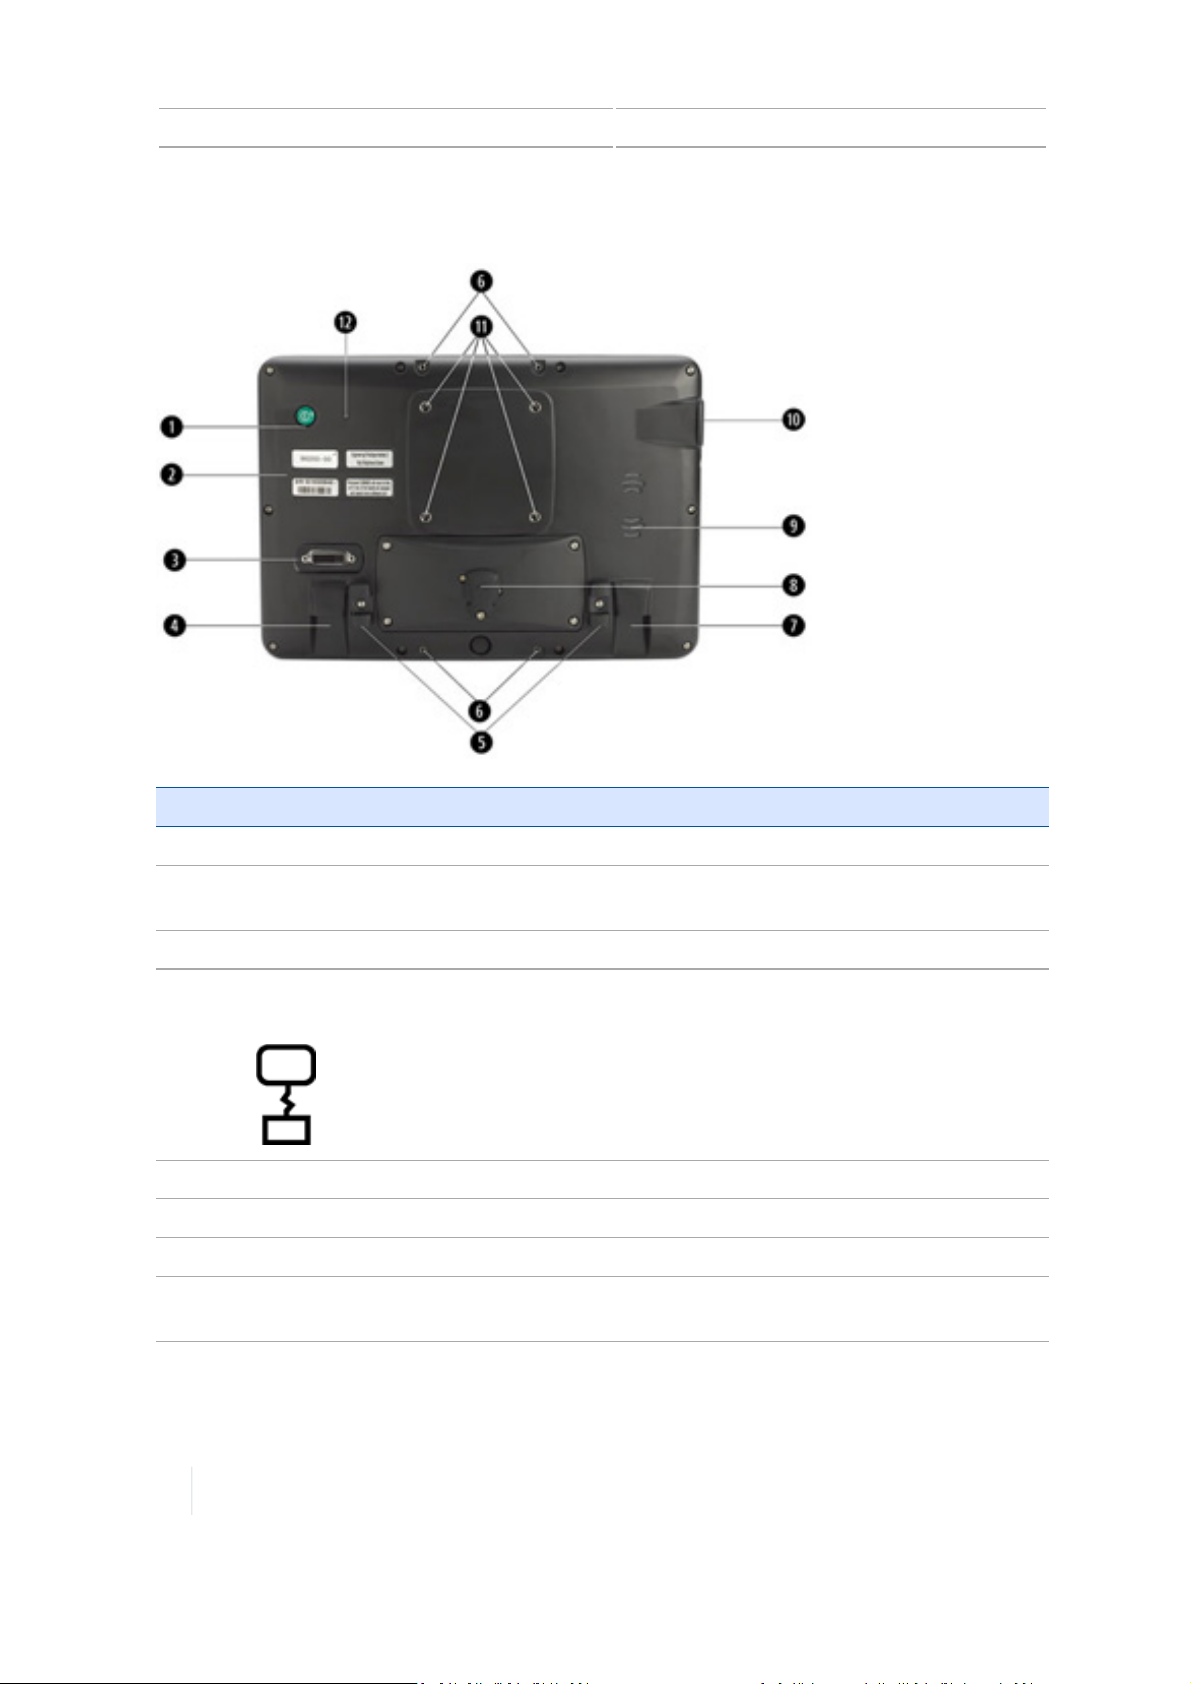
4 Installation Components
Rear view
Item Name Explanation
1 Power button Powers the TMX-2050 display on or off
2 Labels with part number
N/A
and serial number
3 Port: DVI / HDMI For future capability
4
Jack: TM-200 Module
Socket for connecting to the TM-200 Module
(RJ45)
5 Cable brackets Holds Trimble Ethernet cables to prevent cable strain
6 Interior bolts Location for mounting Field IQ switch box
7 Jack: CAN(RJ11) For future capability
8 Port: USB (rear) with cover Socket for USB drive to transferring data to and from the
TMX-2050 display
96 TMX-2050 Display User Guide Version 1.075, Revision C
Page 97
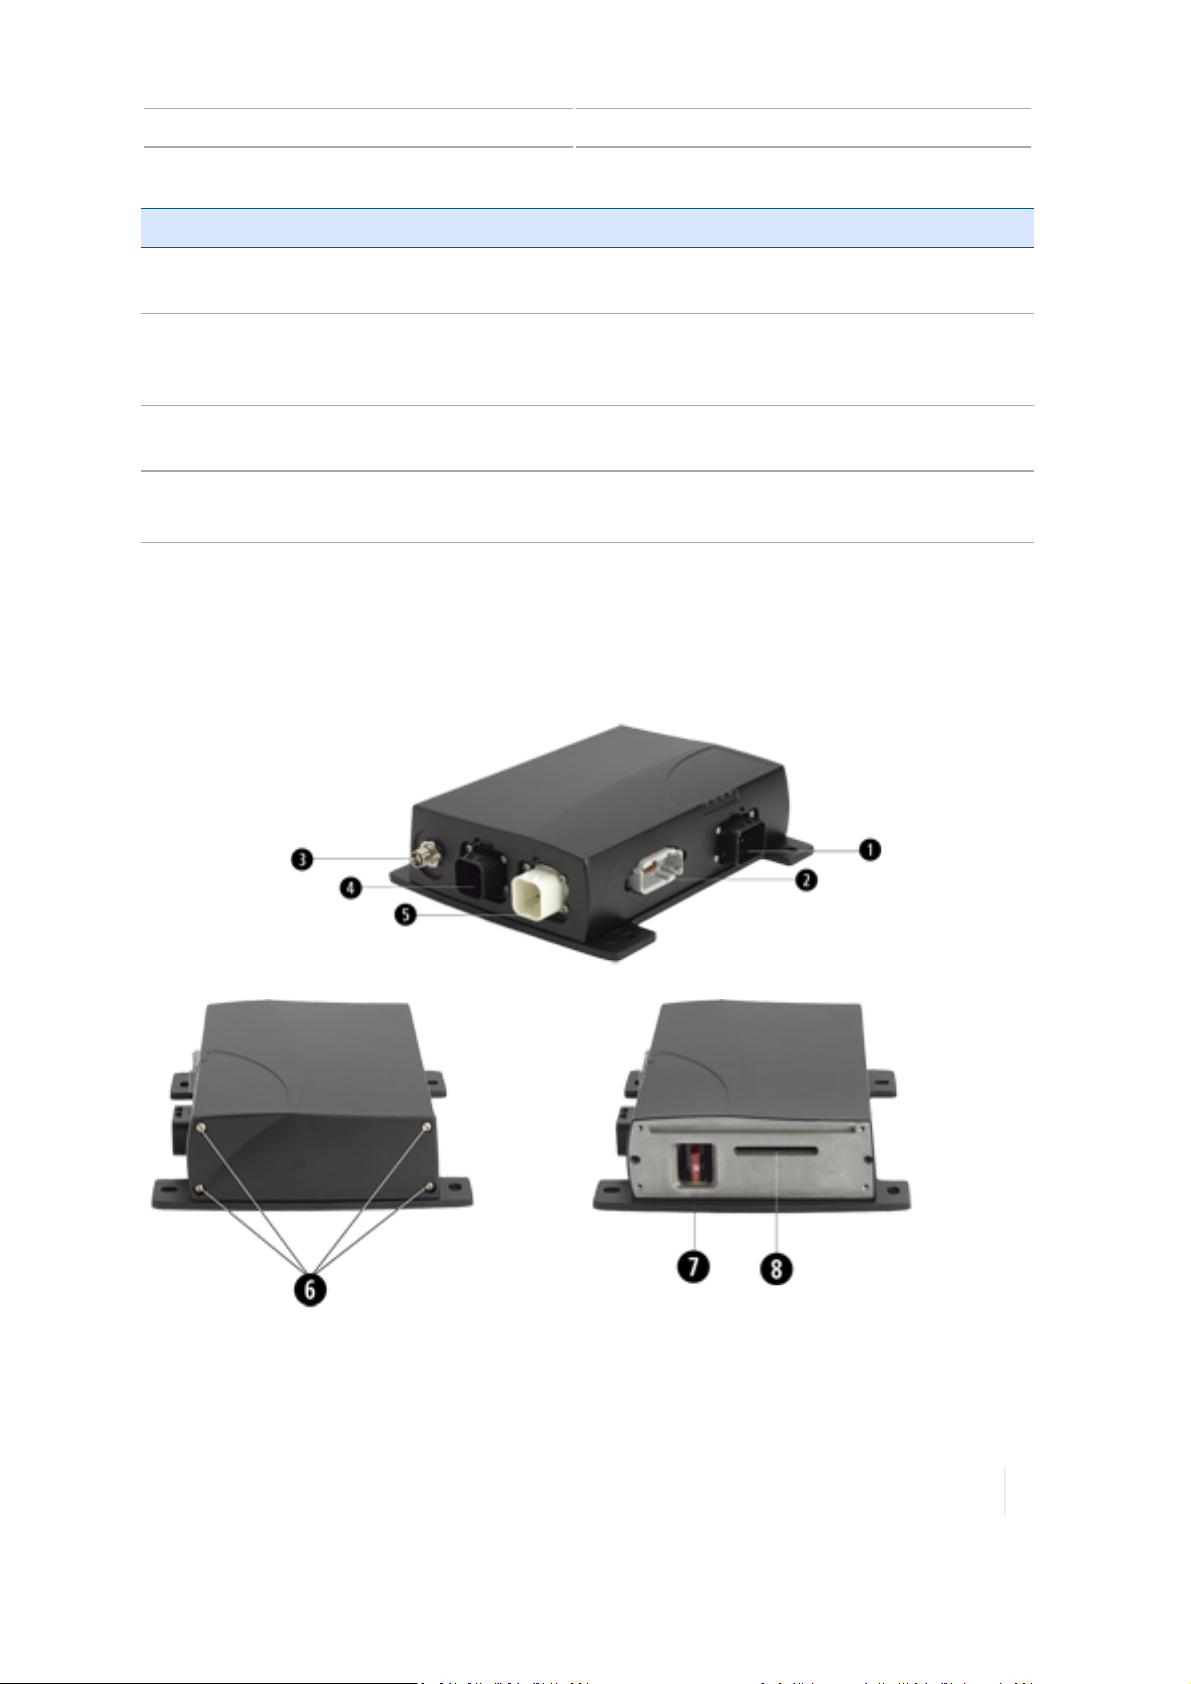
Components 4 Installation
Item Name Explanation
9 Speakers For use if you have sound activated on the TMX-2050
display. See
10 Port: USB (side) with cover Socket for USB drive to transferring data to and from the
TMX-2050 display. See
74
.
Display settings, 82
Data transfer, 67
.
USB socket,
and
11 Interior bolts in mounting
plateplate
12 Ambient light sensor
Receives screws for Zirkona display mount
Senses lower ambient light and activates the backlight on
the display.
TM-200 Module
The TM-200 Module is a hub for connectivity and high-performance GNSS positioning. It connects to
the TMX-2050 display with a single cable. All remaining components connect to the TM-200 Module.
This enables you to quickly disconnect and reconnect the TMX-2050 display as needed.
Version 1.075, Revision C TMX-2050 Display User Guide 97
Page 98
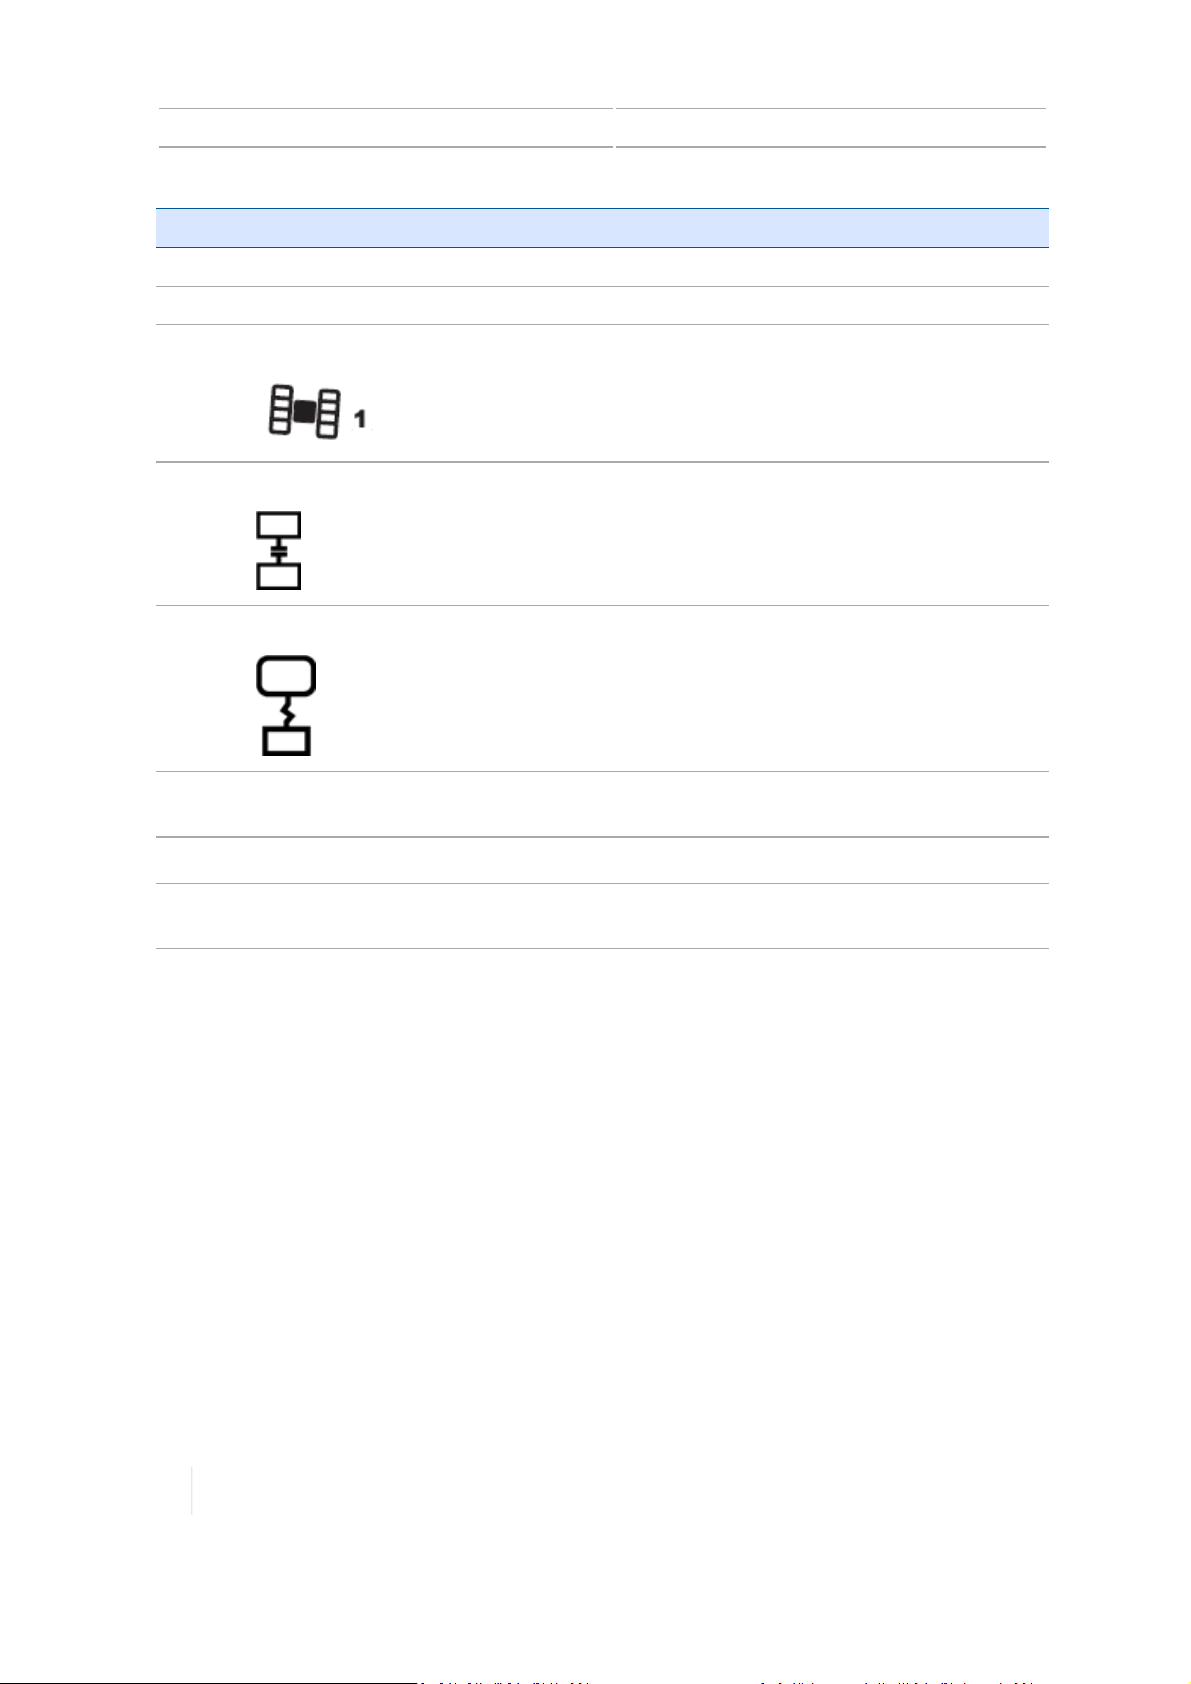
4 Installation Components
Item Name Explanation
1 14 pin AMPSEAL connector Socket for power and inputs (Port B)
2 12 pin DEUTSCH connector Socket for inputs (Port A)
3
4
AG-25 GNSSantenna connector
8 pin AMPSEAL connector
Socket for connecting to the AG-25 GNSSantenna
Socket for Ethernet cable to connect to DCM-300
modem.
5
8 pin AMPSEAL connector
Socket for connecting to the TMX-2050 display
6 Screws and end cover plate Unscrew and remove end cover plate to expose the
AG-815 radio expansion slot.
7 10 amp fuse
Protect components from power surges
8 Radio expansion slot Socket for AG-815 integrated radio connector. (See
AG-815 integrated radio, 99
.)
DCM-300 modem
The DCM-300 modem is available in two models for use on Global System for Mobile
Communications (GSM) cellular networks, such as AT&T, or Code Division Multiple Access (CDMA)
cellular networks, such as Verizon.
The DCM-300 modem enables you to use:
l Correction services CenterPoint RTX™ and CenterPoint VRS™ as well as third-party network RTK
corrections
l Data transfer for Office Sync / Connected Farm Office Sync setup, 130
l Cellular data plans (USA only)
l Global GSM cellular networks
l WiFi signals as applicable
98 TMX-2050 Display User Guide Version 1.075, Revision C
Page 99
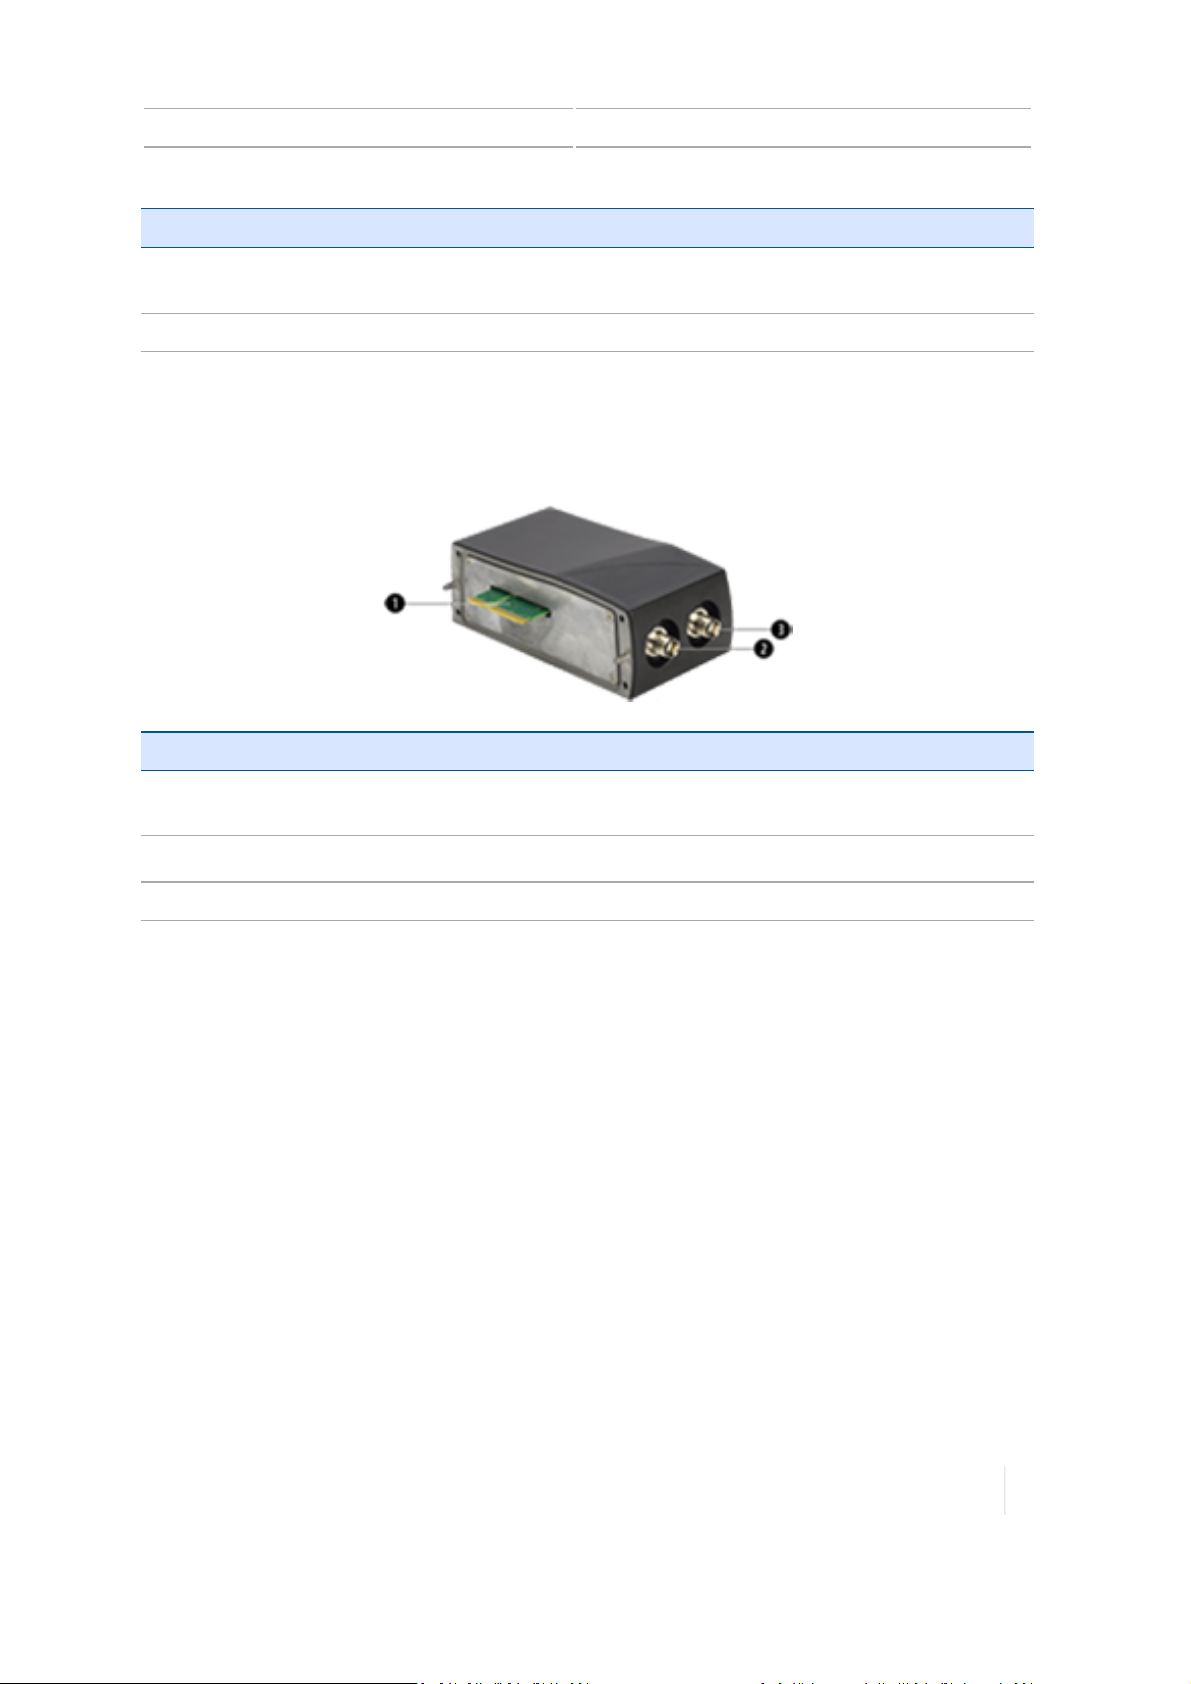
Components 4 Installation
For information on: See:
Connecting the
modem
Modem status
Connect the DCM-300 modem, 111
DCM-300 modem status, 302
AG-815 integrated radio
The AG-815 integrated radio provides access to radio networks for real-time, high-precision
CenterPoint™ RTK applications. The AG-815 is available in both the 450 MHz and 900 MHz versions.
Item Name Explanation
1 Radio blade connector Connection to TM-200 Module. See
number 8.
TM-200 Module, 97
,
2 Antenna connector
3 Antenna connector Optional GNSSconnector for future use
Radio antenna connector
Version 1.075, Revision C TMX-2050 Display User Guide 99
Page 100
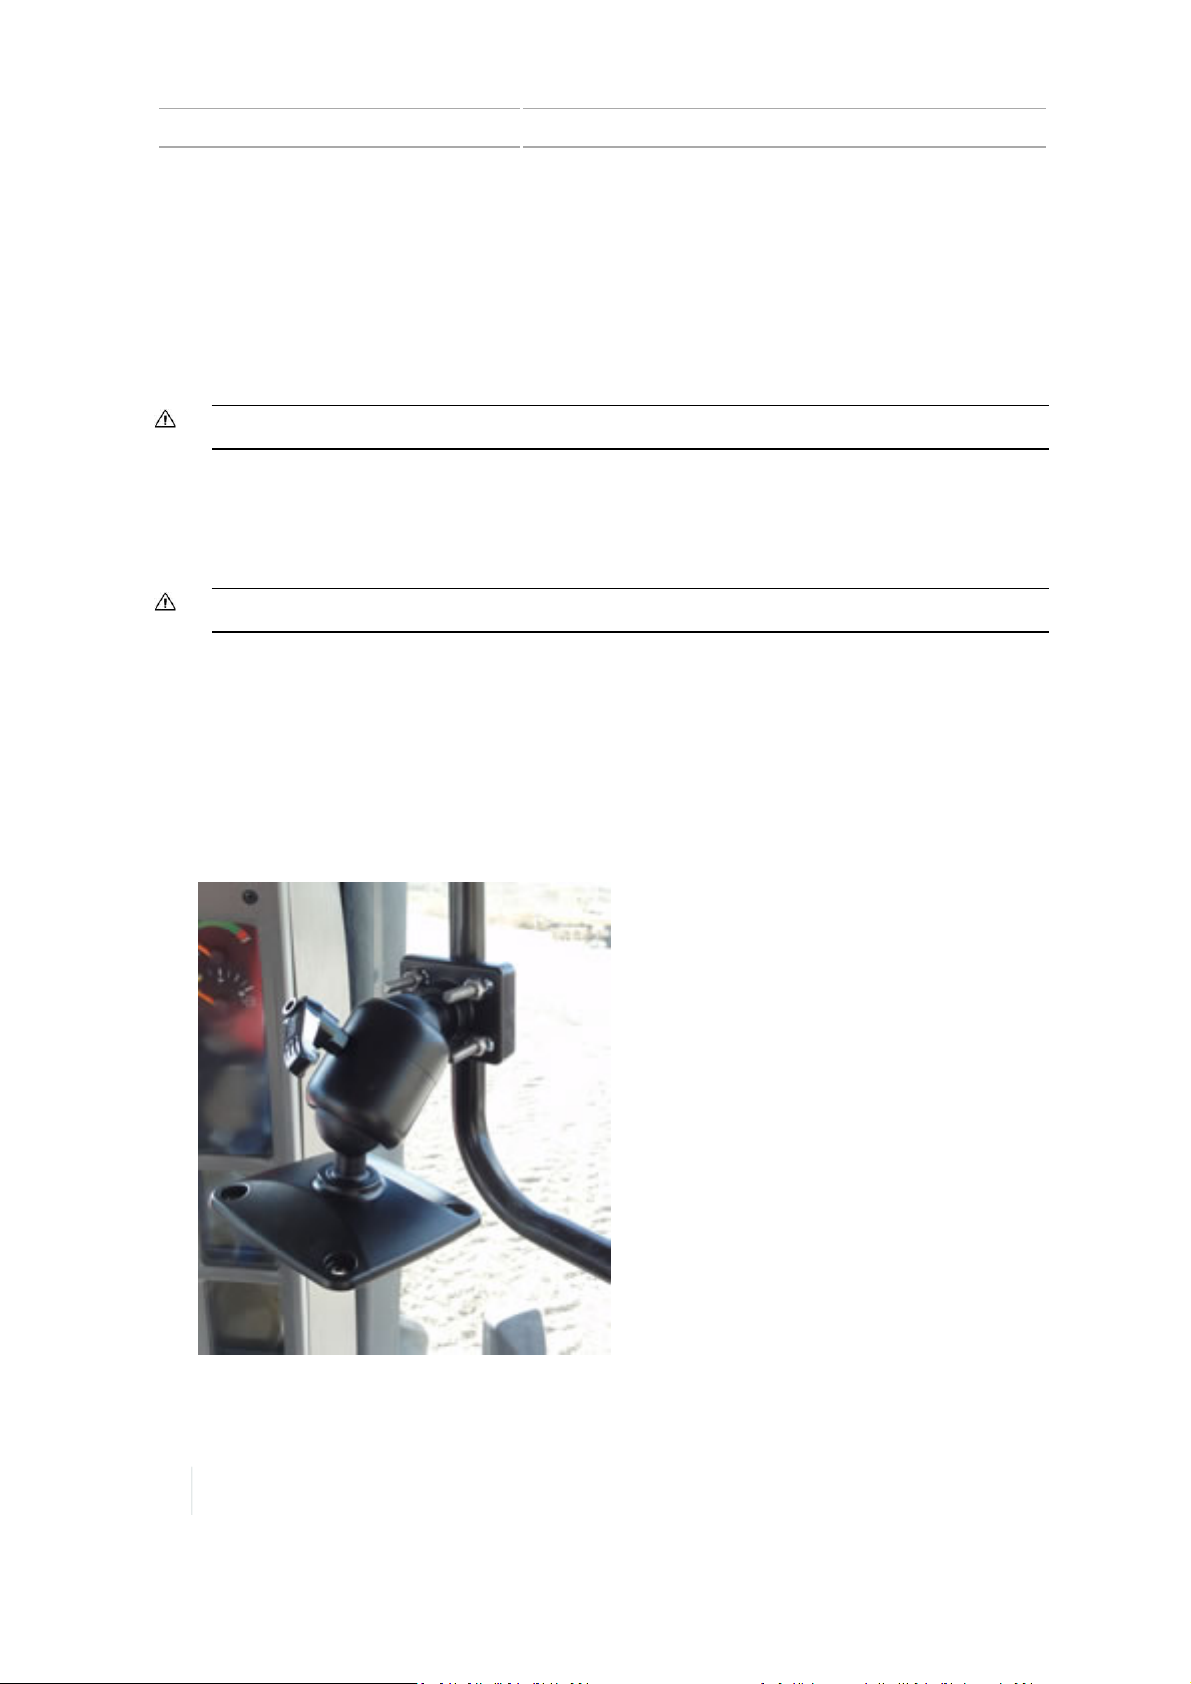
4 Installation Installation overview
Installation overview
The display mount attaches to a rail in the cab of the vehicle. The TMX-2050 display connects to the
display mount.
The TM-200 Module connects to the display with a single cable.
Additional components to install depend on your connection and correction services, and the
features you are using.
CAUTION – Make sure the vehicle power is off when you are connecting system components.
Install the display and mount
Use the mounting hardware supplied in the display kit to mount the display in the vehicle cab.
CAUTION – Make sure the vehicle power is off when you are connecting system components.
Before completing installation steps, select a position in the cab where the bar mount (4) can be
attached to a rail. Hold the display in the selected location and make sure that it is:
l Easy to see, but does not block the driver’s view
l Within the driver’s reach so that the USB drive is easy to remove and replace
l Does not interfere with the driver getting in or out of the cab, or any other activities
1.
Use the provided bolts to attach the bar mount (4) to a rail in the cab.
100 TMX-2050 Display User Guide Version 1.075, Revision C
 Loading...