

Page 1
Quick Installation Guide
TS-I300
TS-I300W
Page 2

Table of Contents
Table of Contents
English .....................................................................................................
1. Before You Start
2. .........................................................................
Hardware Installation
Configure the Storage Server
3. ............................................................
4. Accessing Storage Devices on TS-I300/TS-I300W ...........................
Troubleshooting ........................................................................................
................................................................................
1
1
2
4
7
8
Version 07.06.2006
Page 3
1. Before You Start
System Requirements
Web Browser: Internet Explorer (5.5 or higher)
A computer with a network adapter properly installed.
A network Switch or Hub with an available network LAN port.
A RJ-45 network cable.
IDE Internal Hard Drive or USB 2.0 Storage Device (i.e. flash drive,
external hard drive; not included)
Windows XP, 2000, NT, ME, 98, Linux
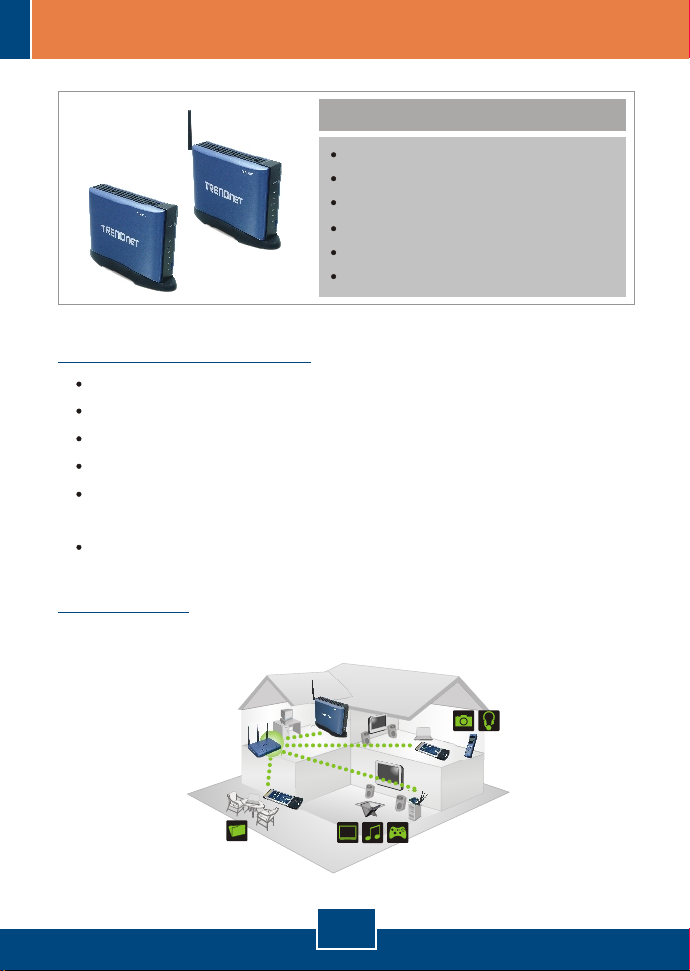
Application
Package Contents
TS-I300/TS-I300W
User's Guide CD-ROM
Quick Installation Guide
Mounting Stand
AC Power Adapter (12V DC, 3.0A)
1 x 2dBi Detachable Antenna (TS-I300W)
USB 2.0 & IDE Network Storage Enclosure (TS-I300)
USB 2.0 & IDE Wireless Network Storage Enclosure (TS-I300W)
DATA
Or
HD
1
English
Page 4
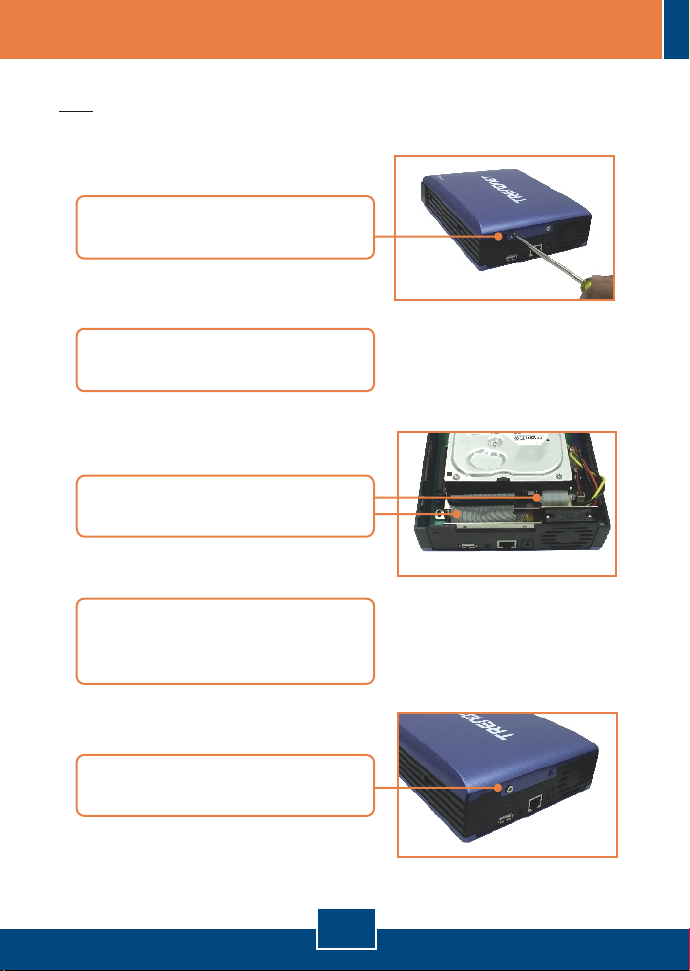
2. Hardware Installation
Note: Before installing the IDE hard drive, the jumper settings must be set to
Master.
1. Remove the two screws from the
rear panel to detach the cover.
2. Make sure the jumper settings on
the hard drive is set to Master.
3. Connect the IDE cable and power
cable to the hard drive.
4. Place the hard drive onto the metal
bracket and secure it with four
mounting screws.
5. Replace the cover and secure the
two screws.
2
English
Page 5

6. Attach the mounting stand to the
Storage Server.
7. Connect a RJ-45 cable from the
Switch/Hub to the LAN port of the
Storage Server and then connect
the 2dBi Detachable Antenna
(TS-I300W).
8. Connect the External Power
Adapter to the Storage Server and
then to a power outlet.
9. Verify that the following panel lights
are on: Power, LAN, HDD and
WLAN (TS-I300W).
Your hardware installation is now complete.
3
English
Page 6

3. Configure the Storage Server
Note: Install and use the Easy Search Utility to discover all the TS-I300/TSI300W on the network, assign IP Address, change the host name and
workgroup, and mount or unmount the hard drive.
For Windows Users
1. Insert the Utility CD-ROM into
your computer's CD-ROM Drive
and then click Easy Search Utility.
2. Click on Search device, and then
select the Storage Server.
3. Configure the IP (IP address),
Network (Subnet mask),
Gateway and then click Modify.
Note: The IP Address must match
the network segment of your
network.
4. Click Connect to webpage.
4
English
Page 7

Note: If your hard drive has already been formatted, please skip to step 9. If
you are attaching a brand new hard drive, please continue on to step 5.
5. Click Format Hard Drive.
6. Click OK.
7. Click Restart.
8. Click OK.
5
English
Page 8

9. Enter the User name and
Password, and then click Config.
User Name: admin
Password: admin
Note: For the TS-I300 skip to section 4. For the TS-I300W continue on to step
10.
10. Click Advanced and then
Wireless.
11. Click Access Point, and then
click Enable. Enter an SSID and
then click Apply.
Your configuration is now complete.
For detailed information regarding the TS-I300/TS-I300W's configuration and
advanced settings, please refer to the Troubleshooting section, User's Guide
CD-ROM, or TRENDnet's website at http://www.trendnet.com.
6
English
Page 9

4. Accessing Storage Devices on TS-I300/TS-I300W
1. Select the hard drive, and then
click Mount.
2. Click OK.
3. Double-click on My Computer.
Then double-click on any mounted
hard drive under Network Drives.
Your storage device is ready for access
English
7
Page 10

Troubleshooting
Can I connect or disconnect the USB storage device while the TS-I300/TS-I300W is on?
Q1:
Q2:
an error message says “The page cannot be displayed.” How can I get into the TS-I300/TSI300W's web configuration page?
Yes, you can connect or disconnect any external USB device while the computer is on,
A1:
because the USB interfaces are Plug-and-Play and hot-pluggable. Just press on the
Unmount button on the unit or open the utility program and press unmount for the USB
device.
I specified the IP address http://192.168.1.2 in my Internet Browser's Address Bar, but
First, check your hardware settings again by following the instructions in section 2.
A2:
Second, make sure the LAN and WLAN (TS-I300W) lights are lit. Third, make sure the
TS-I300/TS-I300W is assigned an IP Address in the same subnet as your network. You may
need to adjust the TCP/IP settings on your computer to match the storage server. Please
see the steps below:
1. Go into the Control Panel and double-click
the Network Connections icon, right-click
the Local Area Connection icon and then
click Properties.
2. Click Internet Protocol (TCP/IP) and then
click Properties. Then click on Use the
following IP address, and make sure you
assign your network adapter an IP address
in the subnet of 192.168.1.x.
Q3:
I am unable to mount or access the IDE hard drive. What should I do?
A3:
First, verify that the IDE hard drive has been properly installed (see section 2). Second,
disable any software firewall programs (e.g. Norton Internet Security, McAfee). If you are
running Windows XP, disable the built-in XP firewall. Third, make sure the
TS-I300/TS-I300W is assigned an IP Address in the same subnet as your network.
8
Page 11

Q4:
All the settings are correct, but I can not make a wireless connection to the TS-I300W.
A4:
First, double check that the WLAN light on the storage device is lit. Second, power cycle
the Access Point. Unplug the power to the TS-I300W. Wait 15 seconds, then plug the power
back in. Third, contact the manufacturer of your wireless network adapter. Make sure the
wireless network adapter is configured with the proper SSID. The default SSID of the Access
Point is TRENDnet.
If you still encounter problems or have any questions regarding the TS-I300/TS-I300W, please
contact TRENDnet's Technical Support Department.
Certifications
This equipment has been tested and found to comply with FCC and CE Rules.
Operation is subject to the following two conditions:
(1) This device may not cause harmful interference.
(2) This device must accept any interference received. Including interference that may cause
undesired operation.
Waste electrical and electronic products must not
be disposed of with household waste. Please
recycle where facilities exist. Check with you Local
Authority or Retailer for recycling advice.
NOTE: THE MANUFACTURER IS NOT RESPONSIBLE FOR ANY RADIO OR TV INTERFERENCE
CAUSED BY UNAUTHORIZED MODIFICATIONS TO THIS EQUIPMENT. SUCH MODIFICATIONS
COULD VOID THE USER’S AUTHORITY TO OPERATE THE EQUIPMENT.
9
Page 12

TRENDnet Technical Support
.
US Canada
Toll Free Telephone: 1(866) 845-3673
24/7 Tech Support
Europe (Germany France Italy Spain Switzerland UK)
Toll Free Telephone: +00800 60 76 76 67
English/Espanol - 24/7
Francais/Deutsch - 11am-8pm, Monday - Friday MET
. . . . .
Worldwide
Telephone: +(31) (0) 20 504 05 35
English/Espanol - 24/7
Francais/Deutsch - 11am-8pm, Monday - Friday MET
Product Warranty Registration
Please take a moment to register your product online.
Go to TRENDnet’s website at http://www.trendnet.com
3135 Kashiwa Street
Torrance, CA 90505
USA
Copyright ©2006. All Rights Reserved. TRENDnet.
 Loading...