

Page 1
TS-U100/ TS-U200
USB 2.0 Network Storage Server with All-in-1 Memory Card Reader/Writer
USB-2.0-Netzwerkspeicherserver mit Multispeicherkartenleser/-schreiber
2-port USB 2.0 Network Storage Server
Quick Installation Guide
Guide d'installation rapide du
Serveur de stockage réseau à 2 ports USB 2.0/
Serveur de stockage réseau USB 2.0 avec lecteur/
enregistreur de carte mémoire tout en un
USB-2.0-Netzwerkspeicherserver mit 2 Ports /
Kurzanleitung zur Installation
Servidor de almacenamiento de red USB 2.0 de 2 puertos/
Servidor de almacenamiento de red USB 2.0 con lector/e
Guía de instalación rápida del
scritor de tarjeta de memoria todo en uno
Version 03.30.05
TRENDnet
TRENDware, USA
What's Next in Networking
Copyright ©2005. All Rights Reserved. TRENDware International, Inc.
Page 2

Table of Contents
Español .....................................................................................................
1. Preparación para la instalación ........................................................
2. Detalles del producto ........................................................................
3. Instalación del hardware ..................................................................
4. Configuración del Servidor de Almacenamiento ...............................
5. Cómo acceder a los dispositivos de
almacenamiento TS-U100/TS-U200 .................................................
Troubleshooting ........................................................................................
1
1
2
4
5
7
9
Page 3
Español QIG
1. Preparación para la instalación
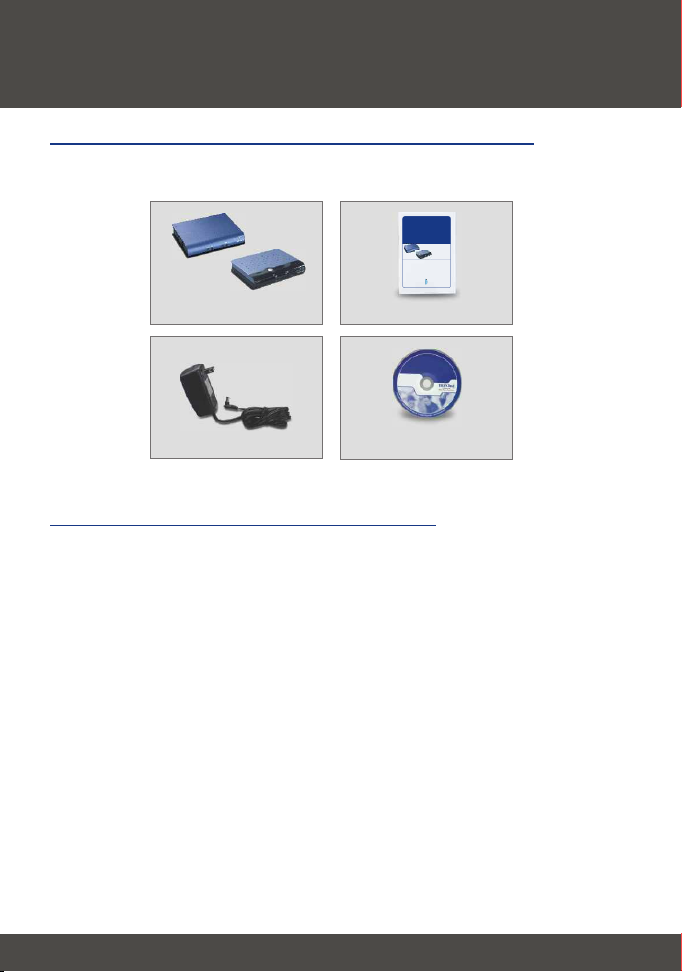
Verificación de los contenidos del paquete
Verifique que su caja contiene todo lo que incluimos en ella:
TS-U100/ TS-U200
2-port USB 2.0 Network Storage Server
USB 2.0 Network Storage Server with All-in-1 Memory Card Reader/Writer
Quick Installation Guide
Guide d'installation rapide du
Serveur de stockage réseau à 2 ports USB 2.0/
Serveur de stockage réseau USB 2.0 avec lecteur/
enregistreur de carte mémoire tout en un
USB-2.0-Netzwerkspeicherserver mit 2 Ports /
USB-2.0-Netzwerkspeicherserver mit Multispeicherkartenleser/-schreiber
Kurzanleitung zur Installation
Guía de instalación rápida del
Servidor de almacenamiento de red USB 2.0 de 2 puertos/
Servidor de almacenamiento de red USB 2.0 con lector/e
scritor de tarjeta de memoria todo en uno
Version 03.30.05
TRENDnet
TRENDware, USA
What's Next in Networking
Copyright ©2005. All Rights Reserved. TRENDware International, Inc.
TS-U100/TS-U200
Guía de instalación rápida
Adaptador eléctrico (5V, 2.5A)
CD-ROM
Requisitos mínimos del Hardware
1. Conmutador a 10/100 Mbps
2. Cable Cat 5 con conector RJ-45
3. Dispositivos de almacenamiento USB 2.0 (p.ej. disco duro, disco flash, lector
de tarjeta de memoria, etc.)
4. Tarjeta de red instalada con protocolo de red TCP/IP
5. Windows XP, 2000, ME, 98SE
1
Español
Page 4
2. Detalles del producto
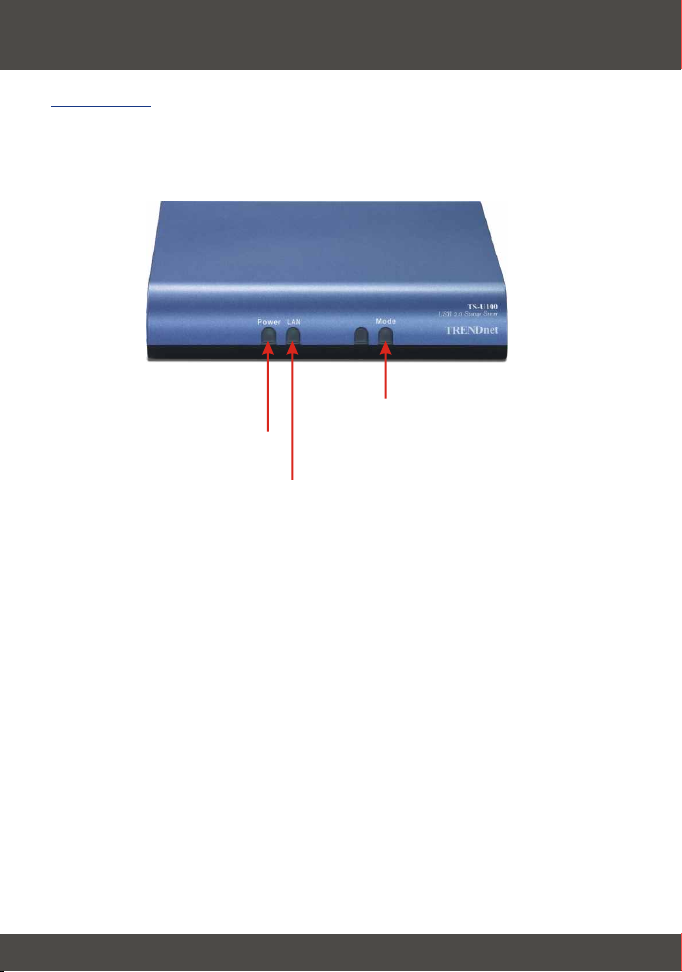
TS-U100
El servidor de almacenamiento de red USB 2.0 dispone de 3 LEDs para la
indicación de potencia, actividad de red y dispositivos de almacenamiento.
LED de
LED de potencia
LED de red
almacenamiento USB
2
Español
Page 5

TS-U200
El servidor de almacenamiento de red USB 2.0 con lector/escritor de tarjeta de
memoria todo en uno cuenta con 3 LEDs y 4 ranuras para dispositivos
lector/escritor de tarjeta de memoria. Los LEDs indican la potencia, actividad
de red y dispositivos de almacenamiento. Las ranuras de los dispositivos
lector/escritor de tarjeta de memoria indican las ranuras SM, SD/MMC, CF y
MS.
LED de
potencia
Tarjeta de memoria
Lector/Escritor
LED de red
3
LED de almacenamiento USB
Español
Page 6

3. Instalación del hardware
1. Conecte el adaptador eléctrico al TS-U100/TS-U200.
2. Conecte el TS-U100/TS-U200 a su conmutador o PC a través de un cable
CAT 5.
3. Conecte su dispositivo de almacenamiento USB 2.0 a la ranura USB.
3
4. (Sólo para TS-U200) introduzca la tarjeta SmartMedia, Memory Stick,
SecureDigital o MultiMedia dentro de las ranuras para tarjeta de memoria
con los conectores de cobre hacia abajo. Introduzca la tarjeta Compact
Flash según la imagen que se muestra a continuación.
La instalación ha finalizado.
2
4
1
Español
Page 7

4. Configuración del Servidor de
Almacenamiento
Para usuarios de Windows
1. Introduzca el CD-ROM de TS-U100/TS-U200 en la unidad de CD-ROM de
su PC.
2. Haga clic en “Run Utility” (Ejecutar la herramienta)
3. Haga clic en Search Device (Dispositivo de búsqueda) y luego pulse TS-
U100/TS-U200. Tome nota y escriba el nombre del TS-U100/TS-U200.
5
Español
Page 8

4. Cambie la dirección IP en la sección LAN y luego pulse Modify (Modificar).
Tome nota y escriba el nombre de la dirección IP del TS-U100/TS-U200
6
Español
Page 9

5. Cómo acceder a los dispositivos de
almacenamiento TS-U100/TS-U200
1. Vaya a la sección Static (Estático) y luego pulse el dispositivo de
almacenamiento al que desee acceder. Haga clic en Mount (Montaje) y
luego pulse OK. Repita este paso para añadir más de un dispositivo de
almacenamiento.
2. Haga doble clic en My Computer (Mi PC) y luego haga doble clic sobre
cualquier dispositivo de almacenamiento instalado en las Network Drives
(Unidades de red).
7
Español
Page 10

3. Su dispositivo de almacenamiento está listo para usar.
8
Español
Page 11

Troubleshooting
Q1:
Can I connect or disconnect the USB storage device while the TS-U100/TS-
U200 is on?
A1:
Yes, you can connect or disconnect any external USB device while the
computer is on, because the USB interfaces are Plug-and-Play and hot-pluggable.
Please DO NOT disconnect any USB storage device while the MODE LED is red
or when TS-U100/TS-U200 is saving a file into a USB storage device.
I typed in http://192.168.1.2 in my web browser, but I do not see the login
Q2:
screen.
Please make sure that the TS-U100/TS-U200 is properly connected to your
A2:
switch or computer (See 3. Hardware Installation). Open a DOS Prompt window,
type ping 192.168.1.2, and press Enter. Under Ping statistics, you should have
0% loss.
I have verified that my TS-U100/TS-U200 is connected properly to a switch or
Q3:
computer, and I can access the login screen. However, when I try to type in the
server name into my web browser, my browser says that it “cannot find server”.
What do I do?
Make sure that you are typing the server name correctly. Remember to type
A3:
the server name with this format: \\Server_Name. As an alternative, you can also
type \\192.168.1.2 or the modified IP address that you assigned to the TSU100/TS-U200. DO NOT type the server name in this format: //Server_Name and
make sure that the server name is spelled correctly.
9
Page 12

Q4:
I made sure that I was typing the server name in the following format:
\\Server_Name, but I get an error message. What do I do?
A4:
Most homes use peer-to-peer networks, so devices such as a storage server
may not be recognized immediately. Please allow 5-10 minutes before typing in
\\Server_Name. If you still cannot find the TS-U100/TS-U200, then power cycle
the TS-U100/TS-U200 by pulling out the power adapter connector and putting it
back in. Now try typing in \\Server_Name.
I clicked “mount” in the utility but I get a “Mount Disk Fail” window. What do
Q5:
I do?
In peer-to-peer networks, network devices such as storage servers are not
A5:
recognized immediately. Please wait about 2-5 minutes before pressing the
“mount” button again. If you still cannot mount a storage device, press the reset
button at the back of the TS-U100/U200. Refer to the User's Guide to reset the
TS-U100/U200.
If you have any questions regarding the TS-U100/TS-U200 USB 2.0 Network Storage
Server, please contact Trendware Technical Support Department.
Certifications
This equipment has been tested and found to comply with FCC and CE Rules.
Operation is subject to the following two conditions:
(1) This device may not cause harmful interference.
(2) This device must accept any interference received.
Including interference that may cause undesired operation.
10
Page 13

@
TRENDnet
TRENDware, USA
What's Next in Networking
Product Warranty Registration
Please take a moment to register your product online.
Go to TRENDware’s website at http://www.TRENDNET.com
TRENDnet Technical Support
US/Canada Support Center European Support Center
Contact
Telephone:
Fax:
Email:
Tech Support Hours
7:30am - 6:00pm Pacific Standard Time
Monday - Friday
1(310) 626-6252
1(310) 626-6267
support@trendnet.com
TRENDware International, Inc.
3135 Kashiwa Street. Torrance, CA 90505
Contact
Telephone
Deutsch : +49 (0) 6331 / 268-460
Français : +49 (0) 6331 / 268-461
Español : +49 (0) 6331 / 268-462
English : +49 (0) 6331 / 268-463
Italiano : +49 (0) 6331 / 268-464
Dutch : +49 (0) 6331 / 268-465
+49 (0) 6331 / 268-466
Fax:
Tech Support Hours
8:00am - 6:00pm Middle European Time
Monday - Friday
http://www.TRENDNET.com
Copyright ©2005. All Rights Reserved. TRENDware International, Inc.
 Loading...