


1

TABLE OF CONTENT
1. Package Contents ............................................................................................................... 3
2. Comprehensive Modem Installation Instructions ............................................................... .3
2.1 System Requirements ........................................................................................................... 3
2.2 Hardware Installation ........................................................................................................... 3
2.3 System Setup ........................................................................................................................ 5
2.3.1 Setup Instructions for Windows 7 /Vista .................................................................................. .5
2.3.2 Setup Instructions for Windows XP / 2000 / ME / 98SE ........................................................... .7
2.3.3 Uninstall Modem from Windows 7 / Vista ................................................................................ 9
2.3.4 Uninstall Modem from Windows XP / 2000 / ME / 98SE ........................................................ 10
2.4 Testing your modem ........................................................................................................... 12
2.5 Install Communication Software ........................................................................................ 12
3. Troubleshooting ............................................................................................................... 13
Appendix 1: Modem Specifications ....................................................................................... 15
Appendix 2: Government Compliance .................................................................................. 16
2
Section 1 Package Contents
TFM-560X
CD-ROM (Driver & User’s Guide)
Multi-language Quick Installation Guide
1 x RS-232C cable
1 x RJ-11 telephone cable
1 x 9VAC 1A external power adapter
Section 2 Comprehensive Modem Installation Instructions
Section 2.1 System Requirements
The modem operates on a personal computer equipped with the following:
Windows 7/Vista/XP/2000/NT/ME/98SE and Mac OS (10.1~10.6) and Linux
One RS-232C (COM) port
Section 2.2 Hardware Installation
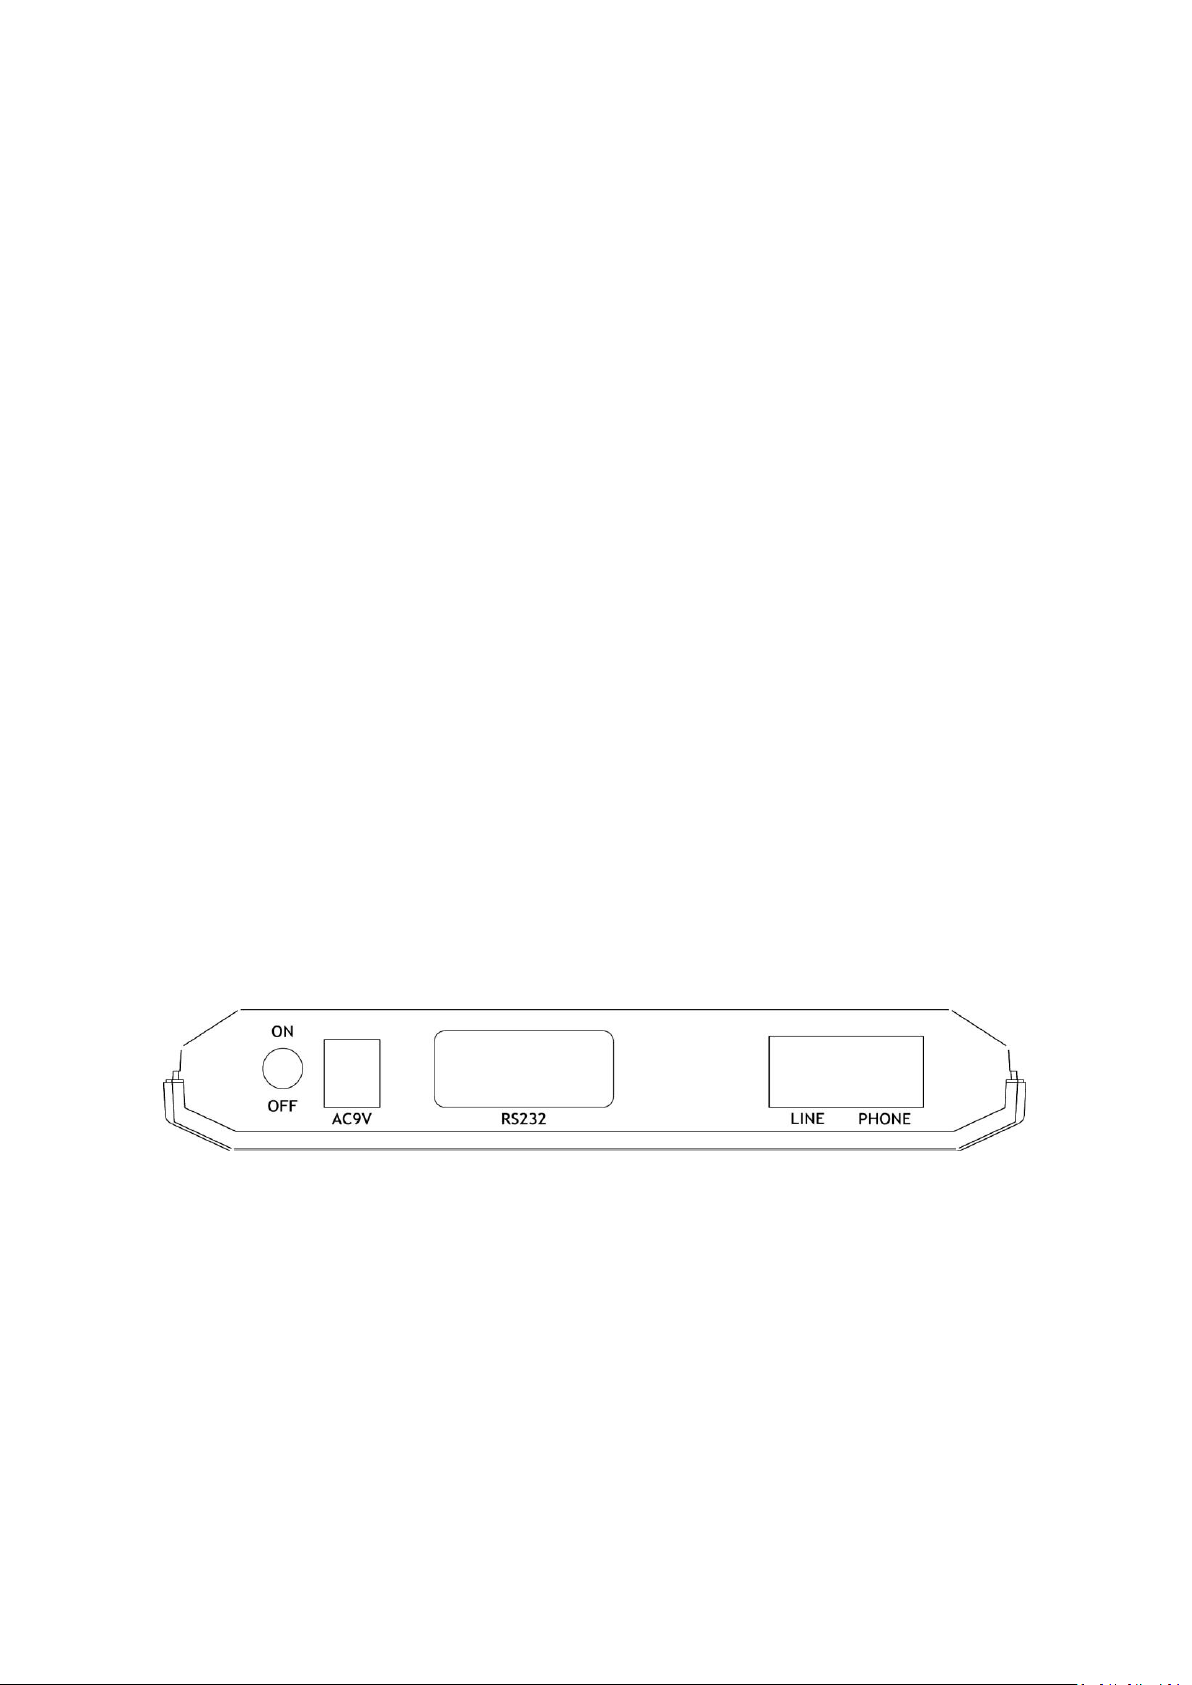
Please refer to Fig. 2 - 1 and proceed to following Steps for how to insert your modem into the computer and connect
telephone wire.
Figure 2-1 External Modem Rear Panel
1. Turn off and unplug your computer from the AC outlet.
2. Unplug any peripheral devices (keyboard, monitor, etc) from your computer.
3. Connect the male end of the serial cable into the connector marked RS-232 on the rear panel of the modem. (see
Figure 2-1)
4. Connect the female end of serial cable to the available serial port marked COMx, RS-232 or SERIAL on the back of
your computer.
5. Plug one end of telephone cord into the "LINE" jack at the modem's bracket. Plug the other end of the telephone
cord into the telephone wall jack
6. Some model may include a phone jack for an optional telephone. If you wish to use a phone through the same
3

telephone wall jack as the modem when the modem is not in use, plug the telephone cord of the phone into
"PHONE" jack at the modem's bracket now. Lift the handset and listen for a dial tone to check for a properly
connection.
7. Plug the power adapter into a AC outlet, and insert its plug into the "POWER" jack on the rear panel of your
modem after you verify the modem power switch is in the OFF position.
8. Plug the power cords, and peripherals back into the computer.
9. Turn on the modem power switch. Then turn the computer on.
10. This finishes the hardware installation for external modem. If you have not encountered any problems, you can
go to Section 2.5 Install Communication Software. If you are having problems, see Section 3 Troubleshooting.
NOTE: The telephone wall jack you use must be for an ANALOG phone line (the type found in most homes). Many
offices are equipped with digital phone lines. Please be sure you know which type of line you have.
The modem will be damaged if you use a digital phone line.
Indicator Lights
Your external modem features LED indicators on the front panel that report modem status :
MR Modem Ready Lights when the modem is turned on.
TR Terminal Ready Lights when the computer is ready to send or receive data. Indicates the status of the DTR signal
from the terminal or computer.
SD Transmit Data Flashes whenever data or commands are transmitted from the serial port of your computer or
other device to the modem.
RD Receive Data Light flashes when data is sent from the modem to your computer or other serial device.
At high speeds light may appear continuously on.
OH Off Hook Lights when the modem is off hook.
CD Carrier Detect Lights when the Data Carrier Detect (DCD) signal from the modem to the computer is on.
RS Request to Send Lights when the computer can accept data from the modem. The light will turn off when the
modem is set for hardware flow control and the computer is not ready, preventing data flow from the modem
CS Clear to Send Lights when the modem can accept data from the computer.
The light will turn off when the modem is set for hardware flow control and the modem data buffer is full,
pre-venting data flow from the computer.
4
Section 2.3 System Setup
Section 2.3.1 Setup instructions for Windows 7/ Vista
STEP 1. Insert Driver CD-ROM into your computer’s CD-ROM driver
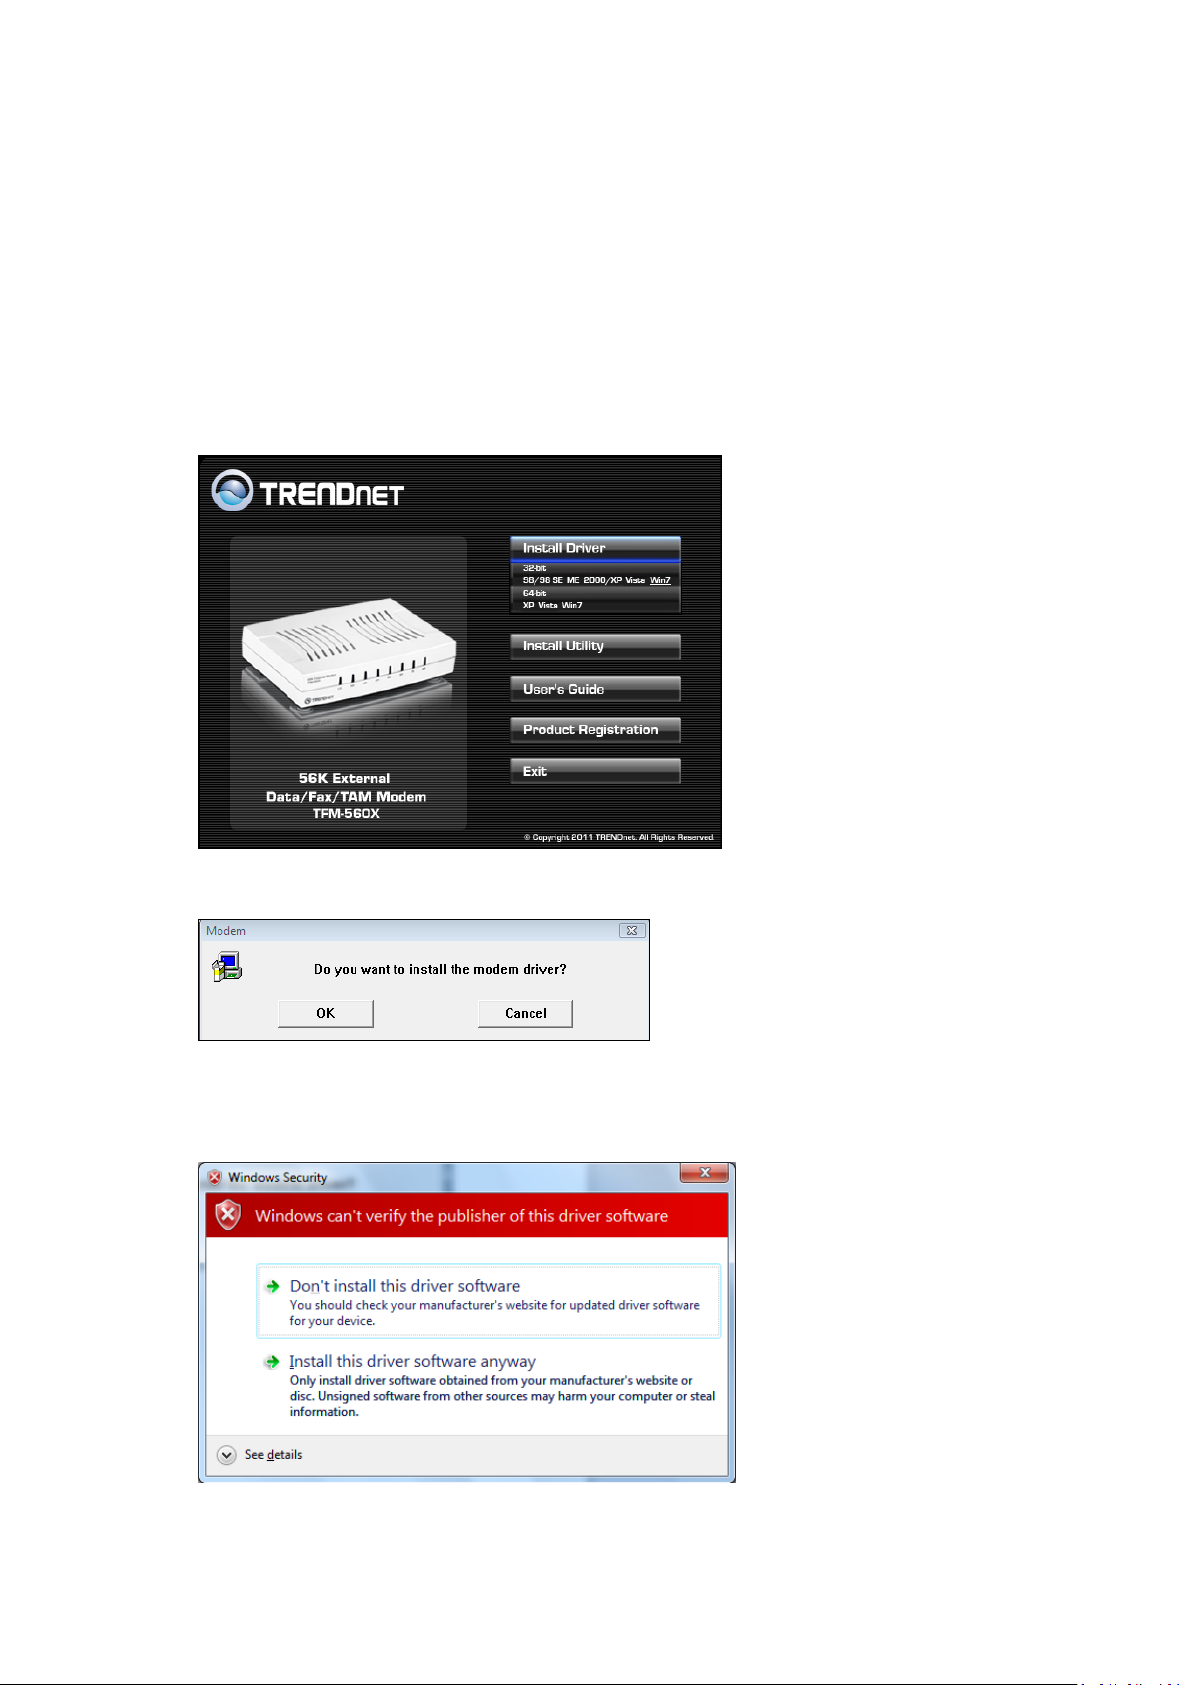
STEP 2. Click Run autorun.exe
STEP 3. Click Install Driver then select your operating system
STEP 5. Click OK to install the driver.
STEP 6. Click “Install this driver software anyway”.
5
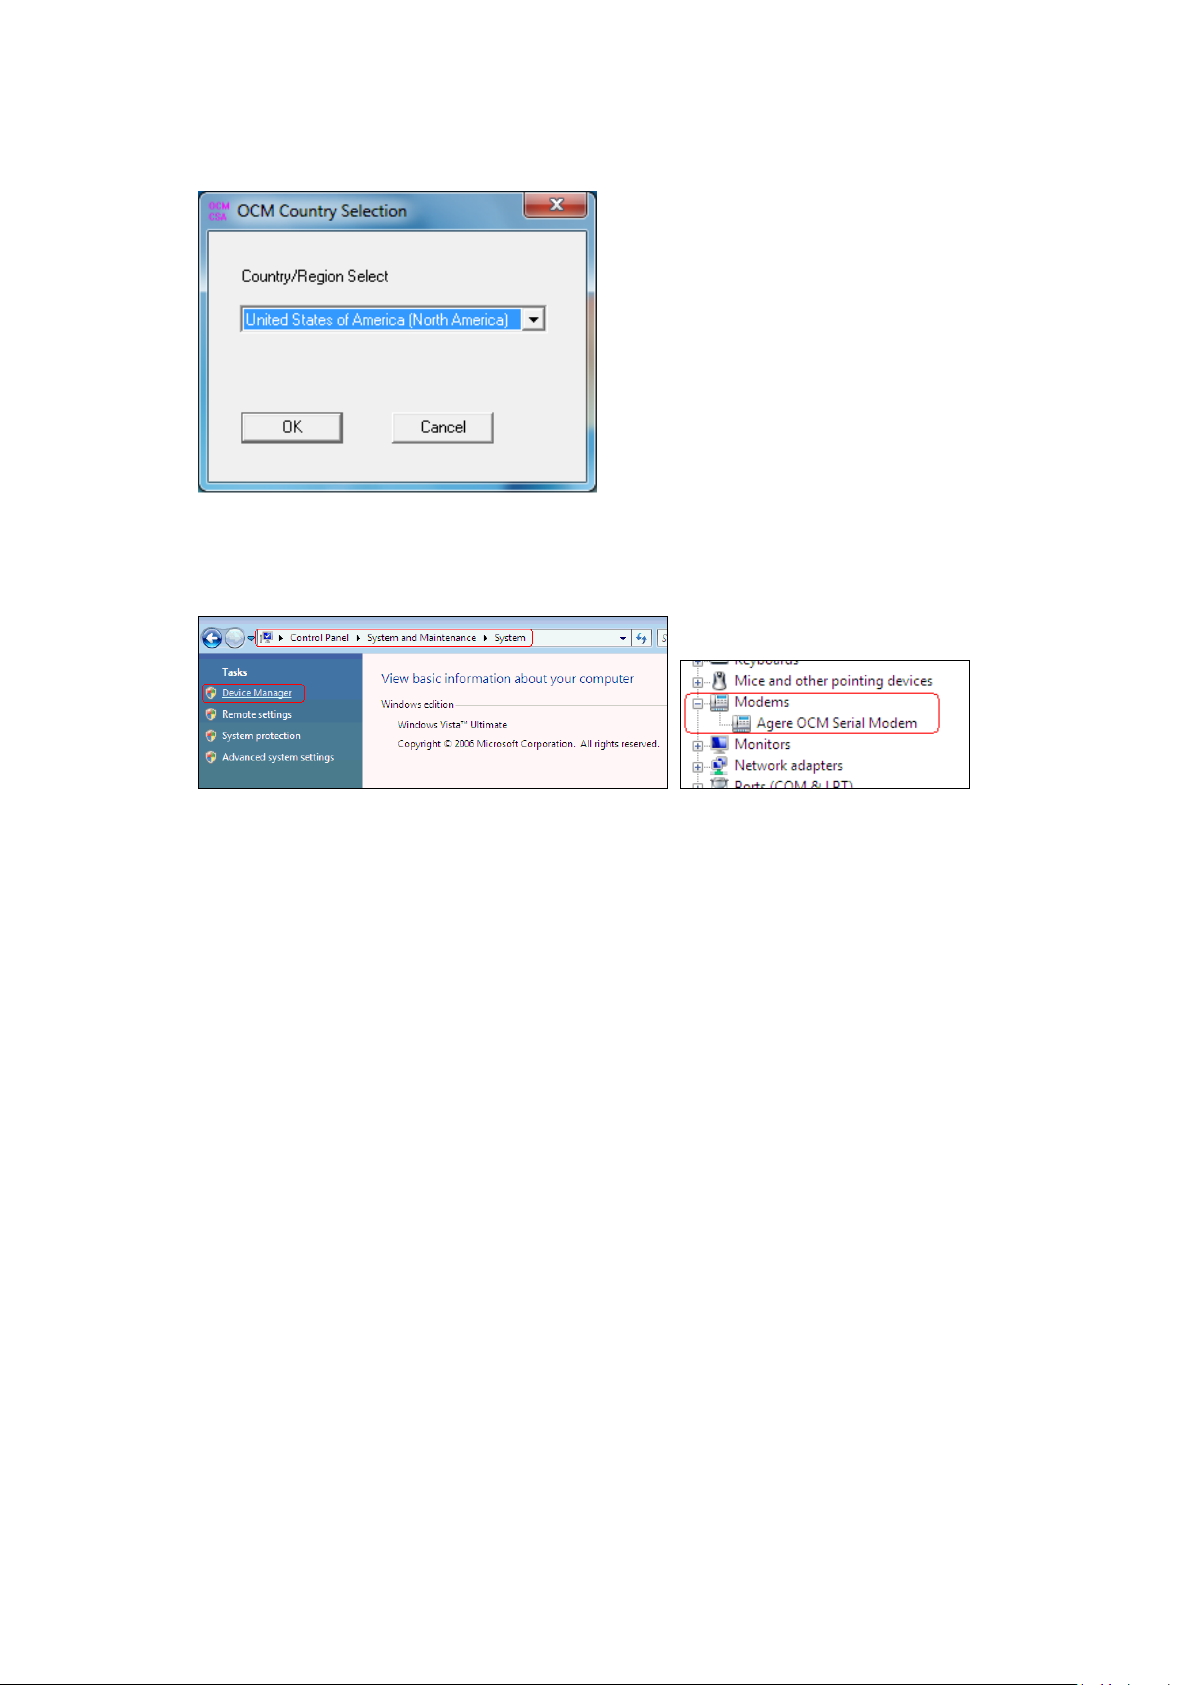
STEP 7. Select the Country and then click OK.
STEP 8. Click Start│Control Panel│System and Maintenance│System│Device Manager. Then, click Modems to check
whether the device driver’s installing is ok.
6
 Loading...