

1

2
Copyright
This publication, including all photographs, illustrations and software, is protected under
international copyright laws, with all rights reserved. Neither this manual, nor any of the
material contained herein, may be reproduced without written consent of the author.
Copyright 2008
Version 1.0 (June, 2008)
Disclaimer
The information in this document is subject to change without notice. The manufacturer
makes no representations or warranties with respect to the contents hereof and specifically
disclaims any implied warranties of merchantability or fitness for any particular purpose. The
manufacturer reserves the right to revise this publication and to make changes from time to
time in the content hereof without obligation of the manufacturer to notify any person of such
revision or changes.
Trademark recognition
All product names used in this manual are the properties of their respective owners and
are acknowledged.

3
Federal Communication Commission Interference Statement
This equipment has been tested and found to comply with the limits for a Class B
digital device, pursuant to Part 15 of the FCC Rules. These limits are designed to
provide reasonable protection against harmful interference in a residential installation.
This equipment generates, uses and can radiate radio frequency energy and, if not
installed and used in accordance with the instructions, may cause harmful
interference to radio communications. However, there is no guarantee that
interference will not occur in a particular installation. If this equipment does cause
harmful interference to radio or television reception, which can be determined by
turning the equipment off and on, the user is encouraged to try to correct the
interference by one of the following measures:
- Reorient or relocate the receiving antenna.
- Increase the separation between the equipment and receiver.
- Connect the equipment into an outlet on a circuit different from that to which the
receiver is connected.
- Consult the dealer or an experienced radio/TV technician for help.
FCC Caution: Any changes or modifications not expressly approved by the party
responsible for compliance could void the user's authority to operate this equipment.
This device complies with Part 15 of the FCC Rules. Operation is subject to the
following two conditions: (1) This device may not cause harmful interference, and (2)
this device must accept any interference received, including interference that may
cause undesired operation.
IMPORTANT NOTE:
Radiation Exposure Statement:
This equipment complies with FCC radiation exposure limits set forth for an
uncontrolled environment. End users must follow the specific operating instructions
for satisfying RF exposure compliance. To maintain compliance with FCC RF
exposure compliance requirements, please follow operation instruction as
documented in this manual.
This transmitter must not be co-located or operating in conjunction with any other
antenna or transmitter.
SAR compliance has been established in typical laptop computer(s) with Express
Card slot, and product could be used in typical laptop computer with Express Card
slot. Other application like handheld PC or similar device has not been verified and
may not compliance with related RF exposure rule and such use shall be prohibited.
The availability of some specific channels and/or operational frequency bands are
country dependent and are firmware programmed at the factory to match the
intended destination. The firmware setting is not accessible by the end user.

4
CE Mark Warning
This is a Class B product. In a domestic environment, this product may cause radio
interference, in which case the user may be required to take adequate measures.
This transmitter must not be co-located or operation in conjunction with any other
antenna or transmitter.

5
Table of Contents
Federal Communications Commission (FCC) Interference statement 3
CE Mark Warning 4
Chapter 1 - Getting Started
About Your Card 6
Package Content 7
System Requirement 8
LED Definition 7
Wireless Utility and Card Hardware Installation 8
Using the Utility to Configure Your Network 9
Link Information 10
Site Survey 11
Profile 12
Chapter 2 – Maintenance
Uninstalling the Driver 25
Uninstall the Client Utility 25
Upgrading the Wireless Utility 25
Glossary 26

6
Chapter 1 - Getting Started
This chapter introduces the Card and prepares you to use the Wireless Utility.
2.1 About Your Card
With the Card, you can enjoy wireless mobility within almost any wireless networking environment.
The following lists the main features of your Card.
Automatic rate selection.
Data transmission rates up to 300 Mbps
Offers 64-bit and 128-bit WEP (Wired Equivalent Privacy) data encryption for network
security.
Supports IEEE802.1x and WPA/WPA2 (Wi-Fi Protected Access).
Multiple antennas design.
Driver support for Windows XP/2000 and Vista.
2.2 Package Content
The WLAN Card
Installation and Manual CD
Quick Start Guide
Warranty/Registration Card
2.3 System Requirement
Pentium class notebook computers with at least one available Type II Express Card slot
Microsoft Windows 2000, XP, or Vista
CD-ROM drive
2.4 LED Definition
The following table describes the LED on the Card
Power LED
Link/ACT
7
S T A T U S
POWER LED
LINK LED
POWER OFF
OFF
OFF
POWER ON
ON
OFF
Associated without traffic
ON
BLINK(SLOW)
Associated with traffic
ON
BLINK(QUICK)
2.5 Wireless Utility & Card Hardware Installation
Follow the instructions below to install the Card and Utility.
STEP 1
Insert the Driver and Utility CD into CD drive
STEP 2
If your CD Autorun is enabled, the installation procedures will be started. (Otherwise open your CD
folder and double-click on the “setup.exe” file)
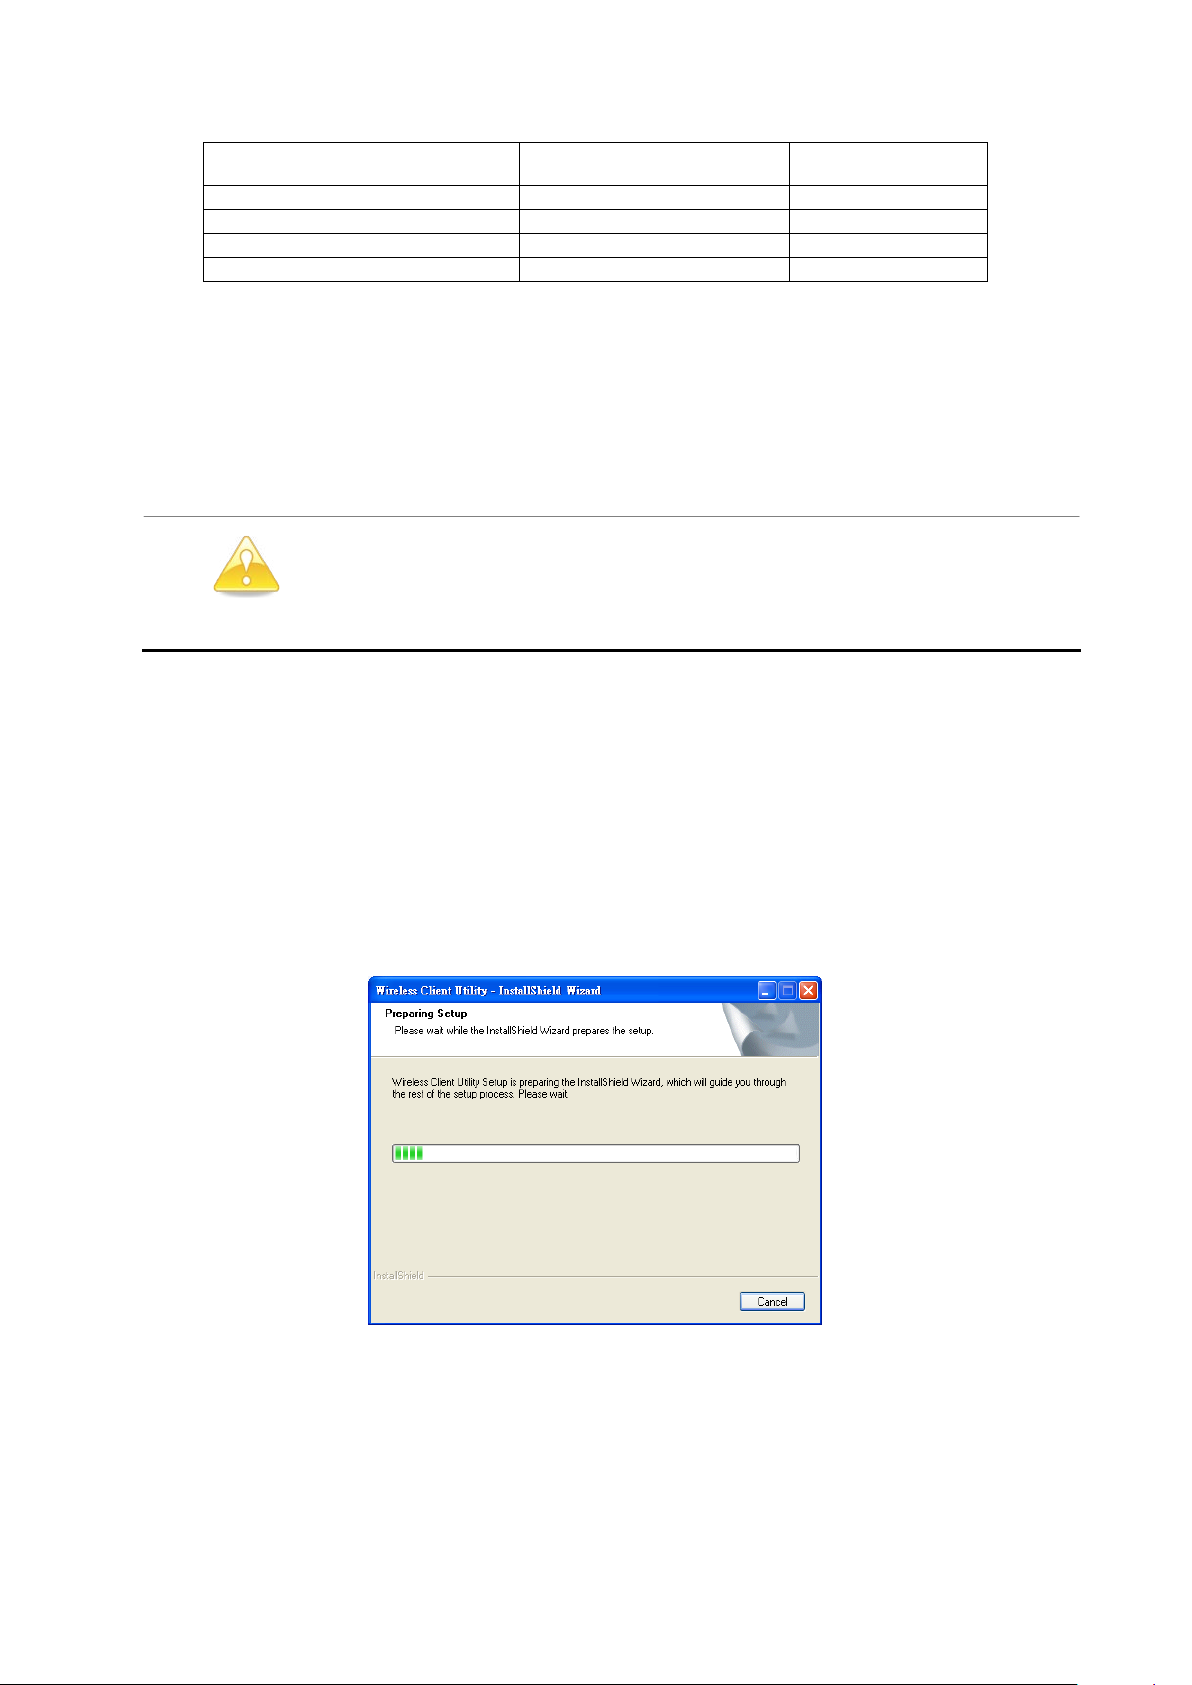
STEP 3
The InstallShield Wizard prepares for installation.
STEP 4
The InstallShield Wizard prompts you for confirmation. Click Next on the following menu.
IF YOU HAVE CONNECTED THE CARD TO YOUR COMPUTER,
PLEASE REMOVE IT FIRST.
NOTE

8
STEP 5
In the destination Folder screen you are asked to confirm the Destination Folder for the application
software. If you would like, you may change the destination folder to another location. Click Next
STEP 6
The wizard is ready to begin installation. Click Install on it.
STEP 7
At the Software Installation menu click Continue Anyway.

9
STEP 8
Click Finish to complete the client utility installation.
STEP 9
At this moment please insert your Card to your Laptop, after the following window pop up, click
Next on the Fund New Hardware Wizard

10
STEP 10
Choose “Install the software automatically” and click Next.
STEP 1 1
Click “Continue Anyway”.
STEP 12
Click Finish to complete the installation.

1 1
2.6 Windows Vista installation
Important! DO NOT install the PC Adapter in the computer until instructed to.
Step 1
Insert the Utility & Driver CD-ROM into your computer's CD-ROM Drive and then click Install Driver &
Utility.
Step 2
Shut down the computer.
Step 3
Insert PC Card firmly into a notebook PC and then turn ON the computer and wait until the Windows
desktop appears.

12
Step 4
Click Locate and install driver software (recommended).

13
Step 5
Click on Next to continue.
Step 6
Click on Close to exit.

14
2.6 Using the Utility to Configure Your Network
The following are explanations on how to configure and use the Utility program. After completing the
installation procedure, a new icon as shown below will automatically appear in the lower right tray bar.
Hold your mouse pointer over the icon, and double click the left mouse button to open the Wireless
Client Utility.
The Wireless Client Utility window as shown below will appear.
The user can now use any of the management functions available in the IEEE 802.11 Wireless Client
Utility.

15
2.7.1 Link Information
Click the Link Information tab to see general information about the program and its operation.
The following table describes the items found on the Link Information screen.
Wireless Network Status
Profile Name
The name of the current selected configuration profile. Set
up the configuration name on the Profile tab.
SSID
Displays the wireless network name.
Link Status
Shows whether the station is associated to the wireless
network.
Networ k T y p e
The type of network the station is connected to. The options
include:
Infrastructure (access point)
Ad H o c
Wireless Mode
Displays the wireless mode. 802.11g, 11b or 11n
Link Speed
Displays the current transmit rate in Mbps.
BSSID
Displays the MAC address of the access point the wireless
card is associated to.
Signal Strength
Shows the strength of wireless signal.
Channel

16
Control Channel
Channel number of the control 20MHz channel
Extension Channel
To locate the 40MHz channel on combination with the control
channel
Channel Width
20MHz only or 40/20MHz channel support
Security Status
Security
Shows the security type – Disable, WEP, WPA/WPA2,
WP A -PSK/WP A 2-PSK or 802.1X
Authentication
Displays the authentication mode.
TCP/IP Status
IP Address
Displays the computer's IP address.
Subnet Mask
Displays subnet mask
Gateway
Displays gateway address
2.7.2 Site Survey
Click the Site Survey tab to see available infrastructure and ad hoc networks.
On this screen, click Refresh to refresh the list at any time.
Connecting to a different network
Hold your mouse pointer over the network icon, and click the right mouse button to select the network.

17
Click the Connect button to connect the available network. If no configuration profile exists for that
network, the Profile Settings window opens to ask to create a profile for the network. Follow the
procedures to create profile for that network.
2.7.3 Profile
T o add a new configuration profile, click Ad d on the Profile tab.
T o m odify a configuration profile, select the configuration from the Profile list and click the Edit button.

18
Scan Available Networks
Click the Browse button on the Profile Settings screen to scan for available infrastructure and ad hoc
networks. On this list, click Refresh to refresh the list at any time.
To configure a profile for Ad-Hoc or Infrastructure mode, select the Network Type field on the Profile
Settings.

19
Click Next to continue the profile setting.
To define the security mode, select the security button of the desired security mode. And then click
Next to continue. Please see following table for details of security modes.
WEP
This card support t wo modes of WEP, include:
64 Bits
128 Bits
Both 64-Bit & 128-Bit modes support Passphrase.
W PA/ WPA2
Enables the use of Wi-Fi Protected Access (WPA).
Choosing WPA/WPA2 opens the WPA/WPA2 Security Settings
screen. The options include:
TLS (Transport Layer Security) is a Point-to-Point Protocol
(PPP) extension supporting additional authentication methods
within PPP. Transport Layer Security (TLS) provides for mutual
authentication, integrity-protected cipher suite negotiation, and key
exchange between two endpoints.
PE AP ( E A P-GTC) (Protected Extensible Authentication
Protocol) authenticates wireless LAN clients using only
server-side digital certificates by creating an encrypted SSL/TLS
tunnel between the client and the authentication server. The tunnel

20
then protects the subsequent user authentication exchange.
PEAP (E AP-MSCHAP V2) (Protected Extensible
Authentication Protocol) To u s e P E A P ( E A P -MSCHAP V2)
security, the server must have WPA-PEAP certificates, and
the server properties must already be set. Check with the IT
manager
TTLS (Tunneled Transport Layer Sec u r i t y ) An EAP variant that
provides mutual authentication using a certificate for server
authentication, and via a secure TLS tunnel for the client
W P A -PSK/WPA2-PSK
Enables WPA/WPA2 Passphrase security .
Fill in the WPA/WPA2 Passphrase on Security Settings screen.
802.1x
Enables 802.1x security . This option requires IT administration.
Choosing 802.1x opens the 802.1x Security Settings screen. The
options include:
TLS
PE AP
TTLS
Advanced Settings
After Security Settings finished, the Advanced Settings screen will be shown as following.
The following table describes the items found on the Advanced Settings screen.
Power Save Mode
Shows the power save mode. Power management is disabled in ad
hoc mode. The options include:
Continuous Access Mode
Maximum Power Saving

21
Fast Power Saving
802.11b Preamble
Displays the 802.11b preamble format.
The options include:
Long
Short
A u t o
RTS Threshold
Value from 0 ~ 2347
FRAG Threshold
Value from 256 ~ 2346
Qos
Enable/disable Qos
After advance settings are finished, the following screen showed as below.
You can activate the profile now or later.

22
Using Windows Wireless Zero Configuration
Step 1
Click on the balloon option “One or more wireless networks are in range of this computer”.
Step 2
Choose a network from the list.

23
Step 3
If the wireless network has wireless security, please supply the wireless security key. Enter the wireless key in twice at the security prompt.
Using Windows Vista
S t e p 1
On the bottom right-hand corner of the screen, right click the wireless network connection icon and
select Connect to a network.

24
S t e p 2
Select the desired network and then click Connect.
Step 3
Click on Continue anyway
S t e p 4
Click on Close.

25
Chapter 3 – Maintenance
This chapter describes how to uninstall or upgrade the Wireless Utility.
3.1 Uninstall the Driver
Follow the steps below to remove (or uninstall) the Card driver from your computer.
Step 1. To remove the driver from the OS, go to Start -> Control Panel
Step 2. Double-click System
Step 3. Under Hardware tab, click Device Manager.
Step 4. Double-click Network adapters
Step 5. Right-click mouse button on “300Mbps Wireless N Express Card ”, and choose Uninstall
Step 6. Click OK to confirm that you are going to uninstall the driver
3.2 Uninstall the Client Utility
Follow the steps below to remove the Client Utility from your computer.
Step 1. To remove the utility from the OS, go to Start -> Control Panel
Step 2. Double-click Ad d-Remove Programs
Step 3. Select 300Mbps Wireless N Express Card, and click the Uninstall button
3.3 Upgrading the Wireless Utility
T o perform the upgrade, follow the steps below.
Step 1. Download the latest version of the utility from the web site and save the file on your
computer.
Step 2. Follow the steps in Section 3.2 to remove the current Wireless Utility from your computer.
Step 3. Restart your computer if prompted.
Step 4. After restarting, refer to the procedure in the Chapter 2 to install the new utility.

26
Glossary
For unfamiliar terms used below, look for entries elsewhere in the glossary.
AD-HOC (IBSS)
Ad-hoc mode does not require an AP or a wired network. Network that transmits
wireless from computer to computer without the use of a base station (access point).
Two or more wireless stations communicate directly to each other. An ad-hoc network
may sometimes be referred to as an Independent Basic Service Set (IBSS).
CHANNEL
A radio frequency used by a wireless device is called a channel.
EAP AUTHENTICATION
EAP (Extensible Authentication Protocol) is an authentication protocol that runs on top of
the IEEE802.1X transport mechanism in order to support multiple types of user
authentication. By using EAP to interact with an EAP-compatible RADIUS server, an
access point helps a wireless station and a RADIUS server perform authentication.
ENCRYPTION
The reversible transformation of data from the original to a difficult-to-interpret format.
Encryption is a mechanism for protecting confidentiality, integrity, and authenticity of data.
It uses an encryption algorithm and one or more encryption keys.
FRAGMENTATION THRESHOLD
This is the maximum data fragment size that can be sent before the packet is fragmented
into smaller packets.
IEEE 802.1X
The IEEE 802.1X standard outlines enhanced security methods for both the authentication
of wireless stations and encryption key management. Authentication can be done using an
external RADIUS server.
INFRASTRUCTURE (BSS)
When a number of wireless stations are connected using a single AP, you have a Basic
Service Set (BSS).

27
RO A M I N G
In an infrastructure network, wireless stations are able to switch from one BSS to another
as they move between the coverage areas. During this period, the wireless stations
maintain uninterrupted connection to the network. This is roaming. As the wireless station
moves from place to place, it is responsible for choosing the most appropriate AP
depending on the signal strength, network utilization among other factors.
SSID
The SSID (Service Set Identity) is a unique name shared among all wireless devices in a
wireless network. Wireless devices must have the same SSID to communicate with each
other.
TEMPORAL KEY INTEGRITY PROTOCOL (TKIP)
Temporal Key Integrity Protocol (TKIP) uses 128-bit keys that are dynamically generated and
distributed by the authentication server.
USER AUTHENTICATION
WPA applies IEEE 802.1X and Extensible Authentication Protocol (EAP) to authenticate
wireless clients using an external RADIUS database. If you do not have an external RADIUS
server, use WPA-PSK/WPA2-PSK (WPA -Pre-Shared Key) that only requires a single (identical) password entered into each access point, wireless gateway and wireless client. As long
as the passwords match, clients will be granted access to a WLAN.
WEP
WEP (Wired Equivalent Privacy) encryption scrambles all data packets transmitted between
the T EW -642EC and the AP or other wireless stations to keep network communications private. Both the wireless stations and the access points must use the same WEP key for data
encryption and decryption.
WPA/WPA2
Wi-Fi Protected Access (WPA) and WPA2 (future upgrade) is a subset of the IEEE 802.11
i security specification draft. Key differences between WPA and WEP are user
authentication and improved data encryption. WPA2 is a wireless security standard that
defines stronger encryption, authentication and key management than WPA.

28
 Loading...