

Quick Installation Guide
TEW-432BRP
H/W: v.D1.0R

Table of Contents
English ...............................................................................................................................................................................................................
1. Before You Start
2. Install Router ..............................................................................................................................................................................................
3. Replacing an existing router ......................................................................................................................................................................
4. Adding the router behind an existing router ..............................................................................................................................................
Troubleshooting .................................................................................................................................................................................................
.........................................................................................................................................................................................
1
1
2
5
7
9
Version 02.13.2009
1. Before You Start
Package Contents
?TEW-432BRP
?Easy Go CD-ROM
?Quick Installation Guide
?RJ-45 Cat.5 Cable
?AC Power Adapter (7.5V, 1A)
System Requirements
?Web Browser: Internet Explorer (5.0 or above)
?Computer with Network adapter installed
?Broadband Internet
?Installed Cable or DSL modem
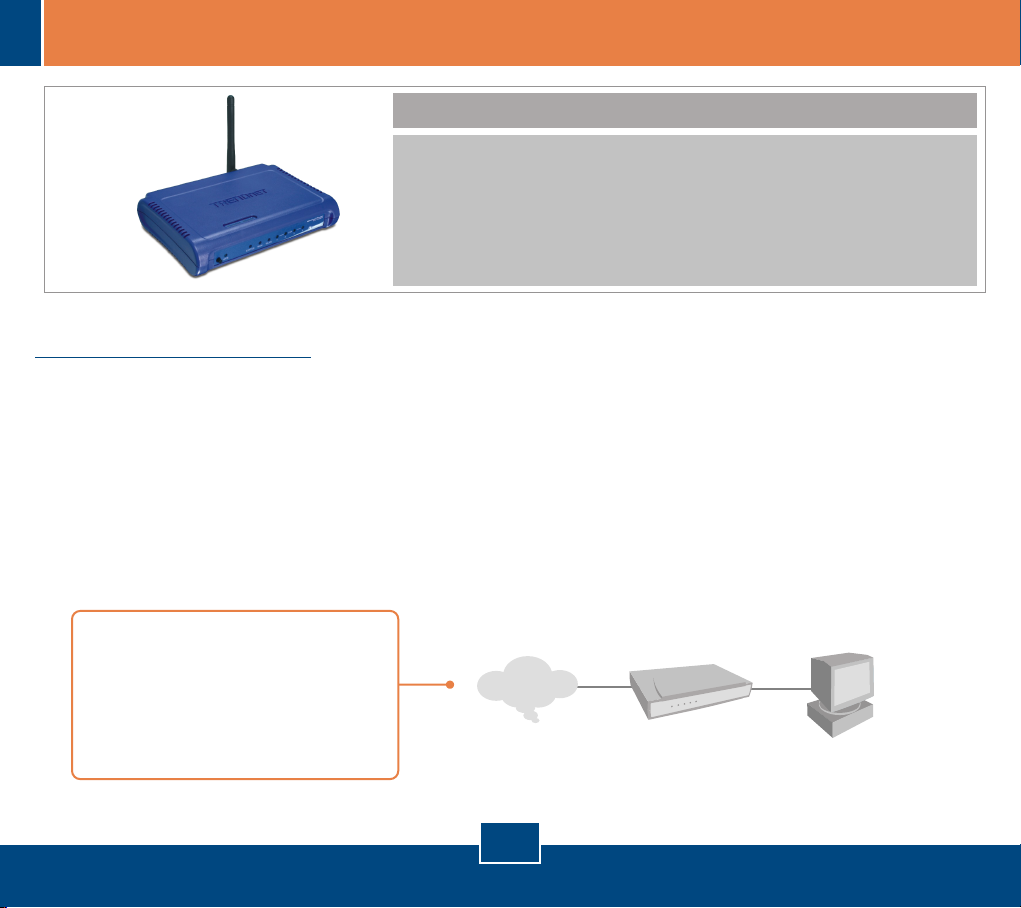
Important! DO NOT connect the router until instructed to do so. Follow the steps below before you insert the EasyGo CD-ROM into your computer's CD-ROM Drive.
1. Verify that you have a direct
connection from your Cable or DSL
modem to your computer. Also verify
that you are connected to the Internet
by browsing to a website, such as
http://www.trendnet.com.
Internet
Cable/DSL Modem
1
English
2. Install Router
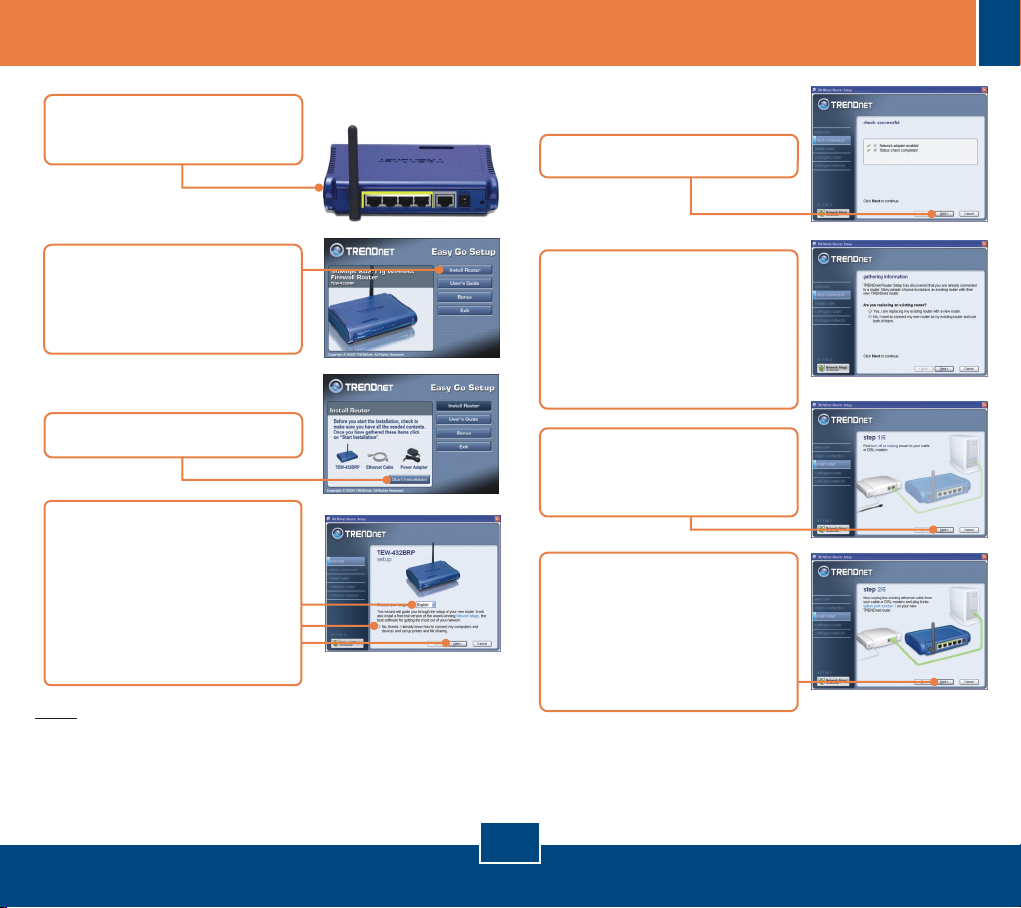
1. Connect the antenna to the
TEW-432BRP.
5. Click Next.
2. Insert the Easy Go CD-ROM
in your computer's CD-ROM
Drive and then click Install
Router.
3. Click Start Installation.
4. Choose the desired language
from the dropdown list. Click
No, thanks. I already know
how to connect my
computers and devices
and set up printer and file
sharing and then click Next.
Note: If you do not check “No thanks, I already know how to
connect my computers and devices and set up printer and file
sharing”, a third party software program, Network Magic will
install. This program is not required to be installed in order to
get onto the Internet.
6. If this screen appears, go to
3. Replacing an Existing
Router or 4.Adding the
Router Behind an Existing
Router. If not, please
continue to step 7.
7. Turn off or unplug power to
your cable or DSL modem.
Then click Next.
8. Unplug the existing Ethernet
cable from your cable or DSL
modem and plug it into
yellow port number 1 on the
TEW-432BRP. Then click
Next.
Warning!!: DO NOT plug the cable or DSL modem power
supply into the TEW-432BRP.
2
English

9. Connect the included power
supply from an available
outlet to the TEW-432BRP.
10. Please wait while the
TEW- 432BRP is being
configured.
11. Connect one end of the
included grey Ethernet cable
to the grey port labeled
WAN on the back of your
new router. Connect the
other end of the cable to
your cable or DSL modem.
Then click Next.
12. Reconnect the power
supply to your cable or DSL
modem. Wait 30 seconds
then click Next.
13. If this window appears, your
Internet connection requires
a user name and password.
Enter your DSL Account
Name and Password. Then
click Next.
3
Version 03.05.2008
14. Please wait while the
TRENDnet Router Setup
configures your router.
15. Enter a password for your
router. By default, the
password is admin. Click
Next.
16. Enter a unique network
name (SSID) for your
wireless network and then
click Next. The network
name (SSID) identifies your
wireless network.
3
English

17. Select the desired level of
security, enter a security key
or keep the randomly
generated security key and
then click Next. It is
recommended that you use
Most secure (WPA). If your
wireless adapter does not
support WPA, please select
Secure (WEP) instead.
21. Click Next.
22. Click Next.
18. Click Next.
19. Click OK.
20. Please wait while the
TRENDnet Router Setup
configures your router.
23. Select Exit TRENDnet
Router Setup and then
click Finish.
24. Open up your browser and
type in a URL (e.g.
www.trendnet.com) to see if
you are online.
Your installation is now complete.
For detailed information regarding the TEW-432BRP
configuration and advanced settings, please refer to the User's
Guide included on the Easy Go Installation CD-ROM or
Version 03.05.2008
TRENDnet's website at www.trendnet.com
4
English

3. Replacing an existing router
1. Select Yes, I am replacing
my existing router with a
new router and then click
Next.
2. Turn off or unplug power to
your cable or DSL modem.
Then click Next.
3. Unplug the power cable from
your old router and remove
its power supply from the
outlet.
4. Disconnect the Ethernet
cable from the port labeled
“WAN” or “Internet” on the
back of your old router. Plug
this cable into the grey port
labeled “WAN” on the
TEW-432BRP. Then click
Next.
5. Disconnect all remaining
Ethernet cables from the
back of your old router and
plug them into the yellow
ports on the TEW-432BRP.
Warning! DO NOT plug the cable or DSL modem power
supply into the TEW-432BRP.
6. Connect the included power
supply from an available
outlet to the TEW-432BRP.
7. Please wait while the router
is being configured.
8. Reconnect the power supply
to your cable or DSL modem.
Wait 30 seconds then click
Next.
Version 03.05.2008
5
English

9. Please wait while the
TRENDnet Router Setup
configures your router.
10. Select the type of Internet
Service, and then click
Next. Follow the wizard
instructions for configuring
the Internet. Please verify
your settings with your
Internet Service Provider.
11. Please wait while the
TRENDnet Router Setup
configures your router.
12. Enter a password for your
router. By default, the
password is admin. Click
Next
13. Enter a unique network
name (SSID) for your
wireless network and then
click Next. The network
name (SSID) identifies your
wireless network.
14. Select the desired level of
security, enter a security key
or keep the randomly
generated security key and
then click Next. It is
recommended that you use
Most secure (WPA). If your
wireless adapter does not
support WPA, please select
Secure (WEP) instead.
15. Click Next.
16. Click OK.
Version 03.05.2008
6
English

4. Adding the router behind
an existing router
17. Please wait while the
TRENDnet Router Setup
configures your router.
18. Click Next.
19. Click Next.
20. Select Exit TRENDnet
Router Setup and then
click Finish.
21. Open up your browser and
type in a URL (e.g.
www.trendnet.com) to see
if you are online.
1. Select No, I want to connect
my new router to my
existing router and use
both of them and then click
Next.
2. Find the Ethernet cable that
goes from your computer to
your old router. Unplug this
cable from your old router
and connect it to yellow port
number 1 on your new
TRENDnet router. Then click
Next.
Warning! DO NOT plug the cable or DSL modem power
supply into the TEW-432BRP.
3. Connect the included power
supply from an available
outlet to the TEW-432BRP.
4. Connect one end of the
included grey Ethernet cable
to the grey port labeled WAN
on the back of your new
router. Connect the other end
Version 03.05.2008
of the cable to one of the
LAN ports on your old router.
Then click Next.
7
English

5. Enter a password for your
router. By default, password
is admin. Click Next.
9. Click OK.
6. When the wireless network
screen appears, enter a
unique network name and
then click Next.
7. Select the desired level of
security, enter a security key
or keep the randomly
generated security key and
then click Next. It is
recommended that you use
Most secure (WPA). If your
wireless adapter does not
support WPA, please select
Secure (WEP) instead.
8. Click Next.
10. Click Next.
11. Click Finish.
12. Open up your browser and
type in a URL (e.g.
www.trendnet.com) to see
if you are online.
Register Your Product
To ensure the highest level of customer service and support, please
take a moment to register your product Online at:
www.trendnet.com/register
Thank you for choosing TRENDnet
8
English

Trouble Shooting
I inserted the Easy Go CD-ROM into my computer's CD-ROM drive and the installation menu does not appear automatically. What should I do?
Q1:
If the installation menu does not appear automatically, click Start, click Run, and type D:\Autorun.exe where "D" in "D:\Autorun.exe" is the letter assigned to your computer's
A1:
CD-ROM Drive. Then click OK to start the installation.
How can I get into the TEW-432BRP web configuration page?
Q2:
After you install the TEW-432BRP Wireless Router, you can access the web configuration page by opening your web browser and entering http://192.168.10.1 into the web
A2:
browser's address bar, where http://192.168.10.1 is the default IP address of the TEW-432BRP Wireless Router. The default user name and password is admin.
I am not sure what type of Internet Account Type I have for my Cable/DSL connection. How do I find out?
Q3:
Contact your Internet Service Provider's (ISP) Customer Service for the correct information.
A3:
I received an error message while running the Install Wizard. What should I do?
Q4:
Make sure that your computer's CD-ROM is in working condition. Also verify that all cable connections are secure and that you are able to connect to the Internet, and then
A4:
retry installing the router. During setup, the Install Wizard will check the operation of your network adapter and Internet connection. If you get the following error codes try the
corresponding troubleshooting steps:
Error 301/302: Internal Error
1) Click cancel to exit the program
2) Eject the CD
3) Restart your Computer
4) Reinsert the Router setup CD
Error 311/312: No Wired Adapter Detected
If your PC has a wired network adapter try the following:
1) Enable your wired network adapter
2) Click Retry to install your router again
If you PC do not have a wired network adapter, you must install a wired network adapter.
Error 313: Multiple Wired Adapters Detected
1) Identify the wired network adapter that you wish to use for setting up your router
2) Disable all other wired network adapters
3) Click Retry to install your router again
Error 321: Ethernet Cable Not Connected
1) Make sure the Ethernet cable from your PC is securely connected to a LAN port on the back of your router
2) Make sure the power cable on your new router is securely connected and the lights on the front of your router are flashing.
3) Click Retry to install your router again
Error 322: New Router Not Detected
1) Make sure that you are connecting your new router and not your old router (if applicable).
2) Make sure the Ethernet cable from your PC is securely connected to LAN
3) Click Retry to install your router again
9

Error 323: Could Not Access New Router
1) Restore your router to factory defaults. Take a pin or paperclip and press the reset button for 15 seconds, then let go.
2) Click Cancel to exit the program.
3) Eject the CD.
4) Restart your computer.
5) Connect the Ethernet cable from your computer to the LAN port on your modem.
6) Reinsert the CD.
If you continue to have problems, you will need to log in to router and configure the your Internet connection settings manually:
1) Open up Internet Explorer, type into the address bar http://192.168.10.1 and then hit enter
2) Enter the user name and password. The default user name and password is Admin.
3) Click Main -> WAN. Select your connection type and configure your Internet connection settings. Contact your ISP for information regarding your Internet connection
settings. Once you have configured your Internet connection settings, and then click Apply.
4) If you do not get onto the Internet right away, unplug the power to your modem and router. Wait 15 seconds, then plug your modem back in. Wait for your modem to boot
up, then plug your modem back in. Once your modem has booted up, then plug your router back in. Then wait for your router to boot up.
Q5:
I am trying to install the router on my Mac. What should I do?
A5:
Follows steps 1-4 in question 4 to manually configure the router.
Q6:
All the settings are correct, but I can not make a wireless connection to the Router. What should I do?
A6:
First, double check that the WLAN light on the Router is lit. Second, power cycle the TEW-432BRP. Unplug the power to the TEW-432BRP. Wait 15 seconds, then plug the
power back in to the TEW-432BRP. Third, log into the TEW-432BRP by entering into the web browser's address bar. Click on Wireless. Make sure Enabled is selected.
Fourth, contact the manufacturer of your wireless network adapter and make sure the wireless network adapter is configured with the proper SSID.
Q7:
What is Network Magic?
A7:
Network Magic is an optional third party bonus program. It works with your router to setup, manage, repair and protect your home network. To install Network Magic, do not
check “No, thanks. I already know how to connect my computers and devices and set up printer and file sharing”. If you do not want to install Network Magic, check “No, thanks.
I already know how to connect my computers and devices and set up printer and file sharing”.
If you still encounter problems or have any questions regarding the TEW-432BRP, please refer to the User's Guide included on the Easy Go Setup CD-ROM or contact Trendnet's
Technical Support Department.
10

Certifications
This equipment has been tested and found to comply with FCC and CE Rules.
Operation is subject to the following two conditions:
(1) This device may not cause harmful interference.
(2) This device must accept any interference received. Including interference that may
cause undesired operation.
Waste electrical and electronic products must not
be disposed of with household waste. Please
recycle where facilities exist. Check with you Local
Authority or Retailer for recycling advice.
NOTE: THE MANUFACTURER IS NOT RESPONSIBLE FOR ANY RADIO OR TV
INTERFERENCE CAUSED BY UNAUTHORIZED MODIFICATIONS TO THIS
EQUIPMENT. SUCH MODIFICATIONS COULD VOID THE USER’S AUTHORITY TO
OPERATE THE EQUIPMENT.
ADVERTENCIA
En todos nuestros equipos se mencionan claramente las caracteristicas del adaptador de alimentacón
necesario para su funcionamiento. El uso de un adaptador distinto al mencionado puede producir
daños fisicos y/o daños al equipo conectado. El adaptador de alimentación debe operar con voltaje y
frecuencia de la energia electrica domiciliaria existente en el pais o zona de instalación.

Product Warranty Registration
Please take a moment to register your product online.
Go to TRENDnet’s website at http://www.trendnet.com/register
20675 Manhattan Place
Torrance, CA 90501
USA
Copyright ©2009. All Rights Reserved. TRENDnet.
 Loading...