


TRELOCK code system
PIN code:
• Every product is delivered with the PIN 0000
• You can protect your cycle computer against
theft by entering your chosen personal PIN
code (page 13). Likewise, you can change the
PIN and PIN time (energy-saving function) at
any time.
You can enter your PIN and PIN time here:
PIN
PIN time
Mandatory entries:
Code number of the speed sensor (BB 2000,
BB 3000, BB 3500, BB 4000)
Speed measurement only works if the code
number which is located on a sticker directly on
the sensor is entered (wheel 1 and wheel 2)
(refer to page 10).
Code number of the pedal frequency sensor
(BB 2000, BB 3000, BB 4000)
Pedal stroke measurement works only if the
code number which is located on a sticker
directly on the sensor is entered (refer to page
10).
Code number of the heart rate sensor
(BB 3000, BB 3500, BB 4000)
Heart rate measurement works only if the code
number which is located on a sticker directly on
the sensor is entered (refer to page 10).
The stickers with the code number of your
sensors can be affixed here
Code no. of the speed sensor.
Wheel 1
Wheel 2
Code no. of the pedal frequency sensor
Code no. of the heart rate sensor
You can alternatively or additionally have your
PIN code and code numbers of the sensors
registered with TRELOCK:
www.trelock.de/Trelock Service
Center/PinCode.
If you change address, please inform us of your
new address.
Check: www.trelock.de for our
international consumer service.
download of product manuals
BIKE & BODY BB 2000/ 3000/3500 /4000
GB MANUAL
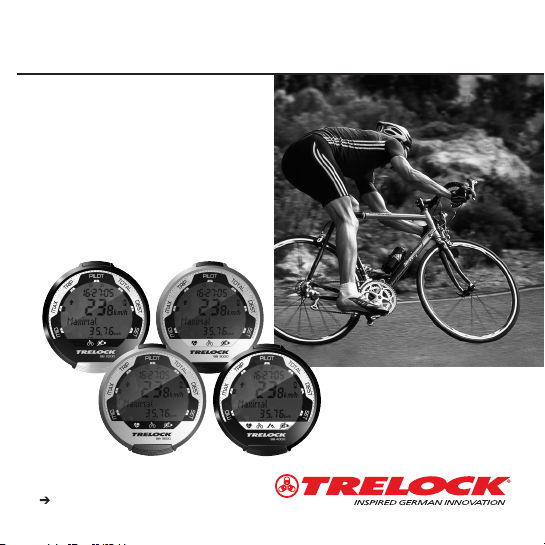
The TRELOCK data systems of the
Bike & Body computer line were
developed to specifically cater for
your needs. This line offers you a
multitude of bike, altimeter, pedal
stroke and pulse measurement functions, depending on the product
features. The hardware, software
and ergonomics of the products
thoroughly meet the highest
demands in terms of quality, convenience and performance.
An outstanding feature is the fully
digitized data transfer between the
various transmitter modules and the
cycle computer developed by
TRELOCK – RADIO SELECT®. The
receiver of the cycle computer
exclusively selects coded system
data – data transfer without any
cross talking effect. Interference due
to mobile phones or training partners' cycle computers is not received.
Theft is pointless owing to the PIN
coding.
The wireless wake-up function is a
special function – ride off without
switching on.
Data transfer to a PC via a USB
interface is possible with the accessory set ZF 450.
The visual control system, large
mono keys and the neatly arranged
display with full text displays in
eight languages allow very simple
operation.
DUAL BI KE
PIN
DUAL BIKE
Contents
Scope of delivery
Inserting the batteries
Installation
1. Display structure and operating principle 44
2. General preliminary settings 46
3. "Bike" menu 54
4. "Altimeter" menu 58
5. "Pedal frequency" menu 64
6. "Heart rate" menu 68
7. Training 74
8. Additional information and instructions 76
9. Notes on safety 77
10 . Guarantee and service 77
11 . Frequently asked questions 77
12 . Accessories 78
BB 4000
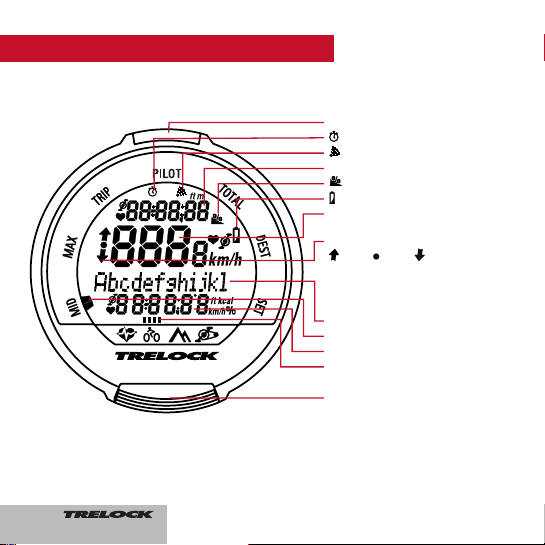
1. Display structure and operating principle
SET button
Alarm is activated
The audible signal is activated
Display line 1
Incline in %
Change battery
Display line 2
Training intensity status:
above within below theoreti-
cal value
(for pulse rate and pedal frequency)
and above/equal to/below average
value (for speed)
Display line 3
Submenu display
Display line 4
Main menu display
MODE button
44

By pressing the MODE button for 3
seconds, you can toggle between the
main menus "Bike", "Altimeter", "Pedal
frequency" and "Heart rate". (The "Pedal
frequency" and "Heart rate" menus can
only be selected if the corresponding sensor is logged in.)
Pressing the MODE button once takes the
suer to the
submenus MID, MAX, TRIP,
PILOT, TOTAL, DEST and SET.
In order to enter digits (time, meter readings etc.), press the MODE button several
times until the desired digit appears.
Pressing the SET button confirms the selection and switches to the next position.
After entering the last position, confirm
again by pressing the SET button.
If you do not wish to make any
entry/modification, you can skip the menu
item by pressing the MODE button. A selected entry function can be aborted by
pressing the MODE button for 3 seconds.
Any changes made will not be adopted in
this case.
45

8
English?
BB 4000
BB 4000
Deutsch?
BB 4000
Francais?
BB 4000
Espaol?
BB 4000
Sprache
?
2. General
preliminary settings
After activating the cycle
computer, the user is transferred to the general preliminary settings automatically.
If you wish to make changes
here at a later stage, press
the SET and MODE button in
the submenu SET for approx.
3 sec.
2.1 Language selection
• Confirm by pressing the
SET button
• Select the language (D, GB,
F, NL, E, I, RUS, PL) by
pressing the MODE button
• Confirm by pressing the
SET button
46
9
BB 4000
unitspeed?
BB 4000
set bike 1
BB 4000
unitt
em
p
.
?
BB 4000
set bike?
BB 4000
Dimensions?
BB 4000
unitt
em
p
.
?
BB 4000
Dimensions?
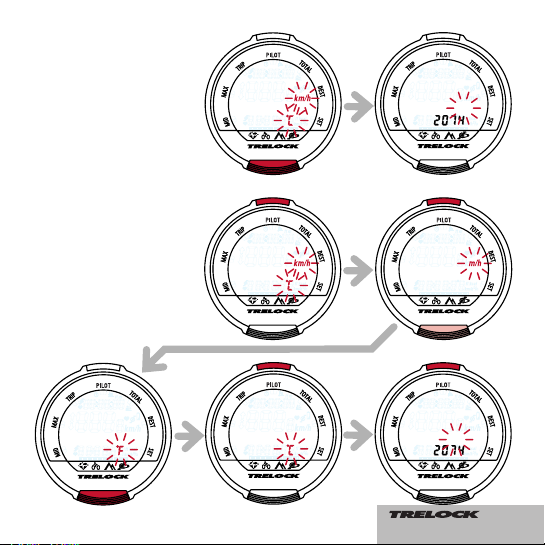
2.2 Selection between km/h
and m/h and between C and
F
• Confirm by pressing the
MODE button to adopt the
standard values "km/h" and
"°C"
• To make changes, press the
SET button and select between "km/h" and "m/h" by
pressing the MODE button
• Confirm by pressing the SET
button
• Choose between "°F" and
"°C" by pressing the MODE
button
• Confirm by pressing the SET
button
IMPORTANT: if you subsequently change from "km/h" to
"m/h" or vice versa, the data
recorded in the "Bike" and
"Altimeter" menus will be reset
to "0"!
47
10
BB 4000
bike 1
BB 4000
Code-No. 1
BB 4000
Code-No. 1
BB 4000
Code-No. 1
BB 4000
Code-No. 1
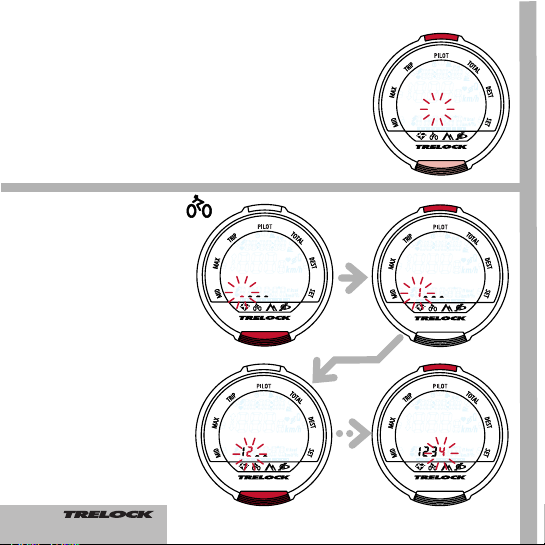
2.4 Settings for wheel 1 and
wheel 2
You can use your cycle computer on two cycles, even if
they have different wheel radii.
An own sensor for each cycle
is required for this purpose.
The switch-over from wheel 1
to wheel 2 is performed automatically.
• Switch to "cycle 1" by pressing the SET button
• Choose between "cycle 1"
and "cycle 2" by pressing the
MODE button
• Confirm by pressing the SET
button
2.4.1 Entry of the code no.
• Entry of the code for "cycle
1" and/or "cycle 2" by pressing the MODE button
(repeatedly)
• Validate the individual digits
with the SET button
• Repeat the process for the
other digits
Please enter the code no. on
page 2 of this operating
manual. The sticker should
subsequently be pulled off the
sensor.
48
11
BB 4000
wheel size 1
BB 4000
wheel size
1
ETRTO WS mm
47-305 16x1.75x2 1272
47-406 20x1.75x2 1590
50-406 20/2.00 1593
60-406 20/2.35 1665
37-540 24x1 3/8 A 1948
47-507 24x1.75x2 1907
50-507 24/2.00 1910
40-559 26x1.5 2026
44-559 26x1.6 2051
47-559 26x1.75x2 2074
50-559 26x1.9 2089
54-559 26x2.00 2114
57-559 26x2.125 2133
37-590 26x1 3/8 2105
20-571 26x3/4 1954
ETRTO
WS mm
60-559 26/2.35 2146
32-630 27x1 1/4 2199
40-622 28x1.5 2224
47-622 28x1.75 2268
40-635 28x1 1/2 2265
37-622 28x1 3/8x1 5/8 2205
18-622 700x18C 2102
23-622 700x23C 2133
25-622 700x25C 2146
28-622 700x28C 2149
32-622 700x32C 2174
37-622 700x35C 2205
40-622 700x40C 2224
50-622 28/2.00 2284
60-622 28/2.35 2340
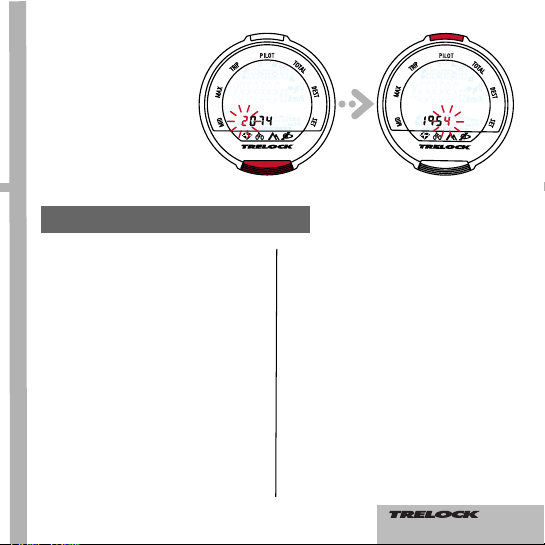
2.4.2 Adjusting the wheel
size(s)
• Determine the wheel size on
the basis of the table below
or calculation of the wheel
circumference
• Enter the value for "cycle 1"
and/or "cycle 2" as under
point 2.4.1 and confirm by
pressing the SET button
• Press the MODE button to
continue
Wheel size/wheel circumference (mm)
49
12
BB 4000
Clock/Date?
BB 4000
Clock
BB 4000
Date
BB 4000
Clock
BB 4000
Clock
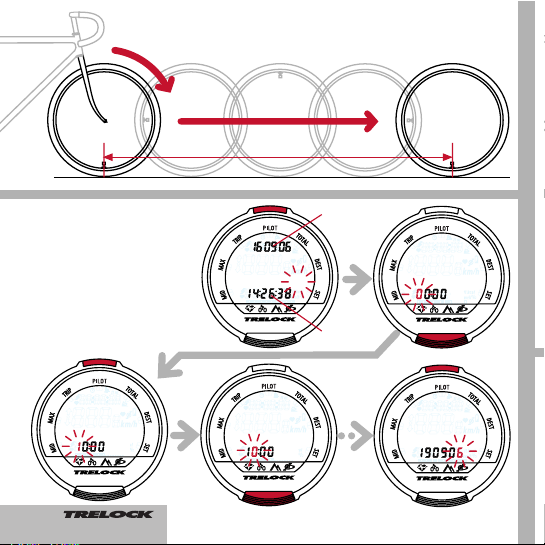
2.5 Setting the current time
• Press the SET button
• Change the digits by pressing the MODE button several times
• Confirm the individual digits
by pressing the SET button
Time
Date
Wheel circumference (mm) = 2 x r (mm) x 3.14
Wheel circumference
50
BB 4000
change PIN?
13
BB 4000
enter PIN
2.7 Entering and modifying the PIN time –
energy-saving function
If the cycle computer, which is in sleep mode
with the PIN function active (PIN not equal to
0000), is not awakened over a certain period
of time, it can only be reactivated by entering
your PIN. This period of time (PIN time) can
be entered or modified in the "New PIN
time?" window: After you have pressed the
SET button, you will be requested to enter
your PIN. After making a correct entry, you
will be transferred to "PIN TIME", where you
can enter up to 240 min. The factory setting
is 60 min. In sleep mode, only the time will be
displayed until the PIN time elapses. After the
PIN time elapses, the time display will also be
faded out. If the PIN time is set to "0", this
energy-saving function is deactivated and the
time will be permanently displayed.
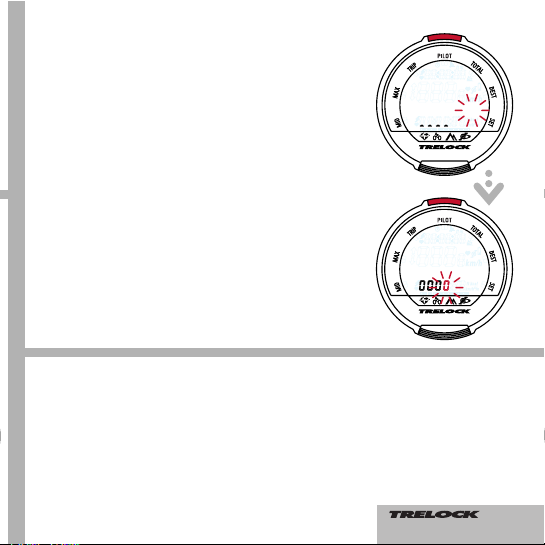
2.6 Entering and modifying the PIN – anti-theft protection
You can protect your cycle computer against foreign access
with a PIN. Activation of the cycle computer is only possible in
this case if the PIN is entered correctly. After adjusting the time
and date, the user is transferred to the "Change PIN?" window.
You can enter your own PIN here and subsequently modify it if
necessary. If you do not wish to use any PIN, press the MODE
button. Otherwise, after pressing the SET button, you will be
asked to enter the former PIN (the factory setting is "0000"). In
order to do this, press the MODE button until the appropriate
digit appears and subsequently jump to the next position by
pressing the SET button. The PIN is controlled. If the PIN has
been incorrectly entered, "Wrong PIN" appears for approx. 3
seconds and you will be requested to make a new entry. If the
PIN is correct, enter a new PIN of your choice as described
above. After confirming the last position by pressing the SET
button, the PIN must be re-entered. If repetition of the PIN is
incorrect, you will be returned to the "Change PIN?" window. If
you wish to dispense with safeguarding your cycle computer
with a PIN, reset the PIN to "0000".
Please note your personal PIN on page 2, so that you can have
it available if appropriate.
51
 Loading...