

Page 1

StoreJet
™
Series
Software User’s Manual
Page 2

Table of Contents
Introduction ............................................................................................ 1
Features.............................................................................................................................................1
Software System Requirements ........................................................................................................1
Usage Considerations ........................................................................... 2
General Use.......................................................................................................................................2
Backing Up Data ................................................................................................................................2
First Time Usage .................................................................................... 3
Software Installation...........................................................................................................................3
Transcend StoreJet™ elite ..................................................................... 6
Backup Data............................................................................................ 6
Backing Up Data ................................................................................................................................6
“OneTouch” Data Backup (StoreJet™ 2.5 SATA Only) ....................................................................13
Restore Data ......................................................................................... 14
Restoring Data......................................................................................................................14
Manage Backups .................................................................................. 17
Settings ................................................................................................. 18
Exit......................................................................................................... 19
Troubleshooting ................................................................................... 20
Warranty................................................................................................ 21
Terminology.......................................................................................... 22
Page 3

Introduction
Congratulations on purchasing Transcend’s StoreJet™. This portable, Hi-Speed USB storage device is
the perfect data management system for uploading, downloading, storing and transferring your vital data
™
and information. With a huge storage capacity and Hi-Speed USB 2.0 data transfer rates, the StoreJet
ideal for storing and transferring your files, folders, documents, photos, music and e-work between it and
any desktop, or notebook computer. In addition, the StoreJet
®
software that can (used in Windows
2000/XP) increase your productivity. The StoreJet™ elite Software
™
comes with some very useful bundled
Pack includes data Backup, Restore and Management features. This Software User’s Manual is written
to help you get the most from your new device, please read it in detail before using the StoreJet
™
Features
z Fully compliant with the Hi-Speed USB 2.0 specification
z Easy Plug and Play installation
z Hi-Speed data transfer rates up to 480Mbits (60MB) per second
z Additional StoreJet
z OneTouch Auto-Backup function (StoreJet
z LED indicates Power ON and data transfer activity
™
elite Software pack (helps you manage your data)
™
2.5 SATA Only)
is
.
Introduction
z Driverless (Only Windows 98SE needs the enclosed driver)
Software System Requirements
Desktop or notebook computer with a working USB port.
One of the following Operating Systems (OS):
z Windows
z Windows
®
2000
®
XP
1
Page 4

Usage Considerations
These usage and safety guidelines are IMPORTANT! Please follow them carefully.
General Use
z The StoreJet
2000/XP.
Backing Up Data
z Transcend does NOT take any responsibility for data loss, or damage during operation. If you
decide to store data on your StoreJet
computer, or other storage medium.
z To ensure Hi-Speed USB 2.0 data transfer rates when using your StoreJet
check the computer has the relevant USB drivers. If you are unsure on how to check this, please
consult the computer or motherboard User’s Manual for USB driver information.
z The StoreJet
™
’s bundled software can only be used on a computer that is running Windows®
™
we strongly advise that you regularly backup the data to a
™
with a computer, please
™
’s internal hard drive comes formatted for NTFS.
Usage Considerations
2
Page 5
Software Installation
First Time Usage
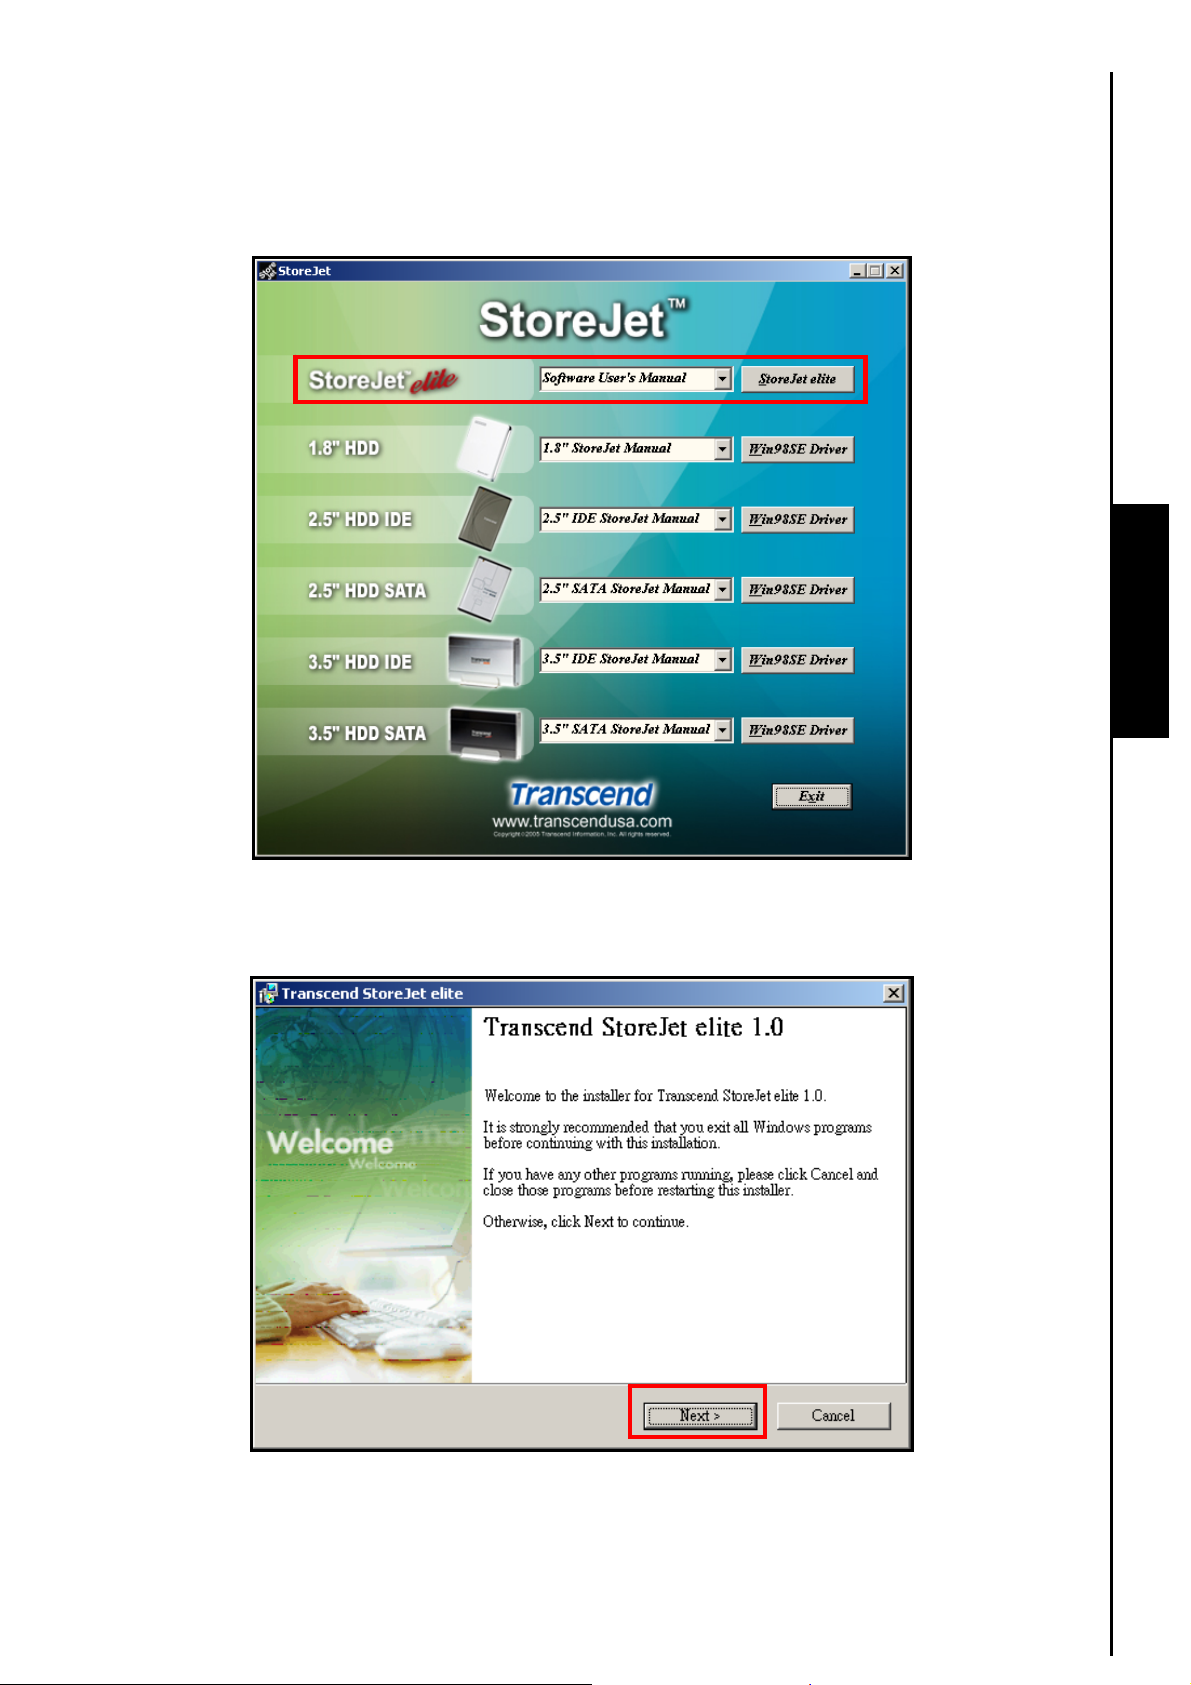
1. Put the Software CD into the CD-ROM (Auto-Run supported). Click on the “StoreJet
™
your HDD-type to begin installing the StoreJet
’s software.
™
elite” button for
First Time Usage
2. The “Transcend StoreJet
The StoreJet
™
elite Setup Wizard will guide you through the software installation.
Figure 1. StoreJet elite Installation
™
elite Setup” window appears. Click on the “Next” button to continue.
Figure 2. Transcend StoreJet elite Setup
3
Page 6
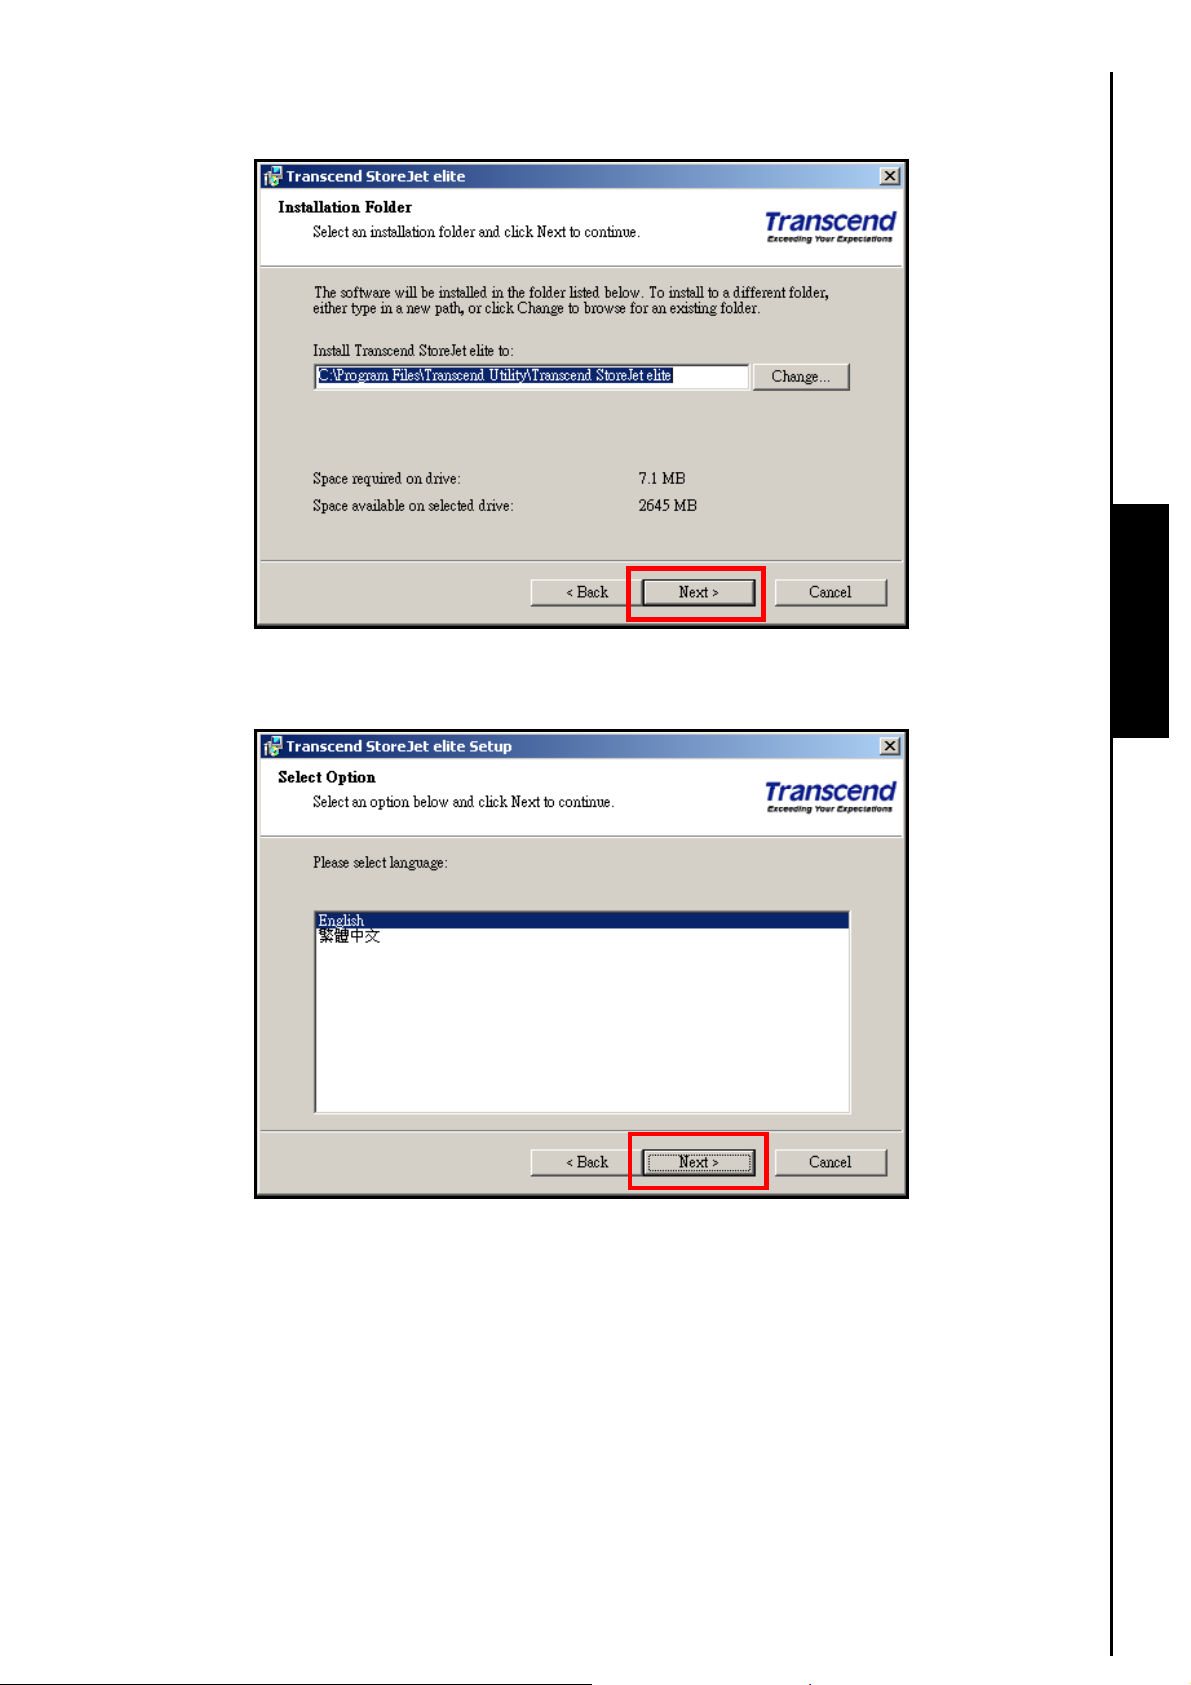
3. Select the destination folder where you want to store the StoreJet
the “Next” button to continue.
Figure 3. StoreJet elite software destination folder
™
elite Software program. Click on
First Time Usage
4. Select your language. Click on the “Next” button to continue.
Figure 4. Select a language
4
Page 7
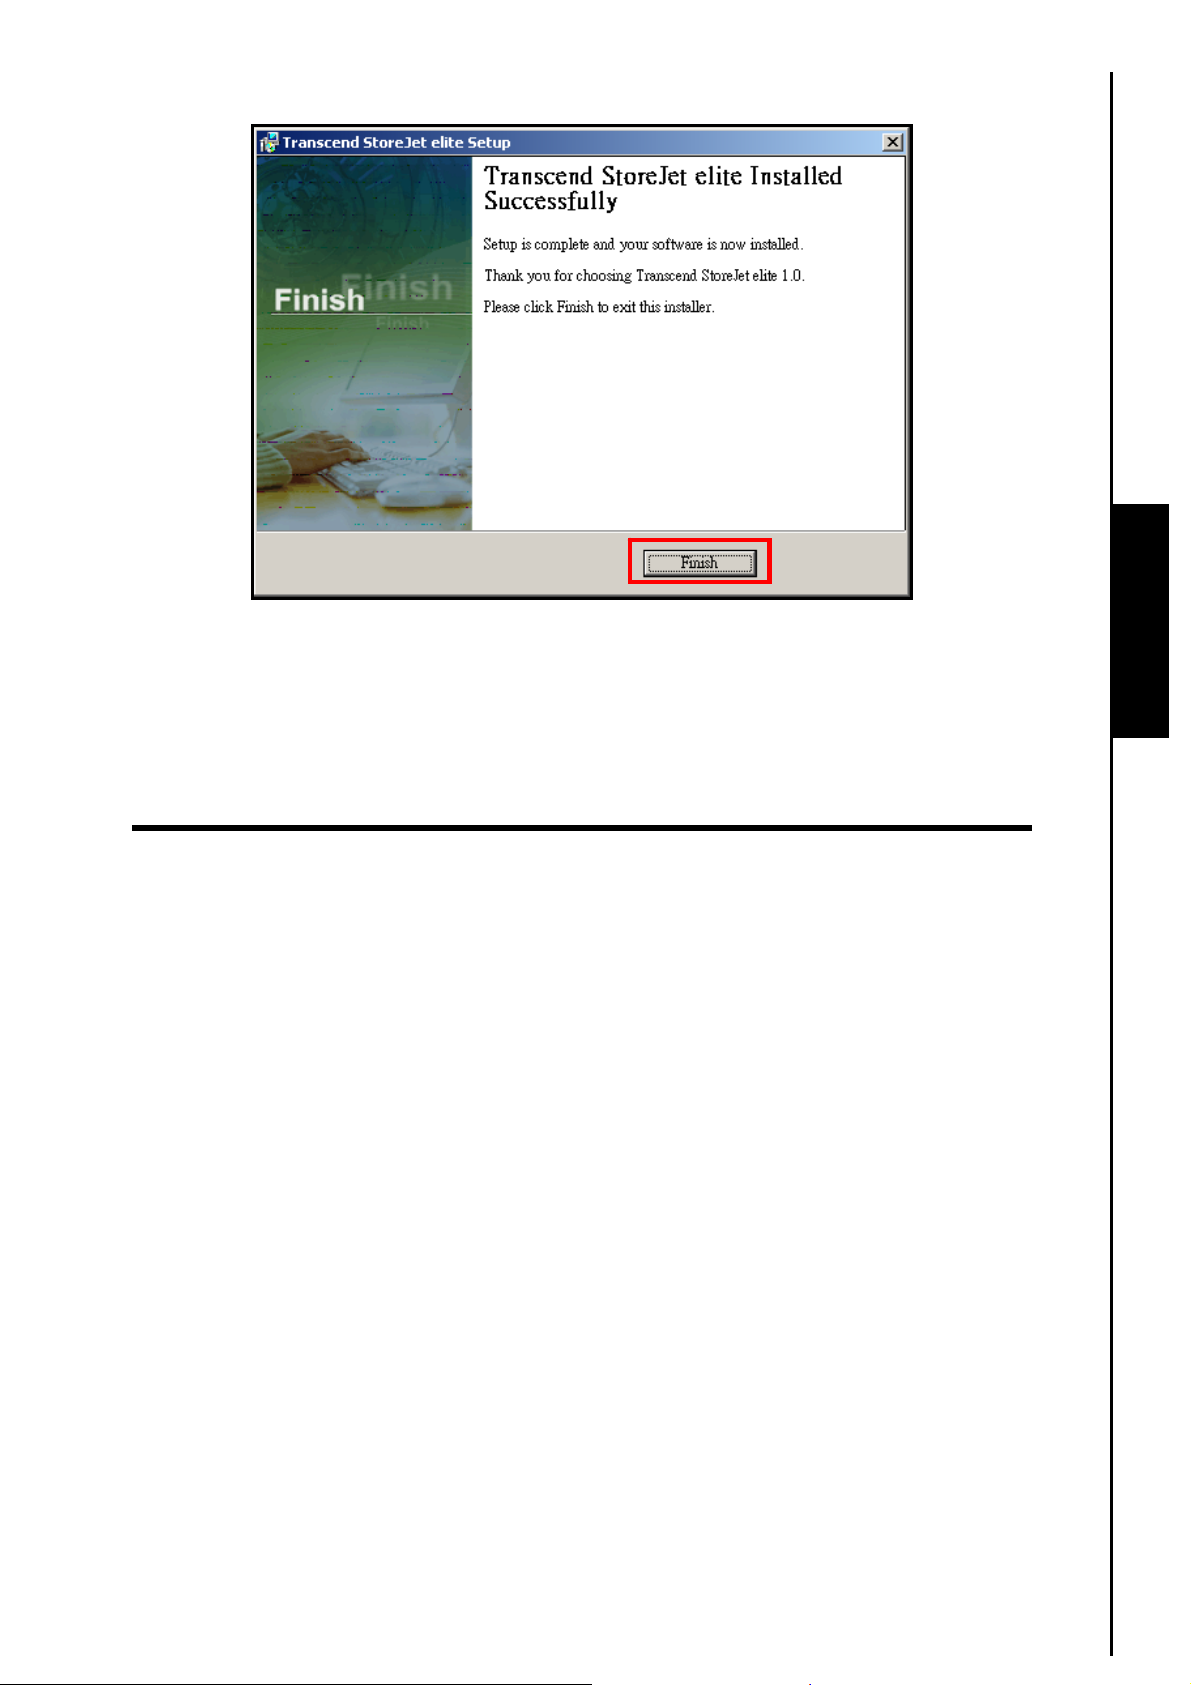
5. When the StoreJet
™
elite is finished installing, click on the “Finish” button to exit the setup.
Figure 5. Installation complete
6. The first time you run the “StoreJet
computer. StoreJet
located, the program will automatically shutdown. This procedure is repeated every time you start the
™
StoreJet
elite application until the software is registered, after which the software can be run without
having a StoreJet
™
elite will search your computer to register the software, if a StoreJet™ is not
™
connected. Please ensure your StoreJet™ is properly connected to the computer.
™
elite” software, you must have a StoreJet™ connected to your
First Time Usage
5
Page 8
Transcend StoreJet™ elite
The Transcend StoreJet™ elite software allows you to securely backup your data from a computer to the
StoreJet
Transcend StoreJet
select the drives, folders, or files that you want to backup, it also allows you to specify where you want to
save your backups and you can even create a schedule to automatically backup your data. In addition to
Backing up your data the StoreJet
space and keep your backups secure. You can easily manage all your Backed Up files using the
software’s Backup Management Browser.
Backing Up Data
™
, or other storage medium. In the event that your computers’ hard disk fails you can use
™
elite software to Restore your data from the backup. The StoreJet™ elite lets you
™
elite can Compress and Encrypt your Backup files to save disk
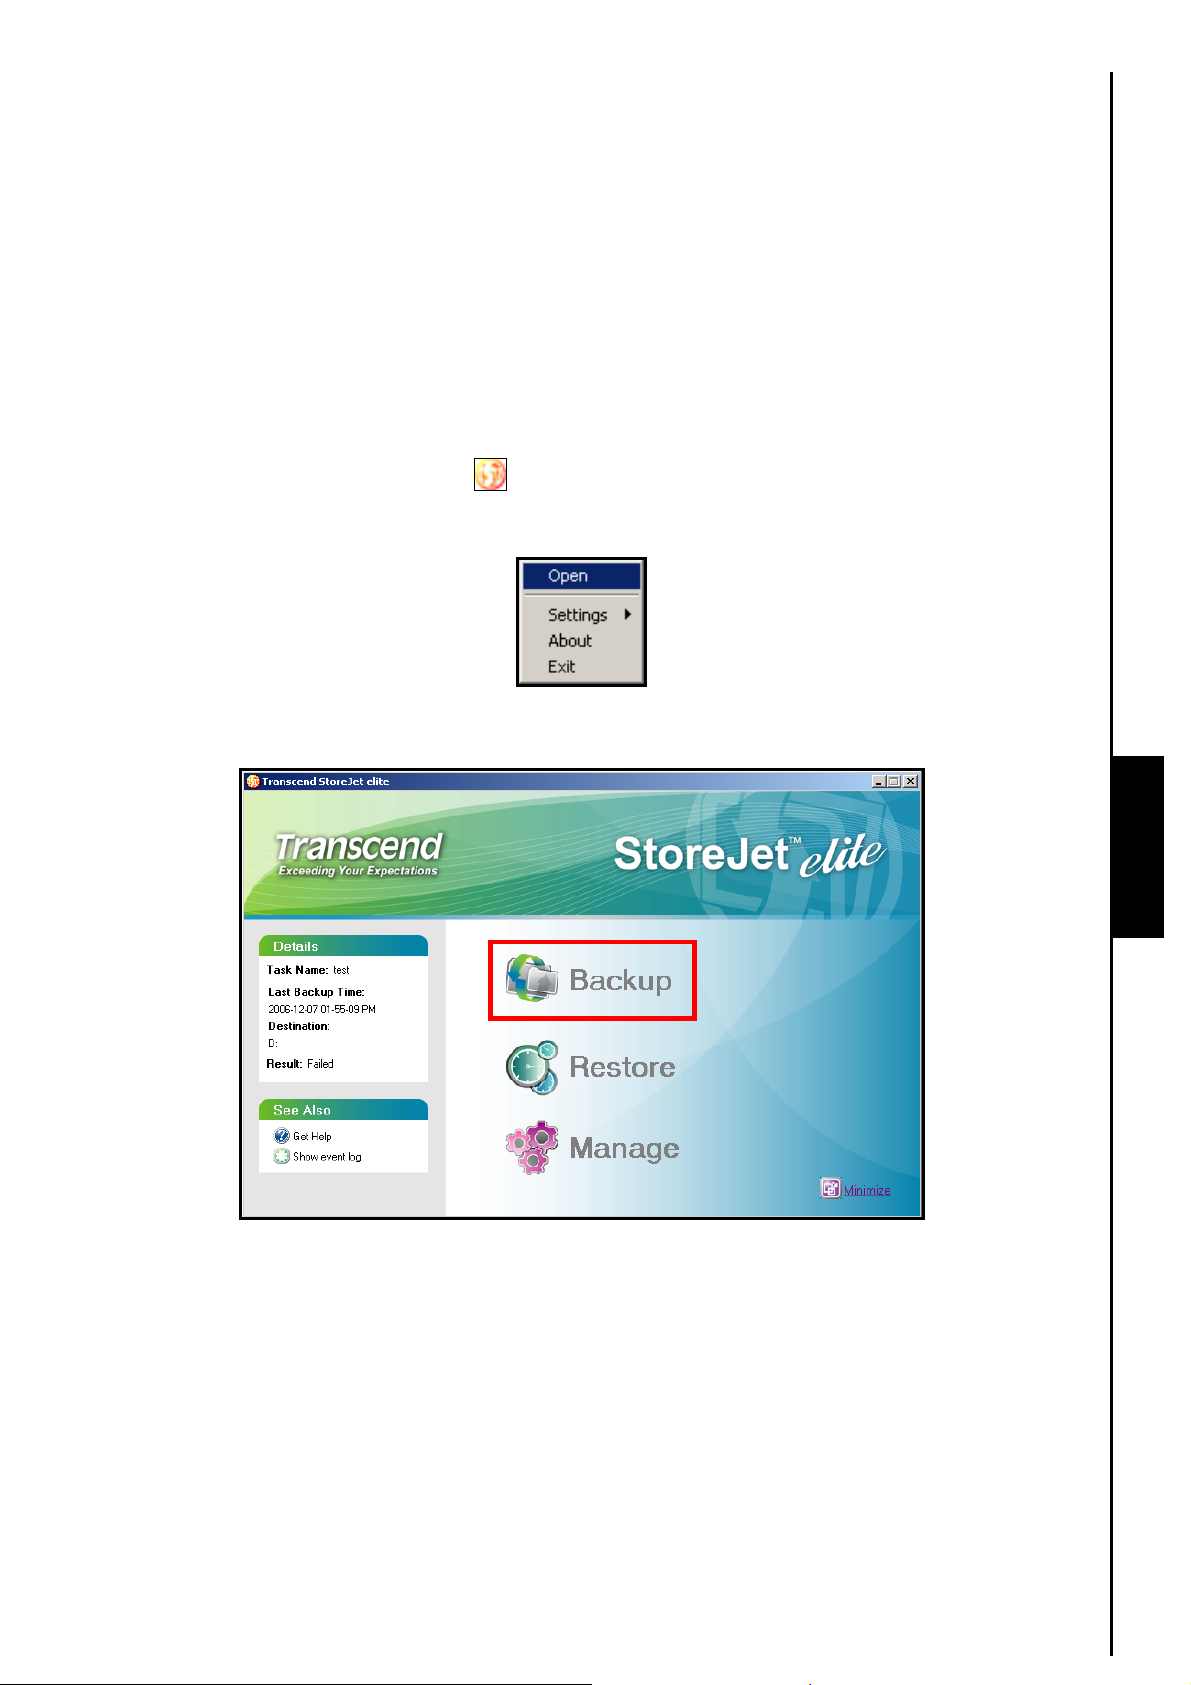
1. Right click on the “StoreJet
™
elite” icon on the Windows System Tray and select the “Open”
option.
Figure 6. Open StoreJet elite
2. To create a Backup click on the “Backup” button in the StoreJet
™
elite Main Menu.
Backup Data
Figure 7. Create a Backup
6
Page 9

3. The Backup Task window will appear, click on the “New Task” button to commence creating a new
Backup task.
Figure 8. Create a New Backup Task
4. Step 1: Enter a name for the Backup Task and a description of what the task does. Select the
“Backup with compression” checkbox if you want to compress your Backup files. You can add
additional password security to your Backed Up Files by selecting the “Encrypt with password”
option; this will encrypt the compressed data. Click on the “Next” button to continue.
Backup Data
Figure 9. Backup Task name, description, compression with password protection
WARNING! If you Encrypt your DATA, whatever Password you enter will be required to
Decrypt and Decompress the Backed Up Files. Do NOT forget your password.
7
Page 10

5. Step 2: In the left hand column select the checkbox of the source drive(s), folder(s), or file(s) that you
want to Backup. The names and locations of the files you select to Backup will be listed in the right
hand column. Click on the “Next” button to continue.
Figure 10. Select files and folders to Backup
6. Step 3: Select a destination folder for your files. Checking the “Remove the previous backup files”
box will delete any existing Backup files that are in the destination folder. Click on the “Next” button to
continue.
Backup Data
Figure 11. Select a destination folder for the Backup files
WARNING! If you create a backup schedule to save files to the StoreJet™, the unit must be
powered on, connected to the computer on which the schedule was created and have
adequate storage capacity to save the selected data.
8
Page 11

7. Step 4: To create a schedule that will automatically Backup your files. Select the frequency of the
Backup Task in the drop down menu Daily, Weekly, or Monthly. If you would prefer not to set up a
schedule and Backup your data manually, select None.
Figure 12. Setup a schedule
8. Daily: If you select “Daily” in the drop down menu your data will be backed up at the same time every
day. Select the time you want the Backup to begin by inputting the time into the clock panel, clicking on
the up/down arrow keys changes the time. Click on the “Done” button to complete the schedule setup.
Backup Data
Figure 13. Daily Backup schedule
9
Page 12

9. Weekly: If you select “Weekly” in the drop down menu your data will be backed up on the same day,
or multiple days at the same time every week. Select the day, or days on which you want to Backup
your data and select the time you want the Backup to begin by inputting the time into the clock panel,
clicking on the up/down arrow keys changes the time. Click on the “Done” button to complete the
schedule setup.
Figure 14. Weekly Backup schedule
10. Monthly: If you select “Monthly” in the drop down menu your data will be backed up on the same day,
or multiple days at the same time every month. Select the day, or days on which you want to Backup
your data and select the time you want the Backup to begin by inputting the time into the clock panel,
clicking on the up/down arrow keys changes the time. Click on the “Done” button to complete the
schedule setup.
Backup Data
Figure 15. Monthly Backup schedule
10
Page 13

11. Congratulations, the schedule for your Backup Task is now complete. A list of all of the Backup Tasks
you have created can be found in the right hand column and the task’s details in the left hand column.
A scheduled Backup Task will run as a background process provided the setup procedures have been
followed correctly. Selecting a Backup Task and clicking on the “Backup Now” button at any time will
backup that Task’s data.
Figure 16. Backup Tasks
12. A summary of the Backup Task will appear. Click on the “Start” button to begin the backup.
Figure 17. Start the Backup
Backup Data
11
Page 14

13. After the Backup is complete a “Backup Completed” message window will appear. Click on the “OK”
button to complete and exit the Backup process.
Figure 18. Backup complete
14. If any of the source drives, folders, or files have been moved, renamed, or deleted from their original
location when the Backup Task was set up, or if the destination folder cannot be located an error
message window will appear. Click on the “OK” button to complete and exit the Backup process.
Figure 19. Backup Error
Backup Data
12
Page 15

“OneTouch” Data Backup (StoreJet™ 2.5 SATA Only)
The StoreJet™ 2.5 SATA can be configured to Automatically Backup a Task whenever you press its
“OneTouch Backup” button. This powerful feature is enabled in the Backup Task list window.
1. In the Backup Task window, a list of all of the Backup Tasks you have created can be found in the right
hand column and the task’s details in the left hand column.
Figure 20. Backup Task List
2. To activate the OneTouch Auto-Backup function for your StoreJet
™
2.5 SATA, select the “OneTouch
Backup” checkbox next to the Backup Task you want to automatically Backup.
Figure 21. StoreJet elite OneTouch Backup
3. Whenever you press the “OneTouch Backup” button on your StoreJet
Task(s) that you selected will be automatically backed up.
™
2.5 SATA the Backup
Backup Data
13
Page 16

Restoring Data
1. To Restore a Backup click on the “Restore” button in the StoreJet
™
elite Main Menu.
Figure 22. Restore a Backup
2. The Backup Task window will appear with a list of the data you have Backed Up. Select the Backup
Task that you want to restore and click on the “Restore” button to continue.
Figure 23. Restore
Restore Data
14
Page 17

3. Step 1: You may have a number of copies of the same Backup Task saved, select the copy you want
to restore and click on the “Next” button to continue. (The little green icon means that this copy of
backup did not encrypted, and red one means encrypted copy.)
Figure 24. Select a backup copy to restore
4. If you Encrypted your Backup with a password the Decrypt window will appear. Enter your Password
and click on the “OK” button to continue.
Figure 25. Enter password to Decrypt
Restore Data
15
Page 18

5. Step 2: The Default path is the original path for the Backed Up files. You can use a different path to
restore your Backup files by selecting the “Other” option and defining a path in the explore panel. If a
file in the destination folder has the same name as the Backup file you are restoring, you can keep the
most recent file by selecting “Keep the latest file,” “Overwrite” the file with the same name, or
“Skip” the file. Click on the “Next” button to Restore your Backup.
Figure 26. Select a destination to Restore your Backup
6. Step 3: After the Backup is Restored a summary of the Restored Task will appear, click on the
“Close” button to complete and exit the Restore process.
Restore Data
Figure 27. Restore complete
16
Page 19

Manage Backups
1. To Manage your Backups click on the “Manage” button in the StoreJet
™
elite Main Menu.
Figure 28. Manage Backups
2. The Backup Manager window will appear with a list of all your Backup tasks. Select the Backup Task
that you want to Manage. The details of the Backup will be listed in the left hand column. A Backup
Task can contain several Backup copies, select a copy and click on the “Delete” button to delete that
Backup copy.
Manage Backups
Figure 29. Delete a Backup
17
Page 20

Settings
In the Settings you can modify the Language and how the StoreJet™ elite interacts with Windows®
2000/XP.
1. Right click on the “StoreJet
™
elite” icon on the Windows System Tray and select the “Settings”
option.
Figure 30. Settings
2. To change the setup language, select the “Language” option and choose from a list of languages in
the drop down menu.
Figure 31. Language
3. If you want the StoreJet
with windows” option in the Settings menu.
™
elite to automatically startup when you open Windows®, select the “Start
Figure 32. Start with windows
4. If you want the StoreJet
™
elite window to automatically minimize after the program is started, select
the “Minimize on start” option in the Settings menu.
Figure 33. Minimize on start
5. Select the “About” option to display information about the StoreJet
currently running.
Figure 34. About
™
elite software version you are
Settings
18
Page 21

Exit
™
WARNING! To prevent data loss, always use this procedure to Exit the StoreJet
When you are finished using the StoreJet™ elite application software it is IMPORTANT! to follow this
procedure for Exiting the program.
elite.
1. Right click on the “StoreJet
™
elite” icon on the Windows System Tray and select the “Exit”
option.
Figure 35. Uninstall & Exit
2. The “Confirm” Exit window will appear. Click on the “Yes” button to Exit and close the StoreJet
elite program.
Figure 36. Exit StoreJet elite software
™
Exit
19
Page 22

Troubleshooting
If a problem occurs with your StoreJet™ please first check the information listed below before taking your
StoreJet
dealer, service center, or local Transcend branch office. We also have FAQ and Support services on our
websites. For any Hardware issues please consult the StoreJet
Software CD cannot auto-run in Windows®
Go to the Device Manager in the Control Panel and enable the Auto-Insert function of the CD-ROM
drive. Alternatively, you can manually run the “StoreJet.EXE” file on the software CD.
Operating System cannot load the StoreJet™ elite software
The StoreJet™ elite software can only be used on computers that are running Windows® 2000/XP.
A Scheduled Data Backup did NOT take place?
1. Was the unit and the computer on which the schedule was created powered on and were the two
2. Does the StoreJet
My OneTouch Auto-Backup feature is NOT working
1. OneTouch data Backups only work with StoreJet
™
for repair. If you are unable to remedy a problem from the following hints, please consult your
connected together at the scheduled time?
™
have adequate storage capacity to handle the scheduled Task(s)?
SATA?
™
User’s Manual.
™
2.5 SATA drives, is the Hard Drive you are using a
2. Did you select the OneTouch Backup Checkbox for the Backup Task you want to Auto-Backup?
Error Restoring a Backup Task?
Have you moved, renamed, or deleted any of the source, or destination drives/folders/files from their
original location(s)?
Data I thought I had Backed Up has NOT been saved?
Did you follow the correct procedure for exiting the StoreJet™ elite software program?
Cannot find the file that was just copied to the StoreJet™
You should always open a transferred file in its new location to ensure it has transferred successfully.
Re-copy the file and refer to the “Exit” section in the Manual for the correct StoreJet
shutdown procedure.
™
elite software
A File that was just deleted still appears
Re-delete the file and refer to the to the “Exit” section in the Manual for the correct StoreJet™ elite
software shutdown procedure.
Troubleshooting
20
Page 23

Transcend Limited Warranty
.
“Above and Beyond” is the standard we set ourselves for customer service at Transcend. We
consistently position ourselves to be significantly above the industry norm, which is all part of our
commitment to Customer Satisfaction.
All Transcend information, Inc. (Transcend) products are warranted and tested to be free from defects
in material and workmanship and to conform to the published specifications. During the warranty period
™
should your Transcend StoreJet
workmanship or materials, Transcend will repair the product or replace it with a comparable one. This
warranty is subject to the conditions and limitations set forth herein.
Duration of Warranty: The Transcend StoreJet
from the date of purchase. Proof of purchase including the date of purchase is required to collect on the
warranty. Transcend will inspect the product and decide whether to repair or replace it. Transcend
reserves the right to provide a functional equivalent product, or a refurbished replacement product.
Limitations: This warranty does not apply to product failure caused by accidents, abuse, mishandling,
improper installation, alteration, acts of nature, improper usage, or problems with electrical power. In
addition, opening or tampering with the product casing, or any physical damage, abuse or alteration to the
product’s surface, including all warranty or quality stickers, product serial or electronic numbers will also
void the product warranty. Transcend is not responsible for recovering any data lost due to the failure of a
hard drive device. Transcend’s StoreJet
industry standards. Transcend will not be liable for damages resulting from a third party device that causes
™
the Transcend StoreJet
incidental damages, lost profits, lost business investments, lost goodwill, or interference with business
relationships as a result of lost data. Transcend is also not responsible for damage or failure of any third
party equipment, even if Transcend has been advised of the possibility. This limitation does not apply to
the extent that it is illegal or unenforceable under applicable law.
to fail. Transcend shall in no event be liable for any consequential, indirect, or
fail under normal use in the recommended environment due to improper
™
is covered by this warranty for a period of two (2) years
™
must be used with devices that conform to the recommended
Disclaimer: The foregoing limited warranty is exclusive. There are no other warranties, including any
implied warranty of merchantability or fitness for a particular purpose. This warranty is not affected in any
part by Transcend providing technical support or advice. Please read Transcend’s Warranty Policy in full to
understand your rights.
Transcend Warranty Policy: http://www.transcendusa.com/Support/Warranty.asp
Online Registration: To expedite the warranty service, please register your Transcend Product within 30
days of purchase.
Register online at http://www.transcendusa.com/registration
The specifications mentioned above are subject to change without notice.
Transcend Information, Inc
www.transcendusa.com
*The Transcend logo is a registered trademark of Transcend Information, Inc.
*All logos and marks are trademarks of their respective companies.
Warranty
21
Page 24

Terminology
CD...........................................................................................................................................................3, 20
Compact Disk.
CD-ROM .................................................................................................................................................3, 20
Compact Disk-Read Only Memory is a compact disk format that can store music, text and graphics.
desktop ........................................................................................................................................................1
This is a single user stationary computer running the Window
driver............................................................................................................................................................2
A software program that allows a hardware device to communicate with a computer operating system.
e-work ..........................................................................................................................................................1
Electronic Work is any data resulting from work performed on a computer, or similar system.
FAQ ............................................................................................................................................................20
Frequently Asked Question.
FAT32 .........................................................................................................................................................21
File Allocation Table is an OS table that contains a map of where information is stored on the hard disk.
®
, Mac™, or Linux™ Operating System.
GB ..............................................................................................................................................................21
A GigaByte measures memory storage capacity, one GB equals one billion bytes.
HDD ..............................................................................................................................................................3
Hard Disk Drive is a device that is used to save and retrieve data electromagnetically.
icon ..................................................................................................................................................6, 18, 19
Is a small picture that represents a function, file, folder, disk drive, or some other element of a device.
LED...............................................................................................................................................................1
Light emitting diode produces light when an electric current is passed through it.
Mac ...........................................................................................................................................................21
Macintosh is a personal computer made by Apple.
MB ................................................................................................................................................................1
A MegaByte measures memory storage capacity, one MB equals one million bytes.
notebook......................................................................................................................................................1
Portable lightweight computer capable of running off of battery power.
NTFS ......................................................................................................................................................2, 21
New Technology File System is the standard file system used by Windows computers.
Partition .....................................................................................................................................................21
A logical division of a disk giving the appearance of separating one disk into more than one memory area.
SATA ..................................................................................................................................................2, 1, 13
Serial Advanced Technology Attachment is an interface used to carry data from a storage device to a
computers' mainboard.
22
Terminology
Page 25

System Tray.....................................................................................................................................6, 18, 19
Provides a location on the taskbar to display icons for programs and devices.
USB ..........................................................................................................................................................1, 2
Universal Serial Bus is a hardware interface found on all modern computers for connecting peripherals.
USB 2.0 ........................................................................................................................................................1
Hi-Speed version of the USB interface, capable of data transfer speeds up to 480Mbits per second.
Windows ......................................................................................................................1, 2, 6, 18, 19, 20, 21
Computer Operating System developed by Microsoft.
Wizard ..........................................................................................................................................................3
A computer program that guides a user through a procedure for setting up a new application, or device.
Terminology
23
 Loading...